Spring Boot shows up in almost every Java backend job listing in 2026. At some point, if you’re getting into backend development, you’re going to run into it. The question is not really whether you should learn it; it’s how to approach it without getting completely lost.
Most people don’t struggle because Spring Boot is too hard. It’s more than everything feels scattered. You start with Spring Core, then move to APIs, then suddenly there’s databases, security, and microservices. It doesn’t feel like a clear learning path.
This guide is a simple Spring Boot roadmap that puts everything in order. If you’re trying to figure out how to learn Spring Boot or looking for a practical Spring Boot learning path, this breaks it down step by step in a way that actually makes sense.
If you’re completely new, here’s a spring boot tutorial that you can access for free: Spring Boot Tutorial
Why Learn Spring Boot in 2026?
If you’re planning to build backend applications using Java, you’ll run into Spring Boot pretty quickly. It’s not really something you can skip. Once you start checking job listings or talking to people in backend roles, it keeps coming up.
What makes it useful is how quickly you can get something working. You don’t spend days setting things up. You can build a basic API, connect it to a database, and see actual results early, which helps a lot when you’re still learning.
At Scaler, we’ve seen this pattern a lot. People understand things much faster when they’re building instead of just reading. That’s why following a Spring Boot roadmap or a structured Spring Boot learning path makes a big difference. It keeps things in order and avoids that “everything at once” feeling.
Stop learning AI in fragments—master a structured AI Engineering Course with hands-on GenAI systems with IIT Roorkee CEC Certification


Prerequisites: Java Fundamentals You Need First
Spring Boot itself isn’t the hard part. Most of the confusion usually comes when Java basics like OOP, collections, and how classes work aren’t clear.
If you already understand Java properly, this java spring boot roadmap becomes much easier to follow because you’re only learning how to apply those concepts in a framework instead of learning everything from scratch again.
Core Java (OOP, Collections, Streams)
Before we get into Spring Boot, your Java basics should be in a decent place. This is usually where things start breaking later if something isn’t clear.
We’re not aiming to cover everything, but things like classes, inheritance, interfaces, and collections should feel familiar. You’ll use List and Map a lot once you start building APIs.
Streams are useful, too, but we can pick them up along the way. As long as you’re able to read basic Java code without getting stuck, you’re ready to continue.
This is an important step in any Spring Boot learning roadmap.
If you aren’t familiar with Java yet, then worry not, you can take help of various resources like this Java Tutorial
Build Tools: Maven & Gradle Basics
When you start a Spring Boot project, you’ll see a ‘pom.xml’ or ‘build.gradle’ file. That’s Maven or Gradle. It’s basically where you add the libraries you need.
In the beginning, you’ll mostly open it when something is missing. You add it, run the project, and just see if it works. Sometimes it does, sometimes it doesn’t, and then you end up coming back to that file again.
We don’t really need to get into how everything inside it works right now. That part usually starts making sense on its own once you’ve used it a bit.
SQL & Relational Database Basics
Most backend applications rely on data, so you’ll end up working with a database pretty quickly.
In the beginning, it’s just basic stuff. Writing simple queries like SELECT or INSERT, creating tables and basic relationships, and checking if the data is coming through properly. Nothing too complex at this stage.
Once you connect your Spring Boot app to a database, you’re not just returning dummy data anymore; you’re actually storing and fetching it, so you can see how everything connects.

We don’t need to go deep into SQL here. Just enough to understand what’s happening when your app reads or writes data.
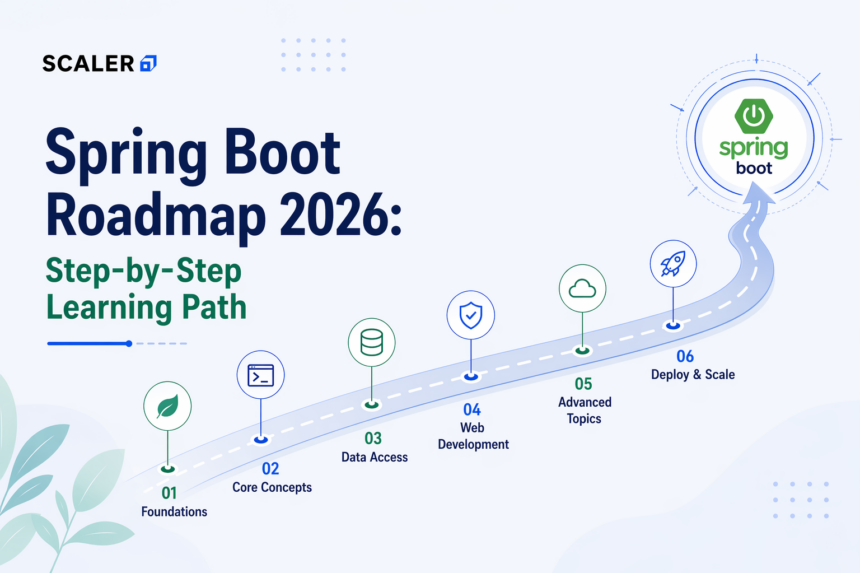
Here’s what the overall Spring Boot roadmap looks like:
| Phase | Focus Area | Key Topics |
| Phase 1 (Weeks 1-4) | Spring Basics & APIs | Spring Core (IoC, DI), Auto-Configuration, REST APIs, API Structure, Swagger |
| Phase 2 (Weeks 5-8) | Data & Backend Essentials | Spring Data JPA, Security (JWT), Validation, Testing, Logging, Configuration |
| Phase 3 (Weeks 9-14) | Microservices & Deployment | Spring Cloud, API Gateway, Docker, Kubernetes, Monitoring, CI/CD |
| Projects | Hands-on Learning | CRUD App, Auth-based App, Microservices Project |
| Interview Prep | Applying Knowledge | Request Flow, JPA Understanding, Design Decisions |
Now that the structure is clear, we can go through each phase one by one.
Spring Boot Roadmap: Phase 1 – Spring Core & Boot Basics (Weeks 1- 4)
In the first few weeks, the focus is on getting comfortable with how Spring Boot works and building a basic understanding of the framework.
You won’t be doing anything complex here. The idea is to understand how things are set up and how different parts of the application connect.
Spring Framework Core: IoC & Dependency Injection
This is one part that might feel a bit confusing at first. Instead of creating objects yourself, Spring starts handling that for you.
You’ll see this when you use things like @Autowired or define classes as components. Instead of manually connecting everything, Spring takes care of how different parts of your application are linked.
We don’t need to go deep into how it works internally. Just get used to the idea that Spring is managing objects for you, and you’re just telling it what to connect.
Spring Boot Auto-Configuration & Starters
This is where you start noticing how much Spring Boot is woeking for you. You add a dependency, run the project, and most of the setup is already there.
You’ll see this with starters. Instead of adding things one by one, you add something like “spring-boot-starter-web,” and it just works for basic API stuff.
You don’t really have to think about what’s happening behind it right now. That part starts to make more sense as you keep using it.
Building Your First REST API
This is where your spring boot learning path actually starts becoming a bit more practical. At this stage, you will start building a simple API using Spring Boot. You’ll define endpoints, handle requests, and return responses.
It doesn’t need to be complex. Even a basic API is enough to understand how things are structured and how data moves through the application.
API Structure & Best Practices
Once you start building a few APIs, the structure of your project starts to matter more than it seems at first.
You’ll notice that most applications follow a simple layered setup. Controllers handle requests, services contain the main logic, and repositories deal with the database. Keeping things separated like this makes it easier to manage as the application grows. It’s also a good time to get used to basic API conventions.
API Documentation – Swagger
As your APIs grow, keeping track of endpoints manually starts becoming messy.
Hence, you can use tools like Swagger here. It gives you a simple interface where you can see all your APIs, test them, and understand what each endpoint expects and returns.
At this stage, just getting it set up and seeing your APIs documented automatically is enough. It makes development smoother and also helps when you’re sharing your work with others.
First Mini Project
This one is EXTREMELY important!
Around this point, you should definitely build something small using what you’ve learned so far.
Since, you’ll be freshly done with the fundamentals, It doesn’t need to be anything complex. A basic CRUD application like a task manager or user management system is enough. The idea is to connect everything, controllers, services, and a simple database, and see how it works together.
Scaler Masterclasses
Learn from industry experts and accelerate your career with hands-on, interactive sessions.
Spring Boot Roadmap: Phase 2 – Data & Security (Weeks 5 – 8)
In this phase, you’ll take the next step after clearing the basic setup and start working with things most backend applications actually rely on, like databases and authentication.
Over these weeks, the focus is on handling data properly and adding basic security to your application. This is where you start building something closer to how real backend systems are structured.
Spring Data JPA & Hibernate
This is where you actually connect your app to a database and start saving real data instead of just returning dummy responses.
You don’t end up writing queries for everything yourself. You will define entities and repositories, and Spring takes care of saving and fetching data. You’ll see it when you store something and then try to get that same data back.
You don’t need to figure out how it works internally right now. Just focus on what’s happening when data goes into the database and comes back out.
Spring Security & JWT Authentication
Once your APIs are working, you’ll need to add some kind of security. Otherwise, anyone can access them.
At first, it’s just basic authentication. Then you move to JWT. Users log in, get a token, and send it with requests when they hit an endpoint.
It’s confusing at first. Mostly around where the token is coming from and how it’s used. Once you see it working, it’ll become easier for you to follow.
Exception Handling & Validation
Once you build a few APIs, you’ll start running into small issues. The input might not be valid, or something just breaks. Instead of letting that show up as random errors, you handle it properly and return clear responses. You also validate the input before using it, so you don’t end up with bad data.
Testing Basics – Unit & Integration
Once your APIs start working with real data, testing becomes important.
At first, it’s just about checking if things work around the way you expect. You write simple tests for your service or controller and see if the output matches what you had in mind. Over time, this helps you catch issues early instead of finding them later when something breaks.
You’ll usually come across tools like JUnit and Spring Boot Test here. No need to cover everything in depth, but running a few tests and understanding what they’re doing is enough to get started.
Logging in Spring Boot
When something goes wrong in your application, the first place you usually look is the logs.
Instead of printing things manually, you start using proper logging. It gives you a better idea of what’s happening inside your application, what requests are coming in, where things are failing, and how different parts are behaving.
Spring Boot already comes with basic logging support, so this is mostly about getting used to reading logs and adding them where they actually help.
Master structured AI Engineering + GenAI hands-on, earn IIT Roorkee CEC Certification at ₹40,000
Configuration & Environment Handling
As your application grows, you’ll notice that not everything should be hardcoded.
Things like database URLs, API keys, or environment-specific settings are usually kept in configuration files. Spring Boot uses application.properties or YAML files for this, and you can have different configs for development, testing, and production.
At this stage, it’s enough to understand how configurations are managed and how they change variabally.
Caching – Basic Introduction
Once your application starts fetching the same data repeatedly, then change sin performance becomes noticeable.
Caching is used to store frequently accessed data so it doesn’t have to be fetched every time. Even a simple setup using something like Redis is enough to see how response times improve.
Second Mini Project – Build Something Slightly Bigger!
By this point, you should be able to build something a bit more complete.
Take your earlier project and extend it, or start a new one where you include authentication, database integration, validation, and basic error handling. This is where things start feeling closer to a real backend system.
It doesn’t have to be perfect. The goal is to connect multiple concepts in one place and see how they work together.
Spring Boot Roadmap: Phase 3 – Microservices & Cloud (Weeks 9-14)
In the last phase of this Spring Boot roadmap, the focus shifts to how applications are built at a larger scale.
Up to this point, you’ve mostly worked with a single application. Here, you start breaking things into smaller services and understanding how they work together.
You also begin looking at how applications are deployed and managed once they’re running.
Microservices Architecture with Spring Cloud
Instead of putting everything in one project, we start splitting it into smaller services. Each service handles its own part, and they communicate when needed.
It can feel confusing at first because we’re no longer working in a single application. Now we have multiple services, and we need to understand how they connect.
This is how most larger applications are structured as they grow. As part of this Spring Boot developer roadmap, you start moving into system design concepts.
API Gateway, Service Discovery (Eureka), Config Server
Once you have multiple services, things don’t work the same way anymore. Requests don’t go directly to each service; they go through a gateway, which forwards them to the right place.
Services also need a way to find each other, since we’re not keeping track of all of them manually. That’s where service discovery comes in.
And instead of setting the same configuration in every service, it’s kept in one place. No need to go into each part in detail right now.
Containerization: Docker & Kubernetes for Spring Boot
At this stage, you start looking at how your application actually runs outside your local setup.
Here, you package your application using Docker so it can run the same way anywhere. Kubernetes comes in when you have multiple instances running and need to manage them.
You don’t need to go deep into this right now; just getting a basic idea is enough.
Monitoring with Spring Actuator & Prometheus
At this stage, you look at how to keep track of your application once it’s running.
You use Actuator to check if the app is up and see basic details, and tools like Prometheus to track what’s happening over time when requests start coming in.
Logging & Centralized Logs
Once you have multiple services running, logs are no longer in one place.
Each service generates its own logs, and checking them separately quickly becomes messy. And that is why centralized logs are used. Instead of looking at logs service by service, everything is collected in one place so you can trace what’s happening across the system.
Basic CI/CD – Build & Deploy Flow
At some point, running everything manually becomes monotonous.
Hence, instead of building and deploying your application step by step, this process is usually automated. You push your code, and the pipeline takes care of building, testing, and deploying it. You don’t need to set up a full pipeline right now, but getting a basic idea of how this flow works helps you understand how applications move from development to production.
Inter-Service Communication – REST vs Messaging
When you split your application into multiple services, they need a way to communicate with each other.
Sometimes this happens through REST APIs, where one service calls another directly. Other times, communication happens through messaging systems, where services exchange events asynchronously.
You’ll start noticing that the choice depends on how tightly services are connected and how quickly a response is needed.
Resilience & Fault Handling
Once systems are distributed, you are bound to come across failures almost all the time. Instead of assuming everything will work perfectly, systems are designed to handle failures. This includes retry mechanisms, fallback responses, and making sure one service failing doesn’t bring everything down.
You don’t need to implement all of this right away, but understanding that failure is part of the system changes how you think about design.
Final Project – End-to-End System
By this point, it helps to bring everything together in one project.

This could be a slightly larger application where you split services, connect them, add basic monitoring, and run them using Docker. It doesn’t have to be production-level, but it should reflect how different parts of the system work together.
Spring Boot Interview Preparation
At the final stage of this Spring Boot learning roadmap, interview preparation becomes important. Most interview questions come from things you’ve already built. You will be asked to explain how a request comes into your Spring Boot app, which controller handles it, and how the data is saved and fetched using JPA. You may also be asked why you chose a certain approach in your project.
It’s not about learning new concepts at this stage. It’s more about going back to your projects and being able to explain them clearly without getting stuck.
FAQs
Q1. How long does it take to learn Spring Boot from scratch?
You should take around 10-14 weeks if you practice regularly. You will learn Spring Core, REST APIs, databases, and basic security during this time. And you can surely get better after building a few small projects.
Q2. Should I learn Spring Framework before Spring Boot?
No, you don’t need to start with Spring Framework. Spring Boot already includes Spring and handles most of the setup for you. You’ll learn the important Spring concepts as you build projects with Spring Boot.
Q3. Is Spring Boot still relevant in 2026?
Yes, it’s still widely used. Many companies use Spring Boot for backend development, especially in enterprise systems. It’s still a common skill required for Java backend jobs.
Q4. What is the difference between Spring and Spring Boot?
Spring is the core framework. It gives you the tools to build Java applications, but you have to configure a lot of things yourself.
Spring Boot is built on top of Spring. It removes most of that setup and lets you start building right away with ready defaults.
Q5. Can I learn Spring Boot without knowing Java well?
You can start, but it will feel difficult without Java basics. Spring Boot uses core Java concepts like OOP, collections, and annotations quite often. If your Java is strong, everything in Spring Boot becomes much easier to follow. This Spring Boot learning roadmap gives you a structured path from Java basics to real-world backend development.