Routing in Angular
Overview
Routing plays a crucial role in Angular since it is used to develop Single Page Applications (SPA).
Basically, These programs are just loaded once, and update required parts dynamically. There are several SPAs that we may utilize in our daily lives, such as Google, Facebook, Twitter, etc.
The main advantage of SPA is that they provide an amazing user experience and you don't have to wait for pages to load, which makes the SPA quick and gives it a desktop-like feel.
Introduction to Angular Router
By reacting to changes in the browser's URL, the Angular routing functionality allows applications to alter the components and templates that are presented to the user.
Instead of reaching out to the server to receive a new page, you modify what the user sees by revealing or concealing bits of the display that correspond to certain components in a single-page app. Users must navigate between the many views that you have developed as they complete application operations.
Router in Angular is used to handle navigation from one view to the next. By changing a browser URL in an order to modify the display, the Router facilitates navigation.
Prerequisites
- Basics of components
- Basics of templates
- An Angular app
Basics of Components
The basic building blocks of an angular application are components. To create a SPA, the application is separated into numerous components, each of which may be utilized multiple times wherever it is needed.
Components are created by adding @Component, which holds the component's metadata.
Scaler Placement Report and Statistics
Scaler learners achieved 2.5x salary growth with average post-Scaler CTC reaching ₹23L.
Basics of Templates
Angular components are made up of HTML templates that are visible to the end-user when the component is inserted anywhere. HTML templates can be inserted inline or in a separate file, as specified by the @Component decorator.
An Angular App
An Angular app is a single-page application. It has one index.html file and several distinct components, directives, and services.
We may make an app by issuing the following command:
The Router-Outlet
The router-outlet directive is included in the @angular/router package.
The routing configuration is defined as a set of fragments that are used to match the browser’s URL and select a component whose template is displayed as the content of an HTML element called router-outlet.
Angular dynamically fills this placeholder based on the current router state.
Transform Your Career
Choose from our industry-leading programs designed for career success
Modern Software and AI Engineering Program
Master full-stack development with AI integration

Modern Data Science and ML with specialisation in AI
Advanced data science techniques with AI specialization
Advanced AIML with Specialisation in Agentic AI
Deep dive into AIML with focus on Agentic systems
DevOps, Cloud & AI Platform Engineering
Build and manage AI-powered cloud infrastructure
AI Engineering Advanced Certification by IIT-Roorkee
Premier AI engineering certification from IIT-Roorkee
Routes and Paths
Routes are definitions that have at least one path and one or more component attributes. The path is the portion of the URL that indicates which unique view should be displayed, and the component is the Angular component that must be connected with a path.
If this route definition is added to the Router configuration, the router will render UserComponent when the web application's browser URL changes to /user.
The Router may lead the user to a certain view based on a route specification that we supply via RouterModule.forRoot(routes).
It specifies the URL path to use for a route; in the case of nested routes, it is added to any parent paths.
Route Matching Strategies
The Angular Router supports many routes matching methods. The default technique just checks to see if the current browser's URL contains the path.
Can also be written as:
The matching approach is specified by the patchMath attribute. The prefix is the default in this scenario.
The second matching strategy is full. When it is supplied for a route, the router checks to see if the path is the same as the path of the current browser's URL:
Route Params
URLs are intended to store information, which might include significant elements such as the ID of a resource to load or other stateful data. Values may be part of the route or the query, depending on how you wish to arrange your URLs.
We've defined a route with a parameter, which may be any name preceded by the colon (:) sign. This will try to match any route that begins with forums and has a second segment of the path that may be any value, but if the path contains the third segment, the router will not match this route.
Angular Router provides several ways to retrieve parameters:
Using the ActivatedRoute service
Using the ParamMap observable
Route Guards
Angular allows you to manage the criteria that allow a route to render, which is commonly done to keep the application from crashing. Allowing an unauthenticated user to see parts of the program that need logging in, for example, will result in a variety of problems.
A guard is similar to a lifecycle hook for route modifications in that it allows an application to validate specific circumstances or load data before making a change.
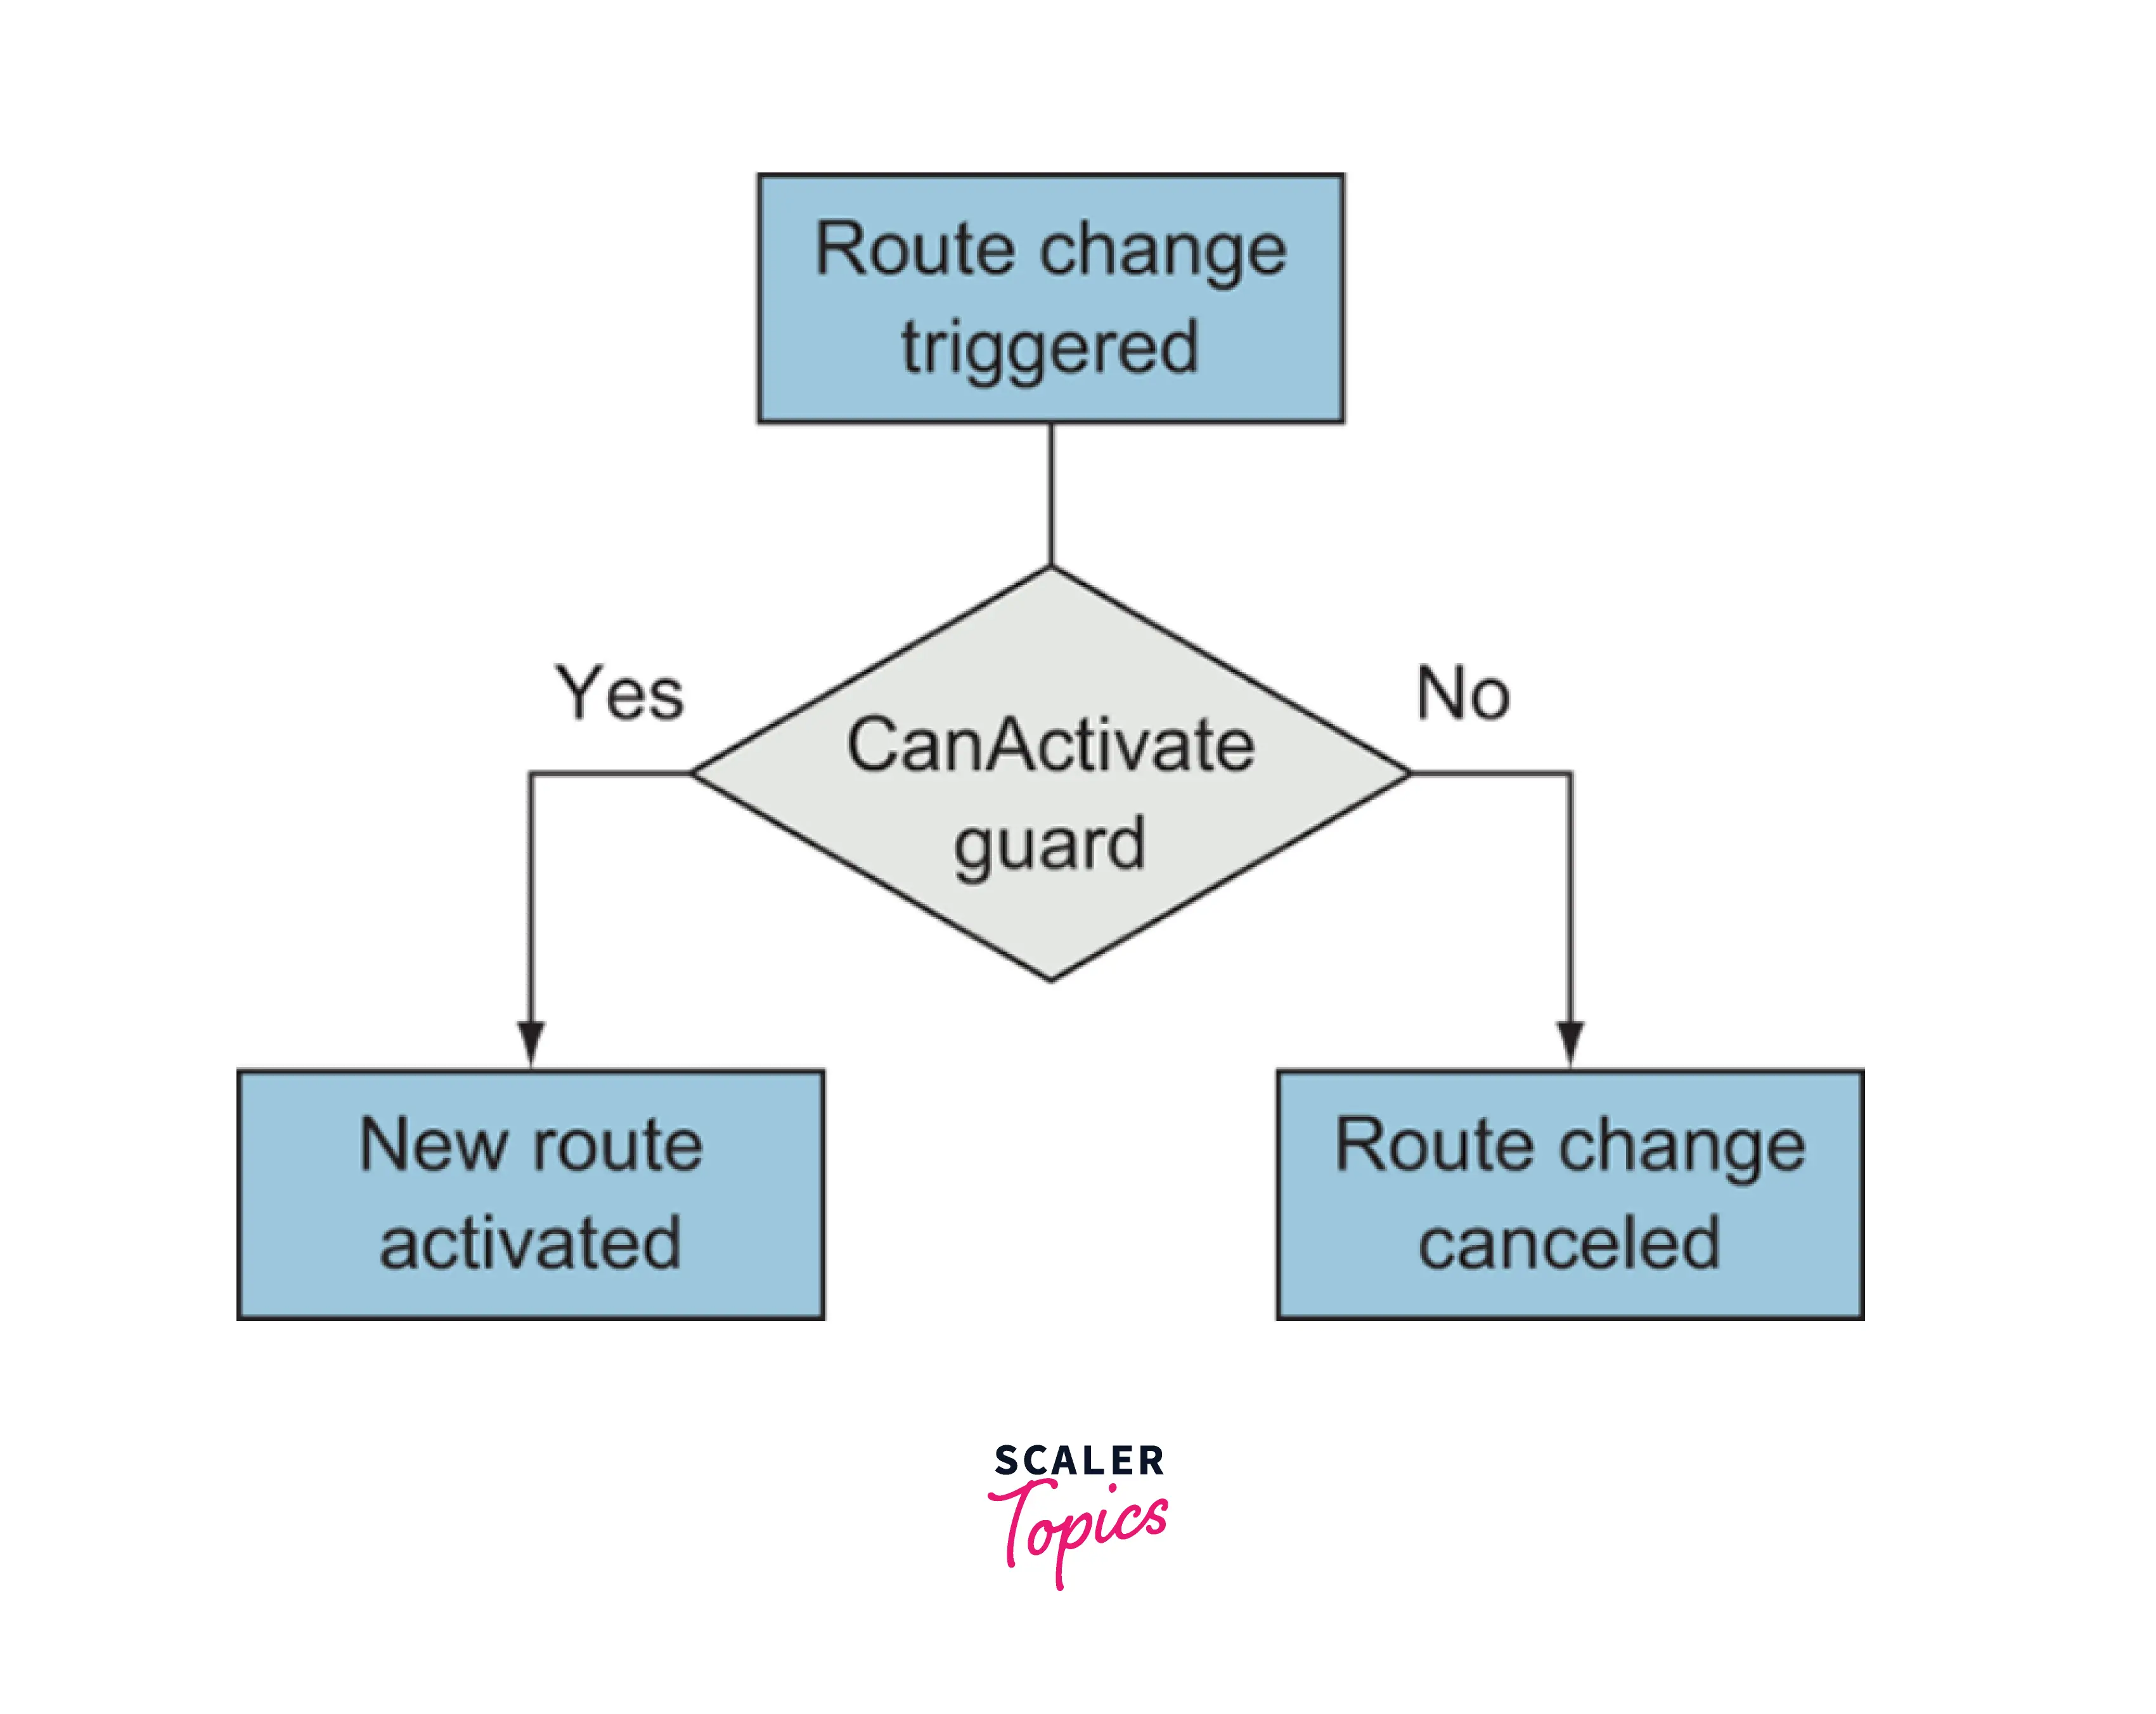
When a route change is triggered (either by the user clicking a link or by the app changing routes programmatically), Angular checks to see whether any guards are registered.
For example, if an unauthenticated user attempts to view the page that displays the account details of a logged-in user, the application should add a guard that validates the user's logged-in status before activating the route. The term activate is used to denote whether or not a route may be loaded.
There are several types of guards that give you different options when managing how routes are activated. They’re defined as a service and then linked to a particular route to take effect. This allows you to use the same guard multiple times. Here are the five types of guards and their basic roles:
CanActivate : Used to determine whether the route can be activated (such as user validation)
CanActivateChild : Same as CanActivate, but specifically for child routes
CanDeactivate : Used to determine whether the current route can be deactivated (such as preventing leaving an unsaved form without confirmation)
CanLoad : Used to determine whether the user can navigate to a lazy loaded module prior to loading it
Resolve : Used to access route data and pass data to the component’s list of providers
the following command to set up the AuthGuard service: ng generate service services/auth-guard
Navigation Directive
To construct navigation links, the Angular Router includes the routerLink directive. This directive navigates to the path associated with the component.
Turn Learning into Career Growth
Multiple Outlets and Auxiliary Routes
In the same application, Angular Router allows numerous outputs. A component has one core route and one or more auxiliary routes. Auxiliary routes allow developers to navigate numerous routes at once.
You'll need a named router outlet where the component associated with the auxiliary route will be displayed to build an auxiliary route.
The first router-outlet is primary here and by default, all modifications are updated here. If we need to use an auxiliary router outlet, we must indicate the following:
Creating An Angular Demo Project
Let's implement routing in the Angular project and see how it works. Follow github repo for the code.
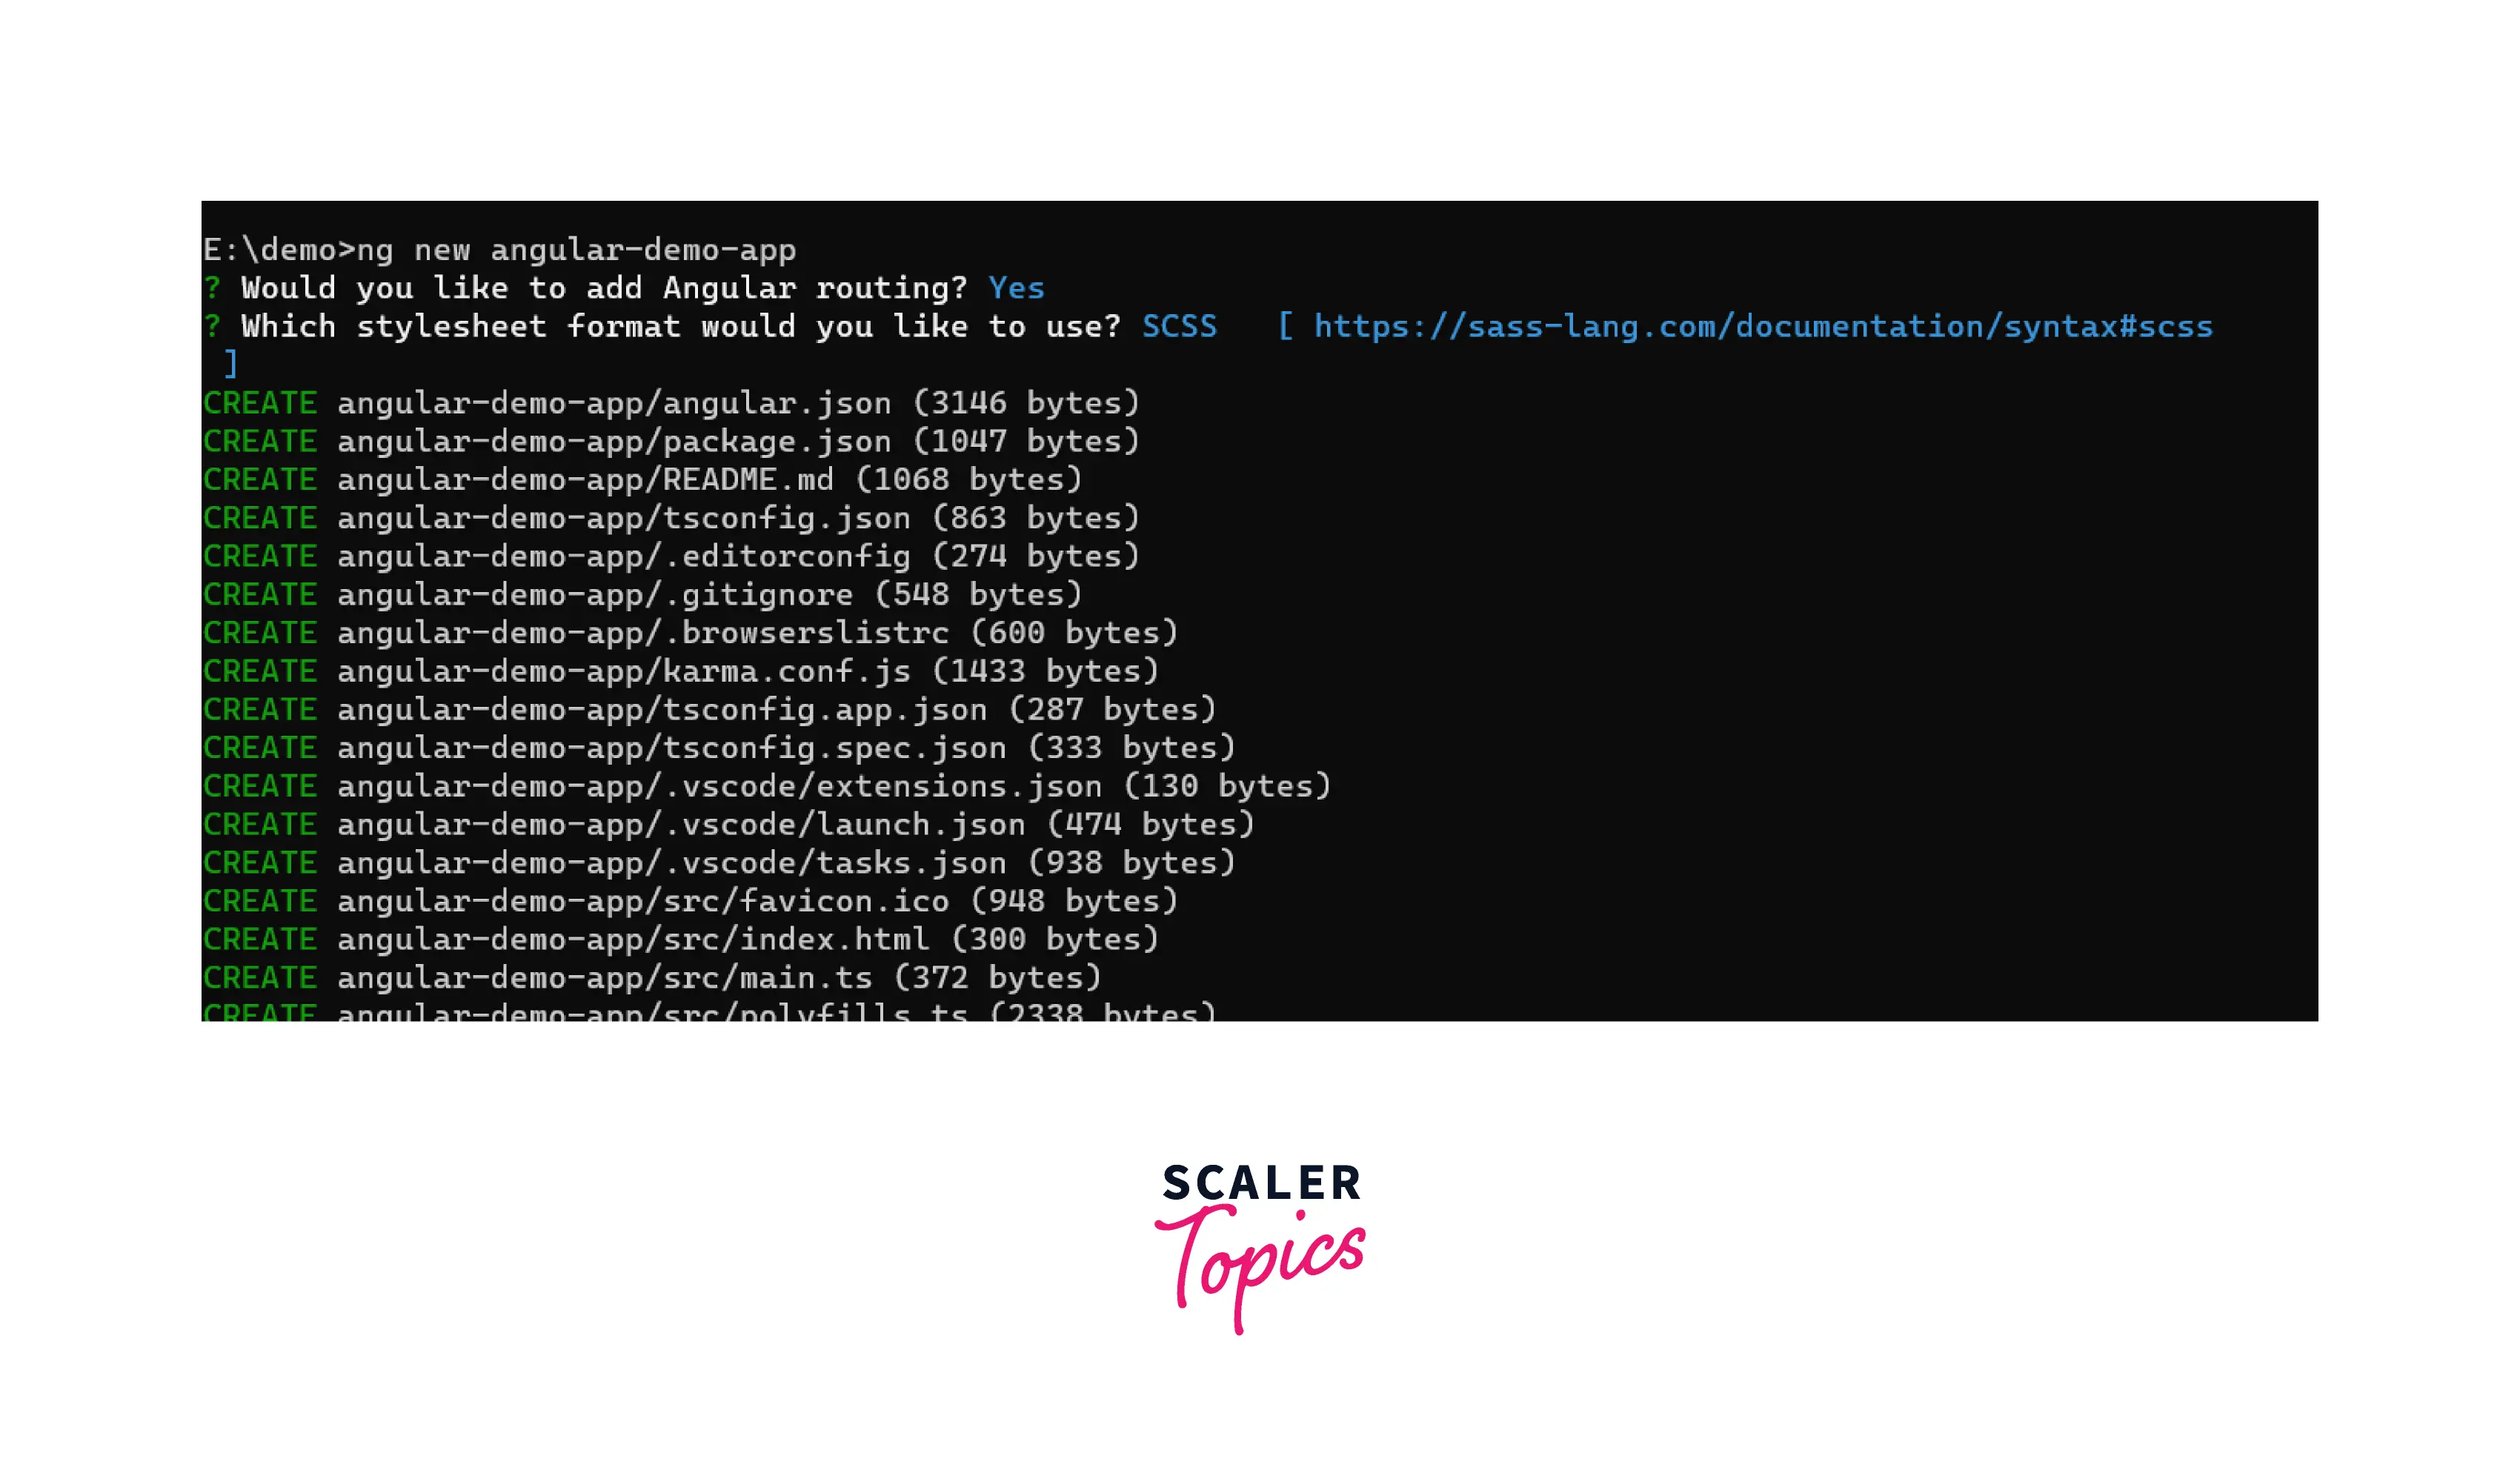
Create an angular app using Angular CLI using the following command: ng new [name]
[name]: Name of the project
CLI will create the required files and set up an angular application
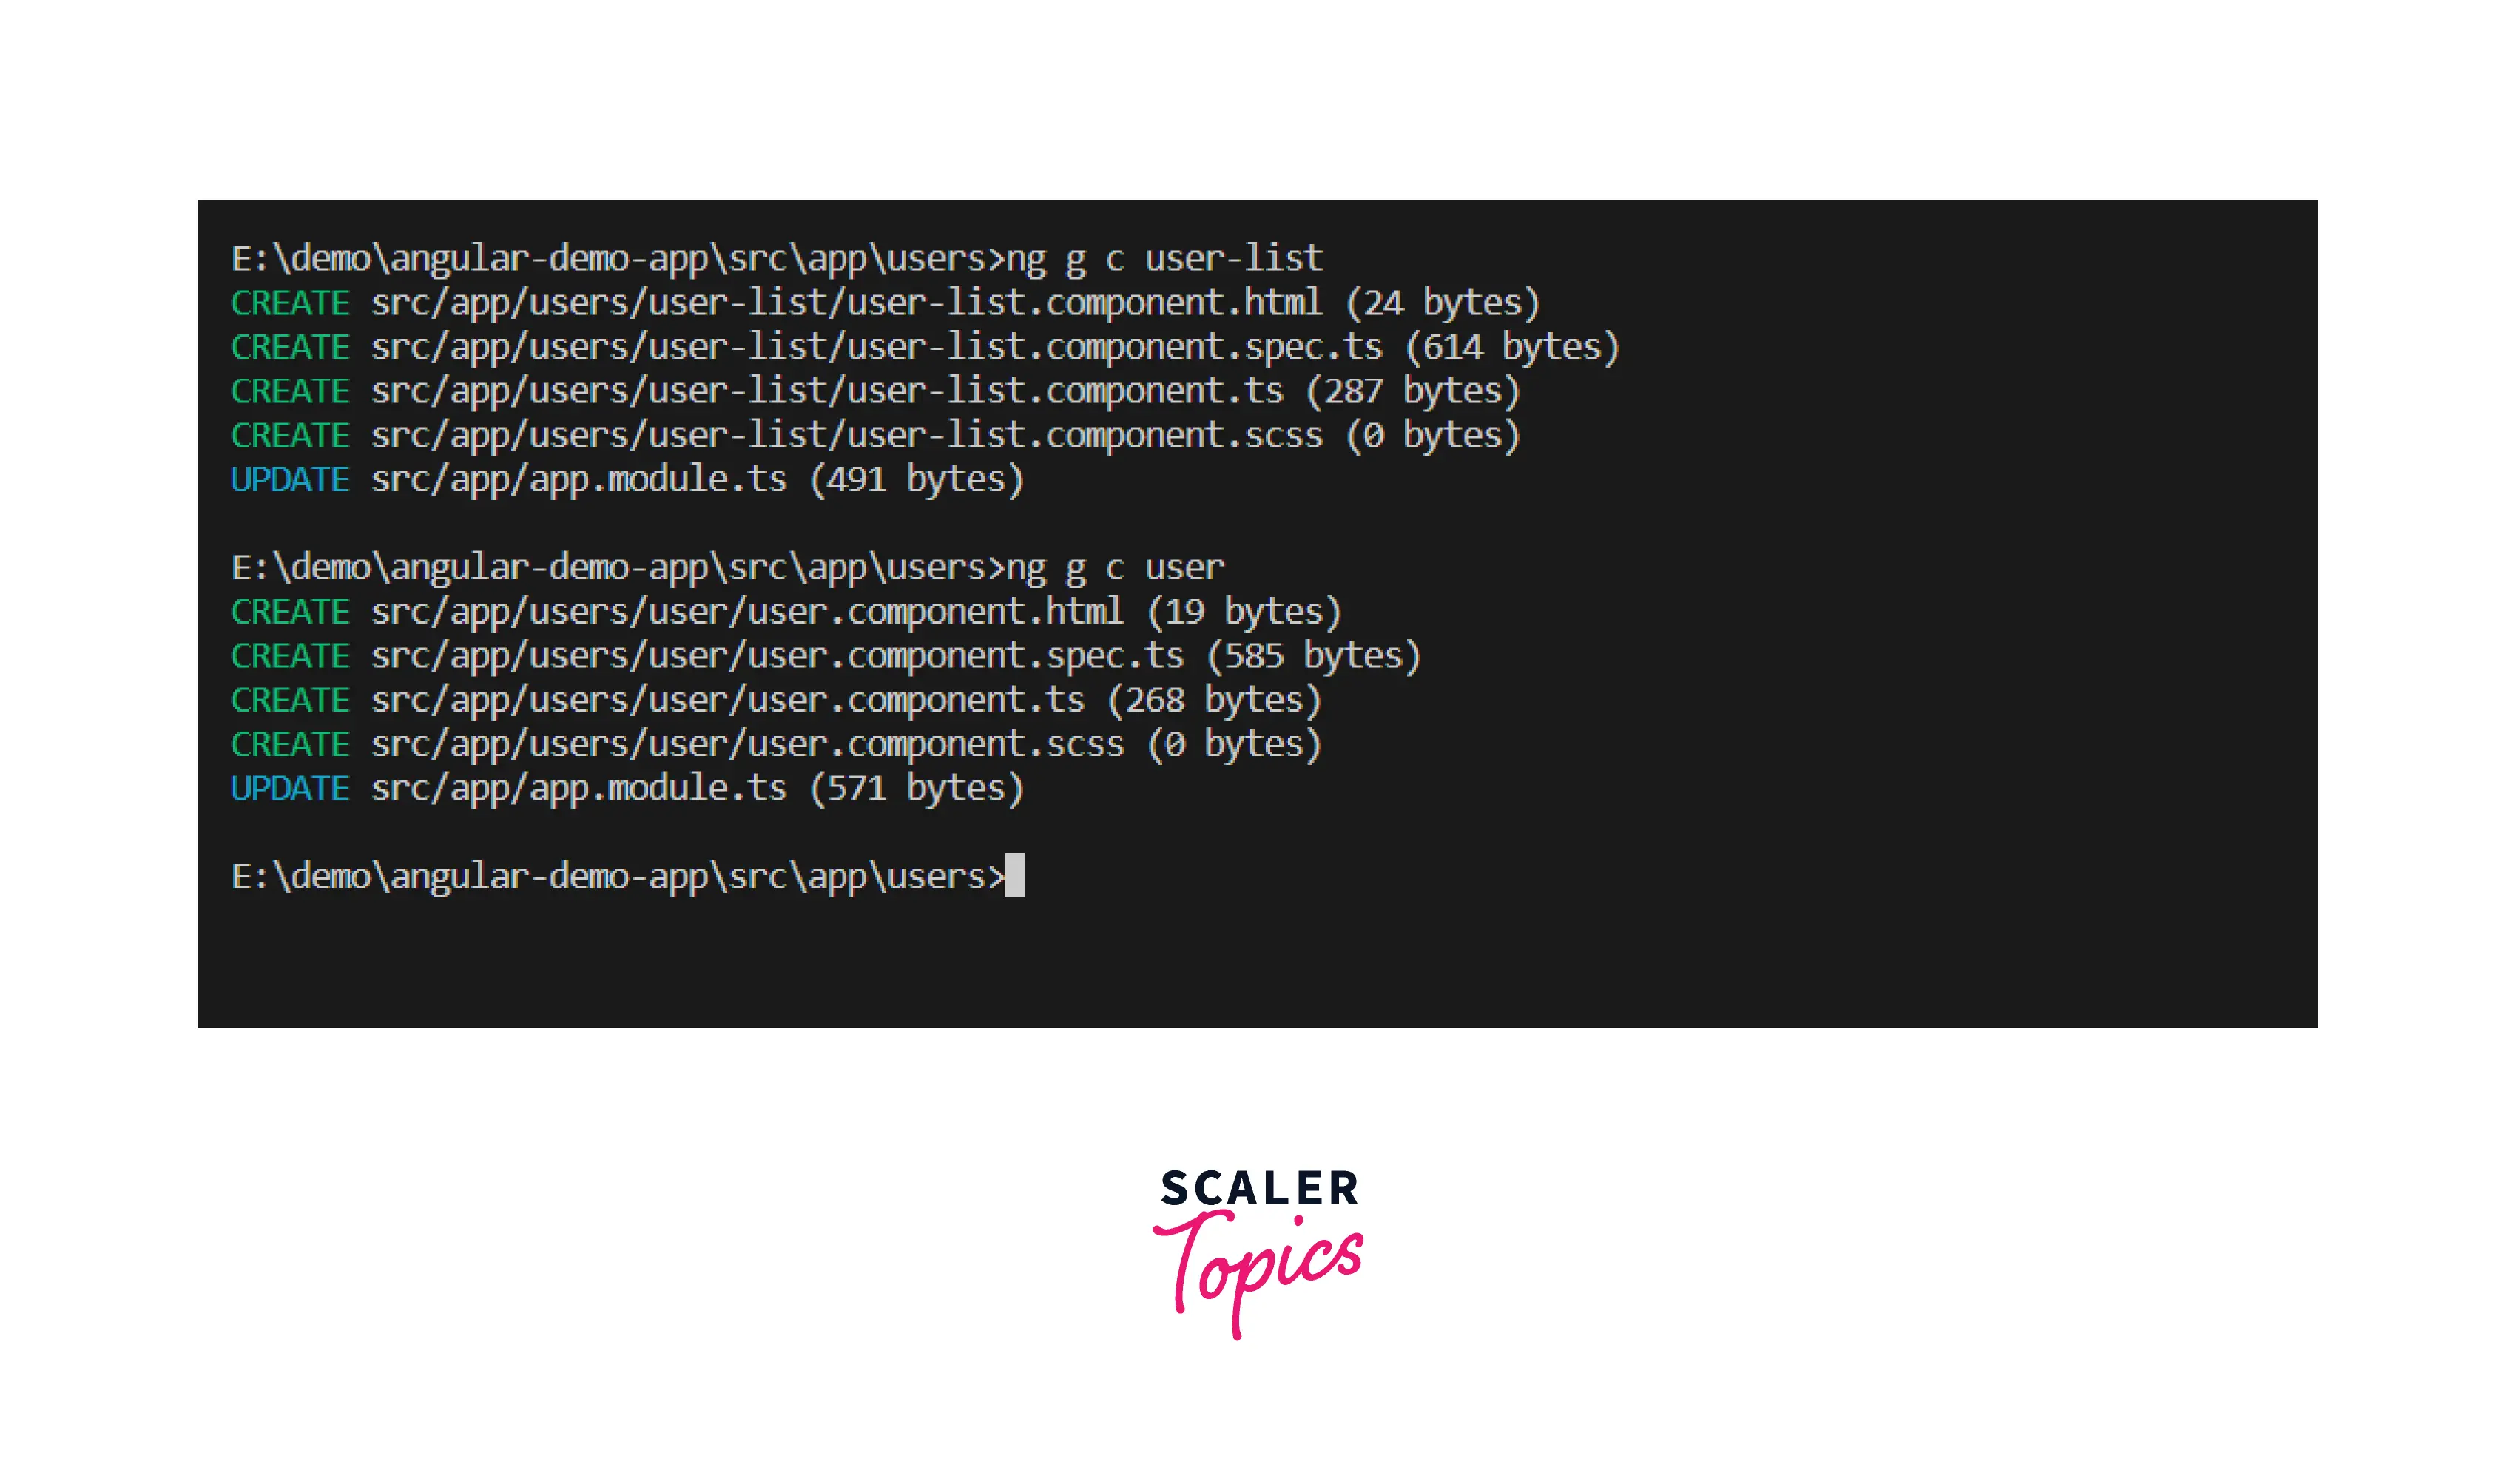
Creating Our Angular Components
Let's start by making a variety of components in our project before we look at how to leverage the various Router functionalities.
Setting Up Routing
We can add routing when ng new my-app command is fired. CLI will ask a few questions to setup app configuration, we can setup angular routing from here too.
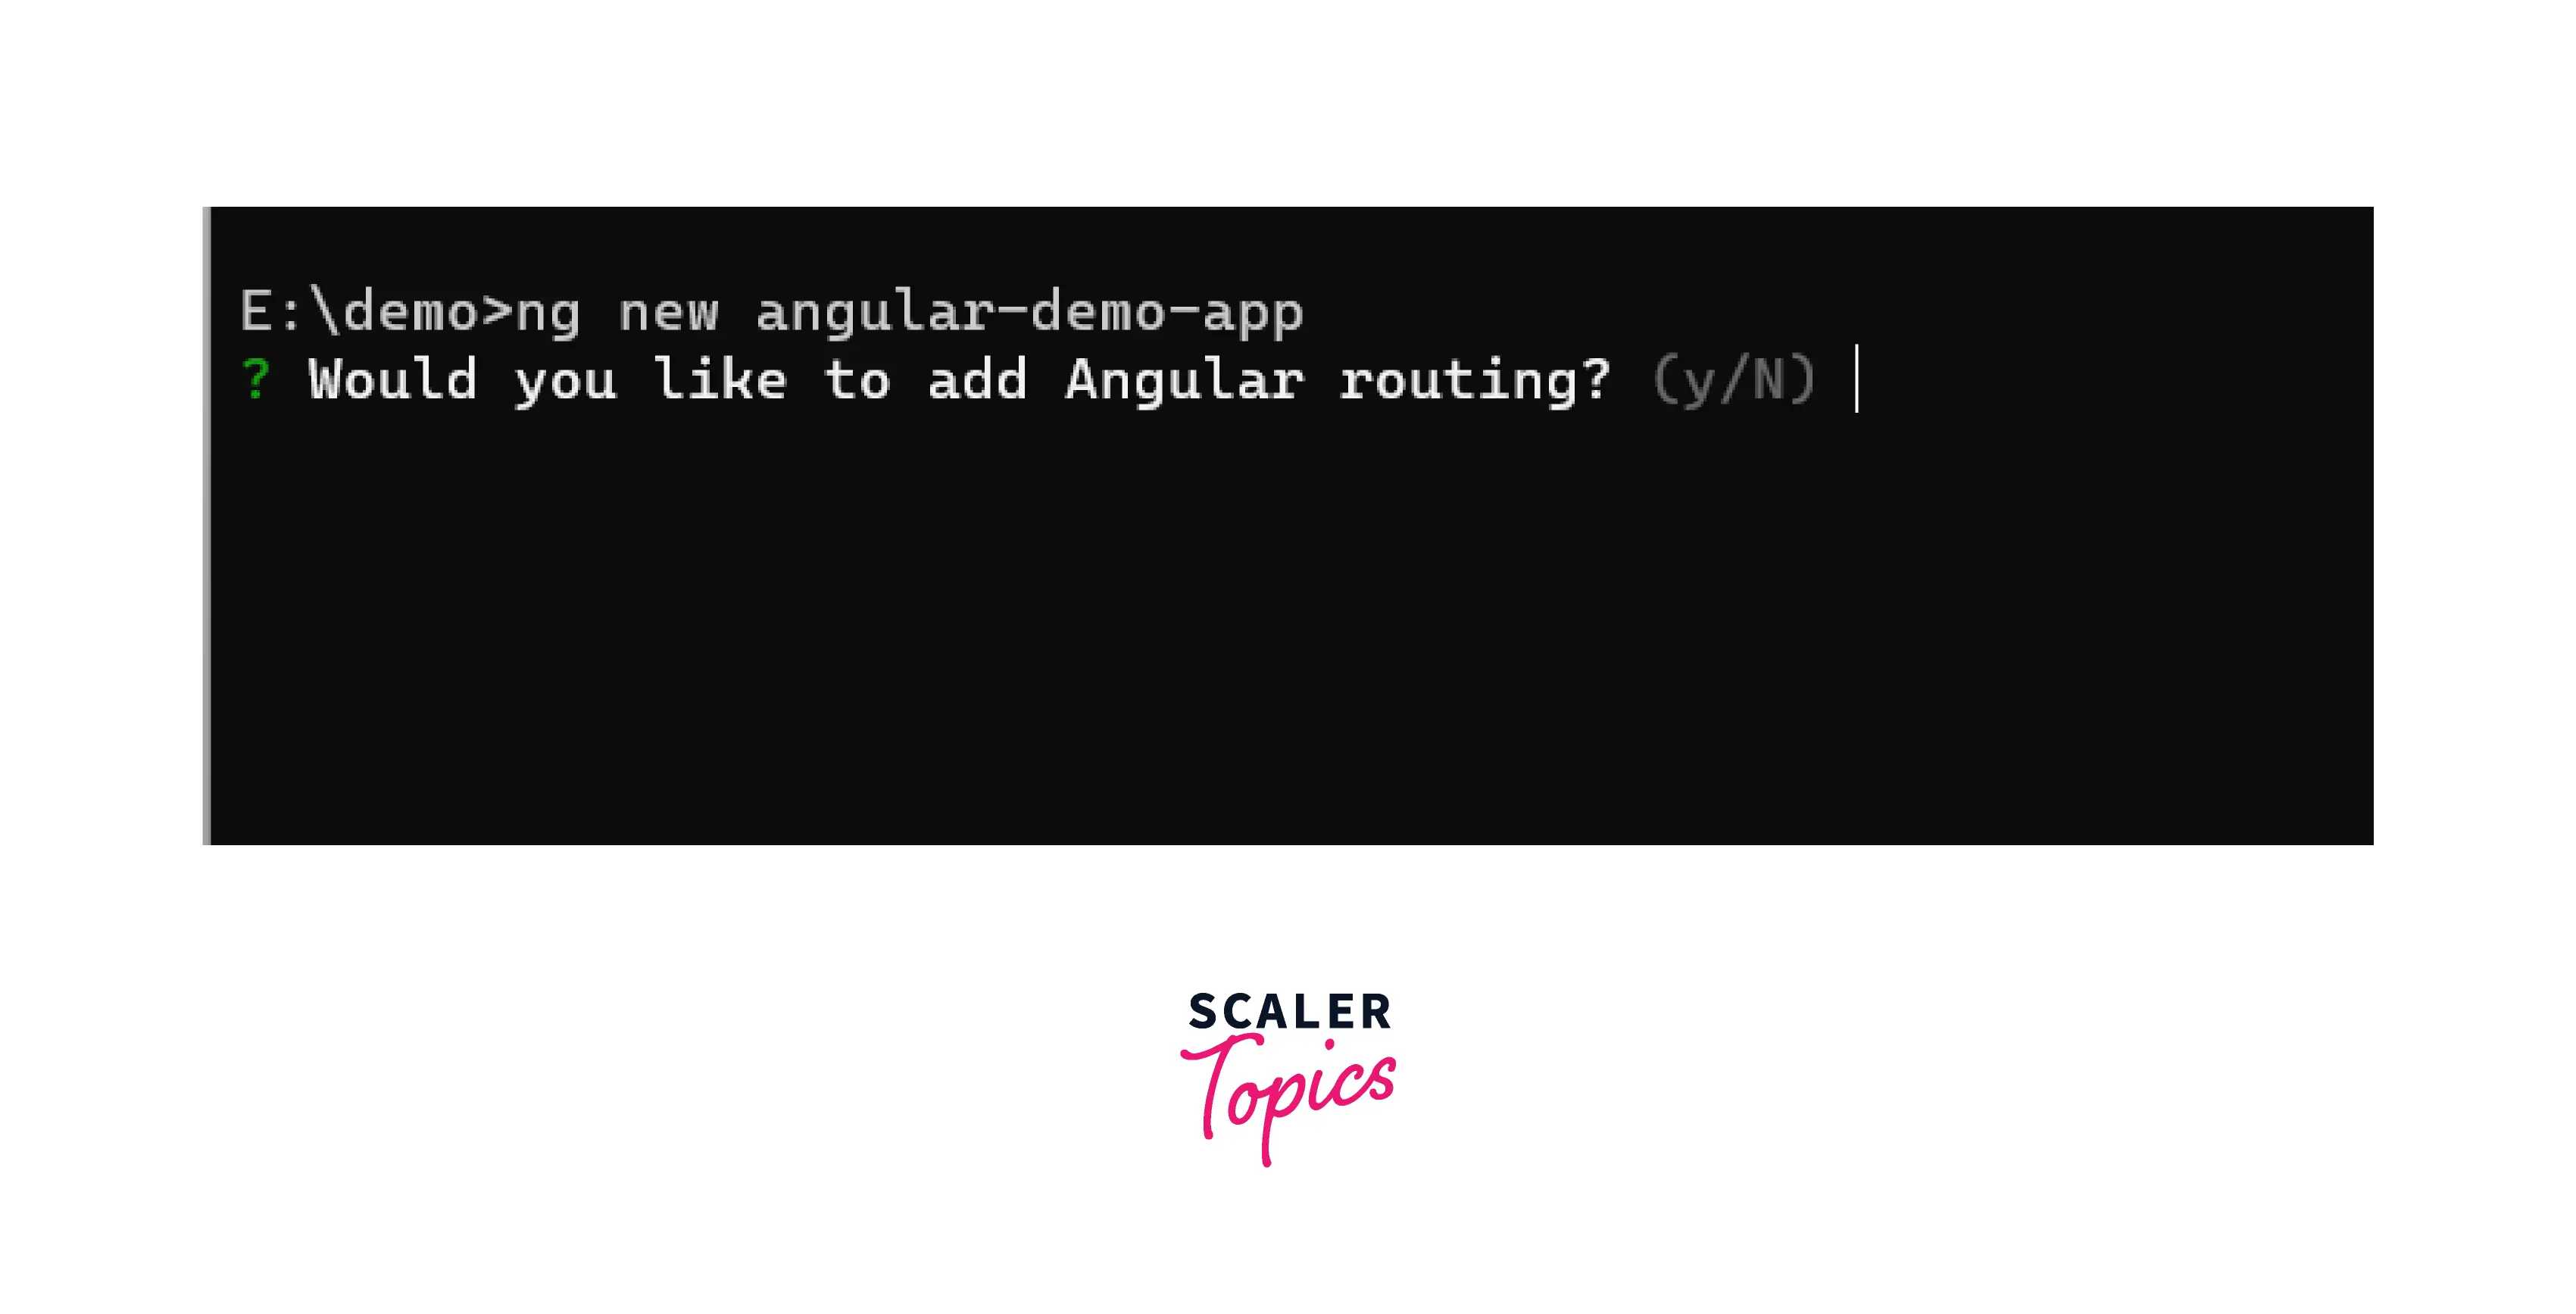
We’ll also add it manually so we can get a better idea of how routing works in Angular.
Adding the Routing Module
We must include an AppRoutingModule that contains our application routes as well as a router outlet where Angular will inject the presently matched component based on the browser's current URL.
Add a module using the following command:
Open the file and add the following code:
Importing the Routing Module
Next, we need to import this module routing into the main app module that lives in the src/app/app.module.ts file:
We import the AppRoutingModule from ./app-routing.module and place it in the main module's imports array.
Adding the Router Outlet
Finally, we must include the router outlet. Add the router-outlet directive to the src/app/app.component.html file, which includes the main app template:
The Angular Router will render the component that matches the current browser's route here.
Creating Routes
Creating Child Routes
We just defined a route with the path /users/:id. We will continue to use this path base when we start to view a specific thread inside of our forum, and we want it to be like this: /users/:id/:business-profile. When you look at the URL structure here, it shows that you expect both a user and profile to correctly navigate, and that’s an indication of a good place to use child routes.
Based on this, you can see that child routes always share their parent route’s path and extend it for a new child route. Here is a basic list showing the relationship between these various routes:
/users: UserListComponent, top-level route /users/:id: Child route to show a specific forum /users/:id/:business-profile: — Also a child route of a specific user, showing a business profile
Child routes work by creating another router outlet that’s localized to the parent component, and then all child routes will render inside this new router outlet.
Adding Navigation Links
Let's use the routerLink directive to add navigation links to our app design.
For example, add the following on the HTML template:
When a user clicks on the Users link, they are directed to the /users route, which loads the UserListComponent.
Conclusion
- Routing in angular is an essential part of the application, it helps the application to become a single-page application.
- All the routing-related information is mentioned inside the router configuration
- Component will be loaded inside<router-outlet></router-outlet>
- Application can have multiple router-outlet