Setting Up Git on Anypoint Studio
Overview
Enabling Git within Anypoint Studio enhances version control, promoting collaboration and effortless change tracking in Mule applications. Anypoint Studio provides an intuitive interface and tools for integration creation, deployment, and testing for Mule application development. Integrating Git into Anypoint Studio helps developers with effective team collaboration, rollback capabilities, streamlined code management, and other version control advantages. In this article, we will go through a step-by-step process to configure Git within Anypoint Studio.
What is Anypoint Studio?
Anypoint Studio functions as a unique computer program used to create something called Mule Applications. It's similar to another tool called Eclipse, but while Eclipse is used for making normal computer programs, Anypoint Studio is specifically designed for creating these special Mule Applications. These Mule Applications can be thought of as lighter versions of large business programs. Anypoint Studio is extremely helpful for both building and testing these types of applications.
Download and Install Anypoint Studio?
We can follow these steps to download and install Anypoint Studio:
-
Go to the MuleSoft website, navigate to the "Anypoint Studio" section, and select the version of Anypoint Studio based on your operating system (Windows/macOS/Linux).
-
Now click on the "Download" button to start the download process.
-
After the download finishes, find the installation file and execute it.
-
Now, we can proceed and follow the on-screen instructions to install Anypoint Studio. We may need to choose an installation directory and customize installation settings based on the preferences.
-
Once the installation is complete, we can launch the Anypoint Studio.
With Anypoint Studio successfully installed, we are now ready to proceed with the steps of setting the Git integration to streamline the Mule application development process.
Setting Up Git on Anypoint Studio
Below are the steps for configuring Git in Anypoint Studio:
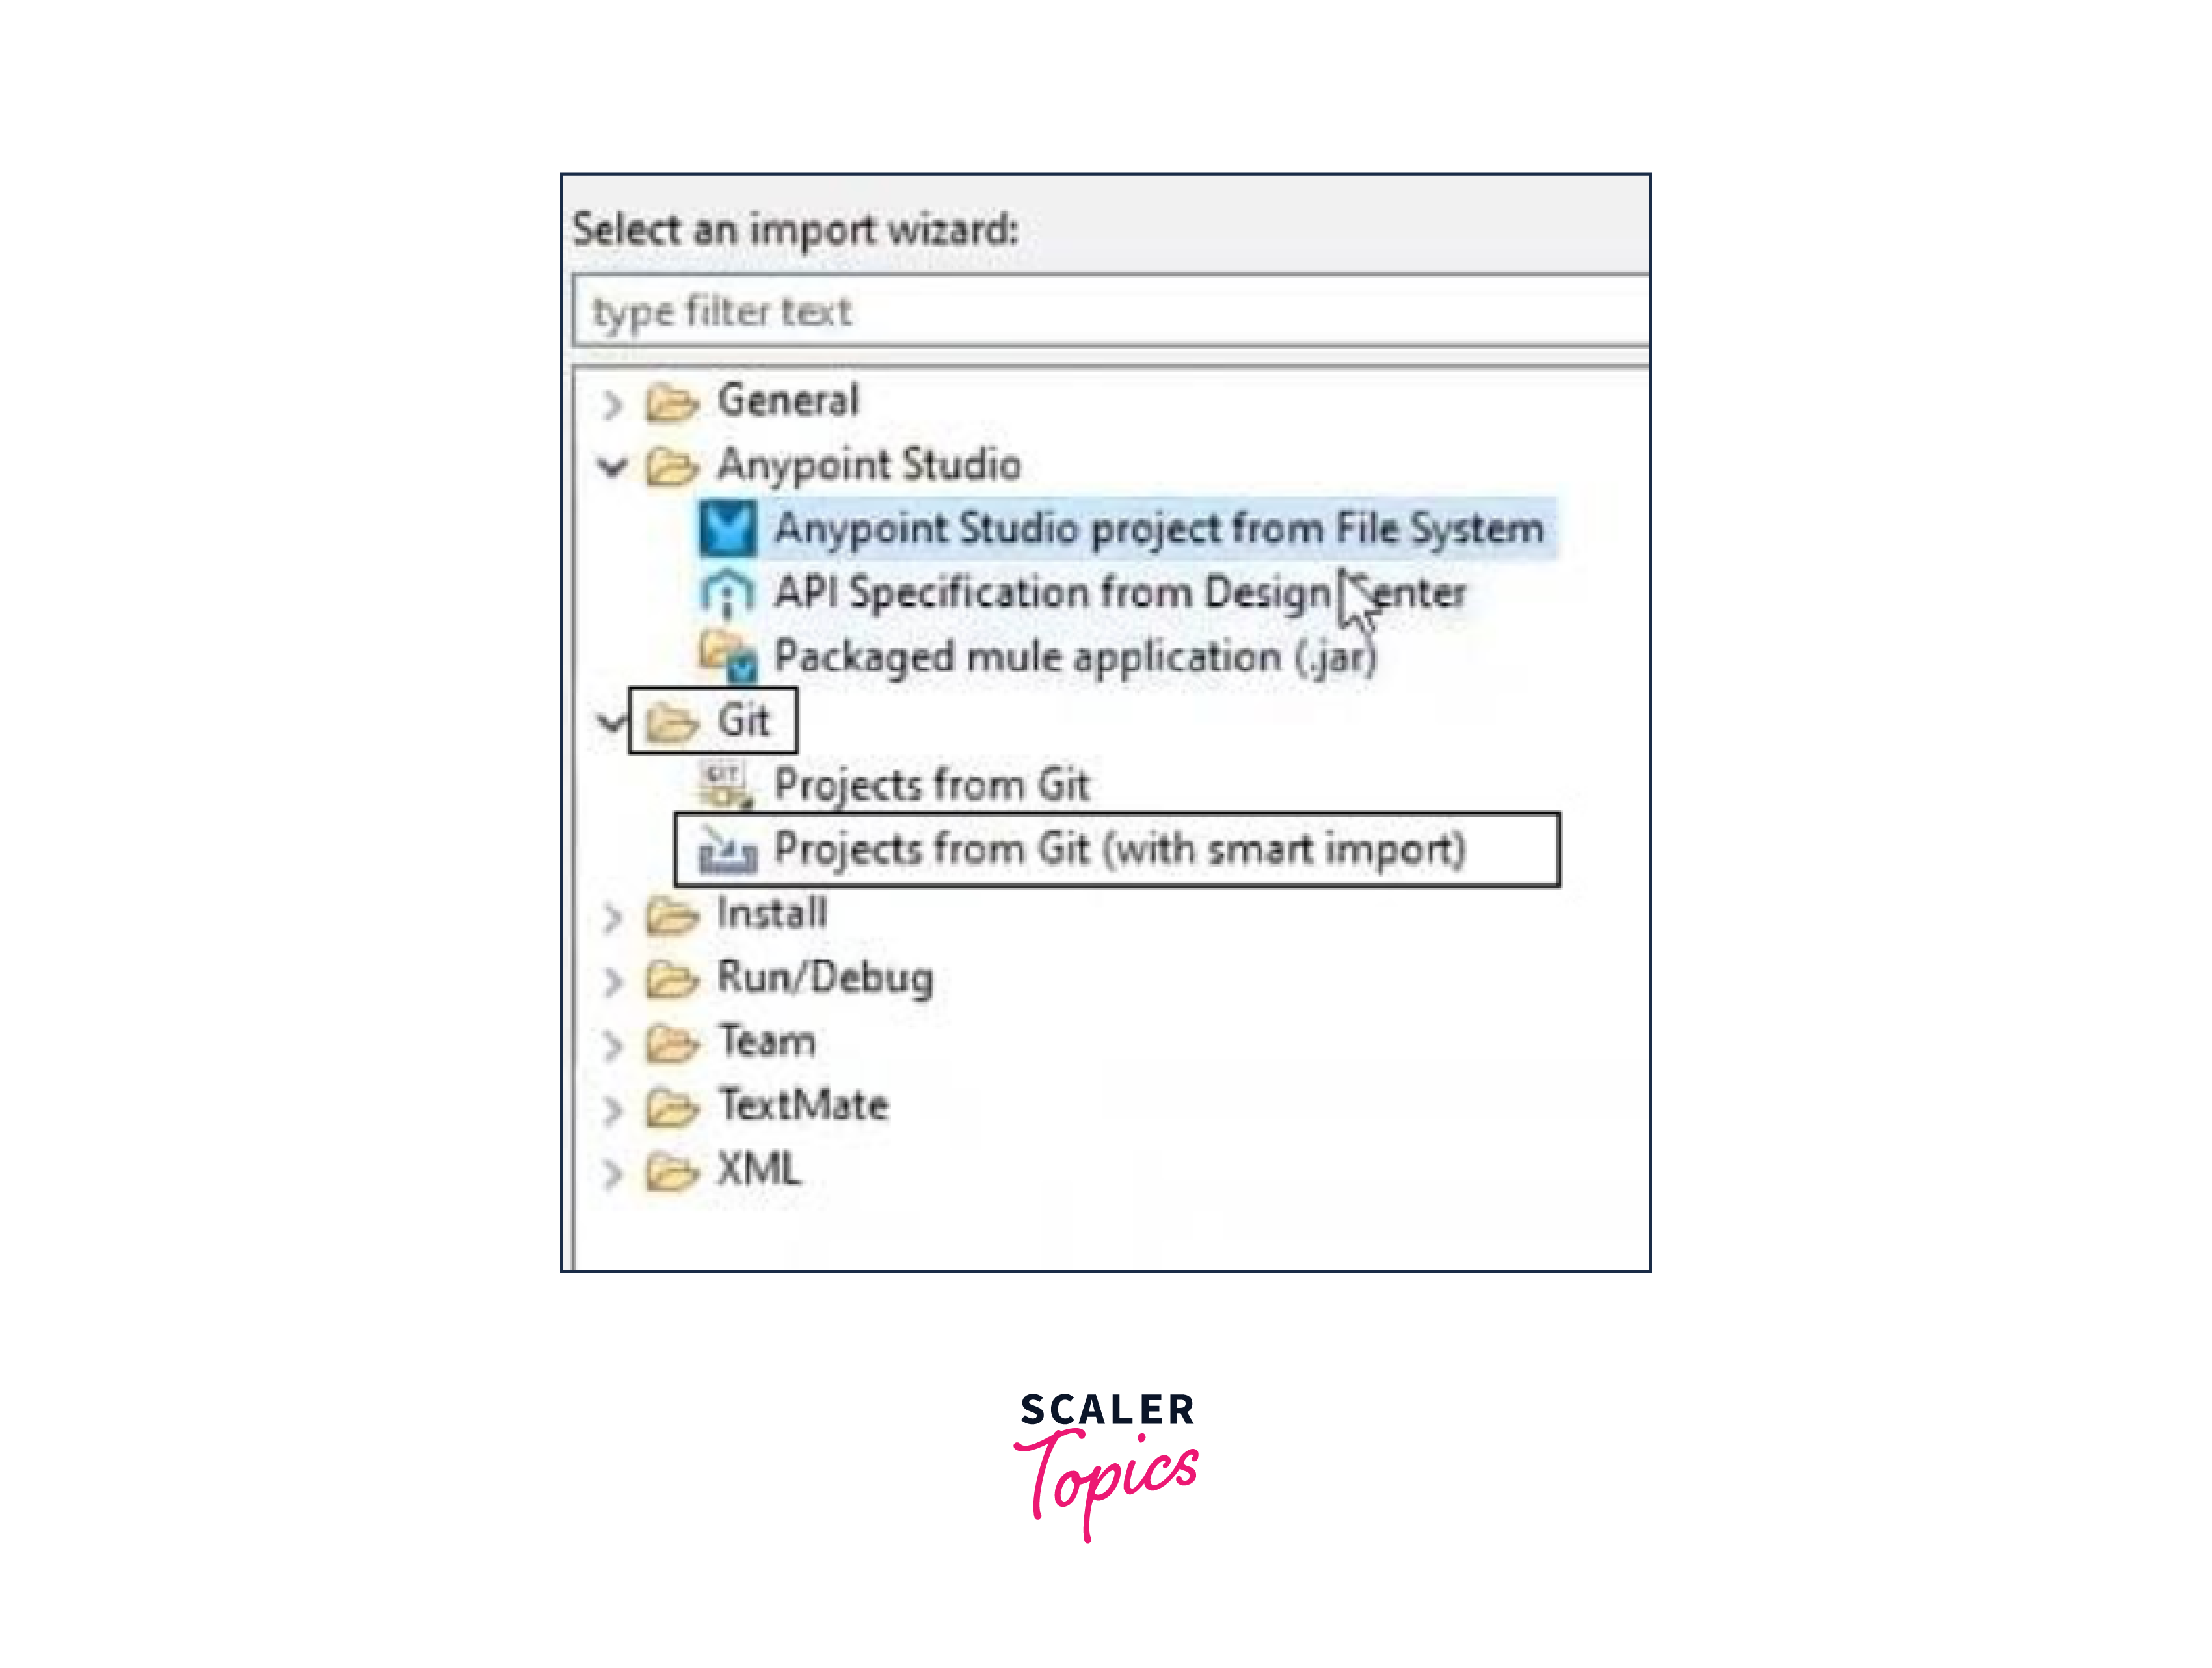
- Open Anypoint Studio and right-click on the screen to bring up a popup window. Now click on the 'Import' option. In the new window, you will see the Git section. Expand it and choose 'Project From Git (With Smart Import)'. After doing this, Click 'Next'.
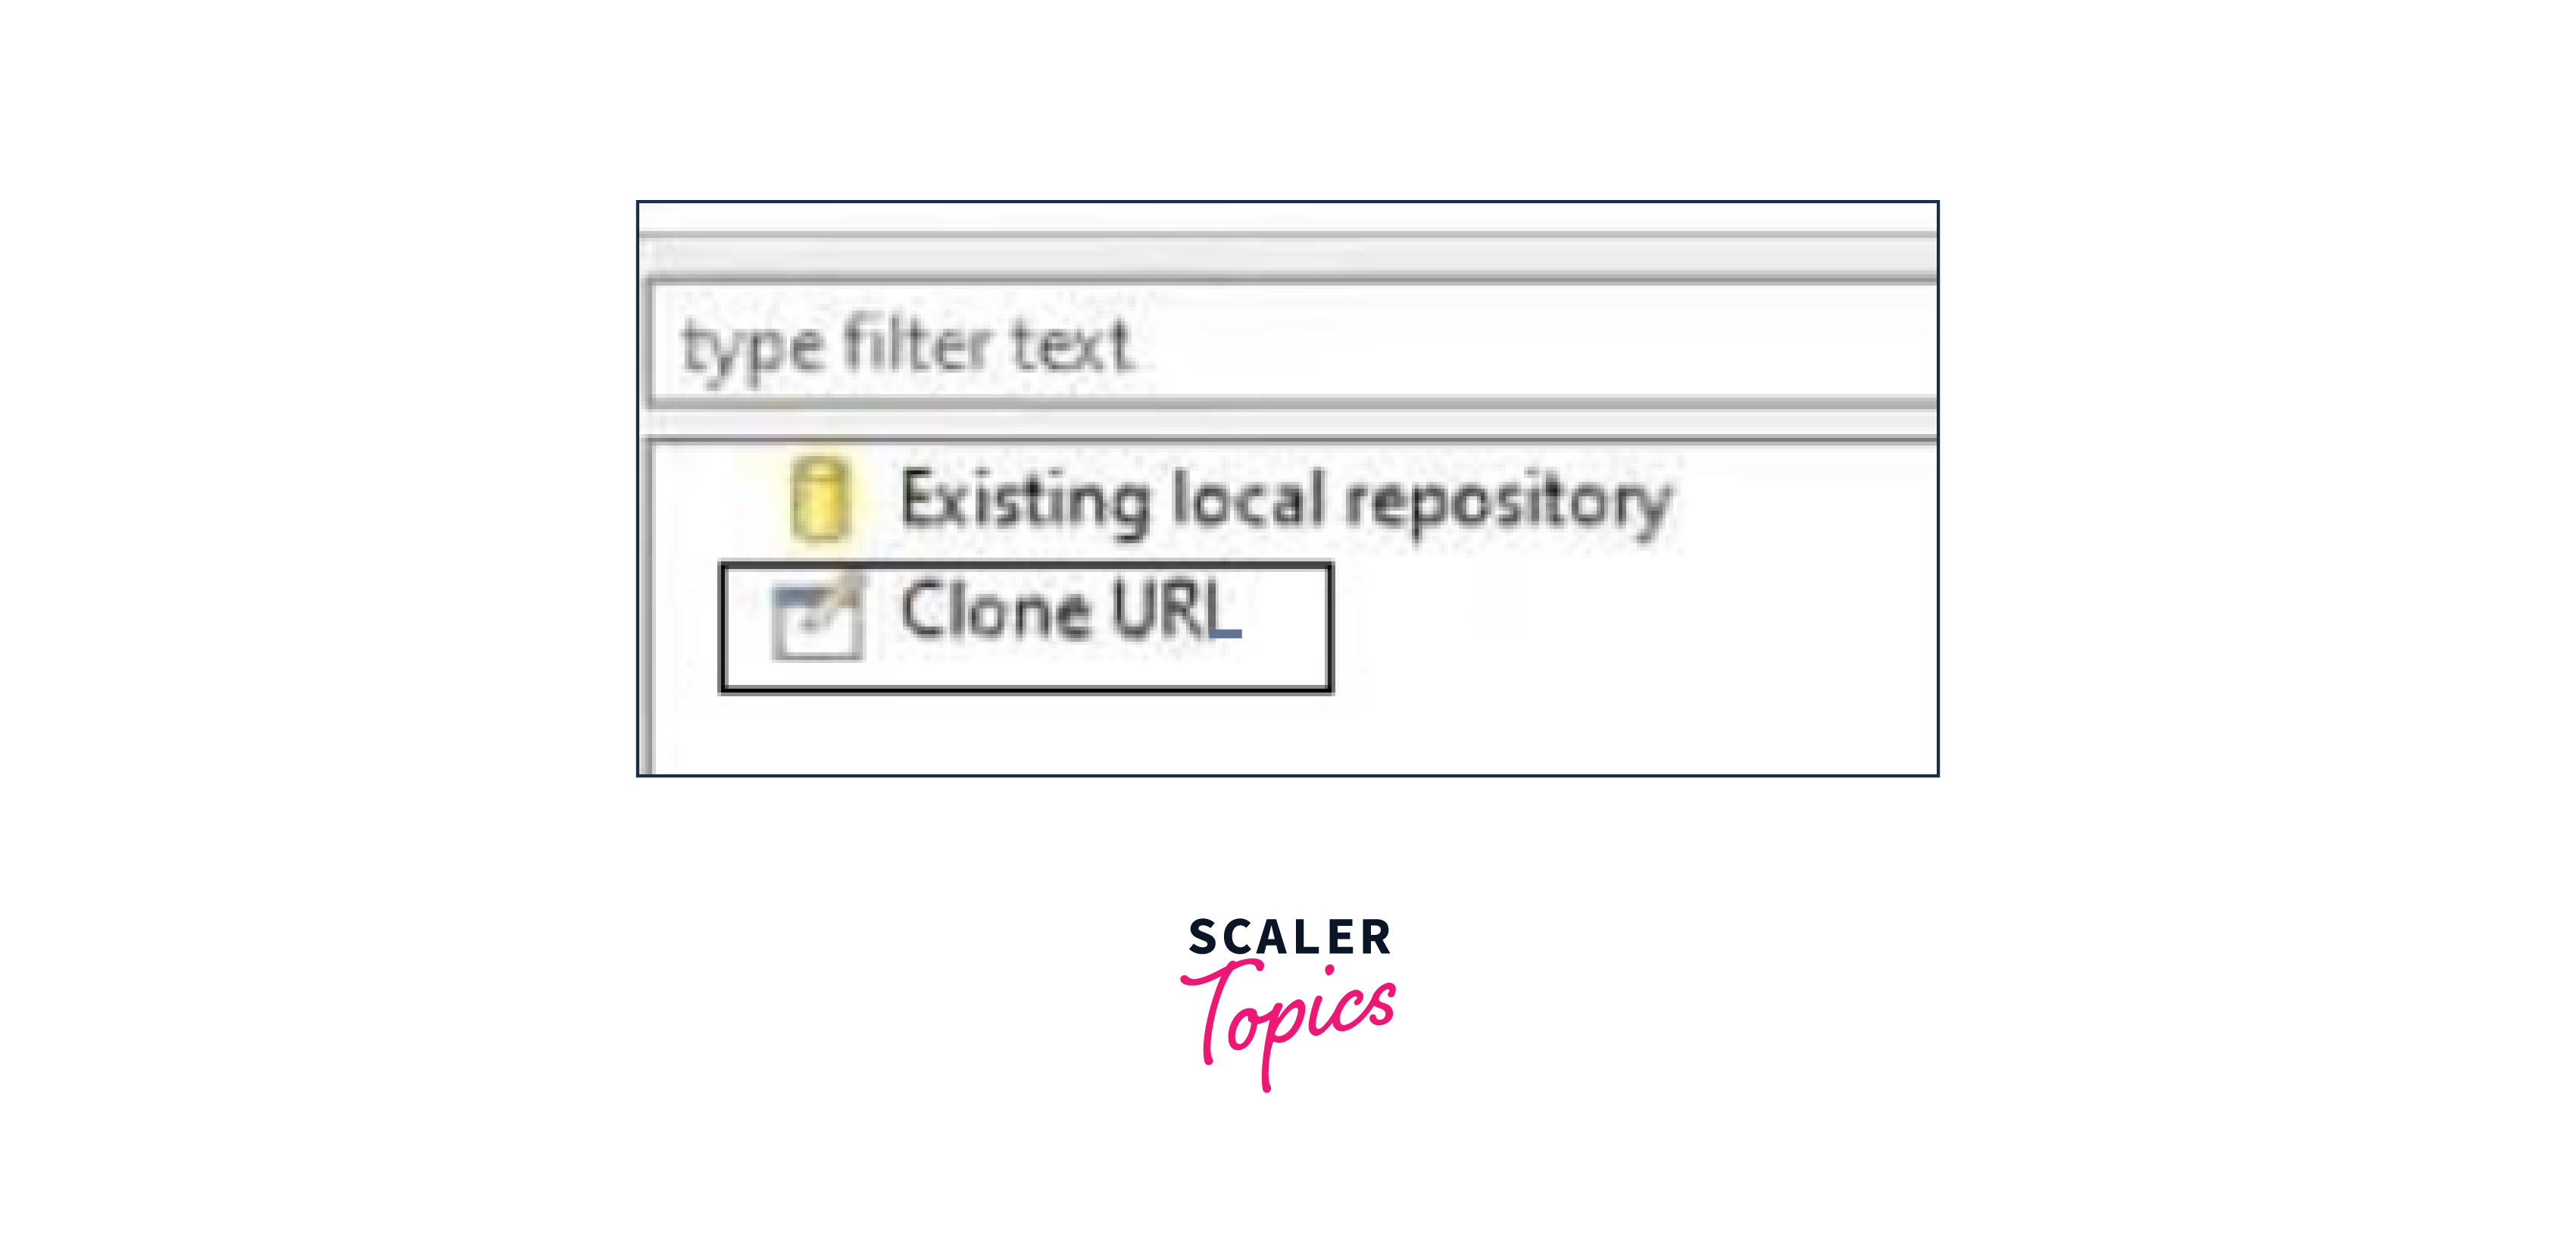
- Now choose the 'Clone URL' option to import from a remote repository and press 'Next'.
- At this step we can paste the repository URL and provide the GitHub credentials. After this, click on 'Next' and wait for some time as the details are imported from GitHub.

- We can now select the branch to import and proceed with 'Next'.

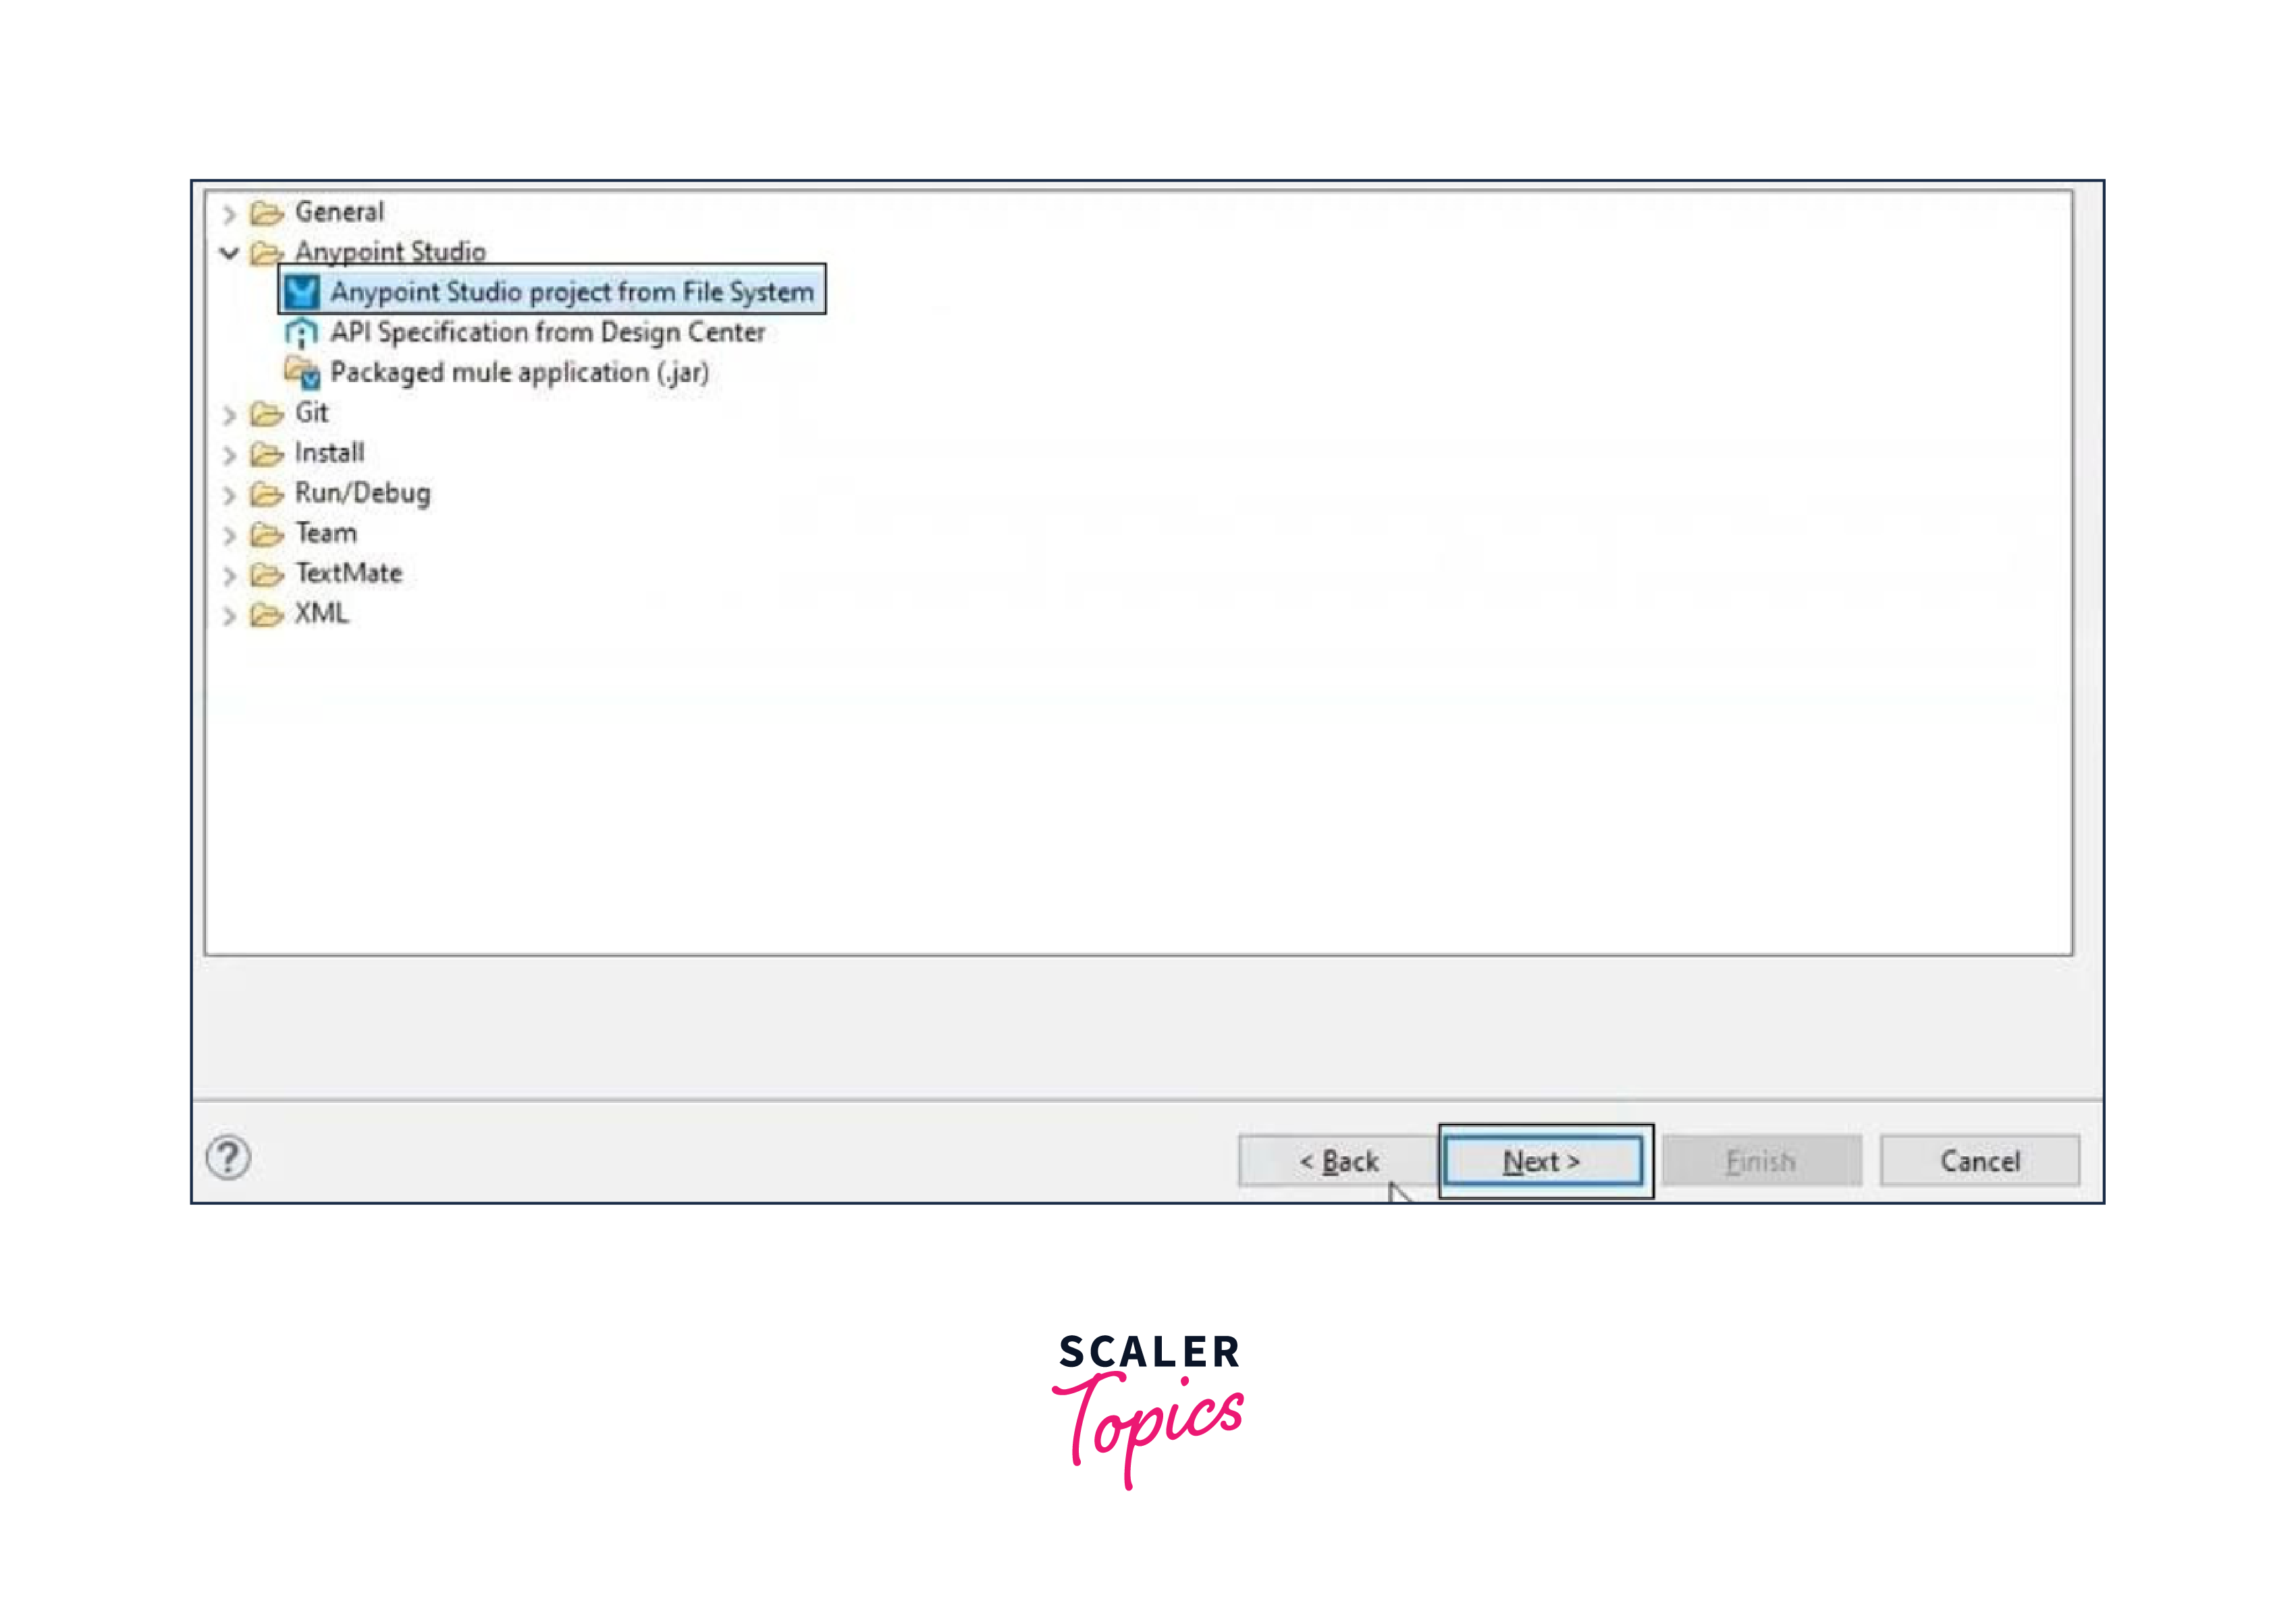
- Now, specify the import directory and wait for the process to complete. Click 'Show Other Specialised Import Wizard' to close the import process and browse to the imported repository's directory.

- In the import window, choose items to import and press 'Next'. after this, provide the path of the directory and click on 'Finish'.
- After successful import, find the Repository in the Anypoint Studio Package Explorer.
FAQs
Q. What is the application of Anypoint Studio?
A. Anypoint Studio is focused on creating Mule applications and provides tools designed specifically for integration development.
Q. What advantages do users of Anypoint Studio gain from integrating Git?
A. Integrating Git into Anypoint Studio helps developers with effective team collaboration, rollback capabilities, streamlined code management, and other version control advantages
Q. Do you need a GitHub account to import repositories?
A. We will need a GitHub account to enter and bring repositories into Anypoint Studio.
Conclusion
- Anypoint Studio functions as a dedicated Integrated Development Environment (IDE) designed specifically for creating Mule applications. It provides user-friendly tools for constructing, deploying, and testing integrations.
- The installation process of Anypoint Studio is straightforward, enabling users to easily do the setup for the Git integration.
- Integrating Git into Anypoint Studio helps developers with effective team collaboration, rollback capabilities, streamlined code management, and other version control advantages
- By following the step-by-step process, users can successfully configure Git integration, and get the benefits for Mule application development.
- By combining the interface of Anypoint Studio with Git's version control, developers can easily handle the complex parts of integrations.
- Using Anypoint Studio with Git integration not only boosts the possibilities of Mule applications but also improves teamwork and the way code is managed.