Install C

Overview
To install the C language on Windows we need to set up a C environment that consists of a C Compiler Eg. MinGW, GCC, LCC, etc, and a text editor Eg. TextPad, Notepad++, etc. Then we have to set the path for the compiler to the environment path variable and then write a c program and save it with extension .c and execute. Or we can install IDE(Integrated Development Environment) which already consists of the text editor and compiler under one GUI(Graphical User Interface)
Eg. Code::Blocks, Dev C++, Turbo C++, etc.
How to install C?
When it comes to C installation, you must know that it is a programming language, and you don't actually install C itself.
Instead, you install a software development environment that allows you to write, compile, and run C programs. There are several options for doing this, depending on your operating system and personal preferences.
You can install C compiler which converts the C language program into machine language on your systems to run any C program because without compilation no program written in C can be executed. There are many compilers for C, like Turbo C, GCC, Microsoft Visual Studio Express, Xcode, Pelles C, and many more.
Many IDEs are also there to work on C such as NetBeans, DevC++, Eclipse, Code:: Blocks, MinGW, and many more.
Scaler Placement Report and Statistics
Scaler learners achieved 2.5x salary growth with average post-Scaler CTC reaching ₹23L.
Steps to install C
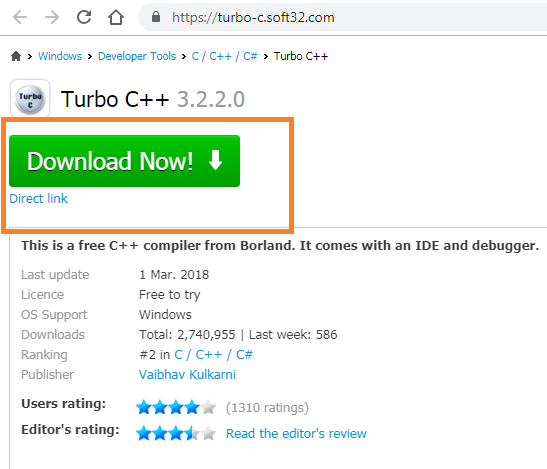
Step 1: Download Turbo C++ software
Firstly, you must download Turbo C++ from the link: Turbo.C.3.2
When you open this link the following page will appear. Open the first link to download it.

Download Turbo C++ software
Transform Your Career
Choose from our industry-leading programs designed for career success
Modern Software and AI Engineering Program
Master full-stack development with AI integration

Modern Data Science and ML with specialisation in AI
Advanced data science techniques with AI specialization
Advanced AIML with Specialisation in Agentic AI
Deep dive into AIML with focus on Agentic systems
DevOps, Cloud & AI Platform Engineering
Build and manage AI-powered cloud infrastructure
AI Engineering Advanced Certification by IIT-Roorkee
Premier AI engineering certification from IIT-Roorkee
Step 2: Download the Turbo C++
When you will open the open link, the option to download turbo C++ will appear. Click and download it.
Scaler Placement Report and Statistics
Scaler learners achieved 2.5x salary growth with average post-Scaler CTC reaching ₹23L.
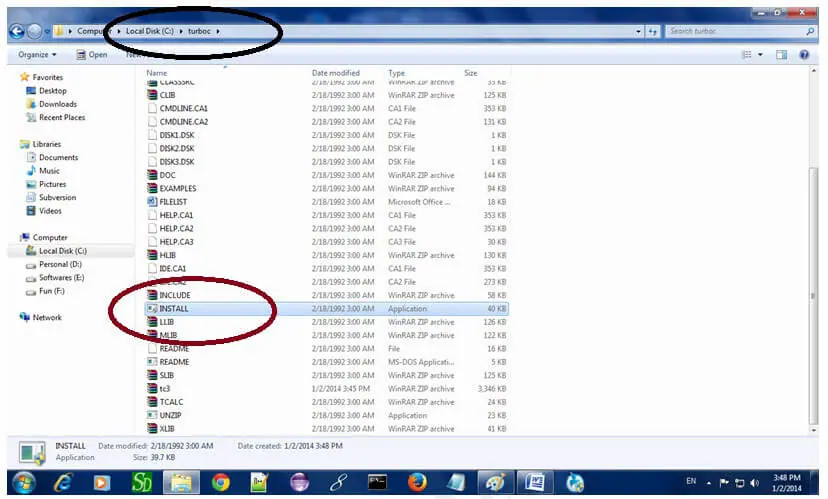
Step 3: Create turbo c directory in c drive and extract tc3.zip
Now, you must create turbo c directory inside c: drive and extract the zip file in this directory.
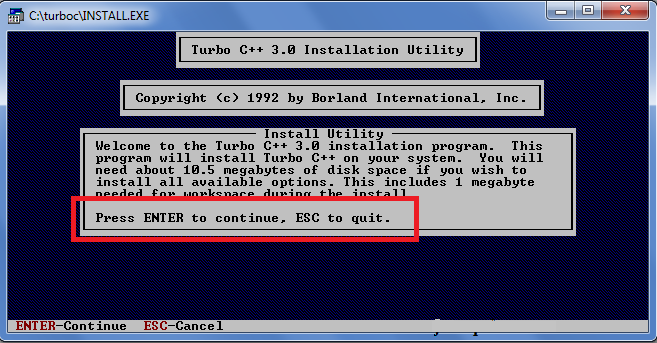
Step 4: Permission to install C
Now a window will appear asking for permission to install or not, press enter to install C.
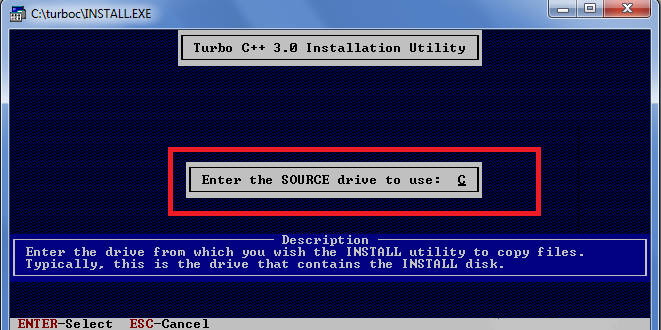
Step 5: Change drive to C
After pressing enter a window will appear. Change the drive to C
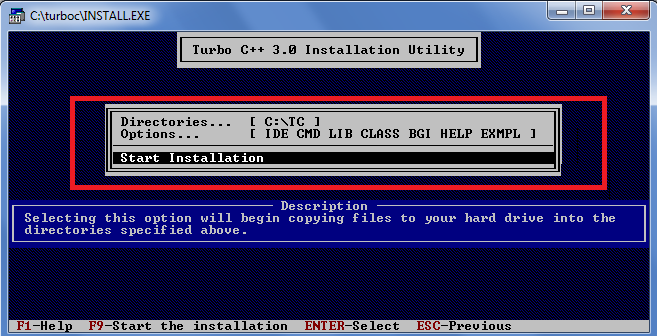
Step 6: Start installation
Select the start installation option by the down arrow key and then press enter.
Turn Learning into Career Growth
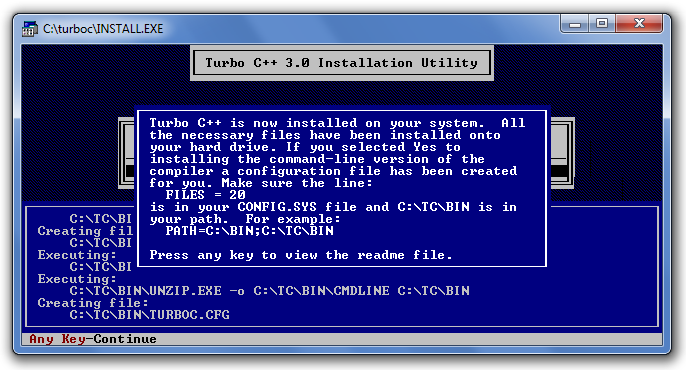
Step 7: C is installed
C is properly installed in your system. So press enter to read a document or close the window.
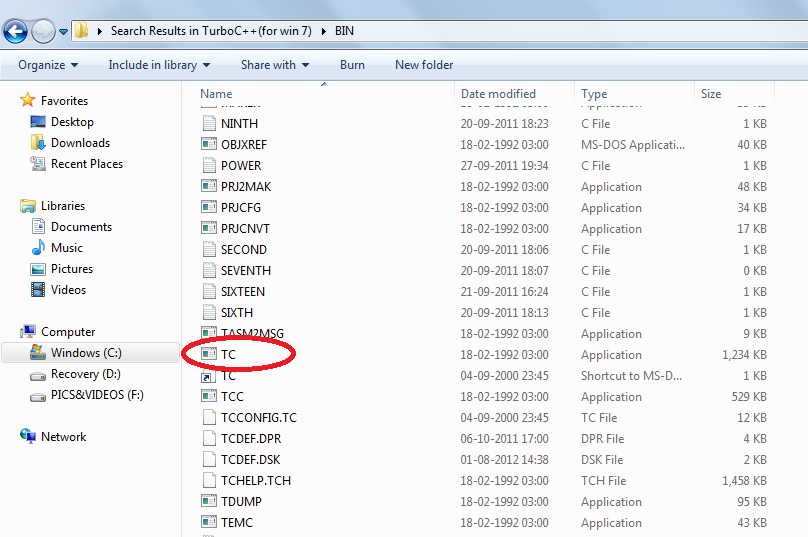
Step 8: Click on the TC application in the BIN folder
Now select or double-click on TC application to start programming.
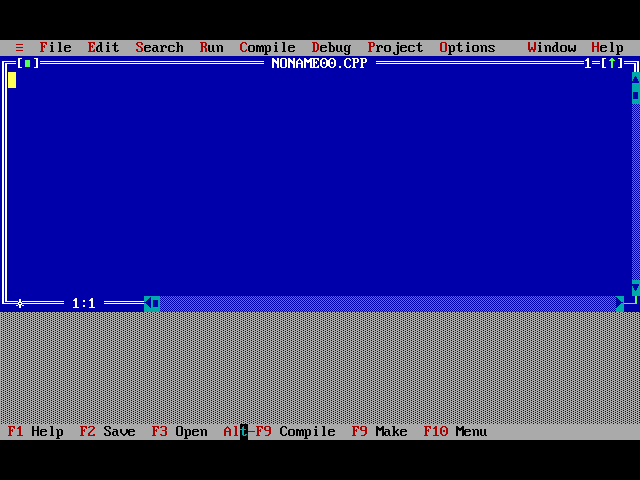
Step 9: A blue window will appear
Start coding in C and execute your programs.
Other Methods To Install C
Many other IDEs can be installed C on Windows that have in-built compilers. Some of them are listed below.
- Dev C++
- Code::Blocks
- Cygwin
Let's see how to install them on Windows PC.
1. Install dev C++
Dev C++
Dev-C++ is a full-featured C and C++ Integrated Development Environment (IDE) for Windows platforms. It is the easiest and most clean IDE to practice C Programming, especially for beginners.
You can download Dev C++ from the websites given below:
- Sourceforge
- Bloodshed
Below are the steps to download and install the Dev C++ IDE.
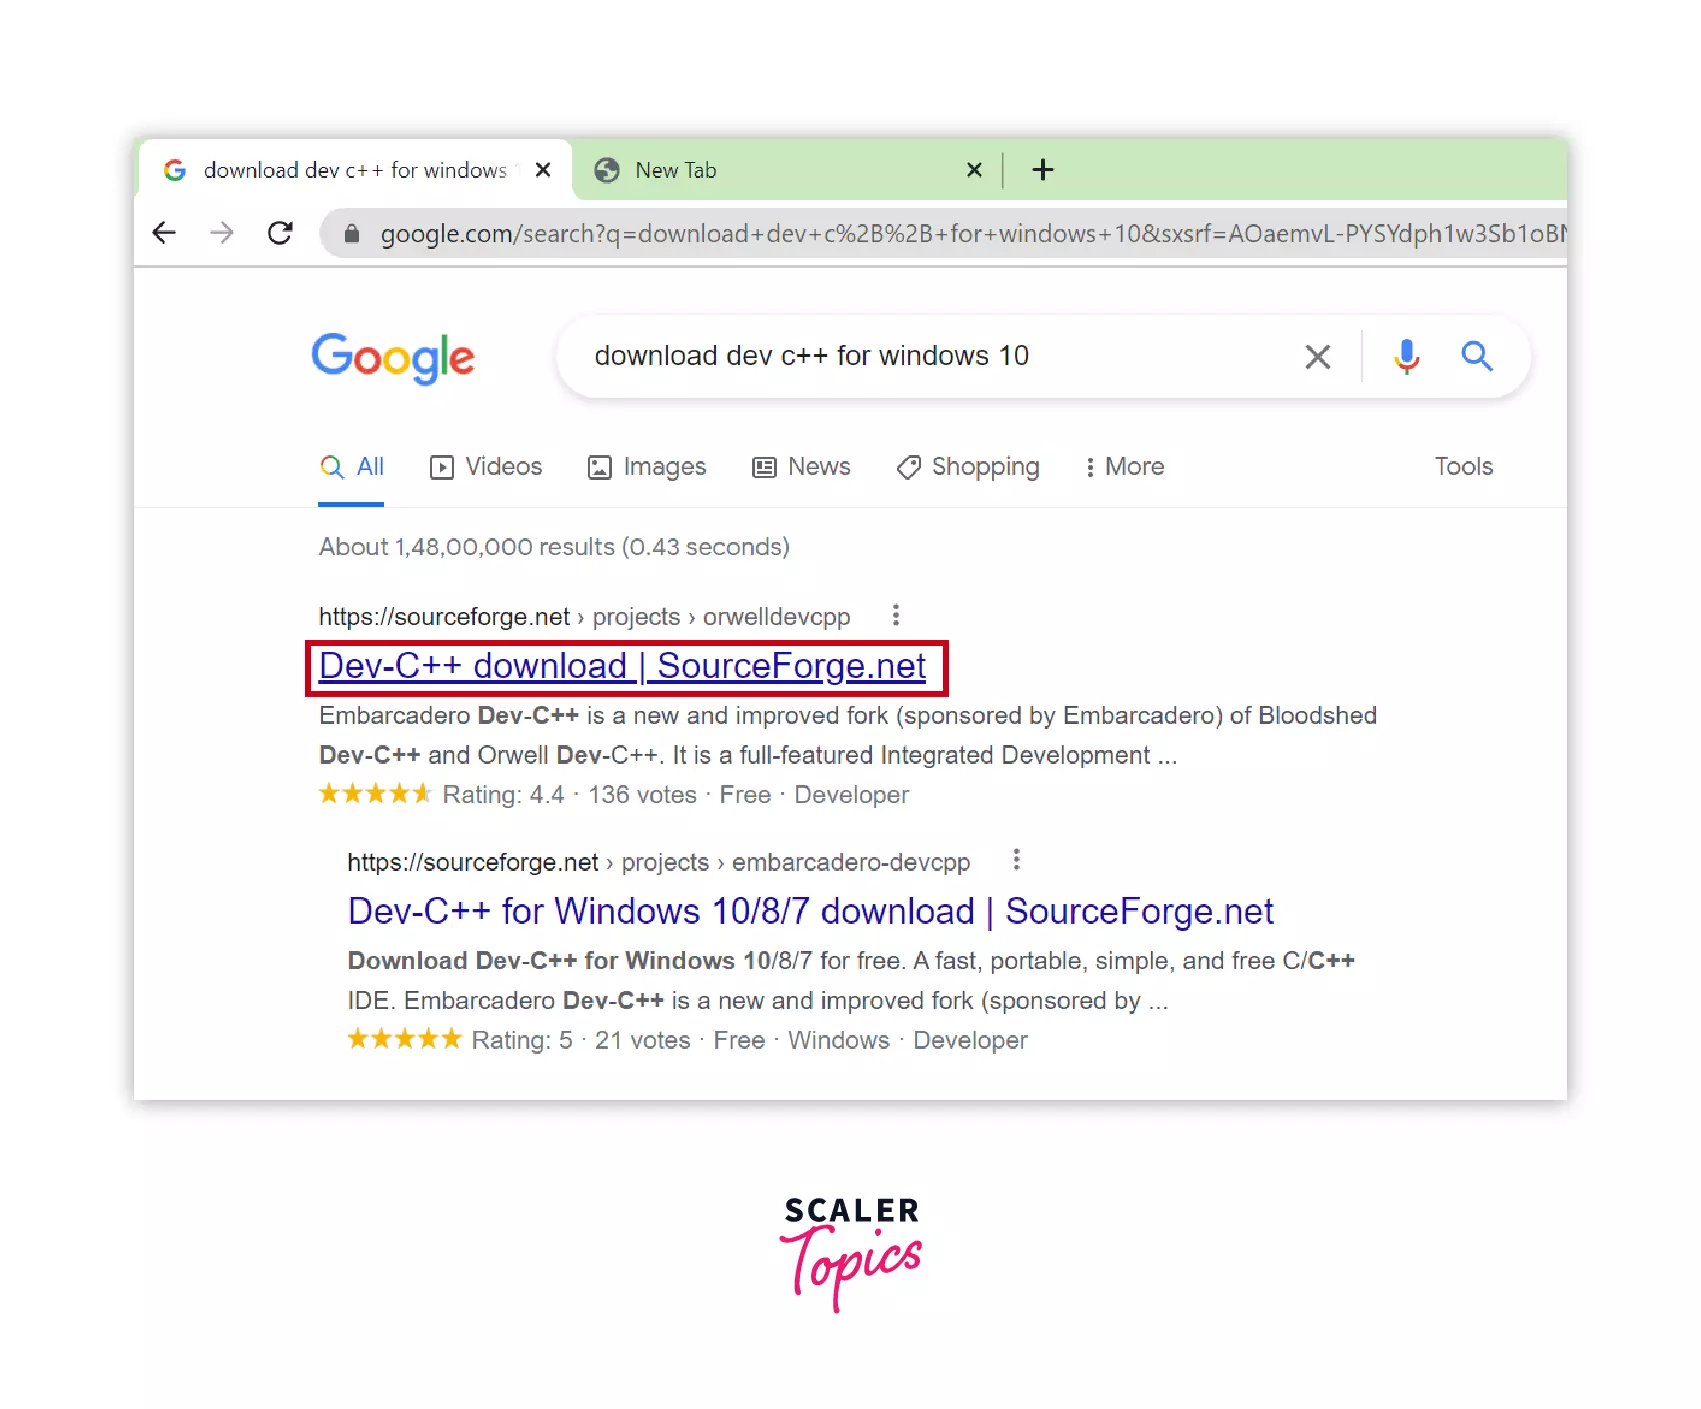
STEP 1: Download the Dev C++ IDE
To download DEV C++ just go to your favorite browser and just simply type DEV C++ and the first website will be Sourceforge.
Click on the link and it will take you to the download page of Dev C++.
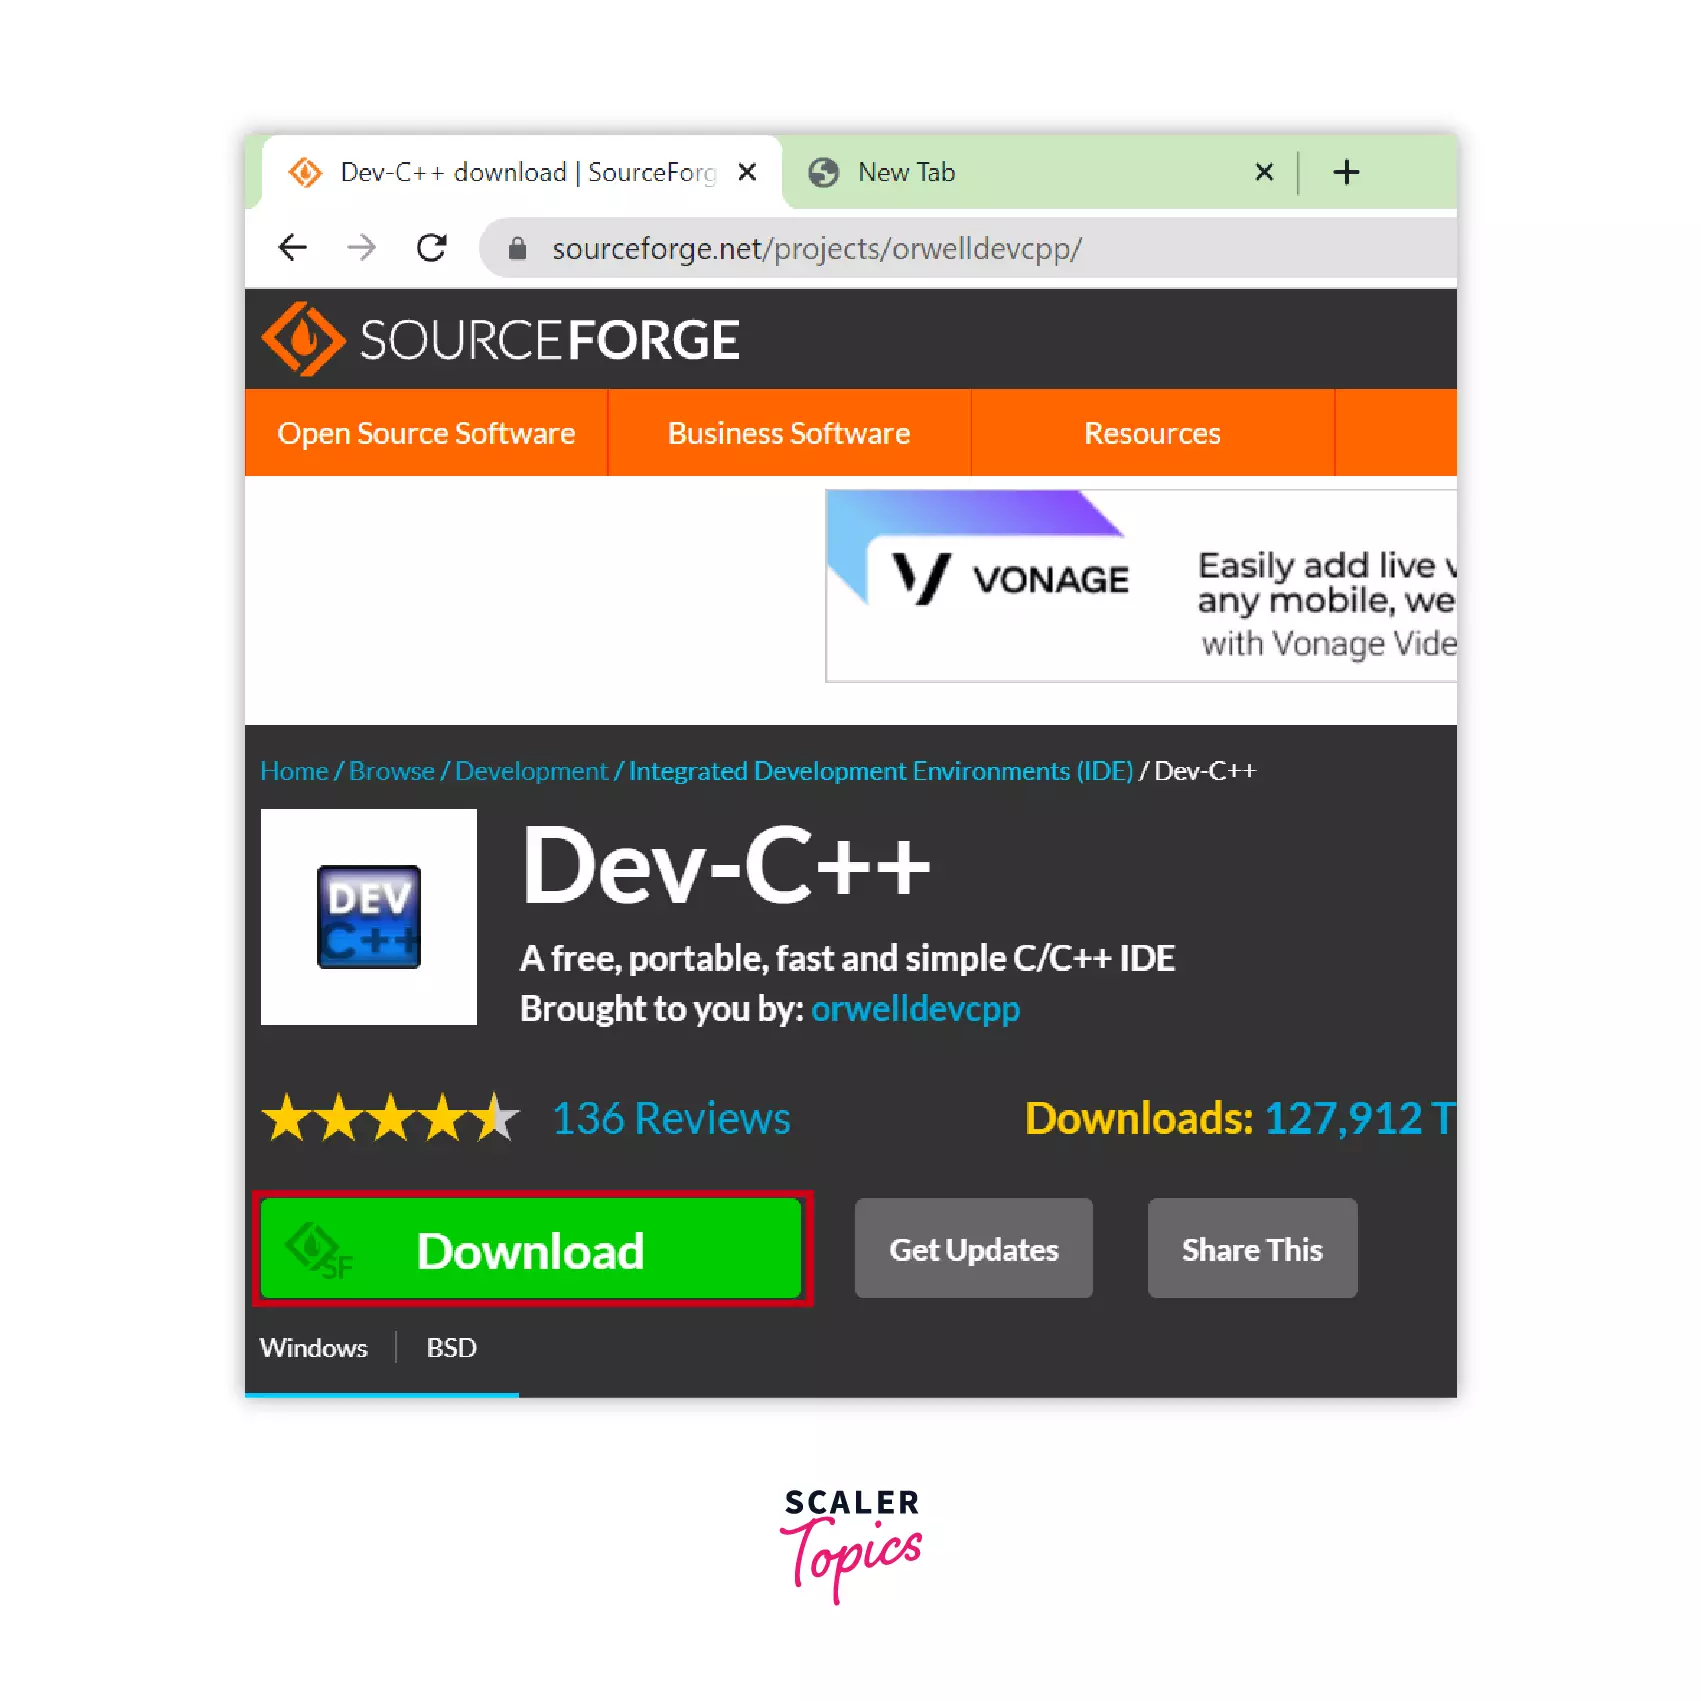
Now just click on the link and you will be redirected to the download page of DEV C++. From there click on the green-colored download button and the download will start in a few seconds. The downloaded file can be seen in the download folder, double click on the file.
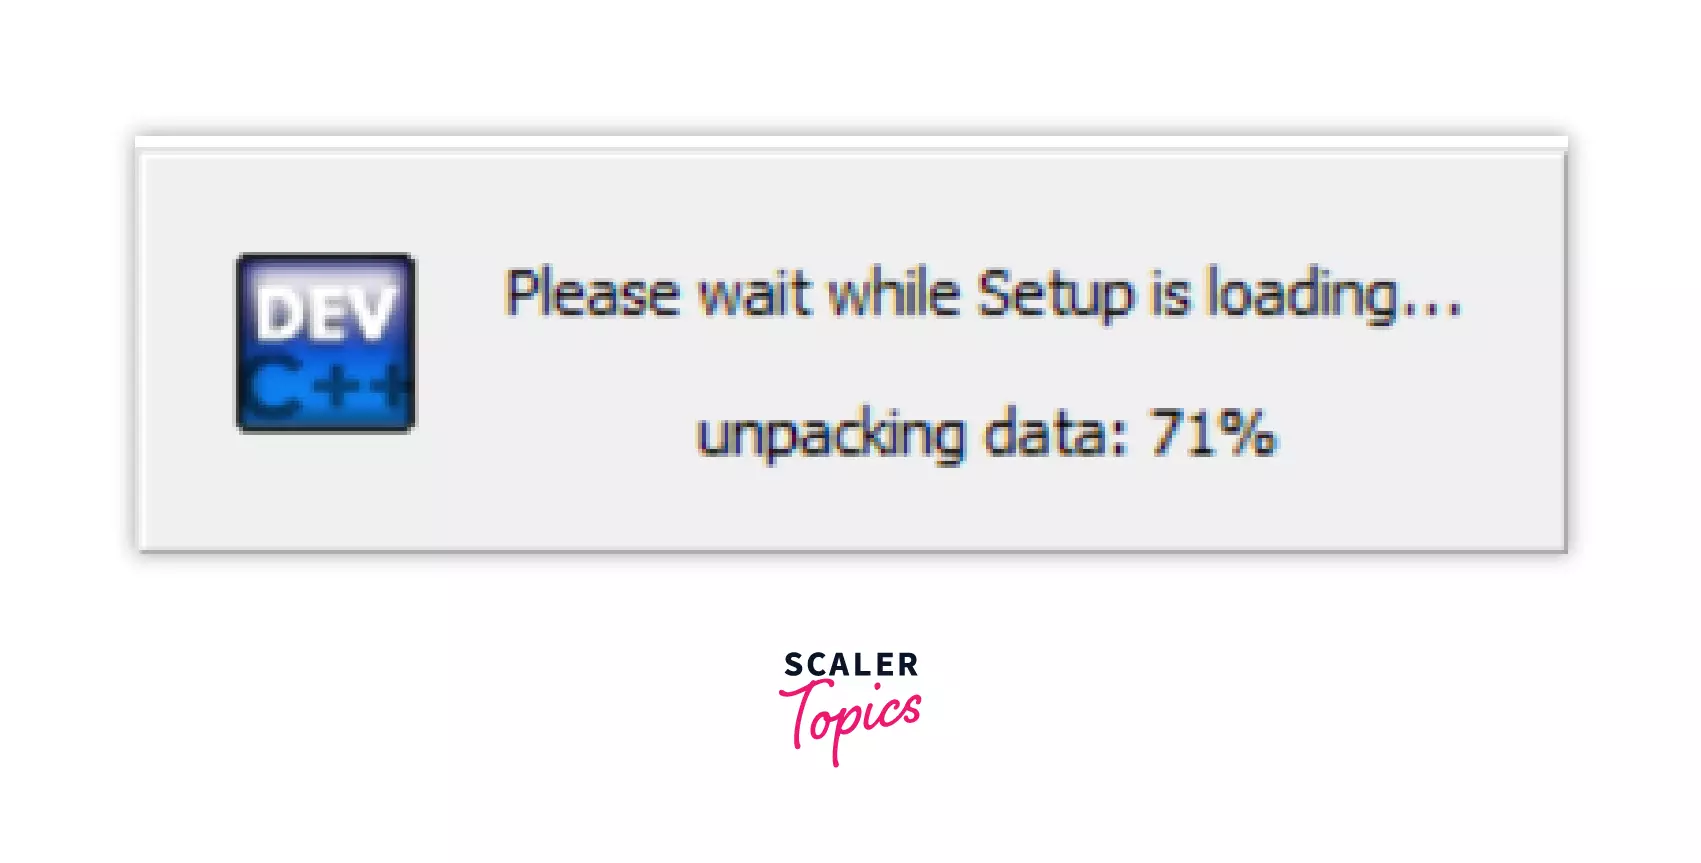
STEP 2: Start the setup
Now the setup will load as seen in the picture, wait until it loads to 100%.
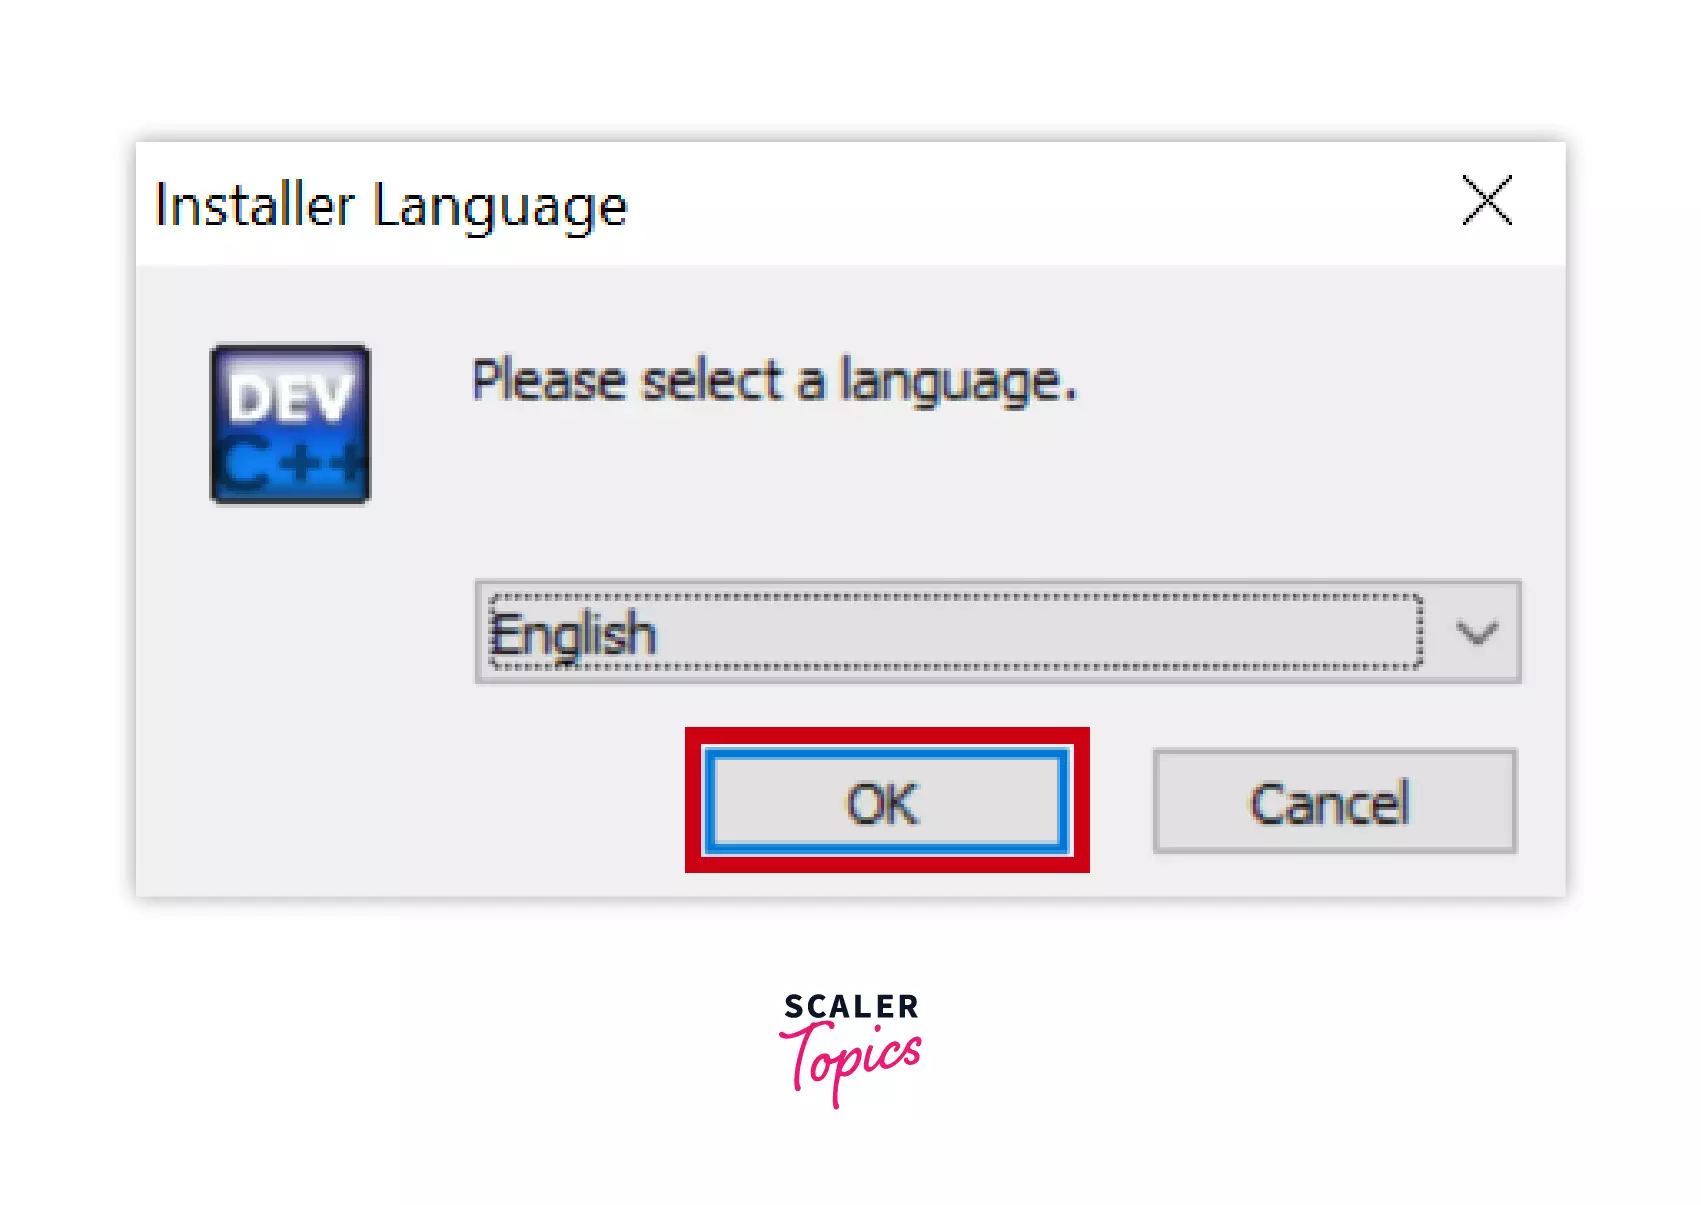
STEP 3: Select the language and accept the license agreement
Now choose the language you want the application to be installed in and after that click on the ok button and proceed.
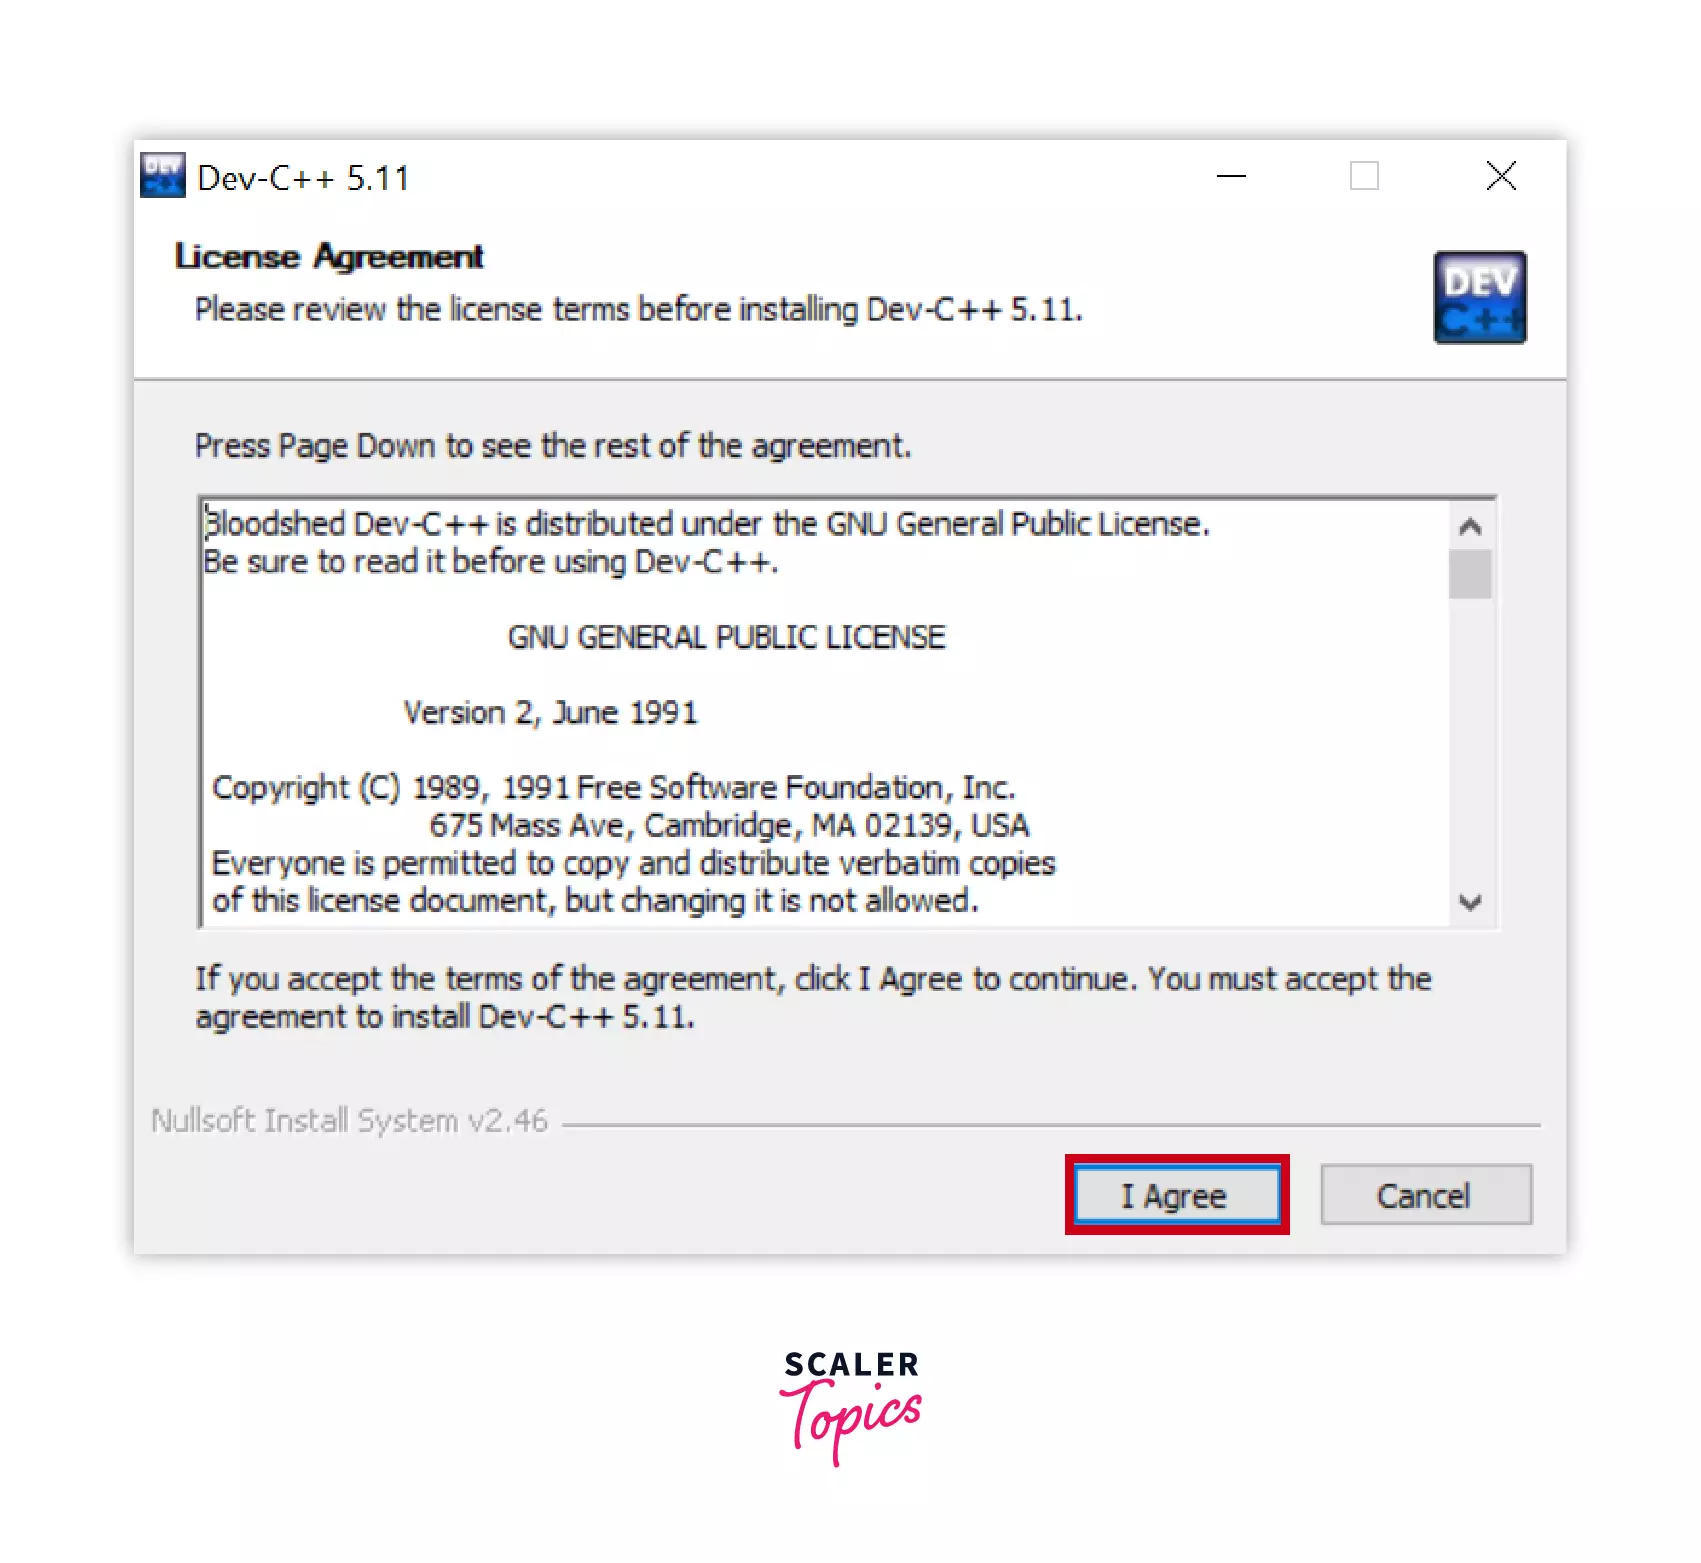
Now, here the license agreement and terms and conditions will appear on the screen click on I Agree button and proceed further.
STEP 4: Choose components
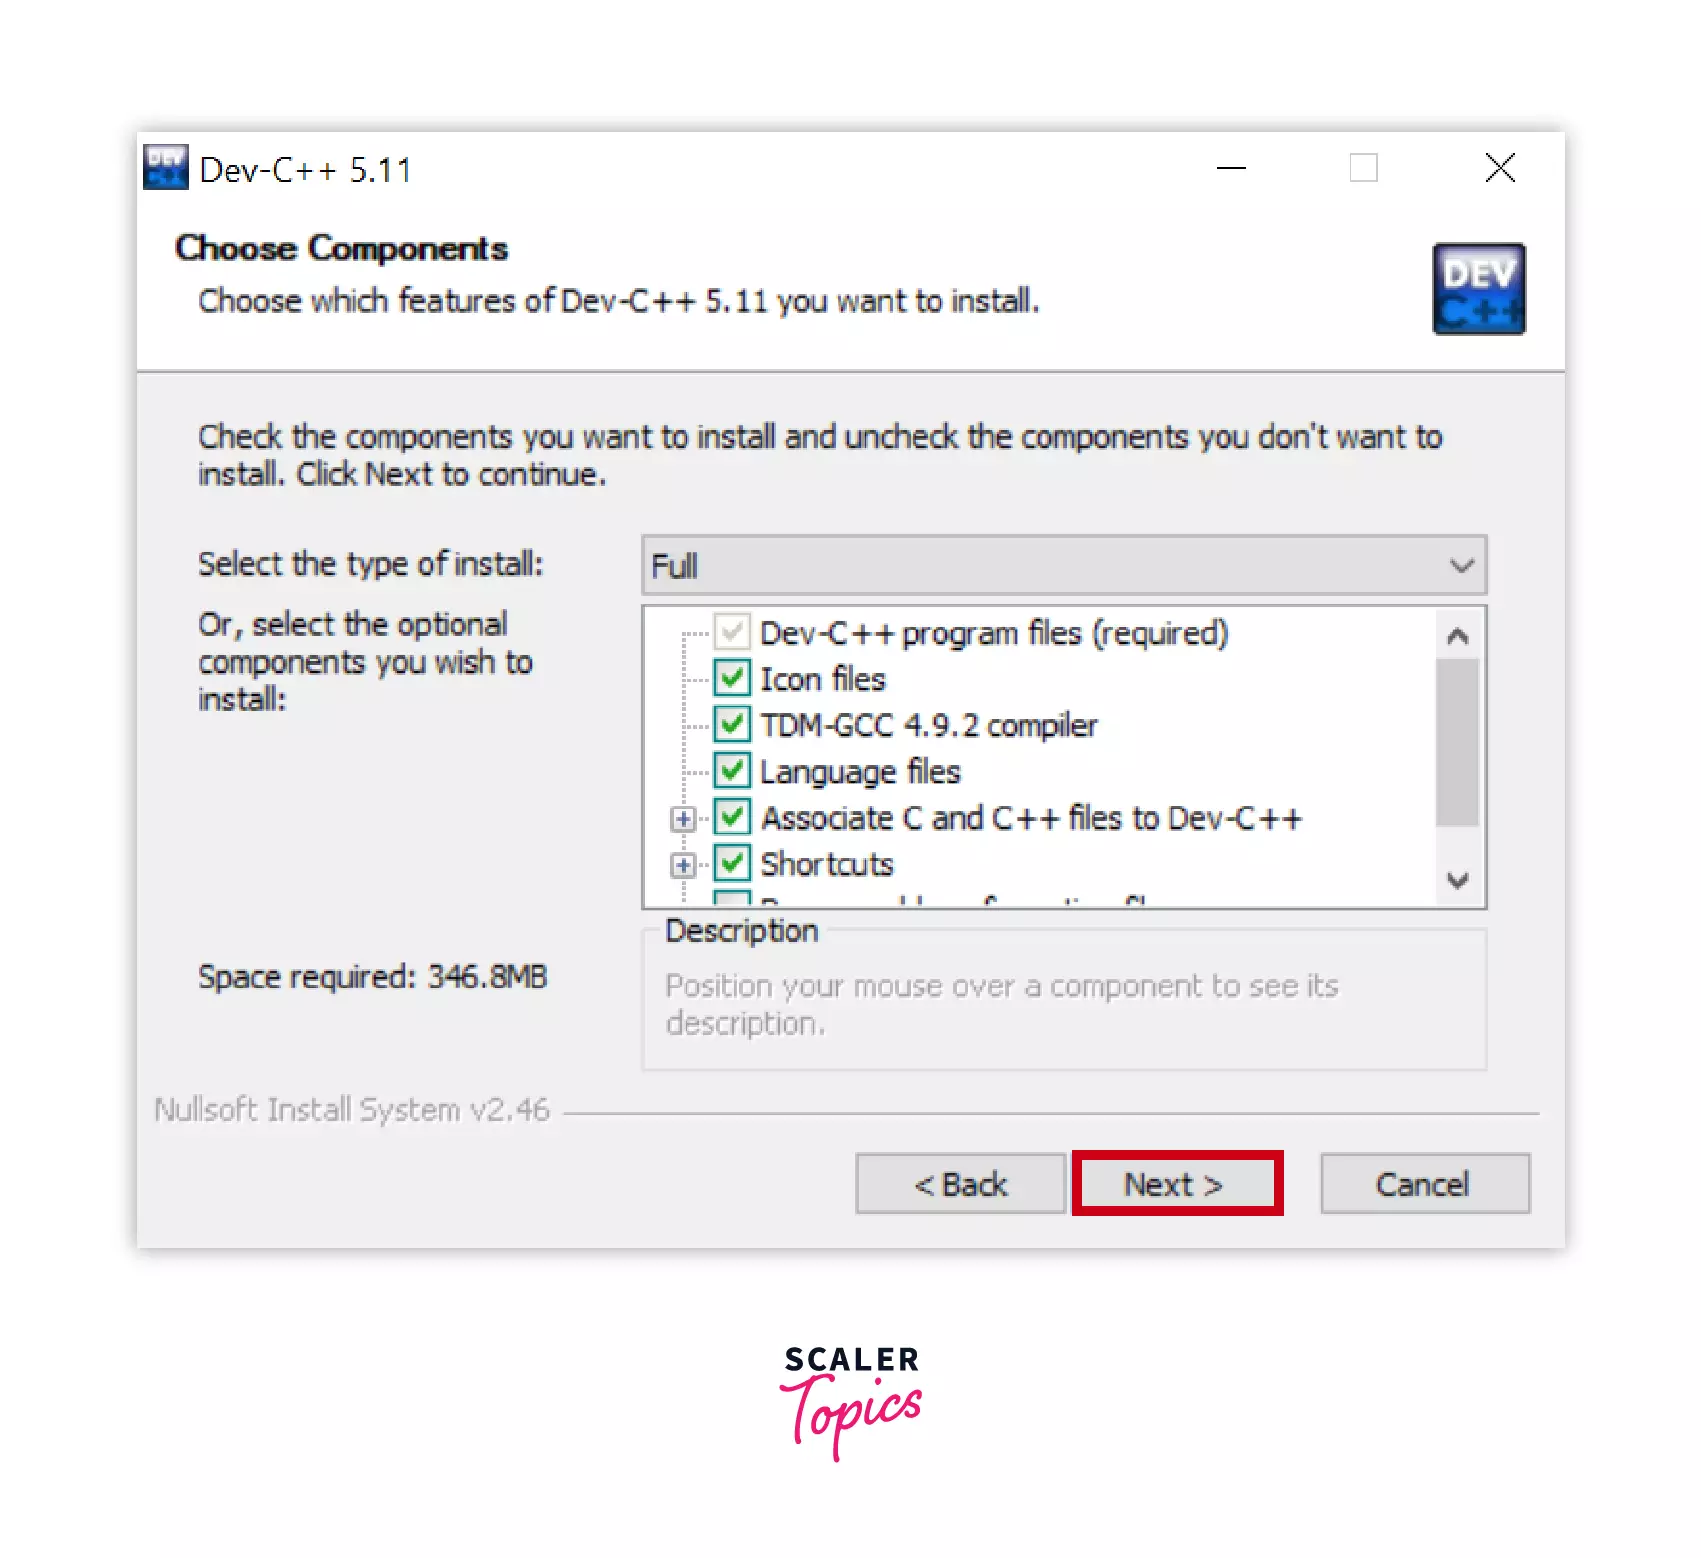
Choose the components that you want to install with the application, or you can unclick the checkboxes if they are not needed. It contains the components like Icon file, Compiler, Language file that are required to run the IDE properly.
In general, choose the full from the dropdown and click on next to proceed further.
STEP 5: Choose the install location
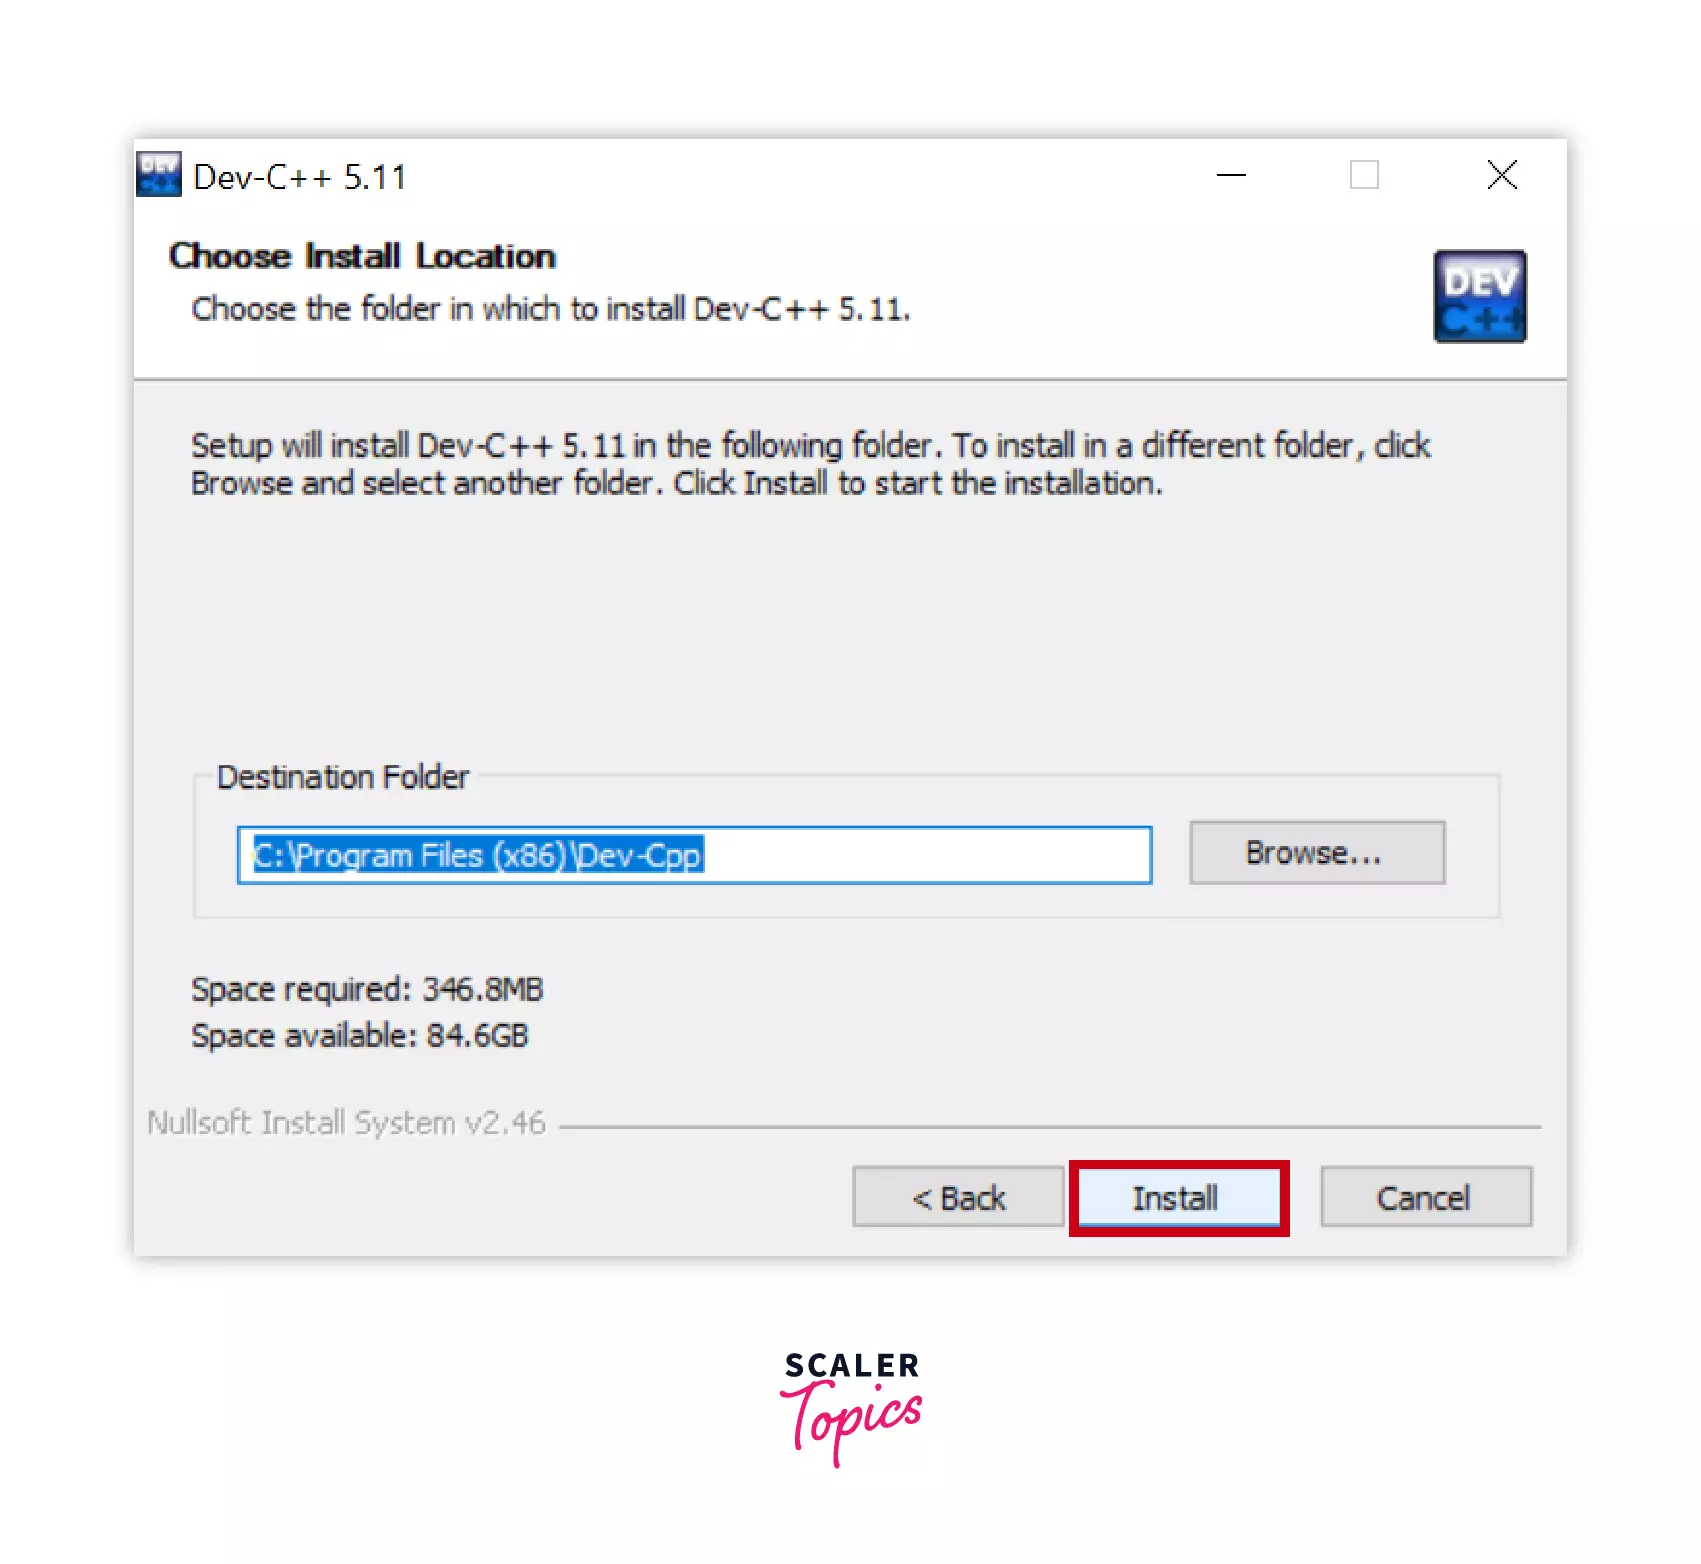
Choose the location on the drive where the application is to be installed. It automatically takes the C: Drive location. To change it click on browse and choose the location and click on next to proceed.
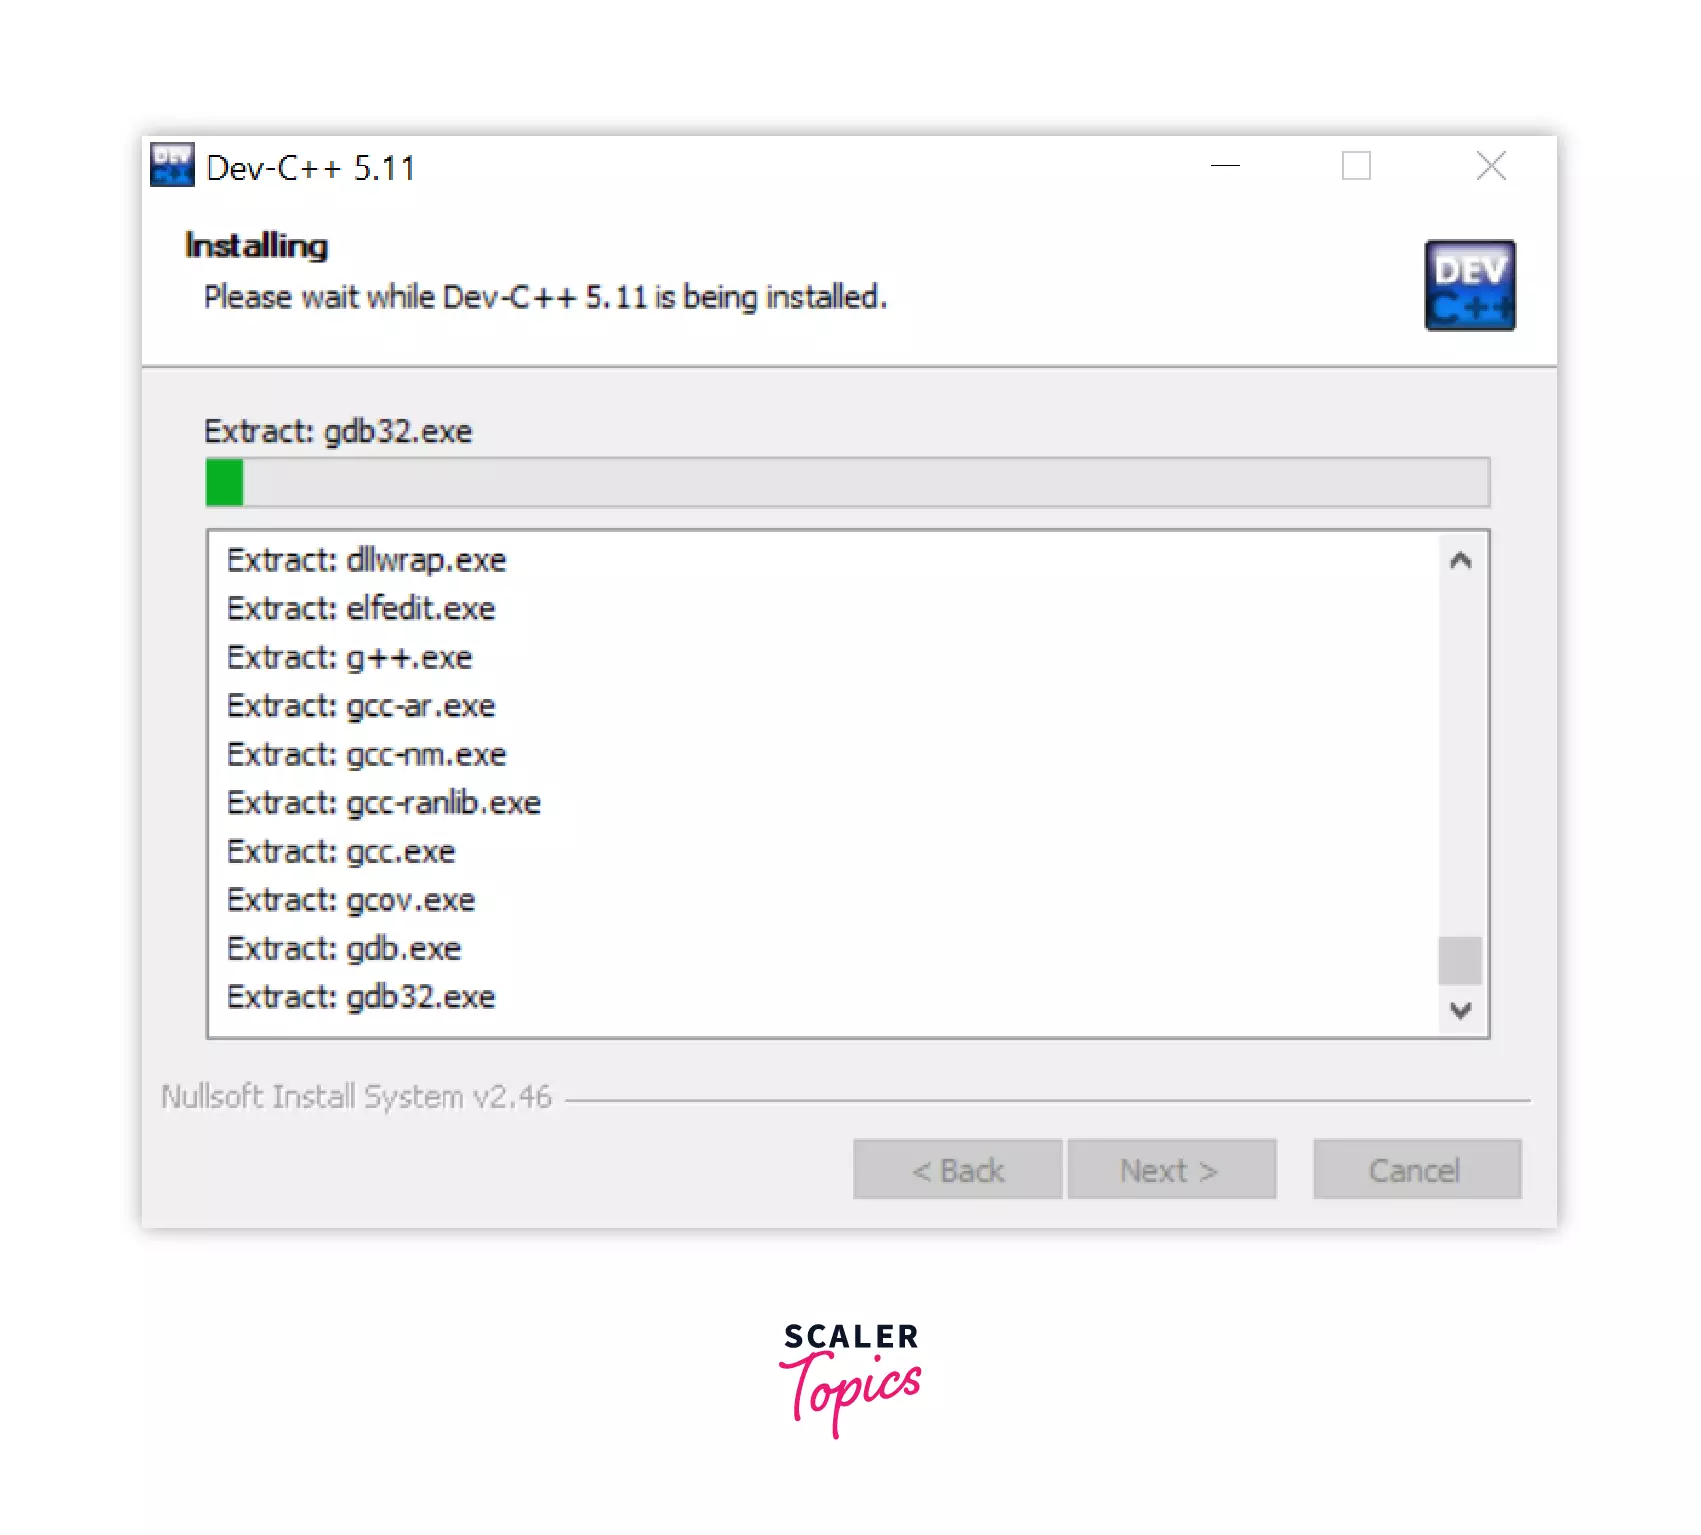
After all the configurations the installer will start installing the application on your windows computer. It will extract all the files to the location you chose in the previous step.
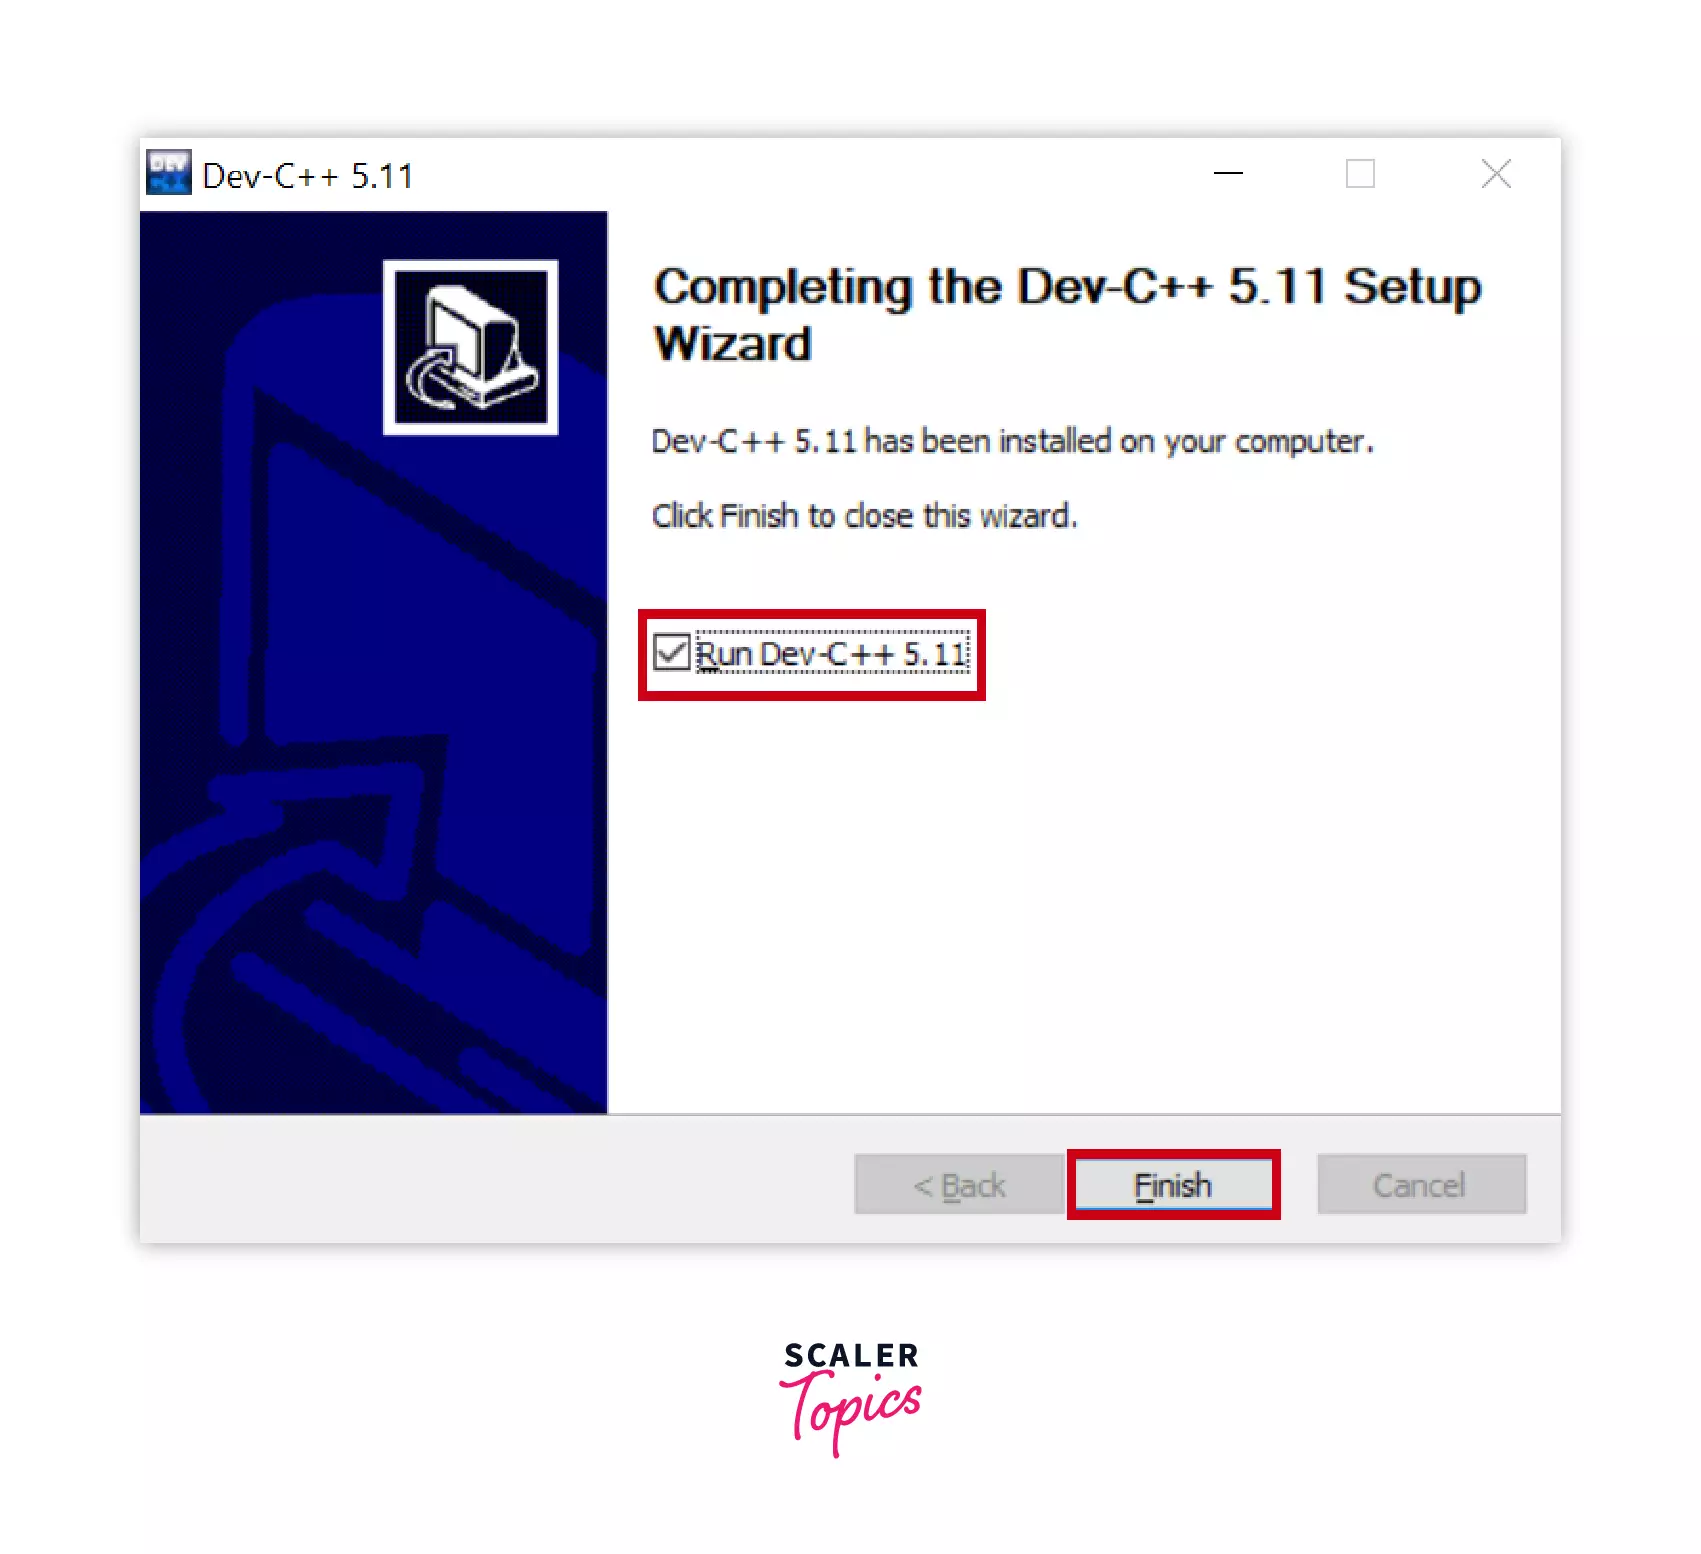
STEP 6: Finish
If the previous step is completed the finish button will appear below, click on it to complete the application installation, and by checking the Run Dev C++, it will open the application just after finishing the installation.
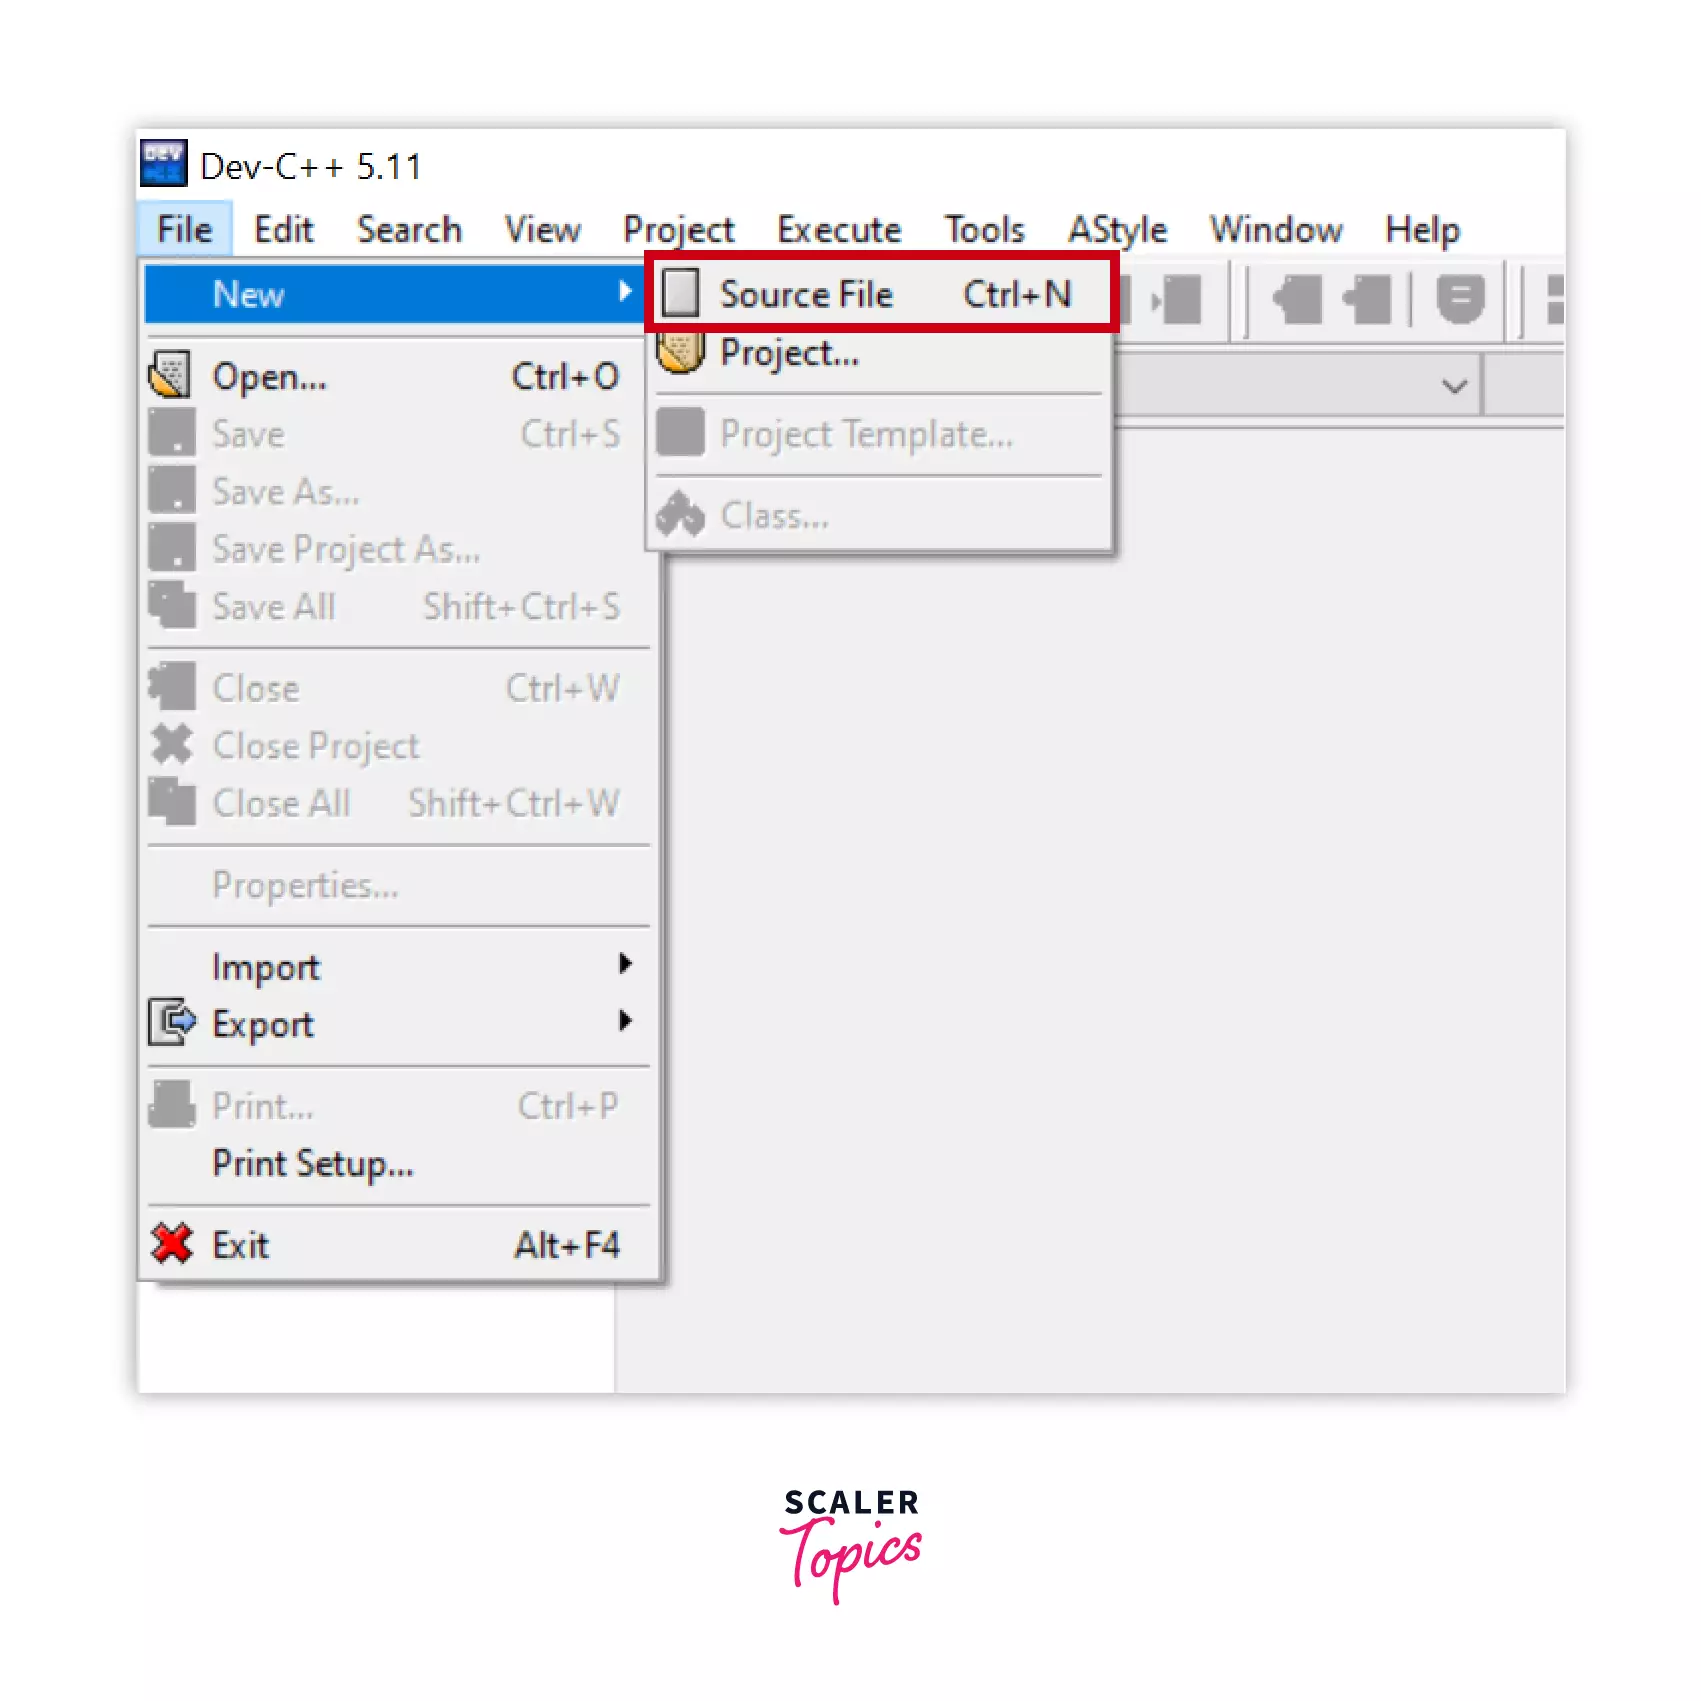
STEP 7: Open a new file in Dev C++
The Dev C++ application will now open, to check if it is working properly or not, let's run a hello world program. Go to Files>>New>>Source File and click on it.
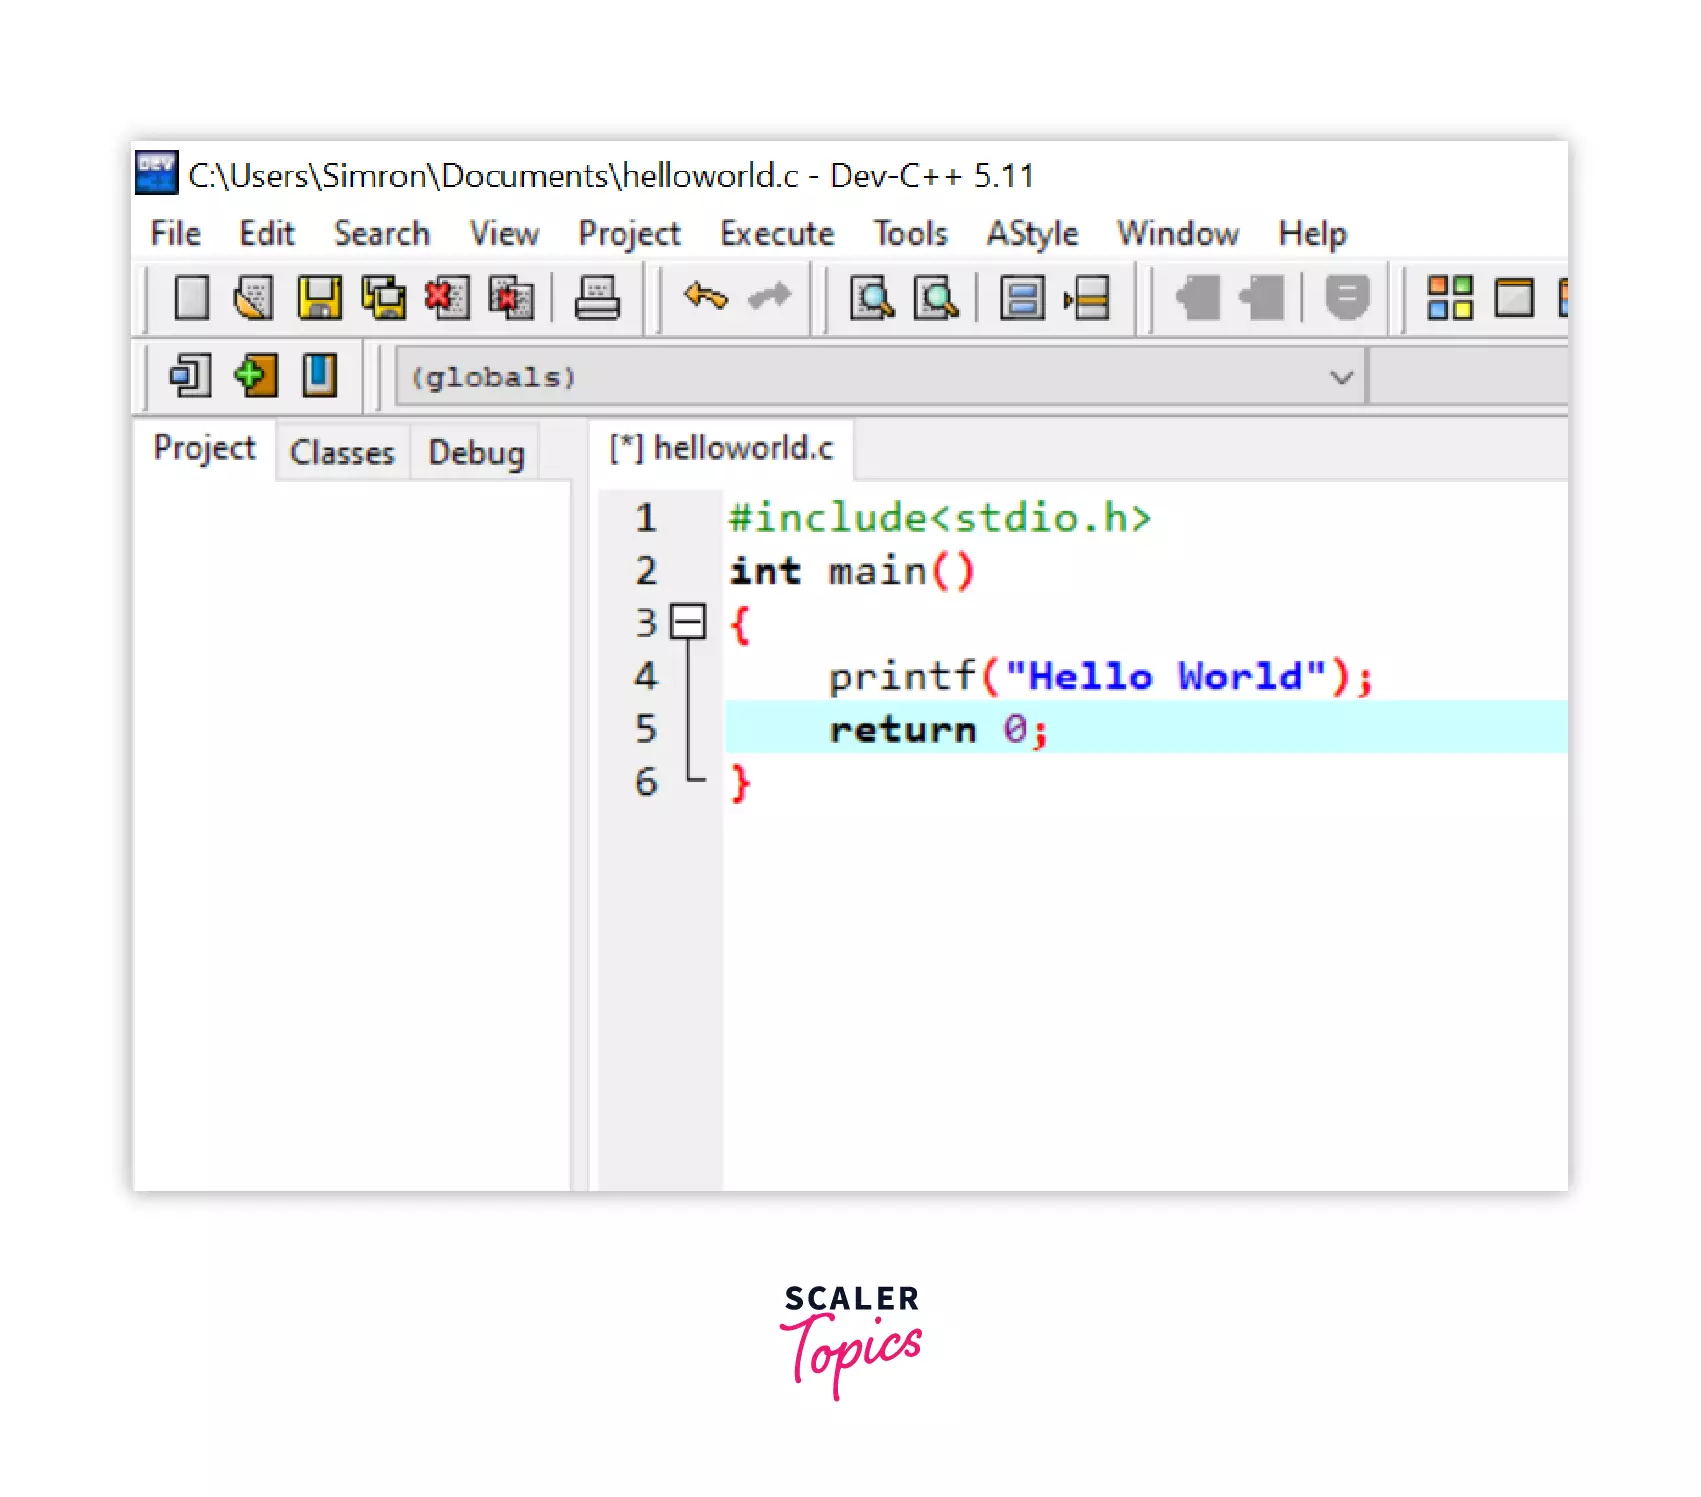
STEP 8: Write a hello world program
Write the Hello world program in C Language.
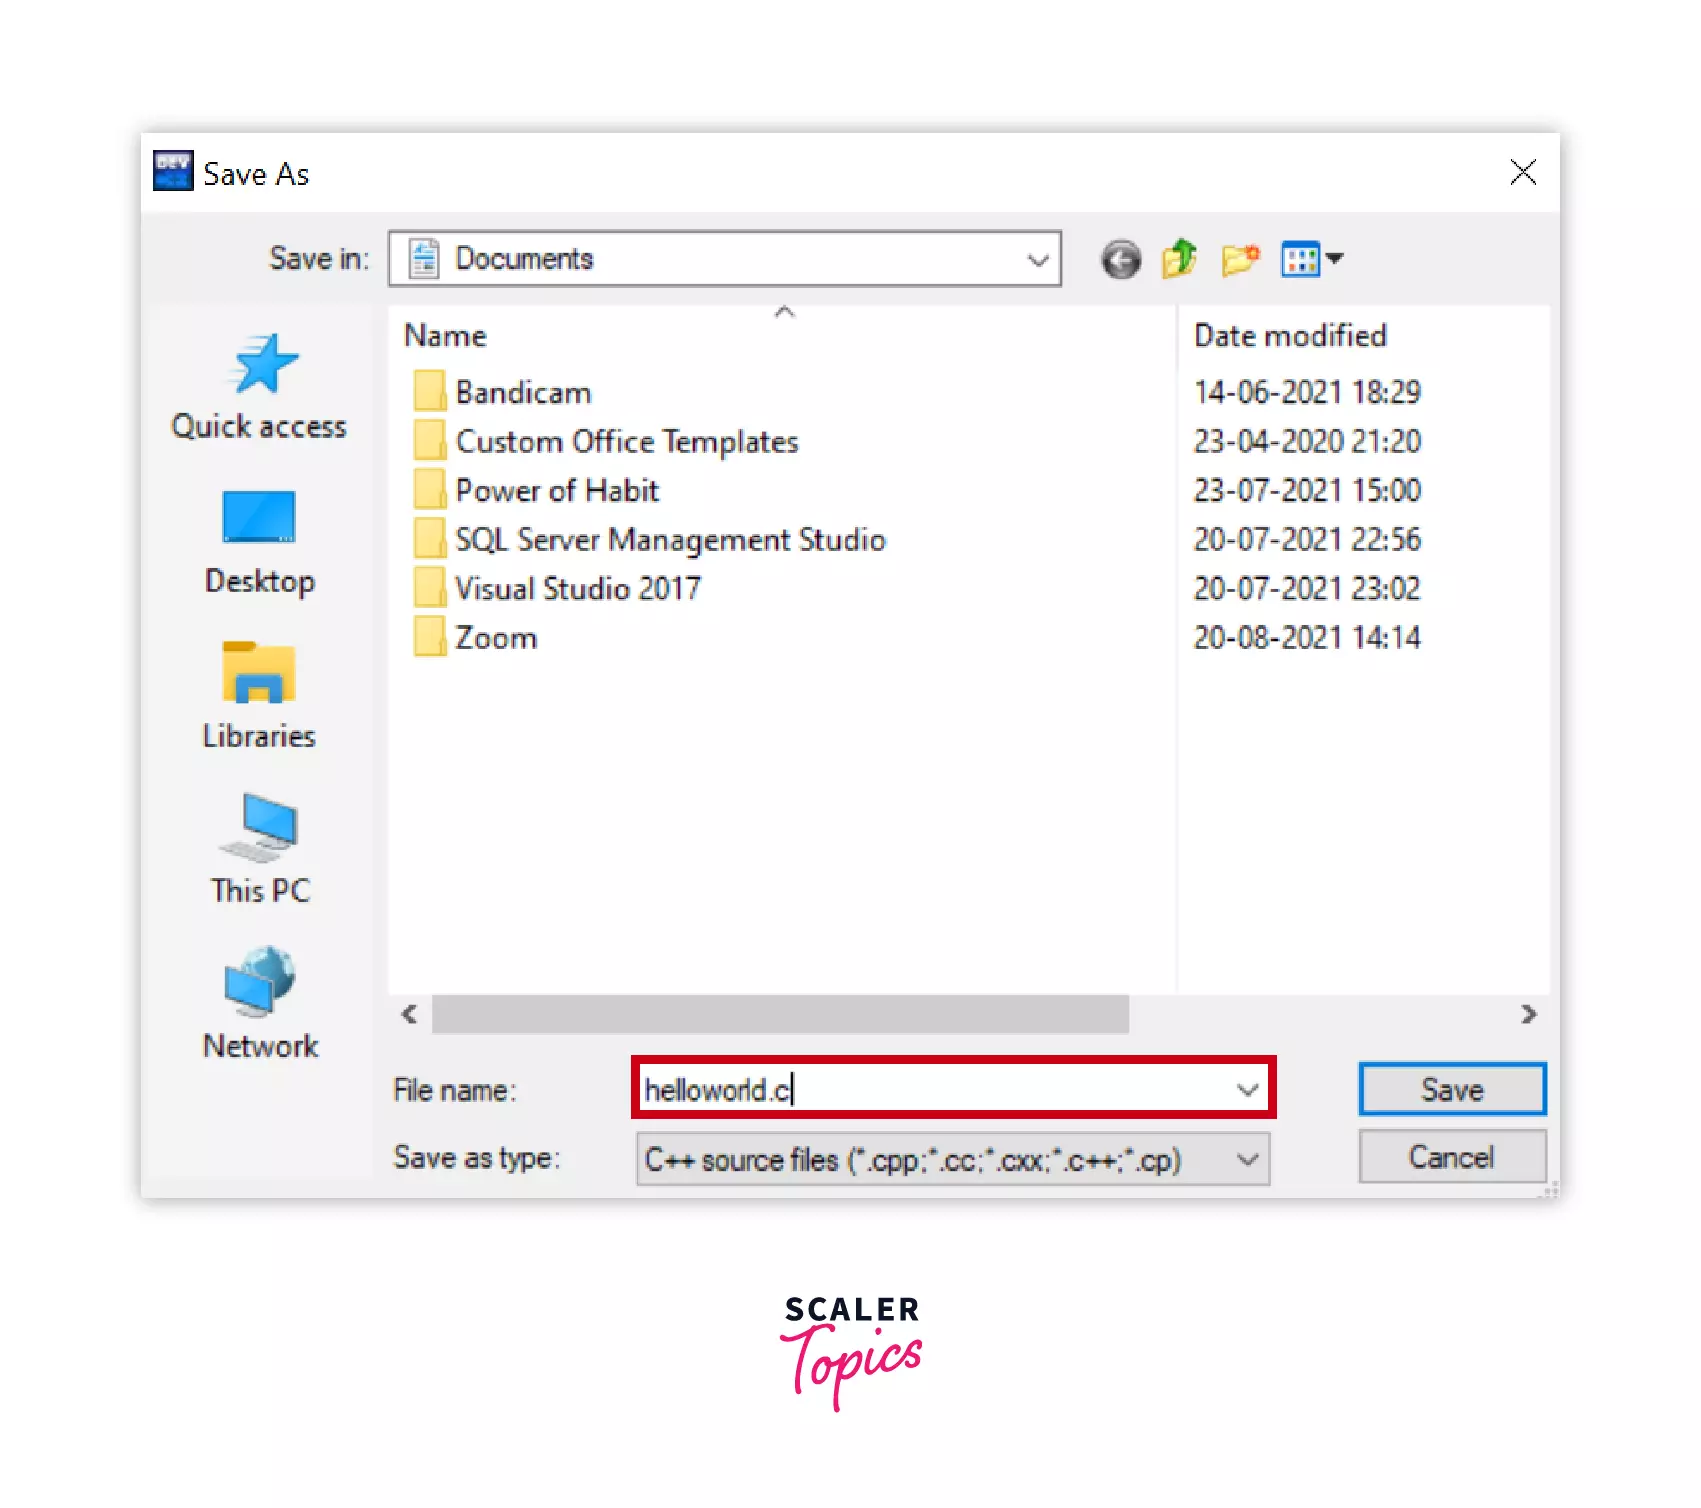
STEP 9: Saving the file
Now save the source file with .c as an extension. As it is the extension for c language.
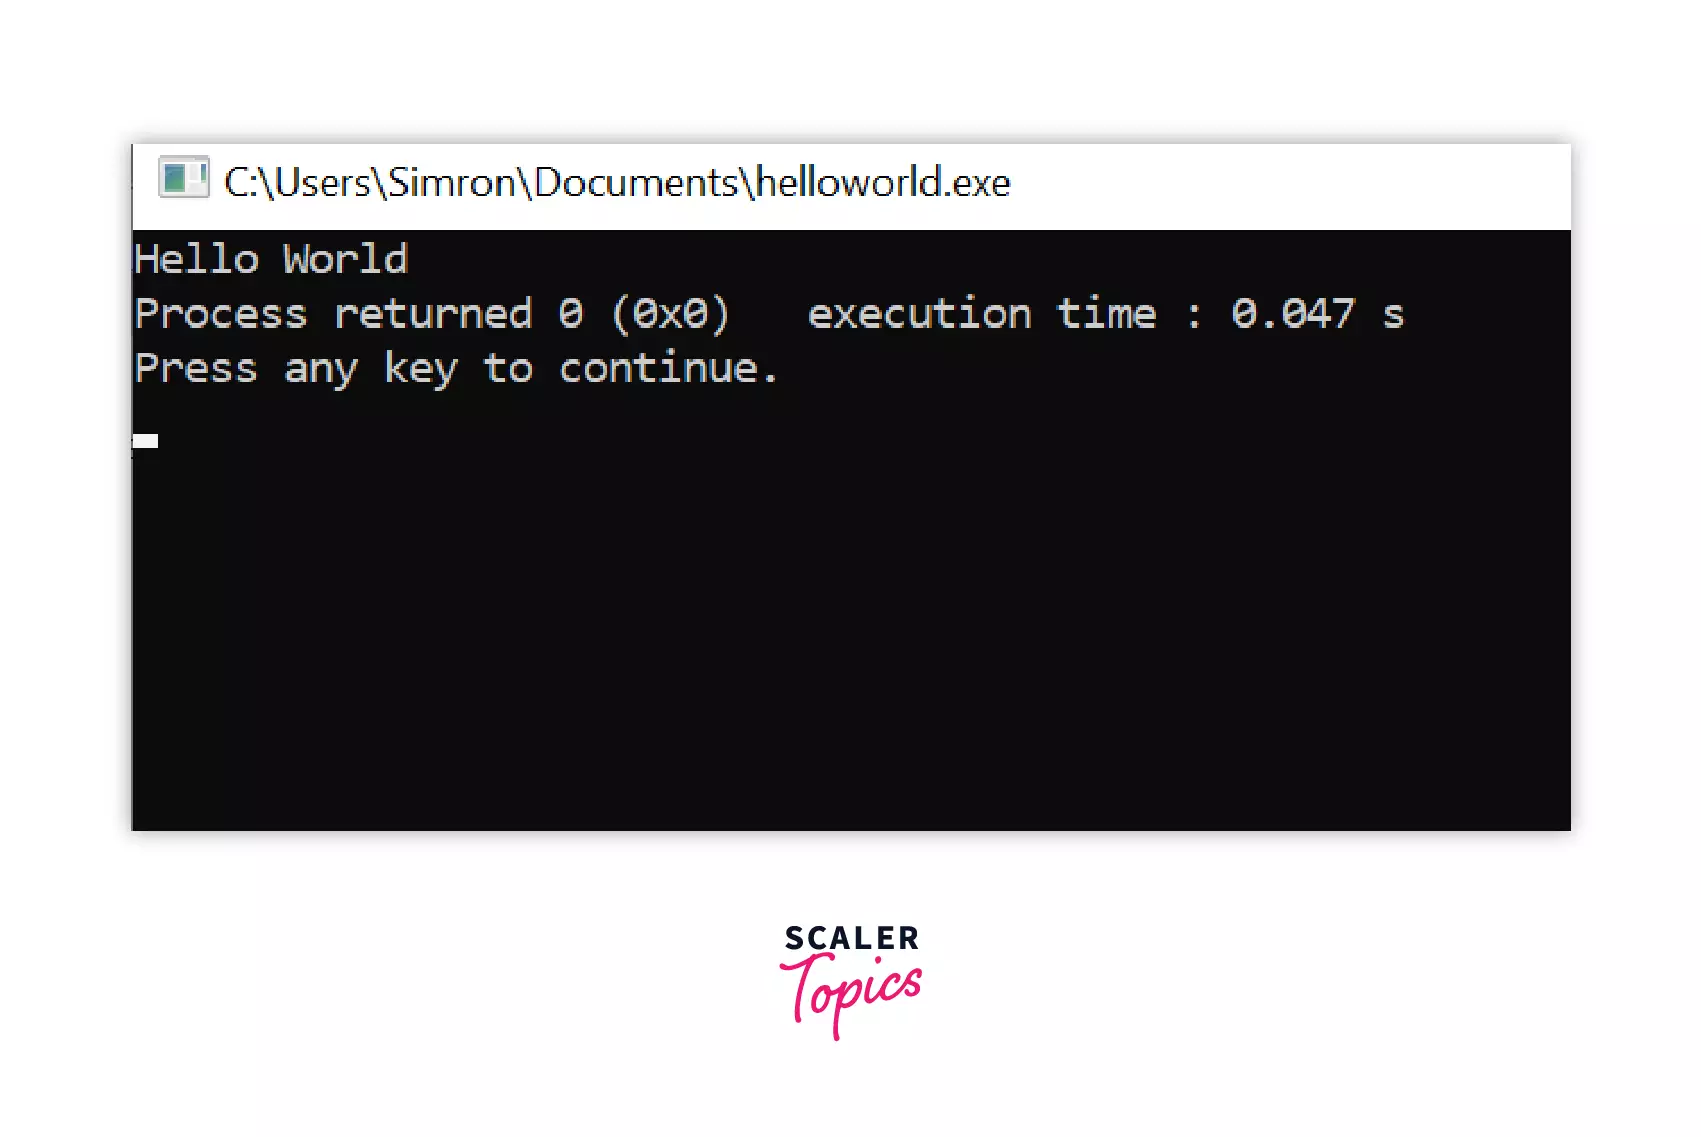
STEP 10: Output
Now go to Execute>>Compile and Run and the program will be executed. The output can be seen on the console.
2. Install Code::Blocks
Code::Blocks
Code::Blocks is a free C/C++ IDE. It can be extended with plugins. Any kind of functionality can be added by installing/coding a plugin. For instance, event compiling and debugging functionality is provided by plugins!
You can download Code::Blocks from the following websites:
- Codeblocks
- Sourceforge
Below are the steps to download and install the Code::Blocks IDE.
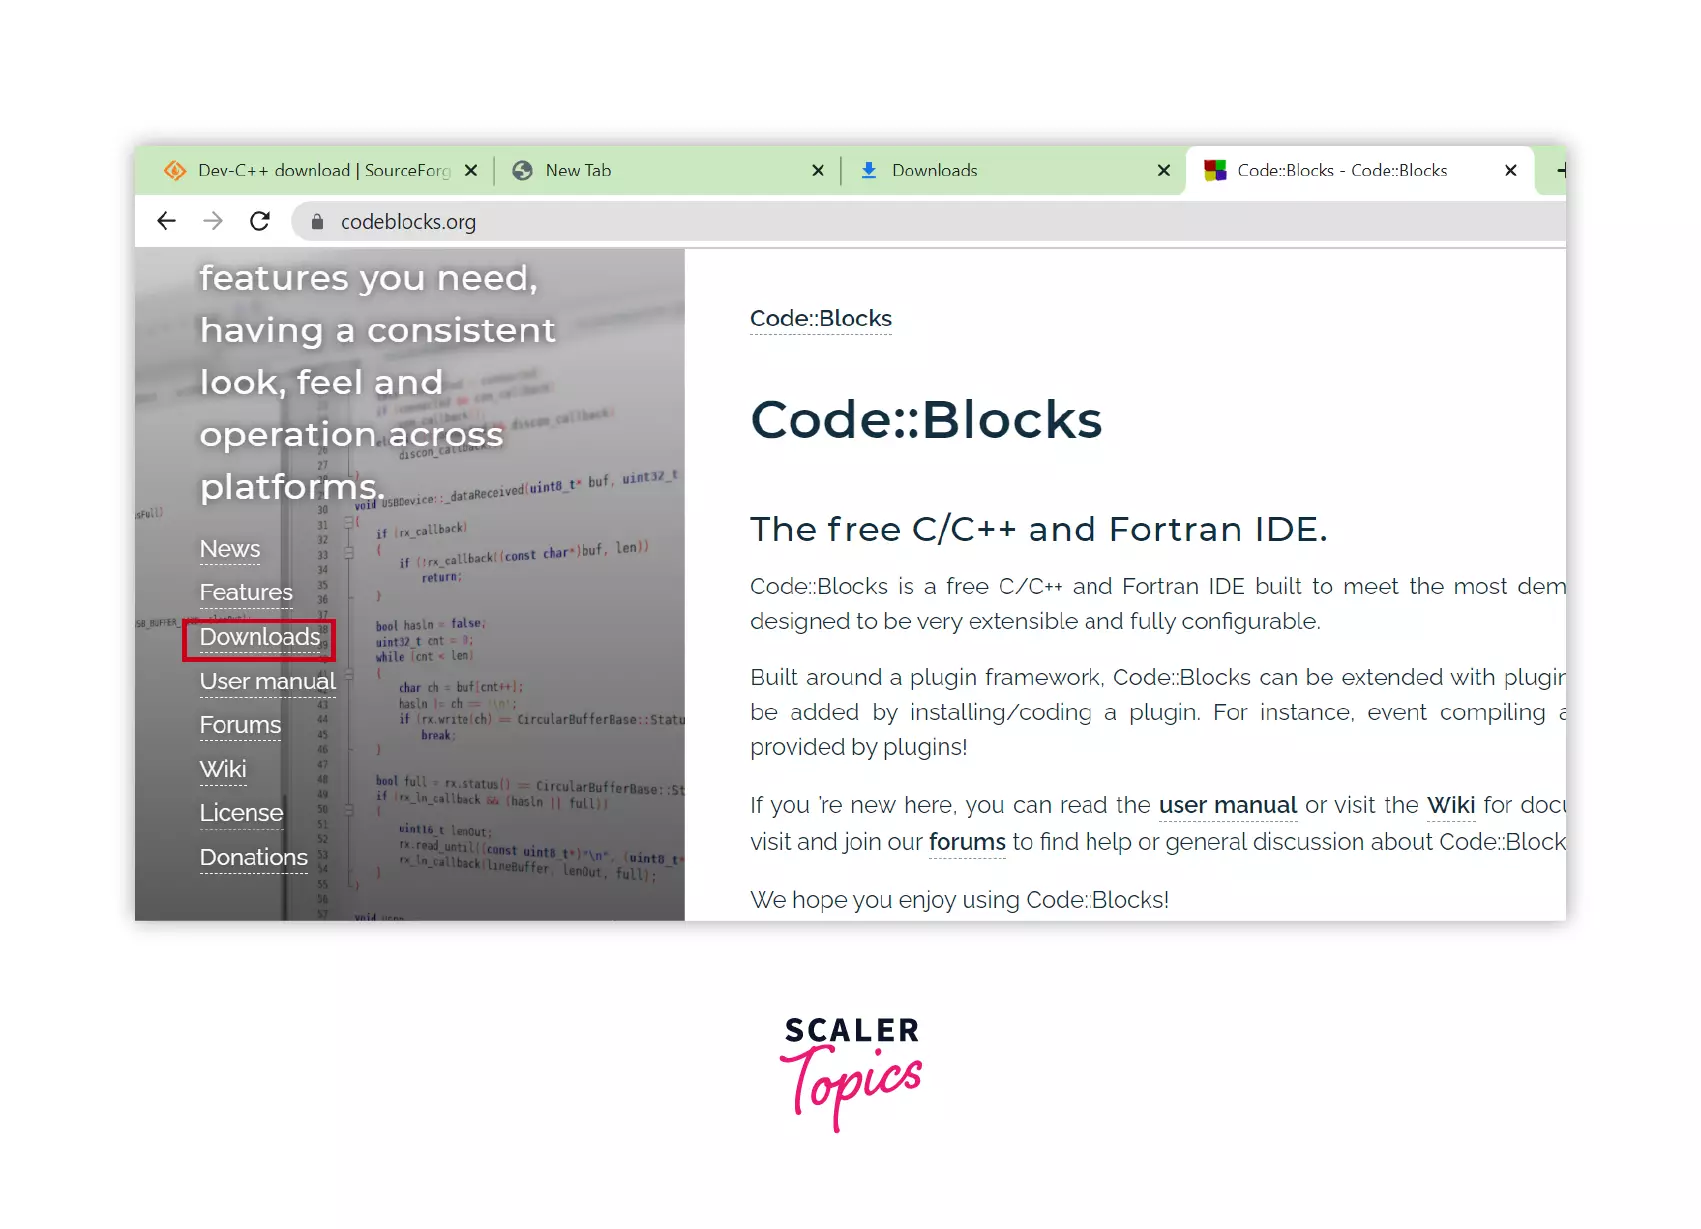
STEP 1: Website to download Code::Blocks
The first step to installing the Code::Blocks IDE is, to go to any of the browsers and open the Code::Blocks official website. The below screen will appear on your screen, on the left side click on the Downloads.
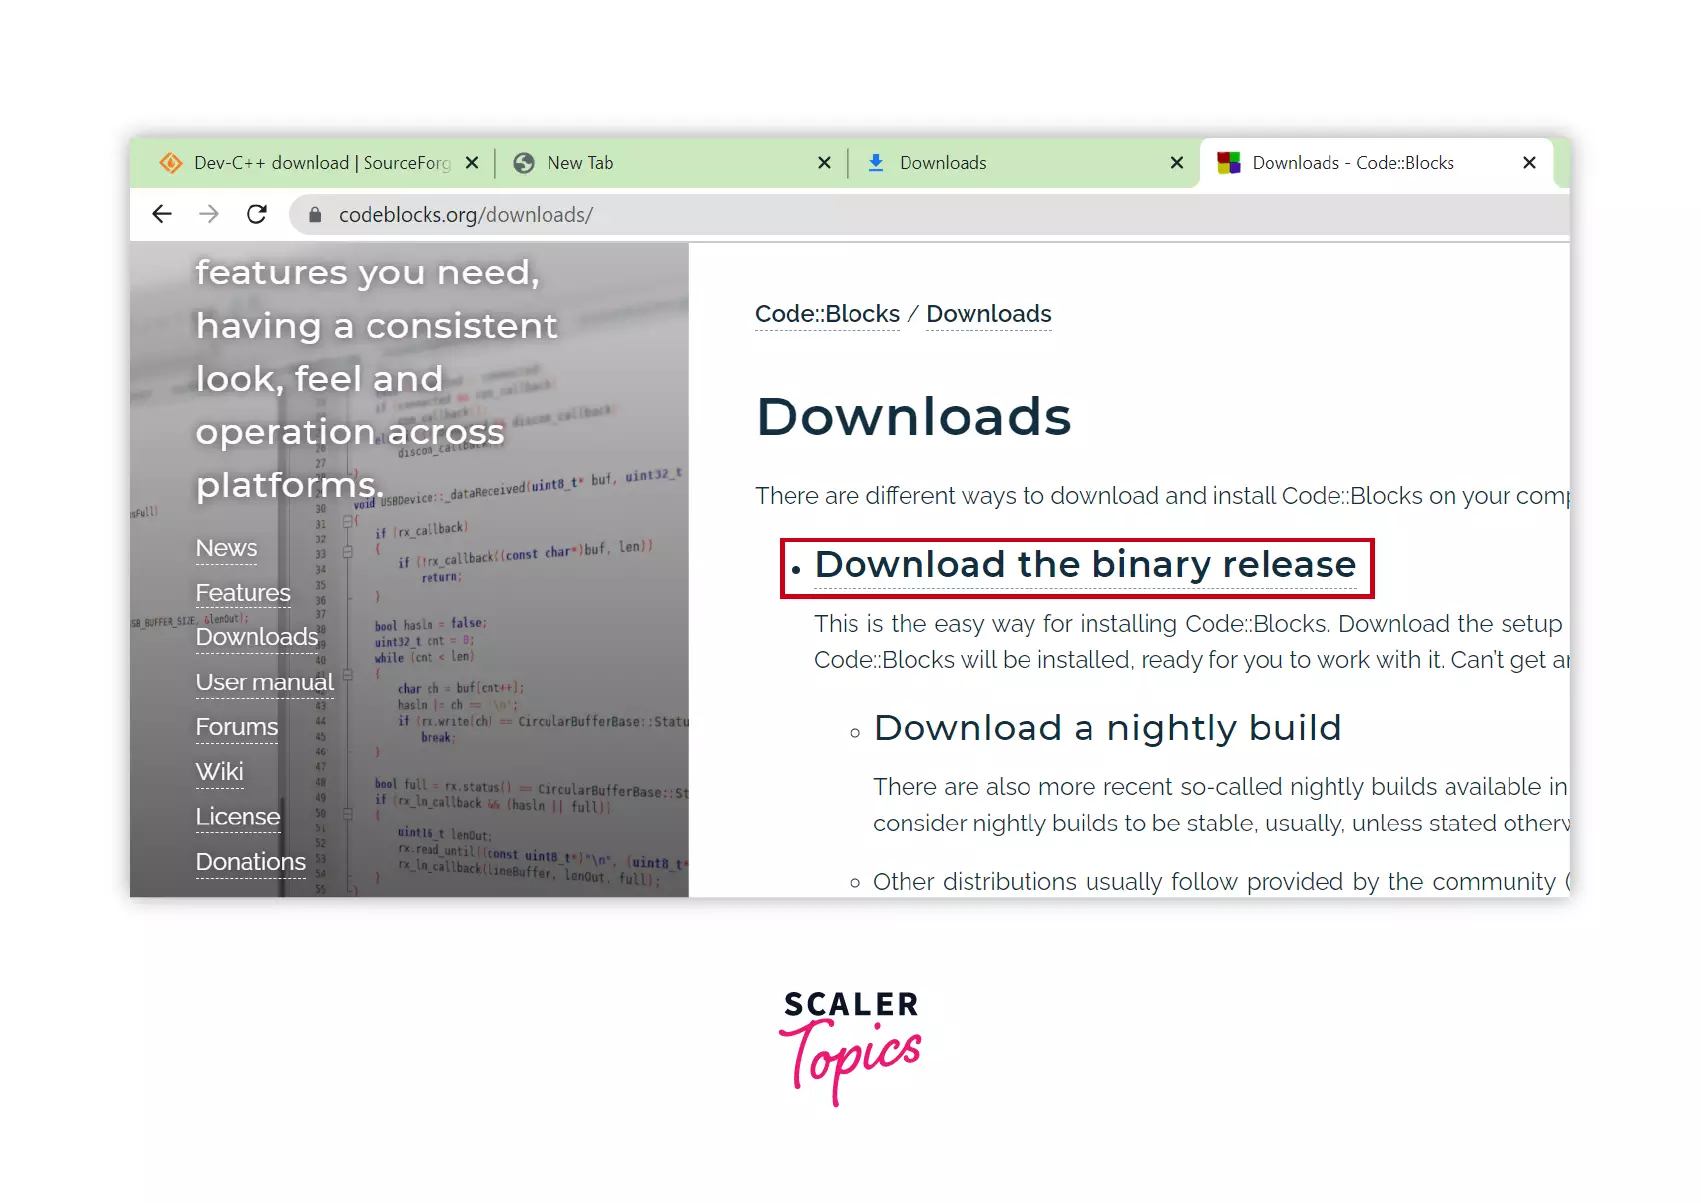
There are different ways to download and install Code::Blocks on your computer so after clicking on the downloads on the downloads page click on the Download the binary release. As we are going to use this way to download for this tutorial.
STEP 2: Choose the version for download
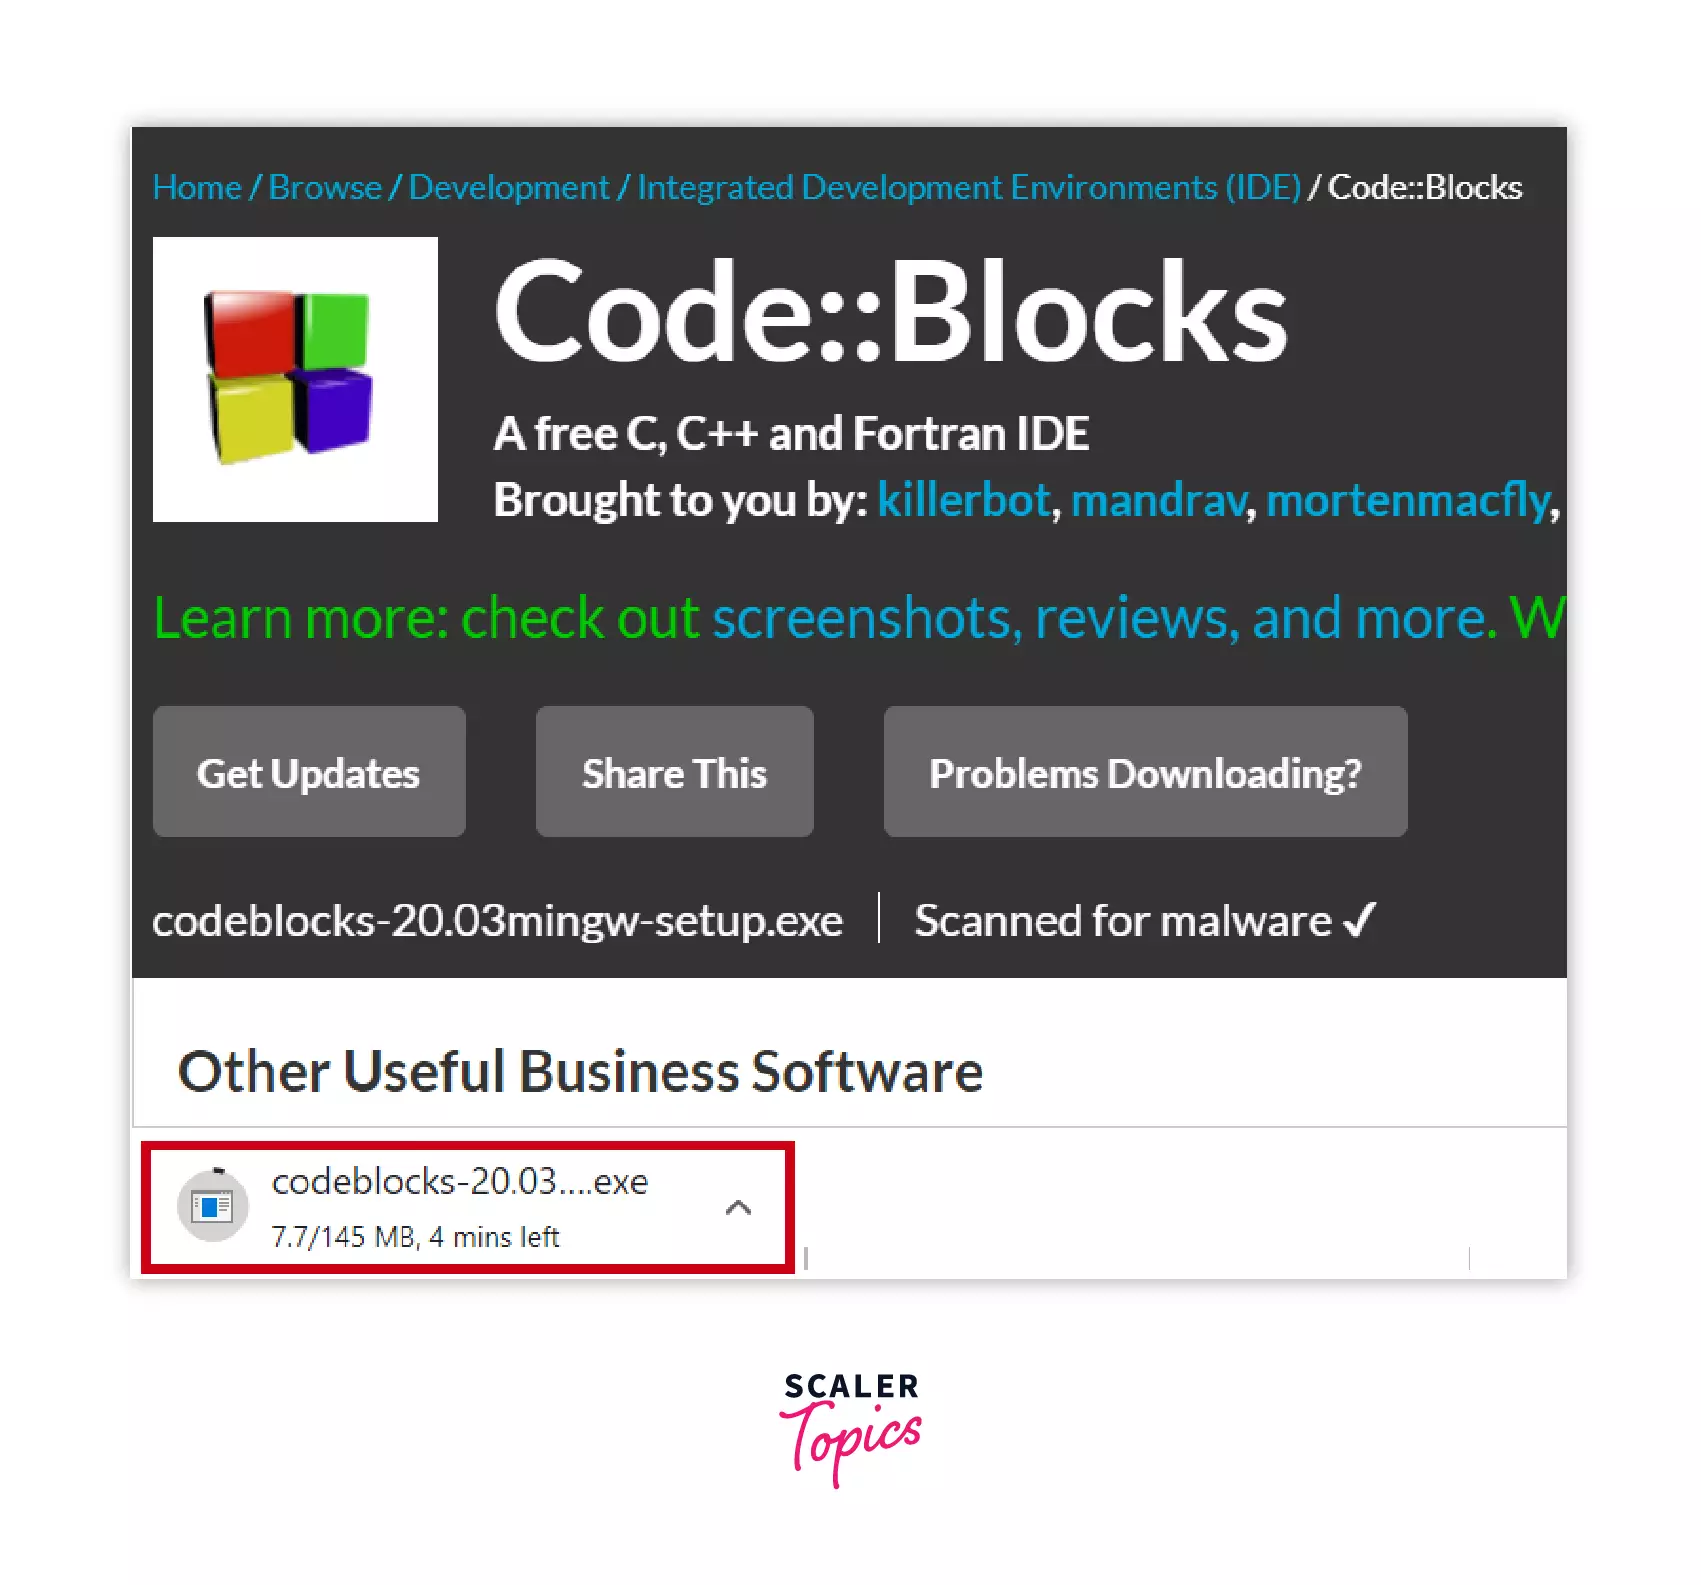
Now here in the Windows section click on the codeblocks-20.03mingw-setup.exe (for the 64-bit version). The codeblocks-20.03mingw-setup.exe comes with the MinGW which includes the GCC/G++/GFortan compiler and GDB debugger.
For 32-bit choose the codeblocks-20.03mingw-32bit-setup.exe
And download the file from the link in front of the selected version as highlighted in the screenshot below.

Here the download has started, it can be seen on the bottom left side of the browser.
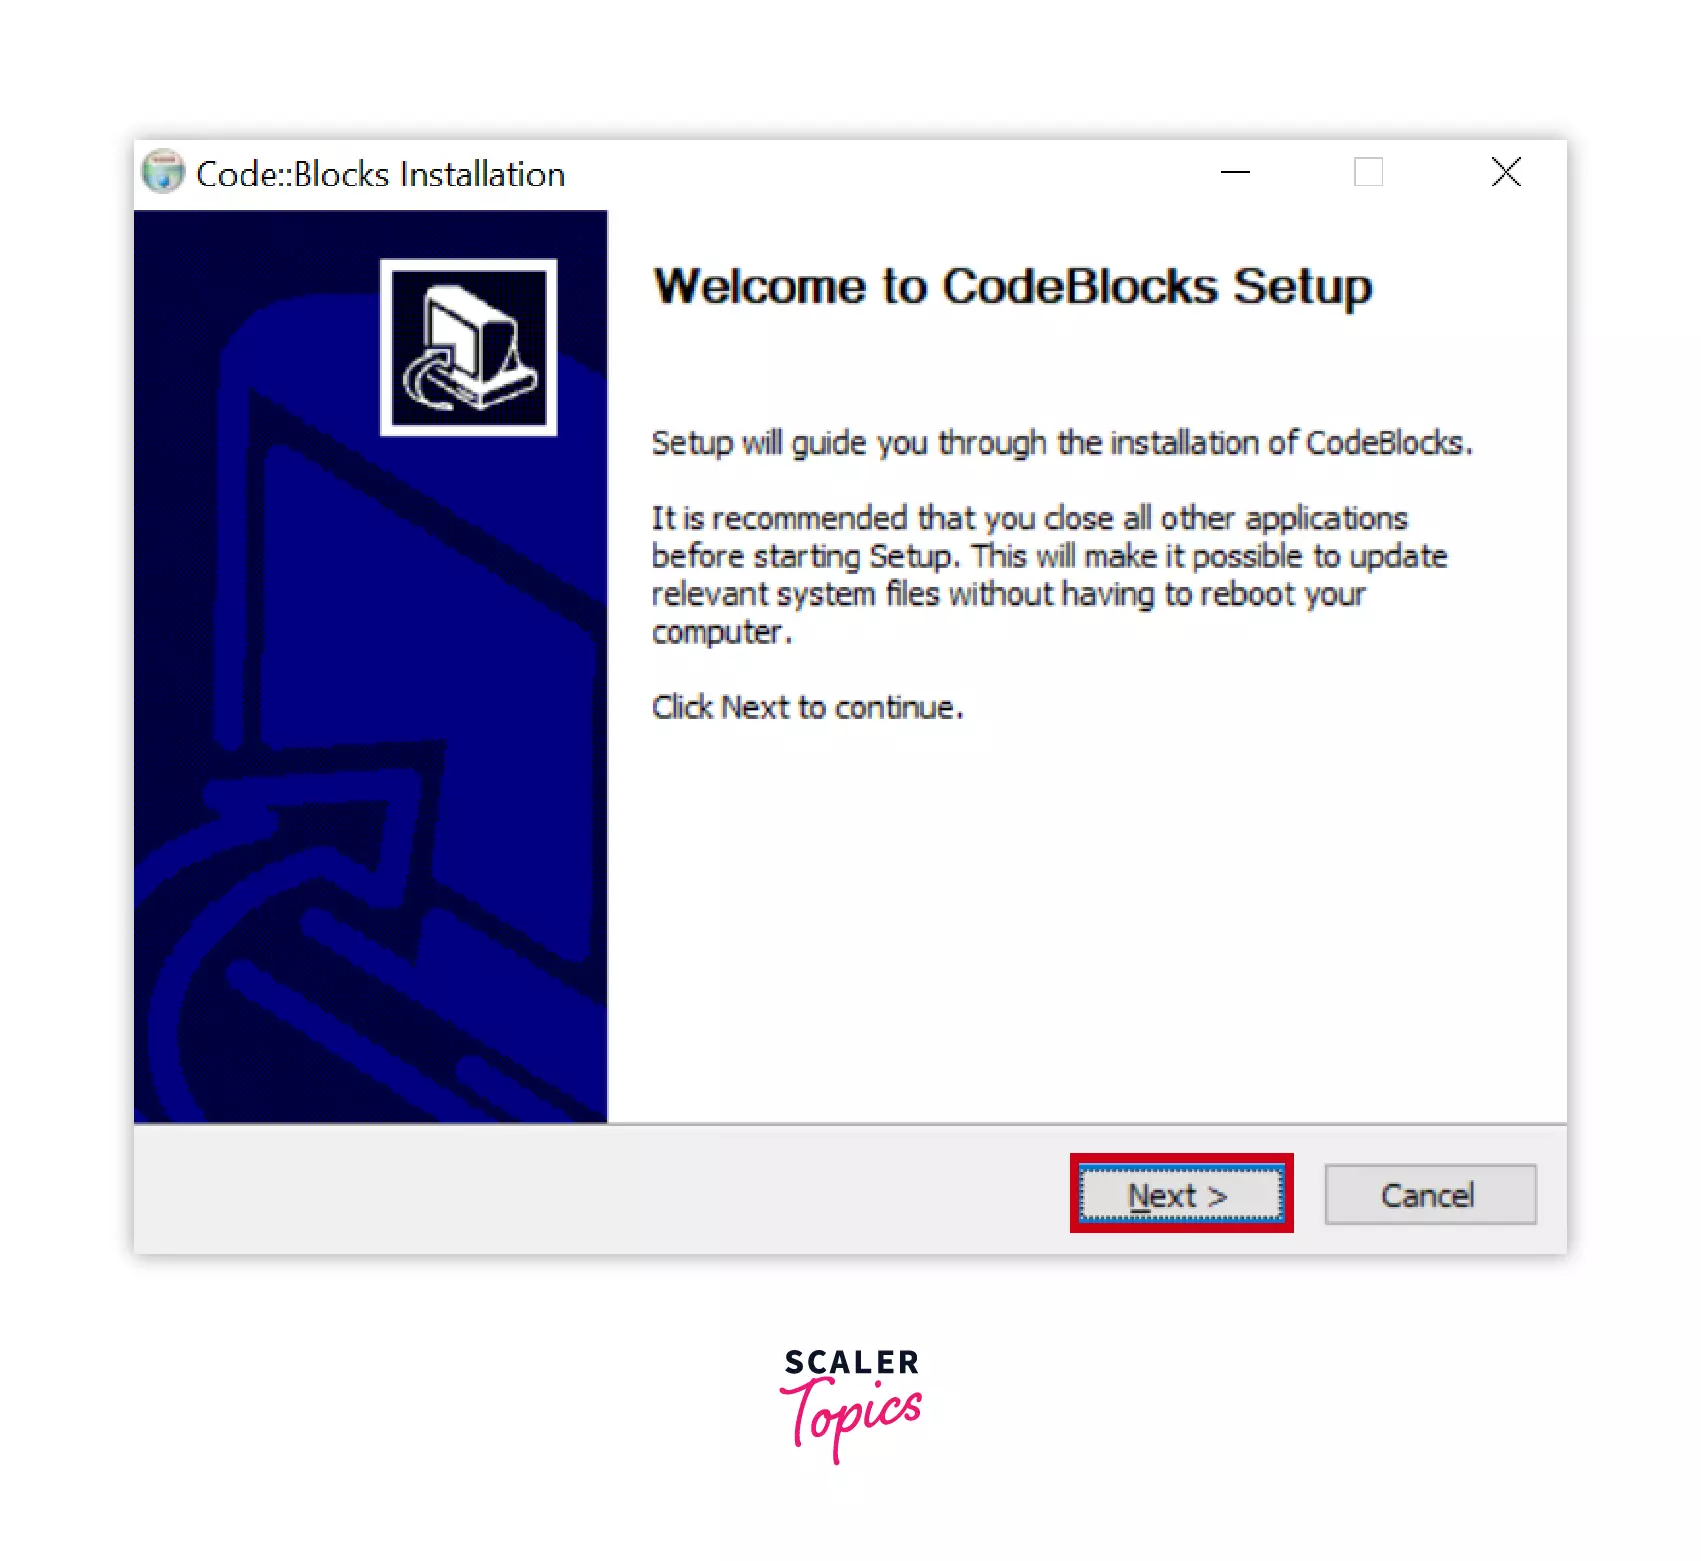
STEP 3: Start the installation
After double-clicking on the downloaded installation file, the window below will appear on the screen, just click on the Next button and proceed further.
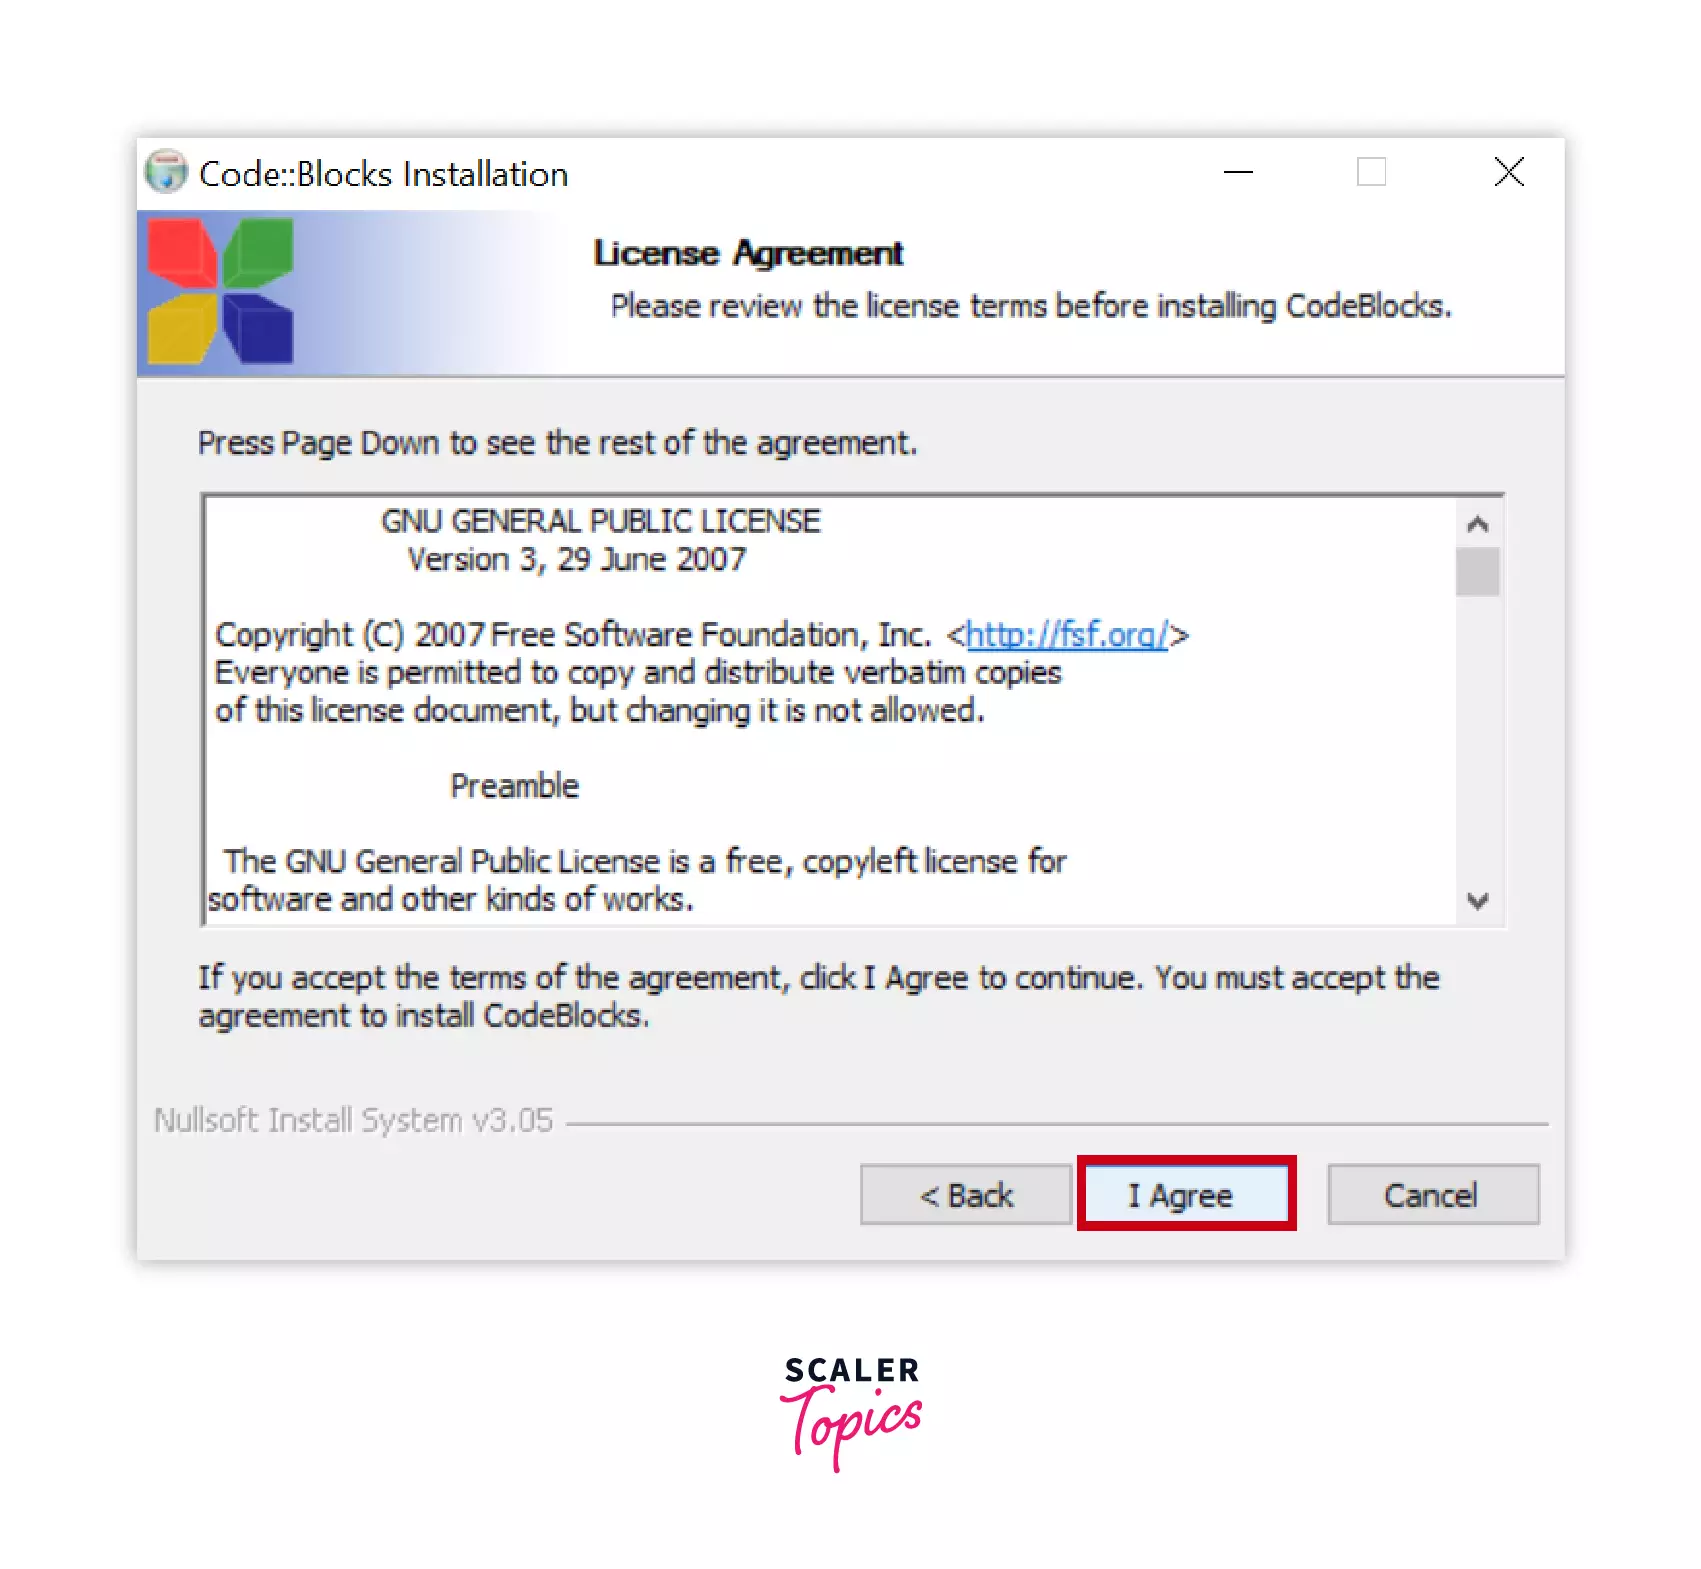
Now, here the license agreement for terms and conditions will appear on the screen click on I Agree button and proceed further.
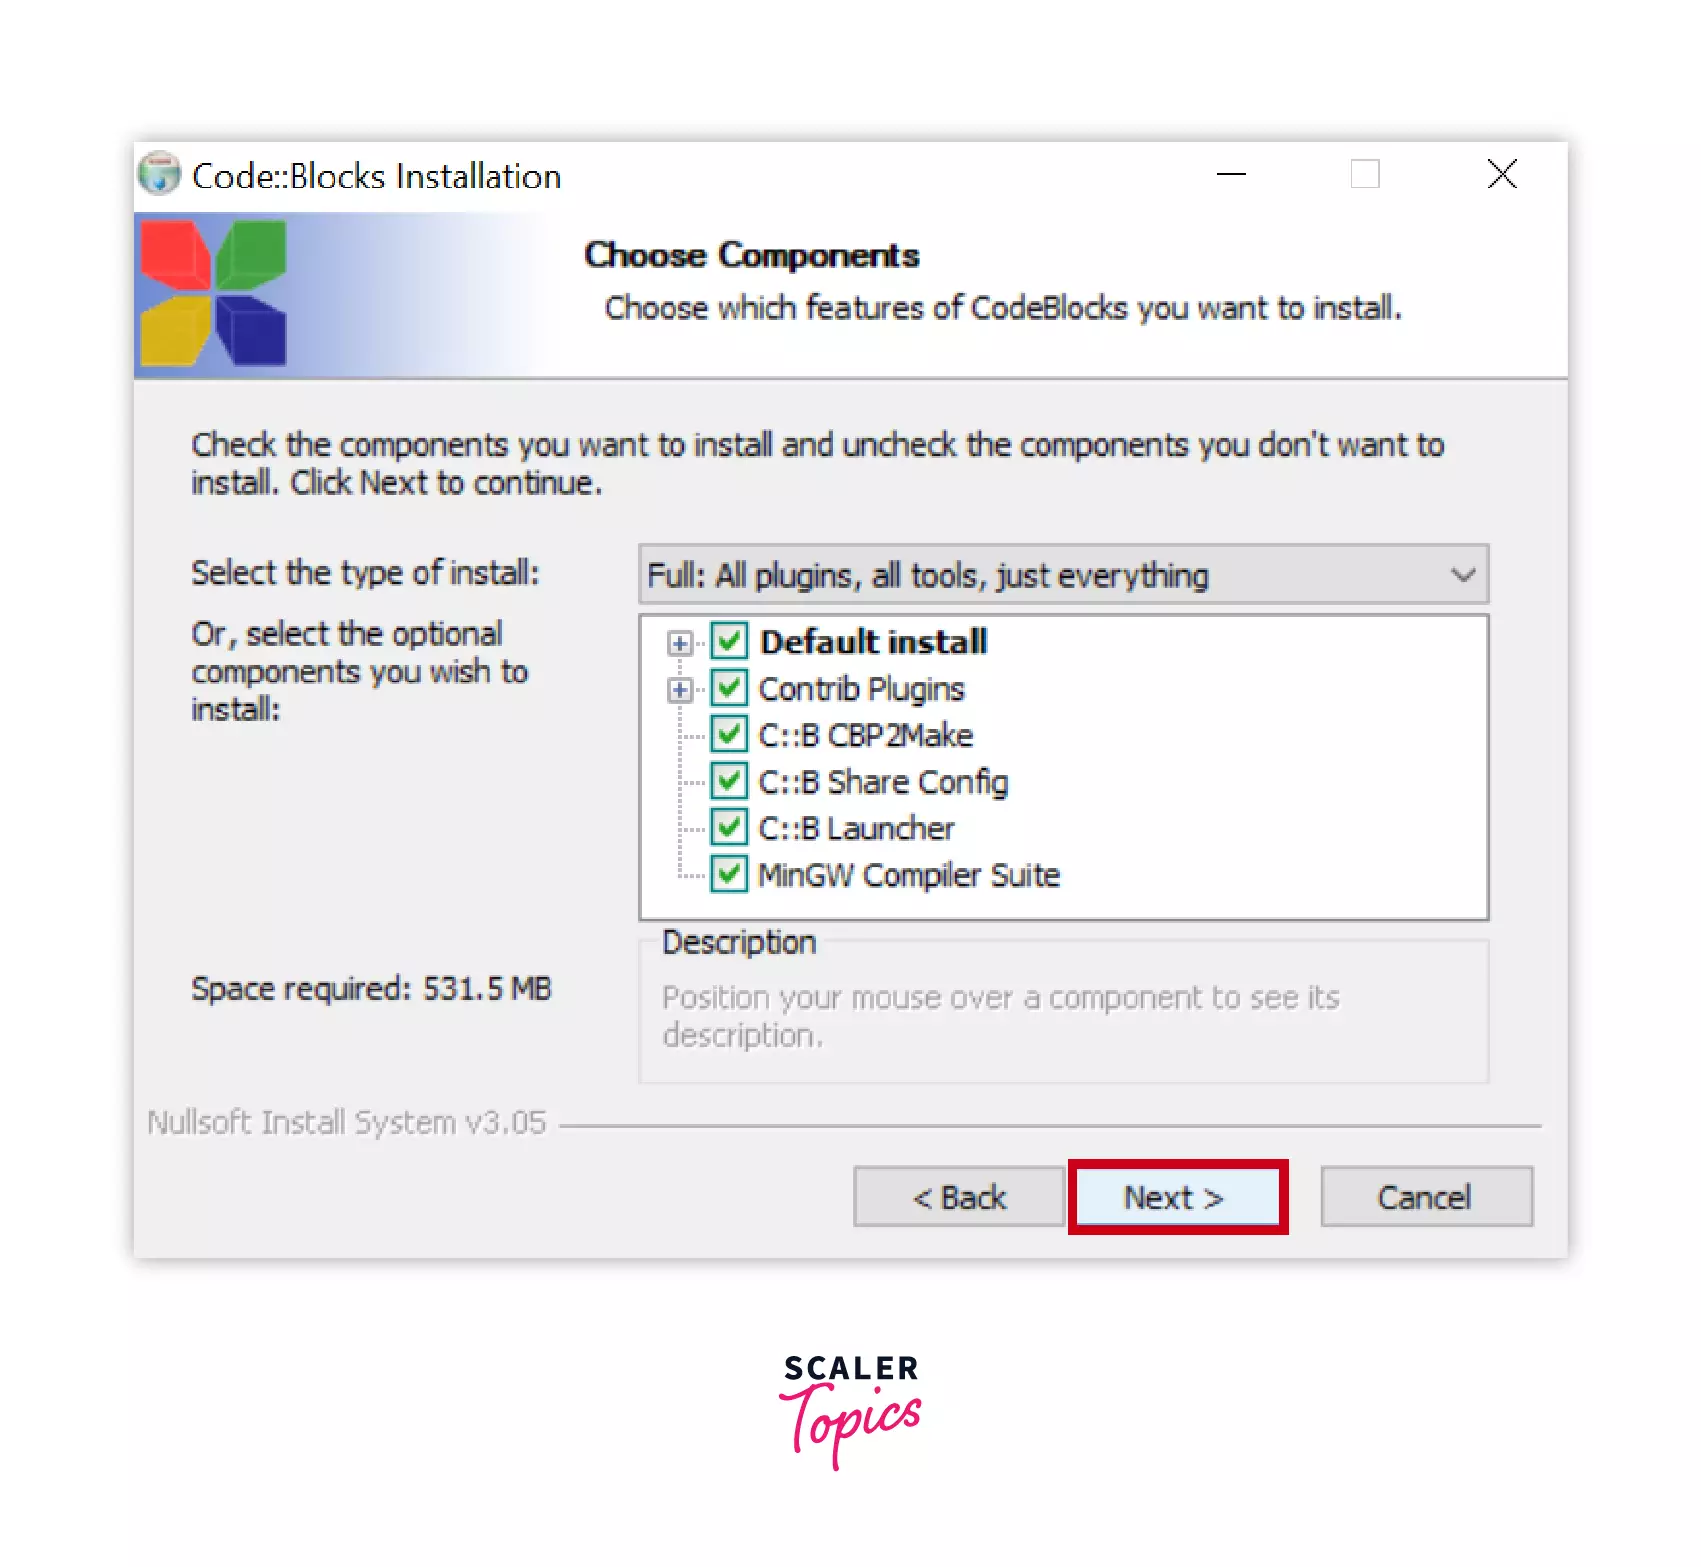
STEP 4: Choose components
In this step, all the components like plugins, and a compiler for the installation will appear. Please don't change anything and just click on the Next to continue.
STEP 5: Choose to install location
Choose the location on the drive where the application is to be installed. It automatically takes the C: Drive location. To change it click on browse and choose the location and click on next to proceed further.
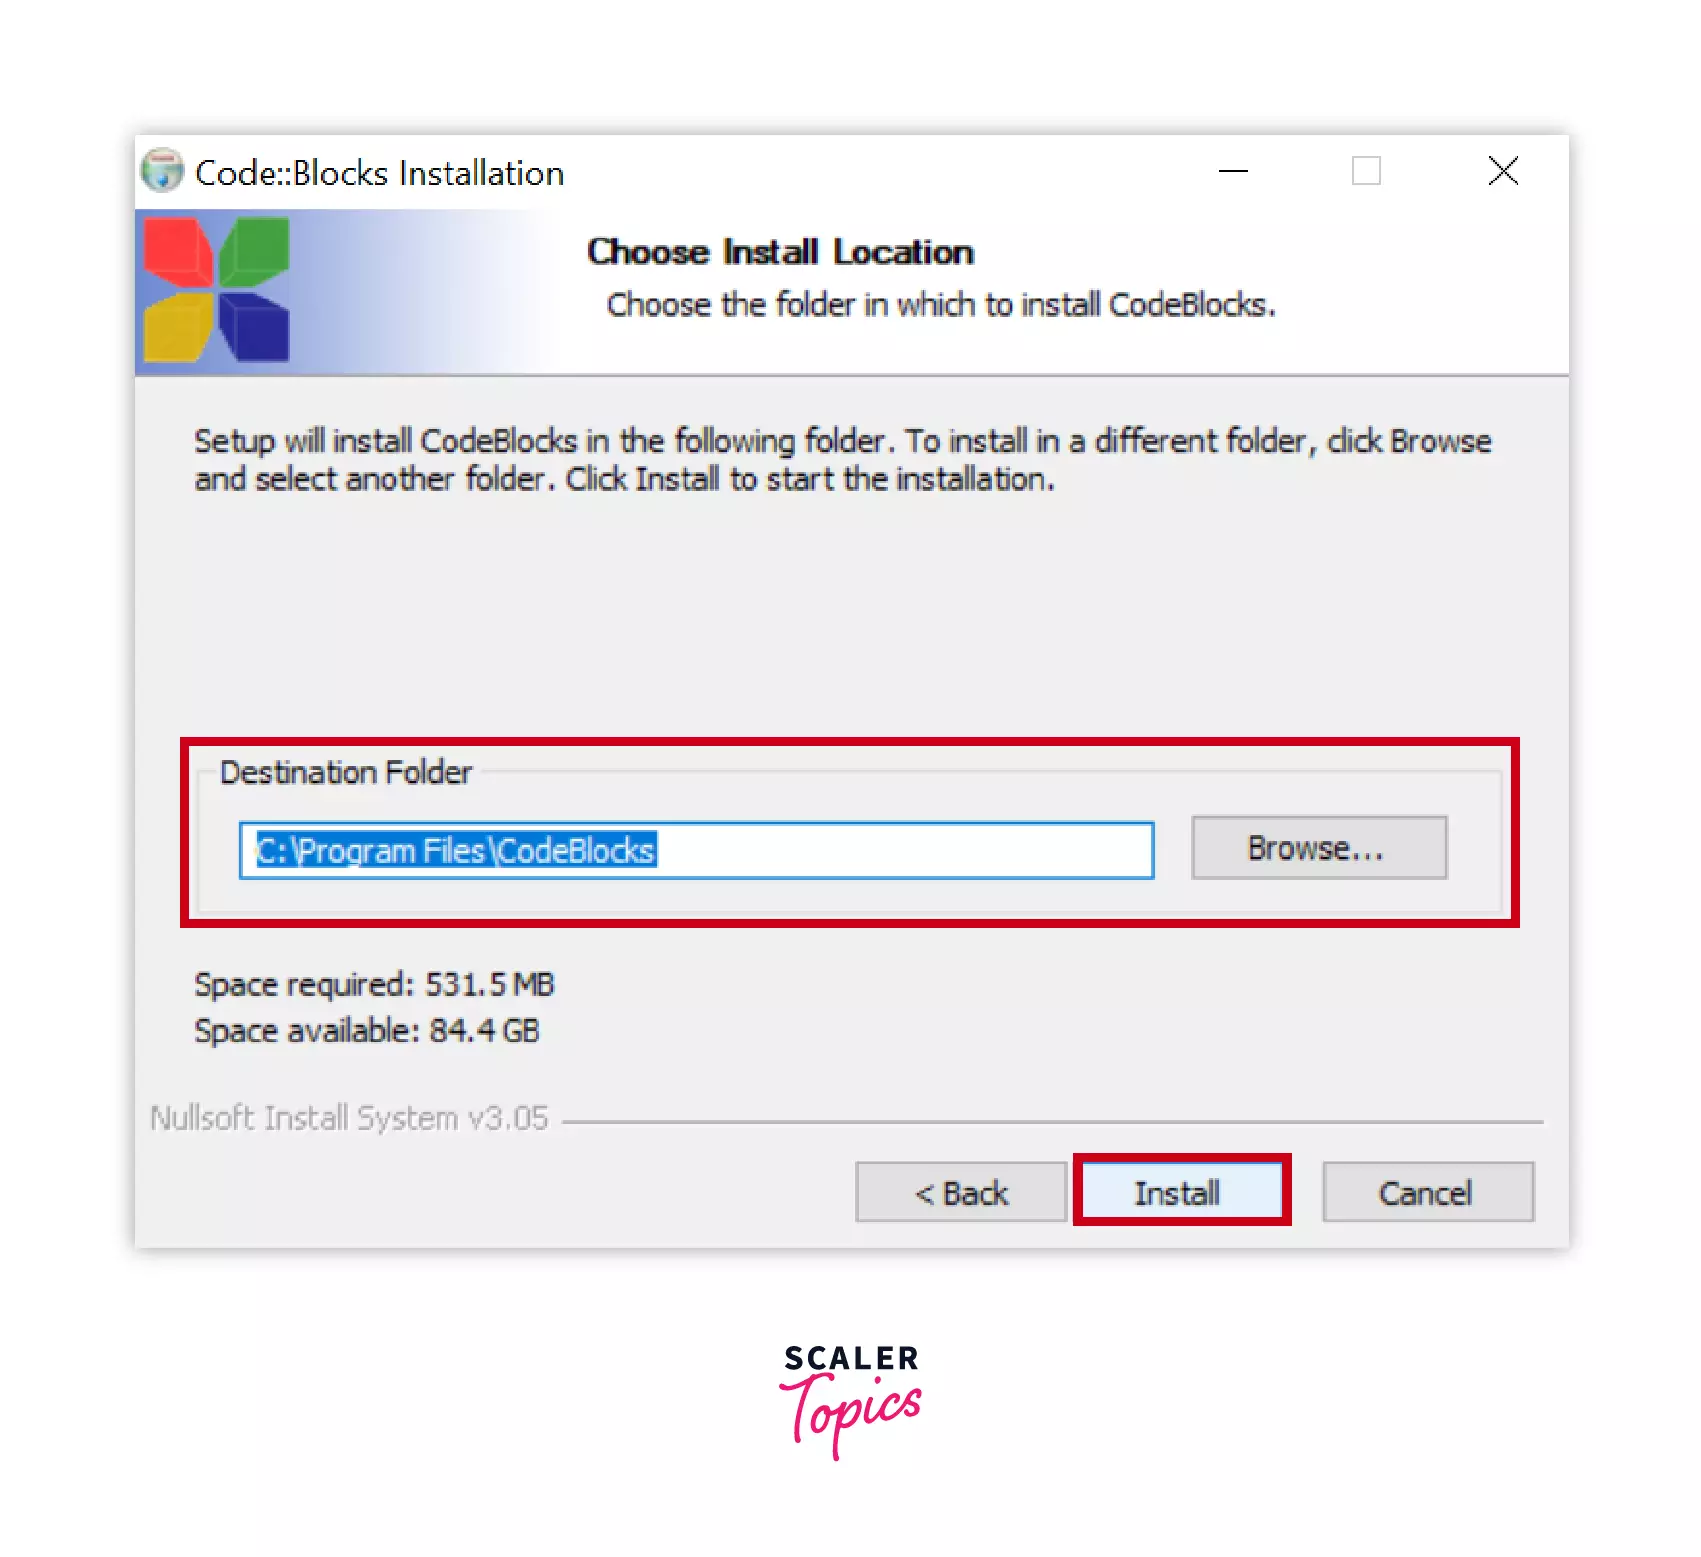
Now the installer will start to extract the files on the destination folder which you chose in the previous step and installation will begin.
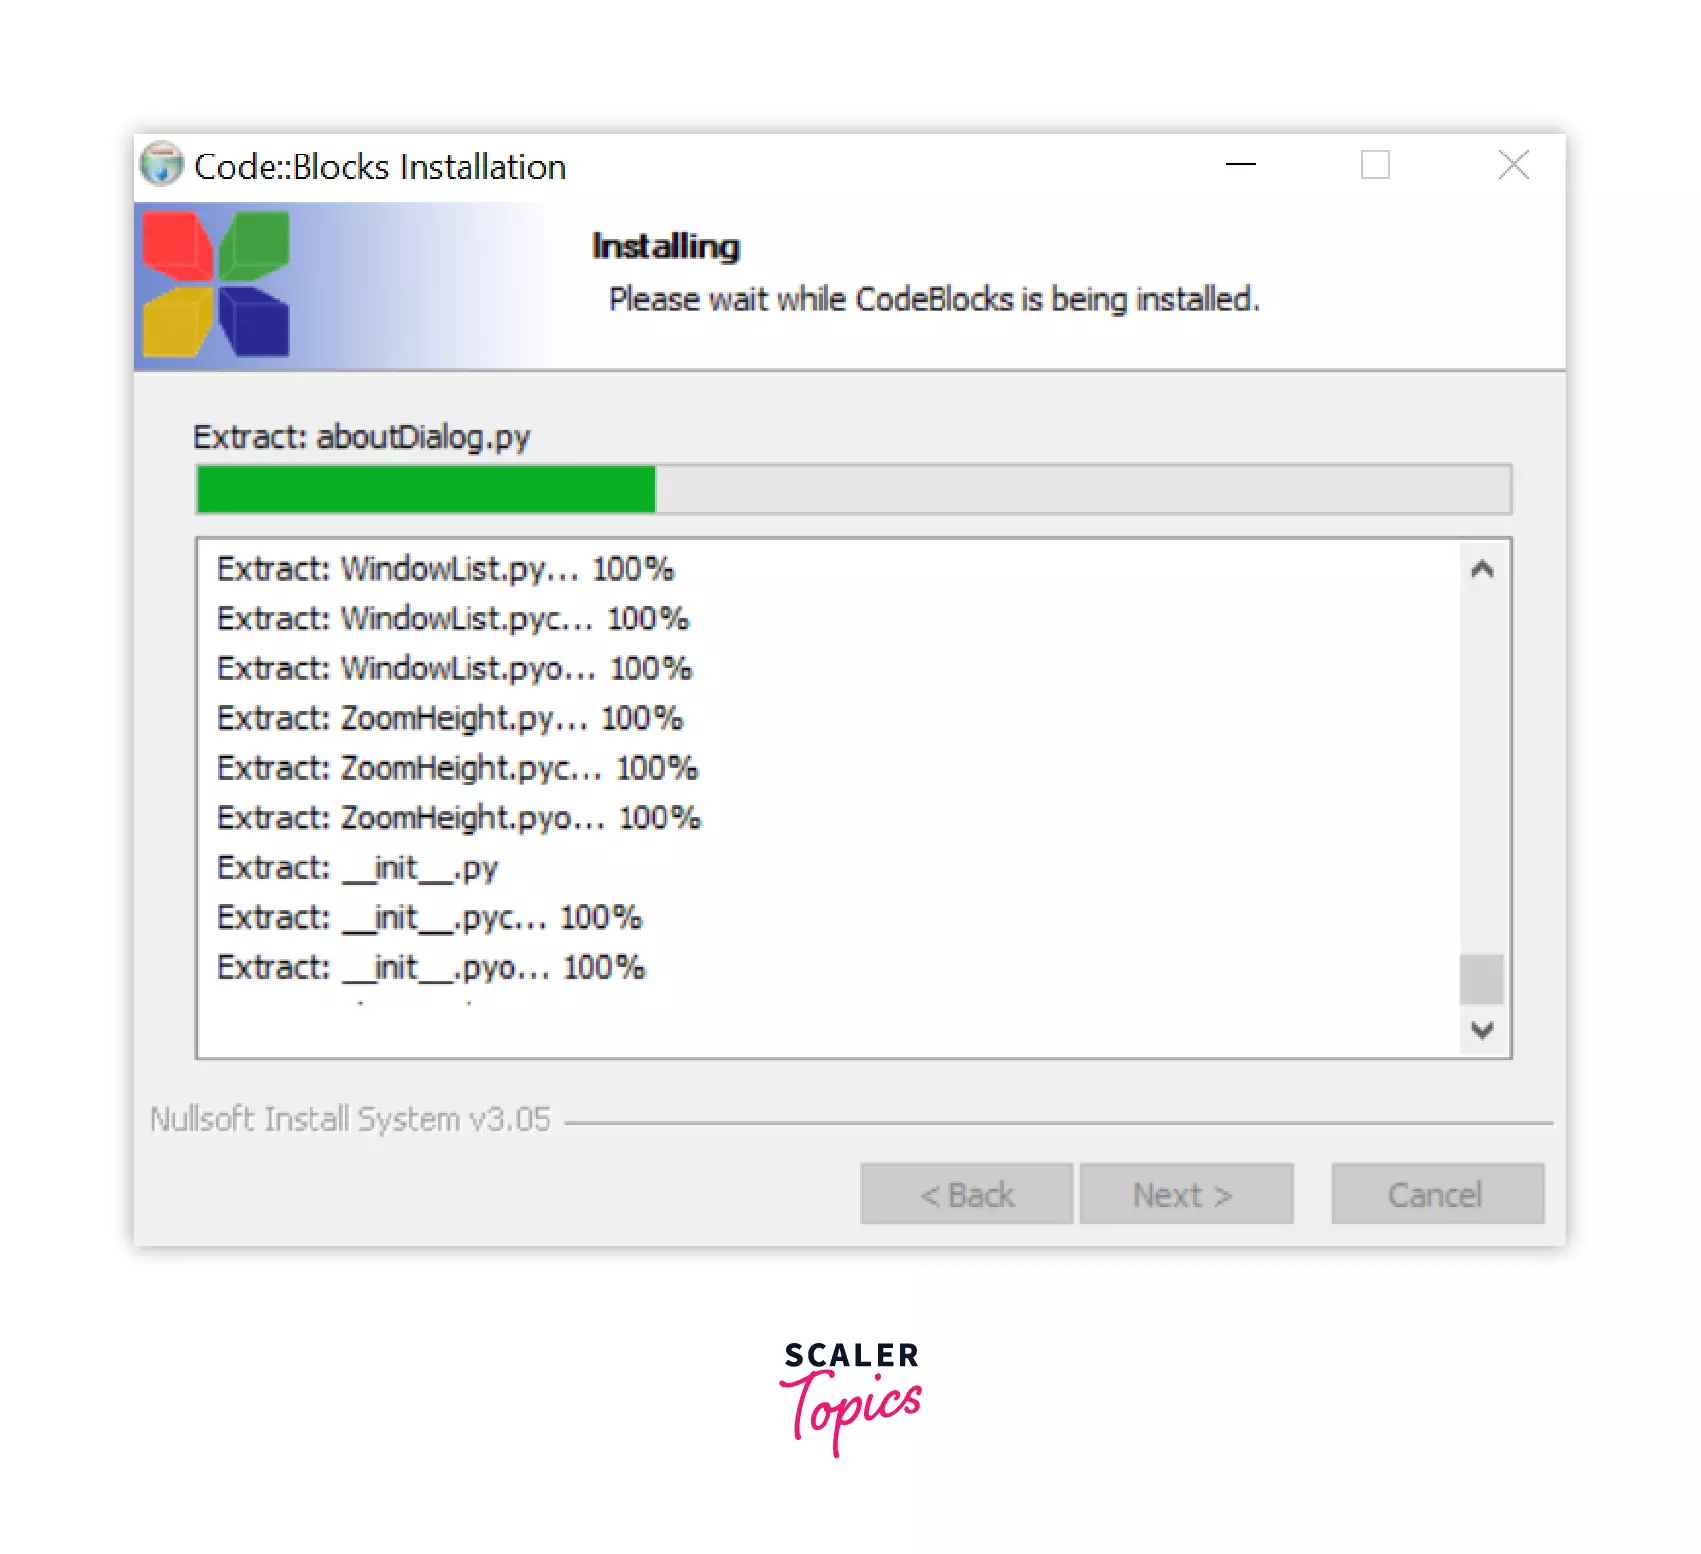
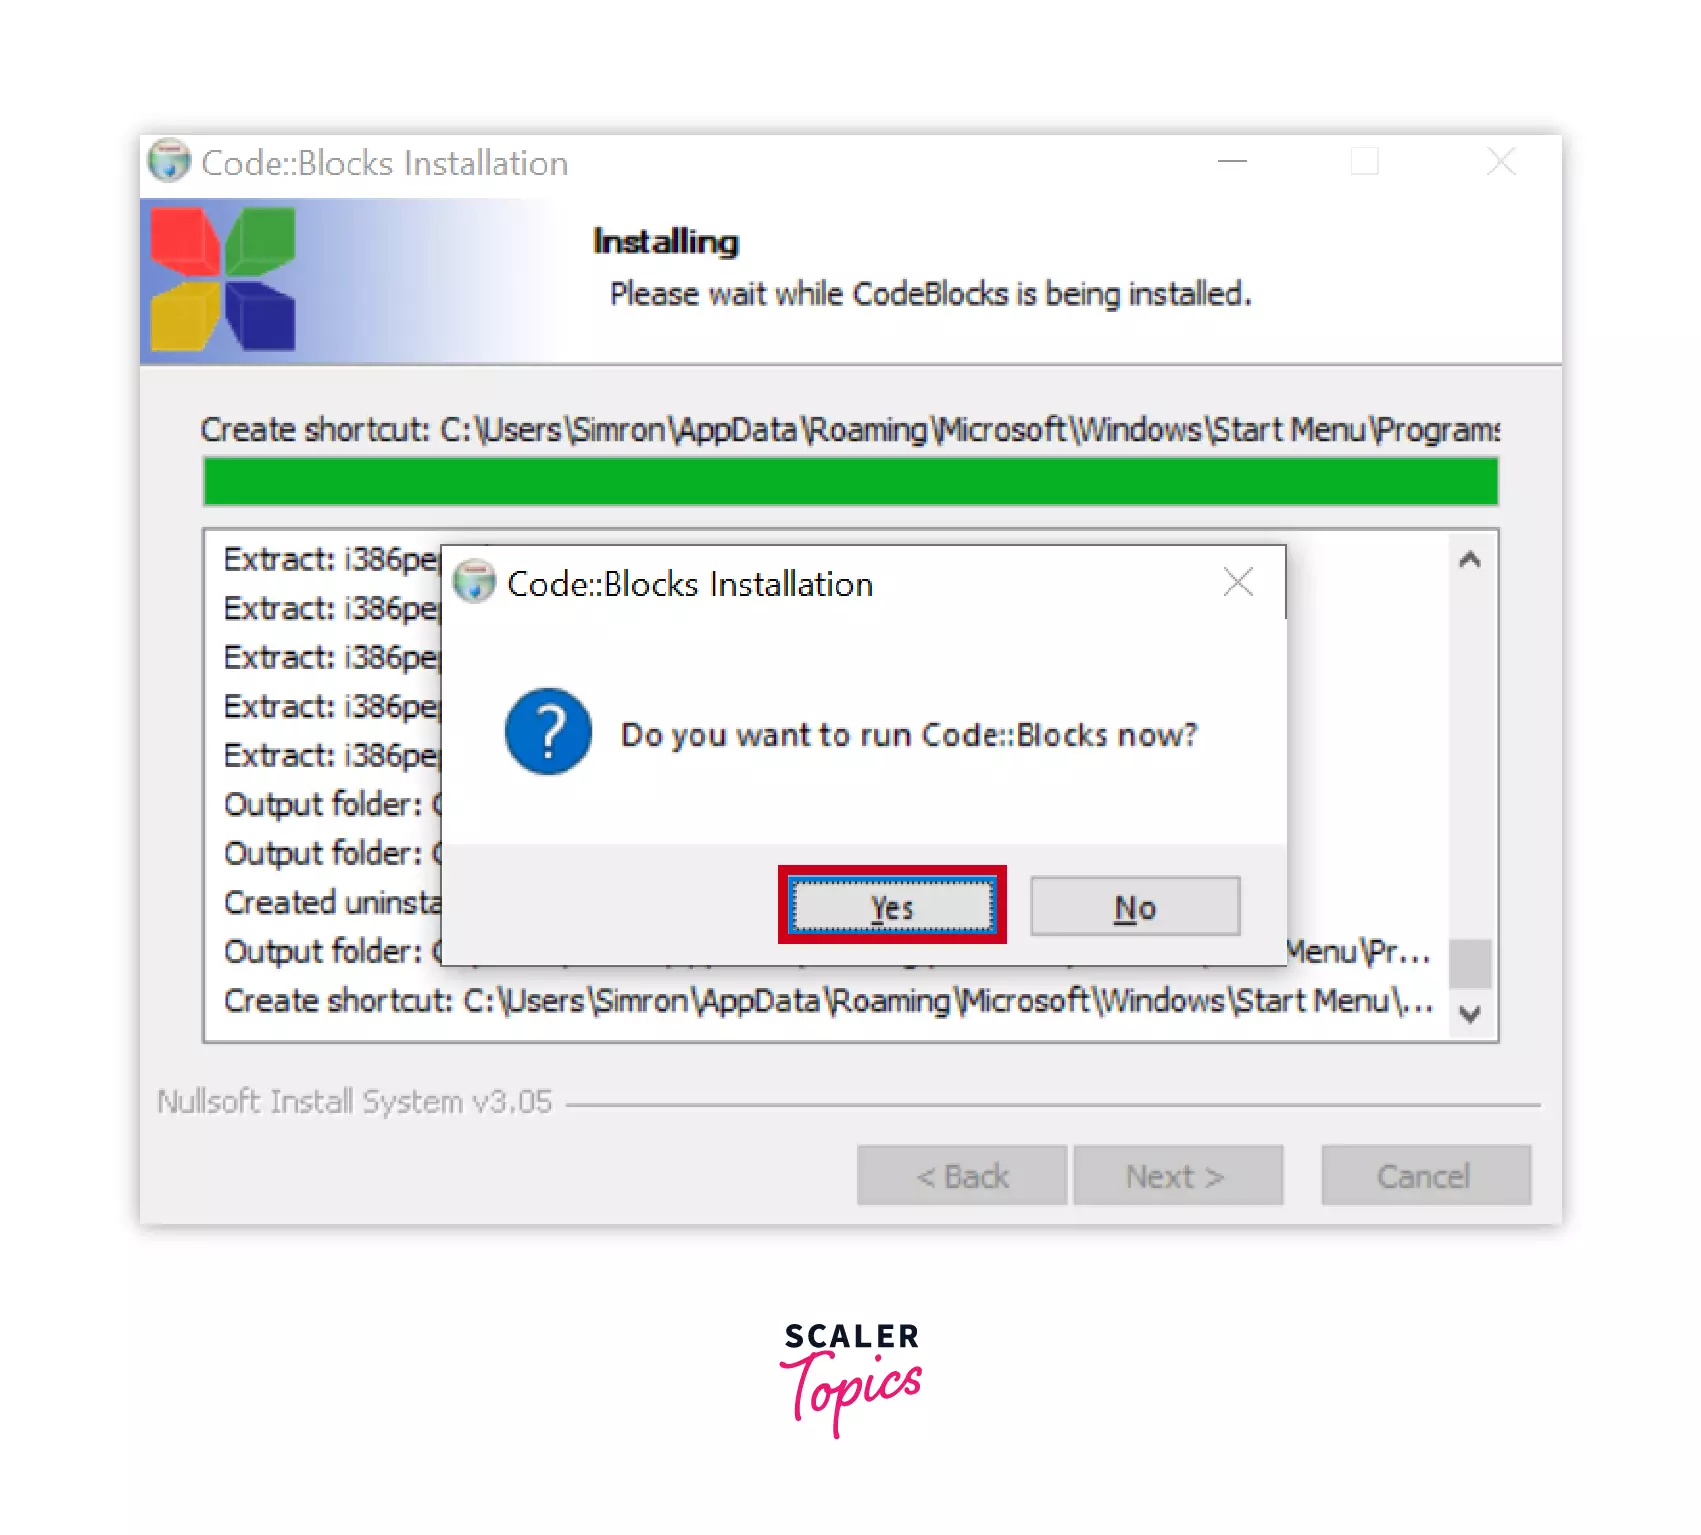
STEP 6: Installation complete
The installation is completed successfully, if you want to open the Code::Blocks IDE click on the Yes button.
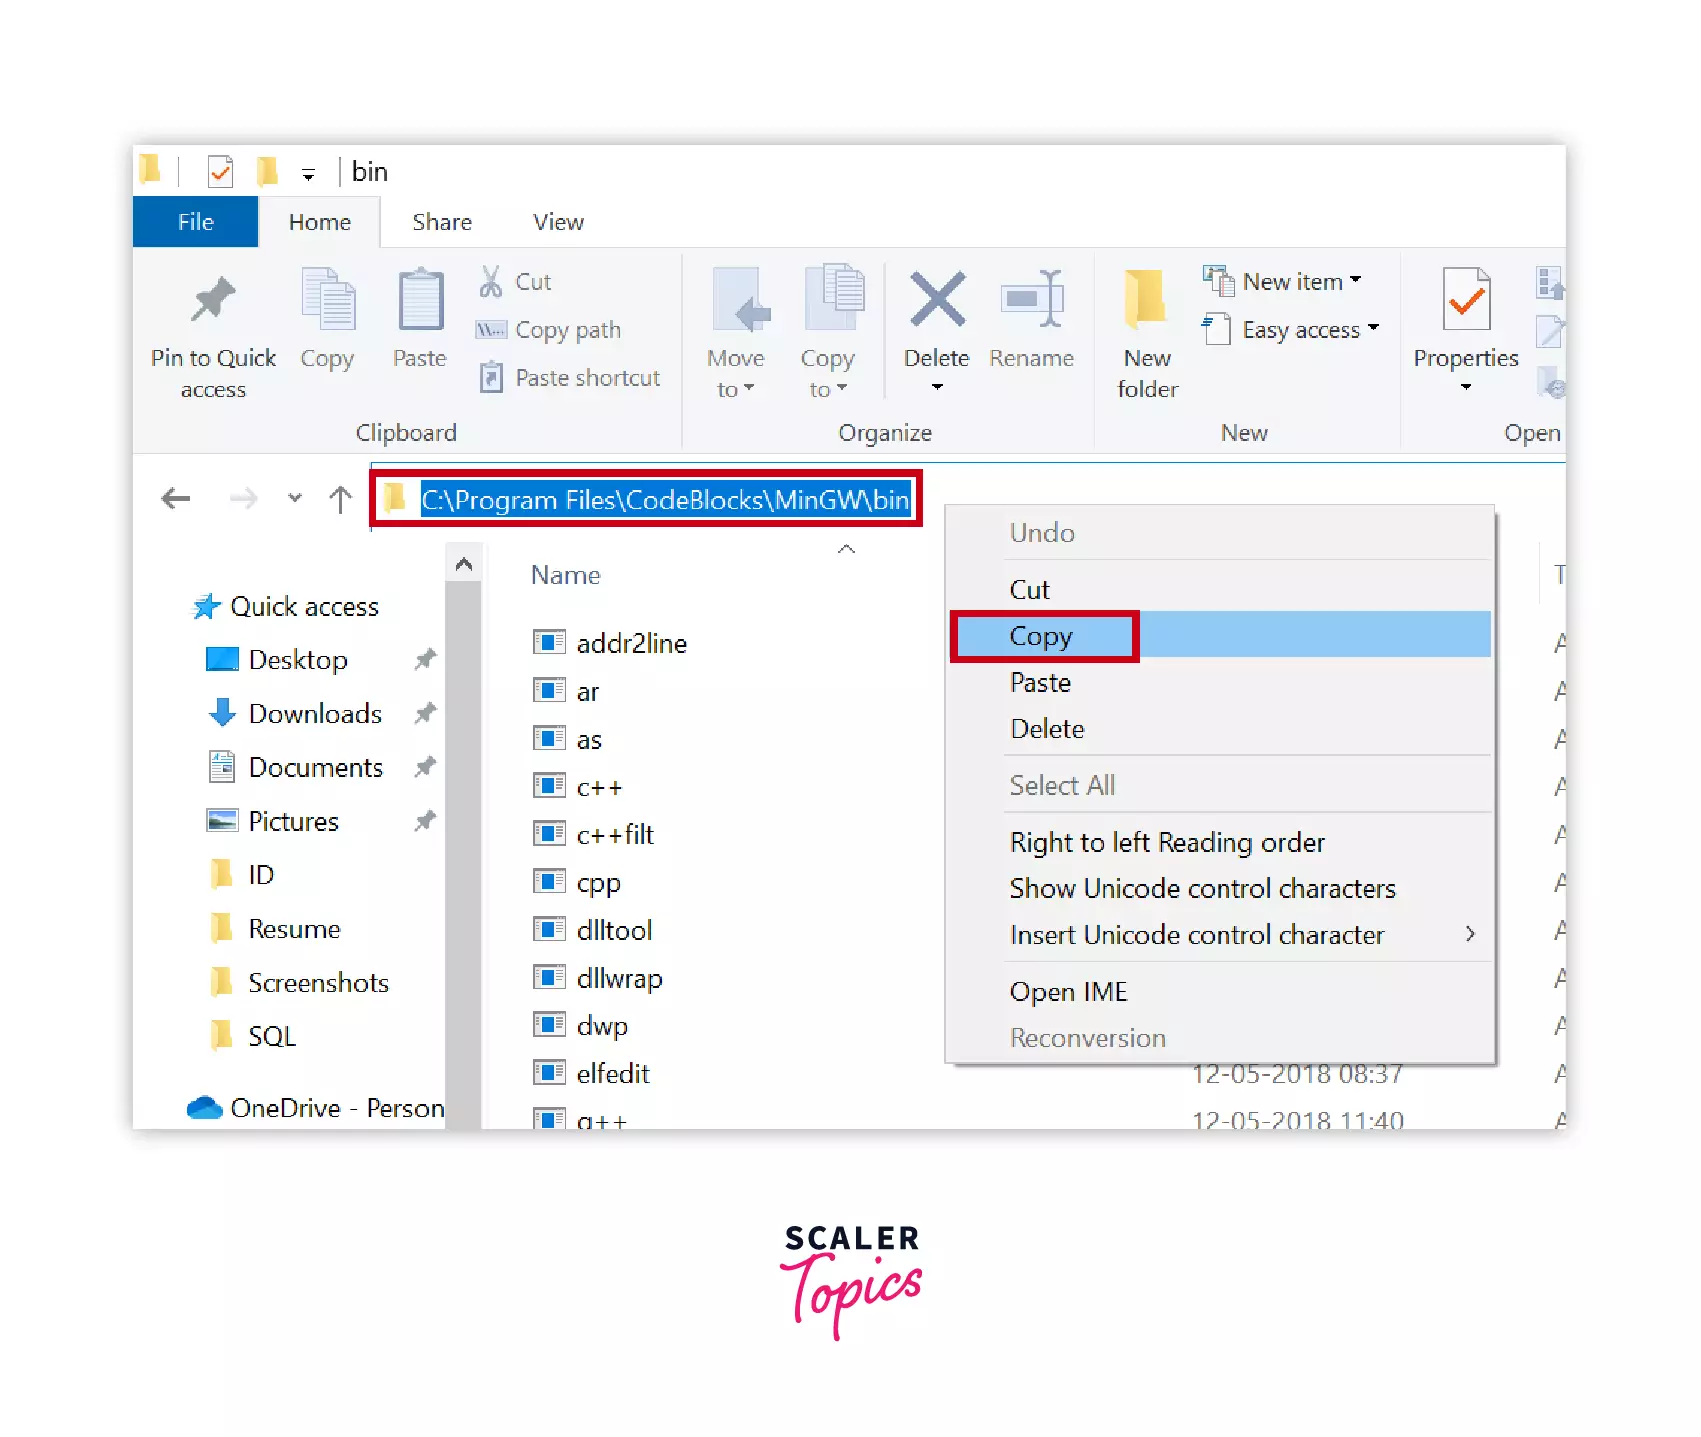
STEP 7: MinGW configuration
But before going to the further step, the location of the MinGW is to be added to the path environment variables so that you can run the C program from any directory on your computer.
Now go to the Folder of the MinGW on your computer. path : C:\Program Files\CodeBlocks\MinGw\bin. The following folder will open on your computer, just copy the path on the address bar by right-clicking on it.
STEP 8: Set the environment path variable for MinGW
Open the control panel on your computer.

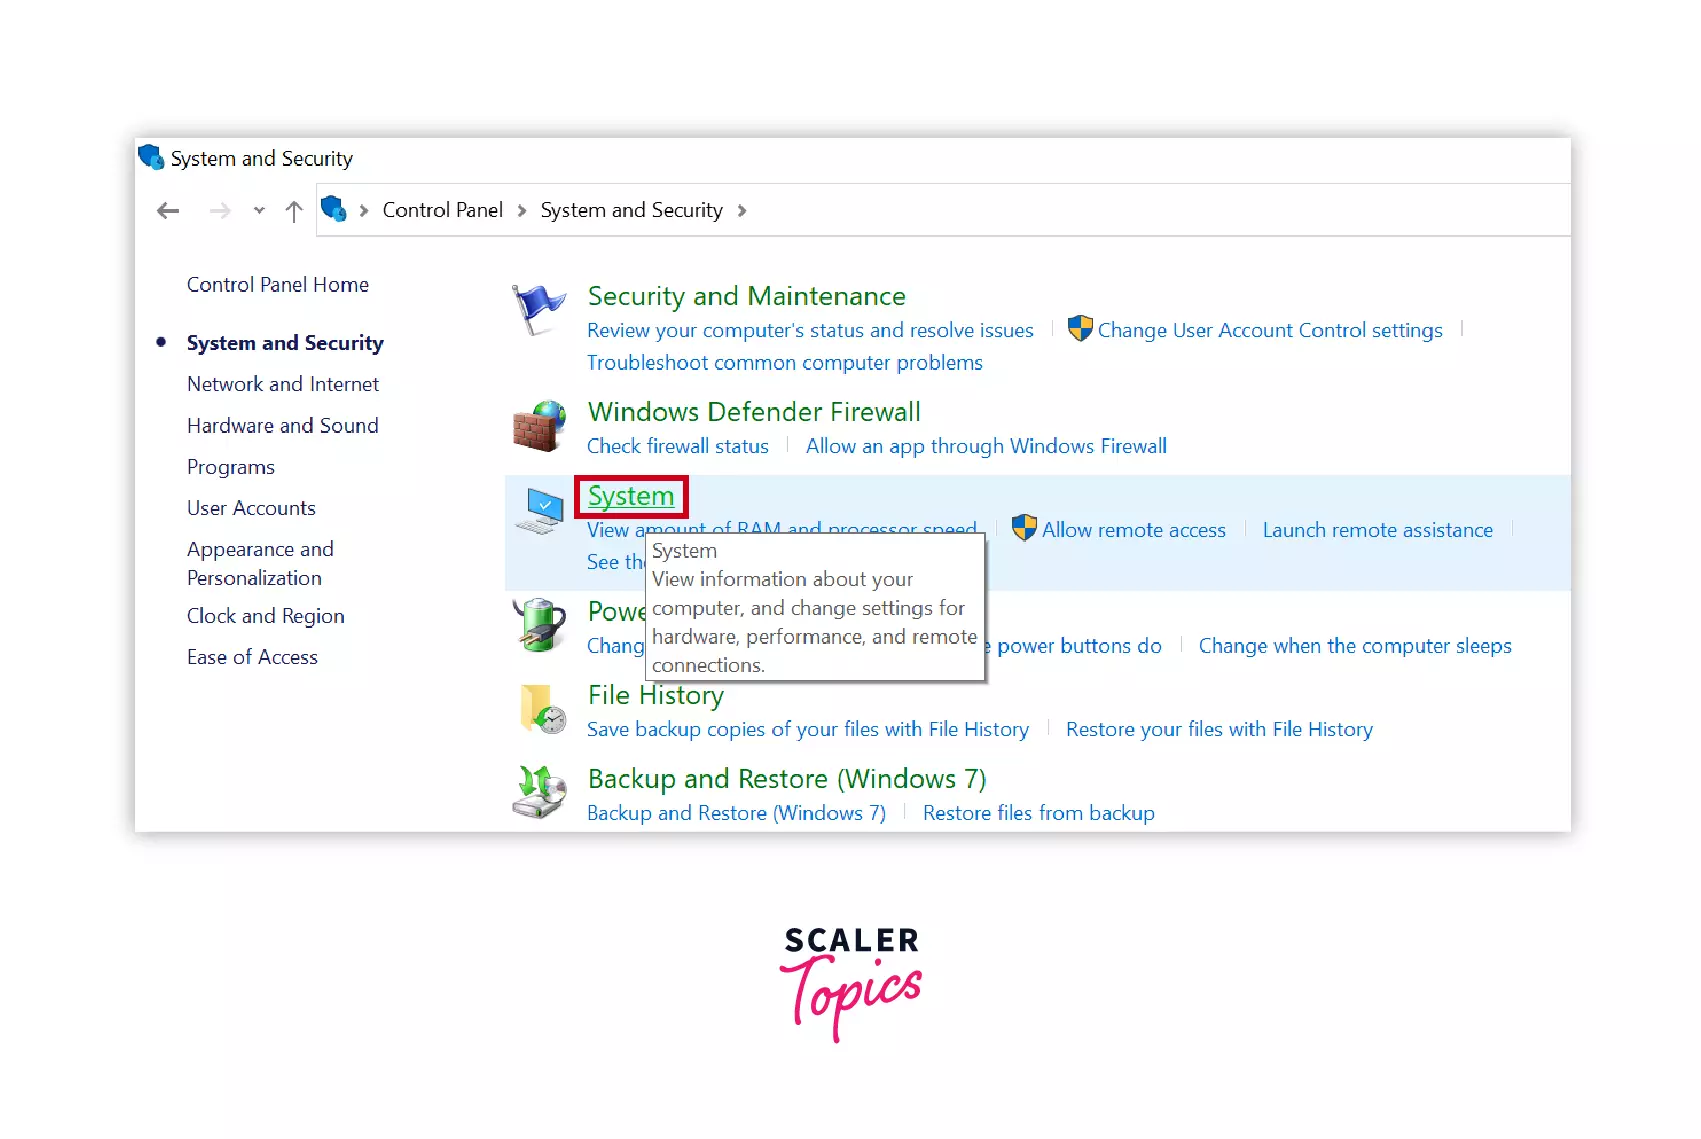
**Go to the System and Security section of the control panel.
**
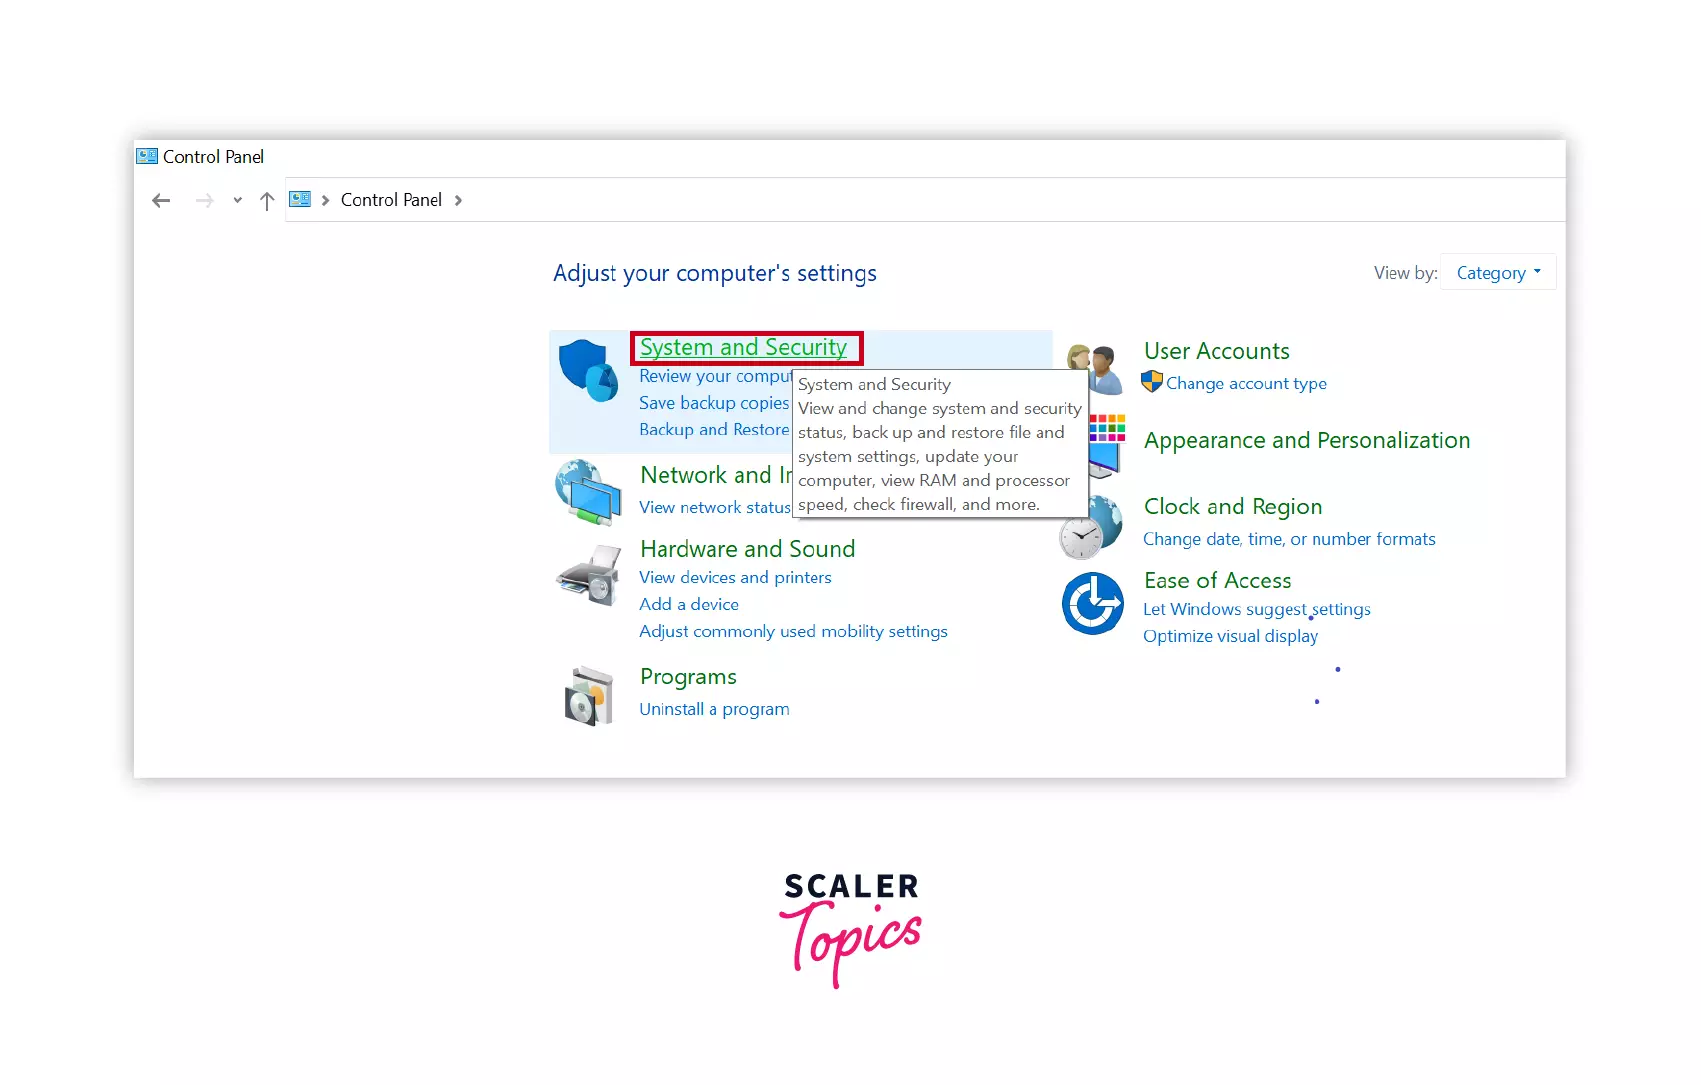
Go to System inside System and security in the control panel.
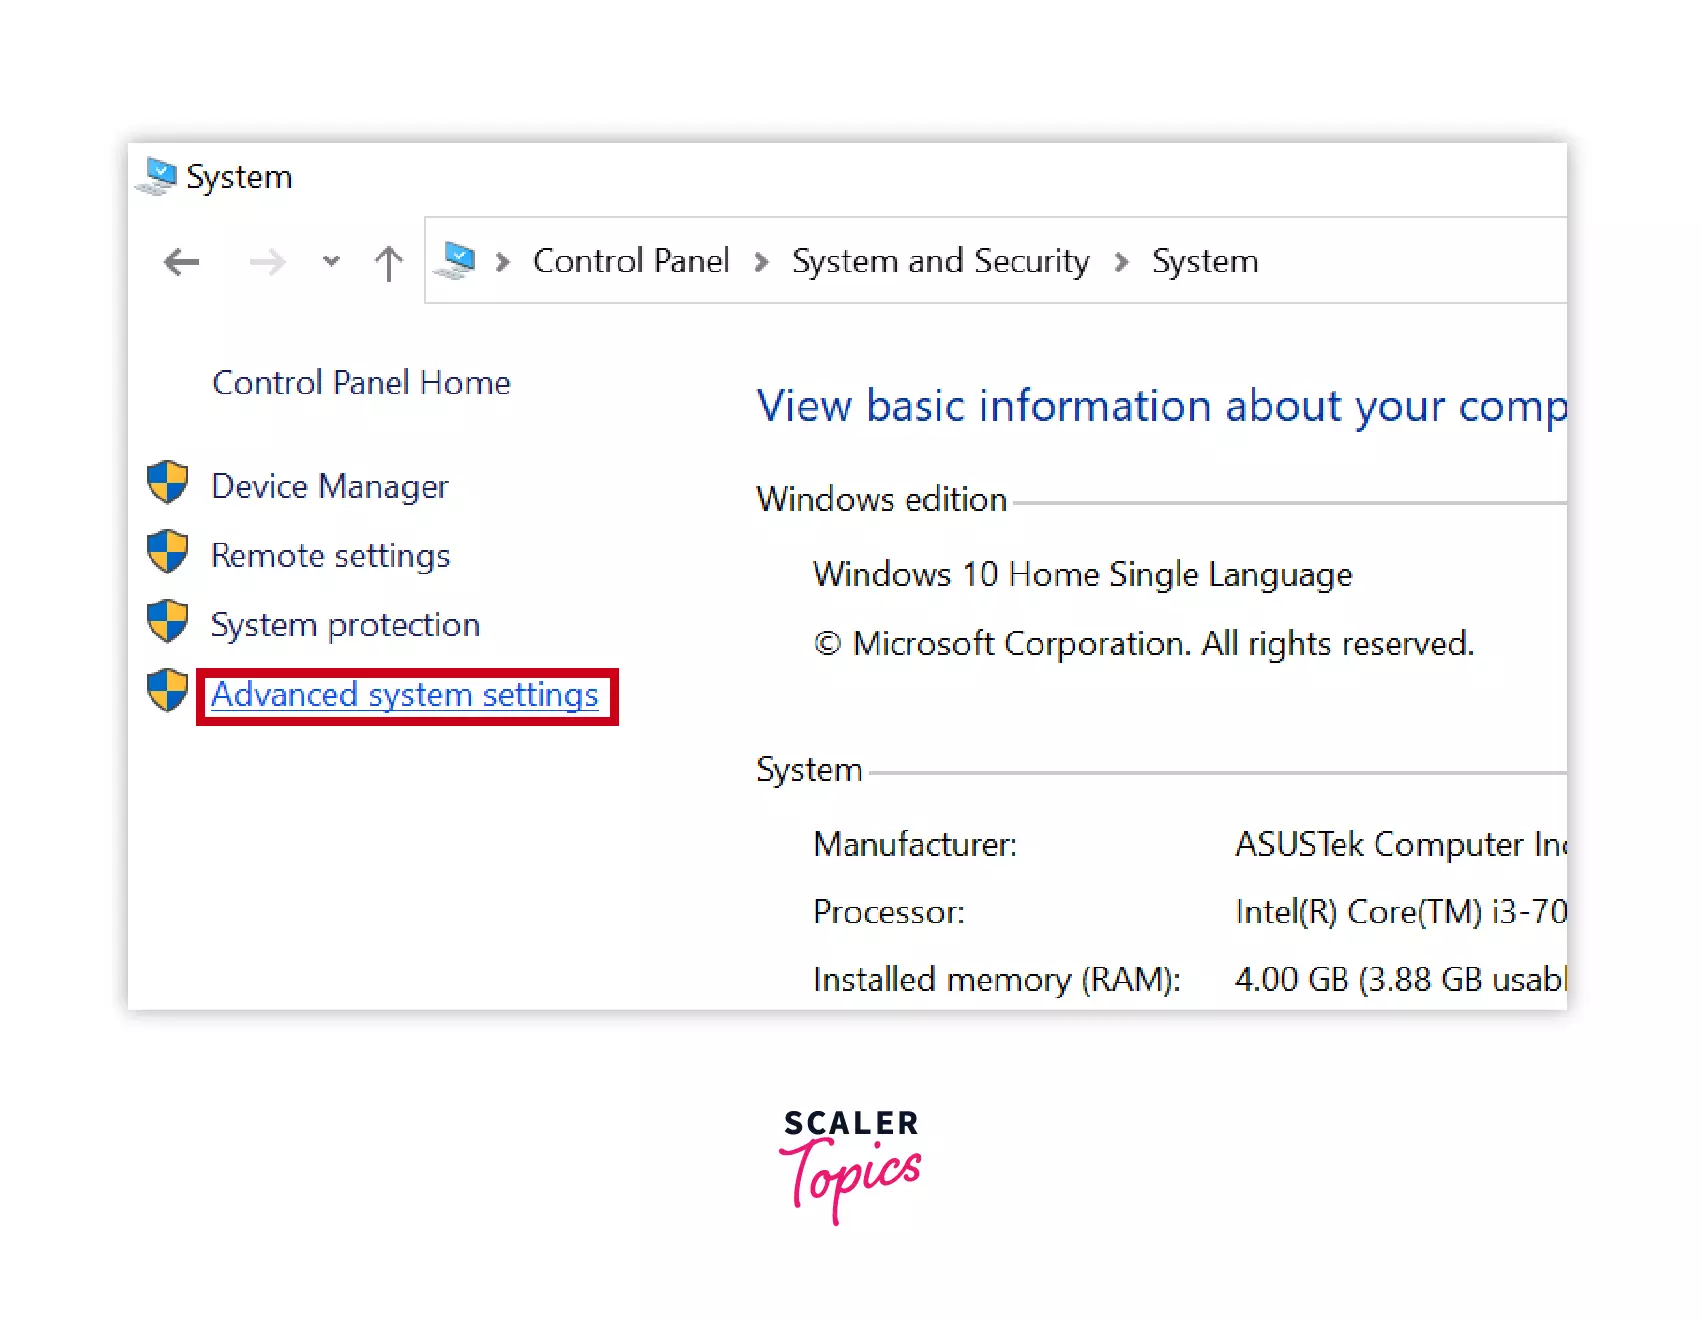
Now on the left side click on the Advanced system settings.
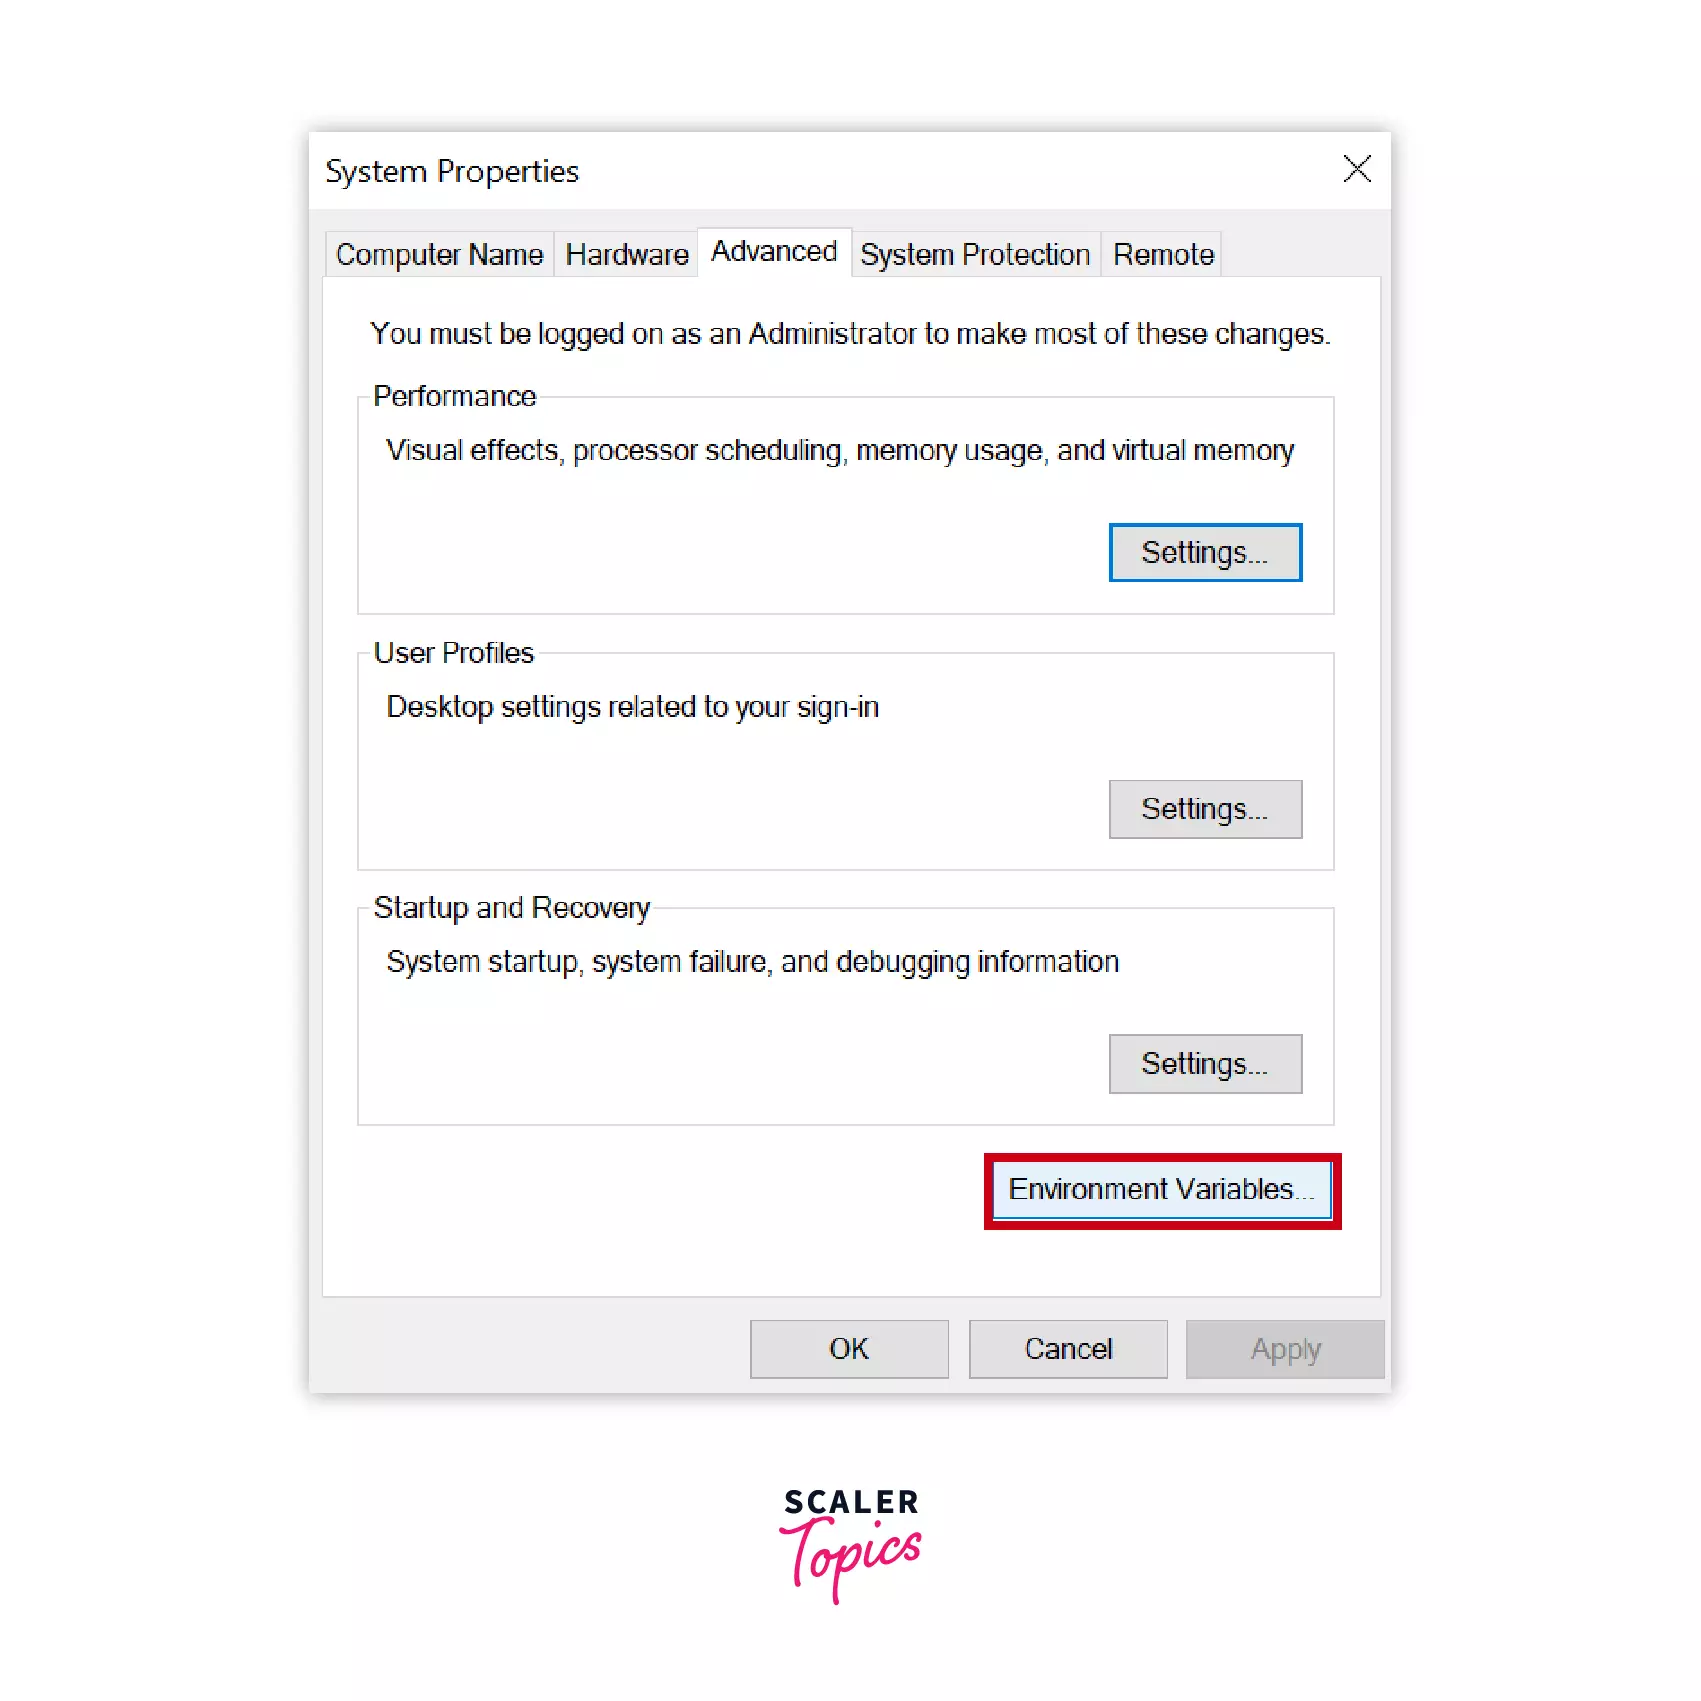
The pop-up visible on the screenshot below will appear on your screen, from there go to the Environment Variables.
Now in the User variables for User section select the path and click on the Edit button.
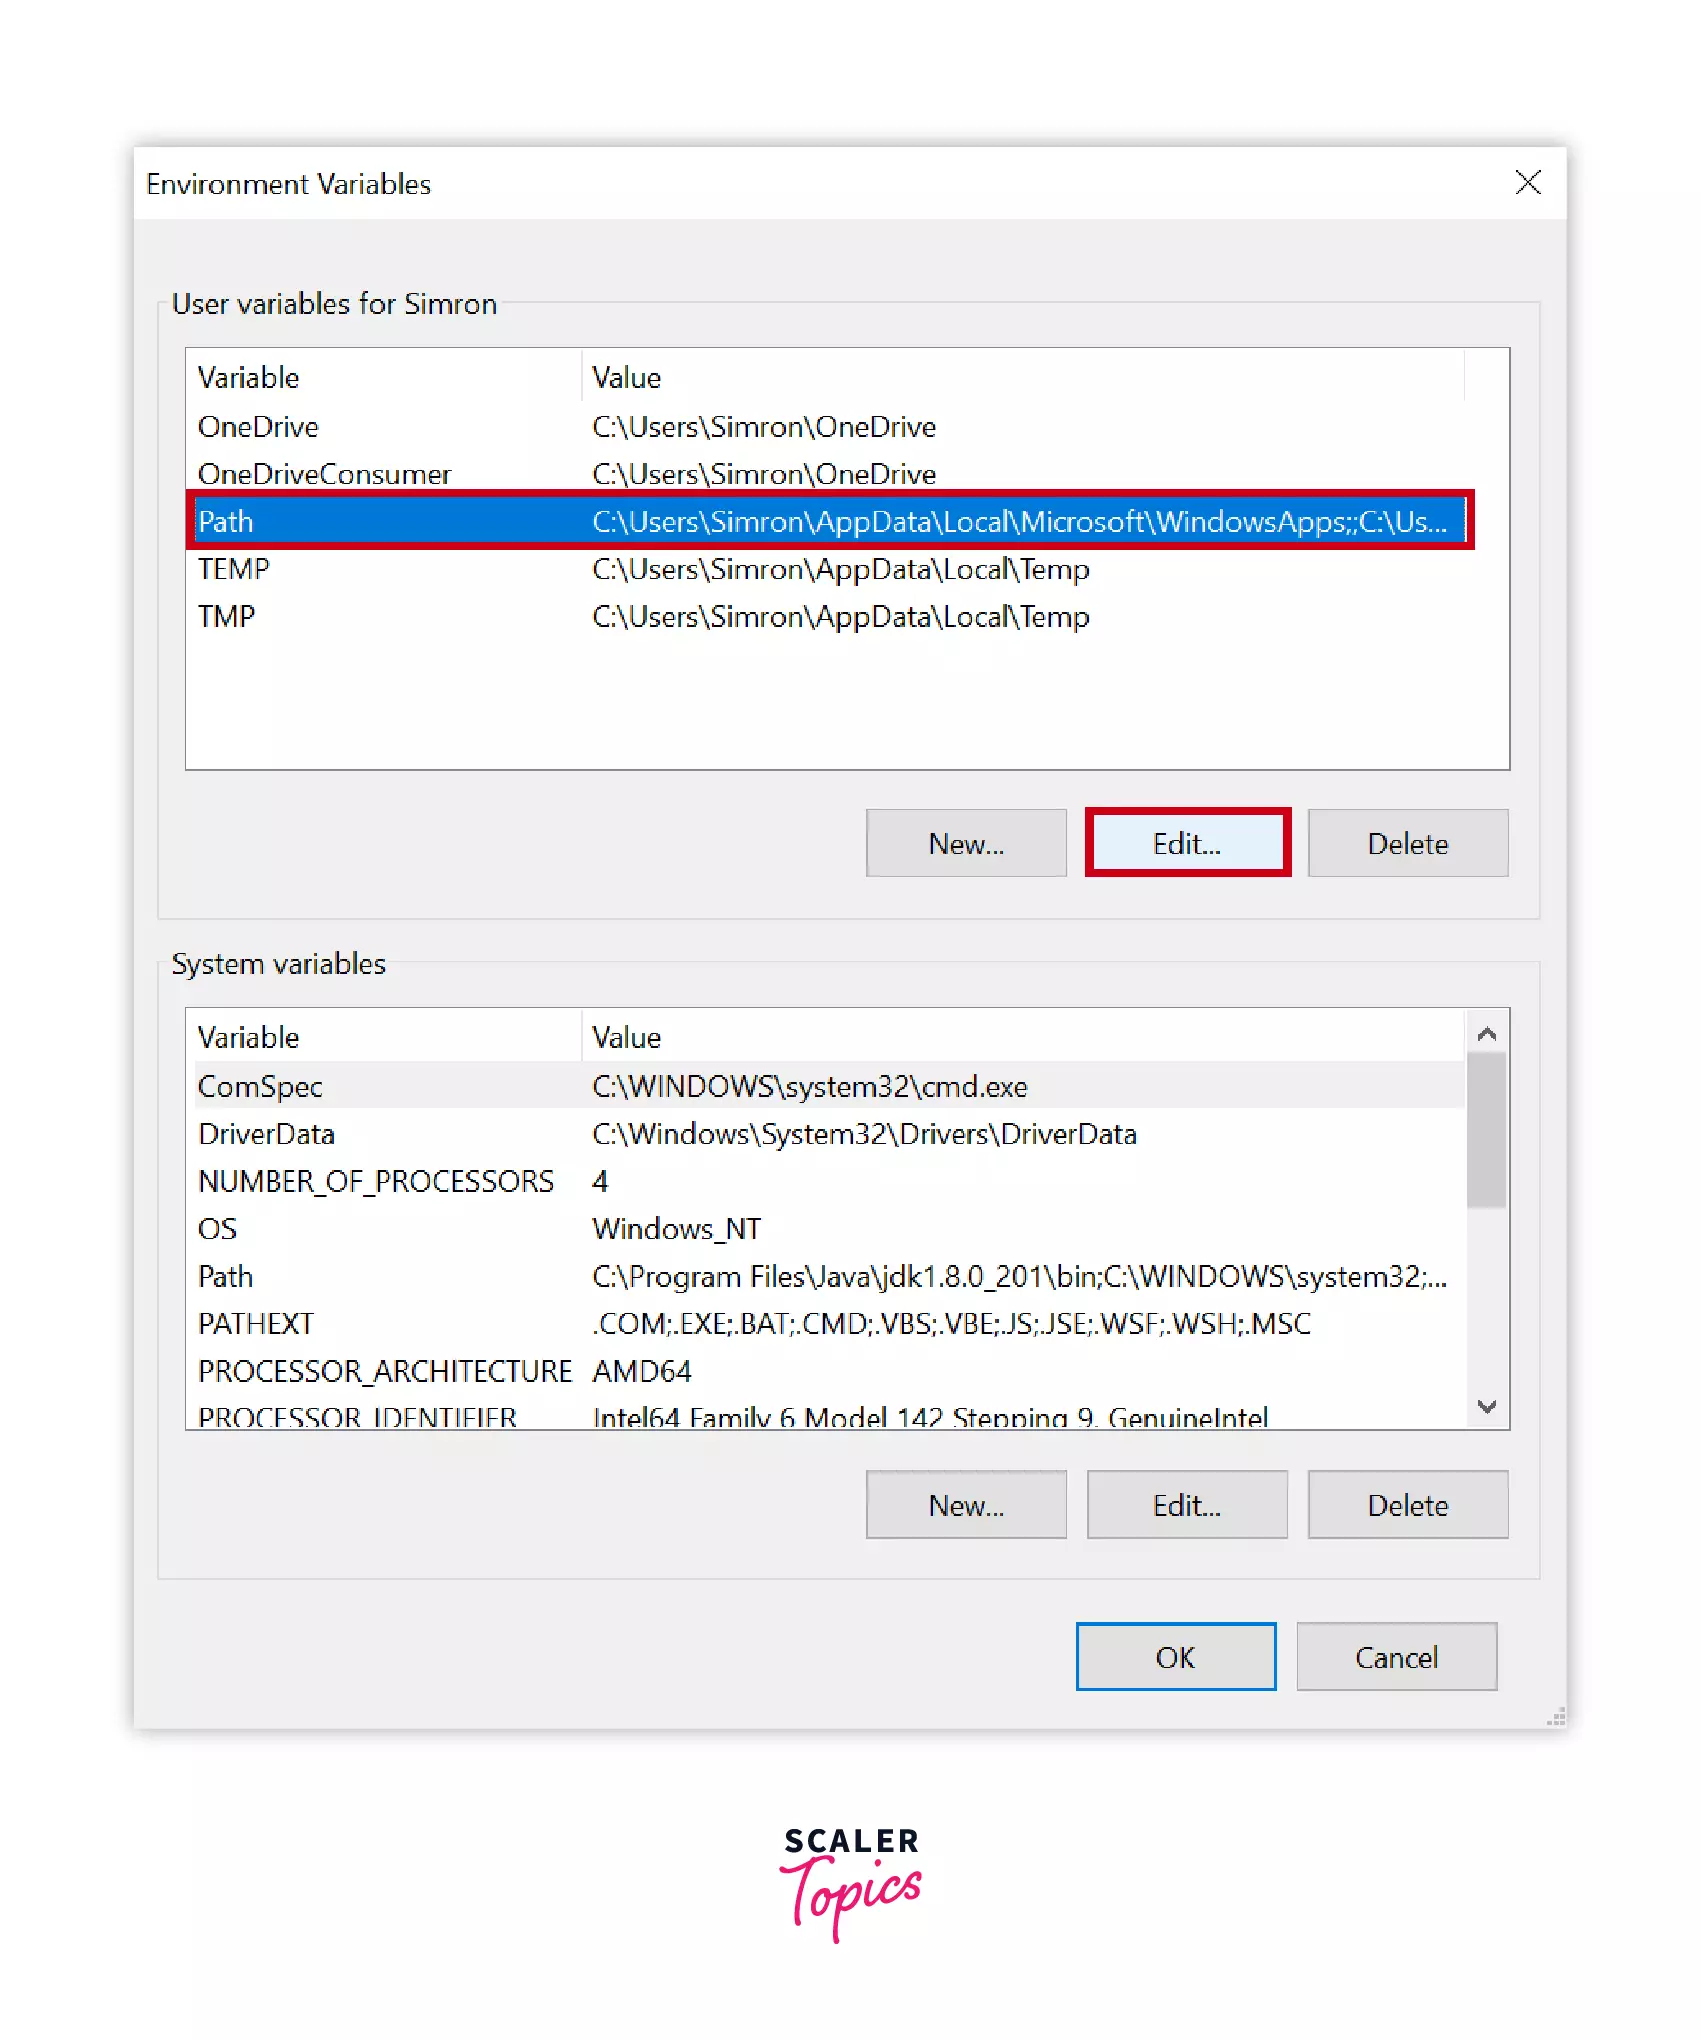
After clicking on Edit the Edit environment variable will open, now click on the New button.
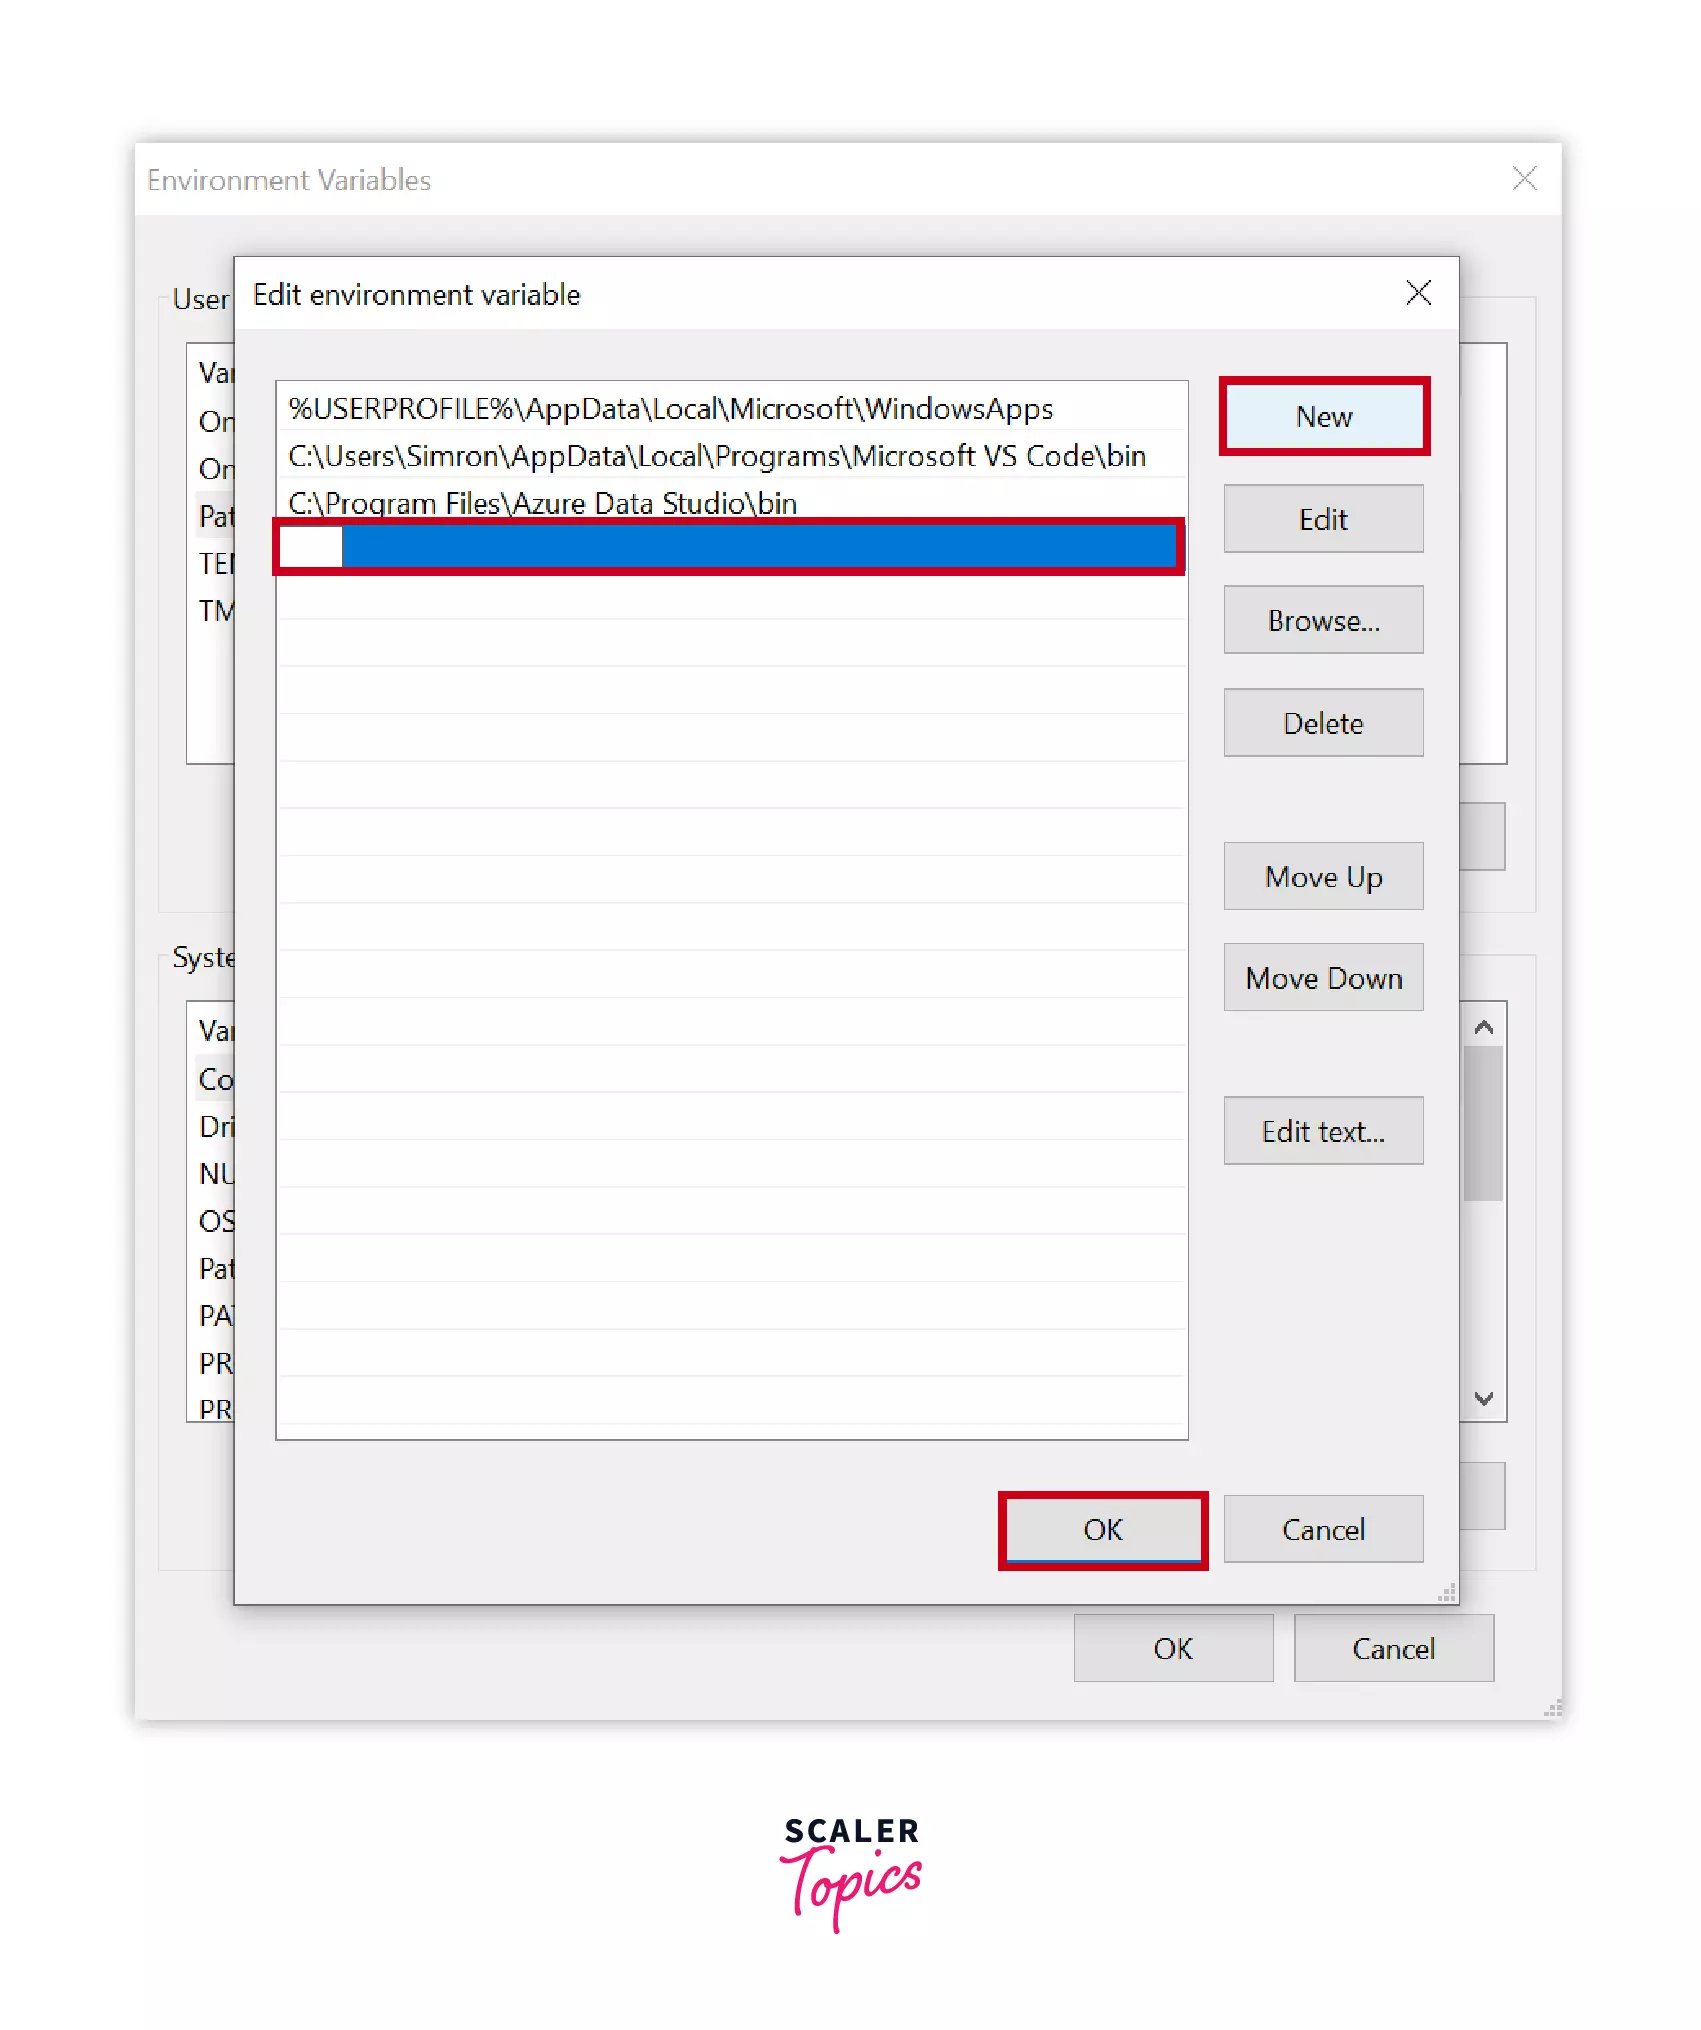
Paste the path of MinGW that was copied earlier and click on Ok. The path is set up successfully.

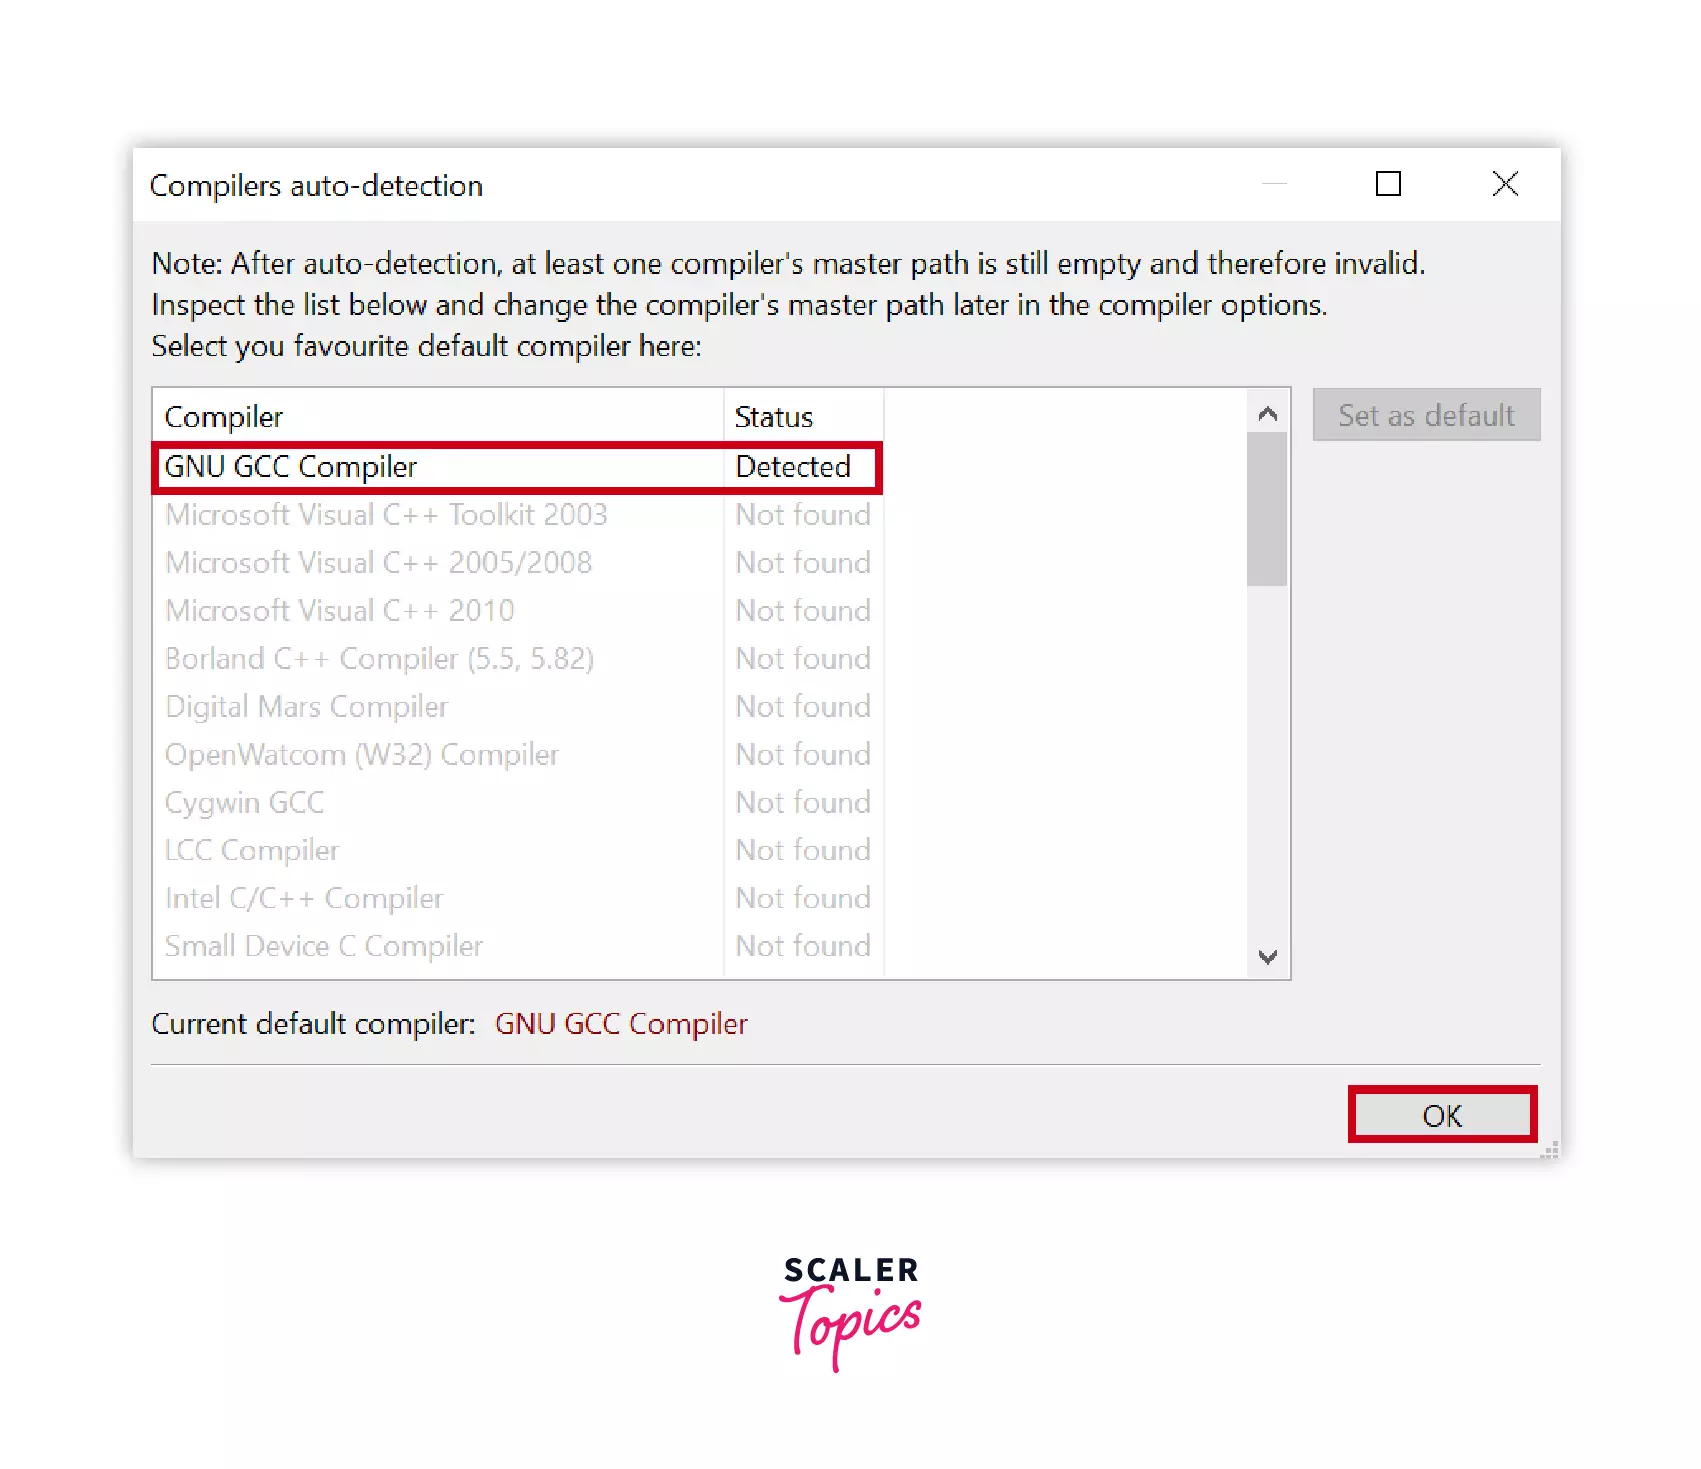
STEP 9: Compiler auto-detection
Now open up the Code::blocks IDE and the Compilers auto-detection popup will appear and the GNU GCC Compiler status will appear as Detected.
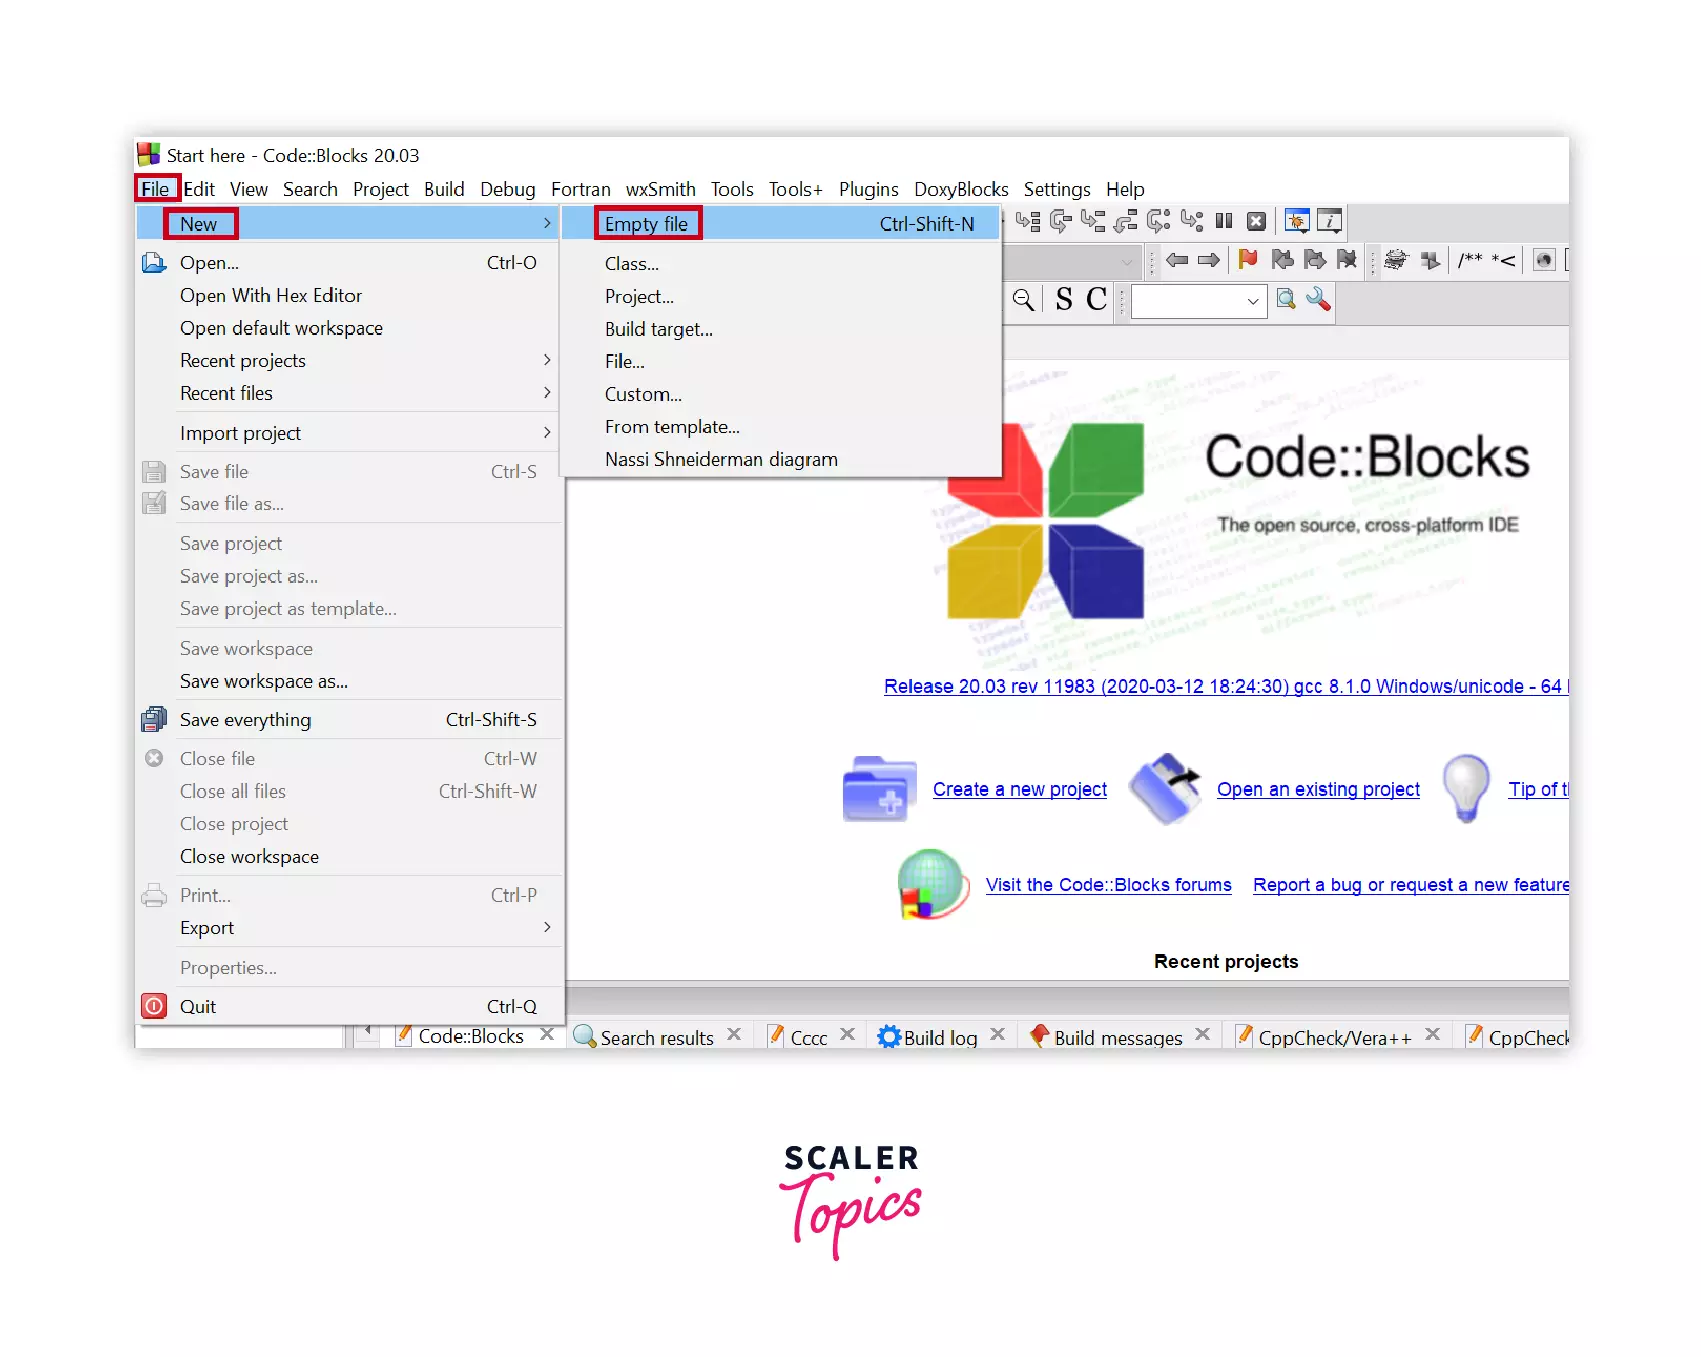
STEP 10: Open a new file in Code::Blocks
If to check whether the IDE is working properly or not go to File>>New>>Empty File and click on it.
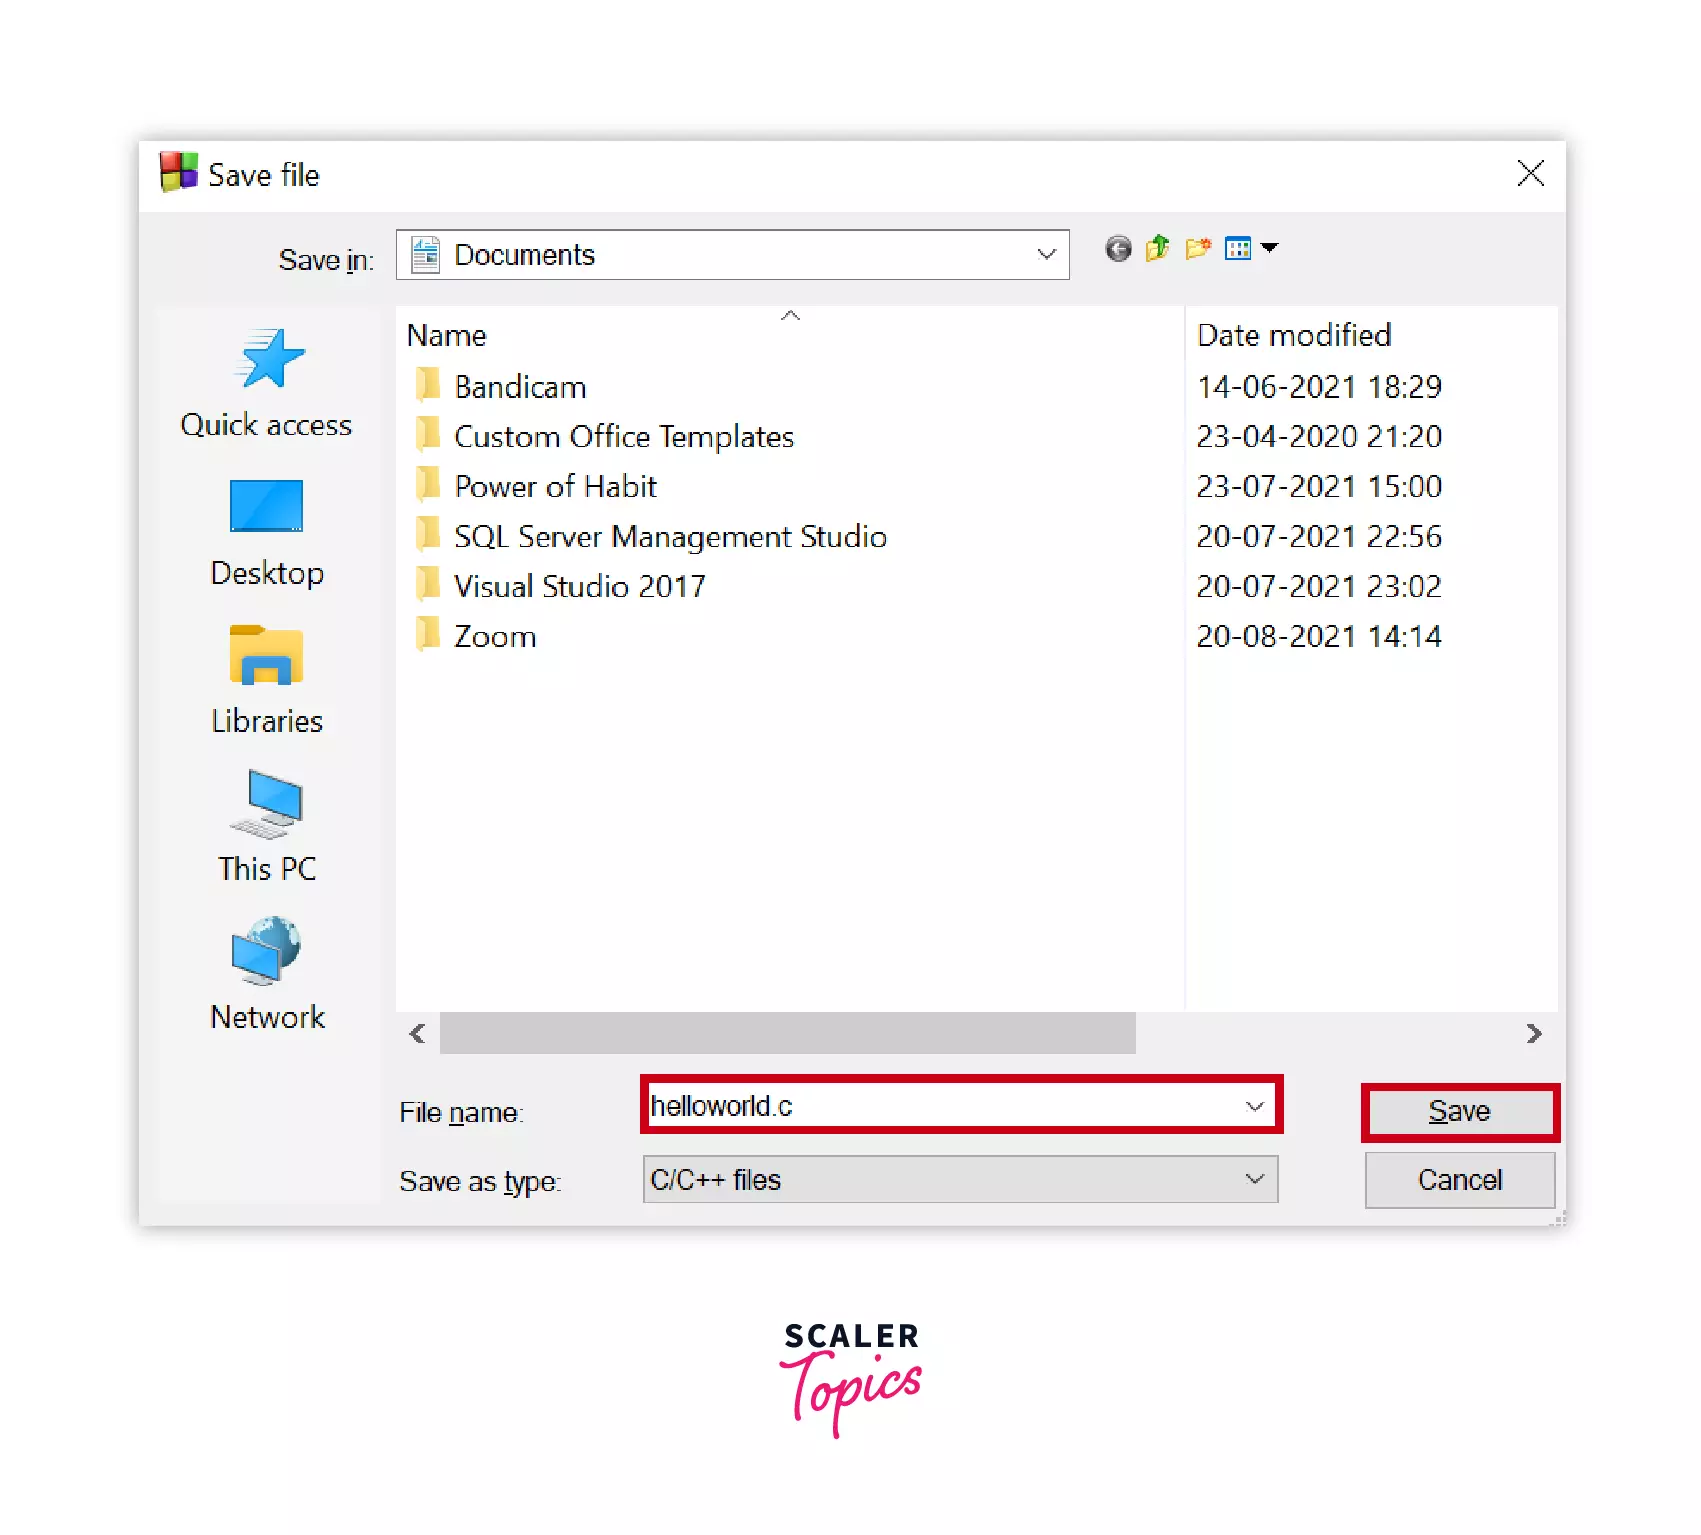
STEP 11: Write a hello world program in C
Write a hello world program in C. and save it with the .c extension.
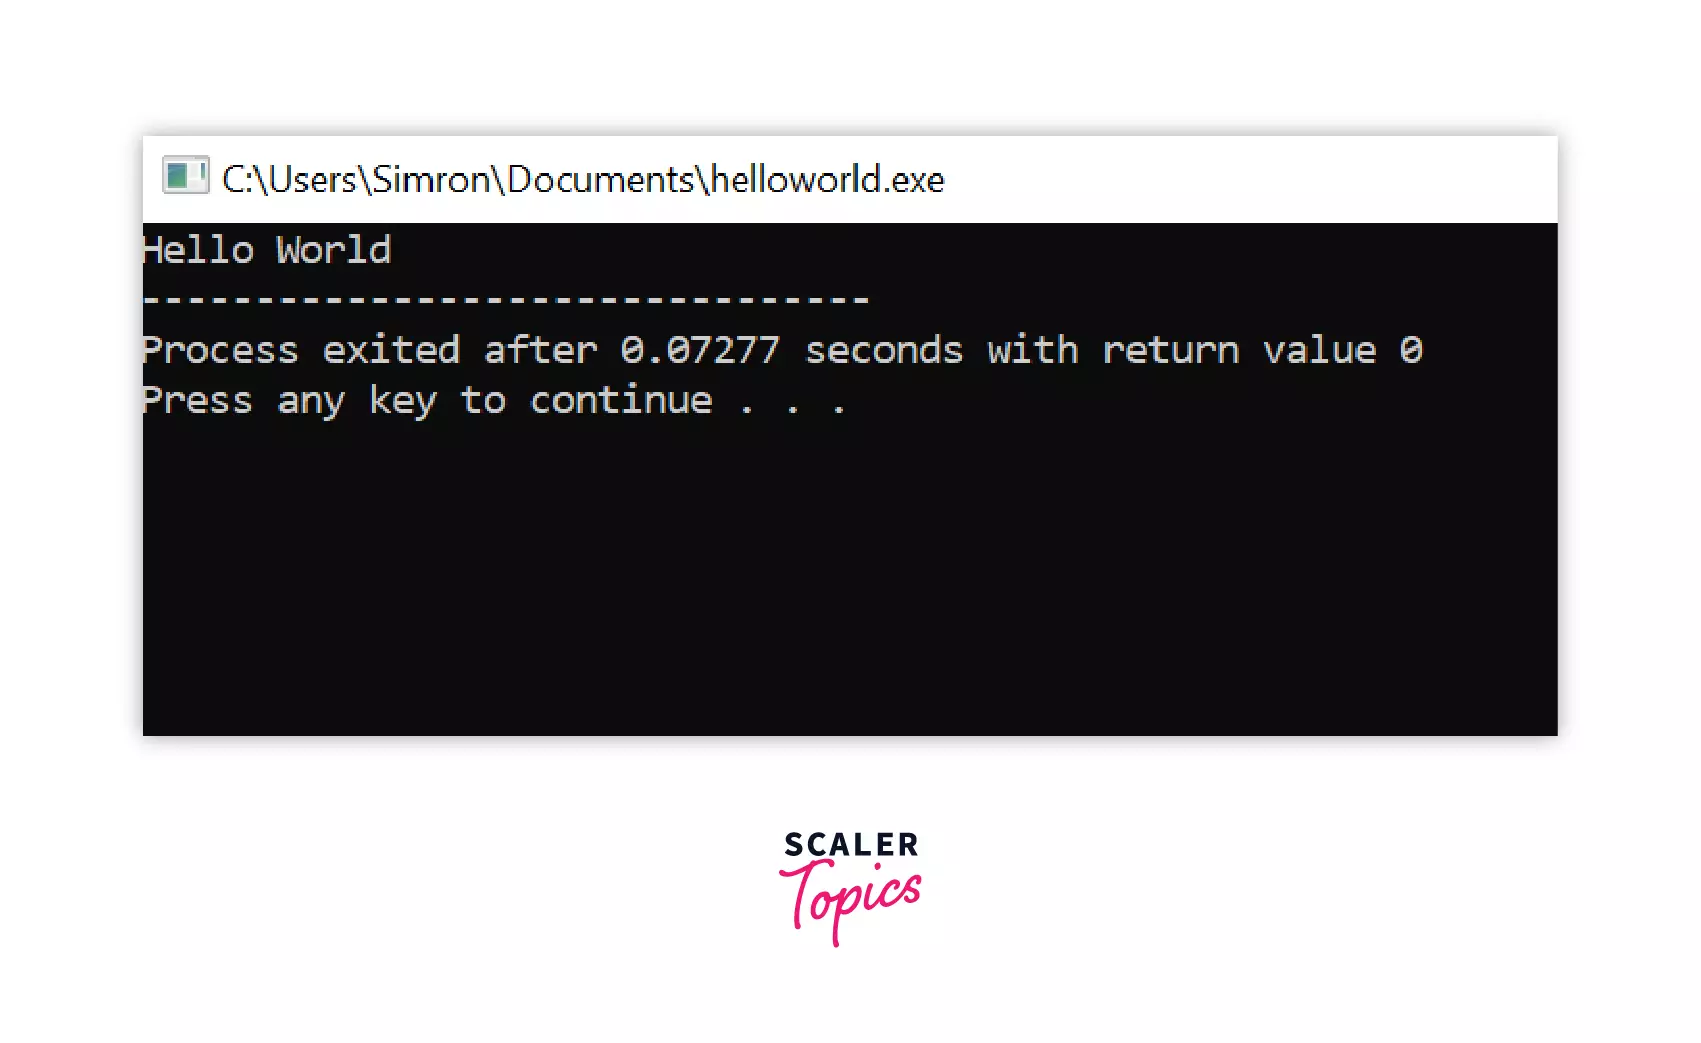
STEP 12: Output of C program
After saving go to Build>>Run and the program will compile and run. If the command prompt with hello world written on it will appear on the screen as it is shown below, then the code blocks are installed successfully!
3. Install Cygwin
Cygwin
Cygwin is the runtime environment that runs on Windows and Linux as well it contains the c compiler and the vi editor as a text editor.
Below are the steps to download and install the Cygwin IDE.
STEP 1: Download Cygwin from the web
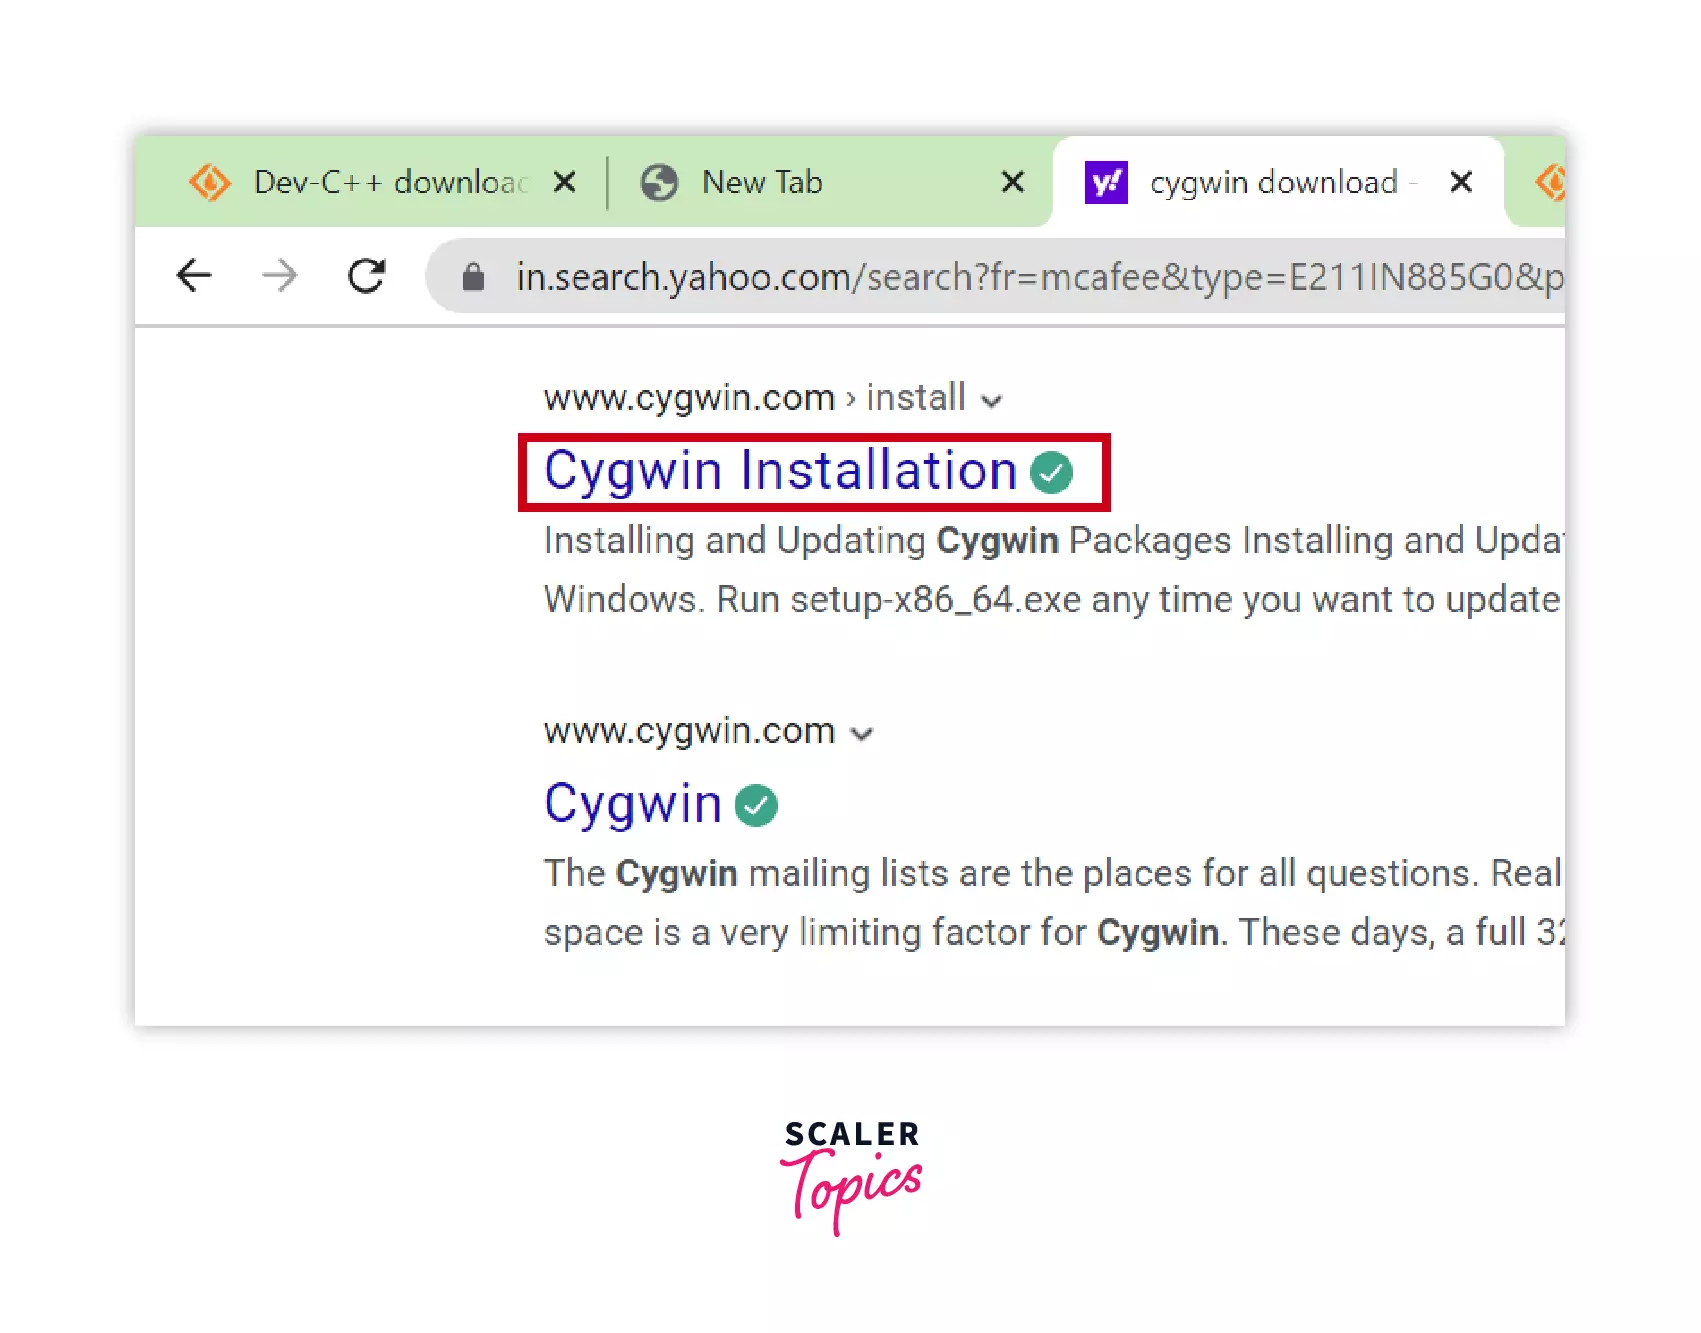
The first step to installing the Cygwin is, to go to any of the browsers and type Cygwin Installation. The below search results will appear on your screen, click on the Cygwin Installation.
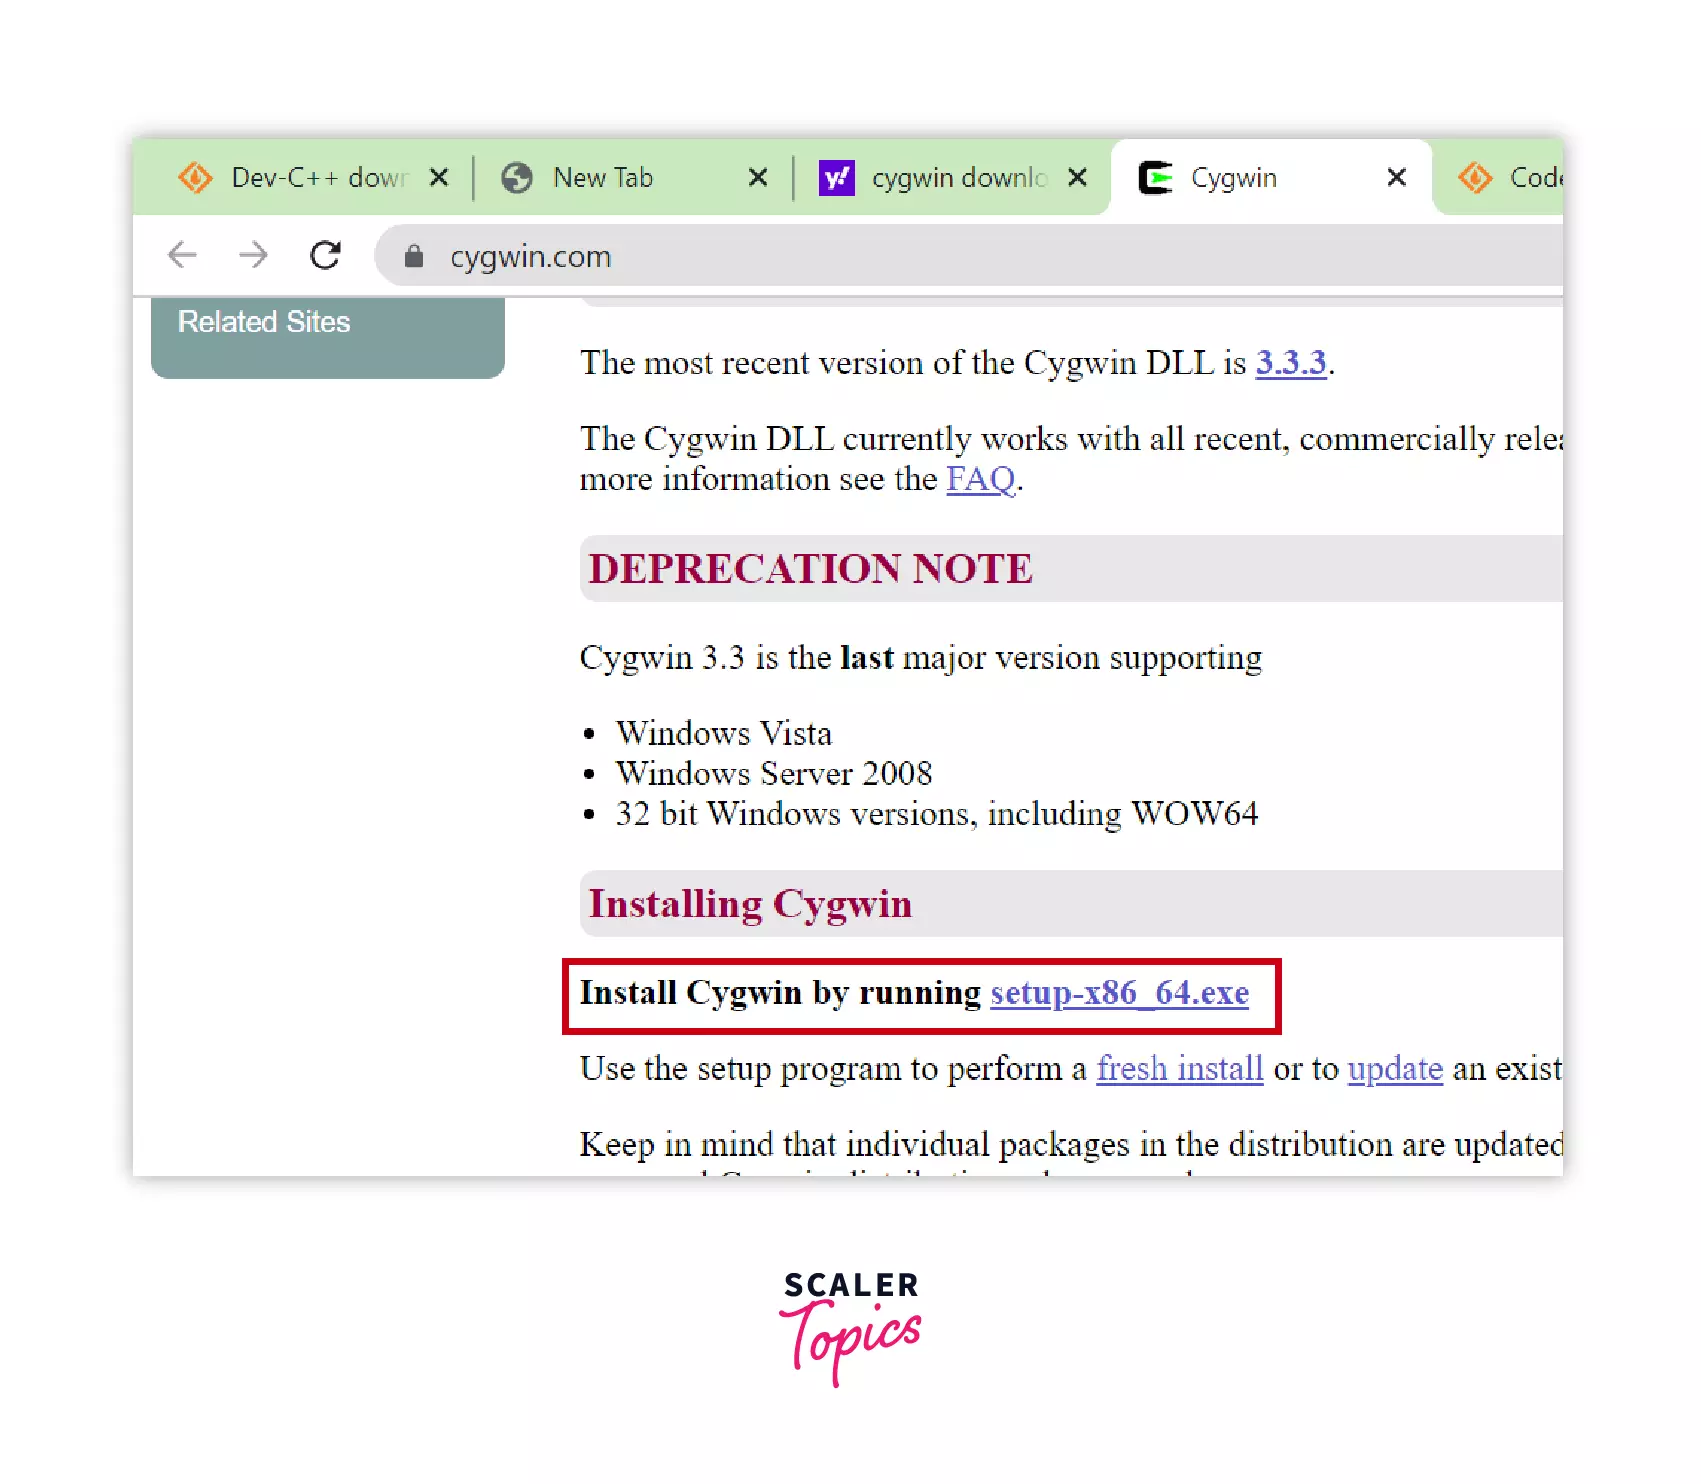
The link will take you to the Cygwin website. Here in the Installing Cygwin section click on the setup link as shown in the screenshot below.
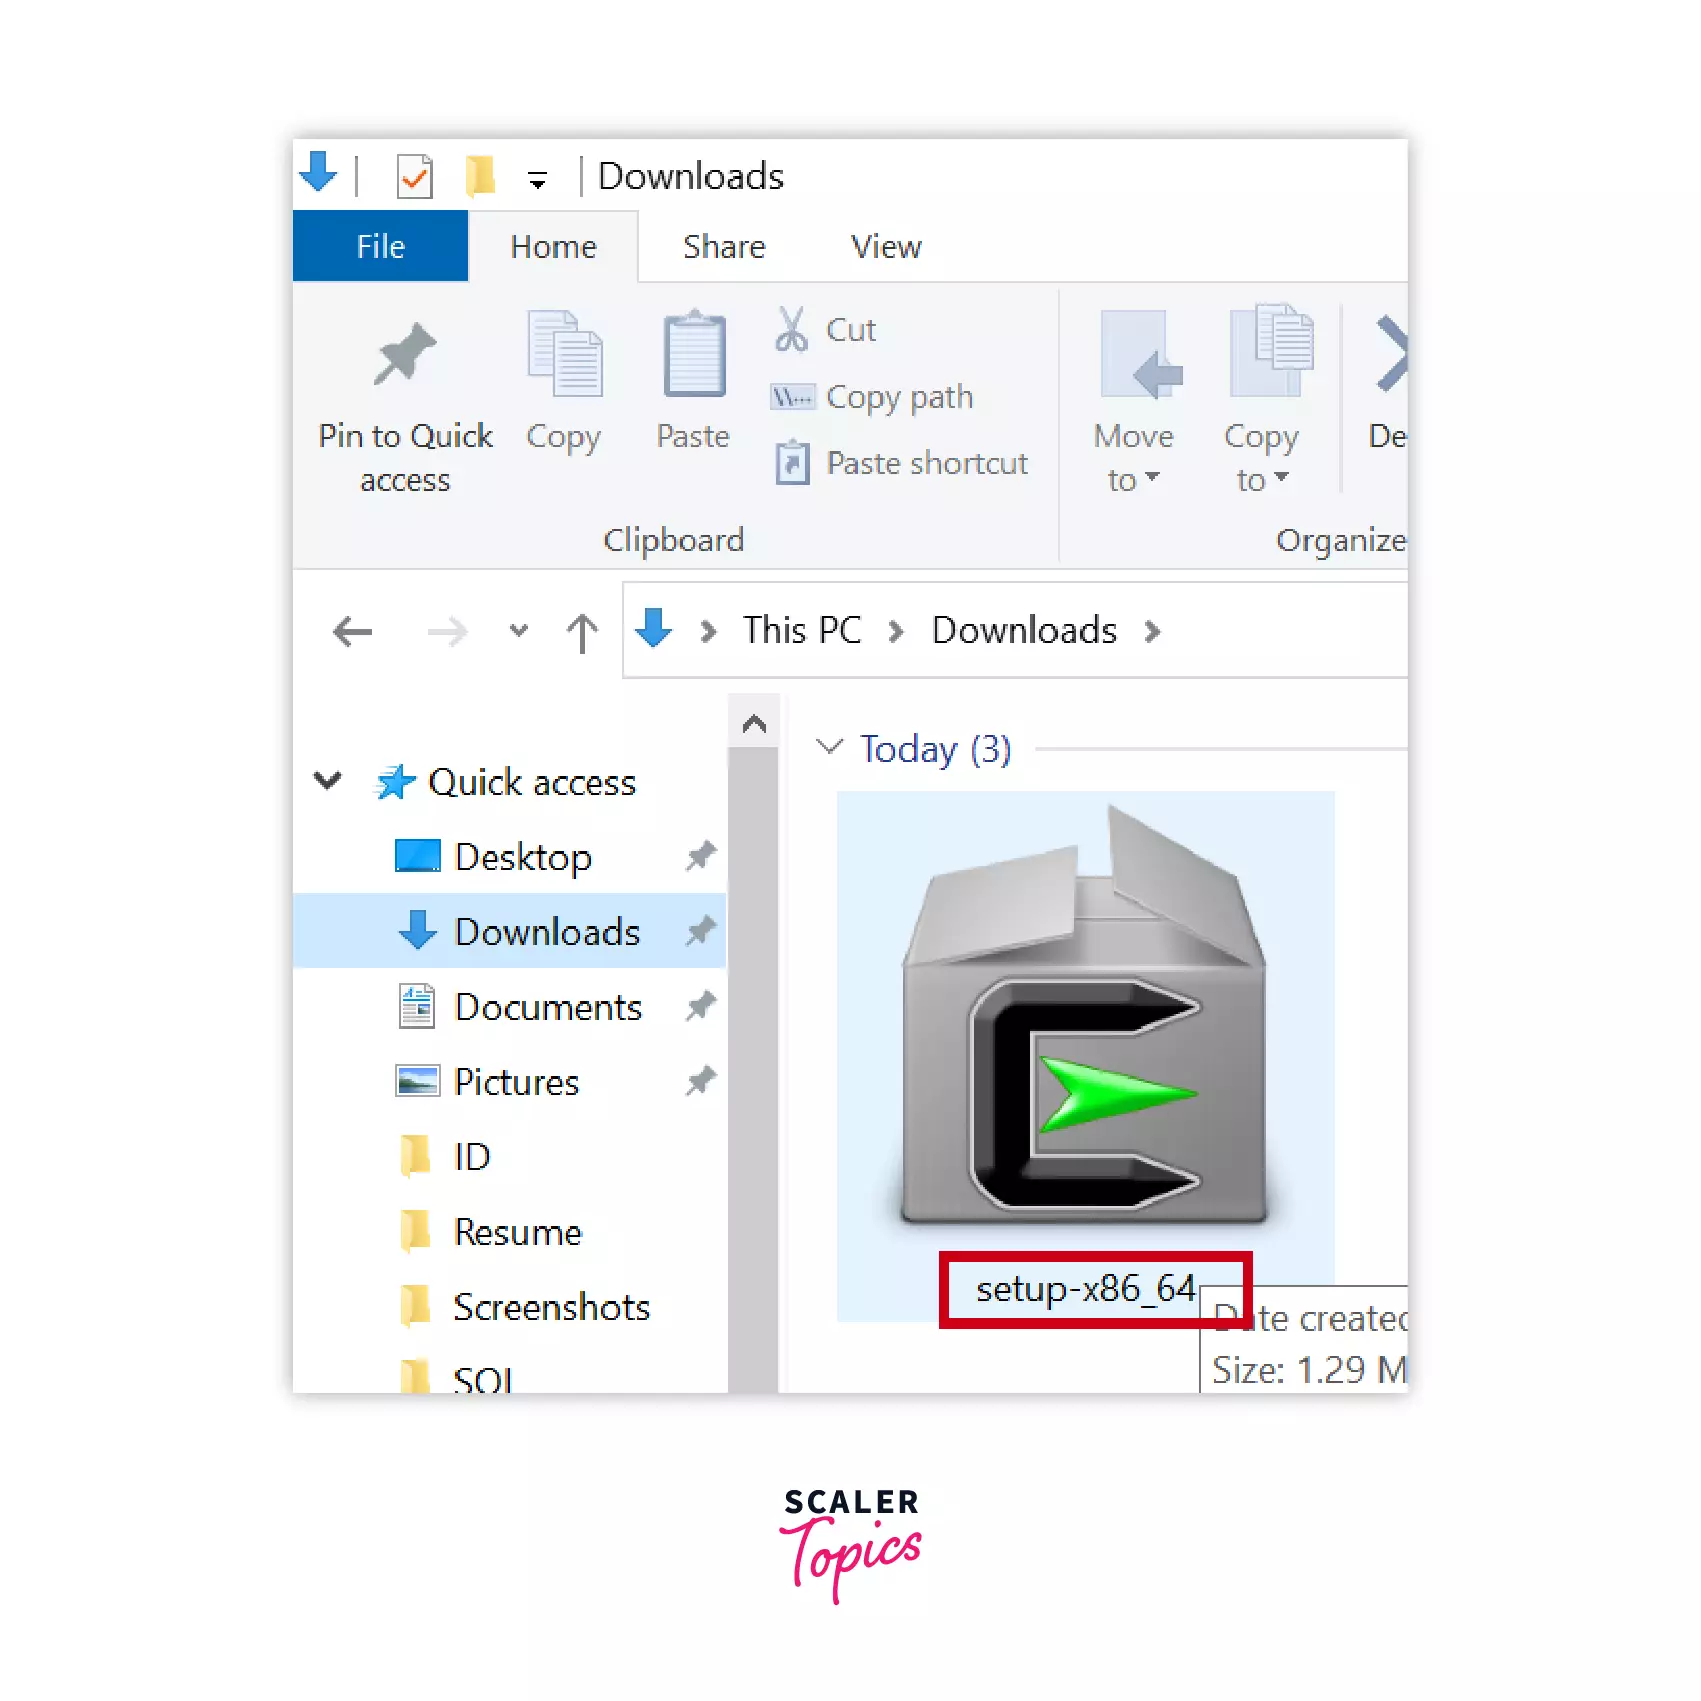
STEP 2: Locating the file on your computer
After clicking the link the download will start and after downloading the installation file will appear in the Downloads folder. Double click on the file.
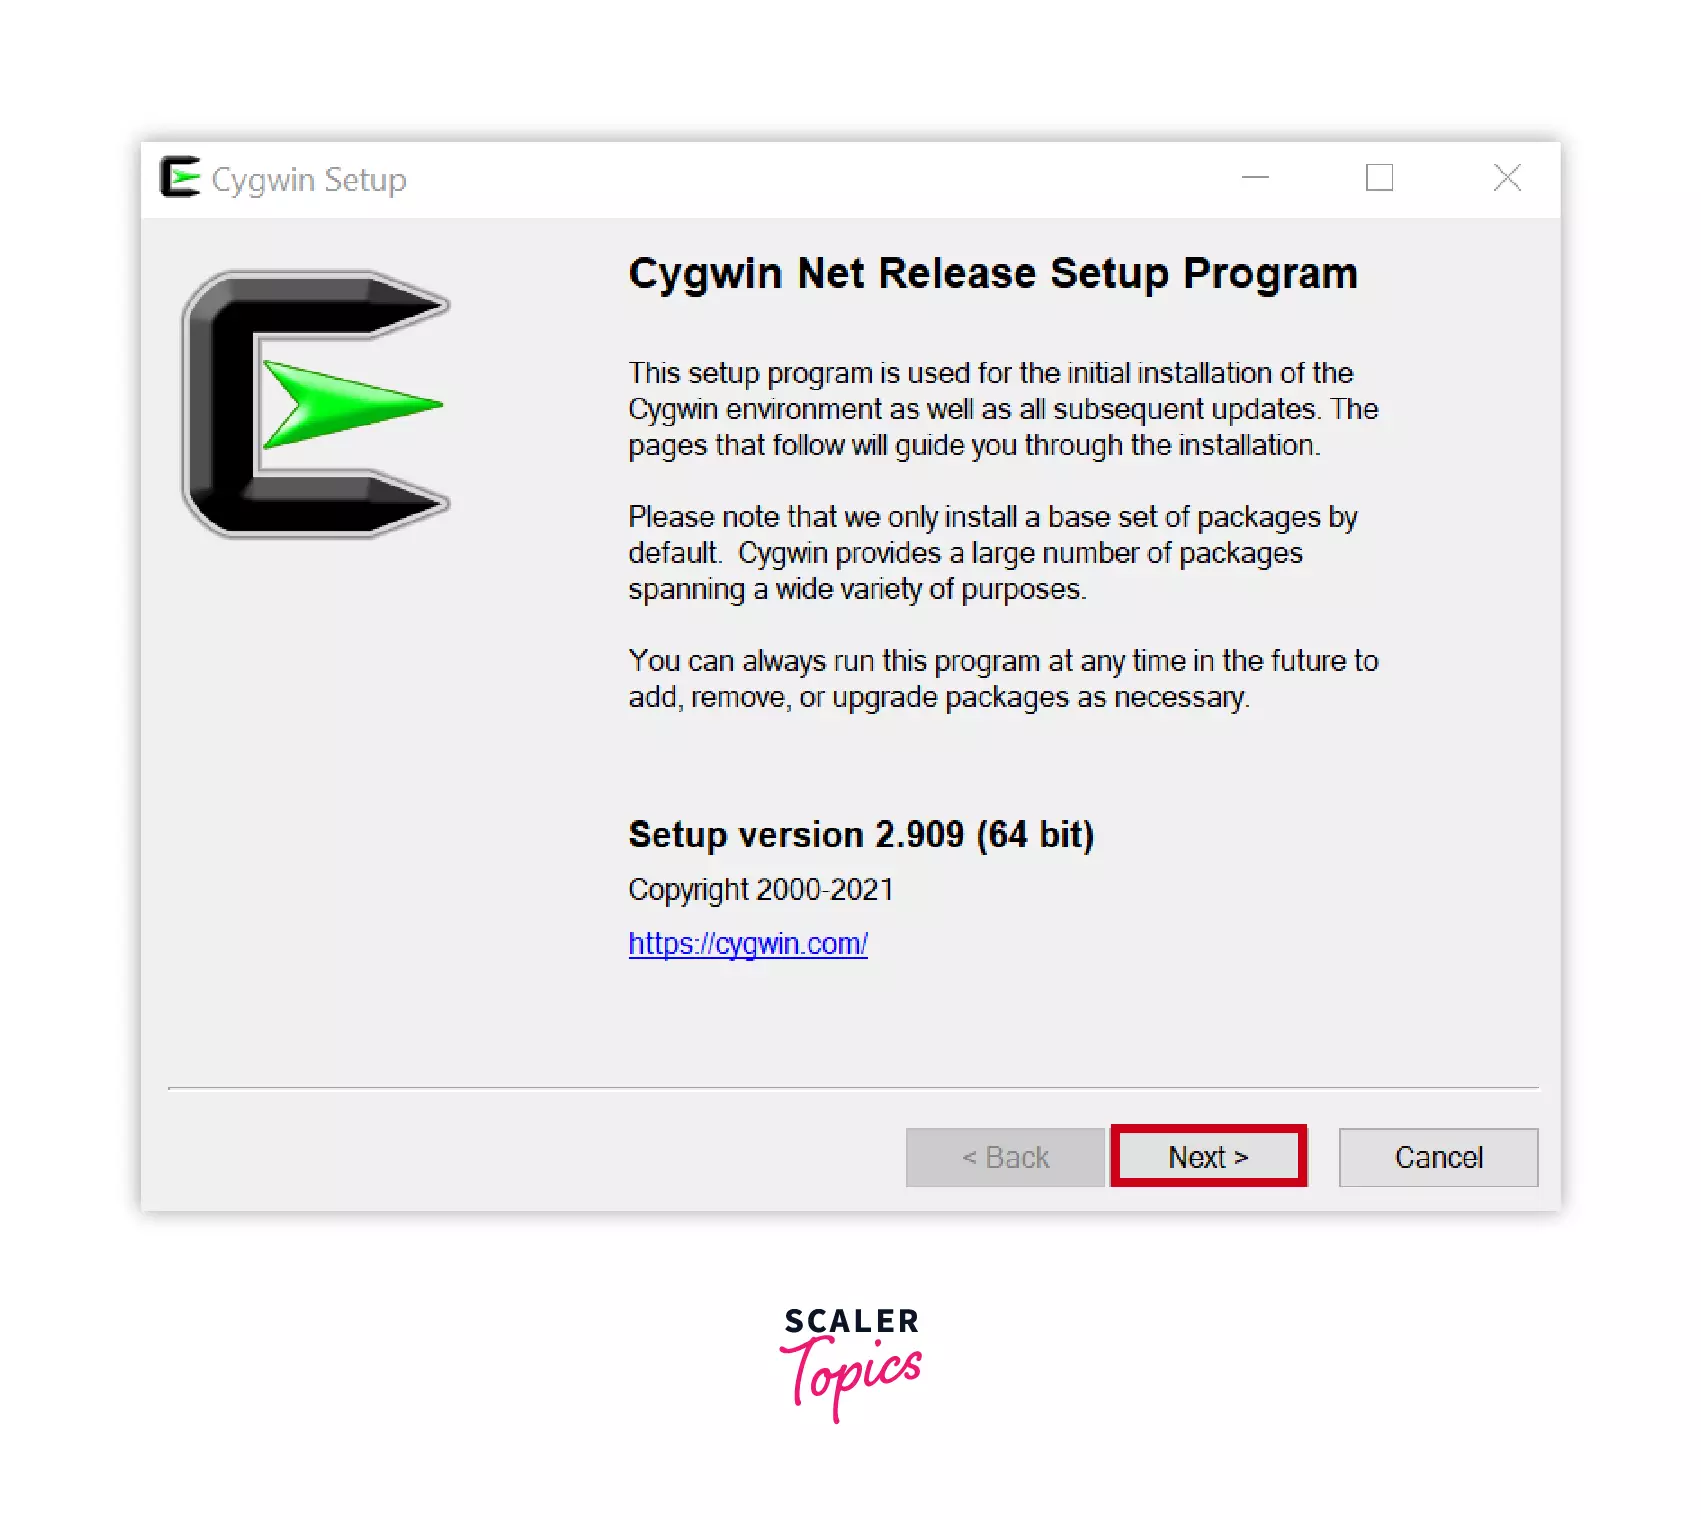
STEP 3: Start the setup for installation
The setup window will open, click on the Next button.
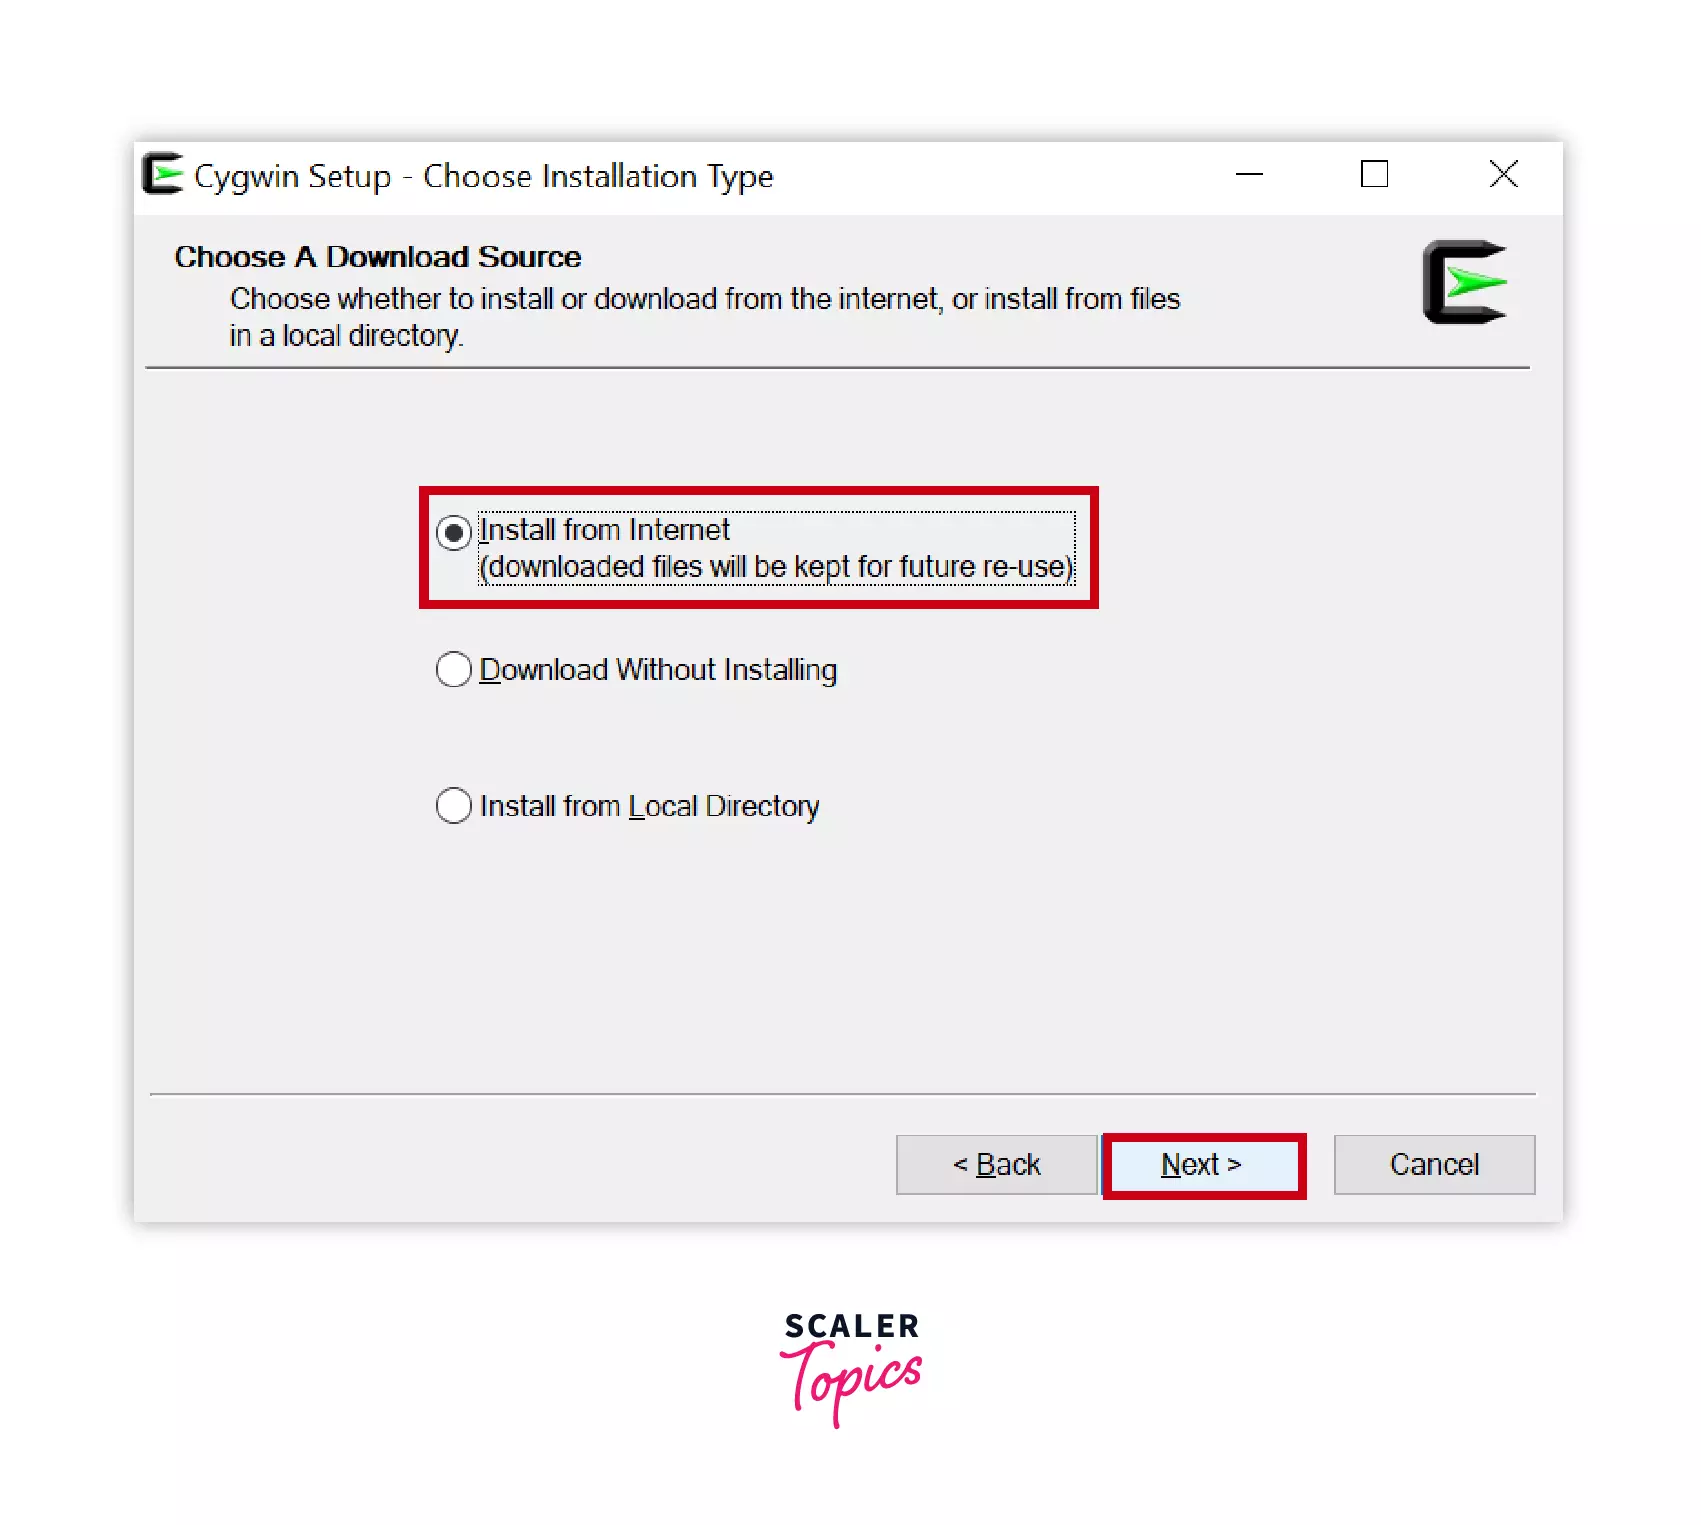
Check on the Install from the Internet and click on the Next button to continue.
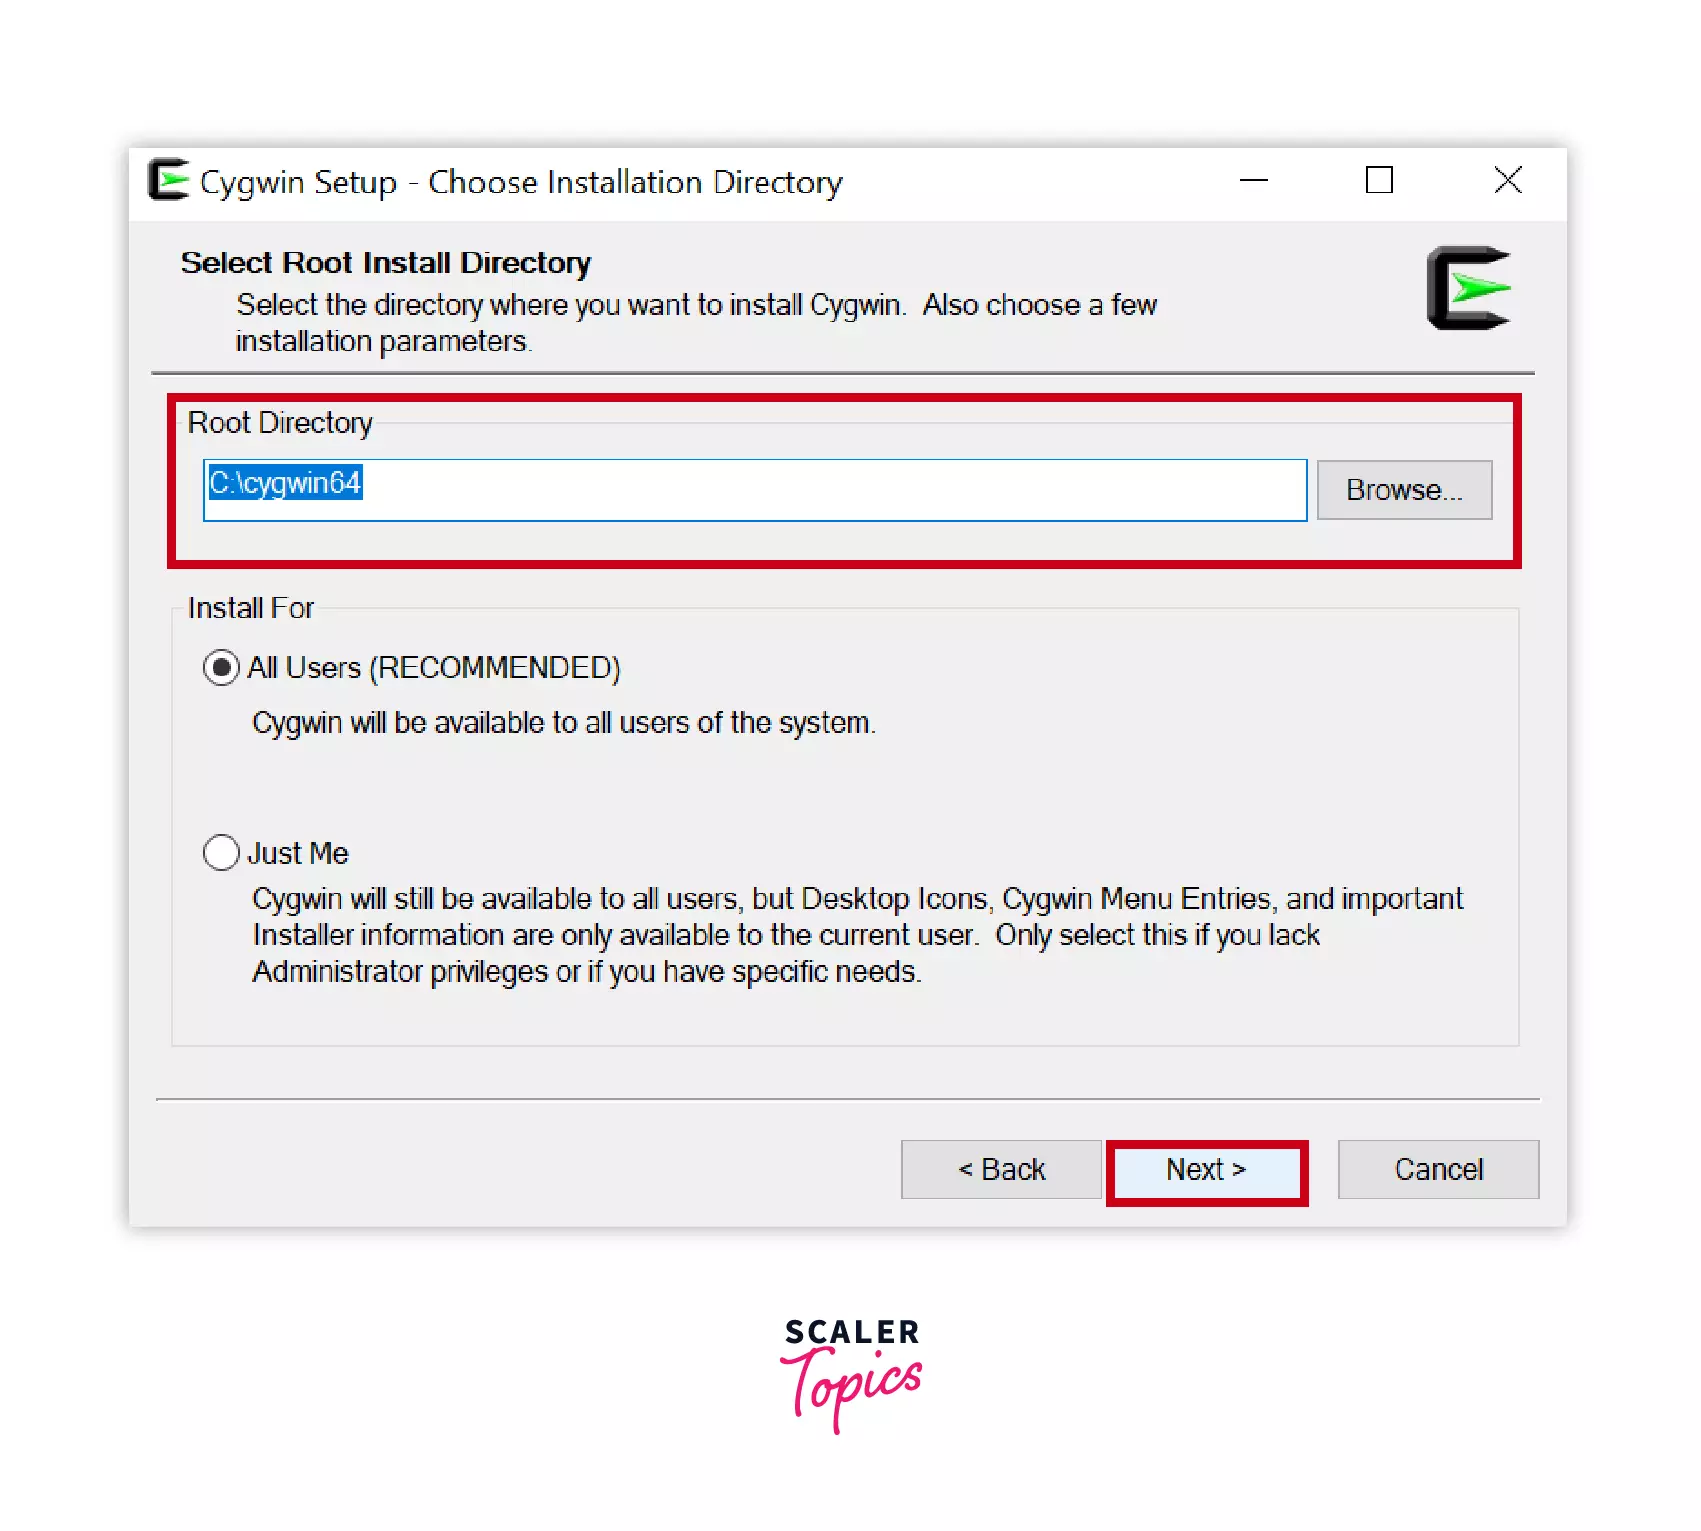
STEP 4: Select root install directory
Now select the root directory or automatically it takes the C drive as the installation directory and makes sure to do the check on All Users, as it will be available to all users of the system. Click on the Next button.
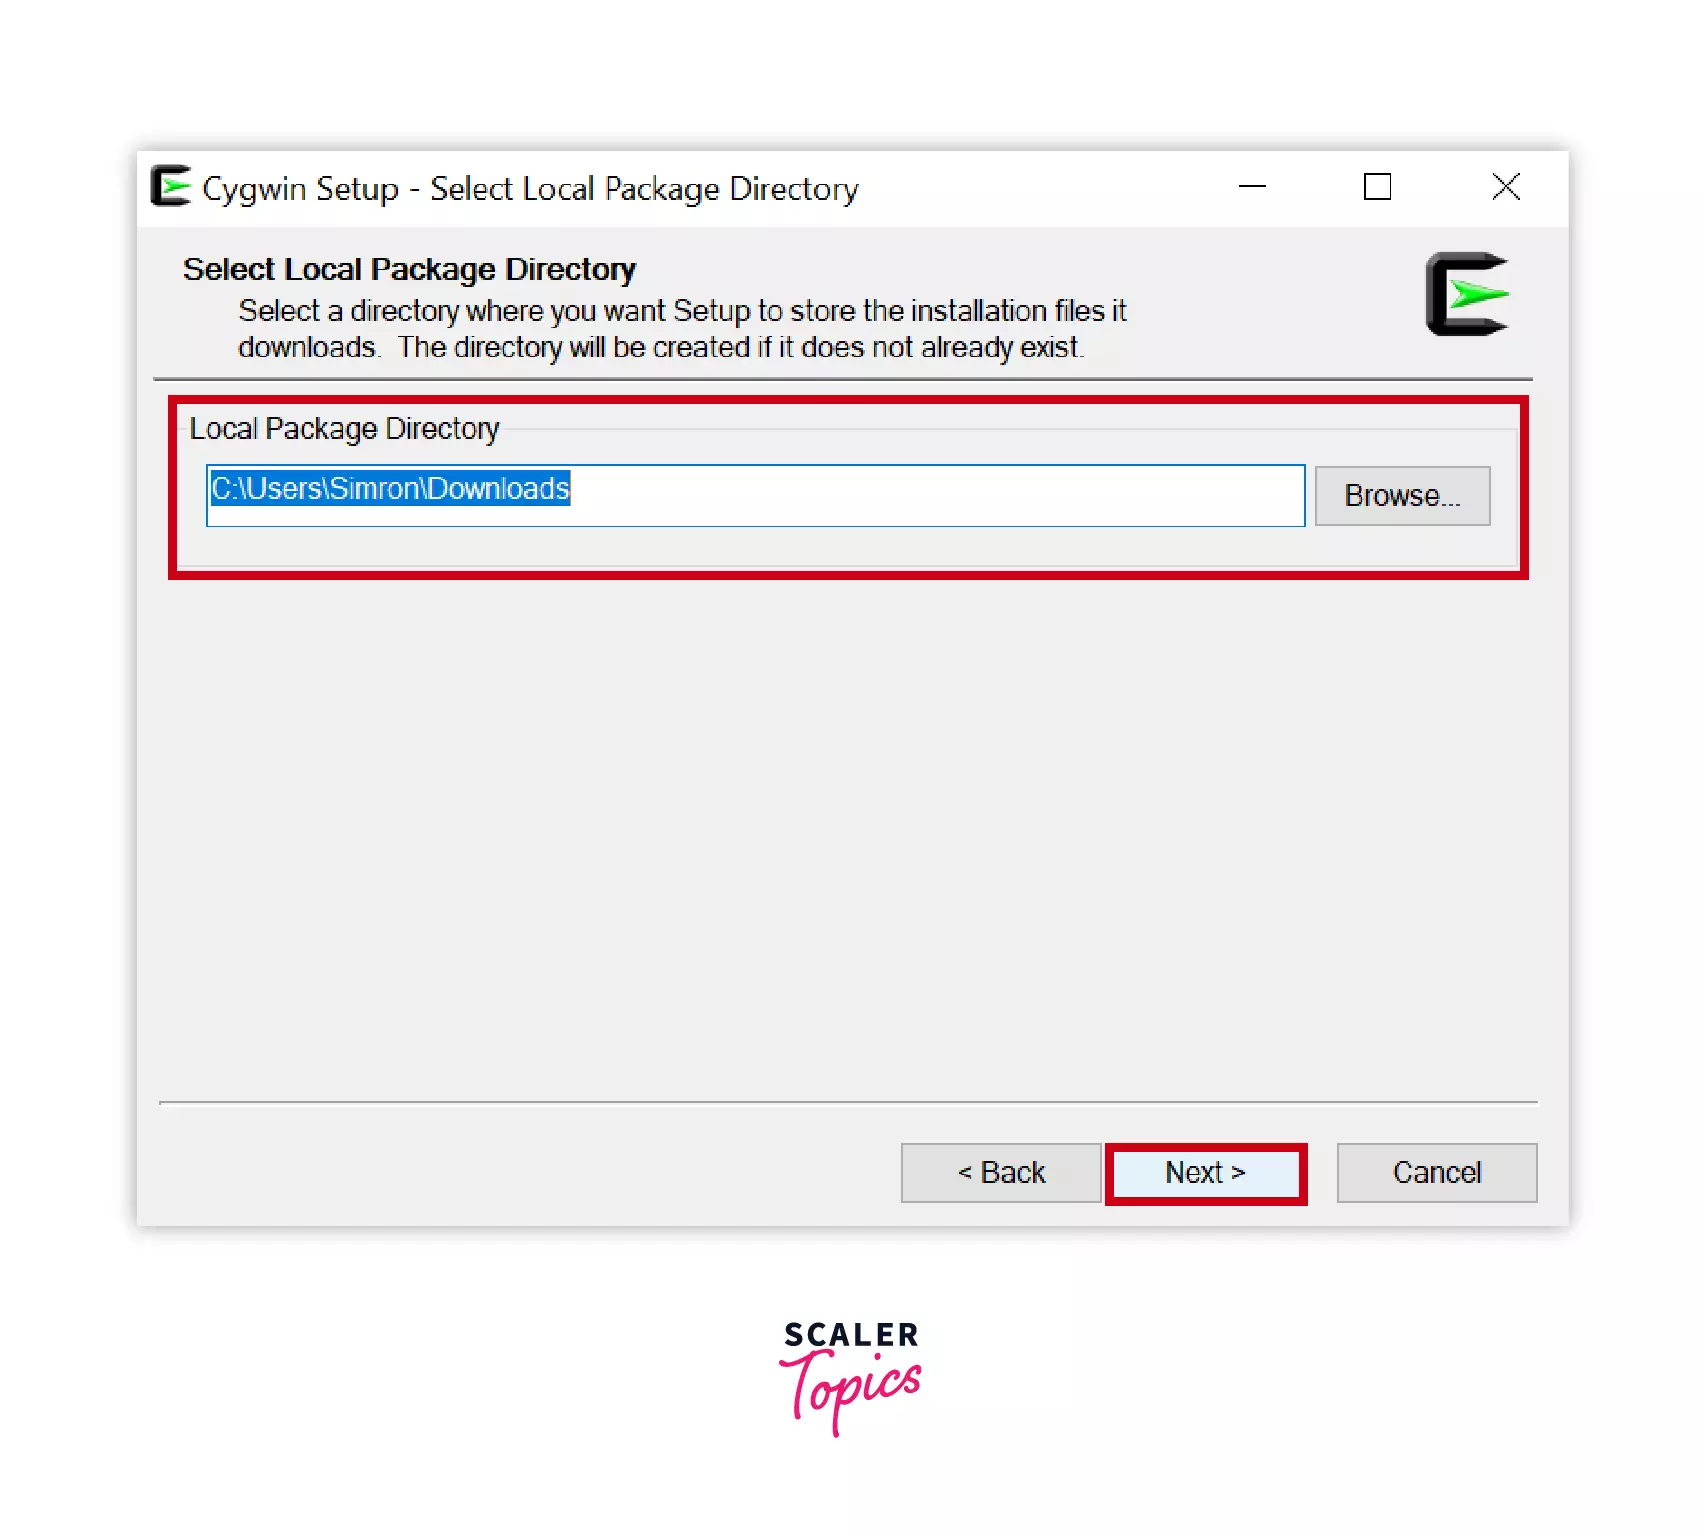
STEP 5: Select local package directory
Copy the path of the directory where you downloaded the setup file of Cygwin from the internet and paste it into the textbox as shown in the screenshot. or It automatically takes the path of your Downloads folder.
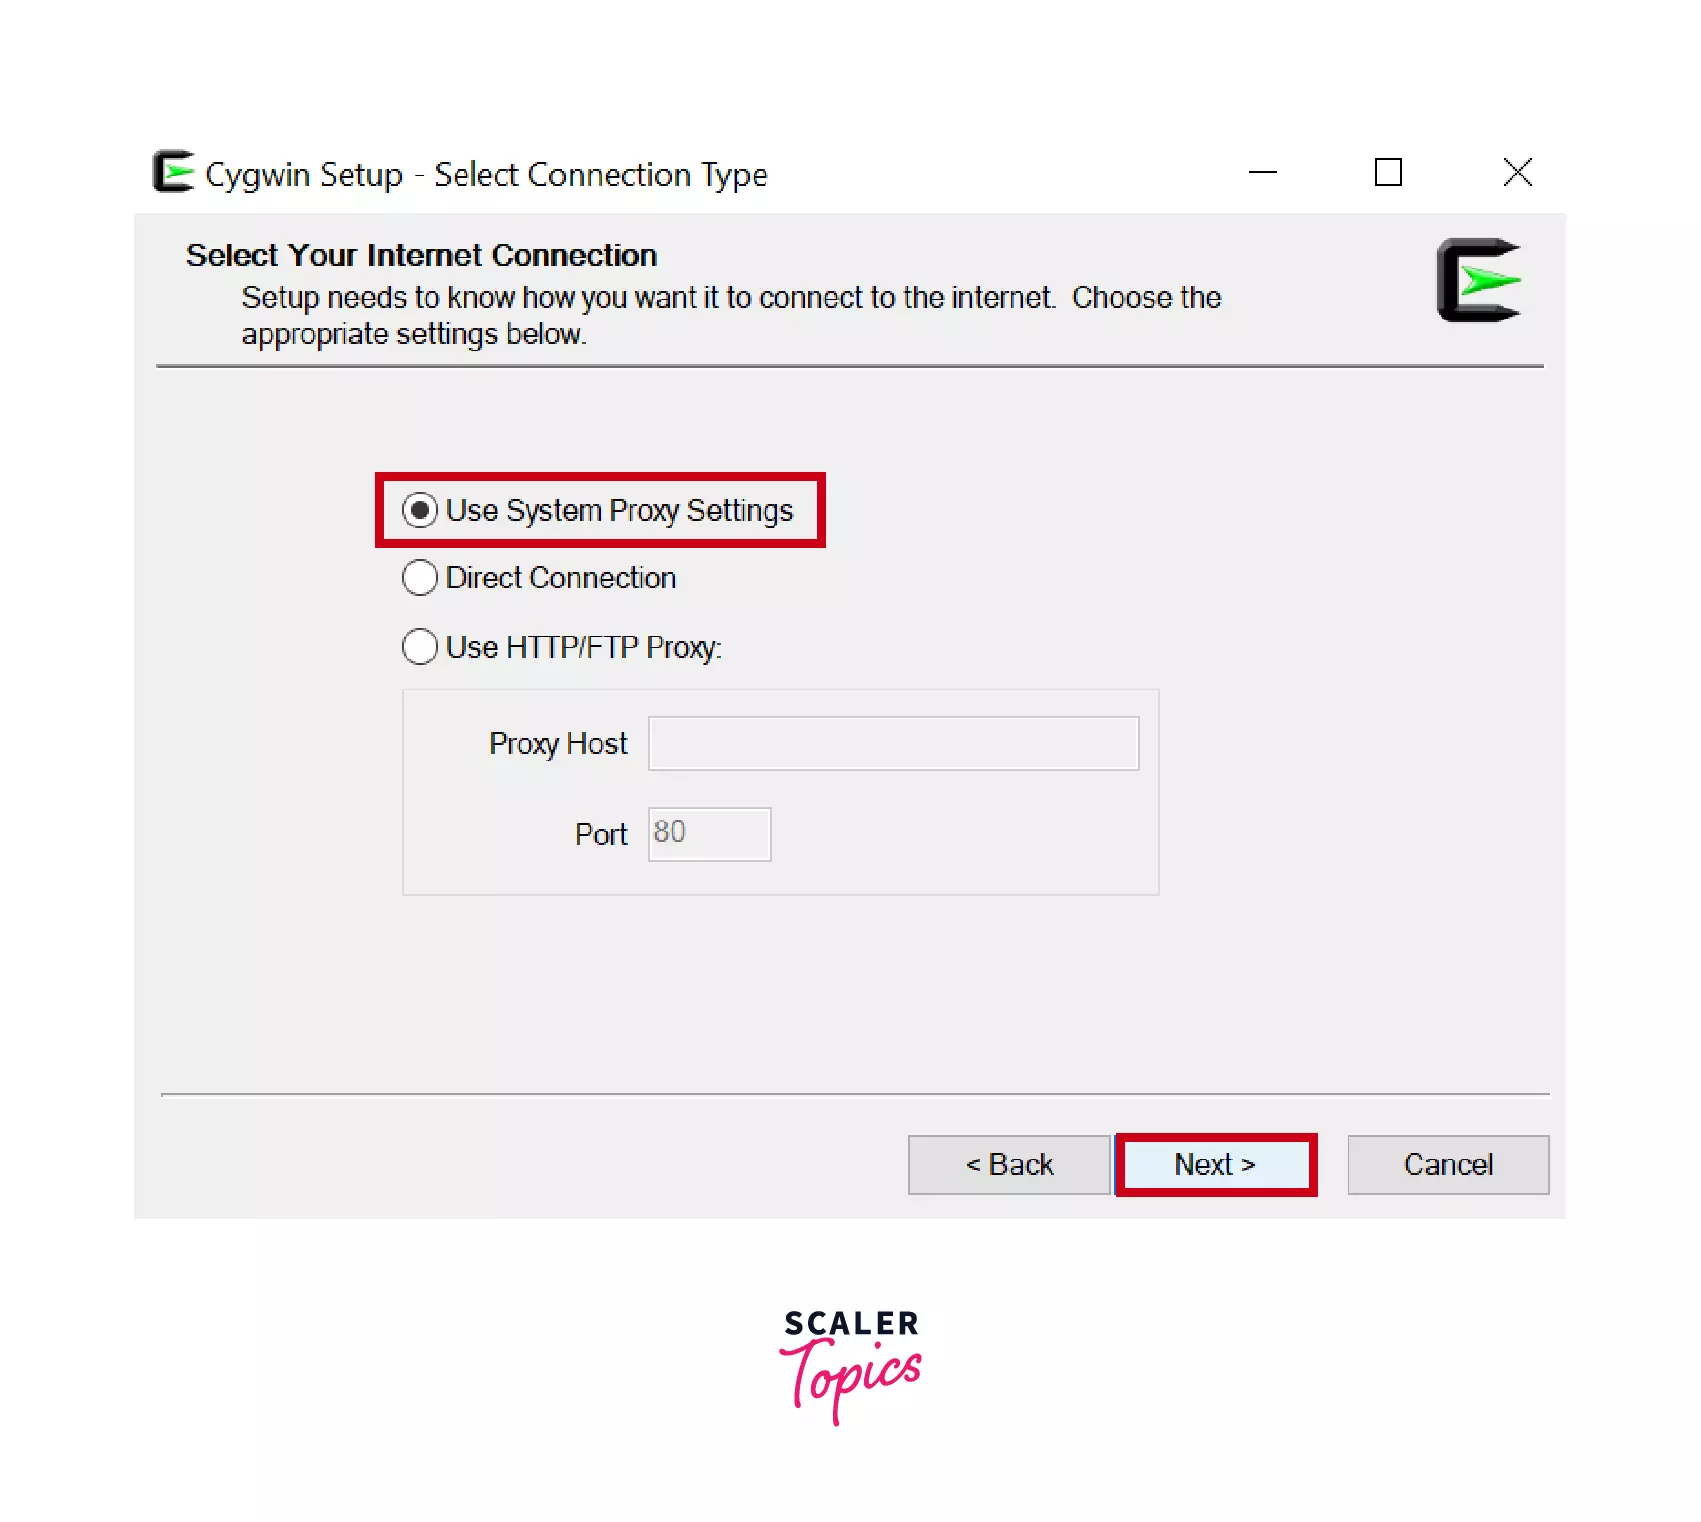
STEP 6: Select your Internet connection
As we choose the Install from internet option in Step 5, now the setup needs to know how do you want to connect to the internet. So, check on the first option i.e Use System Proxy Settings because a proxy server is an intermediary between your Windows 10 computer and the internet. This server makes requests to websites and servers on the internet for you. Click on Next to proceed.
STEP 7: Choose a download site
Now choose a website from the below-mentioned available download sites and click on Next to proceed.
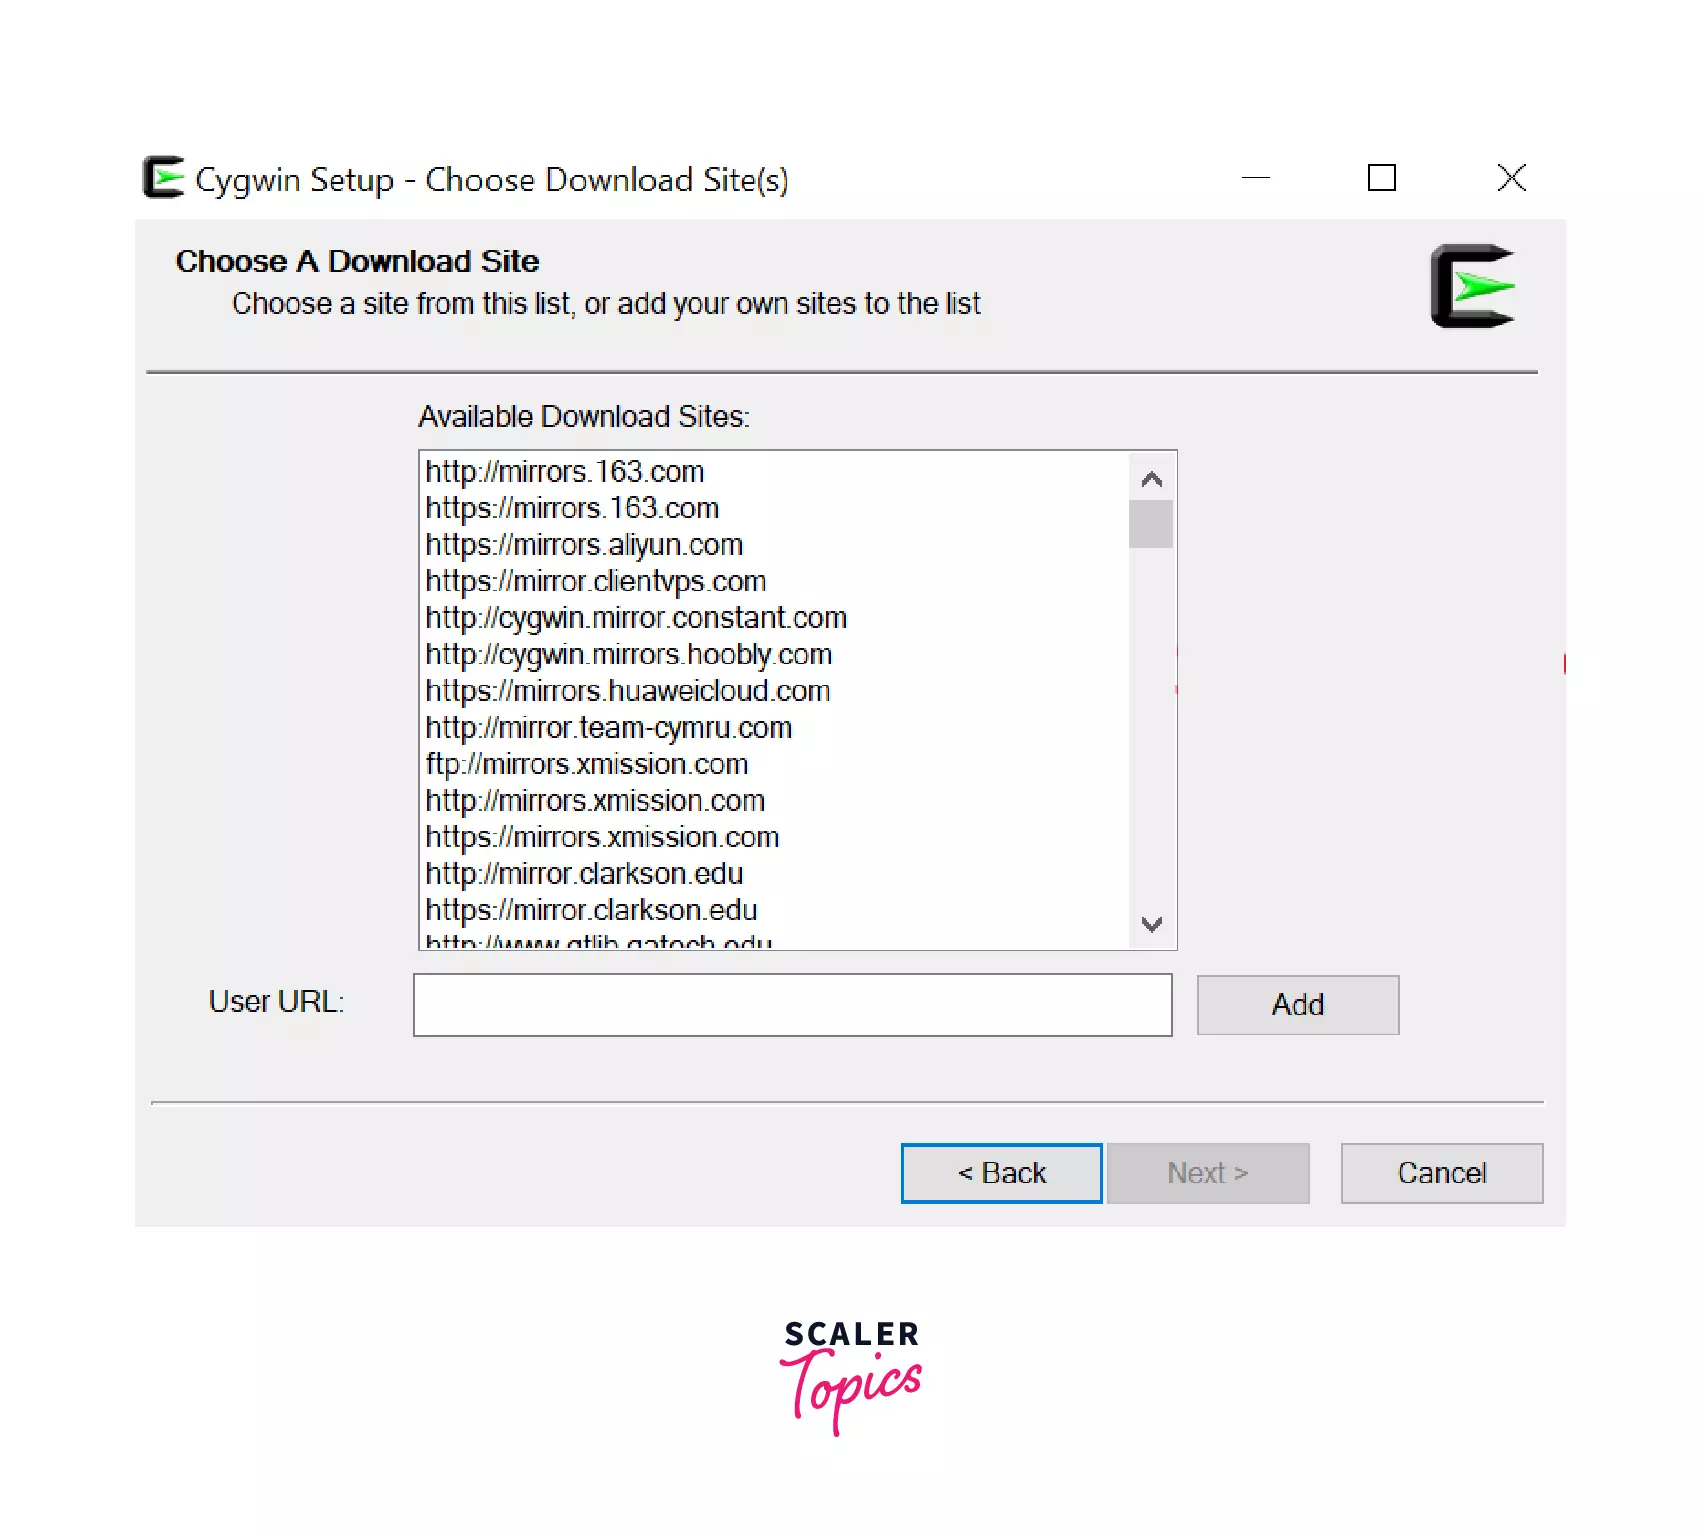
Now, the file will start to download, wait until the download finishes, and click on Next to proceed.
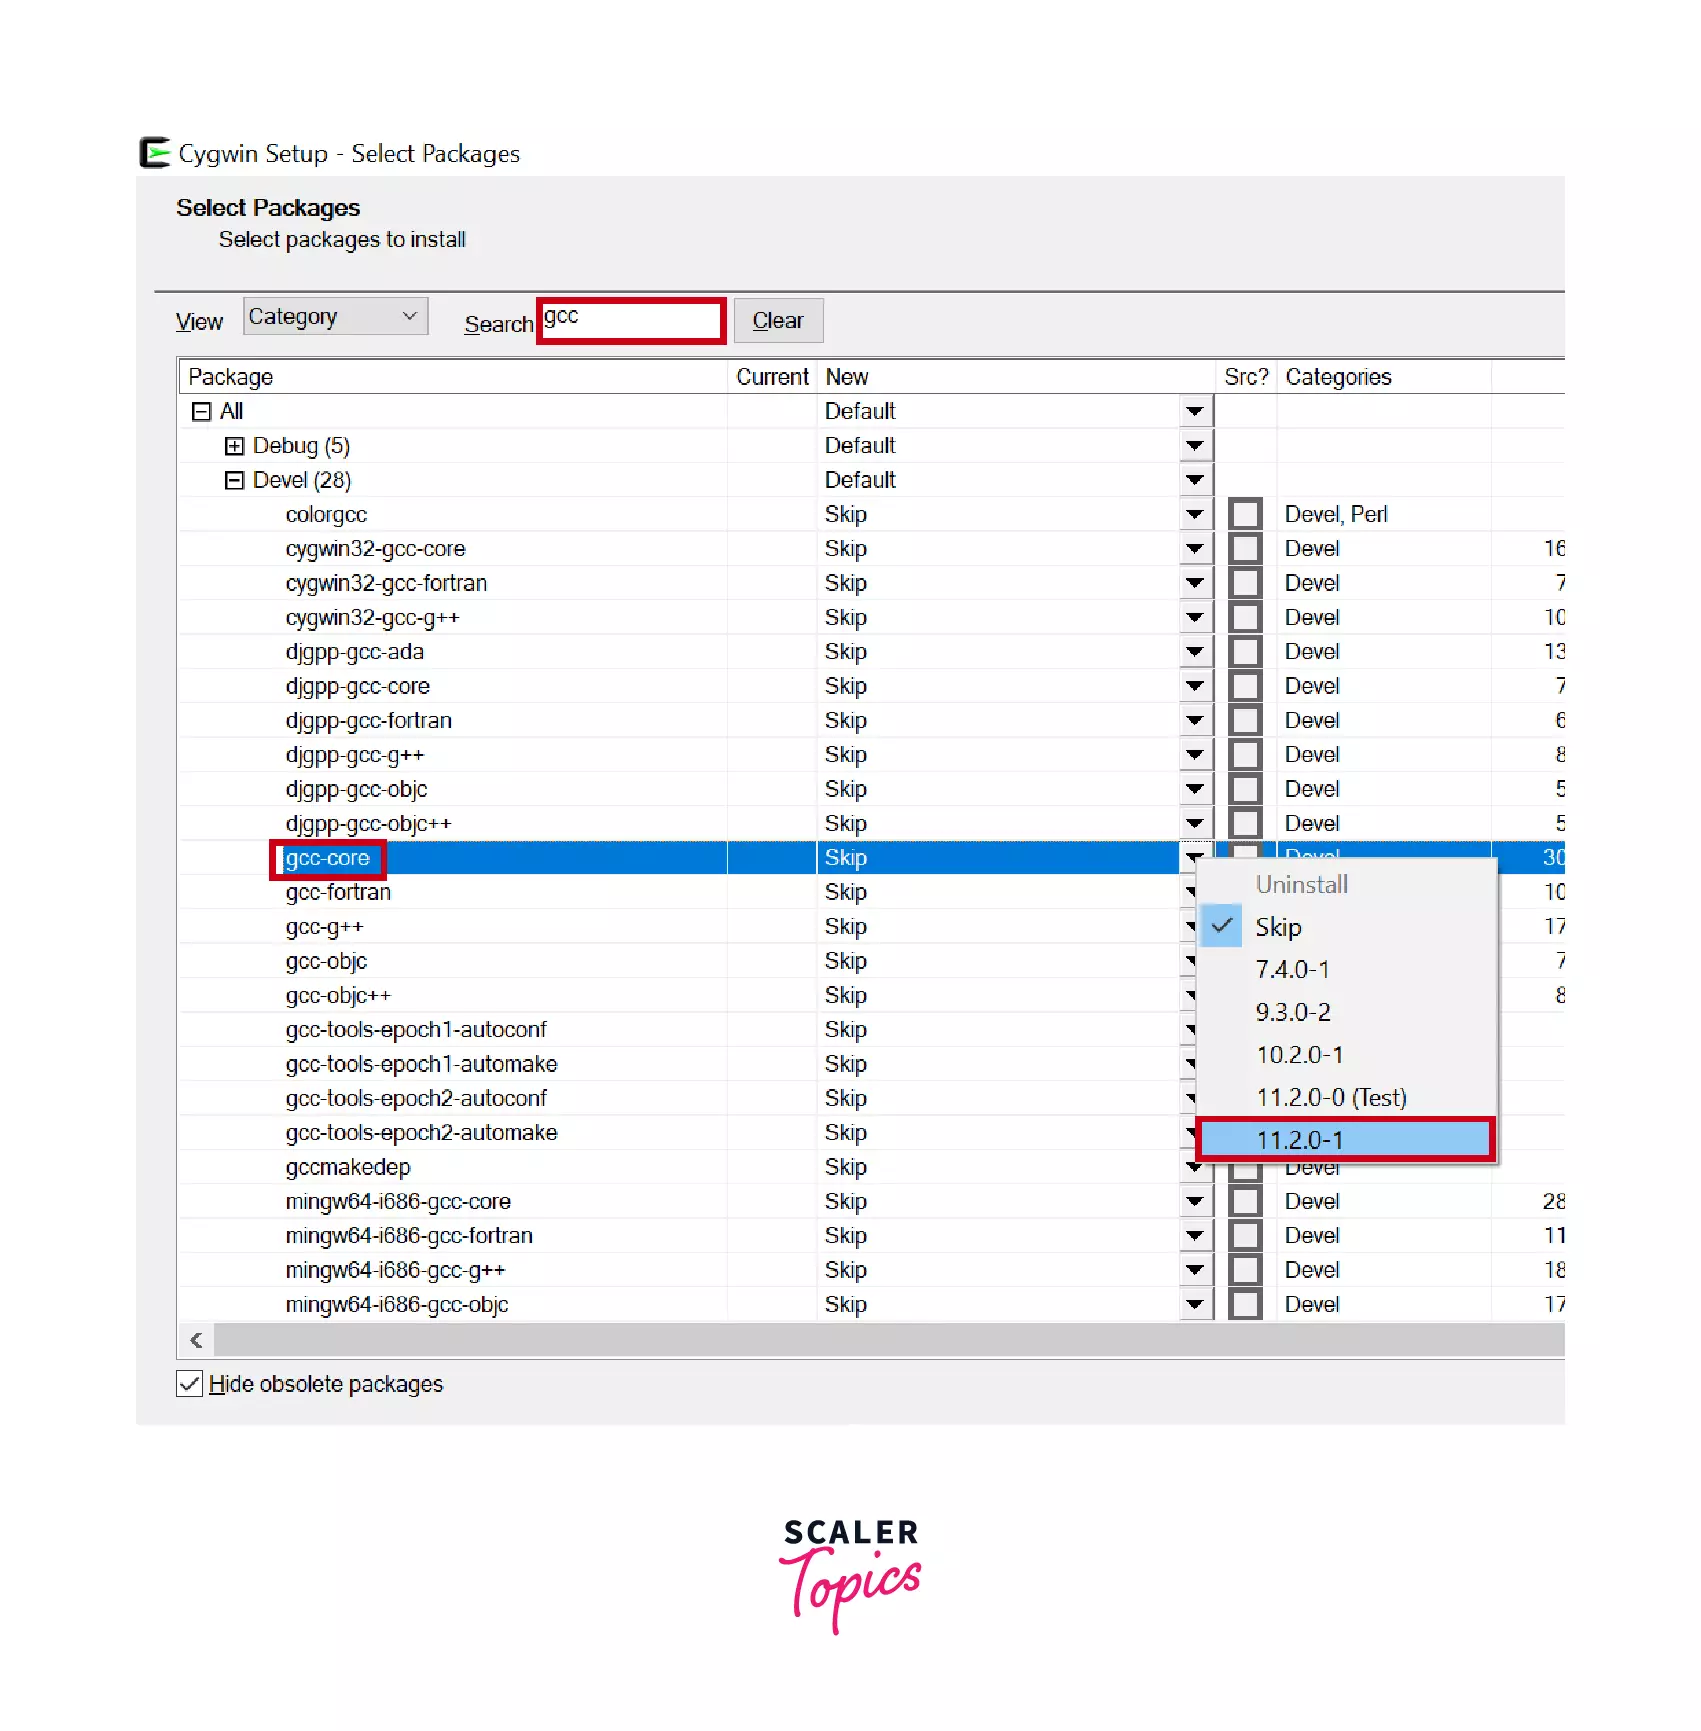
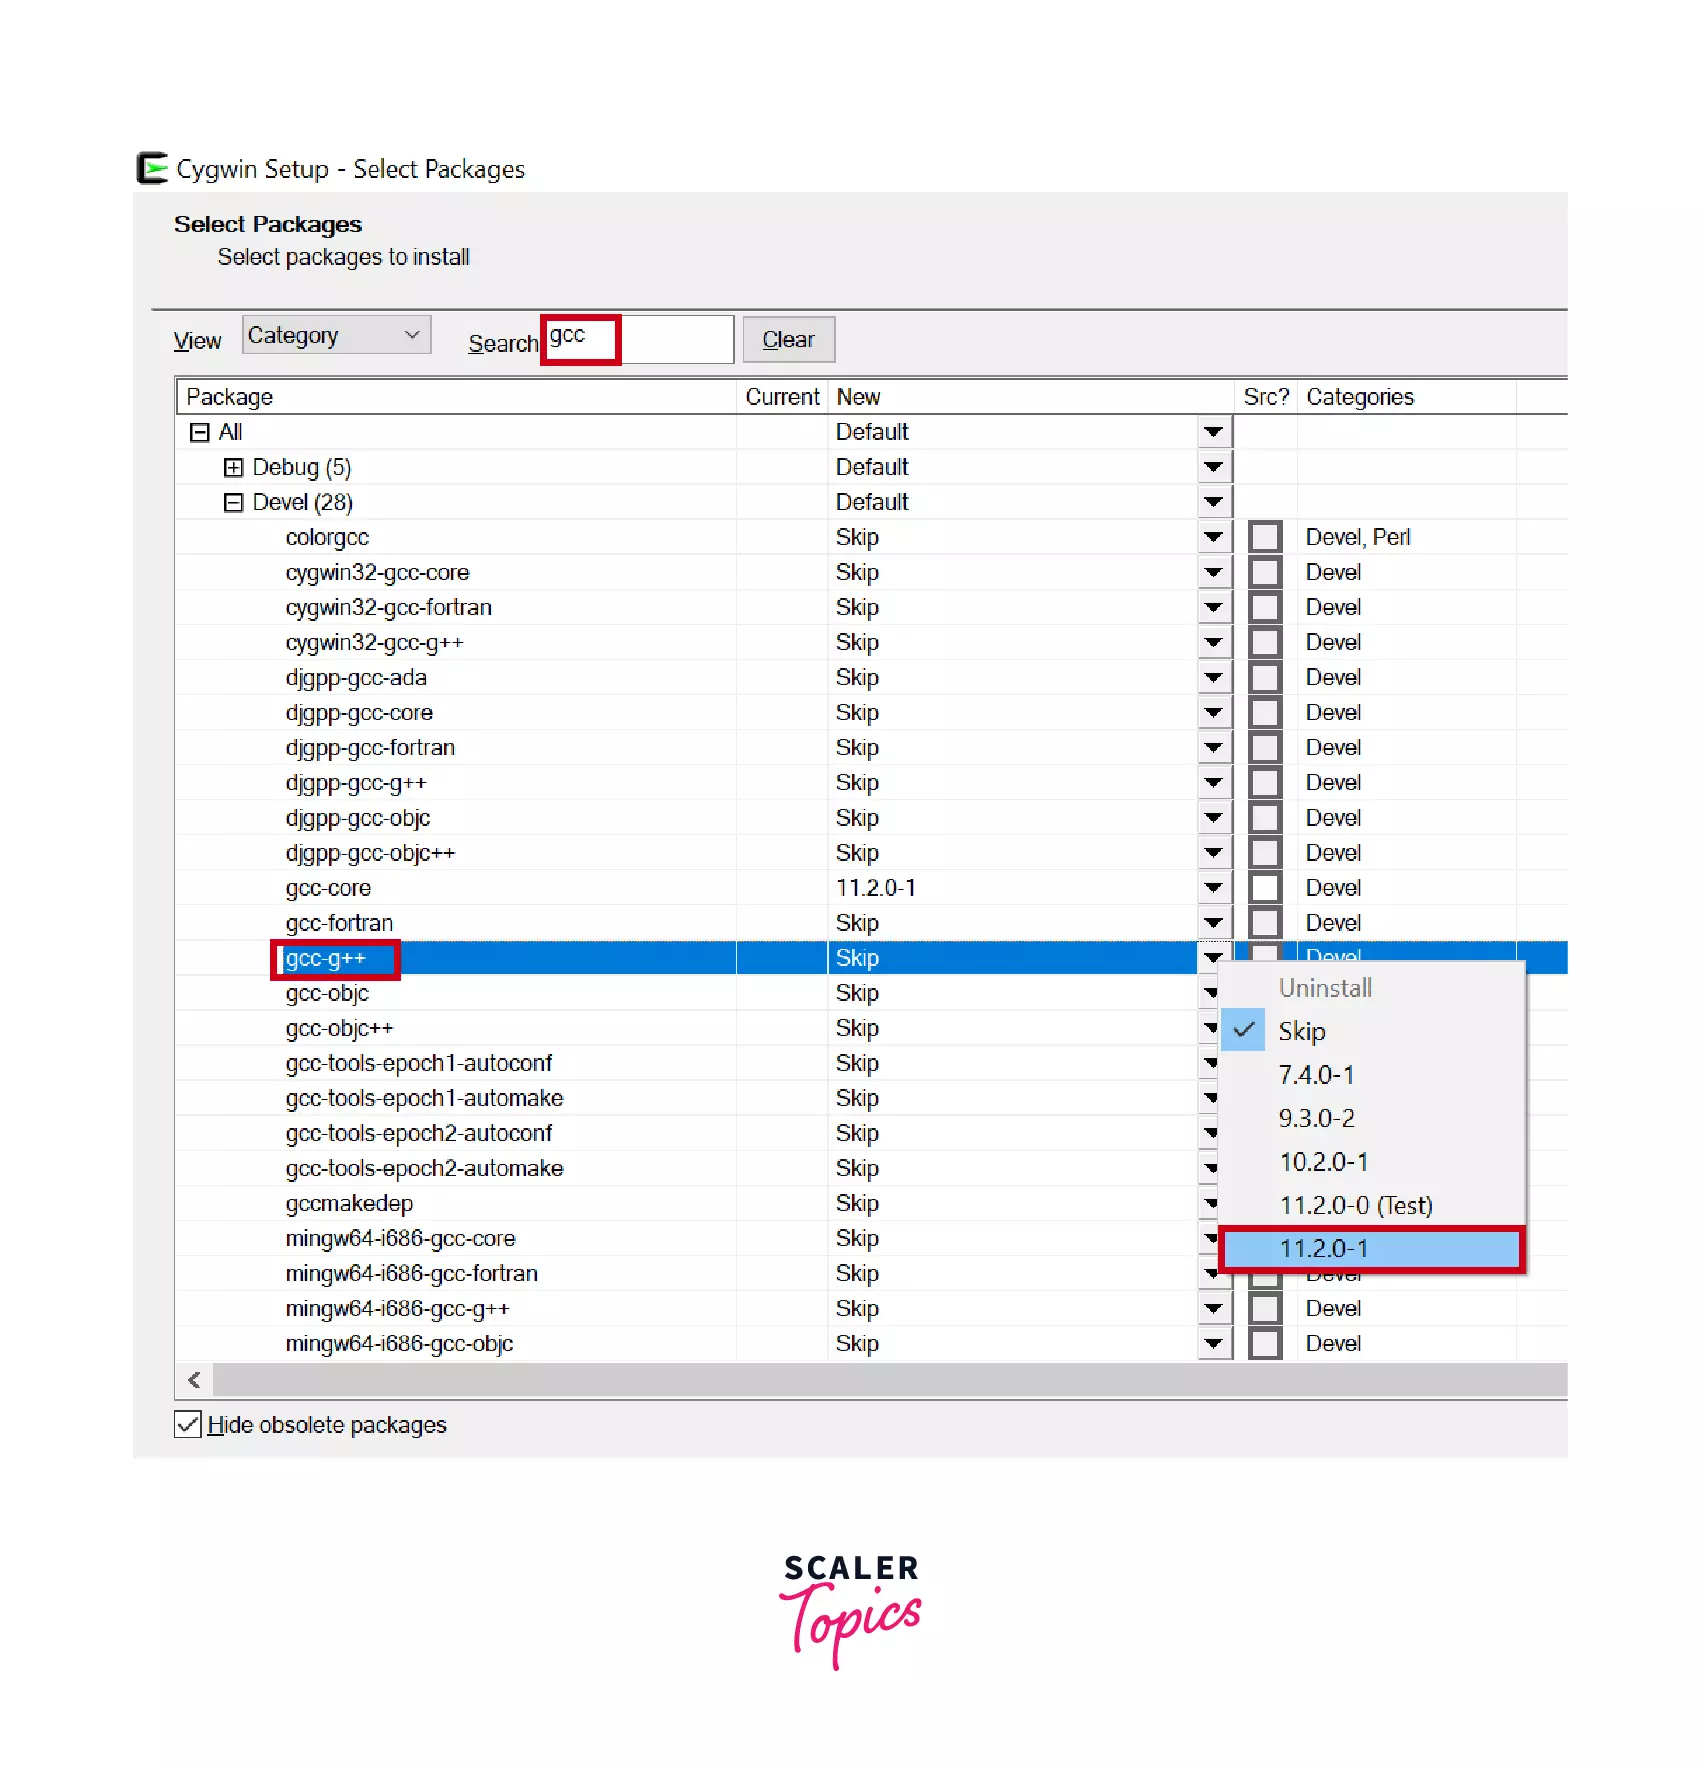
STEP 8: Select the packages to download
Now we have to manually select the packages to install for C Programming. Please follow these steps correctly. There are 4 packages to be downloaded for the compiler. GCC core
First type GCC in the search box and select GCC core from the list with the latest version as shown in the screenshot.
gcc g++ package
Second type GCC in the search box and select gcc g++ from the list with the latest version as shown in the screenshot.
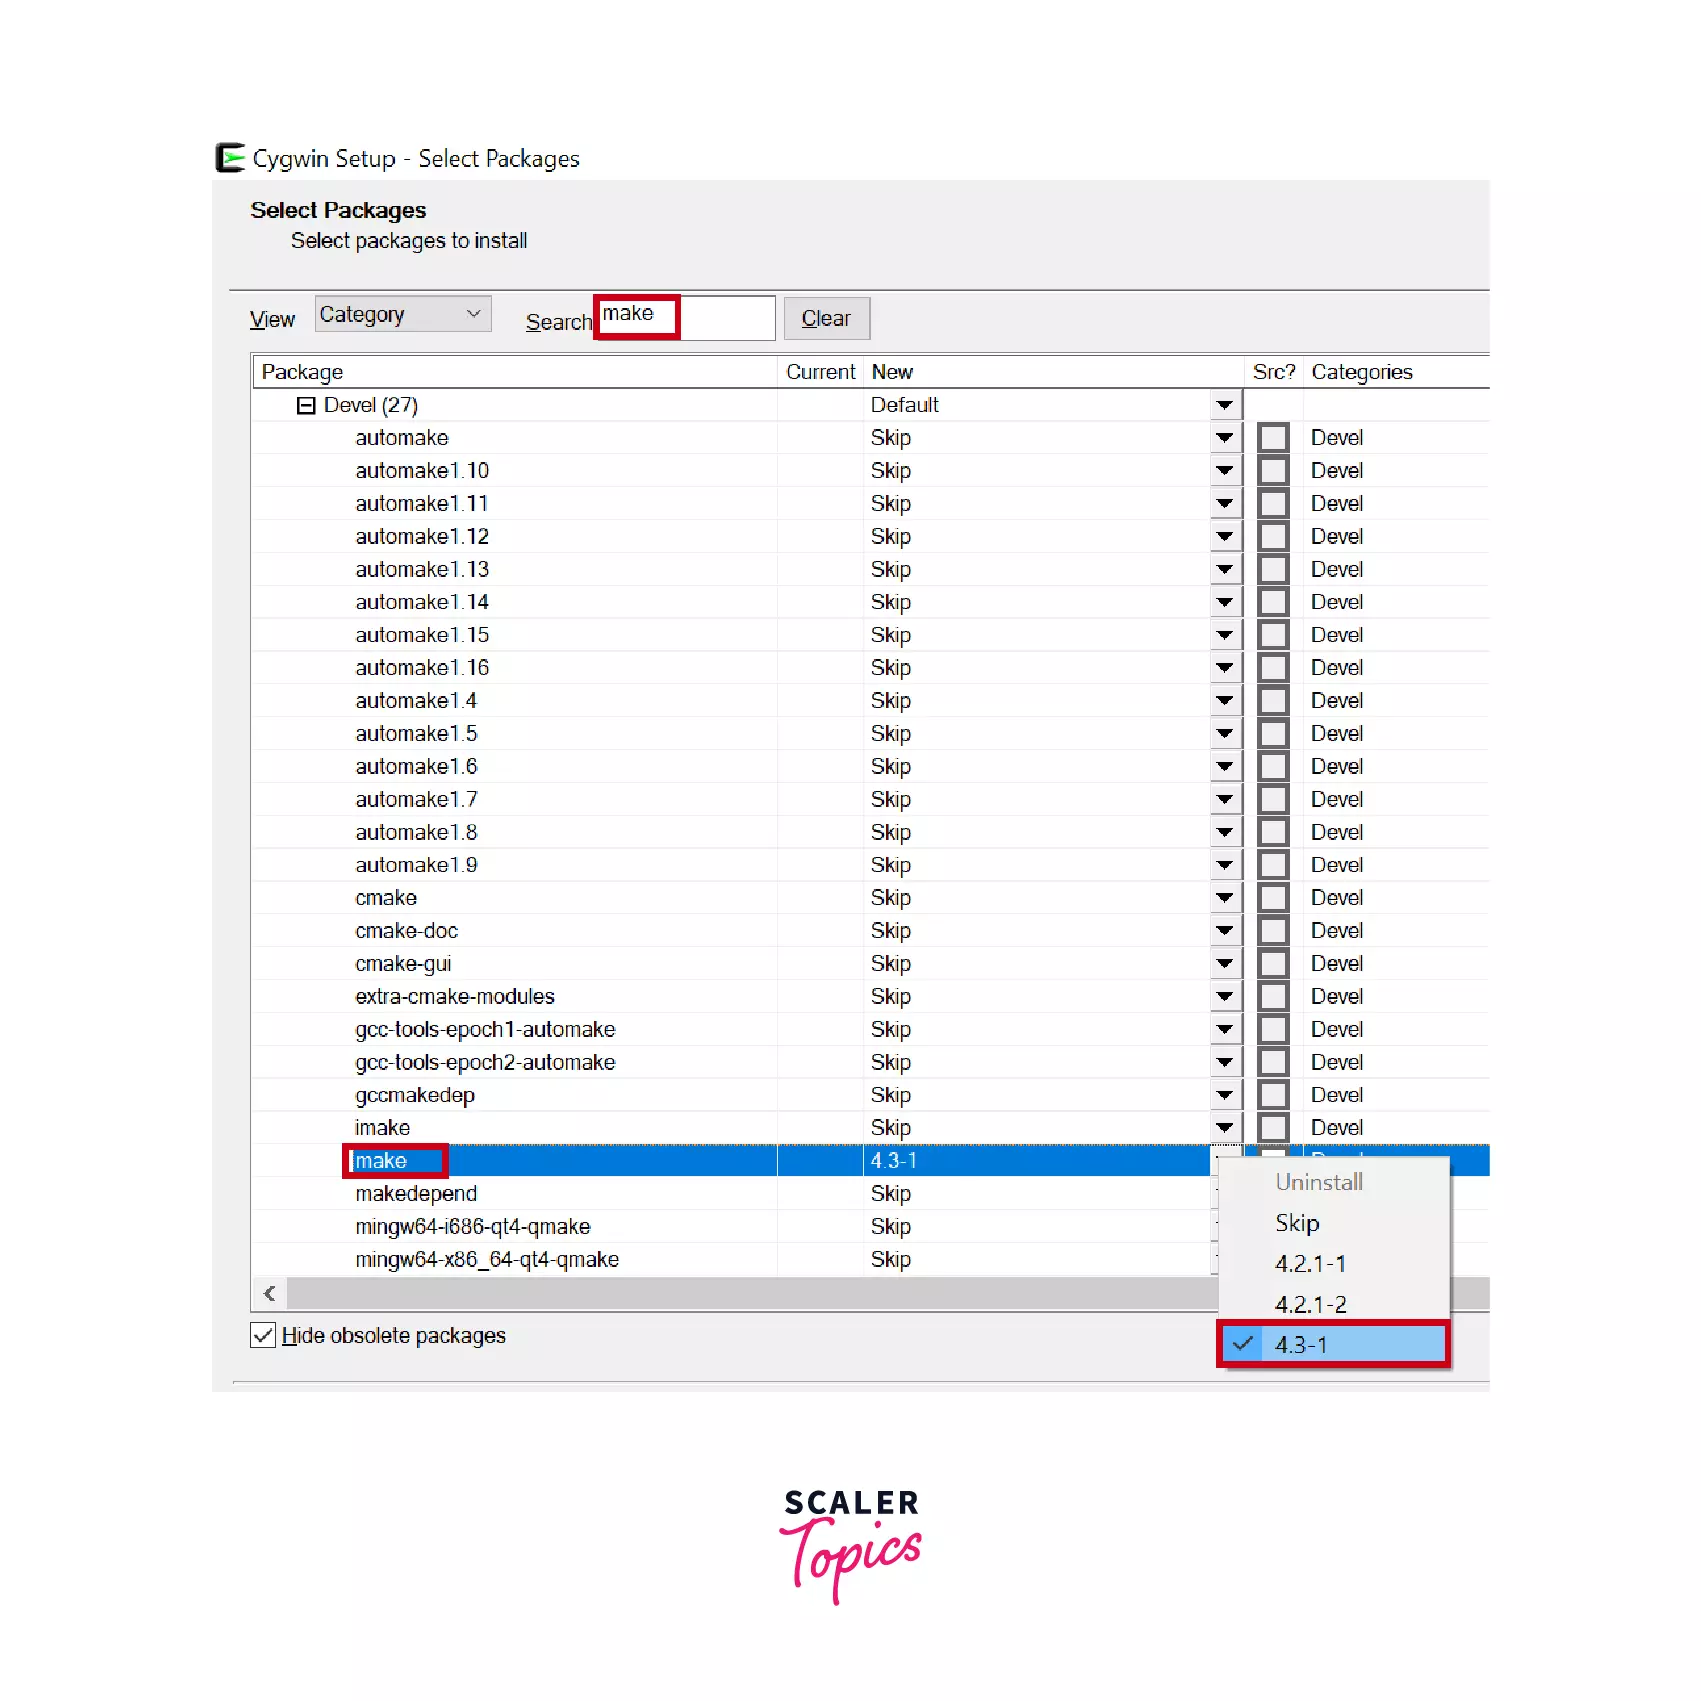
make Third type make in the search box and select make from the list with the latest version as shown in the screenshot.
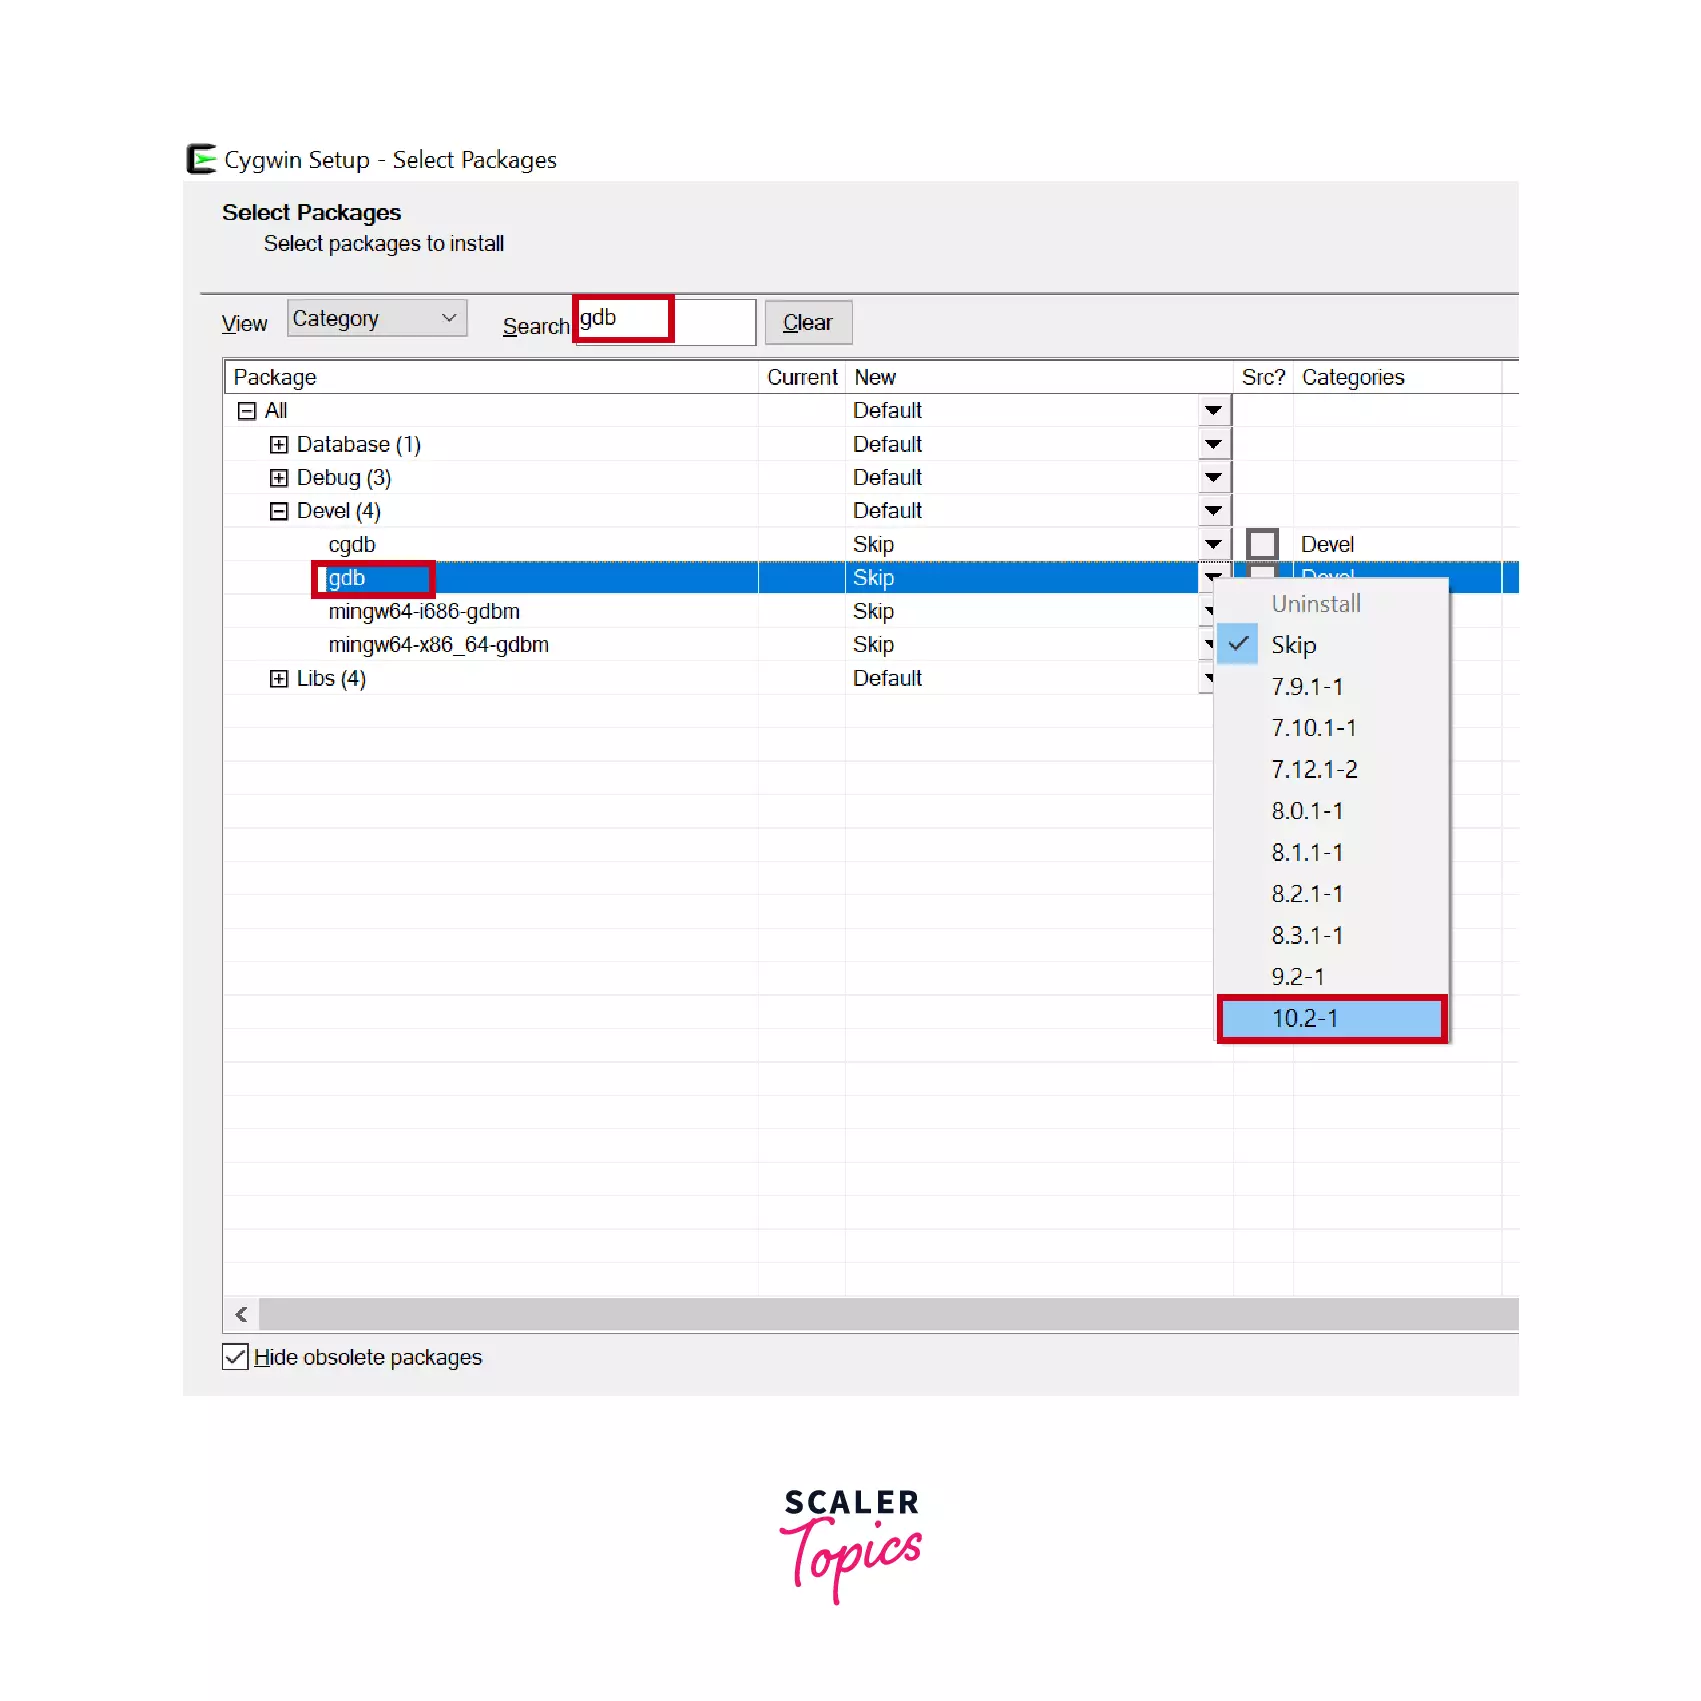
gdb Fourth type gdb in the search box and select gdb from the list with the latest version as shown in the screenshot.
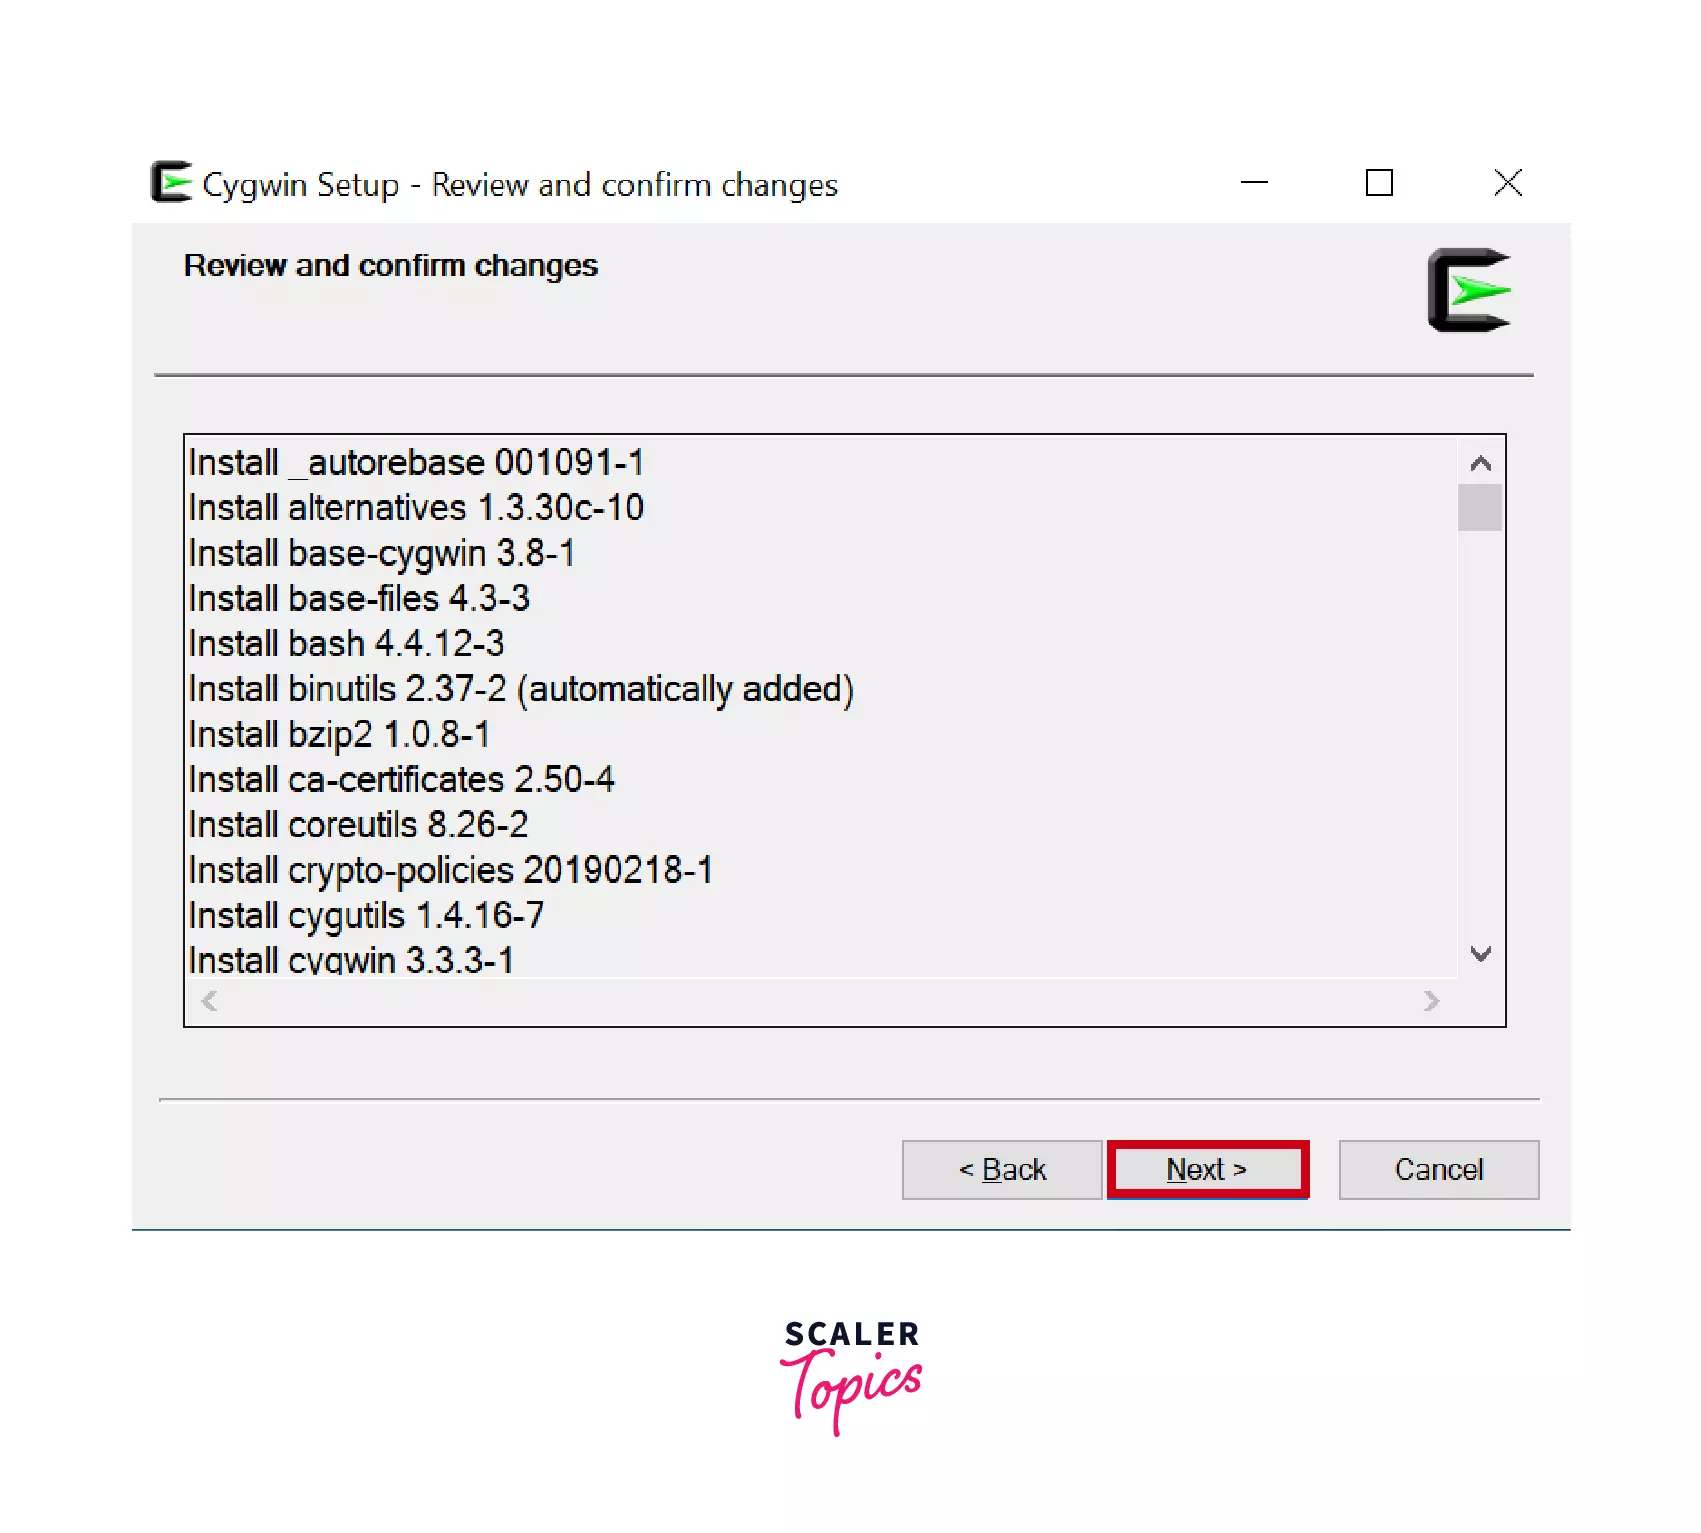
STEP 9: Review changes
In this window, all the plugins and installations that are going to be installed with the Cygwin setup will appear to check whether you've missed something or not. After checking click on Next and proceed.
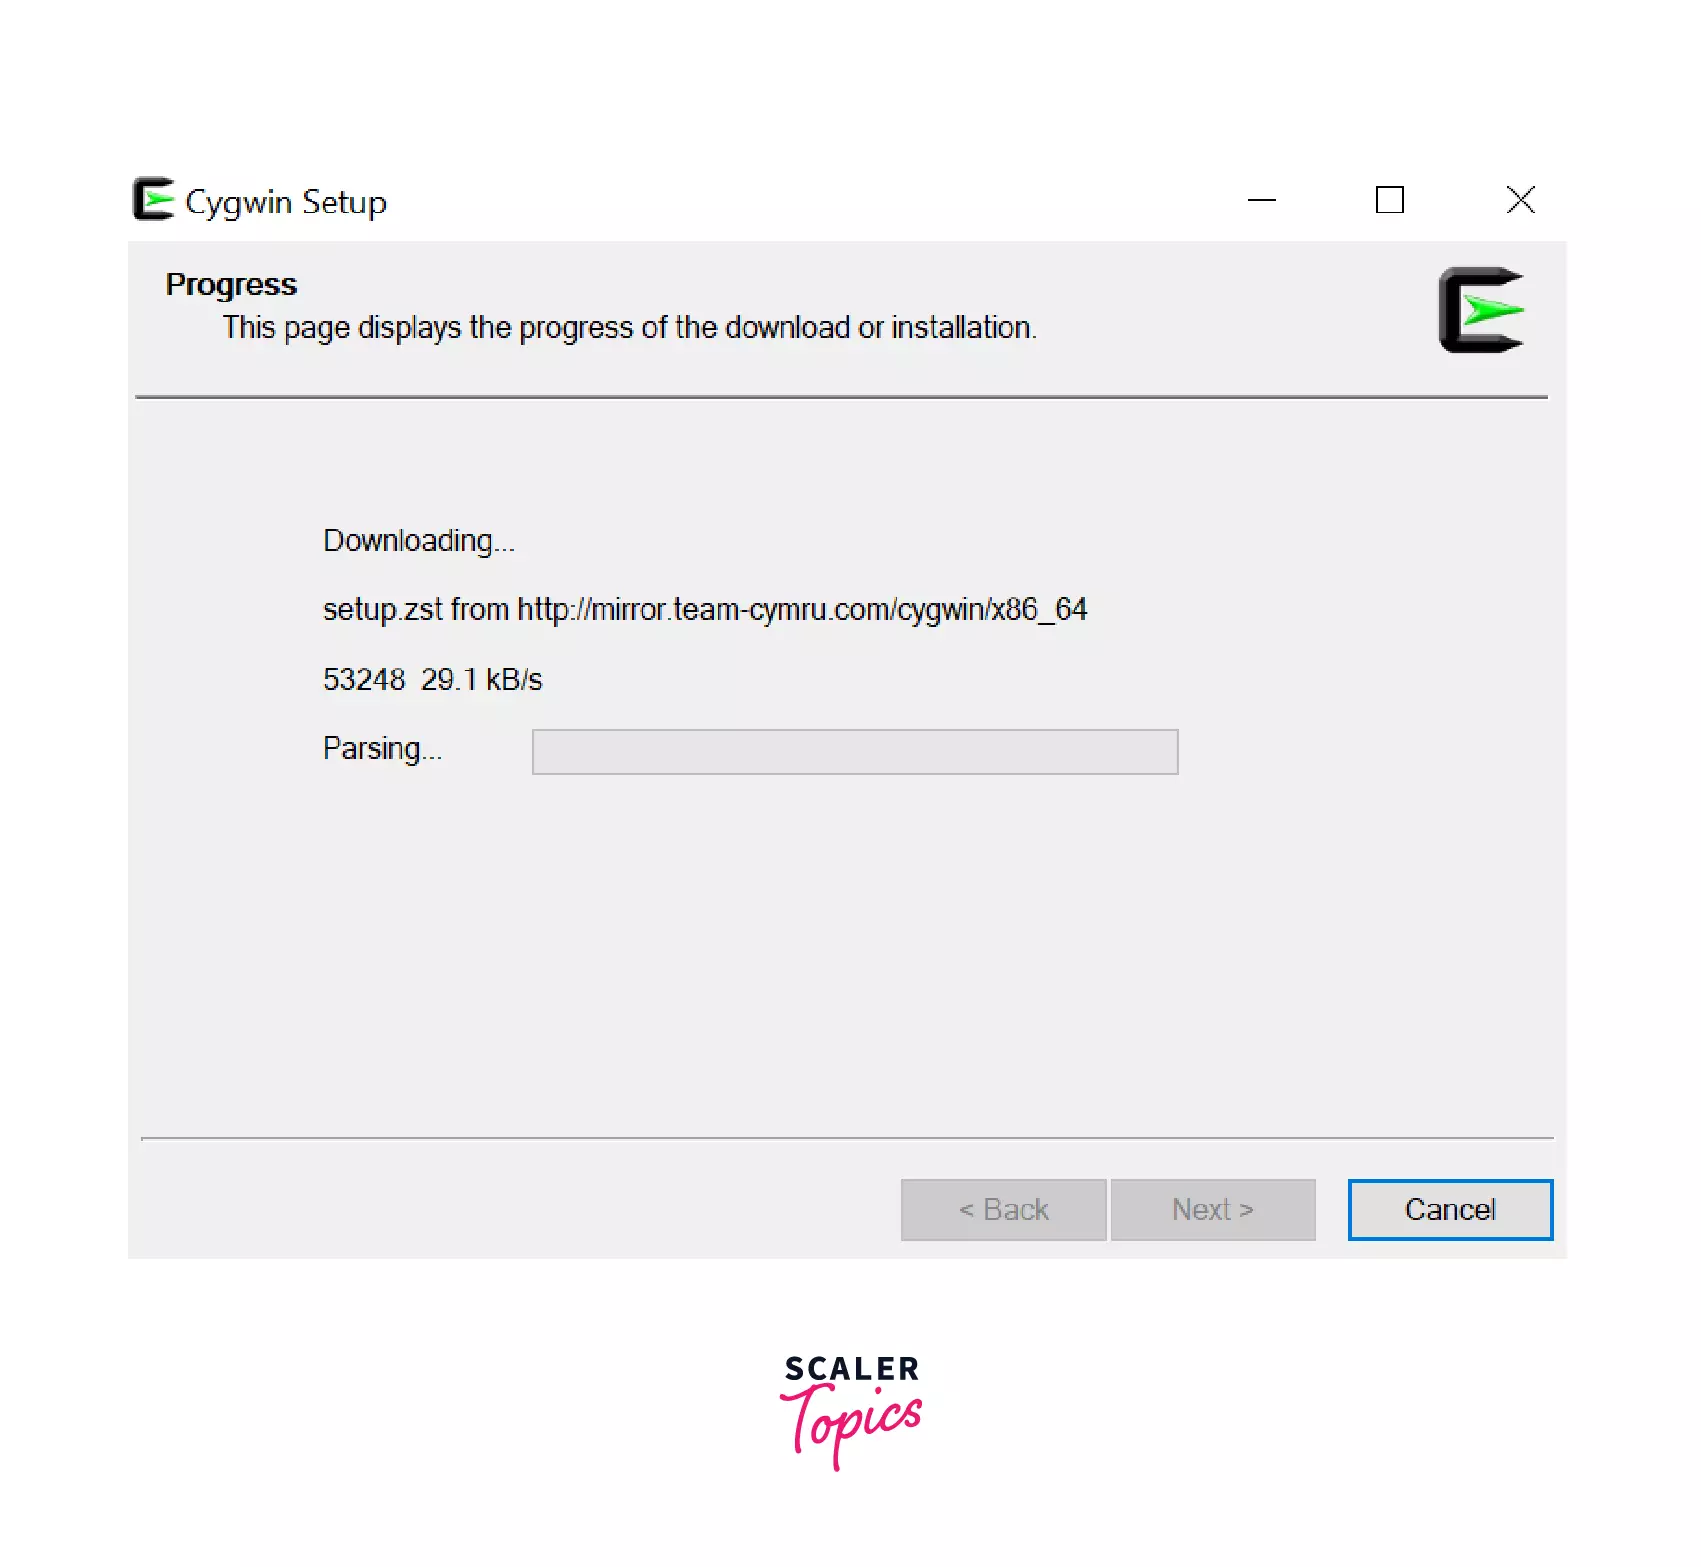
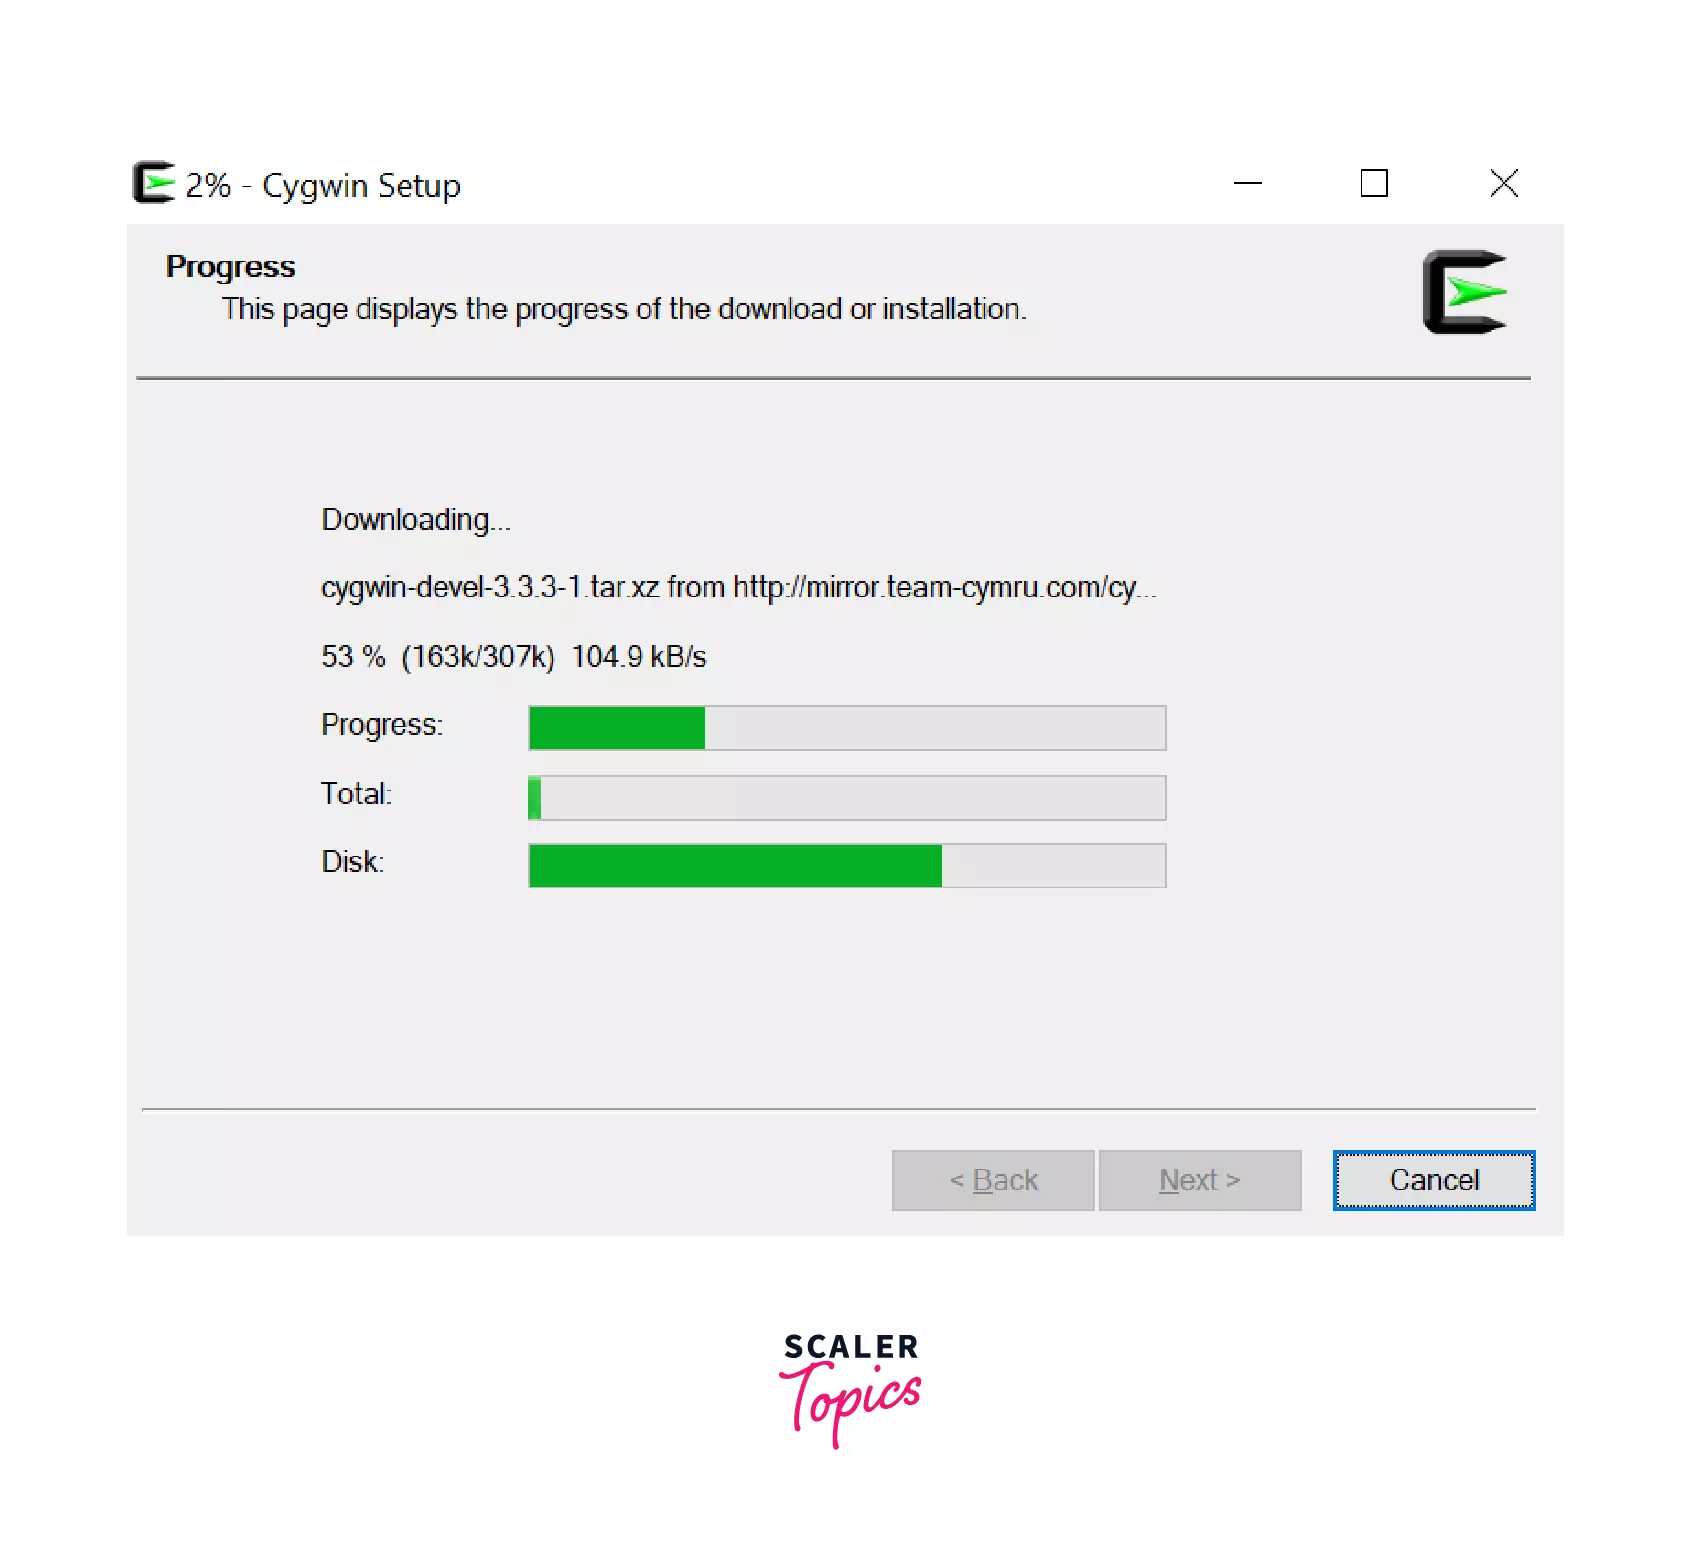
STEP 10: Progress
This window will display the progress of download or installation. After completion click on Next and proceed.
STEP 11: Create icons
To create icons on the Desktop and start the menu check the input boxes and click on Finish to finish the setup.
![]()
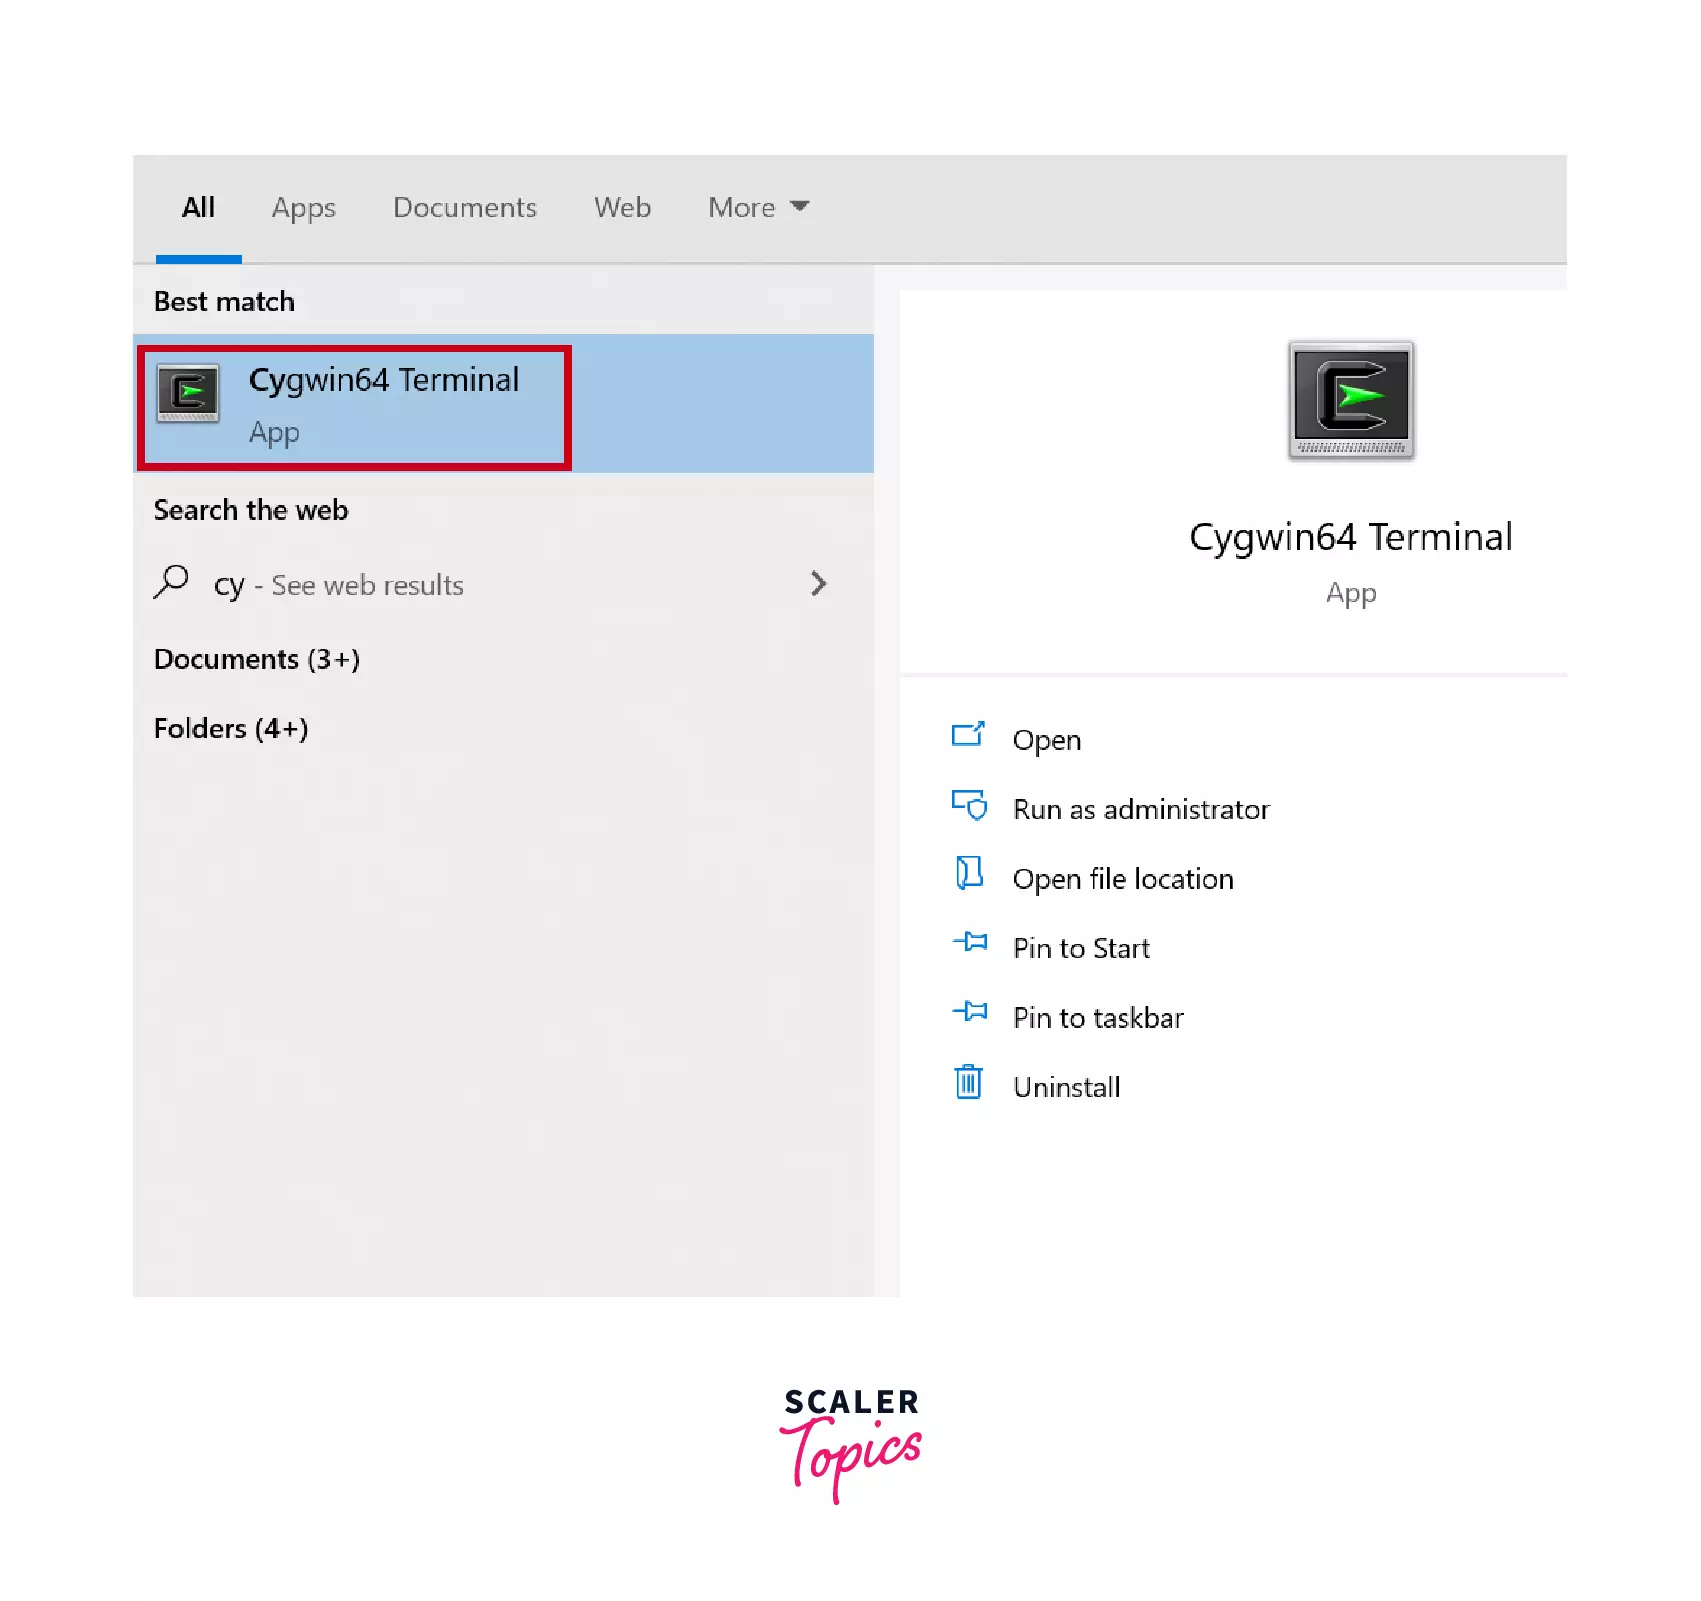
STEP 12: Installation Complete
Now the installation for Cygwin is completed. Type Cygwin in the Start menu to open the Cygwin 64 terminal.
Conclusion
- The C Environment setup includes the combination of Text Editor like Notepad, Textpad, Notepad++, and the compiler like GCC C++.
- The C Compiler can also compile the C++ code.
- The C Program should be saved with the .c extension and for C++ the extension should be .cpp.
- An IDE is a combination of a Compiler and a text editor in a single GUI(Graphical User Interface).Some of the IDEs available are DEV C++, Code::Blocks, VS Code, Turbo C++.
- Cygwin is not an IDE it is the runtime environment that runs on Windows and Linux as well it contains the c compiler and the vi editor as a text editor.