How to Compile C Program in Linux?

C programming, renowned for its extensive function library, necessitates a compiler for execution in Linux. As one of the earliest and prevalent languages, C remains pivotal for diverse applications, including operating systems and embedded systems. This article delves into C's significance and its compilation process within the Linux environment.

Why do We Need to Install the Build-Essential Package?
build-essential meta-package in Ubuntu comes with five separate packages, including the GCC Compiler, that are required during a software compilation process, which will help compile a C program in Linux. All these five packages are listed below:
- gcc: The GNU Compiler Collection (GCC Compiler) for compilation of programs written in C Language.
- g++ : The GNU C++ compiler for compilation of programs written in C++ Language.
- libc6-dev: This is the GNU library files package. The development libraries and header files needed to know how to compile the C program in Linux are included in this package.
- make: This is a handy tool for controlling the compilation of programs. This tool reads a file called a "makefile", which tells the compiler how to do its job.
- dpkg-dev: This package can be used to unzip, compile, and upload Debian source packages. This tool will come in handy if you wish to package your program for a Debian-based system.
Installing the Build-Essential Package
Let's start the tutorial by installing the essential package, the build-essential package, in our Linux operating system. Let's see the steps involved in installing the build-essential package:
First, you have to open up the terminal. You can use the shortcut key Ctrl + Alt + T, or manually open up the terminal by searching it in the menu option (⋮⋮⋮ icon).
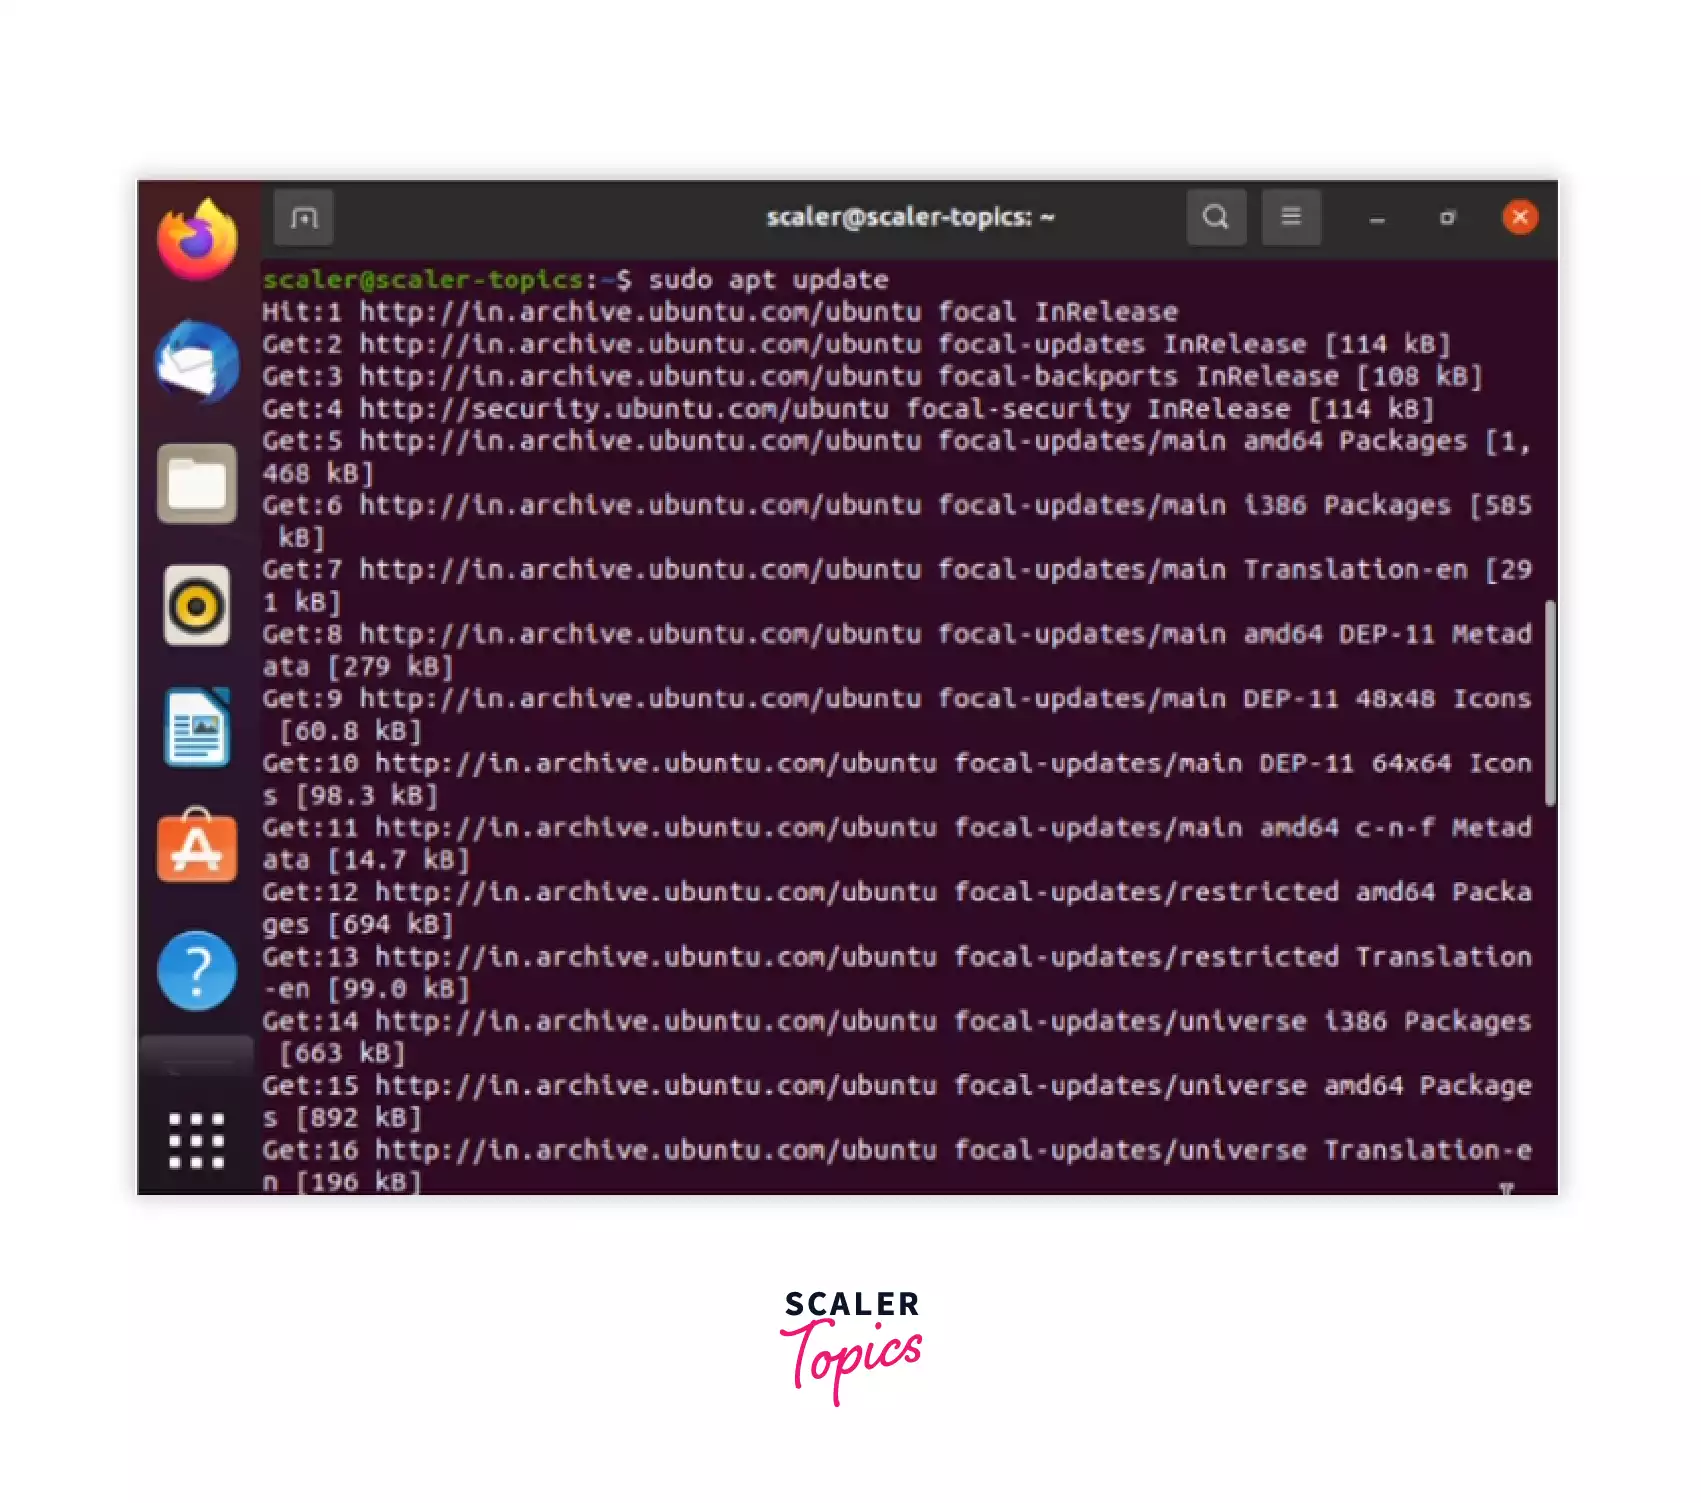
1. To begin, update the packages list using the below command:
The apt command in Linux is in charge of installing, uninstalling, and updating applications on our system. Consider your computer a factory, and the apt command to be the factory manager who manages the installation of new equipment, removing obsolete equipment, and updating the desired equipment to the latest versions while keeping track of the equipment names and versions currently in use. So, the sudo apt update command is used to update the track of the software versions, which helps install the newest available software version in your systems.
Note: sudo (Super User DO) enables a permitted user to run a command as the superuser or another user, depending on the security policy. So, if required, enter your system password to proceed.
Output:
2. Install the package build-essential using the following command:
If required, enter your system password to proceed.
Output:
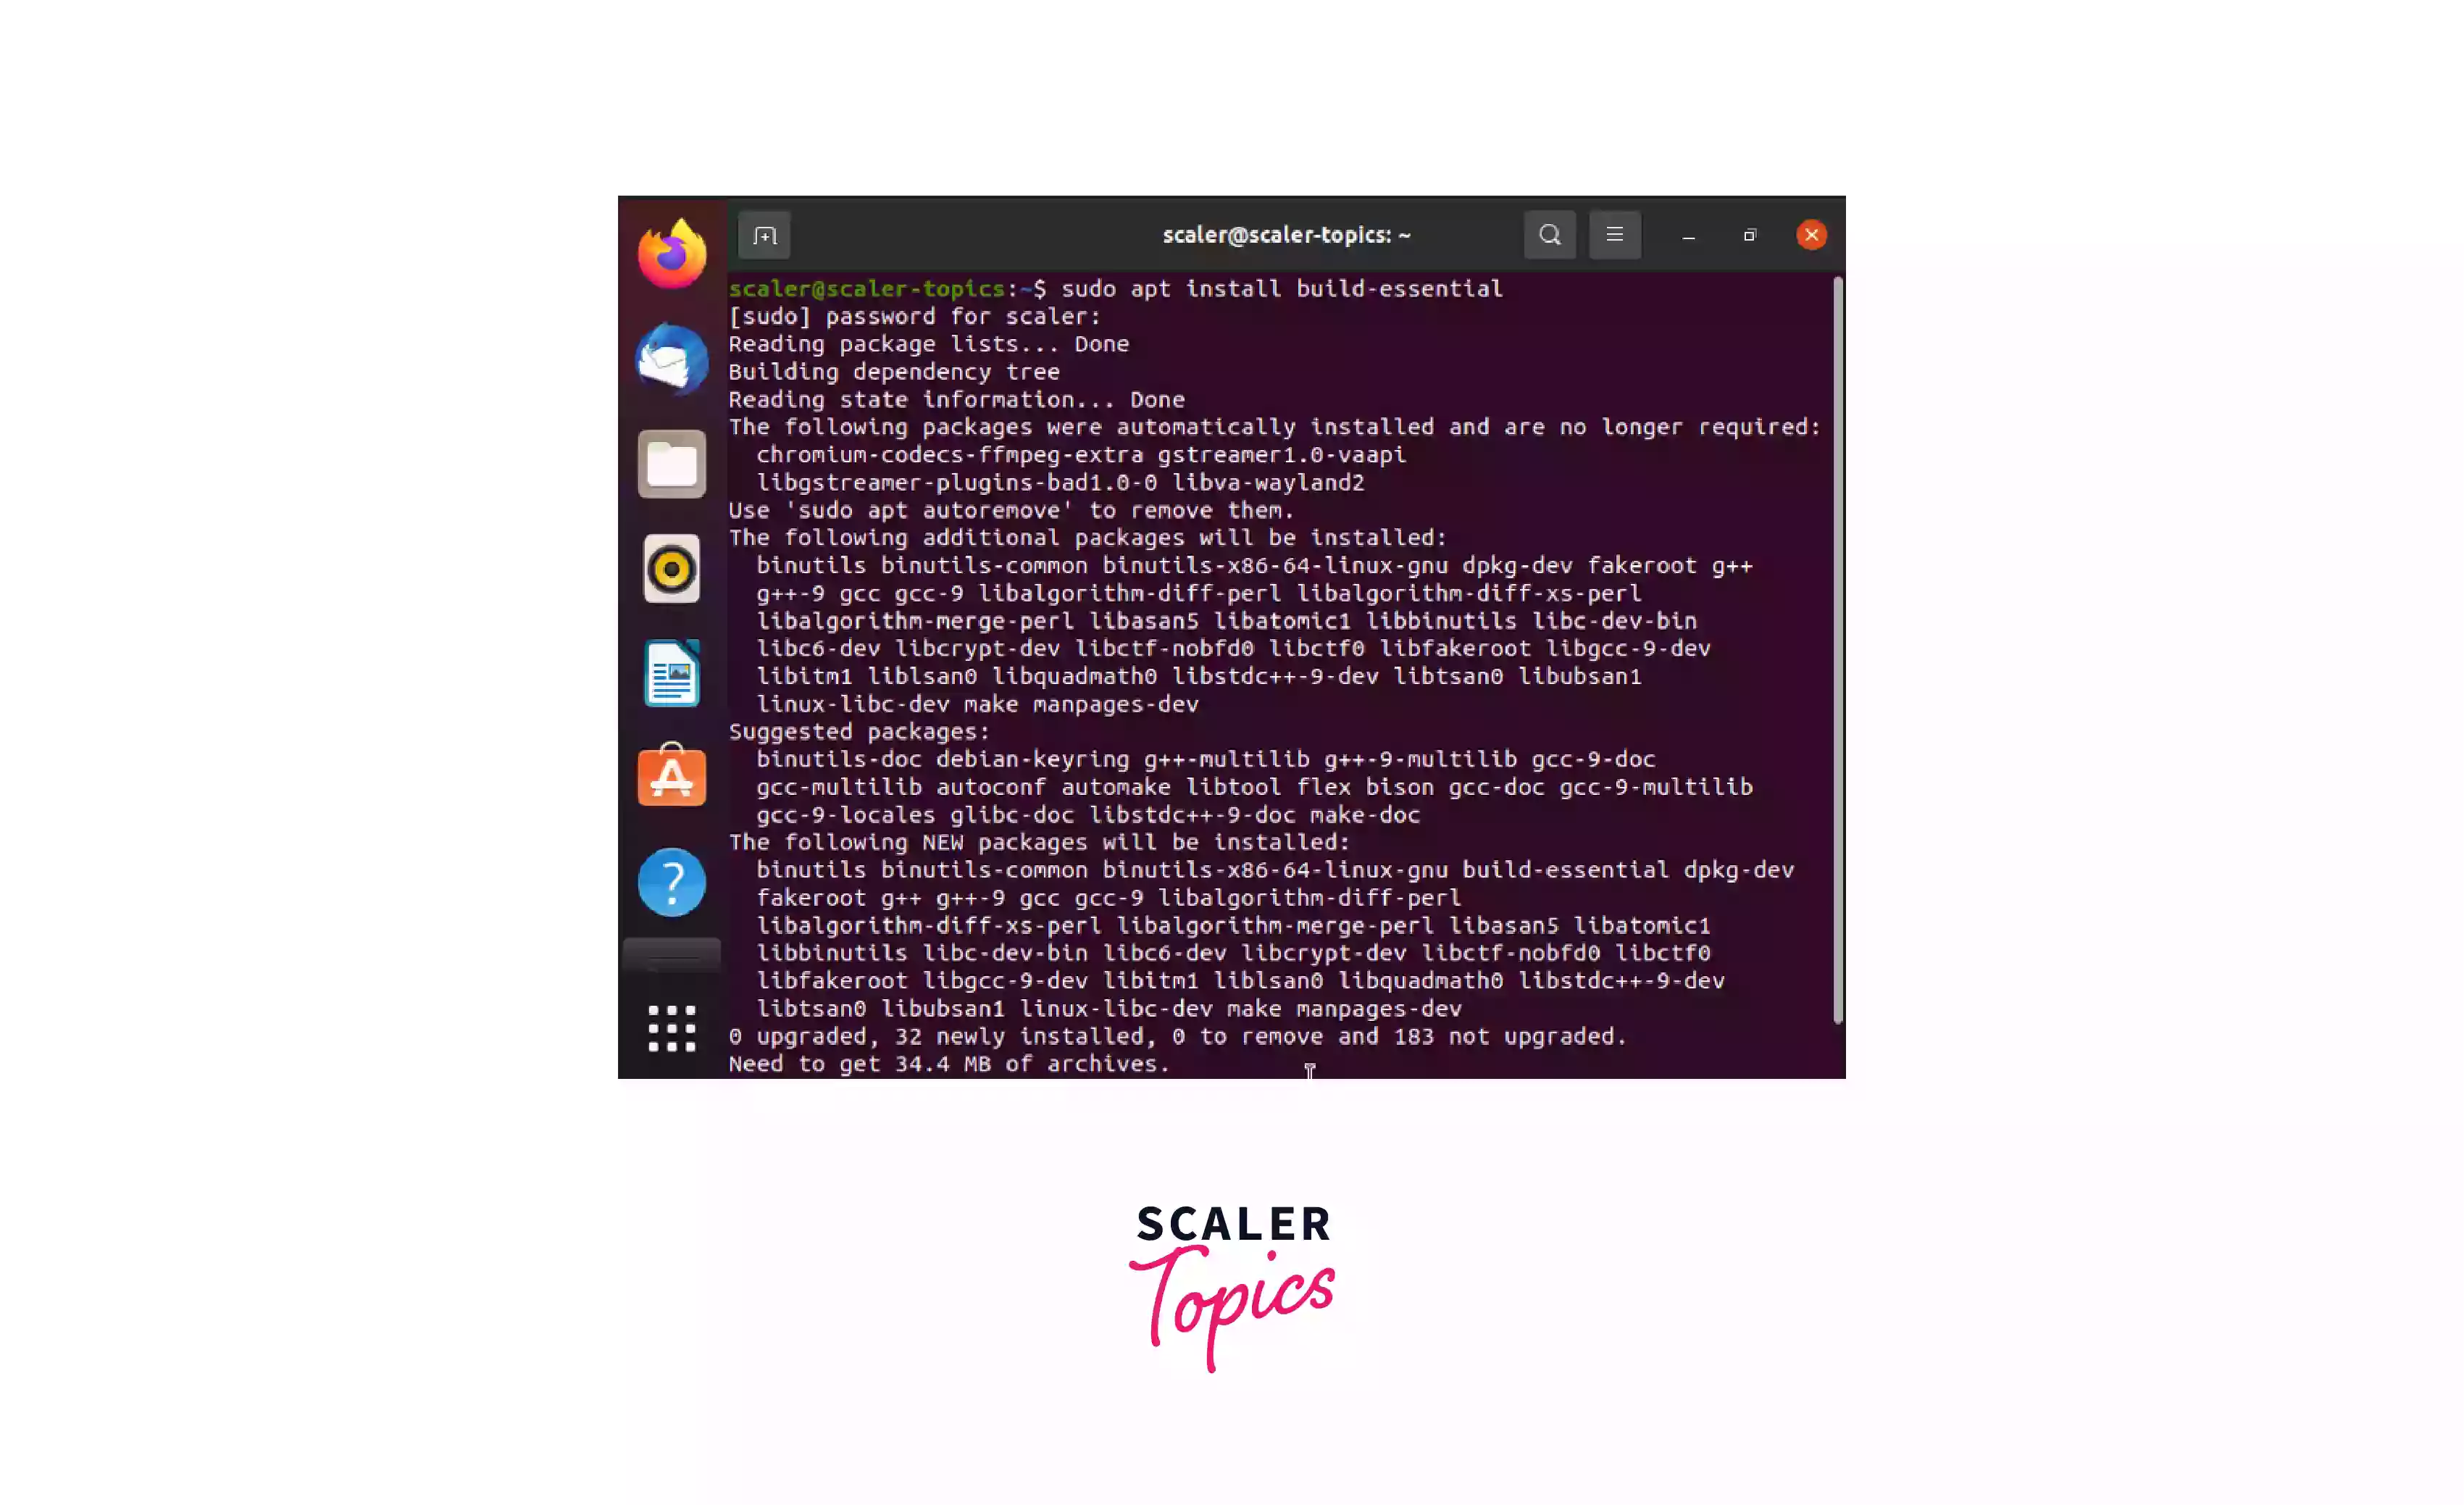
Press the Y key and then the Enter key once you get the same output above on your screen to continue the installation process.
It will take up to 3-5 minutes to completely install the build-essential meta-package in your system. This process will install the GCC Compiler on your Linux Operating System so that you can use this compiler to learn how to compile C Programs in Linux.
Congratulations! Now, you have successfully completed the installation of the build-essential package and the GCC Compiler. Now we can know how to compile the C program in Linux.
Note: We are using Ubuntu 20.04 LTS version in this tutorial. This version of Ubuntu comes with a pre-installed version of the GCC compiler, so you can first check the installed compiler version using the command mentioned in the below section.
Transform Your Career
Choose from our industry-leading programs designed for career success
Modern Software and AI Engineering Program
Master full-stack development with AI integration

Modern Data Science and ML with specialisation in AI
Advanced data science techniques with AI specialization
Advanced AIML with Specialisation in Agentic AI
Deep dive into AIML with focus on Agentic systems
DevOps, Cloud & AI Platform Engineering
Build and manage AI-powered cloud infrastructure
AI Engineering Advanced Certification by IIT-Roorkee
Premier AI engineering certification from IIT-Roorkee
For Red Hat Linux / Fedora / CentOS
In Red Hat Linux Fedora or CentOS operating systems, there is no build-essentials package present, but we can install a similar package in these operating systems that are required for software development. So, if you are using a Red Hat Linux / Fedora / CentOS-based Linux operating system, then you have to install the Development Tools package to get the GCC compiler in your system.
1. First, update the packages list using the below command as the root user:
2. Install Development Tools using the below command as the root user:
or
Check GCC Version
Now that you have installed the build-essentials /Development Tools package, you can quickly check/validate your GCC Compiler version. In this section, you will see how you can check/validate the installed GCC compiler version by using the below command in your Linux terminal:
Note: --version flag under the GCC command is compatible with almost all the terminal development software in Linux.
Output:
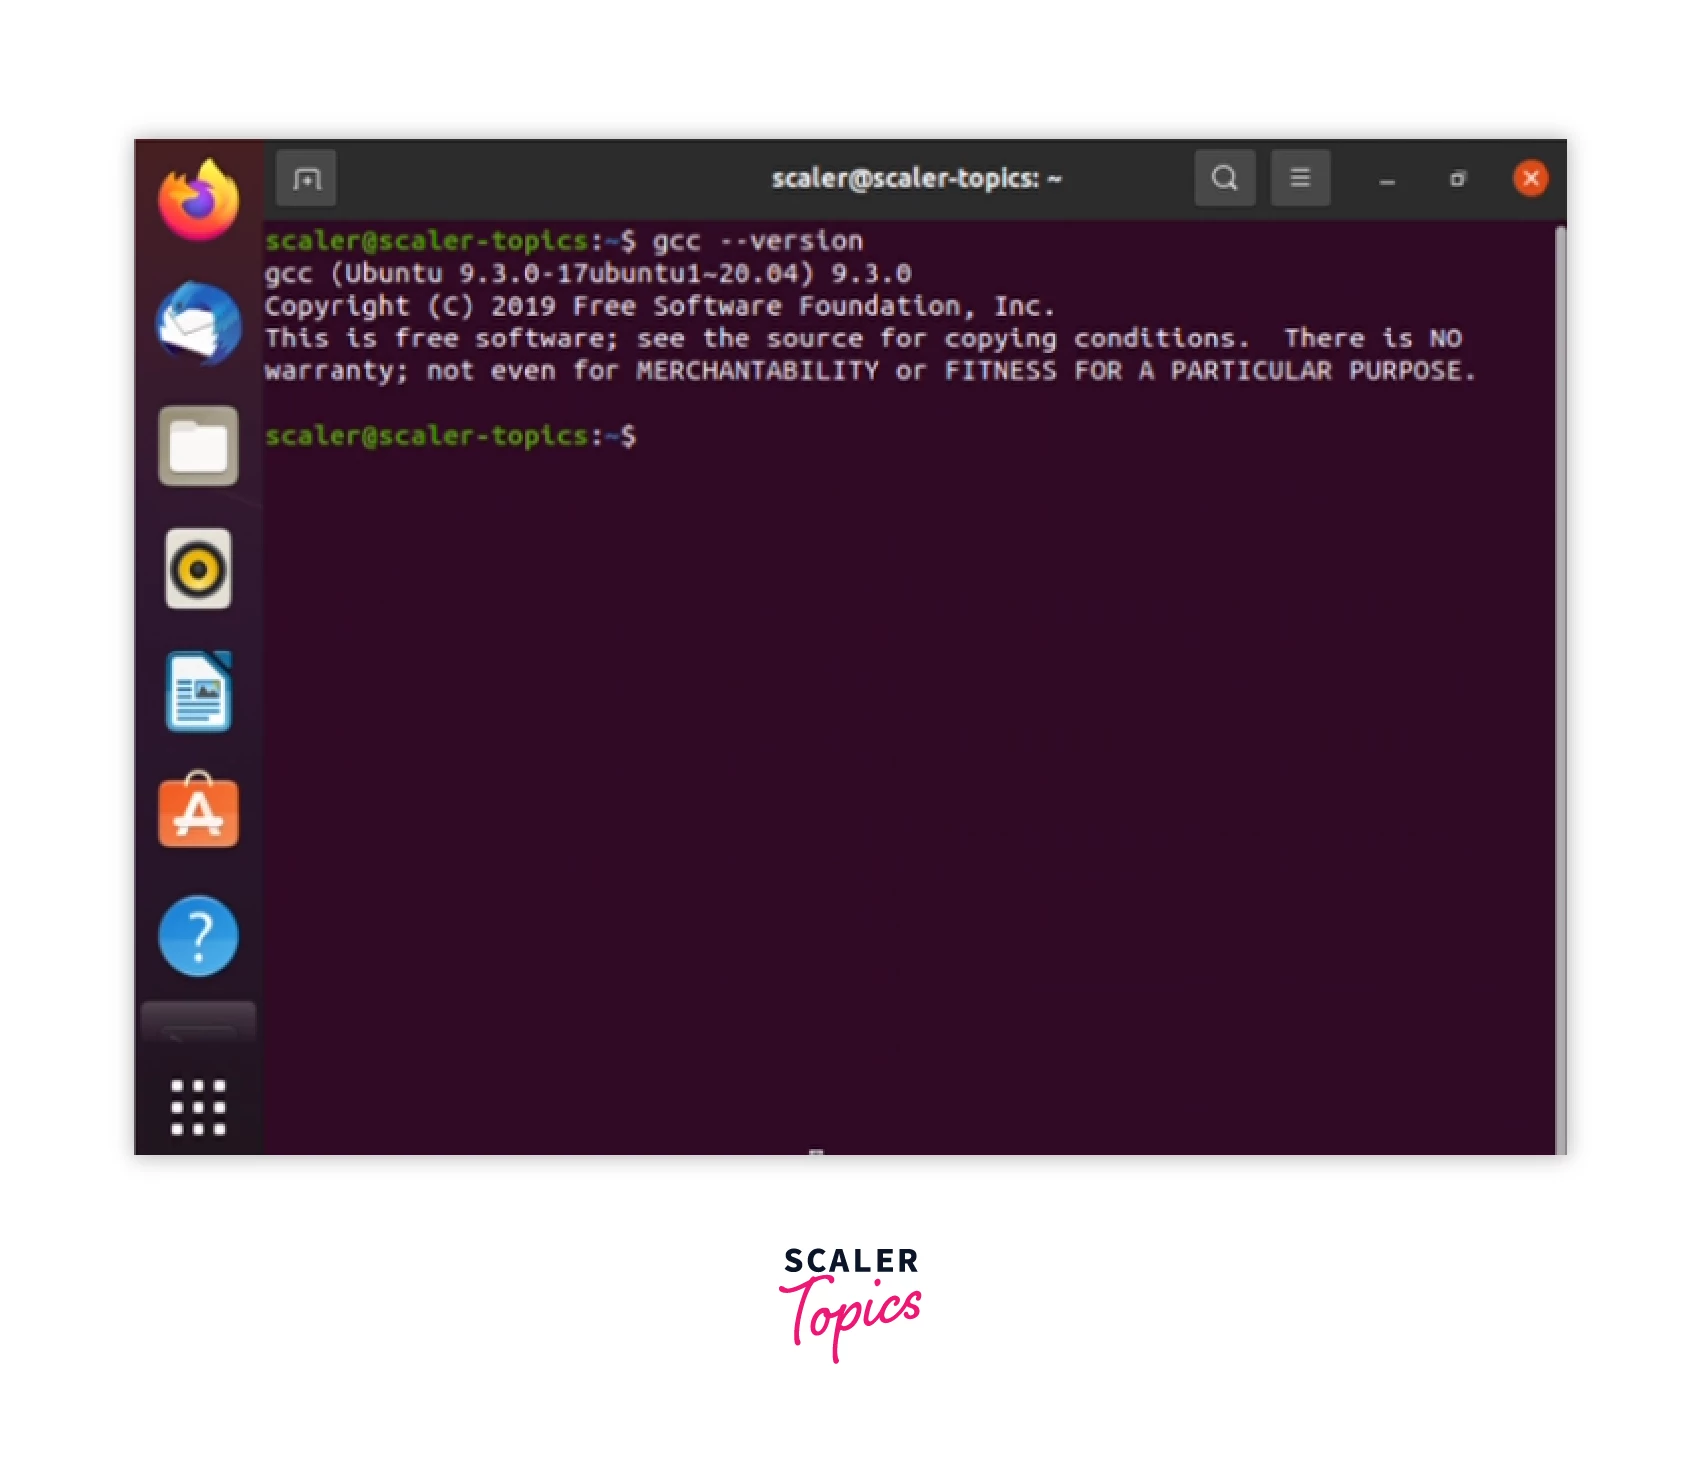
If you see Output like the above-displayed Output on your screen, you have successfully installed the GCC compiler`.
Note: If the Output looks like the below Output, there was some discrepancy during the installation process. Don't worry about it. You have to repeat the steps mentioned in the above section to install the build-essential package / Development Tools again, and then you are good to go.

Creating a Simple C Program in Ubuntu Using Text Editor
In this section, you will create a simple C program on Ubuntu OS using a pre-installed text editor.
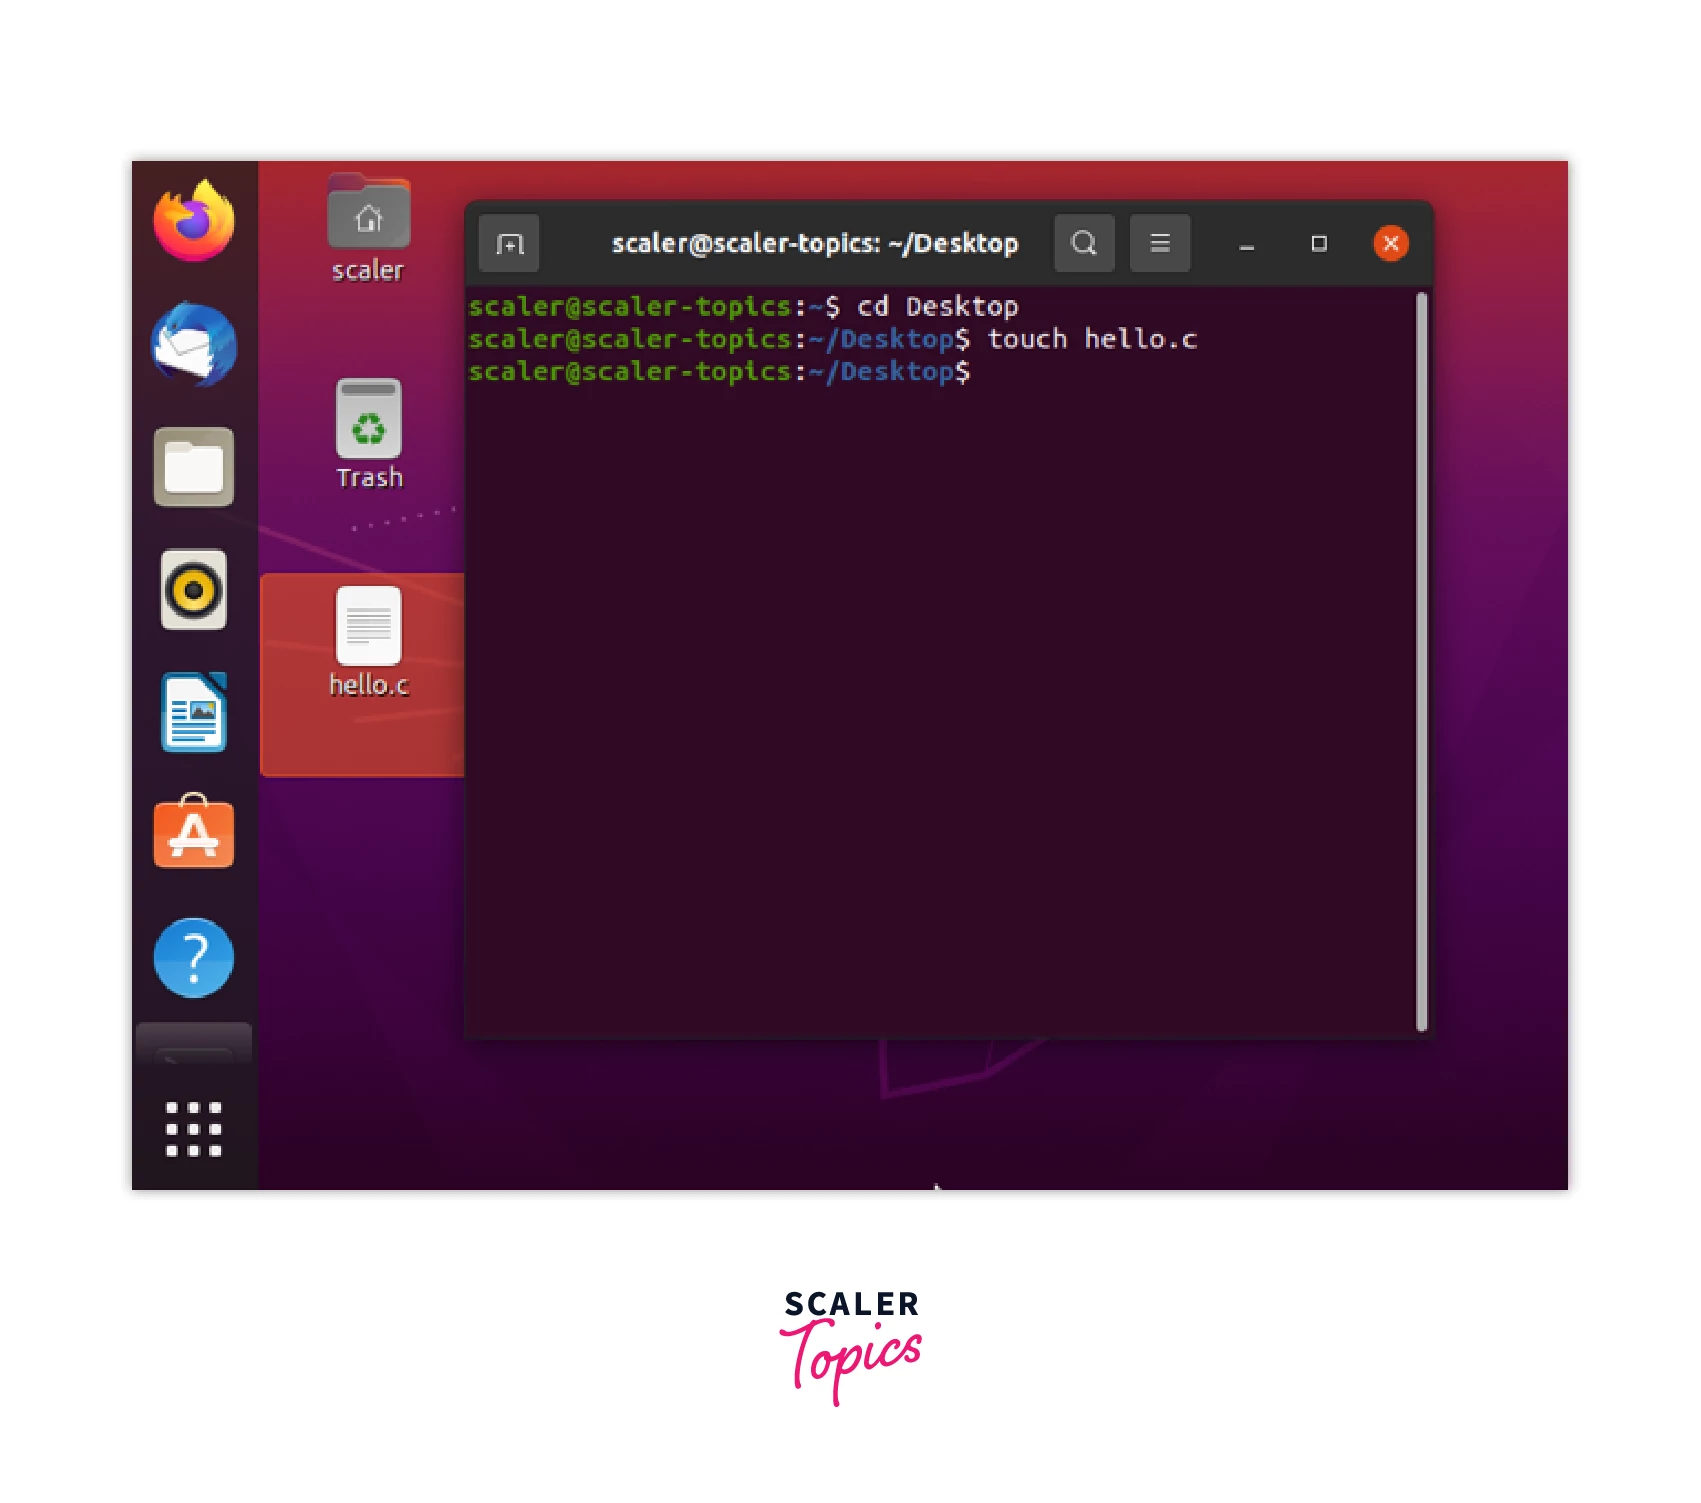
There are many Linux terminal commands to create a new file like using the touch, > (redirect operator), cat, echo commands, or terminal editors like vi, vim or nano. We are using the touch command in this tutorial in the terminal to create an empty C program file. Before creating a new file, you can change the terminal's directory to any desired location in your system. We have chosen the Desktop directory in this tutorial, you can change to the Desktop directory using the cd Desktop (change directory to Desktop) command, or you can choose any directory of your choice, pass the location address of the directory after the cd command. You have to make sure that the C program file is compiled in the same directory as where the C program file is present.
Let's see this in action in Ubuntu 20.04 OS.
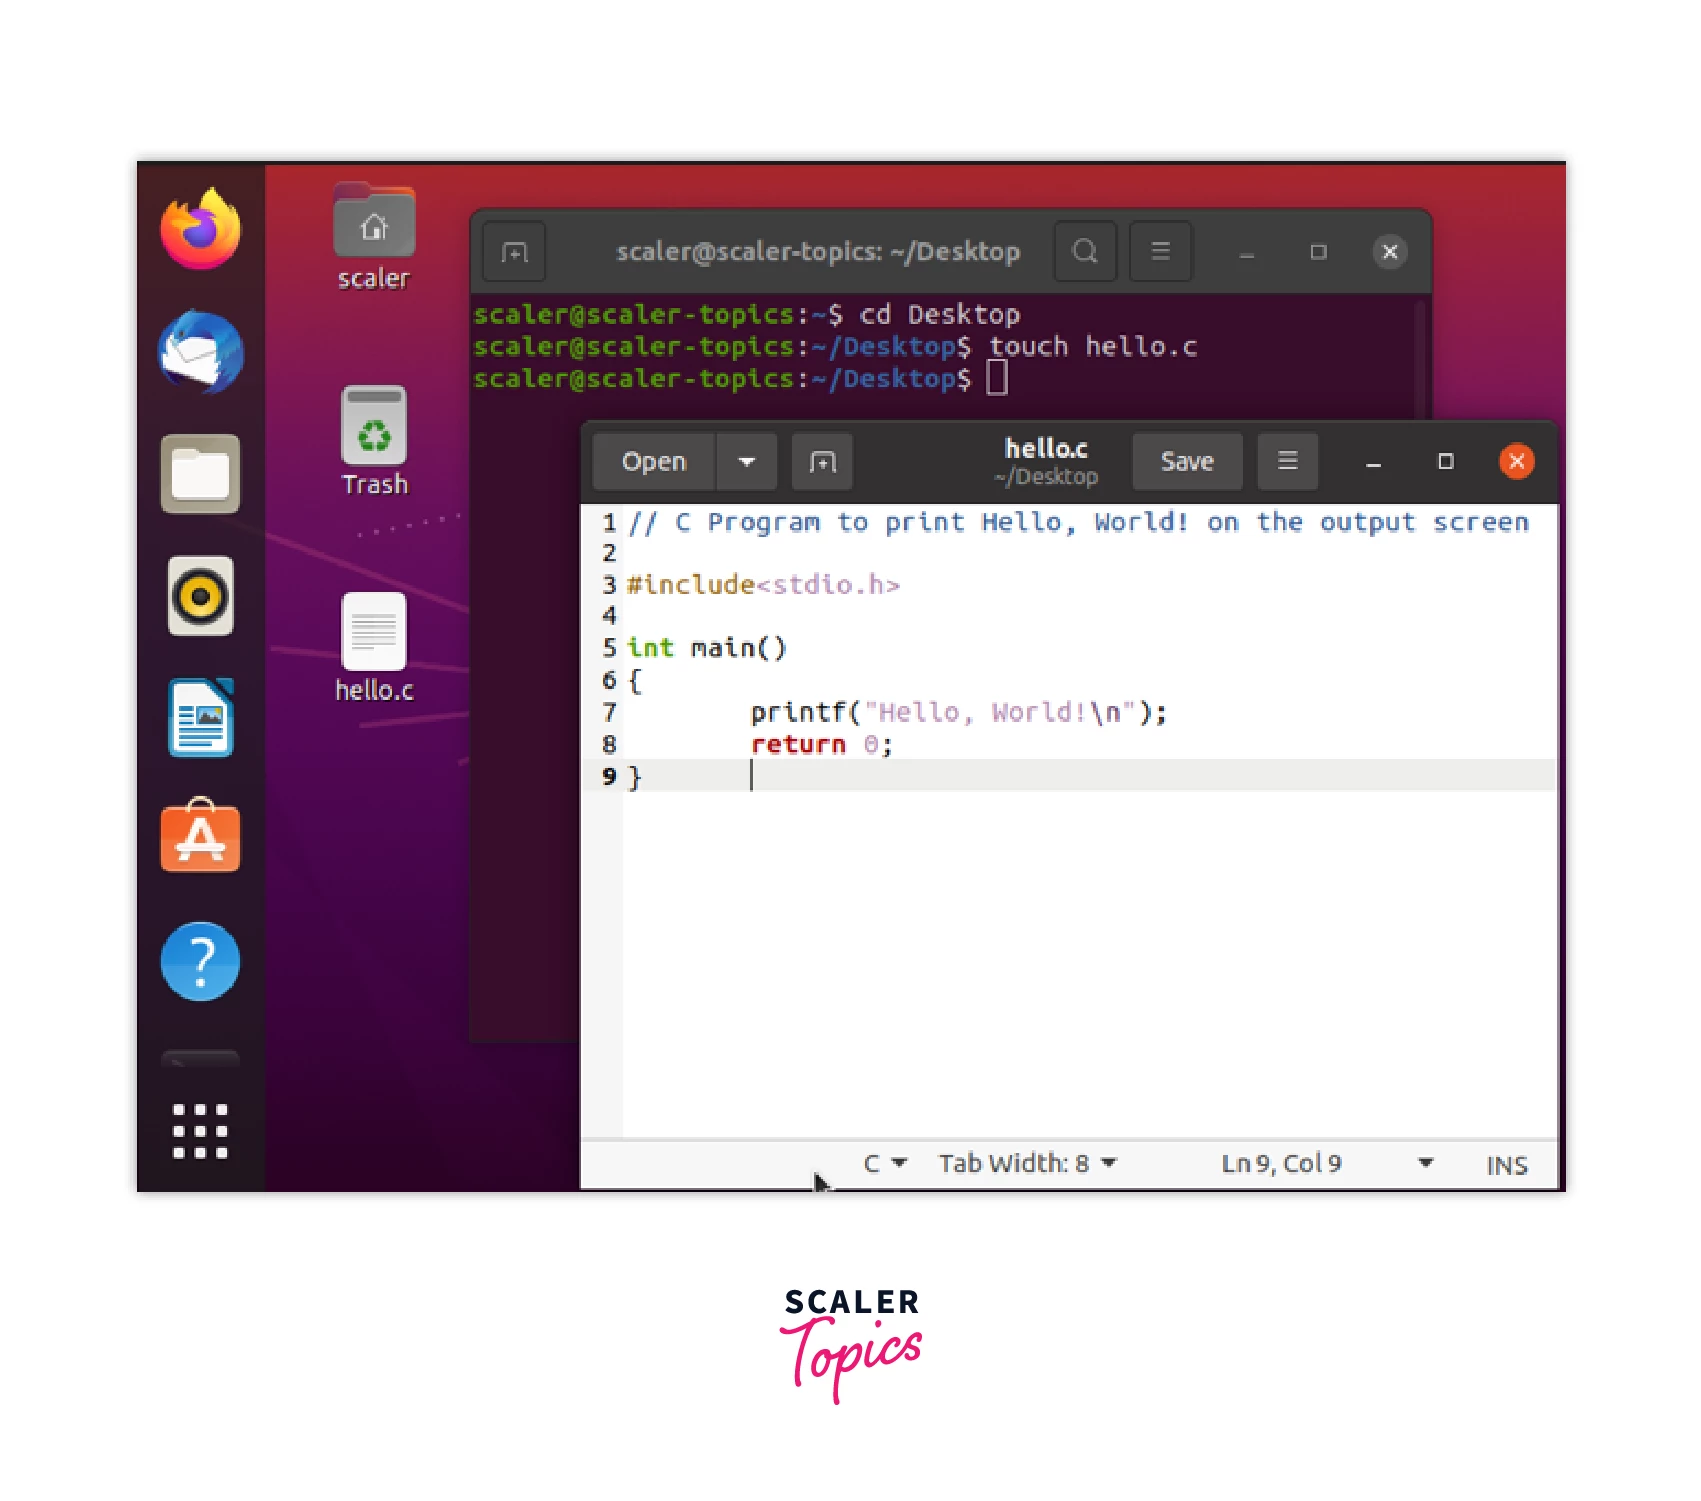
Step 1: touch hello.c command in the terminal will create an empty hello.c C program file in the desktop directory.
Step 2: Open the hello.c file in the in-built text editor (The Ubuntu operating system's default GUI text editor is gedit. It offers most conventional text editor functions as well as many additional ones and is UTF-8 compatible) of Linux by double-clicking on the file and type the Hello World C program in the editor as given below.
Hello World! Program in C
Check and run this program using InterviewBit IDE.
Output:
Congratulations! You're now just one step away from compiling a C program under the Linux operating system. So far, You have created a new file, hello.c through the terminal and successfully written the Hello World program in the in-built text editor.
Now let us see how to compile the C program file in the Linux terminal.
Turn Learning into Career Growth
How to compile C Program in Linux using the GCC compiler
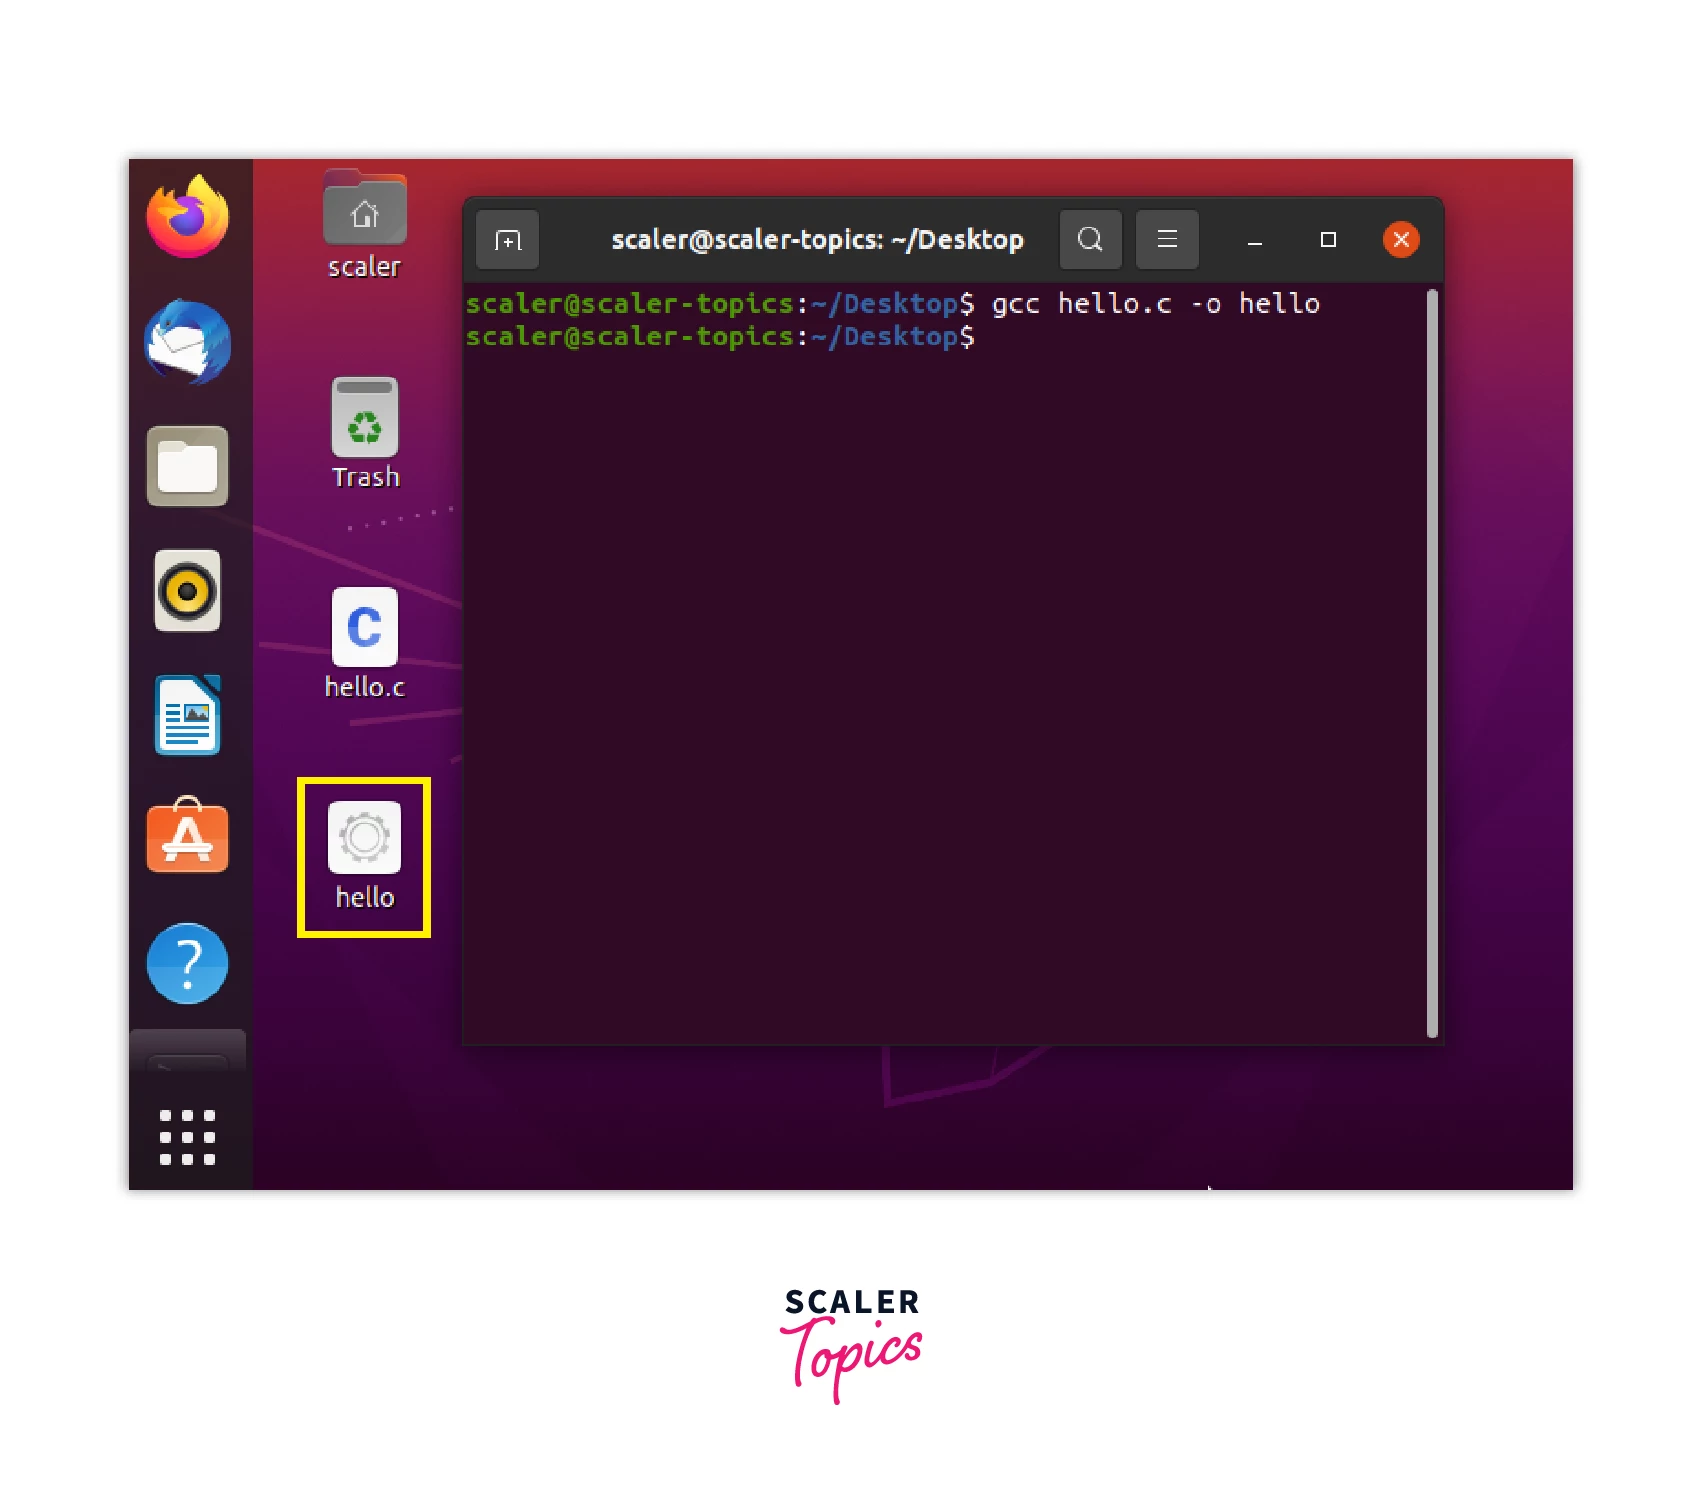
To compile C Program in Linux, you can use the below command in the terminal:
The above command will generate an executable file (a computer file containing binary encoded values that a system can directly execute) with the name hello as given in the command after -o. You can give any name to the executable file. It is not necessary that you give the same name as the C program file.
Note: You also have to ensure that the above command is used in the same directory where the hello.c file is present.
Let's see this in action in Ubuntu 20.04 OS.
Use gcc hello.c -o hello command to compile the hello.c program and generate a hello executable file. You can see in the below image that a hello file is created in the Desktop directory.
Now, let us see how to run our C program in the terminal.
Running our C Program
To run the executable file you just got from compiling your C Program, you need to run the below command, and the Output of the C program will be shown on the terminal screen:
Note: Use this command in the same directory where the hello executable file is present. For example, we are compiling and executing our program file on the Desktop directory.
This command will give Hello, World! Output on the terminal if you have written the same C program mentioned in the above section.

Congratulations! You have successfully completed the compilation and running process of a C Program under a Linux Operating System. Now, you will see how we can do the same thing in Visual Studio Code editor.
Using Visual Studio Code Editor in Linux
In this section, you will see what Visual Studio Code is and how you can make use of it to run and compile a C program in Linux quickly and efficiently.
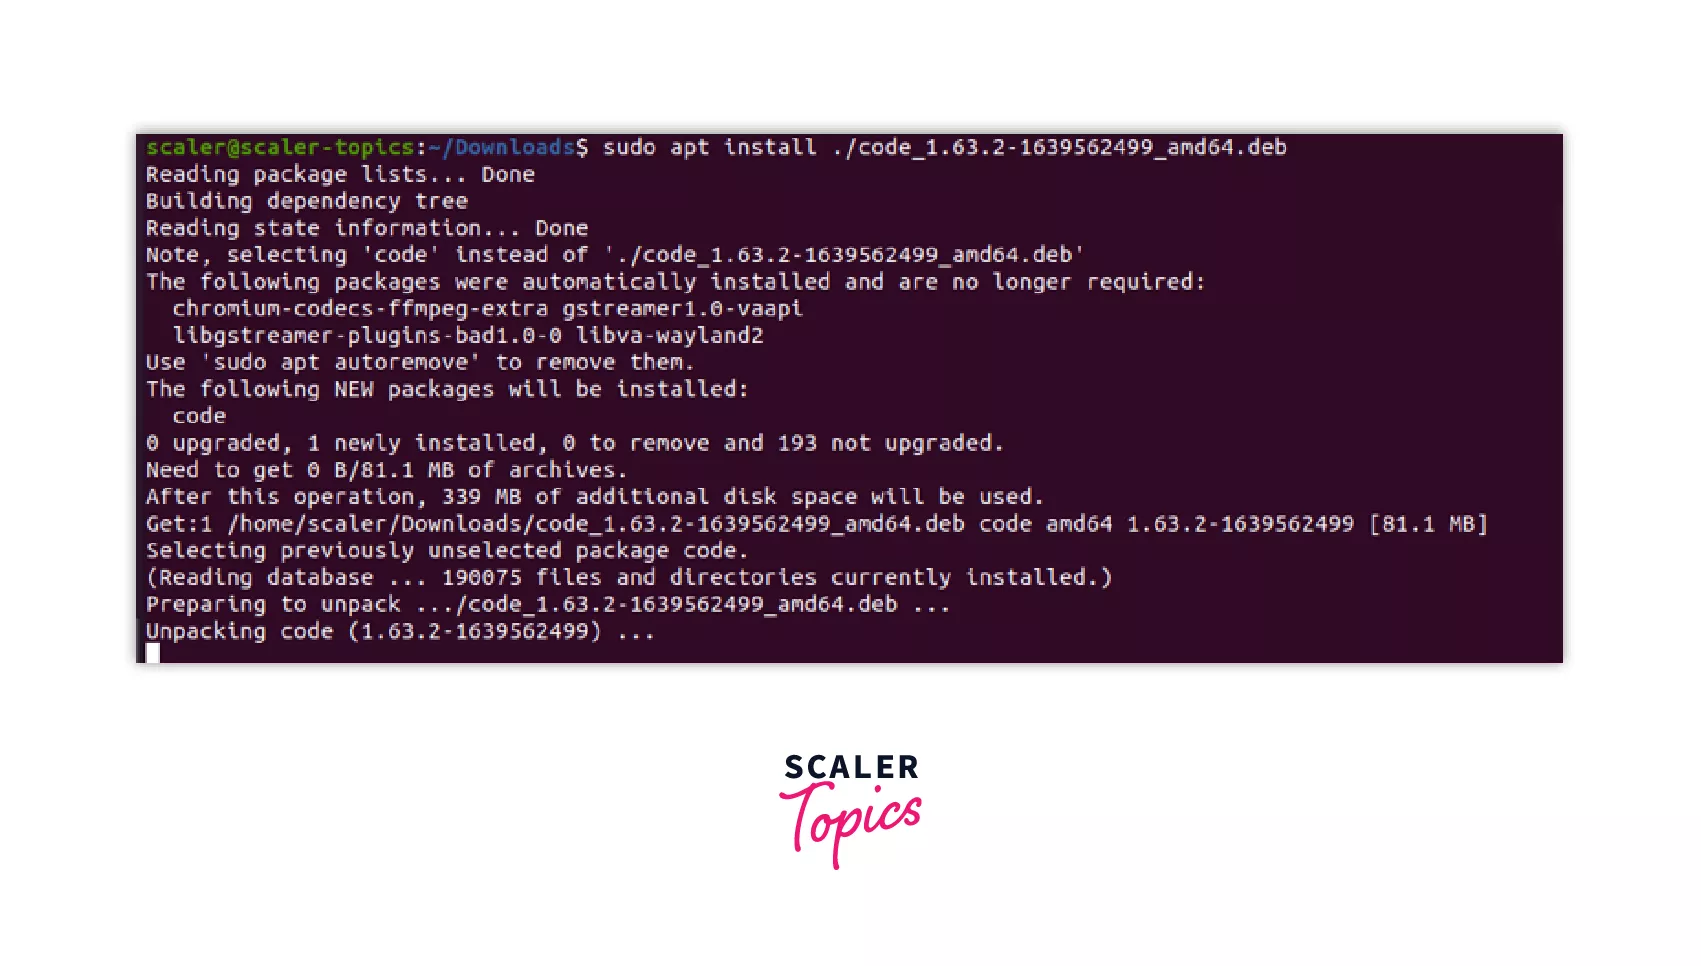
Visual Studio Code is a code editor with an integrated terminal. You can simultaneously use the features of an editor and a terminal in Visual Studio Code. If you want to install Visual Studio Code in your Linux Operating System, visit this link. It is a straightforward process, you have to download the .deb (Debian) file for Ubuntu OS and then open the Linux terminal at the downloaded .deb file location. Follow direct installation commands for Red Hat Linux / Fedora / CentOS.
Use sudo apt install ./file_name.deb command in the terminal where the .deb file is present to install the Visual Studio Code editor in your system. Enter system password if required and proceed.
Once installed, open your Visual Studio Code from the Menu option (⋮⋮⋮ icon) and follow the steps to create, run and compile C program in Linux on the Visual Studio Code editor.
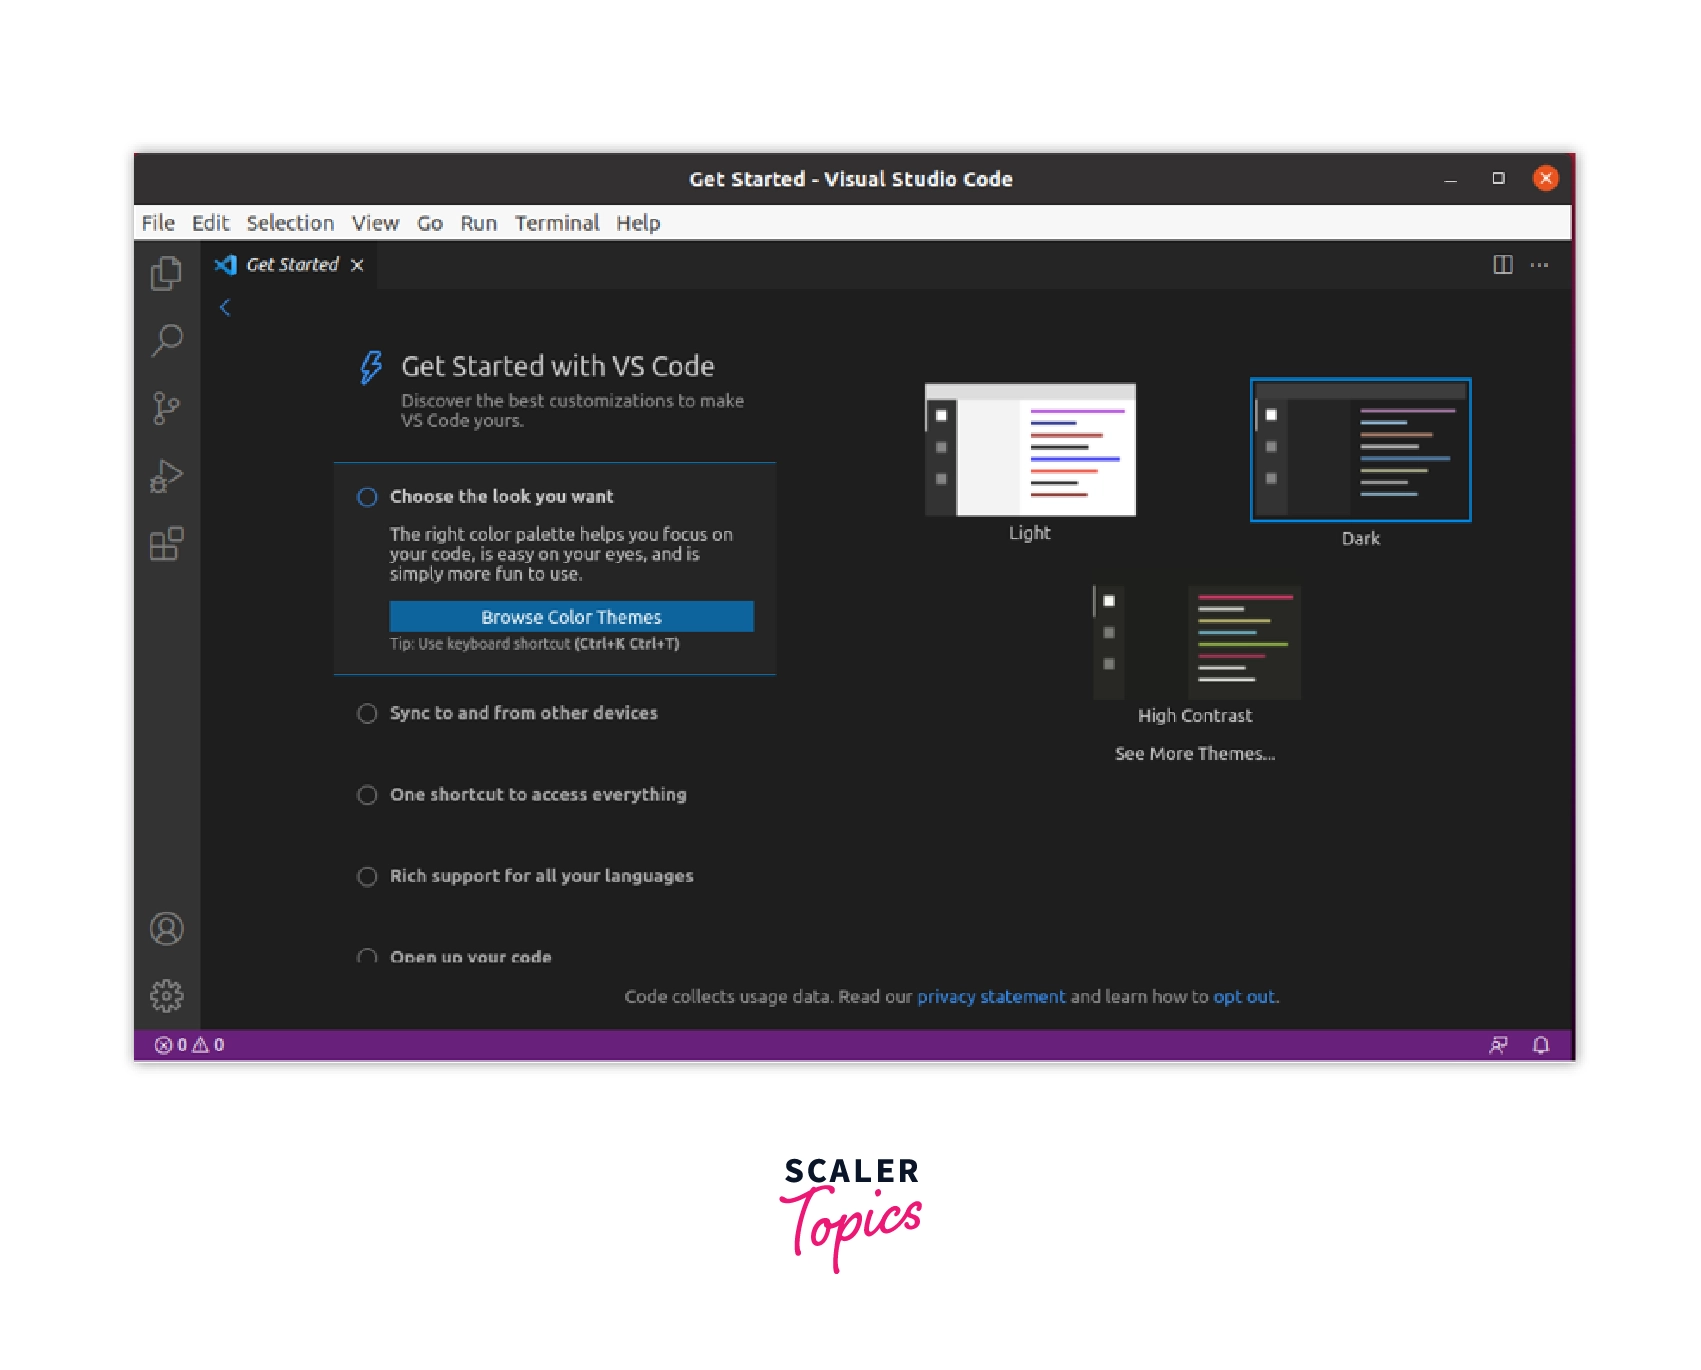
- This is the first "getting started with VS Code" screen after opening the Visual Studio Code editor.
-
Complete the Visual Studio Code editor setup as per your choices or proceed by clicking on ✓✓Mark Done.
-
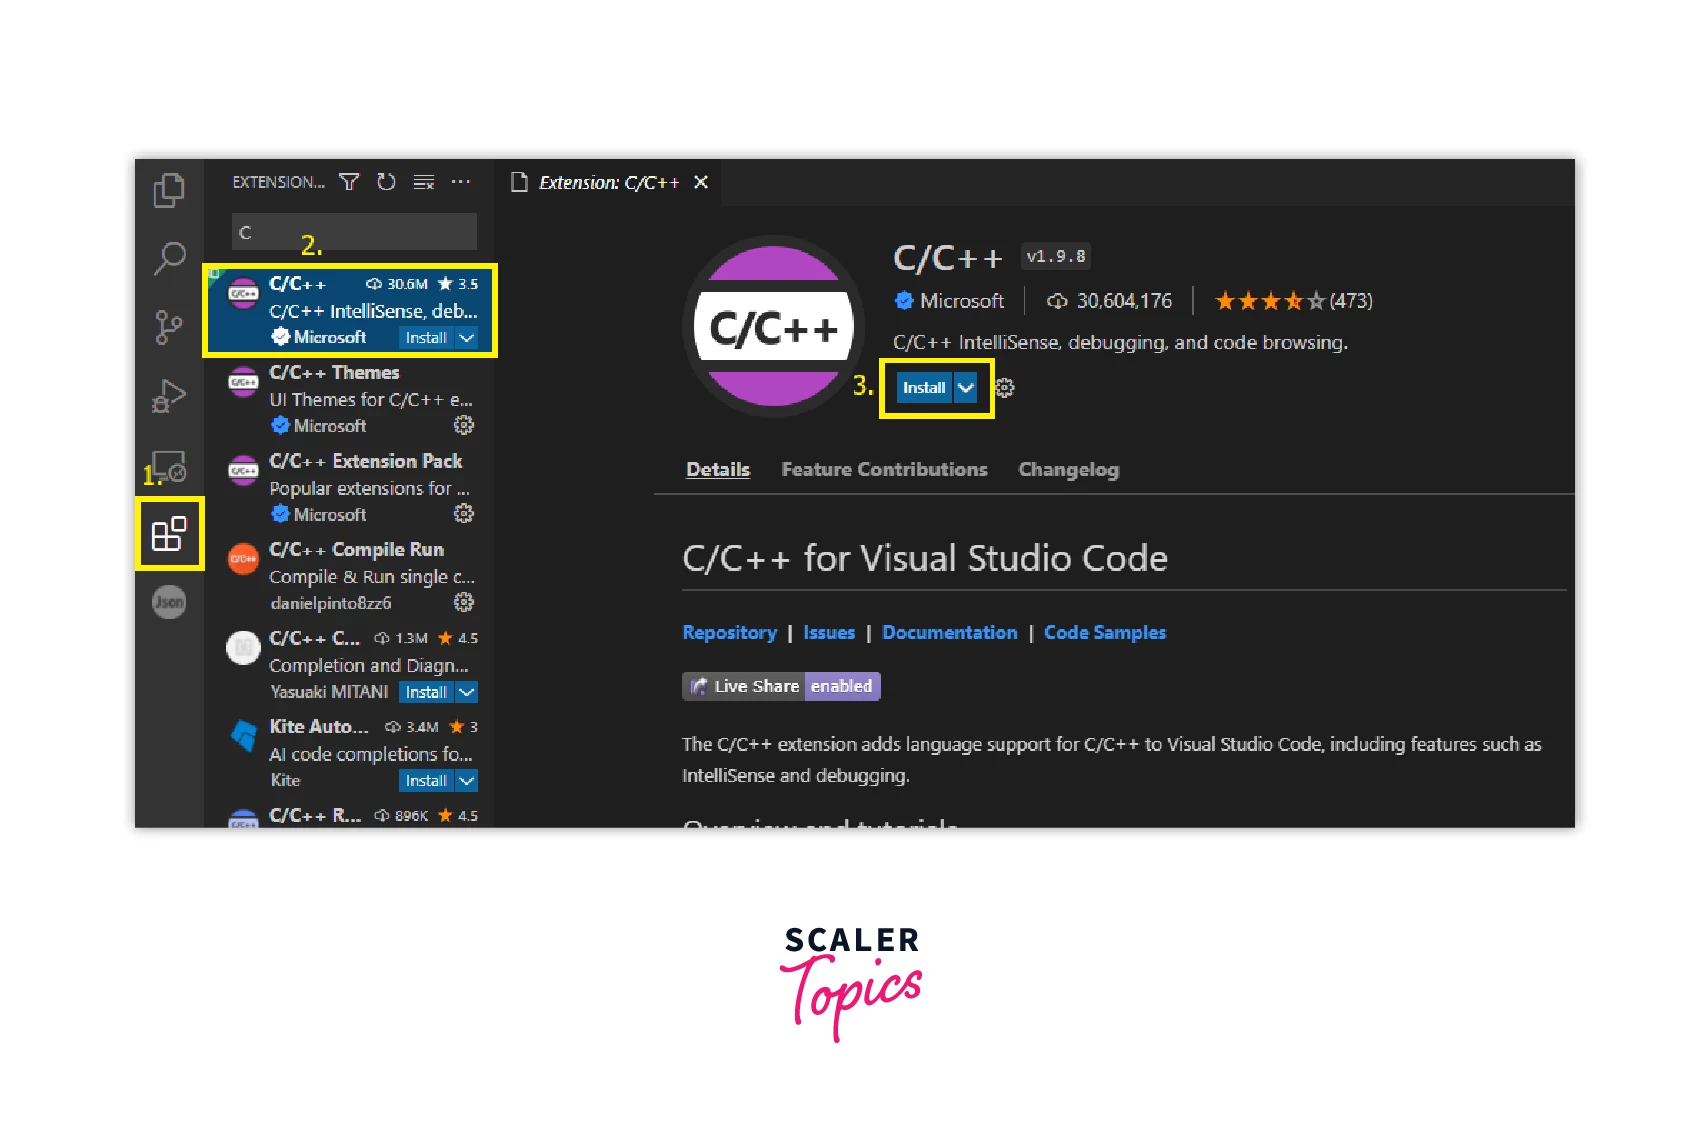
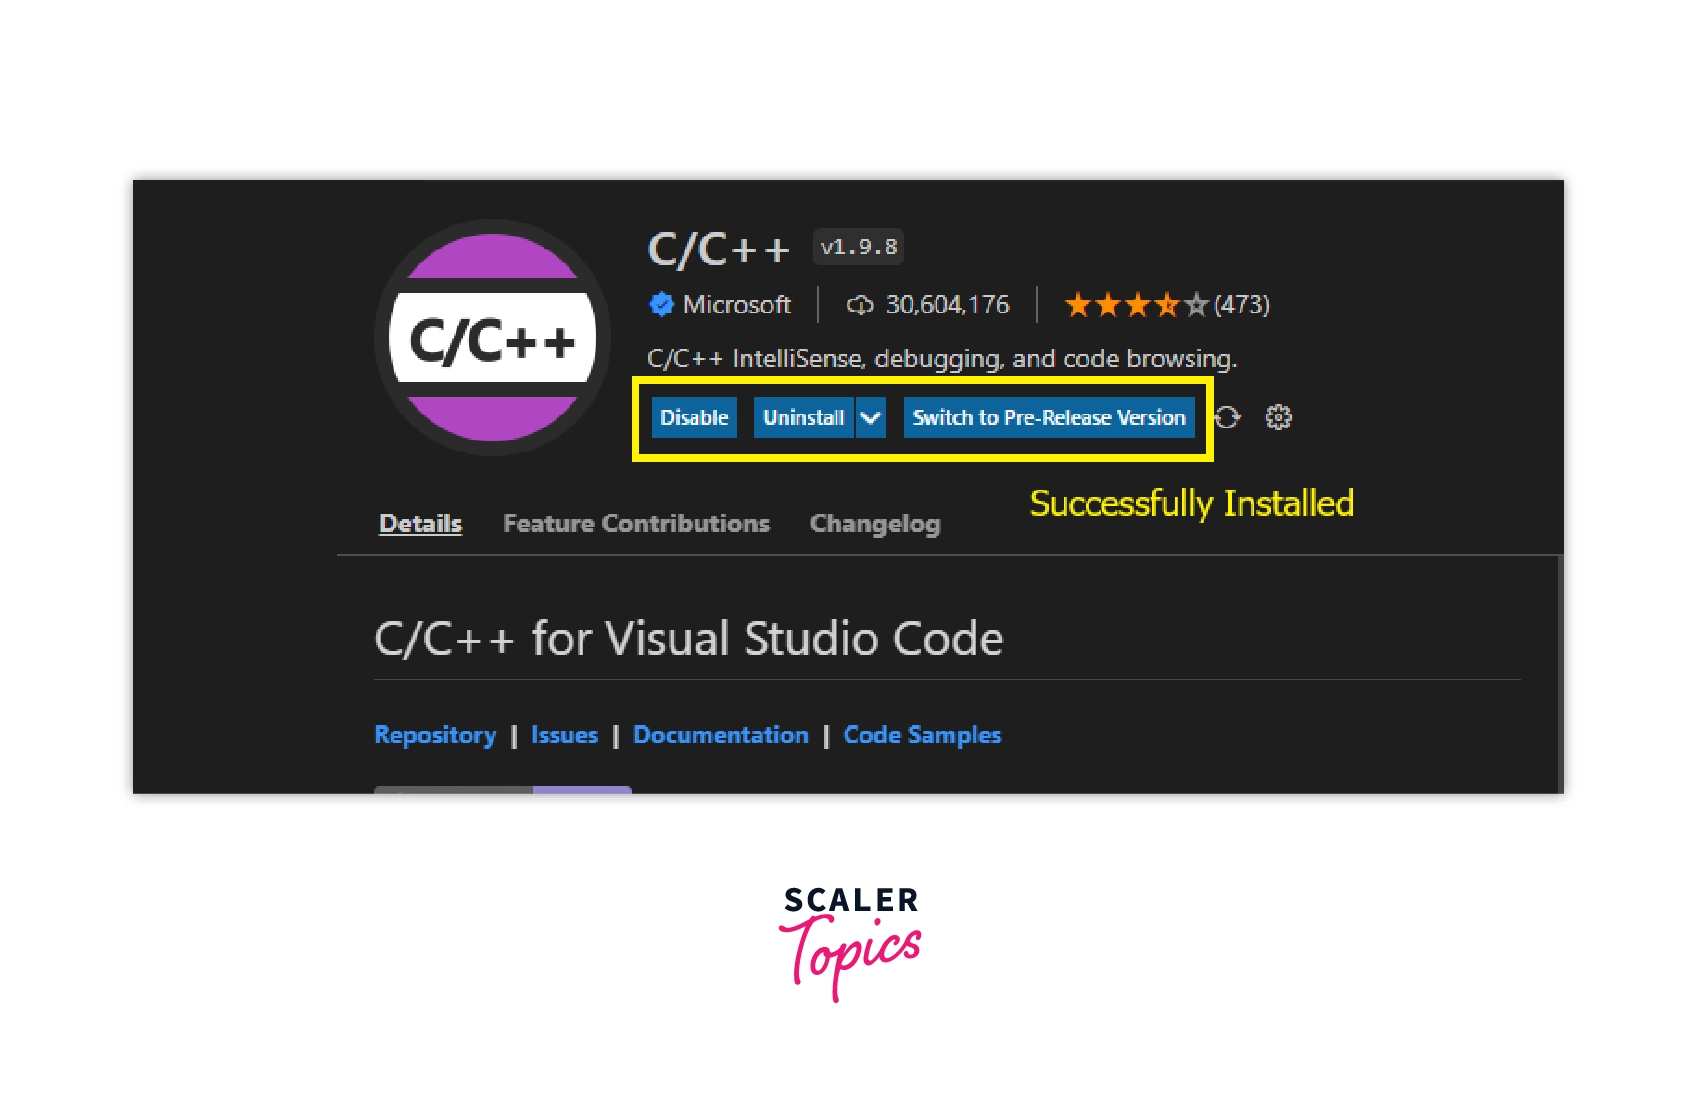
We need to install a C/C++ extension from the extensions store in the Visual Studio Code editor. Click on the extensions button on the sidebar and type C in the search bar, it will show various extensions, but we need to install the *C/C+ extension provided by Microsoft.
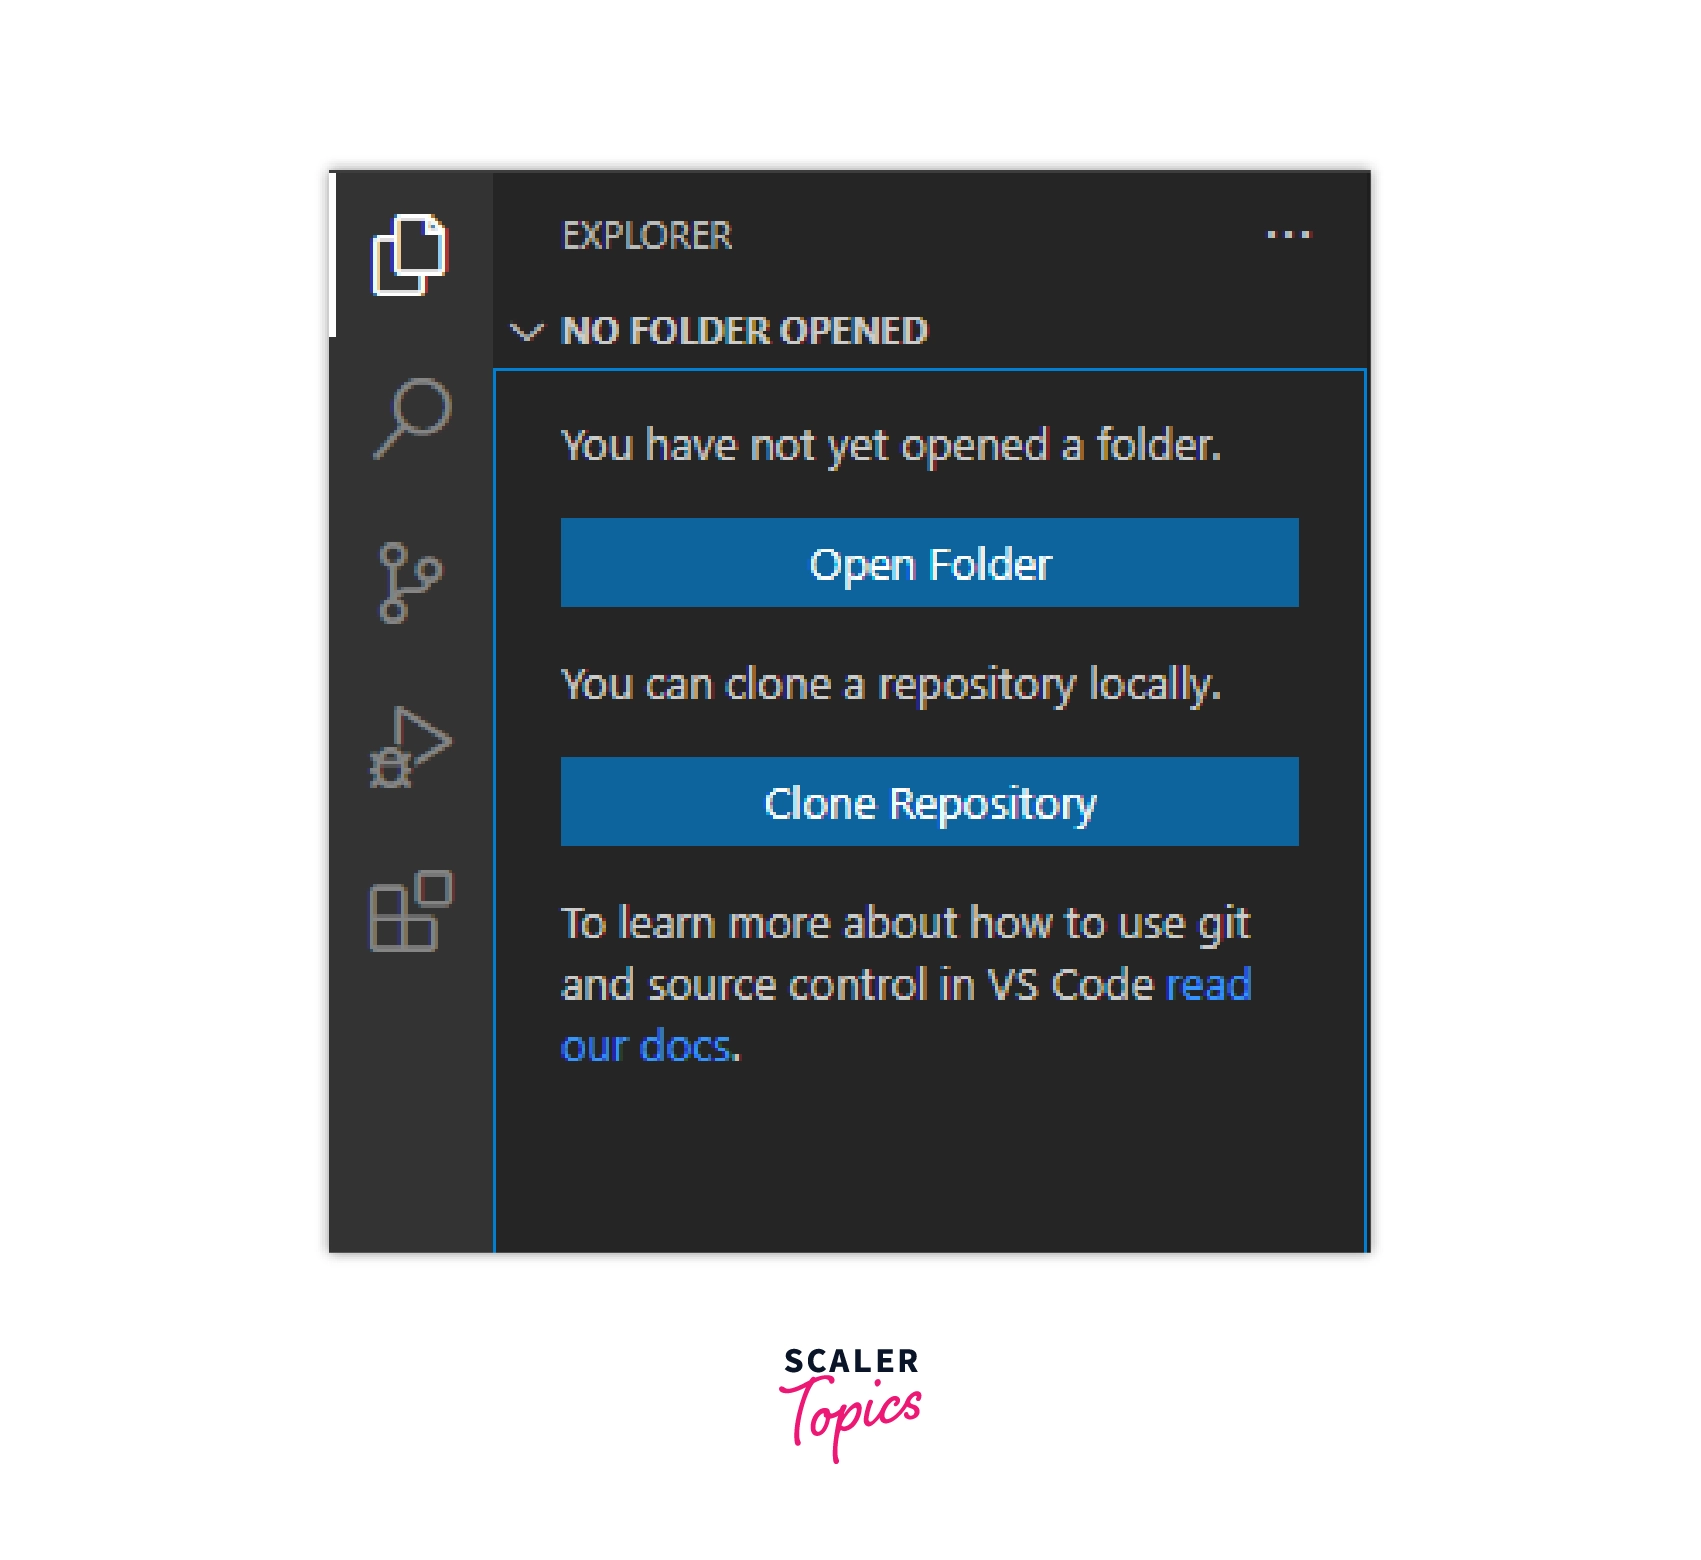
- Click on the Explorer button at the top of the side bar and then on the Open Folder... option to open a folder. Select any folder of your choice. We are using the Desktop folder in this tutorial.
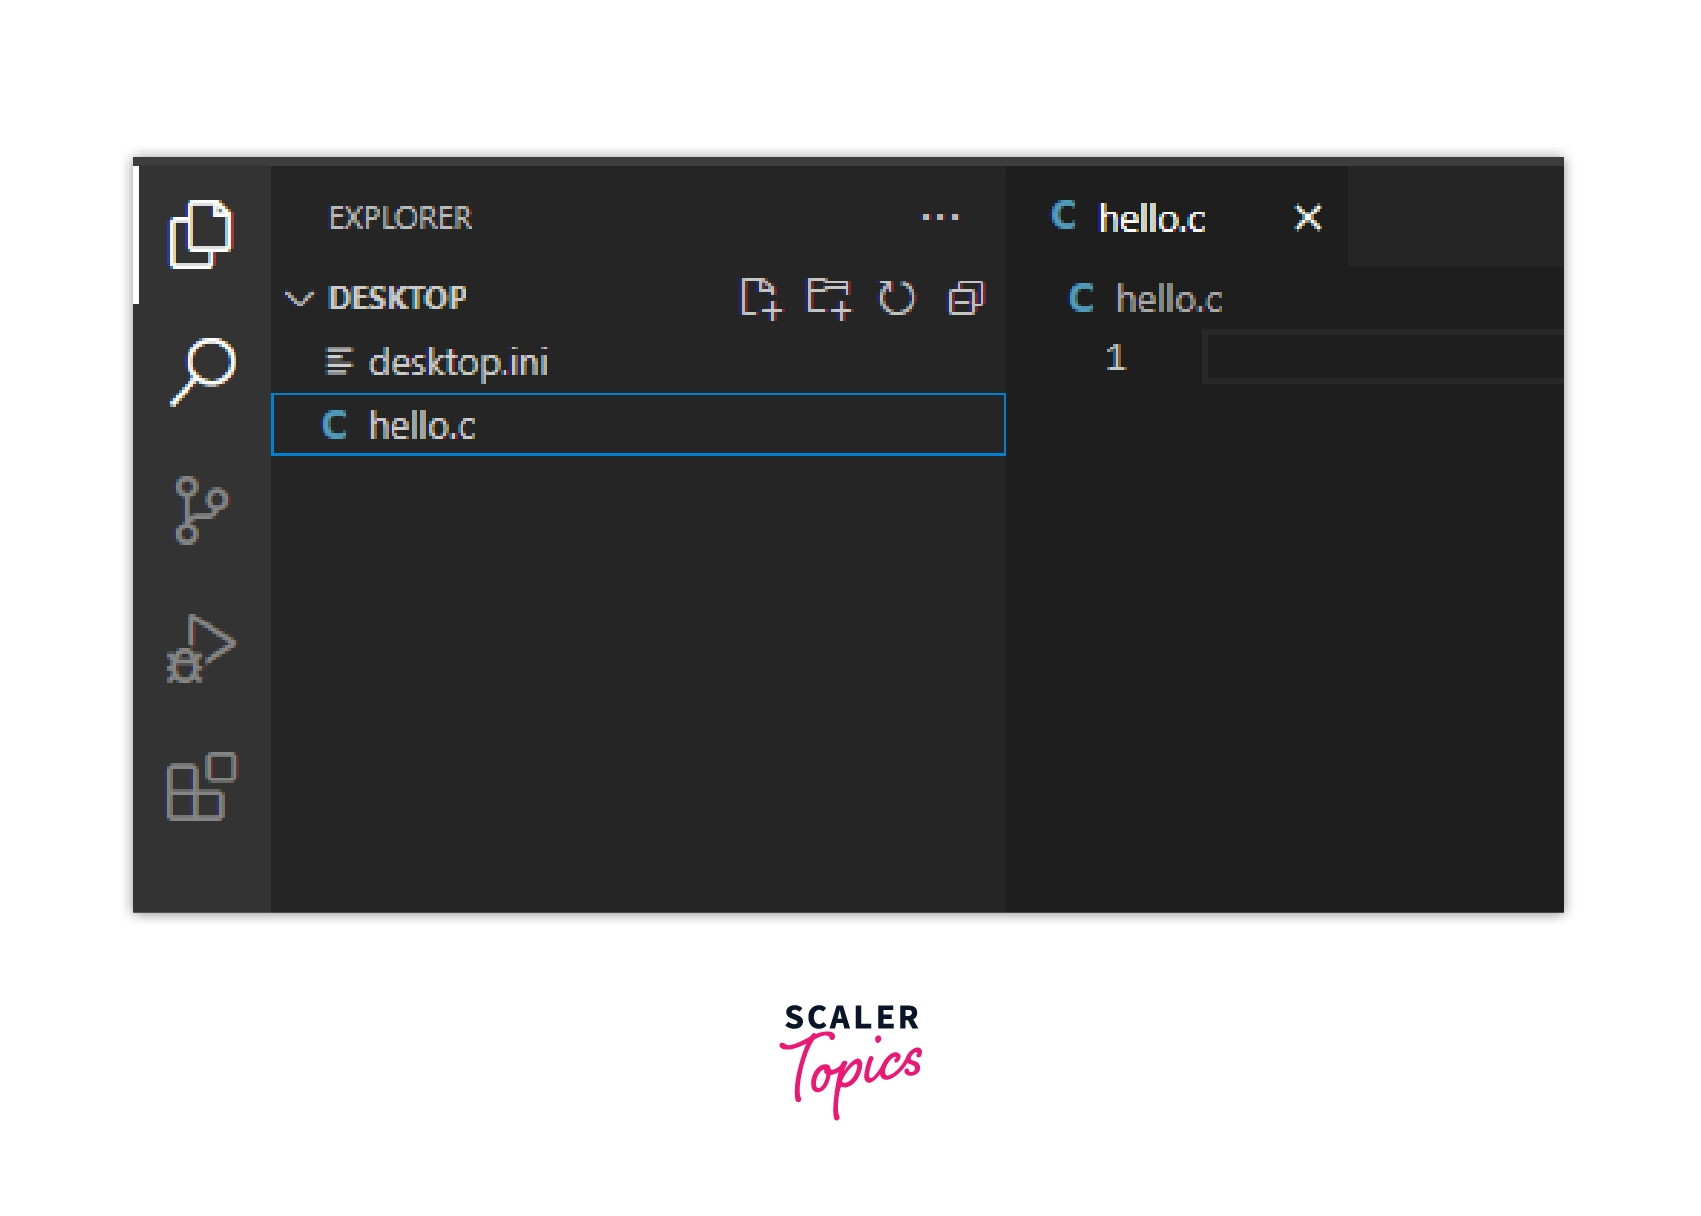
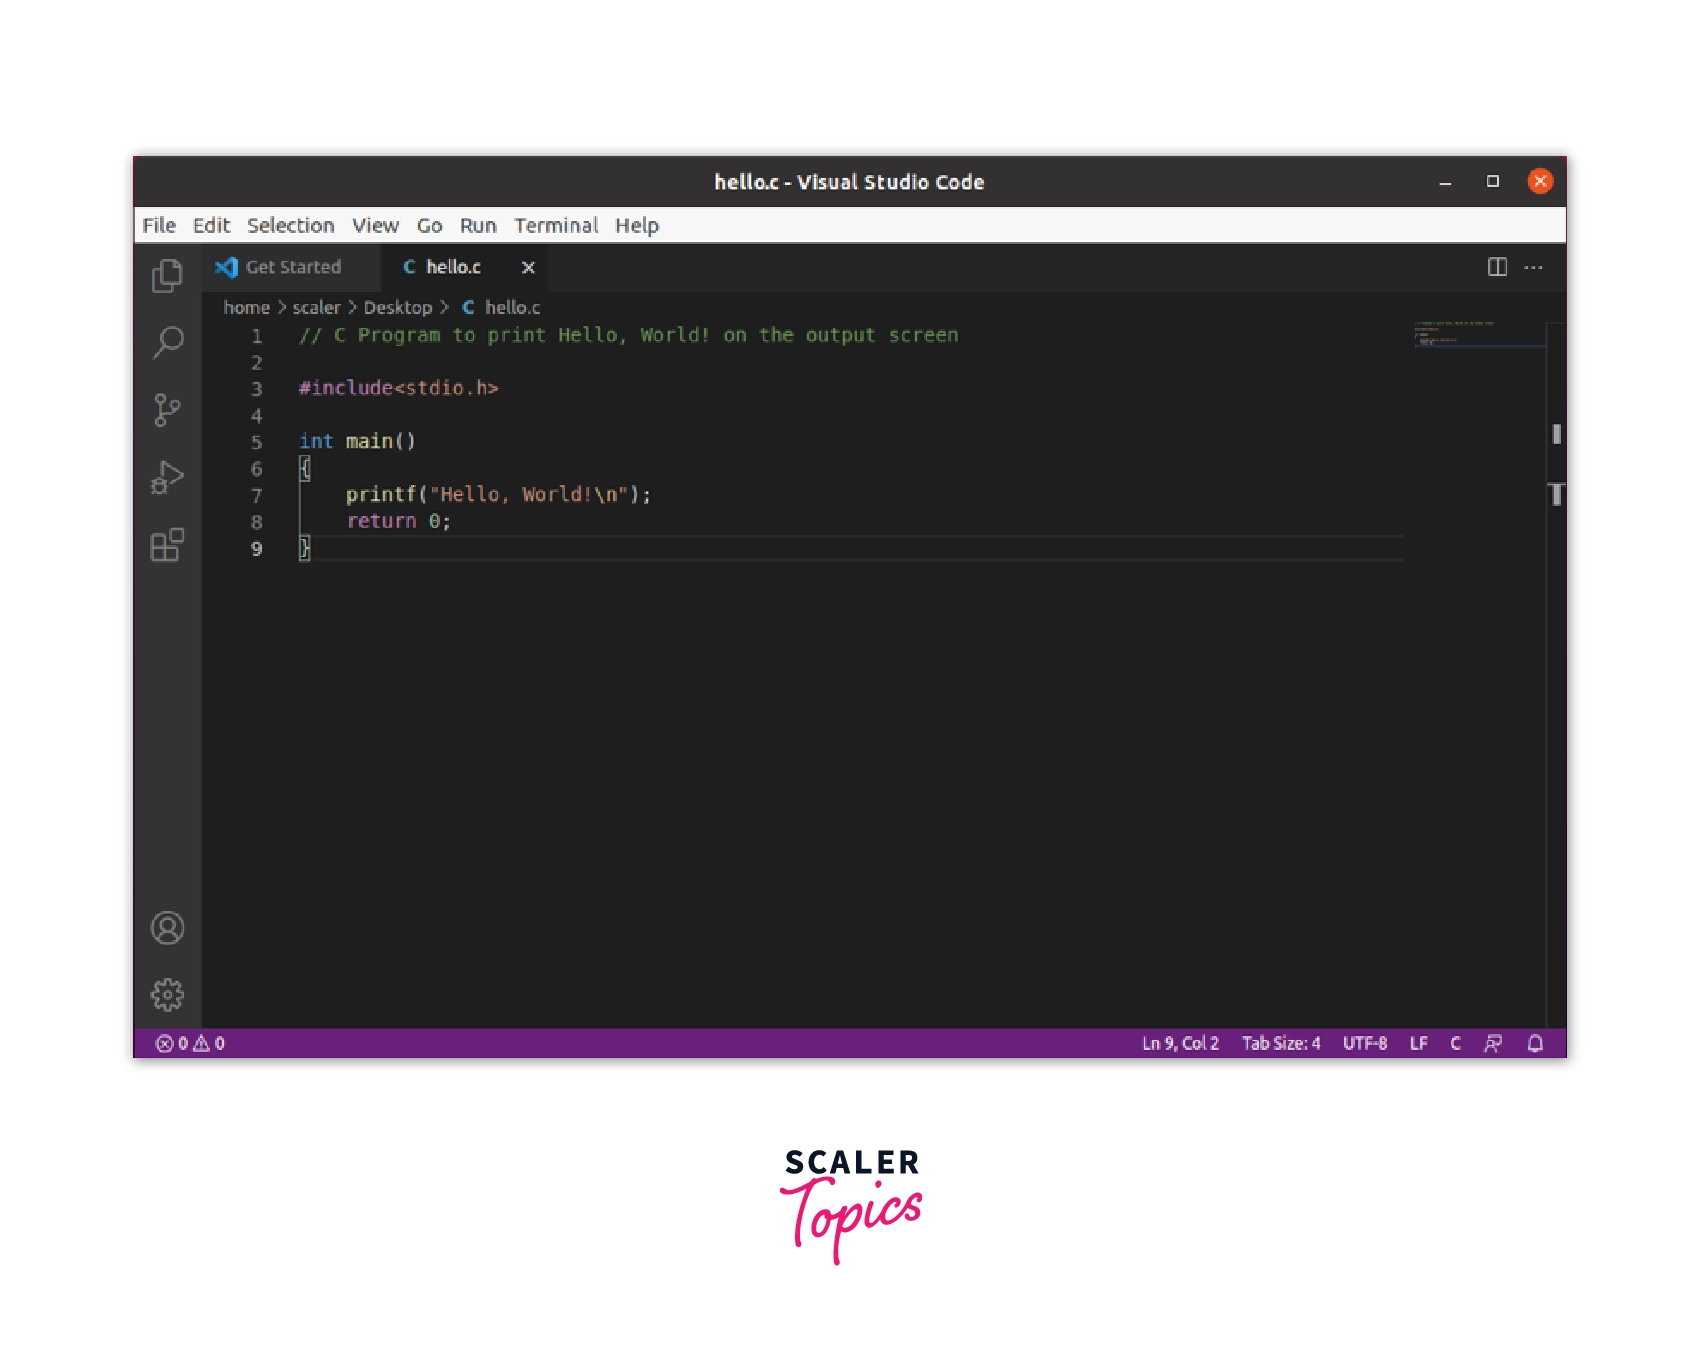
- After opening the Desktop folder, click on the New File+ button to create a new file and name it as hello.c. This process will create a hello.c file in the Desktop directory.
![]()
- Write the Hello World program in the editor and save the file using Ctrl + S.
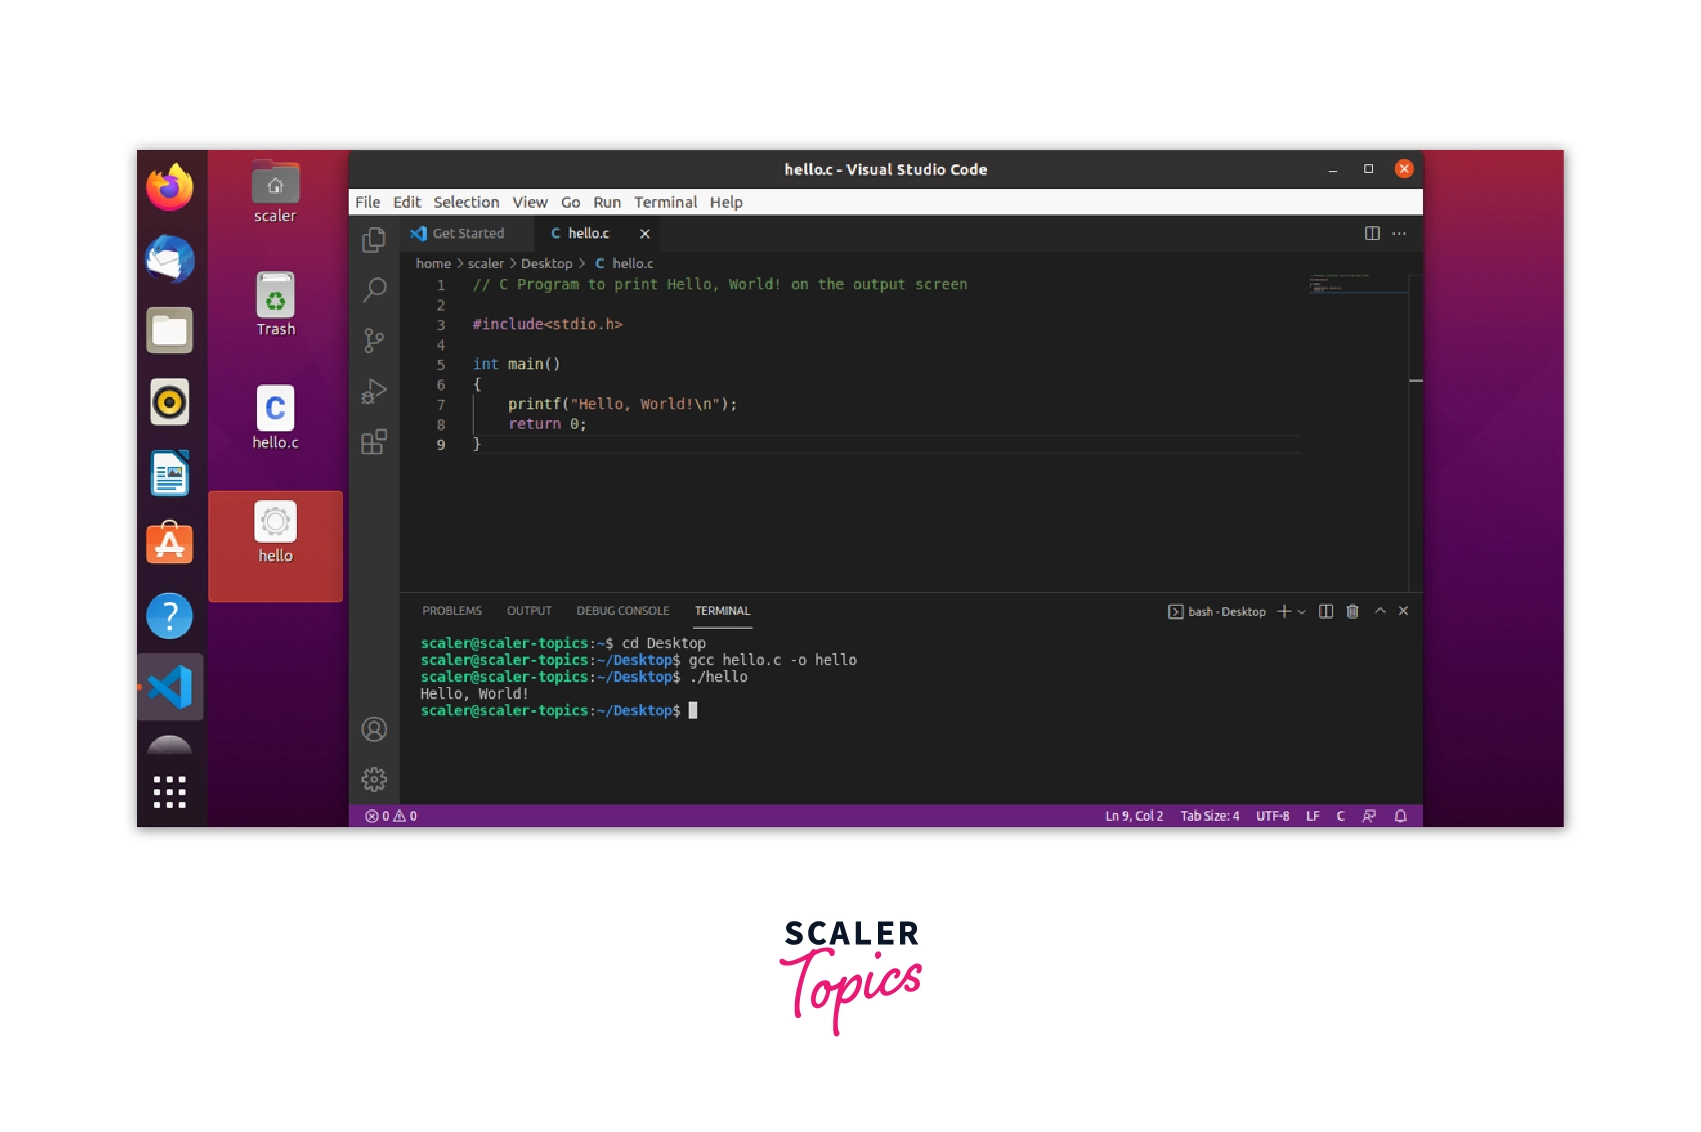
- Open the terminal using Ctrl + Shift + ` or click on New Terminal in the Terminal option from the Menu bar. (VS Code terminal and the Ubuntu Terminal have similar working.)

- Change the directory to ~/Desktop in the terminal using cd Desktop and compile the C program file hello.c using gcc hello.c -o hello command in the Visual Studio code terminal. This command will create an executable file with the name hello in the Desktop directory, as shown in the image.

- Run the executable file using the ./hello command in the terminal.
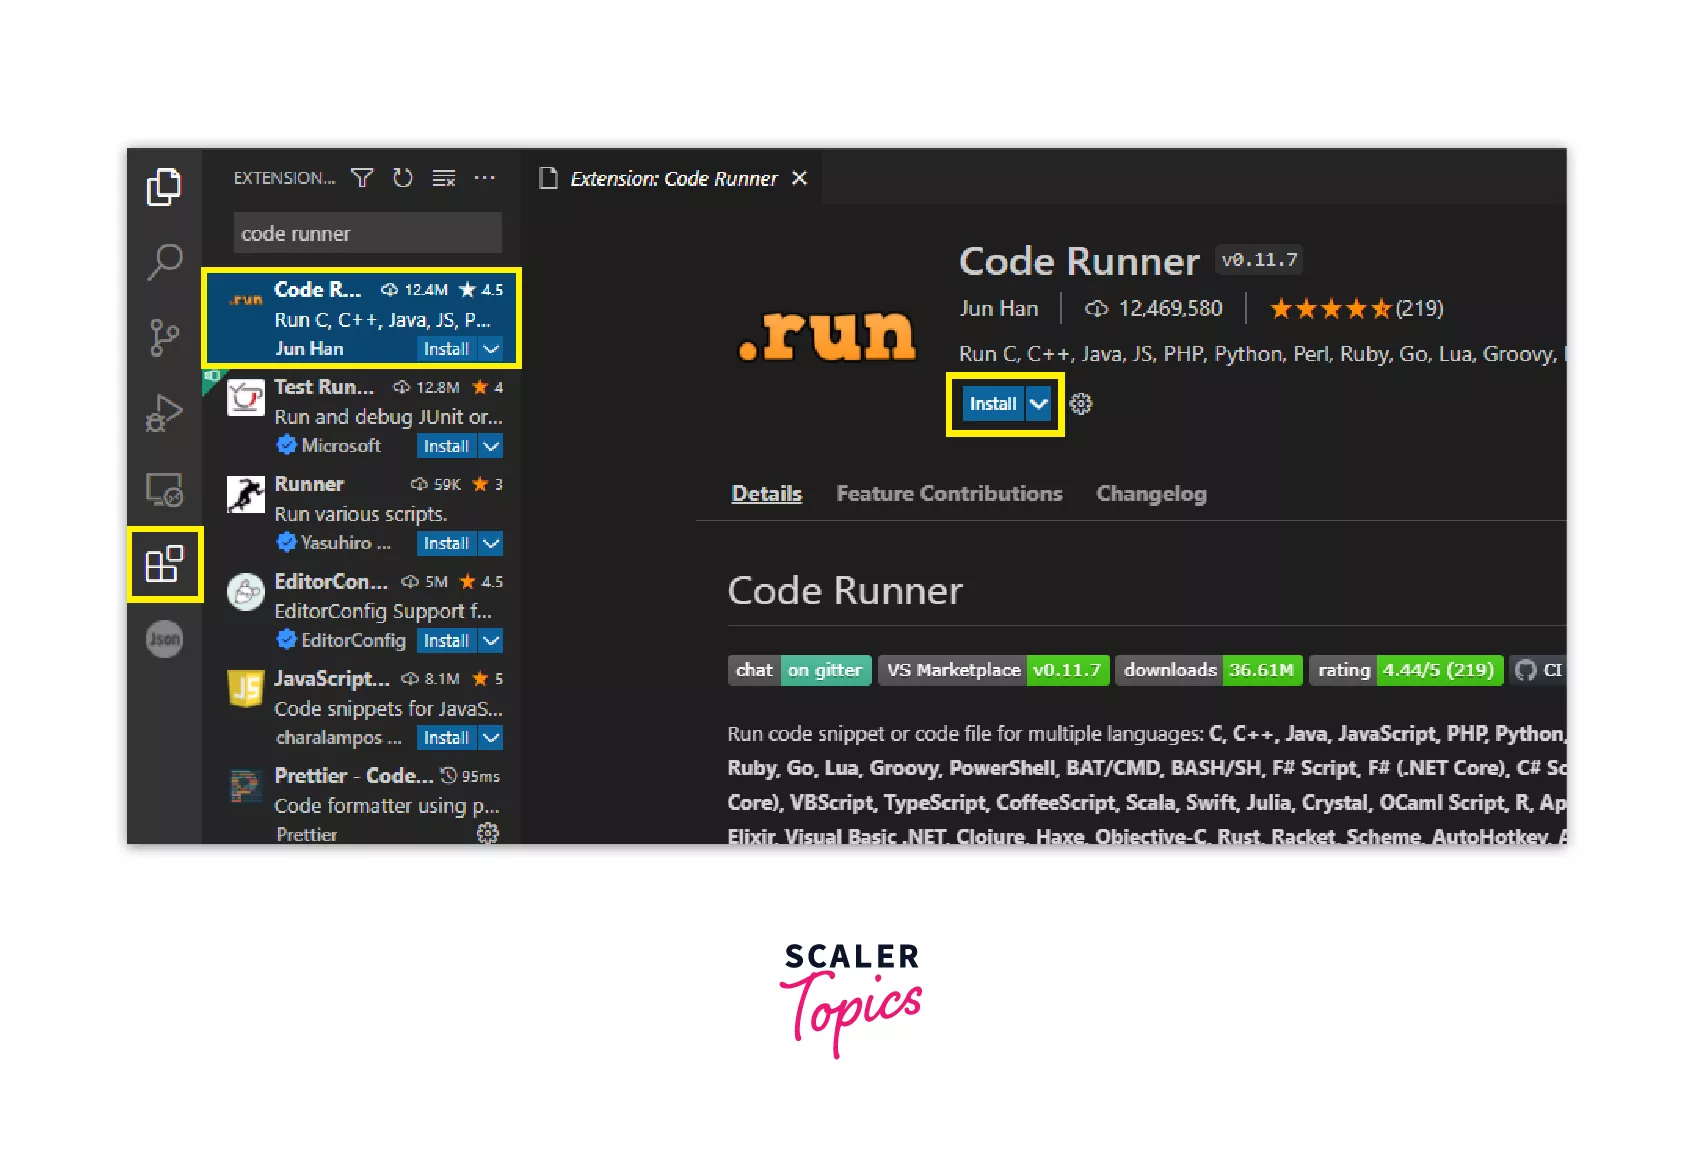
We can also run the code directly using the Code Runner Extension and some settings modifications. Let's see how we can run our C program with one click in the Visual Studio Code editor.
-
Install Code Runner Extension from the extension store (a similar approach will be used in installing Code Runner Extension as we have used in installing C/C++ Extension).

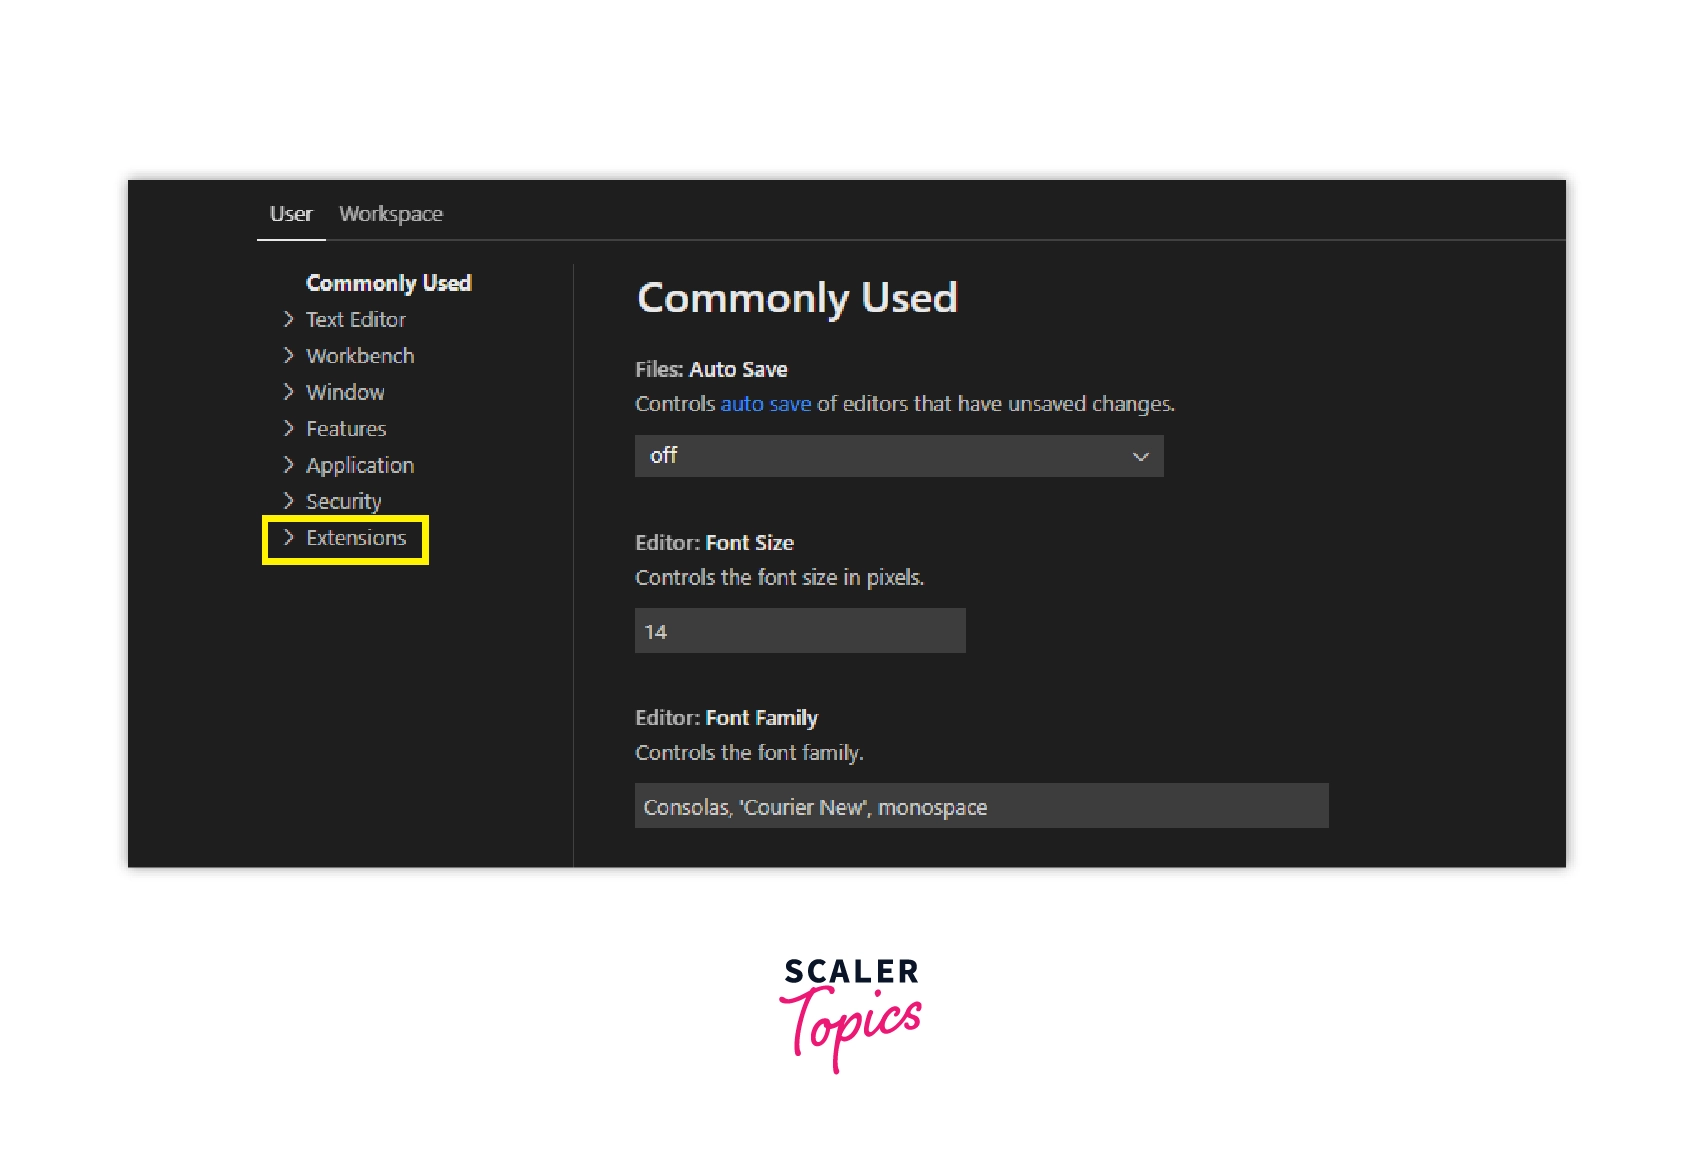
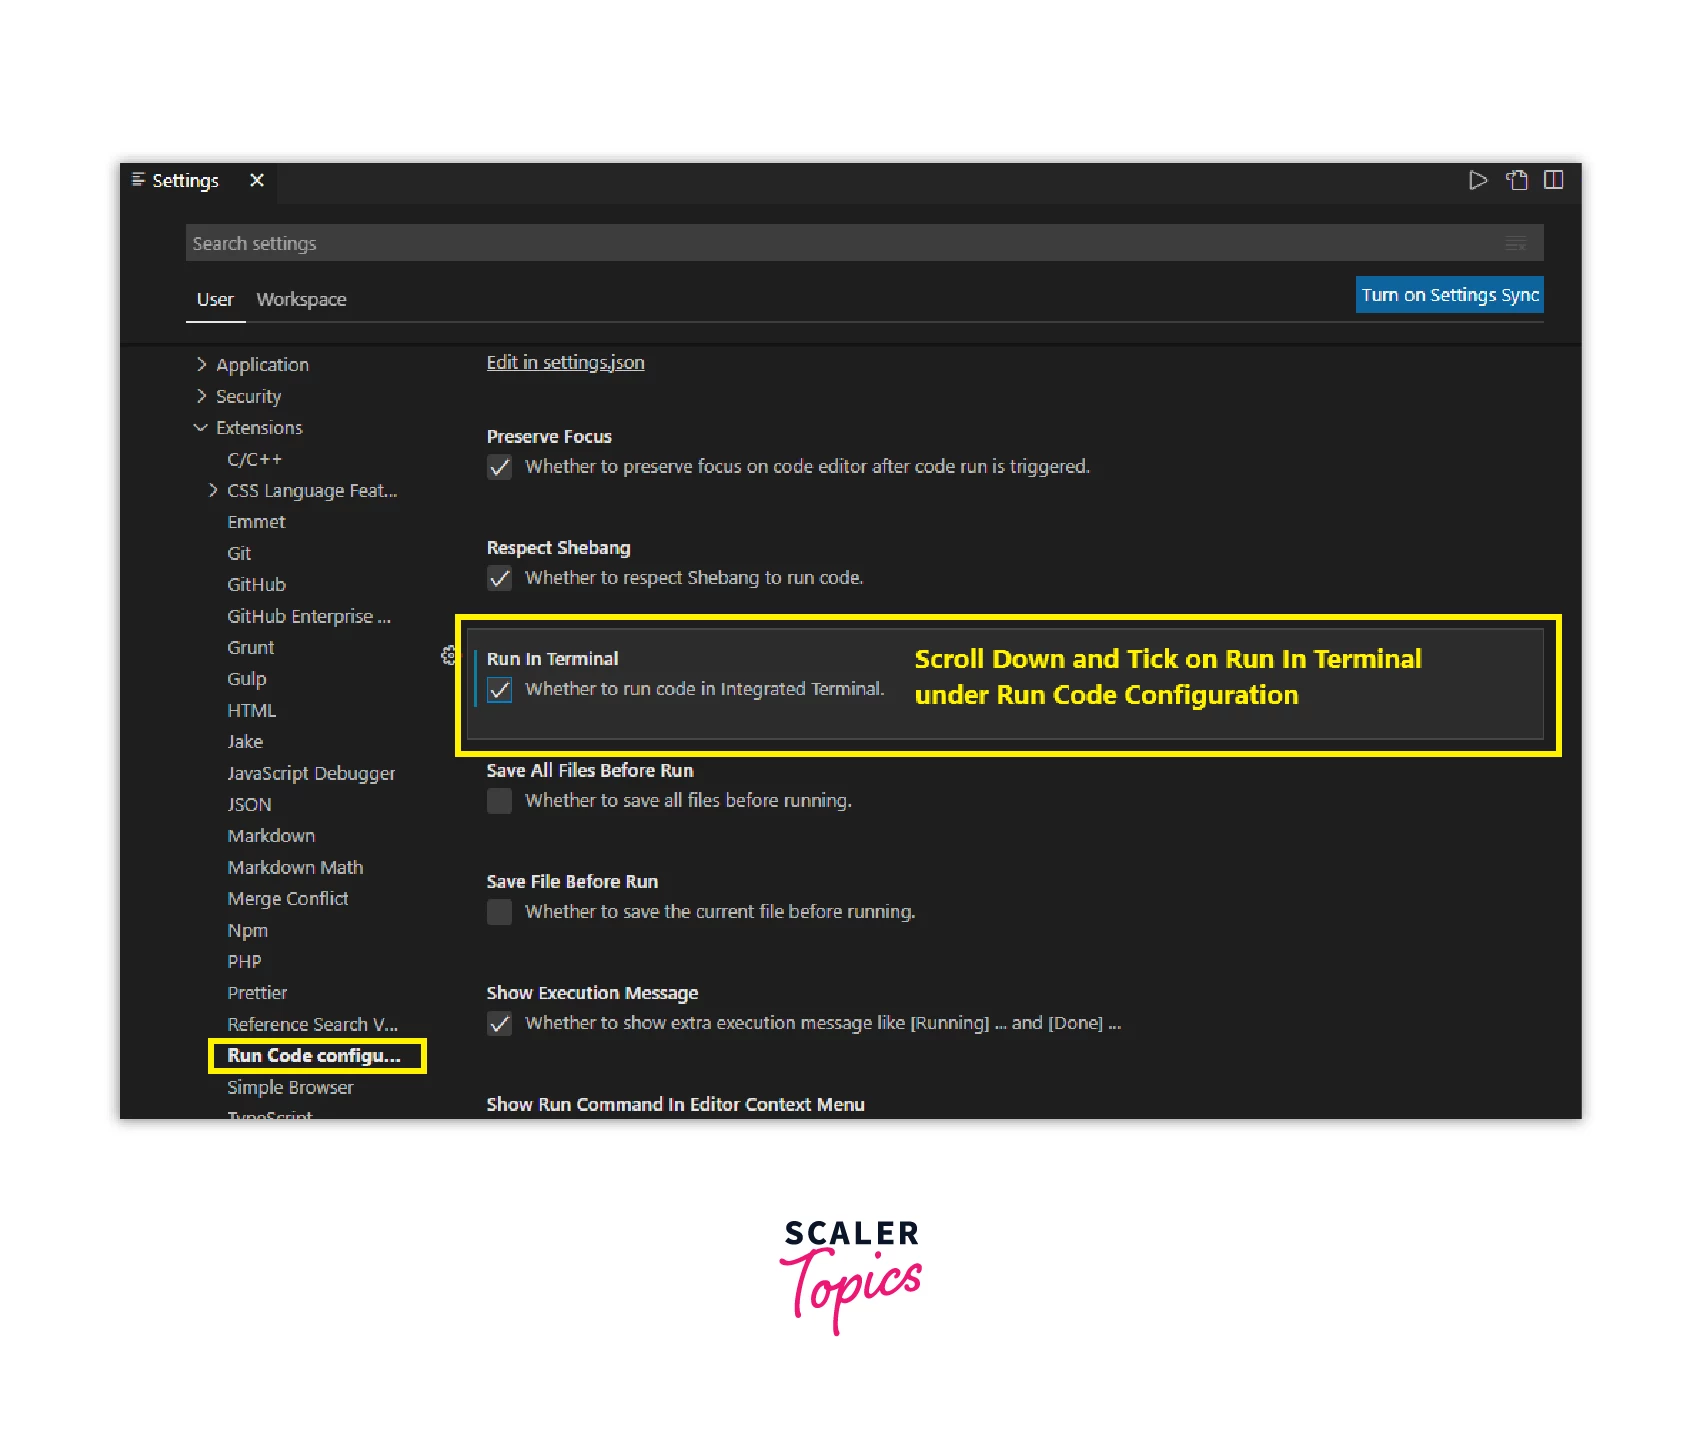
- Code Runner will give Output in the OUTPUT tab of the terminal window, but to take inputs from the user, we have run our program in the Terminal tab. So to do the same, we have to modify some settings. Click on the File option from the menu bar and perform the following steps as shown in the images.


In this section, You have seen how to install and set up the Visual Studio Code editor and write, runandcompile` C program in Linux on the Visual Studio Code editor using the GCC Compiler.
Congratulations! Now, it is easy for you to write many more C Programs in the Visual Studio Code editor and run them using the GCC compiler.
Conclusion
- We need to install the build-essential/Development Tools package to get the GCC Compiler in the Linux-based operating system.
- build-essential meta-package comes with five separate packages that are required during a software compilation process i.e. gcc, g++, libc6-dev , make and dpkg-dev.
- GCC compiler is used to compile and run a C program on the Linux operating system.
- Visual Studio Code editor comes with a pre-integrated terminal, so it is easy to run and compile C programs in Linux on the Visual Studio Code editor.