How to Configure DNS Server in Linux?
Are you looking to set up and configure a DNS server in your Linux environment? Look no further! This article will guide you through the process, providing step-by-step instructions to ensure a smooth and successful DNS configuration. Whether you're a beginner or an experienced user, you'll find the information you need right here. Let's find out how to configure DNS in Linux.
Transform Your Career
Choose from our industry-leading programs designed for career success
Modern Software and AI Engineering Program
Master full-stack development with AI integration

Modern Data Science and ML with specialisation in AI
Advanced data science techniques with AI specialization
Advanced AIML with Specialisation in Agentic AI
Deep dive into AIML with focus on Agentic systems
DevOps, Cloud & AI Platform Engineering
Build and manage AI-powered cloud infrastructure
AI Engineering Advanced Certification by IIT-Roorkee
Premier AI engineering certification from IIT-Roorkee
Introduction
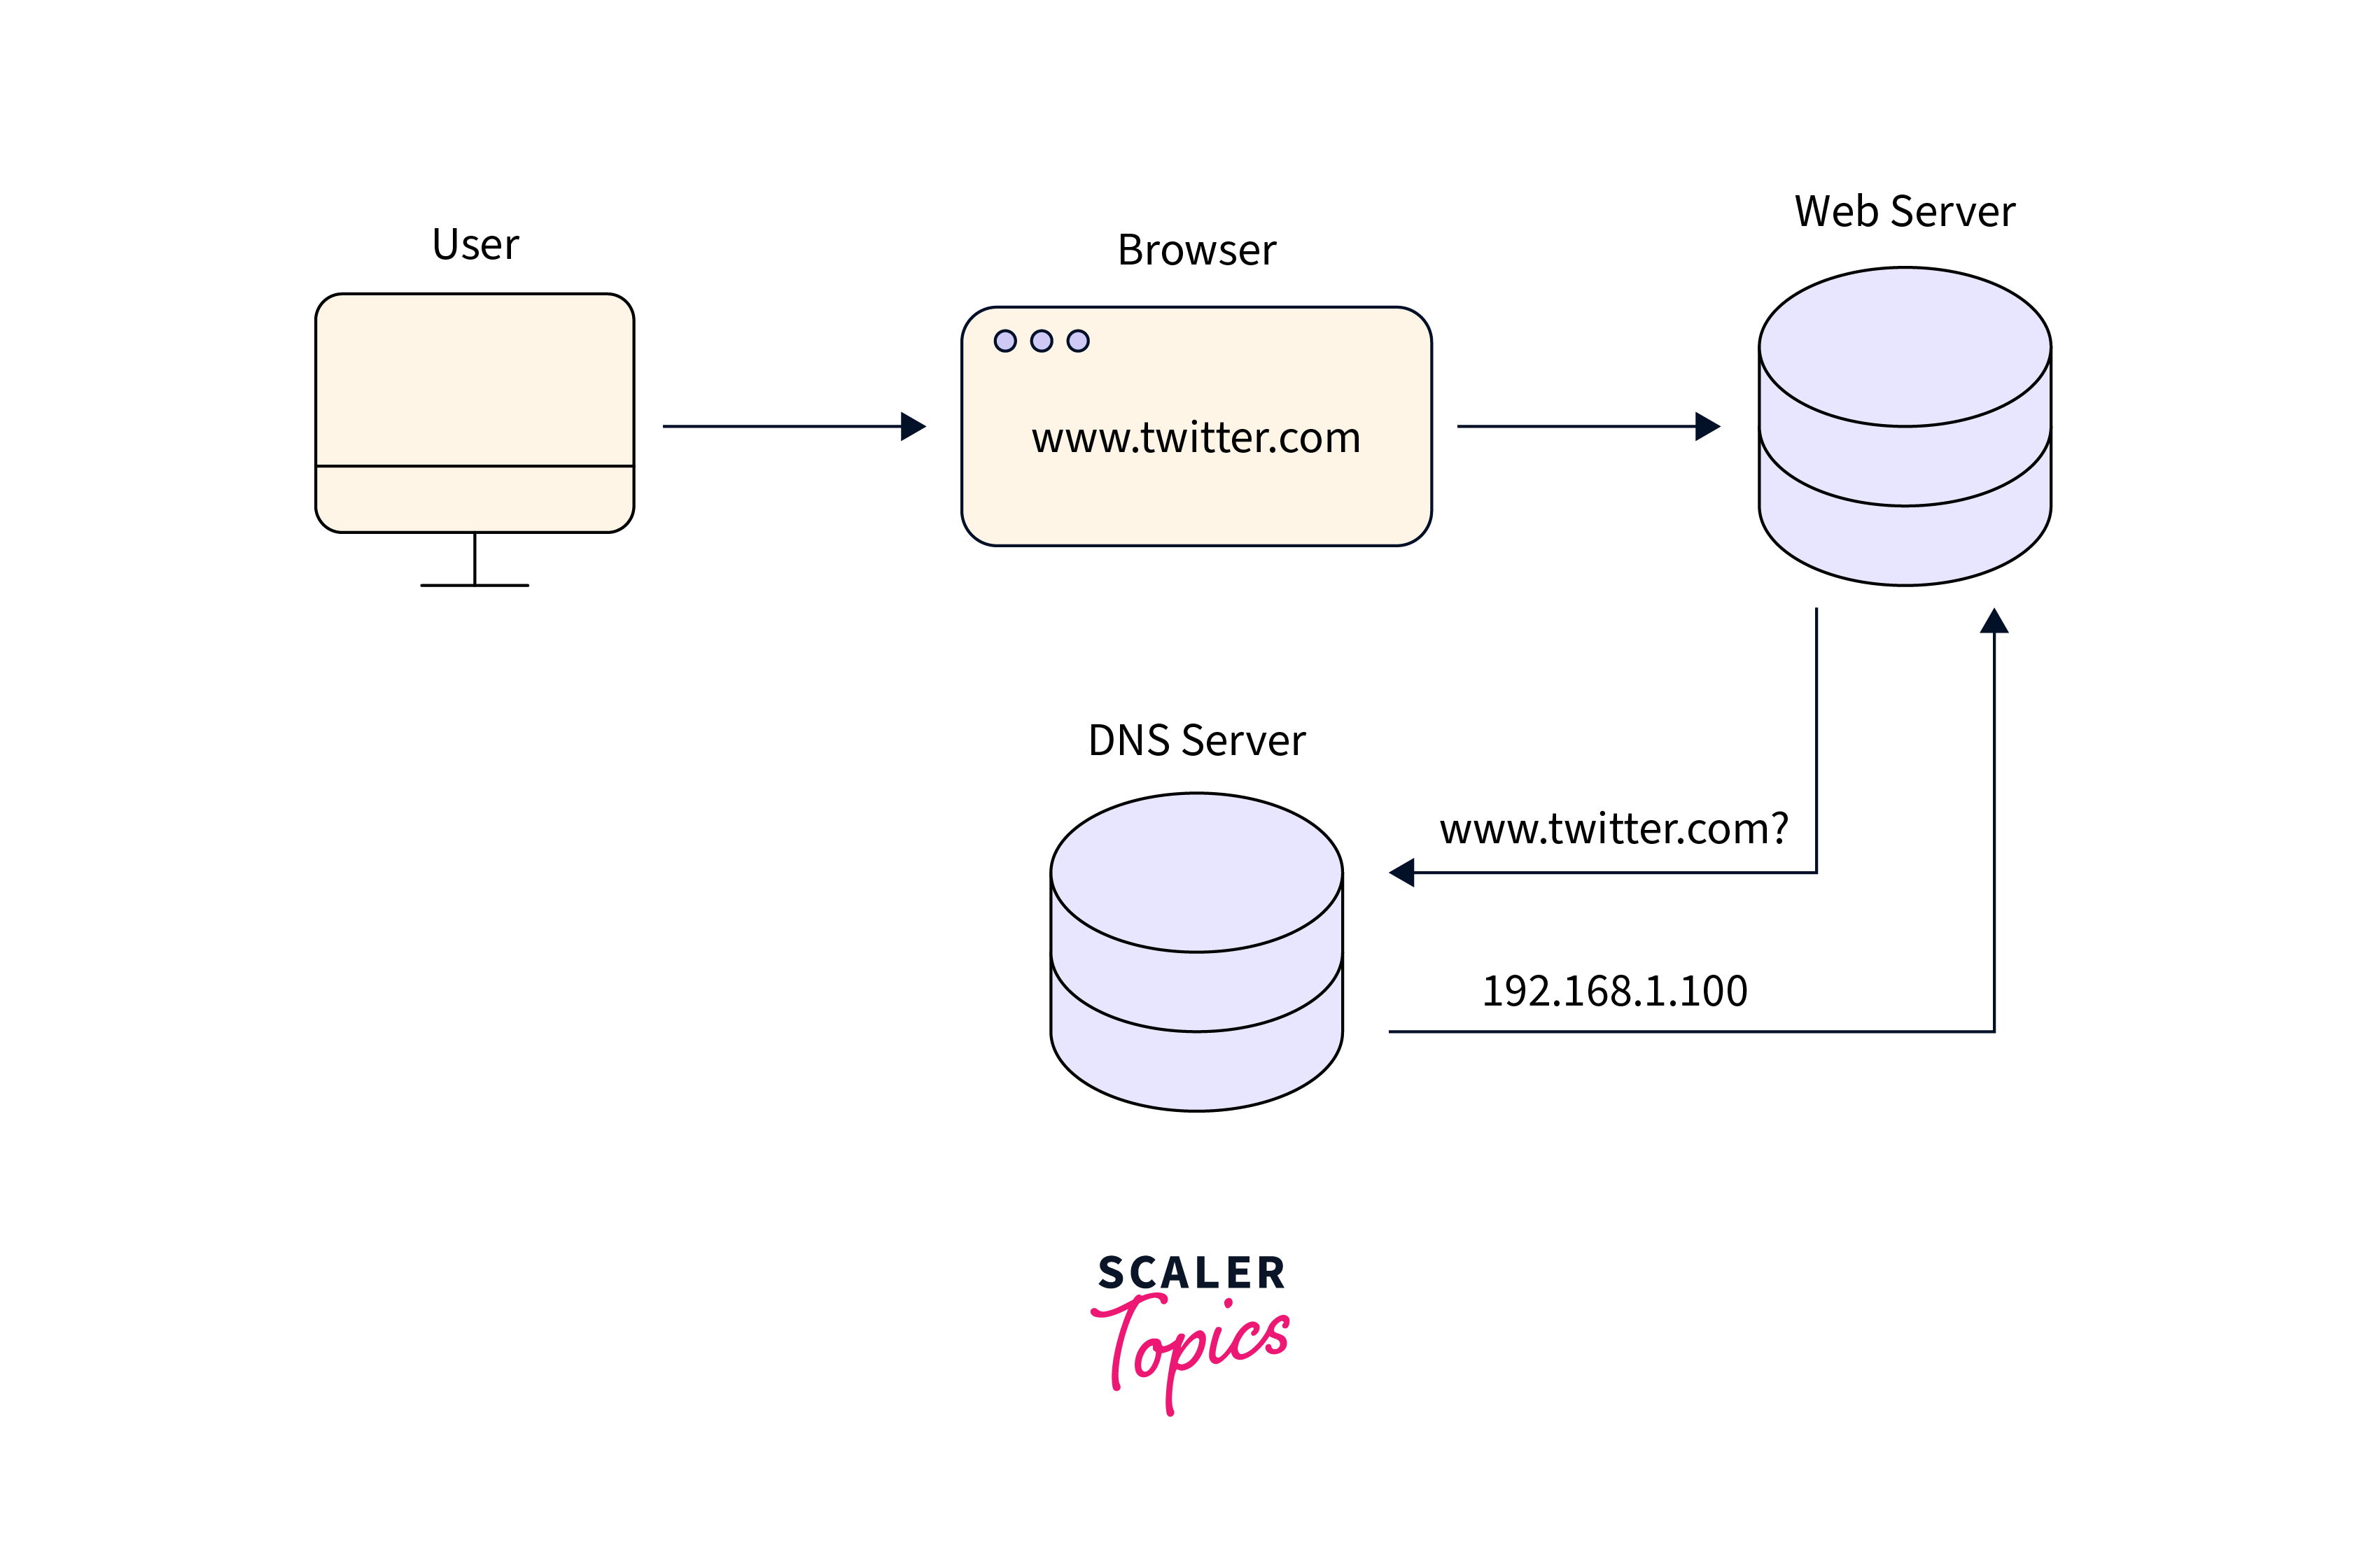
The Domain Name System (DNS) plays a critical role in translating human-readable domain names into IP addresses, allowing us to access websites and services on the internet. In a Linux environment, configuring a DNS server allows you to manage and control DNS resolution within your network. This provides you with greater flexibility, control, and customization options. Let's dive into the steps and find out how to configure DNS in Linux.
Steps of DNS Configuration
Let's learn how to configure DNS in Linux by the steps mentioned below.
Step - 1: Determine Your Linux Distribution
Before getting started, it's essential to identify your specific Linux distribution. Various Linux distributions have slightly different package managers, commands, and file locations. For determining the Linux distribution installed in the system, we will use the hostnamectl command. Just open a terminal window and run the command.
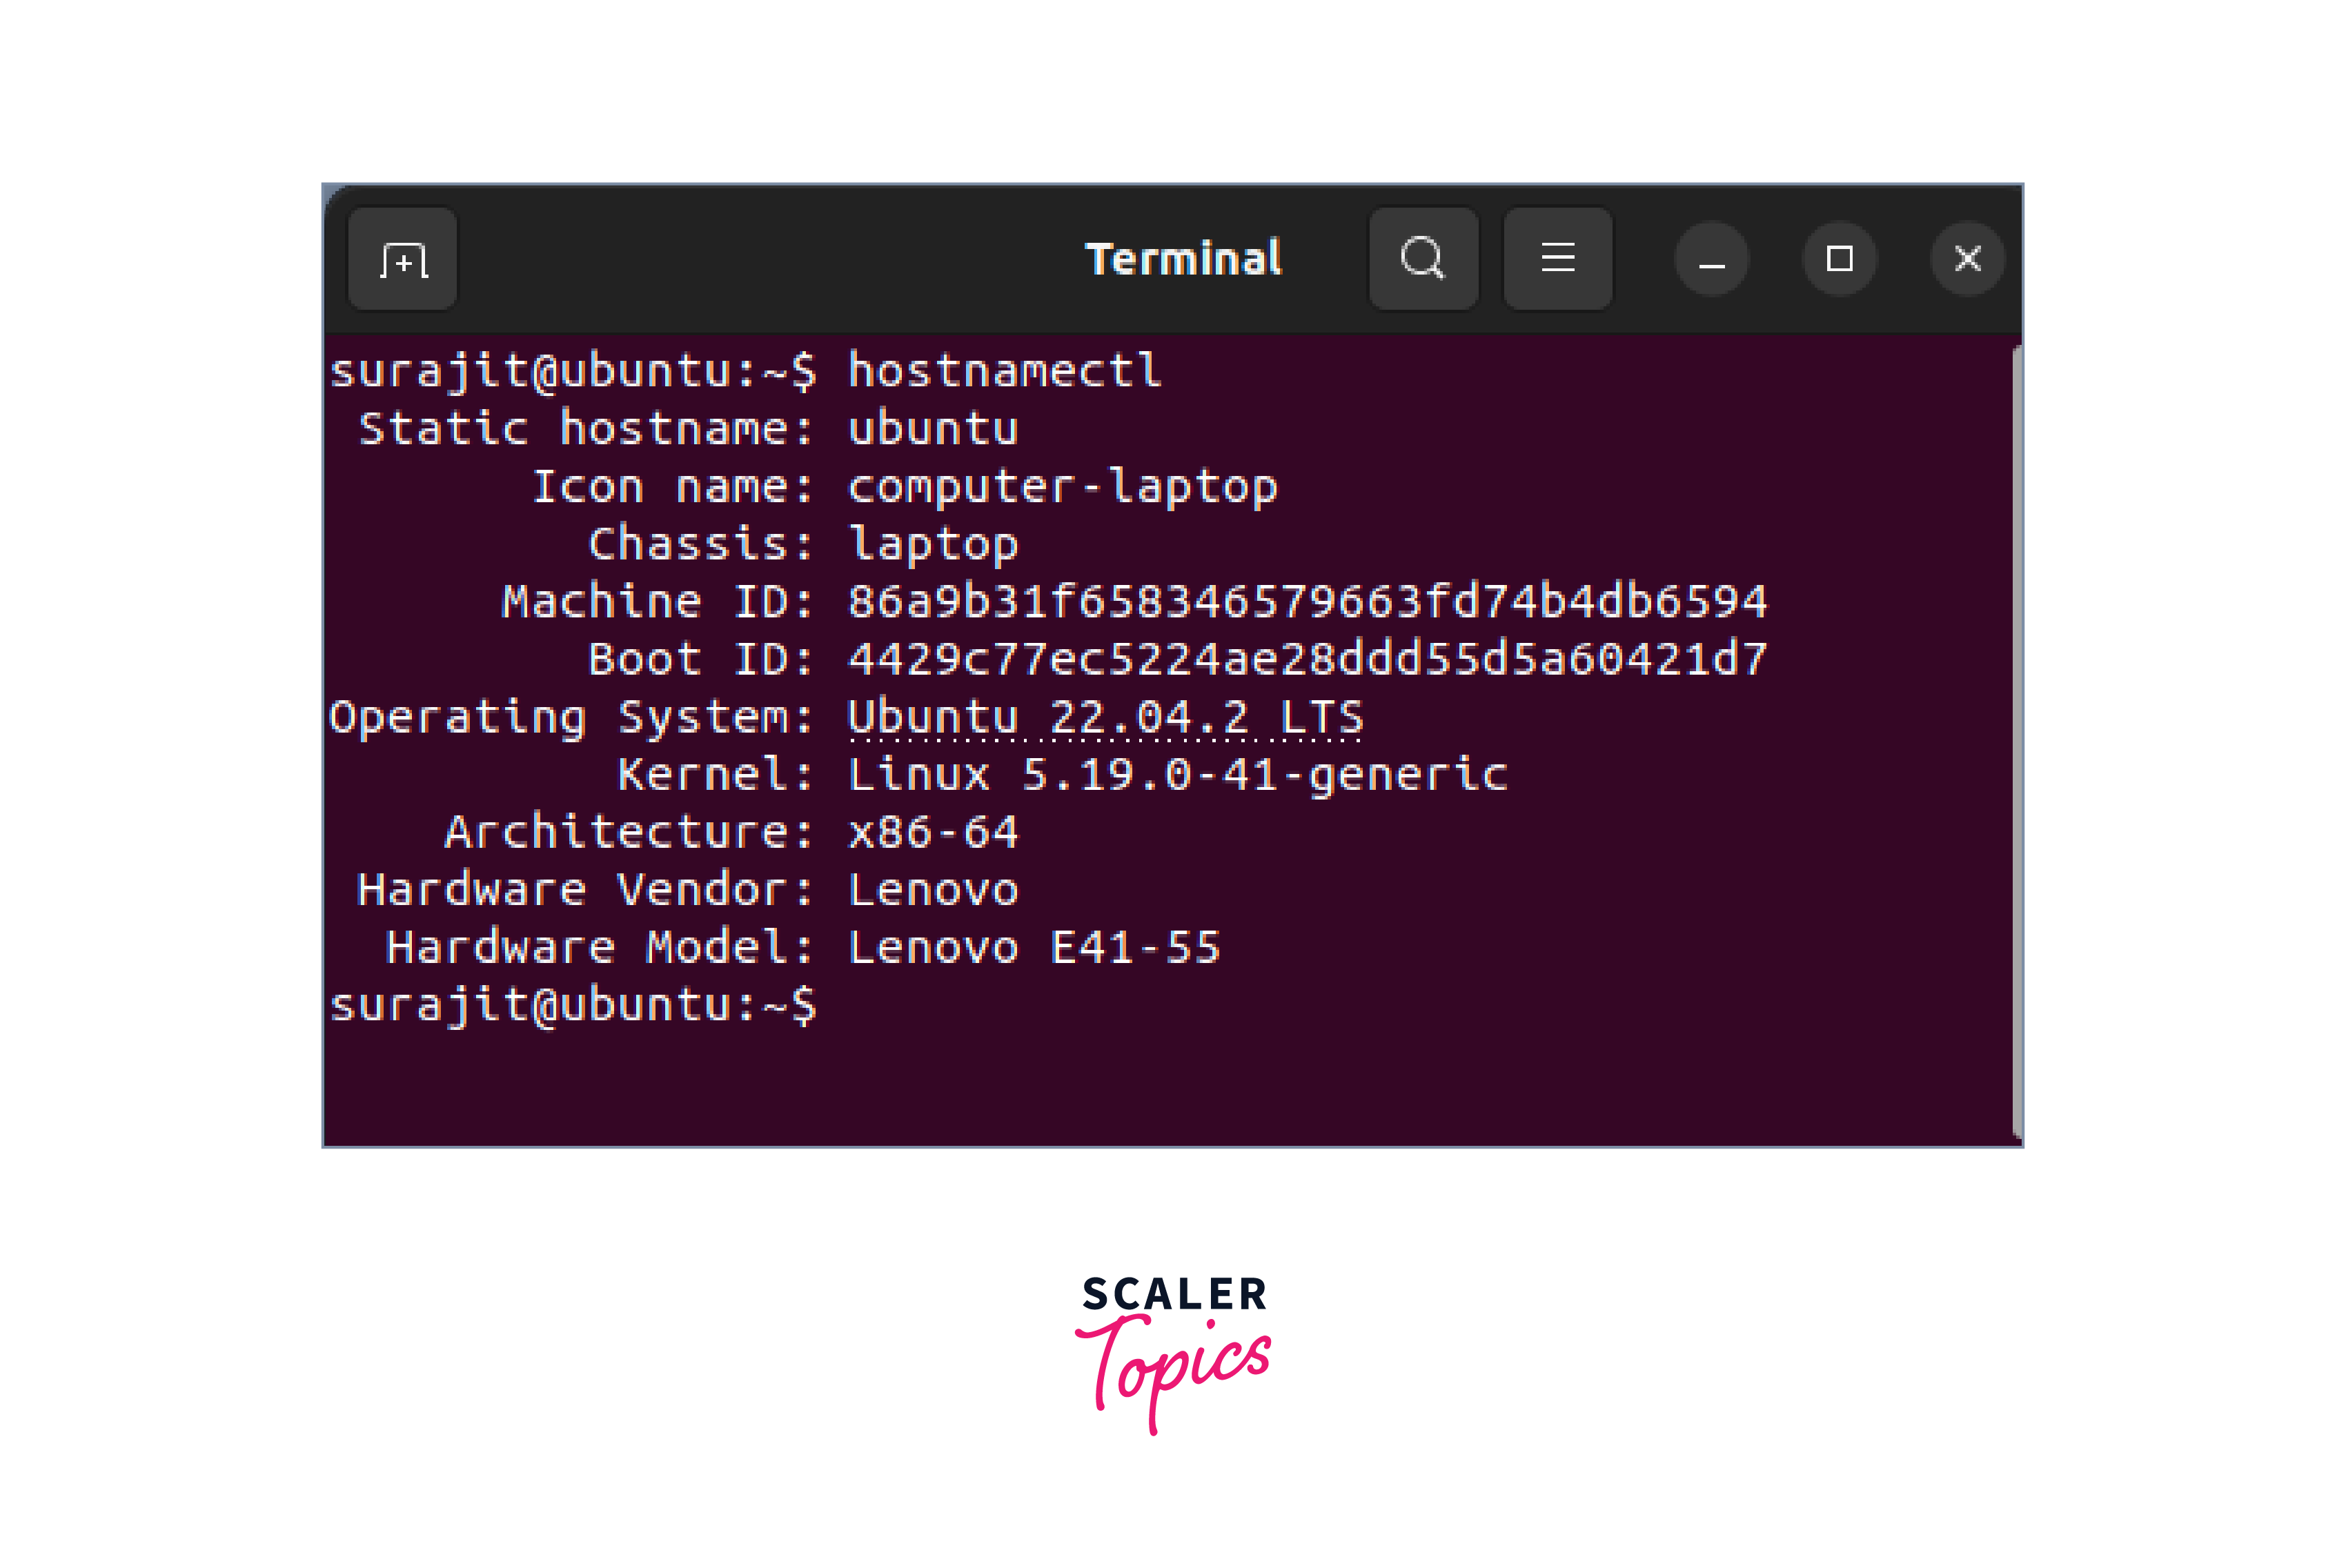
It will display various system information, including the operating system and kernel.
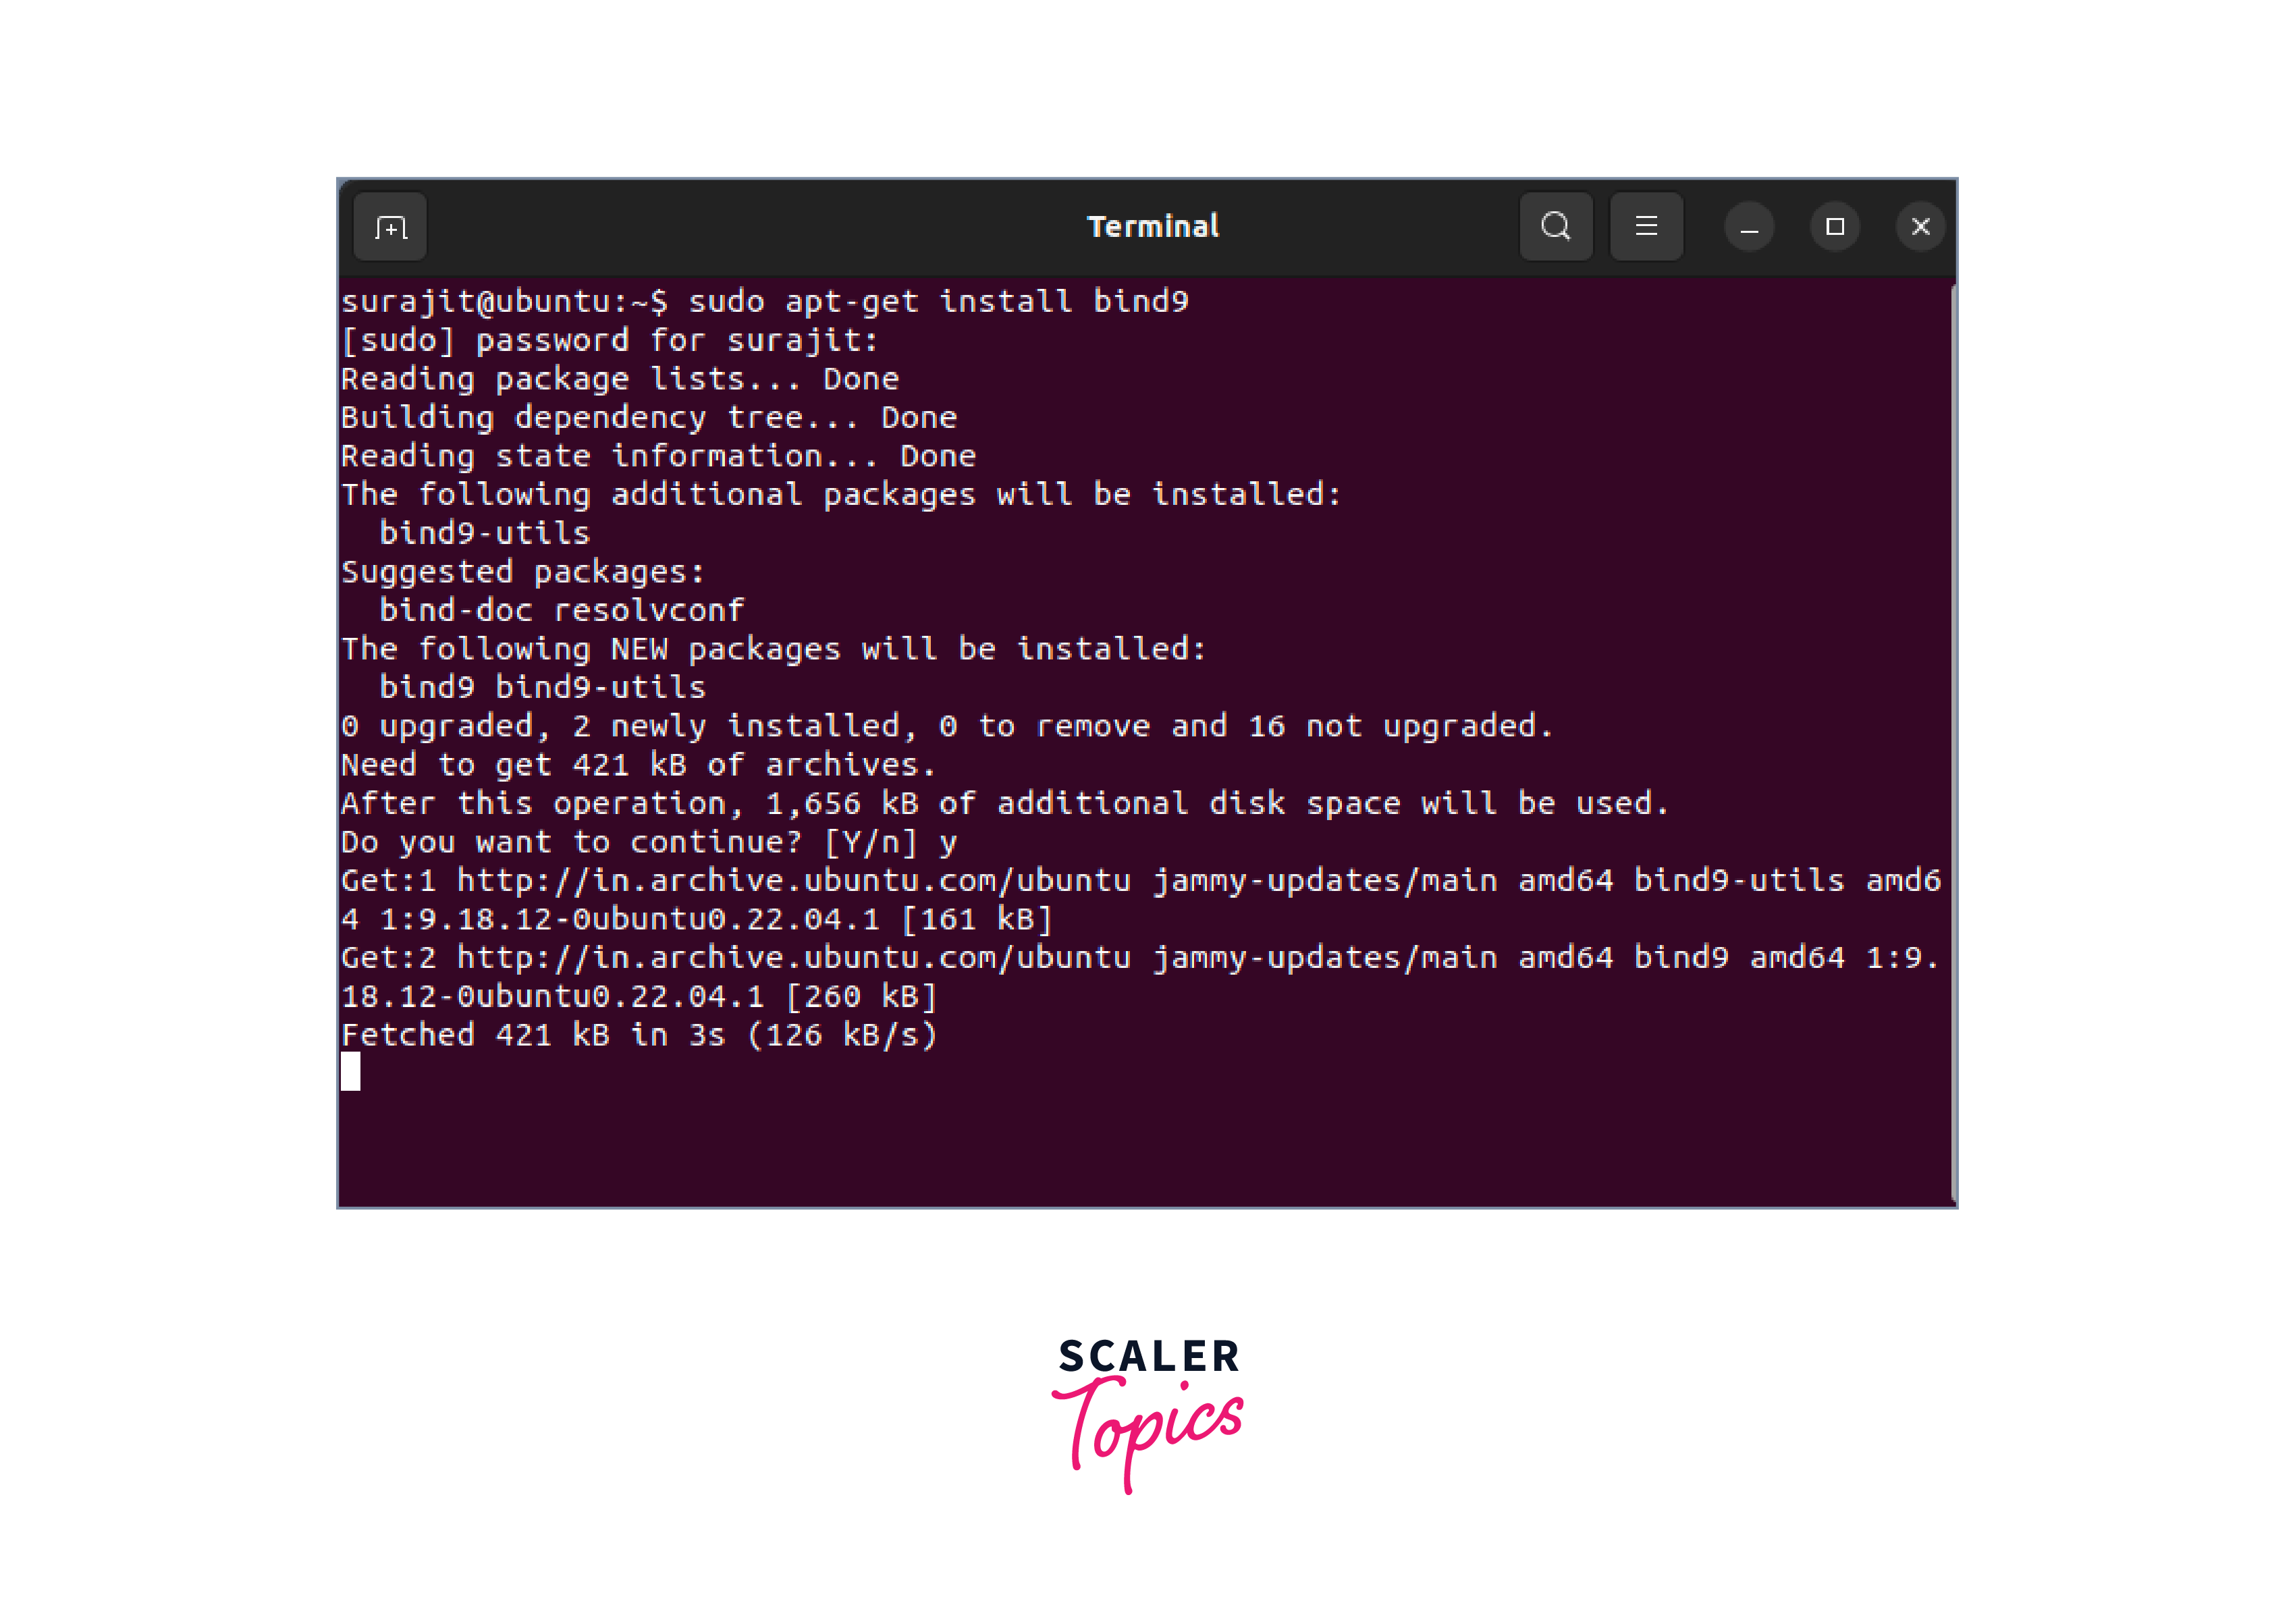
Step - 2: Install DNS Server Software
Once you've determined your Linux distribution, the next step is to install the DNS server software. Bind (Berkeley Internet Name Domain) is a widely used and highly reliable DNS server software. To install Bind, open the terminal and use the appropriate package manager command for your distribution. For example, on Ubuntu, you can use the below-mentioned command.
This step will install the BIND DNS software on the Linux system.
Step - 3: Configure Bind DNS Server
After installing Bind, you need to configure it according to your requirements. The main configuration file for Bind is generally located at /etc/bind/named.conf. Open this file with a text editor of your choice.
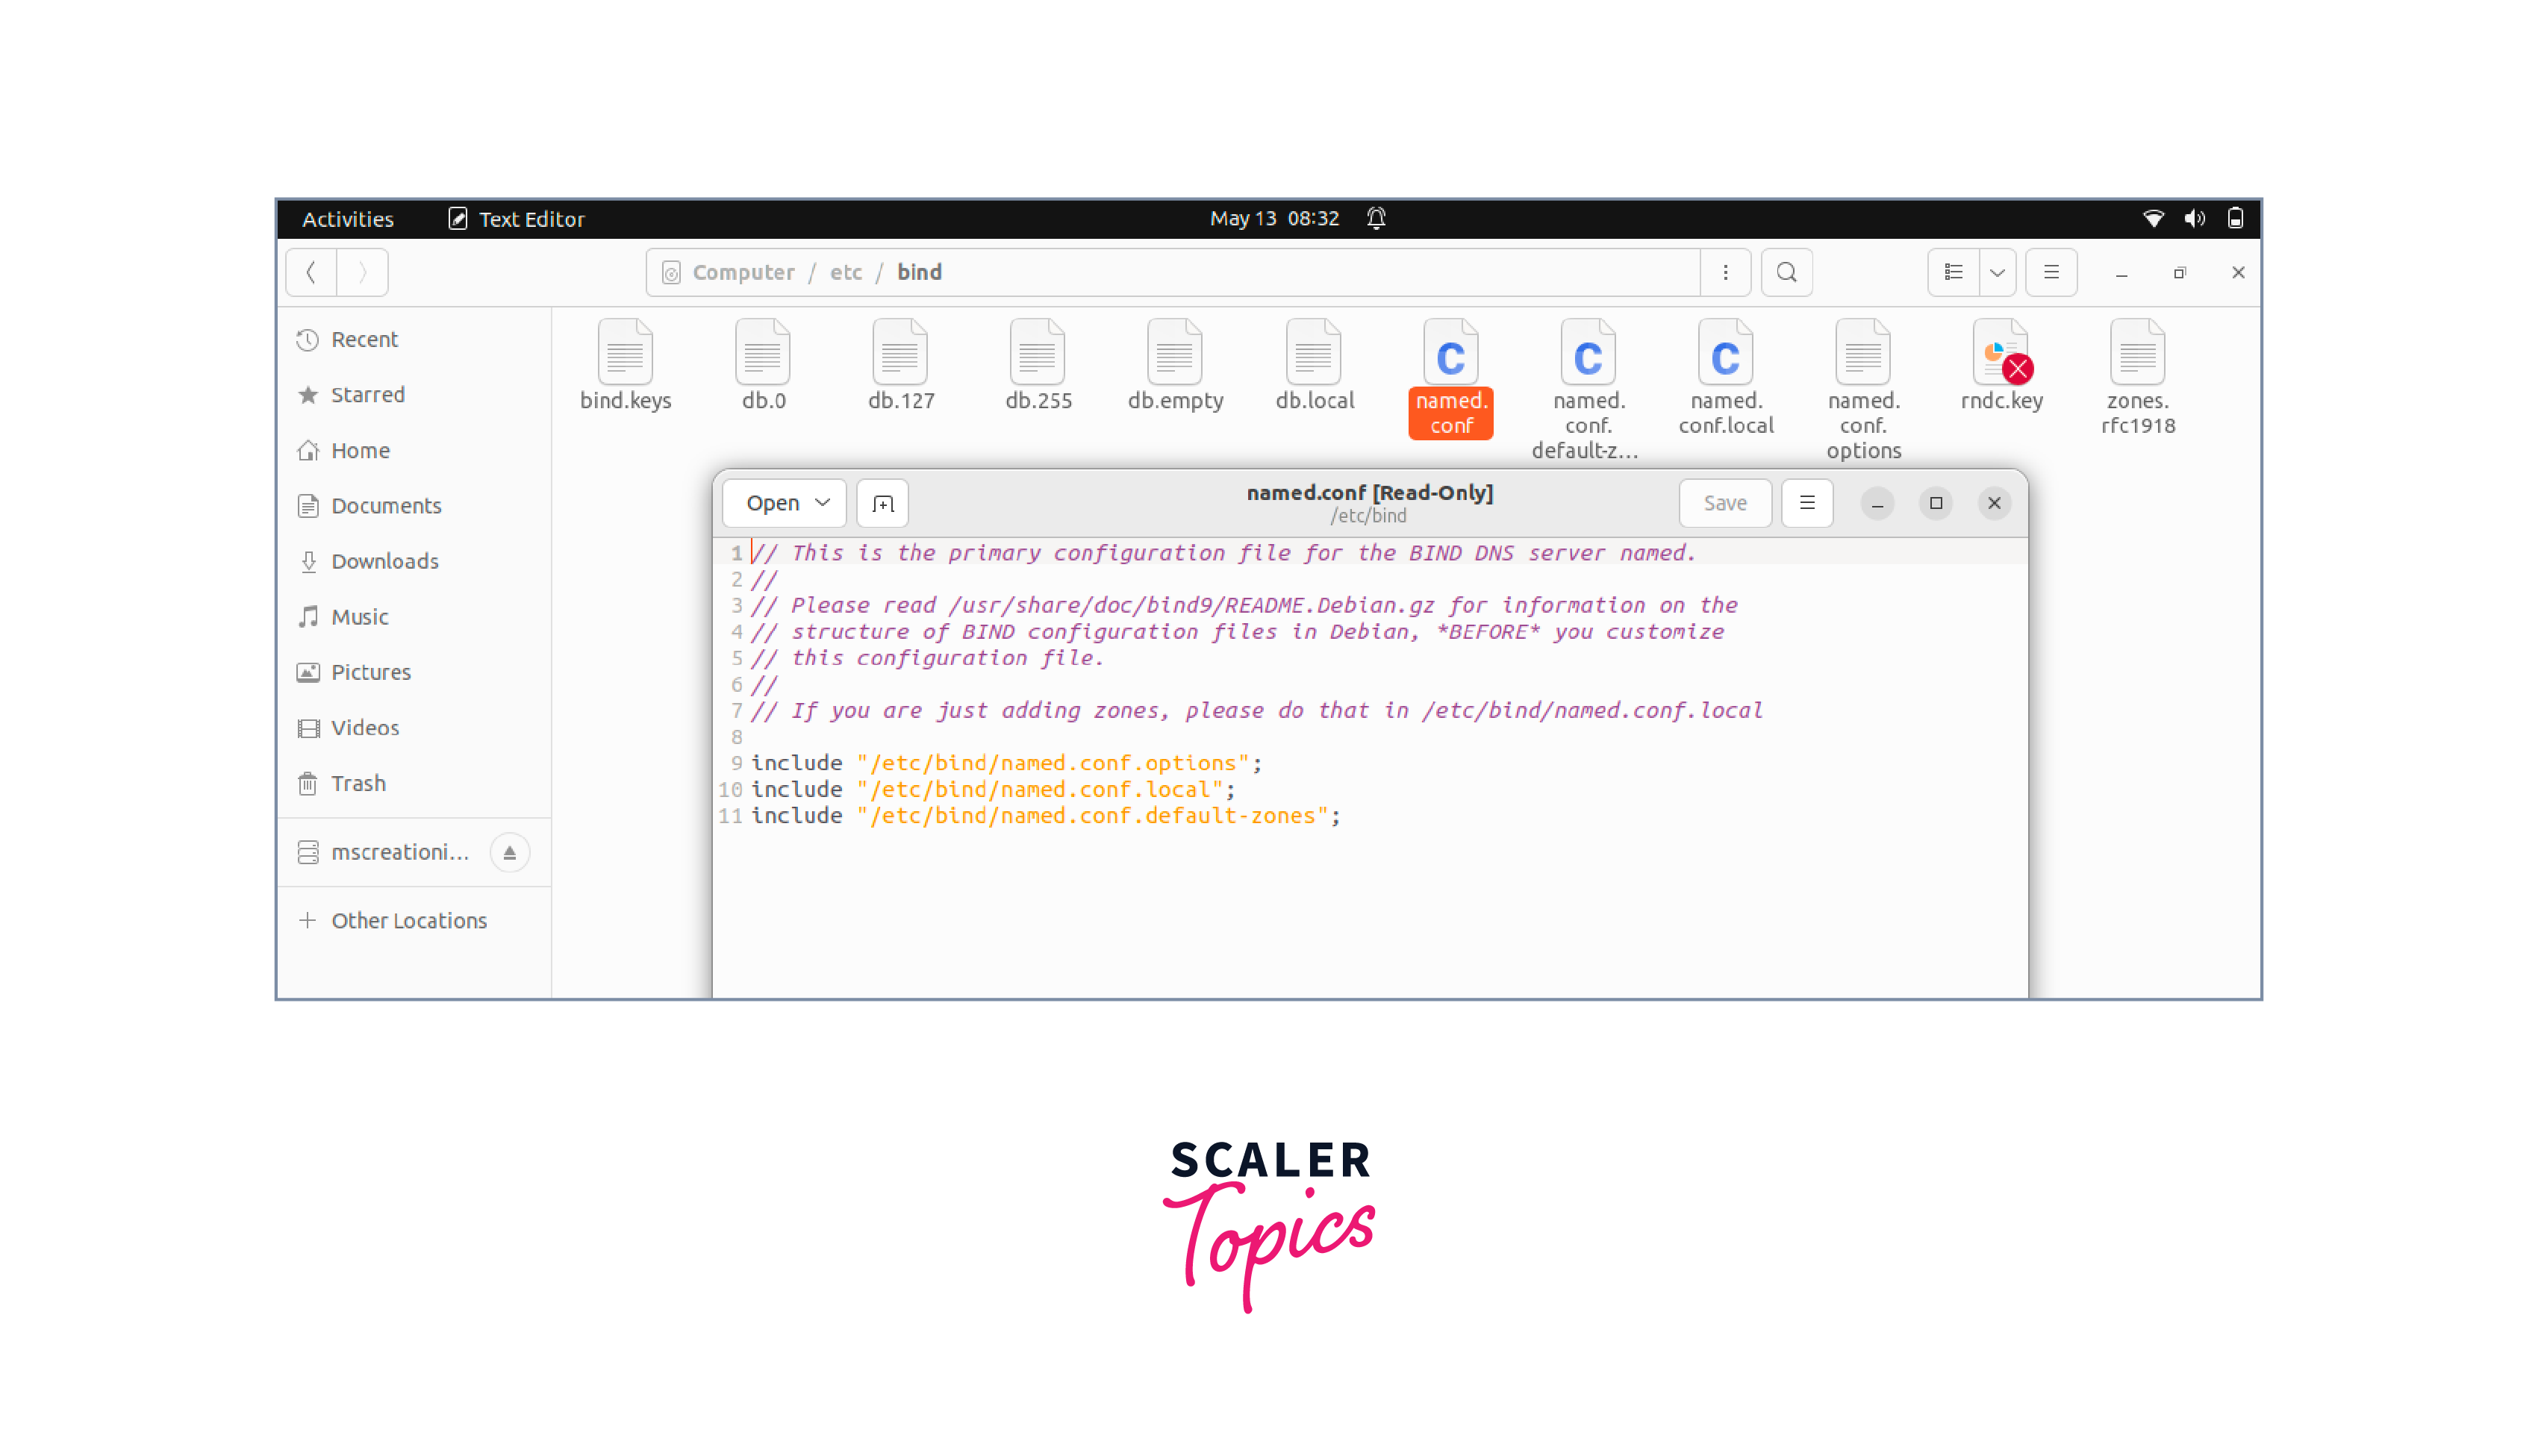
Within the configuration file, you'll find sections to define DNS zones, specify records, and set server options. It's crucial to review and understand these sections before making any changes. Properly configuring these options is essential for smooth DNS resolution.
- Configure global options such as the listen-on directive for specifying IP addresses.
- Allow-query to define which clients can query the server.
- Set up logging options for troubleshooting purposes.
- Define the zones you want to serve, including forward and reverse lookup zones.
Step - 4: Define DNS Zones and Records
To effectively configure your DNS server, you'll need to define DNS zones and their corresponding records. A DNS zone represents a portion of the DNS namespace and contains resource records that map domain names to IP addresses.
- Locate the zone section, where you can define your DNS zones.
- Each zone should have a unique name and specify the zone type, such as forward or reverse.
- Within each zone, you can add various resource records, such as SOA (Start of Authority), NS (Name Server), A (Address), CNAME (Canonical Name), MX (Mail Exchange), and others.
- Save the zone files in a designated directory, usually /var/cache/bind/ or /var/named/.
Step - 5: Update the name.conf File with Zone Information
In this step, we need to update the name.conf file with zone information.
- In the named.conf file, include the zone files you created by using the "file" directive.
- Specify the file paths for the zone files and link them to the respective zones.
Step - 6: Restart and Update DNS Resolvers
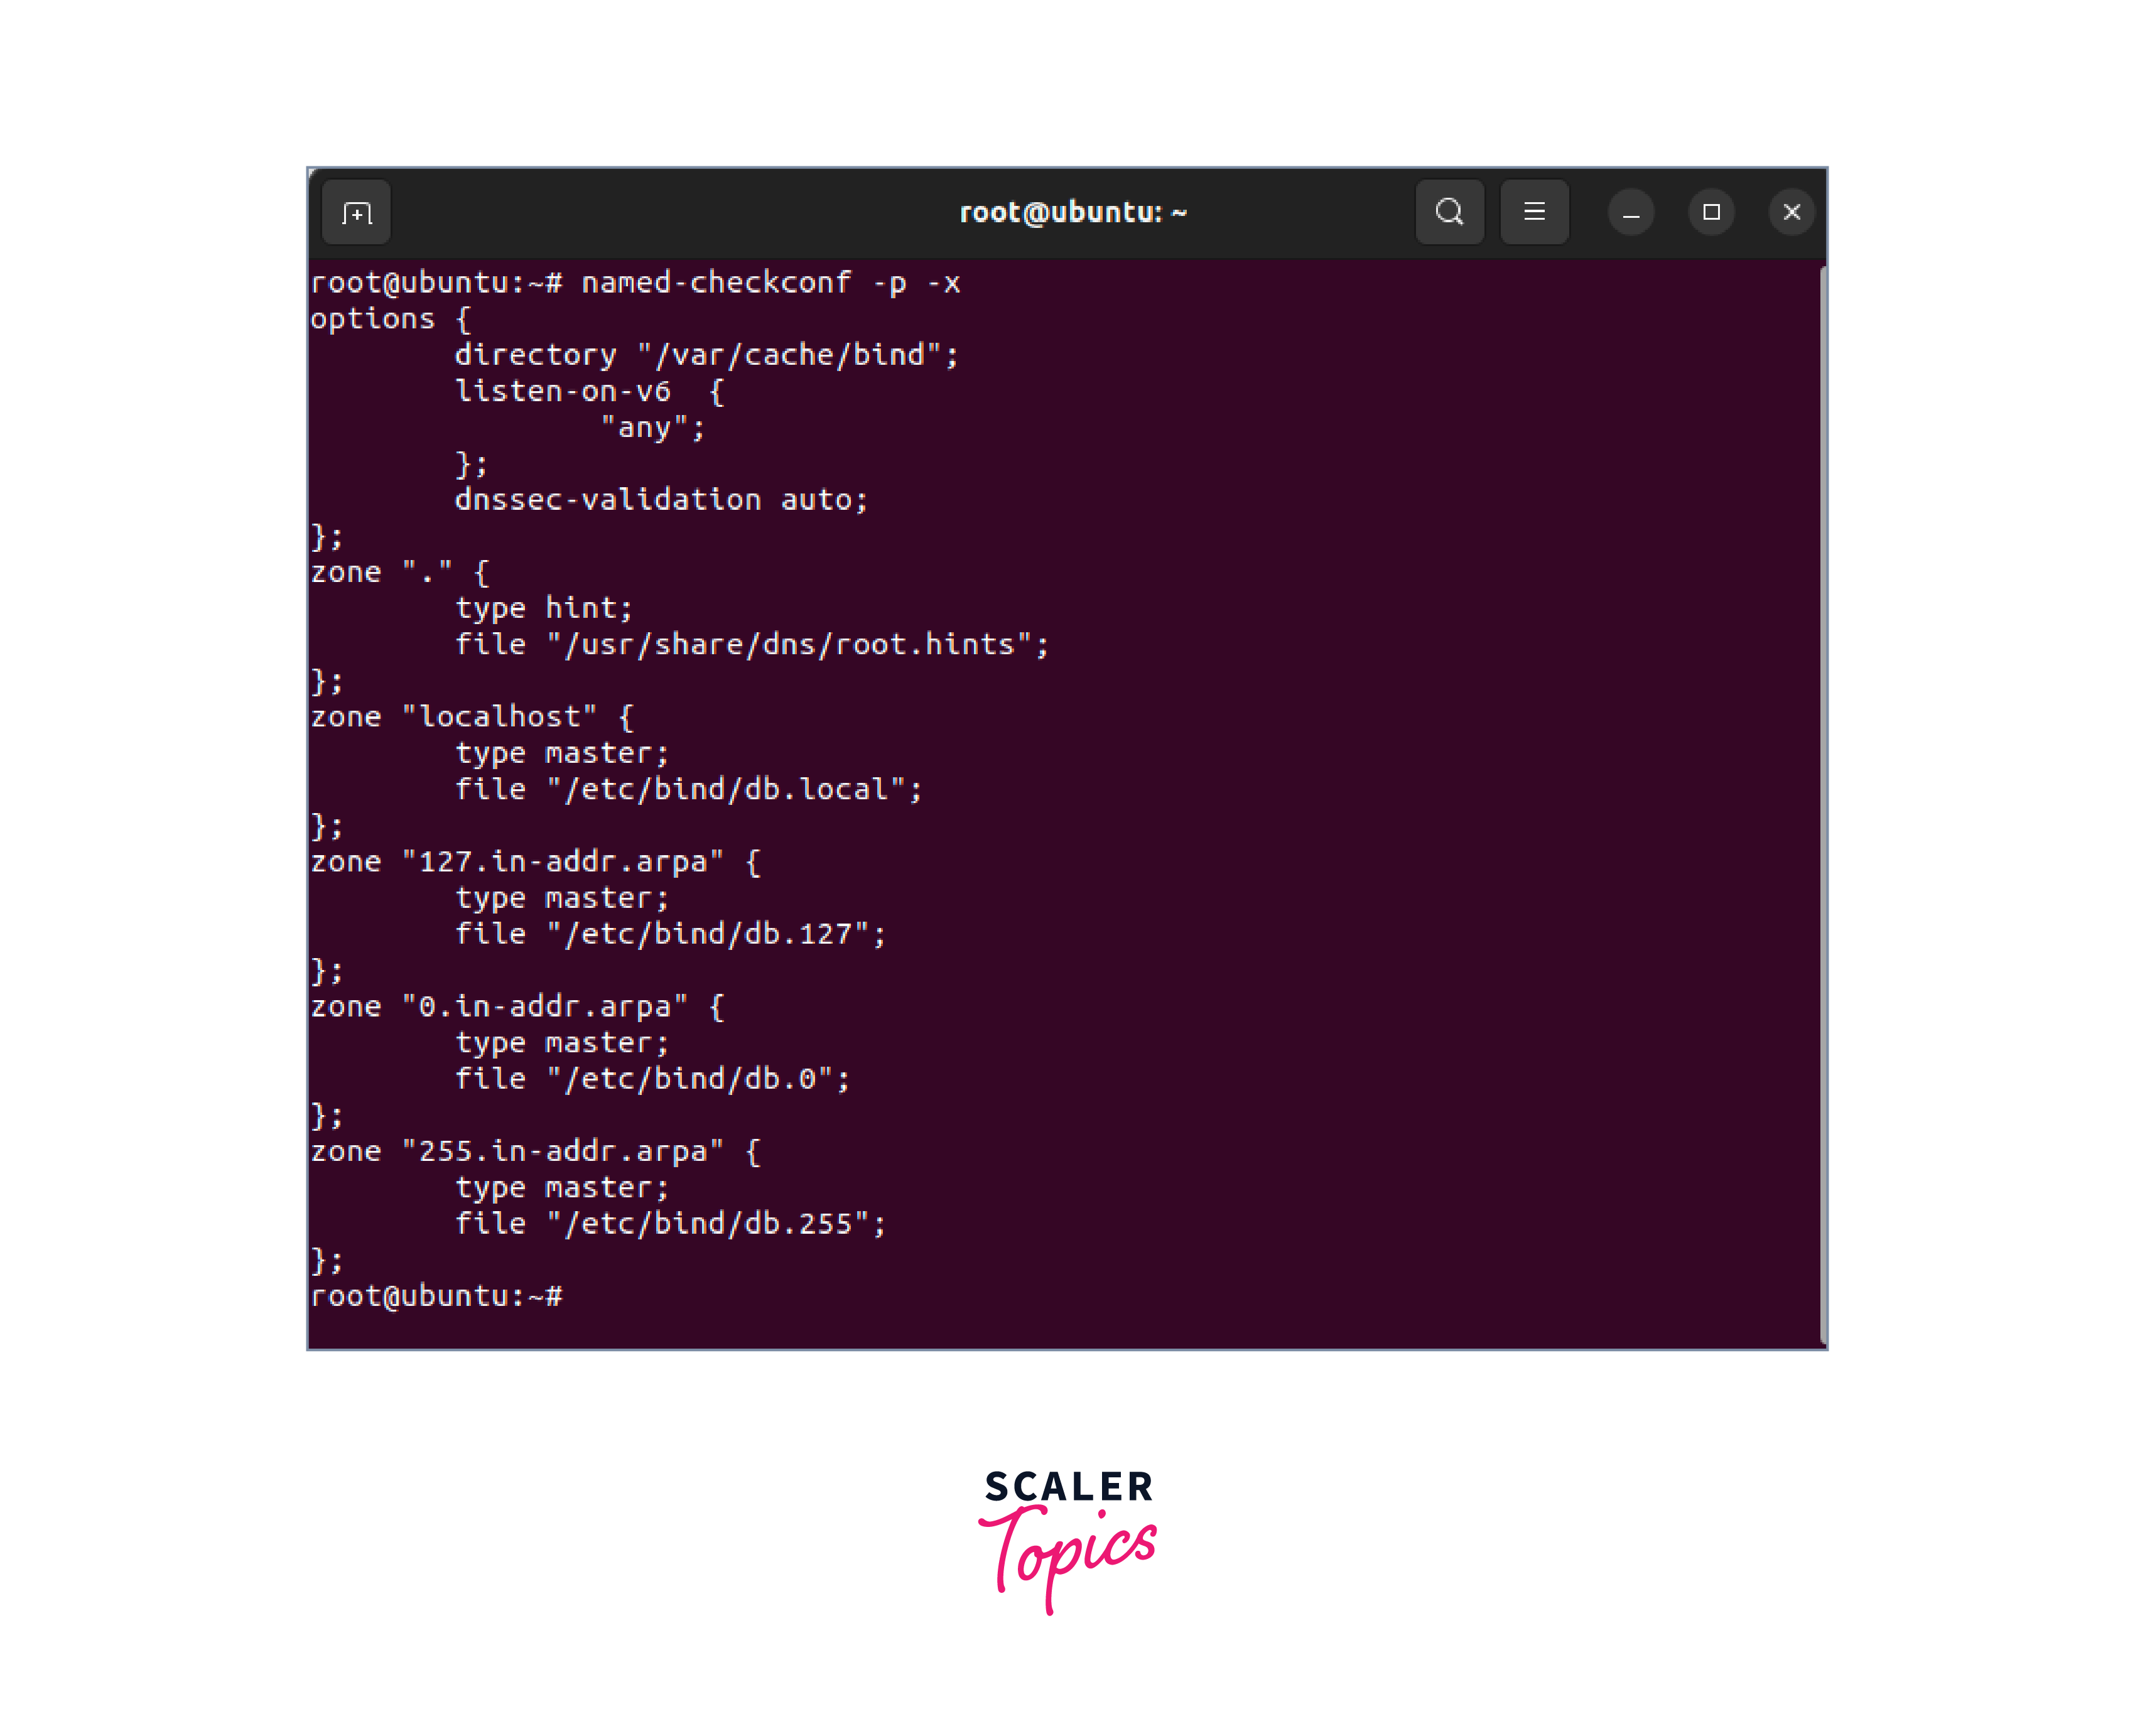
Once you have defined your DNS zones and records, run a syntax check to ensure the BIND configuration is correct.
if the check passes, save the changes to the Bind configuration file. To apply the configuration changes, restart the DNS server. In the terminal, use the following command.
After the DNS server restarts, we need to update the DNS resolvers. If you are hosting authoritative DNS, update the DNS resolvers for your domain to point to the BIND server.
This can typically be done through your domain registrar or DNS hosting provider's control panel.
Step - 7: Testing the DNS Server
Now, it's time to test your DNS configuration. You can use tools like Dig or nslookup to perform DNS lookups and verify the responses. Additionally, ensure that client machines can successfully resolve domain names using your DNS server. So that is how to configure DNS in Linux.
Before we conclude, we should know about the basics of the DNS software we have talked about and have used to configure the DNS setup in this article.
BIND (Berkeley Internet Name Domain)
It is a widely used open-source software for implementing the Domain Name System (DNS) protocol. It serves as the backbone of the internet by translating human-readable domain names into IP addresses that computers can understand.
BIND provides DNS services such as domain name resolution, zone transfers, and DNSSEC (DNS Security Extensions) for data integrity and authentication. It supports various DNS record types, including A, CNAME, MX, and NS records.
Conclusion
- Configuring a DNS server in a Linux environment allows you to take control of DNS resolution and enhance network efficiency.
- By following the steps outlined in this article, you can set up and configure a DNS server tailored to your specific needs.
- Remember to pay attention to the commands and file locations specific to your Linux distribution.
- Take the plunge and start configuring your DNS server in Linux today. Enjoy the benefits of efficient domain name resolution, improved network performance, and greater control over your network's DNS infrastructure and this is how to configure DNS in Linux.