Generating Images Using GANs in TensorFlow
Overview
This article explains using a Generative Adversarial Network (GAN) to generate new images of handwritten digits. A GAN is a machine-learning model consisting of a Generator and a Discriminator.
The Generator creates novel images randomly, while the Discriminator attempts to prove that the generated images are fake. The final output of the GAN is a batch of images that look like handwritten digits. This article explains creating and testing a GAN on MNIST data.
What are We Building?
Creating novel images given an image dataset is one of the strengths of a specific branch of models called Generative Adversarial Networks (GAN). These networks specialize in unsupervised/semi-supervised image generation given any image data.
This article uses the GANs image generation ability to create novel handwritten digits. We perform this generation by training the network on a dataset of handwritten digits. We will create a simple GAN from scratch using the Tensorflow library, train it on the MNIST dataset and generate new images of handwritten digits.
Pre-requisites
Some prerequisites to understanding this article better:
- Basic understanding of Deep Learning and Neural Networks.
- Knowledge of Python programming language.
- Familiarity with TensorFlow or a similar deep learning framework.
- Understanding of Generative Adversarial Networks (GANs)and their concepts.
- Knowledge of image processing and computer vision techniques.
How are We Going to Build This?
In this article, we focus on the GAN's image generation ability. We must first load and preprocess an image dataset to let the GAN learn about images. After loading the data, we must create the GAN and write the training and testing code. The below sections focus on implementing these features and generating new images from the MNIST dataset.
Transform Your Career
Choose from our industry-leading programs designed for career success
Modern Software and AI Engineering Program
Master full-stack development with AI integration

Modern Data Science and ML with specialisation in AI
Advanced data science techniques with AI specialization
Advanced AIML with Specialisation in Agentic AI
Deep dive into AIML with focus on Agentic systems
DevOps, Cloud & AI Platform Engineering
Build and manage AI-powered cloud infrastructure
AI Engineering Advanced Certification by IIT-Roorkee
Premier AI engineering certification from IIT-Roorkee
Final Output
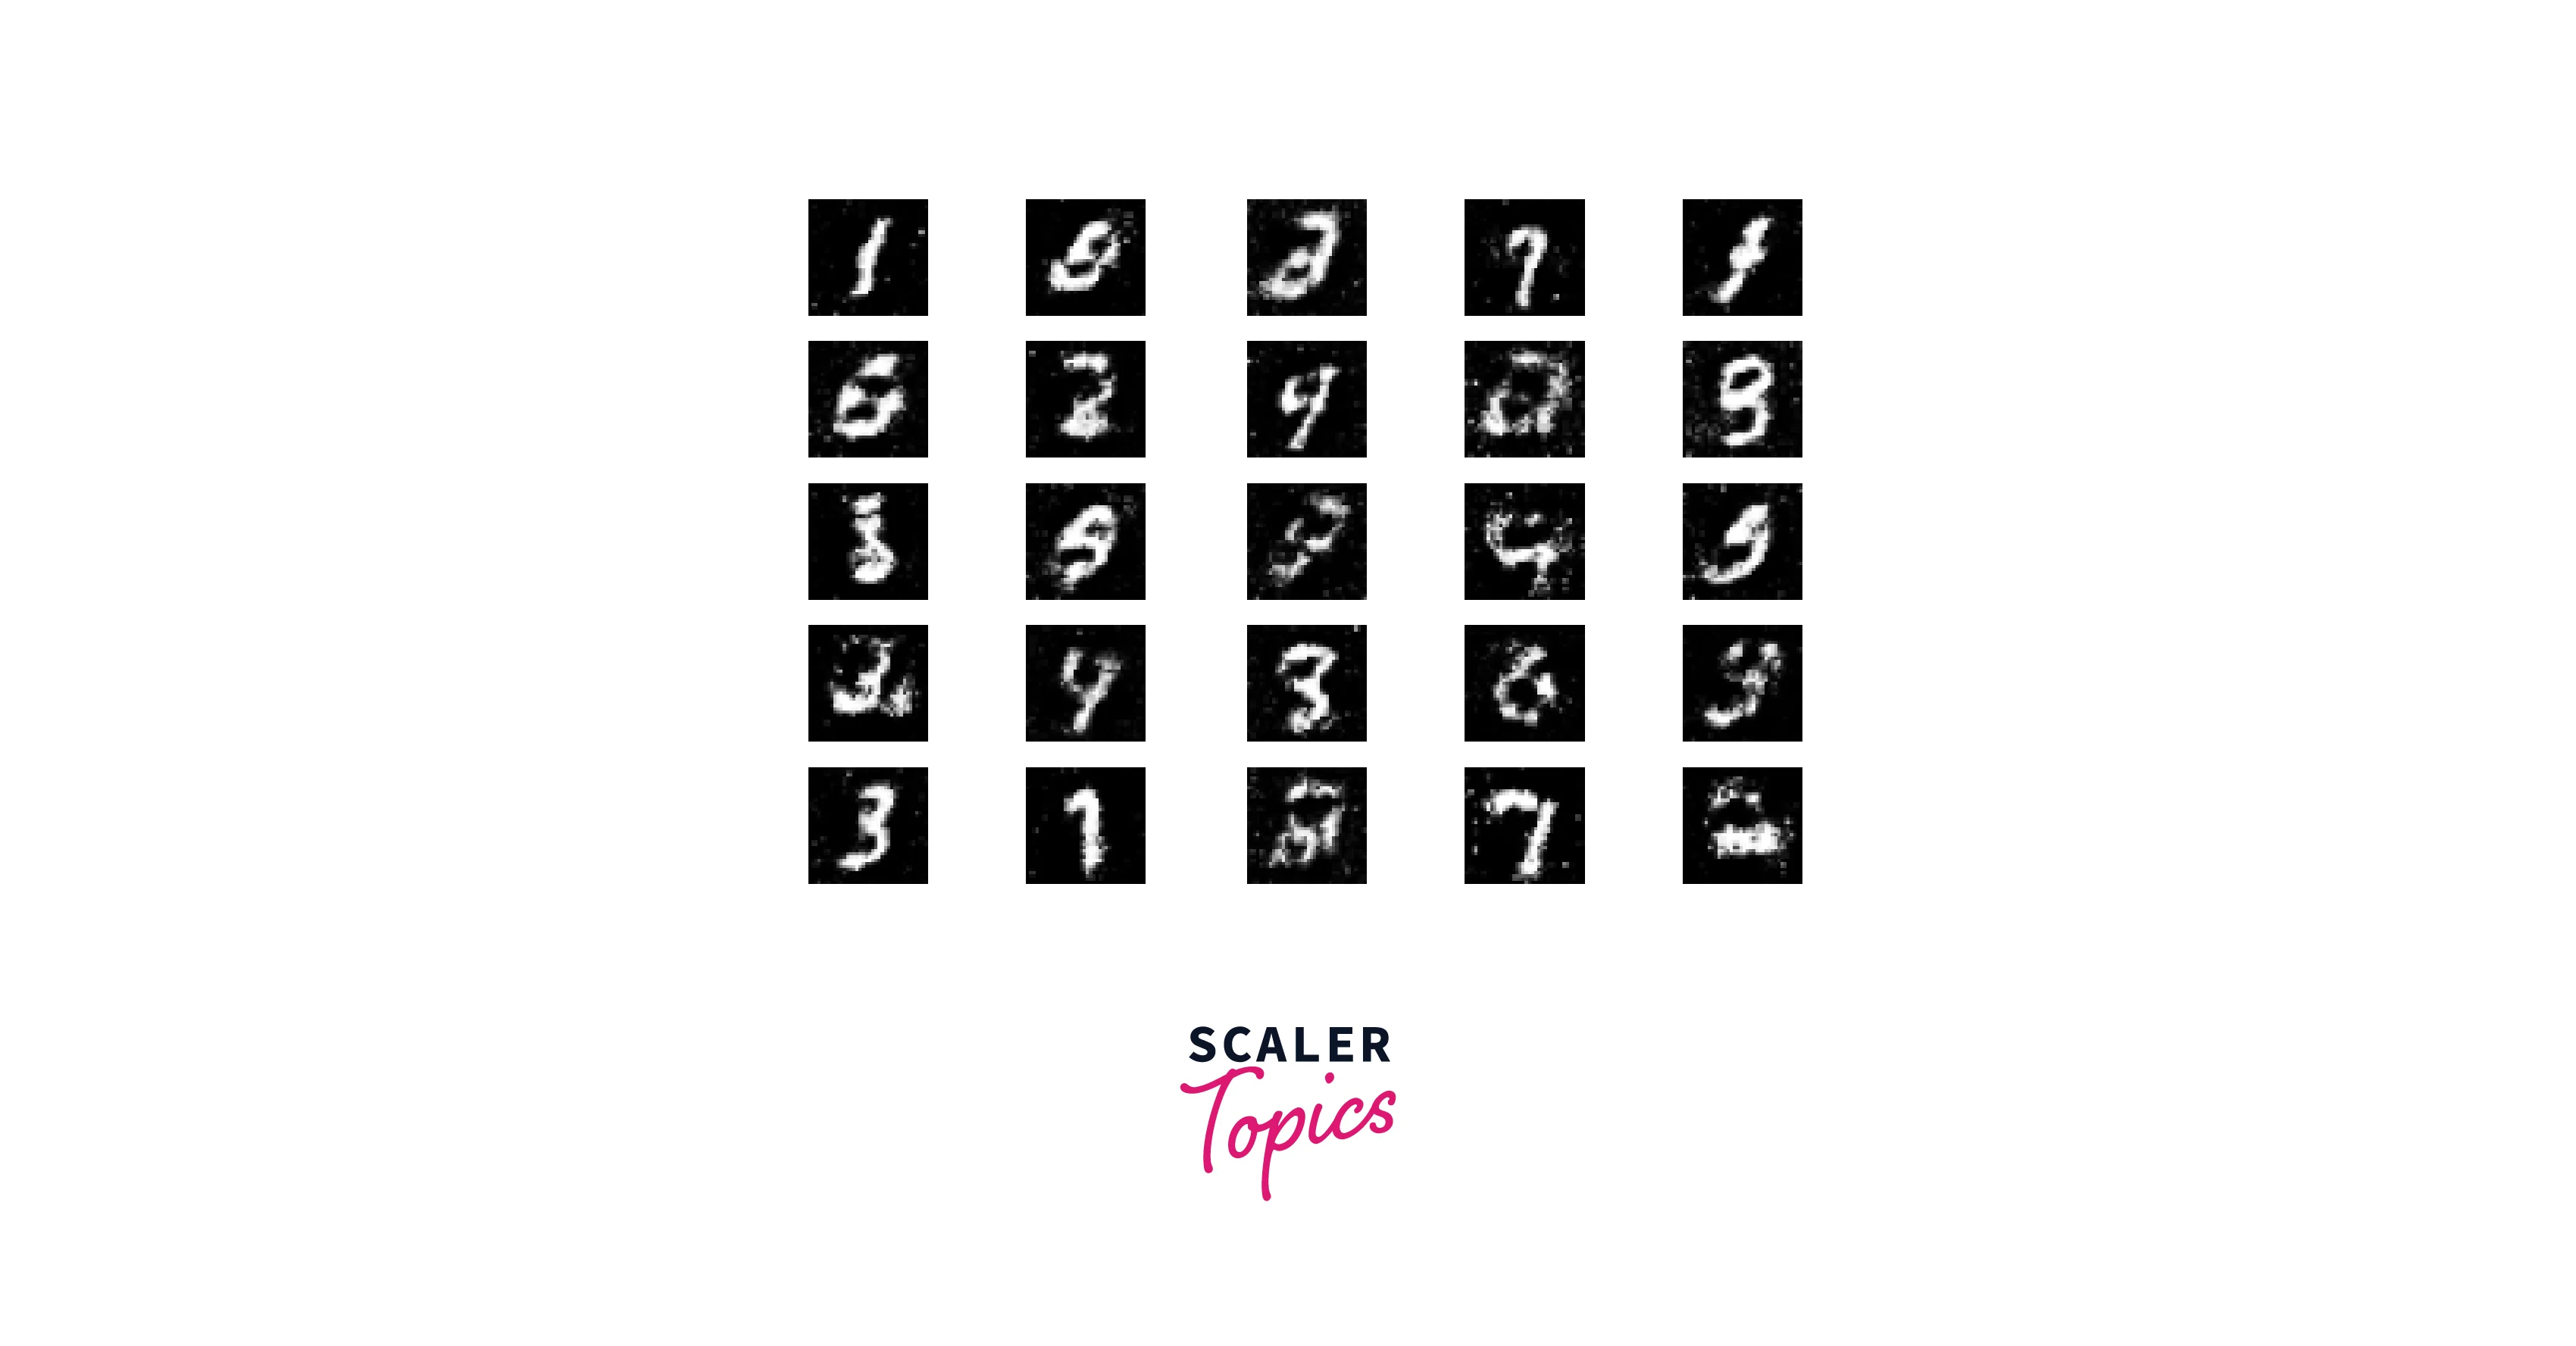
Our final output should be a batch of images that look like handwritten digits. After training the GAN for 10000 epochs on the MNIST dataset, the image below is what we get.
Requirements
Before creating the GAN's image generation module, we must import a few libraries.
- We will import all the functions, layers, and dataset loaders from TensorFlow.
- We will also import numpy (a math library) and matplotlib (a plotting library).
Building the Model
The GAN we want to create comprises two major parts:
- Generator
- Discriminator.
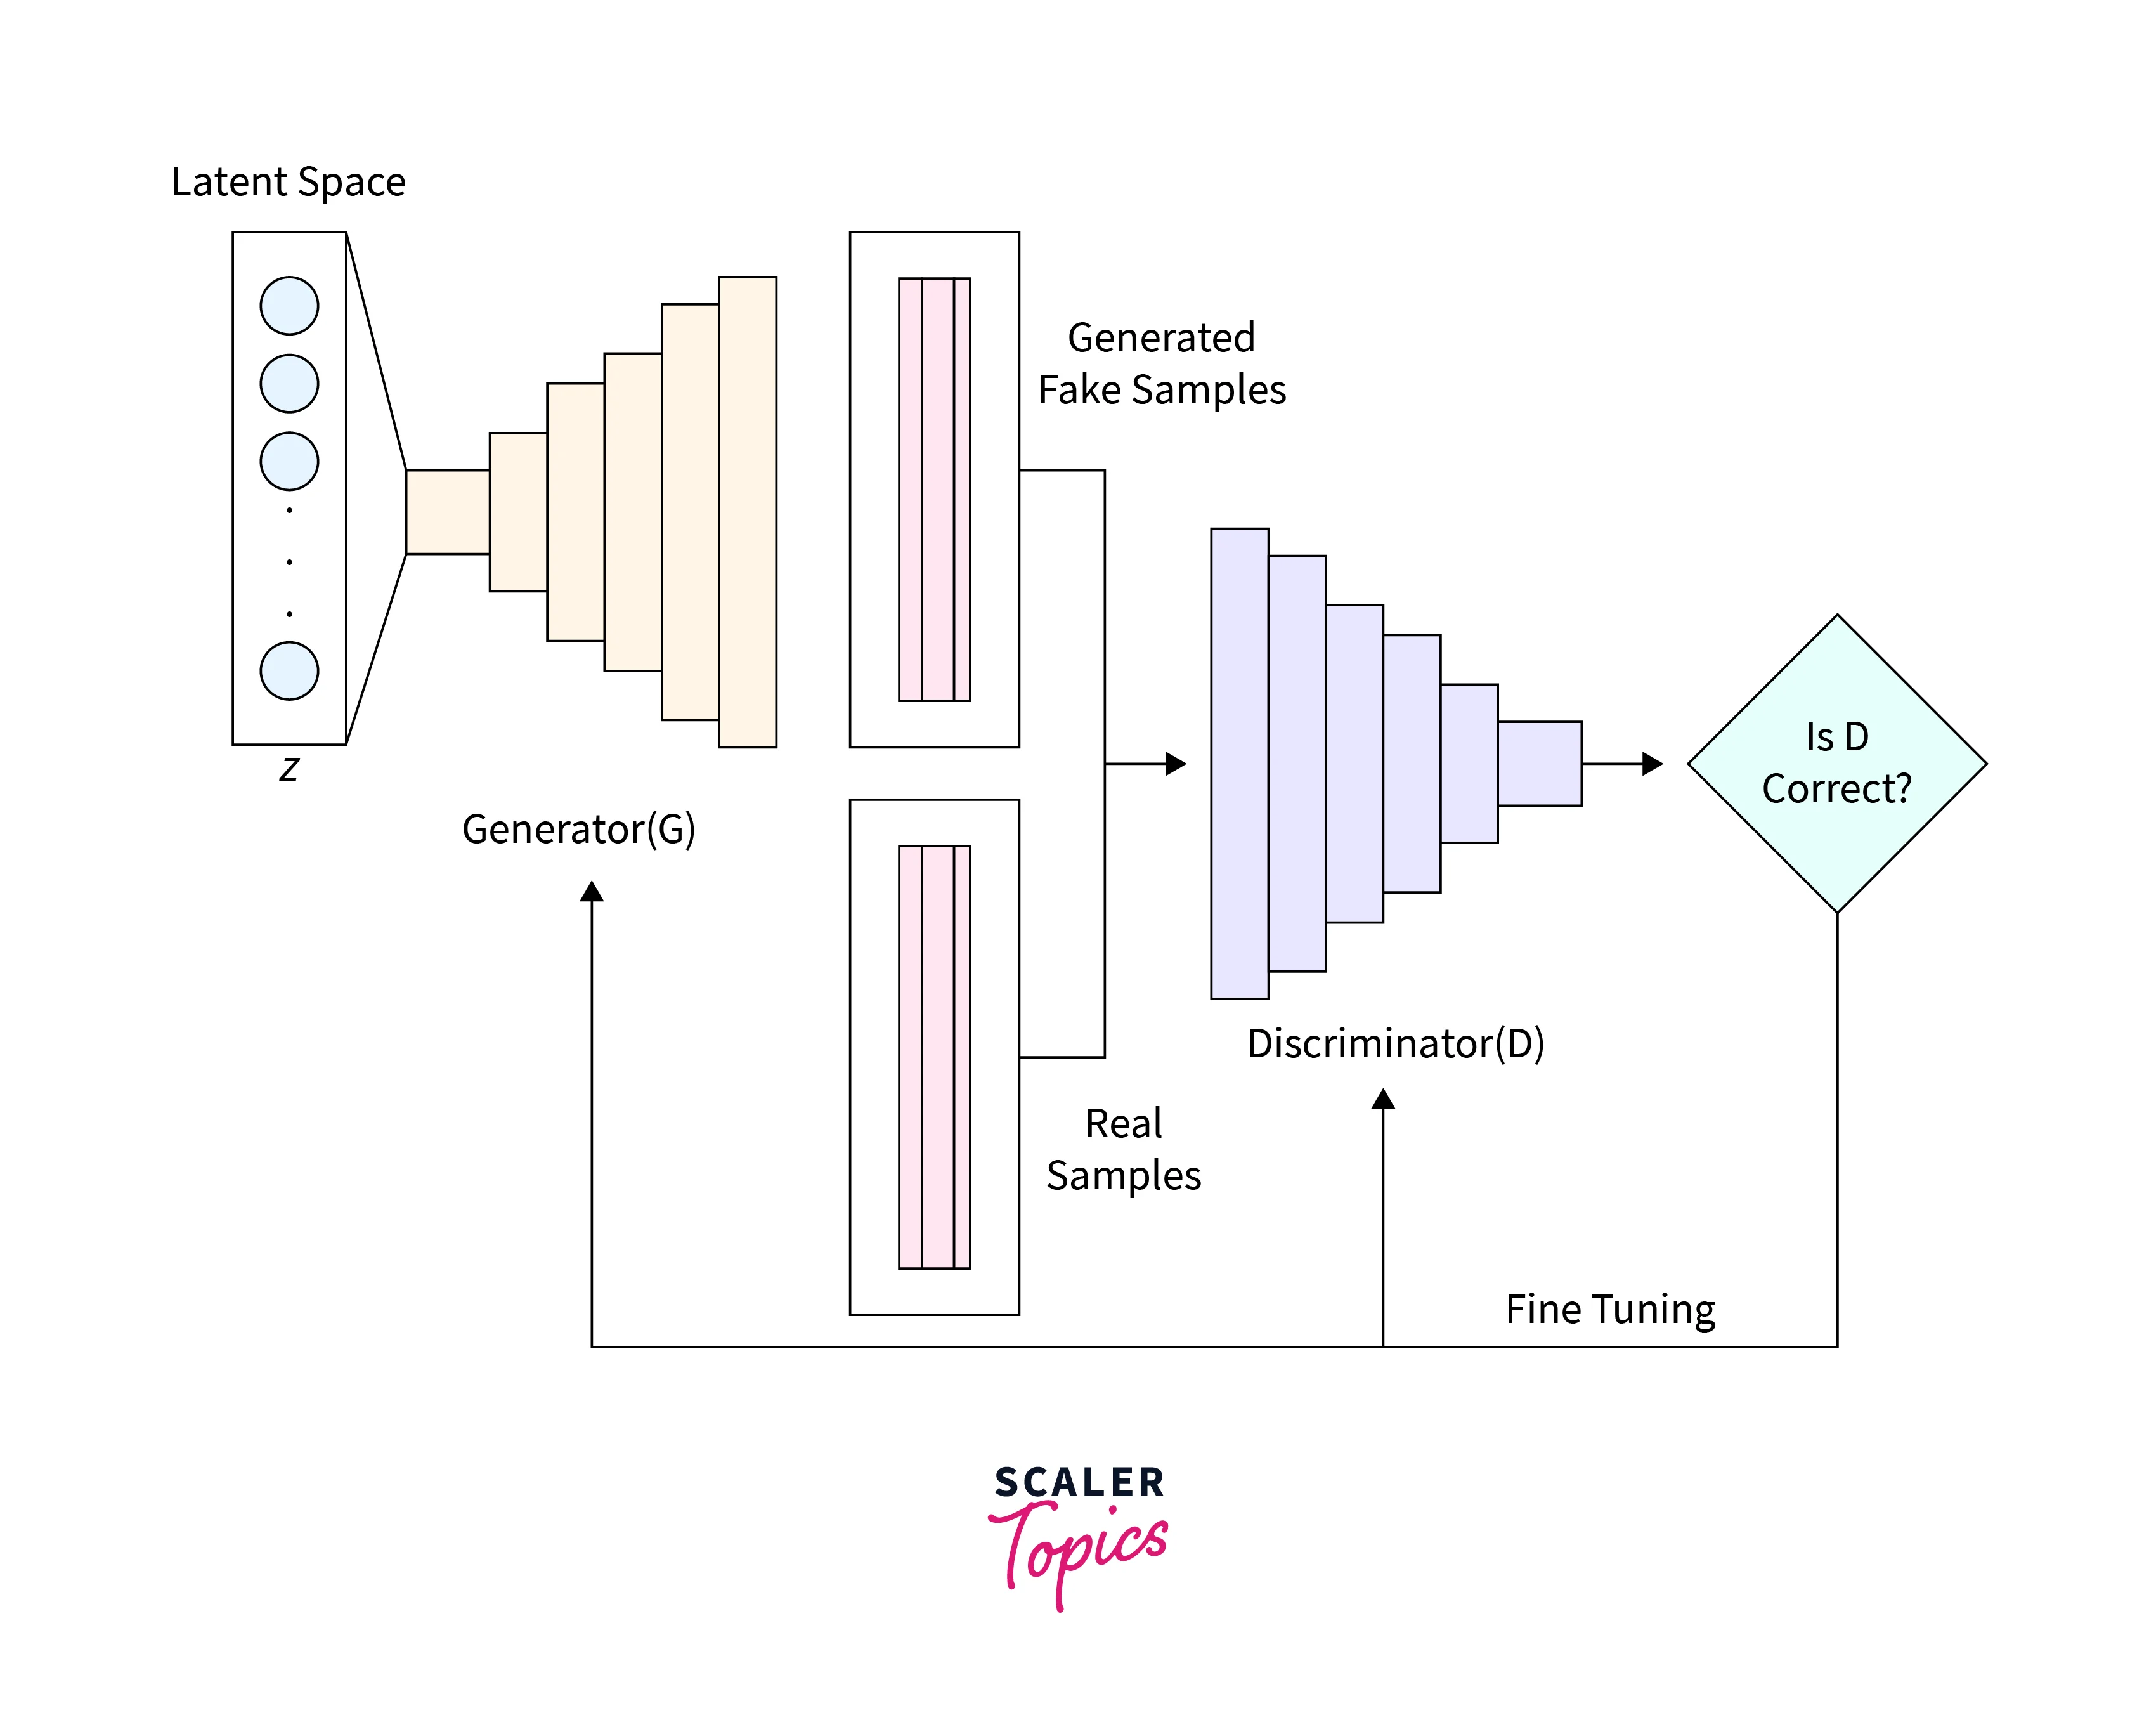
The Generator is responsible for creating novel images, while the Discriminator is responsible for understanding how good the generated image is.
The entire architecture we want to build for the GANs image generation is shown in the following diagram.
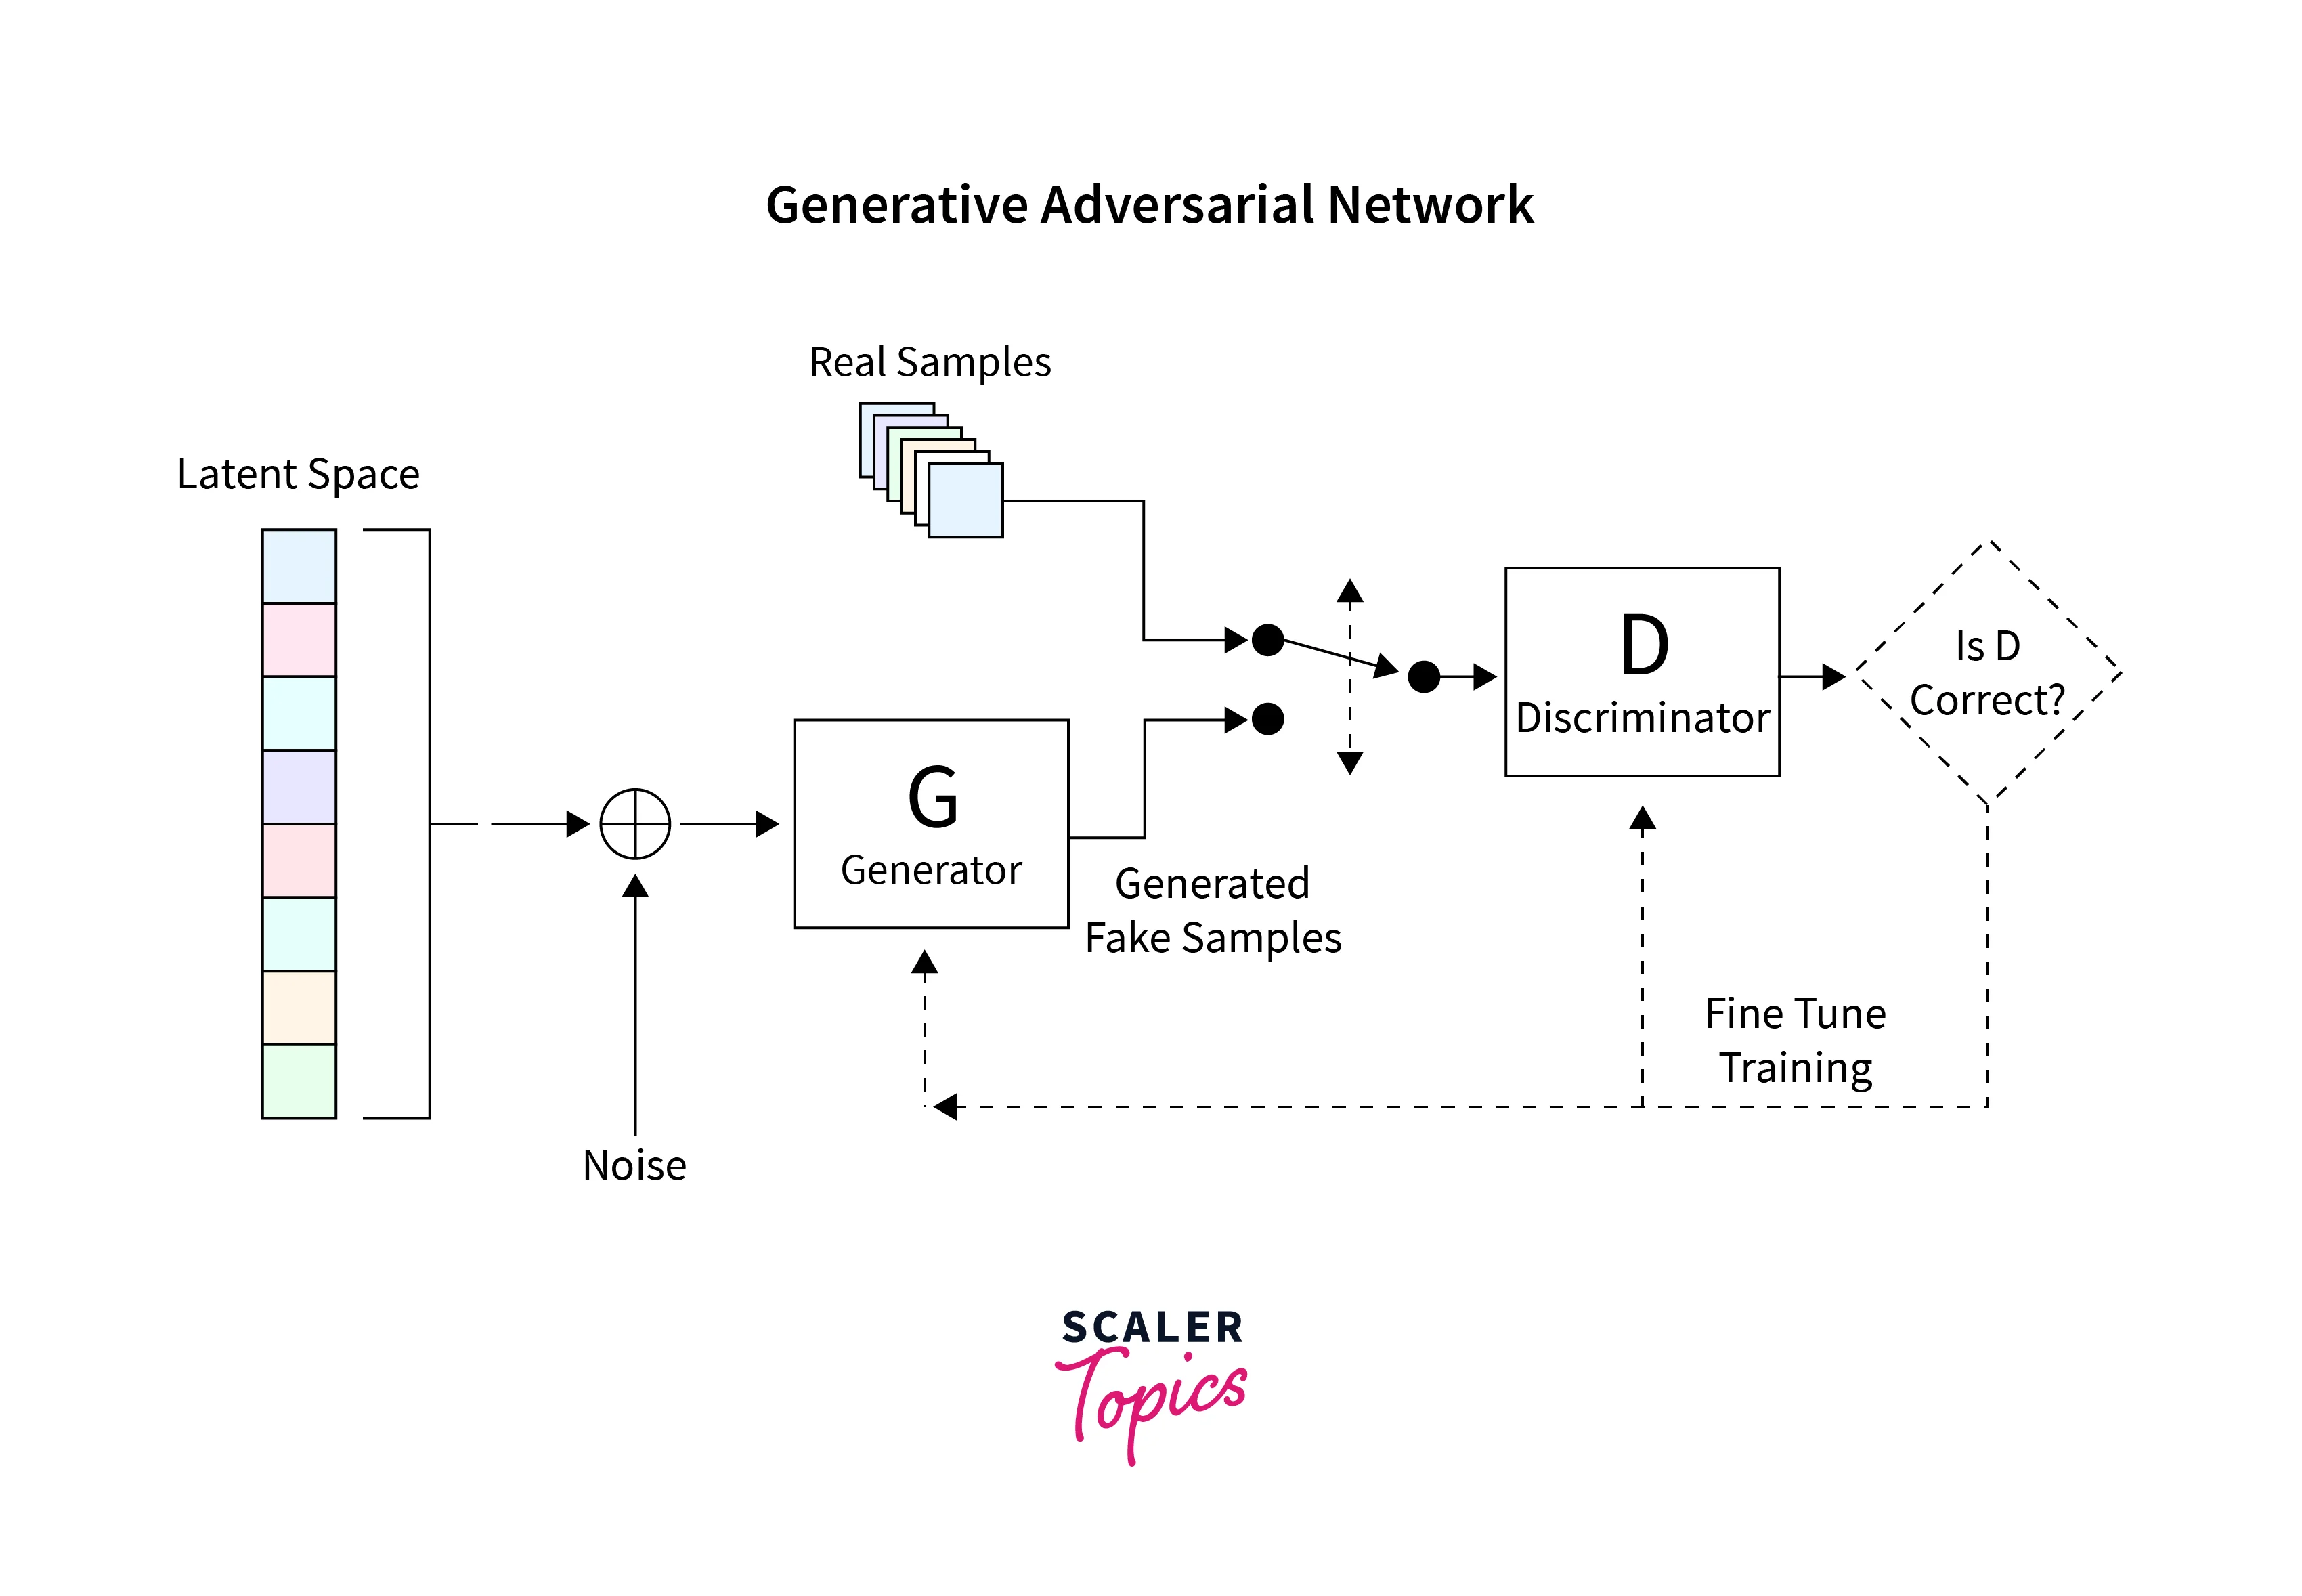
The sections below explain how to read a dataset, create the required architecture, compute the loss functions, and train the network. Finally, the code to test the network and create new images is also shown.
Reading the Dataset
This article will use the MNIST (Modified National Institute of Standards and Technology) dataset. This dataset has more handwritten digits of and is one of computer vision's most widely used datasets. The MNIST is an easy dataset for a GAN such as the one we are building, as it has small, single channels images.
A sample of the dataset is shown below.
We only need to write a little code to load the MNIST dataset as Tensorflow comes with it inbuilt. After loading the dataset, we normalize and reshape it into three dimensions. This reshaping enables the GAN architecture to use this 2D data. We also pre-allocate some memory for our training and validation data.
The shape of the image is defined as a matrix of . The last dimension corresponds to the number of channels in an image. Since we are using the MNIST dataset in black and white, we only have a single channel.
The zsize is the shape of the latent space we want to generate. In this case, we set it to 100. This number could be modified if required.
Turn Learning into Career Growth
Defining the Generator
The job of the Generator (D) is to create realistic images that the Discriminator fails to understand are fake. Thus, the Generator is an essential component that enables a GANs image generation ability. The architecture we consider in this article comprises fully connected layers (FC) and Leaky ReLU activations. The final layer of the Generator has a TanH activation rather than a LeakyReLU. This replacement was done because we wanted to convert the generated image to the same range as the original MNIST dataset (-1, 1).
Defining the Discriminator
The GAN uses the Discriminator (D) to identify how real the Generator's outputs look by returning a probability of real vs. fake. This part of the network can be considered a binary classification problem. To solve this binary classification problem, we need a rather simple network composed of blocks of Fully Connect Layers (FC), Leaky ReLU activations, and Dropout layers. Note that the final layer has a block with an FC layer and a Sigmoid. The final Sigmoid activation returns the classification probability that we require.
Computing the Loss Function
To make the GANs image generation procedure smoother, we need to supply it with metrics showing how well it performs now. Loss functions do just that.
The Discriminator classifies the generated images into real or fake and returns the probability of it being real. To make this distinction, it must ensure that the input it receives is part of the real dataset. And if the input received is fake, it is not classified as part of the real dataset. We can mathematically understand this difference as maximizing and minimizing .
Building on these concepts, the Generator is tasked with fooling the Discriminator by creating realistic images. We can understand this procedure as ensuring that when the Discriminator gets an image sampled from the fake dataset, it thinks that the image belongs to the real dataset instead. We can mathematically understand this procedure as maximizing . Using this part of the formulae as a loss function sometimes makes the network confident about the wrong outputs. To prevent this assumption, we use instead.
The net cost function for the GAN's image generation can be thus mathematically represented as
Training a GAN such as this is a delicate balance and can be considered a game between two enemies. (Hence the name - Adversarial Learning.) Since either party attempts to influence the opposition and reduce the others' chance of winning, this is a MinMax game.
We can create the Generator and Discriminator with a Binary Crossentropy loss.
Optimizing the Loss
To train the network, we need the GAN to play the MinMax game. The training procedure hinges on performing Gradient Descent on the network weights. To reduce the training time and ensure that the training does not get stuck on the loss landscape, we use a Stochastic version of GD, aka Stochastic Gradient Descent.
Both the Discriminator and the Generator have different losses. If We gave both these networks a single loss function, they would not be able to optimize each other.
Having defined all the required functions, we can train the network to optimize the losses. The steps we follow for the GAN's image generation are as follows.
- Load an image, and generate random noise the same size as the loaded image.
- Send these images to the Discriminator and calculate the real vs. fake probability.
- Generate another noise of the same size. Send this noise to the Generator.
- Run training for the Generator for a few epochs.
- Repeat all the steps until a satisfactory image is generated.
These steps are directly translated into the code shown below.
Generating Handwritten Digits
Finally, we can generate handwritten digits from the MNIST dataset. To look at how far the network has trained the images, we create a helper function to store predictions from the Generator for a batch of images. This function creates random noise, passes them to the Generator, processes it for display, and then saves it to a folder. We run this helper function every 200 epochs.
For this article, we trained the GAN for around 10,000 epochs with a batch size of 32. We save the generated images every 200 epochs in the images folder.
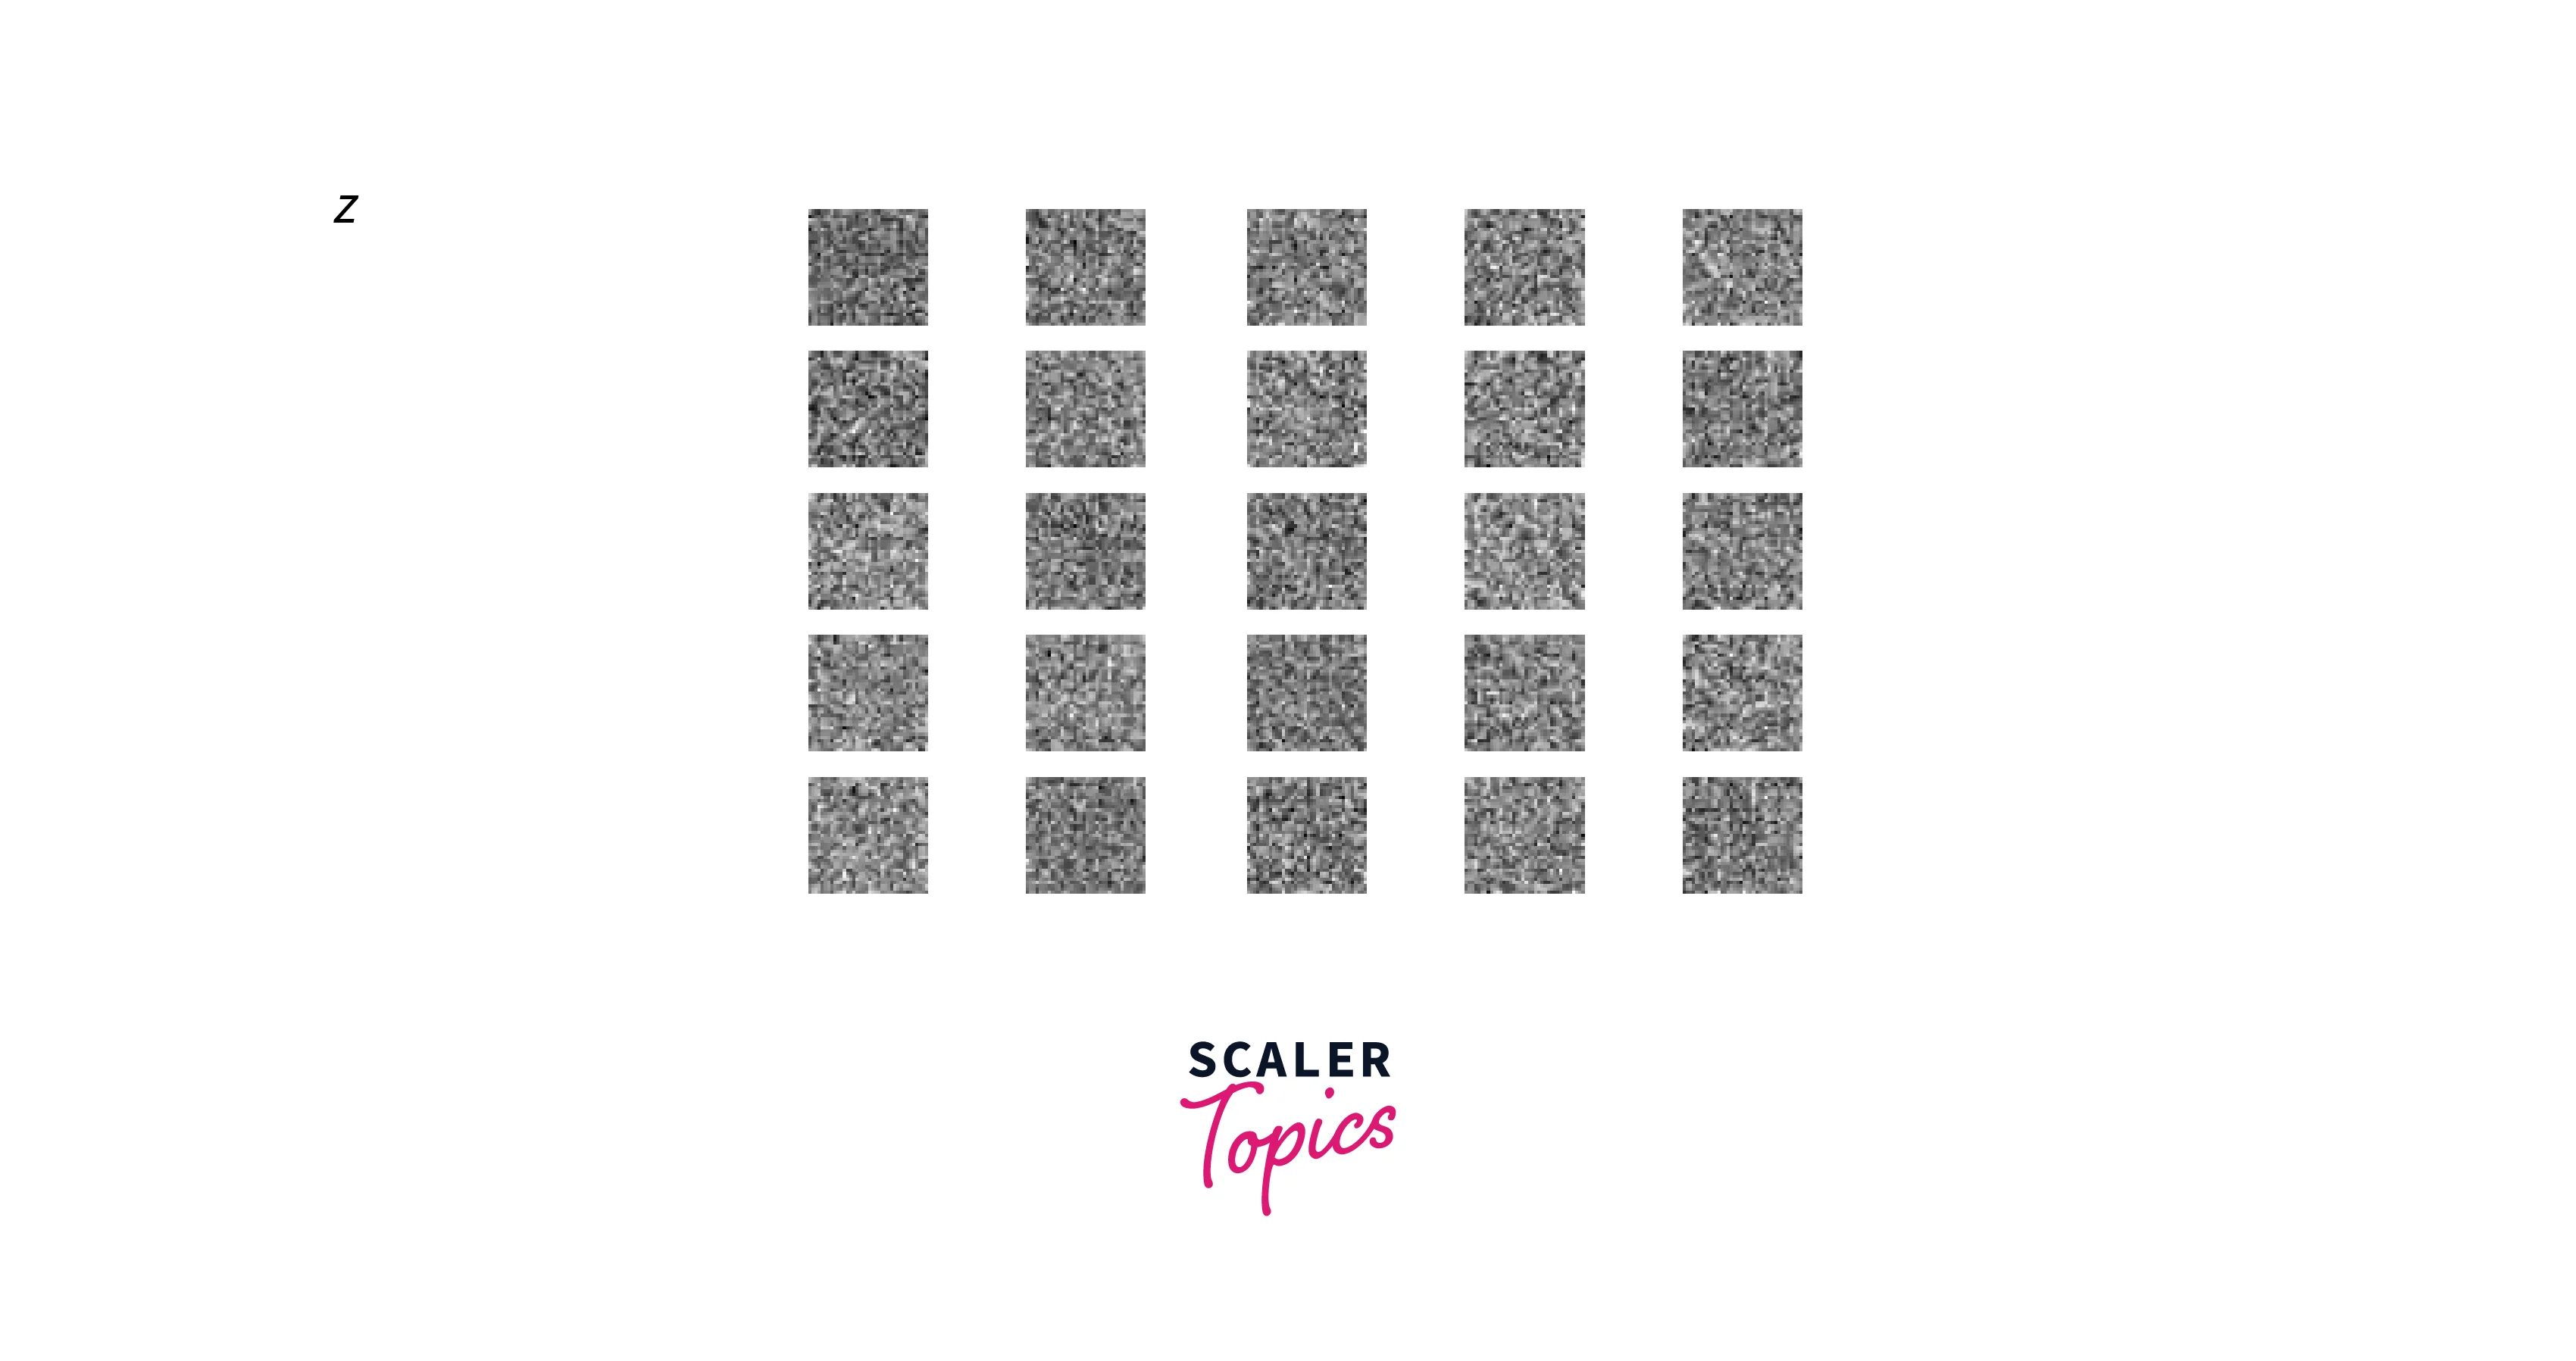
We can now look at the results of the GAN's image generation at the start, at 400 epochs, at 5000 epochs, and the final result at 10000 epochs.
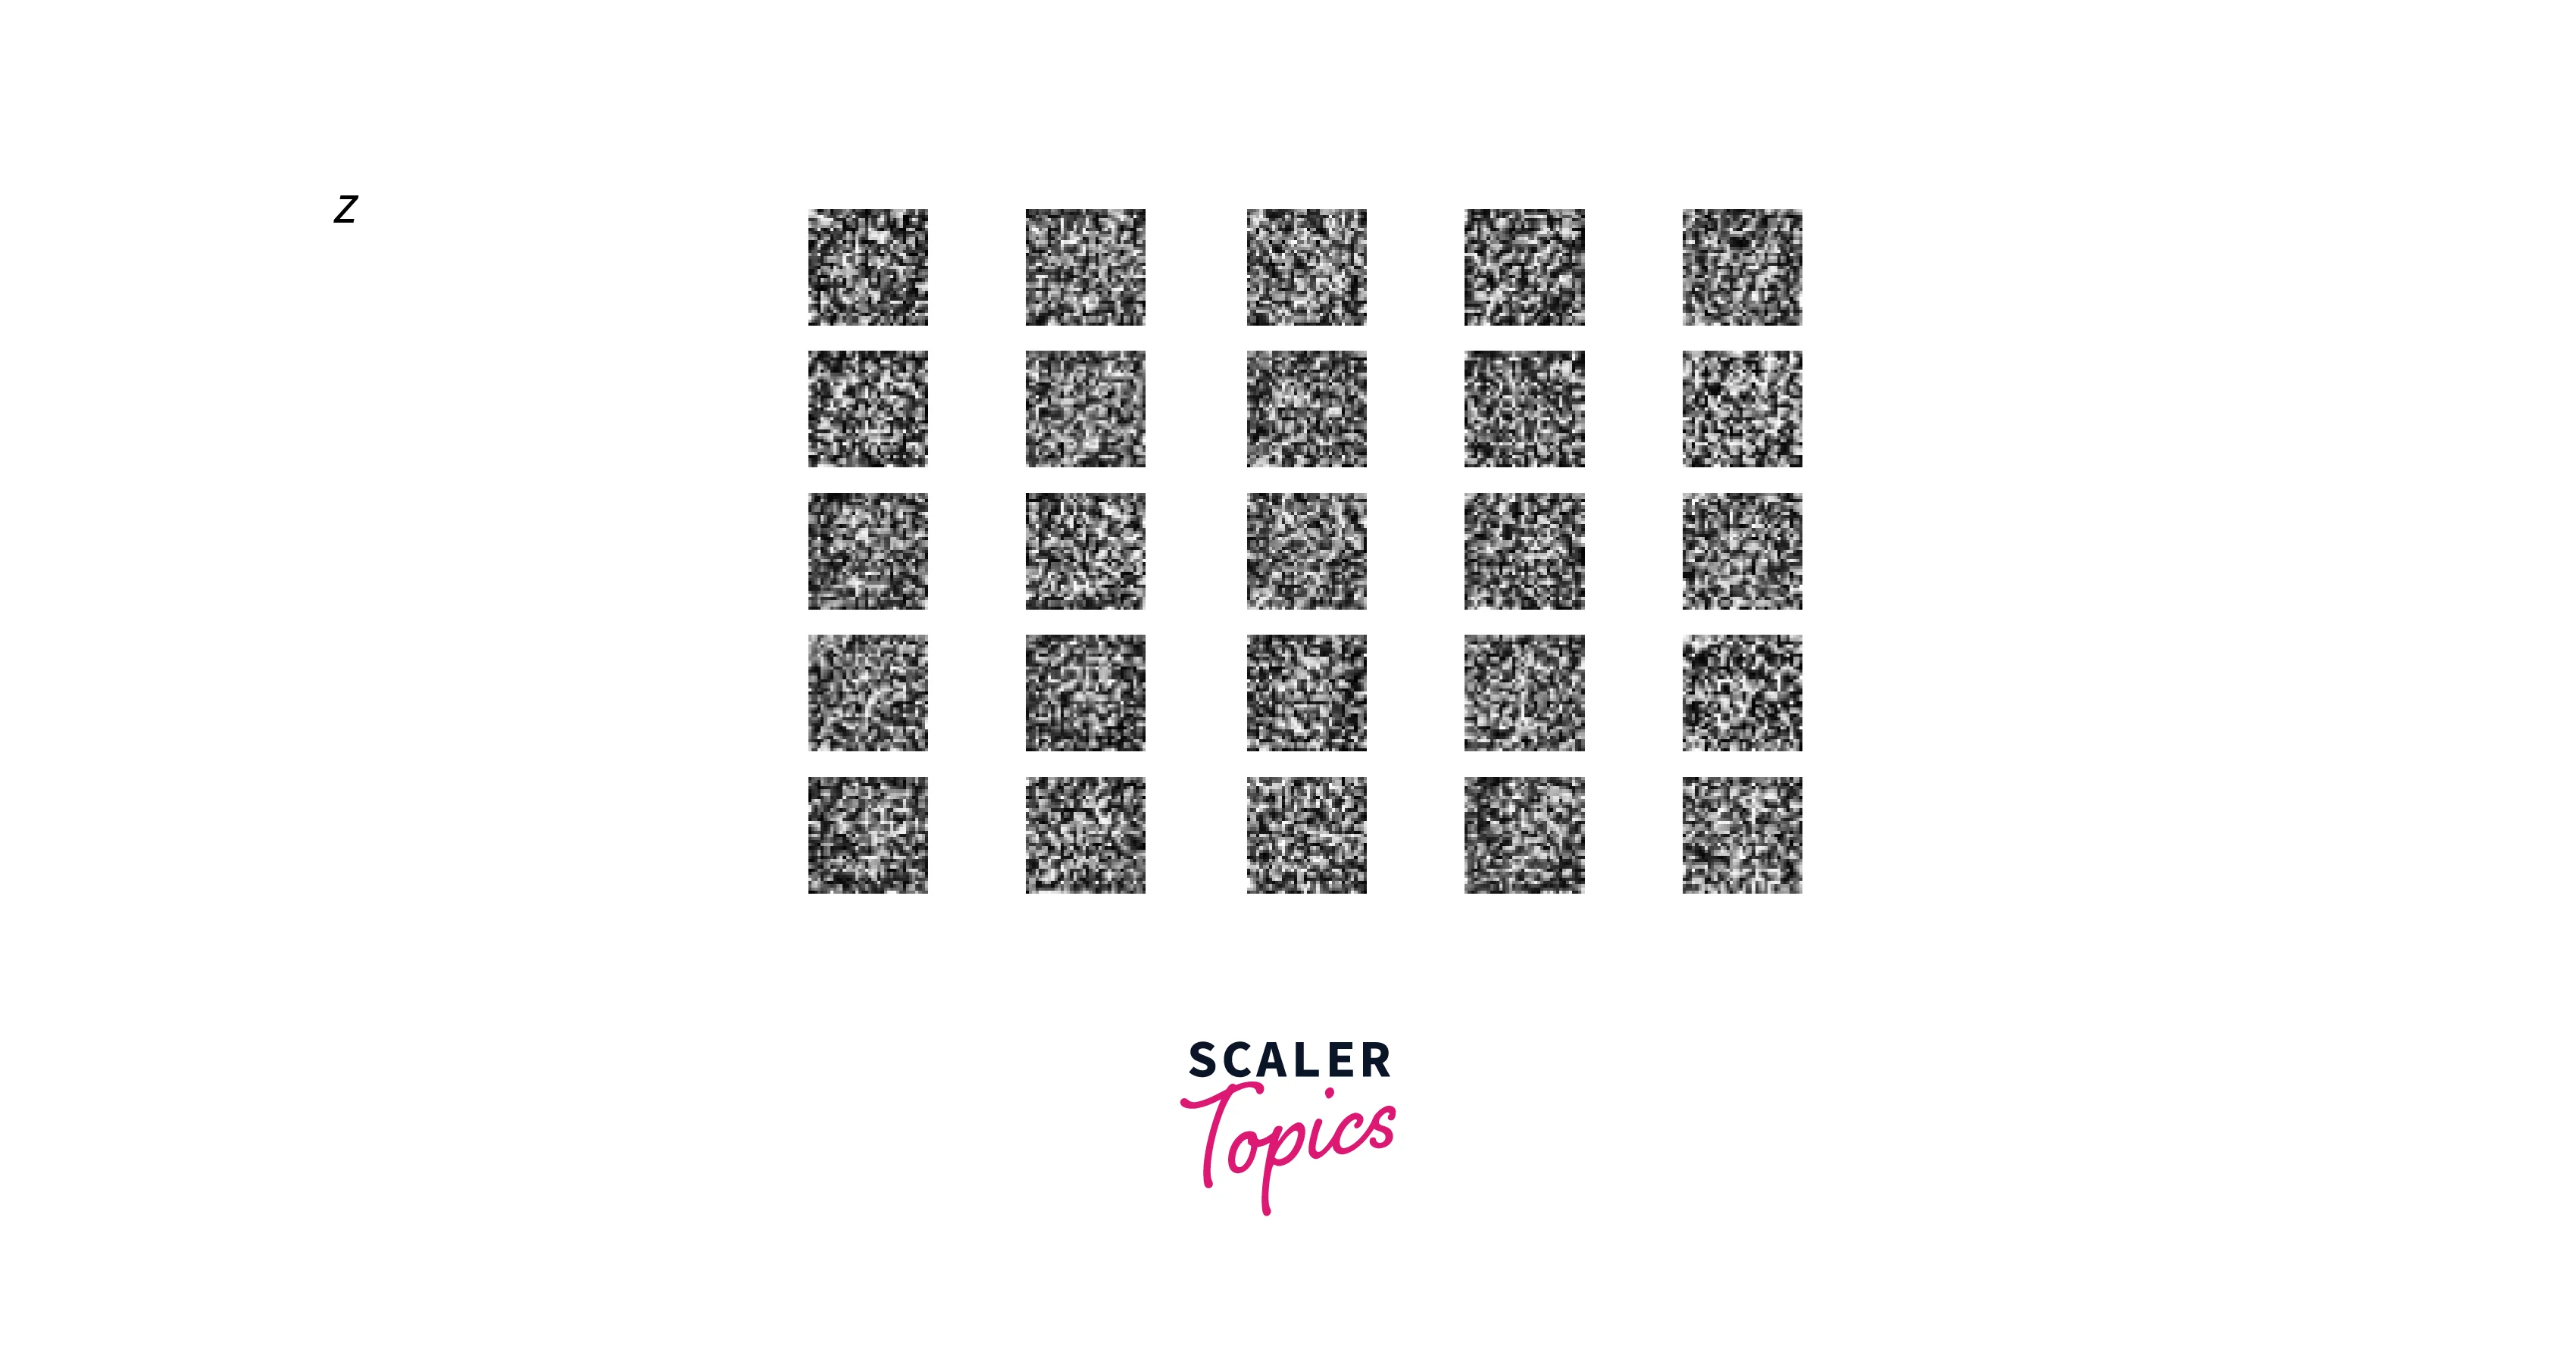
At the start, we have random noise.
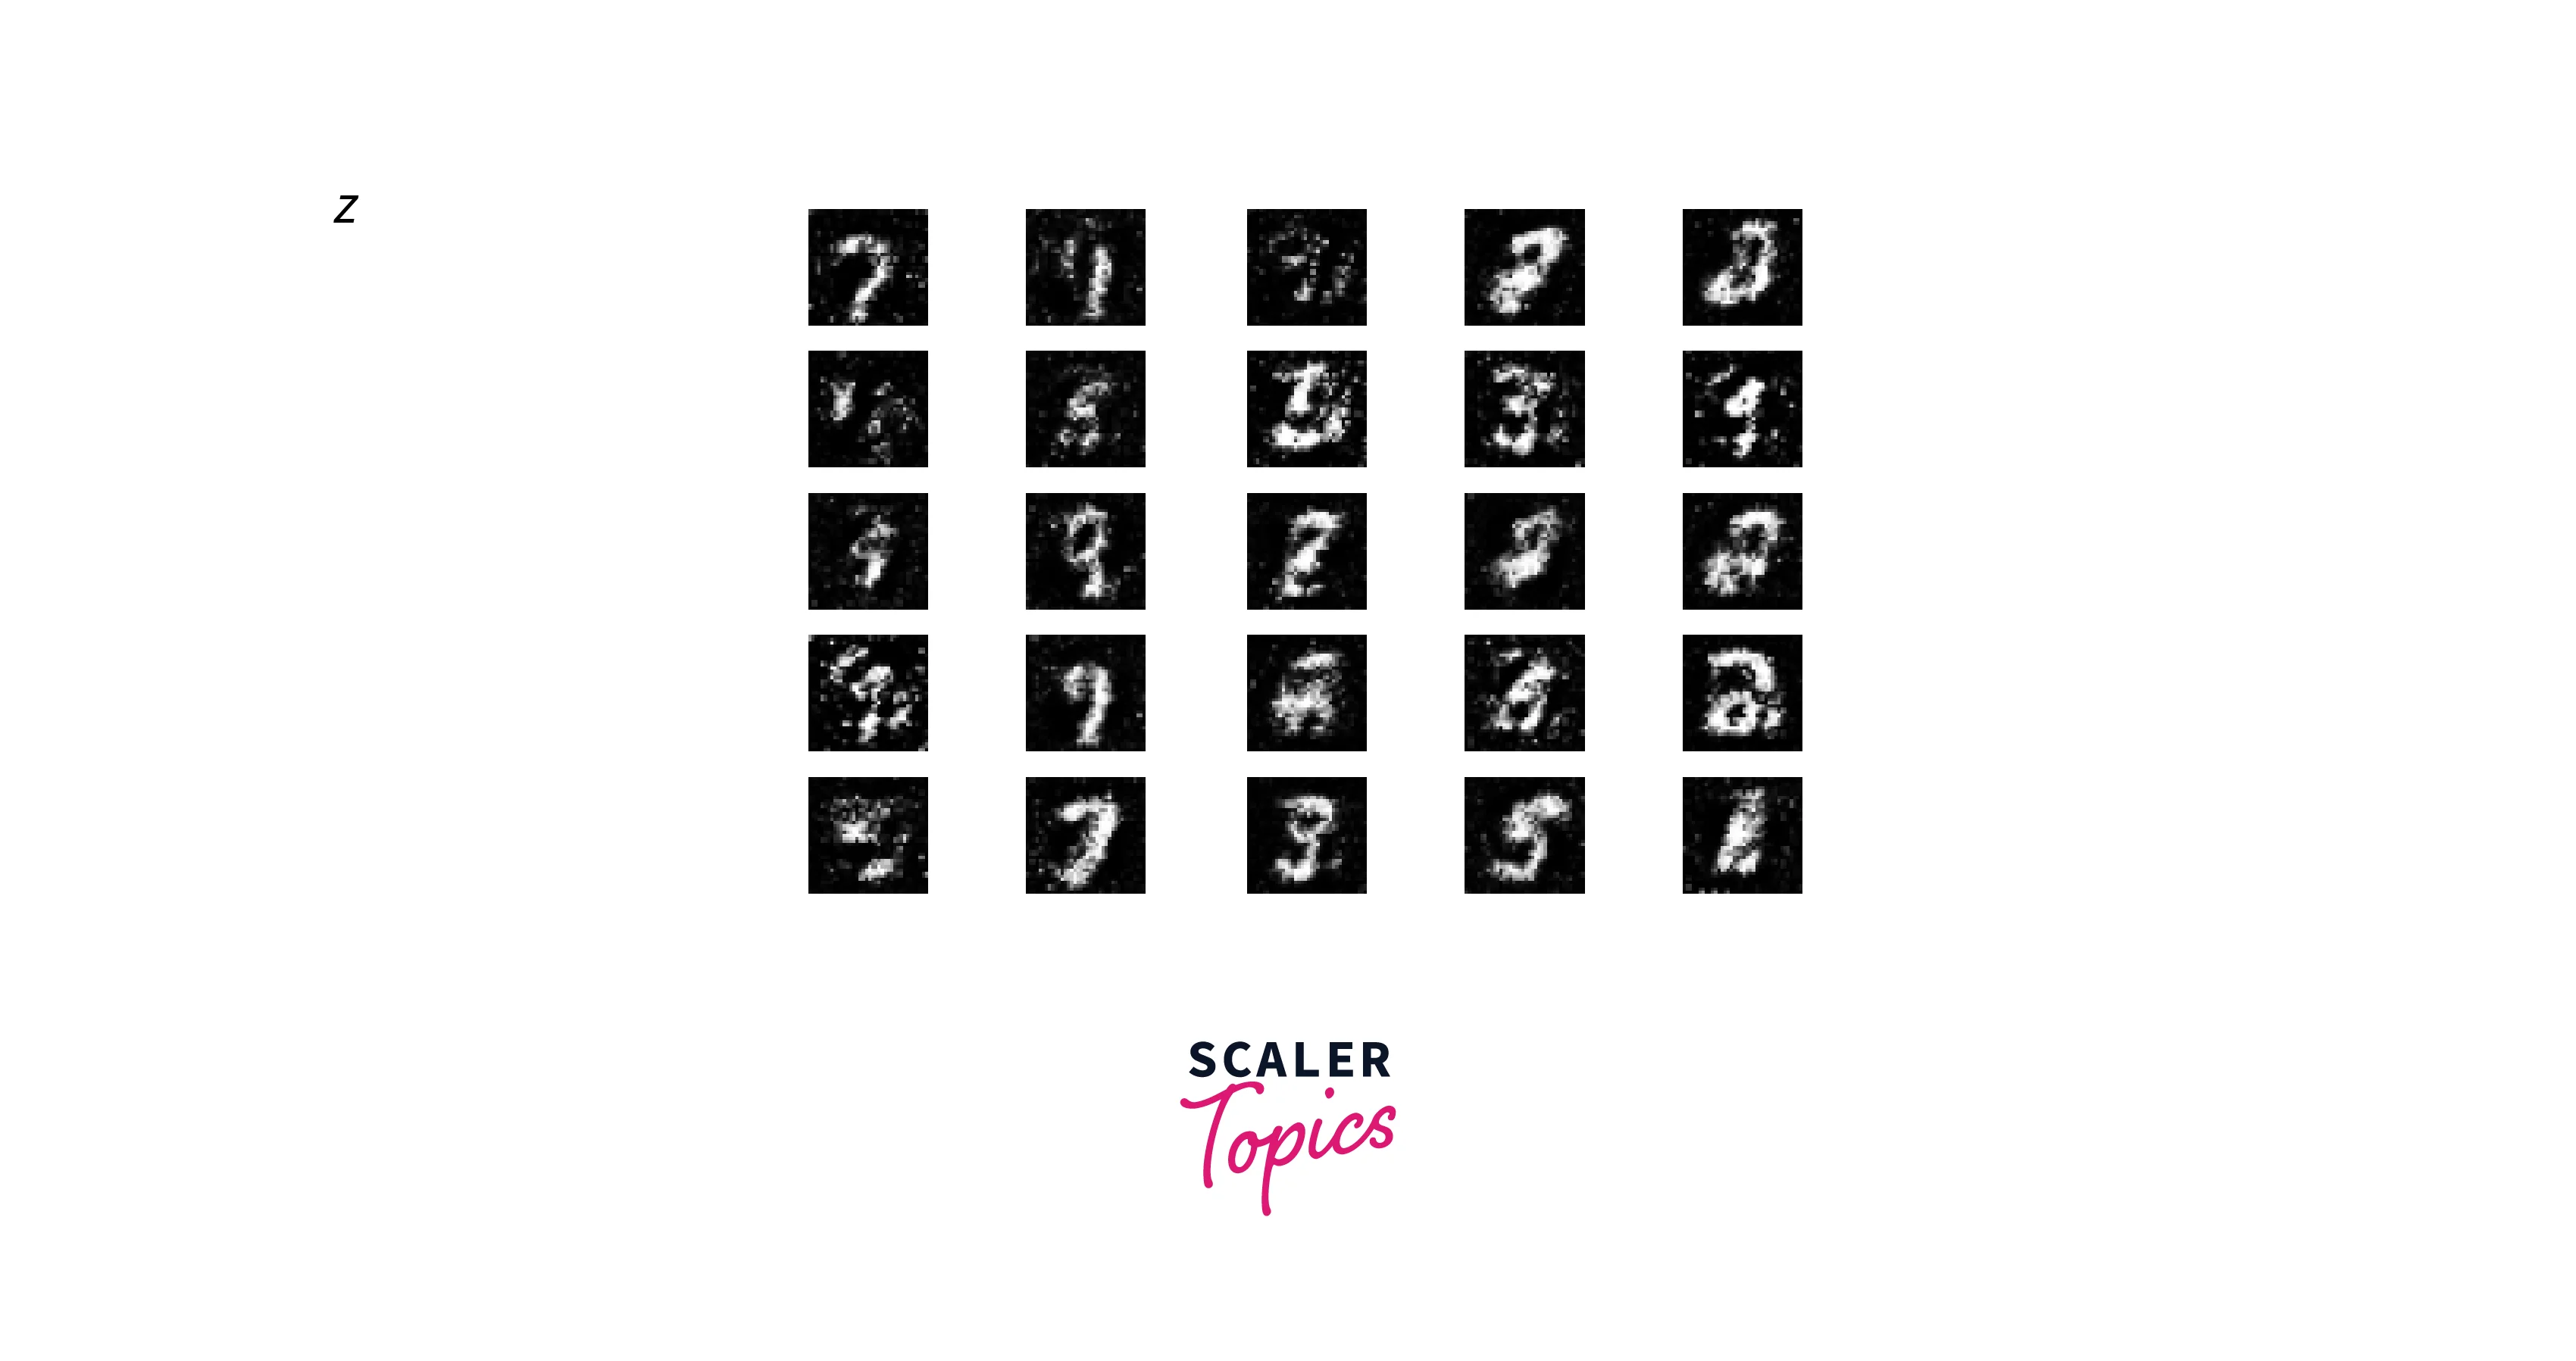
After the 400 epochs, we are getting somewhere slowly. But these results are different from real digits.
After the 5000 epochs, we can see figures that resemble the MNIST dataset.
After training the network for the entire 10,000 epochs, we get the following outputs.
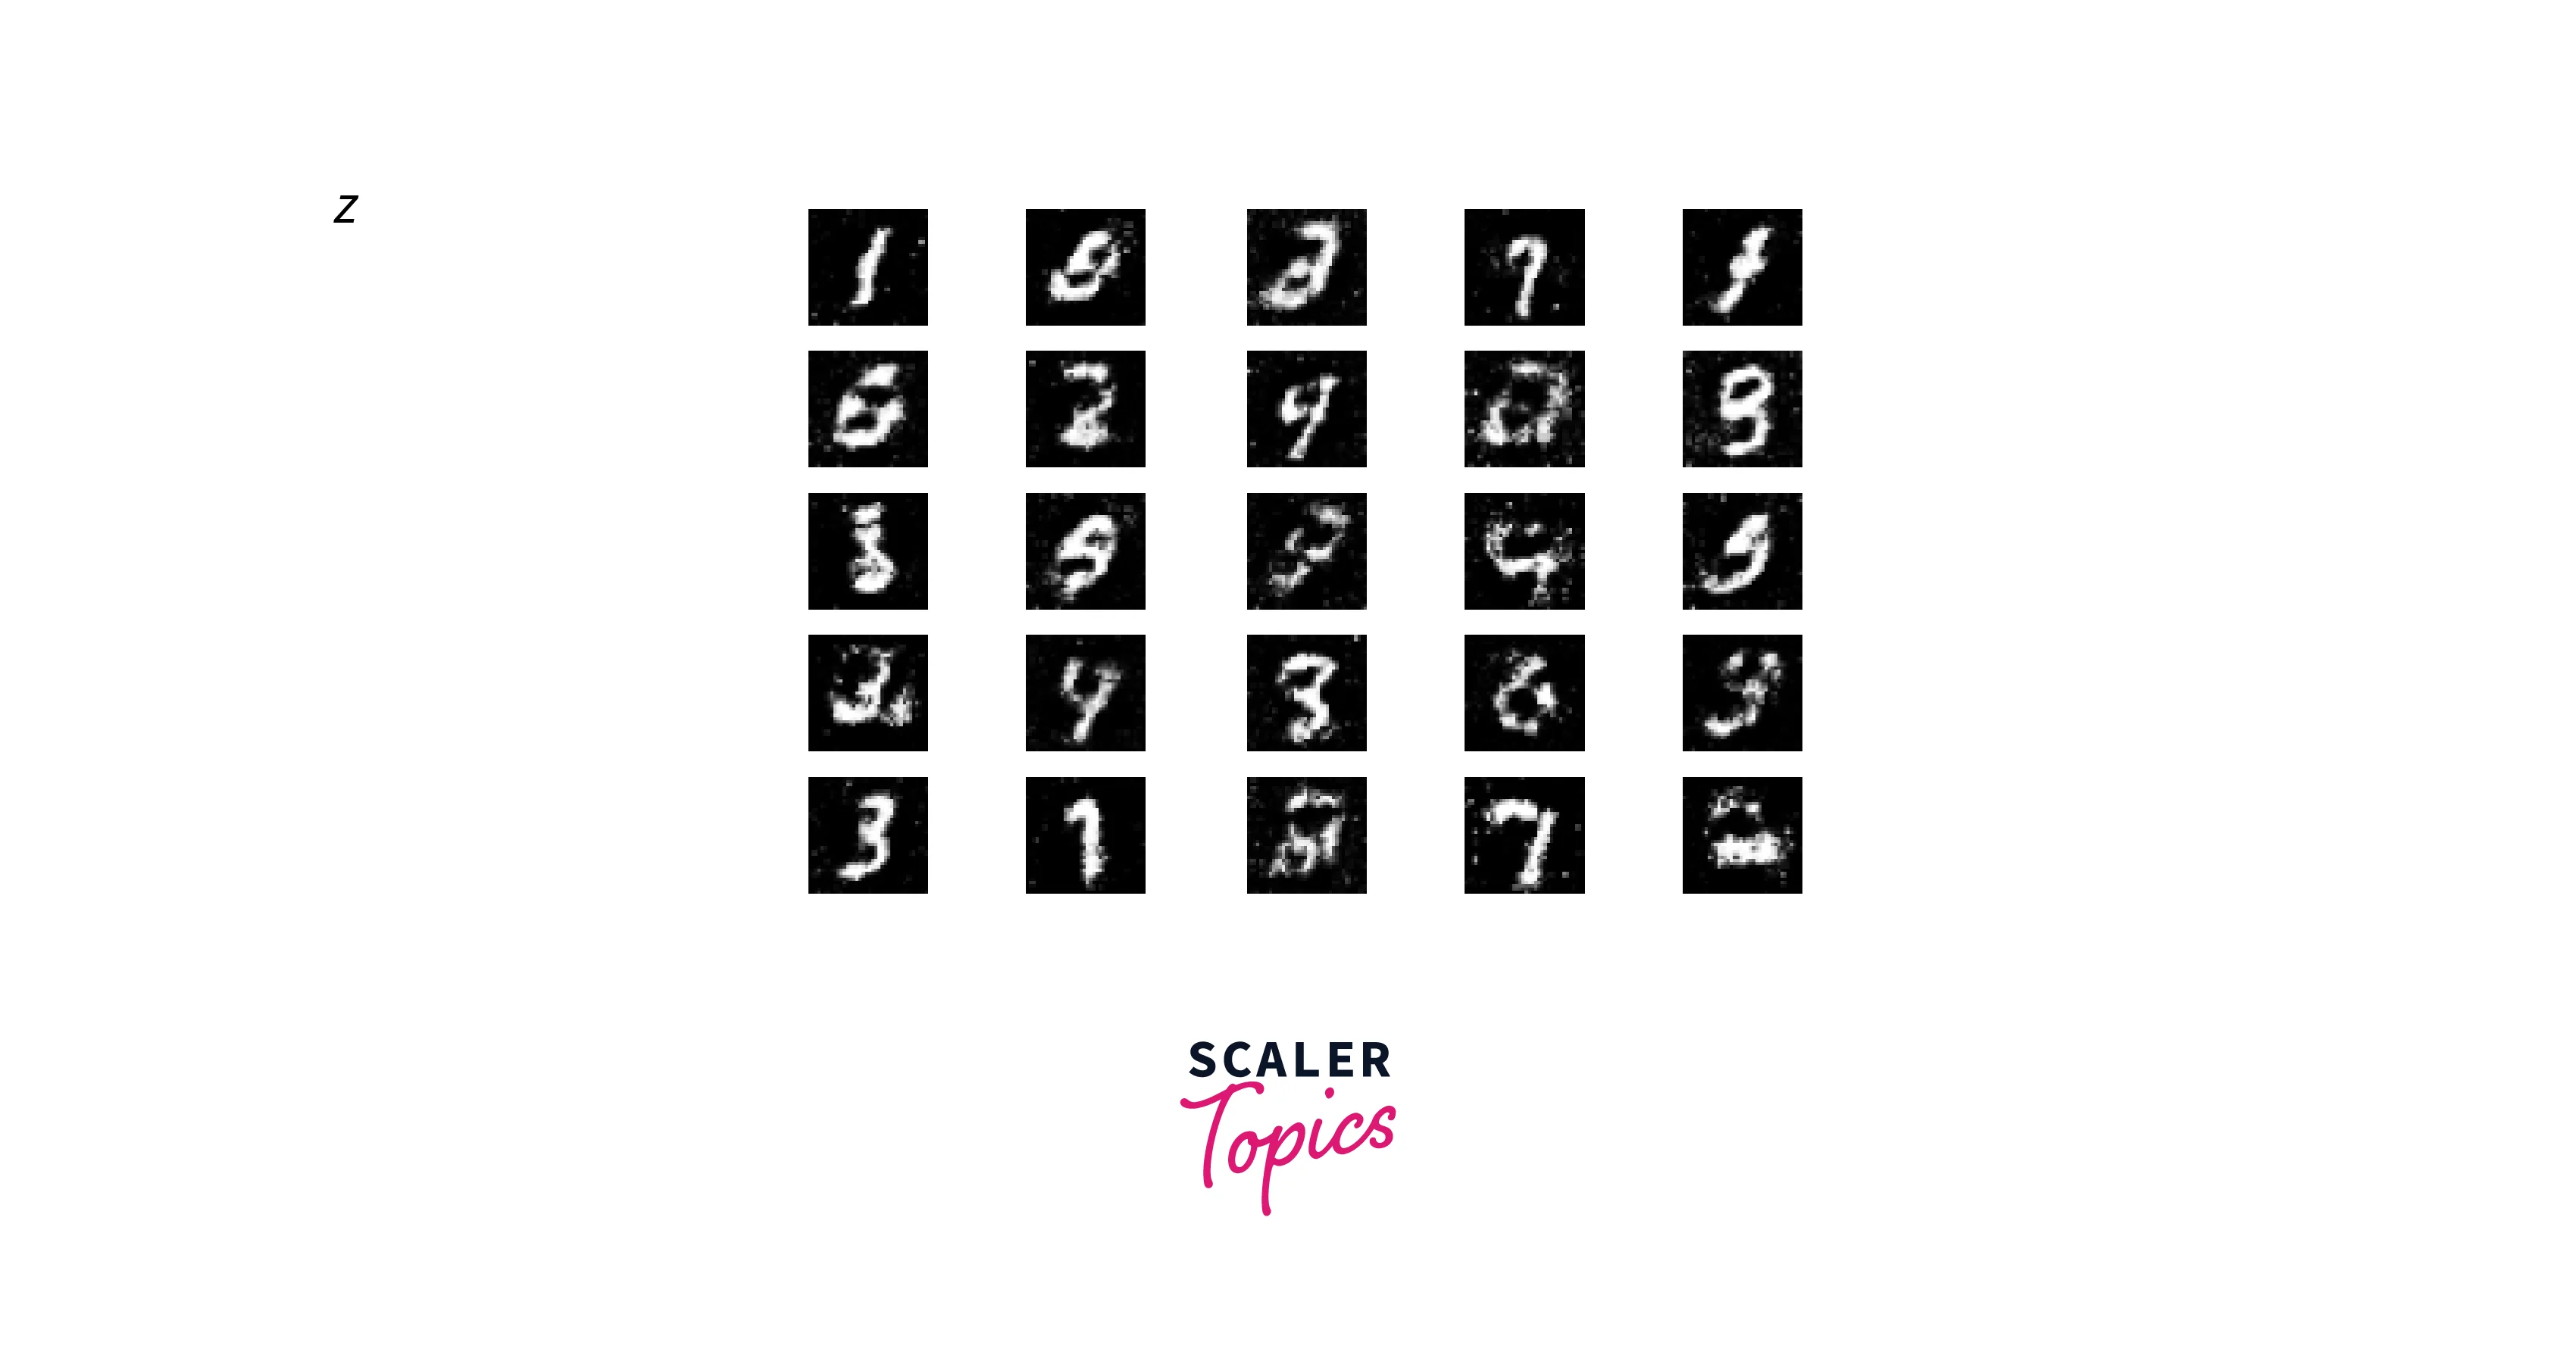
These images look very close to the handwritten number data we fed the network. These images were not shown to the network during training and were generated from scratch.
What's Next?
The output we got from the GANs image generation is good, but we can improve it in many ways. Without leaving the scope of this article, we can experiment with a few parameters. Some of them are as follows:
- Try different values of the latent space variable z_size to see if the performance improves.
- Try training the model for a larger number of epochs. We trained it for 10000; try doubling or tripling that to see if the results improve or worsen.
- Try different datasets such as the Fashion MNIST or the Moving MNIST. These datasets follow the same structure as the MNIST, making it possible to use the code we wrote directly.
- Finally, experimenting with other architectures, such as CycleGAN, DCGAN, etc., is worth experimenting with. Many of them would only require changing the functions of the Generator and Discriminator.
Scaler Placement Report and Statistics
Scaler learners achieved 2.5x salary growth with average post-Scaler CTC reaching ₹23L.
Conclusion
- GANs are machine learning models that can generate new images from a dataset.
- In this article, a simple GAN is created using the Tensorflow library and trained on the MNIST dataset.
- The GAN comprises two parts: a Generator that creates novel images from random and a Discriminator that attempts to prove that the images generated are fake.
- The final output is a batch of images that look like handwritten digits, as shown in the example image provided.
- The GAN is trained by supplying it with metrics and loss functions that show how well it correctly classifies real and fake images.
- The GAN is evaluated by testing it on unseen data and creating new images using the Generator.