Installation and Intro to DRF
Overview
In this article, we are going to take a look at DRF, the Django rest framework. DRF is one of the widely used tools to build web APIs. We will see how to install the Django rest framework, what are the RESTful structure, how to serialize the created model, write views, define the URLs and test our APIs.
Introduction to DRF
DRF, the Django Rest Framework, is a library built on top of Django that enables developers to build web APIs. It comes with a lot of functionalities including authentication packages for both OAuth1 and OAuth2, serializers, pagination, validators, parsers, and lots more. It also allows us to define and structure the URLs. It is used by famous organizations like Mozilla and Red Hat.
Transform Your Career
Choose from our industry-leading programs designed for career success
Modern Software and AI Engineering Program
Master full-stack development with AI integration

Modern Data Science and ML with specialisation in AI
Advanced data science techniques with AI specialization
Advanced AIML with Specialisation in Agentic AI
Deep dive into AIML with focus on Agentic systems
DevOps, Cloud & AI Platform Engineering
Build and manage AI-powered cloud infrastructure
AI Engineering Advanced Certification by IIT-Roorkee
Premier AI engineering certification from IIT-Roorkee
How to Install Django REST Framework?
DRF can be installed using the python package manager pip running the command
Windows
Linux
After successful installation, we need to include 'rest_framework' in the settings.py file of our project as shown
Scaler Placement Report and Statistics
Scaler learners achieved 2.5x salary growth with average post-Scaler CTC reaching ₹23L.
RESTful Structure
REST is a Representational State Transfer built to interact with the web through HTTP protocols and methods. The RESTful structure is comprised of a client, a server, and a response. The HTTP request is sent by the client and an HTTP response is received in return by the server.
REST APIs consist of mainly four types of methods, i.e GET, PUT, POST, and DELETE.
Models
As Django follows Model-View-Template architecture, models act as a mediator between the database and the views, that is the views where writing backend scripts we can fetch data from the database and can also update it.
For the instance, let's create a model for a book store to save the name of the book along with its author and page count of the book in the models.py file
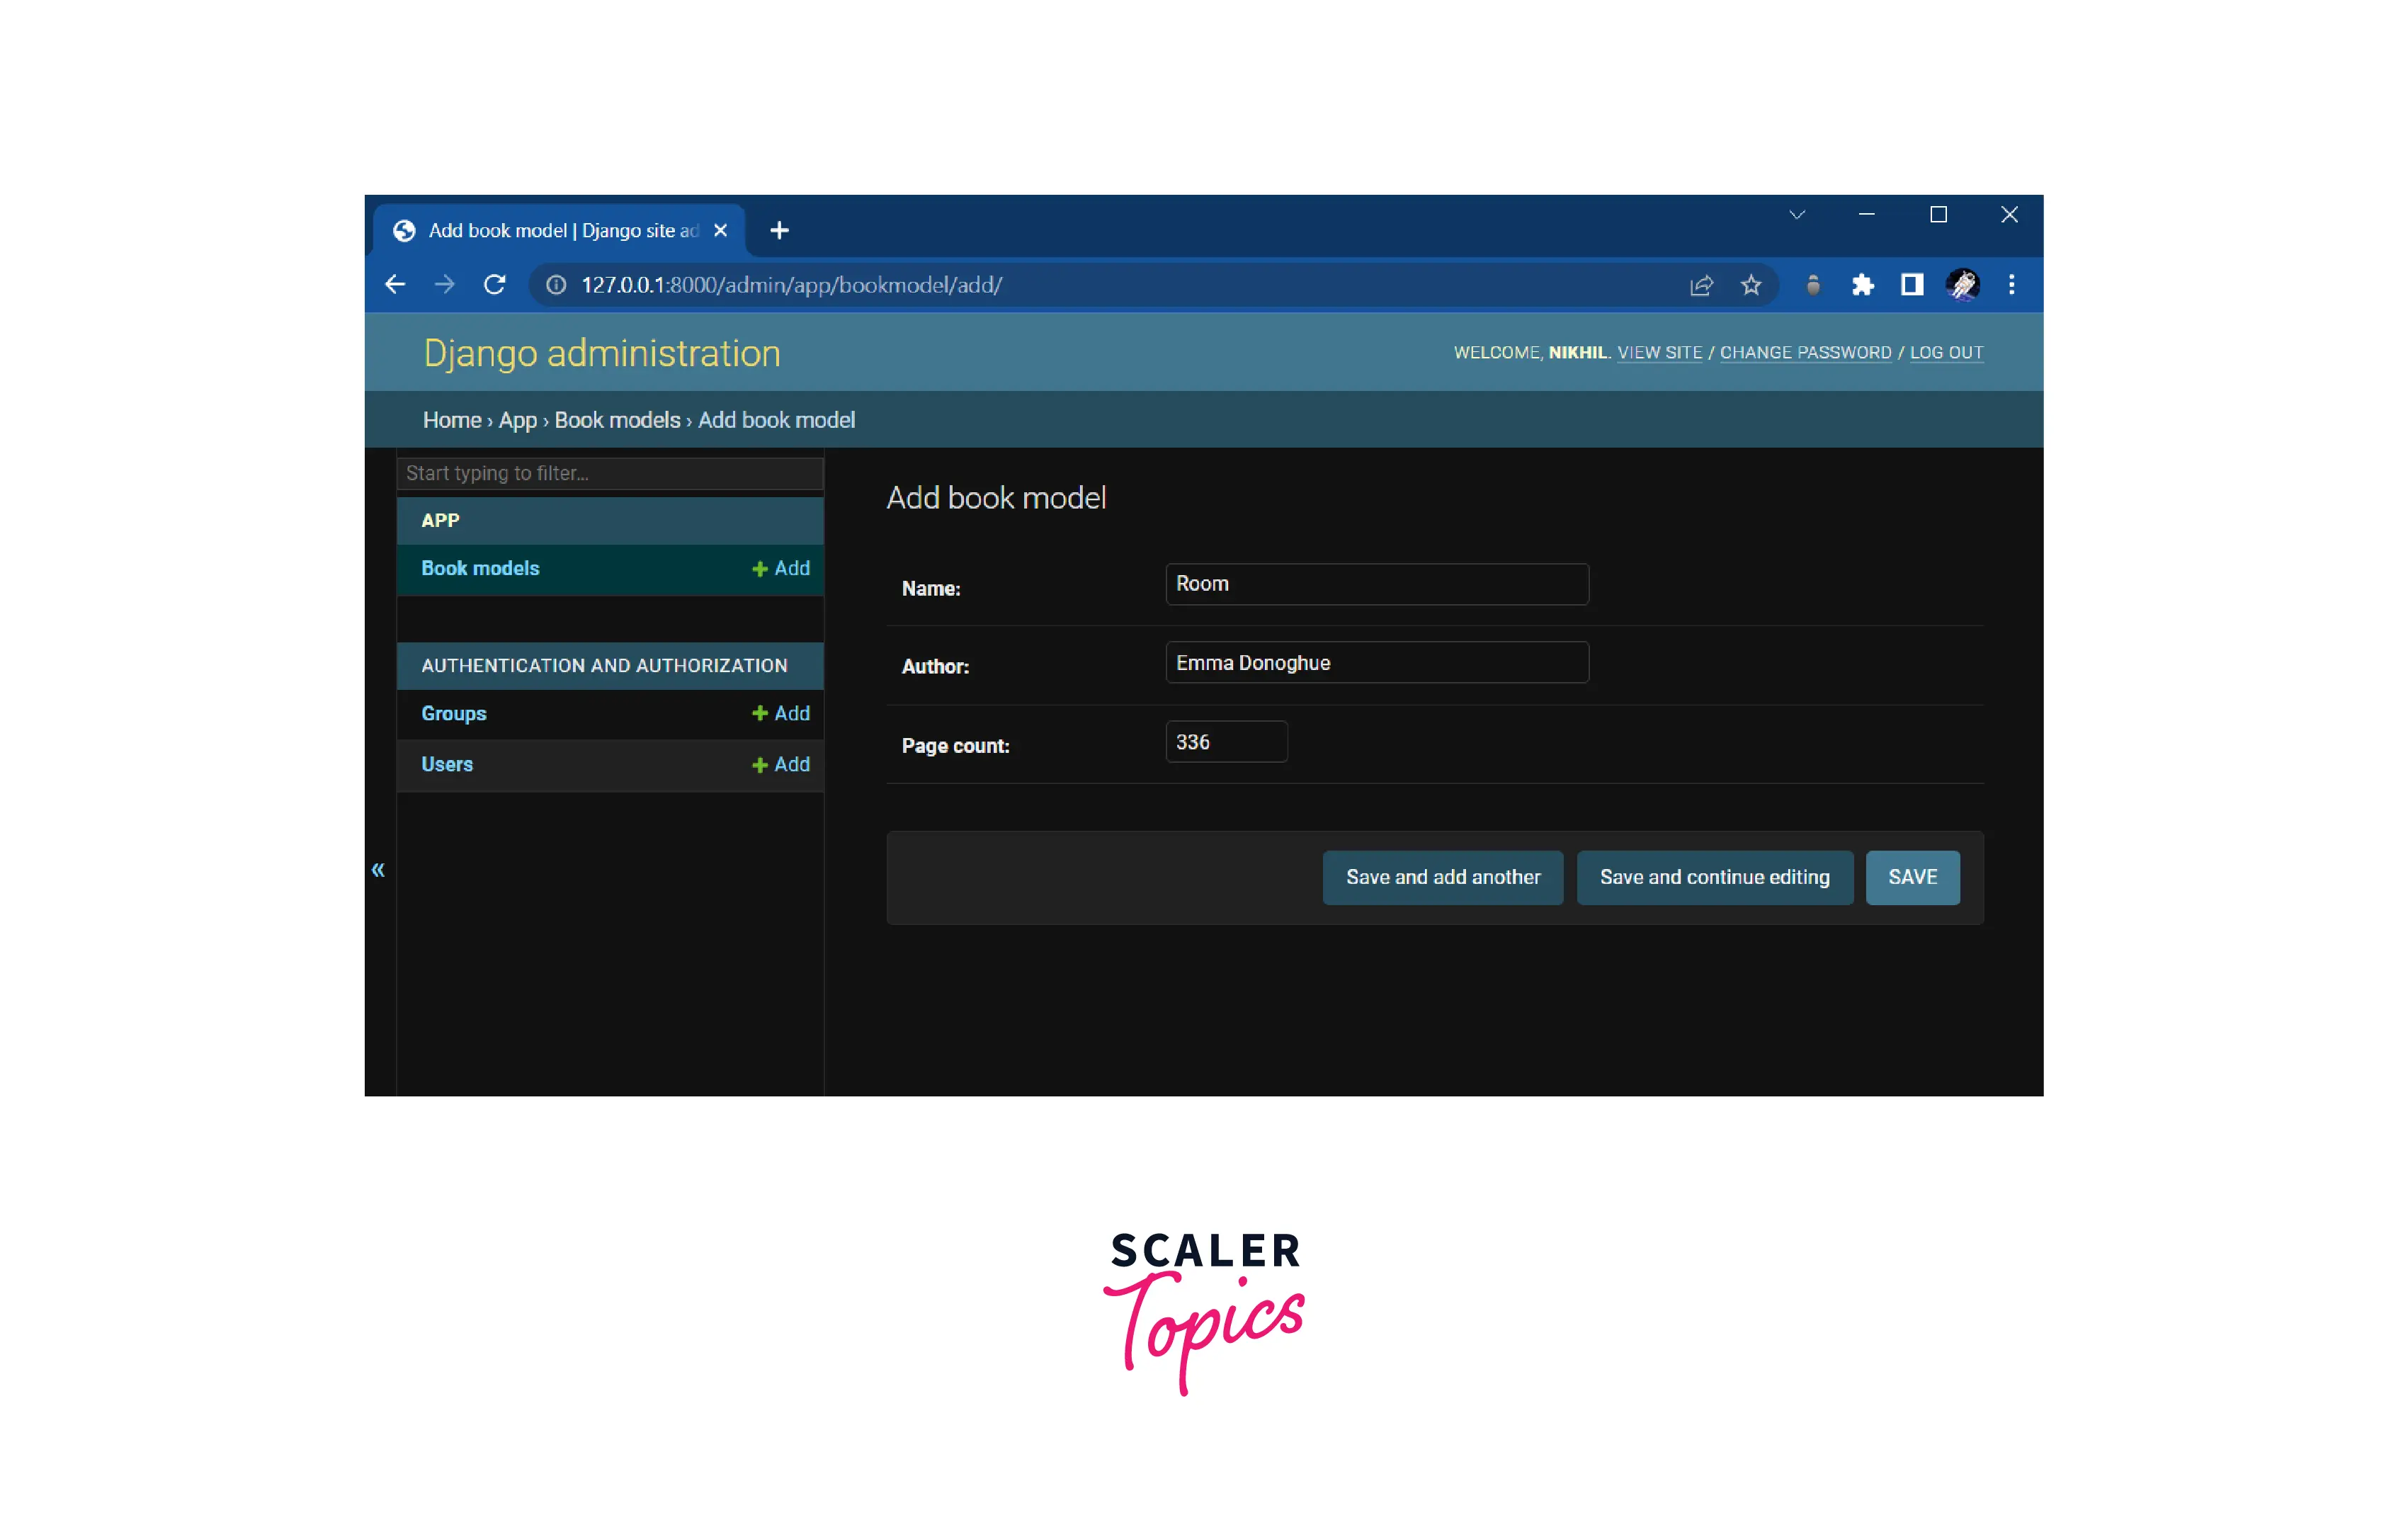
Register this model in the admin.py file so that we can access it through the admin dashboard
Now run the migrations command so that this model reflects in the database
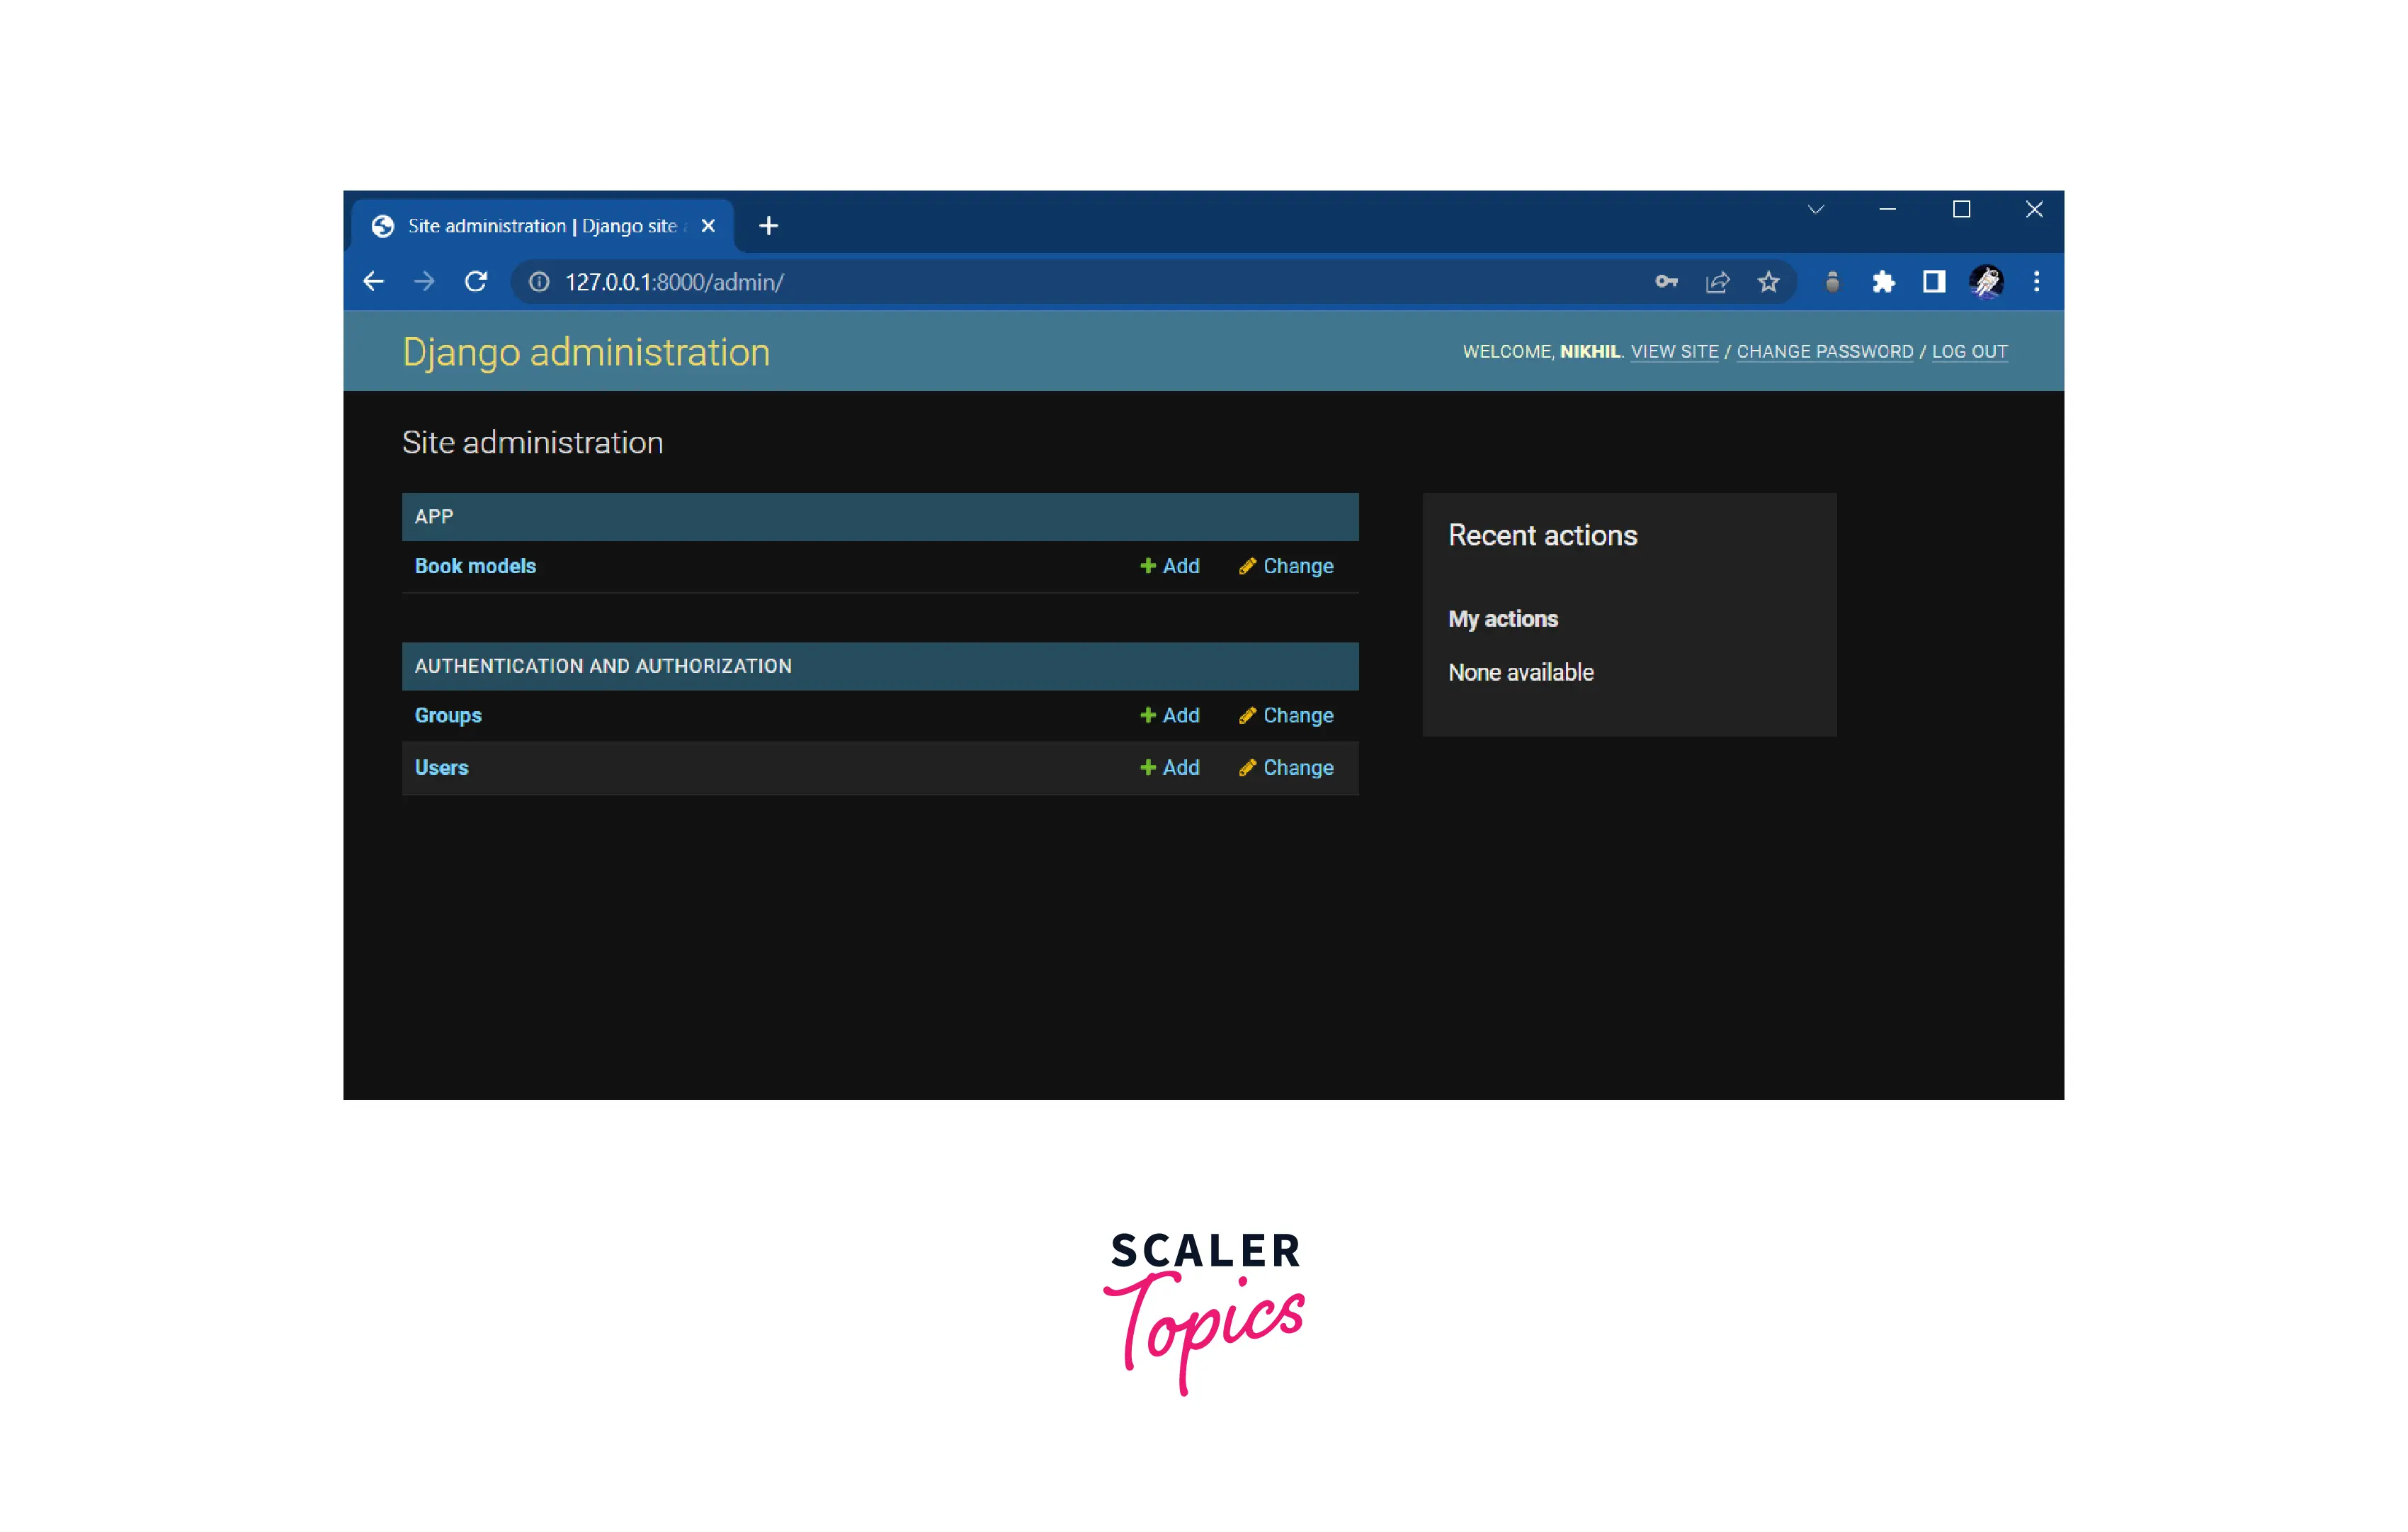
Create a super user running the command
After login, you will find a similar UI as shown in the figure
Click on Book models and add some data accordingly then click save.
Now so far we have successfully created a model and added some data.
Now we need to serialize this model.
Turn Learning into Career Growth
Serialization
Serializers are used to serialize the data i.e to convert objects, and models into data types that can be stored and transmitted into a form that is understandable by JavaScript and other front-end frameworks.
Here, we will use the Model Serializers which generate fields based on the models and can be accessed by simply implementing the .create() and .update() commands.
To implement this, we need to create a file named serializers.py and write
In this code above, at first, we import serializers from rest_framework. Now we need to import the model which we want to serialize.
Now create a class inheriting the ModelsSerializer from the serializers. Define a Meta class with specific models and the field you want to serialize. In the metaclass of serializers, we define which models and its field are required to be serialized.
As our serializers are ready, we can import them to the views.py file to write the backend logic to access this.
In the views.py file, we need to make some imports first including viewsets from rest_framework and the respective models and serializers
The class BookList inherits the properties of ModelViewSet which is a tool that helps you to define functions that match common actions like CREATE, RETRIEVE, UPDATE, and DELETE.
URLs
Now we need to create URLs to access the APIs we have created.
To implement this, we will use the concept of routers. The router can be defined as the URLs that represent their respective controllers and the view logic written.
In the code written above, we first imported routers from the rest_framework and BookList from the views file. We have used the .register() method which requires two arguments, one is a prefix and the other is the ViewSet, every prefix represents a view set mentioned. Here r'books' is the prefix, which can also be defined as the URL path or the endpoints, and BookList is the model view set we have created.
Now the API URL is ready and we can get all the data from the BookModel by routing the URL GET /books/
Pagination
The concept of pagination allows us to control the number of objects we want to view per page. For this, we need to include the following code in the settings.py file
For now, it is set to 5 which means that it will allow viewing 5 objects of the model per page.
Scaler Placement Report and Statistics
Scaler learners achieved 2.5x salary growth with average post-Scaler CTC reaching ₹23L.
Testing Our API
Now as we have created our Django rest framework application, and created and serialized the models we can test our endpoints.
First run the server, by running the command
and route to http://localhost:8000/ or to the specific development server port.
Now, as mentioned above books is one of the routes registered. So now we can route to /books i.e http://localhost:8000/books/. This will return you to the page displayed below in the image with a UI provided by the Django Rest Framework itself.
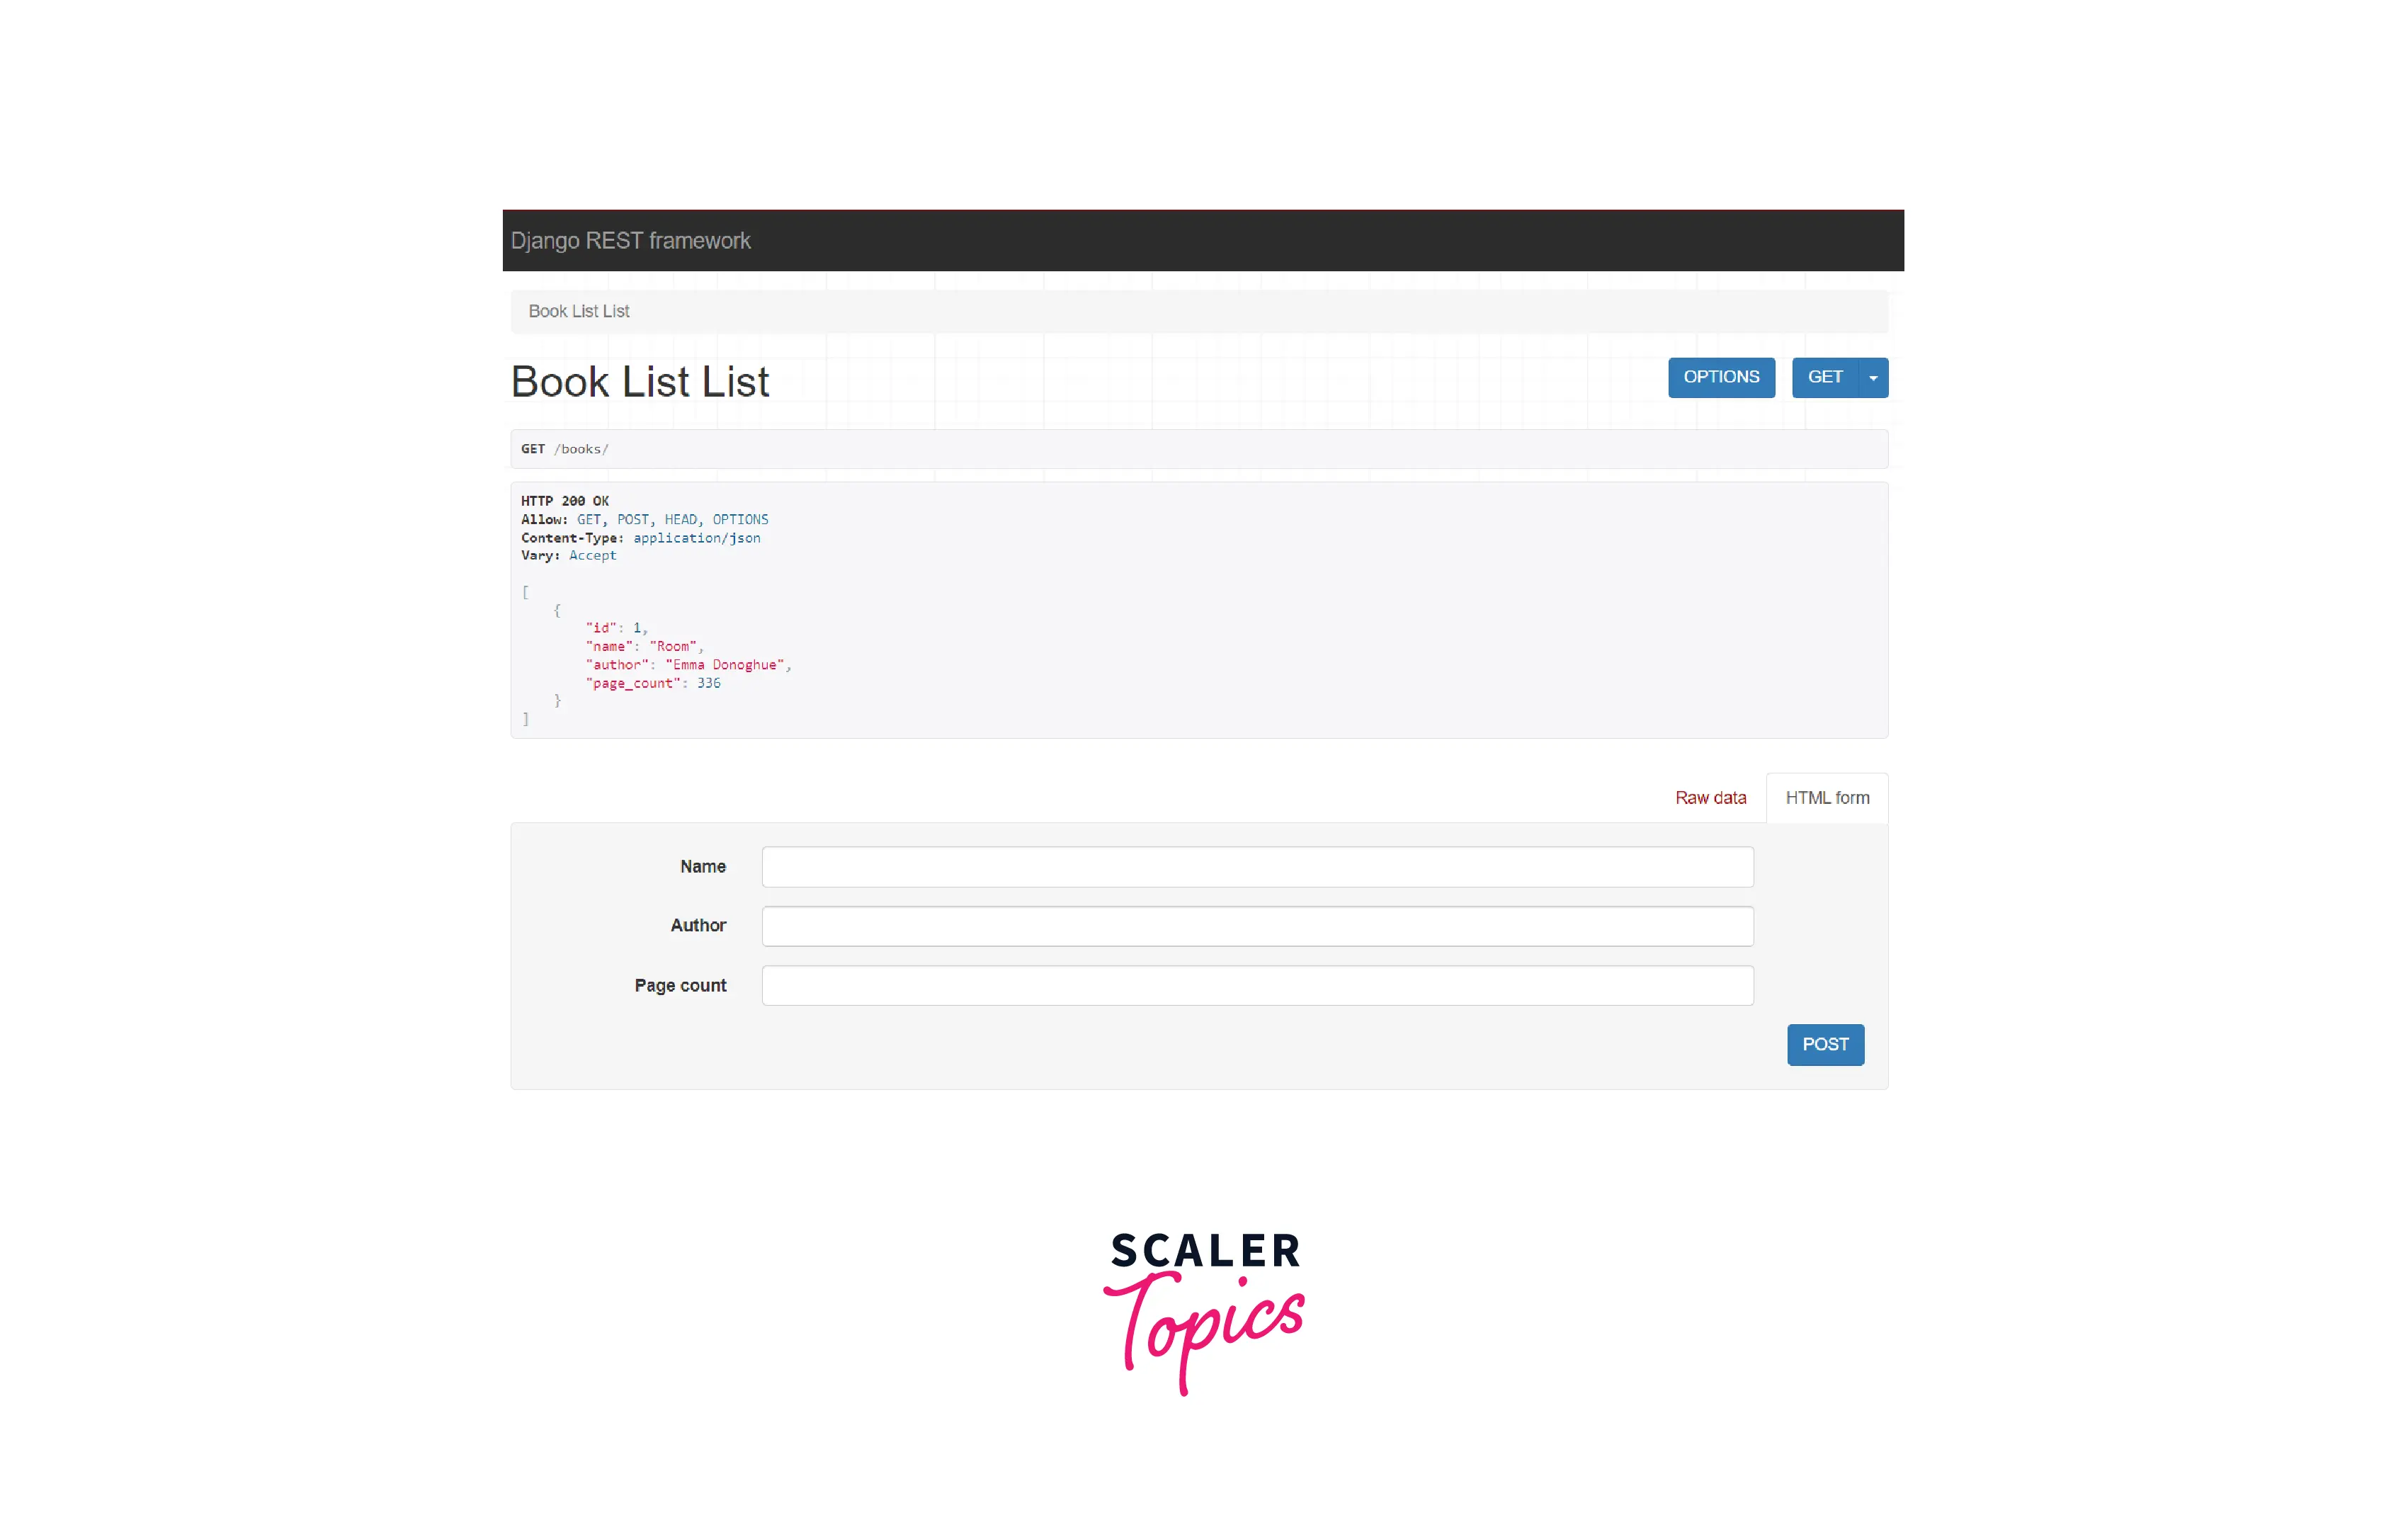
Now as you can see, we have retrieved the data from the models using the GET HTTP method.
Conclusion
Now let's make a quick recap of what we have learned so far in this blog
- DRF is a popular library used to build web APIs
- It comes along with various functionalities like authentication including OAuth1 and OAuth2, validators, parsers, etc.
- What are the RESTful structures that are followed while building an API?
- Creating models, migrating the changes, and accessing them using the admin dashboard.
- Serializing the models using serializers i.e converting them into formats understandable by JavaScript.
- Creating views for the serializers using class-based views and inheriting the properties of ModelViewSet.
- Limiting the number of objects view per page using the concept of pagination.
- Mapping the views in urls.py and creating routes for the APIs.
- Testing the APIs routing the path defined using the UI provided by the DRF itself.