Django REST API
Overview
In this article, we will look at REST (REpresentational State Transfer) APIs and different HTTP methods that we apply to our different API endpoints.
What is a REST API?
REST stands for REpresentational State Transfer which is a defined protocol for listing, creating, changing, and deleting data on your server through different HTTP methods and standard ways to represent data across different platforms so that they can be used to build different applications. Data are provided in different formats like JSON, XML, or HTML through an interface called the API acronym of Application Programming Interface which allows clients to make requests through different endpoints expecting the desired outputs of data as a response.
What is Django Rest Framework?
Django Rest Framework, acronym as DRF is a package built on top of Django and python to build WebAPIs. It allows for interaction with the database in an efficient manner using serializers for both ORM and non-ORM data. It comes along with many built-in features like authorization packages including OAuth1 and OAuth2. It has great community support and has been used by organizations like Red Hat, Mozilla, and Heroku.
How to Create a Basic API using Django Rest Framework?
Quick project setup
- Create a virtual environment
- Activate the virtual environment
- Install Django
- Initialise a Django Project
- Install Django Rest Framework
Transform Your Career
Choose from our industry-leading programs designed for career success
Modern Software and AI Engineering Program
Master full-stack development with AI integration

Modern Data Science and ML with specialisation in AI
Advanced data science techniques with AI specialization
Advanced AIML with Specialisation in Agentic AI
Deep dive into AIML with focus on Agentic systems
DevOps, Cloud & AI Platform Engineering
Build and manage AI-powered cloud infrastructure
AI Engineering Advanced Certification by IIT-Roorkee
Premier AI engineering certification from IIT-Roorkee
Add rest_framework to INSTALLED_APPS
Create an app and model
- Create a Django Application
- Add the created app to INSTALLED_APPS
- Create an urls.py file in the app directory and initialize a list of urlpatterns
- Include your app urls file in the urls.py file of your project
Now that we have created our app, we are good to go to create our model.
Create a Model
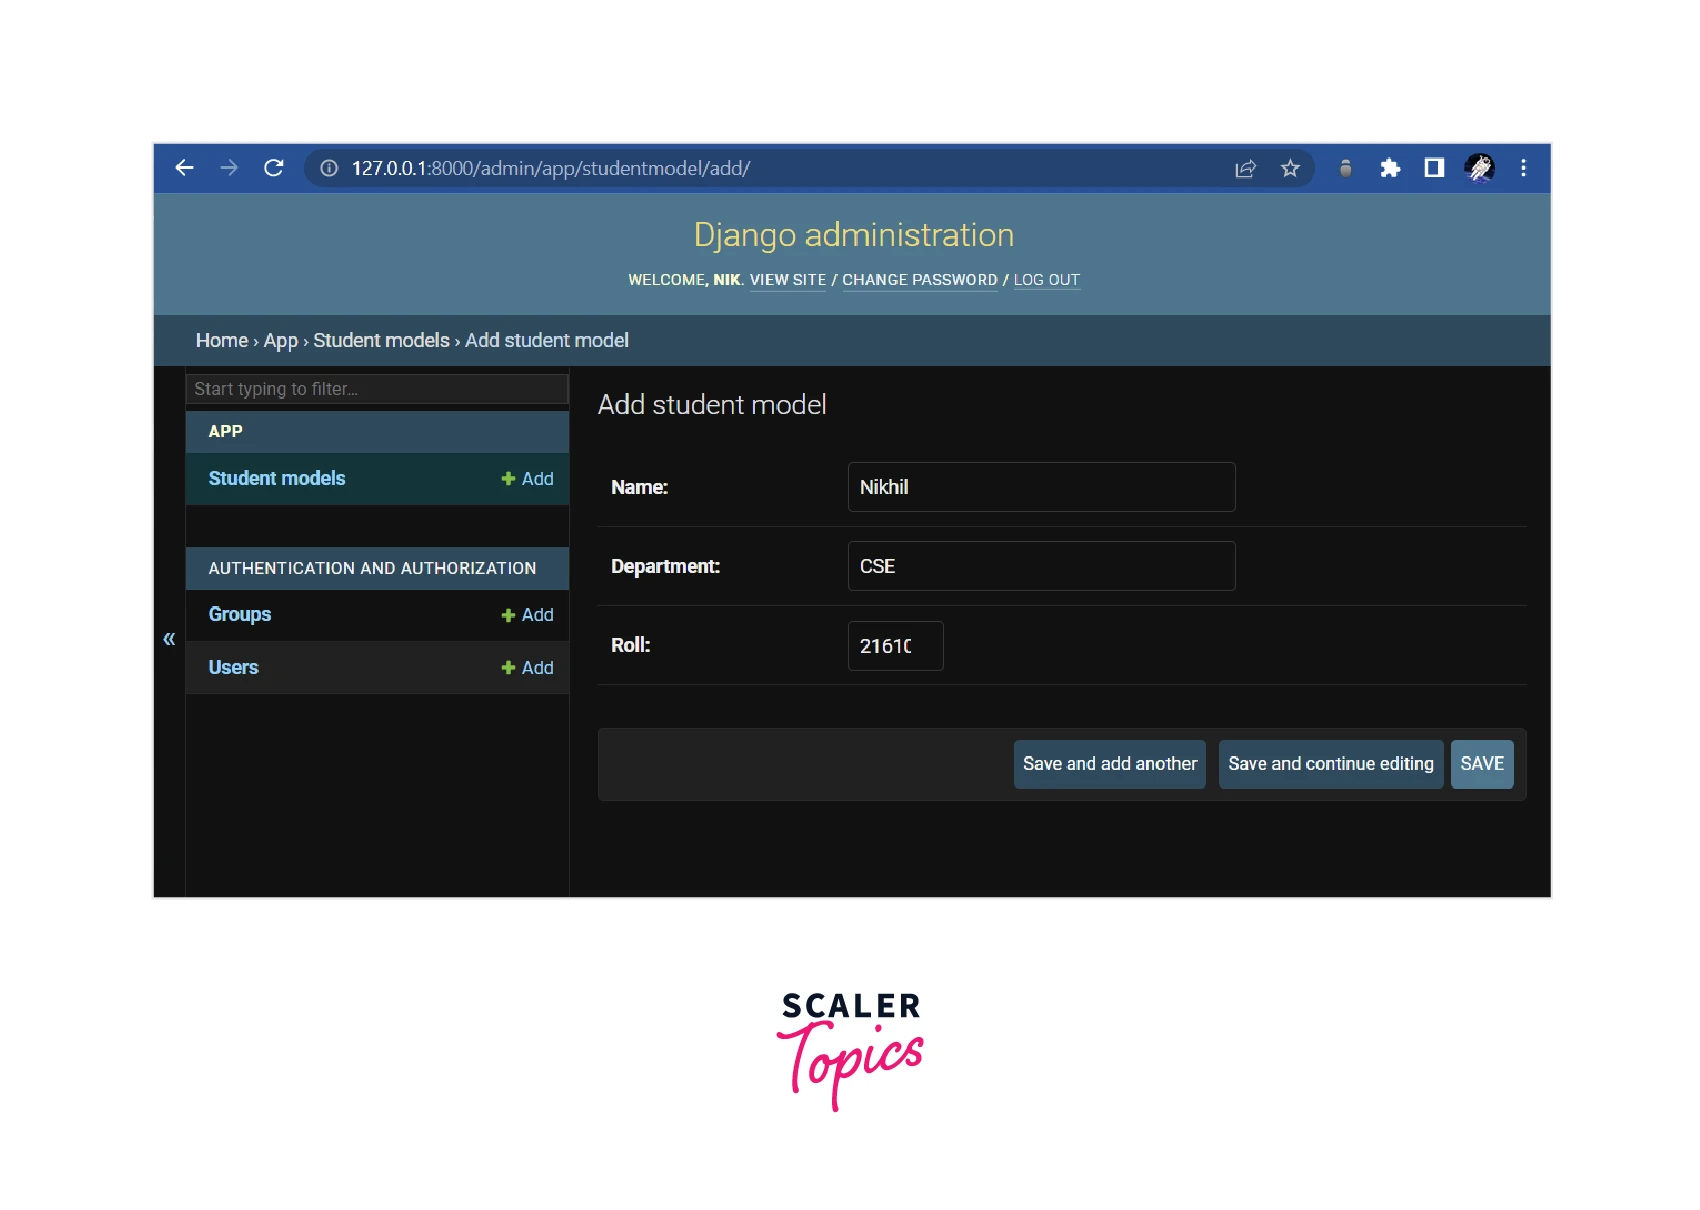
Let's create a model which helps us to store the name, department, and roll number of a student in an engineering college.
As the models are created, we can now register them in the admins.py file. But first, we need to migrate the changes.
Once the changes have been migrated, we need to create the superuser so that we can access the Django admin dashboard.
Enter the required details accordingly and migrate the changes by running the following commands.
Now, to reflect the model created in the admin dashboard, we need to register our created model in the admin.py file of the application.
Route to http://127.0.0.1:8000/admin/ and you will find the UI similar to the picture below
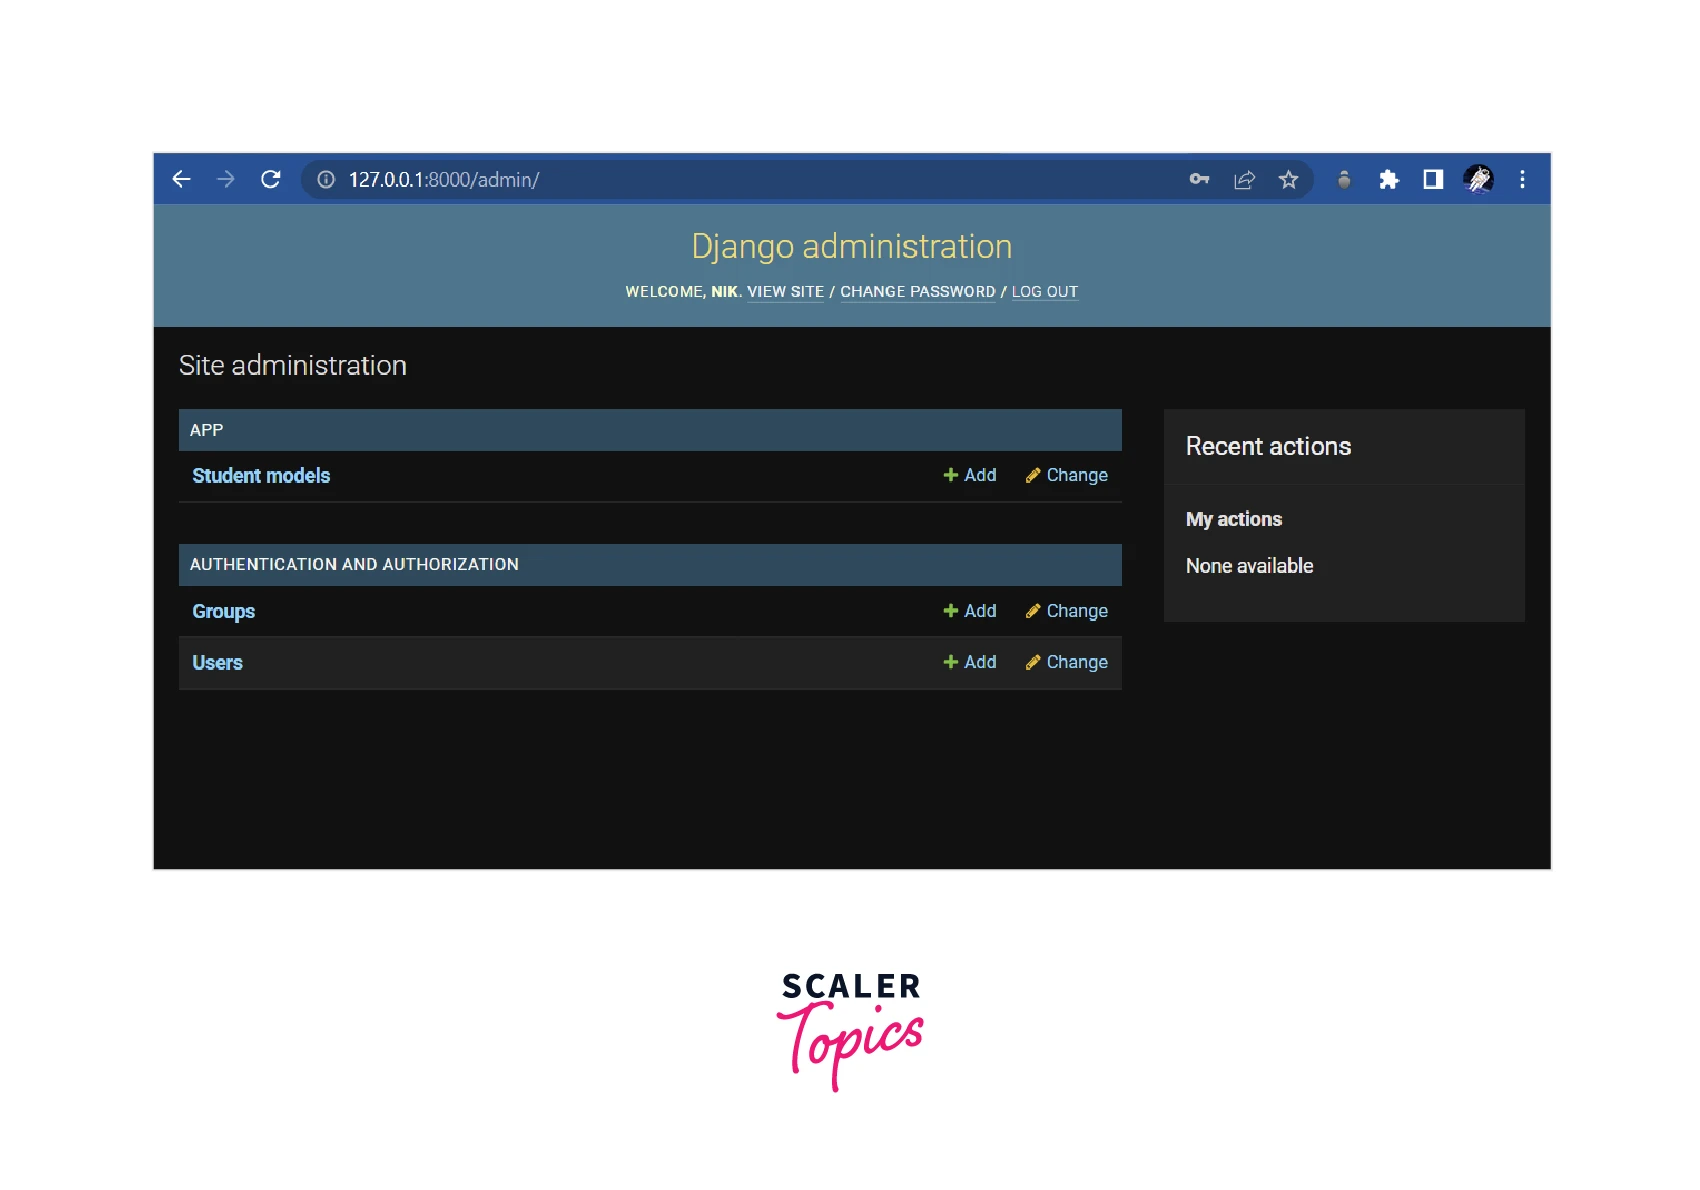
Open the Student Models tab mentioned in the APP section of the admin dashboard and add one data so that we can use it to test our APIs.
Now we need to serialize the model we have created.
Serialization
- First create a serializers.py file in the app directory.
- Once you have created the file, we can now serialize the model we have created as shown in the codes below.
- First we need to make some important imports and then initialize a StudentSerialzers inheriting the serializers.ModelSerializer properties.
- Then we need to mention the field that we want to reflect in the endpoints defined inside a metaclass.
Create Views
- First we need to import our model and serializers from the respective files along with other important imports from the rest_framework
- At first, we imported serializers to present the serialized data and status to send our endpoint status.
- Then we import the api_view decorator, which takes a list of HTTP methods that defined the method for which an endpoint has been used.
- At last we import, response from rest_framework.response which we will use to send a response to an endpoint.
Now, we can write our logic to make various operations which we will see one by one.
For the test purpose, we can create an endpoint that gives an overview of the API.
Specify the URL Path of APIs
We have to link the views created with an URL in the urls.py file. At first, we need to import views from the current working directory, and then in urlpatterns = [] we need to map every URL using path() accepting three arguments, first is the path parameter, then the function in views file we want to link the url with and a name to define the URL.
Turn Learning into Career Growth
Run Server and Check API
As of now we have created the model, serialized it, created a view for the root route, and linked it with an endpoint in the URLs. We can now run the server and can test our API.
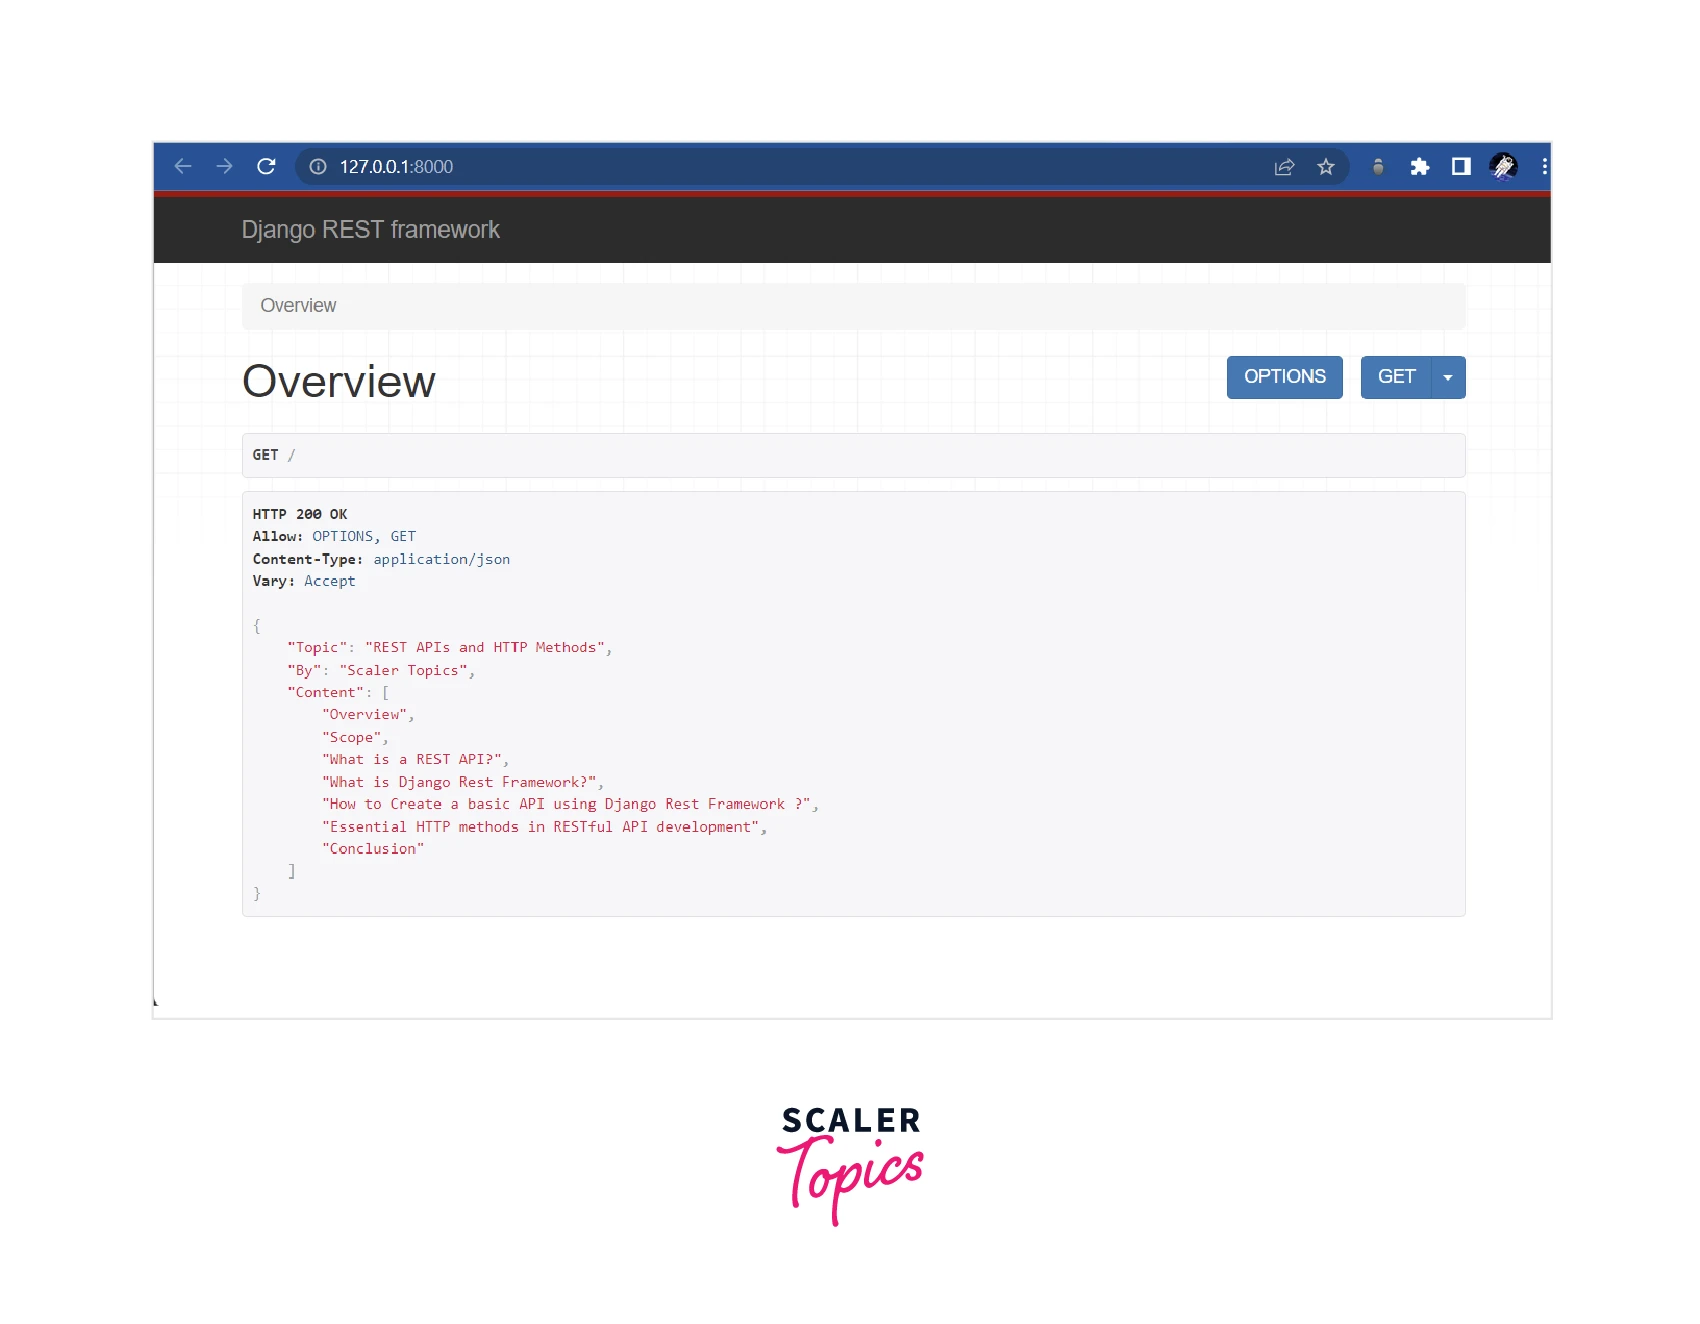
Route to the URL http://127.0.0.1:8000/ and you will see a UI provided by Django Rest Framework for better user experience and accessibility.
We can see HTTP 200 OK mentioned, along with the output we defined in the views.py file.
Essential HTTP Methods in RESTful API Development
Various HTTP methods are used to create a RESTful API including GET, POST, PUT, PATCH, and DELETE methods. We will take a look at each of them one by one.
Scaler Placement Report and Statistics
Scaler learners achieved 2.5x salary growth with average post-Scaler CTC reaching ₹23L.
Method 1: POST
POST method is to create a new resource on the server.
In the code written above, we defined a function addStudent followed by the POST method declared using the apiview decorator. Then we get the data from the client side (request) and serialized it with the data according to the StudentSerialzers. Make some checks to ensure that the data already exists or not, if not then save it in the database.
This function needs to be linked with an URL in the urls.py file.
Route to http://127.0.0.1:8000/add/ and add the data in the content section in JSON format according to the defined models we serialized. The key values in the JSON are case-sensitive, so take care of that.
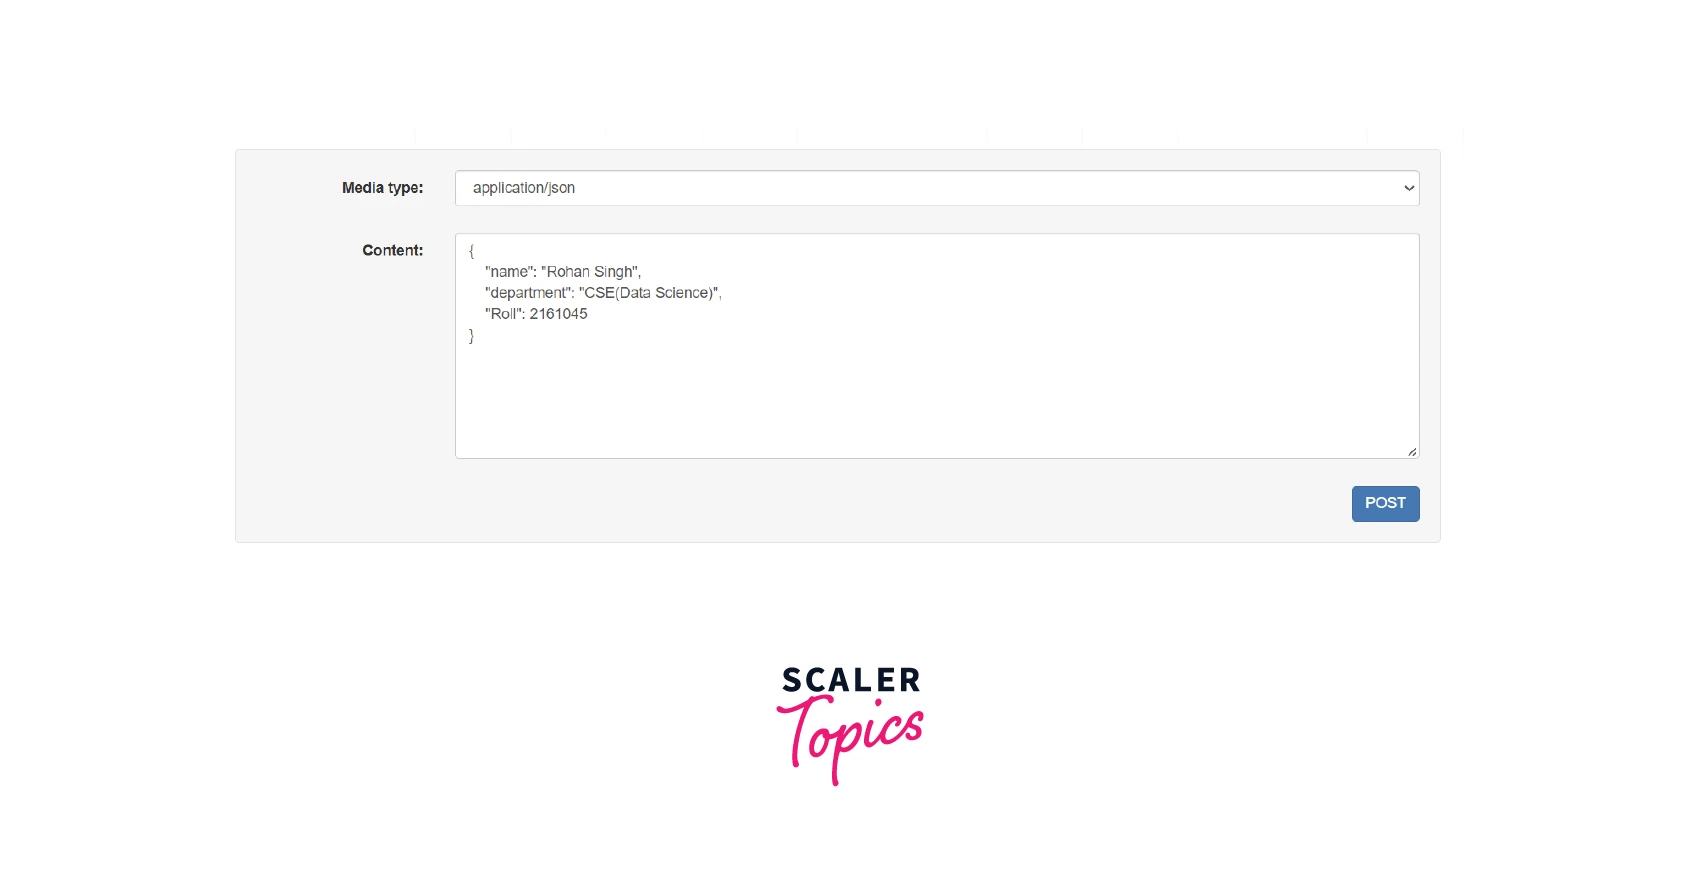
Once you have mentioned the data you need to post, click on the post button and you will see alike response shown in the pictures below.
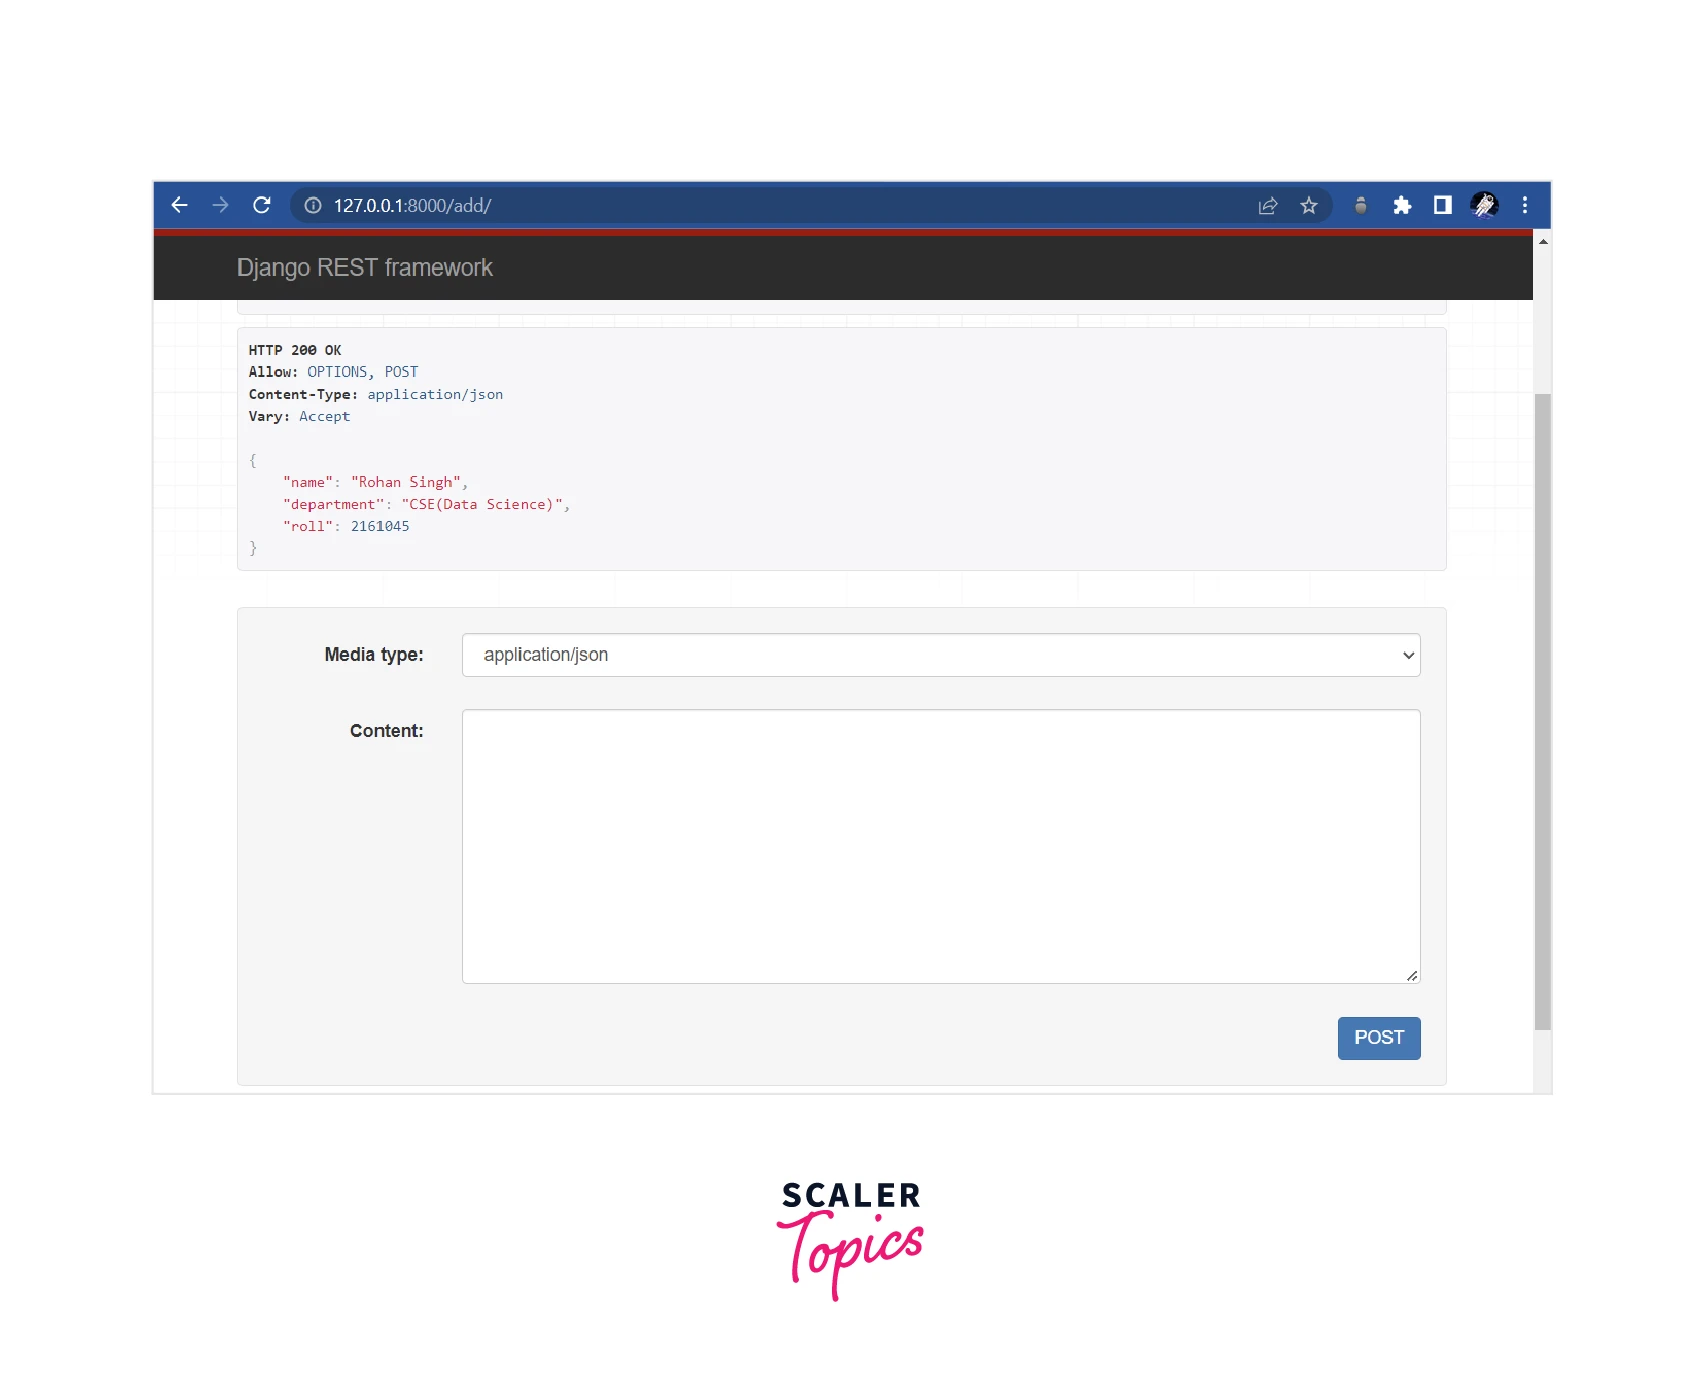
We can see that the data have been posted successfully.
Method 2: PUT
Under the PUT method, we make requests to update an existing resource.
In the function we defined for the PUT method, we need to pass a primary key(pk) which will enable us to filter the data using its id as the primary key.
In the code above, we first filtered the student data by the primary key which we will pass with the request. Then we will validate the newly entered data, if the data is valid, we will update the resource in the database.
In the urls.py define the endpoint update with/<int:pk> which means that we can pass an integer along with the URL.
Route to http://127.0.0.1:8000/update/2, add the updated value in JSON fomrat as shown, and enter the PUT button.
You will find responses similar to what is shown in the figure.

Scaler Placement Report and Statistics
Scaler learners achieved 2.5x salary growth with average post-Scaler CTC reaching ₹23L.
Method 3: PATCH
PATCH is a similar method to PUT, but the only difference is that we can even modify a single element of the schema which is not possible in the PUT method.
The code for the PATCH method is the same as that we used in PUT, but here we need to set partial as True.
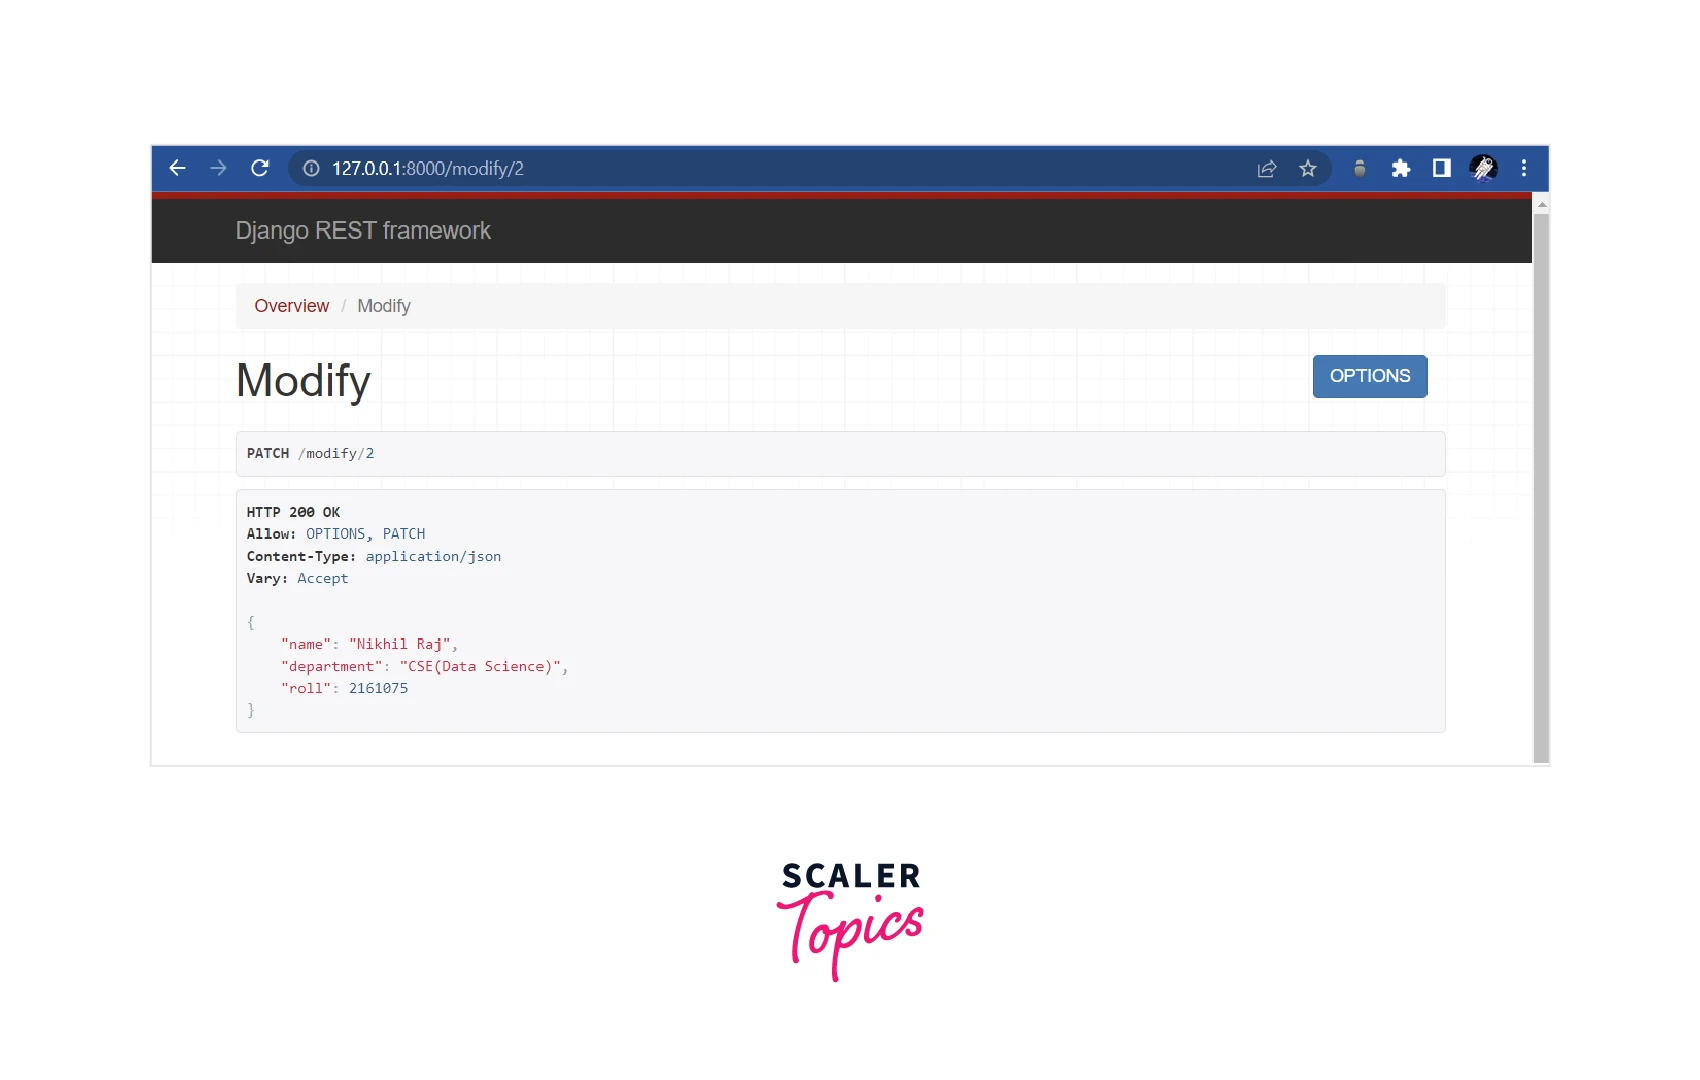
Same as the PUT method, we need to pass an integer as a primary key with the URL.
Route to http://127.0.0.1:8000/modify/2 and try to change only one element and click on the PATCH button
You will see the object's name has been changed from "Rohan Singh" to "Nikhil Raj"
Method 4: GET
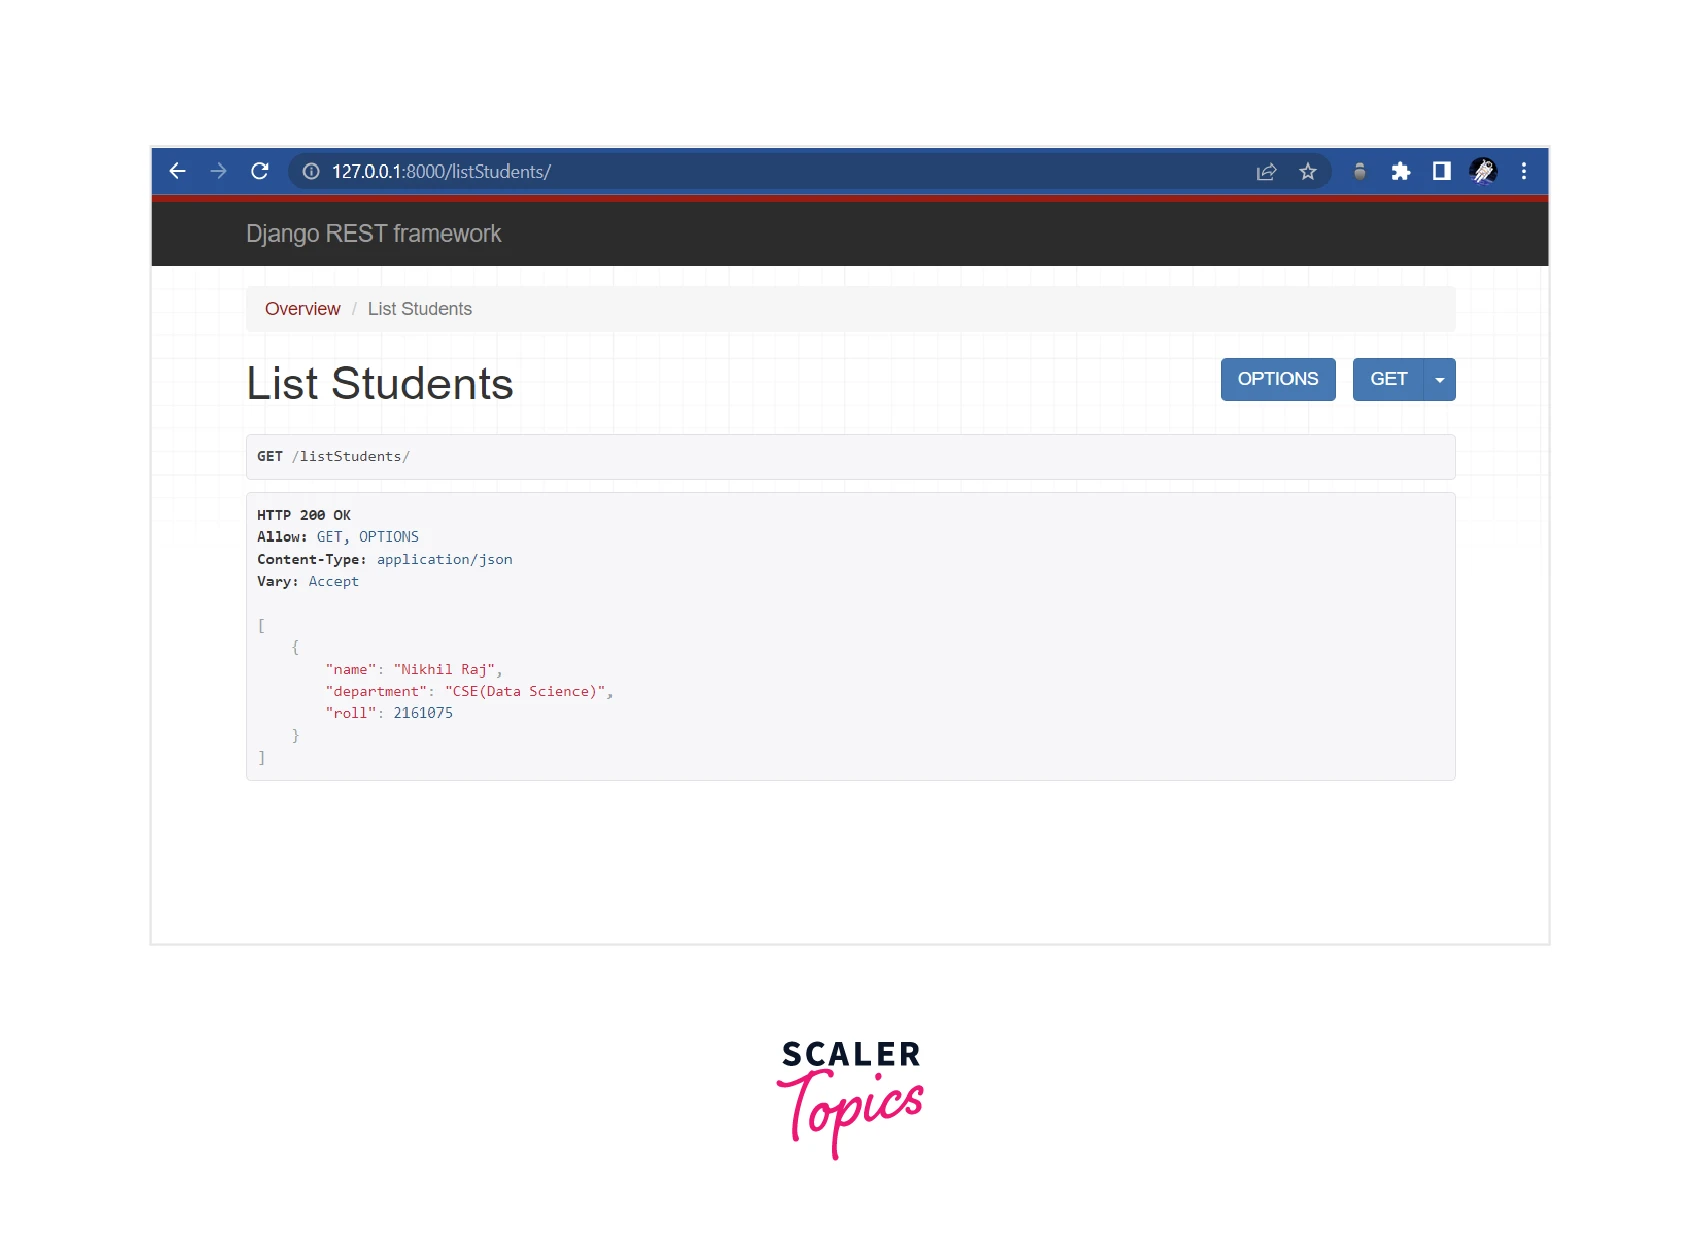
GET method is defined to fetch all the objects. In the views.py file, we need to define a function that fetches all the objects from the database.
For the best practice, we should set many=True as shown in the code which means that StudentModel may contain multiple items, and if so DRF needs to serialize each item with serializer class StudentSerialzers
Link the function with an URL, so that we can execute the function when routing to the specific URL.
Route to http://127.0.0.1:8000/listStudents/ and you will see that all the objects (one here) are listed.
Method 5: DELETE
The HTTP method DELETE is used to delete a resource from the server.
To DELETE a resource we need to pass the primary key along with the request in the defined function. Using that primary key, we will find the specific object and delete using the .delete() method.
In the urls.py file, along with the path we need to pass an integer primary key which we used in the views.py file to find the object and delete the resource.
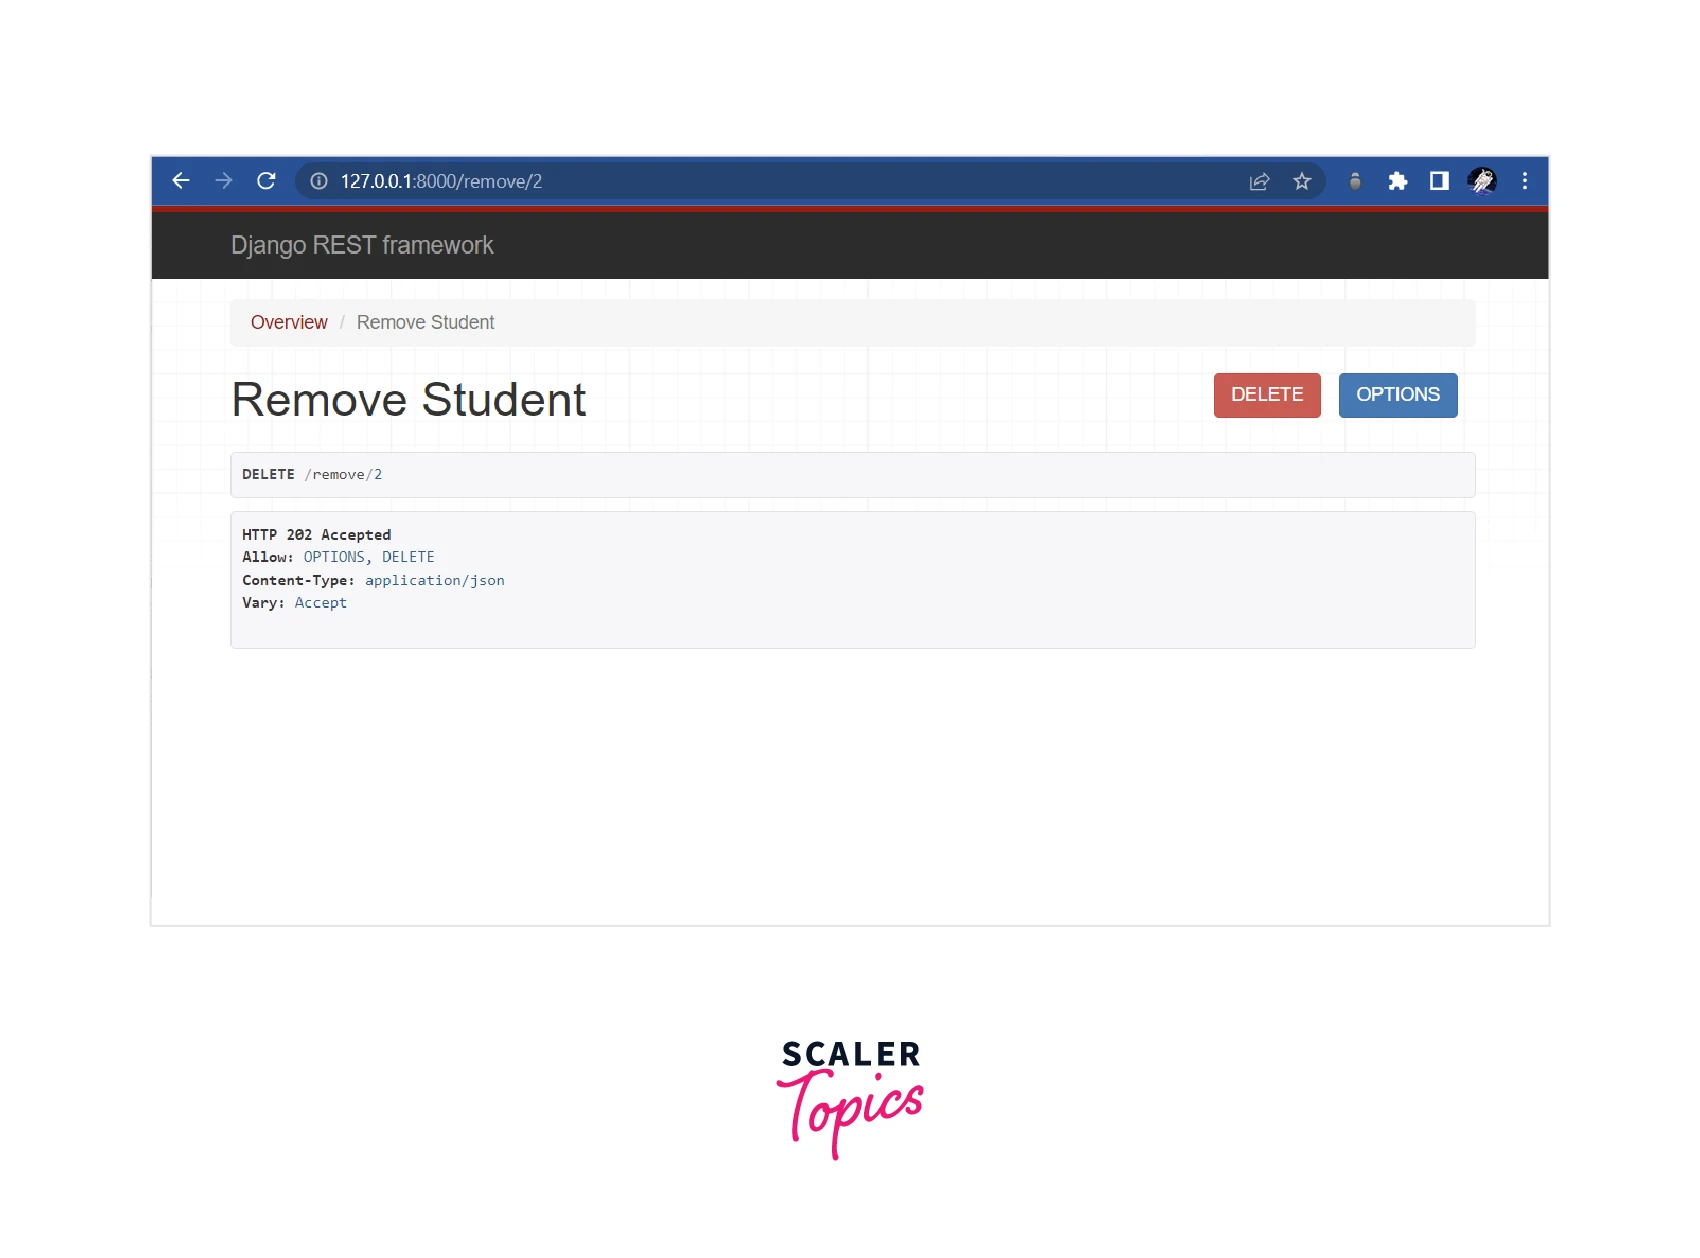
Now, route to http://127.0.0.1:8000/remove/2, this presents a similar UI as shown in the picture below. Click on the delete button.
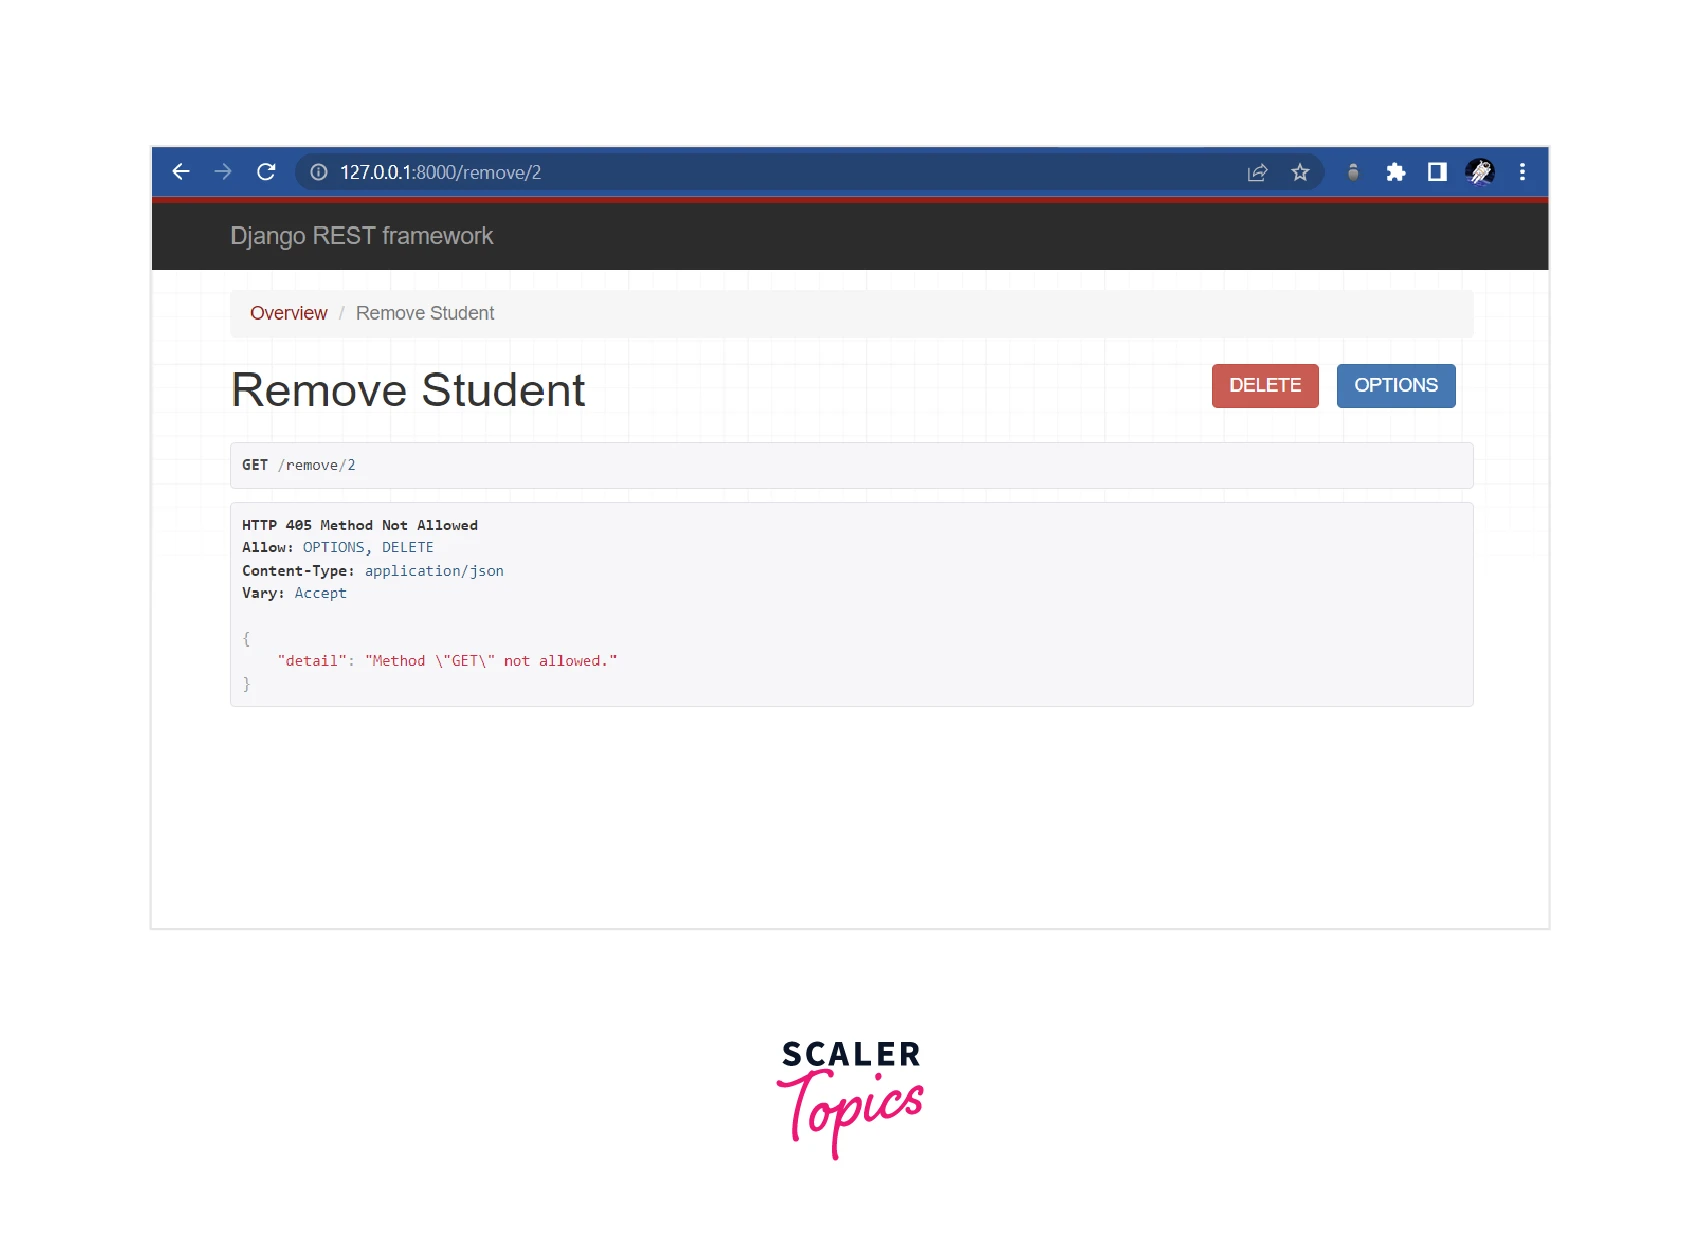
It will as for a confirmation, click yes and you will receive a response with HTTP code 202, which means that the resource has been successfully deleted.
Conclusion
In this article, we learned about REST APIS and HTTPS methods and implemented them using Django Rest Framework. Let us recap what we have learned so far,
- REST are defined protocol for listing, creating, changing, and deleting data on your server through different HTTP methods.
- APIs allows clients to make requests through different endpoints getting the desired output as a response.
- Install the Django rest framework and include it in the list INSTALLED_APPS of settings.py.
- Create a model, migrate the changes and serialize it inheriting the class ModelSerializer from serializers by rest_framework.
- Use the api_view decorator to define the HTTP method of the endpoint in the views.py file.
- Run the Django server and test by routing to http://127.0.0.1:8000/ which will show a UI present by the DRF itself.
- Write logic for different endpoints in the views.py file and link the defined function with their respective endpoints.