Setting Up Django Admin
Overview
For entering into the admin site of Django. Firstly it is required to create the user and then the user can log in to the admin site by entering their username and password. And for displaying the app on the admin index page we need to register the model.
Creating an Admin User
First of all, it is required to create a user who can log in to the admin site. For that following command is required to run:
Now it will ask for entering the username. Press enter after entering the desired username
Now it will ask to enter the email address. Press enter after entering the email address
And the last step for superuser creation is to enter the password. Passwords are required to be entered two times. The second time is required to be entered for the first time entered password confirmation.
Scaler Placement Report and Statistics
Scaler learners achieved 2.5x salary growth with average post-Scaler CTC reaching ₹23L.
Start the Development Server
By default, the admin site of Django is activated. Now it is required to initiate the development server. The following command is required to run for starting the development server
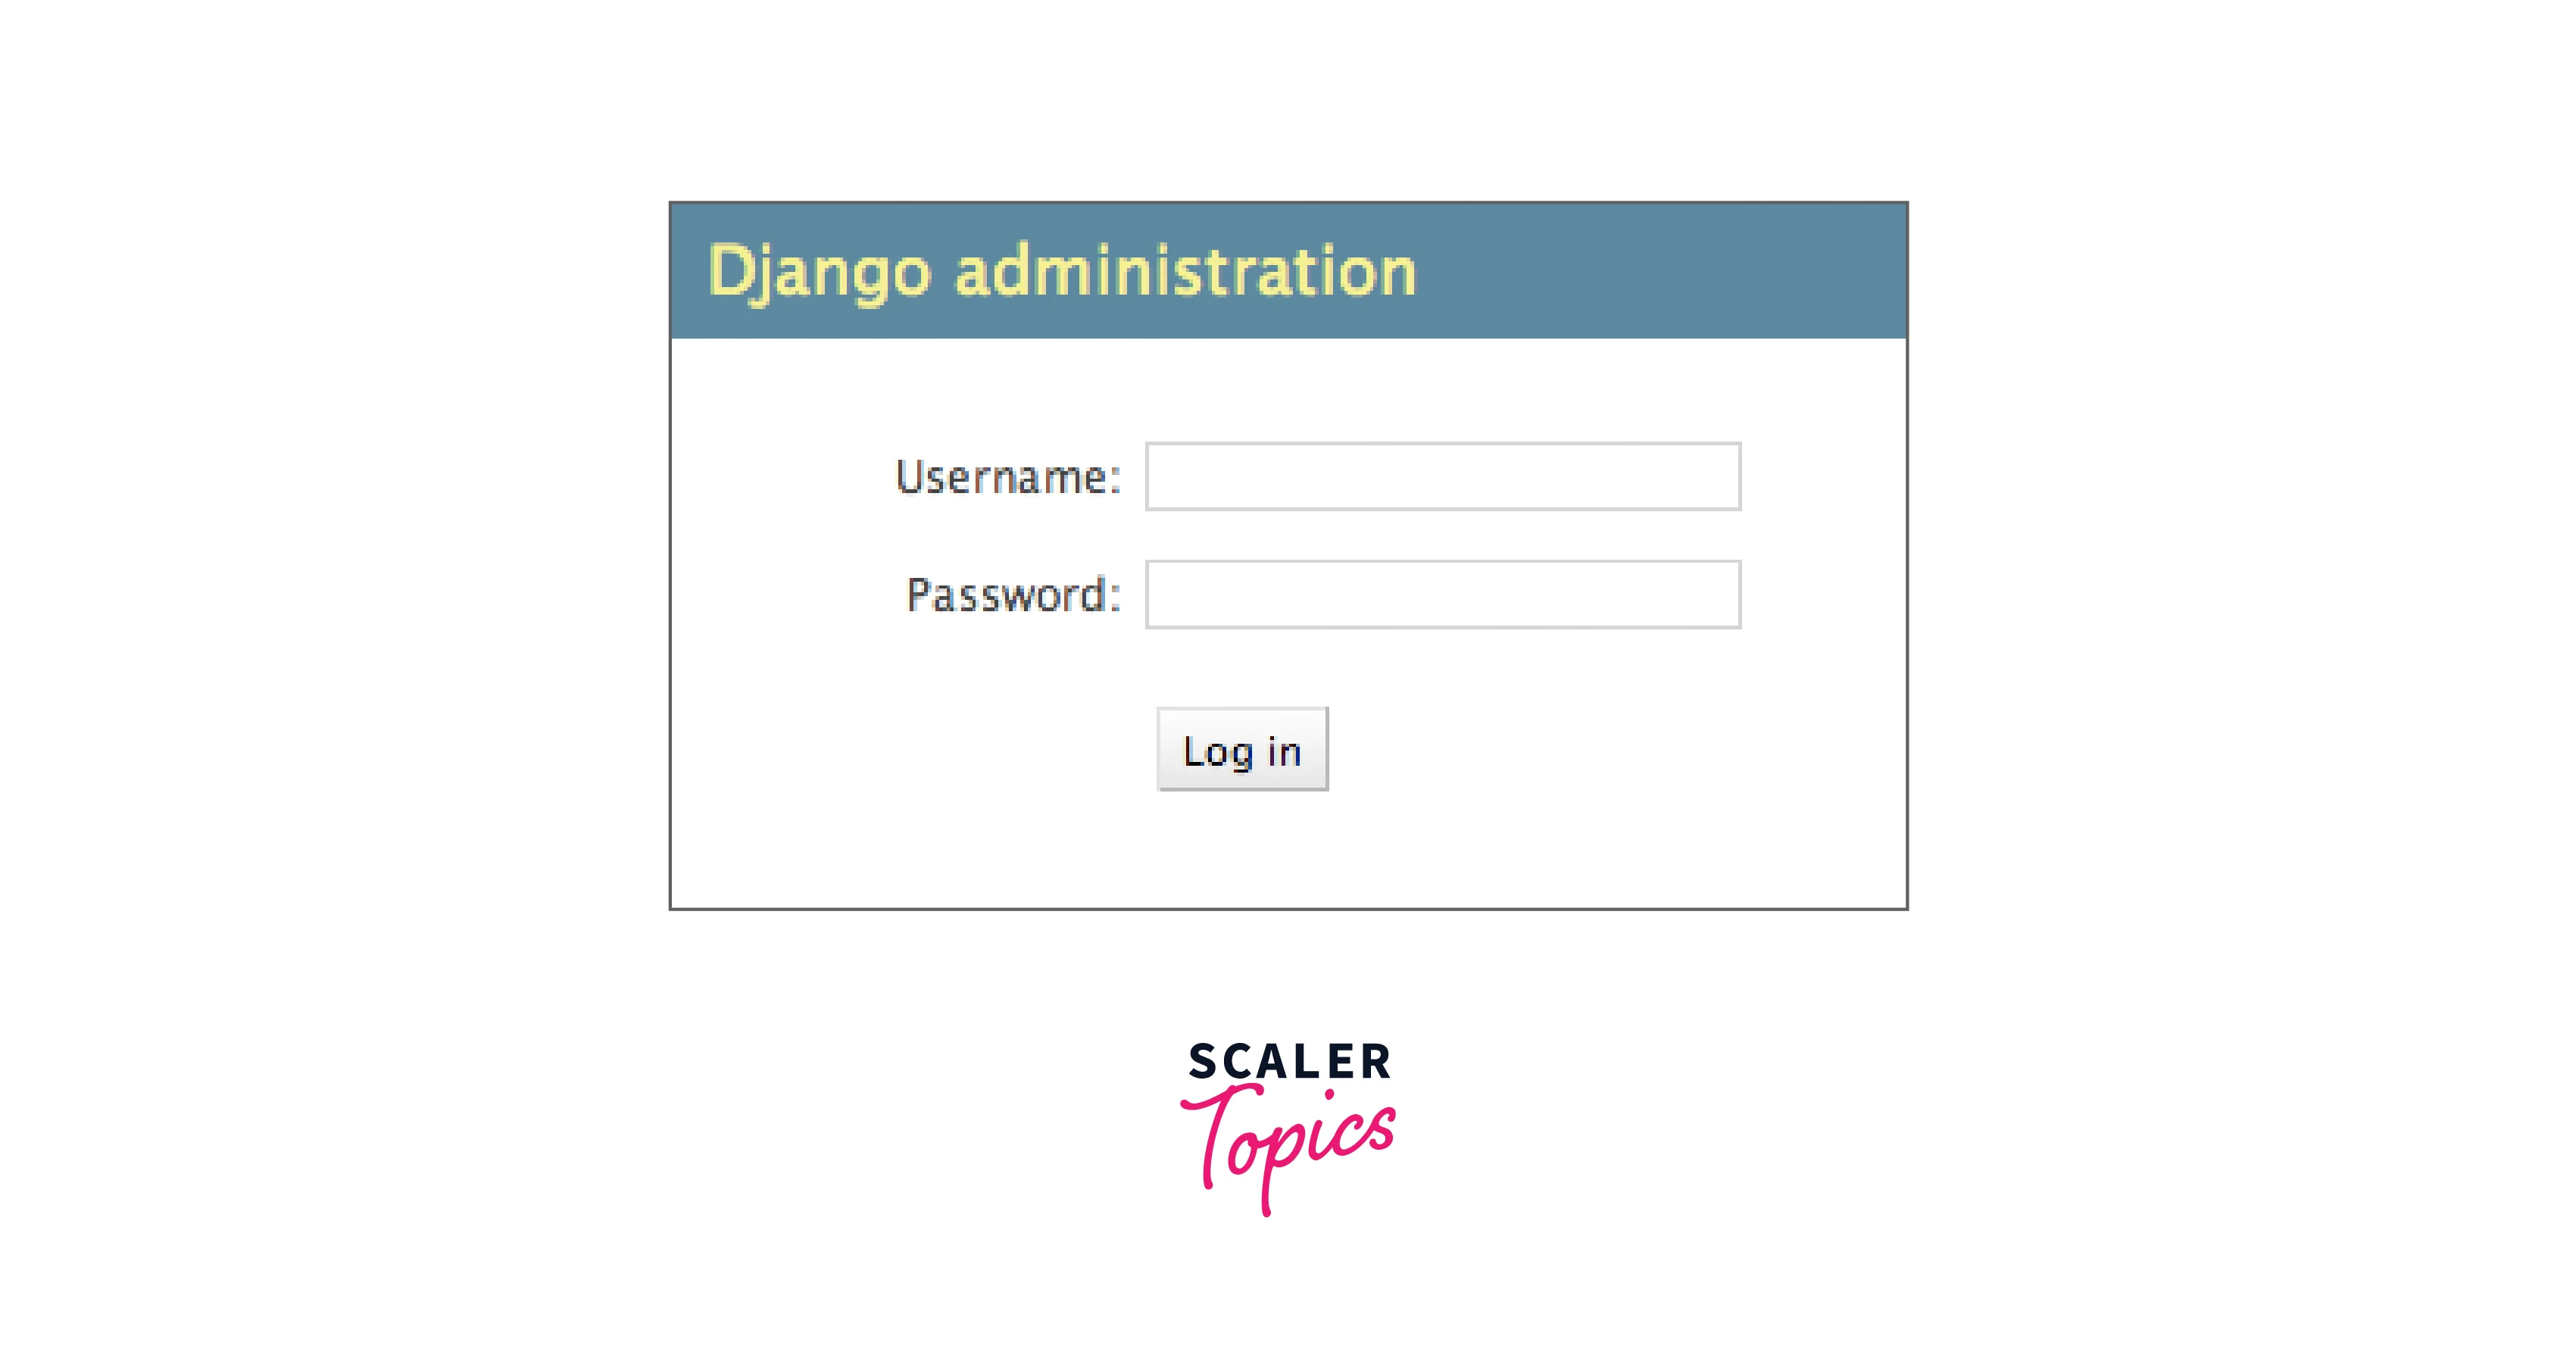
Now go to admin in your local domain by opening the web browser and entering the URL http://127.0.0.1:8000/admin/. Now the login screen of the admin is displayed on your browser.
Refer to the below image for the login page of the admin
Transform Your Career
Choose from our industry-leading programs designed for career success
Modern Software and AI Engineering Program
Master full-stack development with AI integration

Modern Data Science and ML with specialisation in AI
Advanced data science techniques with AI specialization
Advanced AIML with Specialisation in Agentic AI
Deep dive into AIML with focus on Agentic systems
DevOps, Cloud & AI Platform Engineering
Build and manage AI-powered cloud infrastructure
AI Engineering Advanced Certification by IIT-Roorkee
Premier AI engineering certification from IIT-Roorkee
Enter the Admin Site
Now enter the username and password you have entered during the creation of the superuser. And press the login button after entering that and the index page of Django admin will be displayed on your screen.
Refer to the below image for the index page of the admin
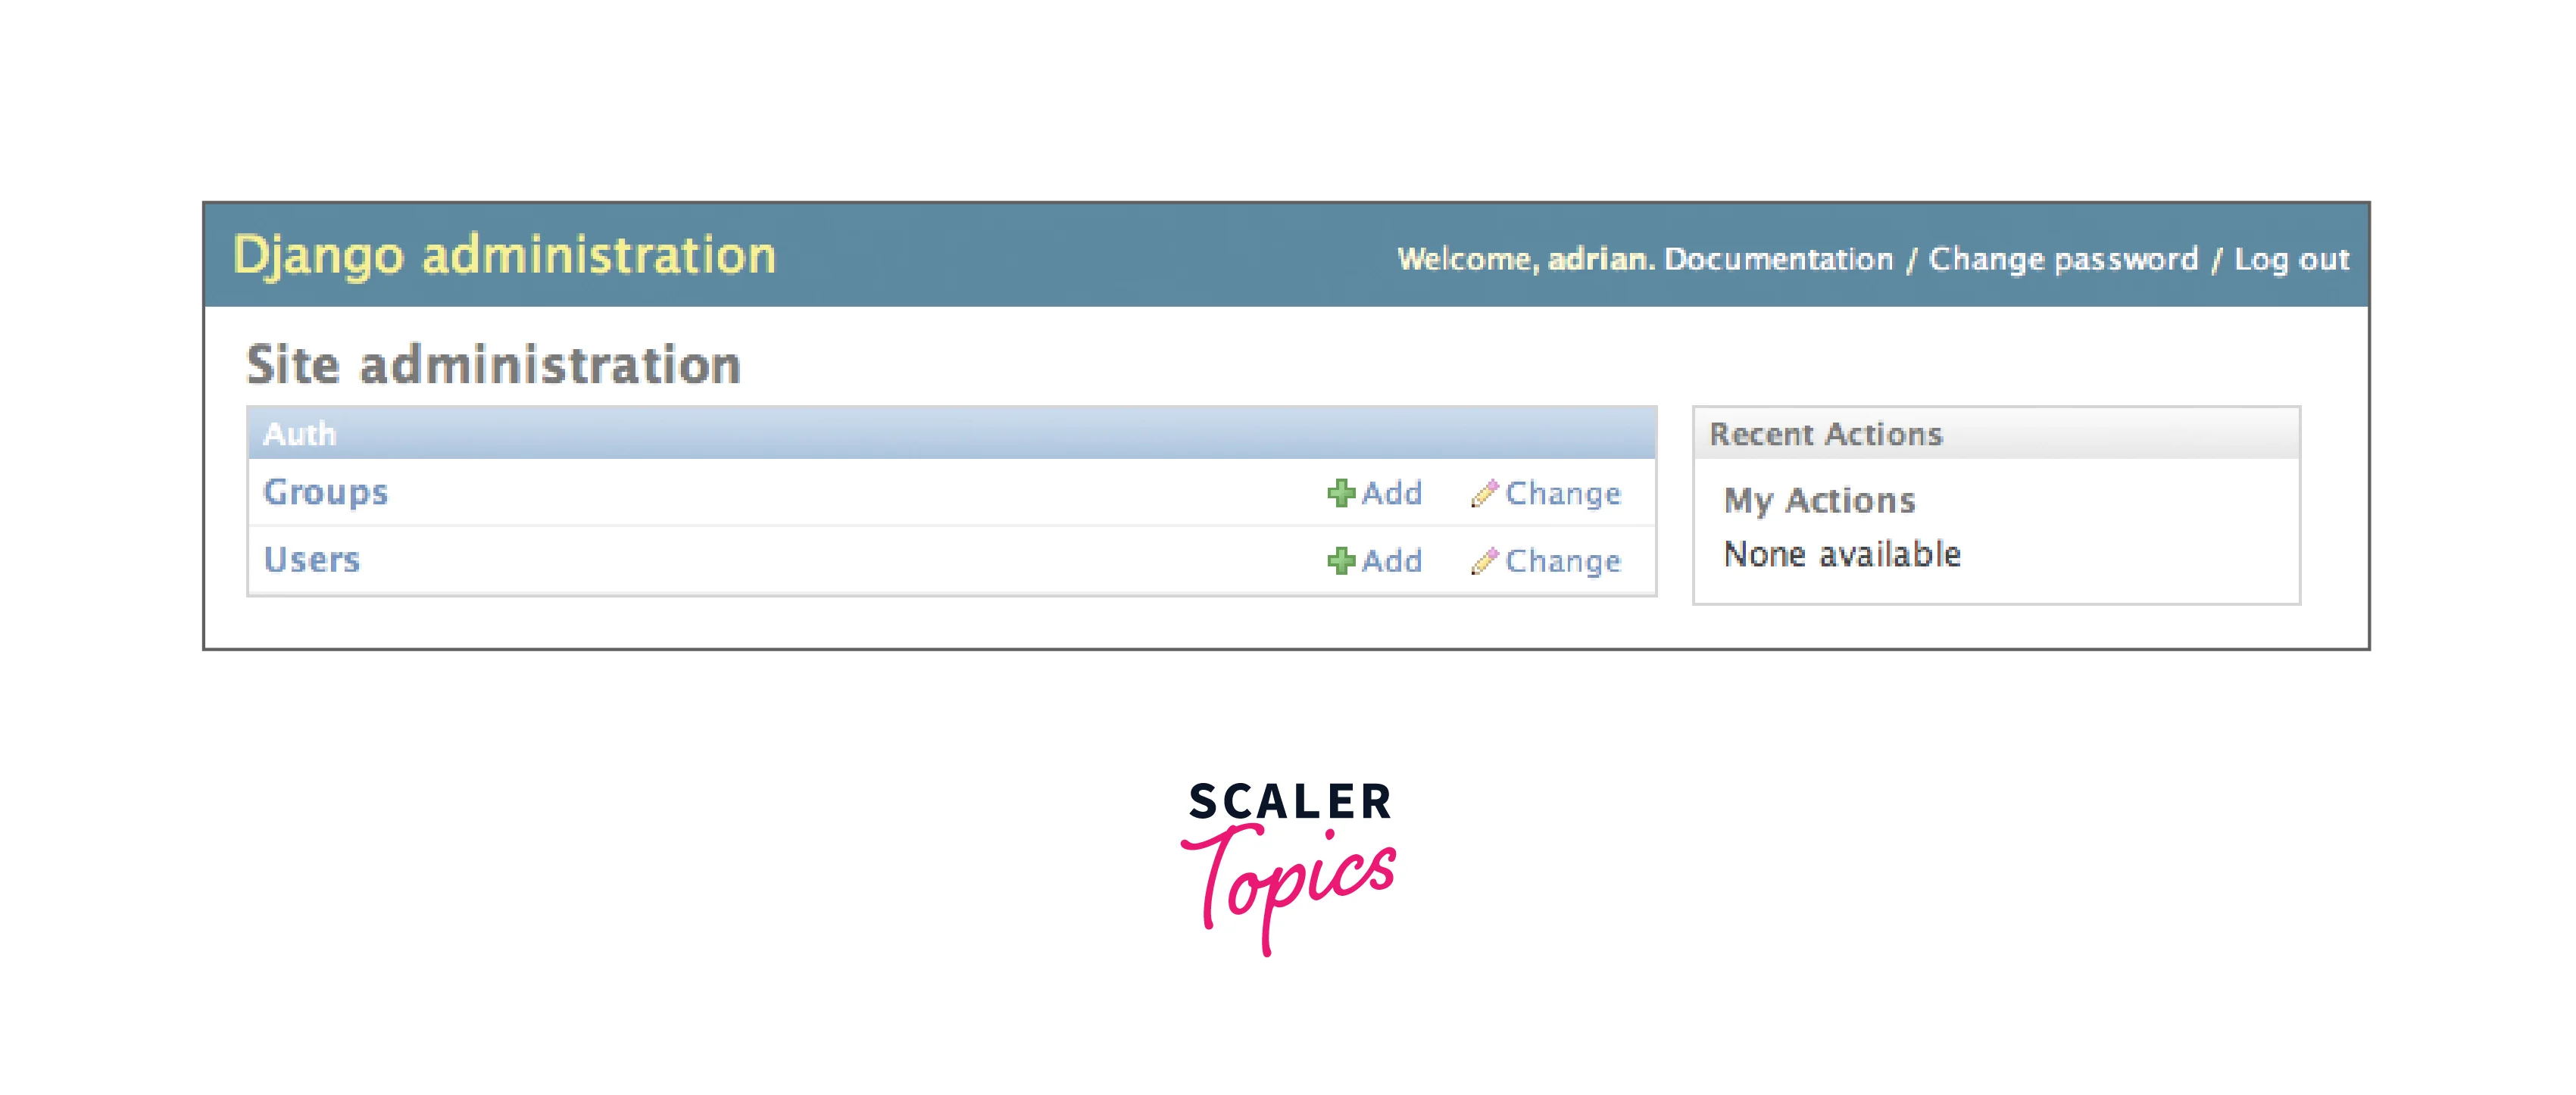 Some of the editable contents are displayed on the screen such as users and groups. django.contrib.auth provides these.
Make the Poll App Modifiable in the Admin
We have created an app named polls and inside that, we are creating the two models with the name Question and Choice there are two fields in the Question model i.e. question_text and pub_date and there are three fields in the Choice model i.e. question, choice_text, and votes. And every choice is associated with one of the questions. And this scenario can be implemented by writing the code given below in the polls/models.py file.
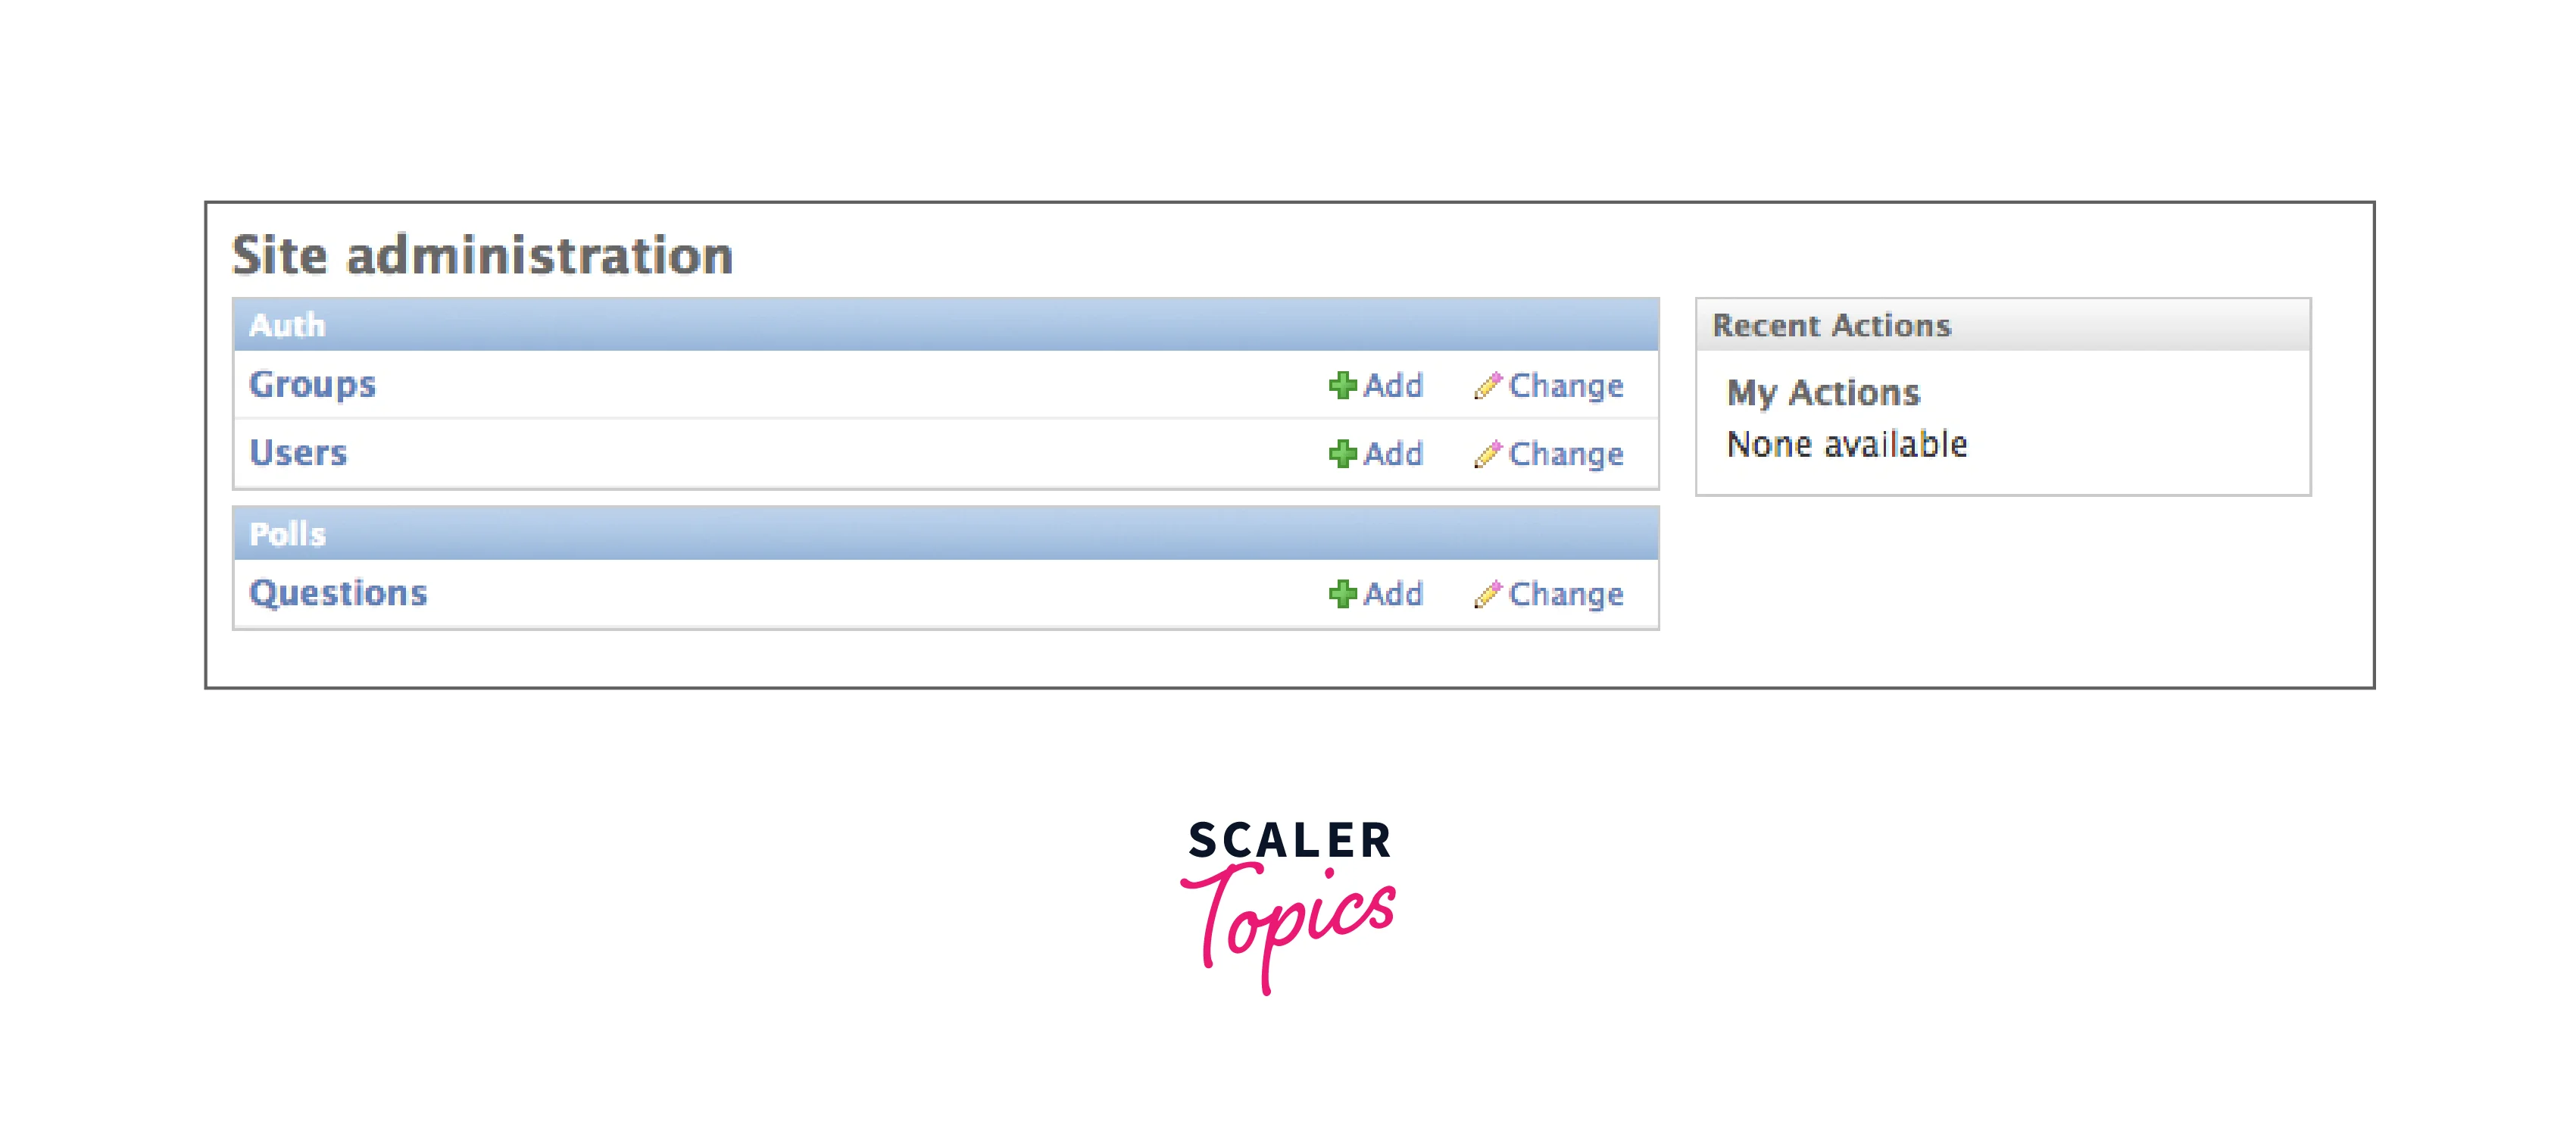
On the index page of the admin, the poll app is not displayed. For displaying the Polls app on the admin interface we need to register the Question model by writing the below code in the polls/admin.py file
Explore the Free Admin Functionality
The question model is displayed on the index page of the admin as we have registered it.
Refer to the below image for the modified index page of the admin
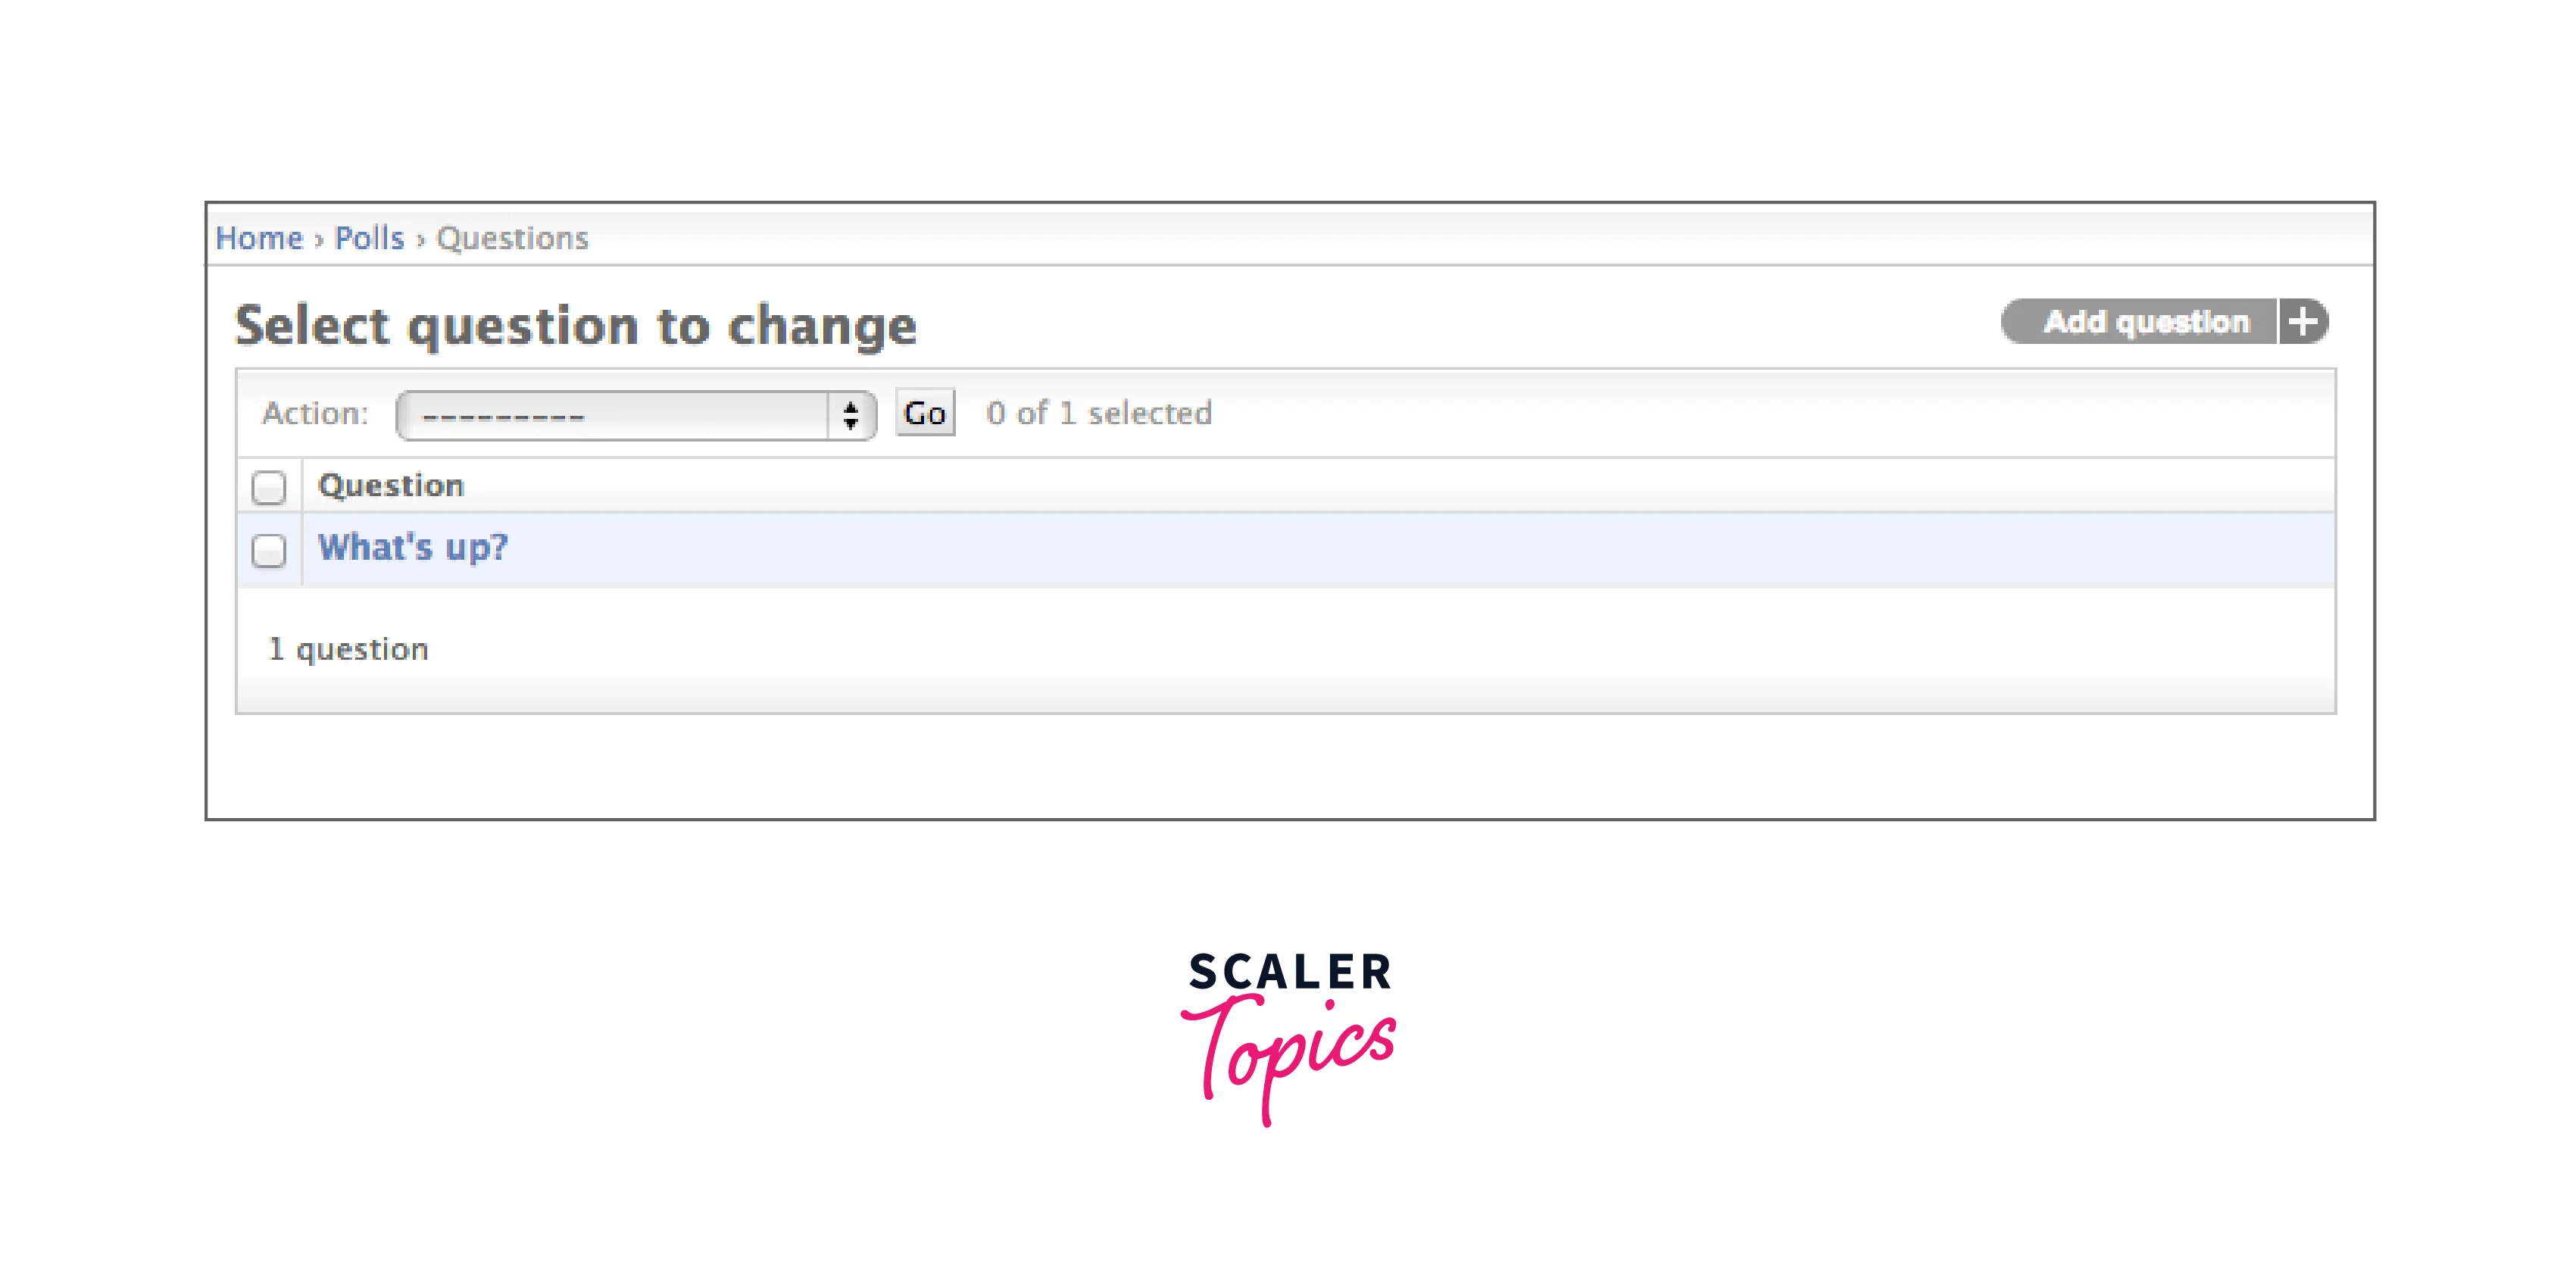
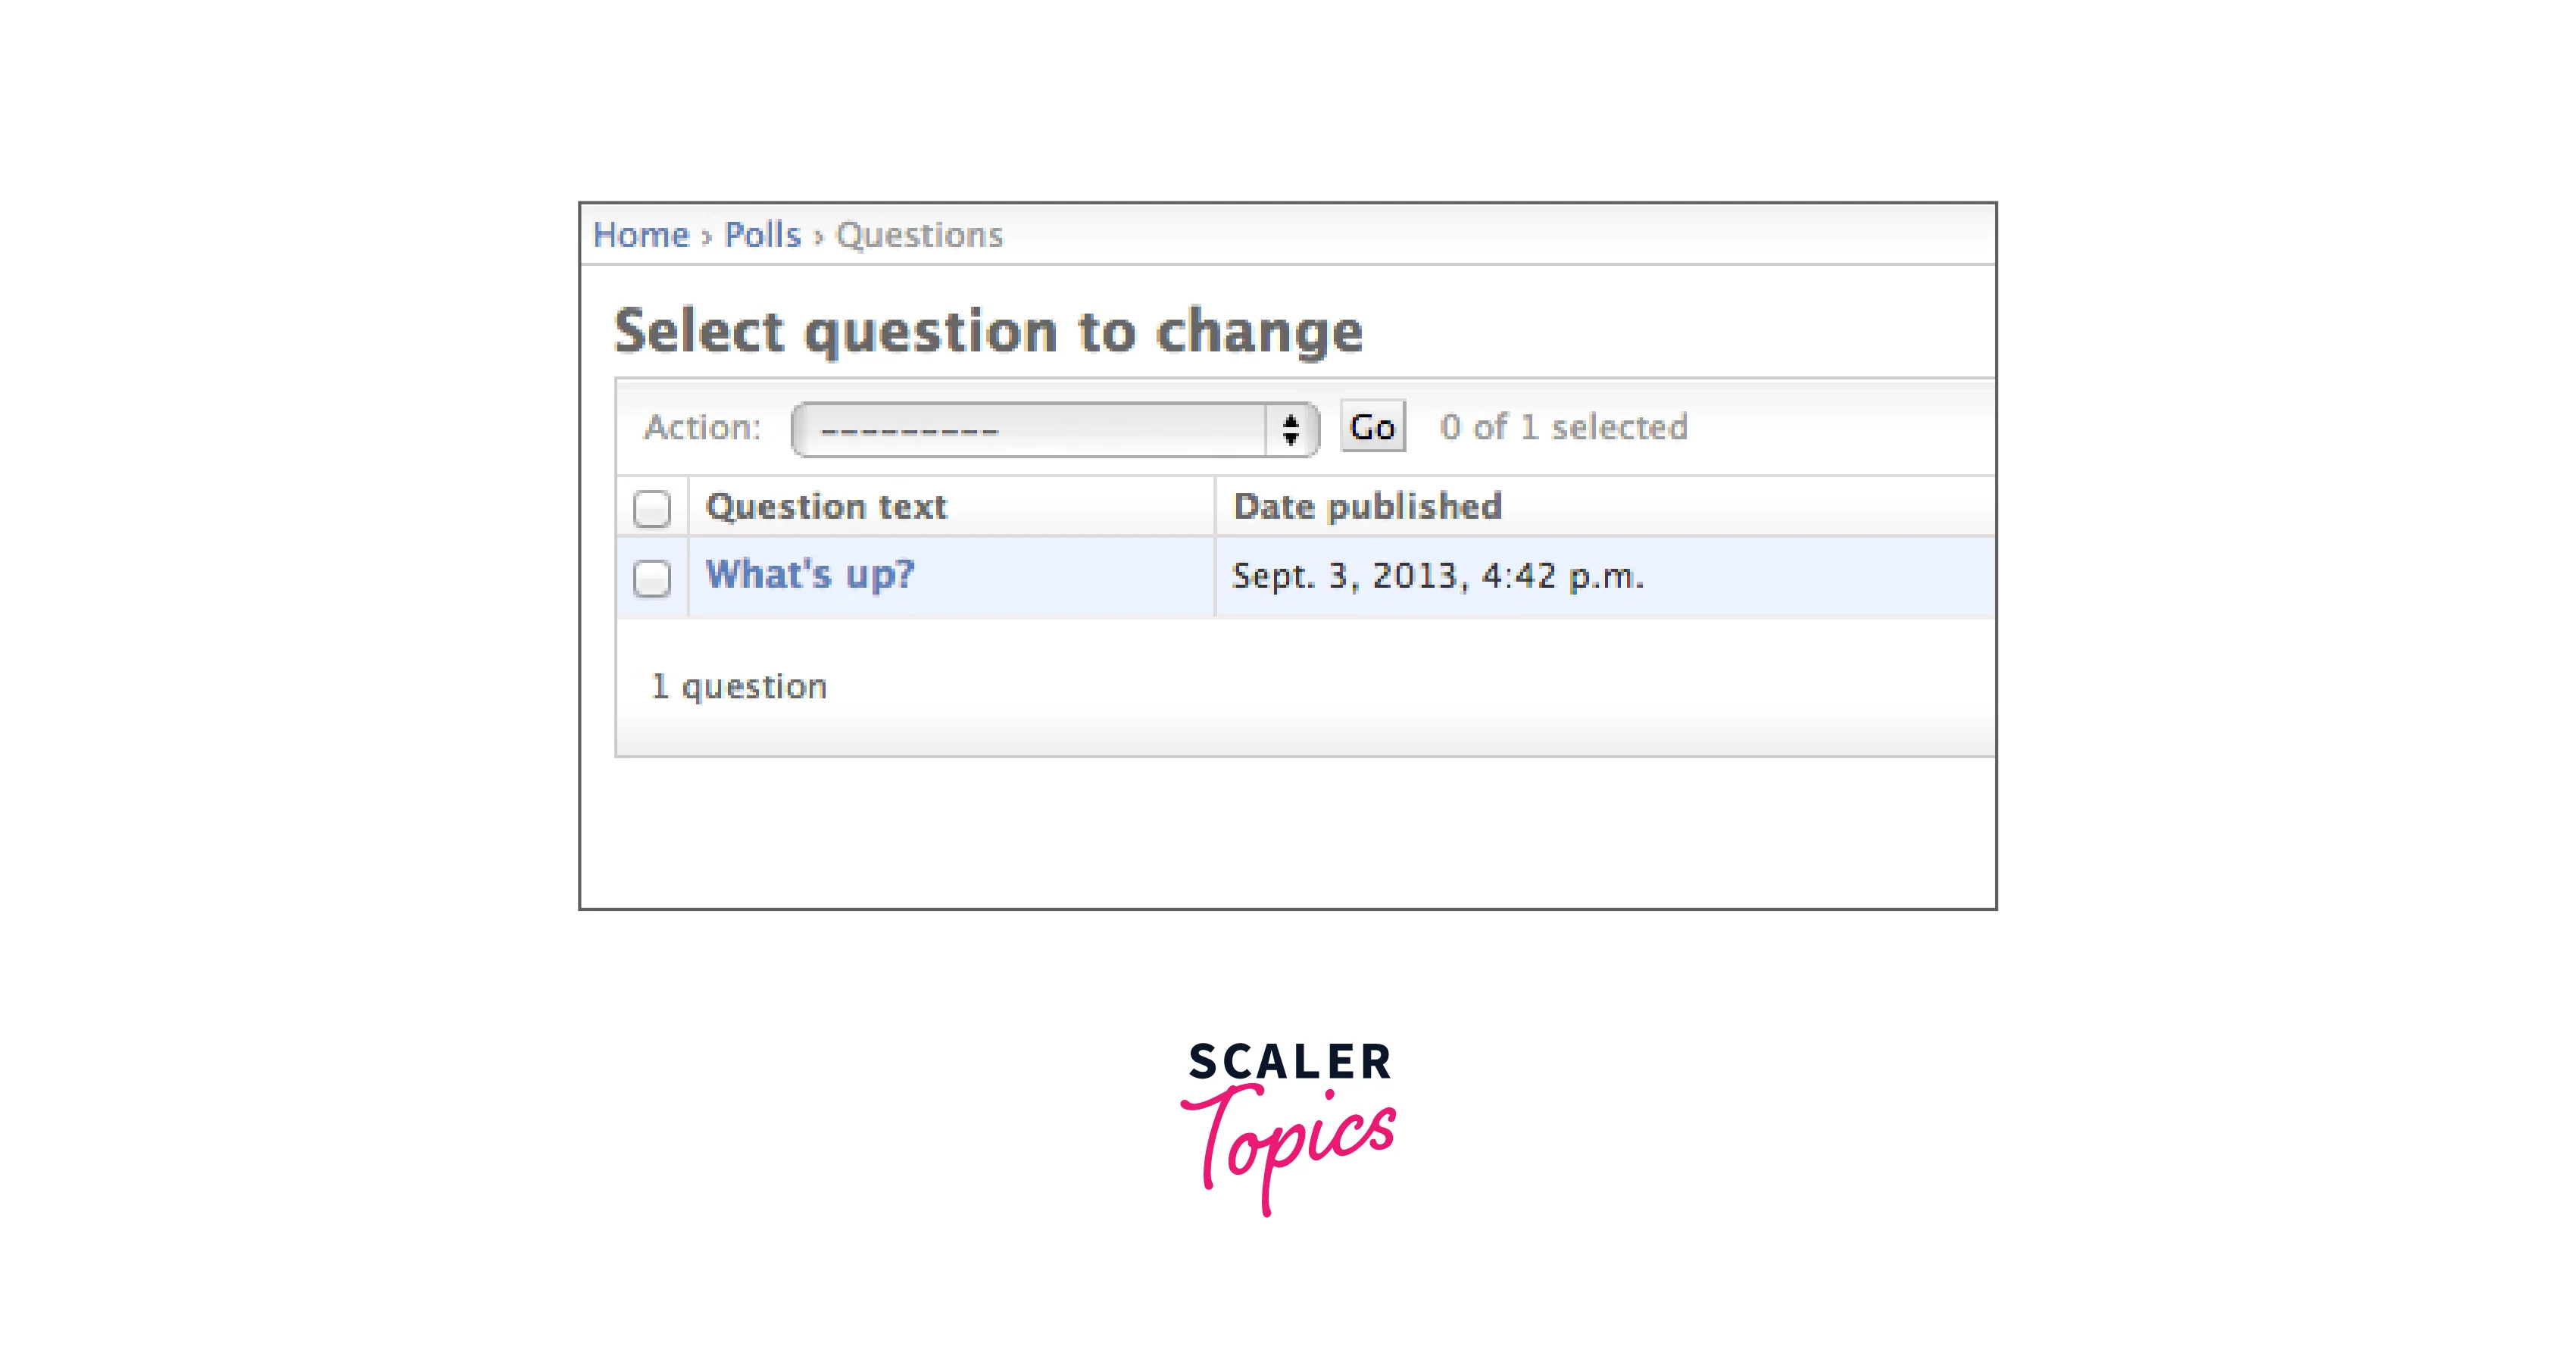
 Now click on the questions. Now the questions “change list” page is displayed on the screen. All the questions stored in the database are displayed on this page and you are allowed to choose one to modify it. And here only one created question "what’s up?" is displayed.
Refer to the below image for the change page of the object
 For editing the question, click on the question “What’s up?”
Refer to the below image for the edit question page
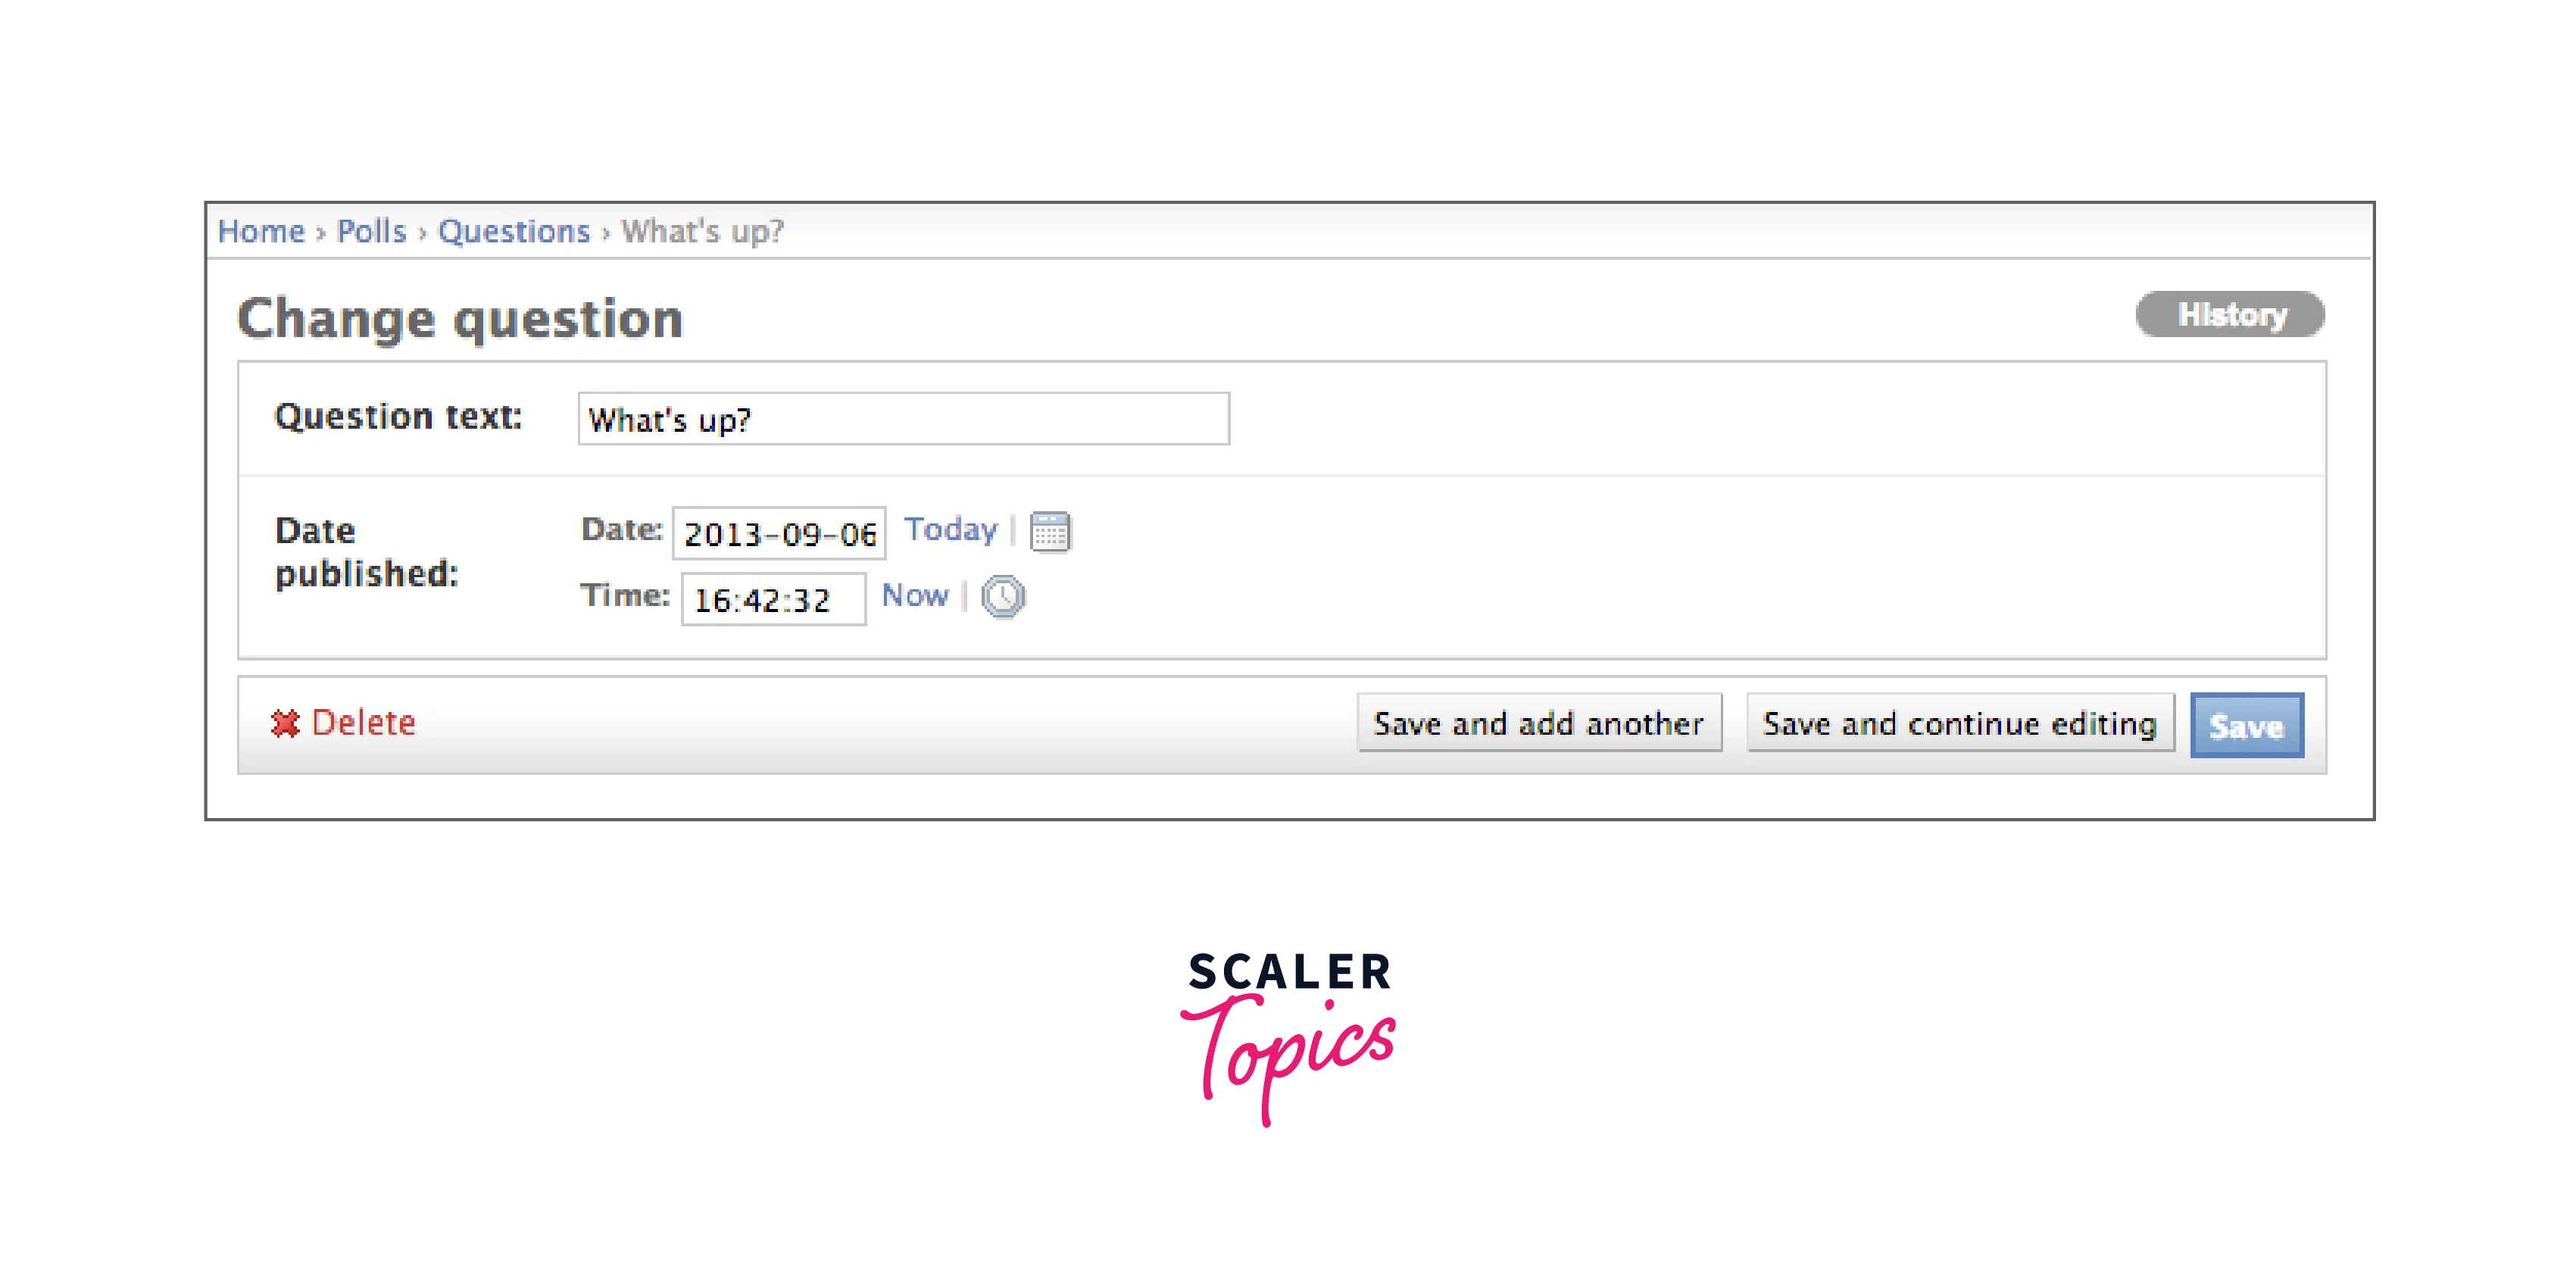
Different options are displayed at the bottom of the page Delete: The confirmation page for deleting the data is displayed by it. Save and add another: Changes are saved by it and a new blank form is loaded for this object type. Save and continue editing: Changes are saved by it and the admin page is reloaded by it for this object. Save: Changes are saved by it and it will display the change list page
Customize the Admin Form
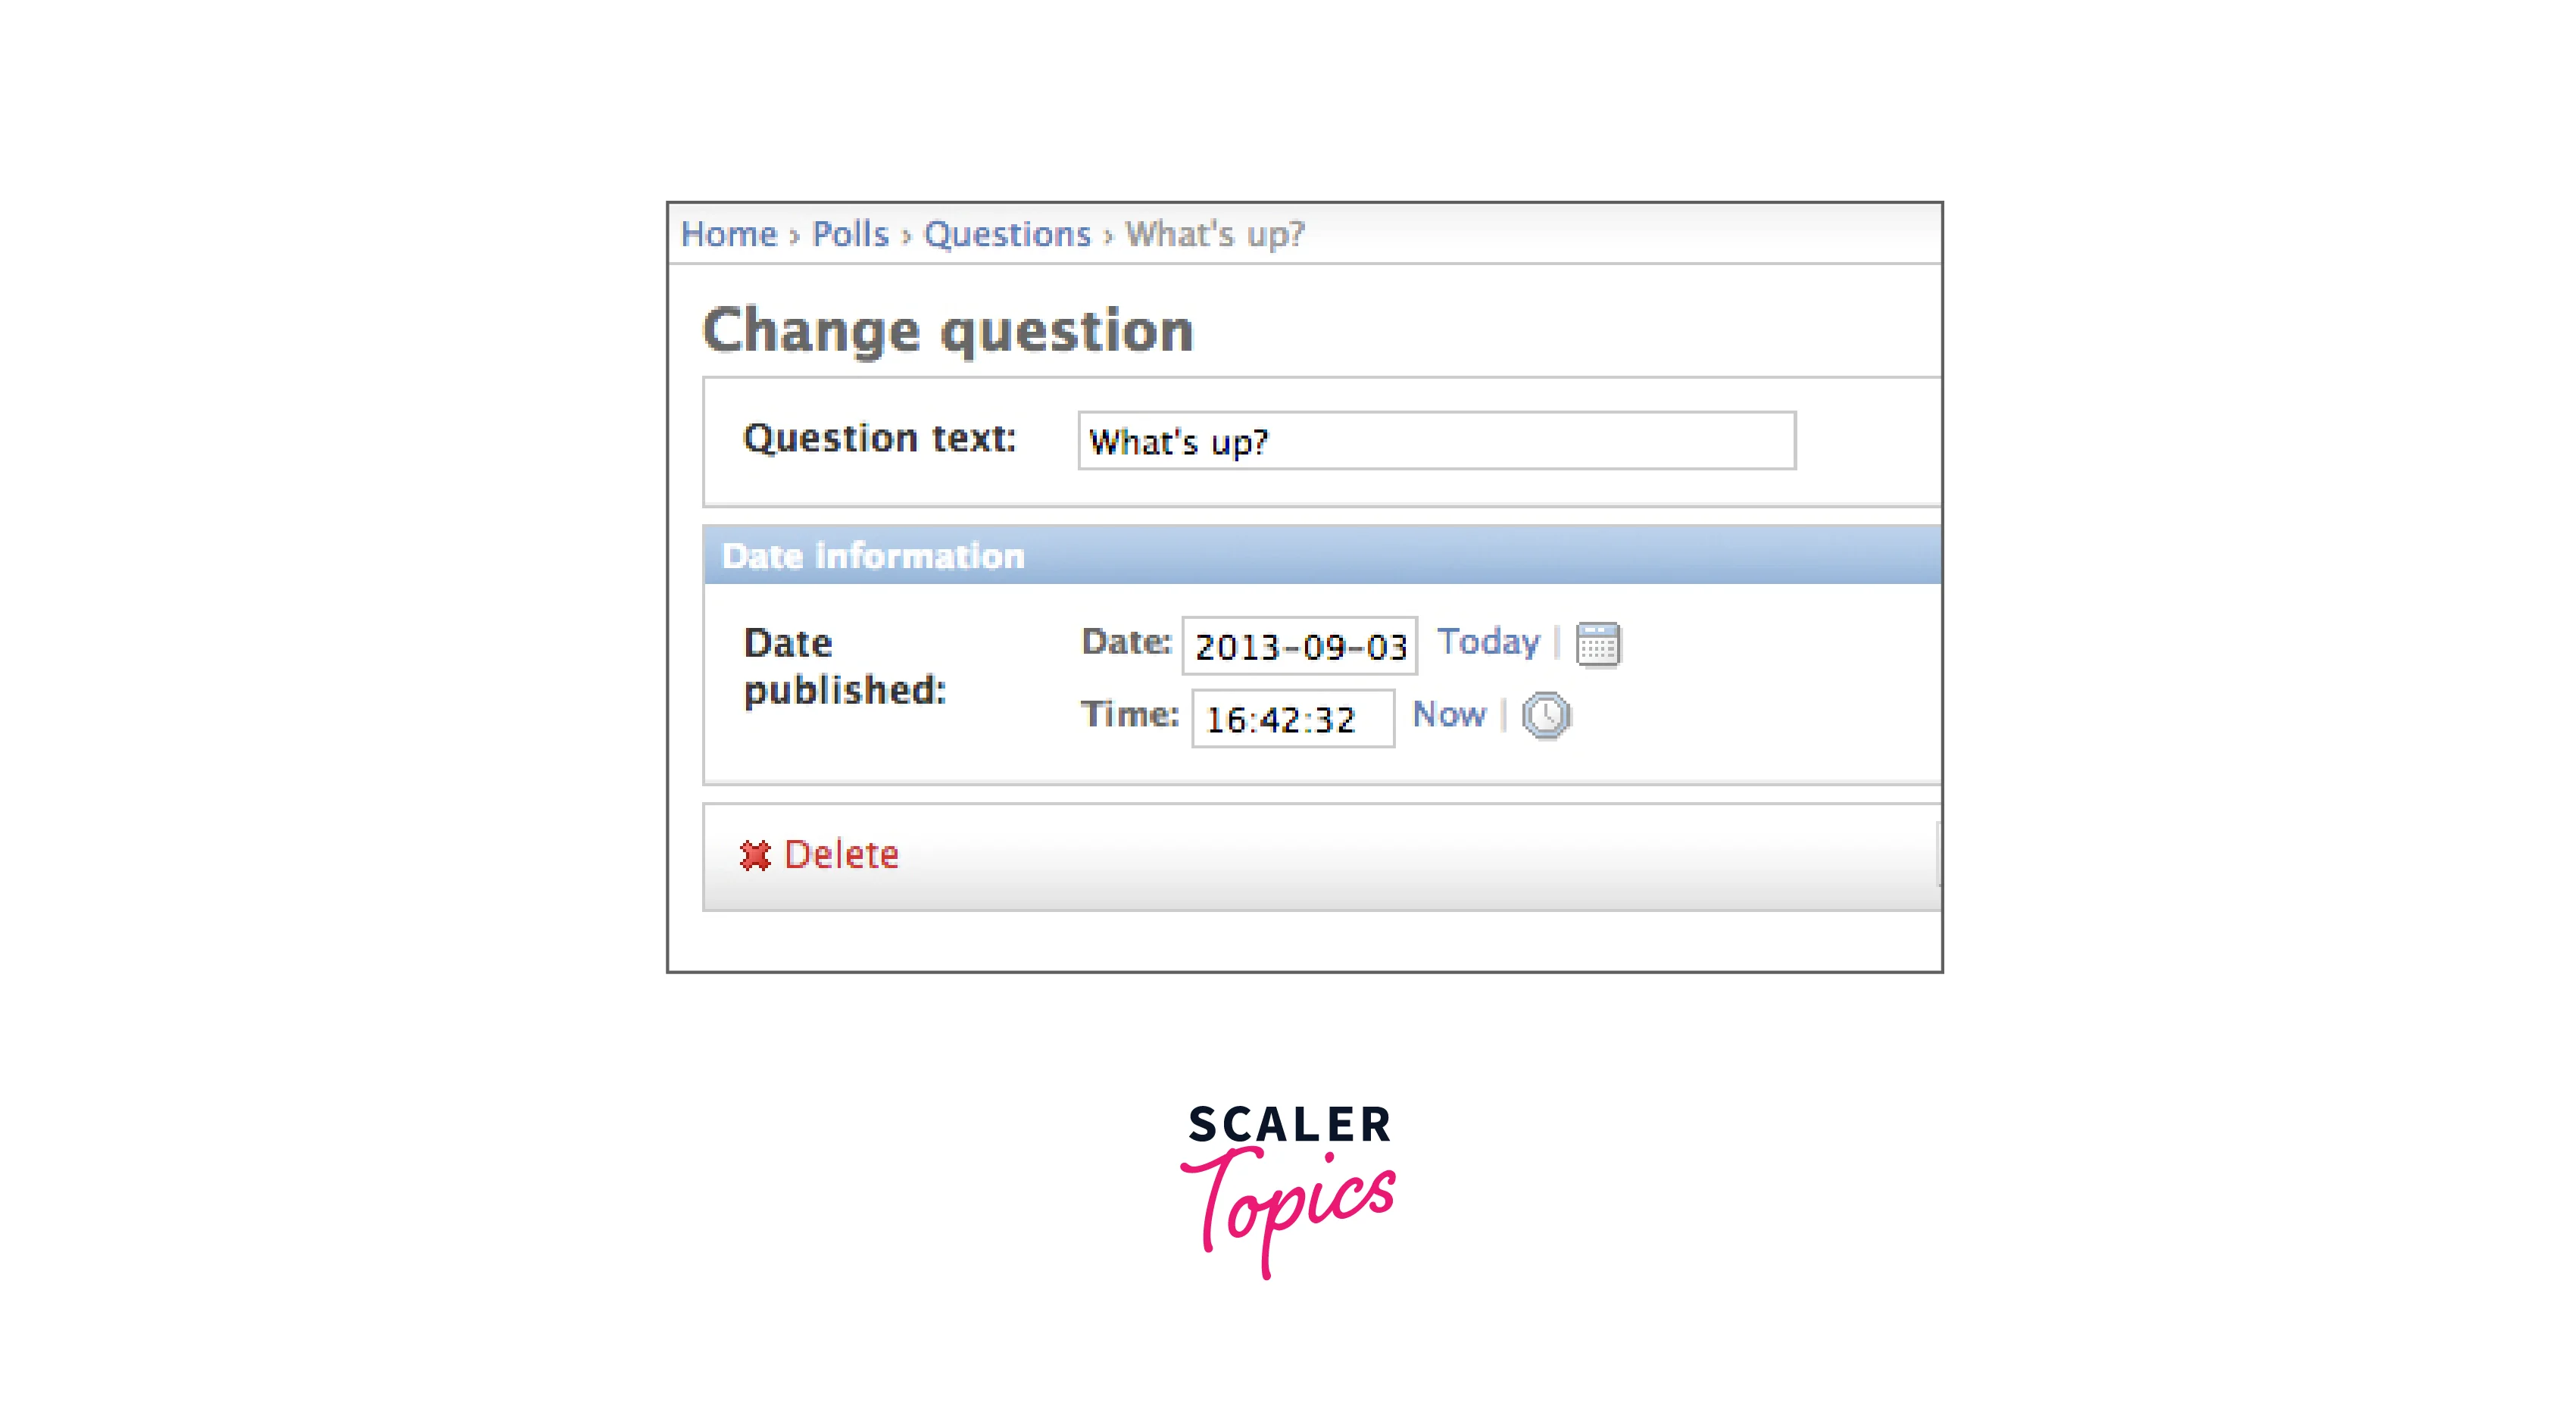
Default form representation is created by Django after the Question model registration by writing the command admin.site.register(Question). Looks and Works of the admin form can be customized. This can be done by providing options at the time of registering the model. Fields in the edit form can be reordered by writing the below code in the polls/admin.py file.
By writing the above code pub_date field is displayed above the question_text field.
Refer to the below image for the modified change list page of the object
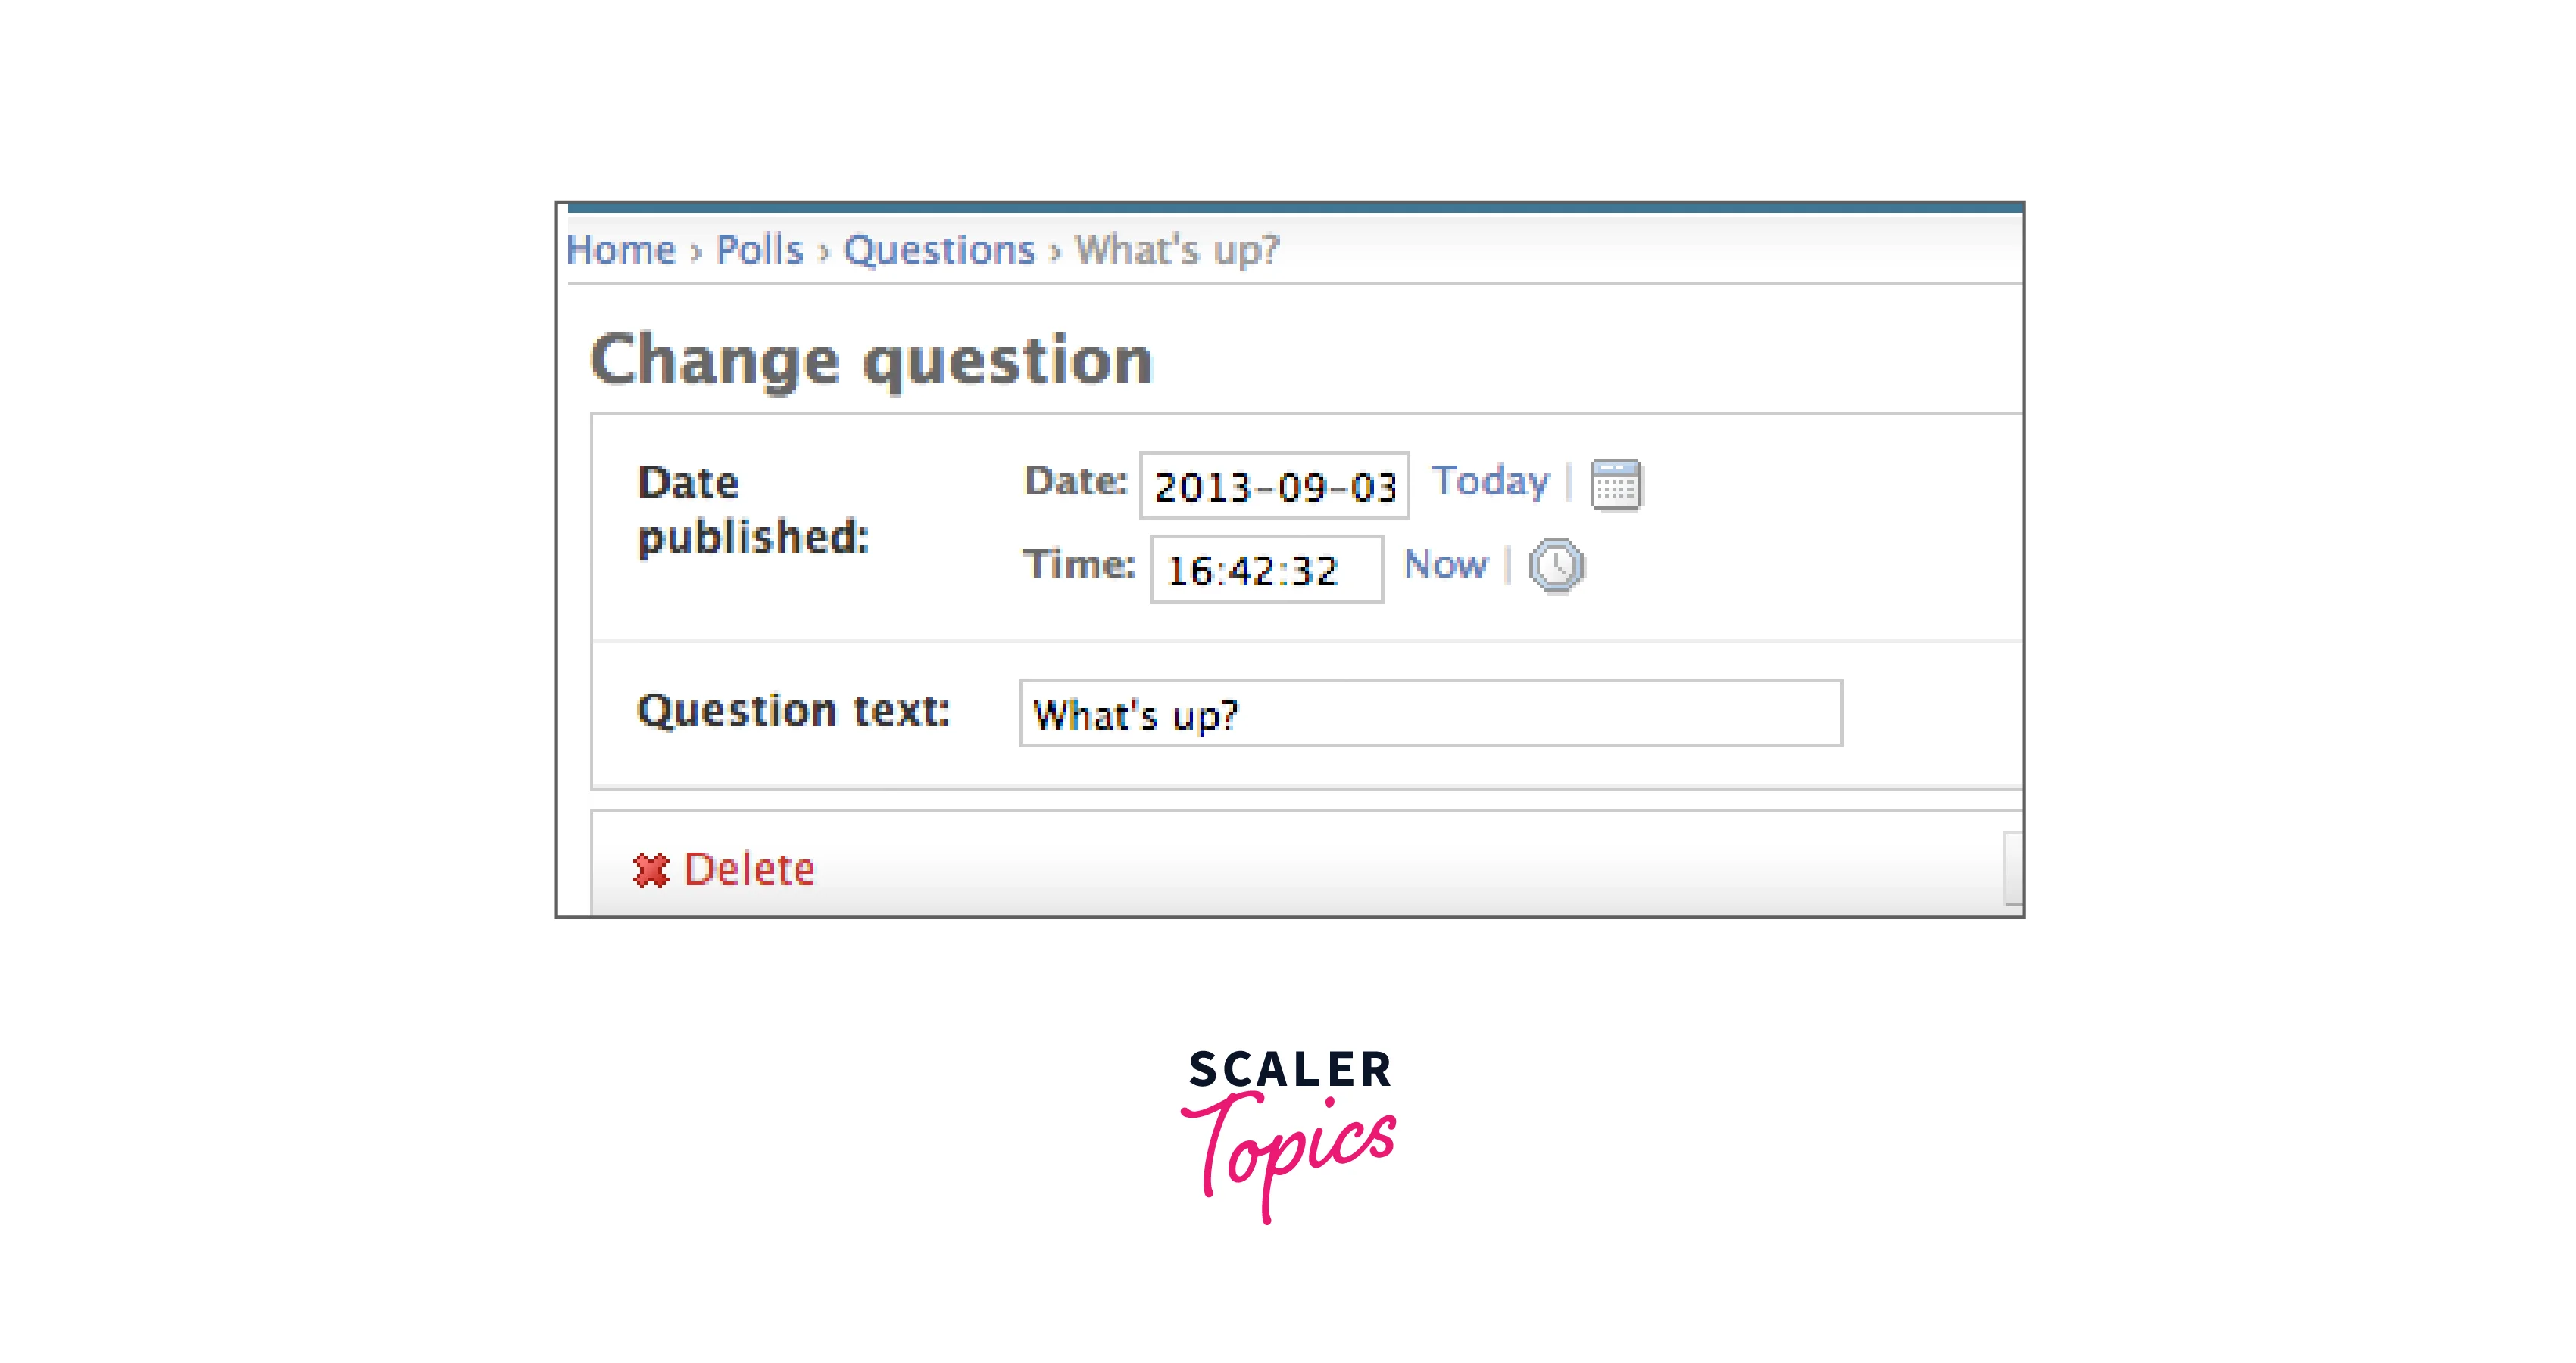
 We can also split the form into multiple fieldsets. To implement this functionality we need to write the below code to create a field set of Date information that contains the field pub_date.
Refer to the below image for the split fieldsets
Turn Learning into Career Growth
Adding Related Objects
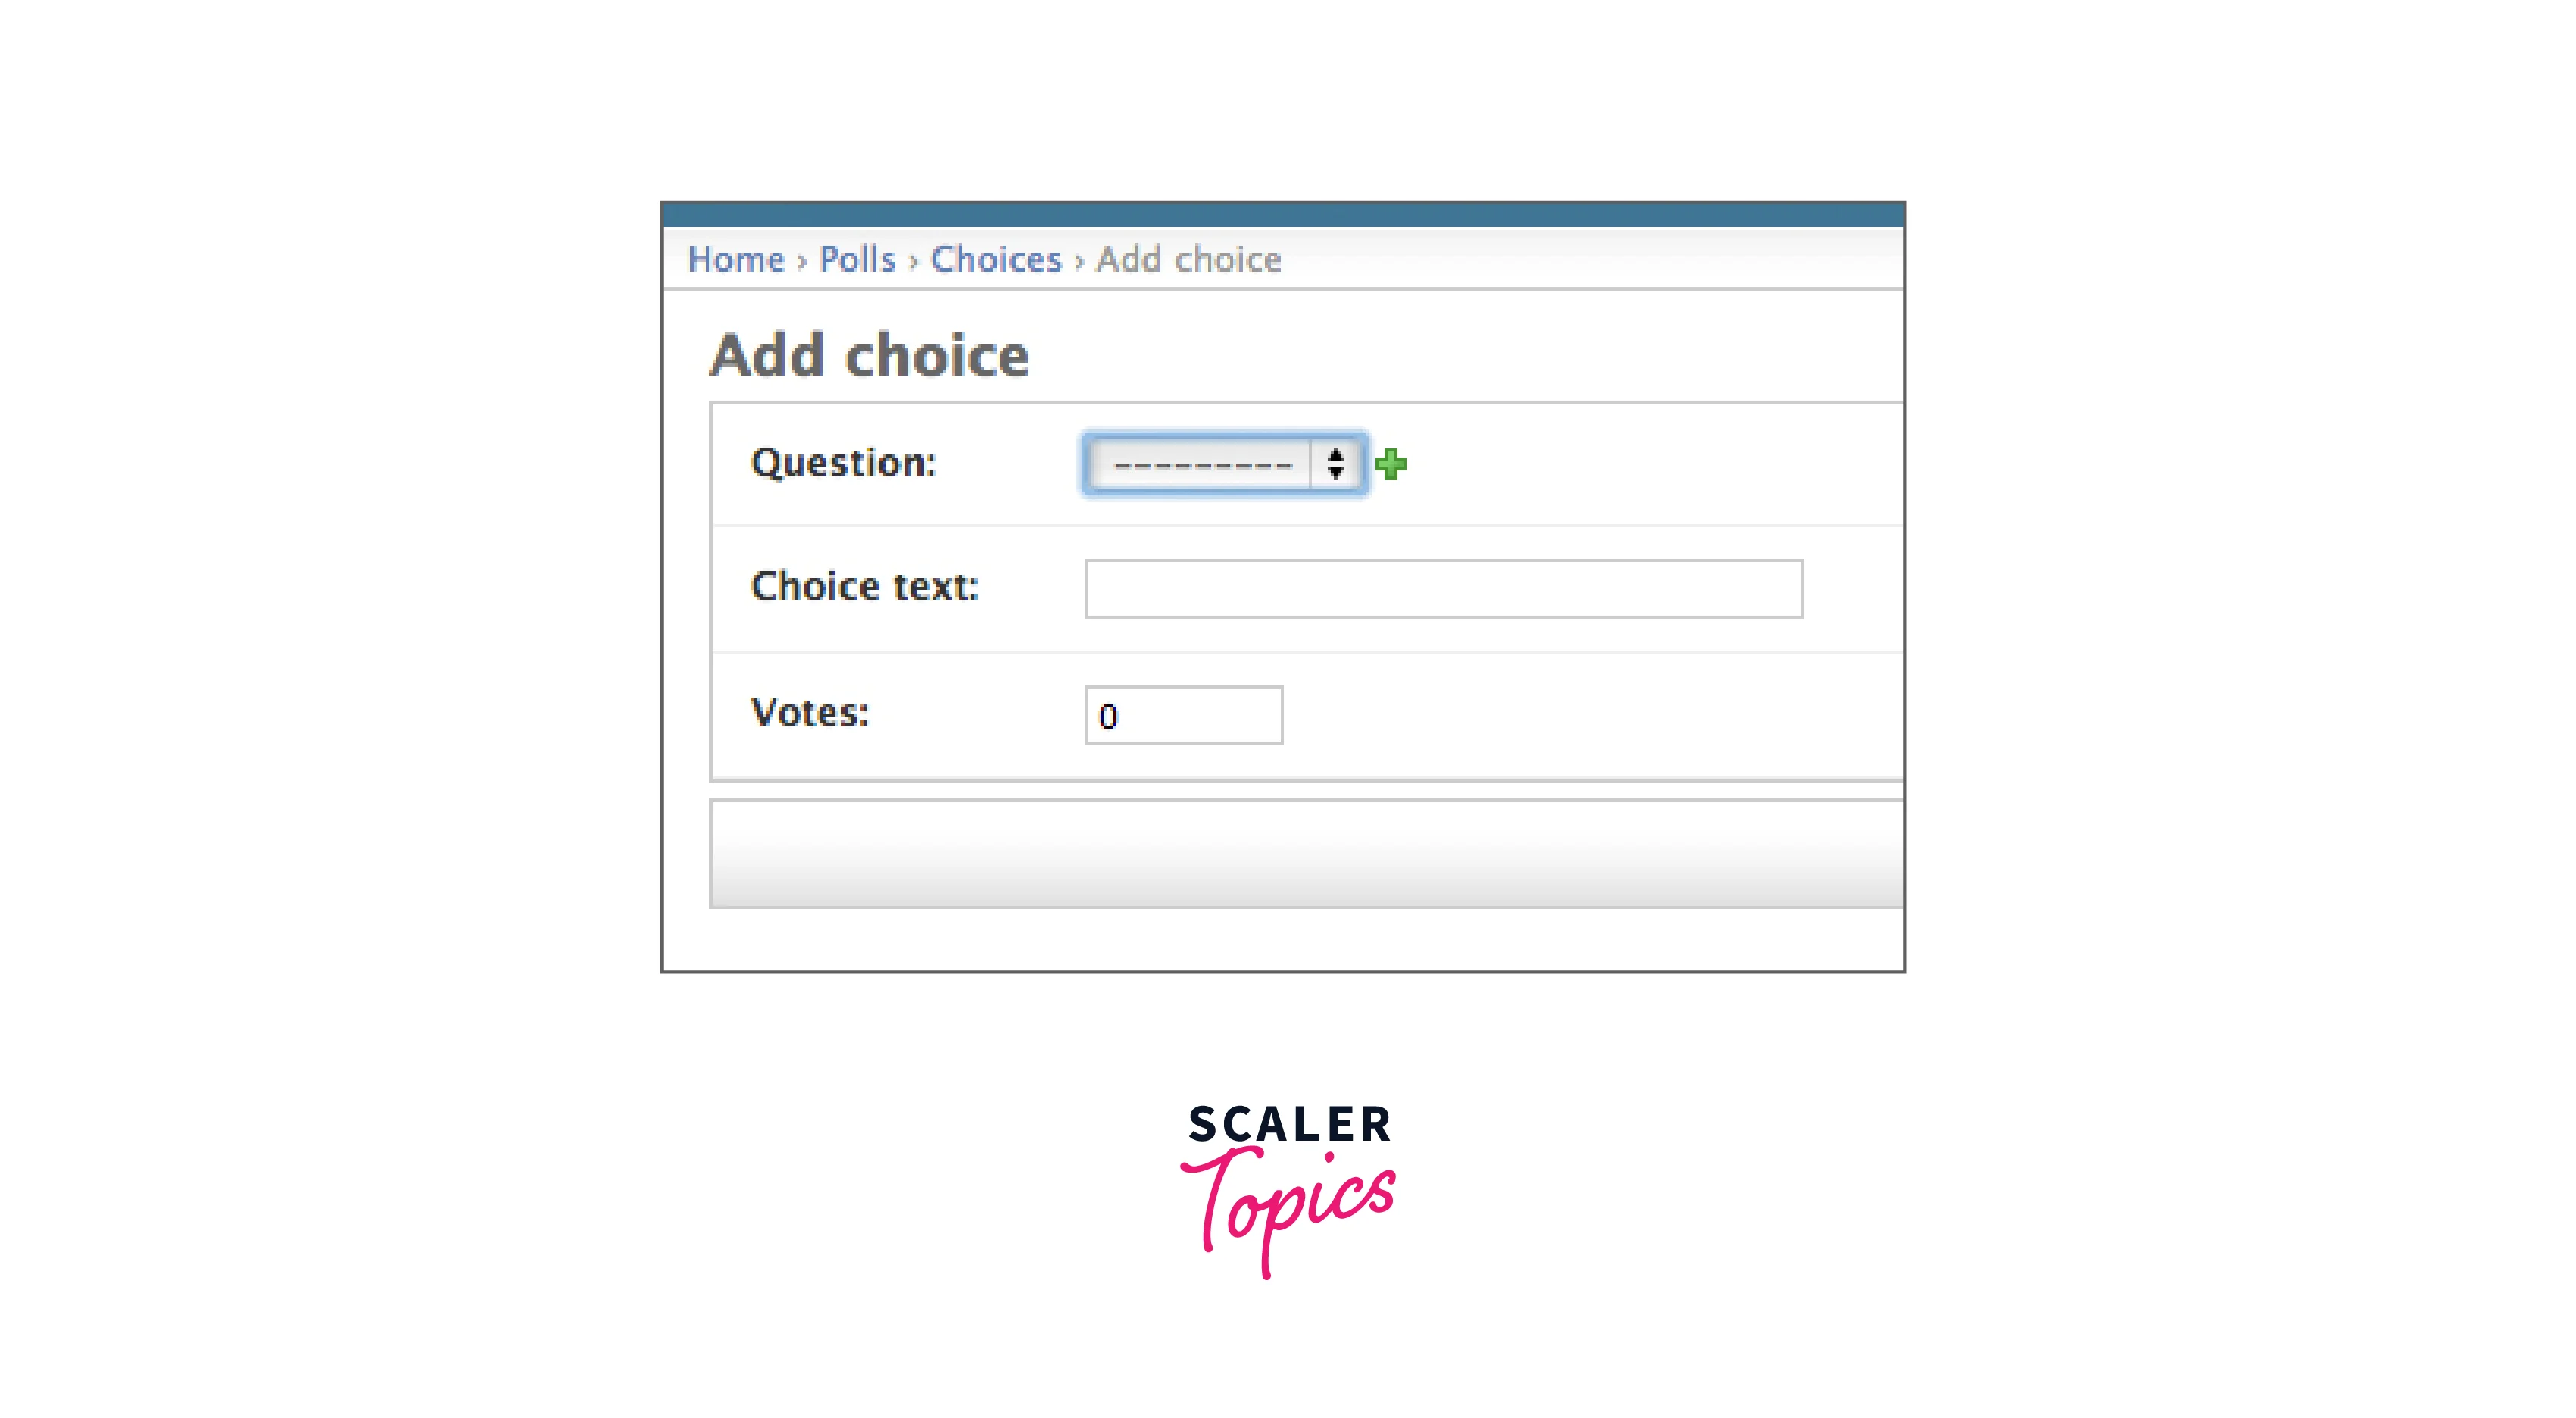
Multiple choices are available for a question but the choices are not displayed on the page of admin. This can be done by two methods. The first one is registering the model Choice just similar to the Question model registration by writing the below code in the polls/admin.py file.
Now the Choices option is also available on the index page of the admin. And the form for “Add Choice” is displayed as shown below.
Refer to the below image for the displayed choices object on the admin page
 And in that, there is a select box for the question field and every question i.e. stored in the database is available in the select box.
And next to the Question, there is an option to Add Another. Django provides this to every object having the foreign key. The window for Add question will be prompted when you click on this link. If you want to add any questions. Simply enter the details and click on save then the question is stored in the database and it will be added dynamically in the select box. But an efficient way of adding the choice is adding multiple at the time of the Question object creation. For implementing this functionality write the below code in the polls/admin.py file.
Above is the code which tells Django that on the admin page of the Question, the choices object can be edited. And 3 choice fields are provided by it by default. To see the changes to the Question admin page reload the page.
Refer to the below image for the question admin page with the choices option
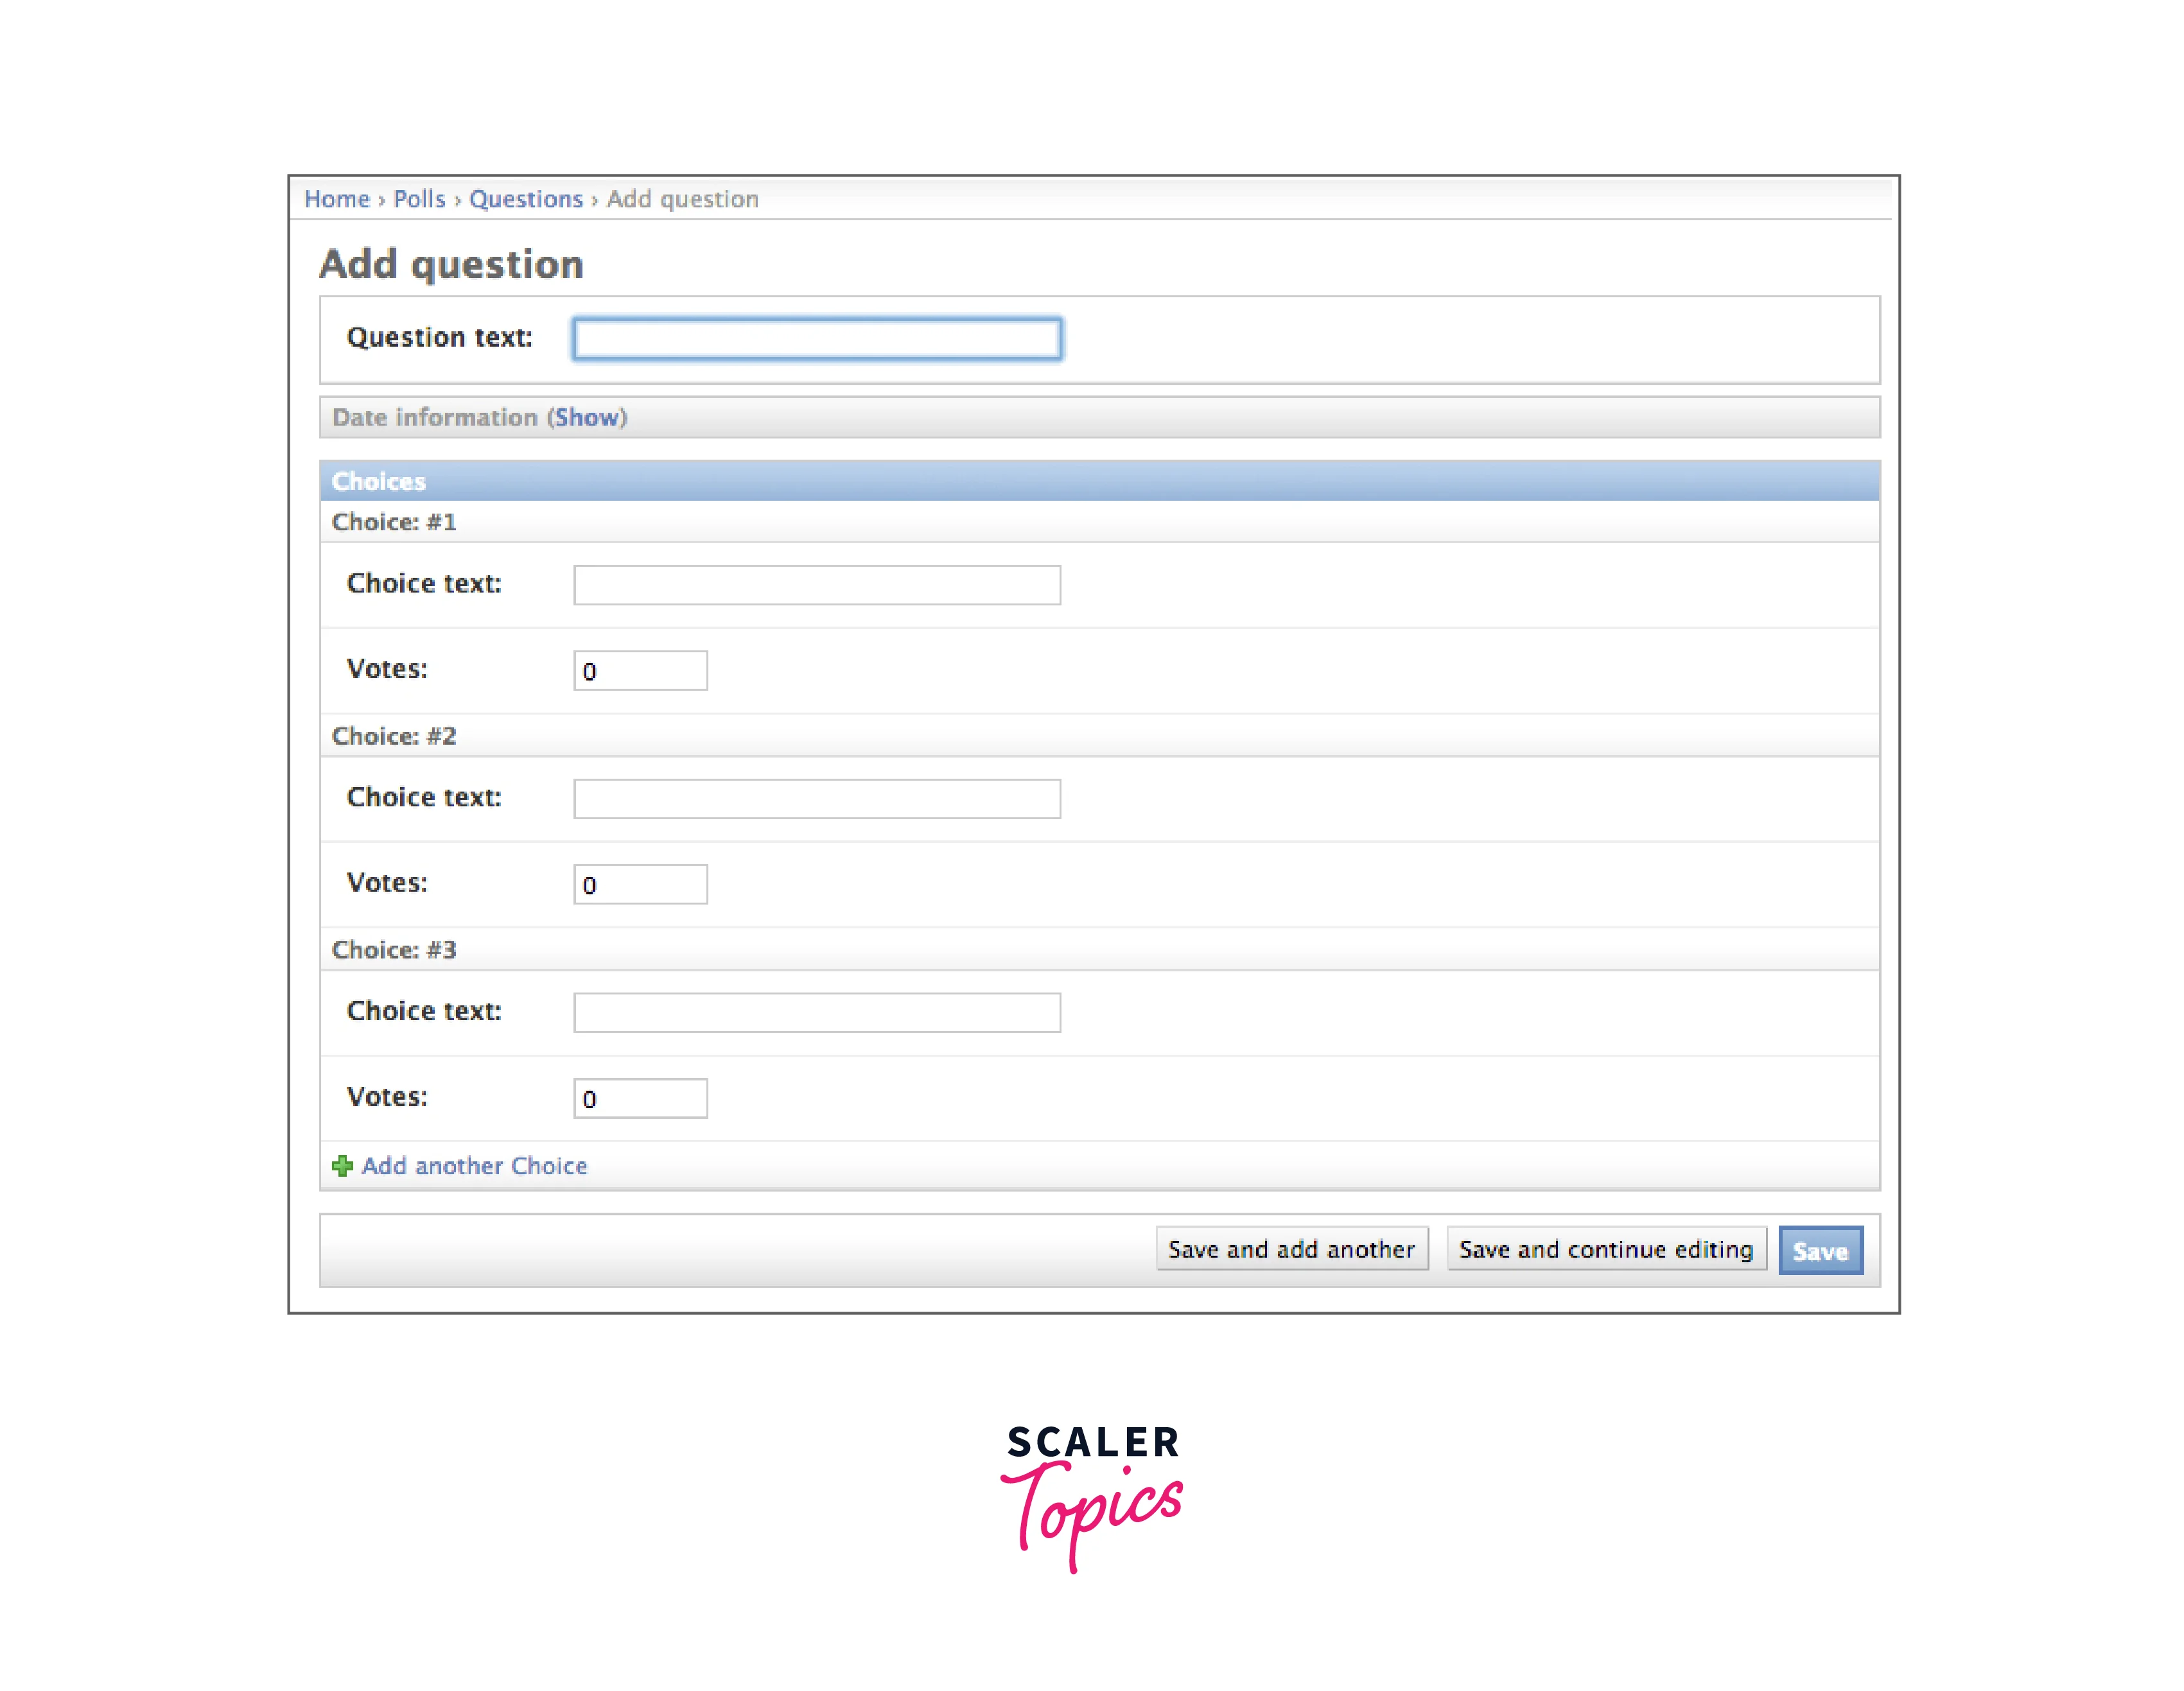 And at the end of the options provided for the choice, there is an option provided for the Add Another Choice. The new Choice slot can be added by clicking on this. And the cross option is displayed on the top left corner of the added slot. It is used for removing the choice option. But you can remove only the newly added choice slot. Default 3 slots are not provided with the cross option.
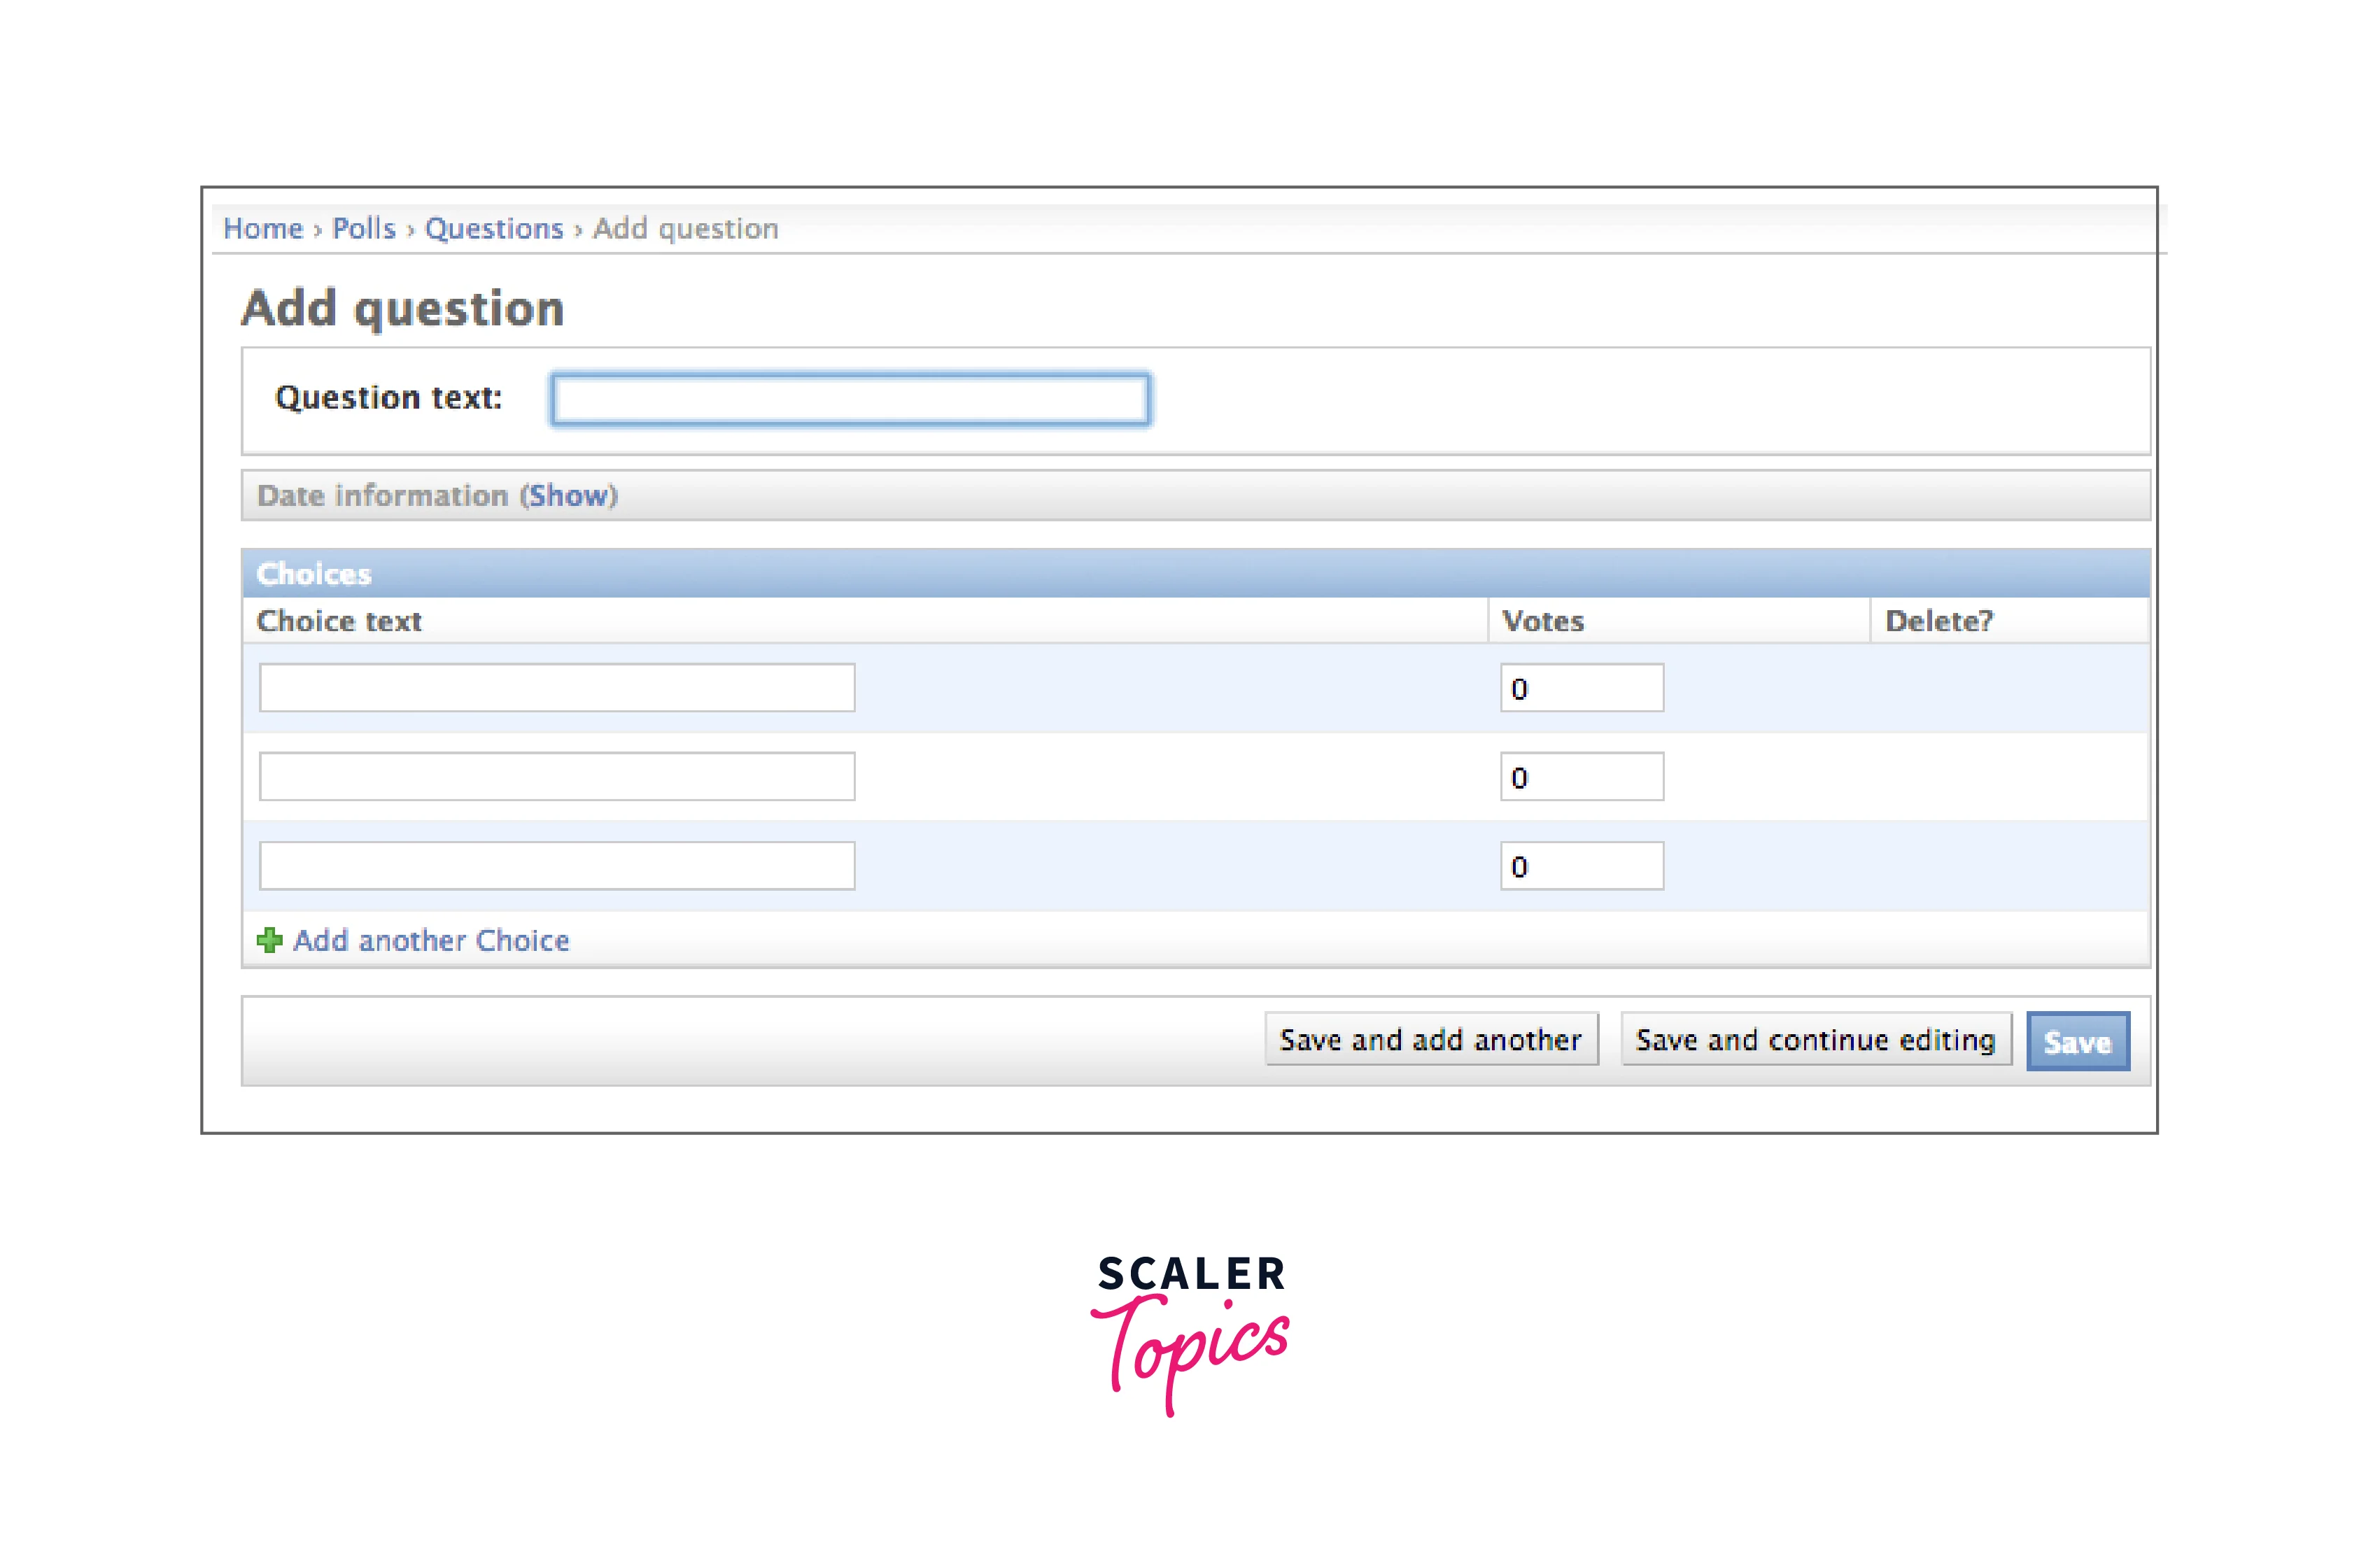
As a Choice option here taking a lot of space on the screen. So it can be improved by making the table format of the choices option. AS Django provides an option for displaying tabular format for the inline object display. For implementing this scenario you just need to add the below code in the polls/admin.py file.
And at the end of the options provided for the choice, there is an option provided for the Add Another Choice. The new Choice slot can be added by clicking on this. And the cross option is displayed on the top left corner of the added slot. It is used for removing the choice option. But you can remove only the newly added choice slot. Default 3 slots are not provided with the cross option.
As a Choice option here taking a lot of space on the screen. So it can be improved by making the table format of the choices option. AS Django provides an option for displaying tabular format for the inline object display. For implementing this scenario you just need to add the below code in the polls/admin.py file.
Refer to the below image for the question admin page with the tabular form of the choices option
Customize the Admin Change List
Django displays every object str() by default. But displaying the individual fields looks more good and helpful for us. For implementing that scenario, simply write a tuple of fields in the list_diplay option to display the changed object list page.
Refer to the below image for the question change list page
 The filter can also be added by writing the filters field list using the list_filter option. And this filter is added on the left corner of the admin page which allows displaying the filter on the change list page of the object.
The search field can also be added to the object change list page by adding the below code in the polls/admin.py file.
It simply adds a search box on the top of the admin page. And this search bow allows the user to search the data with the help of the question_text.
Customize the Admin Look and Feel
Django Administration displayed on the top of every page of the admin is just a text of the placeholder and modification of it is very easy and it can be done with the help of the template system of Django.
Customizing Your Project’s Templates
Inside the directory of your project create a directory with the name templates. And now open the settings.py file of your app. And DIRS option is required to be added in the TEMPLATES setting inside this file.
Now inside the template create an admin-named directory and inside that directory simply pastes the code copied from the code of the template admin/base_site.html which is available in Django’s source code in the default template directory of Django. If you are facing any difficulty in finding the Django source code, then simply run the command written below:
Now you just need to replace and edit the {{ site_header|default:_('Django administration') }} with the text you want to display on the admin page.
Customizing Your Application’s Templates
If the application becomes complex and the custom admin template is not enough to fulfill all the functionalities then simply do modifications to the application template.
Scaler Placement Report and Statistics
Scaler learners achieved 2.5x salary growth with average post-Scaler CTC reaching ₹23L.
Customize the Admin Index Page
If Django admin index page customization is required. All the apps that have been registered to the admin site are displayed by Django in alphabetical order. For modifying this simply copy the code of the admin/index.html and paste it into the template directory and do the modifications according to your requirement.
Conclusion
- For entering into the admin site of Django, firstly it is required to create the user.
- Then the user can log in to the admin site by entering their username and password.
- For displaying the app on the admin interface we need to register the model.
- Default form representation is created by Django after the model registration. Looks and Works of the admin form can be customized.
- List_diplay option is required for displaying more fields on the change list page.
- All the apps that have been registered to the admin site are displayed by Django in alphabetical order.