Upload File in Django
Overview
When uploaded, files can undergo additional processing or be left in their unprocessed state. The question of storage (where the files end up) and the display are also brought up by file uploading (how they can be retrieved and displayed).
These inquiries will be considered as we build a small project that allows users to upload content to a Django web app throughout the guide.
Introduction
Accepting images or pictures from users as input and saving them on the server is one of the most fundamental requirements in any modern web application. However, allowing users to upload files in django can have significant security repercussions.
Users are so accustomed to file sharing in various software that the novelty has long since worn off, and the functionality is frequently regarded as standard.
How, then, does one upload files in Django? In this article, we'll respond to the query of how to upload files in django.
Uploading Files with Django
Every web application requires the uploading and processing of files.
Every web application will eventually require some user data or information collection. Files like images, videos, or documents may be included in this. And even on slow networks, these end users deserve a quick and seamless file-uploading experience.
The Django file upload method enables the upload, processing, storing, and retrieval of files.
The file is attached to the request when a user starts an upload operation through the request.Files section.
The request.Files record file information while uploaded and keep it tagged.
The uploaded file's information and content must be obtained from this request. Files section and processing must continue while referencing request.FILES concerning the file name.
Doing this will produce an object that behaves more like a file-based object during setup and storage. All file information and content could now be retrieved from this file-based object.
Let's dive in now and examine each step in more detail.
Transform Your Career
Choose from our industry-leading programs designed for career success
Modern Software and AI Engineering Program
Master full-stack development with AI integration

Modern Data Science and ML with specialisation in AI
Advanced data science techniques with AI specialization
Advanced AIML with Specialisation in Agentic AI
Deep dive into AIML with focus on Agentic systems
DevOps, Cloud & AI Platform Engineering
Build and manage AI-powered cloud infrastructure
AI Engineering Advanced Certification by IIT-Roorkee
Premier AI engineering certification from IIT-Roorkee
Creating the Model
Let's begin by defining an employee model corresponding to a database table. The user can then fill in the details on a form created to represent this model as a blank page. We can define a model that extends the models. Model class in the employee/models.py file, which then gets the functionality to be saved in the database:
So every employee has a name, a last name, an eod*classification, and corresponding \media (employee information) (E.O.D stands Employee of Department).
Using the null argument set to True during initialization, media is an example of a FileField. Suppose the user attempting to enter the data has no media to attach. In that case, the database will know from this initialization that it is acceptable for the media field to be null. Since we will be mapping this model to a form and Django will handle the form validation, we must inform Django that the media input field on the form is optional so that it won't throw an exception when validating the form.
For consistency, you'll generally want to set these two to the same value. blank refers to the user-end validation, while null refers to the database.
By default, a FileField can upload only one file from the user's file system and can only manage one file at a time. We'll glance at how to upload multiple files later in this section.
Scaler Placement Report and Statistics
Scaler learners achieved 2.5x salary growth with average post-Scaler CTC reaching ₹23L.
Creating the Model Form
After defining our model, we'll bind it to a form. Using Django, we can bootstrap this functionality without having to do it manually on the front end:
The Employee model was just bound to an EmployeeForm that we just created. For our model to appear fully when used on an HTML page, we also set the fields to __all__. However, for our straightforward model, we'll want to display them all. You can individually modify the fields here if you'd like some to remain hidden.
Registering Models with Admin
To aid developers in their work, Django automatically generates an admin site. We can check out our models and fields without manually creating pages. The admin website should be disabled before going live, and users should be made.
By including it in the employee/admin.py file, let's add our model to the admin website registration list:
Registering URL Paths
The first step is to make a urls.py file to register urls for showcasing the form. The following code should be added to the file urls.py
In the following manner, register the file URLs in the root url.py file.
Because this is a small-scale project and there is no need to complicate it, we are adding an empty string as our URL. Although we haven't yet created the view, we have registered its name here before its creation. Next, let's start with the views.addemployee view and the HTML template.
Turn Learning into Career Growth
Creating a Template to Display Our Form
Let's make a templates folder in the employee directory to store our templates. The name cannot be changed because Django will only search the folders named templates for HTML templates.
Let's place a file called entry.html in our new folder that has a <form> that can accept the fields for an employee:
When a user clicks the "Save!" button, we will send a request to the request handler specified by the action="/" attribute. Since the form's input determines how the data is encoded, we've changed the enctype to a multipart/form-data type to support file uploads. You must always set the enctype to multipart/form-data when adding input of type "file" to a Django form.
For any form with action = "POST," the {% csrf_token %} is an additional requirement. Django kindly creates a one-of-a-kind token for each client to guarantee protection when accepting requests. Every POST request in this form includes a CSRF token, which prevents CSRF attacks.
An attack known as Cross-Site Request Forgery (CSRF) compels authenticated users to send a request to a Web application for which they are already authorized. CSRF attacks take advantage of a Web application's confidence in a verified user.
This HTML template will receive the form variable ( {% for entry in form%} ) that we are iterating the for each loop from the view. This variable, an instance of our EmployeeForm, has some neat abilities. To make our form appear professional, we use entry.labeltag, which gives us the label for that Model Form field (unless otherwise specified, the title is the field's name), and we wrap the form field in a div to give our form a presentable appearance
Creating a View to Show Our Template
Let's now construct a view and link it to our backend to render this template. We'll begin by importing our EmployeeForm object along with the render and HttpResponseRedirect classes, both of which are built-in Django classes. We can choose to create a function-based view rather than a class-based view, which works well for straightforward prototypes and demos like this. If the arrival request is a POST request, a new EmployeeForm case is created, and the fields and files from the POST request are included. Django injects the request.FILES after automatically deserializing the body data into an object. As our file field:
Using the isvalid() method of the EmployeeForm instance, we can check the input to see if it's valid or invalid and clear the form accordingly. Otherwise, if the form is valid, we use the save() method to save it to the database and send the visitor to the homepage (our entry.html page), where they are prompted to enter another employee's details.
The files—where are they?
Note:
This method does not need file handling because the files are saved to the database. Although it works, this approach is not recommended, and in the following section, we'll fix it with a proper file-handling system.
To undertake modifications to the model schema for the time being (since we have never done that before), let's perform migrations. When the project has been completed, we can view how everything appears on the development server. Run the following commands from the terminal while the virtual environment remains active:
Now, when we use a browser to access http://127.0.0.1:8000/, you ought to see something similar to this:
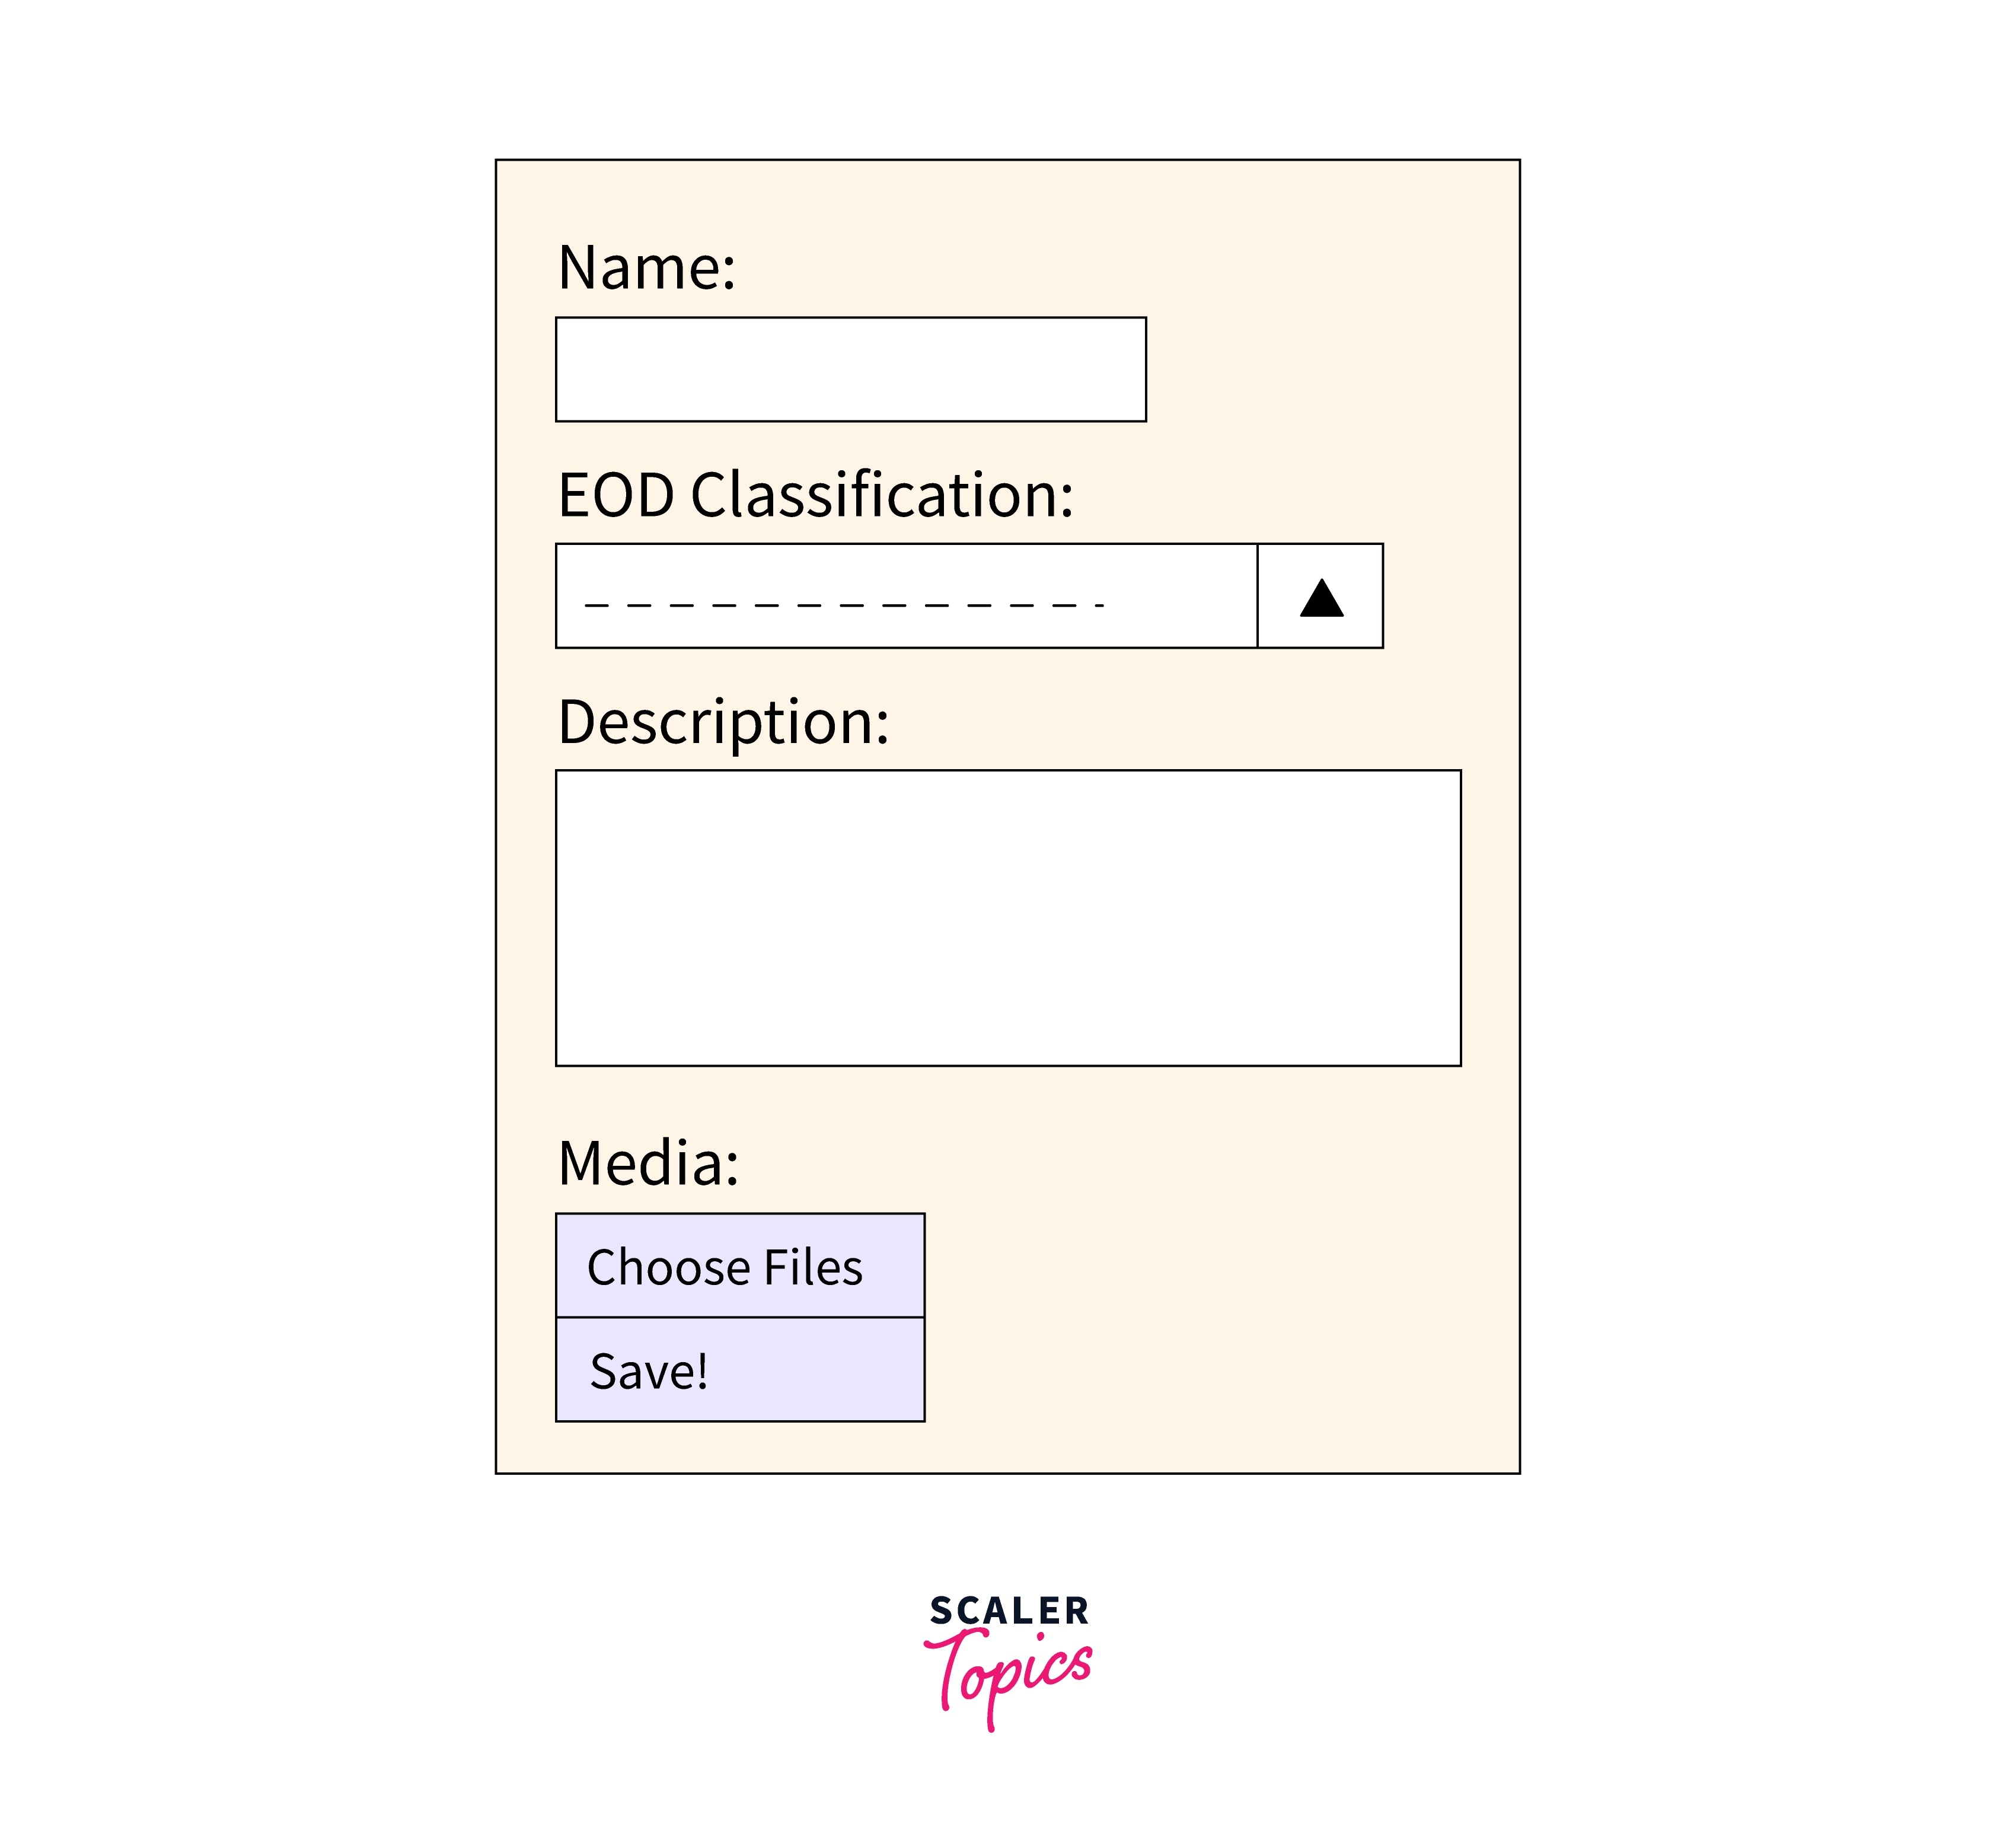
You can go ahead and fill out the form with arbitrary data and attach a file; any file type will work because the field is named "media" but has a generic FileField assigned to it.
Note:
Once we discuss a more reliable system for storing and managing different files instead of just one, we'll look at Django's ability to enforce specific file types, like images.
You can access the admin page after you've submitted the form to view your data in the database!
Uploading an Image in Django
A direct image file upload through Django is described in the following steps. These steps presuppose that you are fully aware of a Django project's fundamental structure.
Step - 1:
Finish your settings.py file by adding the following code.
MEDIAROOT indicates the root folder that the server uses to store media. The reference URL that the search engine uses to access the file over HTTP is MEDIAURL.
Step - 2:
If you don't already have one, make a urls.py file in your app folder rather than the project folder. then incorporate the following code into it.
urls.py
There is a check for the DEBUG mode in this urls.py file. The settings.py file contains this information.
When the settings.py DEBUG status is set to true, the if statement is executed while the development server serves the files using django.contrib.staticfiles.views.serve(). It facilitates serving these files through the local server.
Step - 3:
In the file models.py, create your model class. It might be considerably more complex or considerably more straightforward than the example below.
models.py
The [models.ImageField] in the code above identifies the folder where the image is stored and adds a row to the database table with the URL of the picture.
Step - 4:
Make a form class for our sample employee form using Django's model form and link it to the model in the form.py file.
form.py
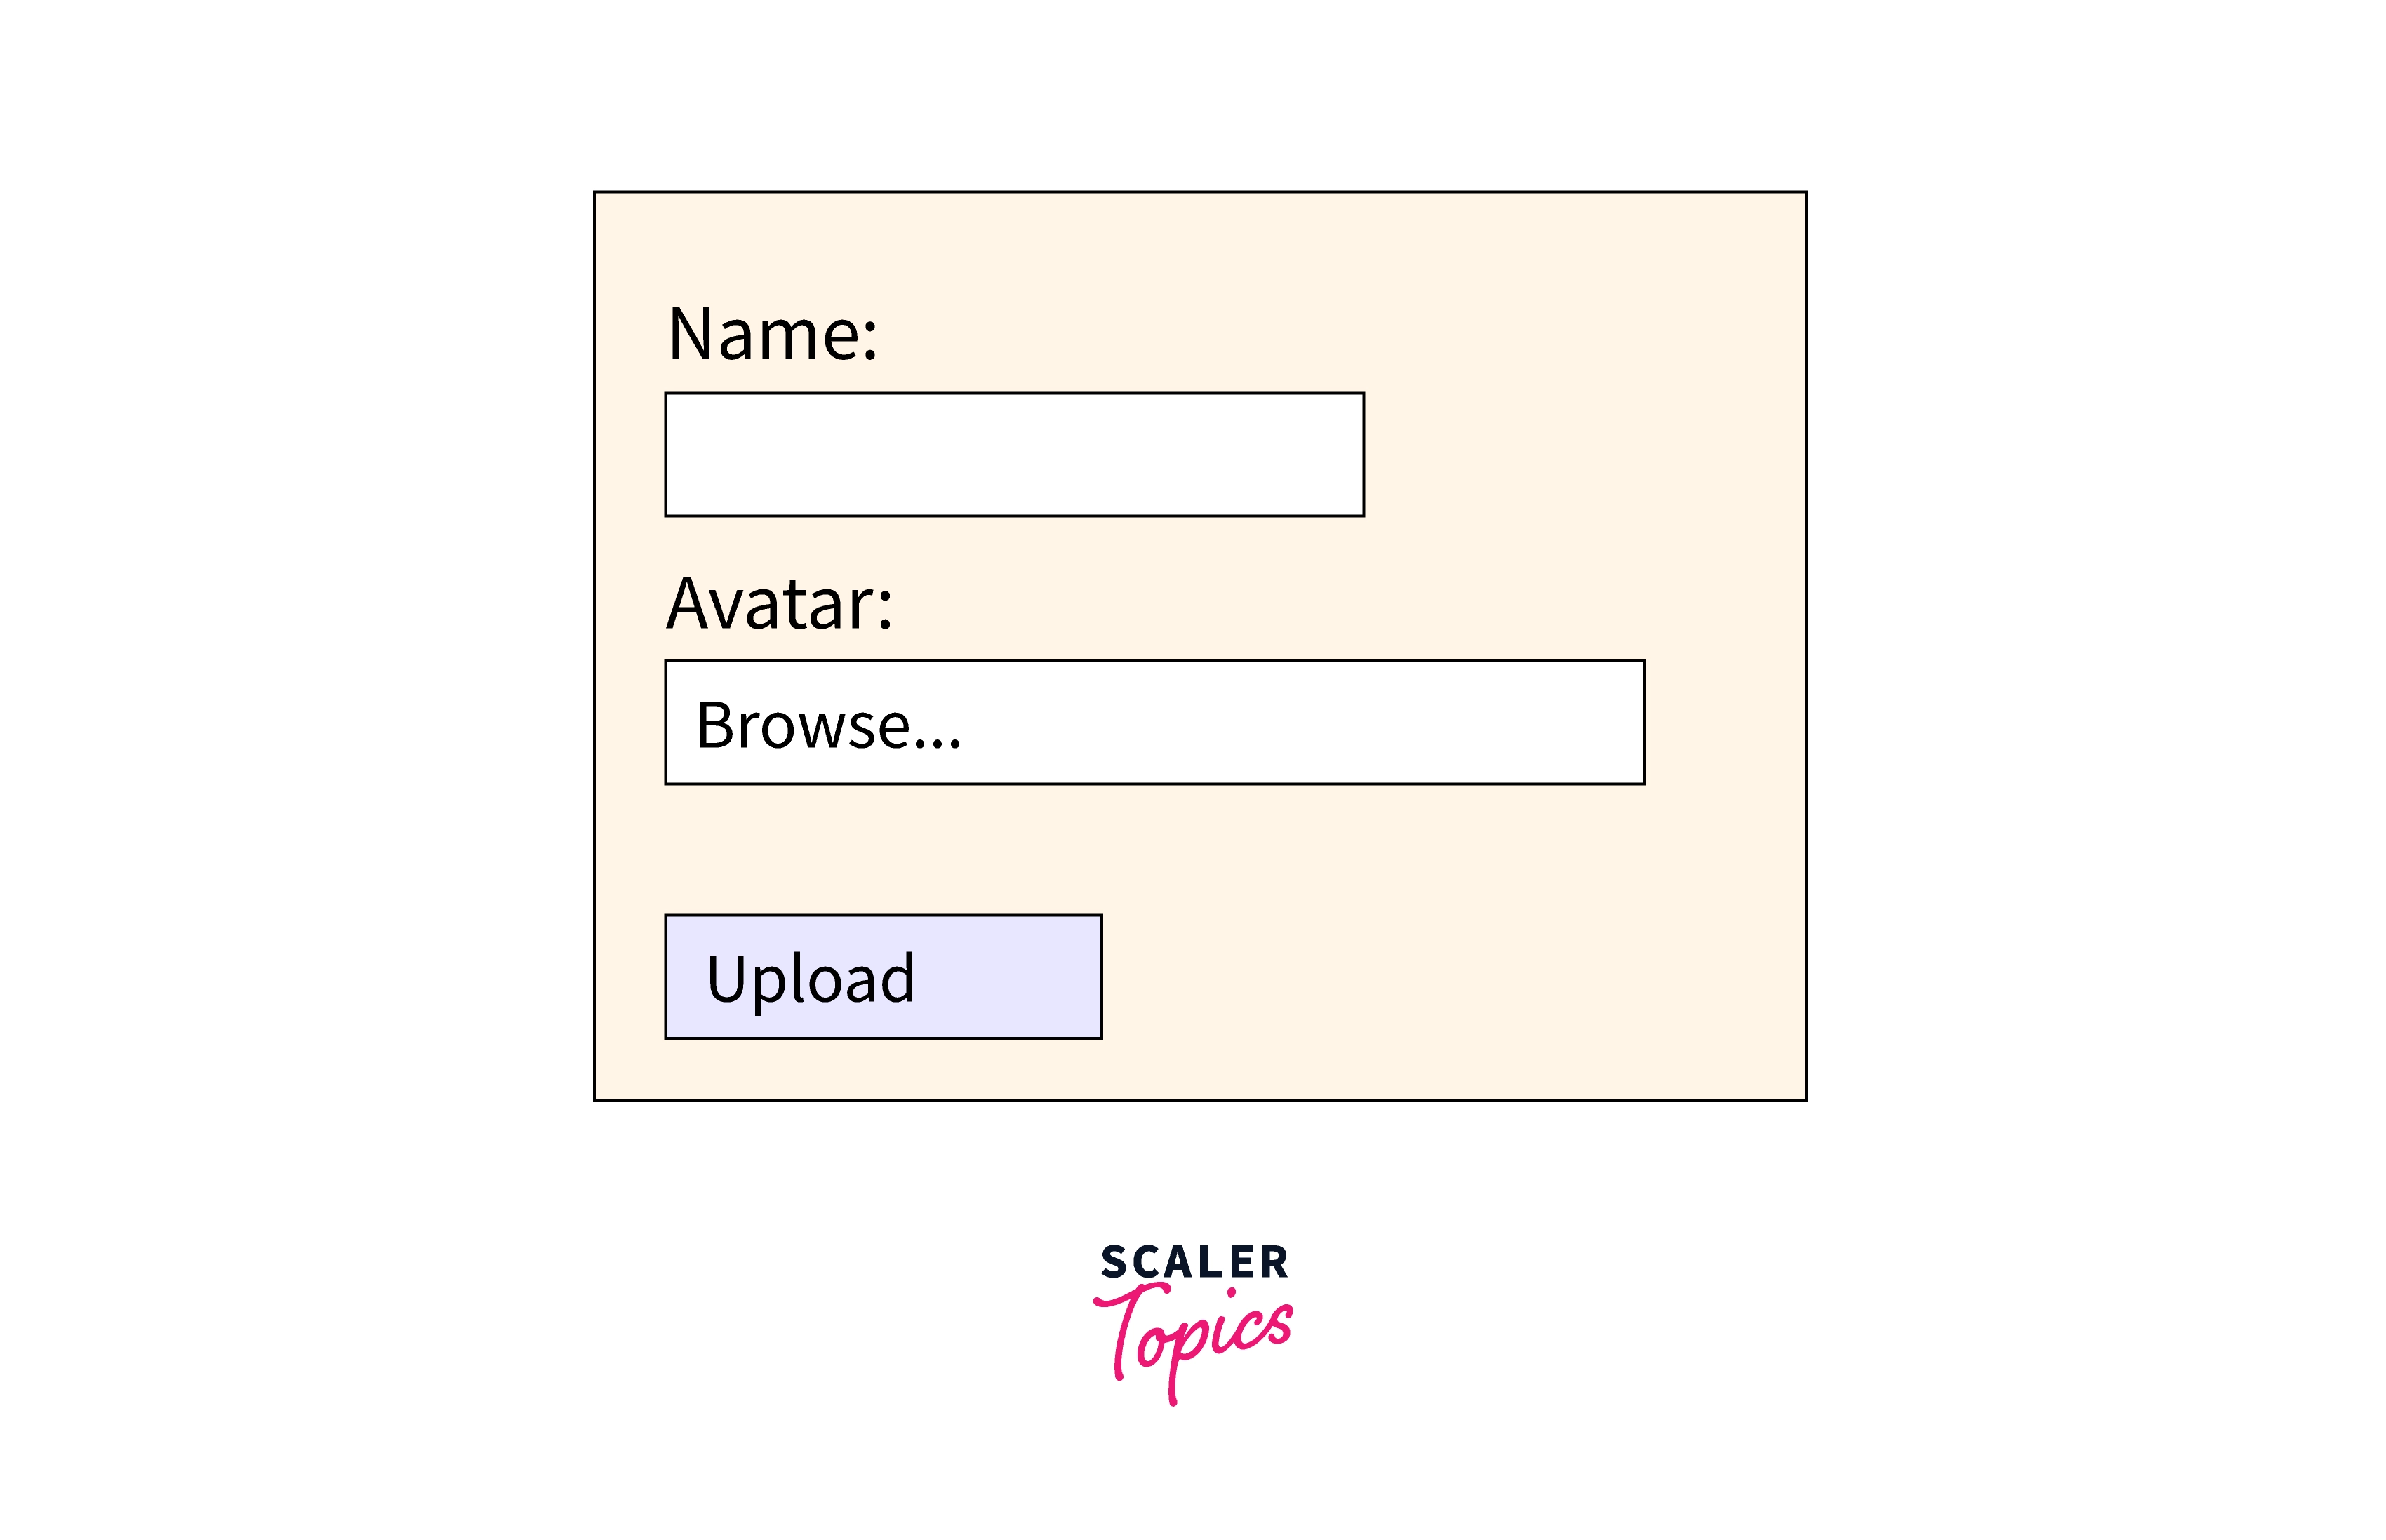
With the aid of this form, Django will show the user two fields via the HTML form: one for text-only name input and one for image upload input.
Step - 5:
The HTML form which exhibits the input fields must then be created, as specified in the forms.py file.
Employeeform.html
The form.asp python command causes the form input to appear as a paragraph.
Step - 6:
Generate your view function in view.py to take care of the upload of the form and its data.
views.py
The avatarView function detects POST requests when a form is submitted. If so, the EmployeeForm class handles the form in form.py, and the image data is stored in the request. FILES list object. The validity of the form is also checked. If the form is valid, the user is forwarded to a submit successful page, and the form and its input are saved. If it isn't correct, the form is showcased again.
The success view function will show a submit successful message.
Step - 7:
Finally, make the following changes to the urls.py file we earlier created in our app folder.
urls.py
After completing the setup, run the migration to build your model and start your server. Go to your browser and launch your application after the server is running. It would help if you observed something that appears as follows:
Displaying Uploaded Image
Uploading Multiple Files in Django
A brief overview of the process for using forms to upload a single file and importing it into views can be found in the Django documentation for File Uploads. Using forms and views, we can modify it like that to allow multiple file uploads.
When using a single model field, you can upload multiple files by setting the numerous HTML attribute of the field's widget in forms.
model.py
Let's imagine that you need to upload several resumes in PDF format. The model attribute is passed to a class that we create.
The FileField function in models uses the upload to the parameter to save the chosen files in the specified folder.
forms.py
We must create a new class in forms that contains the class from the previously developed models, so that this class can be called in views.
The ClearableFileInput renders a second checkbox input to clear the field's value if a field has initial data and is not required. Furthermore, it accepts multiple as an attribute, enabling the application to choose multiple files.
Then, modify your request subclass's post method to manage multiple file uploads:
views.py
Conclusion
- Django offers a simple interface for uploading files or images. The field on the model form needs to be configured, and an ImageField needs to be defined.
- Any file (.xml,.pdf,.word, etc.) may be uploaded using the same method, but we must convert ImageField to FileField in the model's field.
- You can increase the efficiency of your upload files in Django by using Filestack as a solution.
- It provides a complete set of tools and potent APIs for quickly uploading, transforming, and delivering content online.
- Filestack's cutting-edge UI integrations let you provide a fantastic user experience to your users when building sites or web apps with Django, and the robust APIs let you manage all of your file management needs seamlessly.