Erosion and Dilation in Image Processing
Erosion and dilation are fundamental operations in image processing. They reshape objects in images and are vital for enhancing, extracting features, and reducing noise. These operations work on binary images, where each pixel is either black or white, using a small binary structure to define pixel neighborhoods. This structure can take various shapes, such as square, rectangle, circle, or diamond.
Dilation
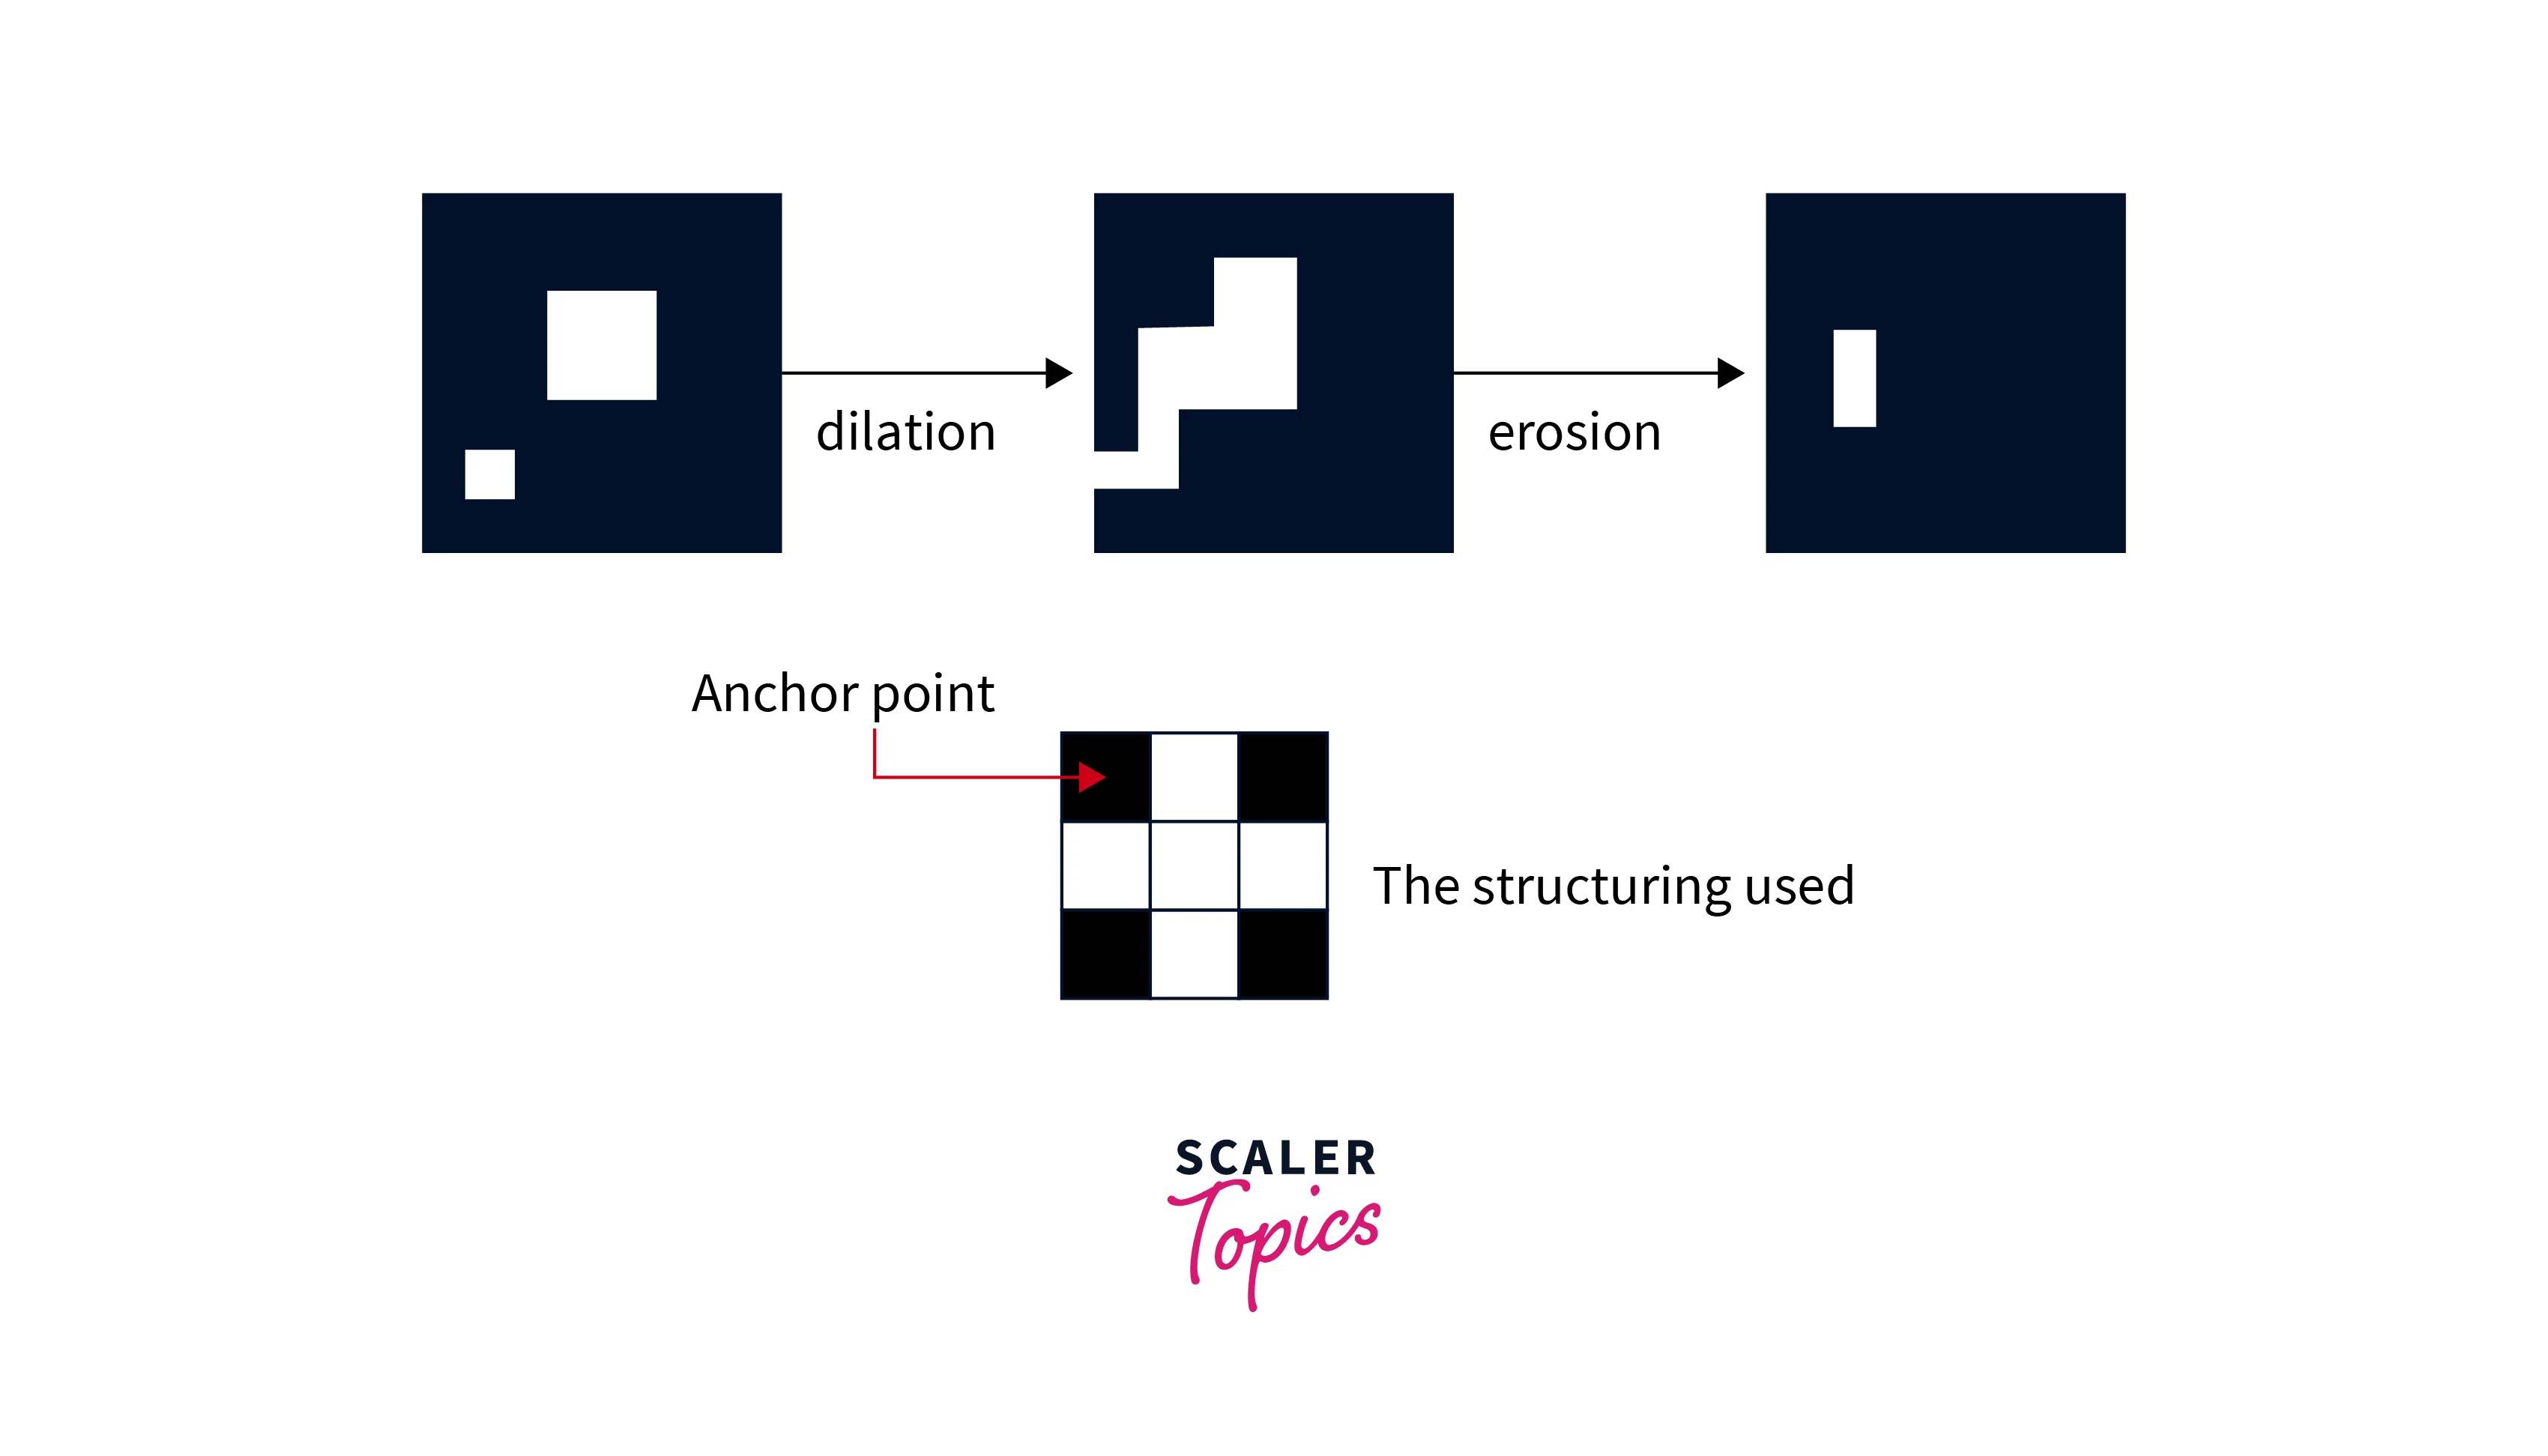
Dilation is a morphological operation that expands the boundaries of an object in an image. This is done by convolving the image with a structuring element, which determines the size and shape of the dilation. The output of the dilation operation is a new image where the pixels in the original image are expanded or dilated.
Structuring Element
The structuring element is a small binary image used to define the neighborhood of a pixel during dilation. The shape and size of the structuring element determine the degree of dilation. Structuring elements can take different shapes, such as squares, diamonds, disks, or lines during erosion and dilation in image processing.
The dilate() function Example
The dilate() function in image processing libraries is used to perform dilation on an image using a structuring element. Here's an example of how to use the dilate() function in Python using the OpenCV library:
In this example, we read an image and define a structuring element using a 5x5 matrix of ones. We then use the dilate() function to perform dilation on the image with one iteration. Finally, we display the original and dilated images using the imshow() function.
Transform Your Career
Choose from our industry-leading programs designed for career success
Modern Software and AI Engineering Program
Master full-stack development with AI integration

Modern Data Science and ML with specialisation in AI
Advanced data science techniques with AI specialization
Advanced AIML with Specialisation in Agentic AI
Deep dive into AIML with focus on Agentic systems
DevOps, Cloud & AI Platform Engineering
Build and manage AI-powered cloud infrastructure
AI Engineering Advanced Certification by IIT-Roorkee
Premier AI engineering certification from IIT-Roorkee
Erosion
Erosion is a morphological operation that shrinks the boundaries of an object in an image. This is done by convolving the image with a structuring element, which determines the size and shape of the erosion. The output of the erosion operation is a new image where the pixels in the original image are eroded or shrunk.
Parameters
The erosion operation typically takes four parameters:
- src: The src parameter is the input image on which the erosion operation is applied. This image can be grayscale or color.
- dst: The dst parameter is the output image after the erosion operation is performed. This image has the same size and type as the input image.
- kernel: The kernel parameter is the structuring element used for the erosion operation. This structuring element is a binary image that defines the shape and size of the neighborhood around each pixel in the input image. The shape and size of the kernel determine the degree of erosion.
- iterations: The number of times the erosion operation is applied to the input image.
| Parameter | Description |
|---|---|
| src | Input image on which erosion operation is applied. |
| dst | Output image after erosion operation is performed. |
| kernel | Structuring element used for erosion operation. |
Example of Erosion Operation
Here's an example of how to perform an erosion operation on an input image using the OpenCV library in Python:
In this example, we read an input image and define a structuring element using a 5x5 matrix of ones. We then use the erode() function to perform erosion on the image with one iteration. Finally, we display the input and eroded images using the imshow() function.
The result is an image where the boundaries of objects in the original image are shrunk as shown below.
Output:
Output after erosion

Implementing Erosion and Dilation Using OpenCV
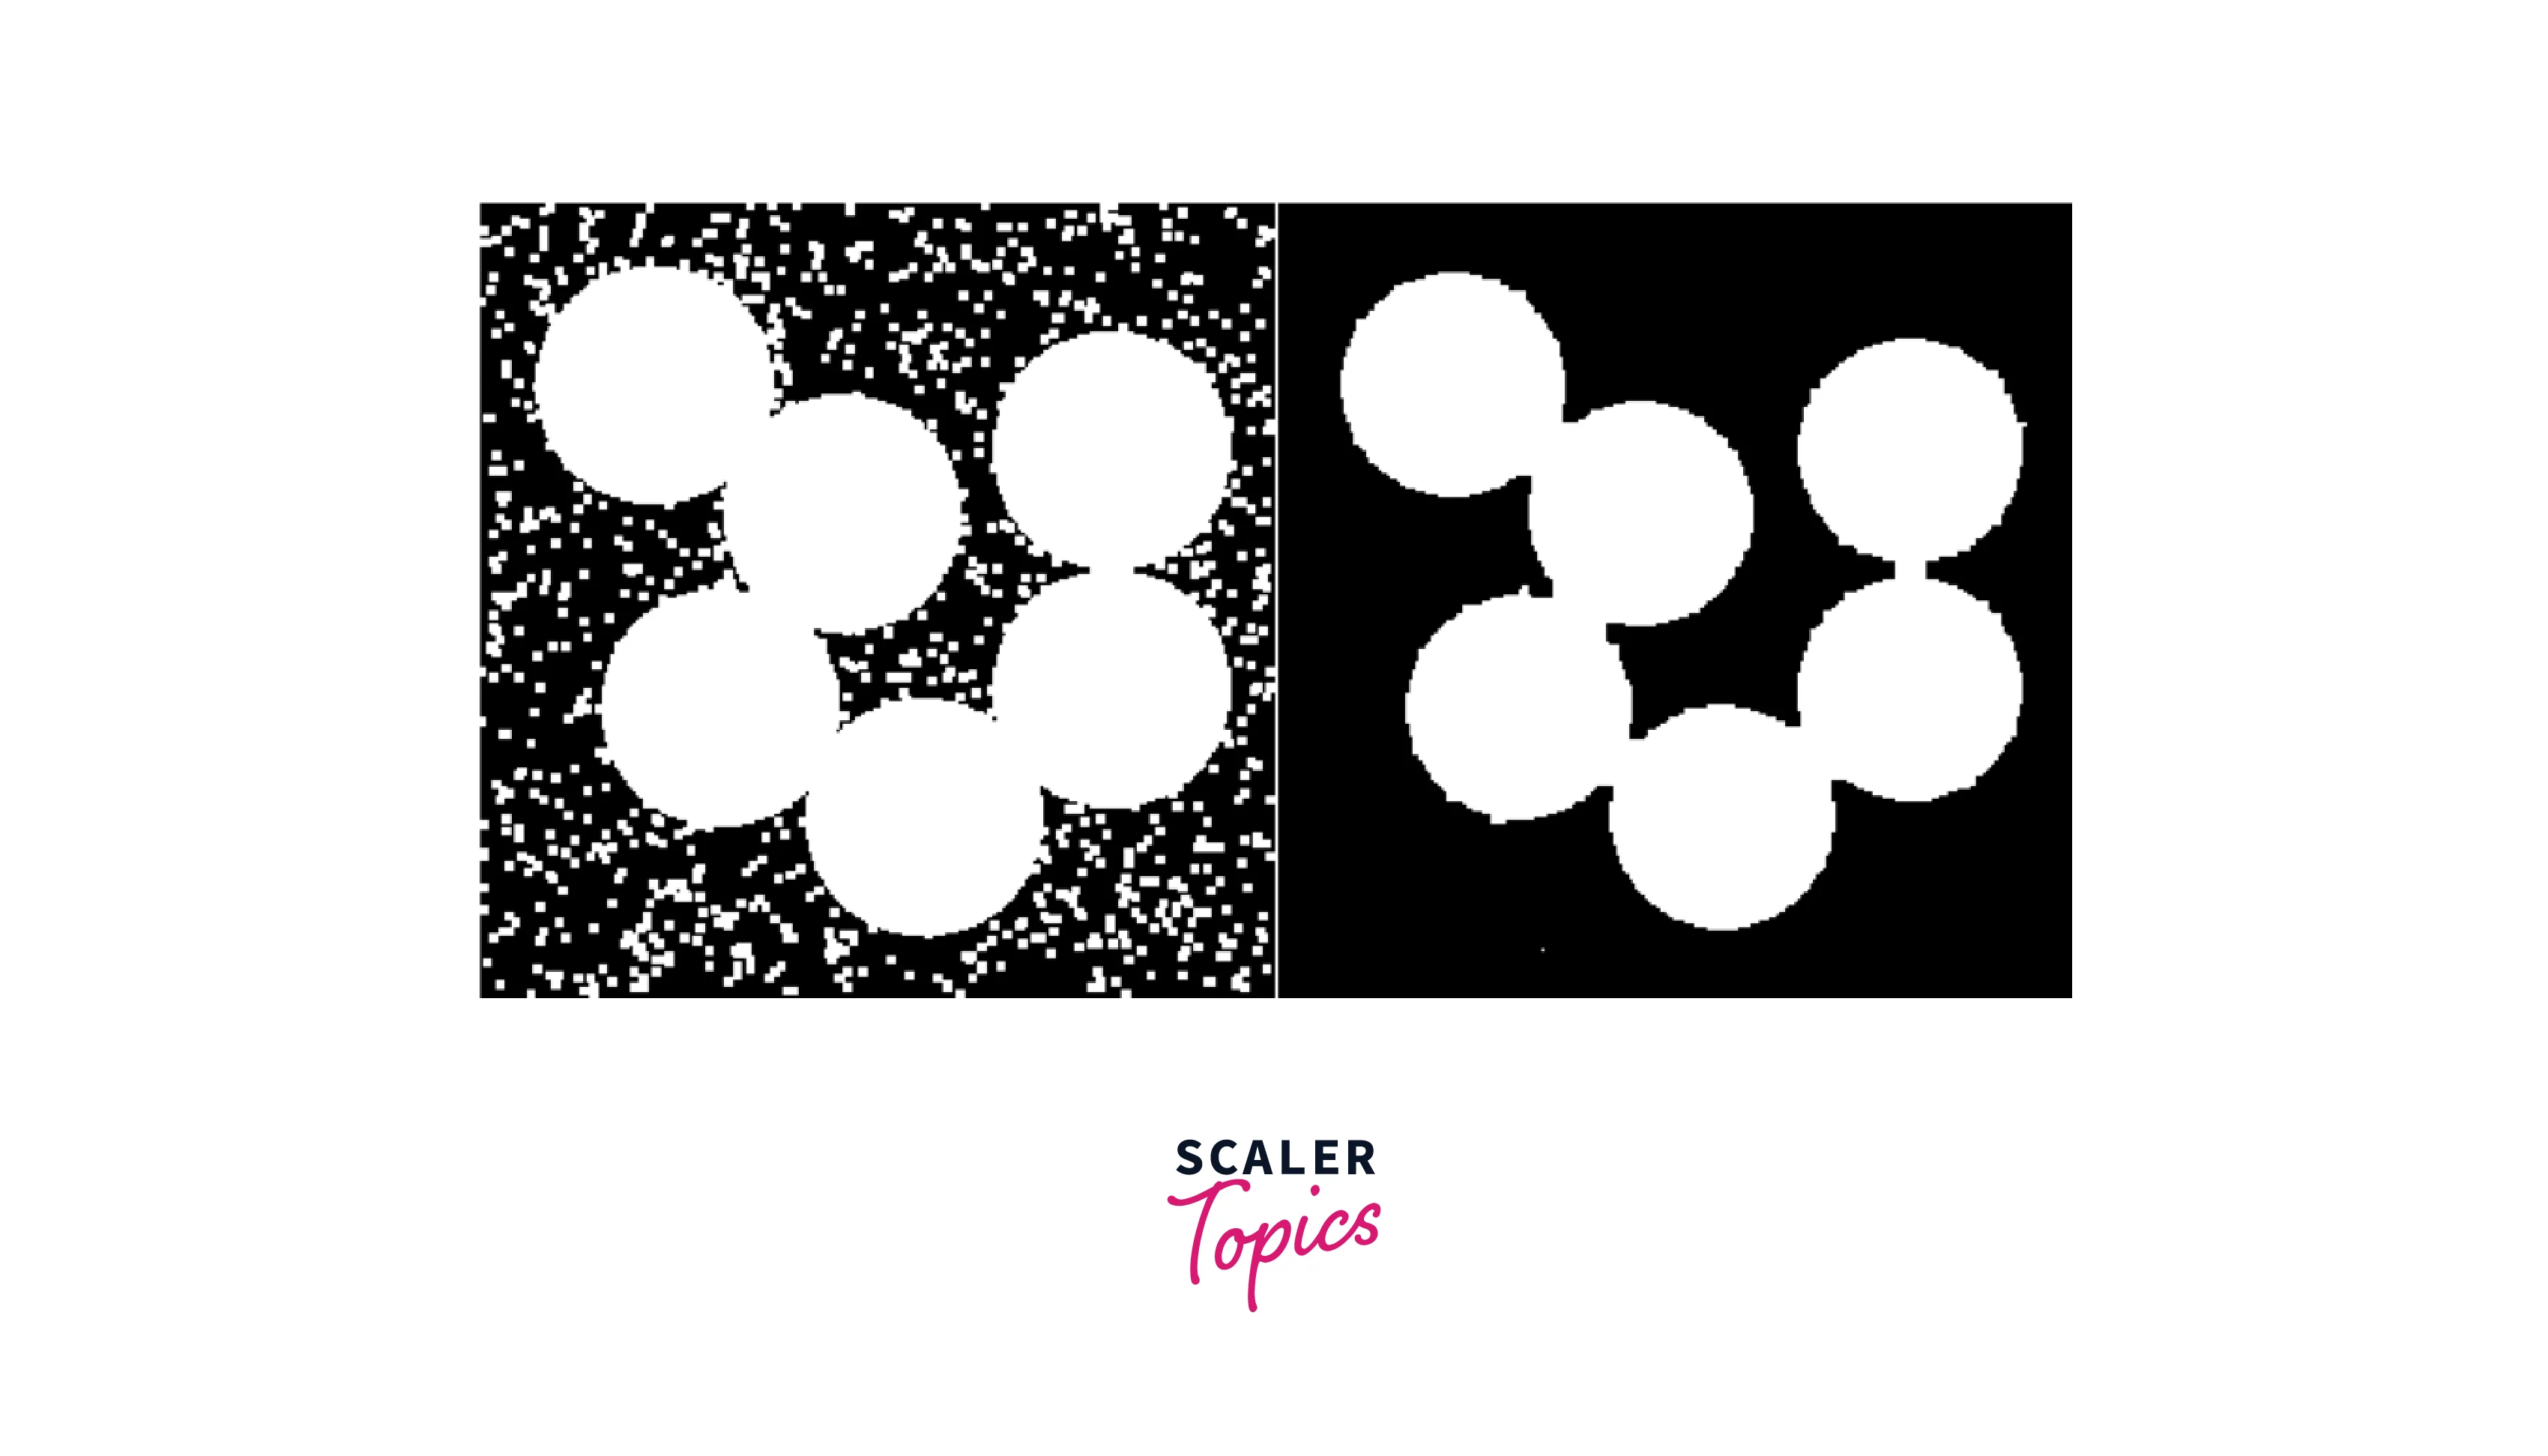
This section demonstrates how to implement erosion and dilation in image processing to process images and manipulate their pixel values. These operations are fundamental in image processing and can be used to perform various tasks such as removing noise, filling gaps, and enhancing image features.
Turn Learning into Career Growth
Implementing Erosion Using OpenCV
In this tutorial, we will demonstrate how to perform erosion using OpenCV, a popular open-source computer vision library.
Step 1: Import necessary libraries
The first step is to import the necessary libraries, which include NumPy and OpenCV. NumPy is a popular library for numerical computing in Python, while OpenCV is a library for computer vision tasks such as image processing and object detection.
Step 2: Load the input image
Next, we load the input image using the cv2.imread() function. In this example, we will use a simple input image.
Here, we specify the second argument as 0 to load the image as a grayscale image. This is because erosion is a morphological operation that is typically performed on binary or grayscale images.
Step 3: Define the kernel for erosion
The next step is to define the kernel that will be used for erosion. A kernel is a matrix that is used to perform operations on an image. In erosion, the kernel is typically a small matrix with a square or circular shape.
Here, we define a 3x3 matrix of ones using the np.ones() function, which will be used as the kernel for erosion.
Step 4: Perform erosion
Now, we can perform erosion using the cv2.erode() function. This function takes two arguments: the input image and the kernel that will be used for erosion.
Here, we specify the number of iterations as 1, which determines the extent of erosion. Higher values of iterations will result in a greater erosion of the image.
Step 5: Display the output image
Finally, we can display the output image using the cv2.imshow() function. This function takes two arguments: the window name and the image to be displayed.
Here, we use the cv2.waitKey() function to wait for a key press before closing the window. This is necessary because OpenCV will not display the image until a key is pressed.
Output
Below are the output images for the above implementation of erosion in image processing using OpenCV.
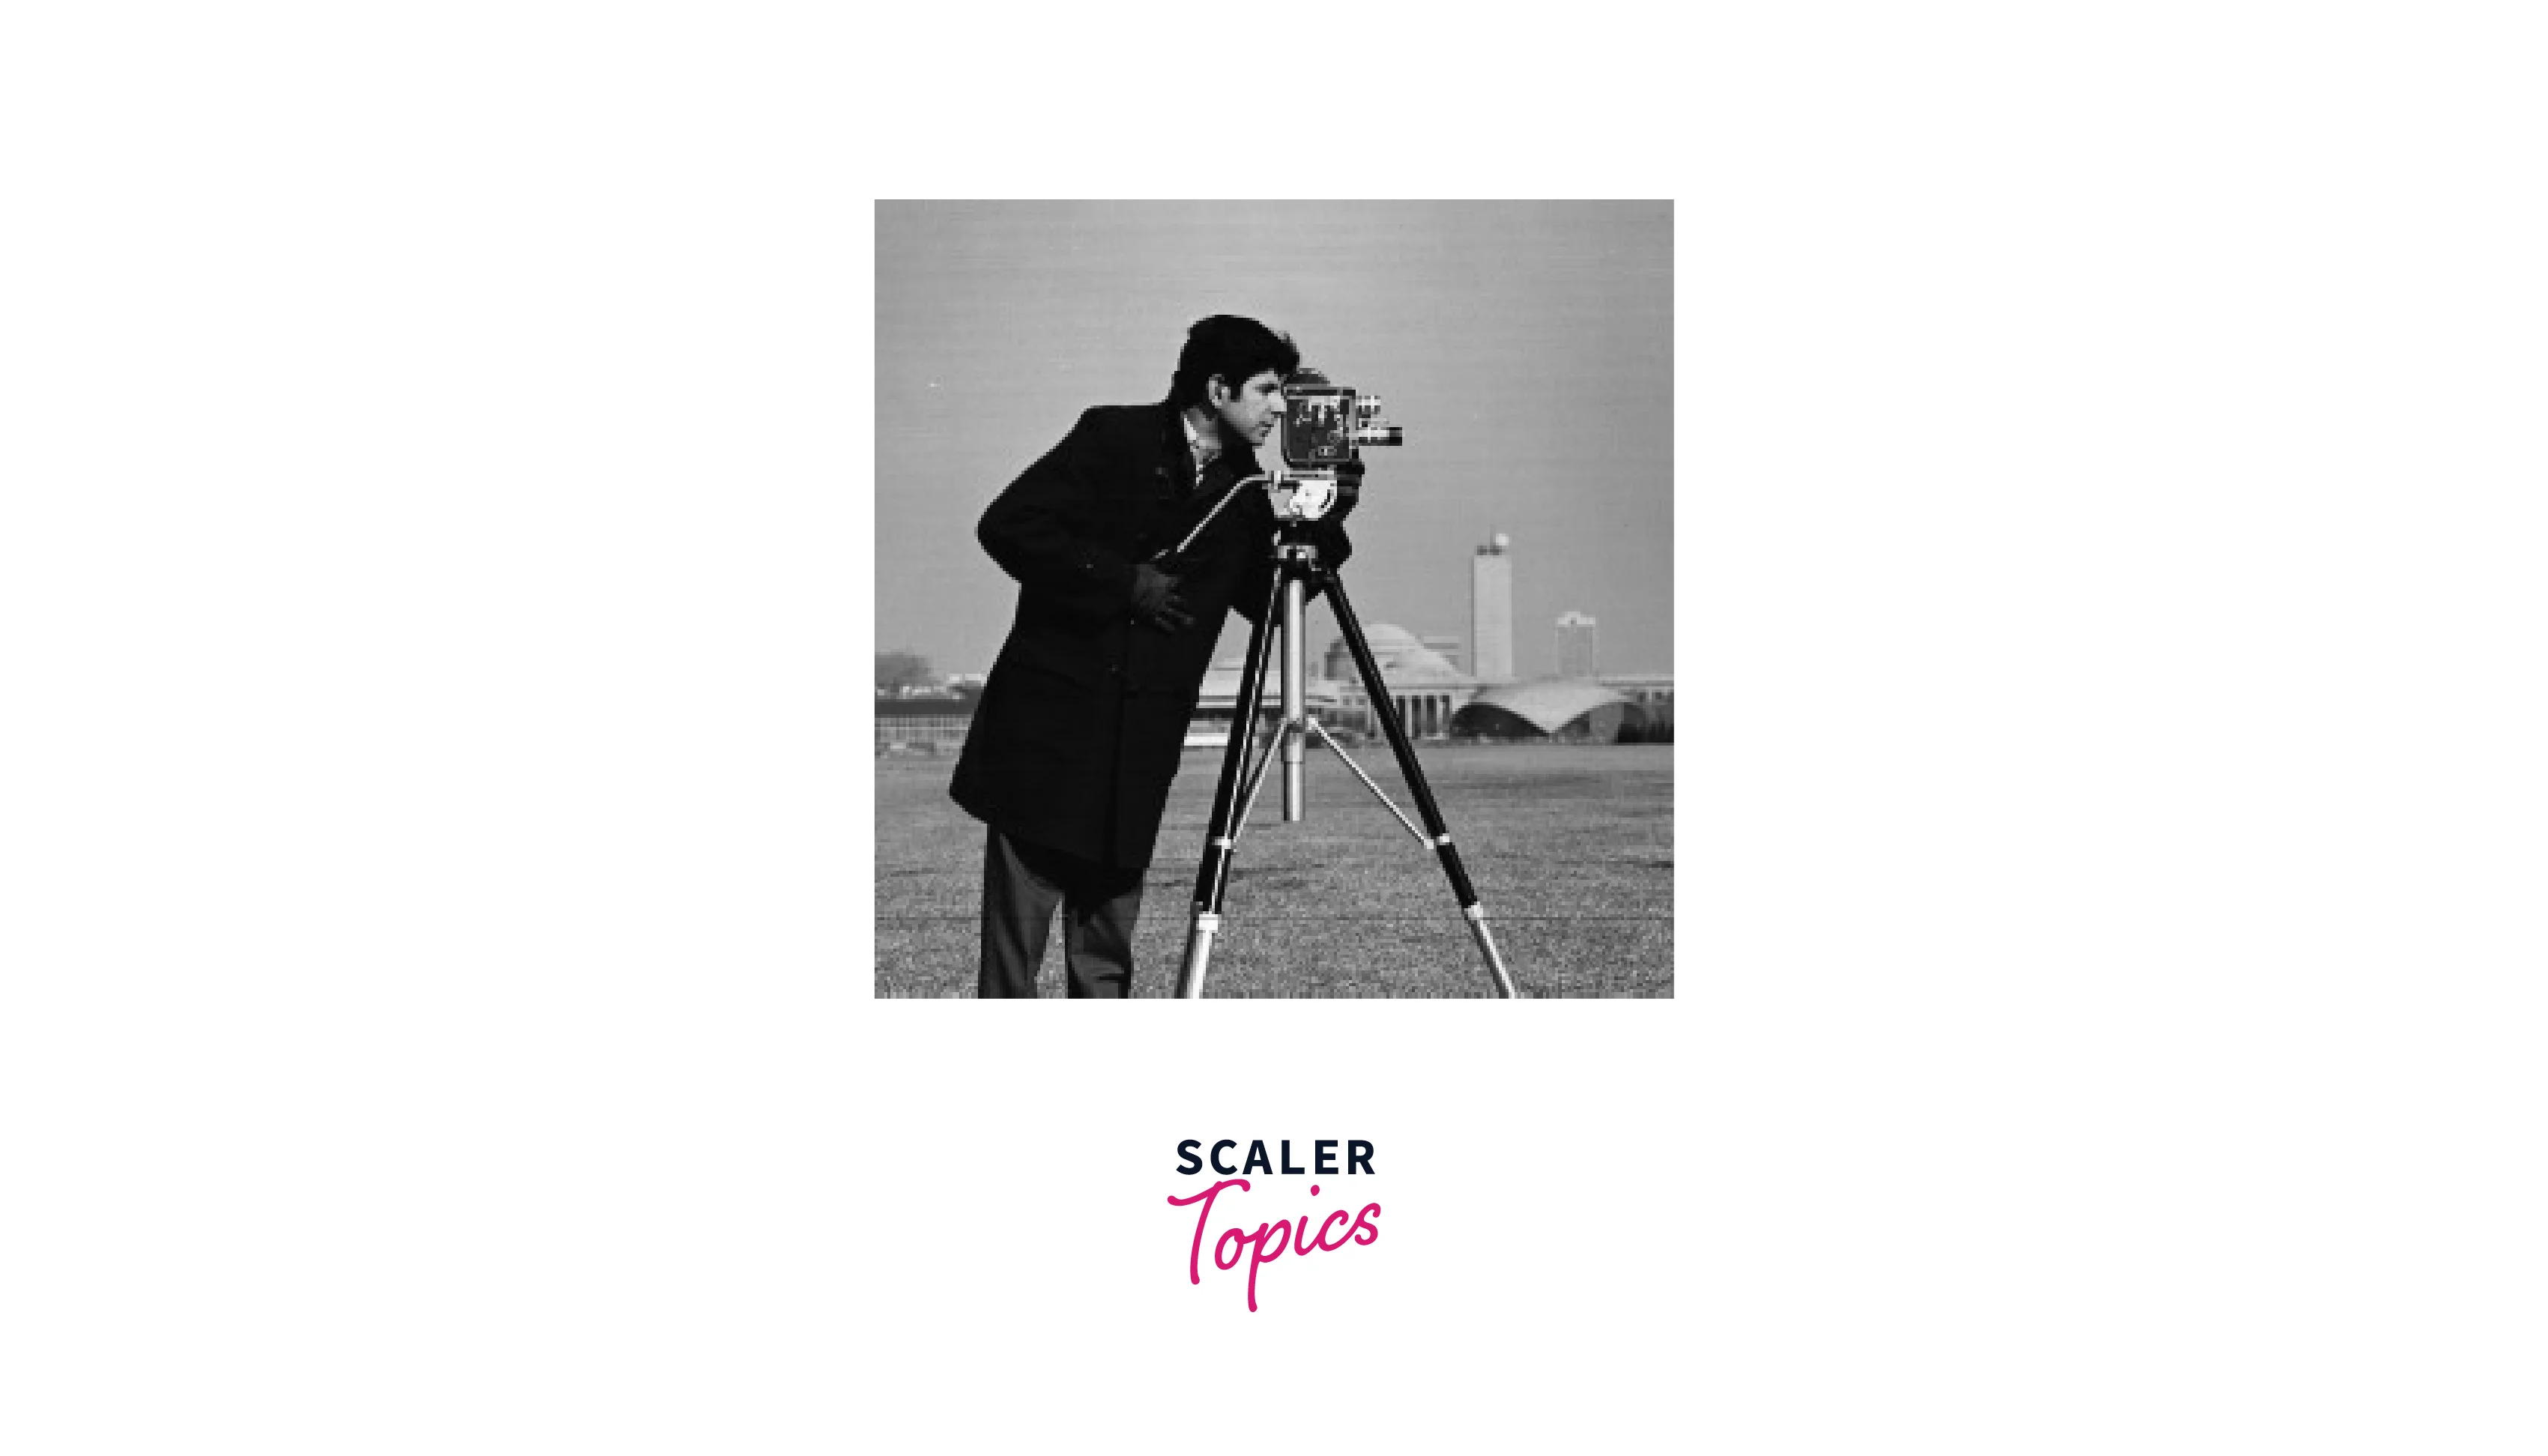
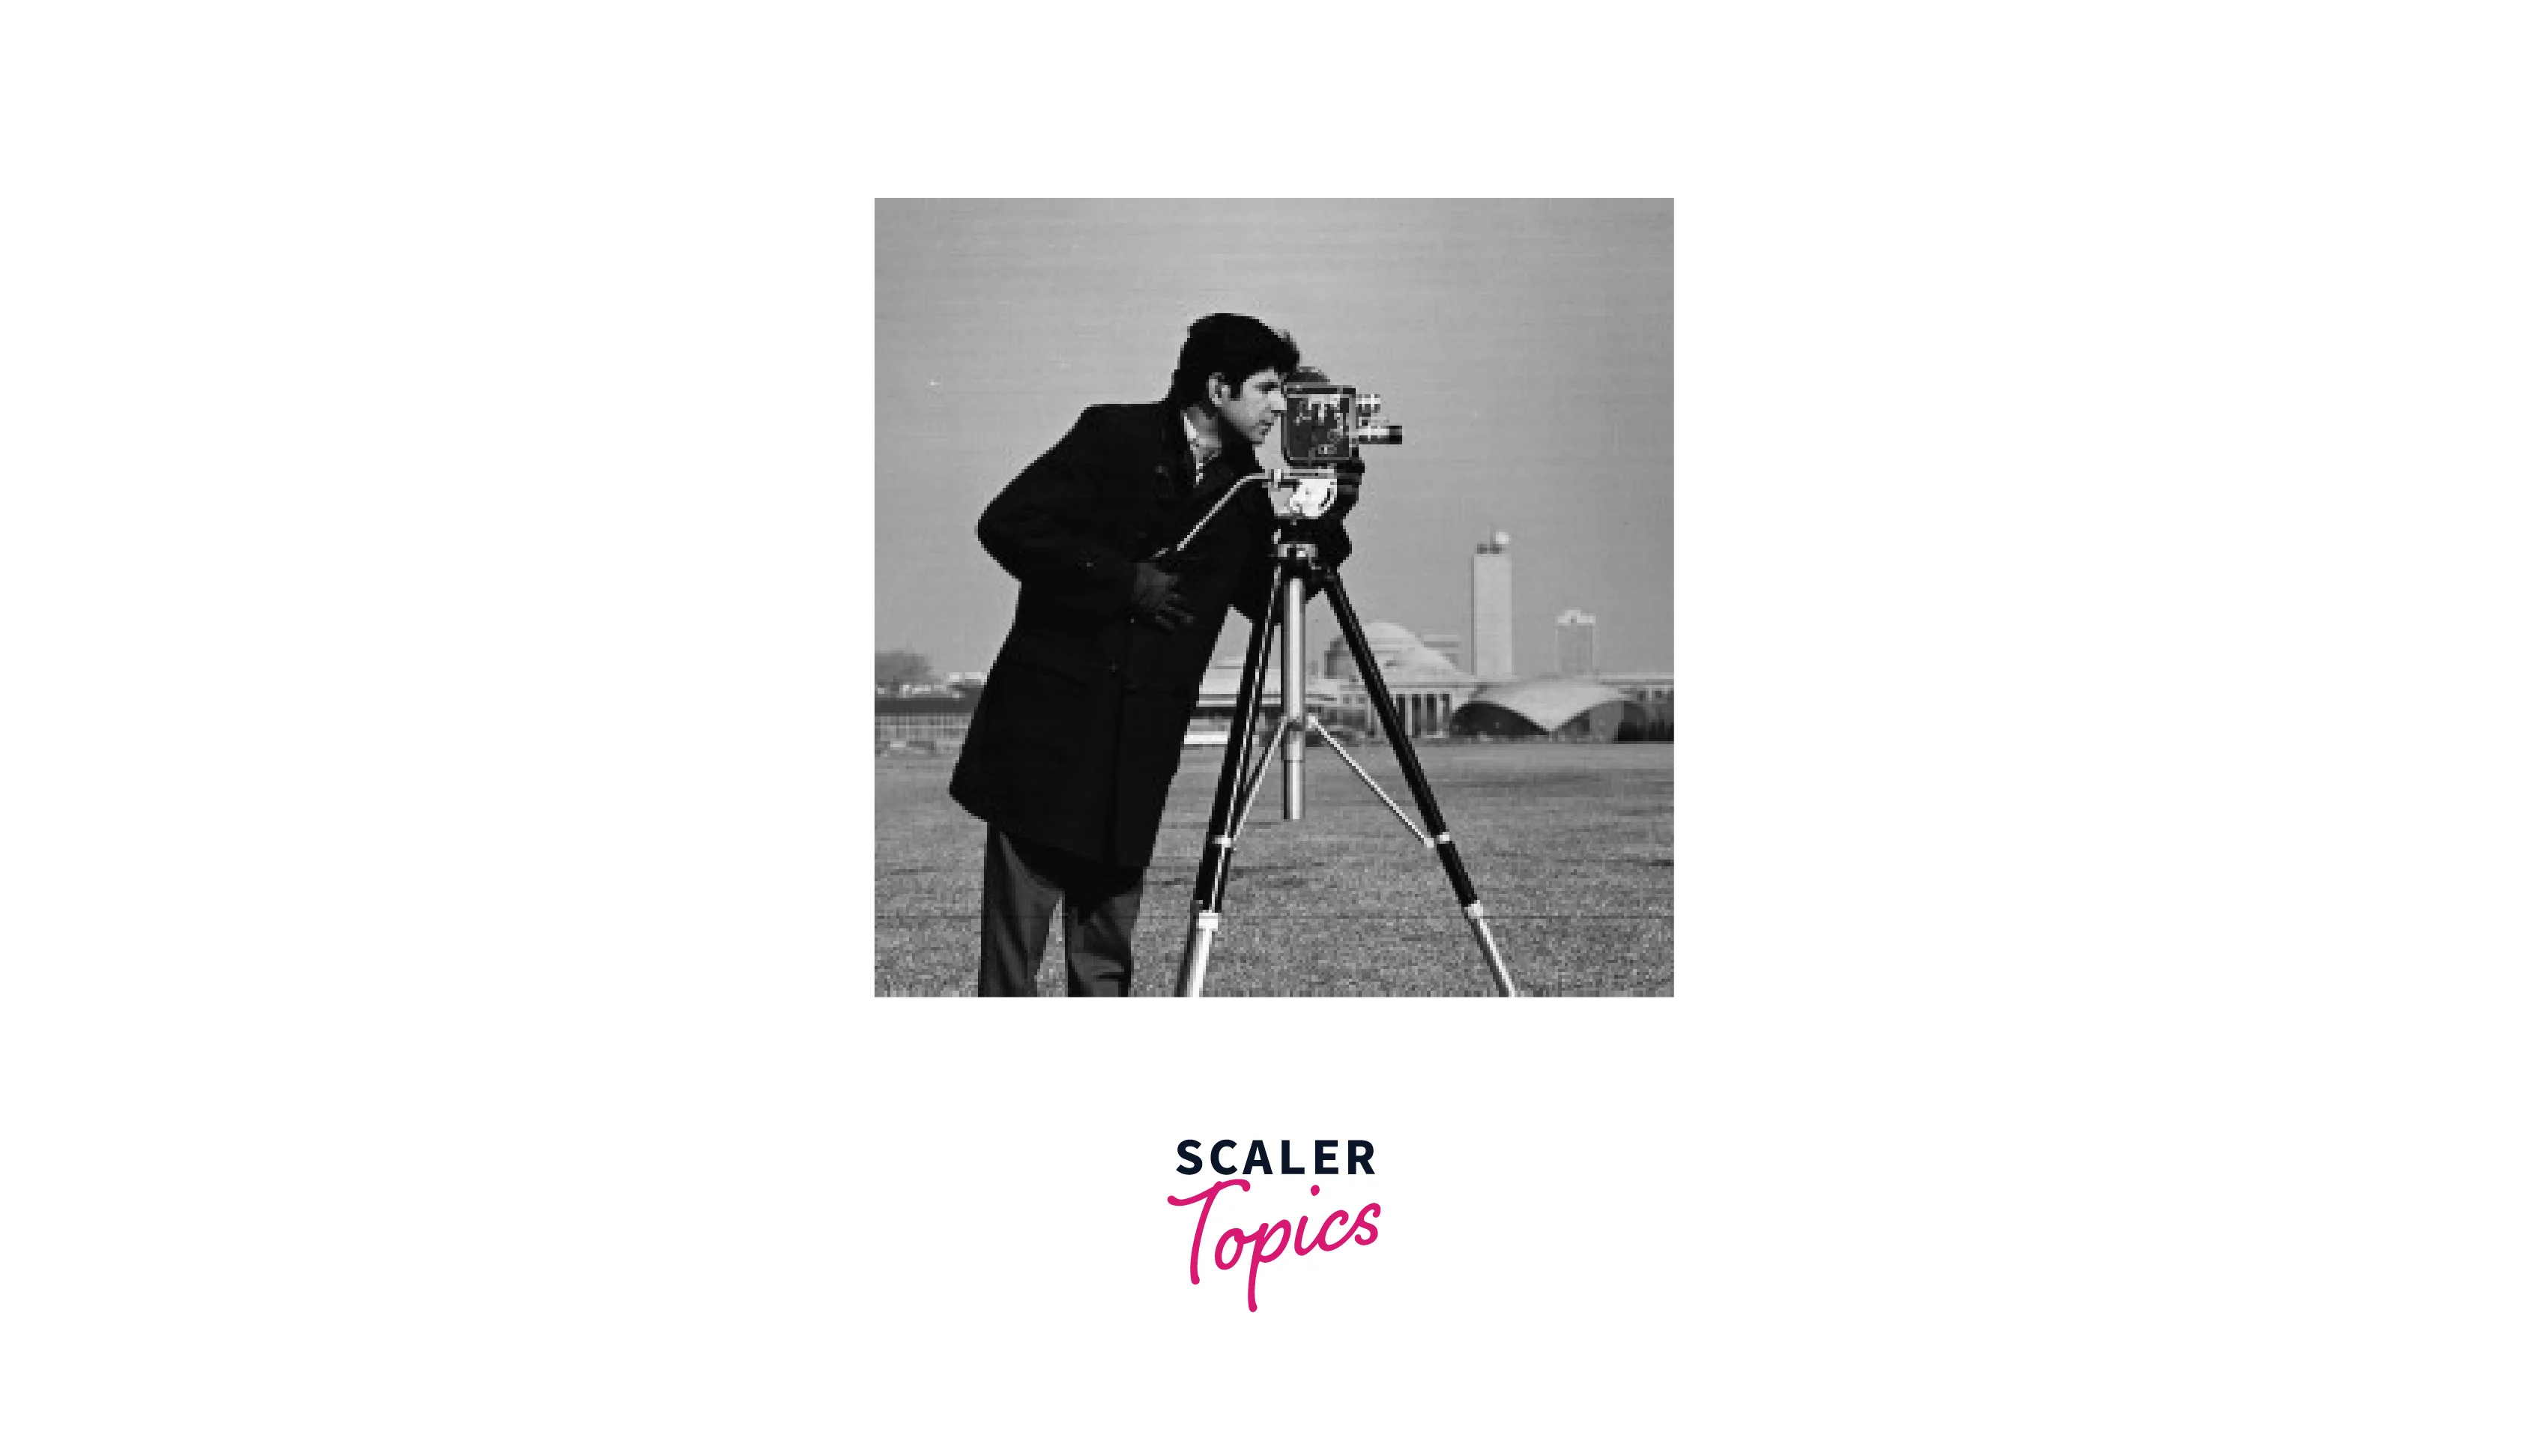
Input Image

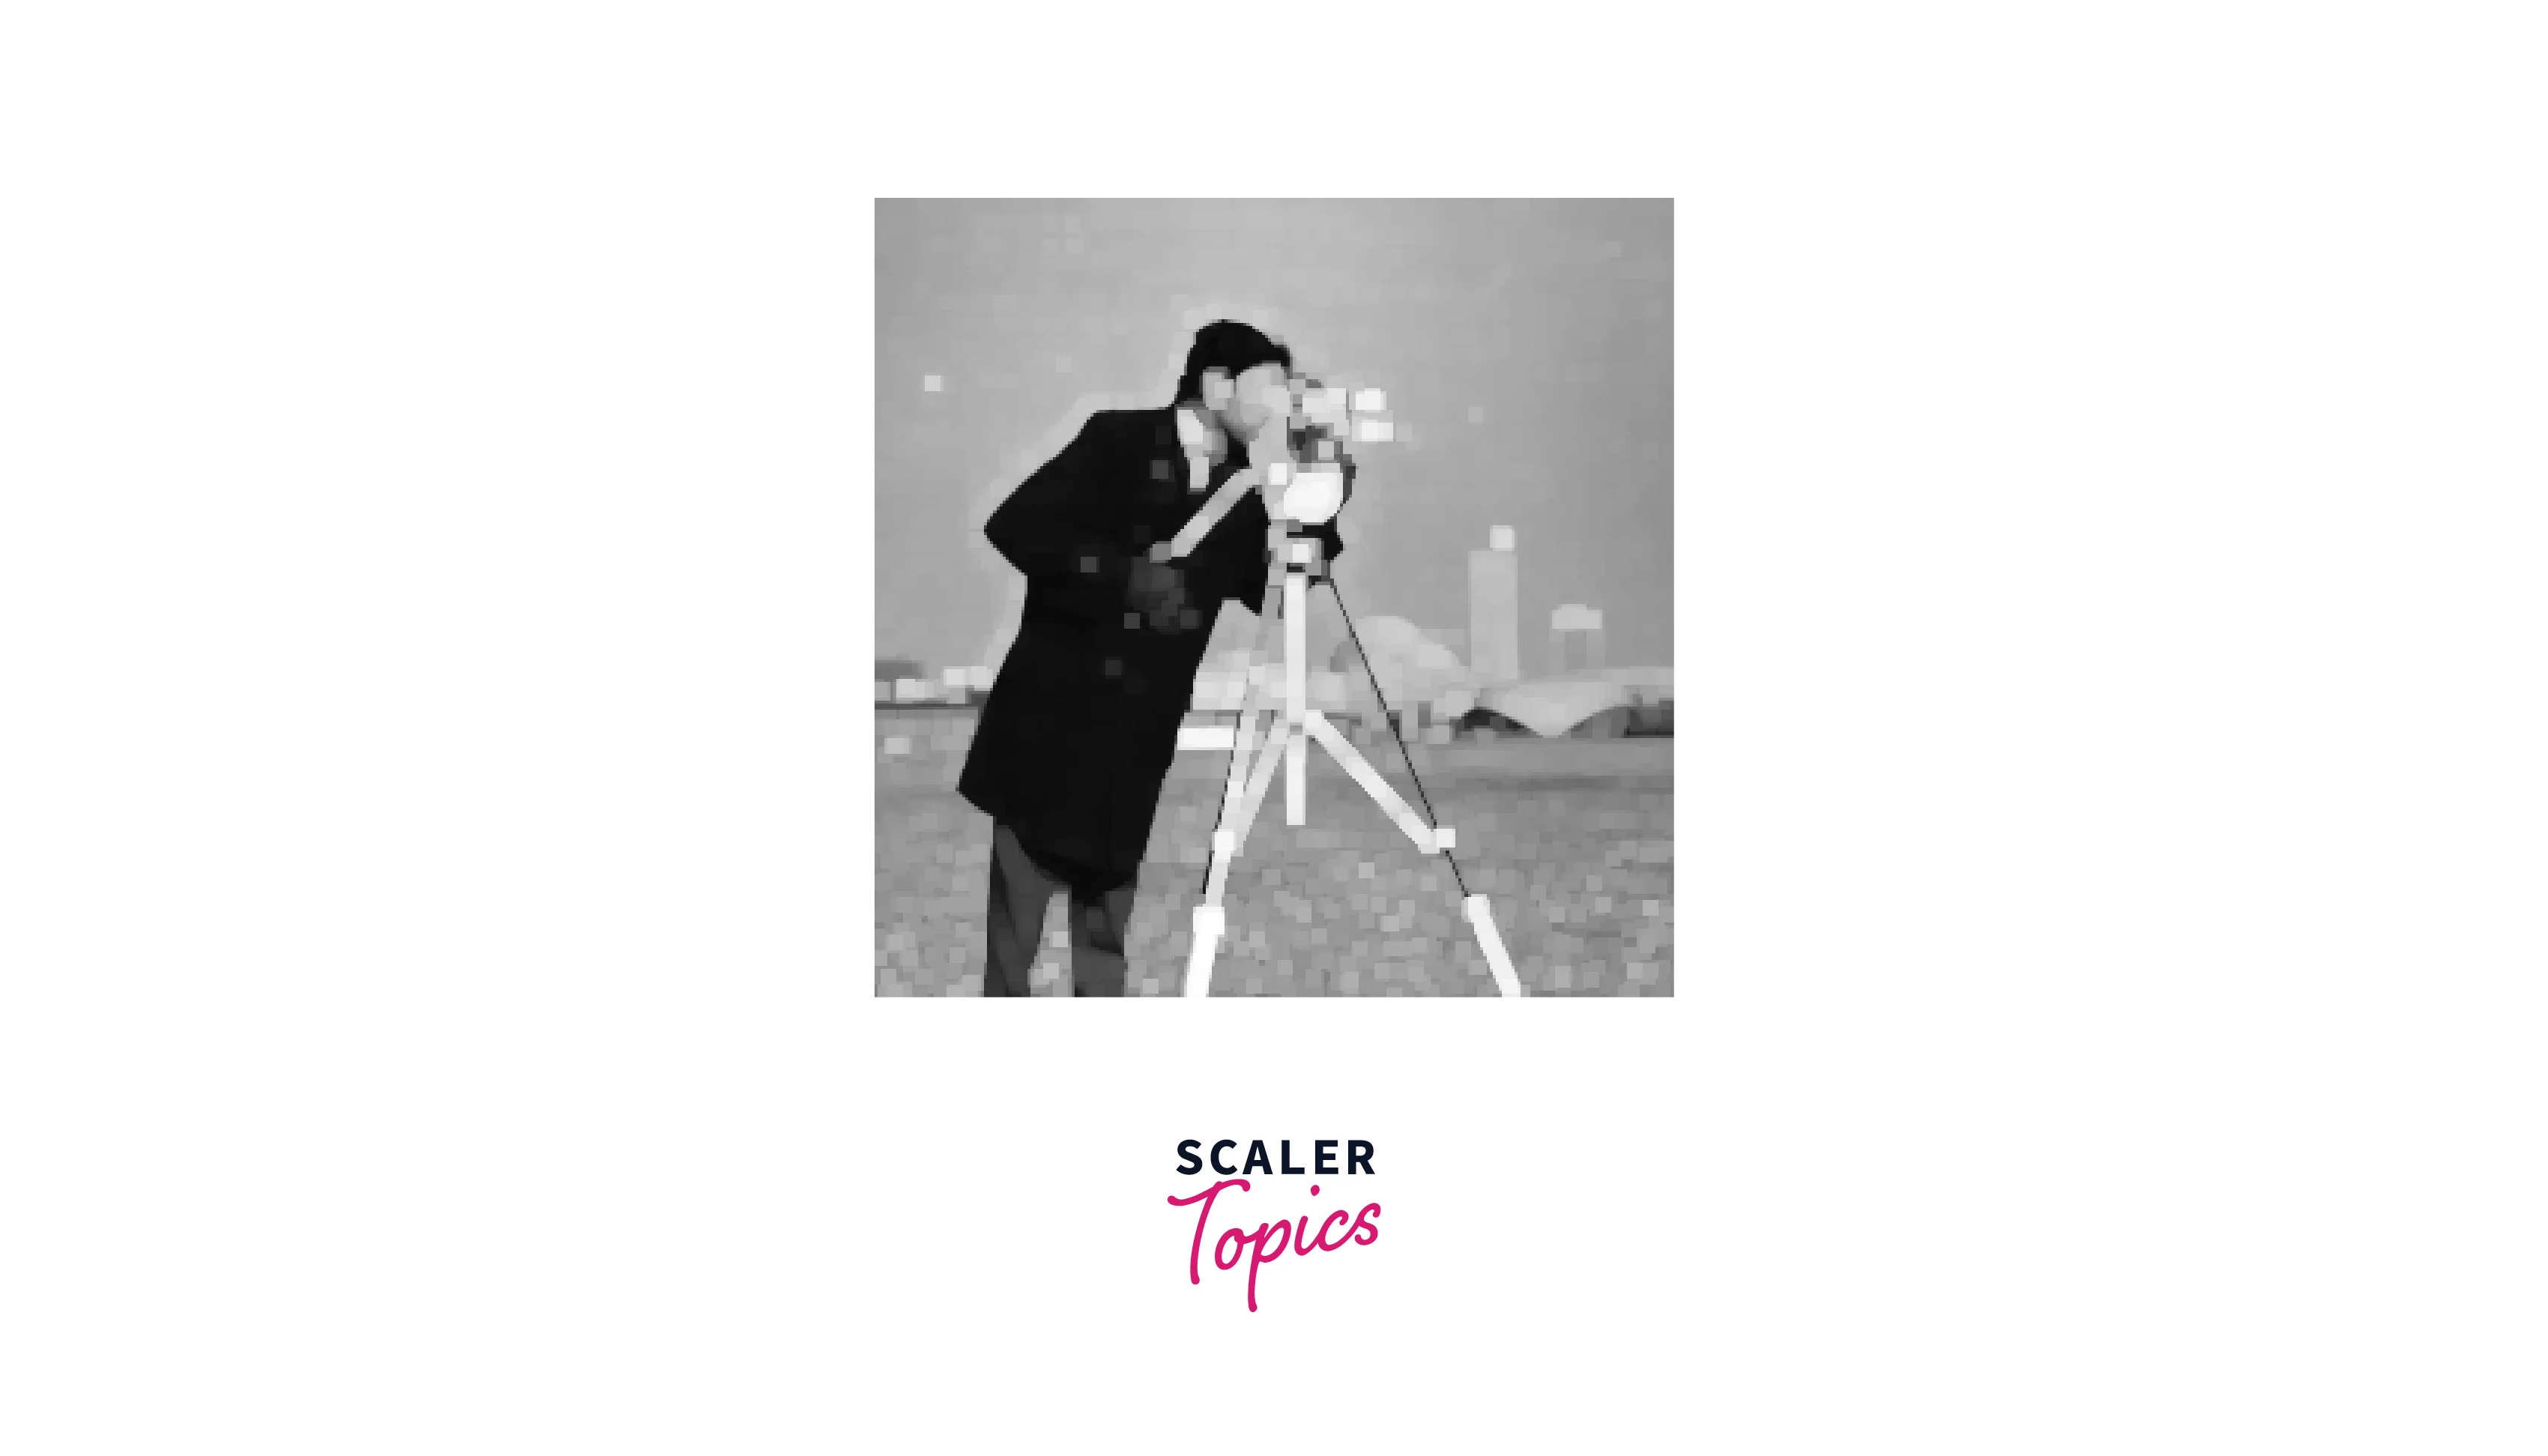
Output Image
After Erosion
Implementing Dilation Using OpenCV
Now, let us the process of implementing dilation using opencv through a step-by-step tutorial.
Step 1: Import the required libraries:
Importing the necessary libraries, such as NumPy and OpenCV, is the initial step. Popular Python libraries for numerical computation include NumPy and OpenCV, which are used for computer vision tasks like object recognition and picture processing.
Step 2: Load the input image:
Next, we use the cv2.imread() function to load the input image. Here, we'll utilize a simple input image.
Step 3: Define the structuring element:
Here, we have defined a 5x5 rectangular structuring element using the NumPy library.
Step 4: Perform dilation using the cv2.dilate() function:
The cv2.dilate() function takes three inputs: the input image, the structuring element, and the number of times the dilation is performed (iterations).
Step 5: Display the output image:
Finally, we can use the cv2.imshow() function to display the output image. The window name and the image to be shown are the two inputs for this function.
Ouptut
Below are the output images for the above implementation of dilation in image processing using OpenCV.
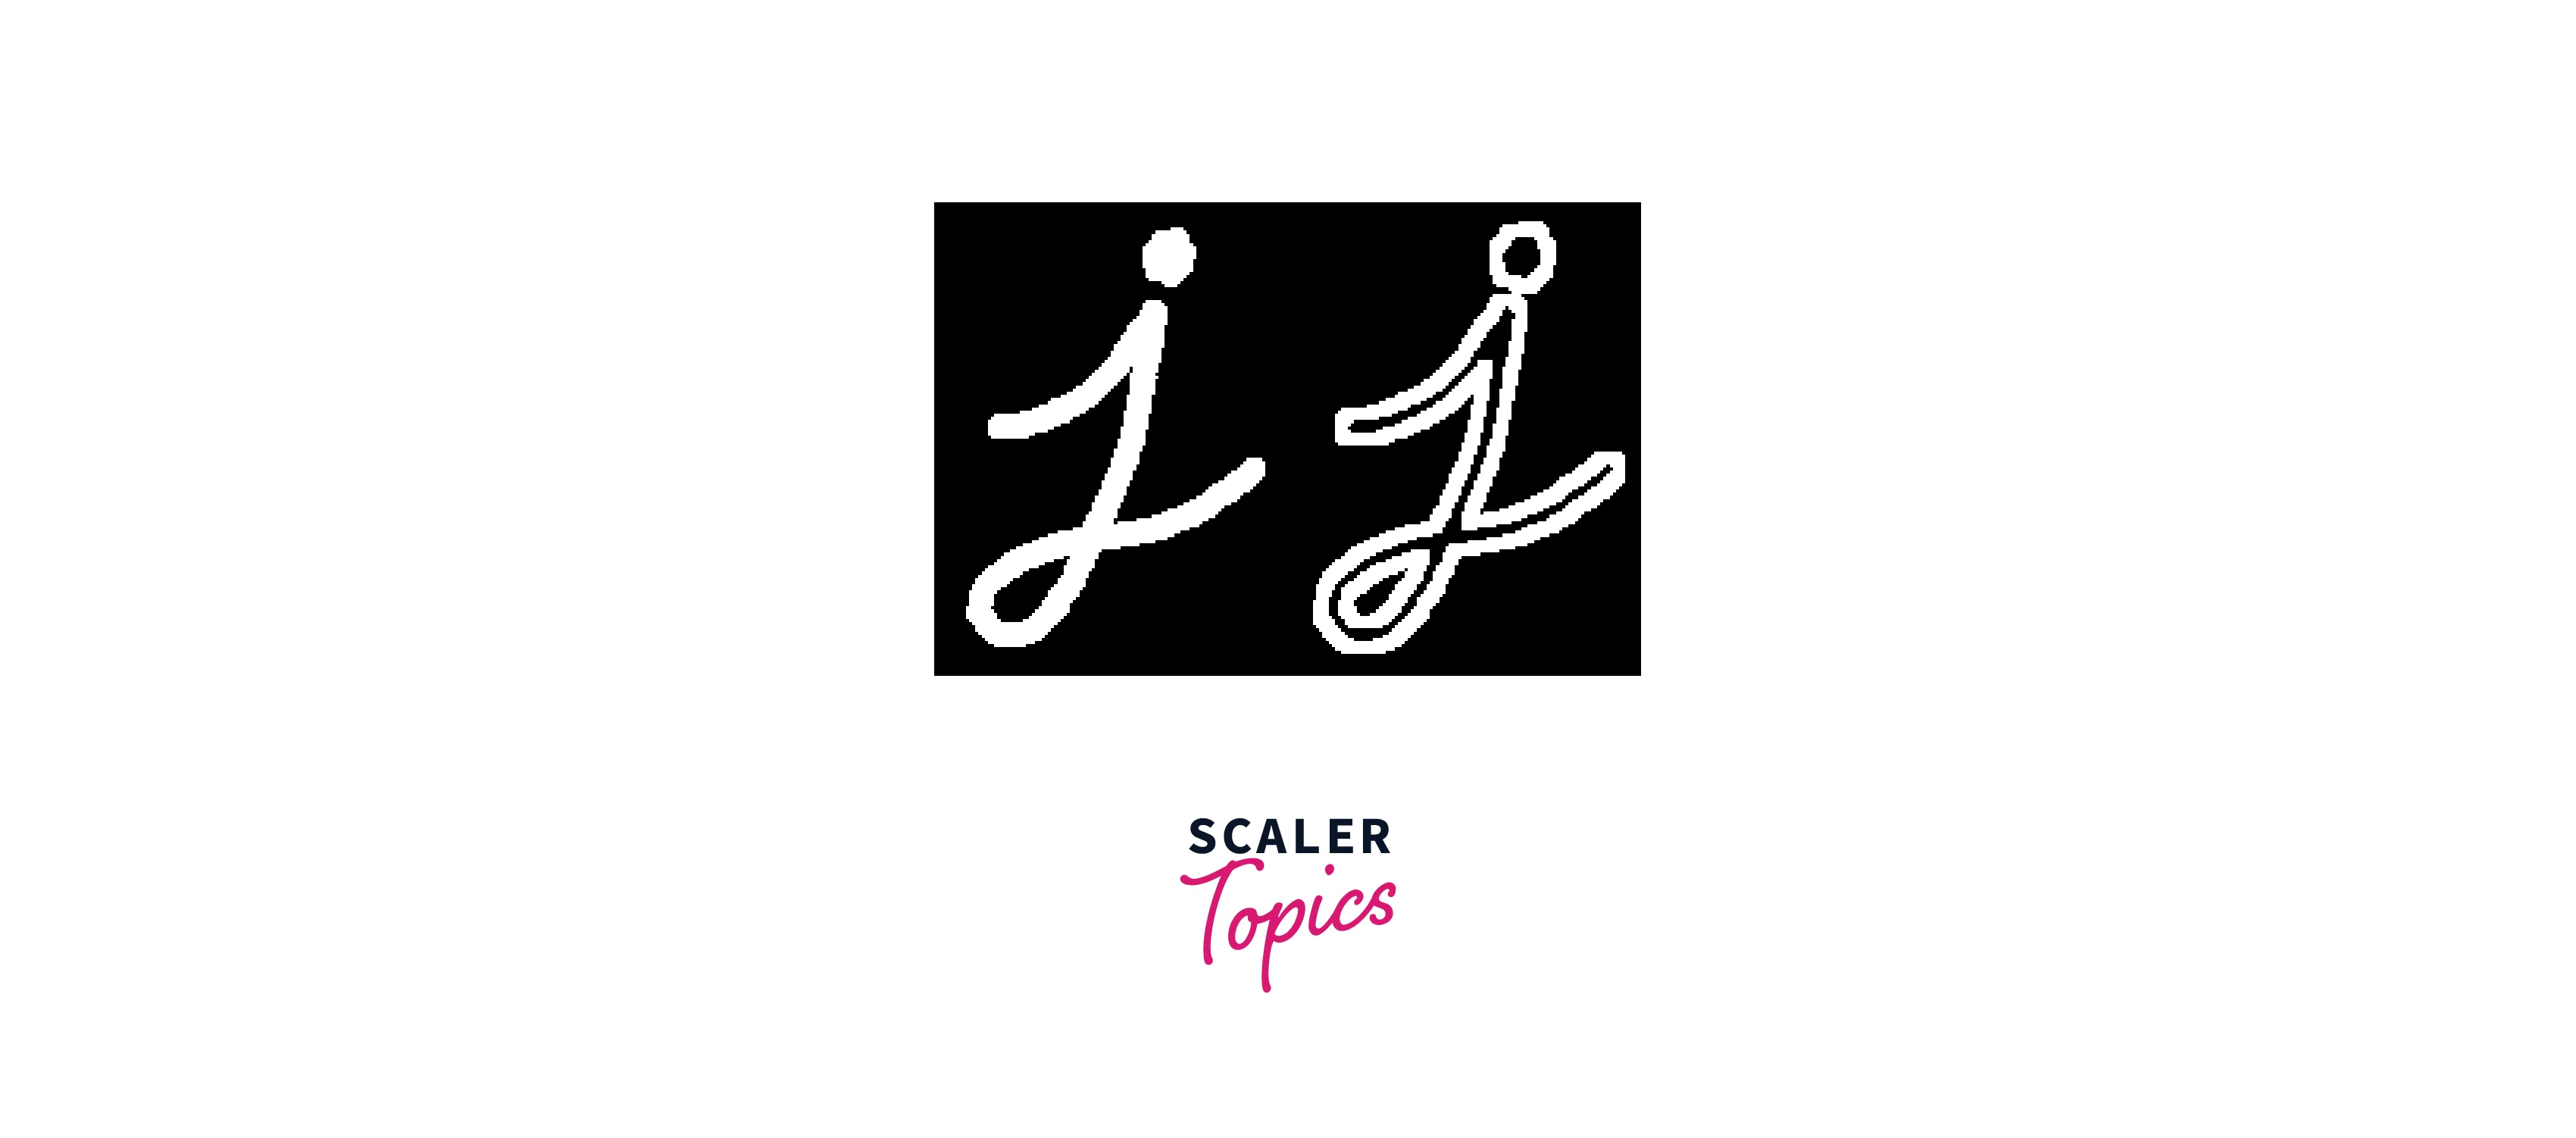
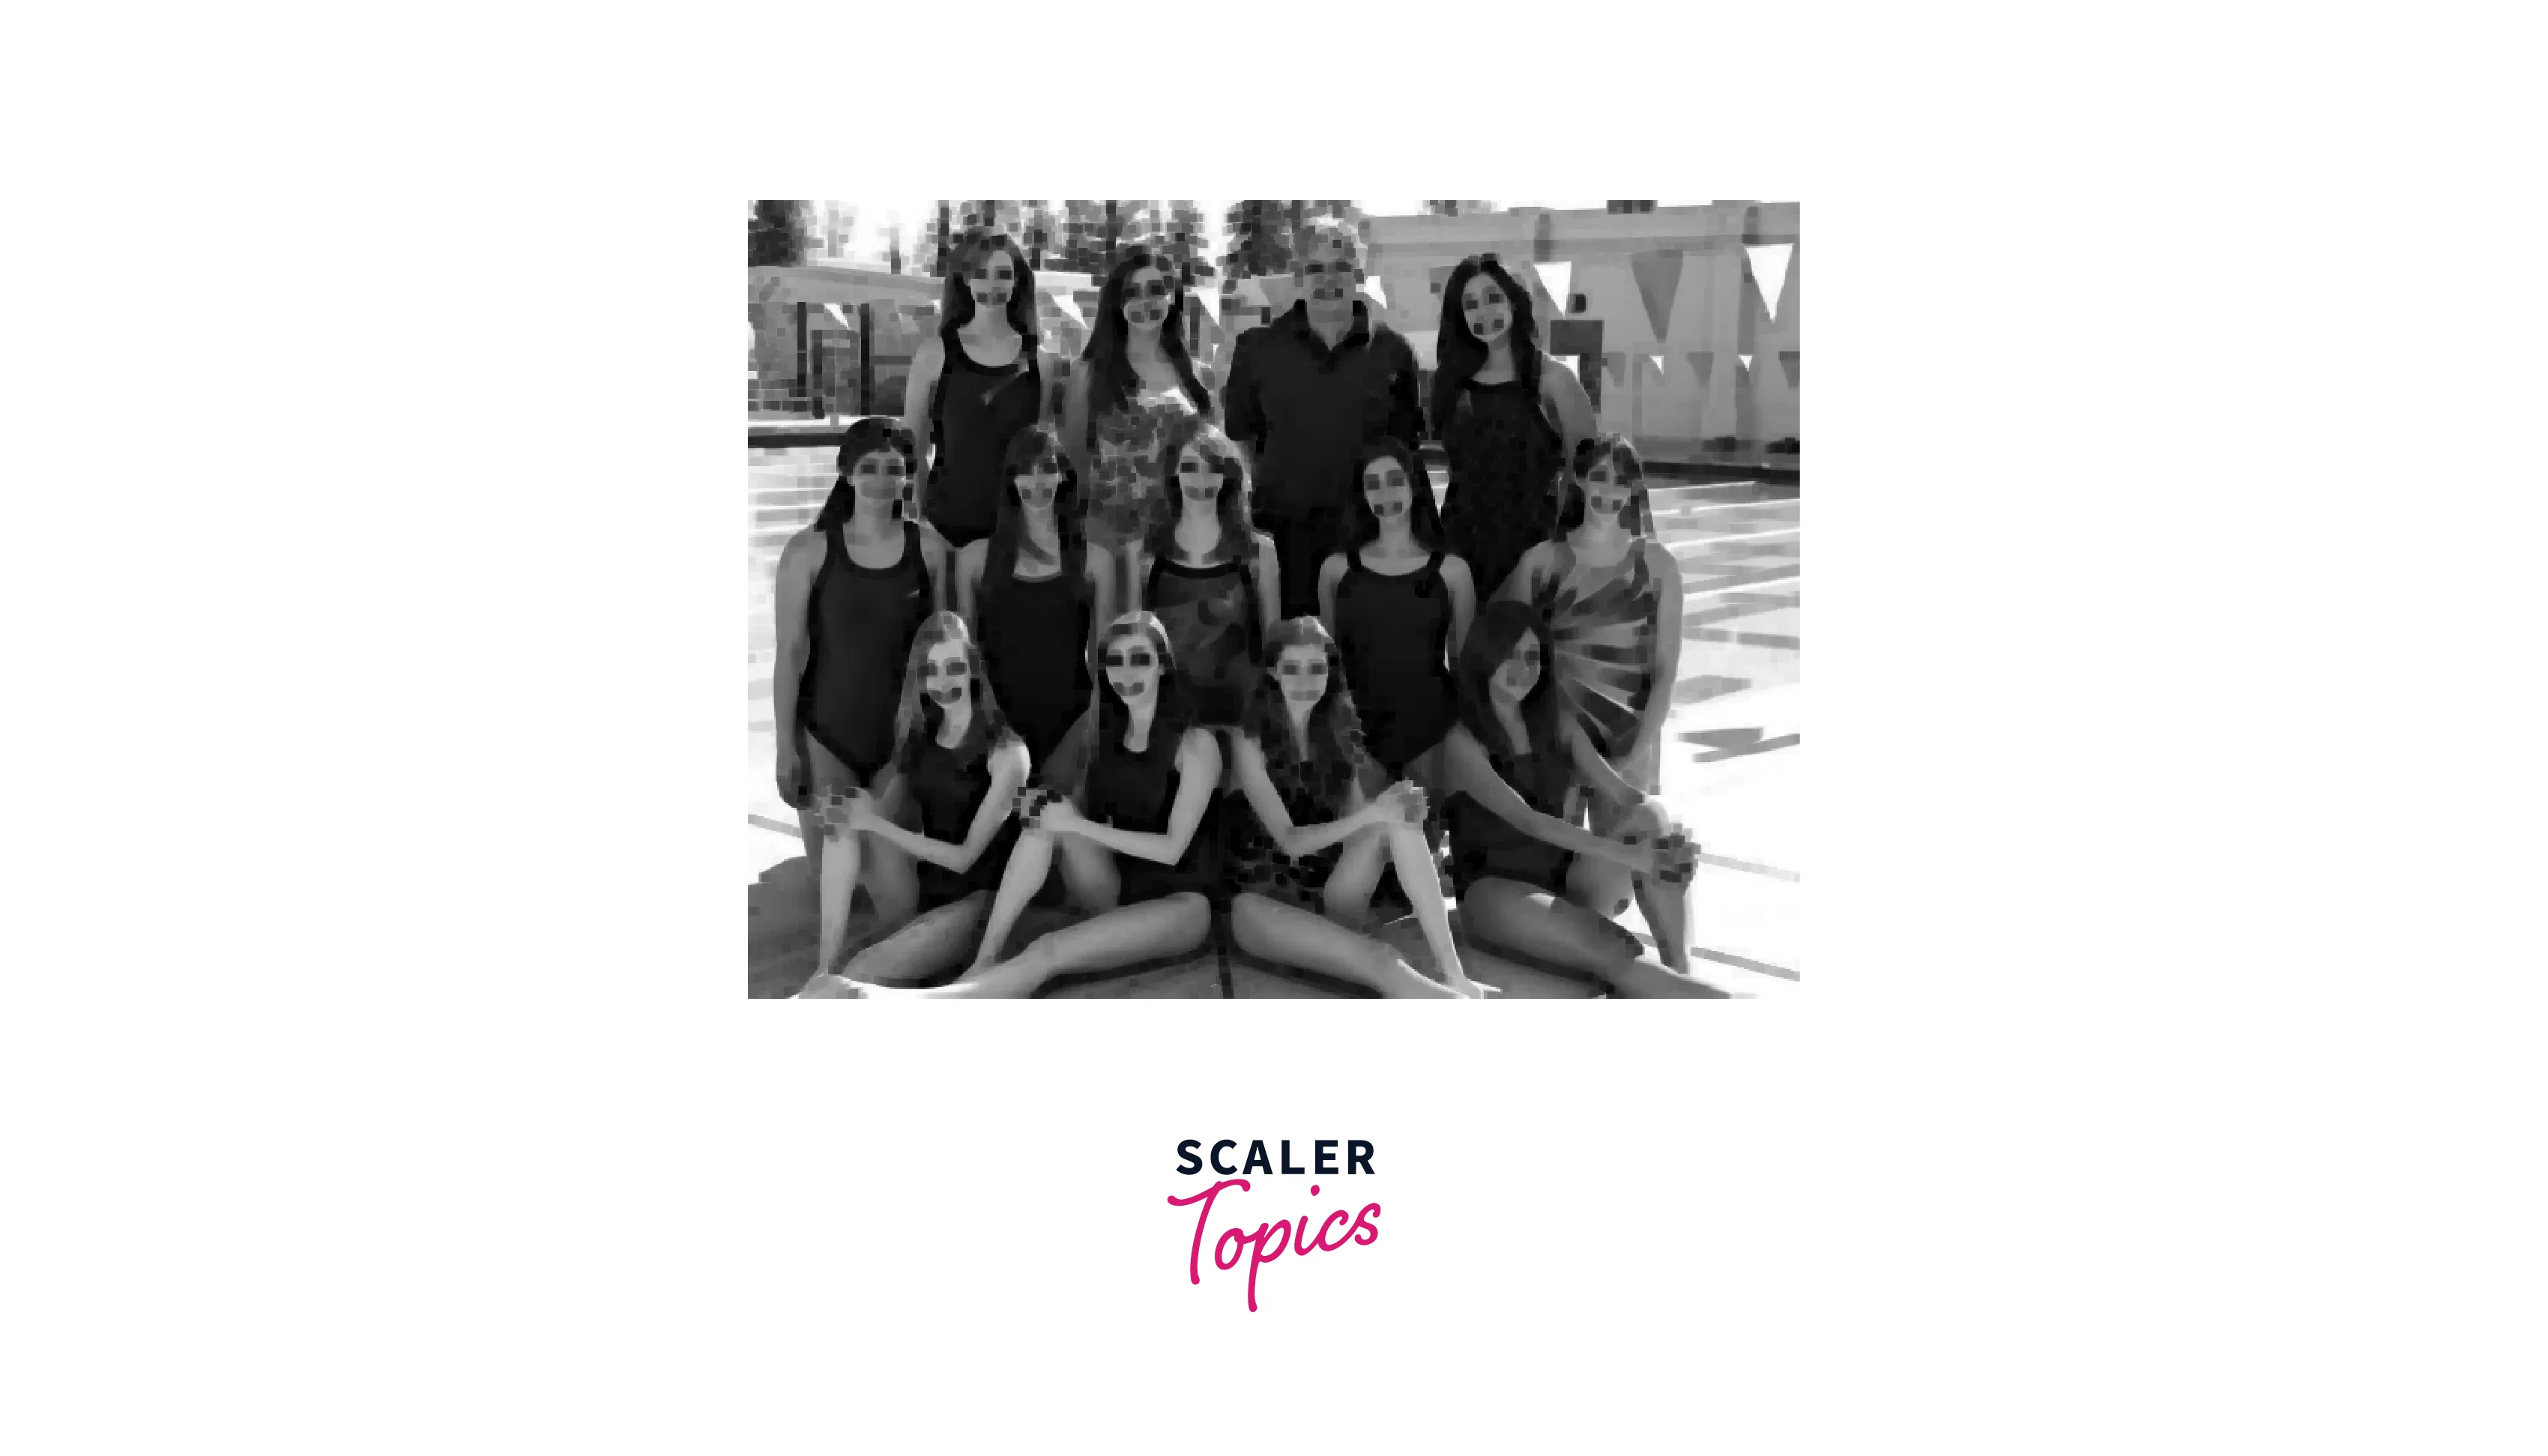
Original Image
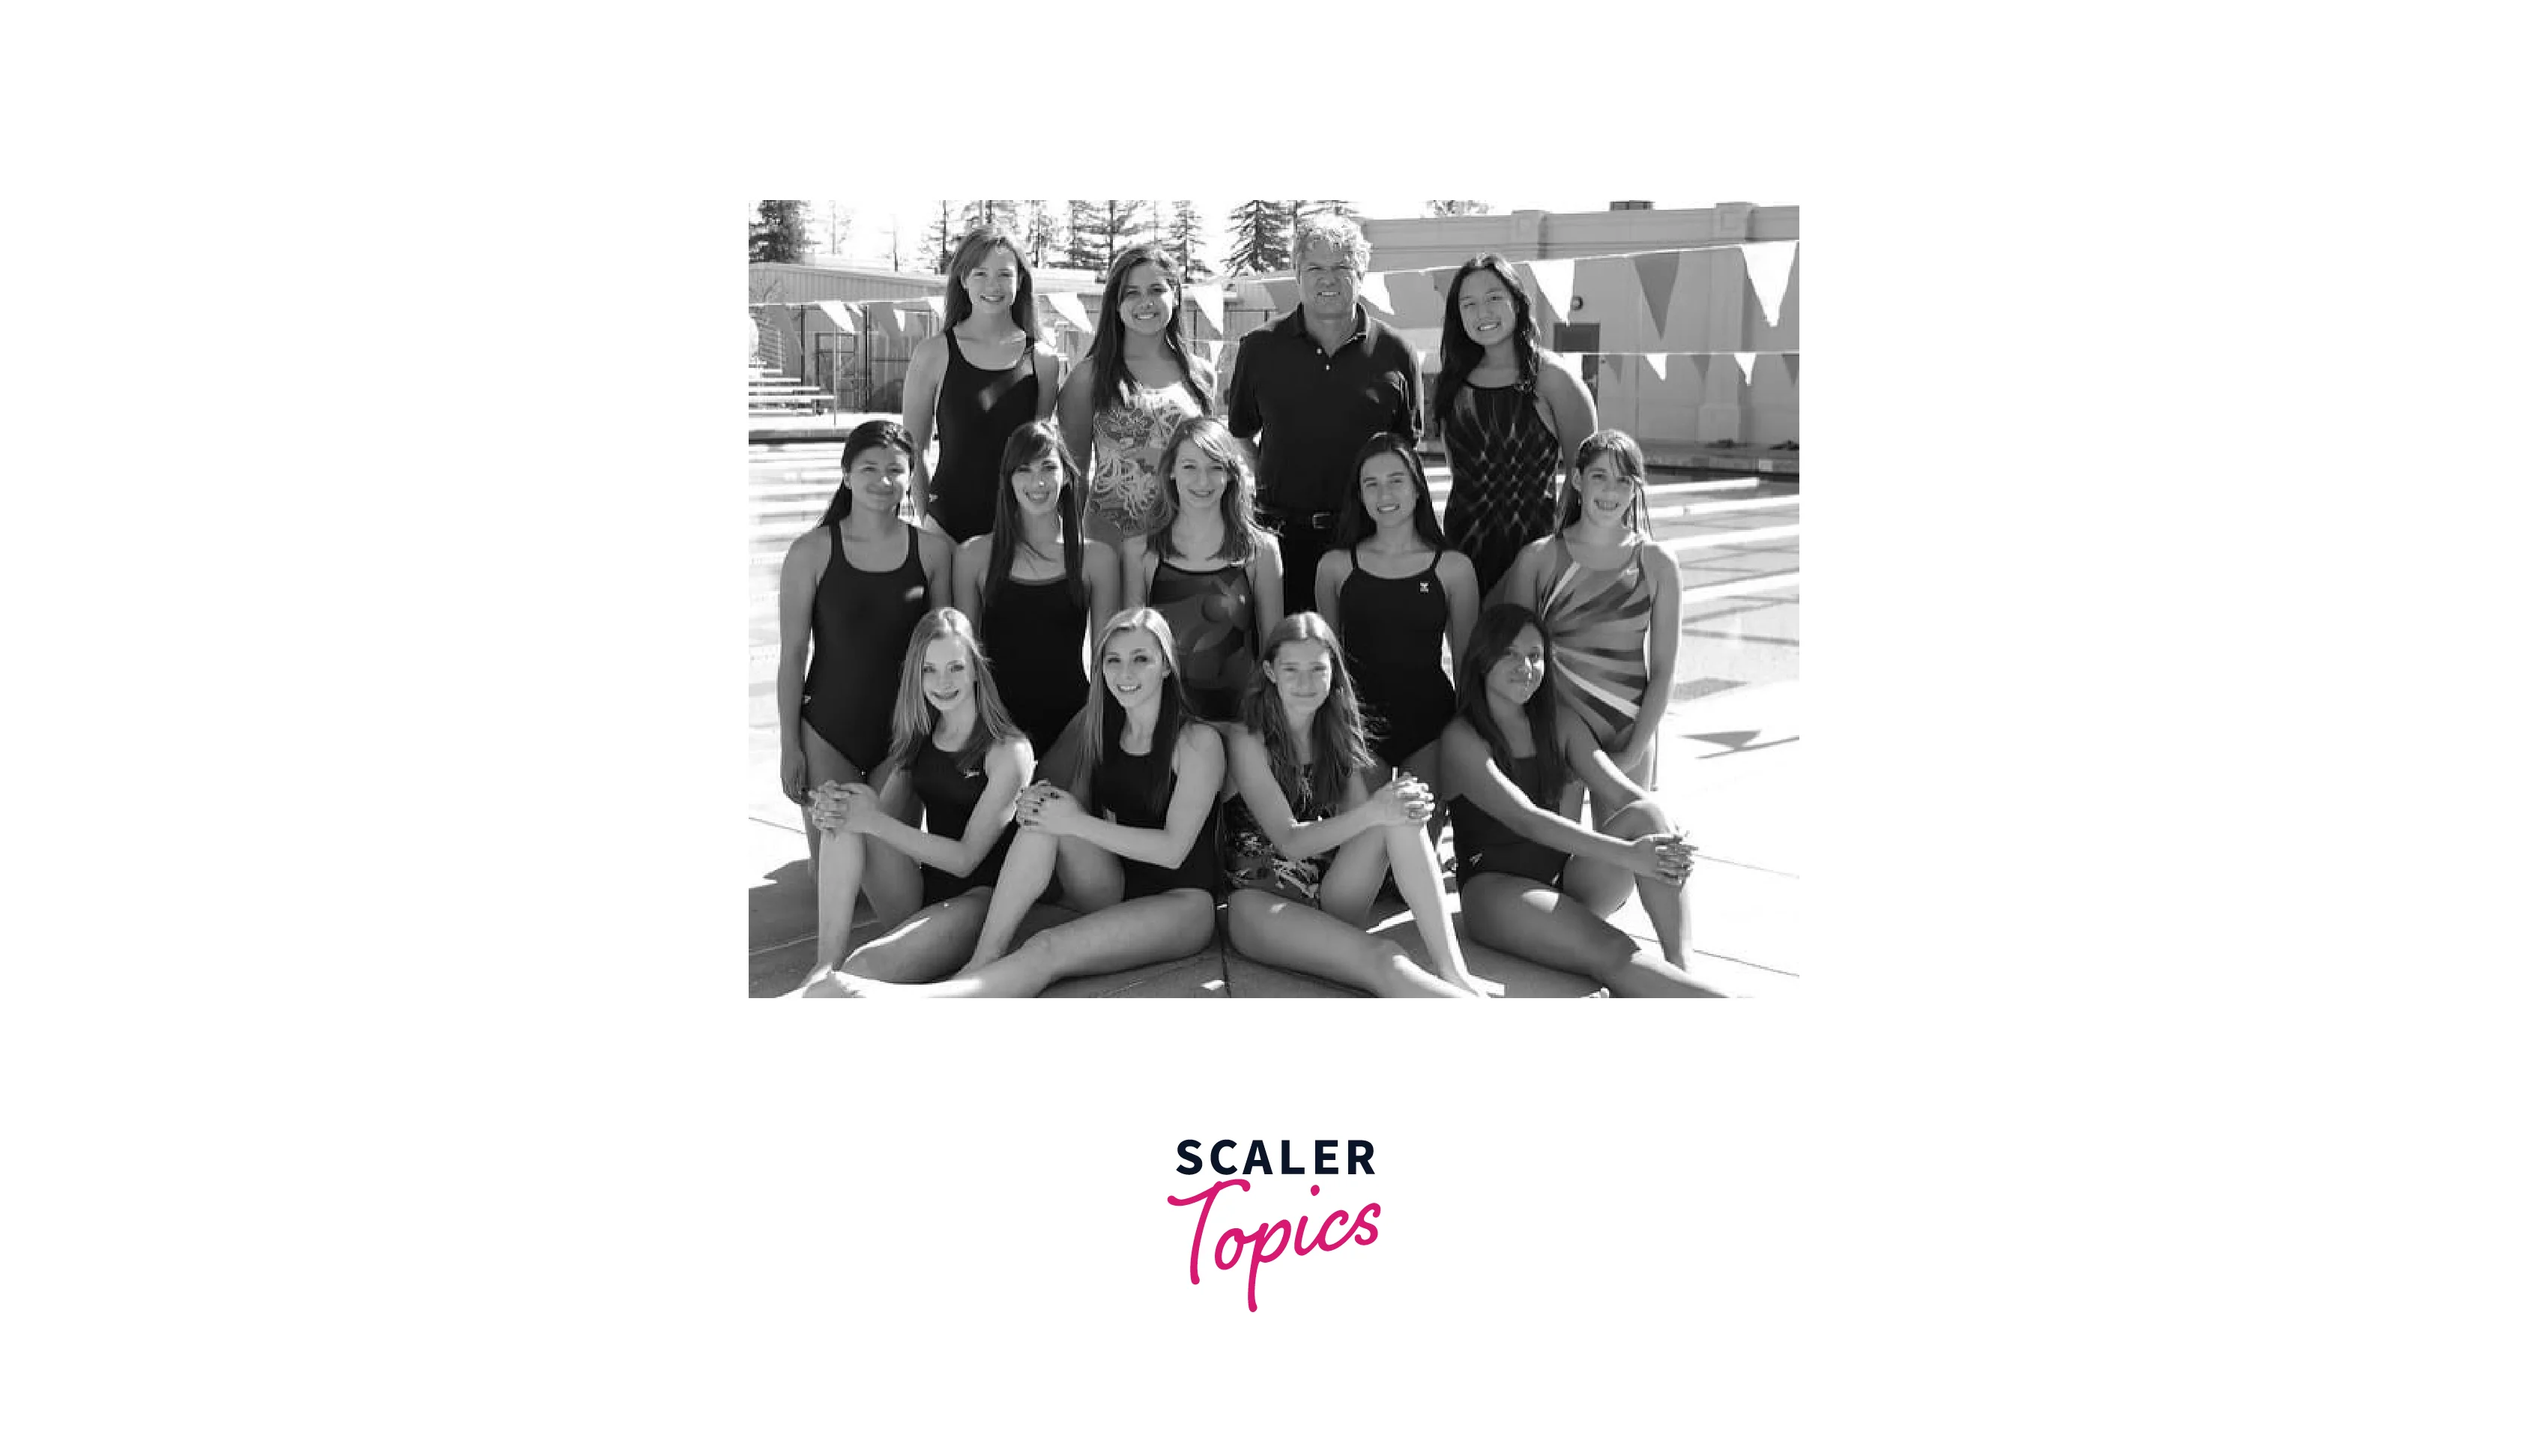
After Dilation
Difference between Dilation and Erosion
The below table represents the differences between erosion and dilation in image processing.
| Dilation | Erosion |
|---|---|
| Increases the size of objects in the image. | Decreases the size of objects in the image. |
| Expands the boundaries of objects. | Shrinks the boundaries of objects. |
| Pixels at the edges of objects are affected more than pixels in the interior. | Pixels in the interior of objects are affected more than pixels at the edges. |
| Used to fill small gaps between objects or to merge overlapping objects. | Used to remove small objects or to separate overlapping objects. |
| More likely to introduce noise and false detections. | Less likely to introduce noise and false detections. |
| Combining dilation and erosion can be used to perform morphological operations like opening and closing. | Combining erosion and dilation can also be used to perform morphological operations like opening and closing. |
Applications of Erosion and Dilation in Image Processing
Erosion and dilation in image processing are two fundamental morphological operations that can be used for a variety of applications, including:
Applications of Erosion:
- Removing small objects or thin structures from an image.
- Separating overlapping objects in an image.
- Finding boundaries of objects in an image.
- Generating a mask for further image processing, such as segmentation.
Applications of Dilation:
- Filling small holes or gaps in an image.
- Enlarging objects or structures in an image.
- Joining broken parts of an object in an image.
- Creating a mask for further image processing, such as segmentation.
Conclusion
- In conclusion, erosion and dilation in image processing can be used to modify the shape, size, and connectivity of objects in an image.
- Erosion removes small objects, separates overlapping objects, and shrinks object boundaries, while dilation expands object boundaries, fills small gaps, and merges overlapping objects.
- These operations are widely used in image segmentation, feature extraction, and object detection, among other applications.
- Overall, understanding the properties and applications of erosion and dilation is essential for developing effective image-processing algorithms and solutions.