Flutter Bloc - Detailed Explanation
Building complex apps with Flutter can be a challenging task, especially when it comes to managing the app's state and business logic. This is where the bloc pattern comes into play.
What is Bloc?
Bloc (Business Logic Components) is a design pattern created by Google to help separate business logic from the presentation layer and enable a developer to reuse code more efficiently.
Why Should We Use Bloc?
As we read before, Bloc help separates the business logic of the app from the UI. It helps developers to organize their code and enables them to reuse that code with more efficiency.
We can also use the setState method to update the state of the widget. But it's not efficient when it comes to handling large-scale apps.
We can easily and effectively use bloc in Flutter to manage the state of the app. Let's see how.
Installation
To install the bloc library in a Flutter project, you need to add the dependency to your project's pubspec.yaml file.
You can also use the command to add flutter bloc as a dependency with the latest stable version:
Once you’ve added the package, you can import it in your Dart code:
And you are good to go!
Important Concepts of Bloc
Events
Events are inputs or actions which occur when a user interacts in the App. Events can be button press, text input, or the api response.
Events are sent to the bloc to inform it of what action the user or the system has taken, and the Bloc processes the events and updates the state of the application accordingly.
Events are represented as classes in Dart. We can create different classes for different events.
Bloc
Bloc is a class in dart. It is used to handle all the business logic of the Flutter app. Bloc is separate from the UI. It is reusable so developers can use it as many times as they want.
Bloc takes an event at a time and returns the respective state as the output to handle the state. We can make changes in the state of the app by the bloc.
States
In Flutter's bloc pattern, states represent the different possible states of an application and are used to reflect the current state of a Bloc instance. Whenever an event is dispatched to a bloc, it processes the event and produces a new state, which is then emitted by the bloc.
For example, in the counter app, the possible states could be:
InitialCounterState: the initial state of the counter with a value of zero. UpdatedCounterState: a state representing an updated counter value.
Cubit
So what is Cubit?! Let's see.
Cubit is mostly the same as Bloc. It is a class that is used to handle the business logic of the app. Yet there are differences between them.
In bloc, we have to Events to yield different States, whereas in Cubit we have Methods to emit different states. So the major difference between Bloc and Cubit is Bloc is Event-driven and Cubit is not Event-driven.
A Cubit does not have a mapEventToState method like a Bloc but instead has a emit method that is used to emit new states in response to events.
Let's see the example of the Cubit class for the counter app:
In this example, we define a CounterCubit class that extends the Cubit<CounterState> class, where CounterState is the type of state that the Cubit manages. The CounterCubit has two methods, increment and decrement, that are used to update the state of the Cubit by emitting a new state using the emit method.
When the CounterCubit is created, it is initialized with an initial state of InitialState. Whenever the increment or decrement methods are called, the CounterCubit emits a new state with the updated count using UpdatedState, which can be used to update the UI of the Flutter app.
Managing State in Flutter with setState (no Bloc)
Flutter provides the setState method for handling the state of a widget. setState method is a built-in method that allows you to update the state of a widget and trigger a rebuild of the widget tree to reflect the updated state.
setState method is used in a Stateful widget. When the setState method is called it runs the build() method which repaints the widget tree passing the new data into the UI. Which updates the UI of the app whenever the user interacts.
Here's an example of a simple counter app using setState:
In this example, we have created a CounterWidget that extends StatefulWidget. The _CounterWidgetState class is the state for the CounterWidget. It has a private _counter field that holds the current value of the counter.
The _incrementCounter method is called when the user presses the floating action button. It updates the _counter field using setState and triggers a rebuild of the widget tree.
In the build method, we use the current value of _counter to display the counter value in the UI. When the user taps the floating action button, the _incrementCounter method is called, which updates the counter value and triggers a rebuild of the widget tree, causing the UI to update with the new counter value.
That's how we can handle the state of a widget and update UI using the setState method.
The Problem with setState
setState is a powerful method that allows us to manage the state of the widget but it has some limitations that one must be aware of.
setState can cause performance issues. When we call setState it rebuilds the whole widget tree by recalling the build() method. It won't make any difference if we have a small-scale app. But it will undoubtedly impact the performance when we deal with large apps by slowing down the performance.
The other issue with setState is that when we need to implement complex state management, setState is difficult to deal with. It can lead us to code duplication and it makes it hard to debug the app for us.
How to Manage State in Flutter with Bloc?
A Bloc pattern is a state management pattern that separates the business logic from the UI code. This makes it easier to manage the state of your app and update your UI without relying on setState.
Managing the state of the app using bloc is easy. bloc state management consists of four essential components:
- Bloc: Bloc class consists of all the business logic of the app.
- Events: An event is a message that triggers a state change in the app. You can define your events as classes that extend the base Event class and contain any data necessary to trigger the state change.
- States: A state is the current state of your app at any given time. You can define your states as classes that extend the base State class and contain any data necessary to represent the current state.
- Cubit: The cubit class is the same as the Bloc class but it's not event-driven
By using these four components we can handle the state of the app. Let's see an example counter app.
Example of Flutter App Using Bloc State
Let us first set up the code for bloc then we will build the UI.
So here is the file structure for implementing bloc:
- bloc
- counter_bloc.dart
- counter_event.dart
- counter_state.dart
counter_bloc.dart
In the counter_bloc.dart file we have all the logic for bloc:
So here we have the CounterBloc which will be used to implement all the logic behind incrementing and decrementing the counter. This class inherits Bloc<CounterEvent, CounterState>.
In Bloc<CounterEvent, CounterState>; <CounterEvent, CounterState> part simply means that the Bloc class has 2 type parameters. The first one is CounterEvent, which represents events and the second is CounterState, which represents states.
The line CounterBloc(): super(const InitialState()); creates an instance of the CounterBloc class and initializes it with an initial state of InitialState. Here, InitialState is a state class that represents the initial state of the counter in the application.
In the same constructor, we have the on() method which listens to the Events and we can emit according to the event passed to it.
counter_event.dart
The next file is counter_event.dart where we have all the events listed out:
Here we have the CounterEvent abstract class which is the base class and we have derived the other two courses from CounterEvent class, which are IncrementEvent and DecrementEvent which are triggered when the user increments or decrements the count.
counter_state.dart
Then we have counter_state.dart file:
In this file, we have created a base abstract class CounterState in which we have a final field of type of in, counter, which will hold the count throughout the execution of the app.
We have derived two classes from the CounterState class, first is InitialState which represents the initial state of the counter with a value of zero, and the second is UpdatedState which represents an updated state of the counter with a new count value.
When an event is dispatched to a Bloc instance, it processes the event and produces a new state that reflects the updated state of the application. The UI layer then subscribes to the state changes of the bloc and updates the UI as necessary to reflect the new state of the application.
So that's it for the Bloc side. Let's code the UI part.
In main.dart we will start with implementing the main() method:
In this part, we have imported essential dependencies and packages. And have declared main() and runApp() methods which will build the MyApp widget.
In the MyApp widget, we have our MaterialApp widget, which has the MyHomePage widget as a child and MyHomePage is wrapped with the BlocProvider widget. The BlocProvider widget is from the flutter_bloc package. It provides MyHomePage with the instance of CounterBloc.
The next widget is MyHomePage, which is a stateful widget. MyHomePage contains all the major UI parts:
In this piece of code, we have the MyHomePageBloc widget. MyHomePageBloc widget creates _MyHomePageBlocState class. In which we have our initState() and the build() and essential variables.
First off we have declared our bloc variable of type CounterBloc, which is named counterBloc. And counterBloc is declared as a late variable; meaning it will be defined later in the program execution.
Then we have our initState() method. In this method, we have defined our counterBloc variable using BlocProvider.
Note: BlocProvider is a Flutter widget that provides a bloc to its children via BlocProvider.of<T>(context). It is used as a dependency injection (DI) widget so that a single instance of a bloc can be provided to multiple widgets within a subtree.
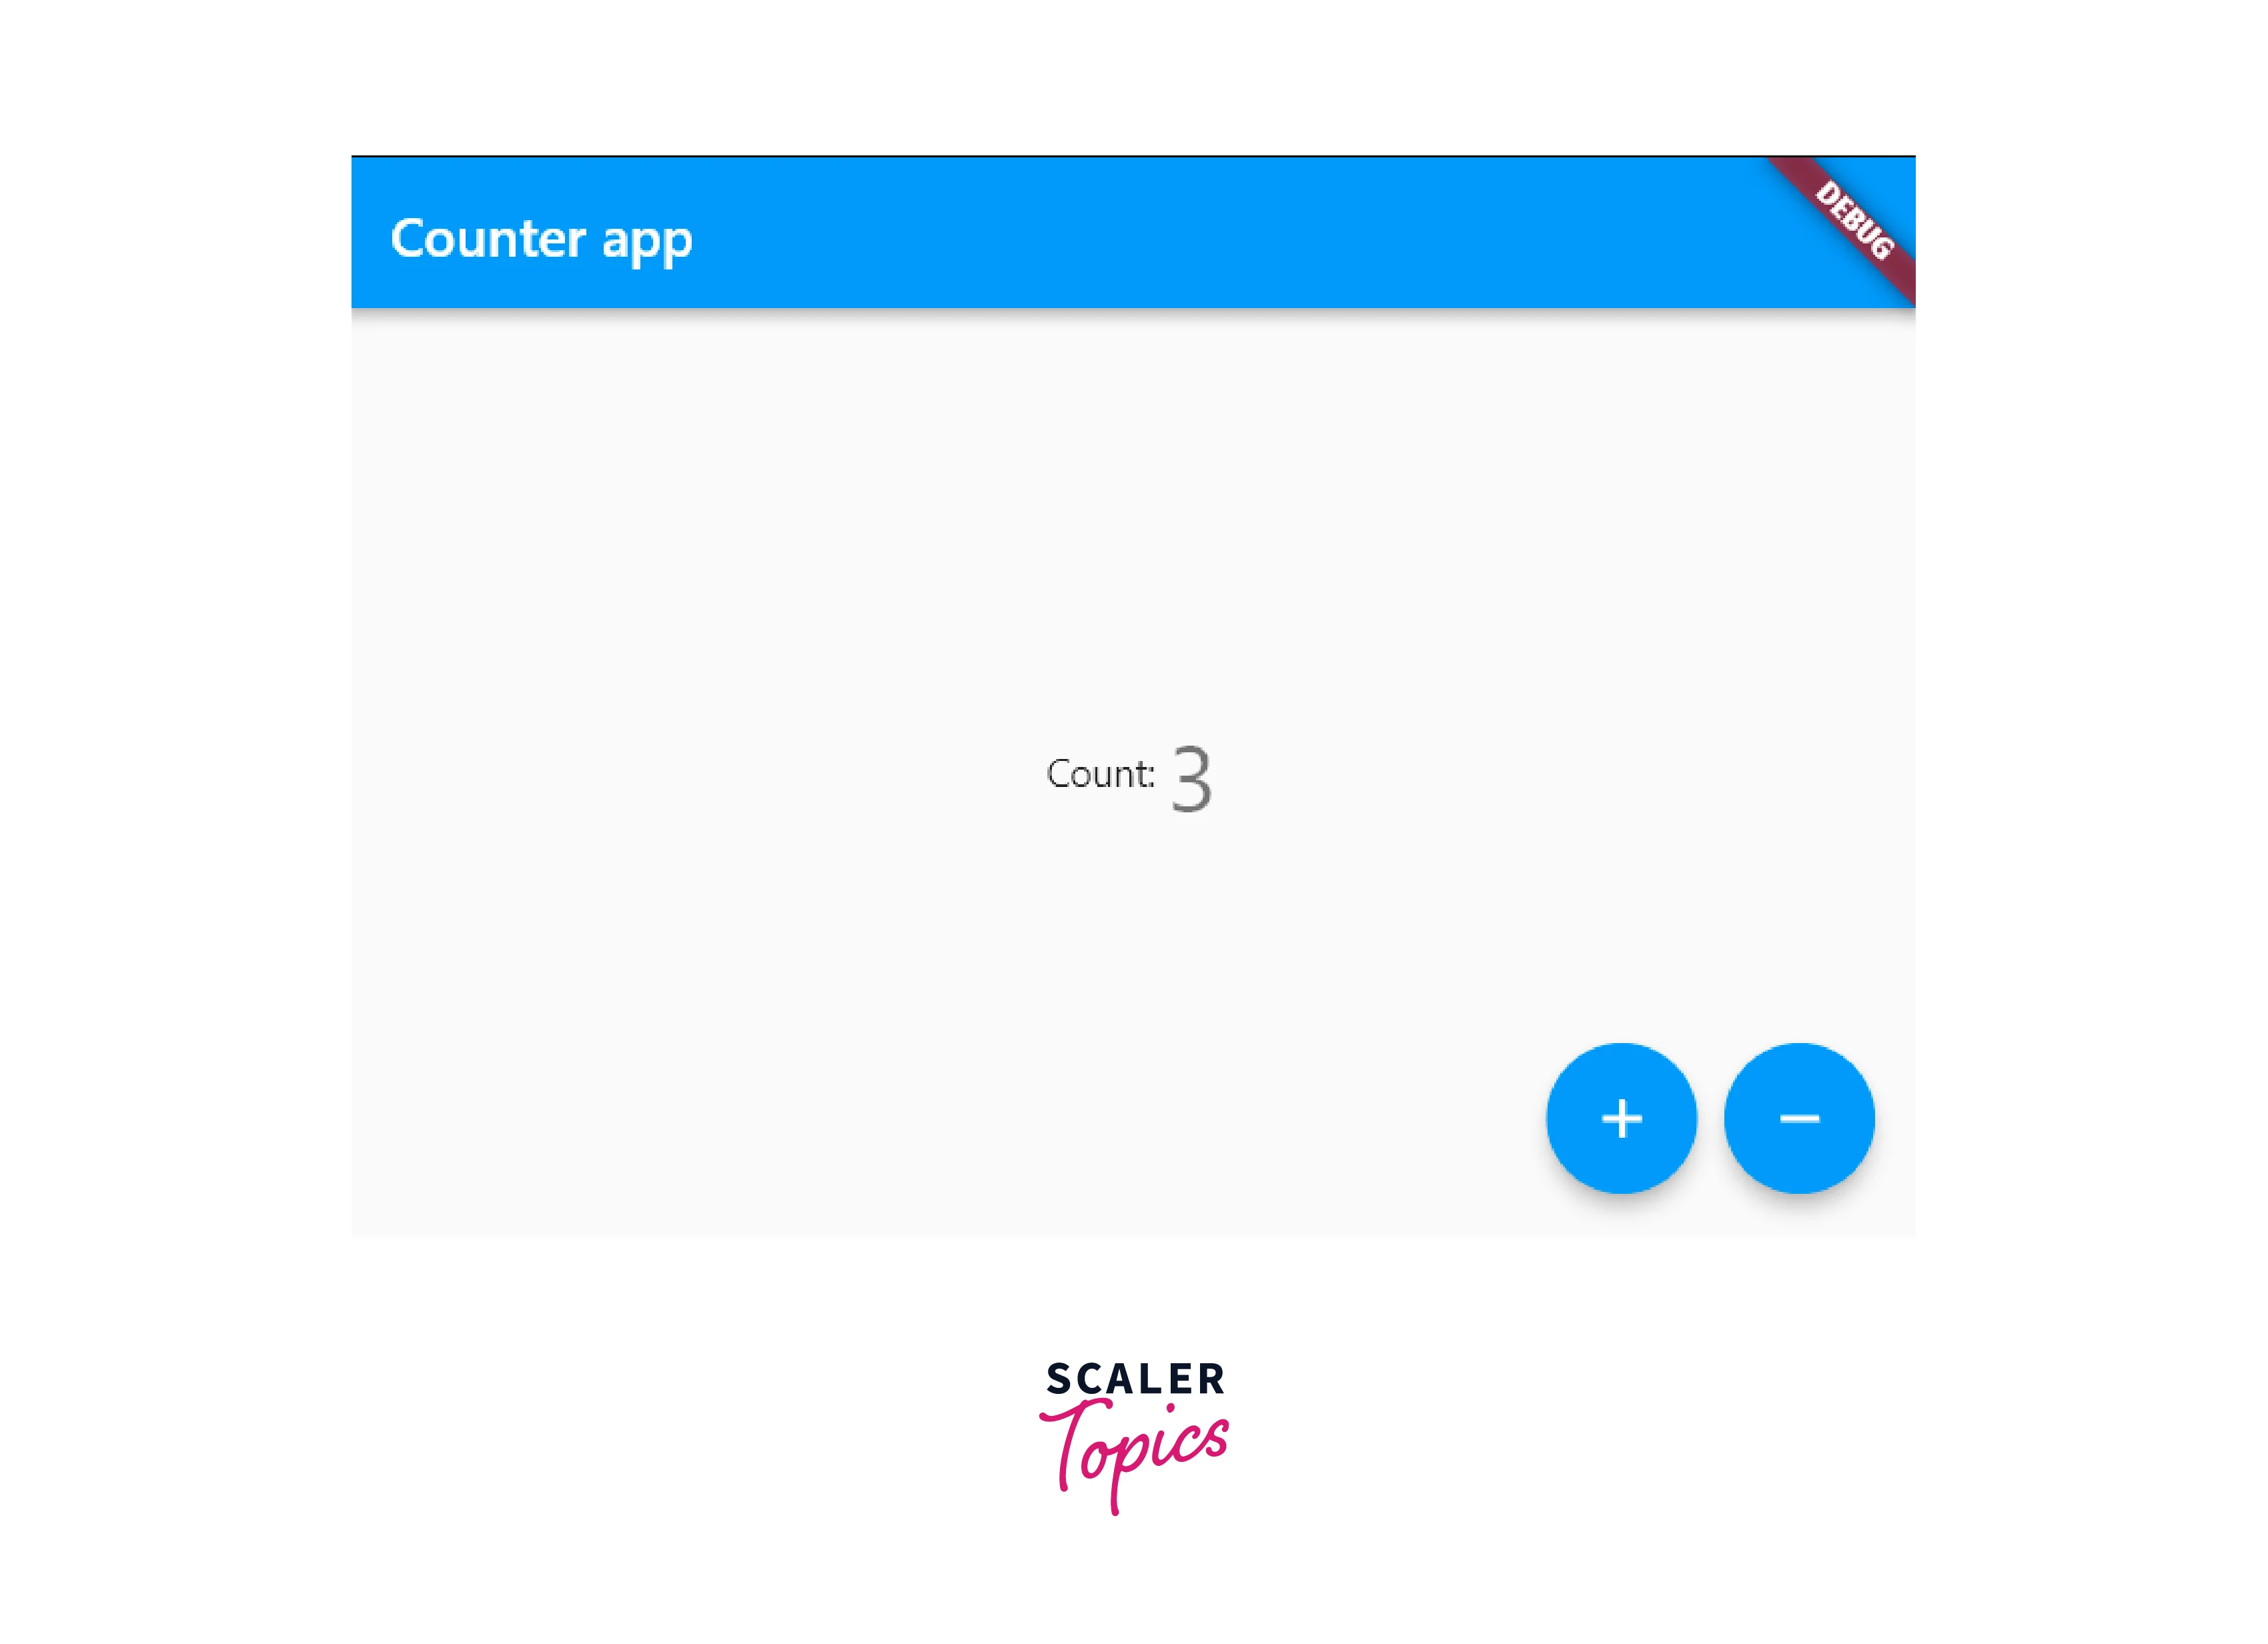
And we have the build() method after the initState(). In the build() method we've taken the Scaffold widget, which will be used to lay the appbar and another widget on the screen. In this Scafflod we have three sections. The first is the appbar. Which is used to give the heading "Counter app", the second is the body part that has the counter output and the third is the floating action button.
Let's see in the body section. It has a Center which has a child widget BlocBuilder of type <CounterBloc, CounterState>.
Note: BlocBuilder is a Flutter widget that requires a bloc and a builder function. BlocBuilder handles building the widget in response to new states. BlocBuilder is very similar to StreamBuilder but has a more simple API to reduce the amount of boilerplate code needed. The builder function will potentially be called many times and should be a pure function that returns a widget in response to the state.
In this BlocBuilder widget, we have passed counterBloc as a bloc, and in the builder, we have passed the Row widget which has two Text widgets that will be used to show the count on the screen. Whenever a new state is emitted builder will build the following widget tree again and data will be updated.
Now let's see at floating action button part. We have a Row widget that contains two floating action buttons in it. The first one is used to increase the counter. In the compressed method of the first floating action button, we used to add IncrementEvent() with the use of the counterBloc variable. and the same goes for the second floating action button, but it will add the DecreamentEvent.
In the initial stage, the Count will be 0. When the user will click on the Increment button, the count will increment by one and will decrement by one when the user clicks on the decrement button.
So this is how we can make a simple counter app using Bloc and this is how it will look.
We can also make it possible by using Cubit.
Let's see how.
First of all, we need to create the Cubit class as follows:
Here we have CounterCubit class which extends Cubit<CounterState>. So CounterCubit will emit a state of type CounterState. And initially, it will have a state of type InitialState.
Then we have two method void methods named increment() and decrement() which will emit a state of type UpdateState with incremented or decremented value.
Let's see how can we implement it in the same MyHomePage class:
We need to pass CounterCubit class in the create param of the BlocProvider widget.
Here most of the things are the same as the Bloc flow. The only difference here is we are using counterCubit of CounterCubit class instead of CounterBloc and we have replaced CounterBloc with CounterCubit at all places. And we are no longer using counterBloc.add() methods in floating action buttons, instead we are using counterCubit.increment() to increment the count and counterCubit.decrement() to decrement the count.
That's how we can make a counter app using Cubit.
Conclusion
In conclusion, the Bloc pattern is a powerful tool for managing the state of your Flutter app. By separating your app's business logic from your UI code, you can create more modular and maintainable code that is easier to test and debug. Here are some of the key takeaways from this article:
- Bloc stands for Business Logic Component, and it is a design pattern for managing state in Flutter apps.
- Blocs work by processing events and emitting new states based on the current state and the event data.
- Events are messages that trigger state changes in your app, while states represent the current state of your app at any given time.
- Cubit is a simpler version of Bloc that is designed for managing simpler state changes in your app.
- BlocProvider is a useful widget for managing the Bloc instances and providing them to your UI code.
- The BlocBuilder widget is a convenient way to listen for changes in your Bloc's state and rebuild your UI accordingly.
By following these best practices, you can create scalable and maintainable Flutter apps that are easy to reason about and modify.