Git Switch Branch
Overview
When you are working on any large project having multiple features, then there might be the case that you are probably maintaining many branches in your repository, and there might come the need to work on different branches to perform different tasks in parallel. So, the action of going from one branch to another branch in a repository is known as branch switching. This branch-switching action is also referred to as the checkout in git. In this article, we will see how we can switch to another branch using git switch branch command in git and start working on another feature easily and efficiently using git.
Transform Your Career
Choose from our industry-leading programs designed for career success
Modern Software and AI Engineering Program
Master full-stack development with AI integration

Modern Data Science and ML with specialisation in AI
Advanced data science techniques with AI specialization
Advanced AIML with Specialisation in Agentic AI
Deep dive into AIML with focus on Agentic systems
DevOps, Cloud & AI Platform Engineering
Build and manage AI-powered cloud infrastructure
AI Engineering Advanced Certification by IIT-Roorkee
Premier AI engineering certification from IIT-Roorkee
Pre-requisites
Before understanding what is branch switching and how to switch between different branches in git, we will understand what exactly are branches in git, and what's the need for having different branches in a repository.
So, branching is a concept in git which allows you to diverge from the main branch and continue to work in an isolated manner without messing with the main branch. In git, each branch is a version of any repository or you can call it the independent line of development, any repository can have as many branches each having a different version of the repository.
Branching can be useful in many terms, firstly, you can work on any specific feature in an isolated manner without disturbing the work on the main branch, in this way the development of bug fixes will also be facilitated and there will be fewer errors as it’s easier to maintain a portion of your work rather than having large branches having all the code.
Branching also helps in maintaining the stability of the code base. To create a branch in git, we can use the command:
When you want to work on a new feature, you create a new branch diverging from the main branch using the command git branch new_branch_name.

If you want to display the total number of branches in a repository, then you can use the command:
The above command will show all the local branches in a repository, along with the * symbol marked in front of the name of the branch you are currently on. Now, in the upcoming sections, you will see how you can switch branches on git.
Scaler Placement Report and Statistics
Scaler learners achieved 2.5x salary growth with average post-Scaler CTC reaching ₹23L.
How To Switch Branch on Git?
As the features in a project increase, the need of having more branches in the repository also increases to work parallelly on many features. So, to switch over and between different branches in a repository is known as branch switching or branch checking out and there are main two methods of doing the same: using the git checkout method and using the git switch branch method. We will see in detail the syntax and examples using both of the methods in the upcoming sections.
1. Using the git checkout command
This is one of the easiest and most common ways of switching branches in a git repository. In this method, you can use the "git checkout" command and specify the name of the destination branch on which you want to switch from the current branch. To view the current branch you are on, you can run the following command:
As we discussed above this command will list all the branches in a repository along with the * symbol marked in front of the current branch you are on.
To use the "git checkout branch", the syntax is:
Here, name_of_the_destination_branch is the name of the destination branch where you want to switch.
Now, consider the case where the destination branch does not exist as of now and you want to create a new branch and immediately switch to it, then you can use this checkout command with a small twist:
Here, name_of_the_branch is the name of the destination branch which you want to create.
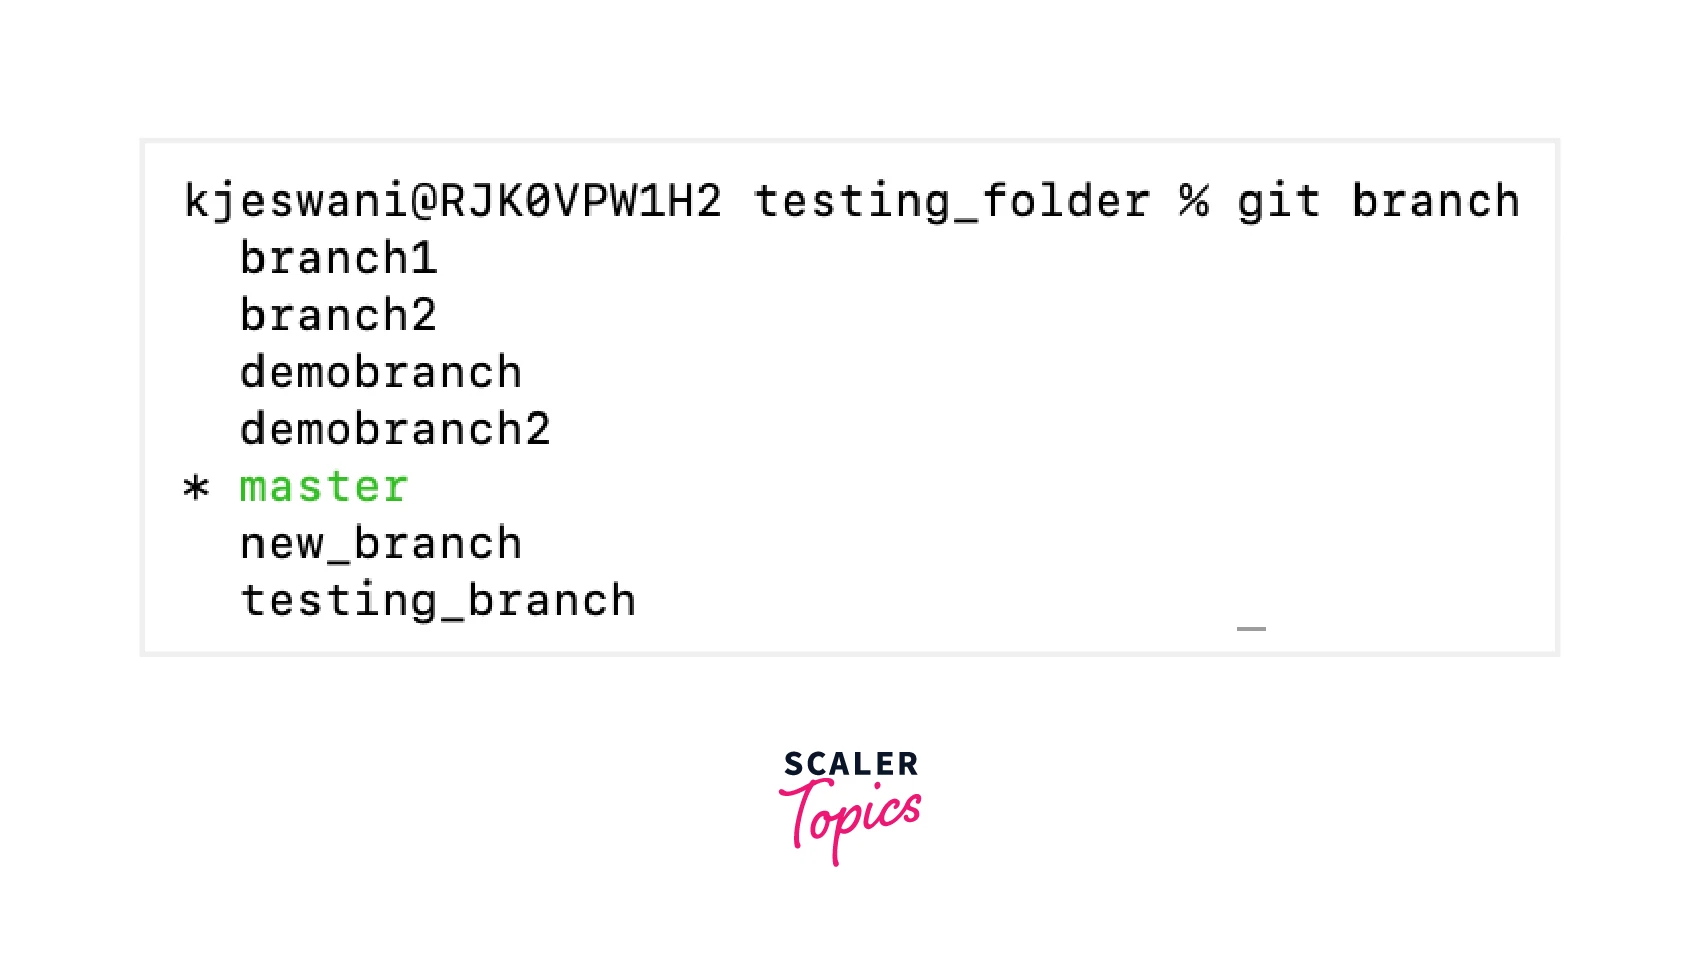
You can also check if you have successfully switched to your destination branch or not with the git branch command, and the * should now be marked in front of the destination branch we just switched.
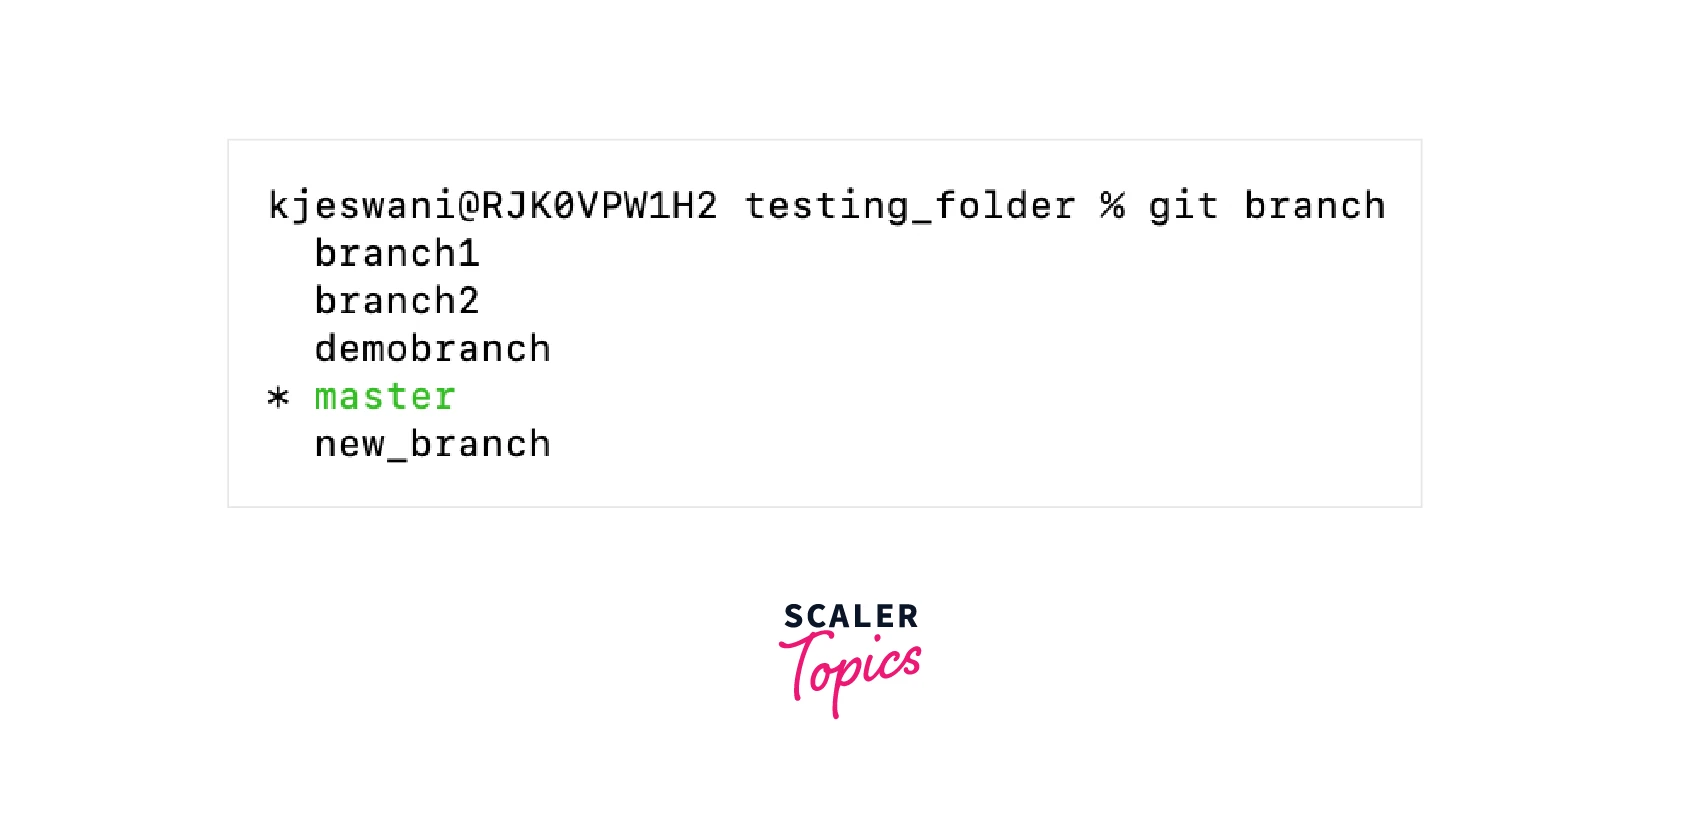
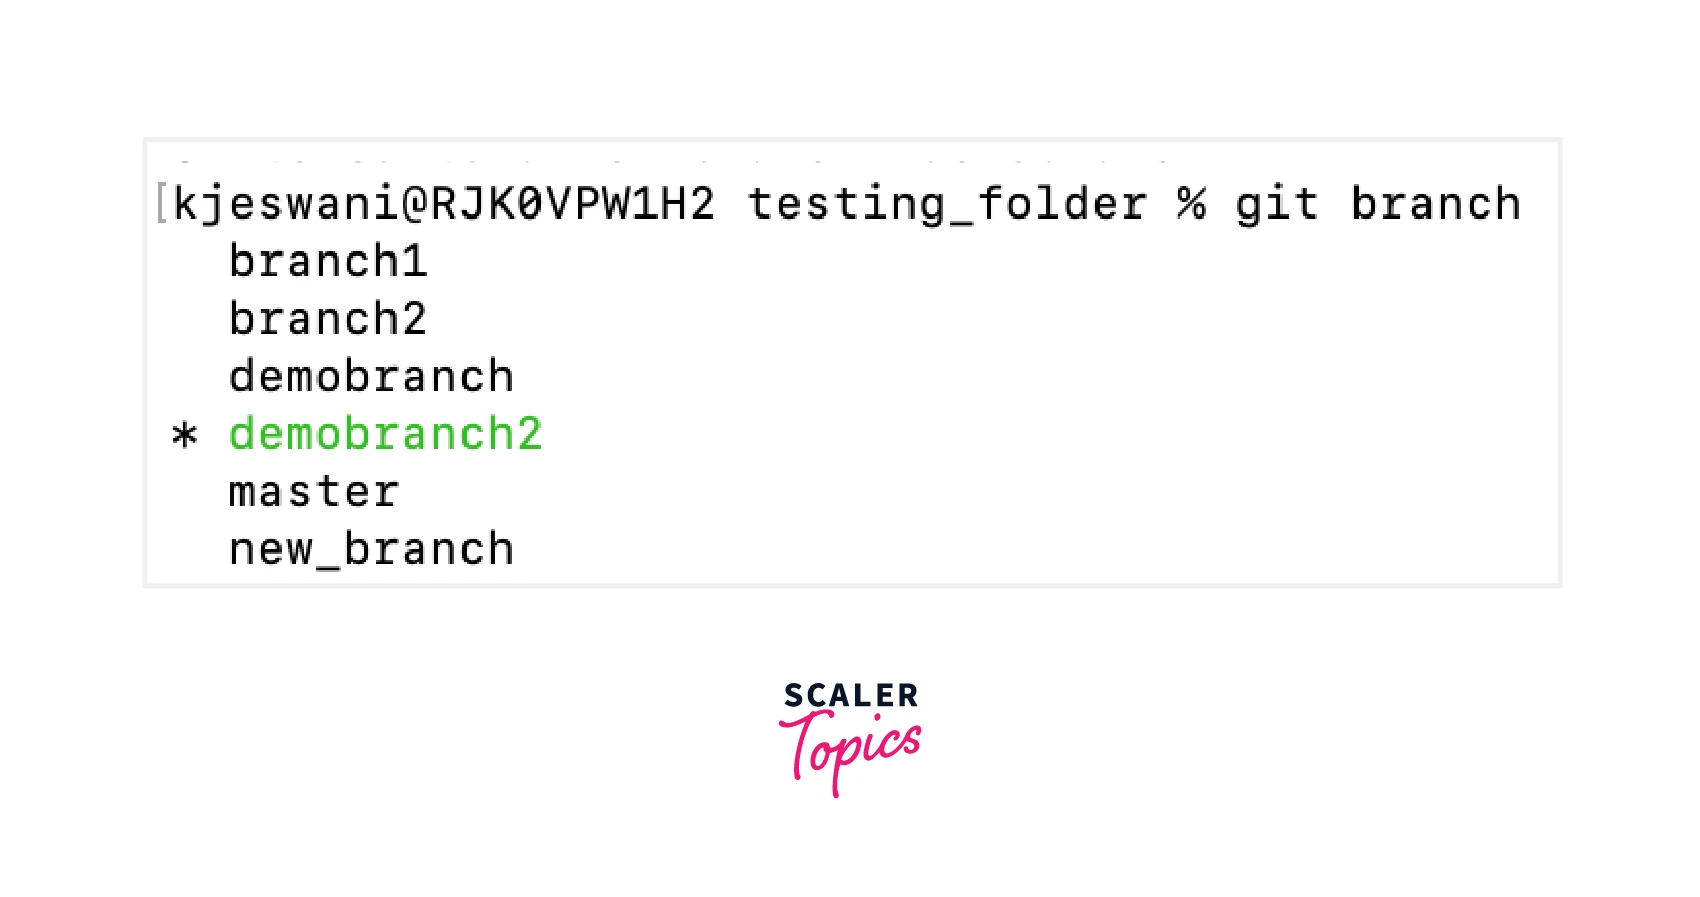
Now, let's see the example of how to switch a branch using this git checkout method. We have a testing folder and there are 5 branches in the repository, and currently, we are on the master branch as you can see from the below image.
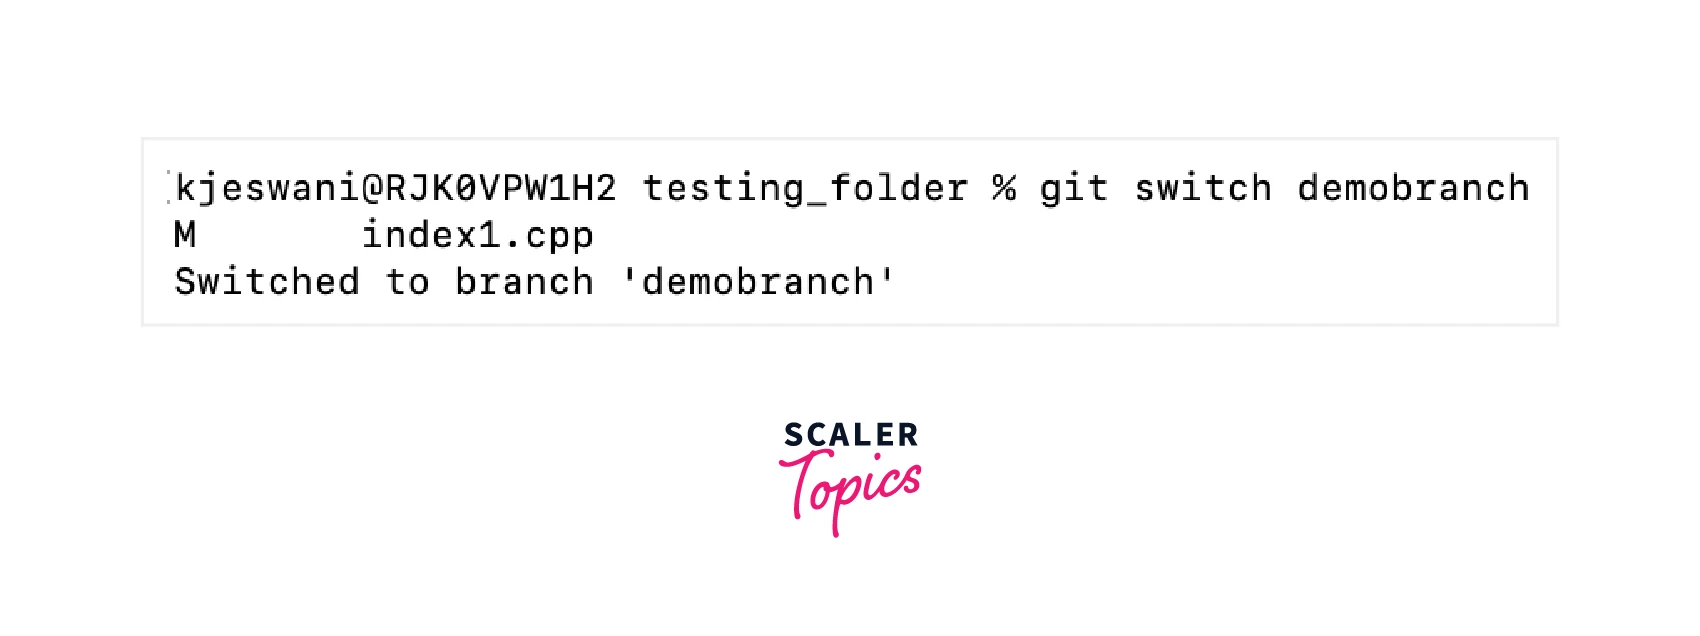
Now to switch to the demobranch, you can use the command:
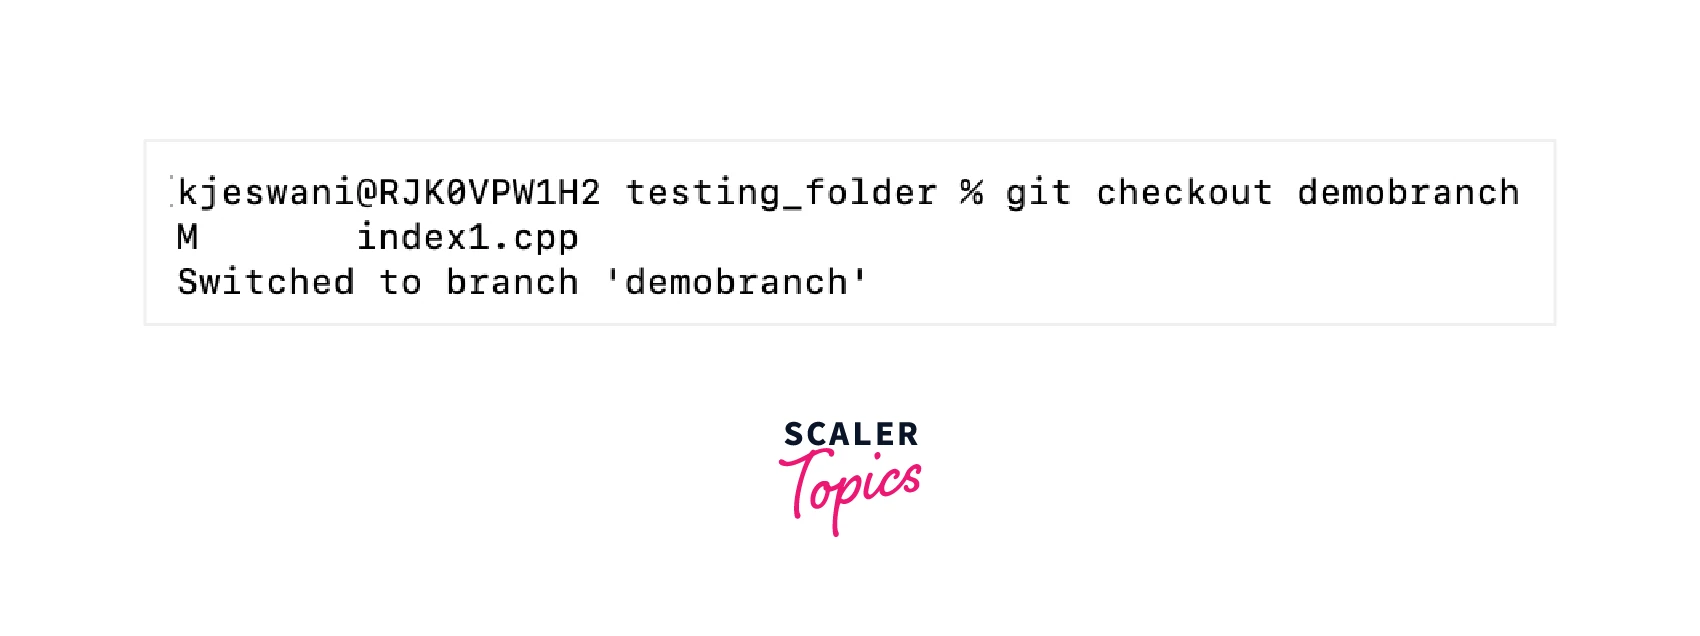
From the above image also you can see the message "Switched to branch 'demobranch'", you can also verify this using the git branch command.
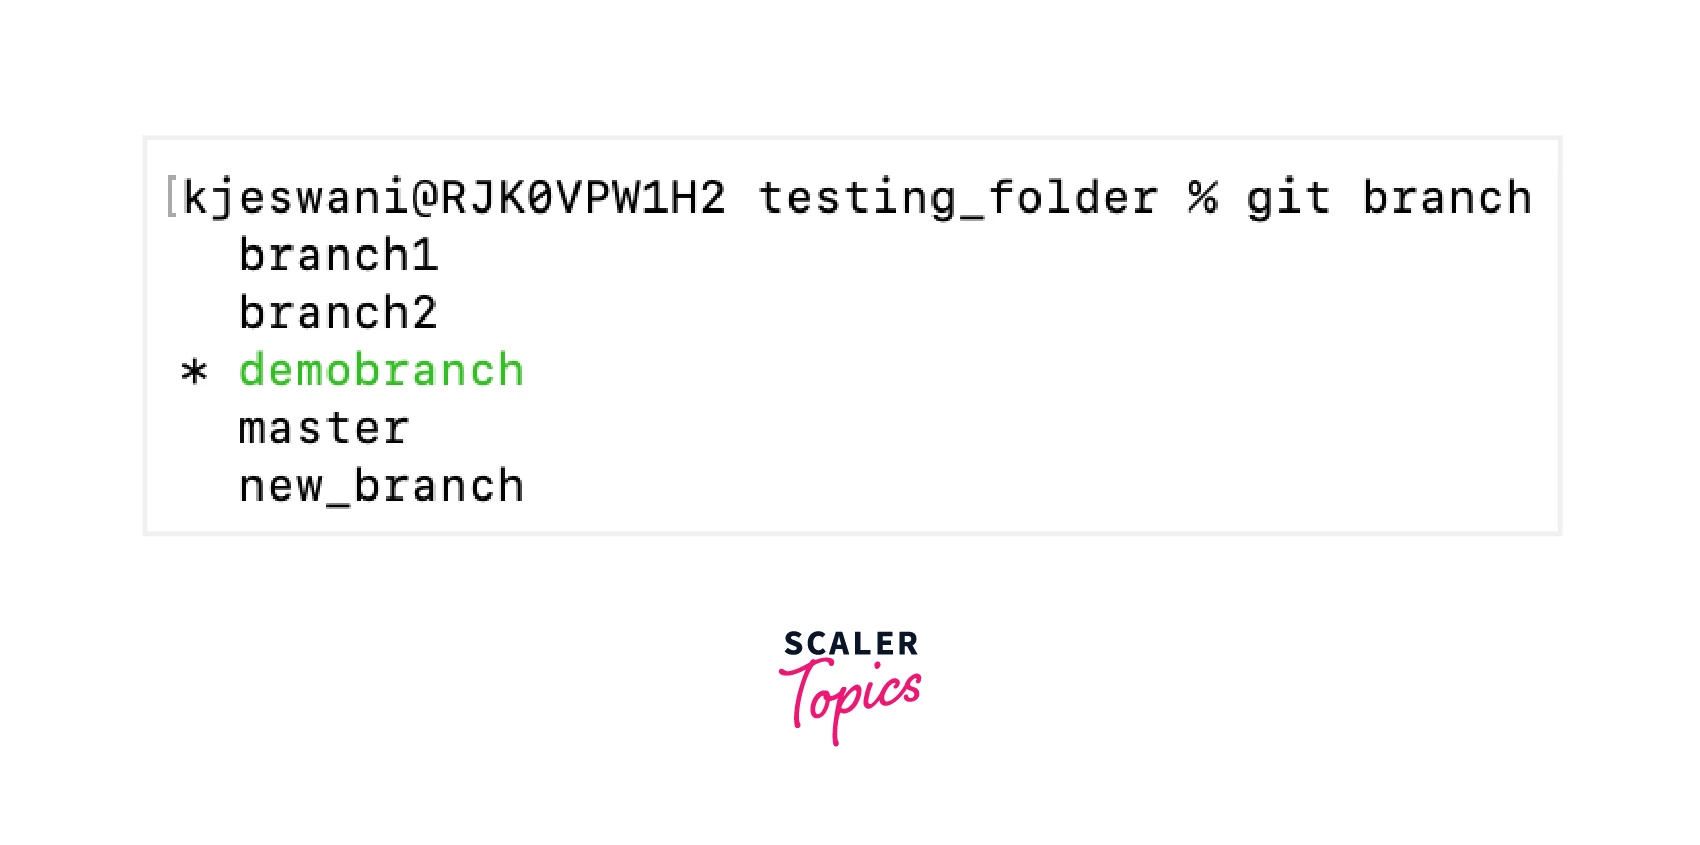
As you can see now the * sign is marked on the demobranch, which means that we have successfully switched to the demo branch.
Now, consider the case that you want to create another branch named demobranch2 and then switch immediately to that branch, so there are two ways to do that, the one we discussed above using the same git checkout command along with a -b flag.
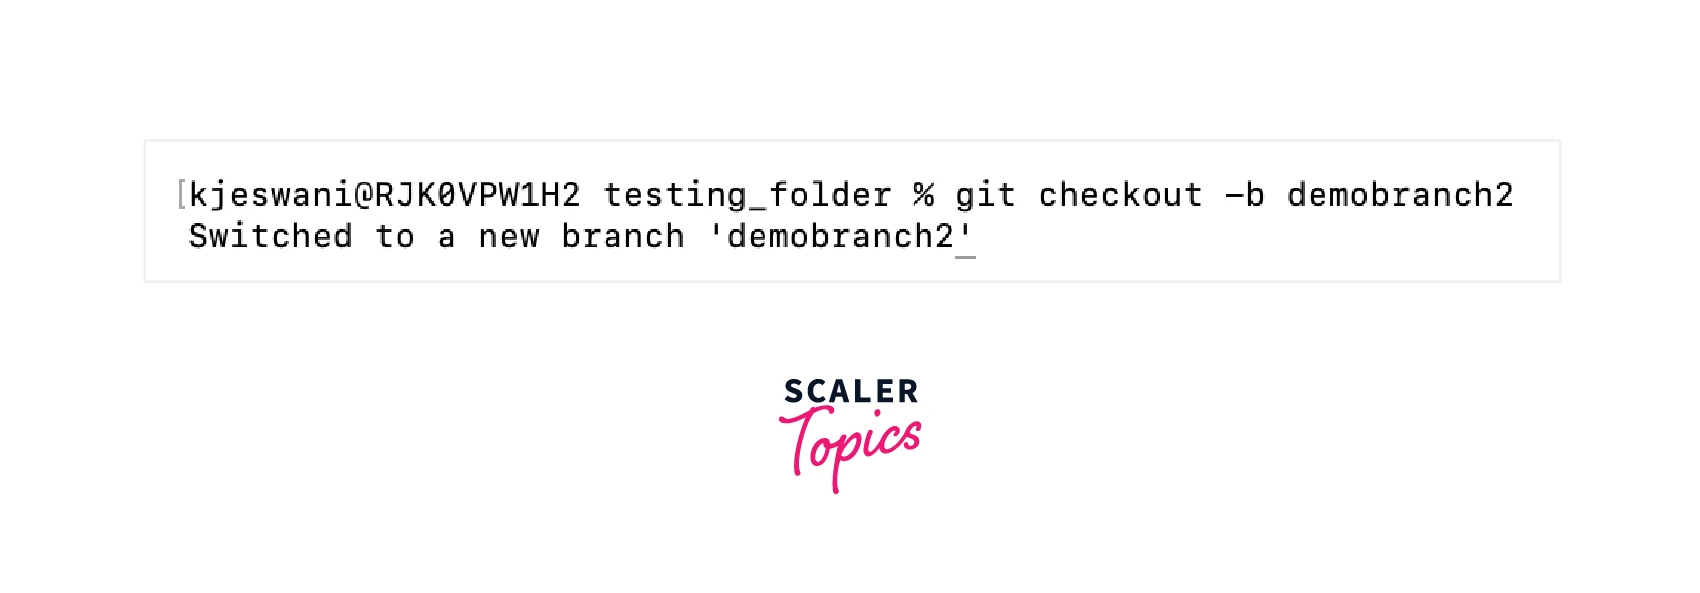 We can see the message "switched to a new branch 'demonbranch2'", and we can verify this by:
We can see the 6th branch demobranch2 is created in our local repository and we have switched to it. Another way of doing the same thing would be to break this down into two steps: First, create a new branch using the git branch <new_branch_name> command and then switch to the newly created branch using git checkout <new_branch_name>.
We can also see the example of this:

As we can see from the above image, we have created a new branch named testing_branch in our repository but we are still on the demobranch2, so to switch to the testing branch you can use the simple git checkout command.
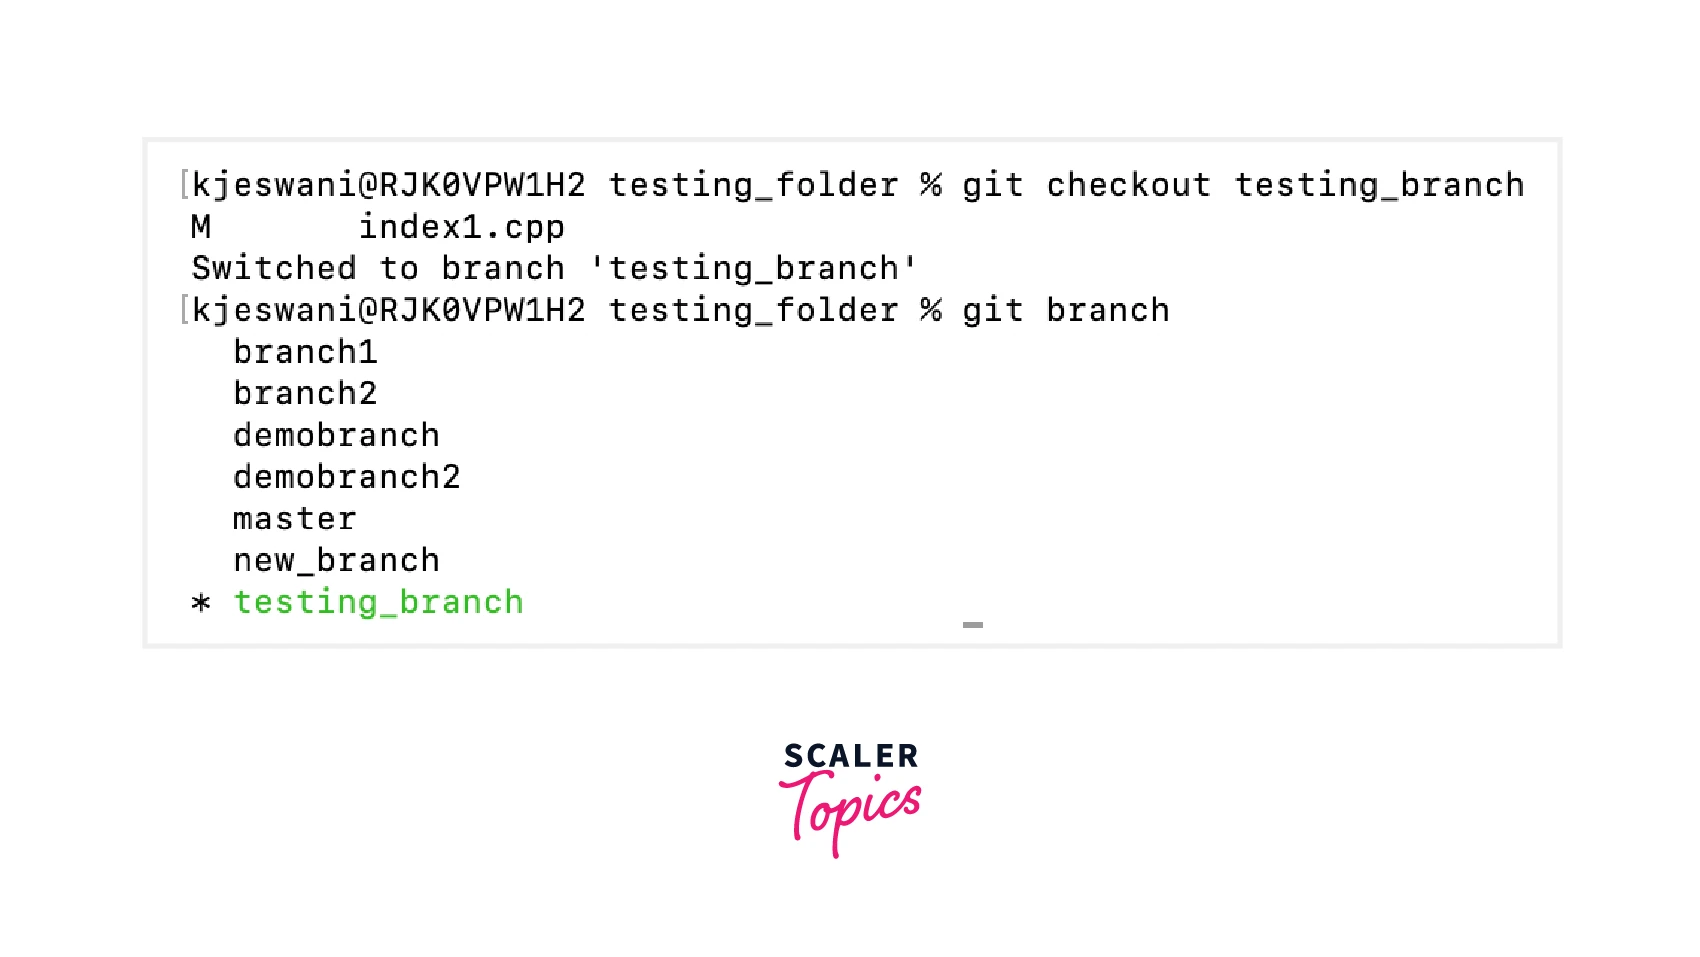 As we can see, now we are on the testing_branch.
2. Using the git switch command
Another quick way of switching between branches on git is to use the git switch command and specify the destination name of the branch you want to switch to.
To use the git switch method, the syntax is:
Here, name_of_the_destination_branch is the name of the destination branch where you want to switch.
Now, consider the same case as we discussed above where the destination branch does not exist as of now and you want to create a new branch and immediately switch to it, you can use this switch command with an additional flag:
Here, name_of_the_branch is the name of the destination branch you want to create and switch from the current branch, and -c is the flag used.
Now, let's see the example of how to switch a branch using this git switch method. We have the same testing folder and now there are 7 branches in the repository, and currently, we are on the master branch.
Now to switch to the demobranch, we can use the command:
 From the above image also you can see the message "Switched to branch 'demobranch'", you can also verify this using the git branch command.
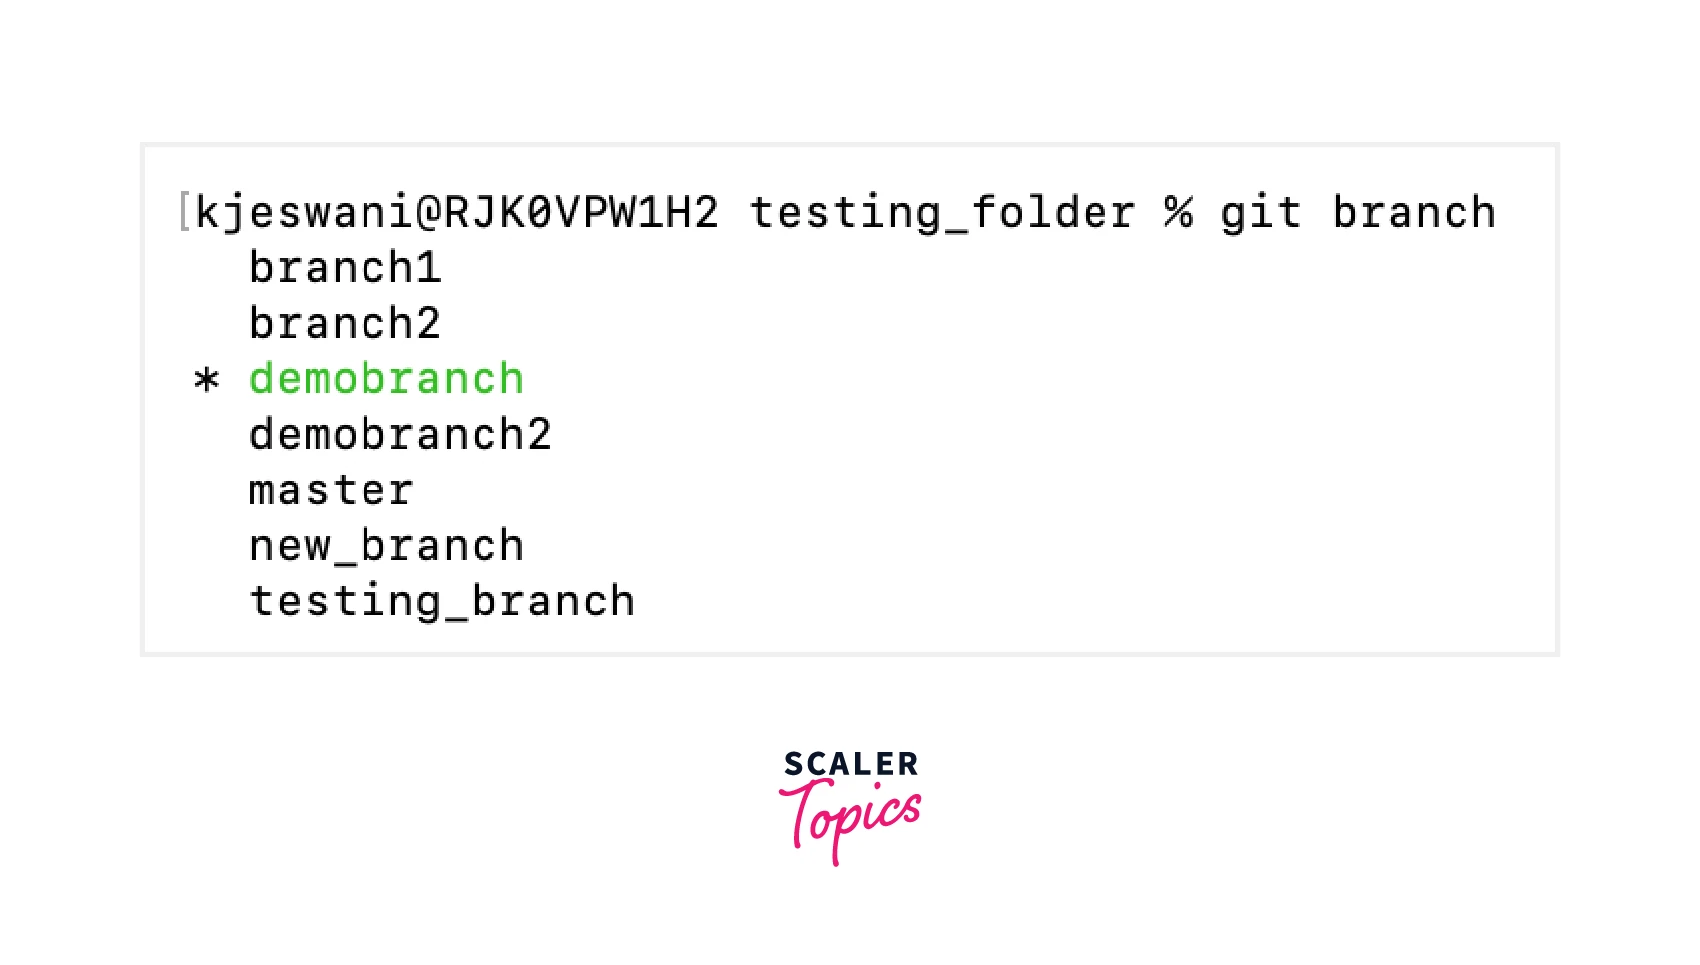
As you can see now the * sign is marked in front of the demobranch, which means that we have successfully switched to the demo branch.
Now, consider the same case which we discussed above where you want to create another branch named testing_branch_2 and then immediately switch to that branch, using the same git switch command along with a -c flag.
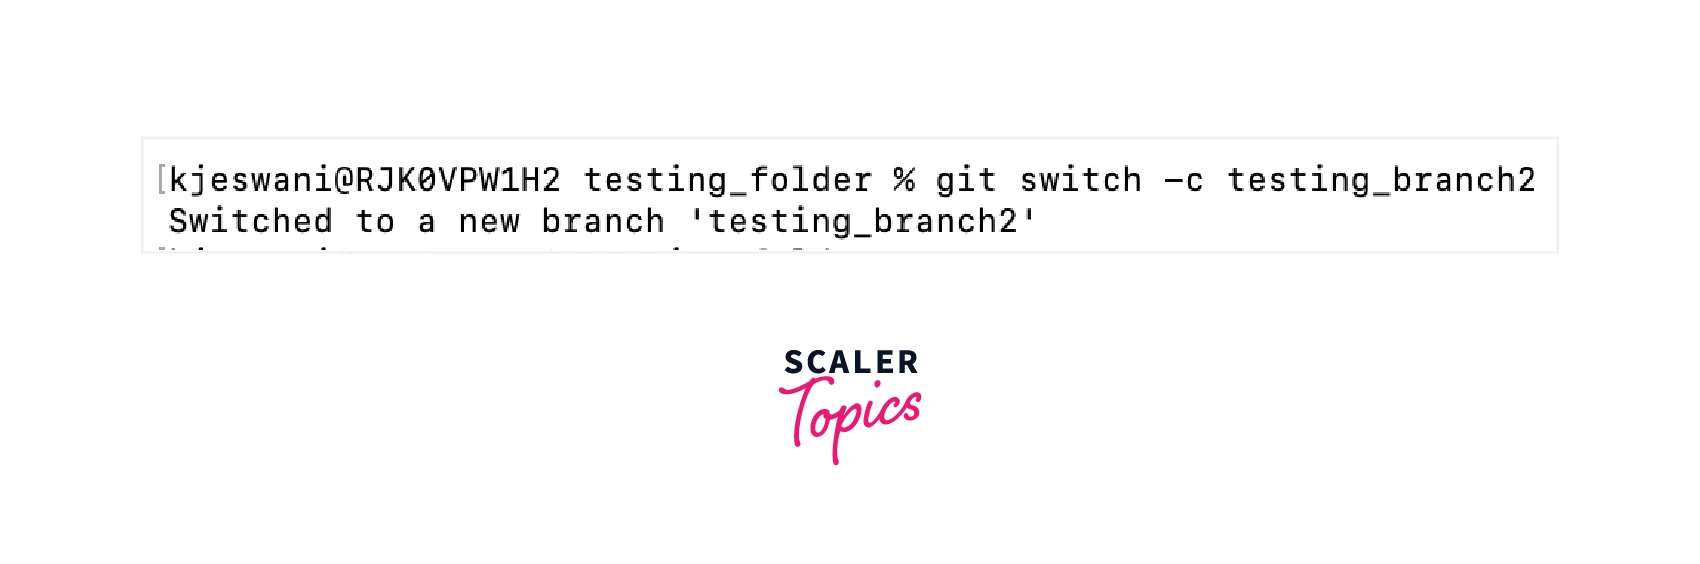
We can see the message "switched to a new branch 'testing_branch_2'", and we can verify this by:

You can see the 8th branch testing_branch_2 is created in our local repository and we have successfully switched to it.
Switch to a remote branch
Till now we were looking at how to switch between the local branches in a repository, but there might also be a case where you may be interested in switching to the remote branches from your repository.
So, to check out a remote branch, you should make sure to fetch your remote branch with the git fetch command.
Then you can switch to the fetched remote branch by using the normal git checkout command along with the -t option and the name of the branch you want to switch.
The -t flag stands for “track” and it is used to create your branch and to set up the upstream branch automatically to the remote branch.
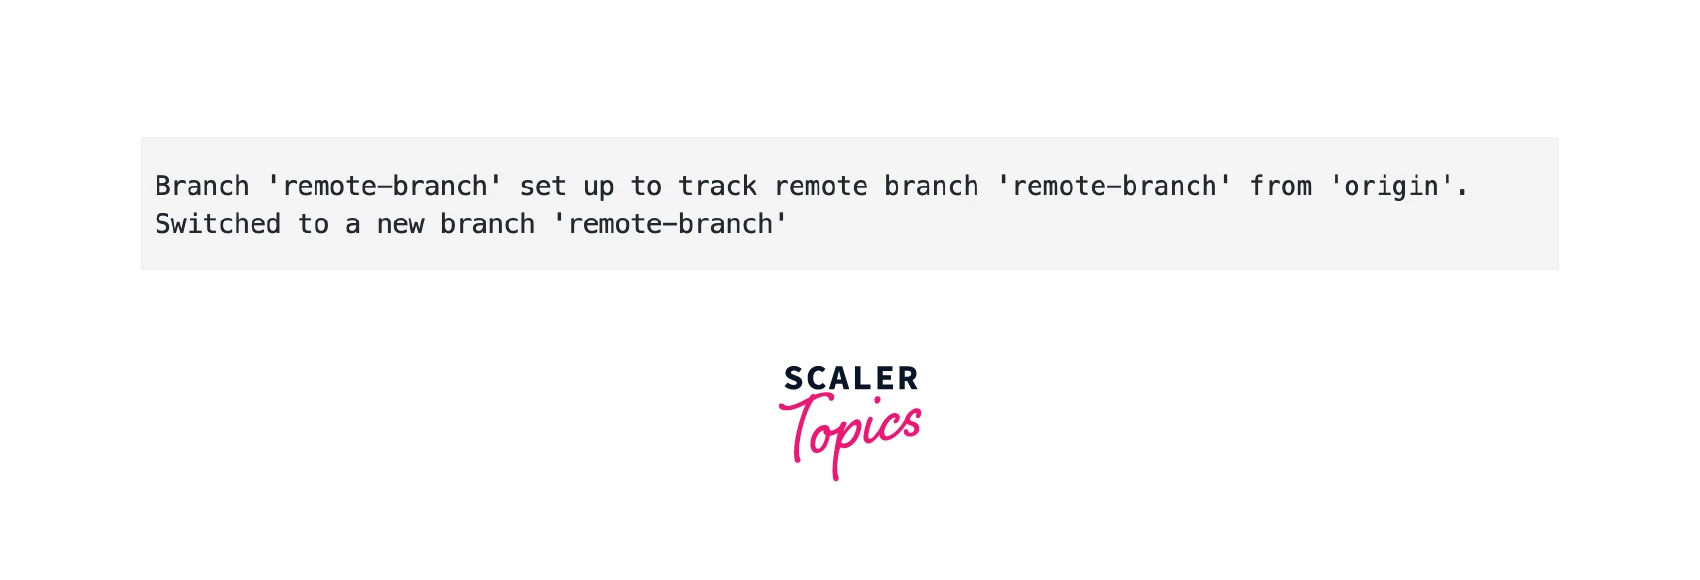
Let's suppose you have a branch on the remote named remote-branch and the origin is the remote name.
So to check out to the remote branch, you will need to execute the checkout command along with the -t flag and the name of the remote branch.
The output will be as shown in the image below:
Conclusion
- Branching is a concept in git which allows you to diverge from the main branch and continue to work in an isolated manner without messing with the main branch.
- Each branch is a version of any repository or you can call it the independent line of development, any repository can have as many branches each having a different version of the repository.
- The action of going from one branch to another branch in a repository is known as branch switching. This action is also referred to as “checkout” in Git.
- git branch <new_branch_name> command is used to create a new branch in a local repository.
- git branch command is used to list all the branches in a repository along with the * symbol marked in front of the current branch you are on.
- git checkout <name_of_the_destination_branch> command is used to checkout or to switch to the destination branch.
- git checkout -b <name_of_the_branch> is used when the destination branch does not exist and you want to create a new branch and immediately switch to it, then you can use this checkout command.
- git switch <name_of_the_destination_branch> command is similar to the git checkout command and is used to switch to the destination branch.
- git switch -c <name_of_the_branch> command works in a similar way we discussed in the git checkout command along with the -b flag with the git switch branch command. It is used to immediately create a new branch and switch to it.
- To switch to the remote branch you need to first fetch the remote branch using the git fetch command.
- After fetching the branch, you can switch to it using the git checkout -t <remote_name>/<name_of_branch> command. It will track and create your branch and then it will automatically set up the upstream branch to the remote branch.