Git worktree
Overview
Git worktree can help a developer checkout and work in multiple git branches simultaneously without hampering the work done in the current working directory.
There might be situations while working on a project if a developer is working on a feature branch and has currently not completed his branch but he needs to switch to another hotfix branch to fix some bugs on priority. In such situations, Git worktree commands come into the picture and help to create a separate worktree to switch to the hotfix branch without hampering the work in the feature branch.
Pre-requisites
Before reading the article you should be familiar with the following :
- What is git used for
- Git branching
- git commit
- git stashing
Scaler Placement Report and Statistics
Scaler learners achieved 2.5x salary growth with average post-Scaler CTC reaching ₹23L.
Introduction to Git Worktree
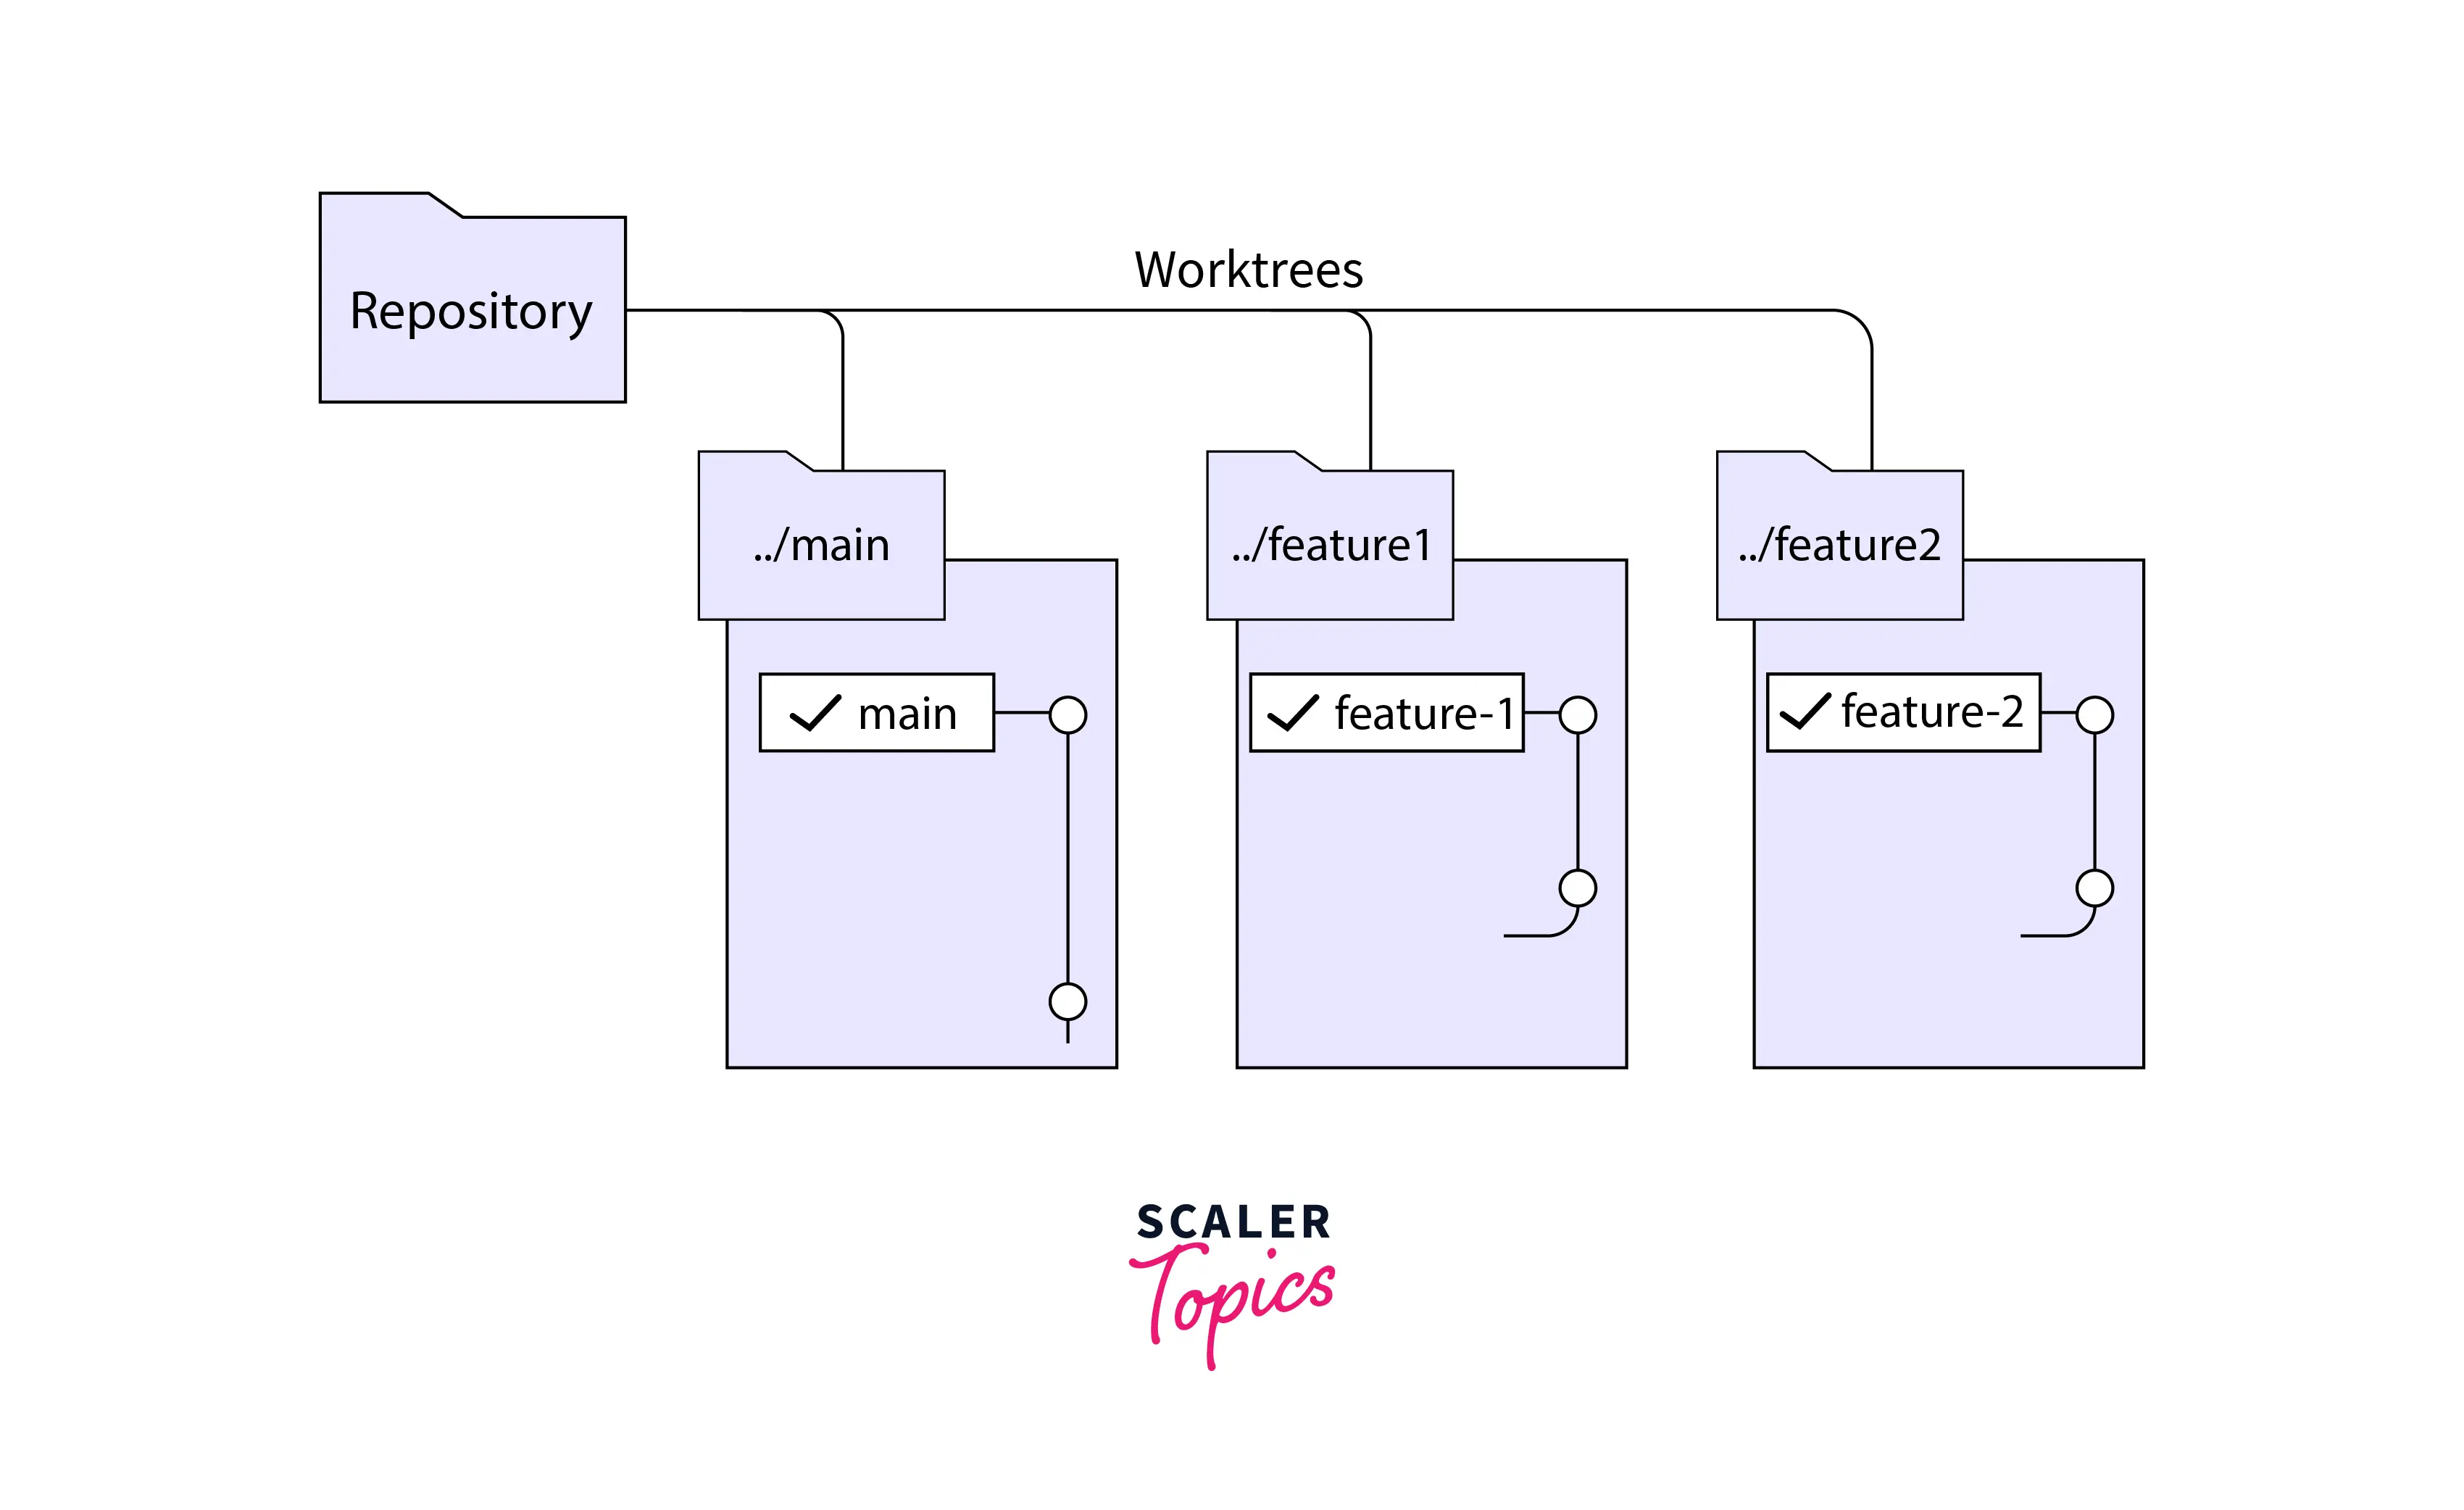
When working with multiple feature (let say feature1 and feature2) Git worktree can be used to create seperate worktrees for each feature and work upon both the features simultaneoulsy.The diagram above show how feature1 and feature2 have different worktrees and do not affect the main branch.
Let's understand the use of worktree with a use case
Let's assume you are working on a feature branch(let's say the branch is my-feature) in your company's project. You have not completed the feature code yet and you get a message from your junior colleague that he/she is facing some issues in his feature branch(let's say the branch is friend-feature) and your colleague needs your help to resolve the issue in his code.
For that, you need to go to the friend-feature branch and then look into the issue and resolve it. But if you directly switch from the my-feature branch to the friend-feature branch your WIP my-feature changes can get lost. To switch to the friend-feature branch you can follow the following steps
- stash all your changes in the my-feature branch by the command "git stash --all".
- Then switch or check out to the friend-feature branch by the command "git checkout friend-feature"
- Then resolve the issue in the friend-feature branch and commit the changes.
- Then again switch back to the my-feature branch by "git checkout my-feature"
- apply the saved stash changes to the my-feature branch by "git stash apply" and then start working on your my-feature branch.
This process can get quite complex or inefficient if you are working on multiple branches simultaneously. This is where worktree comes into the picture.
By worktree you can add a new worktree and then change the directory to the desired branch(friend-feature branch) in that worktree and start working on the friend-feature branch without affecting the work of the my-feature branch.
So, with the help of worktree we can work on multiple branches simultaneously without affecting the work of other branches.
When to Use Worktrees?
worktrees are used mainly when you are working with multiple branches simultaneously and do not need to stash the changes in the current branch every time you switch the branch.
The scenarios of working with multiple branches can arrive at many situations which will be explained in detail in the next section.
Transform Your Career
Choose from our industry-leading programs designed for career success
Modern Software and AI Engineering Program
Master full-stack development with AI integration

Modern Data Science and ML with specialisation in AI
Advanced data science techniques with AI specialization
Advanced AIML with Specialisation in Agentic AI
Deep dive into AIML with focus on Agentic systems
DevOps, Cloud & AI Platform Engineering
Build and manage AI-powered cloud infrastructure
AI Engineering Advanced Certification by IIT-Roorkee
Premier AI engineering certification from IIT-Roorkee
Scenarios Requiring Frequent Branch Changes
The various scenarios in which frequent switching between branches is required are :
Helping a Colleague
When working on a large project there will be situations when your colleague will need help from you to fix some issues in his branch. Either you can stash your WIP changes in your current branch and then switch to your colleague's branch to help him out or you can use the Git worktree features to create a new worktree and then work on your colleague's branch in that new worktree without hampering your current work.
Fixing a Bug
Assume a situation when there is a serious bug in your live deployed code and your manager asks you to leave all the work and fix the bug on priority.
You can create a new hotfix branch in a new worktree and start fixing the bug in that branch without hampering your previous work.
Working on Two Features at Once
When a new feature is being implemented it is always a good practice to create a new feature branch for each feature. When working with more than one feature you will have to work in two or more two feature branches simultaneously. Worktree comes to the rescue in such situations where you can create a new worktree for every feature branch and then switch to the required feature branch without affecting the code in other branches.
Commands
The command used to create a new working tree is
Here -path- is the path to the folder where we want to create the new worktree.
The command used to remove the worktree is
Here -branch- is the name of the worktree branch which we want to delete or remove.
The command used to list the worktree currently active is
This will list the main worktree first followed by all the linked worktree.
Further in this article, we will use all these commands with an example.
Turn Learning into Career Growth
Listing active worktrees
If you want to see all the active worktrees then you have to run a command to tell git to list all the active worktree.
This command will list the main worktree first and then list all the currently active worktree which are linked to the main worktree.
Git Worktree Example
Creating Worktree from an Existing Branch
Let's understand the worktree command with an example.
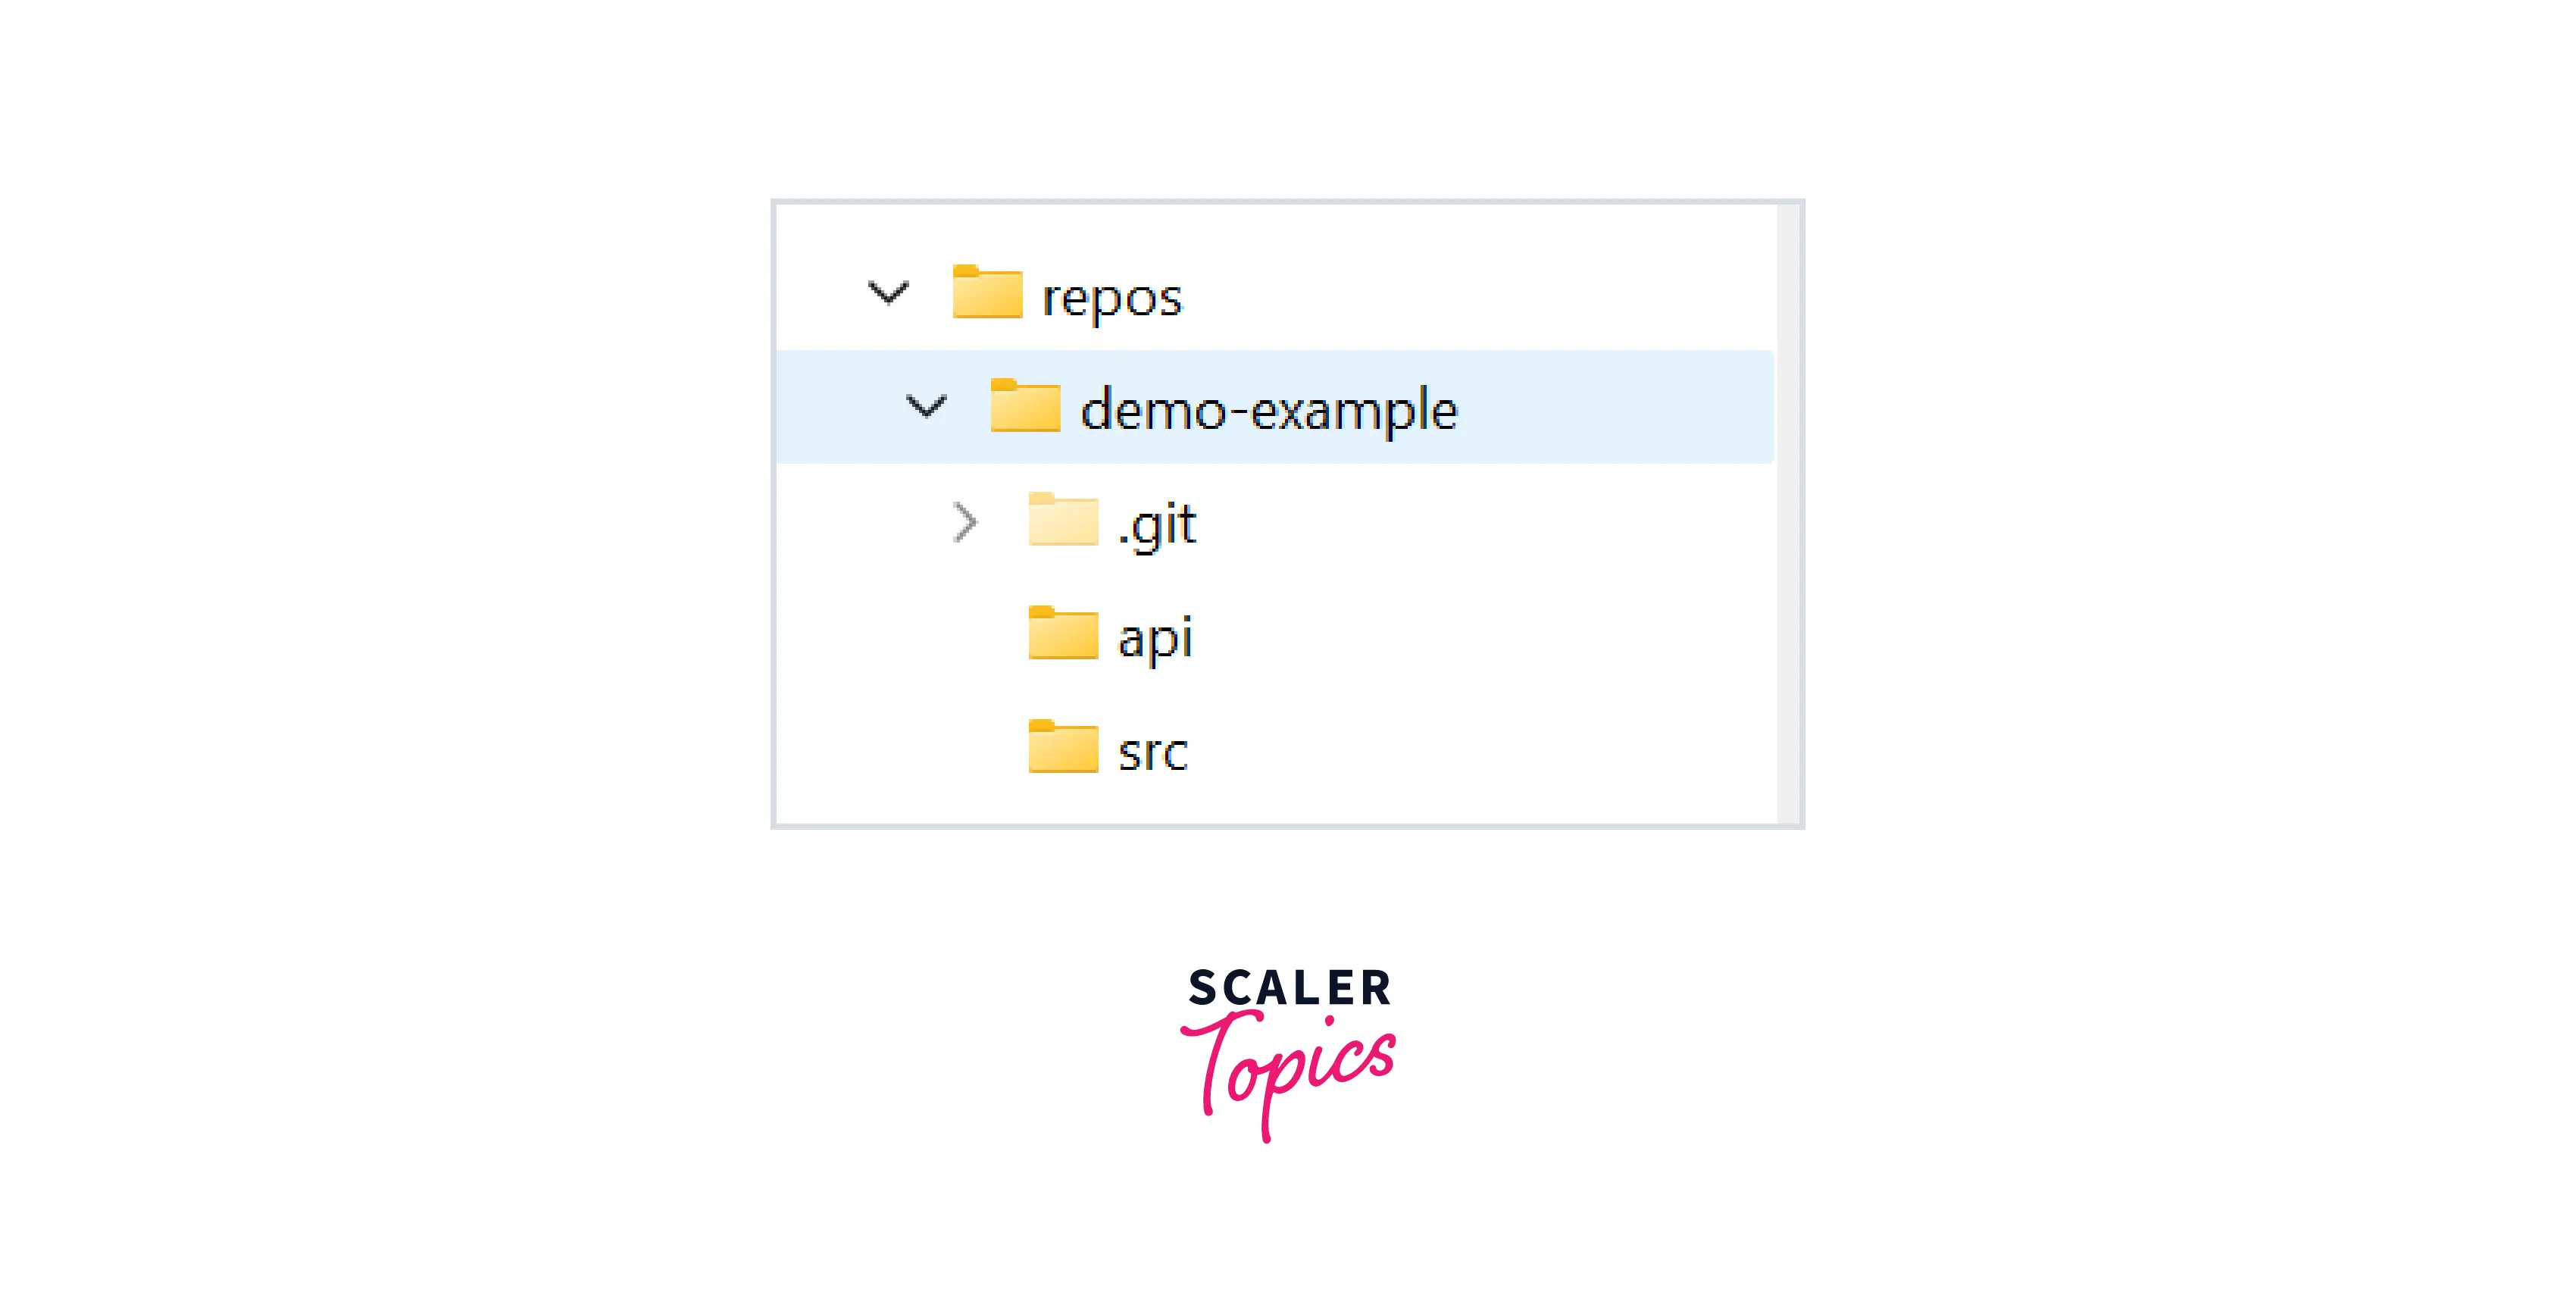
Let's consider that you created a repo in GitHub and cloned the repo in your local system. The repo name is demo-example . You also created a branch called my-feature and you are currently working on the my-feature branch.
The file structure as of now is shown in the below image.
You can check your current branch by the git command git branch. currently, you are in the my-feature branch.

Now, let's assume your friend/colleague is working in the branch named other-branch and he needs help from you to resolve some issues in his code. For checking your colleague's branch you need to go to his branch and then you will be able to see his code.
You can create a new working tree and check the other-feature branch in the new working tree without affecting your WIP(work in progress) in the my-feature branch. You can run the following git add command to create a new working tree.
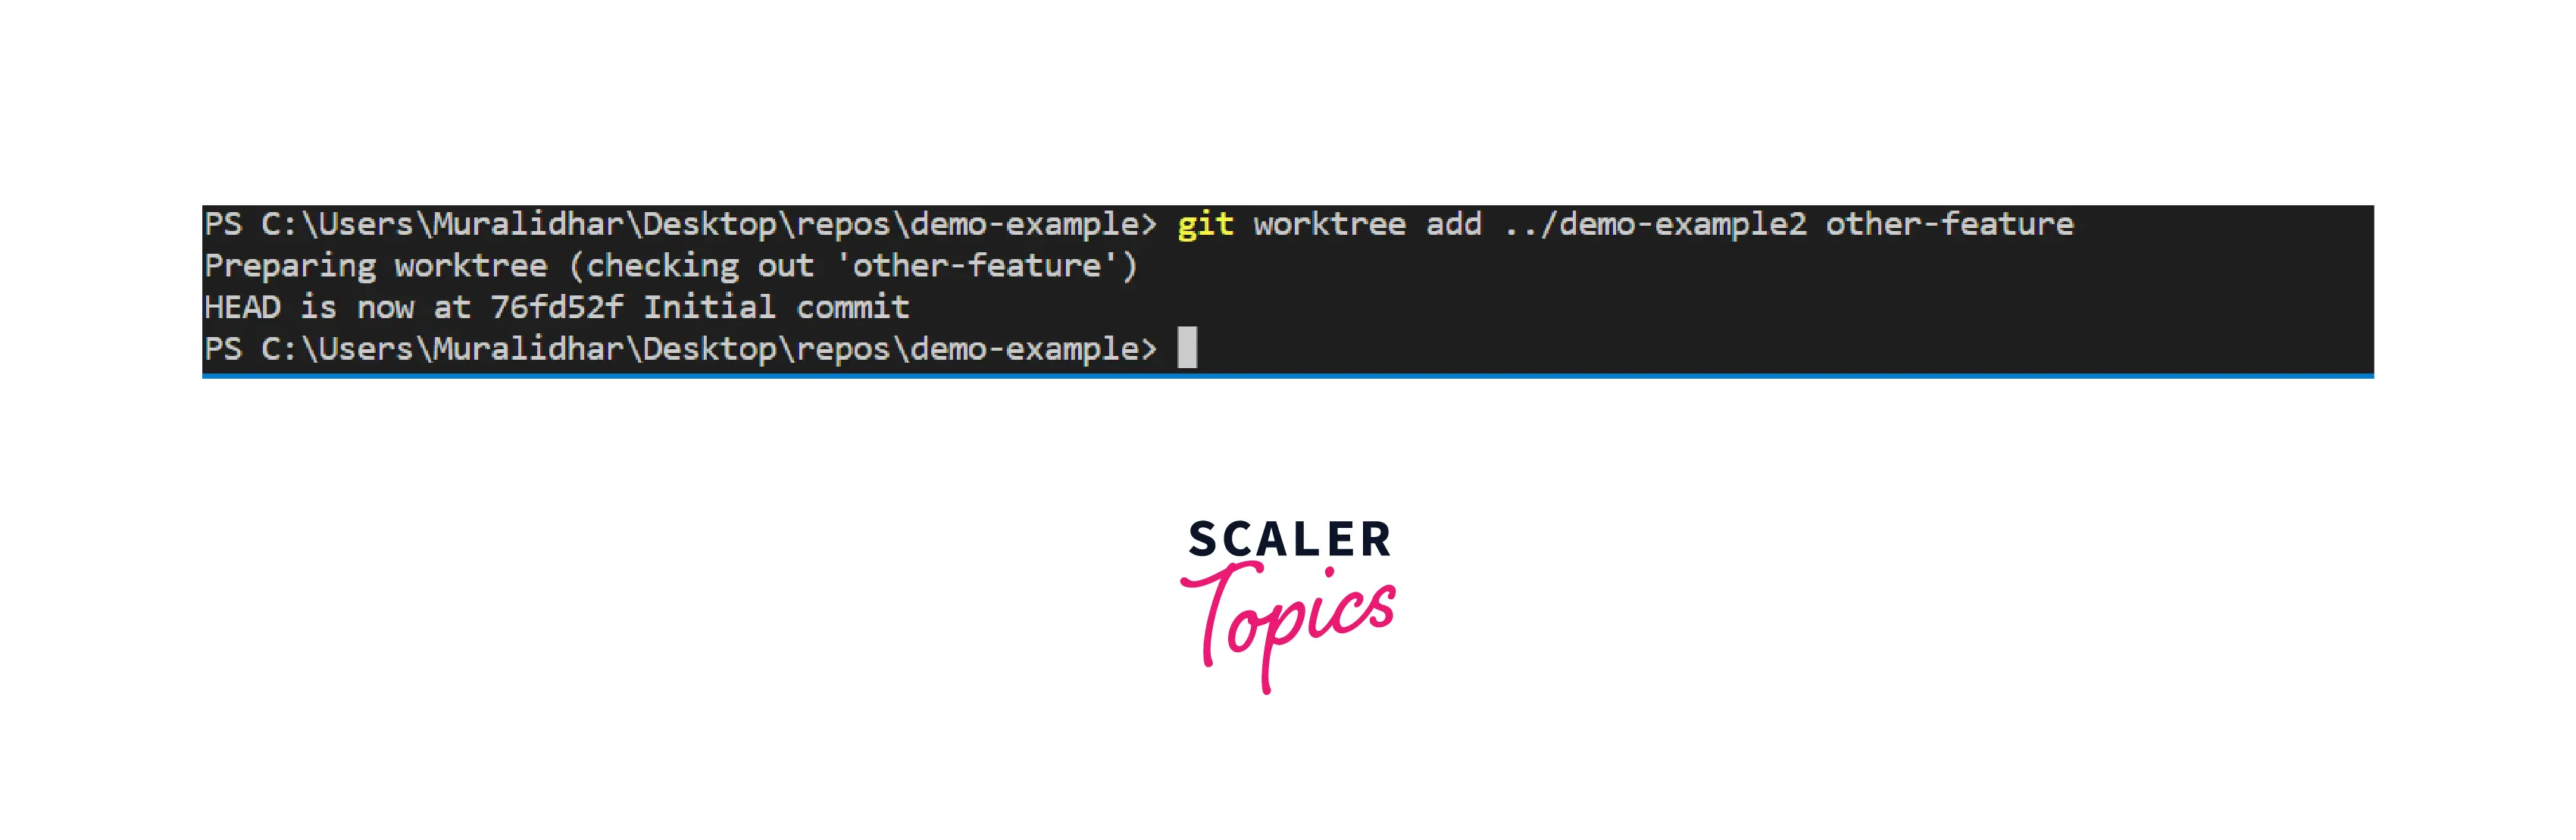
The above Git worktree command uses three arguments
- add - it tells git to create a new working tree.
- ../demo-example2 - This is the path where we want to create the new working tree.
- other-feature - This is the name of the branch you want to switch to in the new working tree.
The file structure will now become :
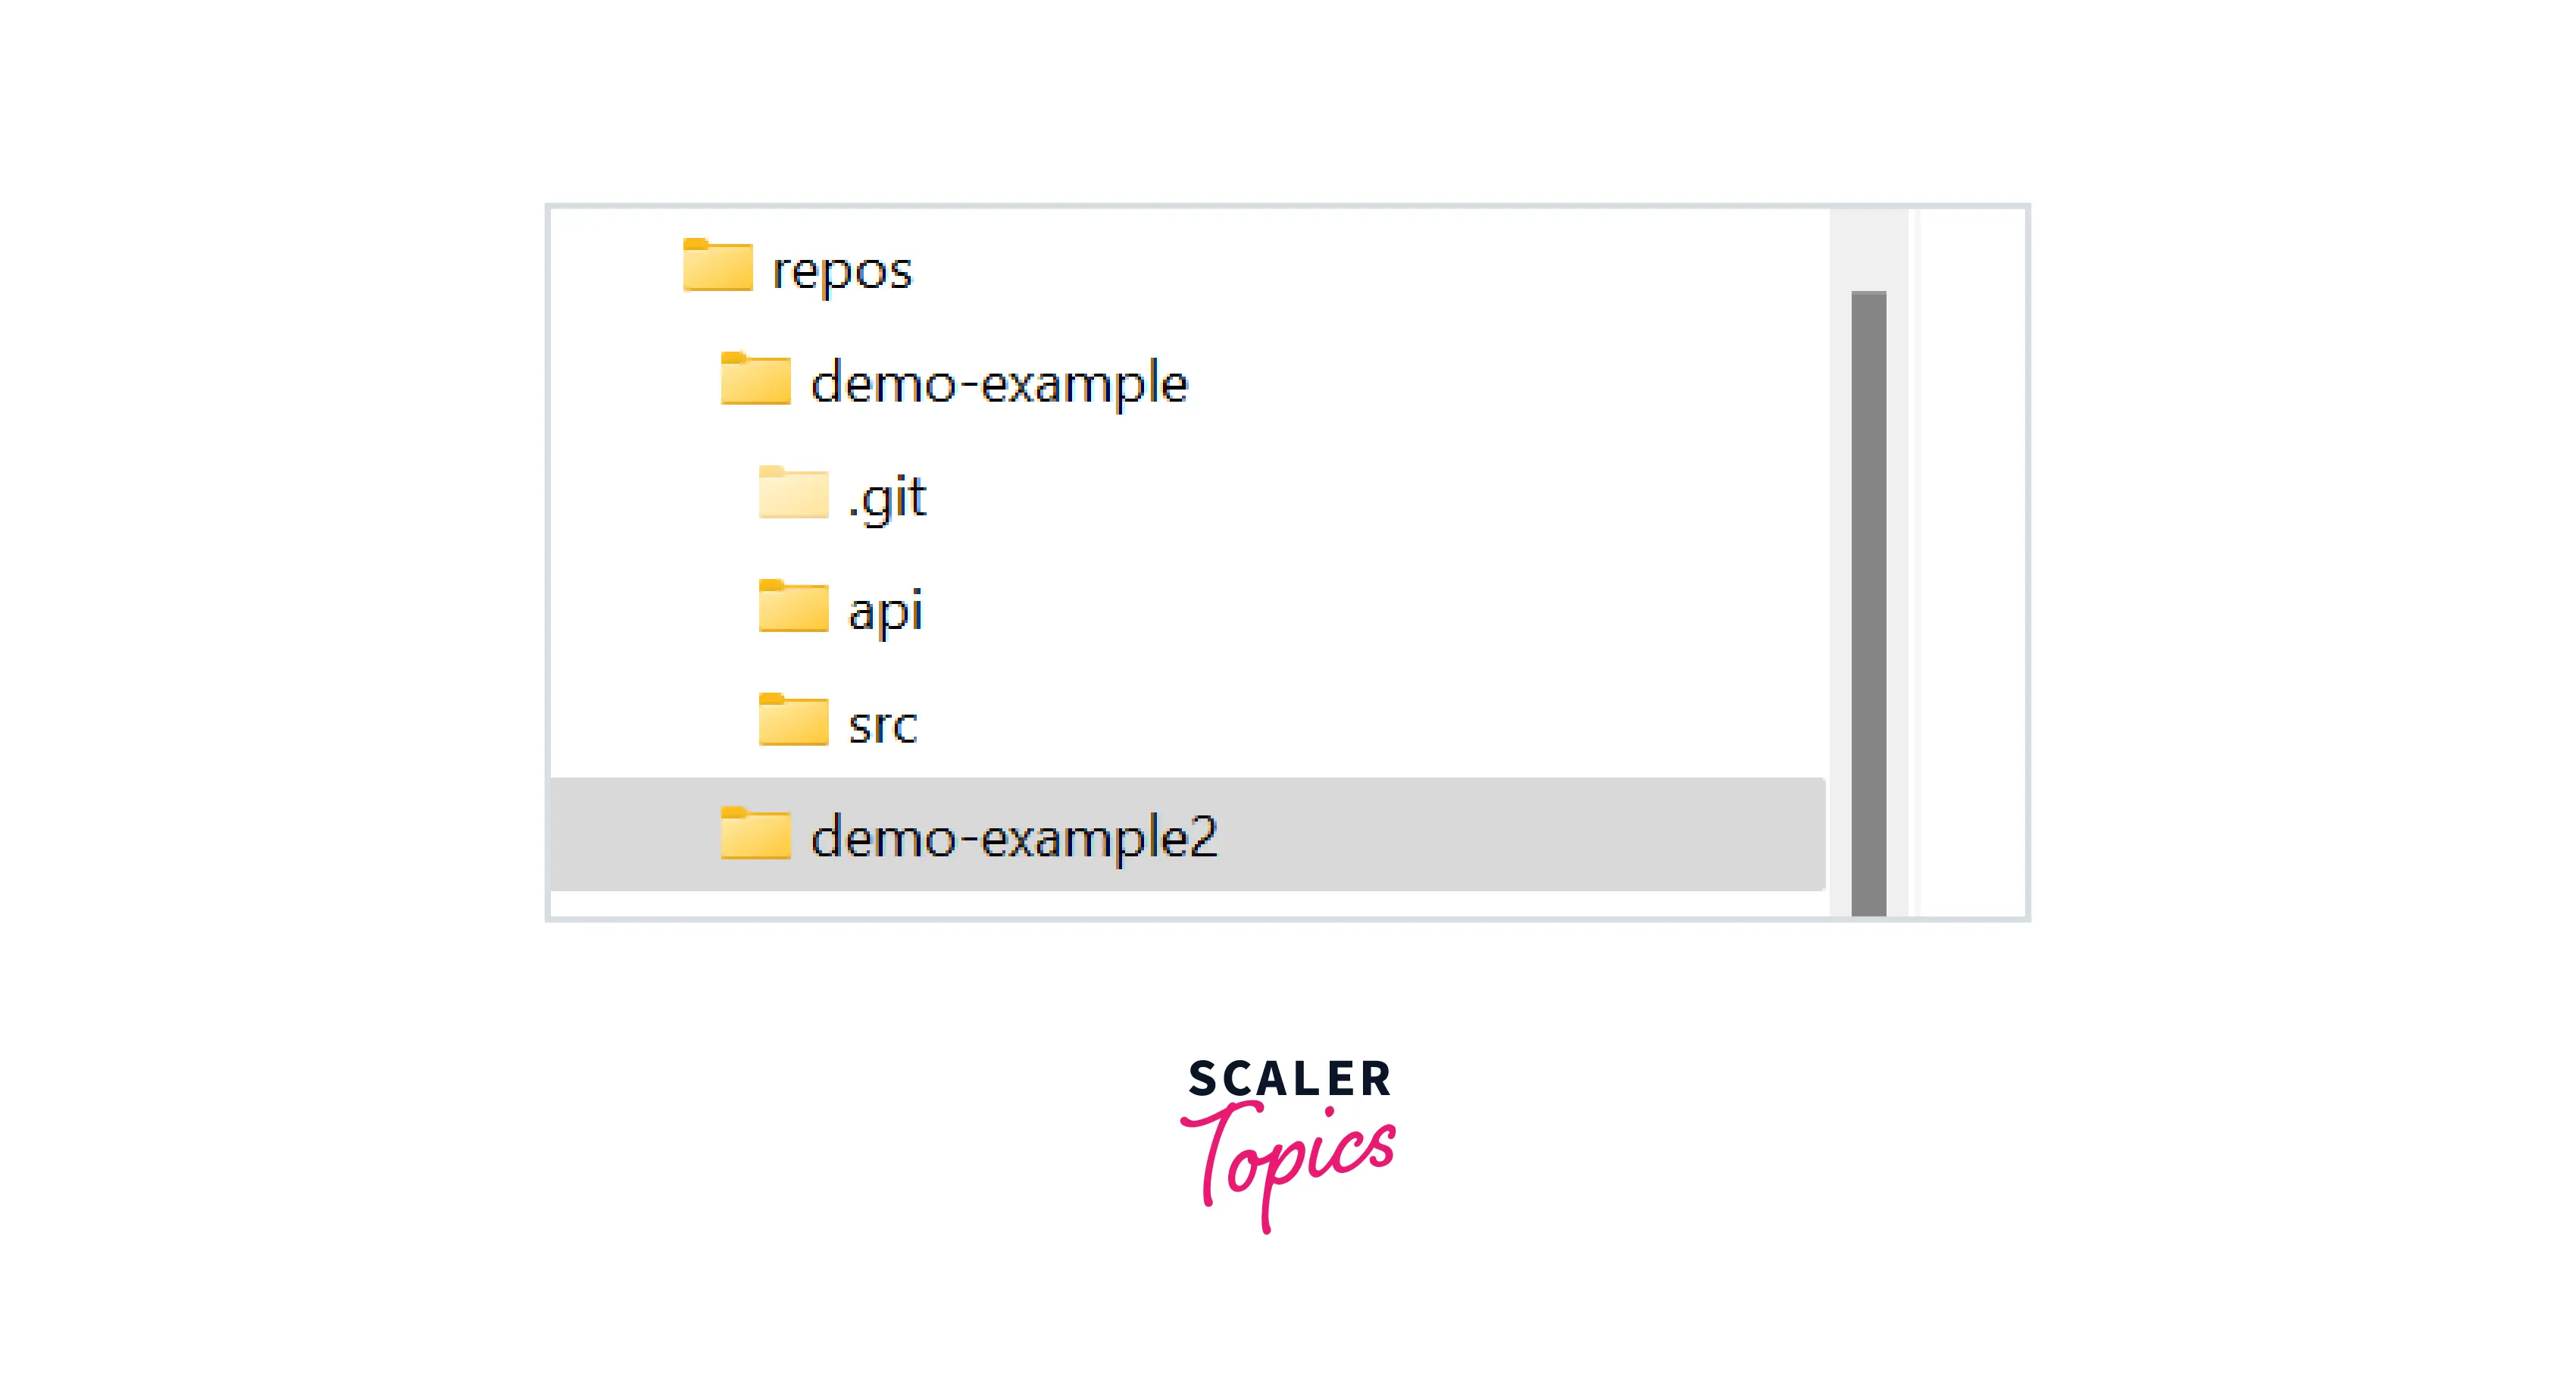
A new folder is created in the repo folder which will contain the .git file which is linked to the original .git file in the demo-example folder.
Creating Worktree from a New Branch
Suppose you are working in your my-feature branch and now your manager asks you to quickly fix a bug on priority then you need to create a new branch in a new working tree so that the WIP in the my-feature branch is not affected. You can use the -b option of Git worktree add command to both create a new branch and switch to the new branch in the new working tree.
The above command will create a new branch named bug-fix from the main branch and switch to it in the demo-example-3 worktree.
How to Delete a Git Working Tree
If you have finished your work in the new worktree branch and now need to delete the branch then you can use the remove command of worktree to delete it.
The above command will delete the demo-example2 and demo-example-3 worktree we created in the previous section while explaining the example of the worktree.
The Advantages of Git Worktree
Git worktree solves many issues with its worktree feature. some advantages of it are :
- duplication of Data - The linked worktree has the same data in the .git file which is in the main worktree. so there is no duplication of data when working with multiple worktree.
- Duplication of update process - If you rename a branch in some other worktree then the name of the branch will be updated in all worktree as the worktrees are operating on the same underlying data.
- No local sharing of branches - As the worktree operates on the same data so there are no issues in sharing the local only branches between the working trees. So there is no issue with multiple clones of the repo.
Disadvantages of Git Worktree
Some disadvantages of using worktree are :
- You can't checkout to the same branch in more than one working tree. Suppose if you are in the other-feature branch in demo-eaxample2 worktree and if you try to switch to the other-feature branch in the demo-example-3 worktree then git will through an error.
- If you try to switch to a branch that is checked out in a different working tree the also git will through an error.
- providing the path to the Git worktree add command can sometimes make the folders in the local system complex.
Scaler Placement Report and Statistics
Scaler learners achieved 2.5x salary growth with average post-Scaler CTC reaching ₹23L.
Conclusion
- worktree helps the developer to work in multiple git branches without the need to stash things while switching between the branches.
- worktree add -path- -branch- command is used to create a new worktree.
- worktree remove branch command is used to delete an active worktree.
- Git worktree list lists all the active worktrees.
- All the worktrees use the same data i.e the .git file as the main worktree.
- You cannot switch to the same branch in more than one worktree at the same time.