Install Node JS

Overview
Node.js has become quite popular since its first release in 2009. Its usage on 30 million sites and about 1.5 billion downloads show that it stands firm in the market, with startups choosing it over other options. The speed and performance of Node.js have given excellent results to big companies like Netflix, NASA, PayPal, LinkedIn, and many others. Node.js installation can be done in various ways with the help of different package managers. Node.js offers asynchronous and event-driven architecture, efficiency, reusability, and scalability.
Setting up the Node Development Environment
As you must have read what Node.js is for in the previous section, let’s see how to set up and test the Node development environment on various operating systems. The first step in setting up the Node Development Environment is to install Node.js.
Scaler Placement Report and Statistics
Scaler learners achieved 2.5x salary growth with average post-Scaler CTC reaching ₹23L.
Install Node.js
The way to install Node.js depends on what operating system you are using.
| Operating System | Directions |
|---|---|
| Mac OS | We can install Node.js on MacOS easily by using the installer from the official Node.js website. The alternative way to install Node.js is to use Homebrew and NVM (Node Version Manager). NVM also helps in the easy management of multiple active Node.js versions. |
| Windows | We can install Node.js on Windows easily by using the installer from the official Node.js website. The alternative way to install Node.js is to use Chocolatey and nvm-windows(Node Version Manager). nvm-windows also helps in the easy management of multiple active Node.js versions |
| Linux (Ubuntu) | There are various package managers available for each distribution. We can install Node.js by using the Ubuntu official repository. Alternatively, we can install Node.js in Linux using Node Source and personal package archive (PPA), it is recommended to use nvm to manage multiple active Node.js versions. |
Install a Text Editor
You can use any text editor of your choice. Here is a list of some recommended ones:
- Microsoft Visual Studio Code - One of the most popular IDE. It is free and comes with a lot of helpful tools pre-installed and useful extensions.
- Cloud 9 - A free cloud-based IDE with a lot of features.
- IntelliJ IDEA - Developed by JetBrains. It can be used to develop Node.js applications with the help of the Node.js plugin.
- Sublime Text - It is a lightweight IDE with features like split editing, customizing, project switching, etc.
- Vim - It is a light and easy text editor. It is free to use.
Starting a New Project
To start a new project we use the command npm init. On execution, it asks a set of questions regarding the application. On completion, it creates a package.json file.
We can now start working on our project.
Transform Your Career
Choose from our industry-leading programs designed for career success
Modern Software and AI Engineering Program
Master full-stack development with AI integration

Modern Data Science and ML with specialisation in AI
Advanced data science techniques with AI specialization
Advanced AIML with Specialisation in Agentic AI
Deep dive into AIML with focus on Agentic systems
DevOps, Cloud & AI Platform Engineering
Build and manage AI-powered cloud infrastructure
AI Engineering Advanced Certification by IIT-Roorkee
Premier AI engineering certification from IIT-Roorkee
How to Install Node.js on Windows
There are two methods to install Node.js on the Windows system environment. Every operating system has a different installation method of Node.js, depending on the existing environment of the system.
- By using the installer from the Node.js website.
- By using the Chocolatey package manager of Windows.
Using the Installer from the Node.js Official Website to Install Node.js on Windows
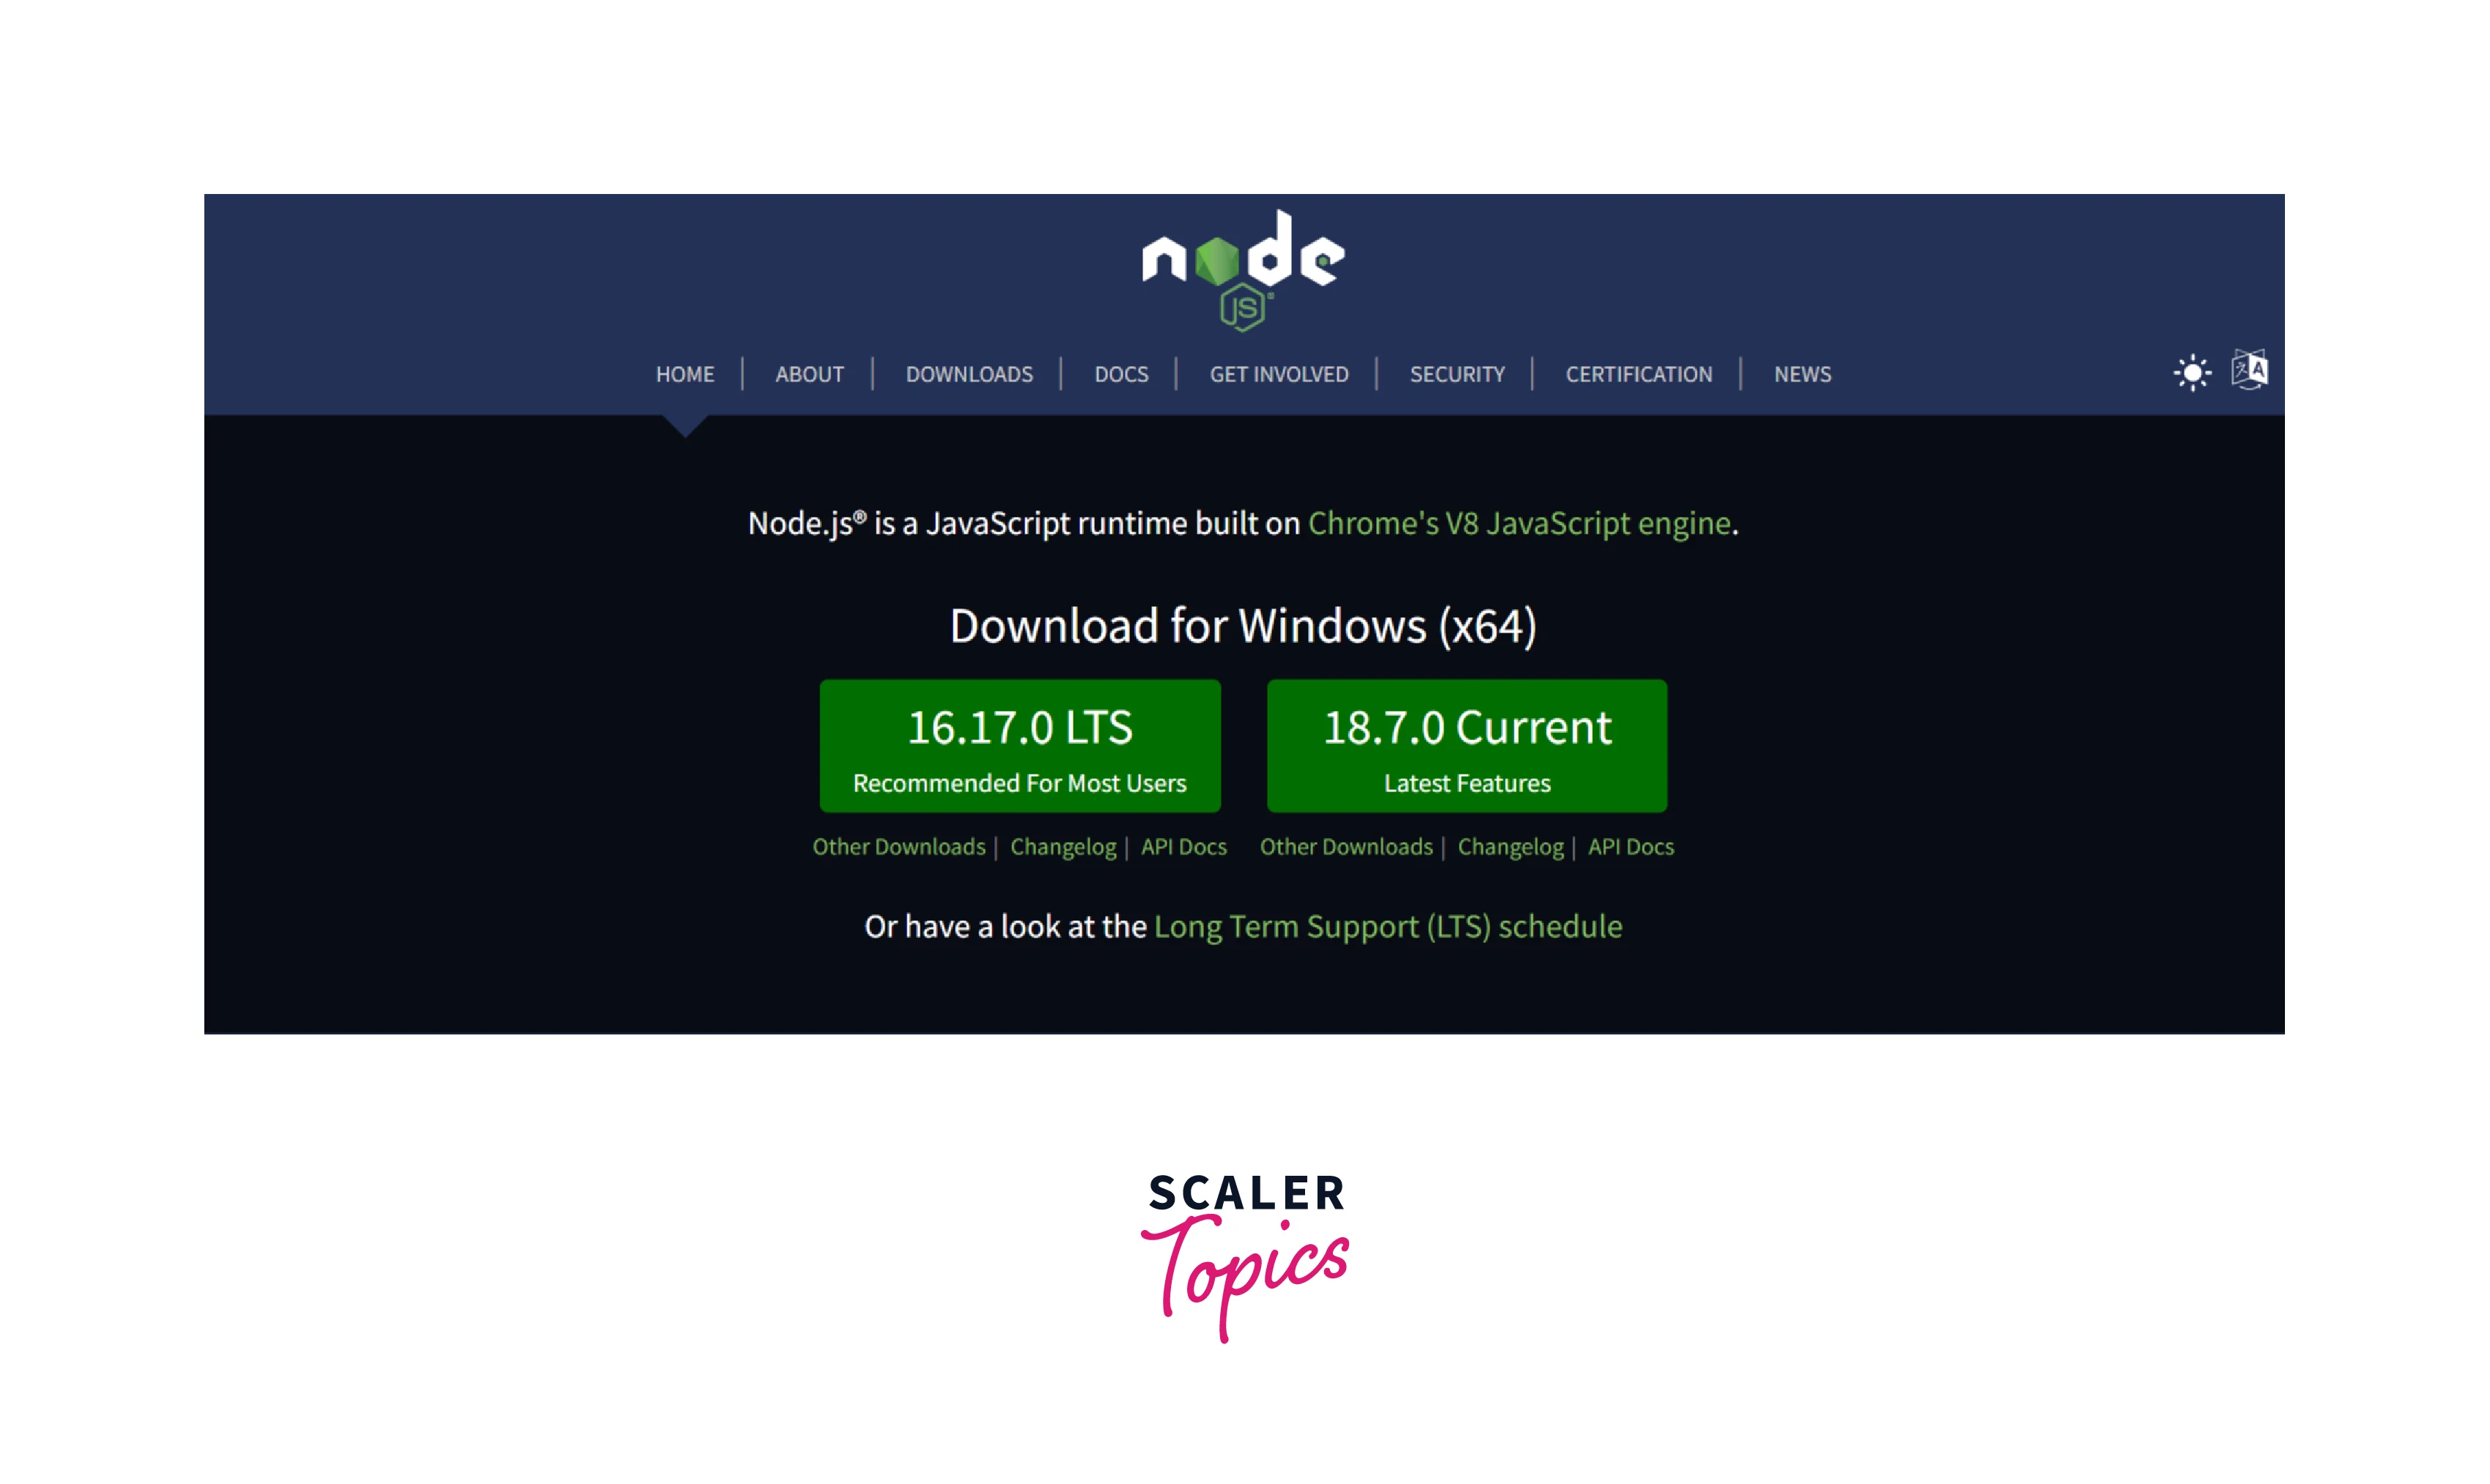
It is the easiest way of installing Node.js. Visit the official Node.js website. There are two kinds of builds available on the website: LTS(long-term support) which is recommended and Current which contains the latest features. The LTS releases are highly refined and bug-free. The Current builds contain the new features, but they may not be complete. Hence it is recommended to use LTS builds. The steps to install Node.js on Windows are as follows:
-
Download the Windows installer (.msi) file according to your system environment (64-bit or 32-bit). It contains a collection of essential files to install, update, or modify the Node.js versions on your system.
-
Run the Node.js installer file. Double-click the (.msi) installer file. Click on the “Run” button on the first screen to begin the installation.
-
Continue the installation steps. On the next screen, click the “Next” button to continue with the installation.
-
Accept terms and conditions. Click on the “Next” button.
-
Setup the directory path where you want Node.js files to be installed in your system. Click on the “Next” button to continue.
-
Select the default components to be installed. Click the “Next” button.
-
Start the installation and wait till it is finished. Click the “Finish” button to complete the installation.
-
Verify the Node.js installation. Open the command prompt and type the following commands
The output will be the version of the node installed. Similarly for npm do,
The output will be the version of npm installed.
Note: You do not need to set up the environment variables path, the installer will take care of the environment variables. Also (.msi) installer includes the NPM (Node Package Manager). Hence no need to download it separately.
Using Chocolatey Package Manager to Install Node.js on Windows
-
First, install Chocolatey (if already installed, move to the 3rd step).
-
Run Command Prompt as administrator. Run the following command to install Chocolatey.
-
Install Node.js to your local machine using the Chocolatey package manager.
-
Verify the Node.js installation. Open the command prompt and type the following commands
The output will be the version of the node installed. Similarly for npm do,
The output will be the version of npm installed.
How To Install Node.js on macOS
There are several ways to install Node.js on MacOS:
- By using the installer from the Node.js official website.
- By using the Homebrew package manager of macOS.
- By using Node Version Manager (nvm).
Using the Installer from the Node.js Official Website to Install Node.js on macOS
It is the easiest way of installing Node.js. Visit the official Node.js website and download the pre-built .pkg installer. There are two kinds of builds available on the website: LTS(long-term support) which is recommended and Current which contains the latest features. The LTS releases are highly refined and bug-free. The Current builds contain the new features, but they may not be complete. Hence it is recommended to use LTS builds. The steps to install Node.js on MacOS are as follows:
-
Download the .pkg installer: Select Open with Installer and run it.
-
Run the installer.
-
Introduction window, On this screen click continue.
-
Licence window, click agree and then press the continue button.
-
Installation Type, click install and authenticate using your macOS username and password the continue installation.
-
After successful completion a summary will be shown saying that Node.js and npm were installed.
-
Close the installation wizard.
-
Verify the Node.js installation. Open the command prompt and type the following commands
The output will be the version of the node installed. Similarly for npm do,
The output will be the version of npm installed.
Using Homebrew to Install Node.js on macOS
Homebrew is one of the most popular package managers of macOS and it makes installing Node.js relatively easy.
-
Check if you have Homebrew installed, in your terminal type:
-
If Homebrew is installed it will give the installed version. If Homebrew is not installed you can install it with the following command:
-
After installation of Homebrew, install Node.js
-
After this you can verify the installation by node -v and npm -v.
Note: Homebrew always installs the latest version of Node.js.
Using Node Version Manager (nvm) to install Node.js on macOS
NVM( Node Version Manager) is a bash script that helps in efficiently managing multiple active Node.js versions. To steps to install NVM and then Node.js using NVM are:
-
To clone the nvm repository and add the source lines to shell profile(~/.bash_profile, ~/.zshrc, ~/.profile, or ~/.bashrc):
- For curl
- For gwet
-
Reload the shell configuration by using the source command. For example :
-
Verify installation.
The above command will print nvm if installation was successful.
-
Now install Node.js with the help of node version manager (nvm).
- For the latest release of Node
- For a specific version of Node.js
- Now to use that particular version of Node.js
- To delete a version of Node.js
- To list all local versions of Node.js available on the system
- For the latest release of Node
-
To install npm (npde package manager)
Turn Learning into Career Growth
How To Install Node.js on Ubuntu (Linux):
There are several ways to install Node.js on Ubuntu (Linux):
- By using apt with Ubuntu’s official repositories.
- By using the Node Source and personal package archive (PPA).
- By using Node Version Manager (NVM).
Using Ubuntu's Official Repository to Install Node.js on Linux
It is the best option to set up Node.js and npm on Ubuntu and is sufficient for many developers. Ubuntu 20.04 contains a Node.js version 10.19 in its default repository that can be used across multiple systems. Follow the following steps,
- Refresh your local package index using
- Install Node.js using the following command
- Now install npm
- Verify the Node.js installation
Using Node Source and PPA (personal package archive) to Install Node.js on Ubuntu
You can install different versions of Nodejs with the help of PPA (personal package archive) maintained by NodeSource. These PPA have many versions of Nodejs available like v14 and v16. Follow these steps for successful installation:
-
First, we need to install PPA to get access to its packages.
Replace 16.x with your preferred version of Node.js in the above script This script will add the NodeSource signing key to your system, create an apt repository and install the necessary packages.
-
Now run the script.
This will add PPA configuration, and your local cache will be updated automatically.
-
You can now install Node.js and npm.
-
Verify the Node.js installation.
Note: The NodeSource package contains both the node binary and npm, so you don't need to install them separately.
Using Node Version Manager (nvm) to Install Node.js on Ubuntu
It is another way of installing Node.js and npm on Ubuntu. Follow these steps for Node.js installation:
-
First you need to install nvm using the following curl command.
This will install the nvm script to the user account.
-
Now to use it, you must first source your .bachrc file.
-
Now you can ask nvm, which version of Node.js are available.
-
Now you can install any of the above versions or versions.
-
Now you can check different versions of Node.js installed using.
This will show the currently active version on the first line, followed by some named aliases.
- You can switch the Node.js version using
- You can switch the Node.js version using
Updating the Local npm Version of Windows, macOS, and Linux (Ubuntu)
NPM is one of the most prominent package managers for Node.js. It manages the dependencies of packages. NPM takes care of automatically unpacking all the packages every time we use them in a project. Regularly updating npm improves the code used in the projects. The process of checking and updating the npm version in Windows, macOS, and Linux is discussed below:
Updating local npm version on Windows:
- Open the command prompt and check the version of npm.
- To update, run this command
After running this command, the npm version will be updated. You can recheck the npm version by using the step1 command.
Updating local npm version on macOS:
- Open the terminal and check the version of npm.
- To update, run this command
After running this command, the npm version will be updated. You can recheck the npm version by using the step1 command.
Updating local npm version on Ubuntu:
- Run the following commands one by one to update the npm
How does Node.js Work?
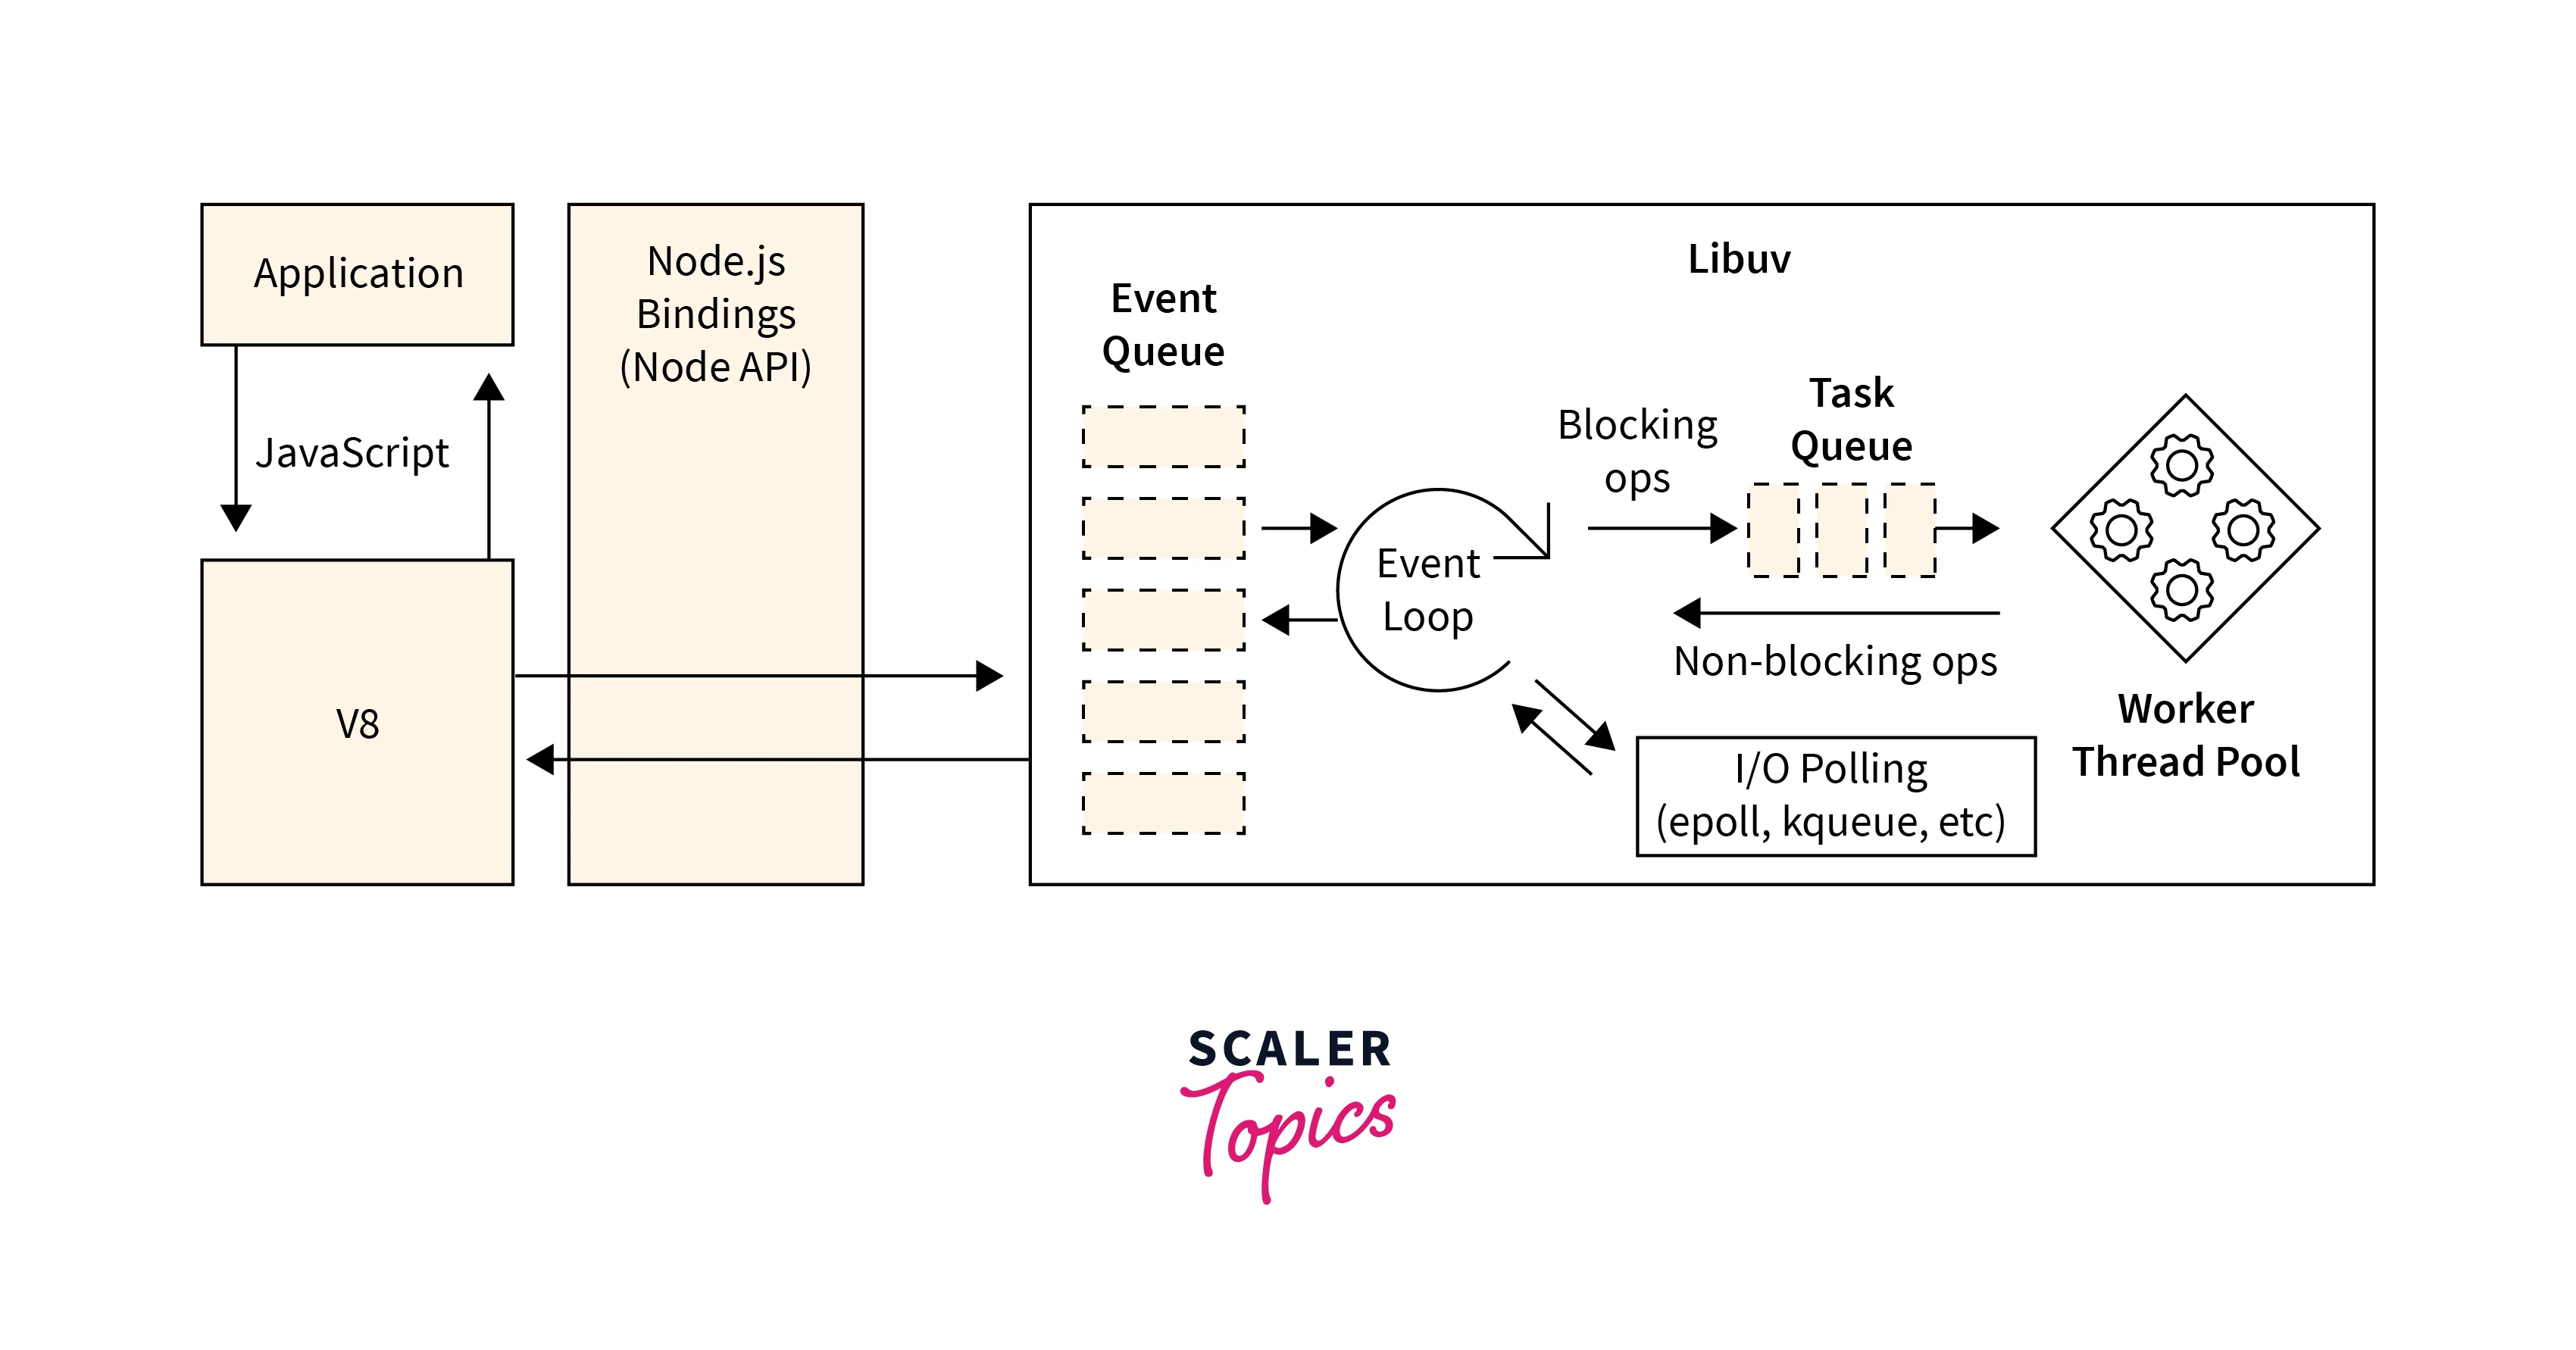
Node.js is a Javascript run time environment built on top of Chrome's V8 engine. It is single-threaded, although it provides asynchronous operations with the help of the Libuv library.
Let's understand the components of Node.js: V8 engine: It is an open-source project by Google. The primary purpose of the V8 engine is to run the javascript code outside the browser and convert javascript code directly to machine-level code for faster execution. It gives access to the Node, underlying networking and helps the Node to handle aspects of concurrency.
Libuv: It is responsible for all the asynchronous operations. It performs, maintains, and manages all the I/O operations and events in the event pool. All the TCP level connectivity and file/system operations are performed by this library. This library is written in C. Libuv implements an extremely important feature of Node.js which is Event Loop.
Event Loop: The event loop in Node.js helps you in performing non-blocking I/O operations even though JavaScript is single-threaded. The event loop is a limitless loop that assigns operations to the operating system whenever and wherever possible. The event loop is initialized as soon as Node.js starts, thus when a multi-threaded operating system finishes one of its many tasks, the kernel tells Node.js, and accordingly, the assigned callbacks to that task are added to the event queue, which is executed as soon as the primary call stack is empty.
Working of event loop in brief:
- Asynchronous functions emit events like promises used for fetching data from the database etc.
- After that, Event-loop picks up those events from the event queue and processes them when the main stack is empty.
- Callback functions are executed after that.
Example:
Output:
When you execute the above code, you will see the following output:
Thus Node.js holds the two libraries (V8 and Libuv) together; thereby, it becomes a unique interface and solution for developers. Hence can write your whole code in Javascript and compile it efficiently without interacting with C++ code directly.
Advantages of Using Node.js
There are various advantages of Node.js. Some of the following are
-
Simplicity - Javascript is one of the most liked and widely used languages in the programming community. It has quite a simple syntax; hence one can quickly adapt it. It also reduces the time to write codes. Node.js has an easy learning curve as anyone who knows the concepts of server-side programming (Javascript) can learn it in no time. Also developers can use a single language to develop entire full-stack applications (frontend and backend).
-
Scalability - Node.js provides a lot of features like cluster modules, non-blocking event loop mechanisms, and microservices. All of these make a Node.js application highly scalable.
-
Open Source - Node.js has the support of a large community of developers that have created numerous open-source modules for anyone to use.
-
Cross-platform Development - With Node.js, one does not need to spend time writing separate code for Windows, Linux, and Mac. We can use the same code for a mobile application and a desktop version.
-
Cost-Effective - Node.js allows users to write both server and client-side codes in Javascript. Hence there is no need of hiring a separate group of developers for each of them.
-
Real-Time Applications - Node.js offers high performance in Real Time applications due to its ability to multitask. The speed of I/O operations is enhanced by the non-blocking event loop.
-
Large Community - Node.js has a large community of developers that are constantly working to improve its performance.
-
Caching - Node.js provides caching of single modules. Requests get cached in application memory. This provides faster loading.
Conclusion
- Node.js is an open-source, cross-platform Javascript runtime environment that runs on Chrome's V8 engine internally.
- For setting up the Node.js development environment: install Node.js, install a text editor, and initialize the project with the command npm init.
- Node.js can be installed on Windows by the installer provided on the node.js website or by using the package manager Chocolatey.
- Node.js can be installed on macOS by the installer provided on the node.js website or by using the package manager Homebrew.
- NVM, Node Version Manager, can be used to manage multiple active node versions easily.
- Node.js can be installed on Ubuntu by using Ubuntu's official repositories, by using the Node Source and personal package archive (PPA), and by using Node Version Manager (NVM).
- To update npm on Windows and macOS we use the command
- To update npm on Linux we use the following commands:
- NodeJs internally works with the help of Chrome’s V8 engine and Libuv library. These help Nodejs to become non-blocking, concurrent, event-driven, and robust.