Jenkins - Installation
Overview
In today's fast-paced software development environment, effective and automated continuous integration and continuous delivery (CI/CD) techniques are essential. Jenkins, an open-source automation server, plays a crucial role in enabling CI/CD pipelines, accelerating software development, and fostering team collaboration. This blog provides a comprehensive tutorial on Jenkins installation, catering to beginners and experienced users. It covers various installation topics, including an overview of Jenkins and its relevance, and installation of Jenkins on different operating systems.
Hardware requirements
During Jenkins installation on server, it is crucial to consider the hardware requirements to ensure optimal performance and stability.
For Jenkins Installtion minimum hardware requirements are:
- A minimum of 256 MB of RAM.
- At least 1 GB of drive space, although it is advisable to have a minimum of 10 GB if running Jenkins as a Docker container.
For a small team, it is recommended to have the following hardware configuration:
- 4 GB or more of RAM.
- 50 GB or more of drive space.
It's important to understand that the hardware requirements may vary depending on factors such as the size and complexity of your project build and concurrent users.
Software Requirements
Before Jenkins Installation and running it on server , it is important to ensure that your system meets the necessary software requirements. Here are the key requirements to consider:
-
Java Development Kit (JDK):
- Jenkins relies on Java for its execution. It is essential to have a compatible JDK installed on your system.
- While Jenkins generally supports Java 8 and newer versions, it is advisable to use the latest LTS (Long-Term Support) version of Java for optimal compatibility.
-
Operating System:
- Jenkins is designed to be cross-platform meaning it provides support to various Operating Systems present. eg. Windows, Linux, MacOS etc.
- It is important to check that your chosen operating system is supported by Jenkins.
-
Web Browser:
- Jenkins has a user-friendly web-based interface for administration and configuration.
- To access the Jenkins interface, you will need a modern web browser such as Google Chrome, Mozilla Firefox, or Microsoft Edge.
It is highly recommended to refer the official Jenkins documentation for detailed jenkins installation instructions tailored to your specific operating system and additional software requirements.
Release Types
- LTS (Long-Term Support) Release:
- Jenkins LTS releases are regarded as the most dependable and stable releases.
- LTS releases go through extensive testing and issue fixes, making them appropriate for use in production settings.
- Weekly Release:
- The "Mainline" releases, usually called weekly releases, are more frequent and offer the newest features and improvements.
- Compared to LTS versions, these releases might contain untested experimental features and new functionality.
- Users that want to keep up with the most recent Jenkins features and can keep up with it can use this.
- Experimental Releases:
- Jenkins' experimental releases are beta versions that are used for testing and assessment.
- These releases include the most recent updates and features, but using them in a production setting is not advised.
- Advanced users, developers, and testers who wish to sample new features and participate in testing and issue reporting should utilize experimental releases.
The release type you choose will rely on your unique needs and preferences and can vary from organizations to your needs.
Steps to Install Jenkins
For Jenkins Installation on our local system or cloud we can follow some simple steps but before that, we must see that our system meets the hardware and software requirements. Since we are moving toward containers we will also look Jenkins Installation using Docker.
1. Installing on Debian/Ubuntu: For this example, we are using LTS support as we are going to use this for practice
Here we are using the curl command to download the Jenkins GPG key from the specified Jenkins URL:
In this part we are adding the Jenkins repository to the system's package sources list by echoing the repository information and writing it to the /etc/apt/sources.list.d/jenkins.list file.
Once done update the system and packages installed.
In this, we are using the apt-get package manager to install Jenkins by retrieving and installing the Jenkins package from the configured package sources.
You can enable the Jenkins service to start at boot with the command:
You can start the Jenkins service with the command:
You can check the status of the Jenkins service using the command:
If everything has been set up correctly, you should see an output like this:
2. Jenkins Installation using Docker:
To install Jenkins using Docker, you can use the following commands:
- Pull the Jenkins image from Docker Hub:
- Start a Jenkins container with the necessary configurations:
Let's break down the command:
-d: Runs the container in detached mode (in the background). -p: Maps the container's port to the host's port. -v: Mounts the Docker volume jenkins-data to the container's /var/jenkins_home directory to persist Jenkins data.
Whichever way you choose once Jenkins is installed you can access the Jenkins web interface by visiting http://localhost:8080 in your web browser.
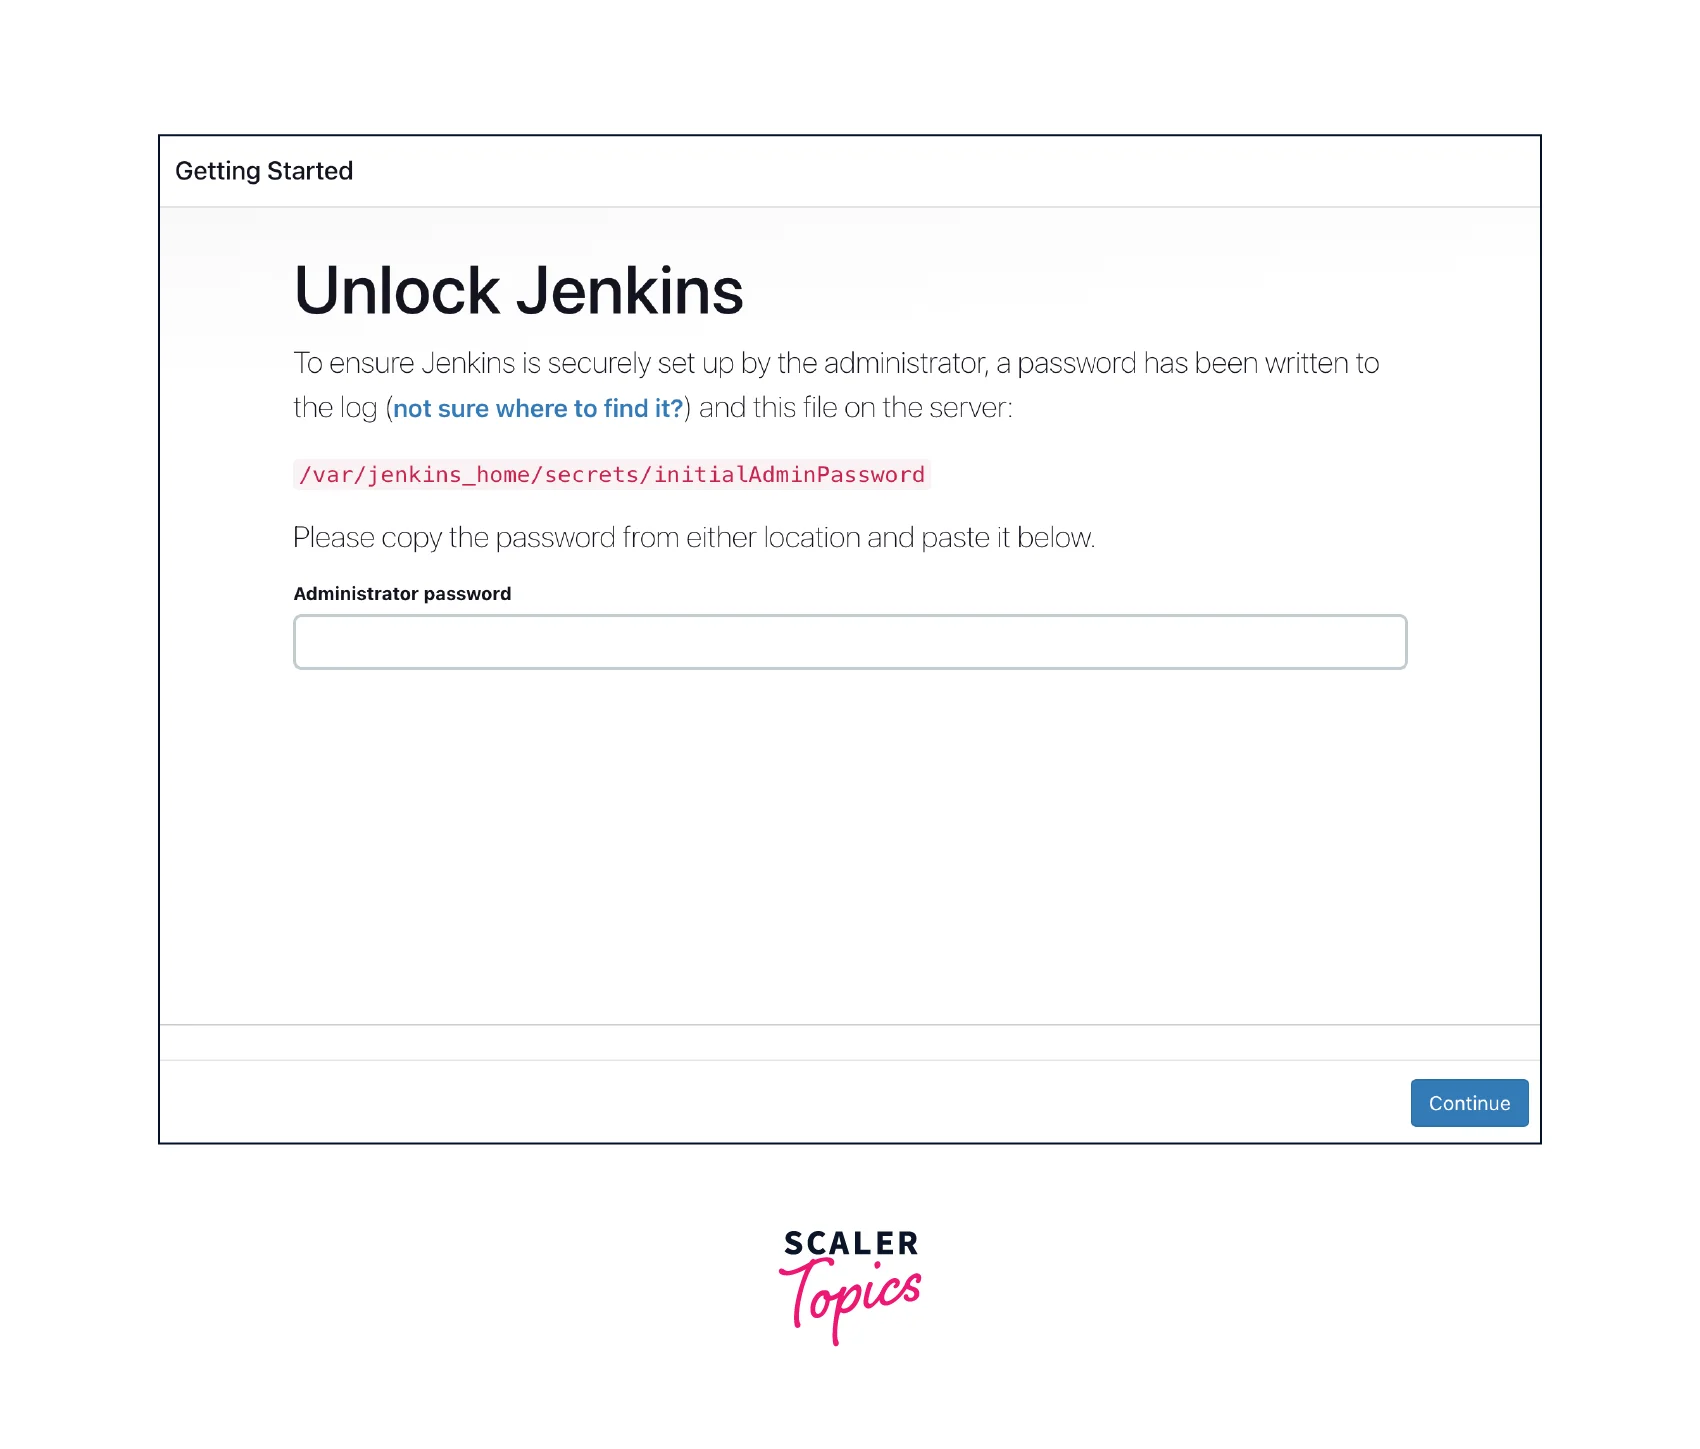
How to Unblock Jenkins?
To unblock Jenkins we will be needing the initialAdminPassword which is downloaded when we installed Jenkins and is kept in a file.
On Ubuntu/Debian:
To access the file paste this command
By using the following command it will print initialAdminPassword on the terminal next copy this value and paste it on the Jenkins UI.
On Docker: To access the initialAdminPassword in Docker we will have to get inside the container.
sudo: It is a command used to run the subsequent command with superuser (root) privileges. This may be required depending on your system's configuration. docker exec: This is the Docker command used to execute a command inside a running container. -it: These flags are used to indicate that the command should be executed interactively, allowing input and output between the terminal and the container.
and after that, we can follow the same instructions as above:
We could follow the same thing if you have installed Jenkins on another OS.
Customize Jenkins
After successful Jenkins installation one can see extensive customization options to tailor it to your specific needs.
 Here are a few customization options you can explore:
- Themes and UI: Customize the Jenkins interface by installing and applying themes to improve the aesthetics and user experience.
- Plugins: Jenkins has a vast plugin ecosystem that extends its functionality. Explore and install plugins that align with your project requirements.
- User Management: Manage user accounts, permissions, and access control to ensure secure collaboration within your organization.
- Build Pipelines: Define complex build pipelines to automate the entire software delivery process, including build, test, and deployment stages.
Feel free to experiment with different customization options and explore.
Conclusion
- Setting up Jenkins requires ensuring that your system meets the necessary hardware and software prerequisites, such as having a compatible Java Development Kit (JDK) and a supported operating system.
- The installation process may vary depending on the operating system you are using. You have the flexibility to install Jenkins directly on your system or opt for containerized deployment using Docker.
- Once installed, you can tailor Jenkins to your needs by installing plugins, managing user accounts and permissions, configuring build pipelines, and customizing the user interface.
- To unlock Jenkins and gain administrative access, you will need to retrieve the initial administrator password generated during the installation process.
- Exploring and experimenting with the extensive customization options in Jenkins is essential to optimize its functionality according to the specific requirements of your project.