Node.JS Command Line In-depth
Overview
A command line interface allows us to interact with a computer system using text-based commands. The Node.js command line interface (CLI) is a tool for executing commands on a Node.js application. It allows us to execute arbitrary shell commands without leaving our editor or IDE and without complex build procedures. Using a command line, we can install packages, run applications and also debug our code. It is a simple and effective tool for developing, testing, uploading, and running commands in Node.js.
Introduction - Command Line
We use a computer daily but we rarely realize that we can't talk to a computer directly. We need an interface between the user and the system which will facilitate this communication. The user will give commands to the computer using this interface. The computer will produce some output to display on this interface. There are two types of user interfaces:
- Graphical User Interface: A graphical user interface (GUI) incorporates images, text, and mouse input to create an experience that enables the users to interact with the systems via monitors, tablets, or other displays. For eg, an icon of a folder is a GUI element.
- Command Line Interface: It is a text-based interface where users enter commands in a Shell for the computer system to run. A Shell is software that interprets the commands and proved access to the resources offered by the Operating System. Command Line Interfaces are in use since before GUI and can essentially perform any task using a computer from running applications to playing games. They lack the graphical prowess but make up for it in terms of speed, memory, and overall control they provided over a computer system. Other tasks include manipulating directories, running servers, automation via scripting, remote access to cloud systems, etc.
There are two types of Command Line Interfaces:
- Operating System CLI: These come out of the box with the operating system and help to interact with the operating system. Different OS command line interfaces offer different commands based on the operating system's use cases. Examples include Bash for Linux and Windows, CMD or Command Prompt for Windows, Terminal for Linux and macOS, etc.
- Application-based CLI: Many applications are command-line-based and offer their own CLI shell software. Many applications provide a CLI service along with the regular GUI. This command line interface is used to interact with the application like passing arguments, running the application server, etc. An excellent example of this would be the MySQL database. It is based on Structured Query Language and when we download and install it, we get both:
- MySQL Command Line Client: Application CLI offered by MySQL
- MySQL Workbench: A GUI-based client for MySQL
Similarly, the Node.js command line interface is the CLI tool for Node.js which offers a variety of Command Line options ready to be used throughout the Node.js application development process.
Scaler Placement Report and Statistics
Scaler learners achieved 2.5x salary growth with average post-Scaler CTC reaching ₹23L.
Installing Node JS Using the Command Line
It is highly recommended to use the Node.js installer downloaded from their website to install Node.js on Windows. However, if you're using Linux, then use the following command to install Node.js and NPM:
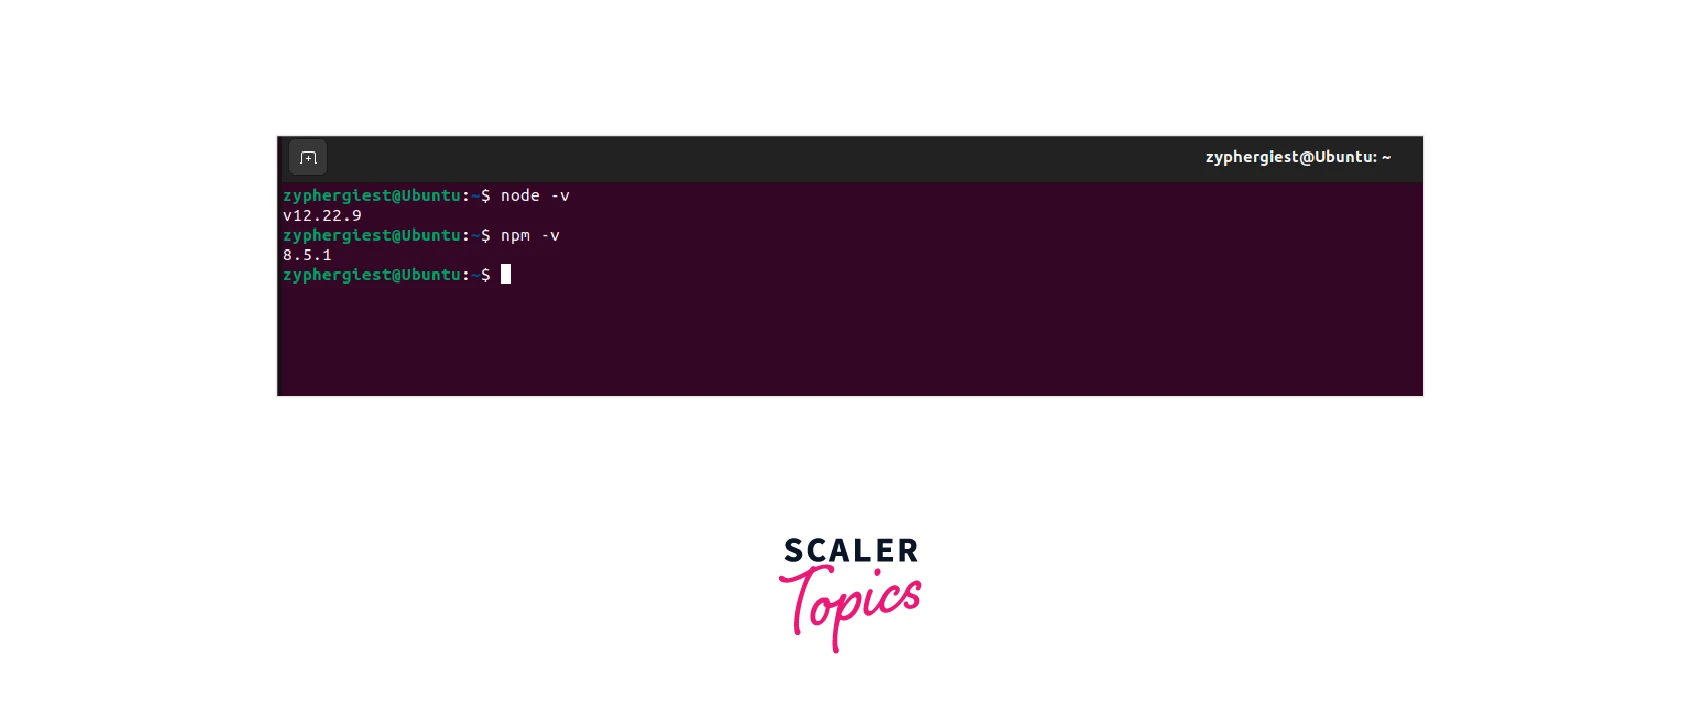
Make sure the user installing the app has the right privileges. After the installation is complete, run the following commands to check if node.js is present or not:
node -v npm -v
Common Node JS Command Line Options
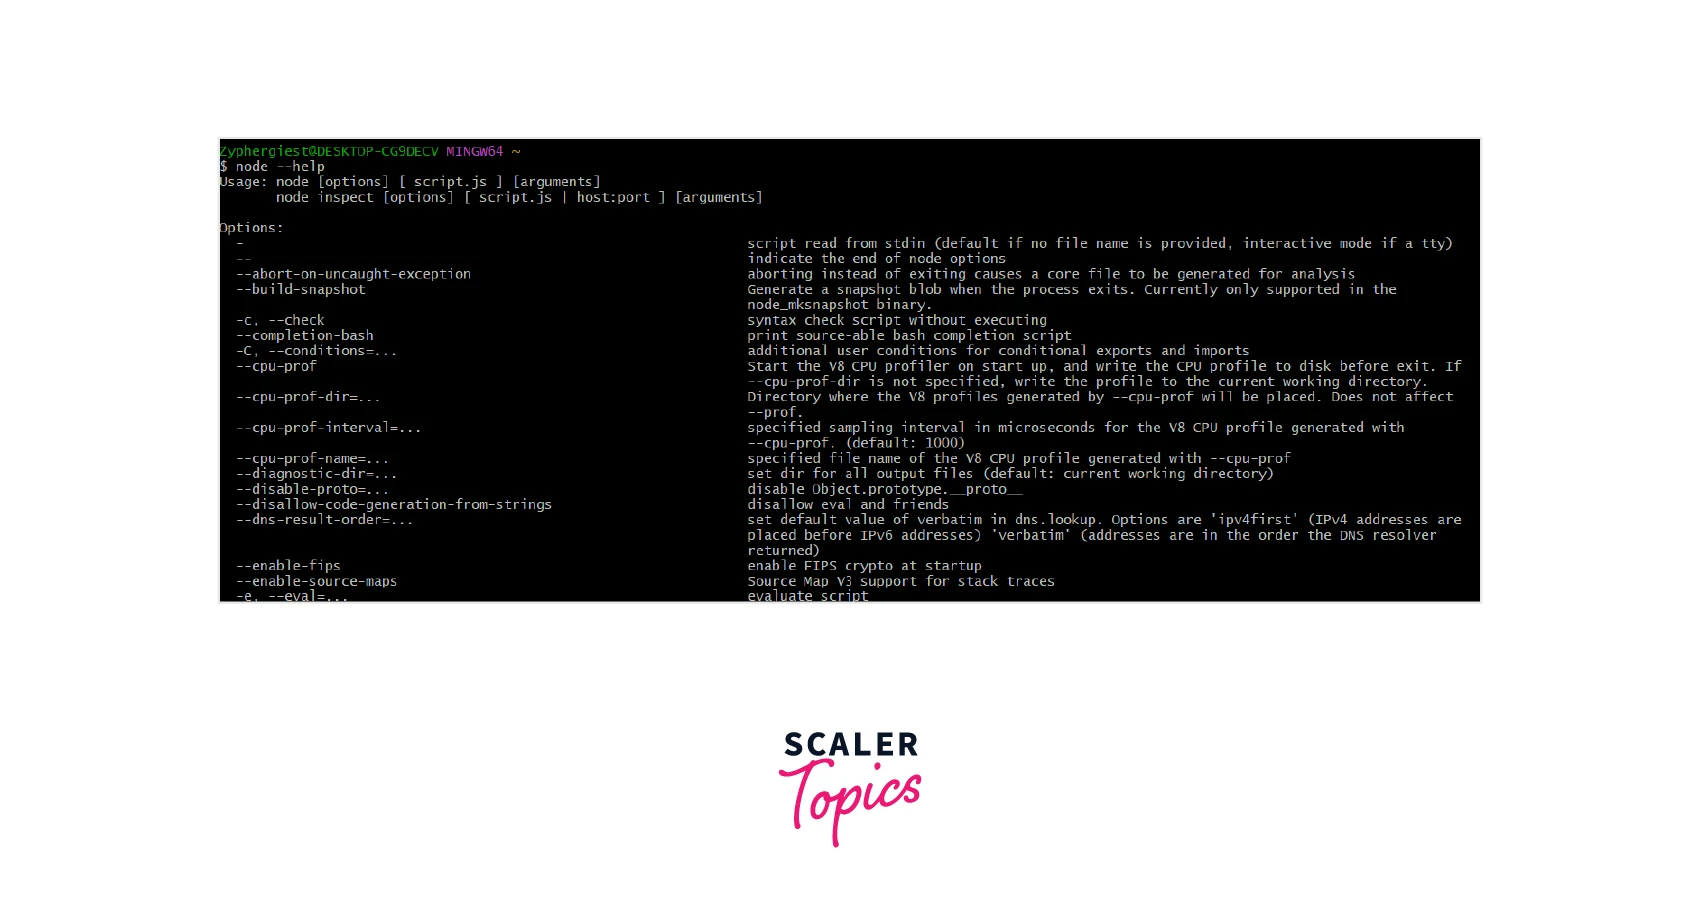
Help
This command is used to display Node.js Command Line commands. This is a list of all the available options which can be run using the node.js command line. To execute, run the following command:
node -h or node --help
Here is a short screengrab of the terminal output:
Transform Your Career
Choose from our industry-leading programs designed for career success
Modern Software and AI Engineering Program
Master full-stack development with AI integration

Modern Data Science and ML with specialisation in AI
Advanced data science techniques with AI specialization
Advanced AIML with Specialisation in Agentic AI
Deep dive into AIML with focus on Agentic systems
DevOps, Cloud & AI Platform Engineering
Build and manage AI-powered cloud infrastructure
AI Engineering Advanced Certification by IIT-Roorkee
Premier AI engineering certification from IIT-Roorkee
Version
This command is used to display the current version of Node installed on our system. To execute, run the following command:
node -v or node -version
We can use the same command for NPM as well:
npm -v will display the version of Node Package Manager.
Here is a screen grab of the expected output.

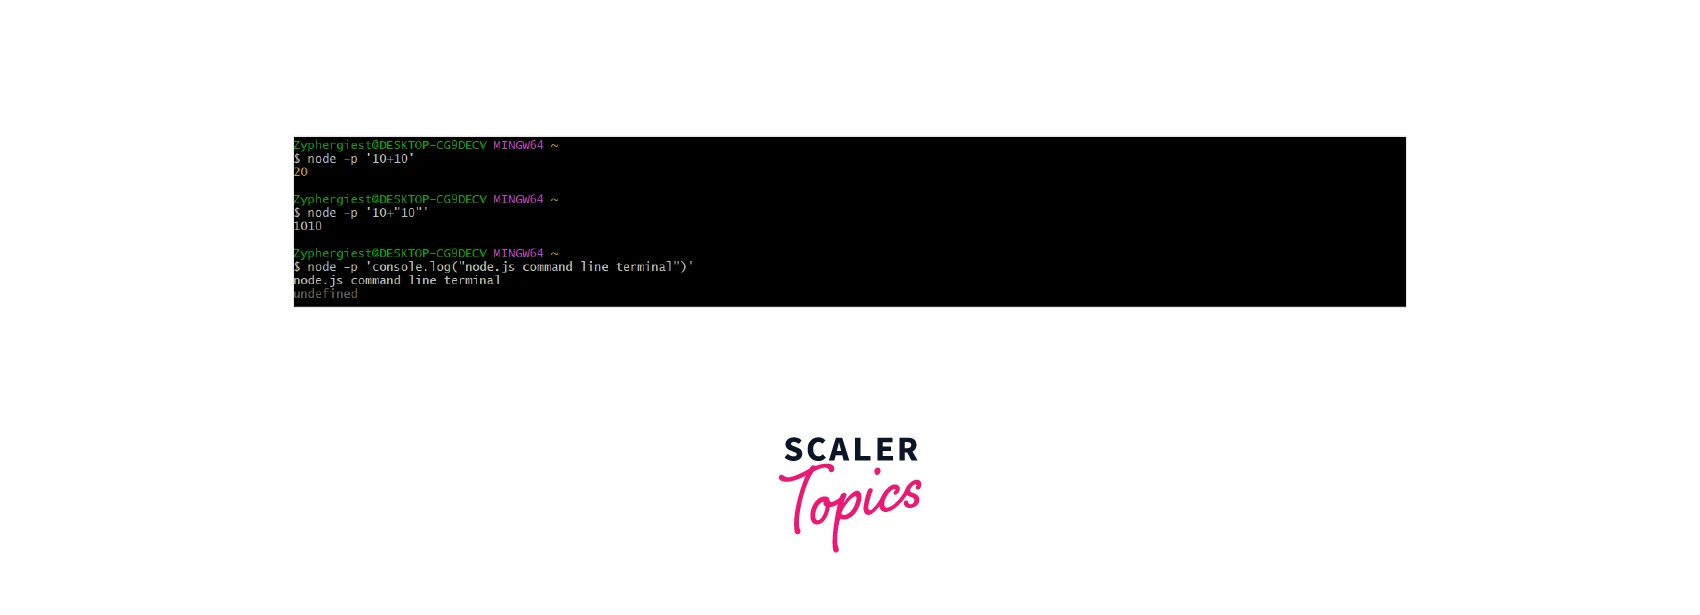
Eval
This command is used to evaluate an argument as JavaScript. This is especially useful if we want to check if an argument is a valid JS statement or not. To execute, run the following command: node -e <argument> or node --eval <argument>
Here are some examples:
This command is similar to the evaluate command, however, it also prints the executed arguments. To execute, run the following command:
node -p <argument> or node --print <argument>
Here are some examples:
Here is the output:
Check
This command is used to check a JavaScript file for syntactical errors. It does not execute the file and thus it is useful when we want to run scripts without execution. To execute, run the following command: node -c <file name> or node --check <file name>
Here is an example:
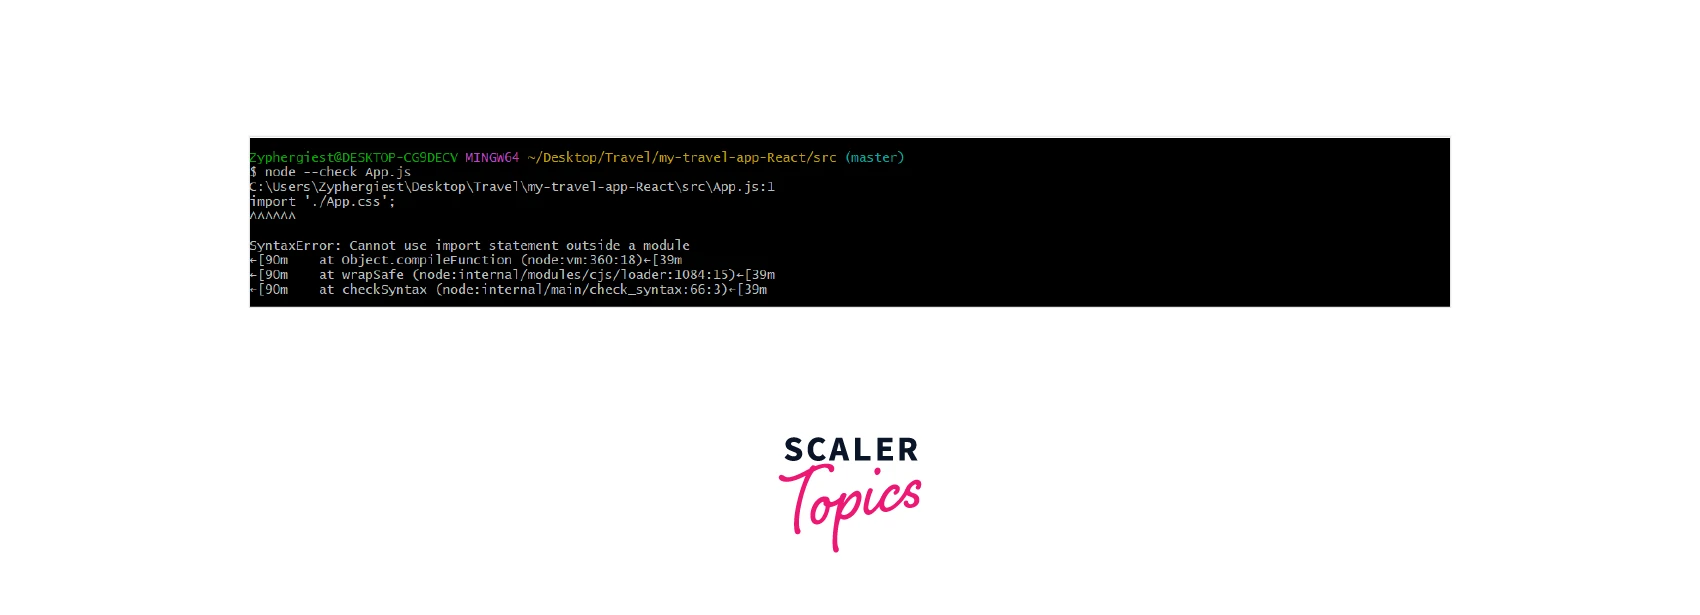
There was an error in the App.js file and thus the command displayed the error without actually executing it.
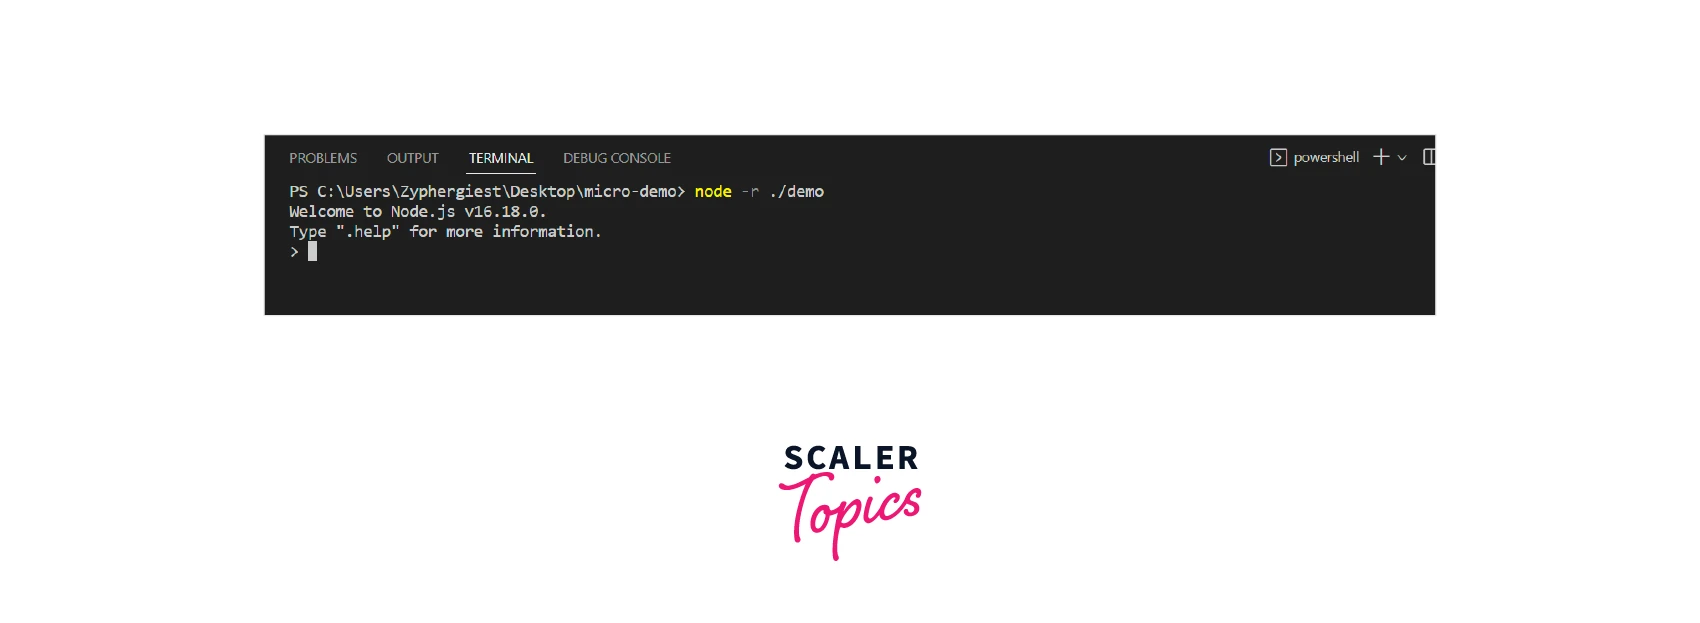
Require Module
This command is used to import a JavaScript module in the Command line interface. This will only pre-load common modules. To execute, run the following command:
node -r <module name> or node --require <module name>
Here is an example:
Ready to create real-time applications? Join our free Node JS certification course & gain the skills to build interactive & engaging web experiences.
Turn Learning into Career Growth
REPL in Node JS Command Line
REPL or READ, EVALUATE, or PRINT Loop is an environment that comes with Node.js. It runs in the terminal of our choice. Consider REPL to be a better version of the regular node.js command line interface. We can type and run whole scripts in the command line itself. We can execute complete JS logic and even write multi-line JavaScript code. To start the REPL environment, open up the Node.js Command Line or any Terminal and simply write node, and press Enter. Now we can start writing our JS code in the Terminal Prompt. This prompt will process any JS code using the Node.js runtime environment and it will display the output in the command line itself. This is great for quick debugging and checking if a piece of code produces the desired output or not. Here are a few examples:
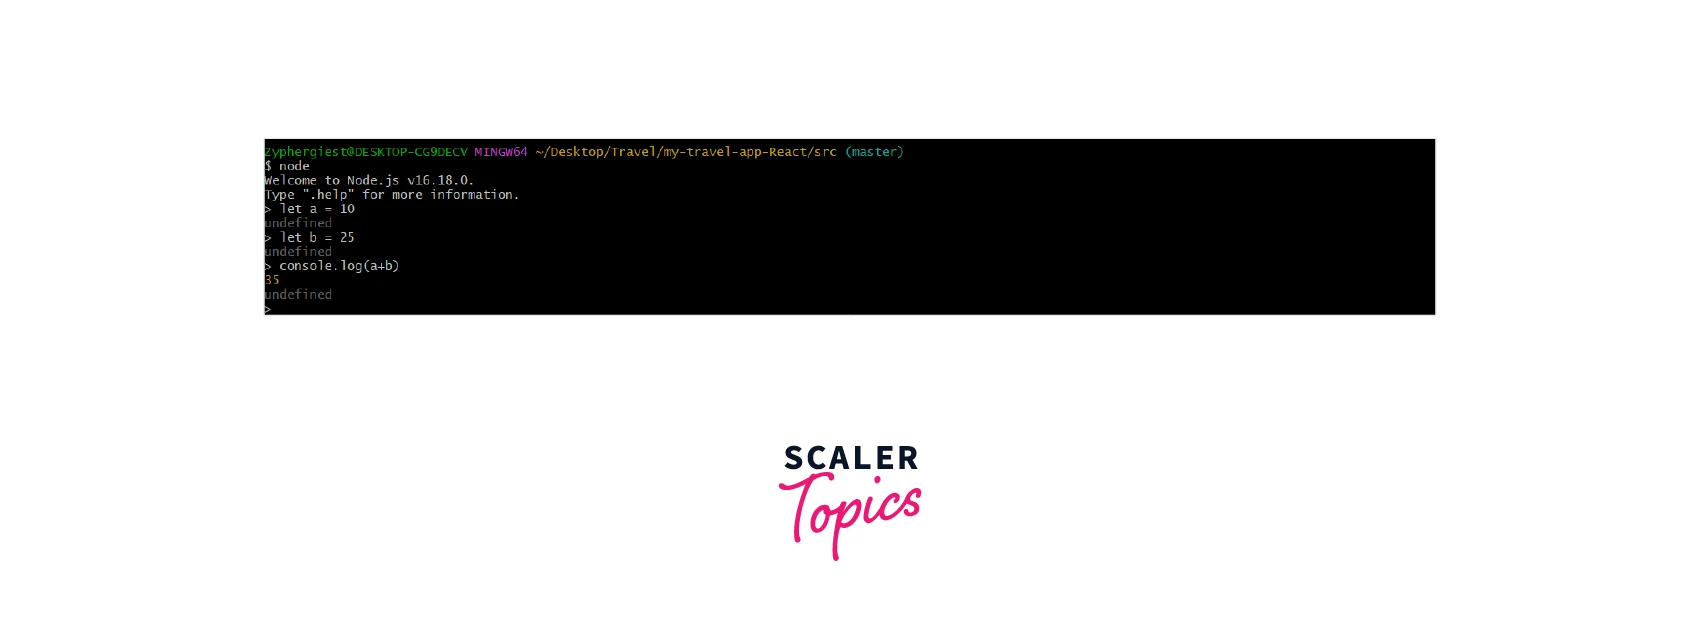
Operations Using REPL
Here is the output for the above snippet:
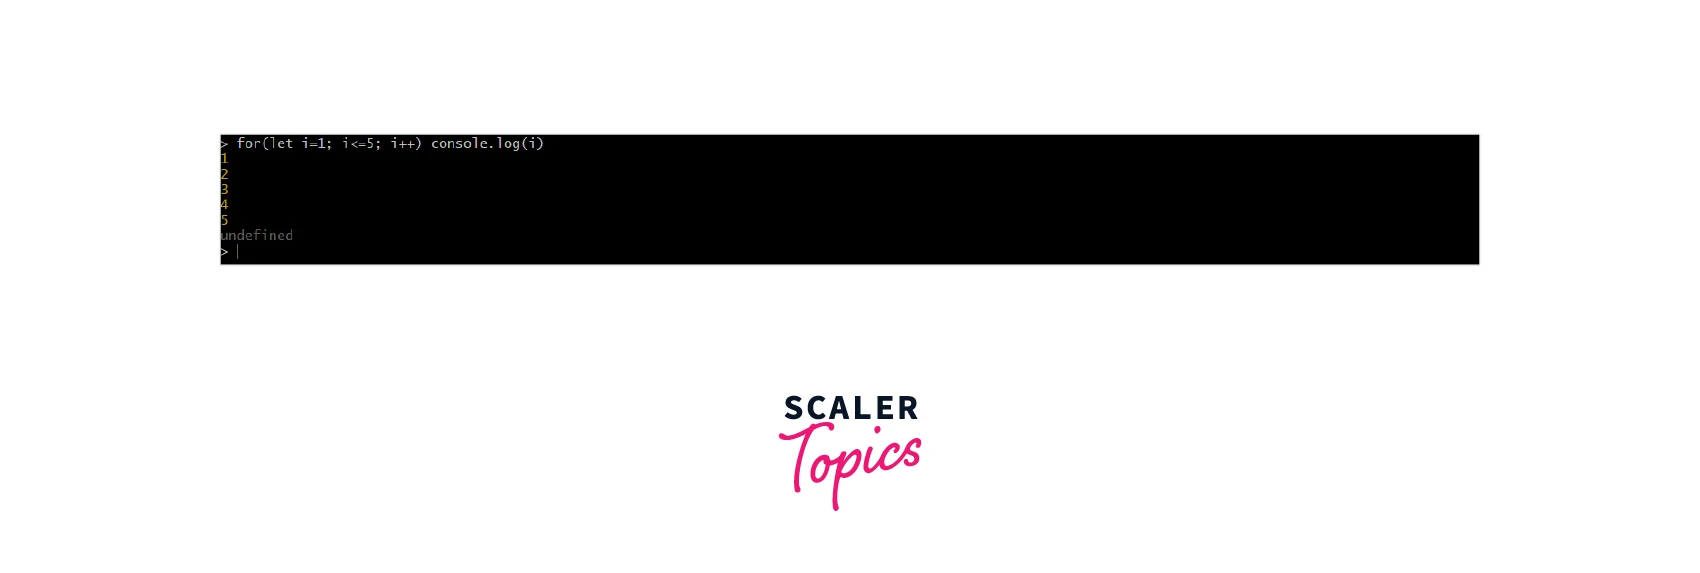
For Loop Using REPL
Here is the output for the above snippet:
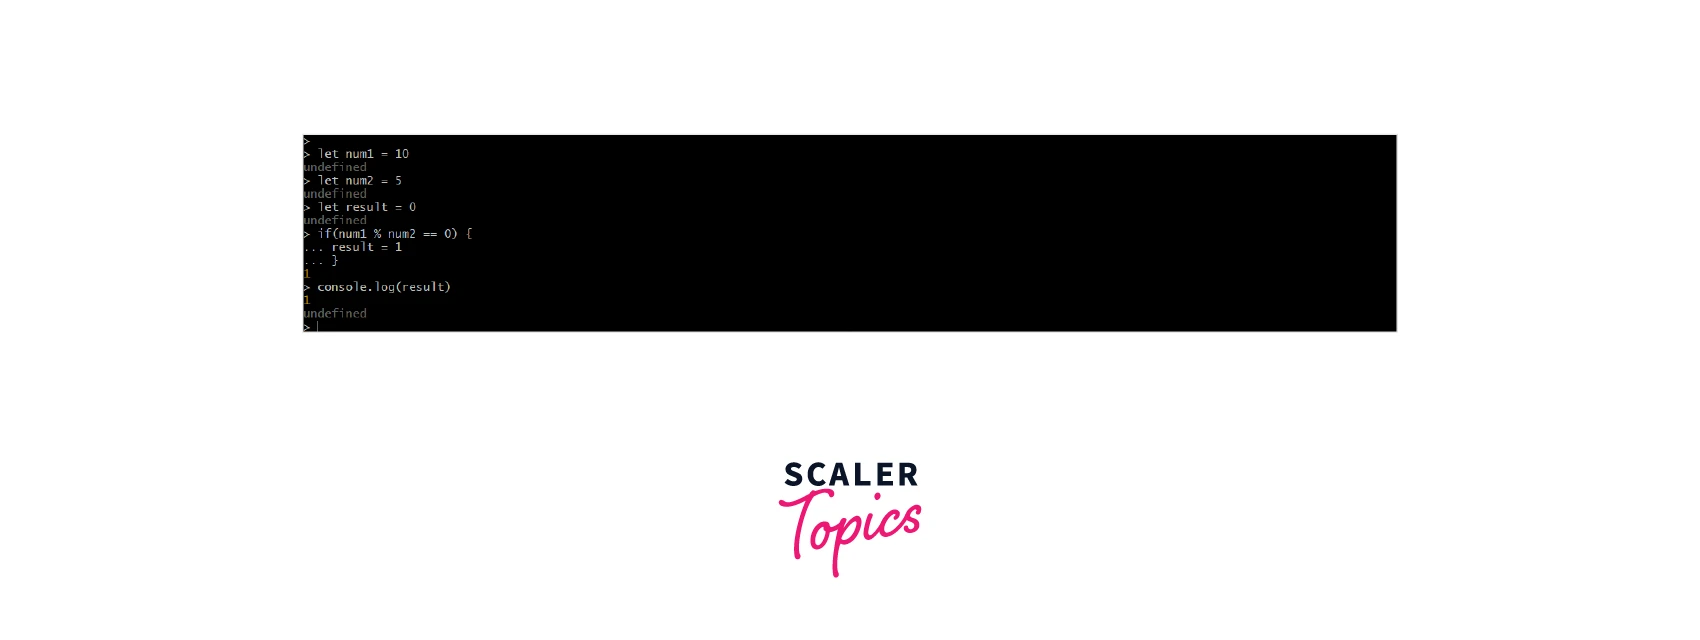
Conditional Statement Using REPL
Here is the output of the above snippet:
Running our Files Using Node.js Command Line
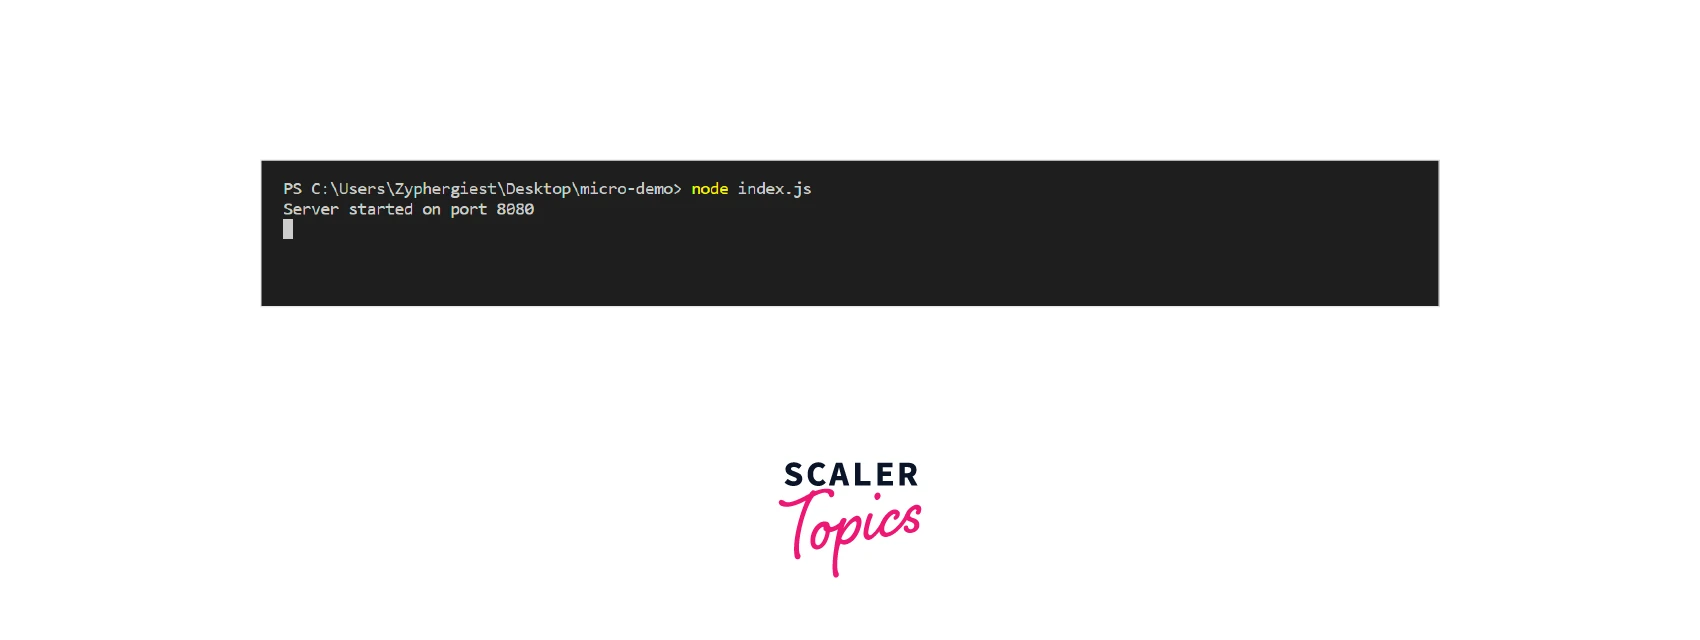
Node.js Command Line is primarily used to run JavaScript files from the terminal. Node.js was made so that JavaScript can run on the server as well. Previously, browsers only understood JS; hence, it was only used for client-side applications. Server-side runtime environments like Node.js allowed JavaScript to be used on the server side as well. This enables developers to write an entire application - front-end and back-end, end-to-end in JavaScript. Today, the node.js command line is used for industry-scale server-side and client-side servers. Execute the following command to run the file using the command line:
node <filename>
Eg: node app.js or node app
Accepting Arguments from the Node.js Command Line
Command Line Arguments are used to pass additional data to a JavaScript file at the time of execution. This allowed different users to pass in different data of their choice giving them flexible control over the output. We have already seen an example of passing arguments through the node.js command line interface by using eval and print. Let us now try to pass arguments to a JavaScript file using the node.js command line interface.
Here is the snippet for the JS file:
Run the following command in the node.js command line interface:
Output
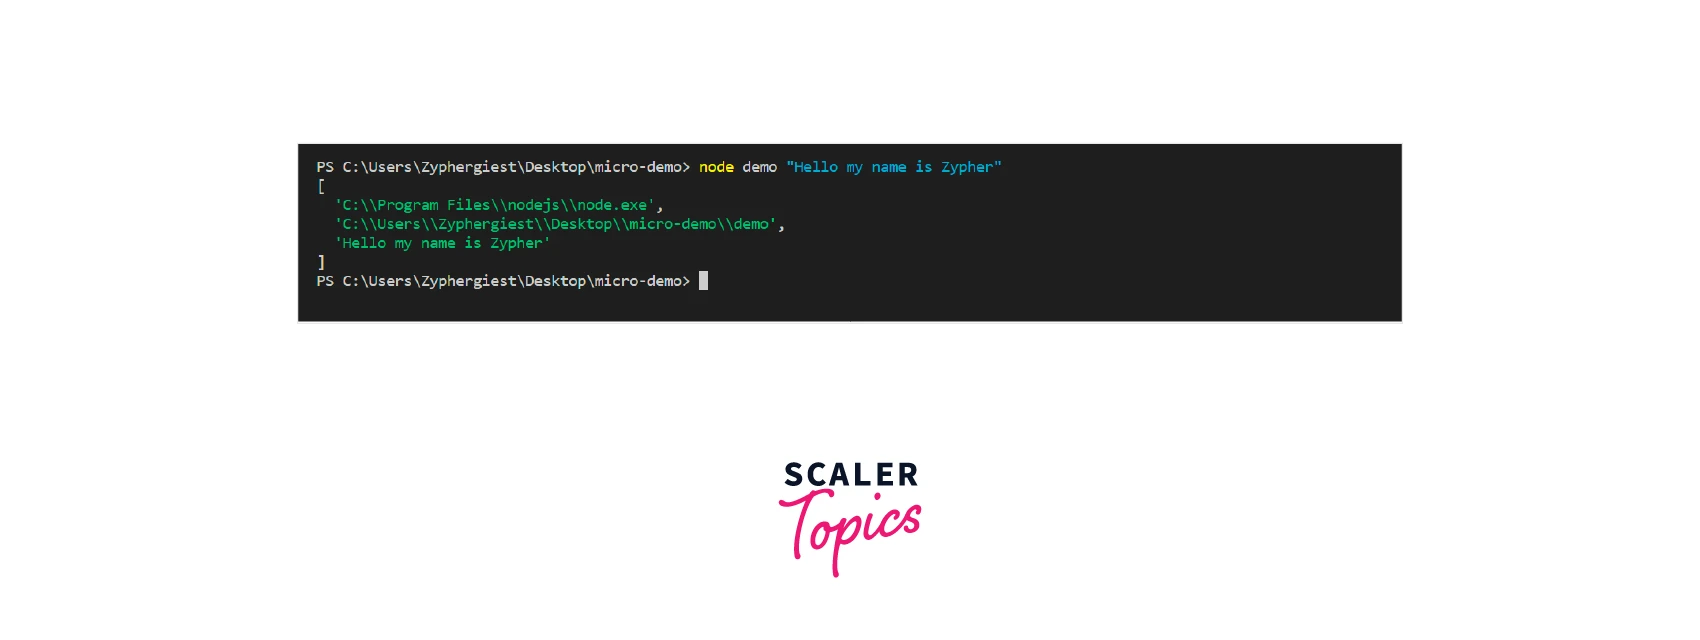
As we can see, we have received an array as our output. The argument is present at the second index of the array. Now, let us try to pass multiple values to a file. Here is the snippet for the JS file:
Run the following command in the node.js command line interface:
Here is the output
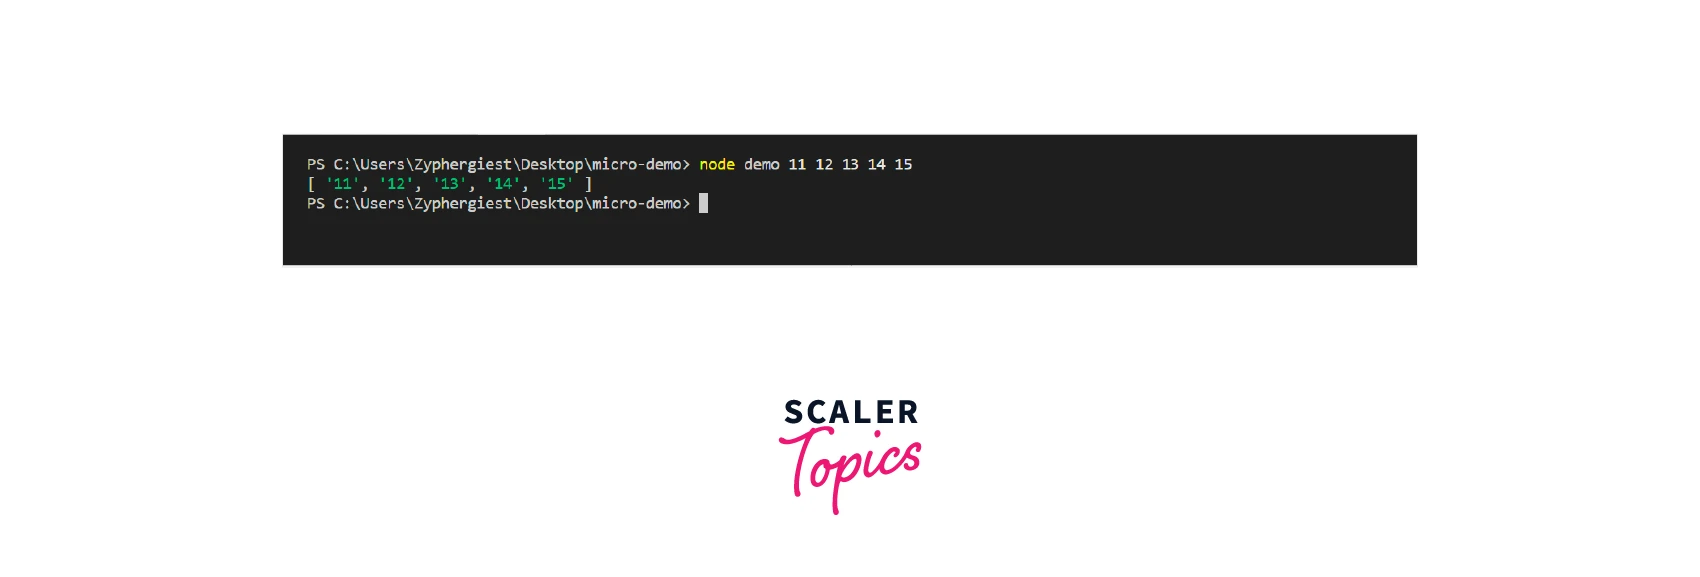
As we can see we can also pass in multiple values using the node.js command line interface to a JS file and use this data as per our requirement. In the above code, we have filtered out only the numbers from the input array.
Nodemon
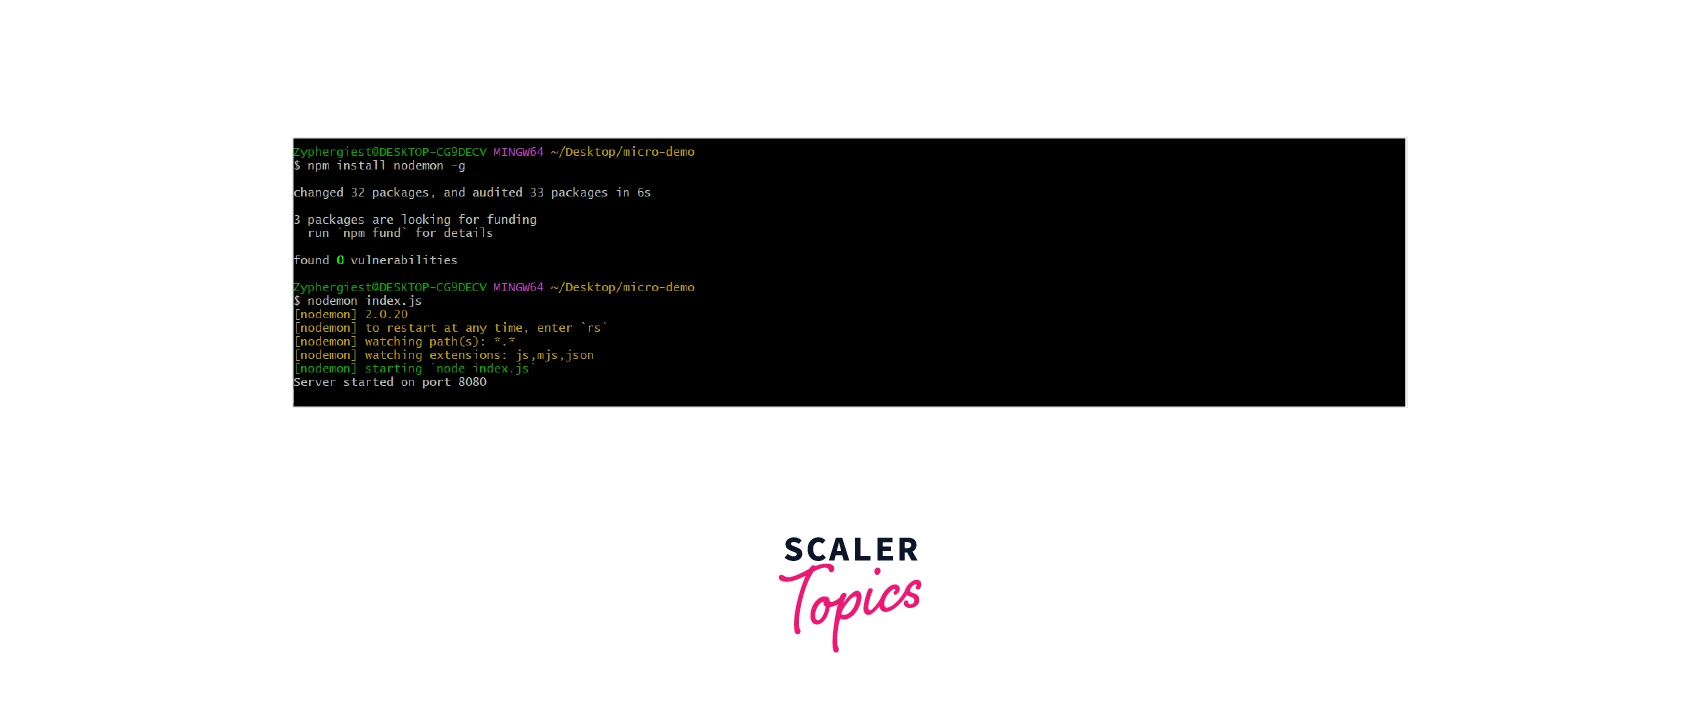
Nodemon is one of the most popular packages offered by the Node Package Manager. When developing an application, every time we make a change, we need to restart our server so that it reflects the latest changes. Nodemon automatically restarts our server with the latest changes as soon as we save our file. This means that the developers don't have to do the tedious task of restarting their servers every time they make a small change in the application. To install Nodemon, use the following command:
npm install nodemon -g
Now if we want to run our JavaScript file, we use the following command:
nodemon <file name>
We can also change the package.json file of our application to include nodemon as a script for running our file and assign it to a name. Here is the snippet for that:
Advantages of Nodemon
- It saves a lot of developer time as the developer doesn't need to tediously restart the server every time they make a change.
- Nodemon can be used to automatically run and restart scripts on servers.
- We can pass arguments to nodemon also.
- It is self-restarting so a server run using nodemon requires less monitoring.
- Nodemon can be used to run servers on remote Linux Servers provided by Cloud Services. Thus, it enables micro-services.
- It doesn't require any modification to our code.
- It is free and open source.
Fuel Your Full-Stack Passion! Enroll in Our Full Stack Developer Course Taught by Industry Experts and Get Certified!
Conclusion
- A command line interface allows us to interact with a computer system using text-based commands as opposed to the Graphical User Interface.
- CLI is of two types - Operating System CLI and Application CLI.
- Node.js CLI offers an array of very useful commands which can be used in every phase of Node.js application development.
- A few of these commands include version, help, check, eval, print, etc.
- Node.js CLI also comes with Read, Eval, Print, Loop which allows us to use the Node.js runtime environment directly from the Terminal.
- We can also use the Node.js CLI to run our files and pass arguments to a JavaScript file.
- Nodemon is an NPM package that is used to automatically restart the server when a change is detected.