How To Use Permission Handler In Flutter?
Overview
The Permission Handler package in Flutter is a useful tool for managing permissions in mobile applications. It simplifies the process of requesting and checking permissions for both Android and iOS platforms. With the permission handler in Flutter, developers can easily request user permission to access sensitive information such as cameras, contacts, location, and more. The Permission Handler package provides a standardized API for handling permissions, reducing the need for platform-specific code. It also provides helpful features such as checking the current status of permission, handling permission callbacks, and showing a dialogue to prompt the user for permission. Overall, the Permission Handler package makes managing permissions in Flutter applications easy.
In this article, we will learn about permission handlers in Flutter.
Introduction
Permission Handler is a popular package in Flutter that allows developers to handle runtime permissions easily and efficiently. It is used to request user permission to access certain device resources such as the camera, microphone, storage, location, and more. With Permission Handler, developers can easily check the status of a particular permission and request permission from the user when needed.
Permission Handler in Flutter works by wrapping the platform-specific permission APIs, allowing developers to write platform-specific code without worrying about the differences between platforms. It supports both Android and iOS platforms.
The package provides an easy-to-use API that can be used to request and check permissions. It includes several methods such as requestPermission, checkPermissionStatus, and openAppSettings that help developers handle permission requests and responses.
Overall, Permission Handler simplifies the process of requesting and checking permissions in Flutter, making it easier for developers to handle runtime permissions in their applications.
Setup
You have now understood the importance of Permission Handler in Flutter, let us look into the setup process. To set up the permission handler in Flutter, you can follow these steps:
- Add the permission_handler dependency to your pubspec.yaml file:
- Import the permission_handler package in your Flutter app:
- Request permission for the desired feature using the request() method:
In this example, we request permission to access the user's location. You can replace Permission.location with any other permission type available in the permission_handler package. In this way, the permission handler in Flutter helps us in getting the location access.
- To check the permission status, you can use the status property:
This method returns a Future<bool> which is true if the permission is granted and false otherwise.
- You can also use the shouldShowRequestRationale() method to determine whether or not to show an explanation to the user before requesting permission:
This method returns a Future<bool> which is true if an explanation should be shown, and false otherwise.
In this way, you can start using a permission handler in your Flutter application.
Requesting and Checking Permissions
To request and check permissions using the permission_handler package in Flutter, you can follow these steps:
- Import the permission_handler package:
- To request permission, use the request() method:
- To check if permission is granted, use the status property:
This method returns a Future<bool> which is true if the permission is granted, and false otherwise.
- To check if permission is permanently denied (meaning the user has chosen "don't ask again" when prompted), use the isPermanentlyDenied property:
- To open the app settings screen where the user can manually grant or deny permissions, use the openAppSettings() method:
Hence, by following these simple steps you can get all the permissions you need with the help of the permission handler in Flutter.
Handling Permission Responses
To handle permission responses of the permission_handler package in Flutter, you can use the request() method and listen to its result. Here's an example of how to do it:
In this example, we are requesting permission to use the camera. After calling the request() method, we check the result using the isGranted, isDenied, and isPermanentlyDenied properties.
If permission is granted, the isGranted property will be true. If the permission is denied, the isDenied property will be true. If the permission is permanently denied, the isPermanentlyDenied property will be true.
You can also use the openAppSettings() method to open the app settings screen where the user can manually grant or deny permissions:
Therefore, the permission handler in flutter provides you with ways in which you can request the permissions you want and then check whether they have been granted by the user or not.
Using Permission Groups
The permission_handler package in Flutter provides several permission groups, which allow you to request multiple permissions at once. Here are the different permission groups provided by the permission_handler package:
| Permission Group | Description |
|---|---|
| PermissionGroup.sms | Permission to send or receive SMS messages. |
| PermissionGroup.sensors | Permission to access the device sensors. |
| PermissionGroup.phone | Permission to read or write to the user's phone state. |
| PermissionGroup.photos | Permission to read or write to the user's photos. |
| PermissionGroup.reminders | Permission to read or write to the user's reminders. |
| PermissionGroup.microphone | Permission to access the microphone. |
| PermissionGroup.mediaLibrary | Permission to read or write to the user's media library. |
| PermissionGroup.locationWhenInUse | Permission to access the user's location only when the app is in the foreground. |
| PermissionGroup.locationAlways | Permission to access the user's location, even when the app is in the background. |
| PermissionGroup.location | Permission to access the user's location. |
| PermissionGroup.contacts | Permission to read or write to the user's contacts. |
| PermissionGroup.camera | Permission to access the camera. |
| PermissionGroup.speech | Permission to access the device's speech recognition system. |
| PermissionGroup.storage | Permission to read or write to the user's external storage. |
| PermissionGroup.calendar | Permission to read or write to the user's calendar. |
You can use these permission groups with the request() method of the permission_handler package to request multiple permissions at once. For example, to request permission to access the user's camera and microphone, you can use the PermissionGroup.camera and PermissionGroup.microphone constants like this:
That's it! With these simple steps, you can now use the different permission groups provided by the permission_handler package in your Flutter app.
Handling Permission Changes
As your designed application is used the permissions granted to it might be changed. Therefore, it is essential to ensure that the flutter application can handle these changes very smoothly without malfunctioning. Let us now understand how to handle permission changes while using a permission handler in flutter.
The permission_handler package in Flutter provides a way to handle permission changes using the onStatusChange stream. This stream emits an event whenever the permission status changes for any permission.
Here are the steps to handle permission changes using permission_handler:
- Import the permission_handler package:
- Subscribe to the onStatusChange stream:
In this example, we are subscribing to the onStatusChange stream for camera permission. Whenever the camera permission status changes, the stream will emit an event, and we can handle it accordingly.
- When you are done handling permission changes, make sure to cancel the subscription to the onStatusChange stream to avoid memory leaks:
Platform-Specific Considerations
For every platform the application is run on, you need to customize it accordingly. While using the permission_handler package in Flutter, there are some platform-specific considerations that you should keep in mind:
IOS
In iOS, you must include a description of why your app needs particular permission in the app's Info.plist file. If you don't provide a reason, the permission dialogue will not be displayed, and the permission will be denied by default.
For some permissions, like PermissionGroup.camera, you may need to add a usage description in the app's Info.plist file to explain why your app needs access to the camera.
When requesting permission to access the user's location, you must provide a usage description that explains why your app needs the user's location.
Android:
In Android, you must include permission requests in the app's AndroidManifest.xml file.
When targeting Android 11 or higher, you must use the package visibility feature to restrict access to app data. This means that you may need to request additional permissions to access specific files or directories.
If your app targets Android 6.0 (API level 23) or higher, you must request permissions at runtime, and the user must grant permission before your app can use the corresponding feature.
When requesting permission to access the user's location, you must provide a rationale for why your app needs access to the user's location.
When requesting permission to access the user's location, you must provide a rationale for why your app needs access to the user's location.
This is how your AndroidManifest.xml file would look like
Web:
In web applications, the permission_handler package does not work for all permissions. Some permissions, like PermissionGroup.camera and PermissionGroup.microphone, are not supported on the web platform.
When requesting permission on the web, the browser will display a permission dialogue that the user must respond to.
You can use the window.navigator.permissions API to check the current status of permission. However, this API is not supported in all browsers.
Overall, it's essential to keep these platform-specific considerations in mind when using the permission_handler package in your Flutter app. By doing so, you can ensure that your app works correctly on all supported platforms and provides the best user experience possible.
So, while you use a permission handler in flutter, these specifics must be kept in mind.
Best Practices
Till now you have learned how to use the permission handler in flutter to ask for permissions in the application. However, there are other aspects of it that you need to keep in mind before asking for permission.
Some of the best practices that should be followed while asking for permissions with the help of a permission handler in flutter are given below:
-
Request only the permissions you need : Avoid requesting permissions that your app does not need. Requesting unnecessary permissions can harm user privacy and security and may cause users to distrust your app.
-
Explain why you need permissions : When requesting permissions, provide a clear and concise explanation of why your app needs the permission. This will help users understand why the permission is necessary and may increase the likelihood of them granting the permission.
-
Handle permission gracefully : Your app should be able to handle changes in permission status gracefully. For example, if a user revokes permission, your app should disable the corresponding feature and provide a clear explanation of why the feature is disabled.
-
Test your app on all supported platforms : Make sure to test your app on all platforms where the permission_handler package is supported. This includes Android, iOS, and web platforms. Testing will help you ensure that your app works correctly and provides the best user experience possible on all platforms.
-
Use the onStatusChange stream to handle permission changes : Use the onStatusChange stream to handle changes in permission status. This stream emits an event whenever the permission status changes for any permission, allowing your app to respond to changes in real time.
-
Use the appropriate permission group : Use the appropriate permission group for each permission you request. The permission_handler package provides several permission groups that you can use to request permissions, such as PermissionGroup.camera for the camera permission and PermissionGroup.location for the location permission.
-
Handle permission errors : When requesting permissions, your app should be able to handle errors gracefully. For example, if a user denies permission, your app should provide a clear explanation of why the permission is necessary and ask the user to grant the permission again.
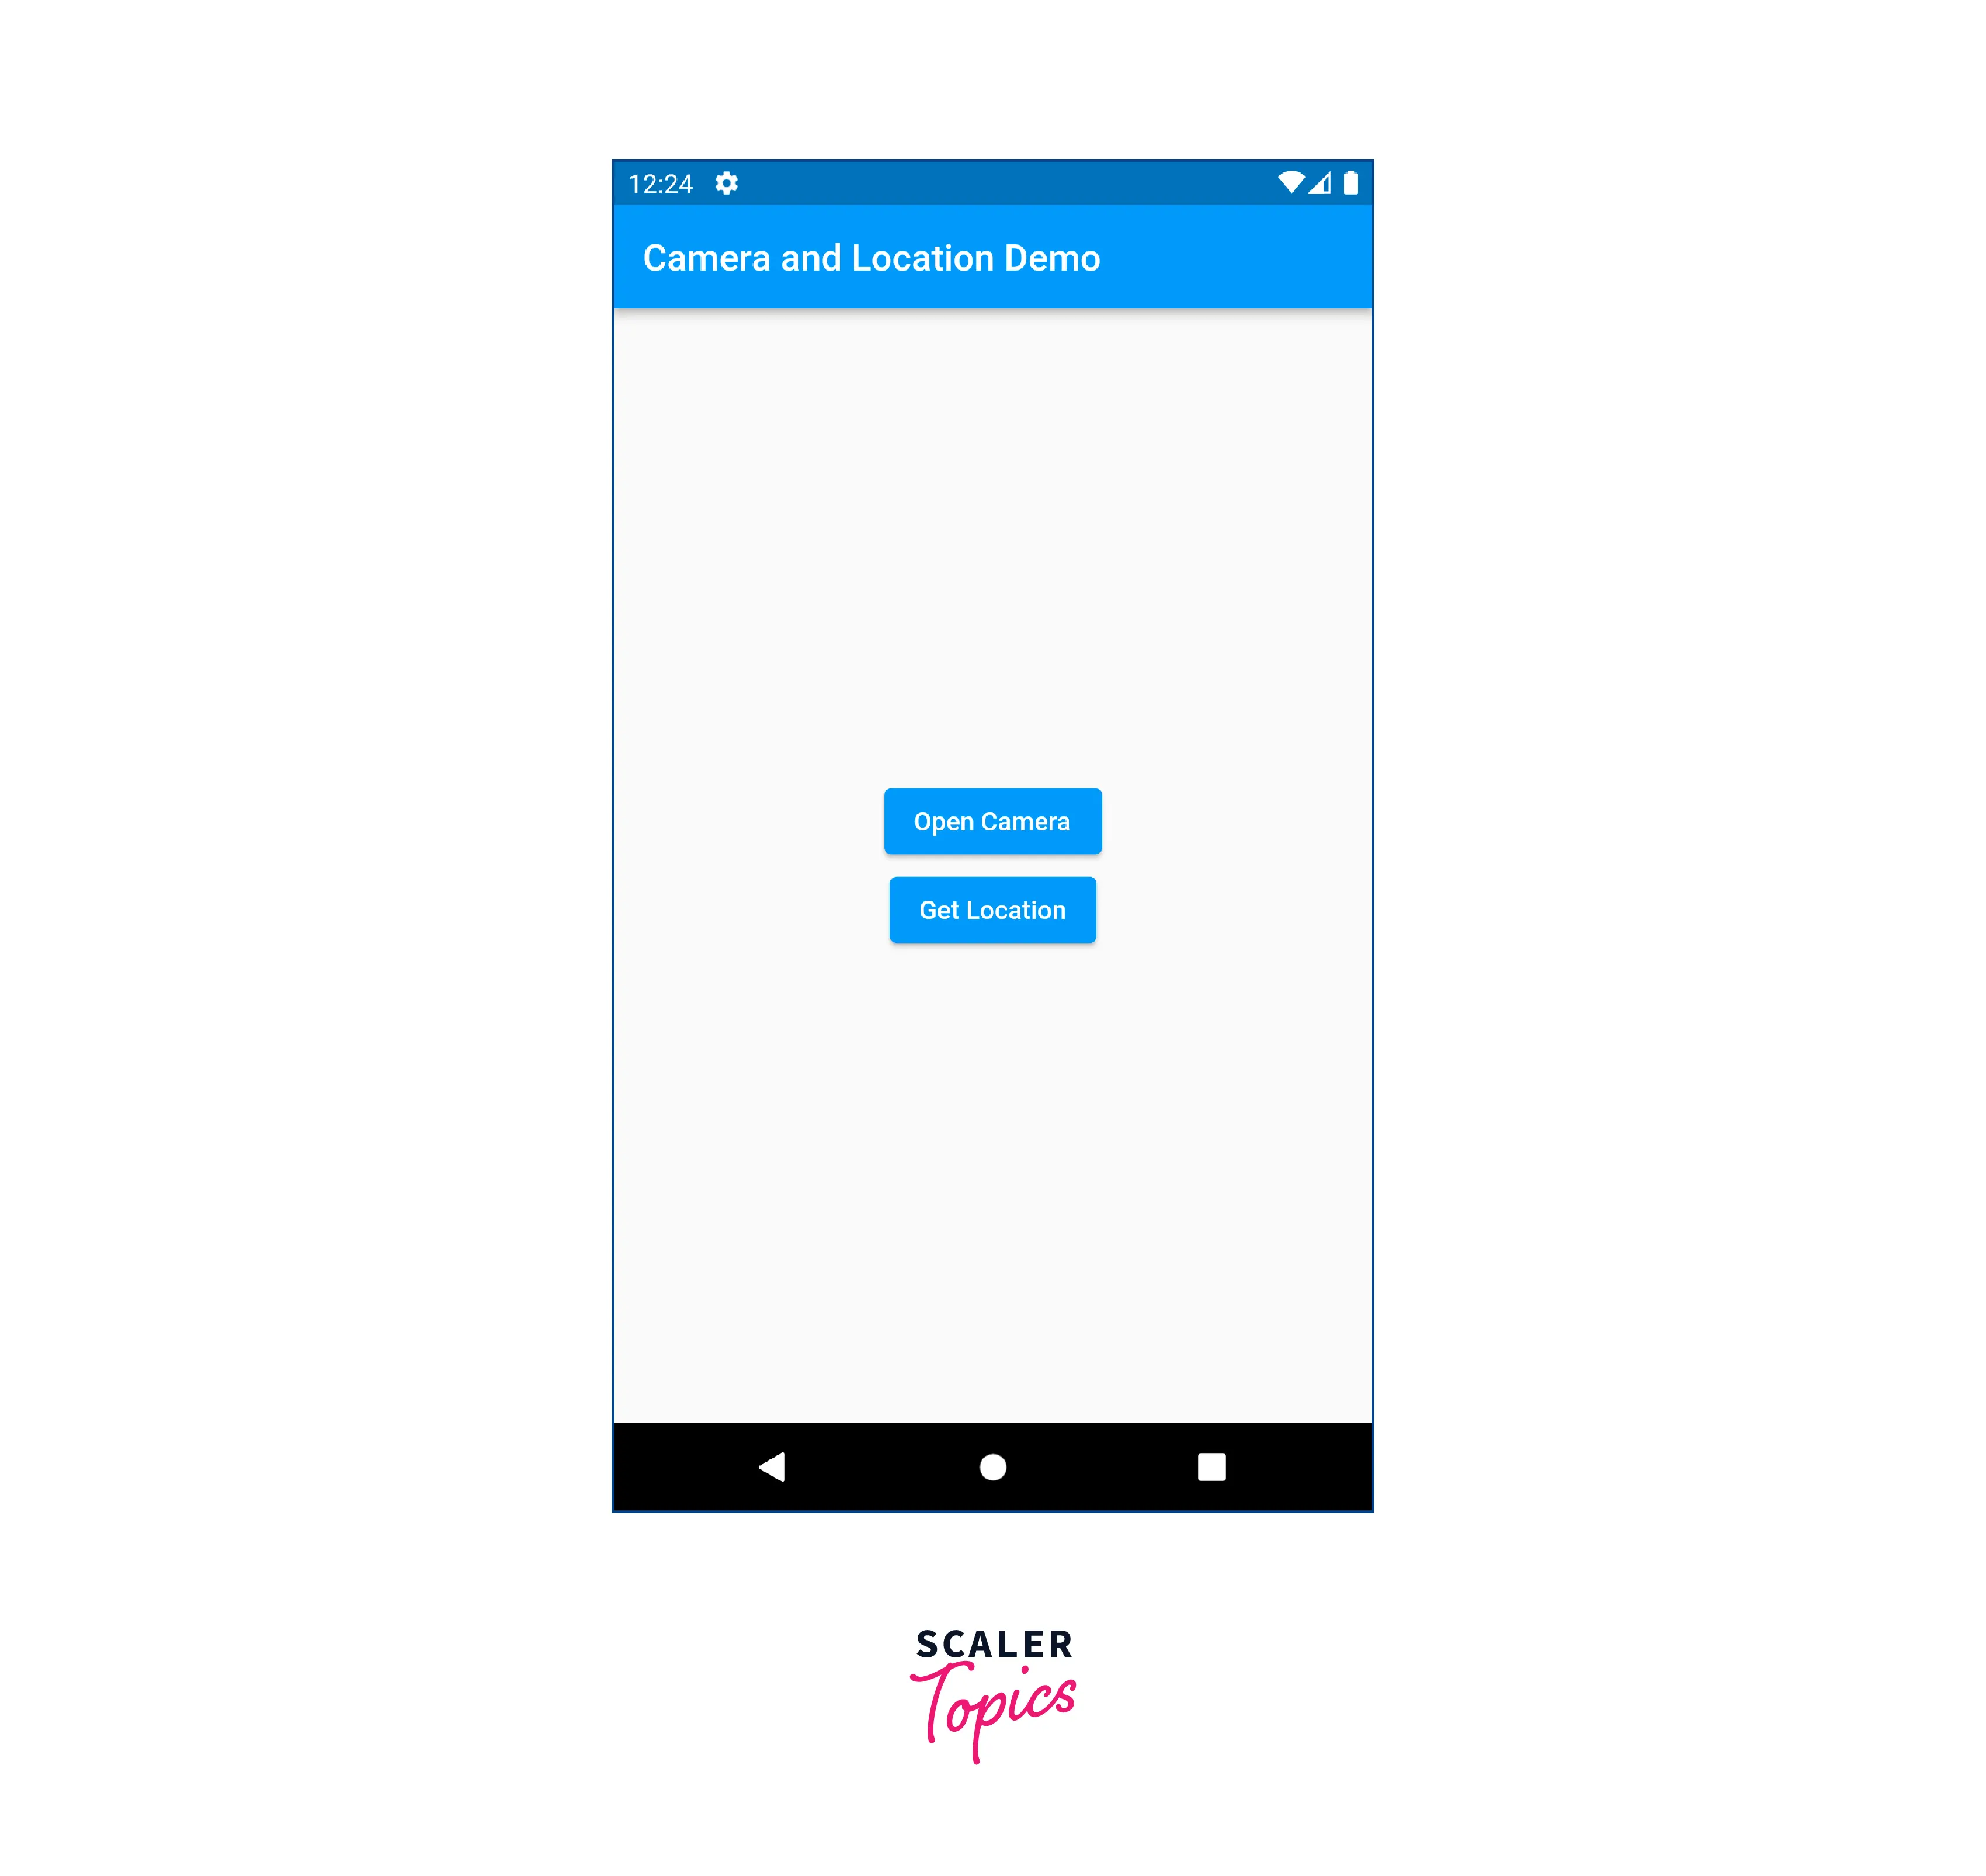
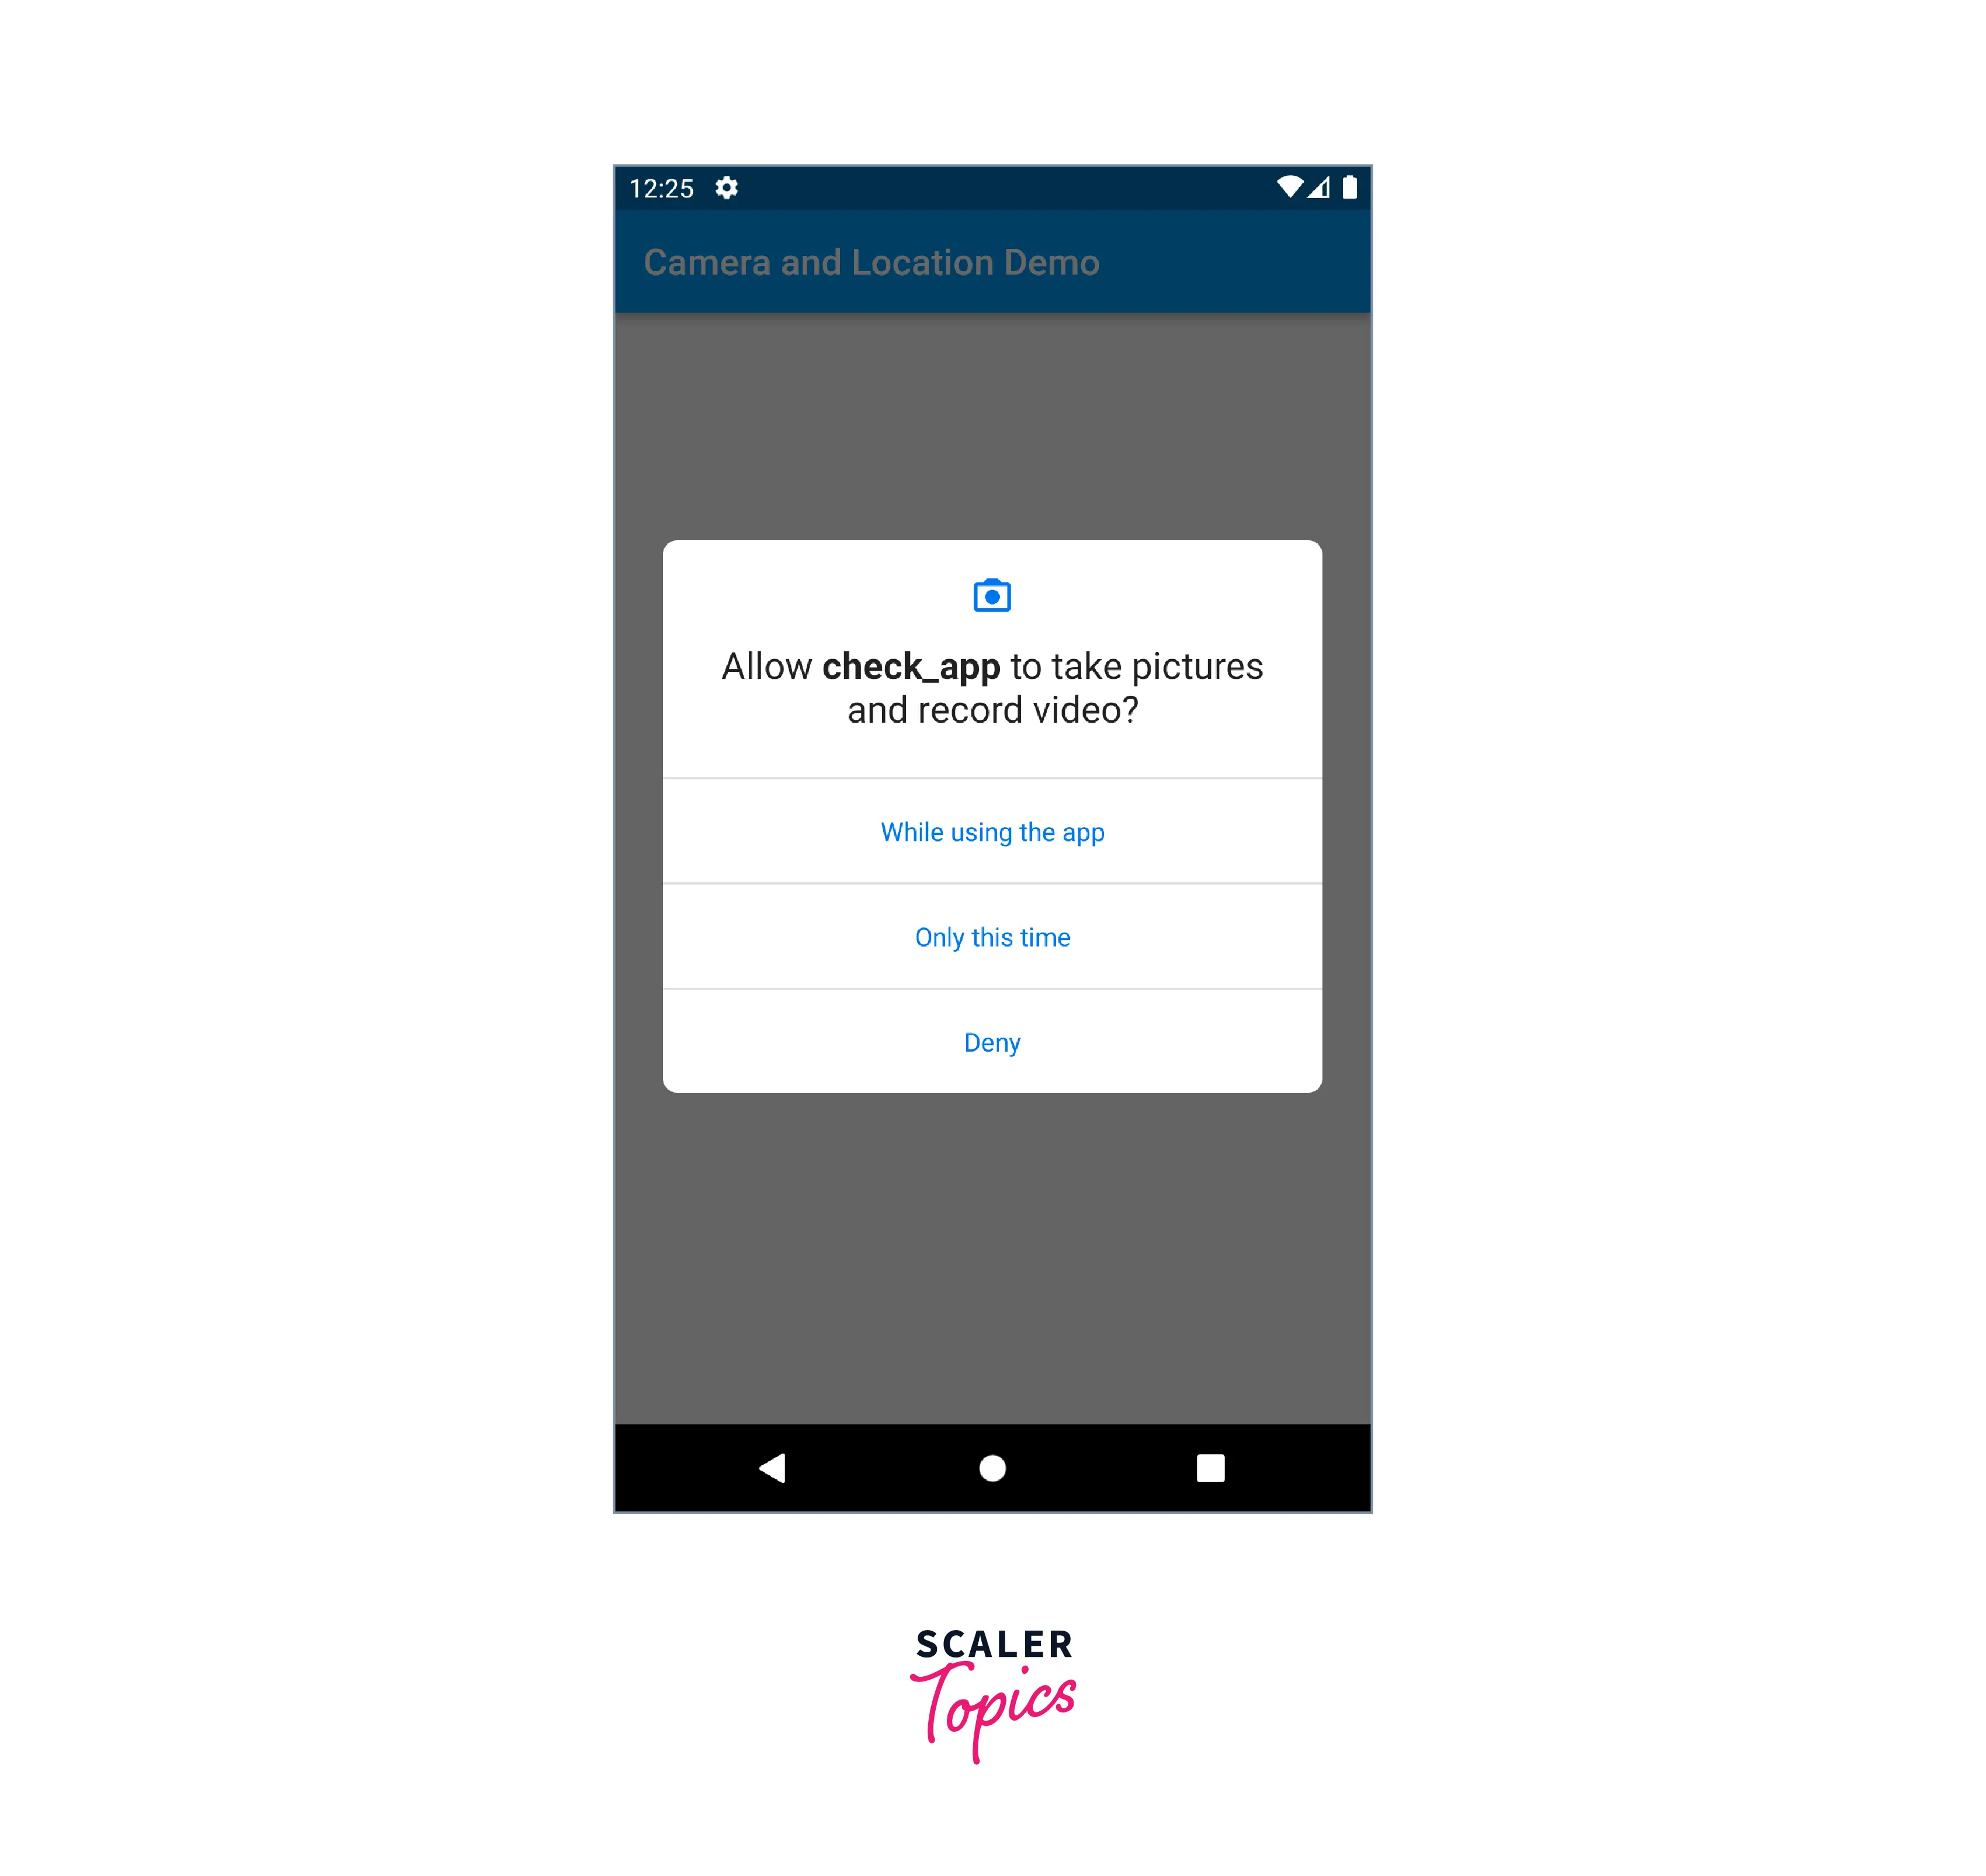
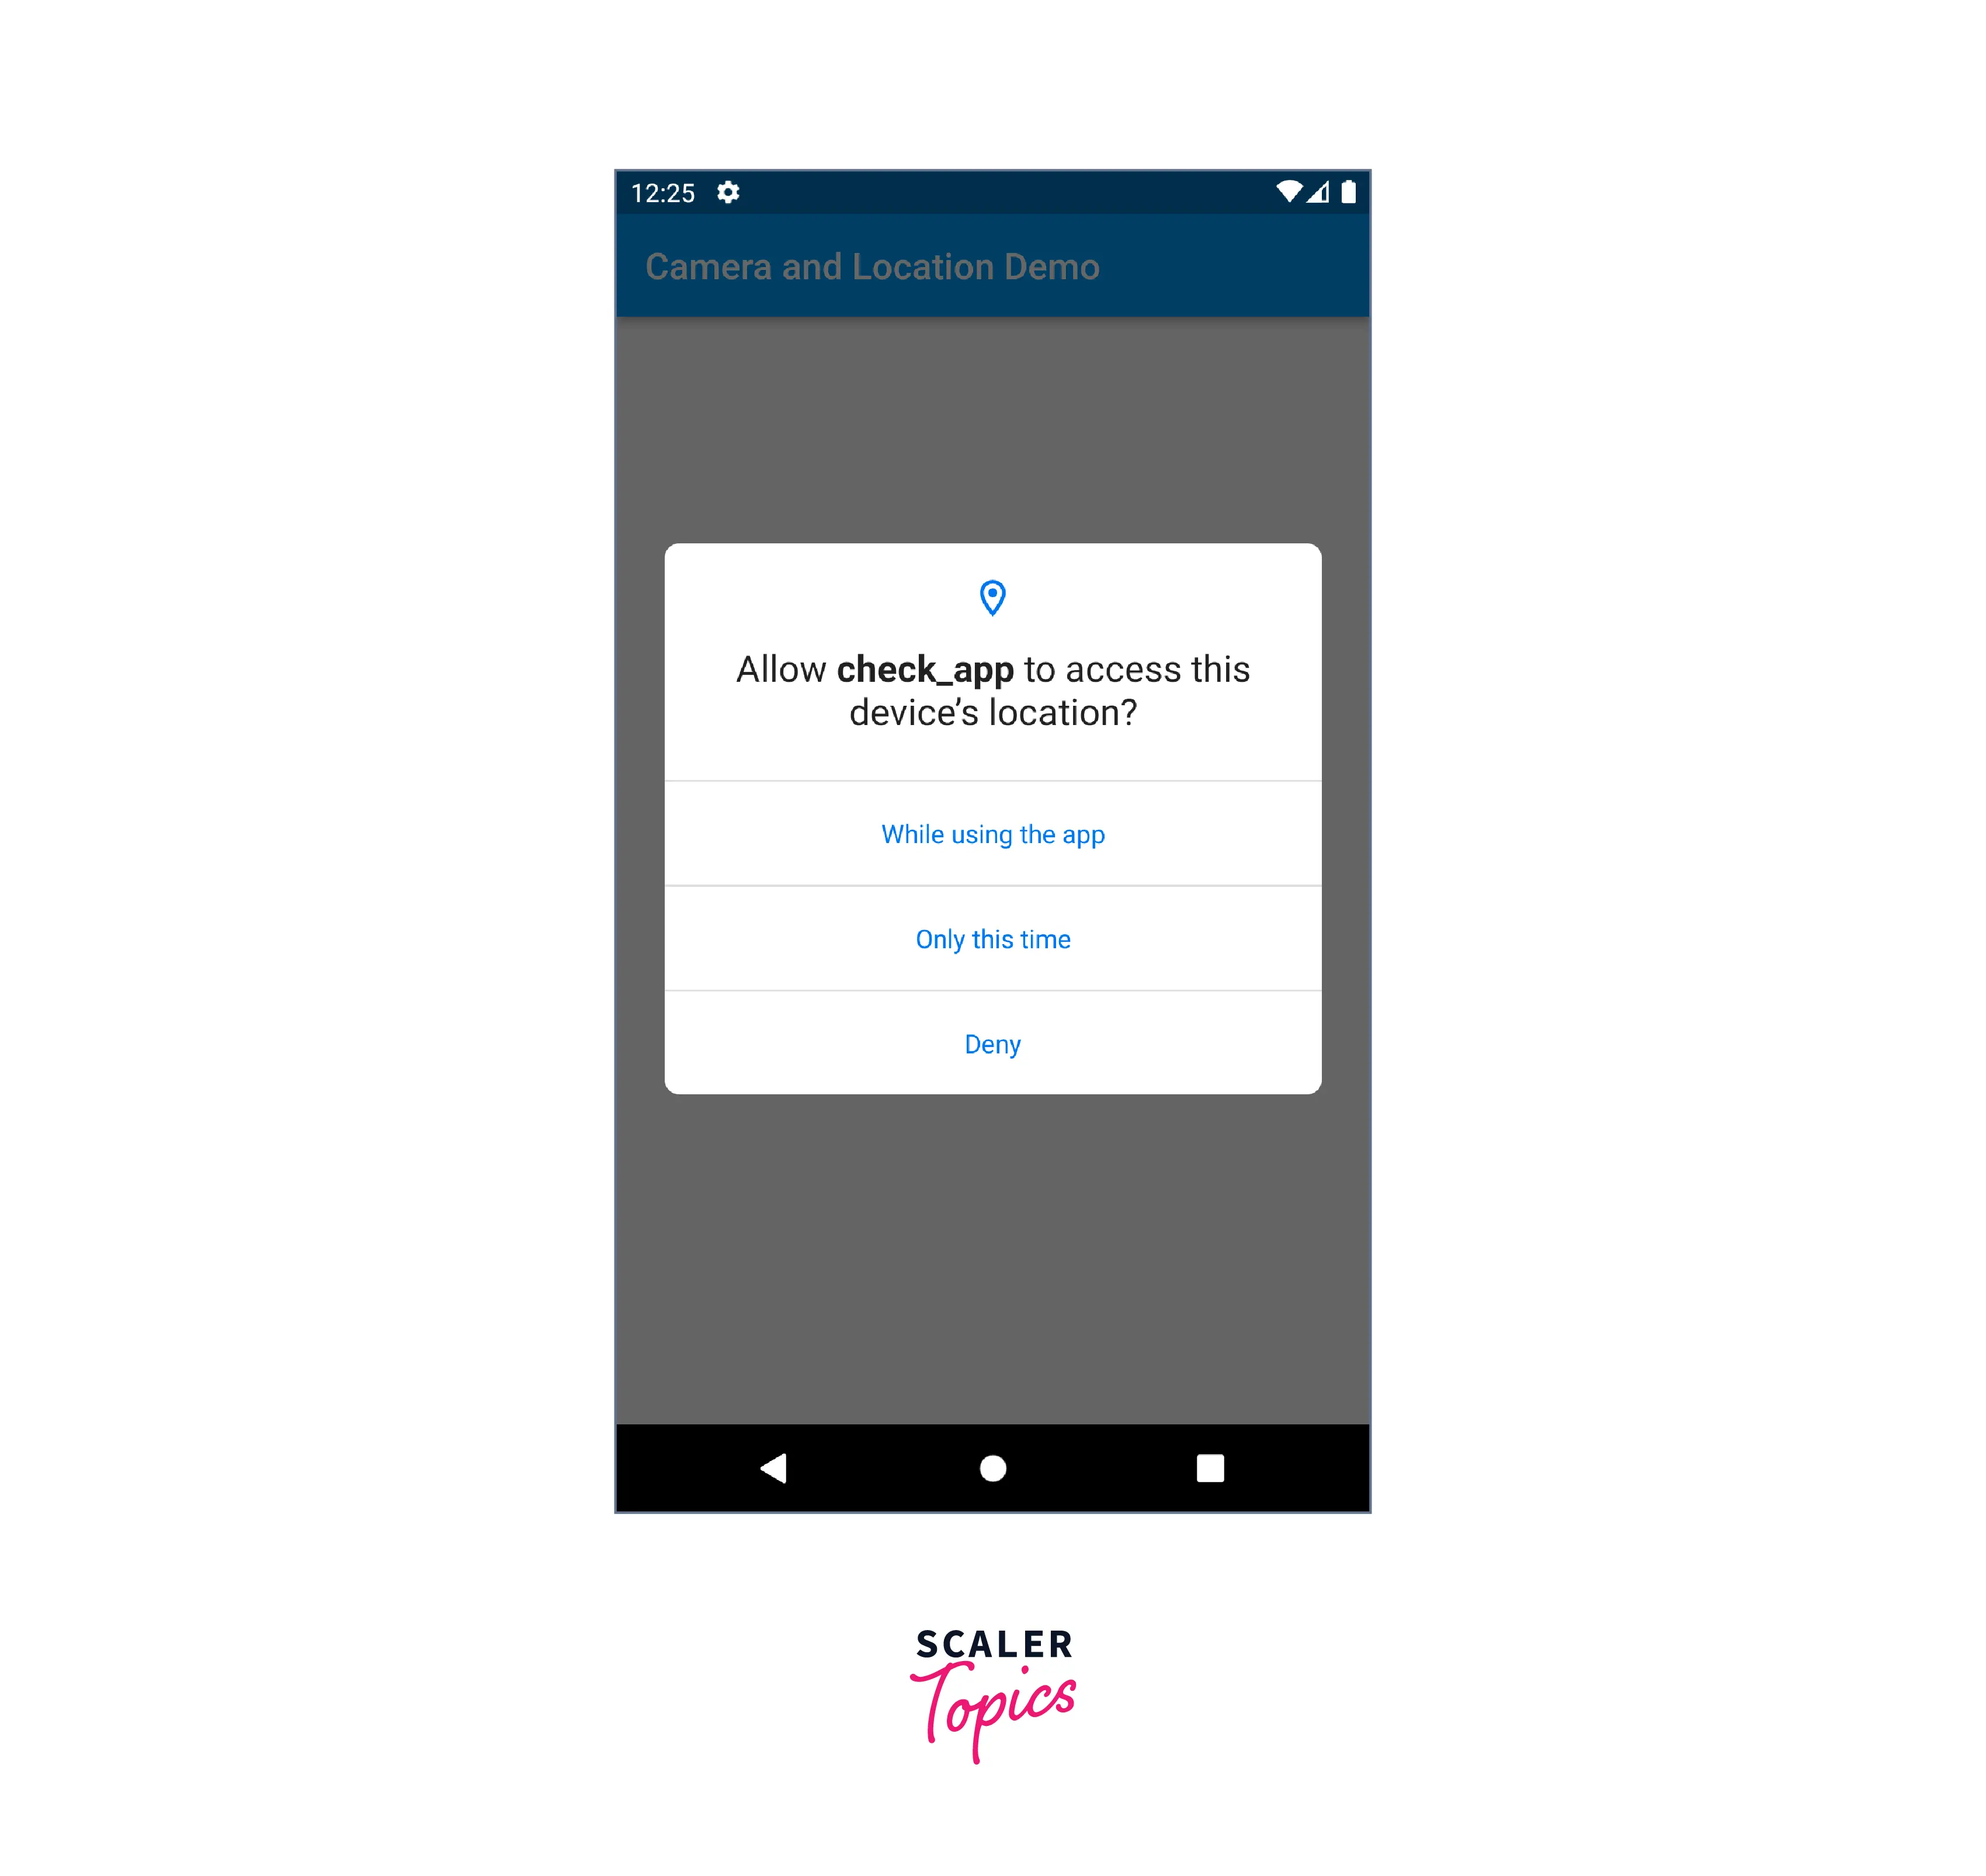
Example Application
Here's an example Flutter app that has two buttons - one to open the camera and one to print the current latitude and longitude. The app will request permission to access the camera and location data using the permission_handler package.
First, let's add the required dependencies to Pubspec.yaml:
Then, we can create the main app widget:
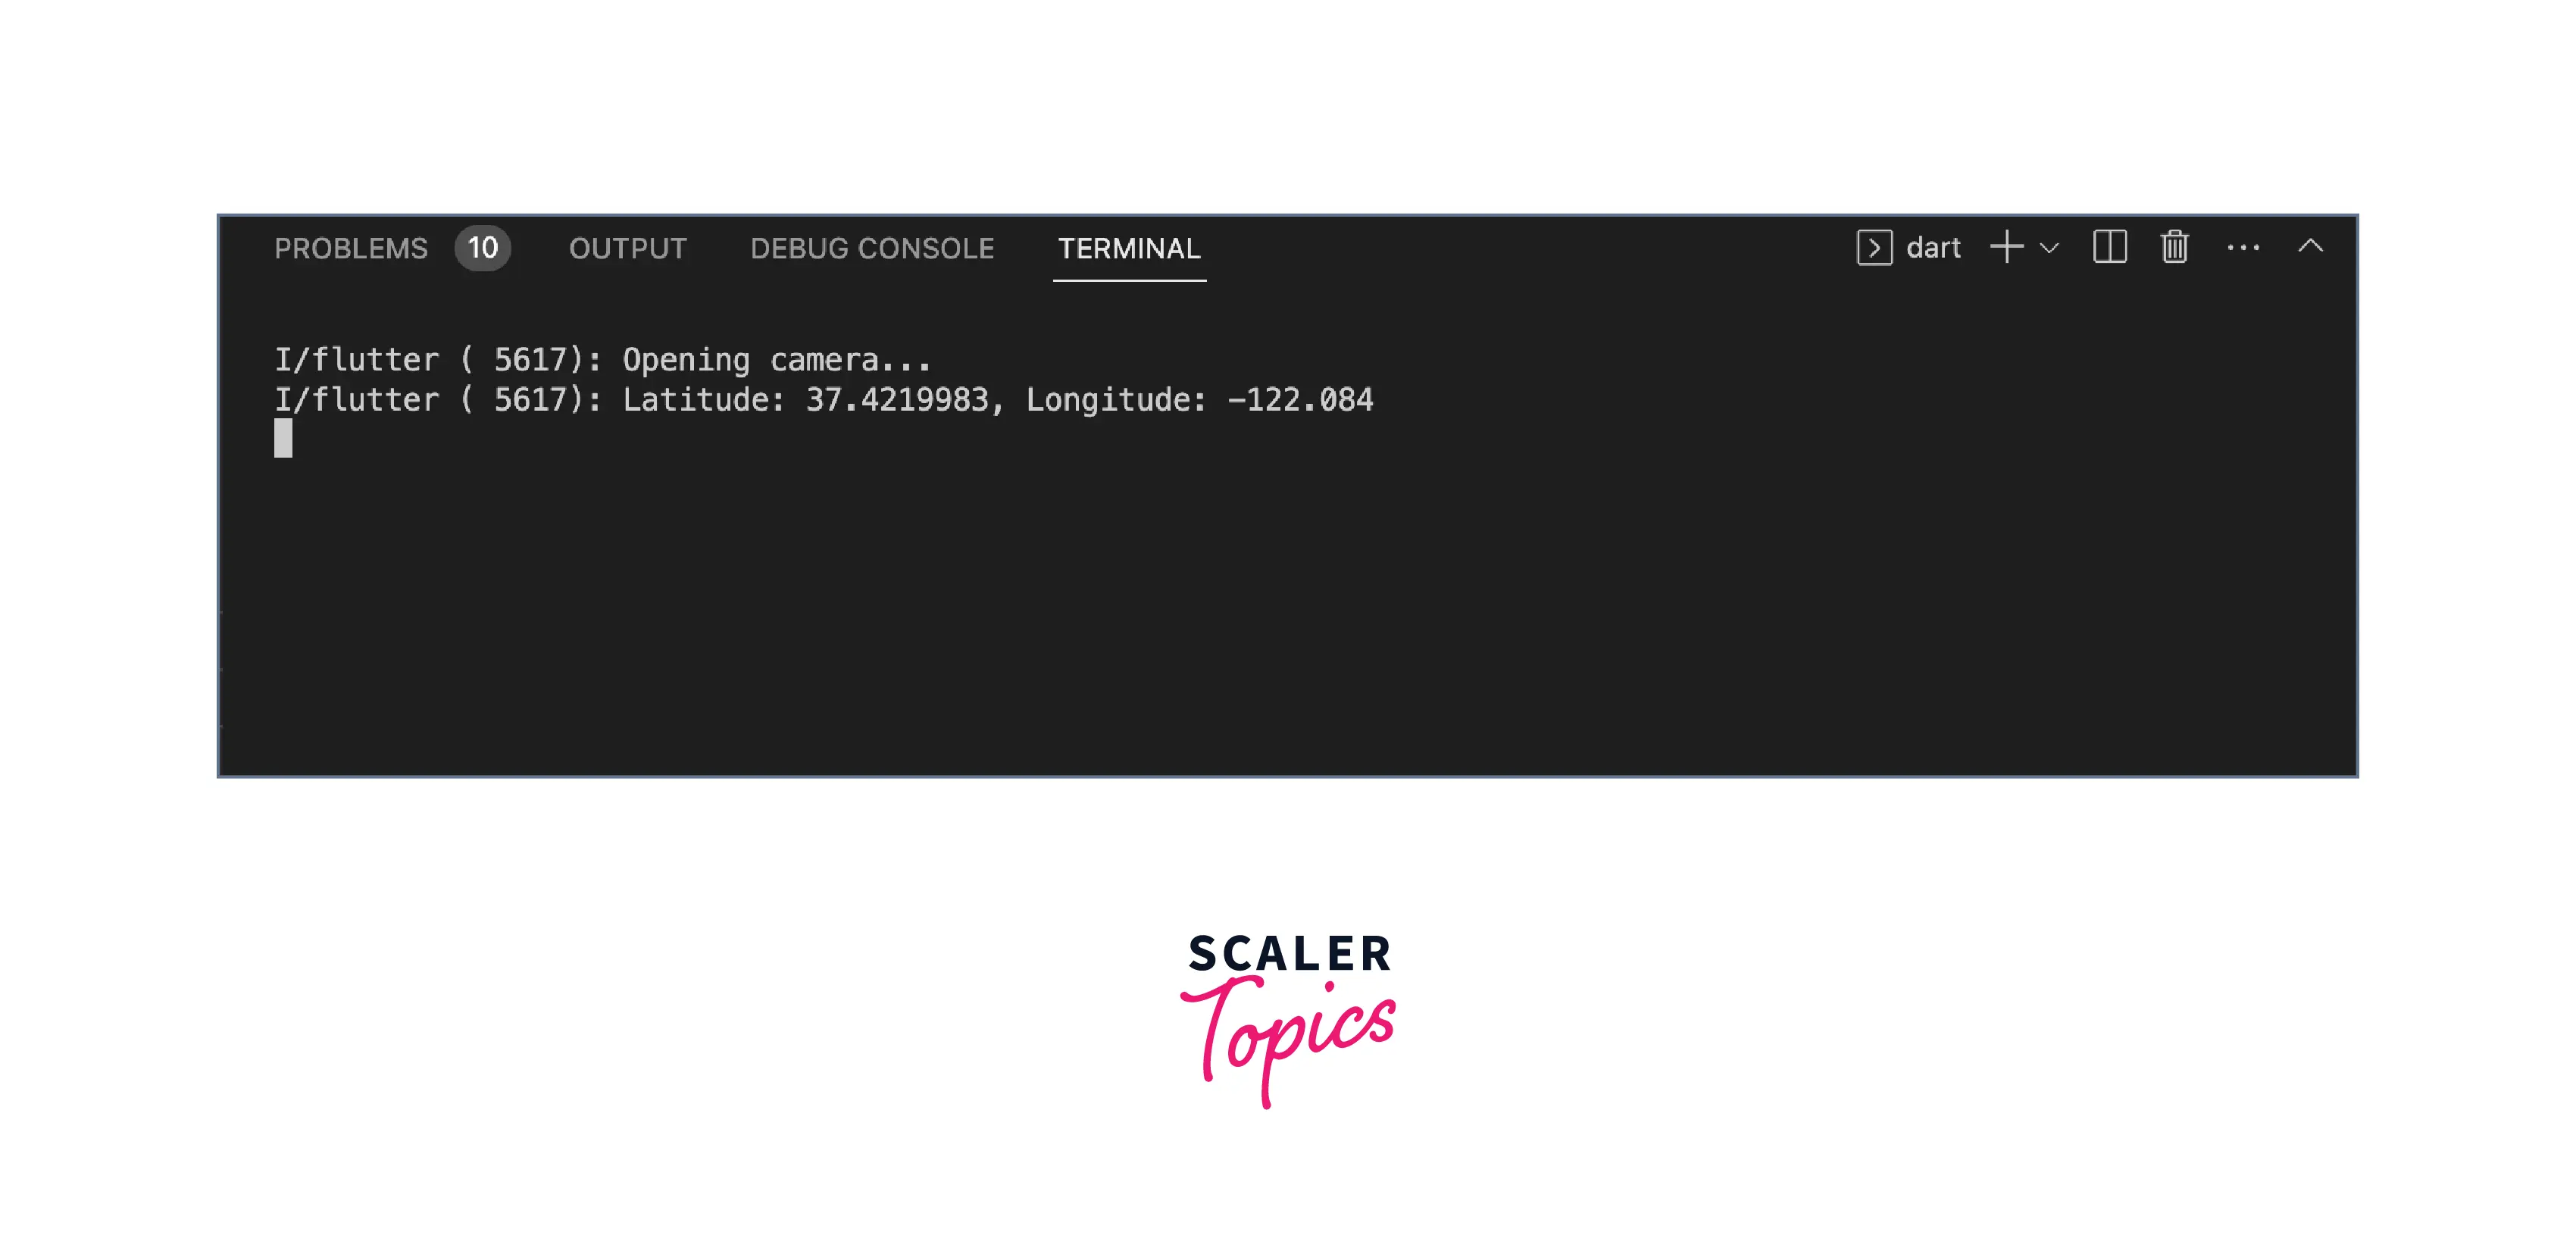
The output of the above code will be as follows:
Conclusion
In this article, we have learned the following points about permission handlers in flutter:
- The Permission Handler package is a useful tool for Flutter developers to handle runtime permissions in their applications. It simplifies the process of requesting and checking permissions, allowing developers to focus on other aspects of their app.
- The package supports both Android and iOS platforms, and provides an easy-to-use API that includes methods such as requestPermission, checkPermissionStatus, and openAppSettings.
- Developers can also use permission groups to request multiple permissions at once.
- For different platforms like Android, and iOS several specific considerations must be kept in mind as you make your application.
- By following the setup process, developers can easily request and check permissions. They can also handle permission responses by listening to the result of the request() method.
- Finally, developers can use permission groups provided by the permission_handler package to request multiple permissions at once, making it easier to handle permissions in their applications.