Project: Dog vs Cat Classifier using Pytorch
Overview
Dog v/s Cat Classifier is a hello world Project for anyone learning deep learning. This project will give you a brief idea of building a classification using a deep learning project having image data with the PyTorch library. This article will offer a head start towards the PyTorch library for projects, computer vision, and the classification deep learning project. So, without any further due, let's explore and learn.
What Are We Building?
In this project, we will build a model to predict an image of a dog or a cat. In addition, this project will explore the approach to solving a classification problem with the PyTorch library. Also, we will learn how to train, validate and test the model.
Pre-requisites
The prerequisites for this project are knowledge of Python, concepts of neural networks and especially convolutional neural network will help, and basic Pytorch. Also, We will be doing the code in Jupyter Notebook/Colab ( having some information about these will help)
How Are We Going to Build This?
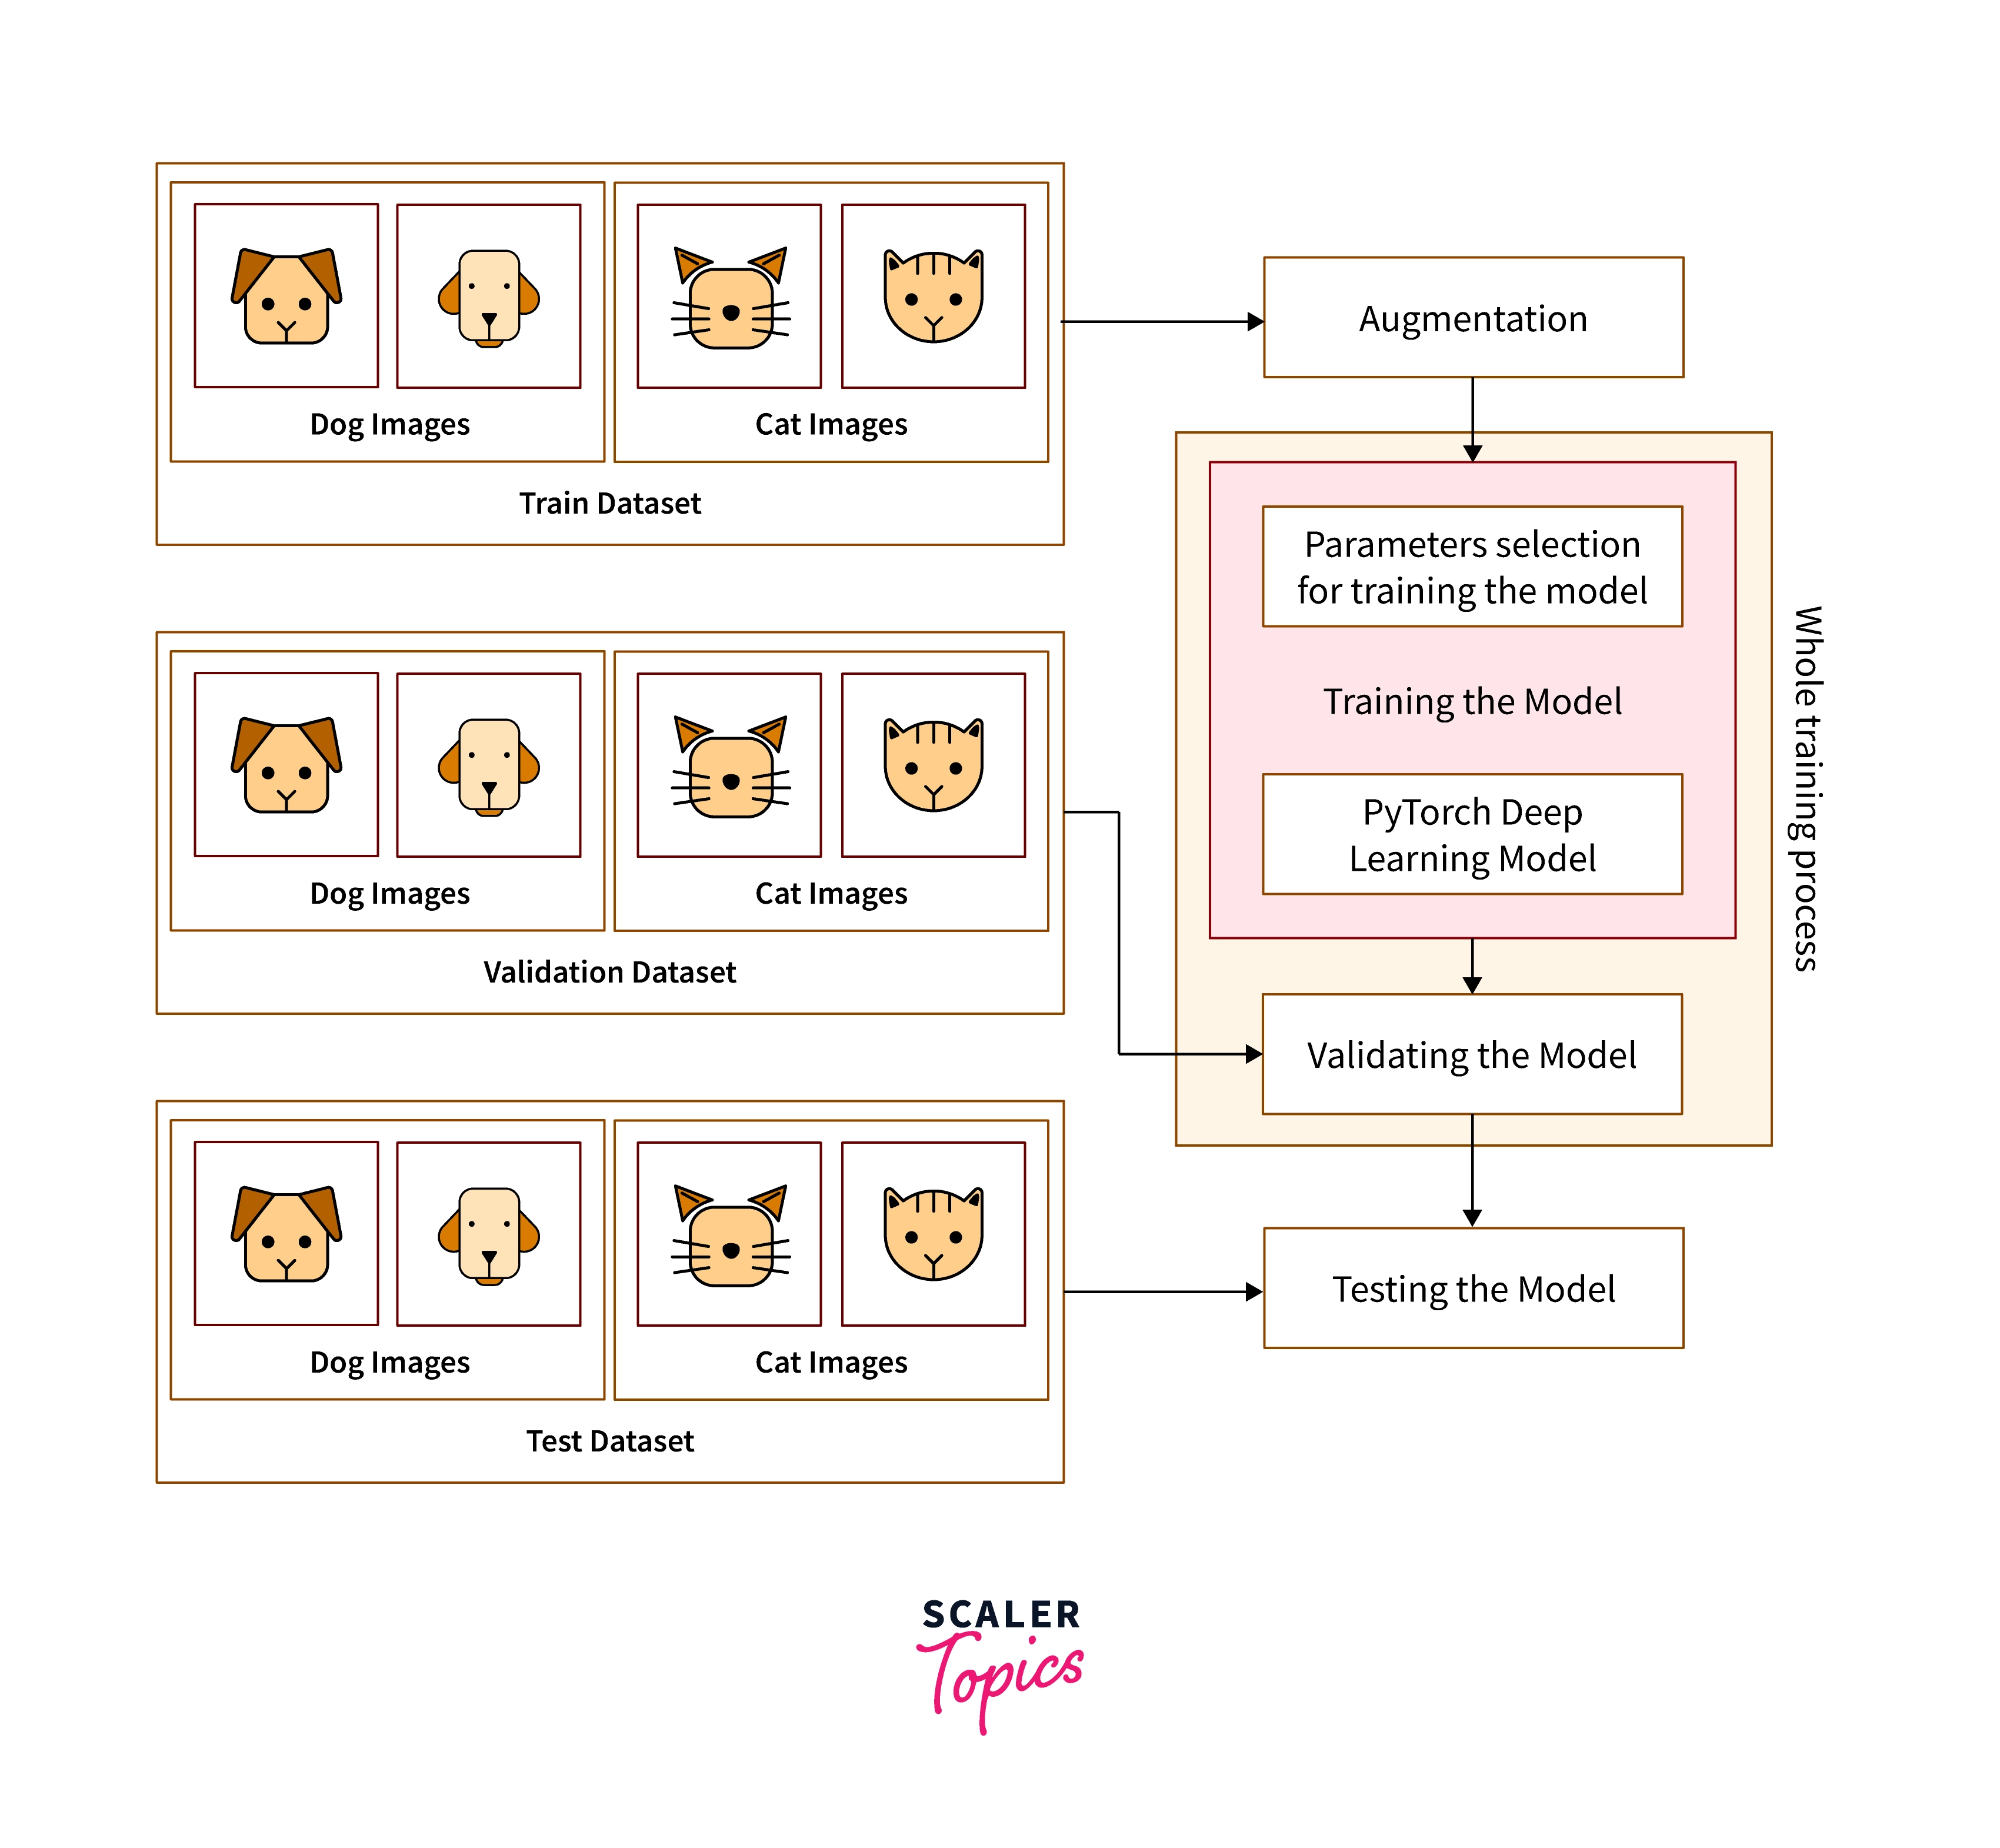
We will follow part of the machine learning life cycle to complete the project. The below block diagram will explain the process of the project. The General Steps of the Machine Learning project are
- Aqucisition of Data
- Preprocessing and extracting features from data
- Model Preparation, training, and validating
- Testing and reiterating some of the previous steps for performance enhancement
- Deployment of the model
We will focus on most of the steps in this project. We will focus on most of the steps in this project. The general approach for building this project is visualized in the below block diagram.
Transform Your Career
Choose from our industry-leading programs designed for career success
Modern Software and AI Engineering Program
Master full-stack development with AI integration

Modern Data Science and ML with specialisation in AI
Advanced data science techniques with AI specialization
Advanced AIML with Specialisation in Agentic AI
Deep dive into AIML with focus on Agentic systems
DevOps, Cloud & AI Platform Engineering
Build and manage AI-powered cloud infrastructure
AI Engineering Advanced Certification by IIT-Roorkee
Premier AI engineering certification from IIT-Roorkee
Requirements
The requirements for this project are divided into three sections.
-
Python Libraries used in the project
-
Kaggle Account for downloading the data and kaggle.json file.
-
Use Google Colab or any other notebook platform to run the code with GPU acceleration. Running the code on the CPU can be difficult because of the computation. So it is preferred to use any platform, or if you have the GPU in the system, use a Jupyter Notebook.
Building the Classifier
Downloading Cat vs. Dog Image Data from Kaggle
Before downloading the data, you must have a kaggle.json file in the project directory (Resource for downloading that file). If you are using google colab, later you can upload the file to Colab via the below command.
Now, let's write a bash script to download the data and place it in the proper places, also removing the junk files.
Create the Bash script
Script to download Data
You can write the below code in the "download_data.sh" file. This script downloads data zip files, extracts them, and places those in assigned directories. You can customize this code to perform more tasks.
Run the Bash script
By now, the data will download to the directory data/. Also, train and test data are in the respective directories.
1. Importing Libraries
Let's import the libraries and functions that are needed for us to build this classifier.
Turn Learning into Career Growth
2. Loading the Data
First, Let's organize the data in the below format, allowing us to create our data loader module.
The code for structuring the data is given below.
Now, we will write the code for splitting the data to train and validate data. Also, we will write the code for the Data loader used to load the data batch-wise while training and validating the model. We will inherit the Dataset class from the torch utils, giving us features used while training the model. There are mainly three magic methods in this class that is needed; we will edit those functions according to our application.
Scaler Placement Report and Statistics
Scaler learners achieved 2.5x salary growth with average post-Scaler CTC reaching ₹23L.
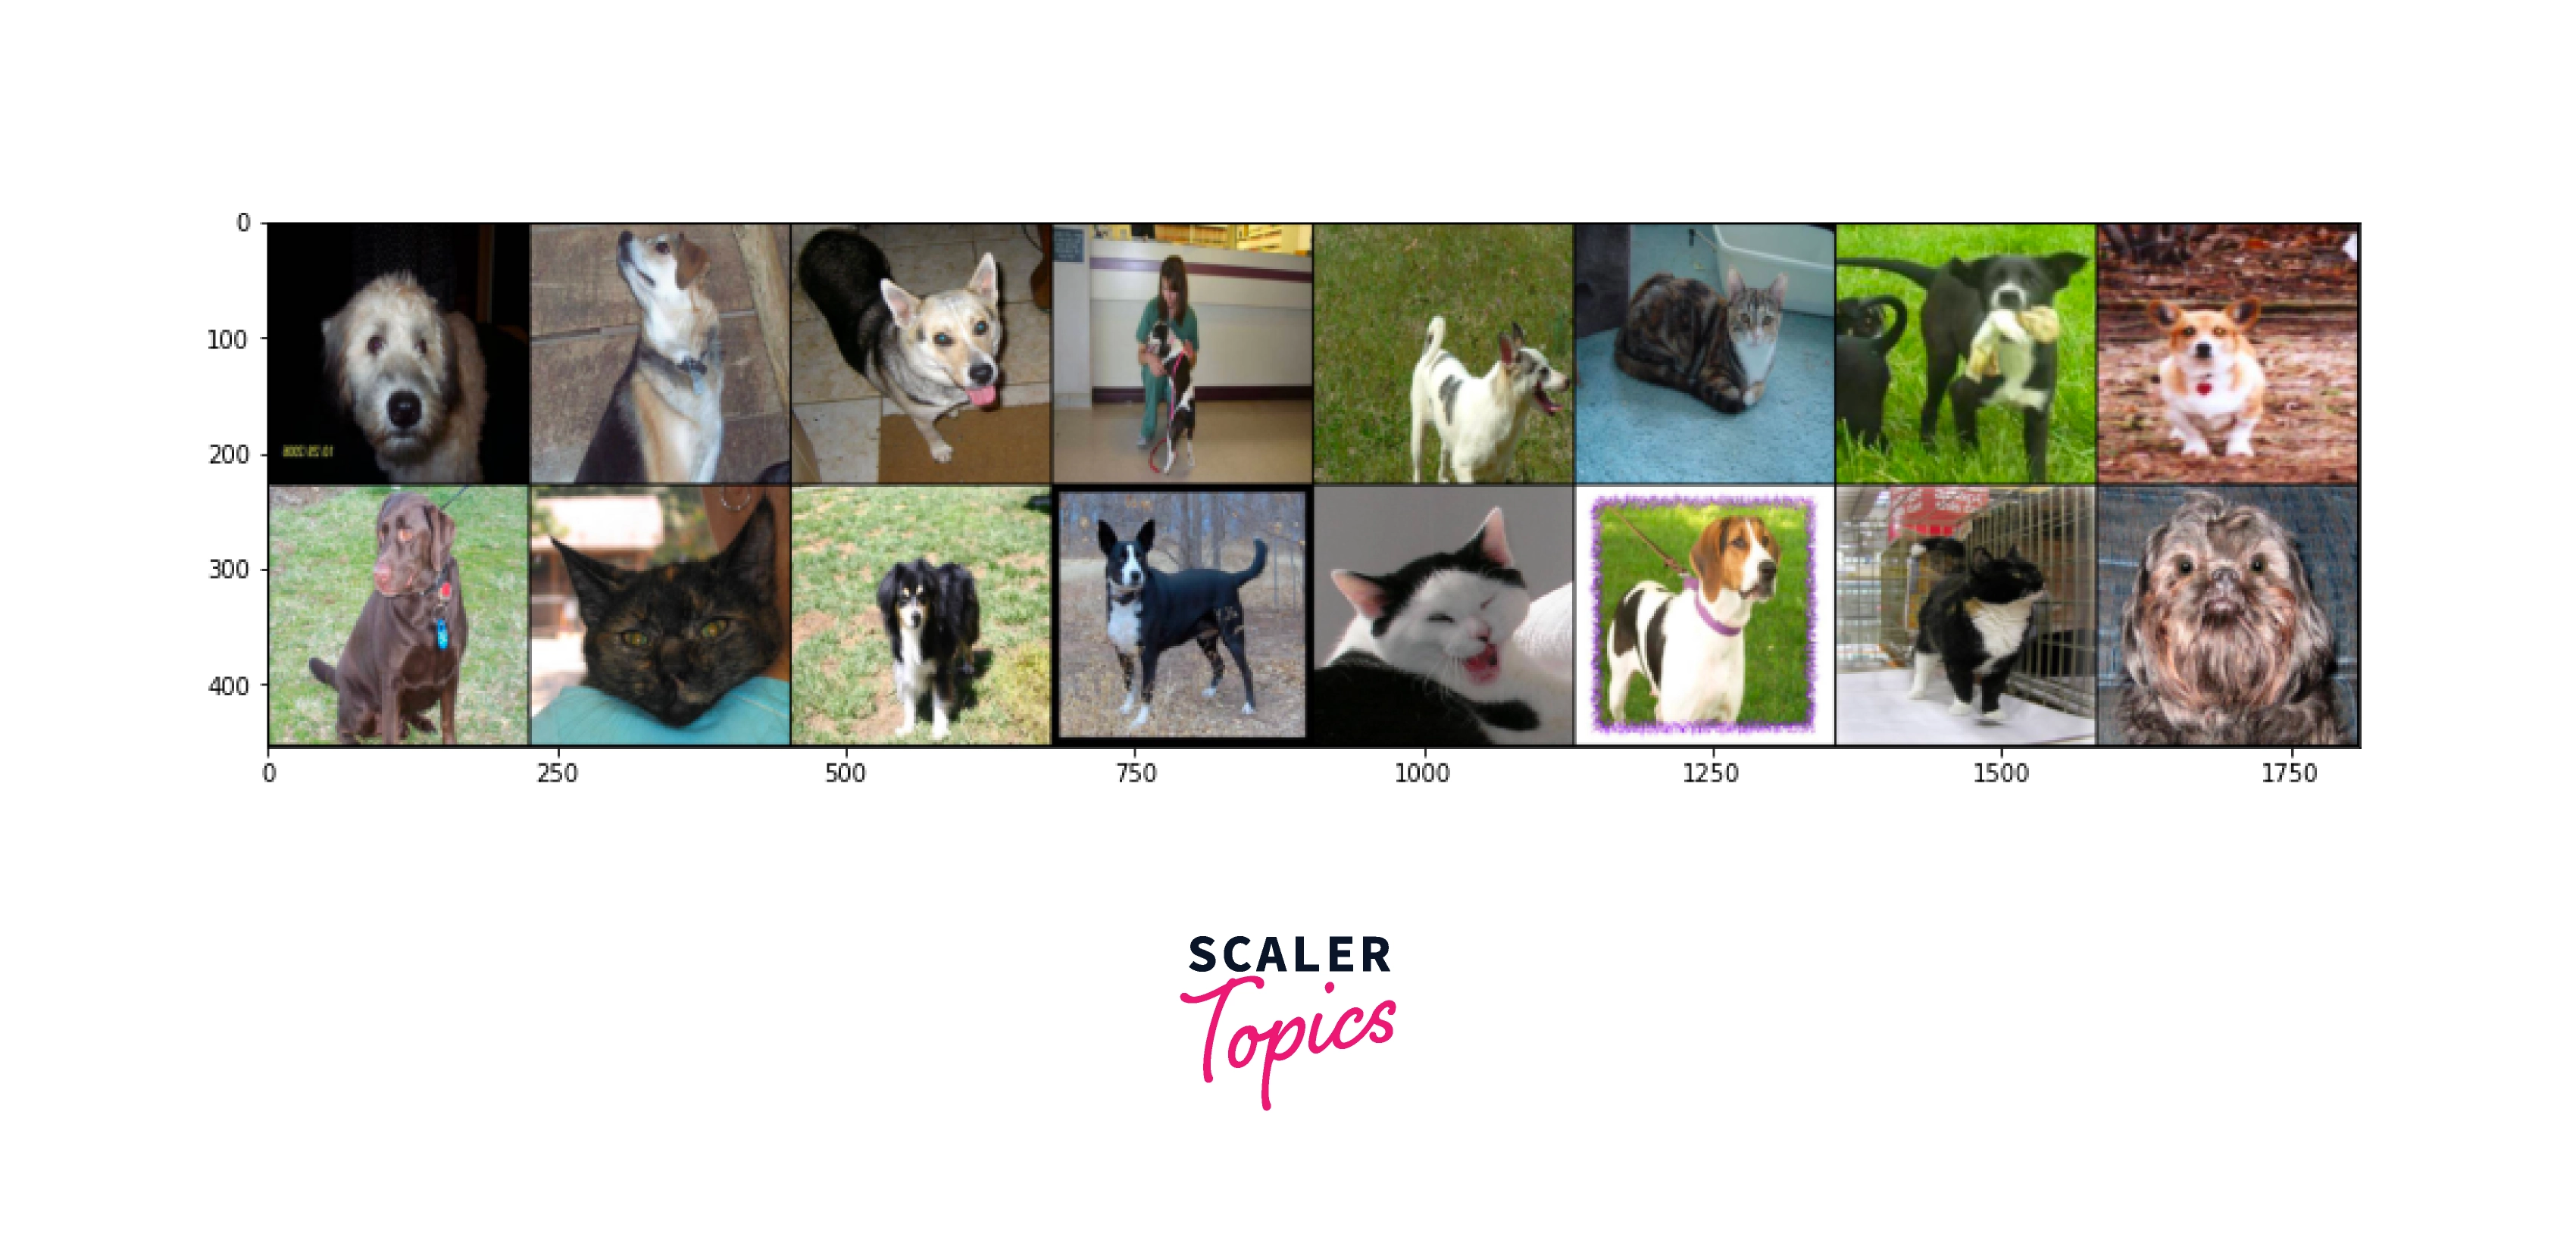
3. Visualizing the Bata
Next, we will visualize the data from the train data loader. Matplotlib is used to visualize the augmented data. The images are batch-wise; we will display one batch with 16 image data.
Scaler Placement Report and Statistics
Scaler learners achieved 2.5x salary growth with average post-Scaler CTC reaching ₹23L.
4. Building the Model
Let's Build the Model using a pre-trained neural network called VGG16. This method of using a pre-trained network is known as transfer learning, allowing us to train the model faster and better since it has previous knowledge. Main points to remember before building the model
- The Input channel size is 3 (RGB)
- Last Layer (Output Layer) should be either sigmoid with one output or softmax with two outputs.
5. Training the Model
We will write some functions to make our tasks easier. The points to remember before writing code are
- The loss function should be Binary Cross Entropy Loss (BCELoss) if the last layer is sigmoid (the loss function should be Cross Entropy Loss if the last layer is softmax).
- The optimizer can be any; in this case, we can use the Adam optimizer. Also, you can adjust the learning rate.
- The data, labels, and model must be on the same device.
- While writing the train_batch snippet, remember the below points:
- Set optimizer.zero_grad(), which removes the gradients present that help frees up memory.
- After computing the criterion (loss), execute the criterion.backward(); this performs the backward propagation and computes the gradients.
- The code optimizer.step() will iterate through the model and adjust the parameters.
- Points to note for the validate_batch code are
- Do not use .backward() and .step() because the batch is not being trained.
- Use torch.no_grad() before giving the data to the model; this will ensure that gradients are not stored in memory.
Next, we will write the loop for the model to train and validate. The loop is based on the number of epochs we choose. The tqdm library is used to visualize the training and validation. Inside the main loop are two parallel loops for training and validation. First, the inner loop will provide batch-wise data. Then it's given to train_batch and validate_batch, which we had defined earlier. Next, compute and print the losses and accuracy.
6. Results & Inferences
The Results of this model are
| Process | BCE Loss | Accuracy | F1-Score |
|---|---|---|---|
| Train | 0.072 | 98.66 | 98.84 |
| Validate | 0.0592 | 98.0 | 80.0 |
You can improve the model by training it more or tweaking the parameters.
7. Save the Model to the Disk
To save the model use run the below.
Conclusion
Here are some takeaways from this project:-
- Process the Data according to your needs, and write scripts/ functions to make tasks easier.
- Use Augmentations,, especially for images with the DataLoader and Dataset classes.
- Try to use a Transfer learning approach rather than a bare neural network; this will help the model to learn faster and better since it has the previous knowledge
- It's always good to approach having more than one metric unless you have a specific reason for having one.