How to Install PyTorch?
Overview
This article serves as your one-stop guide to installing PyTorch on your system for Deep Learning modeling. We will learn how to install PyTorch on different operating systems using commands for both types of package management systems, i.e., pip install PyTorch and conda install PyTorch. Installation of PyTorch on Docker is also demonstrated. We also look at how to work with PyTorch in Google colab while setting up a GPU environment for faster and more efficient computing.
Introduction
PyTorch is one of the most popular deep learning libraries offering two core functionalities that facilitate the building and training of neural network-based models.
The following are the primary features of the library -
- Its core data structure is called Tensor, and it can be easily migrated to GPUs for efficient and faster computing, and
- An automatic differentiation engine called autograd is supported in the library that allows for the training of deep neural networks by automatically calculating gradients with ease.
In this article, we will be taking our first step towards learning to build deep neural networks in PyTorch - that is, installing and getting PyTorch running on our system.
So, let's dive right in.
Installation on Windows
Let us first learn how to install PyTorch on Windows Operating System -
The pre-requisites for the installation are as follows -
- Python - Python needs to be installed on the system.
- The two package managers that we will be learning to install torch with are pip and conda should be installed on the system.
Using Pip
- Let's first ensure Python is installed on the system by checking its version using the following command from the command line -
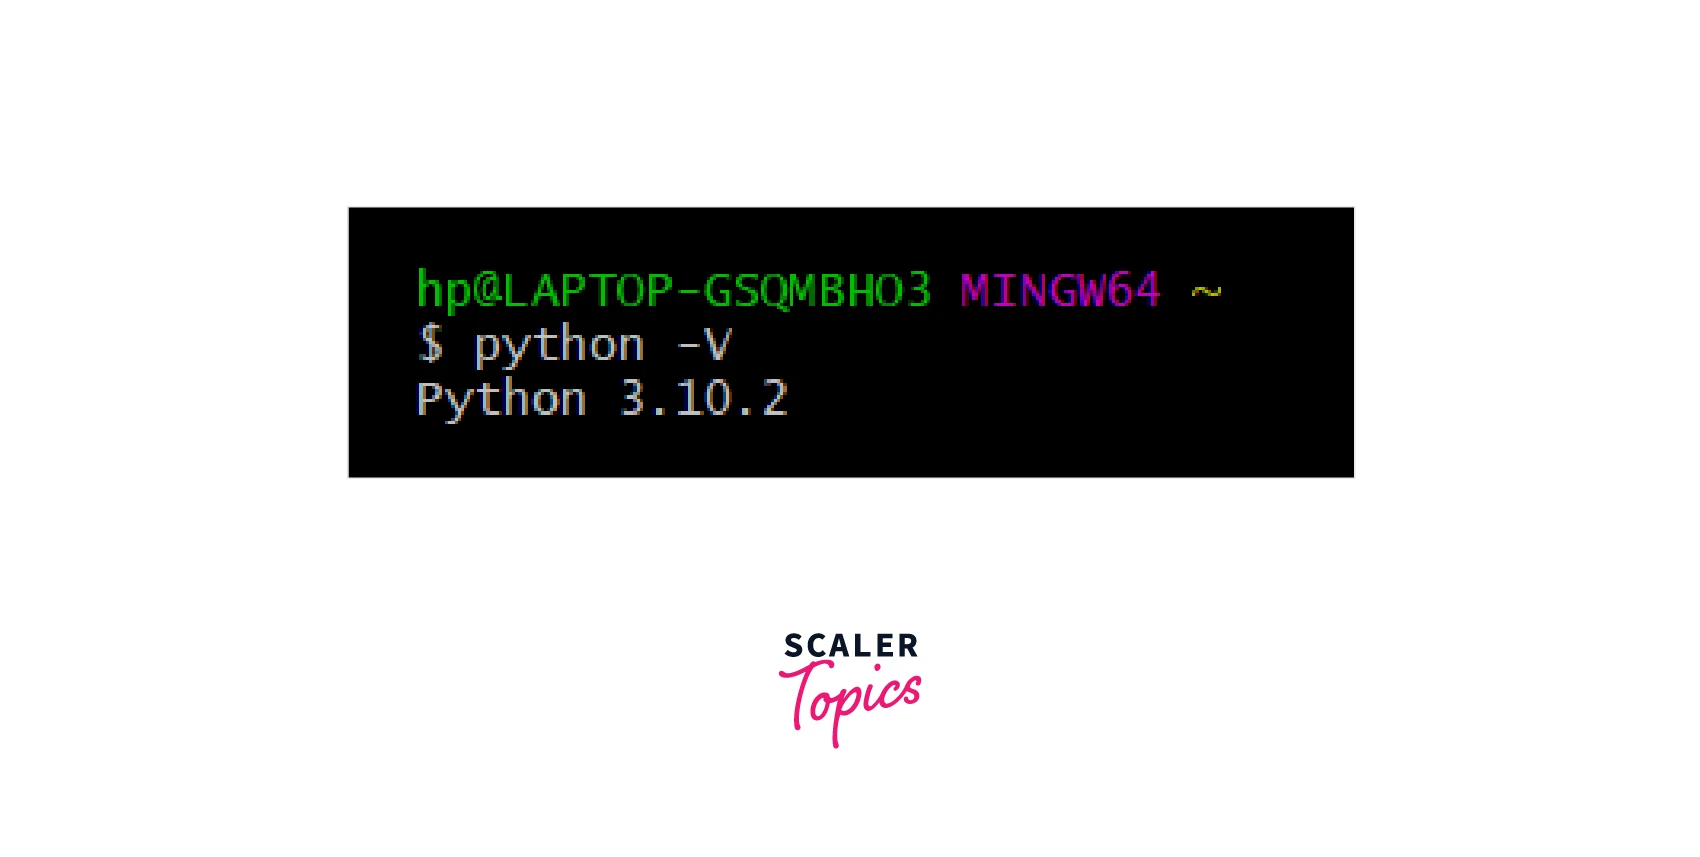
We can thus see that Python version 3.10.2 is already installed on the system.
- Then, we will check if the package manager we wish to use, pip, is installed or not by again checking the version present using the following command -
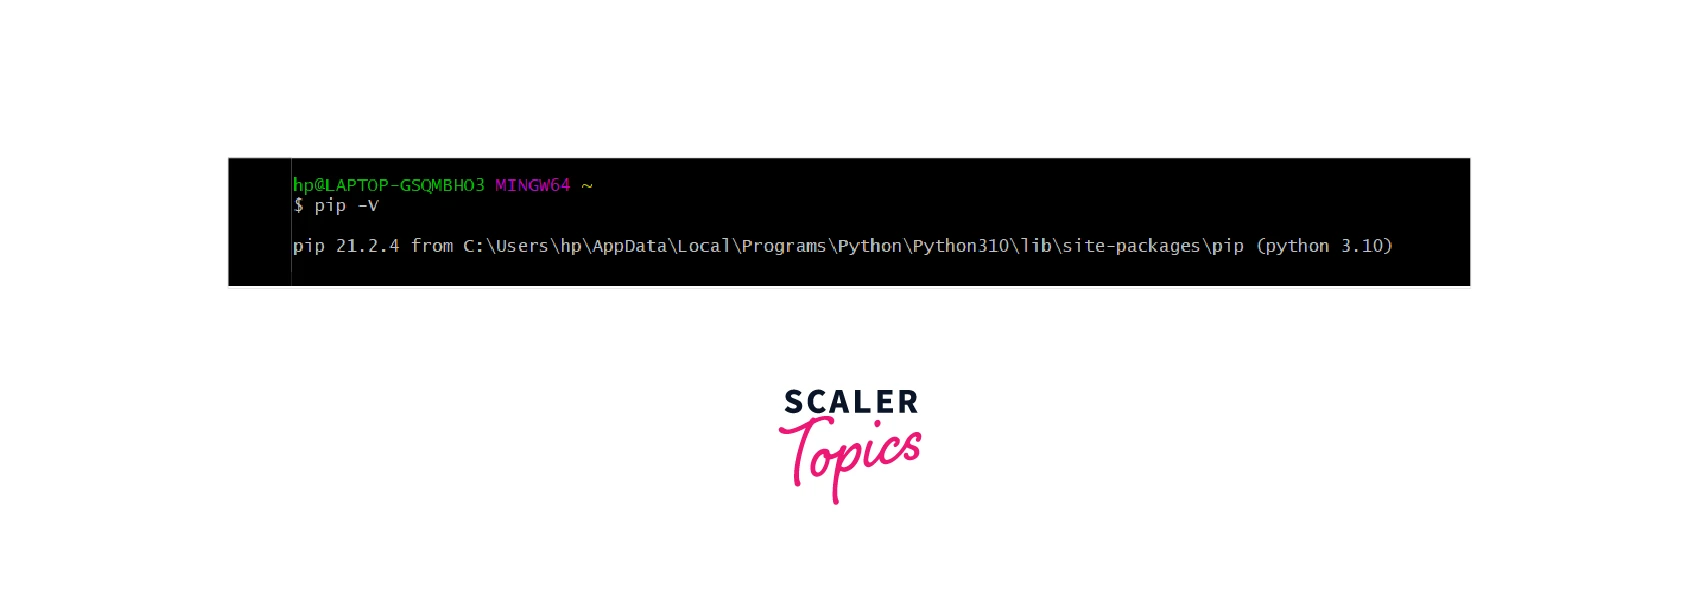
We are now good to go as pip version 21.2.4 is also available on the system.
- Now, let us install on our system PyTorch for CPU using -
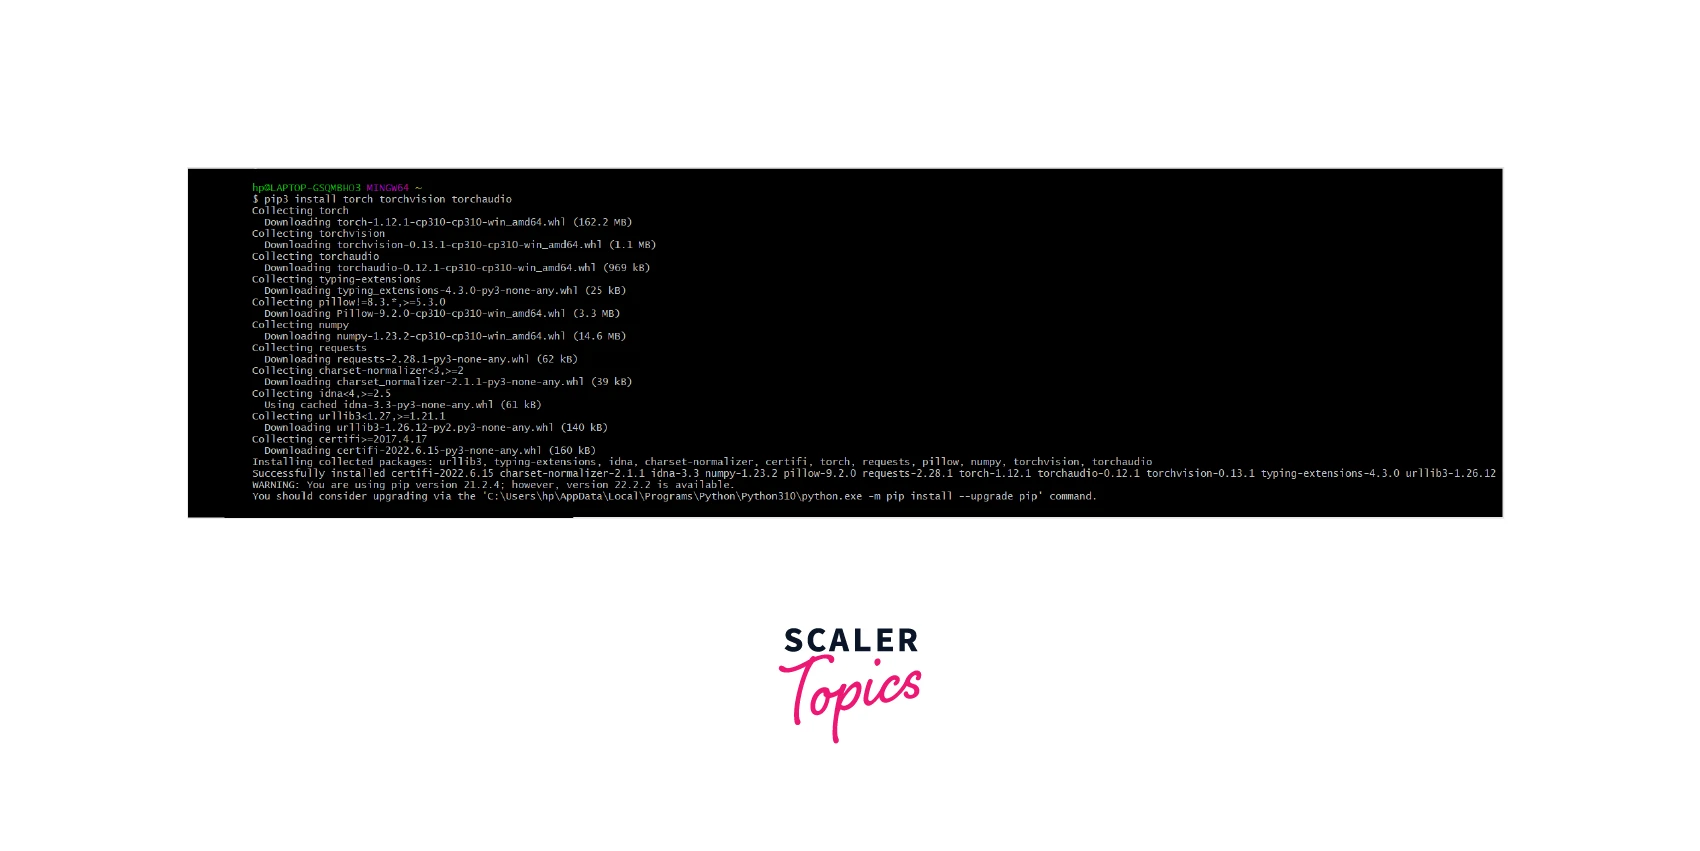
That is it! We have successfully installed PyTorch using pip install PyTorch.
- To ensure that the installation was successfully done, we will now take an additional step to verify it by checking the PyTorch version installed using the command -
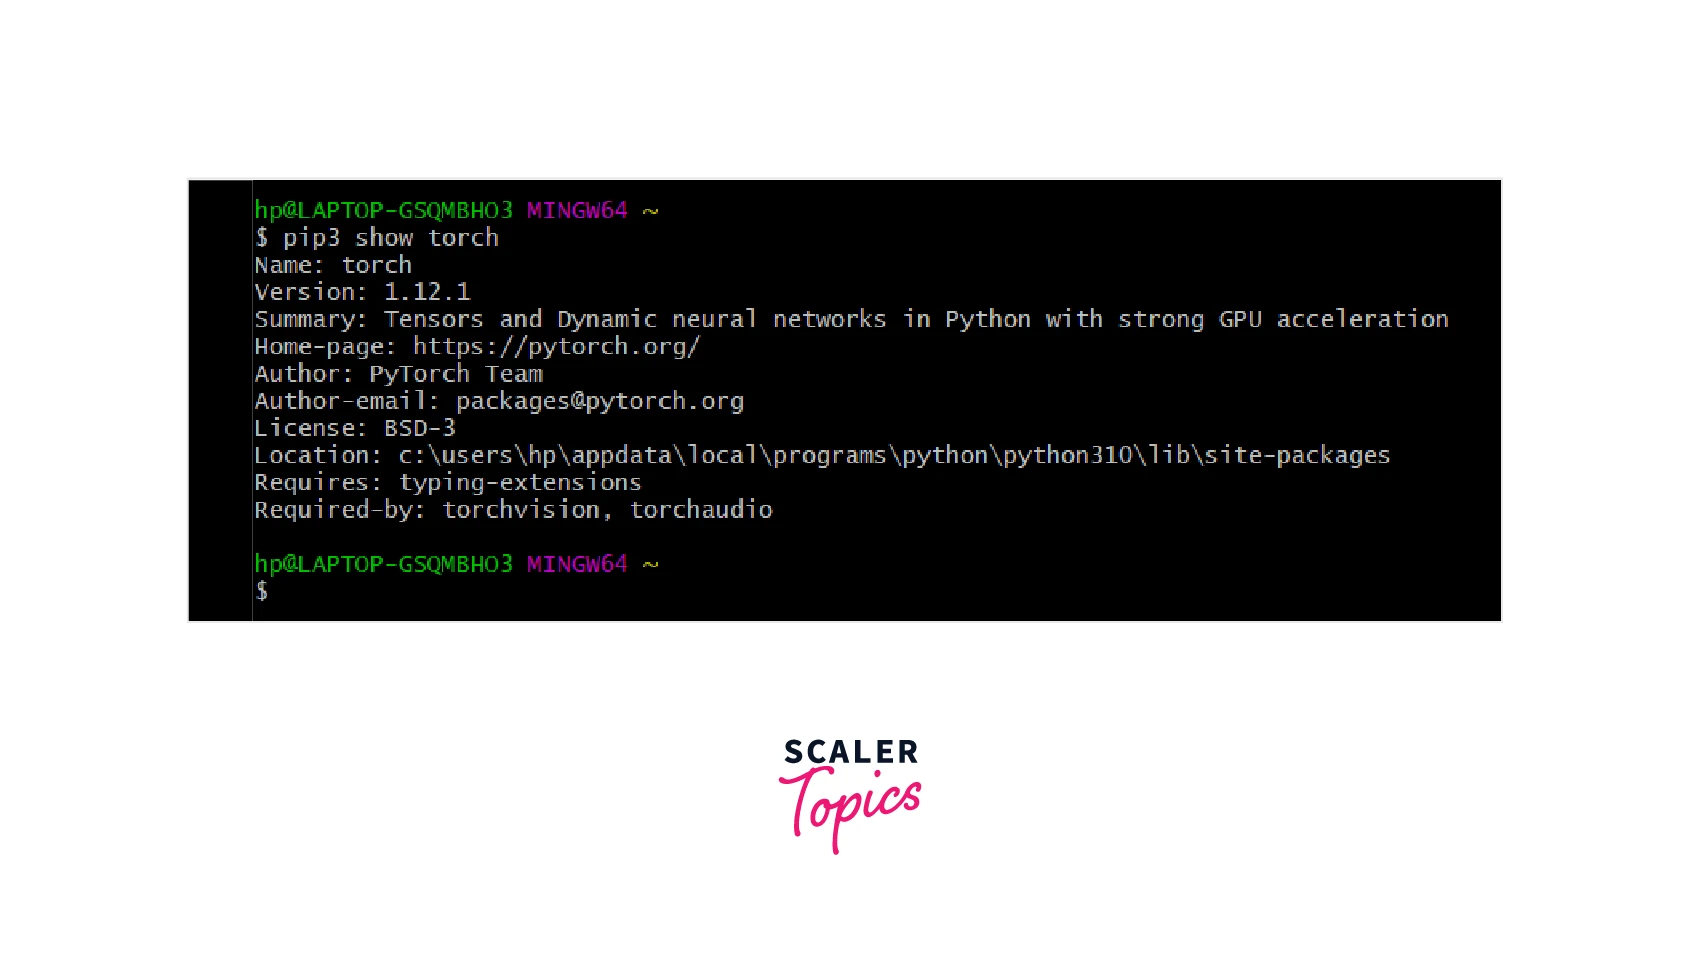
Good to go! PyTorch version 1.12.1 has successfully been installed on our Windows system.
- To install PyTorch for the compute platform CUDA 11.3, replace the command in pointer 3 with the following one -
- Similarly, to install PyTorch for the compute platform CUDA 11.6, replace the command in pointer 3 with the following one -
Uninstall PyTorch Now, let's say for some reason we need to uninstall the current version of PyTorch that is already present on the system. The following command can be simply used to proceed with the uninstallation -
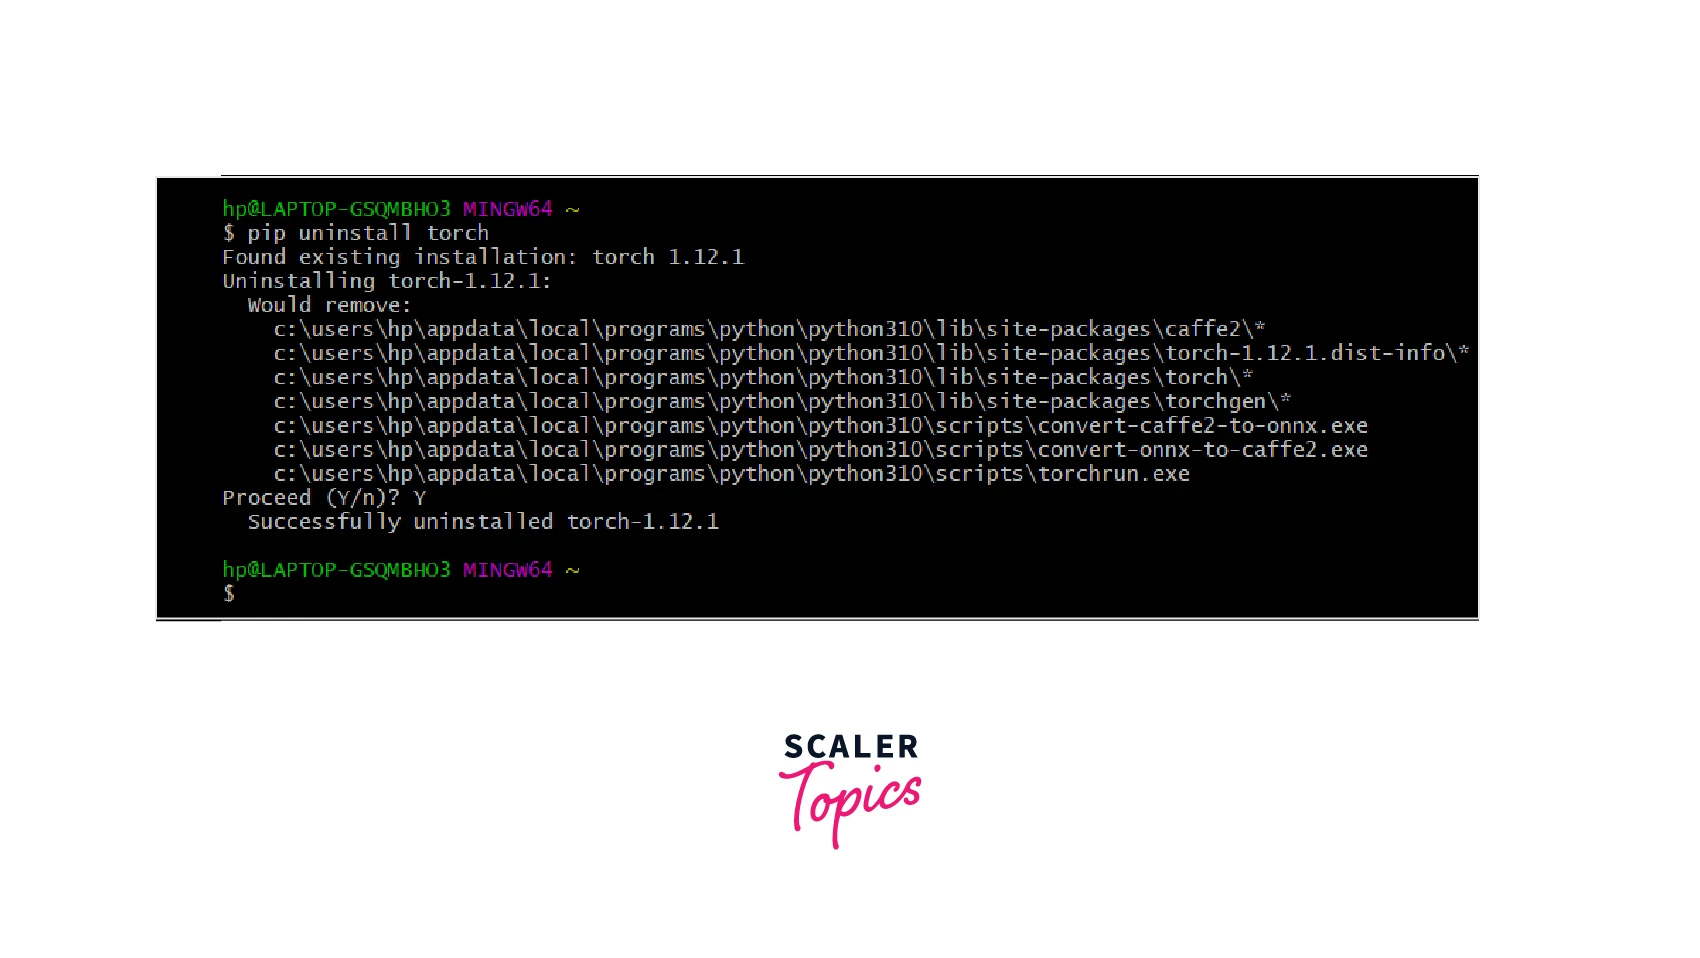
Hence, PyTorch version 1.21.1 is successfully uninstalled from our system.
Transform Your Career
Choose from our industry-leading programs designed for career success
Modern Software and AI Engineering Program
Master full-stack development with AI integration

Modern Data Science and ML with specialisation in AI
Advanced data science techniques with AI specialization
Advanced AIML with Specialisation in Agentic AI
Deep dive into AIML with focus on Agentic systems
DevOps, Cloud & AI Platform Engineering
Build and manage AI-powered cloud infrastructure
AI Engineering Advanced Certification by IIT-Roorkee
Premier AI engineering certification from IIT-Roorkee
Using Conda
Let us look at the installation process using the conda package manager. The following commands need to be entered in the Anaconda command prompt. That said, we will need to install Anaconda distribution on our system if it's not already installed.
- We will first check for the conda pre-requisite by checking the conda version on the system using the command -
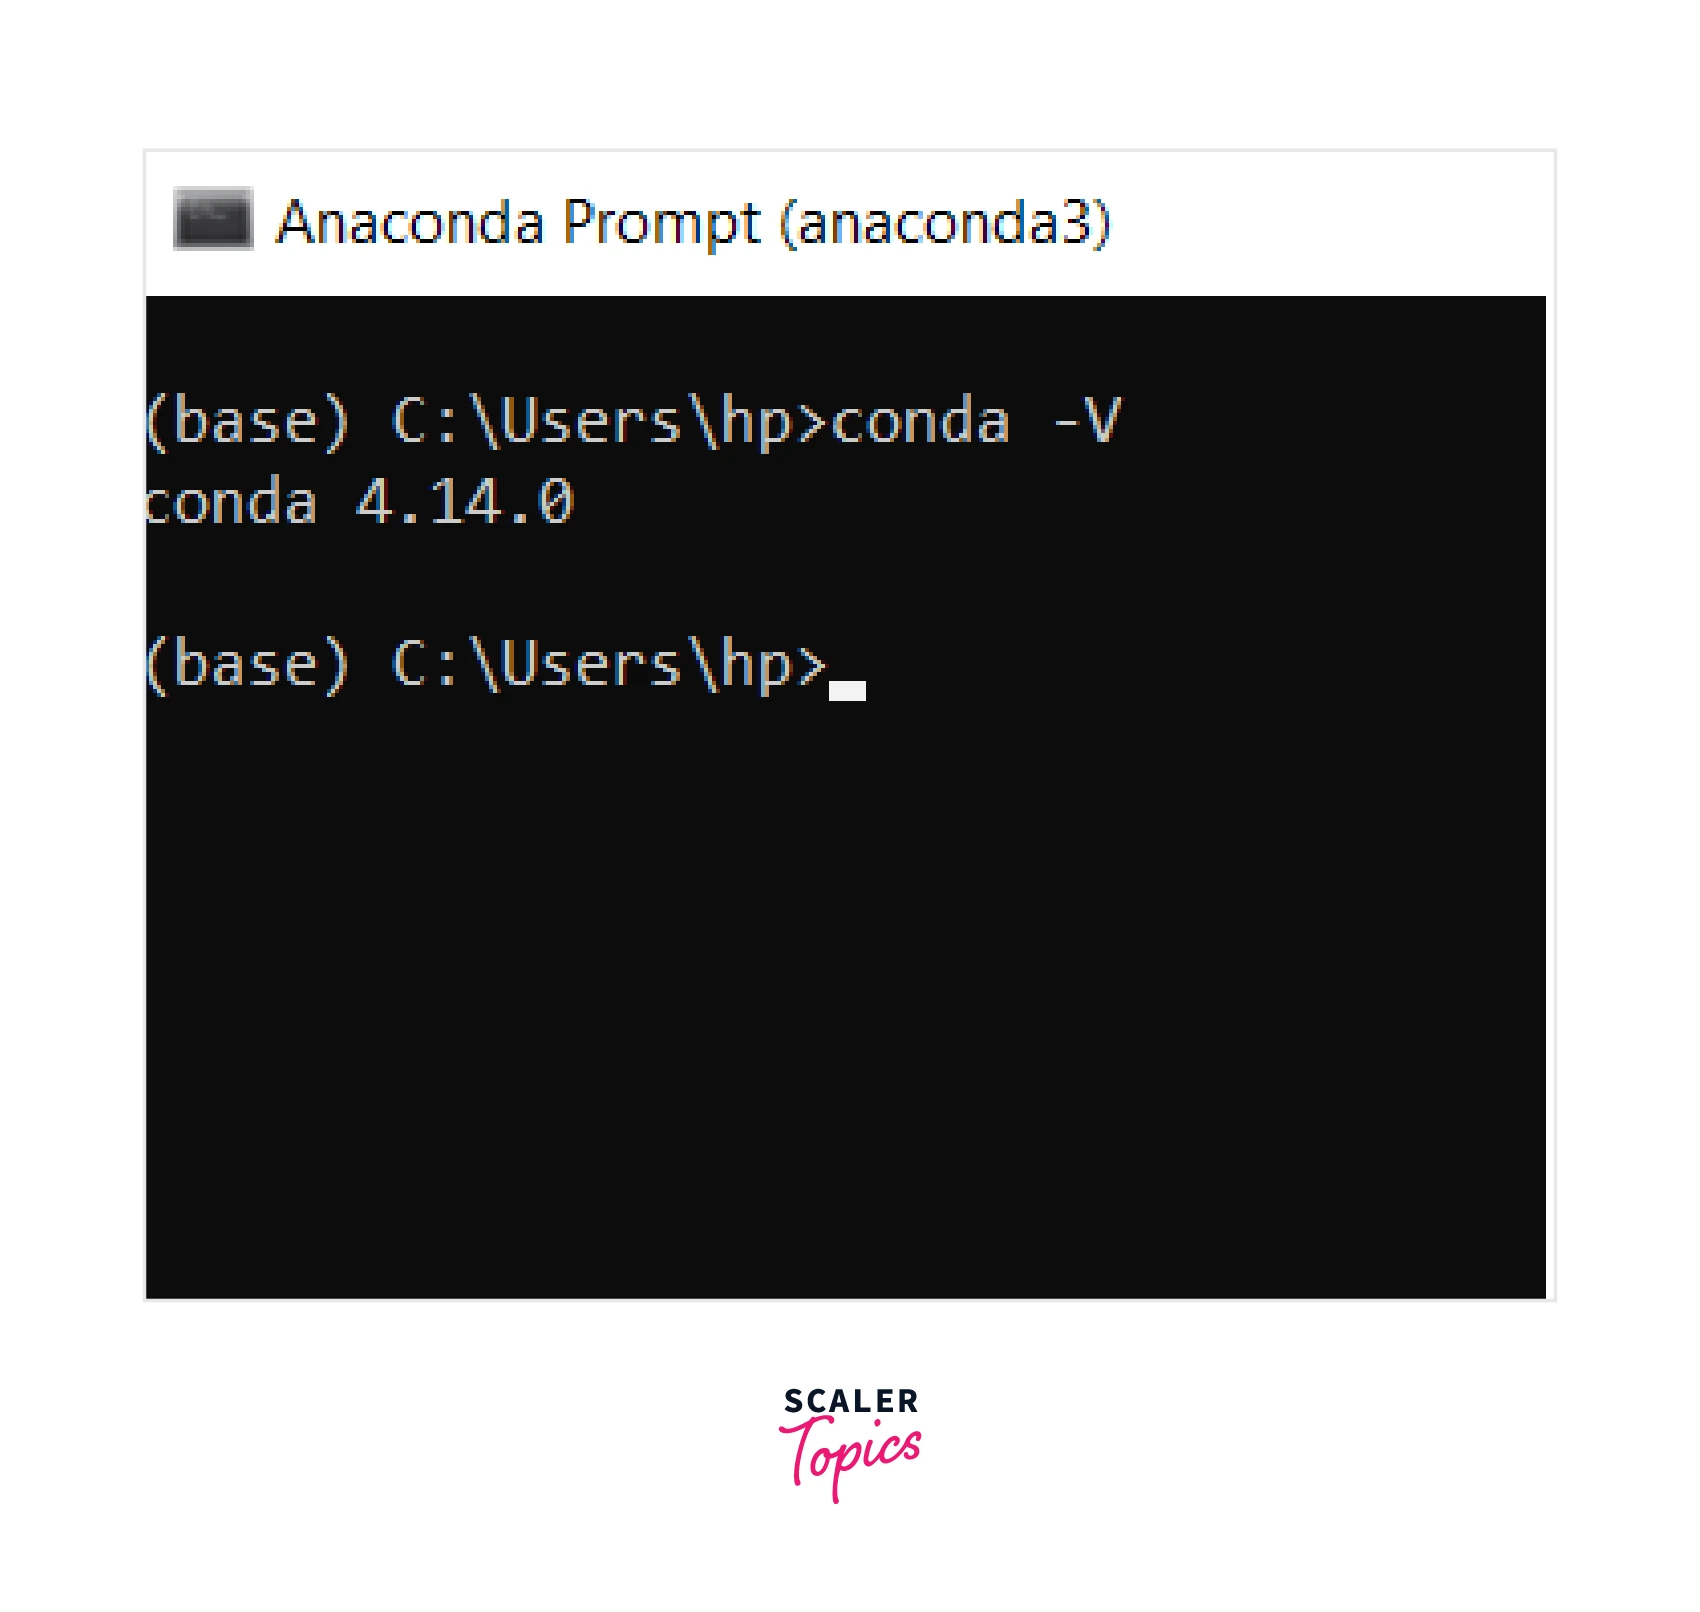
conda version 4.14.0 is installed on the system, so we are good to go.
- Now, let's install PyTorch for the CPU using the below command -
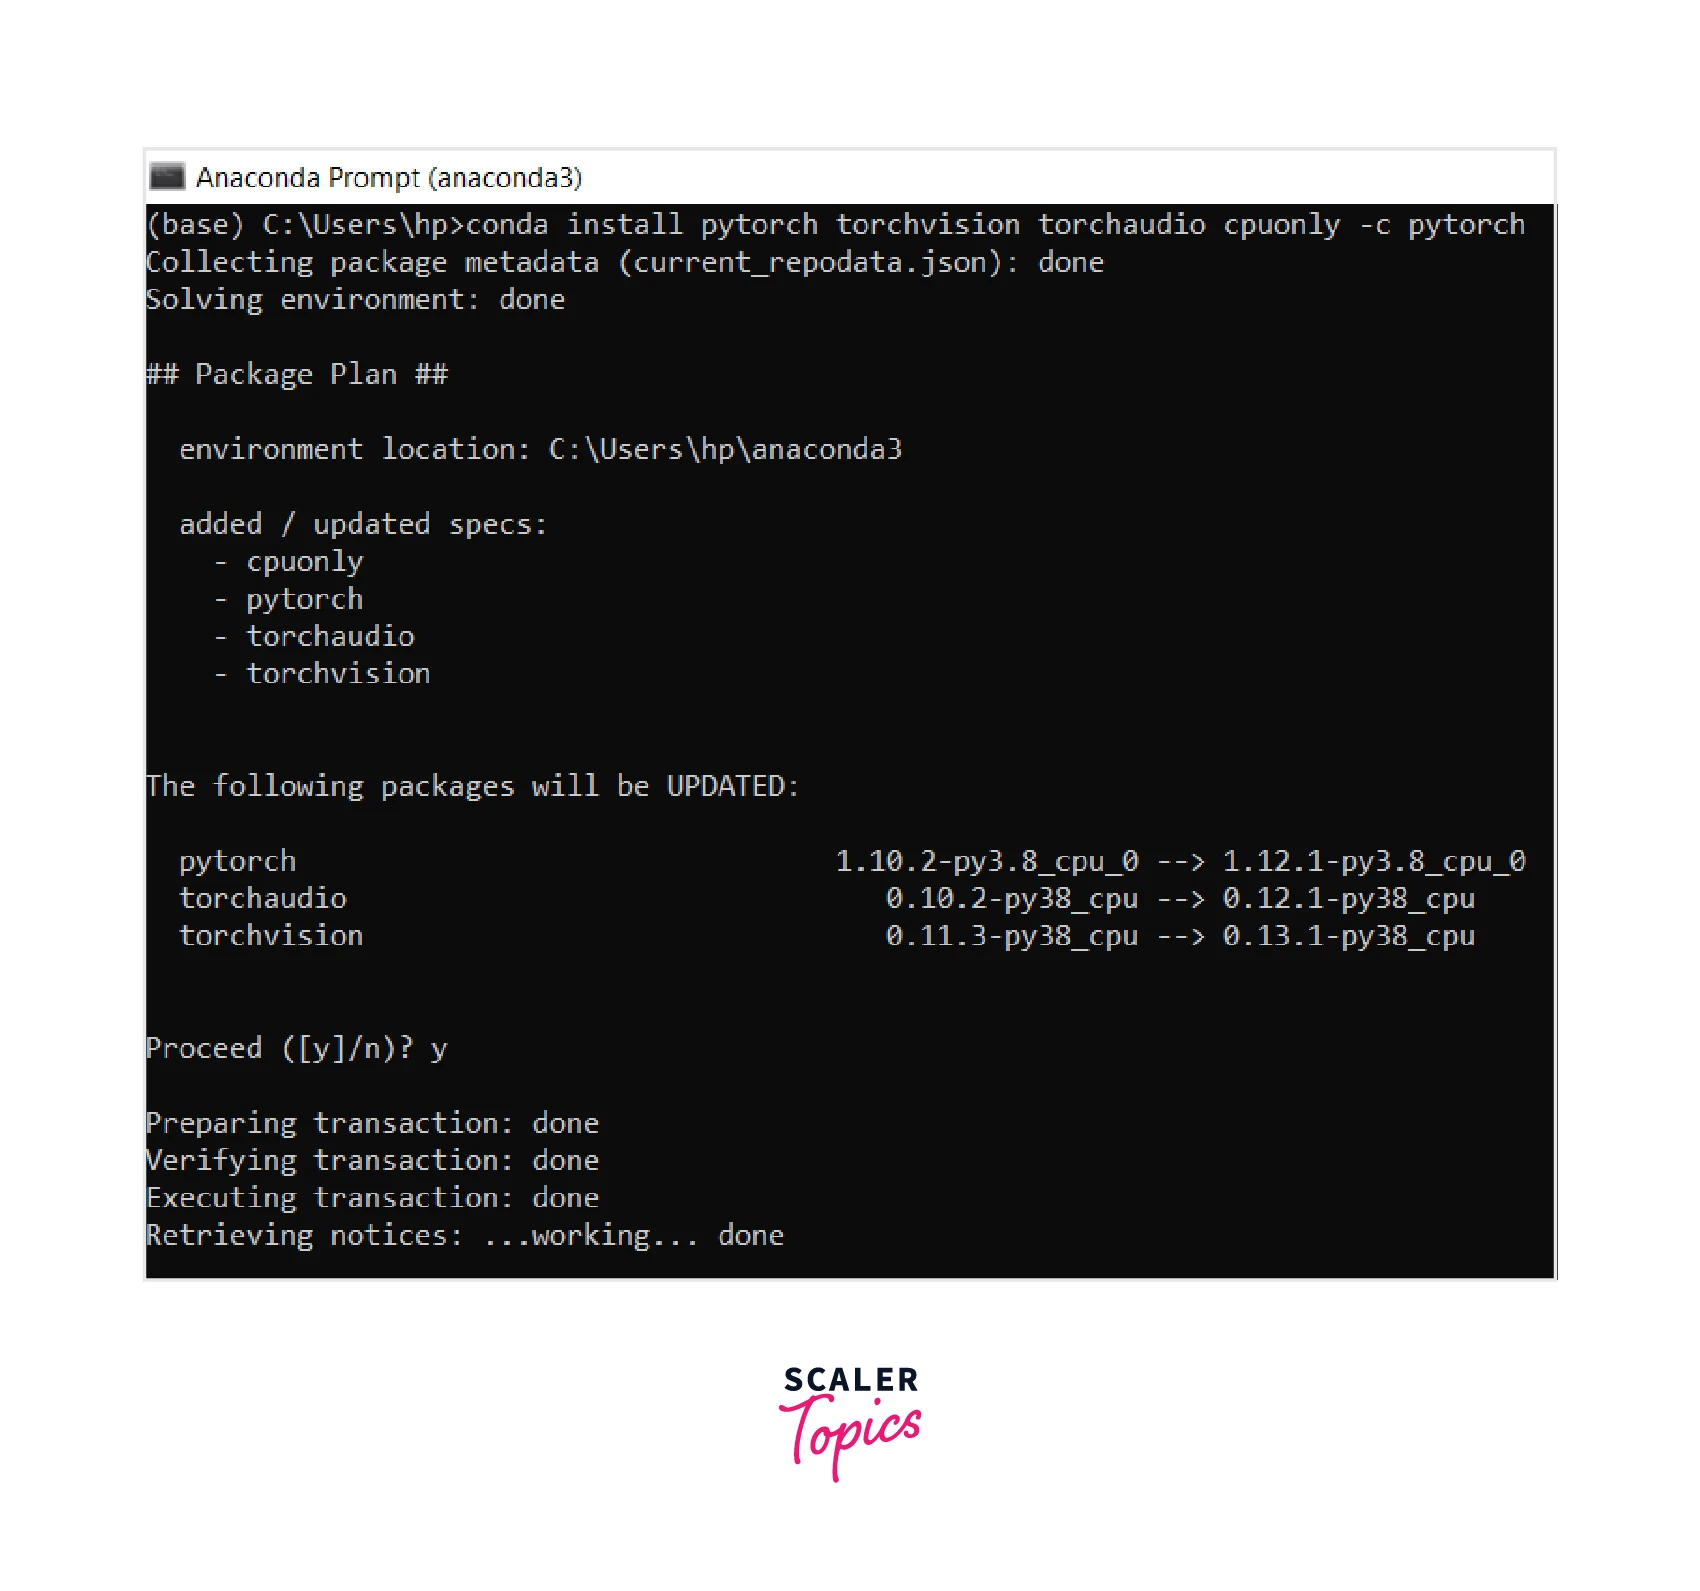
With this command, PyTorch is now successfully installed on our Windows system.
- To ensure the successful installation further, we will check the PyTorch version installed on our system using the command -
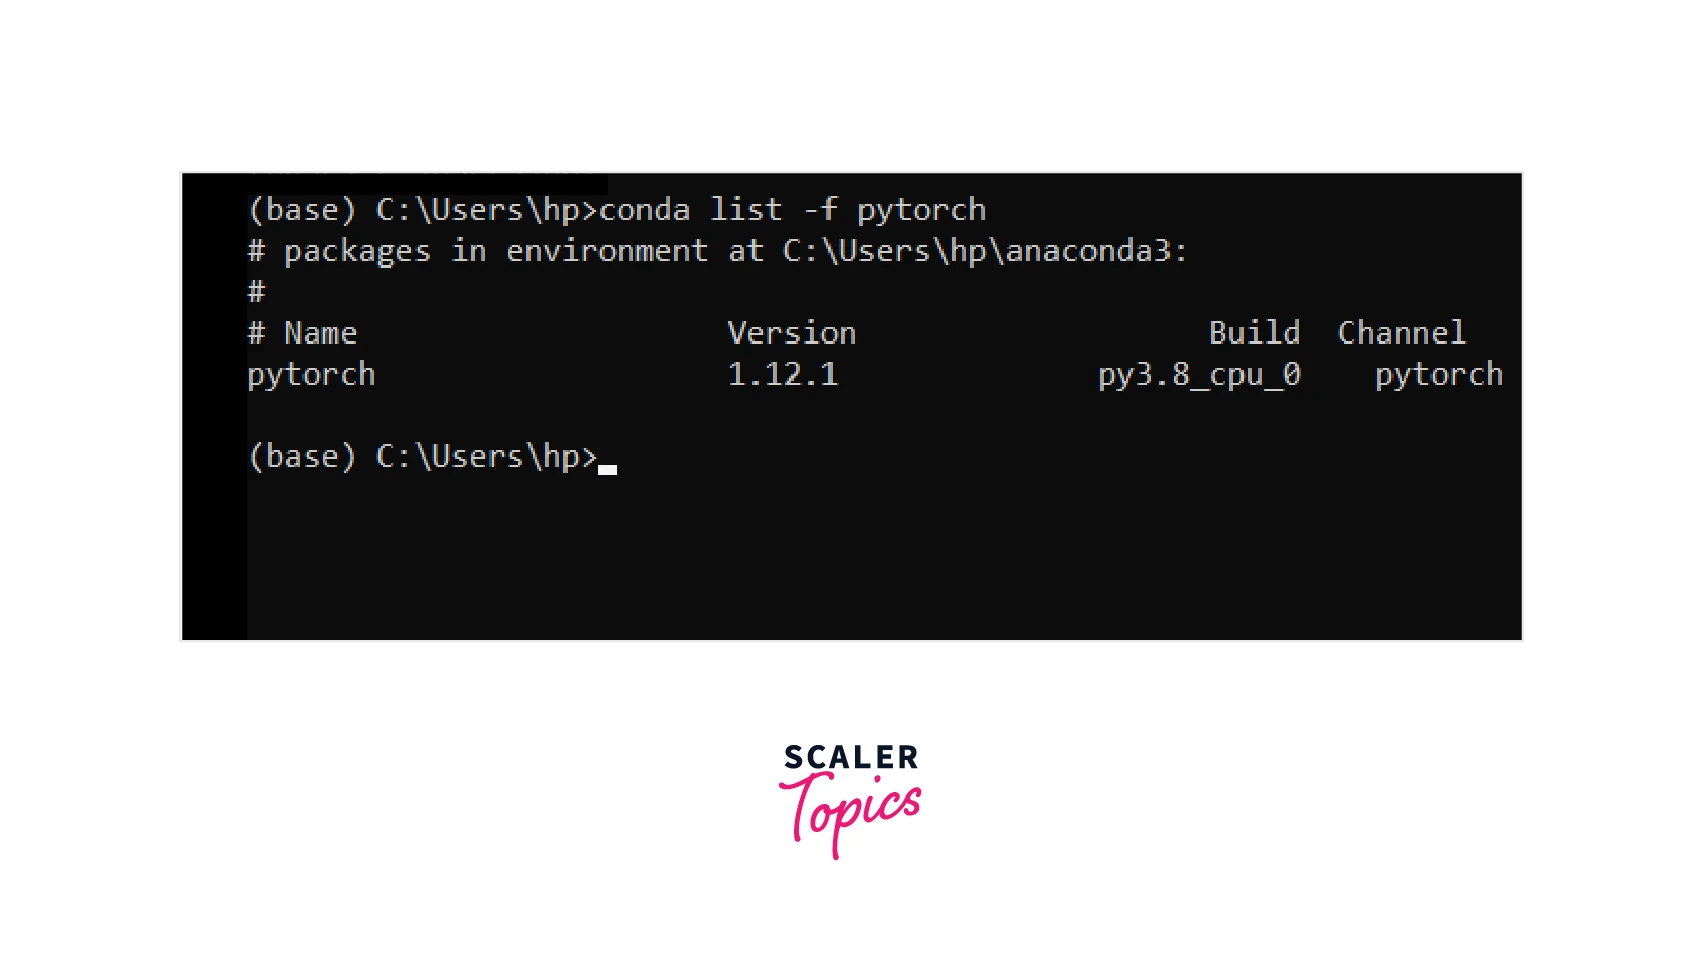
Done! PyTorch version 1.12.1 hence was successfully installed on our system.
- To install PyTorch for the compute platform CUDA 11.3, replace the command in pointer 2 with the following one -
- And, to install PyTorch for the compute platform CUDA 11.6, replace the command in pointer 3 with the following one -
Install Pytorch on MacOS
Now, we will look at how to install PyTorch on macOS.
The pre-requisites here are the same, that is -
- Python - Python needs to be installed on the system.
- The package managers that we will be using, that is, pip and conda should be installed on the system.
The following commands need to be entered in the command line.
Scaler Placement Report and Statistics
Scaler learners achieved 2.5x salary growth with average post-Scaler CTC reaching ₹23L.
Using pip
- We'll first check the version of Python installed on the system by using -
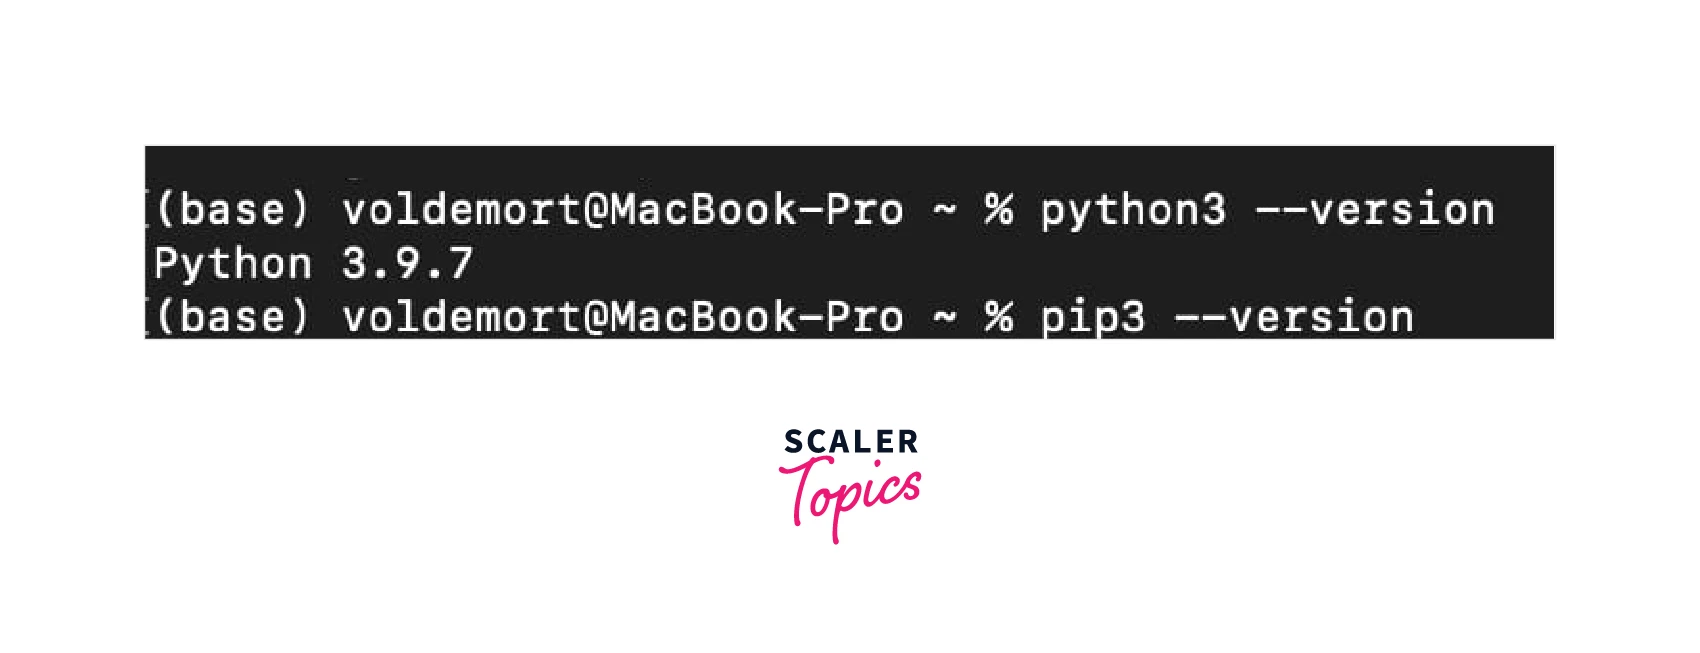
This means python version 3.9.7 is already installed on the system and we can proceed.
- Now we will check the version of the package manager pip on the system by entering the following command -
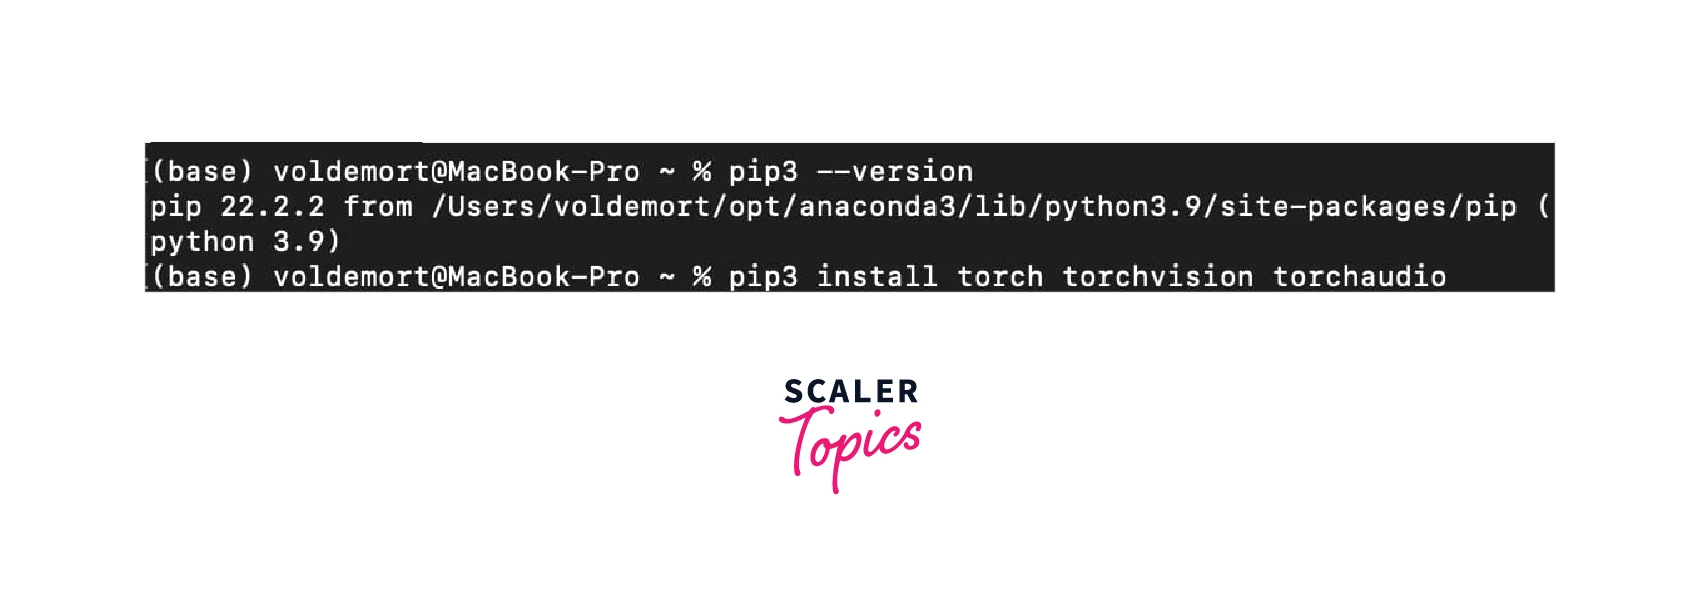
This means pip is already installed on the system with version 22.2.2.
- Next, we will install the latest stable version of PyTorch. Also, note that macOS Binaries do not support CUDA, and we need to install from the source if PyTorch for CUDA is needed. So, we install PyTorch on the system for the CPU using the following command -
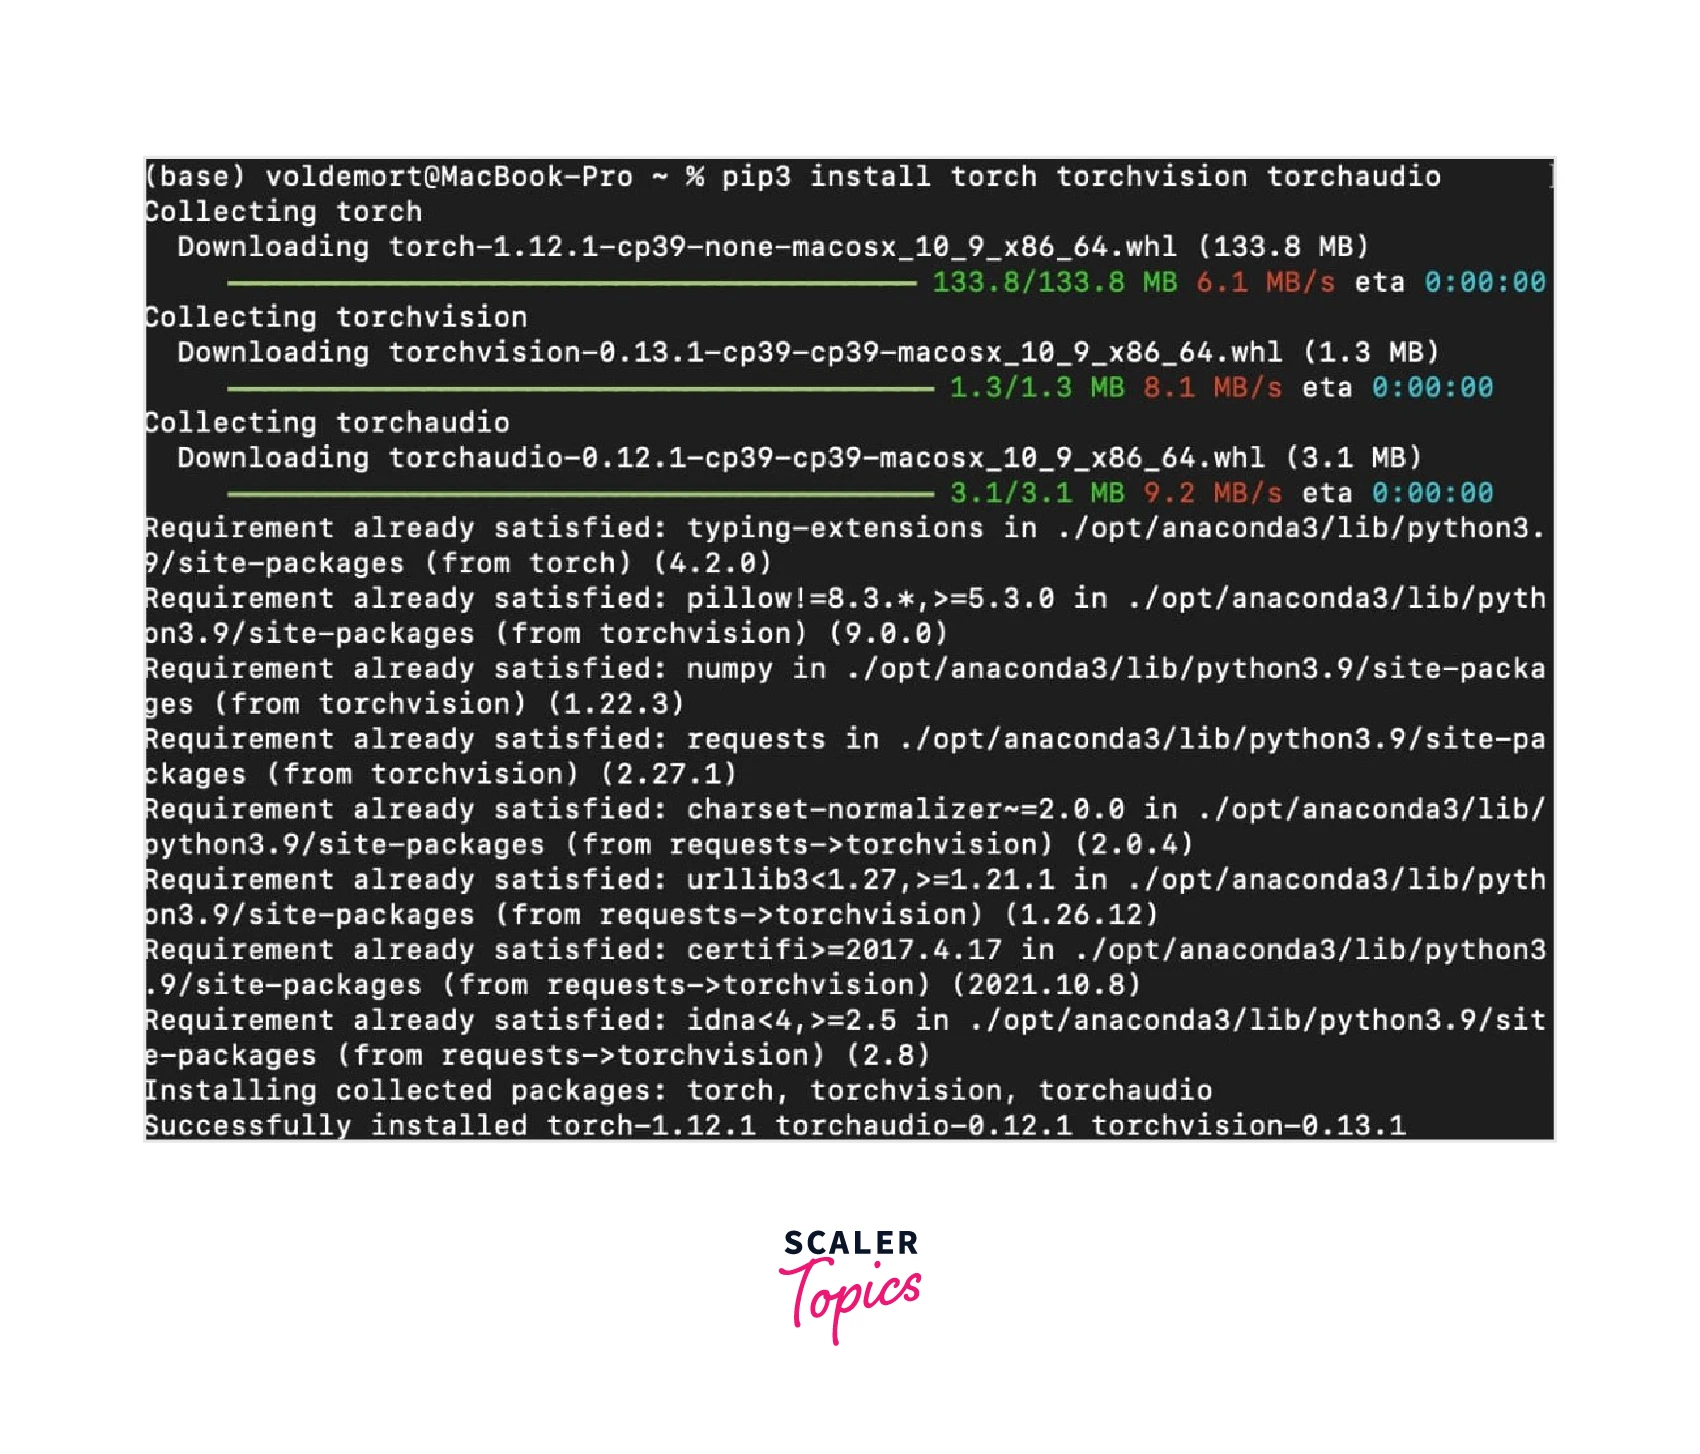
PyTorch is now successfully installed.
- To further ensure the successful installation, let us check the version of PyTorch installed on the system using the following command -
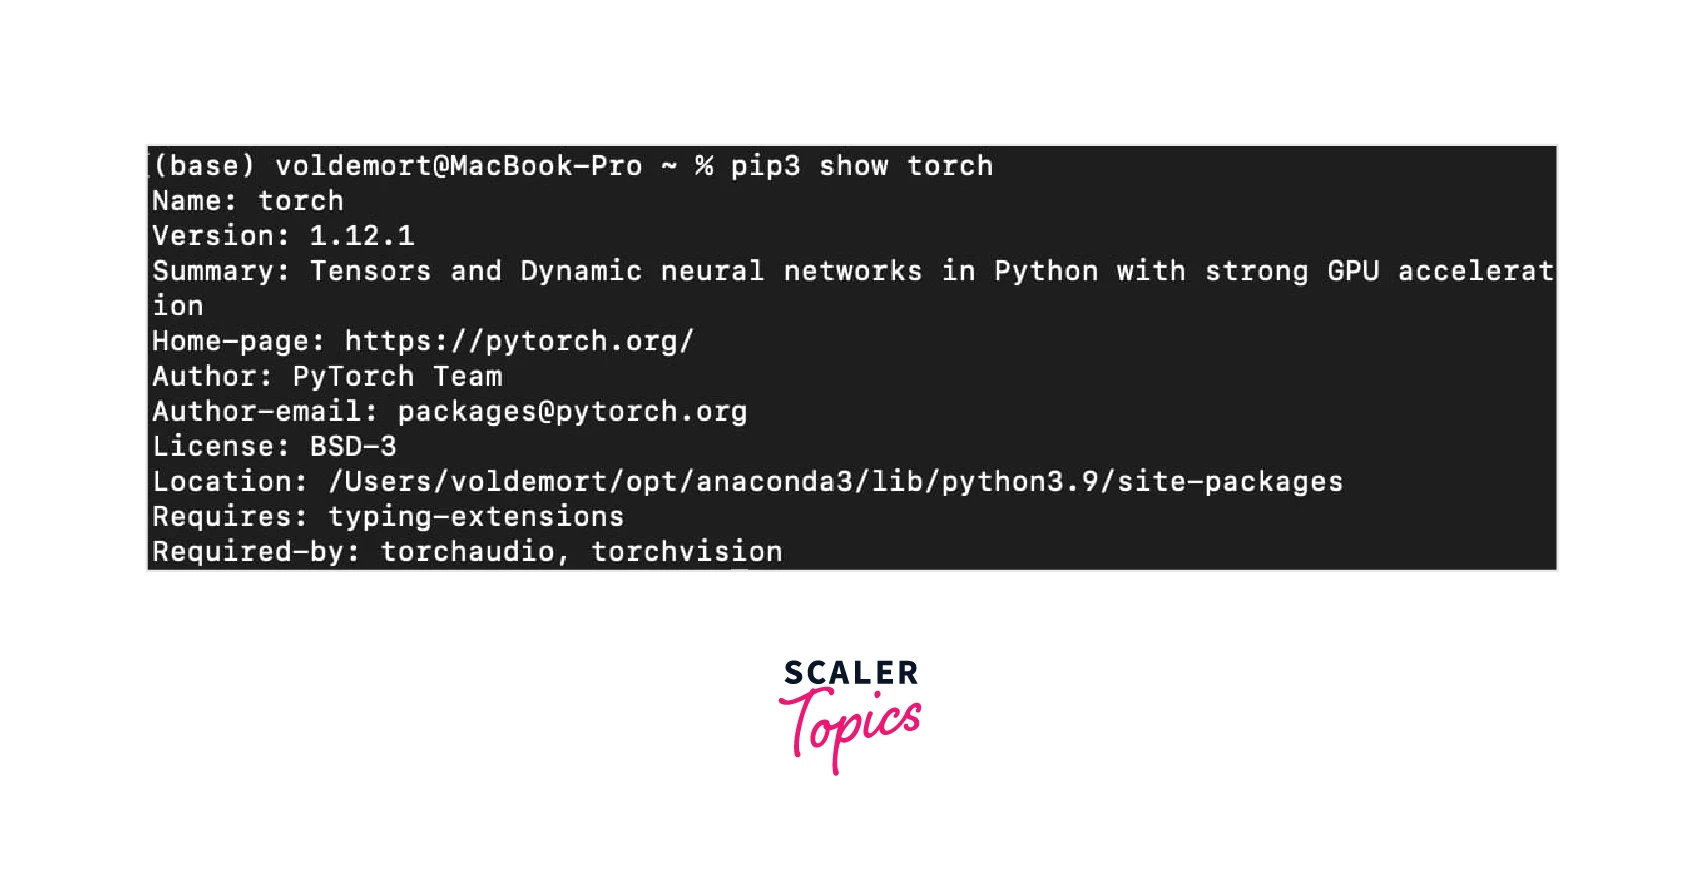
As we can see, PyTorch version 1.12.1 is installed successfully.
Uninstall PyTorch There might arise a situation when for some reason, we would need to uninstall the current version of PyTorch on our system. Then, we can use the following command to proceed with the same.
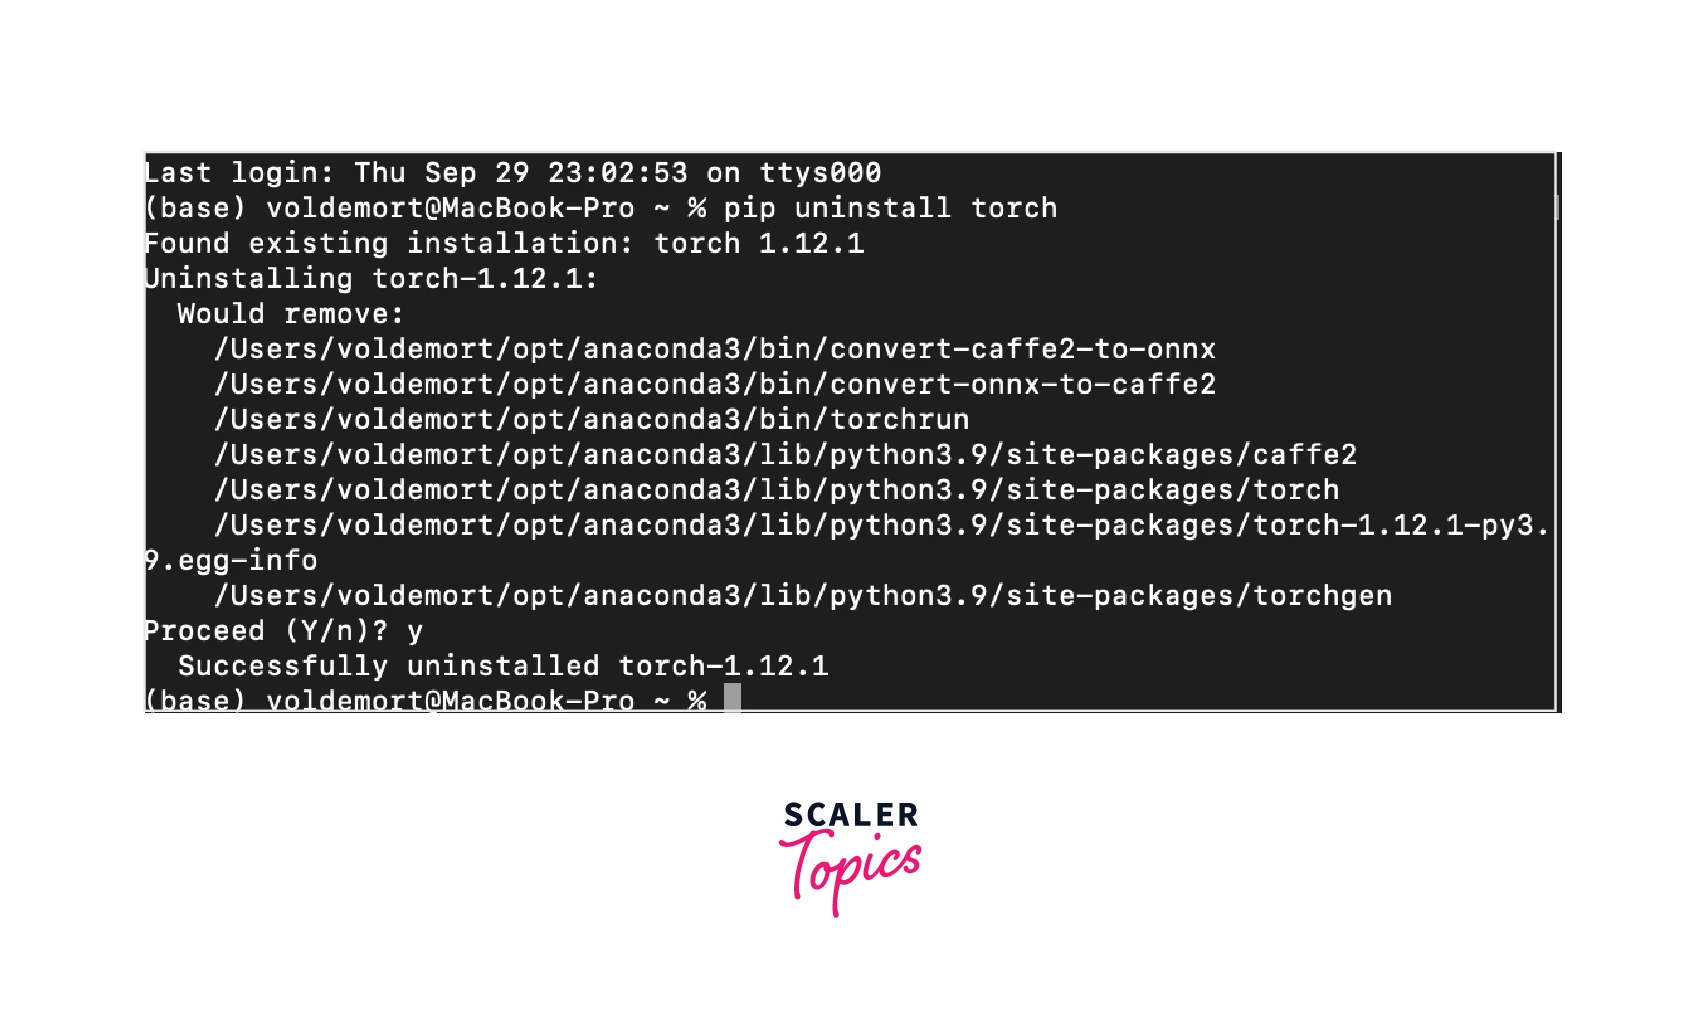
As we can see, PyTorch version 1.21.1 is successfully uninstalled.
Using Conda
Now, we'll use the other package manager called conda to install PyTorch on the system.
- From the command line, we will first activate the Anaconda prompt in case it is deactivated using the below command -
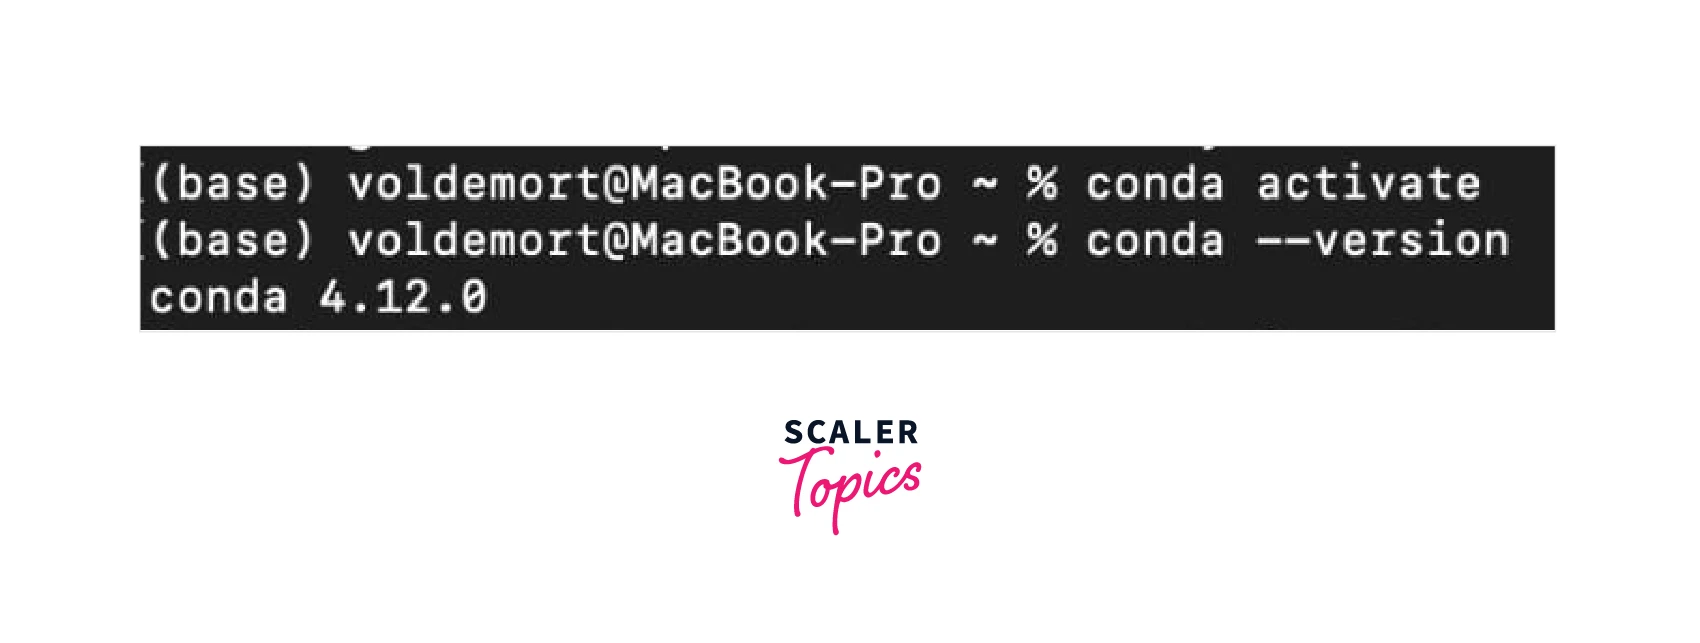
- After activating the Anaconda prompt, we will check the version of the package manager 'conda' installed on the system by entering the following command -
If you get a similar output showing the version of package manager 'conda' installed on the system, it's a green flag; else you will need to install Anaconda distribution on macOS before proceeding with PyTorch installation using conda install PyTorch.
- Next, like before, we move on to install the latest version of PyTorch, this time using the conda package manager by running the following command -
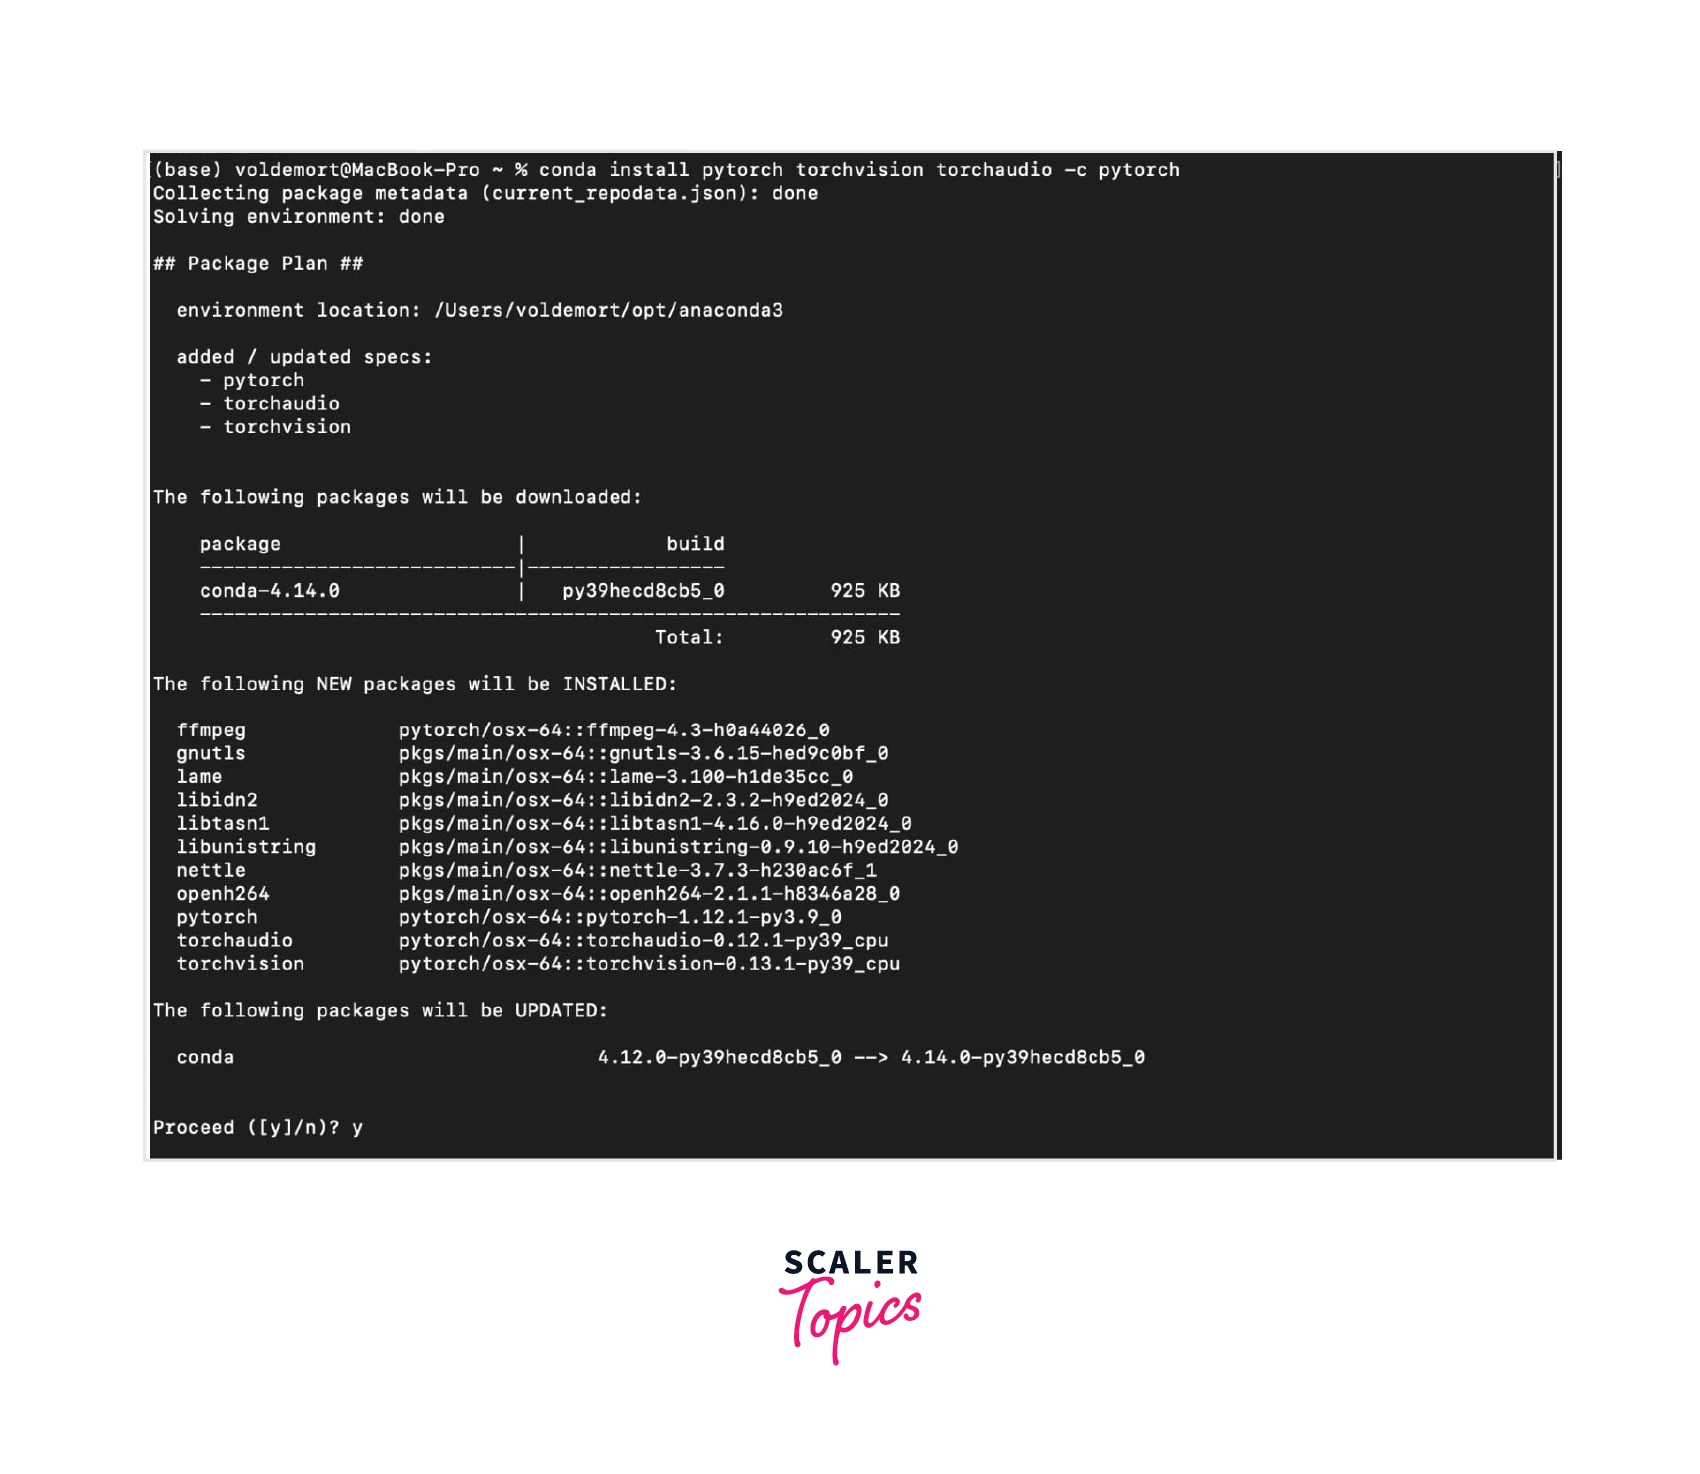
Looks good! We've successfully installed the latest PyTorch version using conda install PyTorch.
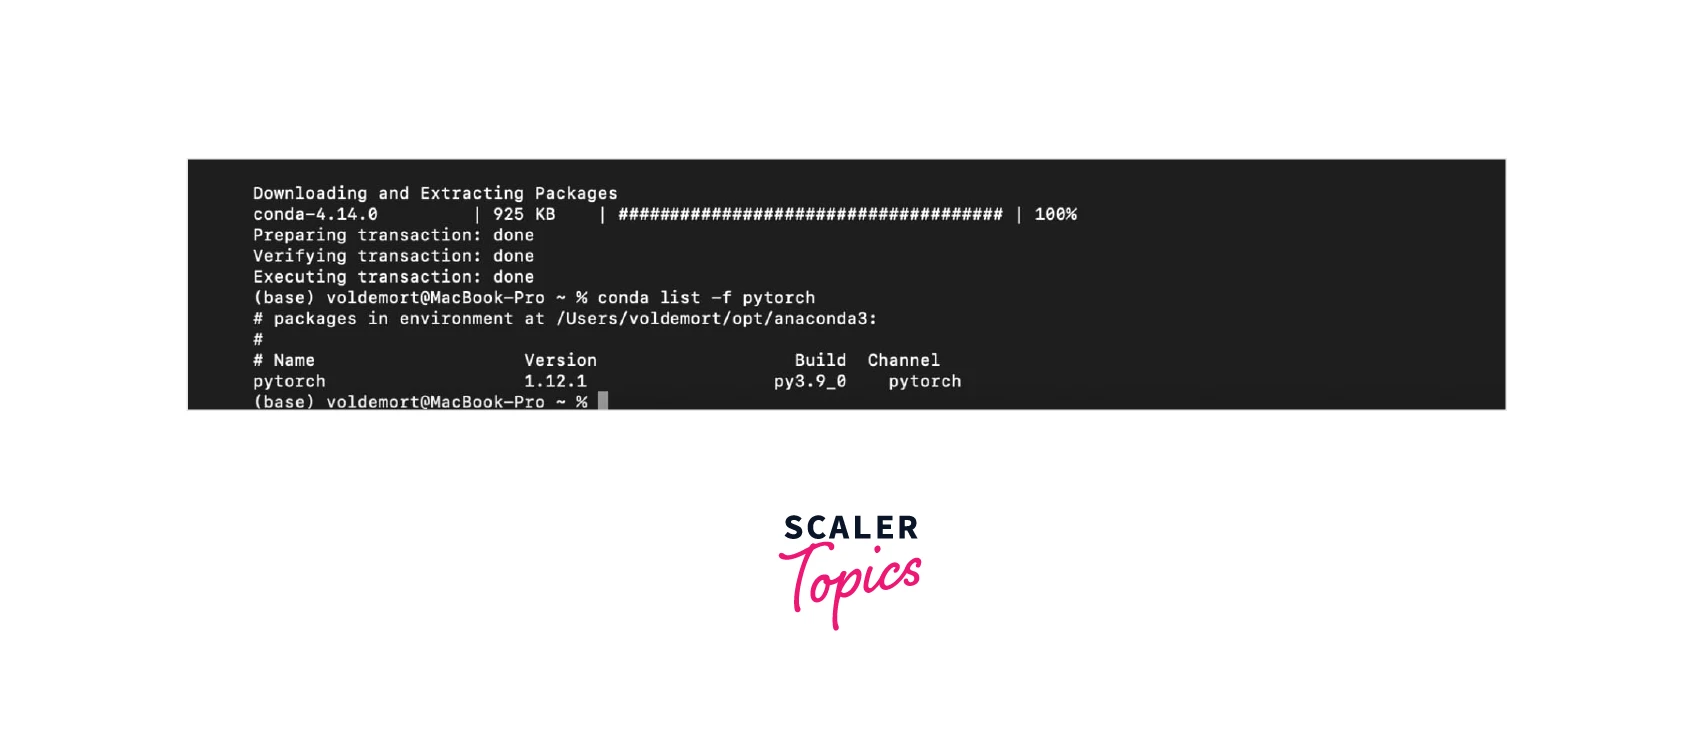
- As a final step, let us check the PyTorch version we just installed using the following command in the anaconda prompt -
There we go. It's PyTorch version 1.12.1 installed on our system.
Turn Learning into Career Growth
Installation on Linux
PyTorch can be easily installed and used on Linux distributions. In order to install PyTorch on a Linux-based system, the pre-requisites are:
- A Glibc version, which is greater than or equal to v2.17.
- Python - Python needs to be installed on the system.
- The two package managers that we will be learning to install PyTorch with that is, pip and conda should be installed on the system.
Using pip
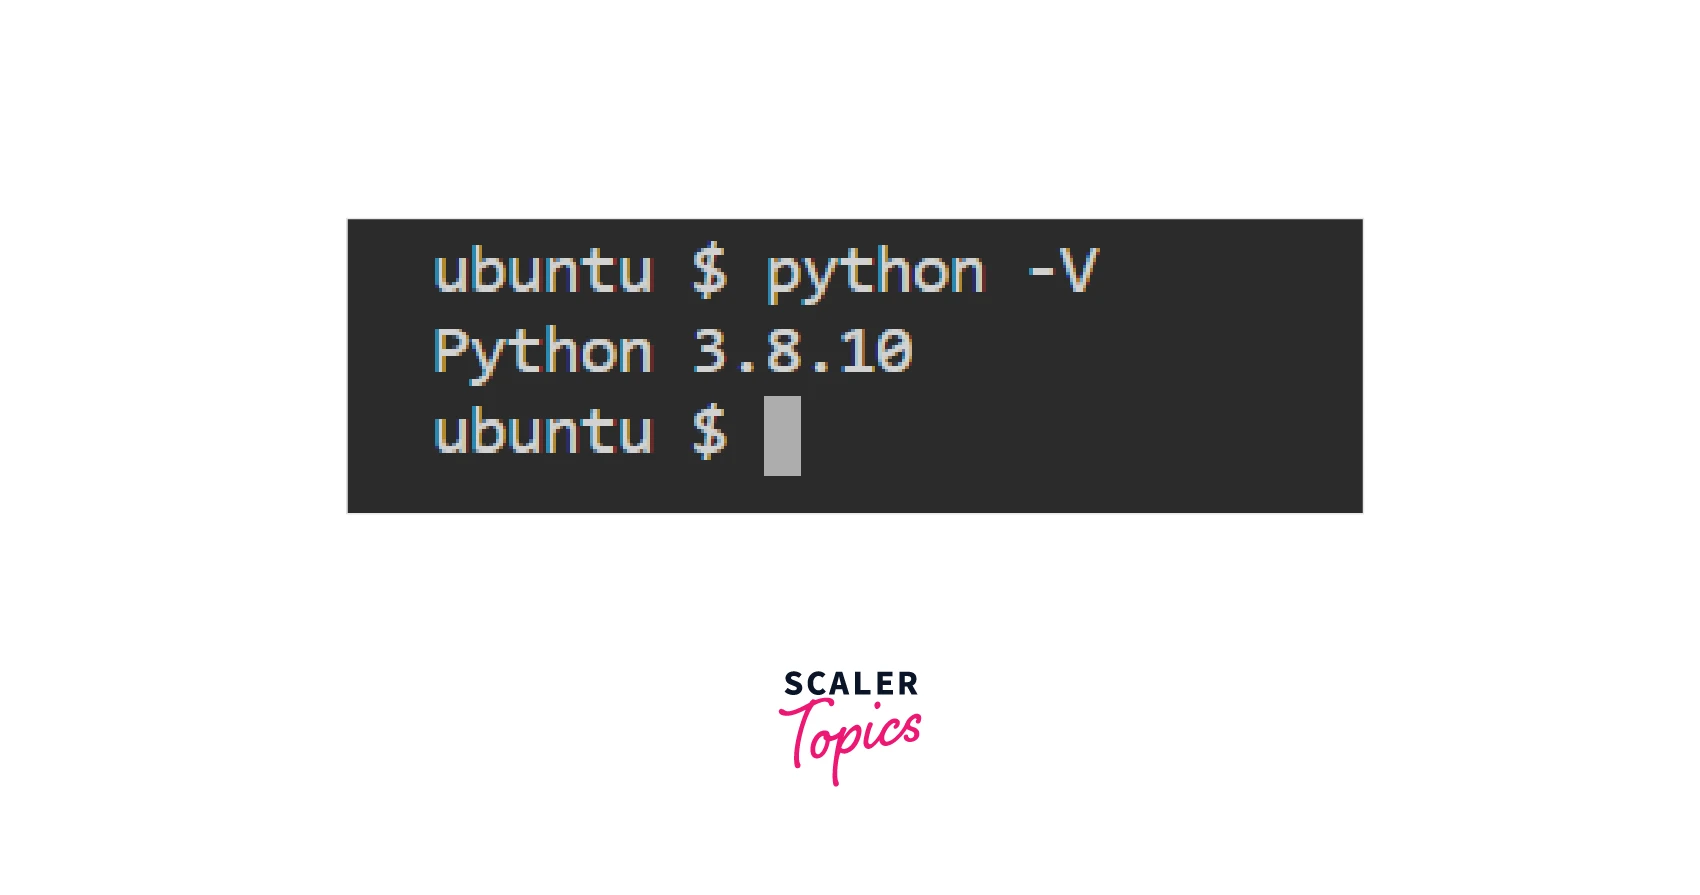
- We will begin by checking the version of Python installed on the system using the below command, thereby ensuring that Python is correctly installed.
So, we can see Python 3.8.10 is installed on the system.
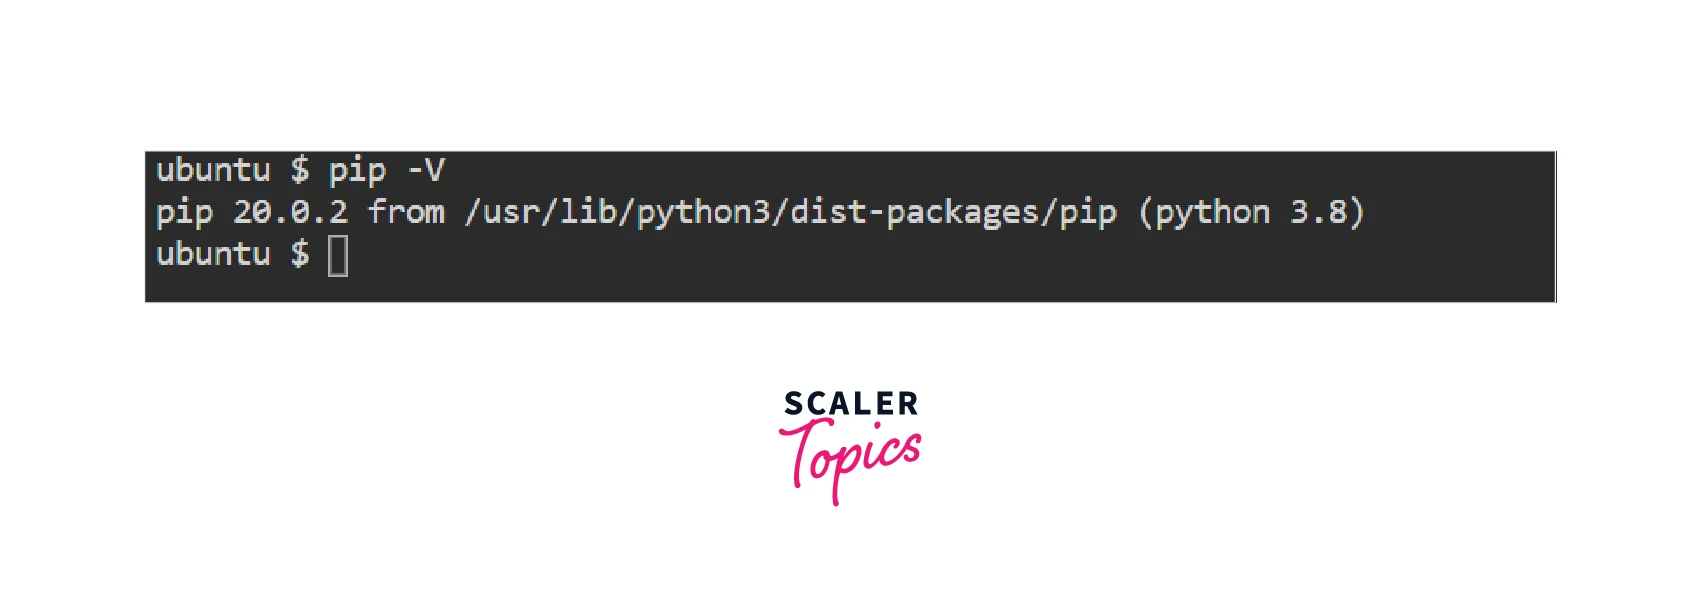
- Now, let us proceed to check if the package manager, pip is installed on the system, using the command:
We are good to go as pip version 21.2.4 is available on the system.
- Now, let us install PyTorch with CPU support using the command -
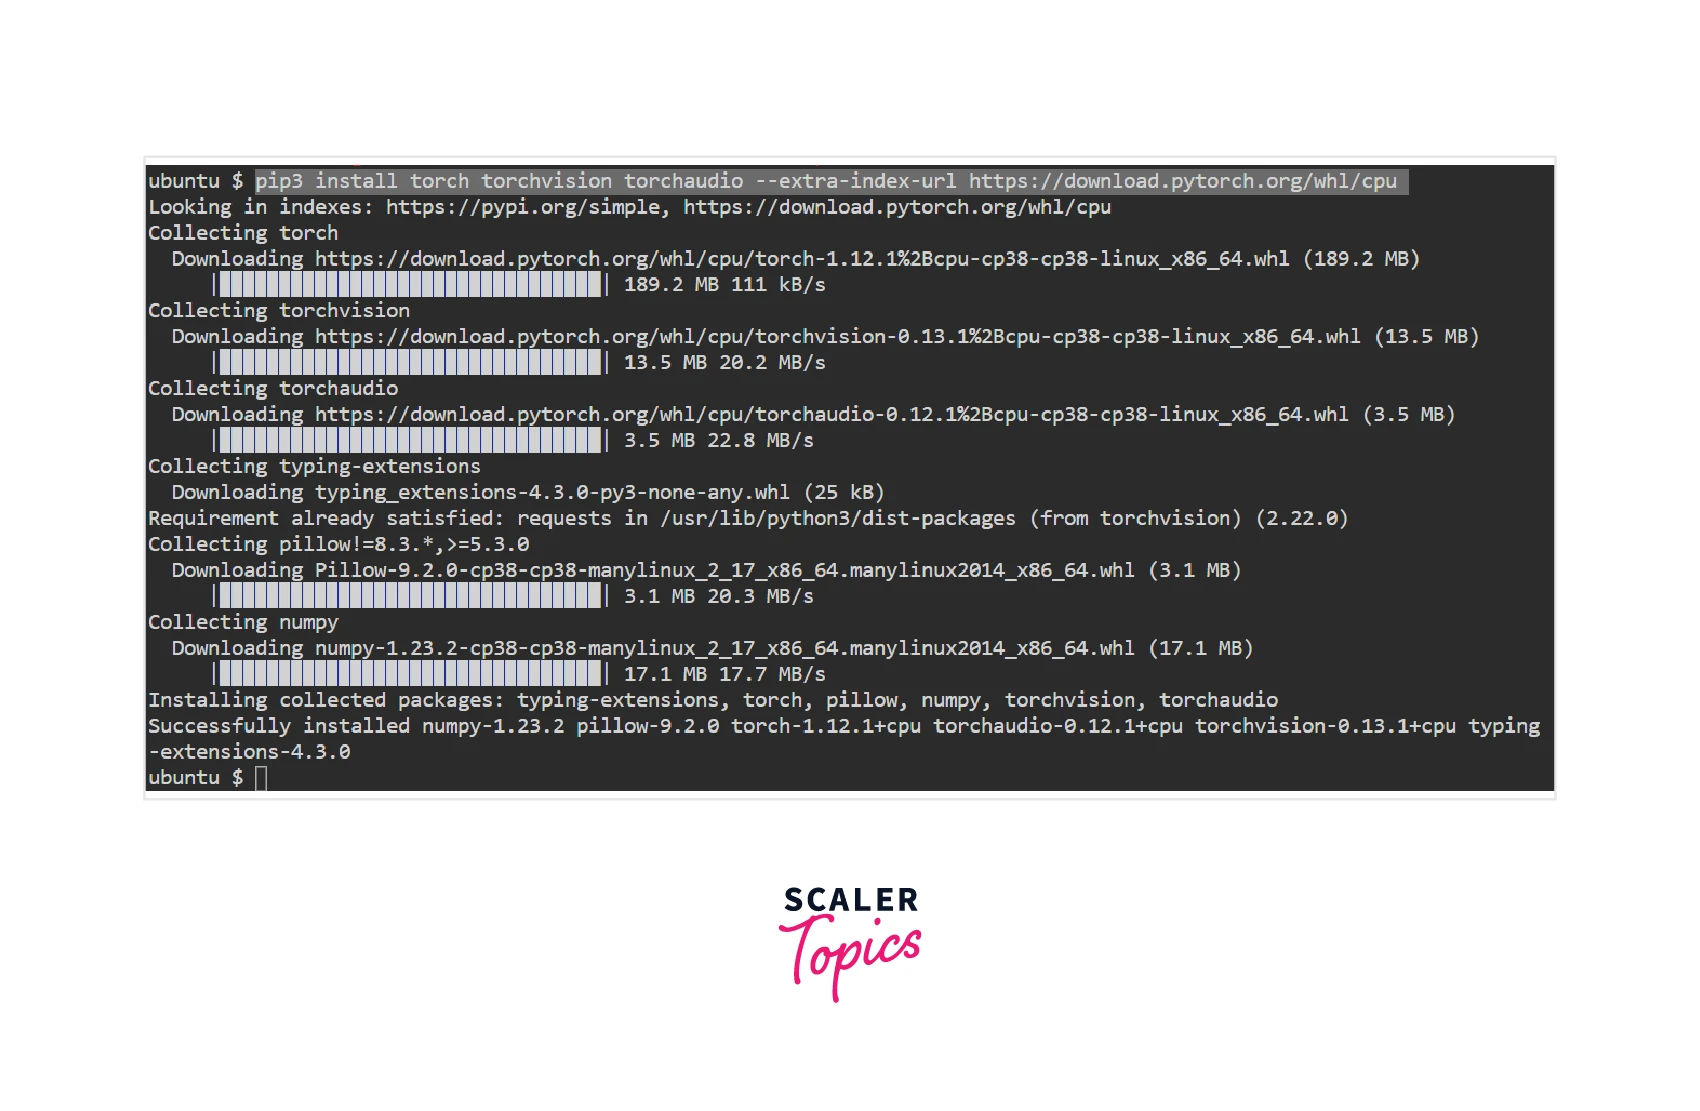
We have now successfully installed PyTorch with CPU support on our system.
- To ensure the successful installation of PyTorch on the system, let us check the PyTorch version that was installed using the command, like so -
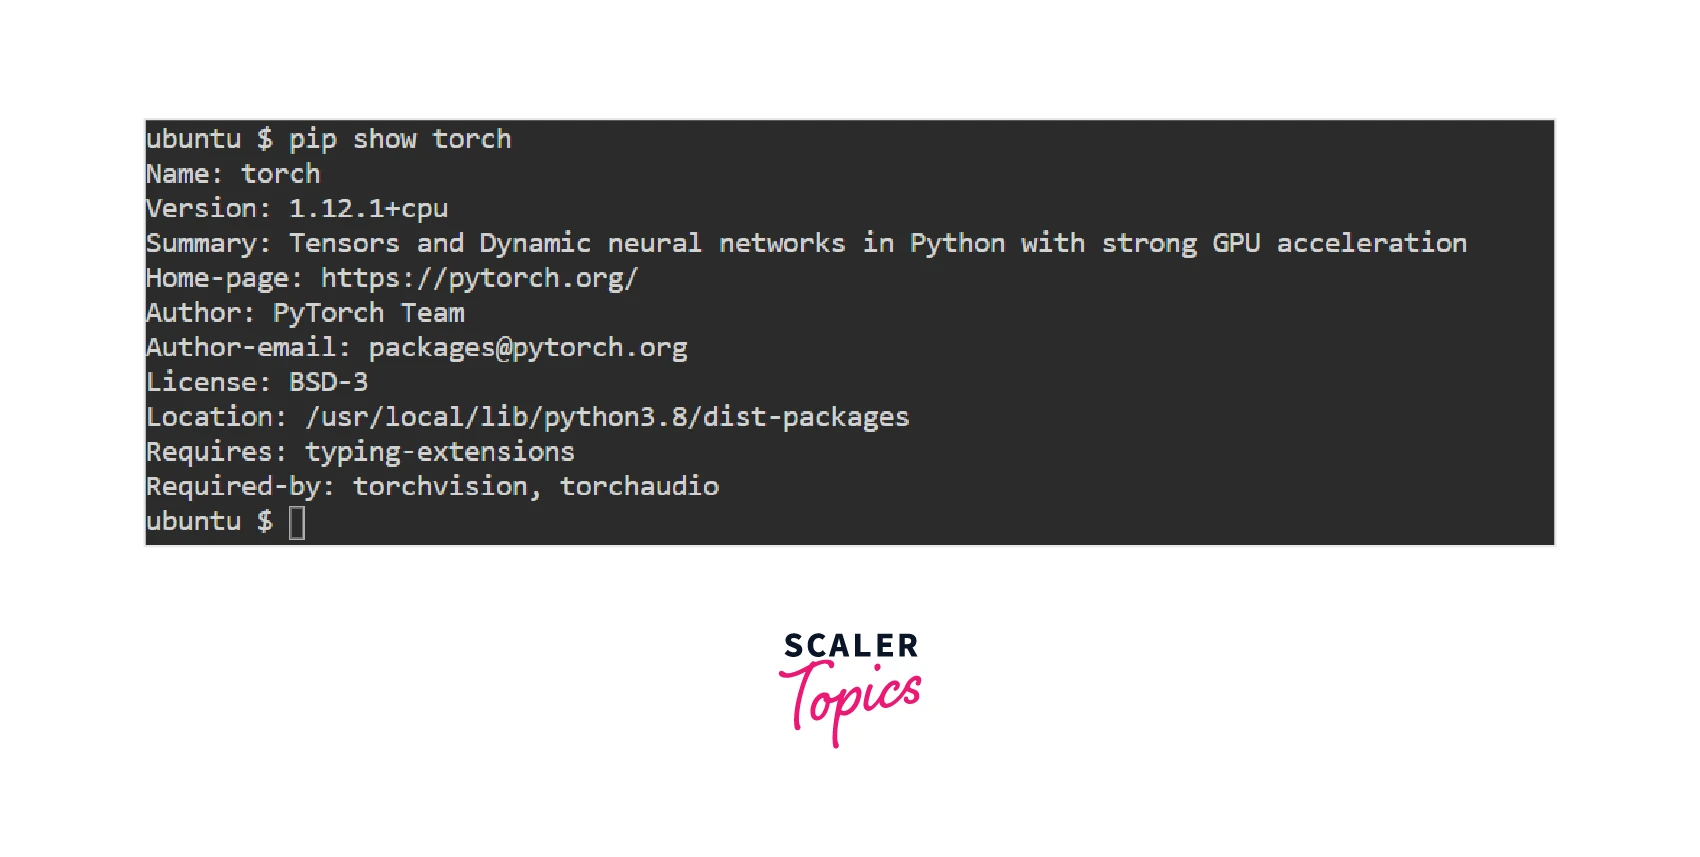
There we go; PyTorch version 1.12.1 is installed successfully on our system.
In order to install the compute platform CUDA 11.3, replace the command in pointer 3 with the following one -
Uninstall PyTorch If we wish to uninstall the current version of PyTorch that is installed on our system, we can make use of the following command -
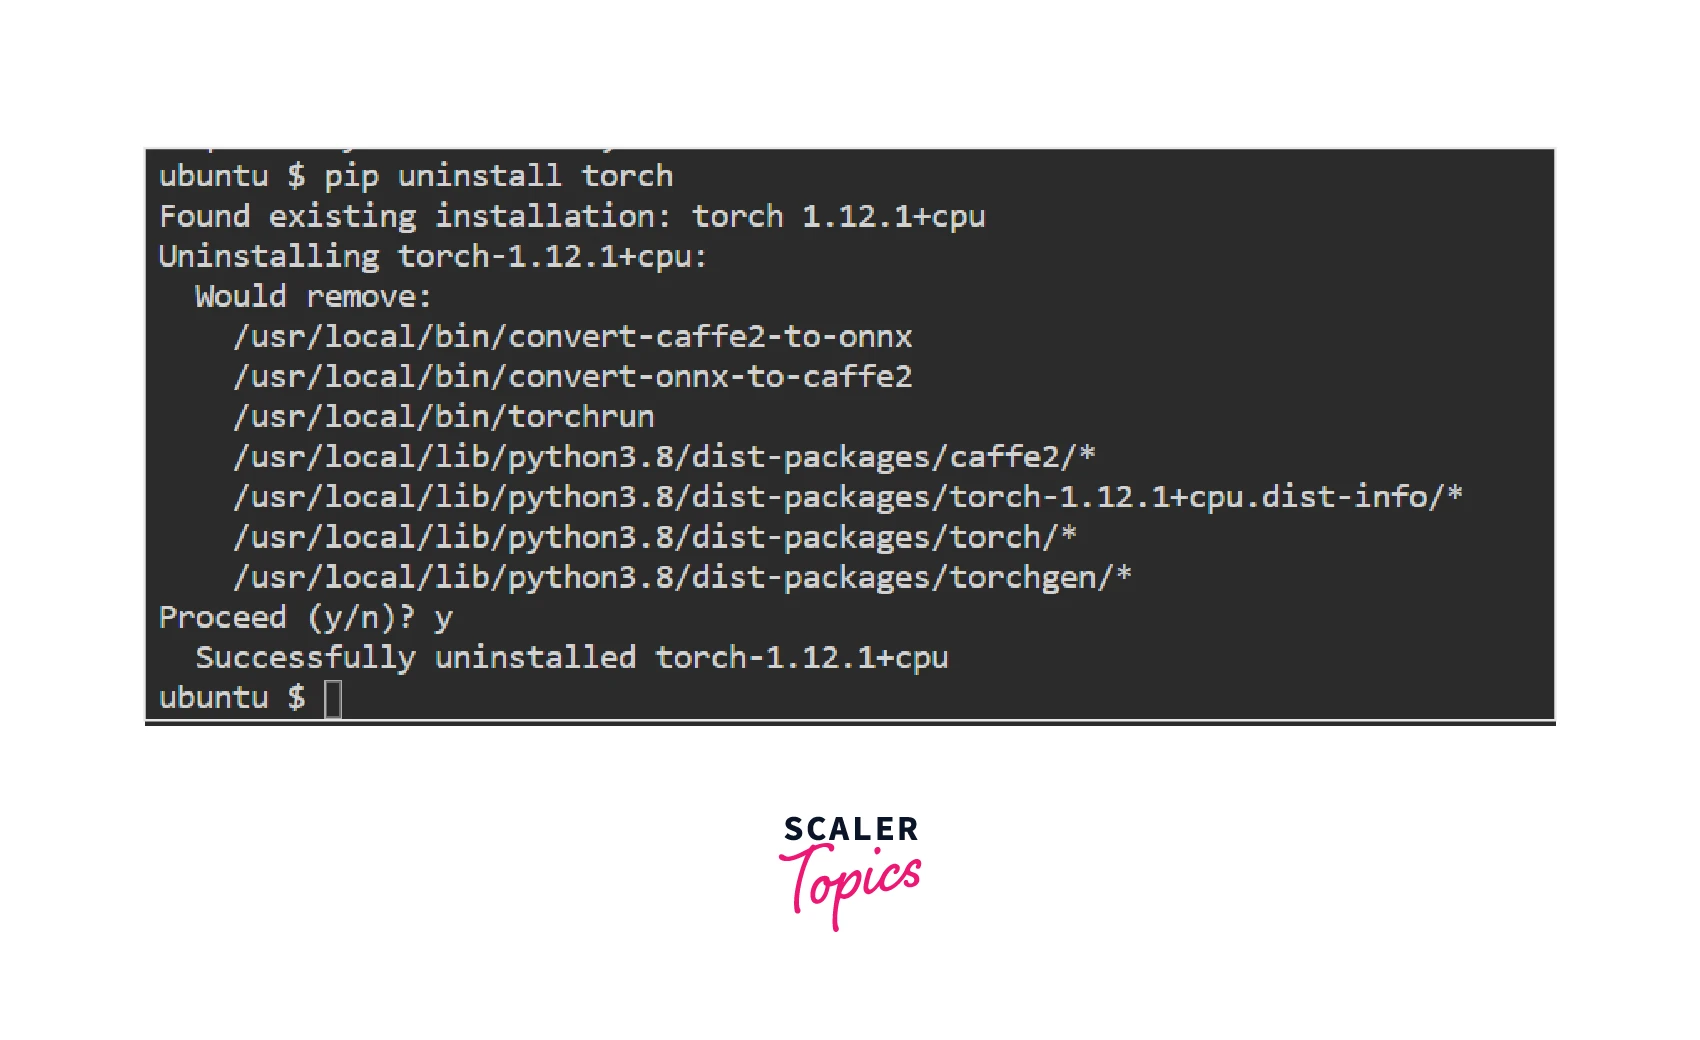
PyTorch version 1.21.1 has successfully been uninstalled from our system.
Using Conda
In order to install PyTorch using conda package manager, firstly, we need to ensure that conda is correctly installed on our system.
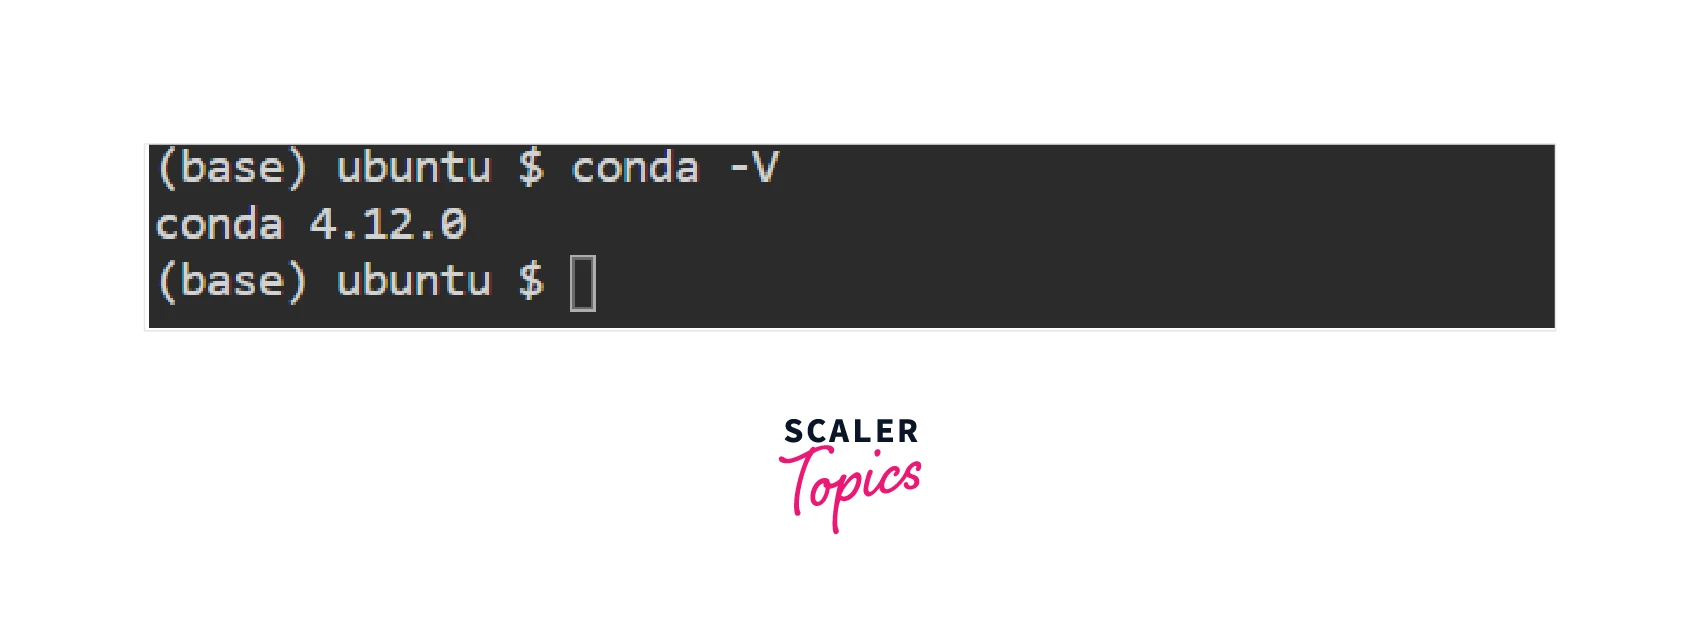
- We will first check for the conda pre-requisite by checking the conda version using the command below -
- Now, let us install PyTorch with CPU support using the below command -
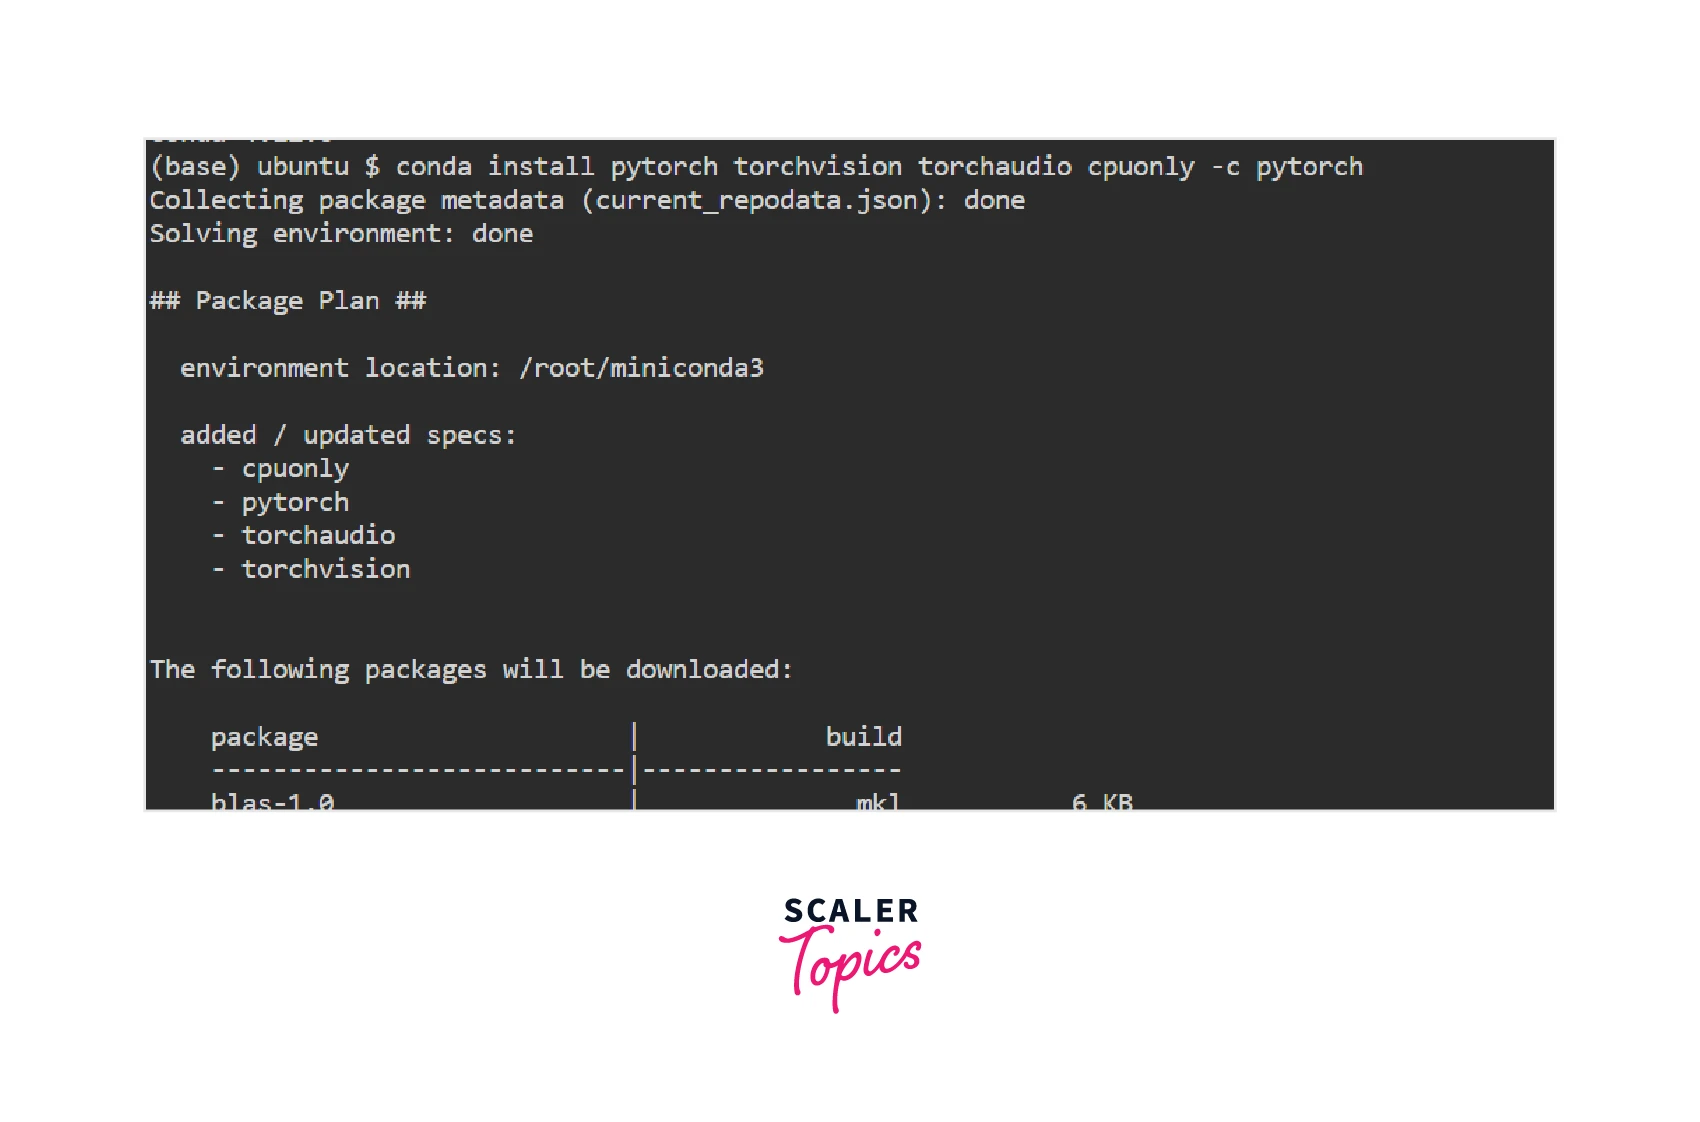
PyTorch is now successfully installed on our system.
- In order to verify the installation, we will check the PyTorch version installed using the following command -
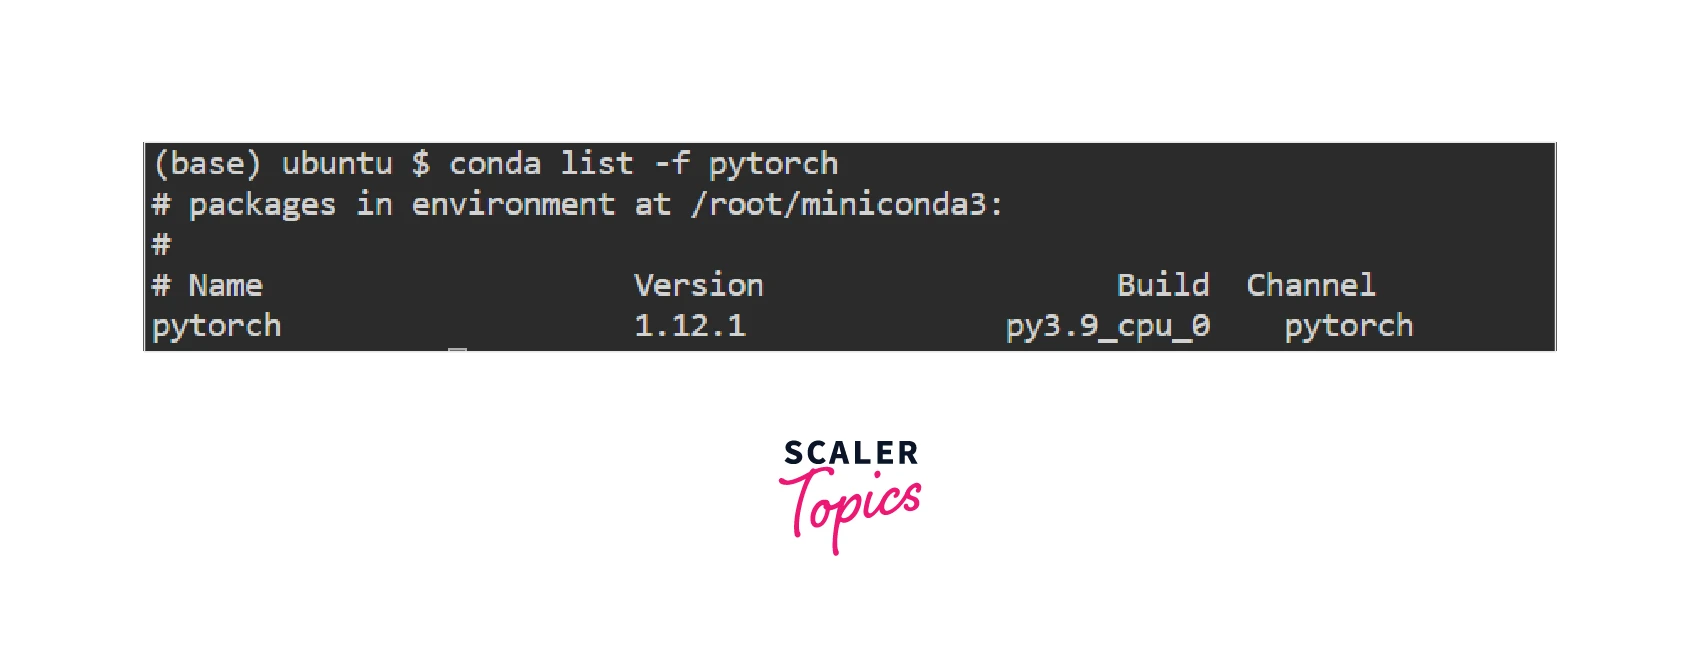 Done! PyTorch version 1.12.1 is now successfully installed in our Linux system.
Note -
- To install PyTorch for the compute platform CUDA 11.3, we can replace the command in pointer 2 with the following one -
- And, to install PyTorch for the compute platform CUDA 11.6, we can replace the command in pointer 3 with the following one -
Install Pytorch on Docker
NVIDIA runtime container is mandatory to run PyTorch with GPU. PyTorch provides pre-configured Docker images with various versions of CUDA and cuDNN.
Here, we will be downloading the latest stable image release provided by PyTorch using the command -
Output -
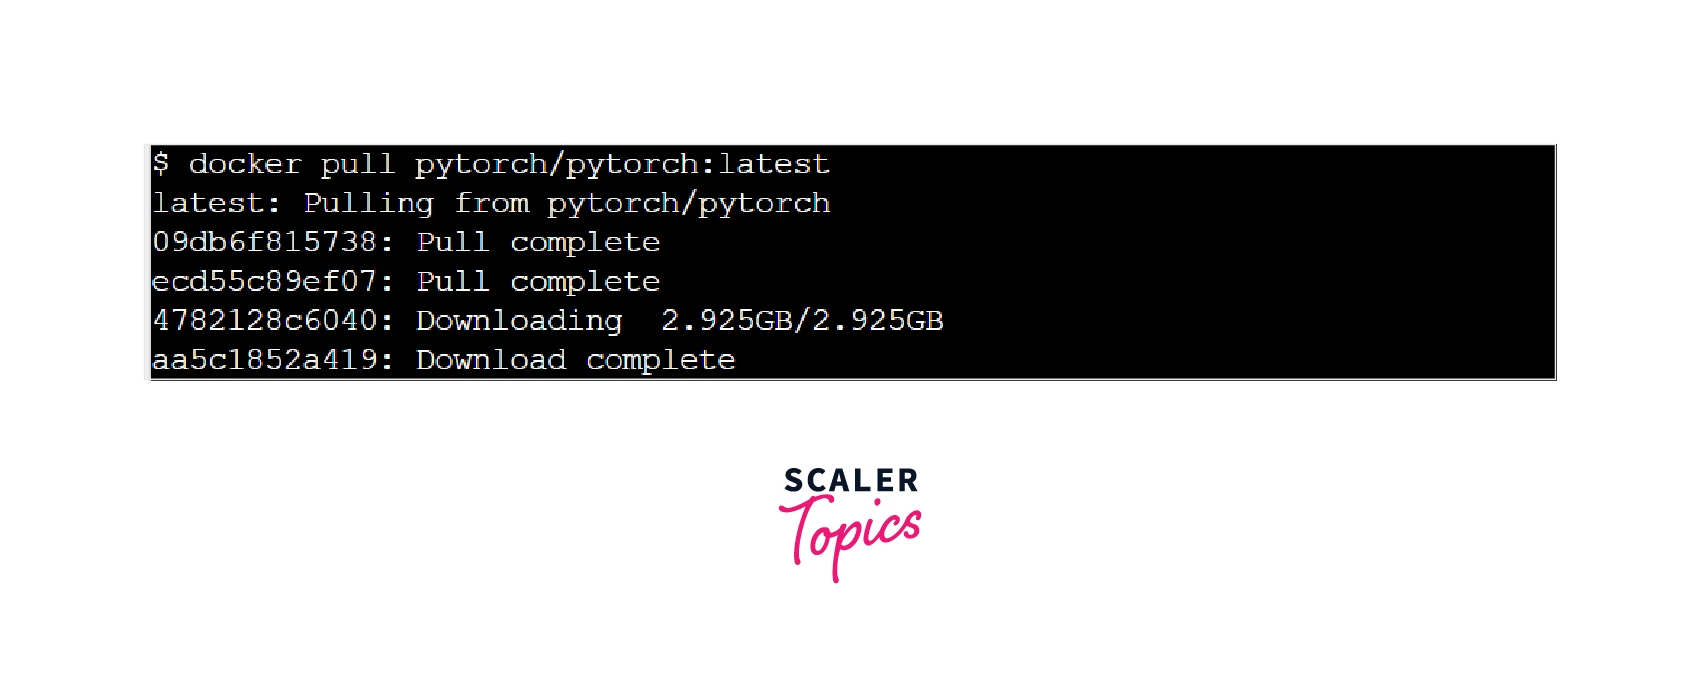
As we can see, we successfully downloaded the latest stable release of PyTorch as a Docker image.
Getting Started with PyTorch on Google Colab
What's google colab?
- Google Colab is a free research tool offering a Jupyter notebook environment for machine learning education and research.
- Requiring no setup to use, Colab offers a free GPU cloud service that can be used without worrying about hardware requirements.
- The tool is hosted by Google with a motivation to encourage collaborative research and developments in the field of Machine Learning.
Getting Started with Google Colab Follow these simple steps to get started with Google Colab on your system -
- Go to Google Colaboratory
- Sign in with your Google Account
- Create a new Jupyter notebook like this: File -> New Python 3 notebook
And we are all set to use colab!
GPU Environment set up
-
Colab offers 12 hours of execution time which essentially implies that every 12 hours, RAM memory, Disk, CPU's Cache, and the Data present on the allocated virtual machine get erased.
-
Nevertheless, the session gets disconnected in case of inactivity for more than 1 hour.
-
To activate the GPU hardware accelerator, follow the steps as: Runtime -> Change runtime type -> Hardware accelerator -> GPU

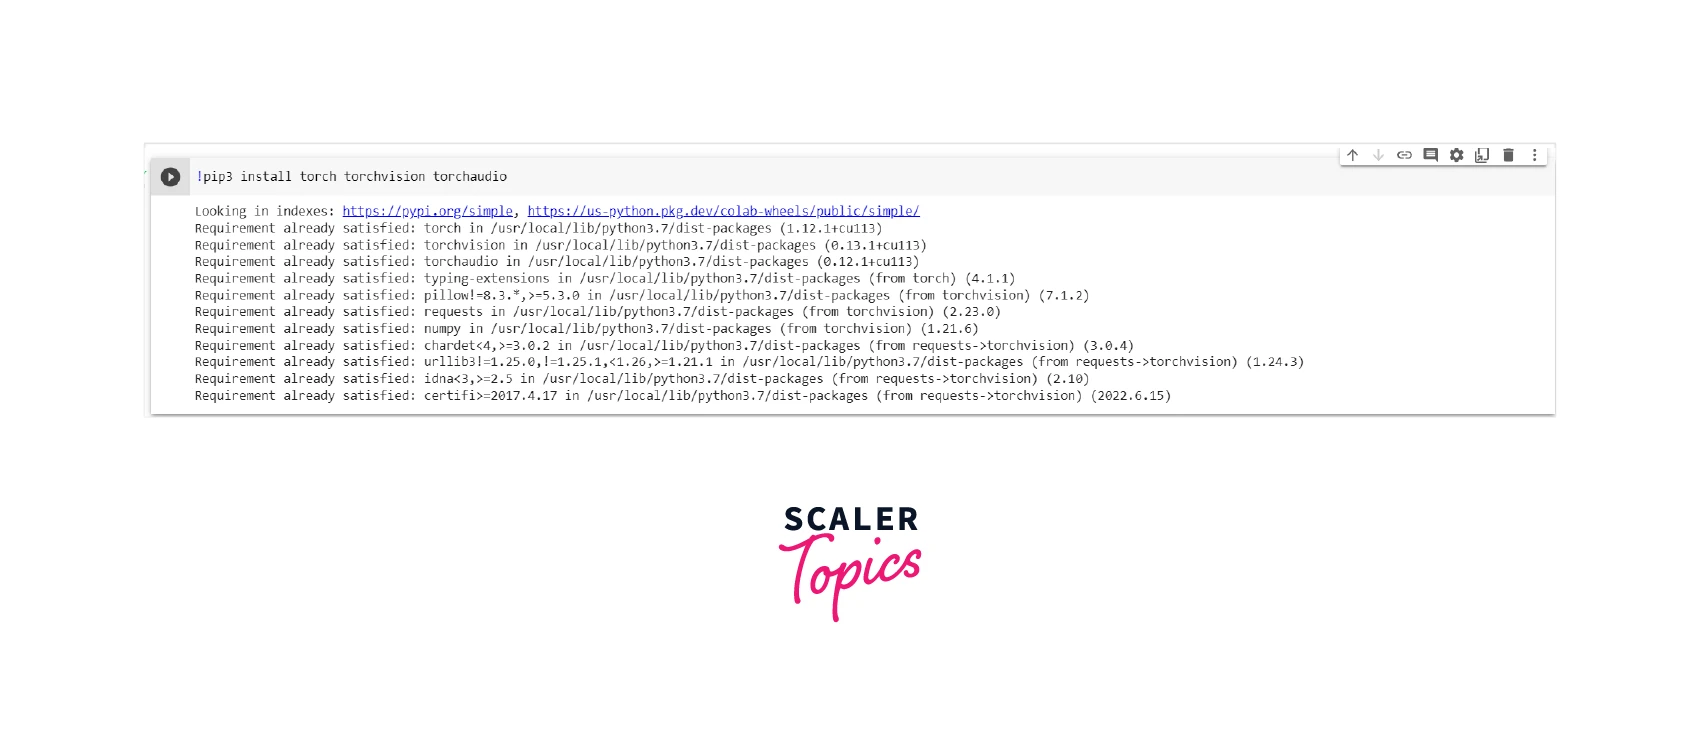
Colab comes with some pre-installed standard libraries, of which PyTorch is one. So, on running the following command on Colab notebook, it will show the requirements as being already satisfied.
That's pretty much about it. Now, in your colab notebook just import torch using -
... and start using it.
Elevate your deep learning skills with PyTorch. Join our PyTorch for Deep Learning Course now and stay ahead in AI.
Conclusion
- In this article, we walked through all the steps involved in installing PyTorch on three major types of Operating Systems - Windows, macOS, and Linux along with learning to do the same on Docker.
- We learned how to quickly experiment with models on Google collab where support for free GPUs is available for faster computing.