How to migrate from PyTorch to PyTorch Lightning
Overview
PyTorch Lightning is an open-sourced Python library that is essentially a wrapper around PyTorch aimed at making deep learning research easier to conduct by decoupling the research from engineering. Migrating from PyTorch to PyTorch Lightning takes just a bit of code refactoring and enables much cleaner, reproducible, and robust deep learning pipelines.
To this end, this article teaches a step-by-step process to take your code written in plain PyTorch to PyTorch Lightning with the help of code examples and detailed explanations wherever necessary.
This article will teach us about another deep-learning framework called PyTorch Lightning. We follow the following structure through the article -
Pre-Requisites
- This article assumes the reader is familiar with building neural network models in PyTorch.
- While much expertise is optional, just a basic understanding of creating custom model classes and defining the routine training would do.
Refer to these articles to learn more about building models in PyTorch.
Scaler Placement Report and Statistics
Scaler learners achieved 2.5x salary growth with average post-Scaler CTC reaching ₹23L.
Introduction
PyTorch is one of the most widely used deep learning libraries offering a wide set of functionality to build and train deep neural networks with specialized architectures for various domains like ResNets in computer vision, transformers in Natural Language Processing, and other such models in the audio and speech domains.
While the library is easy to use due to its Pythonic nature offering adequate access to low-level components to design custom and novel architectures with ease, it still has a lot of boilerplates that require good engineering skills and focus for any practitioner to get its functionality running the correct way. For instance, often, the code for the model definition, the training pipeline, the data access, etc., is spread over multiple files that, hinder reusability to an extent.
To this end, we have another framework called PyTorch Lightning that targets these shortcomings and other aspects of building, training, and evaluating deep neural networks and aims to decouple research from engineering.
This article uses a code example to demonstrate migrating from PyTorch to PyTorch lightning.
Transform Your Career
Choose from our industry-leading programs designed for career success
Modern Software and AI Engineering Program
Master full-stack development with AI integration

Modern Data Science and ML with specialisation in AI
Advanced data science techniques with AI specialization
Advanced AIML with Specialisation in Agentic AI
Deep dive into AIML with focus on Agentic systems
DevOps, Cloud & AI Platform Engineering
Build and manage AI-powered cloud infrastructure
AI Engineering Advanced Certification by IIT-Roorkee
Premier AI engineering certification from IIT-Roorkee
What is PyTorch Lightning?
PyTorch Lightning is an open-source Python library that provides a high-level interface for PyTorch.
That said, on a high level, PyTorch Lightning needs to implement the abstraction principle since it is not meant to provide a more abstract way to build and train neural networks. Rather, it is more of an organized way to build neural networks so that the academicians or researchers or any deep learning practitioner can focus more on their art of the research rather than on the engineering aspect - PyTorch Lightning does so by helping the users do away with a lot of the boilerplate code that is involved in building end to end ML systems.
That is, PyTorch Lightning makes you refactor your code in a much more organized and reusable way.
It consists of a Trainer class called the lLightningTrainer that automates all the engineering involved in building complex deep neural nets.
It implements the following steps of the pipeline automatically -
- Loops
- Hardware calls - Lightning Modules are hardware agnostic
- model.train()
- model.eval()
- zero_grad()
PyTorch Lightning also consists of callbacks that are self-contained programs to run arbitrary code at the correct time. To know more about PyTorch Lightning, refer to this article.
How to Migrate from PyTorch to PyTorch Lightning?
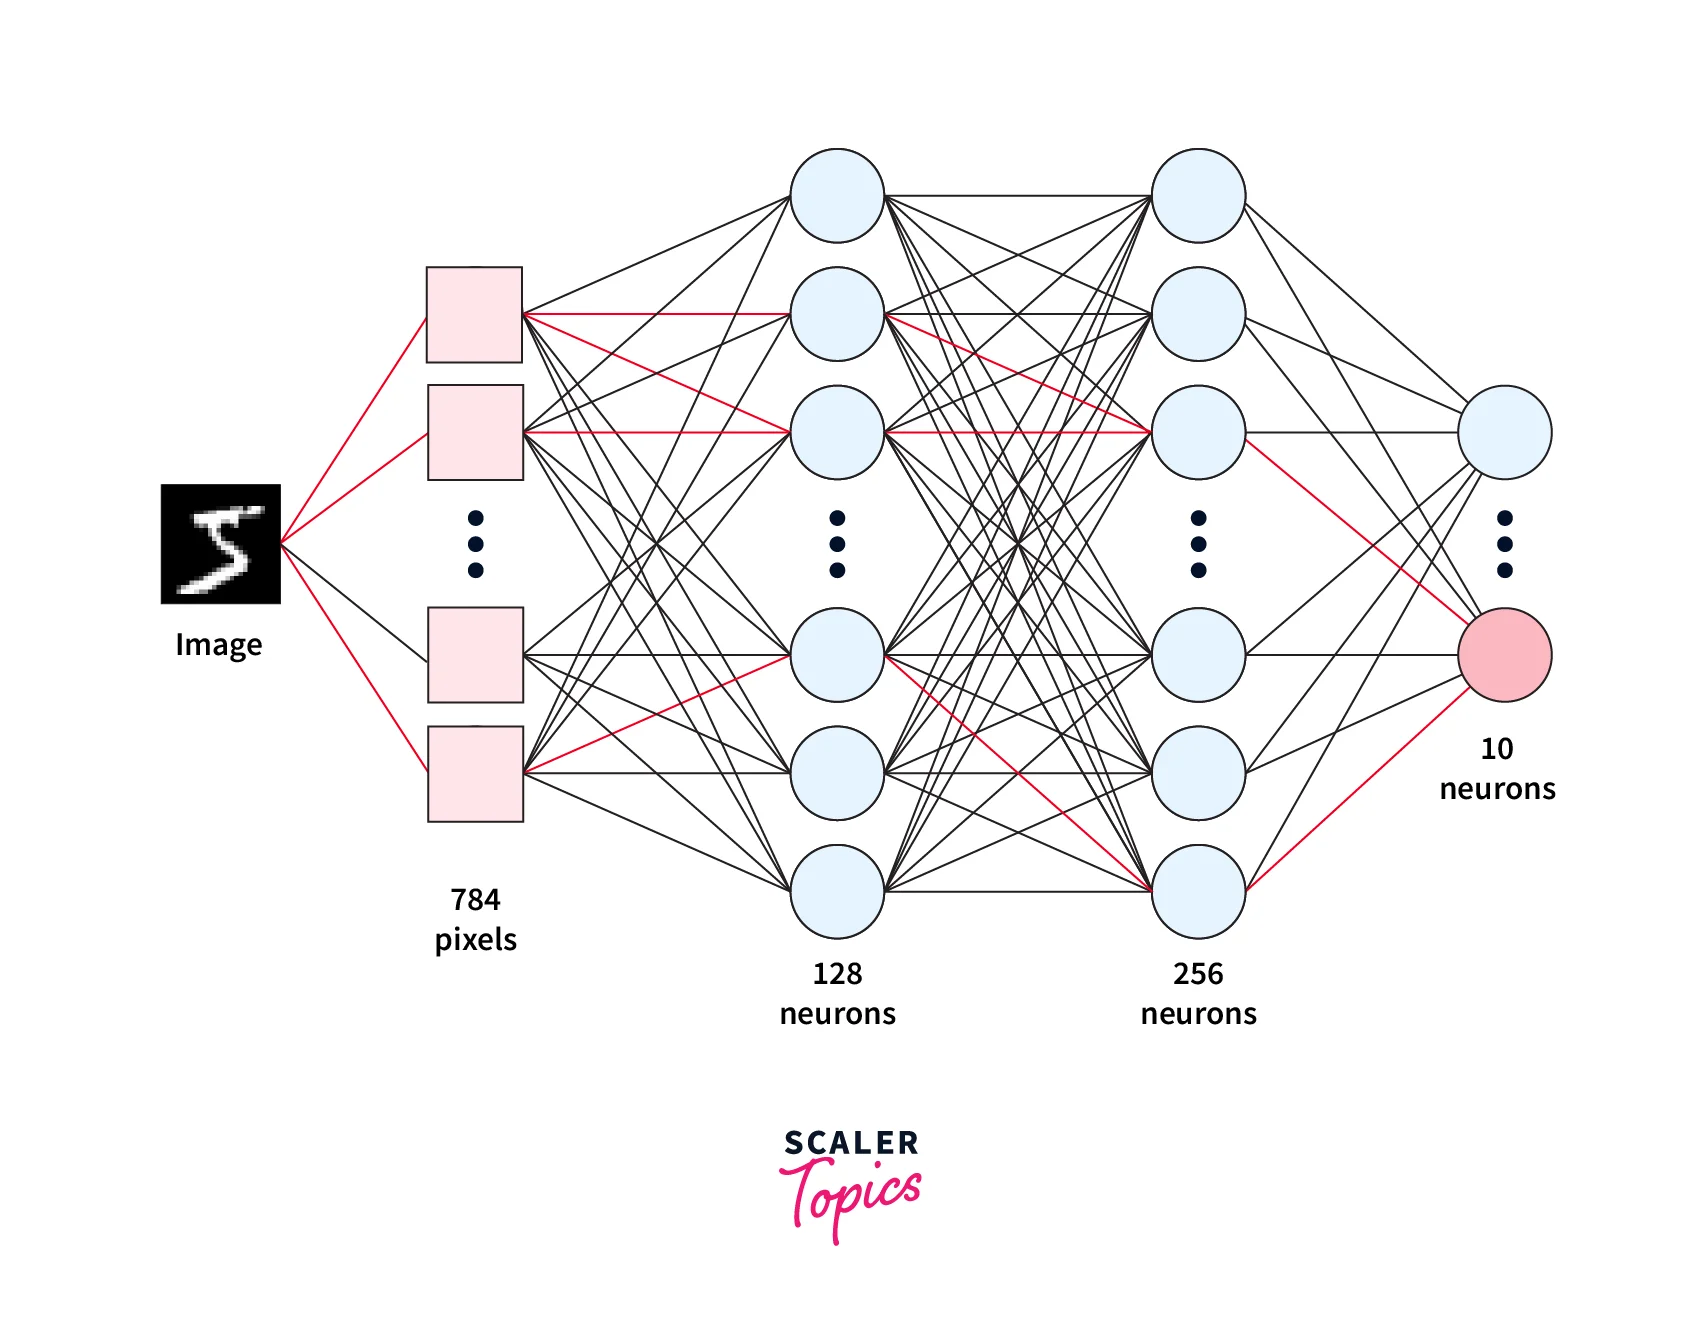
In this article, we will build a classifier based on neural networks for the MNIST dataset in PyTorch Lightning.
We will also provide the PyTorch code to manifest our understanding of how PyTorch Lightning essentially refactors code written in PyTorch into a more organized manner.
As we know it, the following are the major components of any deep learning project -
- The data to be used for training, validating, or testing the model
- The model architecture to be trained for the task
- The loss function to be used for making the model learn
- The optimization algorithm based on which the model is updated
We will next demonstrate how each of these components is organized using PyTorch Lightning.
We will be using different headings from these to build our image classifier but the essence of what PyTorch Lightning has to offer is captured well in the next few headings.
Install and Imports
Let us first install PyTorch Lightning and make all the necessary imports, like so -
To instead install using the conda package manager, use the following command -
Keep Your Computational Code
In this section, we will define our model architecture. Firstly, let us have a look at how it's done in PyTorch -
Since the original images in the MNIST dataset are of the dimension , we use the view from PyTorch to reshape the input image tensor into .
We also used log_softmax as the final layer to convert the output of the linear layer into a probability distribution. So this is what our full model architecture looks like -
Let us now refactor this into PyTorch Lightning -
We will first replace the base class nn.Module with the pl.LightningModule, like so -
Apart from this, the same code is used to define the model architecture, like so -
Turn Learning into Career Growth
Everything in PyTorch
Before moving on to further sections, let us look at what the full PyTorch code for training an image classifier for the MNIST dataset looks like.
Among other things, the full training routine has the following steps -
- Iterates for a certain no. of epochs (an epoch is a full pass through all of our data, i.e. we want to see the data multiple times).
- In each epoch we iterate the dataset by batches -
- The forward pass through the model -
- We compute the loss using and , like so - KaTeX parse error: Expected 'EOF', got '−' at position 3: L=−̲∑_i^Cy_ilog(y_{…
- Perform the backward pass to compute the gradients for all the parameters -
- Update the parameters as defined by the optimization algorithm
Move Optimizers and LR Schedulers
We have already refactored the model definition from the full code above.
We will now take the rest of the scattered components and organize them.
Let us start by refactoring the code for the optimization algorithm.
The Lightning Module provides the configure_optimizers() hook meant to define the optimizer instance and the learning rate schedulers in one place inside the same class where we defined our model, LightningMNISTClassifier.
the code will hence look like this -
Configure the Training Logic
Next up, we will organize the training and validation loops in the same LightningMNISTClassifier class.
This means that instead of being scattered over different files, that one class will contain our training and validation logic along with the optimizer, like so -
Organize Testing Logic
Similar to how we define our training and validation loops in the LightningModule class, we will do the same for the testing loop.
This is used when we use trainers. test later in the code.
Remove any .cuda() or .to(device) Calls
The LightningModule can automatically run on any hardware, eliminating the need to explicitly move the model parameters and data to specific hardware devices.
Any explicit calls to .cuda() or .to(device) can hence be removed since Lightning makes sure that the data coming from DataLoader and all the Module instances that are initialized inside LightningModule.init are moved to the specific hardware devices automatically. If there still arises a need to access the current device, we can use self.device anywhere in our LightningModule except in the __init__ and setup methods.
With this, our full Lightning Module class looks like the following -
The DataModule
The DataModule class provided by PyTorch Lightning is essentially an encapsulation to bind all the steps needed to process data in one shareable and reusable class.
DataModules from PyTorch Lightning are a way to decouple the model definition and training from the data accessing and loading components.
The data preparation for our classifier consists of 4 major steps that are as follows -
- Download images
- Image transforms.
- Generate training, validation, and test dataset splits.
- Wrap each dataset split in a DataLoader
The LightningDataModule has dedicated methods to implement each of these steps.
In short, all of the code related to data processing that we saw in the plain PyTorch code is refactored into one class using the LightningDataModule class.
Our custom LightningDataModule class is implemented as follows -
With this, we are done refactoring our code such that we now have two separate classes dealing with different steps of the pipeline of our image classifier.
All we are left with is taking these components together and using yet another class from PyTorch Lightning to automate the training process with just a few lines of code!
Let us see how it works next.
Taking it all Together - The Trainer Class
We will now instantiate our DataModule and Lightning Module classes and use the Trainer API from PyTorch to train our model. Let us look at the code first -
After instantiating the DataModule and Lightning Module classes, we instantiated a built-in callback from PyTorch Lightning called pl. callbacks.ModelCheckpoint saves the trained model checkpoint automatically - this eliminates the need to write extra boilerplate code for saving the rained model checkpoint.
Callbacks, thus, are yet another way PyTorch Lightning helps us get away with writing extra code.
We then created a trainer instance and defined hyperparameters like the maximum number of epochs to train the model for, the number of GPUs available, etc.
All we then need to do is to call the trainer. fit function with the DataModule and Lightning Module instance passed to it - this will train our model and save the trained checkpoint.
To test the model, we can use the .test function and pass the test dataloader to it using the dm instance.
Output:
As we can see in the output, the test logger logs the tensorboard loss, which is the default one used by PyTorch Lightning.
To know more about loggers, refer to the official docs.
We can also access the saved checkpoint and use it for, let's say, inference much like how we do in plain PyTorch, like so -
Output:
The loaded model can now be used for inference or deployment etc.
Conclusion
- In this article, we first studied the motivation behind having yet another deep learning framework called PyTorch Lightning.
- We then discussed the major components of any deep learning project cycle and learned how to handle each one of these components using PyTorch Lightning.
- We specifically learned about three major classes in PyTorch Lightning called the LightningModule, LightningDataModule, and the Trainer class and explored the purpose each one is meant for.
- We also build our own MNIST classifier in PyTorch Lightning using these three classes and leveraging the robust pipeline design offered by PyTorch Lightning.