Building First React App (Basic Hello World App)

Overview
ReactJS is a declarative, practical, and adaptable JavaScript library for creating reusable UI components. It is an open-source front-end component library and is only in charge of the application's view layer. It was initially developed and maintained by Facebook and was eventually incorporated into services like WhatsApp and Instagram.
It could be difficult to use React from scratch at first. While learning React for the first time, there are numerous features and ideas that must be addressed. Also, it can be challenging for new developers to start out properly.
Introduction
Before beginning with React, you must have Node.js and npm (Node Package Manager) installed on your PC. Run the following commands in your terminal to see if Node.js and npm are installed on your system, and then we are ready to build a React app.
If Node.js and npm are not already installed on your system, you can follow many online step-by-step tutorial to install Node.js.
For React programming, you need a code editor. To build your first app, you can use any free code editor. Installing the Atom or Visual Studio Code text editors is advised.
To get started, you should also have a fundamental understanding of HTML, CSS, JavaScript, ES6 features, and npm.
Scaler Placement Report and Statistics
Scaler learners achieved 2.5x salary growth with average post-Scaler CTC reaching ₹23L.
Setting Up a React Project
A boilerplate version of a React application can be generated manually. But by using the node package create-react-app , you can build a React app easily. You don't need to install or set up tools like webpack or Babel while using create-react-app.
1. Install Globally Create React App Hit this Command in Command Line After Installing Node
Utilizing the create-react-app script is one of the simplest ways to start a new React project. We can easily run a given script using the npx command, which enables us to do so without first downloading the package in a separate step.
To Install the global React app after installing the node, enter this command at the command line:
npm install -g create-react-app
2. Go to the Directory Where You Want to Create the Project and Hit
Now we will go to the location where you want to build a React app in your terminal after opening it. In the previously given command :
npx create-react-app my-app
The name of the react application, my-app, can be changed to anything of your choice. But make sure there are no capital letters in it.
The installation process will take some time, and once it is finished, you will receive instructions on how to use the application and that is how you shall begin to build a React app:
Transform Your Career
Choose from our industry-leading programs designed for career success
Modern Software and AI Engineering Program
Master full-stack development with AI integration

Modern Data Science and ML with specialisation in AI
Advanced data science techniques with AI specialization
Advanced AIML with Specialisation in Agentic AI
Deep dive into AIML with focus on Agentic systems
DevOps, Cloud & AI Platform Engineering
Build and manage AI-powered cloud infrastructure
AI Engineering Advanced Certification by IIT-Roorkee
Premier AI engineering certification from IIT-Roorkee
Output
By entering the following command in the terminal, you can navigate to the directory you just created your React app.
Now launch your preferred code editor and open the project. However, you should be aware of the application's original project structure before executing it.
3. To Run a Webserver and Serve the New Application
The following terminal command can be used to launch the development web server:
Or
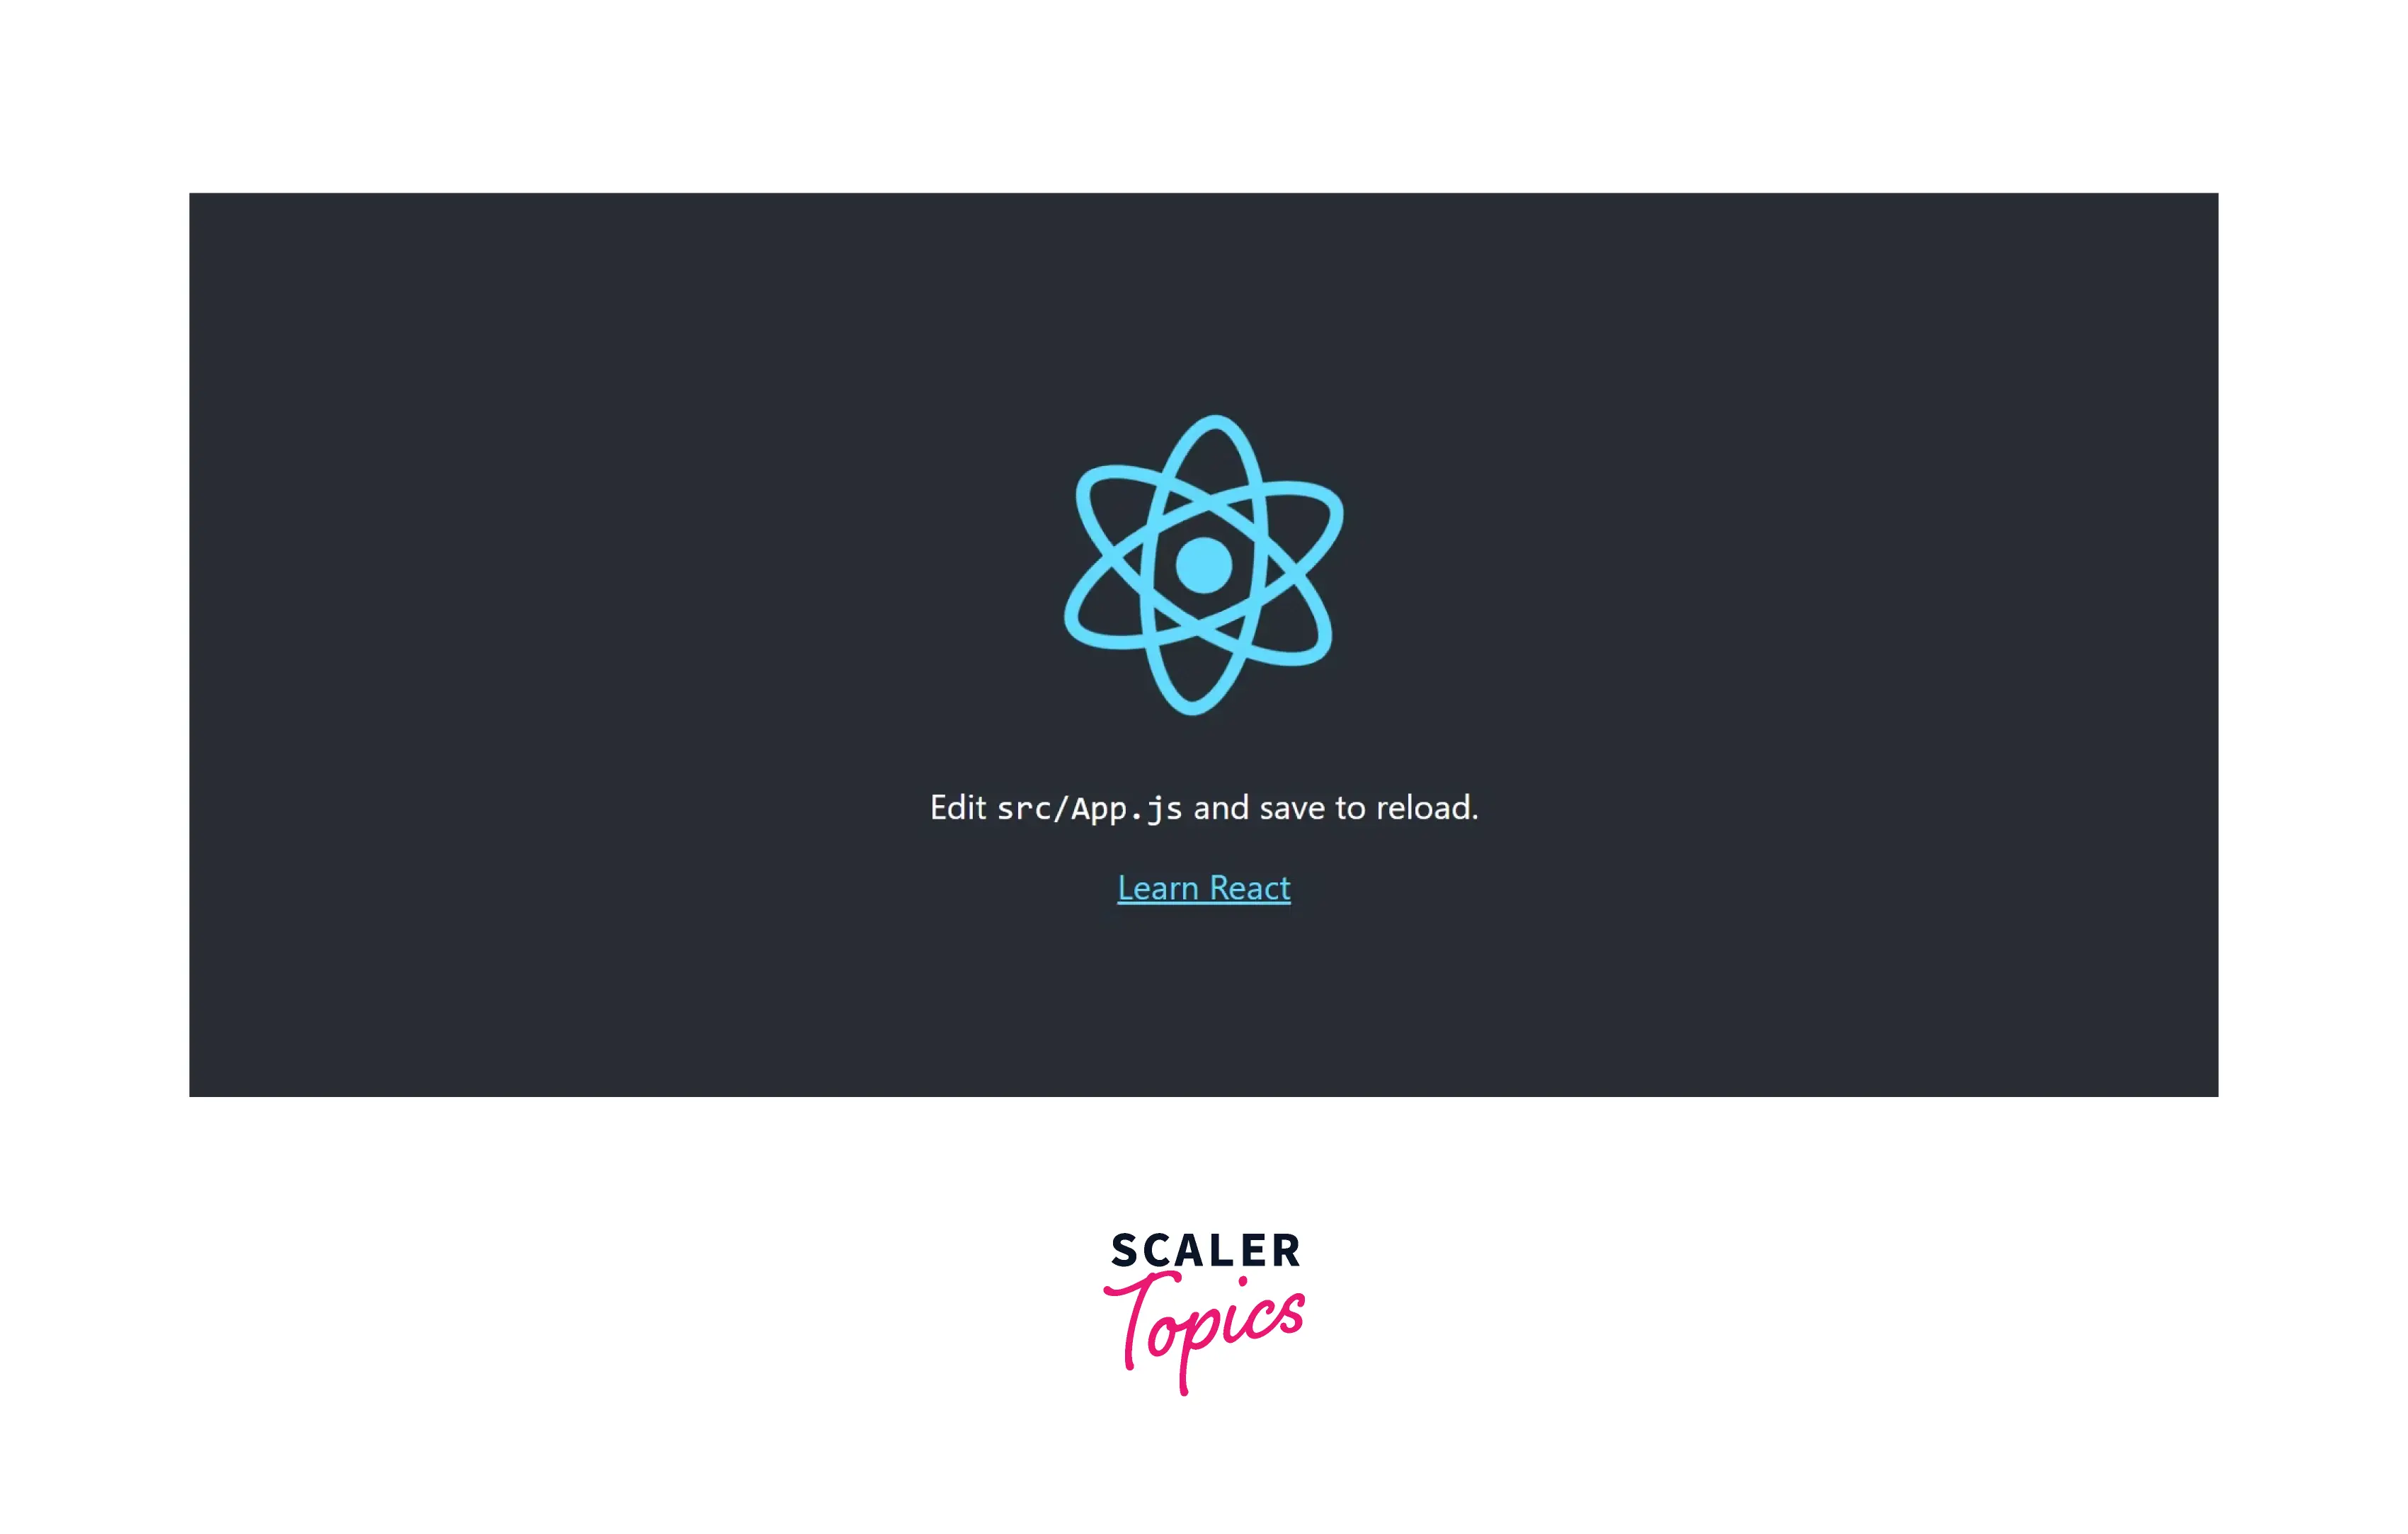
The react app is executed in development mode. The browser will start a new tab with the address http://localhost:3000 by default. You'll need to access http://localhost:3000 if the tab doesn't open automatically manually. The following page will appear when you visit localhost:3000.
The following code may be found in the App.js file:
Congratulations! Your Hello World React app is now operational. From this point on, you may start working with React.
4. To Minify and Bundle the JS Code for Optimization
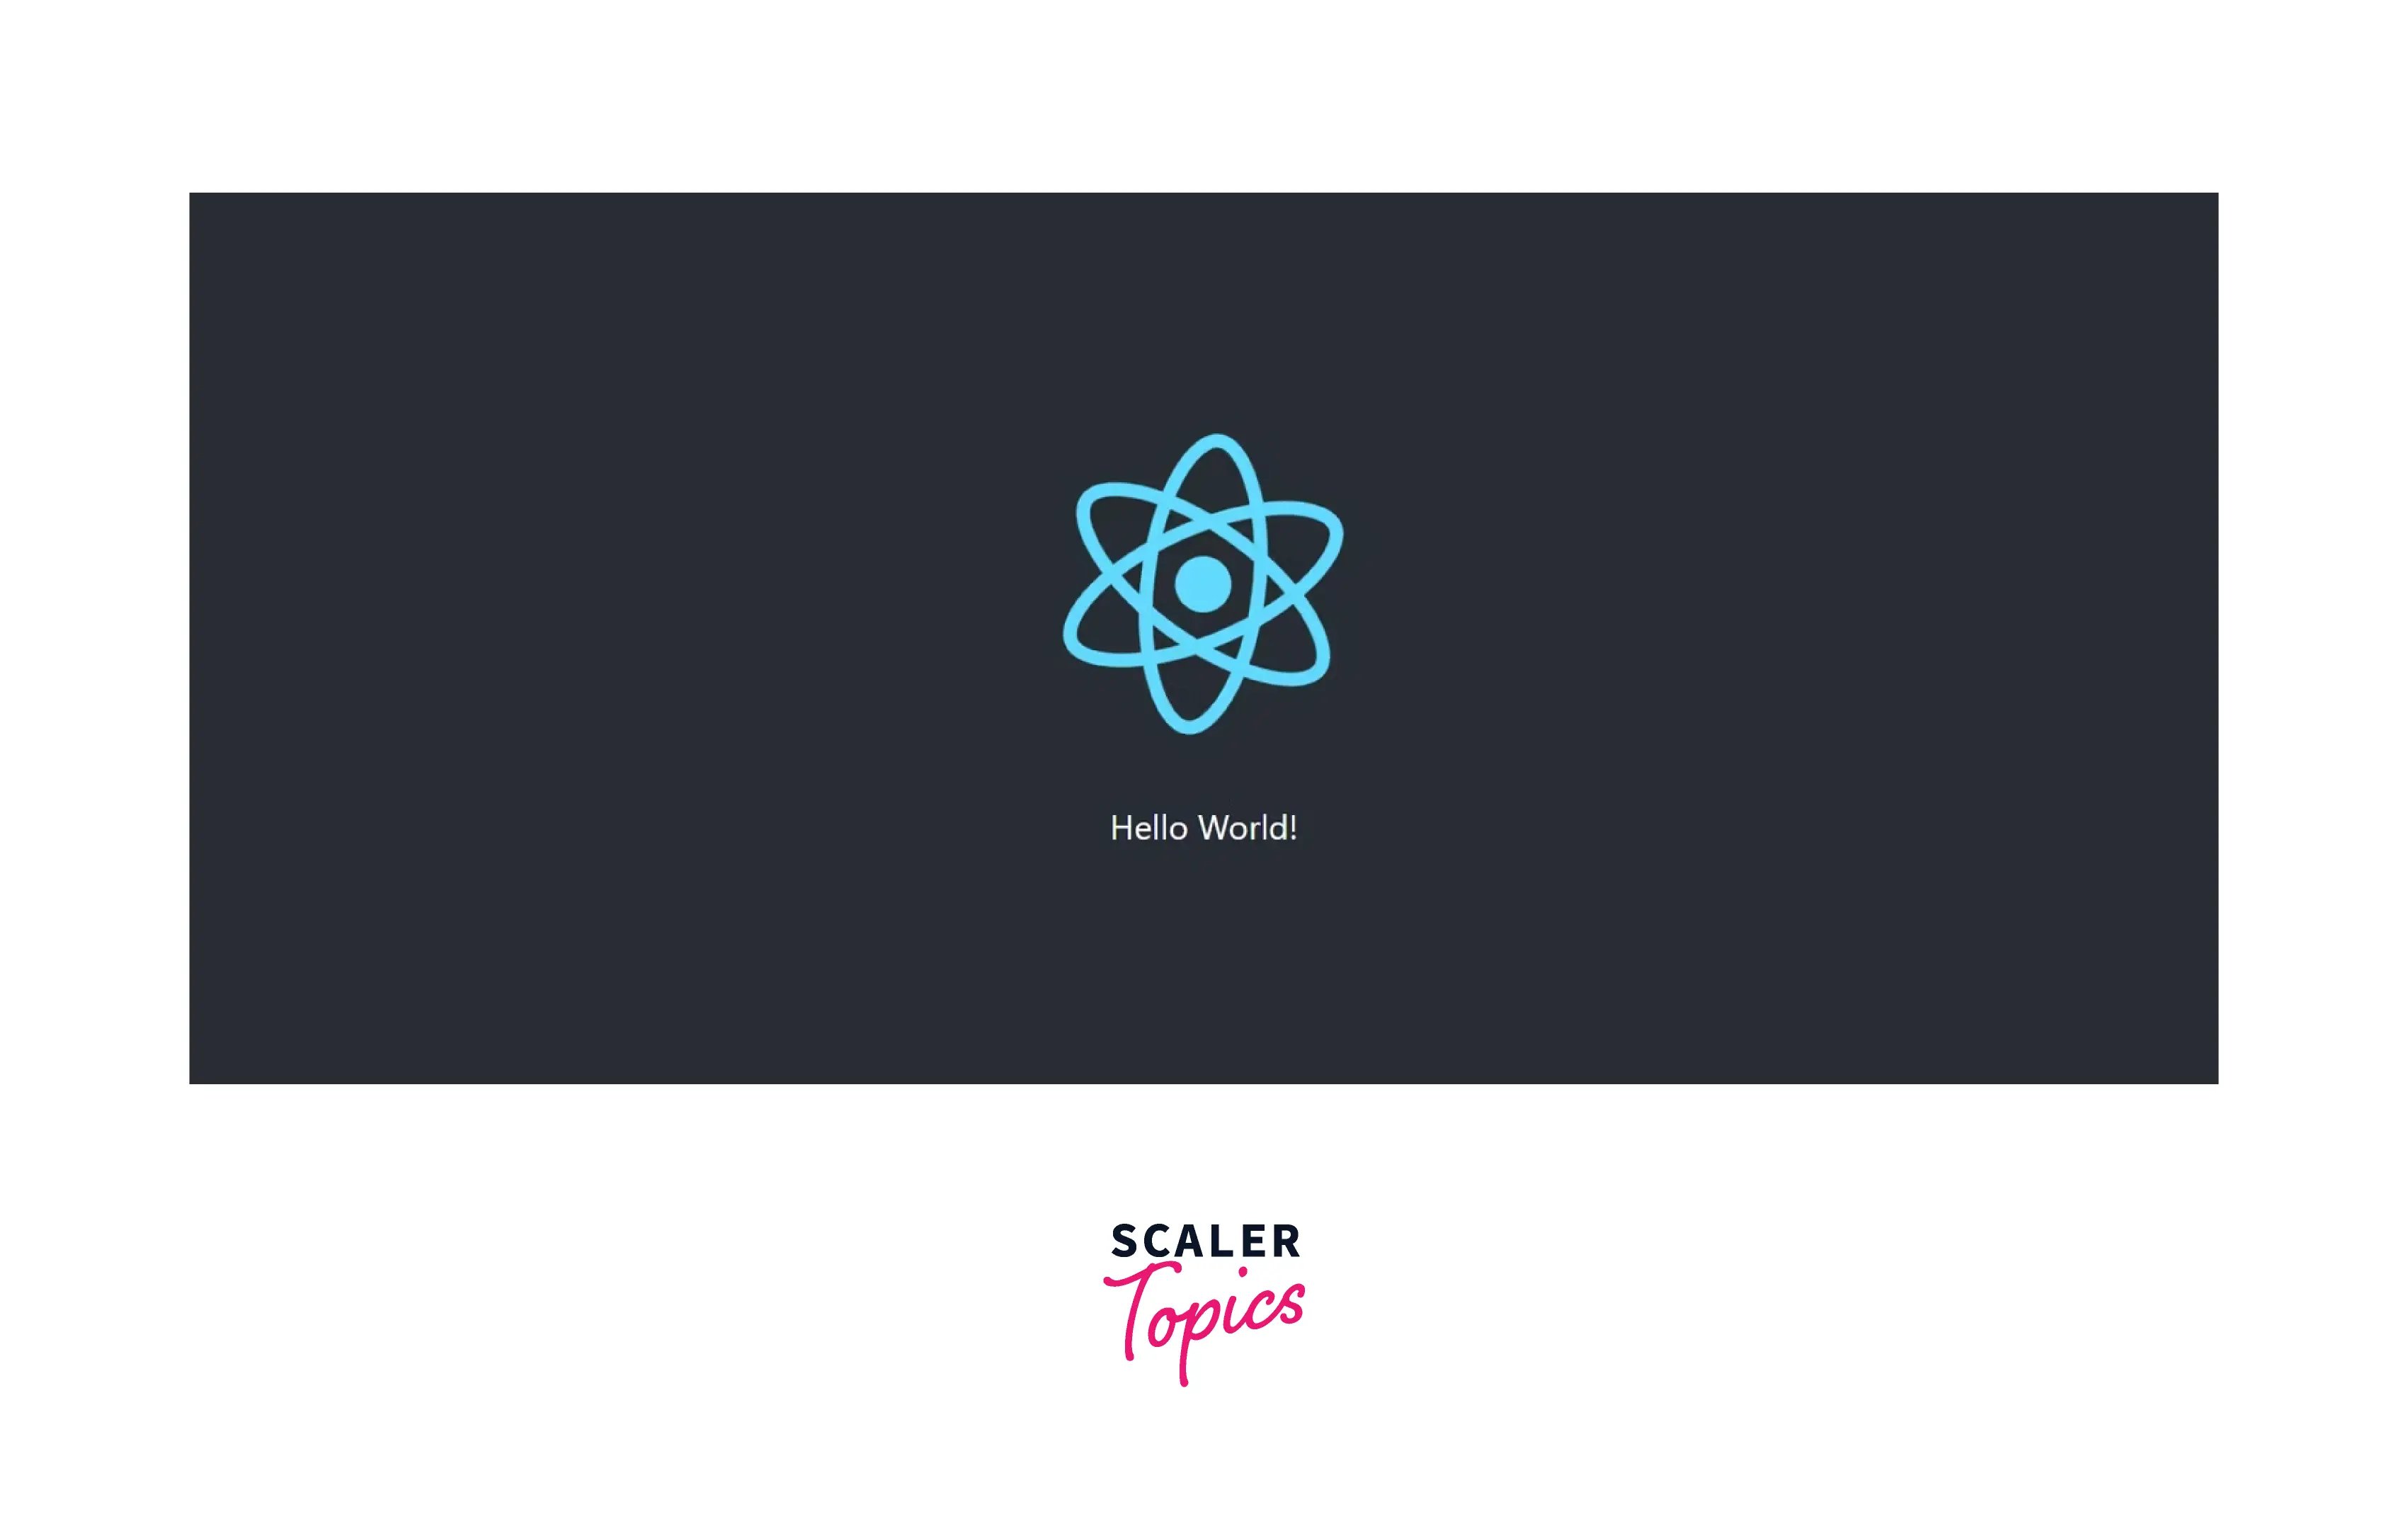
Here, any modifications you make to the source code will immediately update. Open src/App.js in the programming editor of your choice. To update your current React application, for example: Modify App.js as follows to build a React app that says Hello World.
The following screen will appear as the modifications are updated in real time by the browser:
Bundling
You can utilize the optimization method of JavaScript bundling to cut down on the number of server requests for JavaScript files. This is achieved by bundling, which combines many JavaScript files into a single file to minimize the number of page requests.
Minification
Minification is the process of reducing the amount of code and markup in your script files and web pages. It's one of the primary techniques used to lower website load times and bandwidth use. Significantly increasing site accessibility and speed through minification results in a better user experience.
To optimize the JS code, minify and bundle it use the following command in your command line argument. This will help us to build a React app.
Turn Learning into Career Growth
5. Start the Test Runner, Unit Tests Can be Written Using JEST
Jest is a JavaScript testing framework that makes it simple to connect with React JS and enables developers to run tests on JavaScript and TypeScript code.
A testing technique called unit testing examines each piece of software separately. An individual React Component is tested during unit testing for React apps. Teasing will help us to build a React app more efficiently and securely.
Launch the test runner by the following command. We can use JEST to create unit tests.
6. Pull Out Configurations and Build Dependency Files
Only if we wish to manage configuration on our own, we should do the irrevocable step of pulling out designs and building dependency files to the project directory. Use the following command :
Creating a Component
To build a React app, it is necessary to get familiar with the concept of react components. We all know that React makes use of the JSX syntax to enable the fusion of HTML and JavaScript. The definition and use of these React components are possible throughout your ReactJS project. There are two ways to define components in ReactJS. While many programmers use both, the functional components are growing in popularity, thanks to APIS/HOOKs like useState and use context.
Types of Components:
- React functional components
- React class-based component
React Functional Components
A JavaScript function that returns HTML can be a React Functional Component. These useful parts can also take in props , which stands for data or properties. These can also be produced using the ES6 convention of the arrow function since they are JavaScript functions or extensions of JavaScript functions. You can also place your standard JavaScript code before the return statement, and these functional components can also accept the props that we may use with JSX syntax. One thing to keep in mind is that each component should only have one return.
Scaler Placement Report and Statistics
Scaler learners achieved 2.5x salary growth with average post-Scaler CTC reaching ₹23L.
2. React Class-based Components
The class-based components are similar to React function components, these two share many of the same functionalities. However, we must first import the React.Component or extract the Component like {Component} from React before we define our class-based component. Also, this keyword is used in the case of class components to handle states and props.
The Application Can be Built in 3 Broad Steps
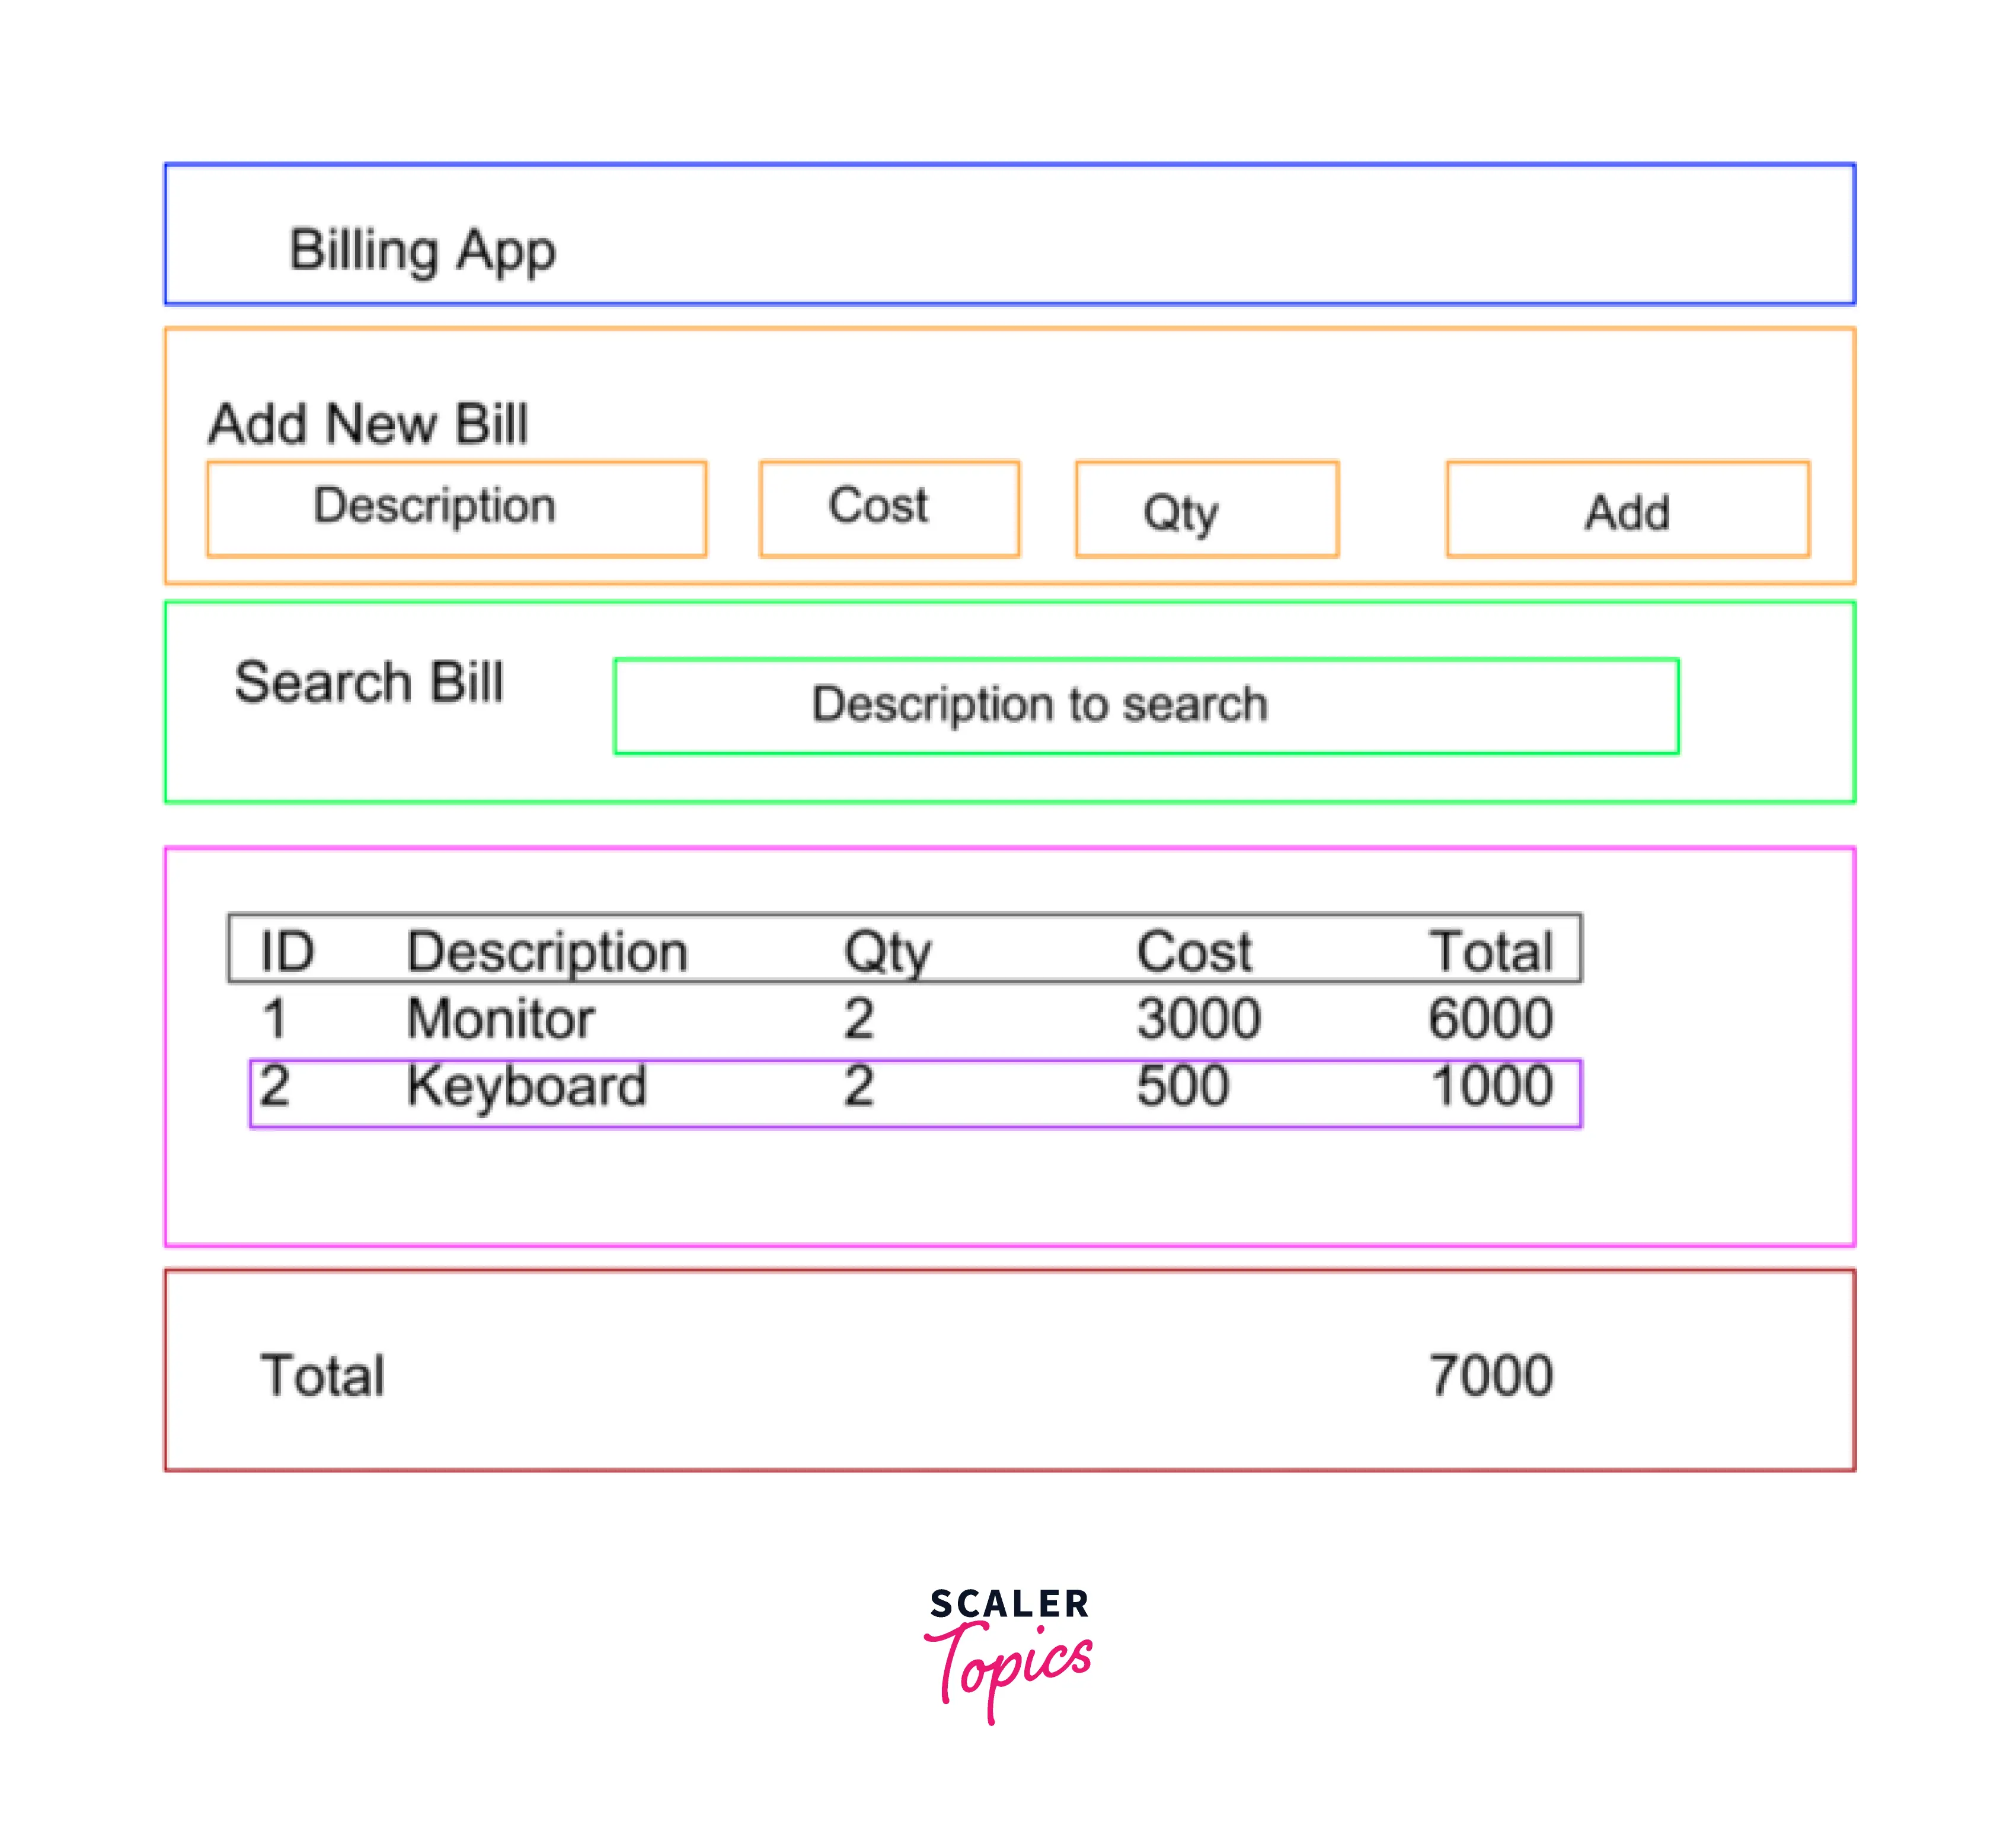
The entire program must be viewed as the fusion of numerous tiny components. Take the Billing Application as an example:
- Showcase goods
- Utilize the search field to filter products
- A user may include new products.
- Show the entire amount due.
Step 1
We must first consider the potential components before we begin to code. The single responsibility principle design pattern, which states that a component should only carry out a single responsibility, is highly beneficial in this step. If you see that it is performing several tasks, break them down into separate components. In this case, our application has seven main parts. They are :
- Application header
- Add a new product
- Filter bill (Search)
- Product List
- The title bar of the product list (part of component 4)
- Single bill row of product list (part of component 4)
- Total Bill Amount
Step 2
All of the components on the above list should be created as static components that accept props as data (attributes) and display it, so that view and rendering are our primary concerns rather than data flow. We must keep in mind that the Single Product Row component will be invoked from within a loop and will be reusable. Each iteration's bill details will be displayed based on the data that is currently available.
Step 3
Define data state and flow. The state should have the bare minimum of data and should be non-redundant. If we want total bill amount, we should not use total as separate attribute beacause it will be calculated on the basis of sum of all the individual products total. Due to the fact that the total is calculated instantly and we are confident that it is always consistent with the bill list, the issue of updating a separate total variable is avoided when a new bill is added or deleted.
Conclusion
-
We have the basic introduction to React and learned about how to setup a React app in the following 6 steps:
- Install the global React app after installing the node
- navigate to the directory where you have to build your react app
- launch the development web server
- optimize the JS code, minify and bundle it
- Launch the test runner
- Pull out configurations and build dependency files for to project director.
-
Then we moved to the section where we learned about creating a react component which included:
- React Functional Components
- React Class-based Components
-
Finally, we have seen how a React application can be built in 3 steps visualization.