Create your Own Custom Hooks
Overview
A hook in React is a function that allows a component to interact with React features such as state and lifecycle methods. Custom react hooks are user-defined hooks that allow developers to abstract component logic into reusable functions. This can make it easier to share logic between different components and keep code DRY (Don't Repeat Yourself).
Introduction to React Custom Hook
To create a react custom hook, use the use keyword followed by a unique name for the hook. The hook can then be used within a React component, just like a built-in hook. For example, a react custom hook named useFriendStatus could be used to track whether a friend is online or offline. This hook could then be used in multiple components to display the friend's status without having to repeat the logic for tracking the status in each component. Overall, custom reacts hooks can help make React code more organized and reusable.
React custom hooks are a new feature introduced in React 16.8. Custom hooks allow developers to abstract component logic into reusable functions that can be shared among multiple components. This can make it easier to organize and maintain complex applications.
Custom hooks are defined using the use keyword, followed by a unique name for the hook. The hook function can then be used within a React component, just like a built-in hook, such as useState or useEffect. React custom hooks can also accept arguments and return values, making them even more flexible and powerful. For example, a custom hook named useFriendStatus could be used to track whether a friend is online or offline. This hook could be used in multiple components to display the friend's status without having to repeat the logic for tracking the status in each component.
Overall, react custom hooks are a great way to make React code more organized and reusable. They can help developers write clean and maintainable code and make it easier to share common logic among different components. Custom hooks are functions. They typically begin with the word "use" (important convention). We have access to all of the well-known hooks, like useState, useMemo, useEffect, etc., thanks to react custom Hooks, which provide us access to the React ecosystem in terms of hooks. This method makes it possible to separate logic from the viewpoint.
Rules for Using React Hooks
A custom react Hook in React is a function that begins with "use" and can invoke other Hooks. The useWhatever naming style mainly enables the linter to discover issues in the usage of certain hooks, such as instances when their usage violates the Hooks rules.
A custom react hook does not need to have a particular signature as a React component does. What it accepts as support and what, if anything, it should return is up to us to decide. In other words, it just works as it would normally.
Custom react hooks are subject to the same general guidelines as React Hooks, including
- Only call Hooks at the top level. Don’t call Hooks inside loops, conditions, or nested functions
- Only call Hooks from React function components
- Don’t call Hooks from regular JavaScript functions
Only your own unique Hooks are acceptable as a second location to call Hooks. These regulations are in place because React associates each Hook with a certain local state based on the order in which the Hooks are called. Placing a hook inside of a condition may alter this order, causing the next hooks not to be called and, most likely, leading to bugs.
A form with many Hooks is used to demonstrate this in the React documentation, as shown below:
These hooks are called in the following order on two renders:
It would be against the rules of hooks to call the second hook inside such a condition where it only saves when data is entered, as illustrated below:
Explanation
We can utilize many State or Effect Hooks in a single component, as we learned earlier:
So how does React figure out which useState call goes with which state? The order in which Hooks are called is how React works in the response. Because the Hook calls are made in the same order on every render, our example works.
React can associate some local state with each render as long as the order of the Hook calls remains the same. But what would happen if a Hook call, like the persistForm effect, was placed inside a condition?
On the initial render, the name!== ‘’ condition is true, so this Hook gets executed. However, the user could clear the form on the subsequent render, rendering the condition false. The order of the Hook calls has changed because we skipped this one during rendering:
For the second useState Hook call, React would be unable to determine what to return. React anticipated that the second Hook call in this component would perform exactly the same just like it did during the previous render, correlate to the persistForm effect. However, this is no longer the case. After that, each Hook call after the one we skipped would shift by one as well, resulting in issues.
Because of this, the highest level of our components must call Hooks. We can include a condition within our Hook to conduct an effect conditionally.
Benefits of Building a Custom React Hook
Using custom react hooks is an effective option in a case where we would like to implement the logic for both the useState and useEffect Hooks across many components.
We can simply reuse stateful behavior across several components using custom React Hooks in a style that is both efficient and scalable. Additionally, react custom hooks result in a clear and organized codebase, which lessens complexity and duplication in your React project.
As long as they adhere to the React Hooks guidelines, there is no restriction on the kinds of unique custom react hooks you might develop to handle various use cases.
We extract the logic to a third function when we want to share it between two JavaScript functions. This also applies to components and hooks since they are both functions.
Imagine that while developing, you came into a circumstance where you needed to apply useEffect and useState.
After a time, you notice that another component also has to use the same useEffect and state logic. You can copy code, but you probably convince yourself there has to be a better method. What are you going to do? To the rescue, react custom Hooks. Using react custom Hooks has a number of benefits:
- Reusability: We don't have to write the same hook twice because we can use it repeatedly.
- Clean Code: A cleaner codebase can be achieved by isolating all component logic into a hook.
- Easy maintenance : maintainability. The logic of the hook only needs to be altered once, if at all.
- Great Community: there is a significant probability that the hook you had in mind has already been developed. There are tonnes of custom react hooks on the web! You can locate a hook that fits your needs, utilize it as is, or use it as a springboard to create something great!
Build Your Own React Custom Hooks
With the help of custom React hooks, you may provide your React applications with additional, distinctive functionality. Installing a third-party library designed to address your issue is frequently the simplest way to add certain functionality to your application. What do you do, though, if such a library or hook doesn't exist?
Learning how to create custom react hooks is crucial if you want to fix issues or add features that are lacking in your own React projects.
Here is a step-by-step tutorial that will walk you through the process of developing your own unique React hooks by dissecting three existing ones and explaining the issues they were designed to address.
1. useCopyToClipboard Hook
The code is added to the user's computer's clipboard so they may paste and use it wherever they wish by just hovering over the snippet and clicking the clipboard button.
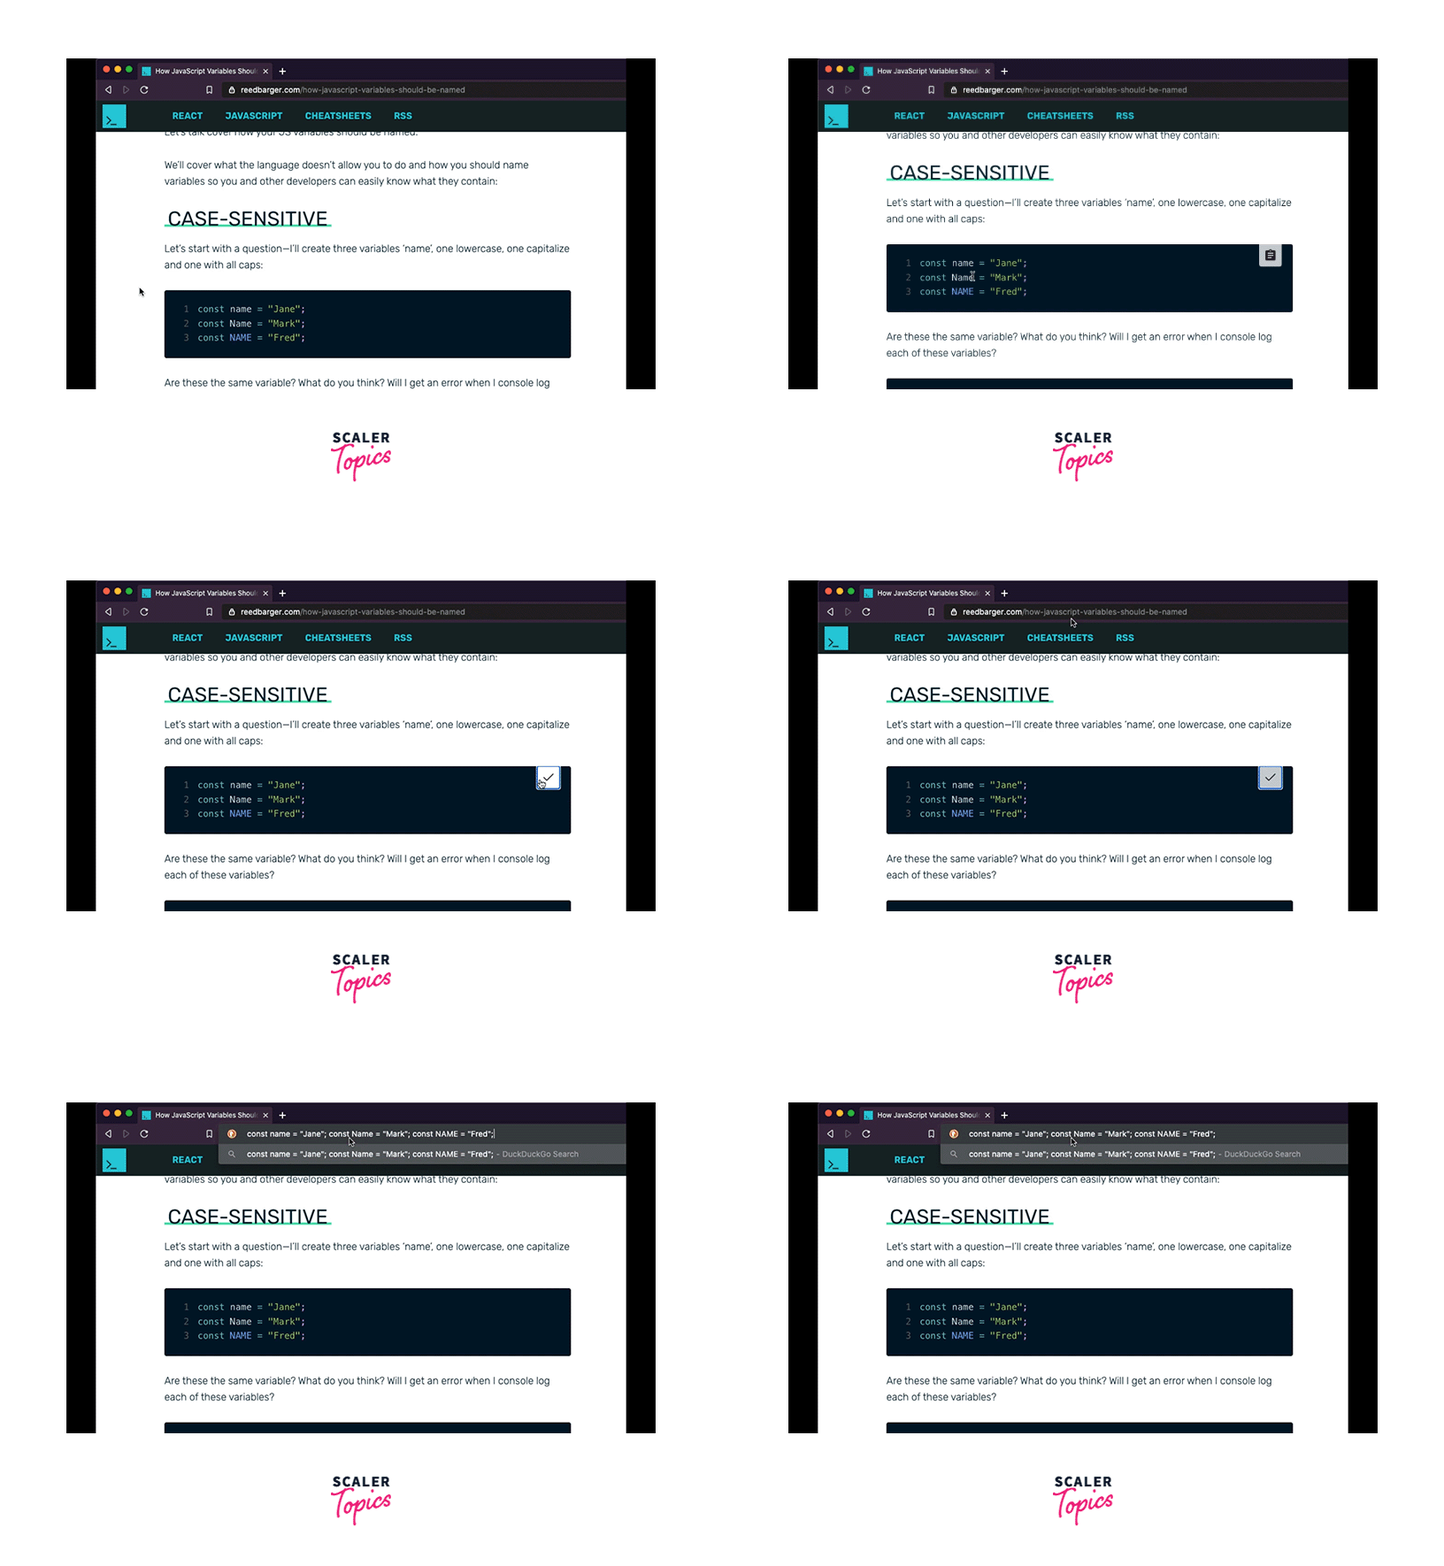
However, I intended to re-create this feature with my own unique React hook rather than using a third-party package. Every time I make a new react hook, I store it in a special folder for functions that I can use across my app. These folders are typically called utils or lib.
This hook will be added to the useCopyToClipboard.js file, and I'll create a function with the same name. We can copy text to the user's clipboard in a number of ways. I like to use a library called copy-to-clipboard for this because it makes the procedure more dependable.
It exports a function that we'll refer to as copy.
The function we build next will be used to copy any text the user wishes to the user's clipboard. This function will be known as handleCopy.
How to make the handleCopy function?
We must first check that the function only accepts data of the types string or numeric. To ensure that the type is either a string or an integer, we will create an if-else statement. If not, we will record a console error informing the user that they are unable to copy any further types.
Next, we turn the text into a string so that it can be passed to the copy method. The handleCopy method from the hook is then returned for use wherever in the application we see fit.
The handleCopy function will typically be attached to a button's onClick event.
We also need a state that indicates whether or not the text was copied. UseState will be called at the beginning of our hook to construct that, and we'll make a new state variable called isCopied with the setter setCopy.
This value will initially be false. If the copying of the text is successful, copy will be set to true. Otherwise, we'll make it false. Finally, we will return handleCopy and isCopied from the hook in an array.
How to use useCopyToClipboard?
Now we can call useCopyToClipboard in any component we choose. In my example, I'll combine it with a copy button element that already has the code for our code snippet.
Simply adding an onClick to the button will enable this to function. Moreover, a function called handle copy returns the text representation of the code that was input as input. It is also accurate once copied. A separate icon that denotes a successful copy can be displayed.
How to Add a Reset Interval?
There is one way we can make our code better. As our hook is now written, the success icon will always be present because isCopied will always be true:
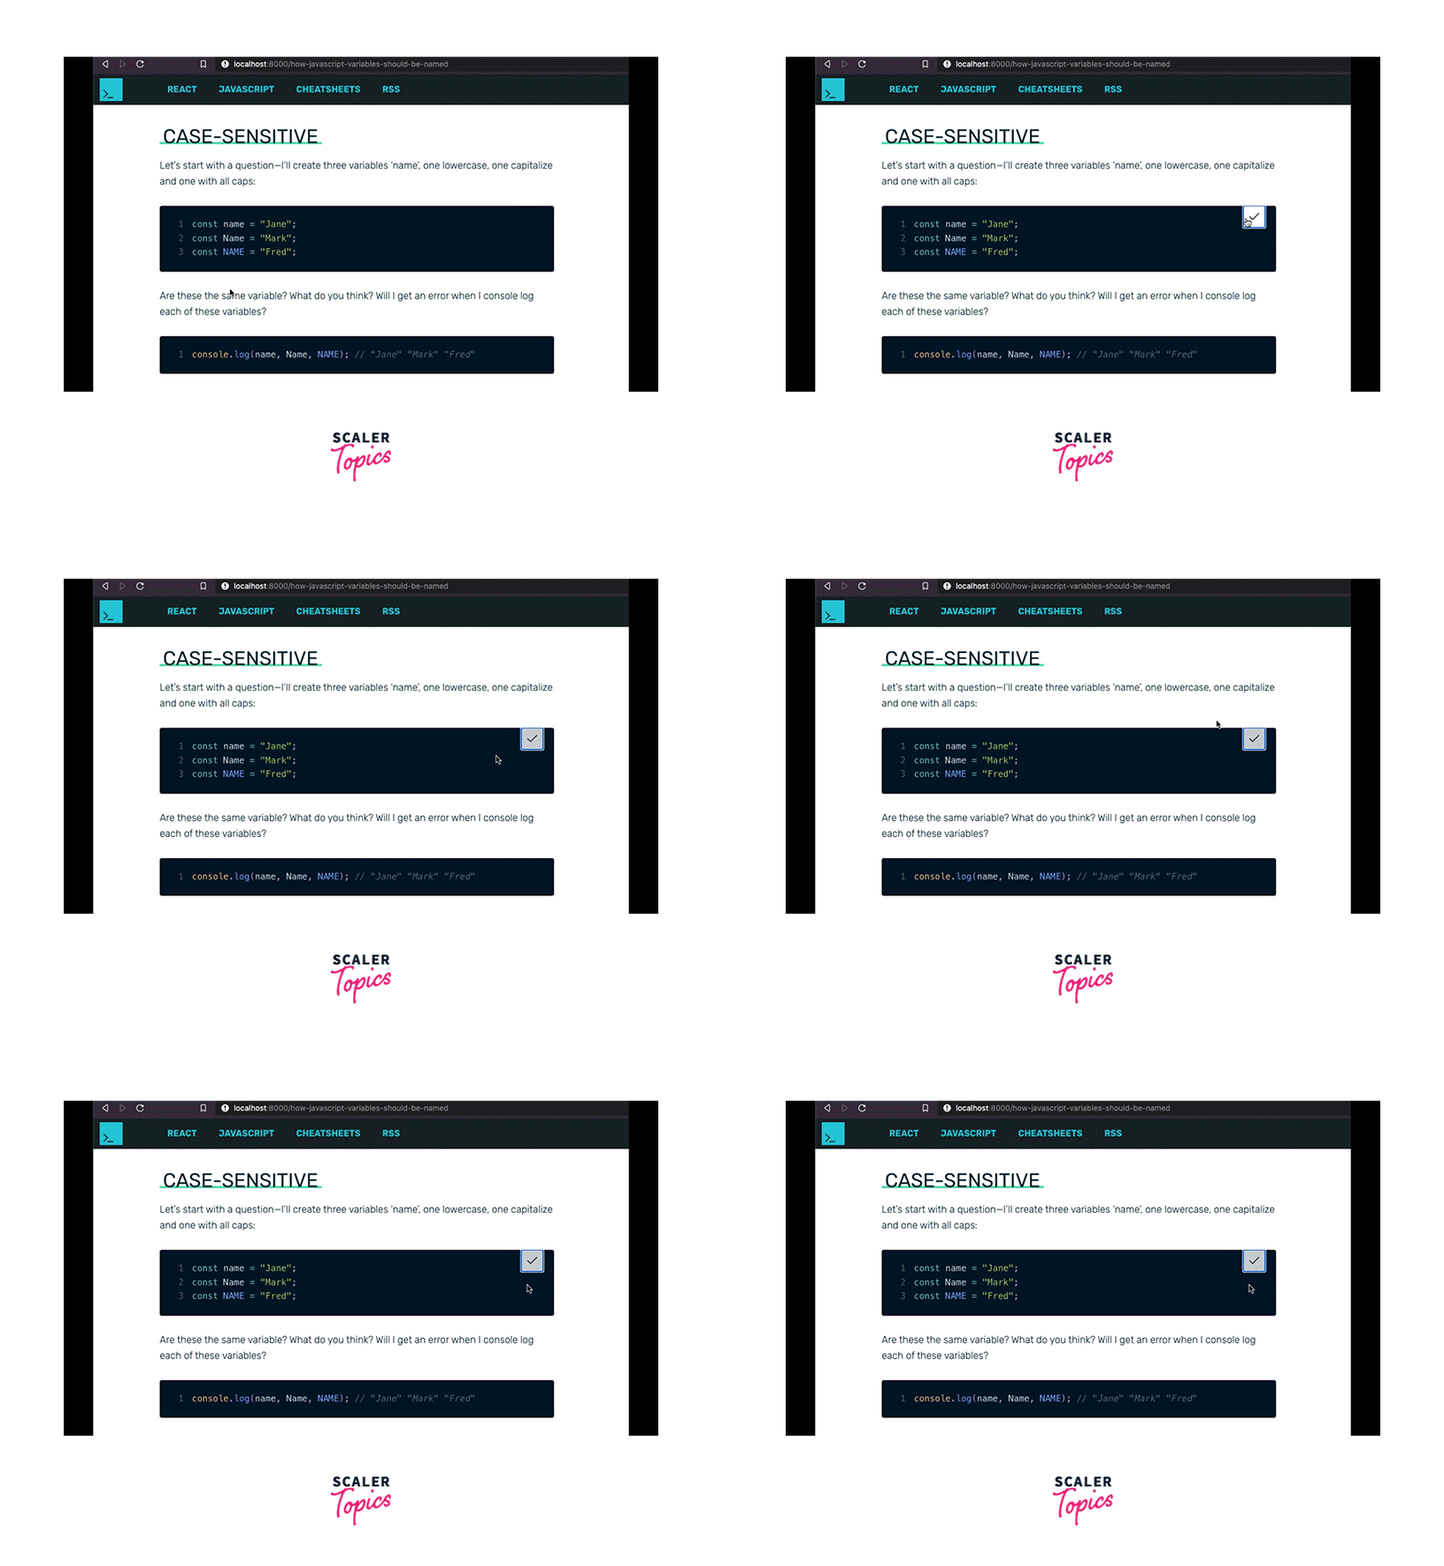
You can supply a time interval to useCopyToClipboard if you wish to reset our state after a short period of time. Let's include that feature. The state won't reset if no argument is supplied to the hook's resetInterval parameter, which we may define back in the hook and set to null by default.
After that, we will add useEffect to specify that if the text is copied and there is a reset interval, we will use a setTimeout to reset isCopied back to false after the interval.
Additionally, if the component in which the hook is being utilized unmounts, we must reset the timeout (meaning our state is no longer there to update).
The final enhancement we can do is to encapsulate handleCopy in the useCallback hook so that it won't be produced each time a rerender occurs.
Final Result
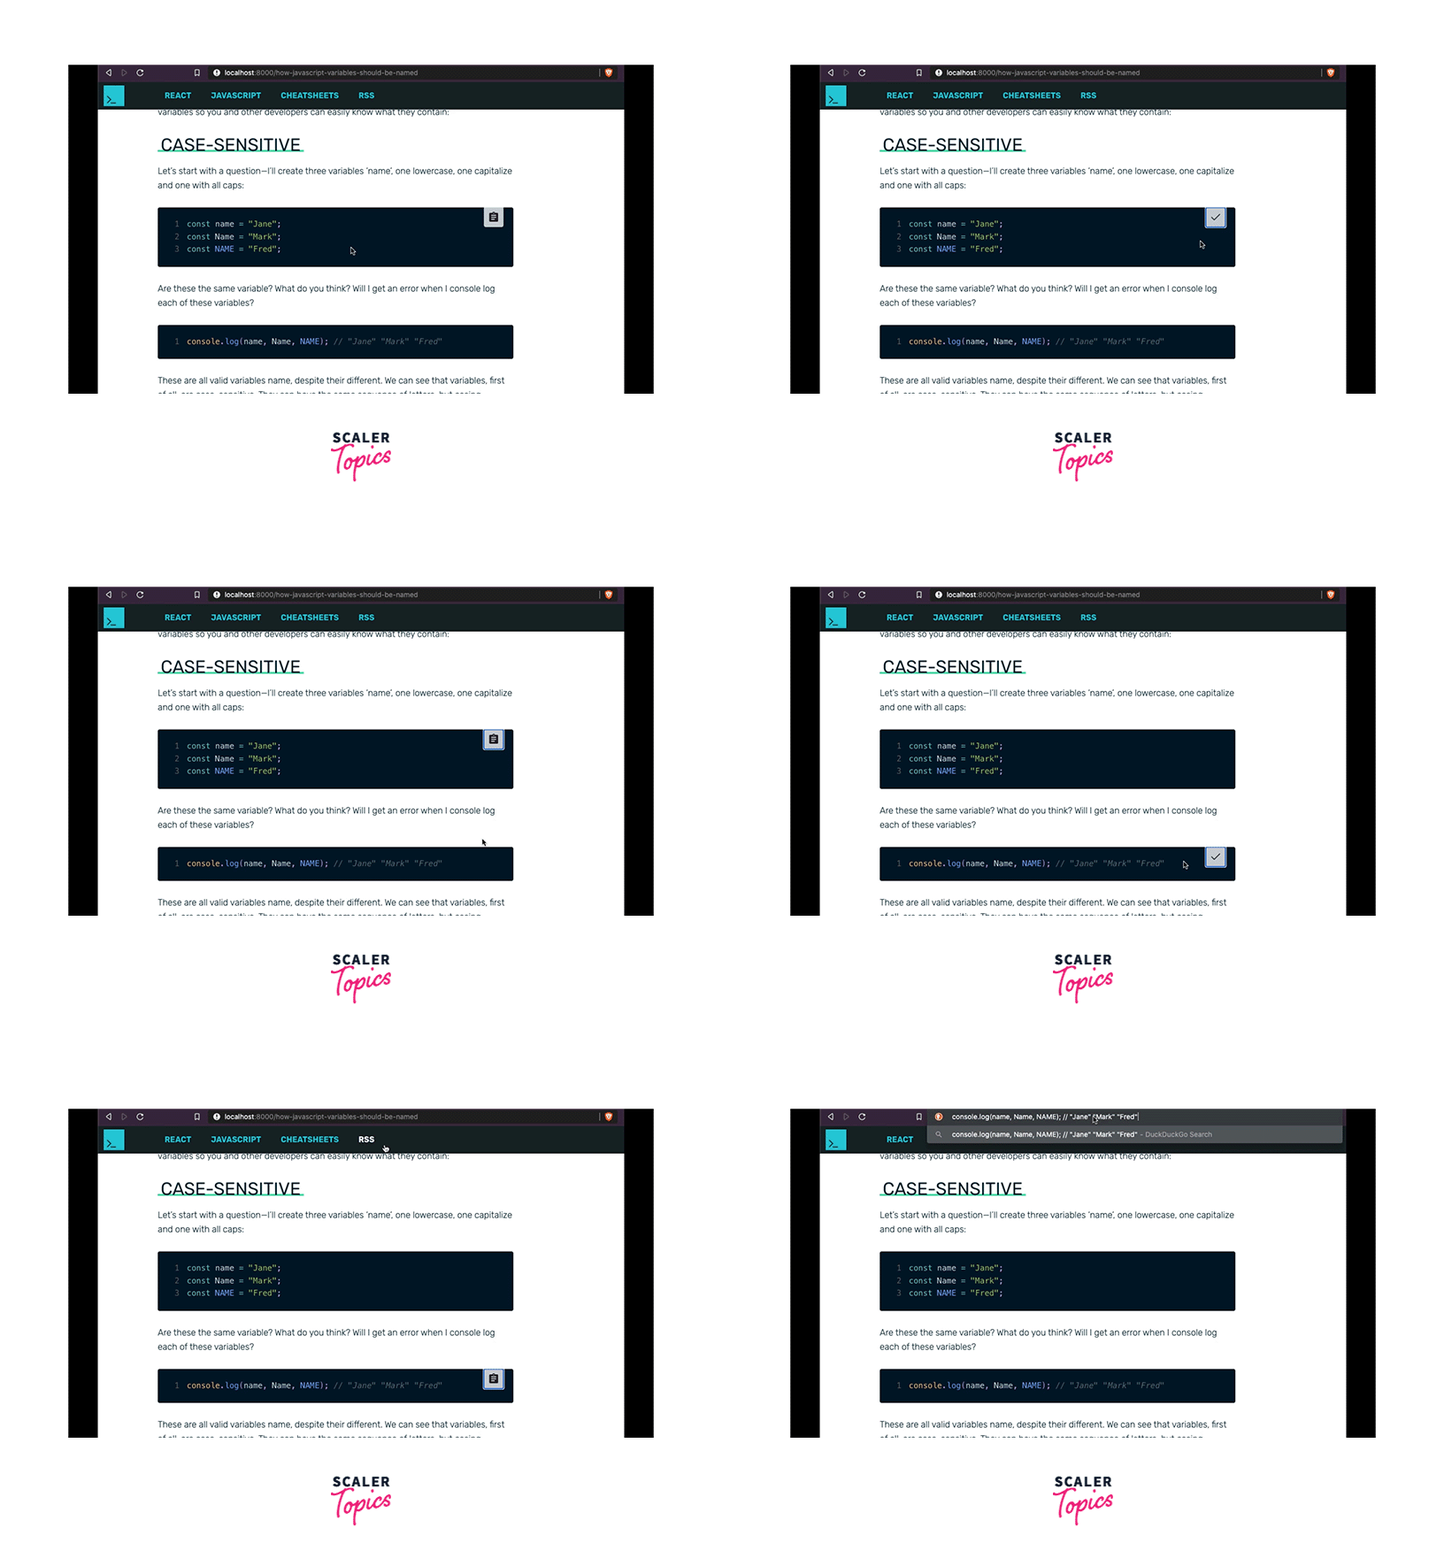
And with that, we have our last hook, which enables the state to be reset following a predetermined amount of time. If we give it one, the outcome should resemble what is seen below.
2. usePageBottom Hook
It can be crucial for React apps to understand when a user has scrolled to the bottom of a page.
When a user reaches the bottom of the page on an app with an endless scroll, like Instagram, you must fetch new posts.
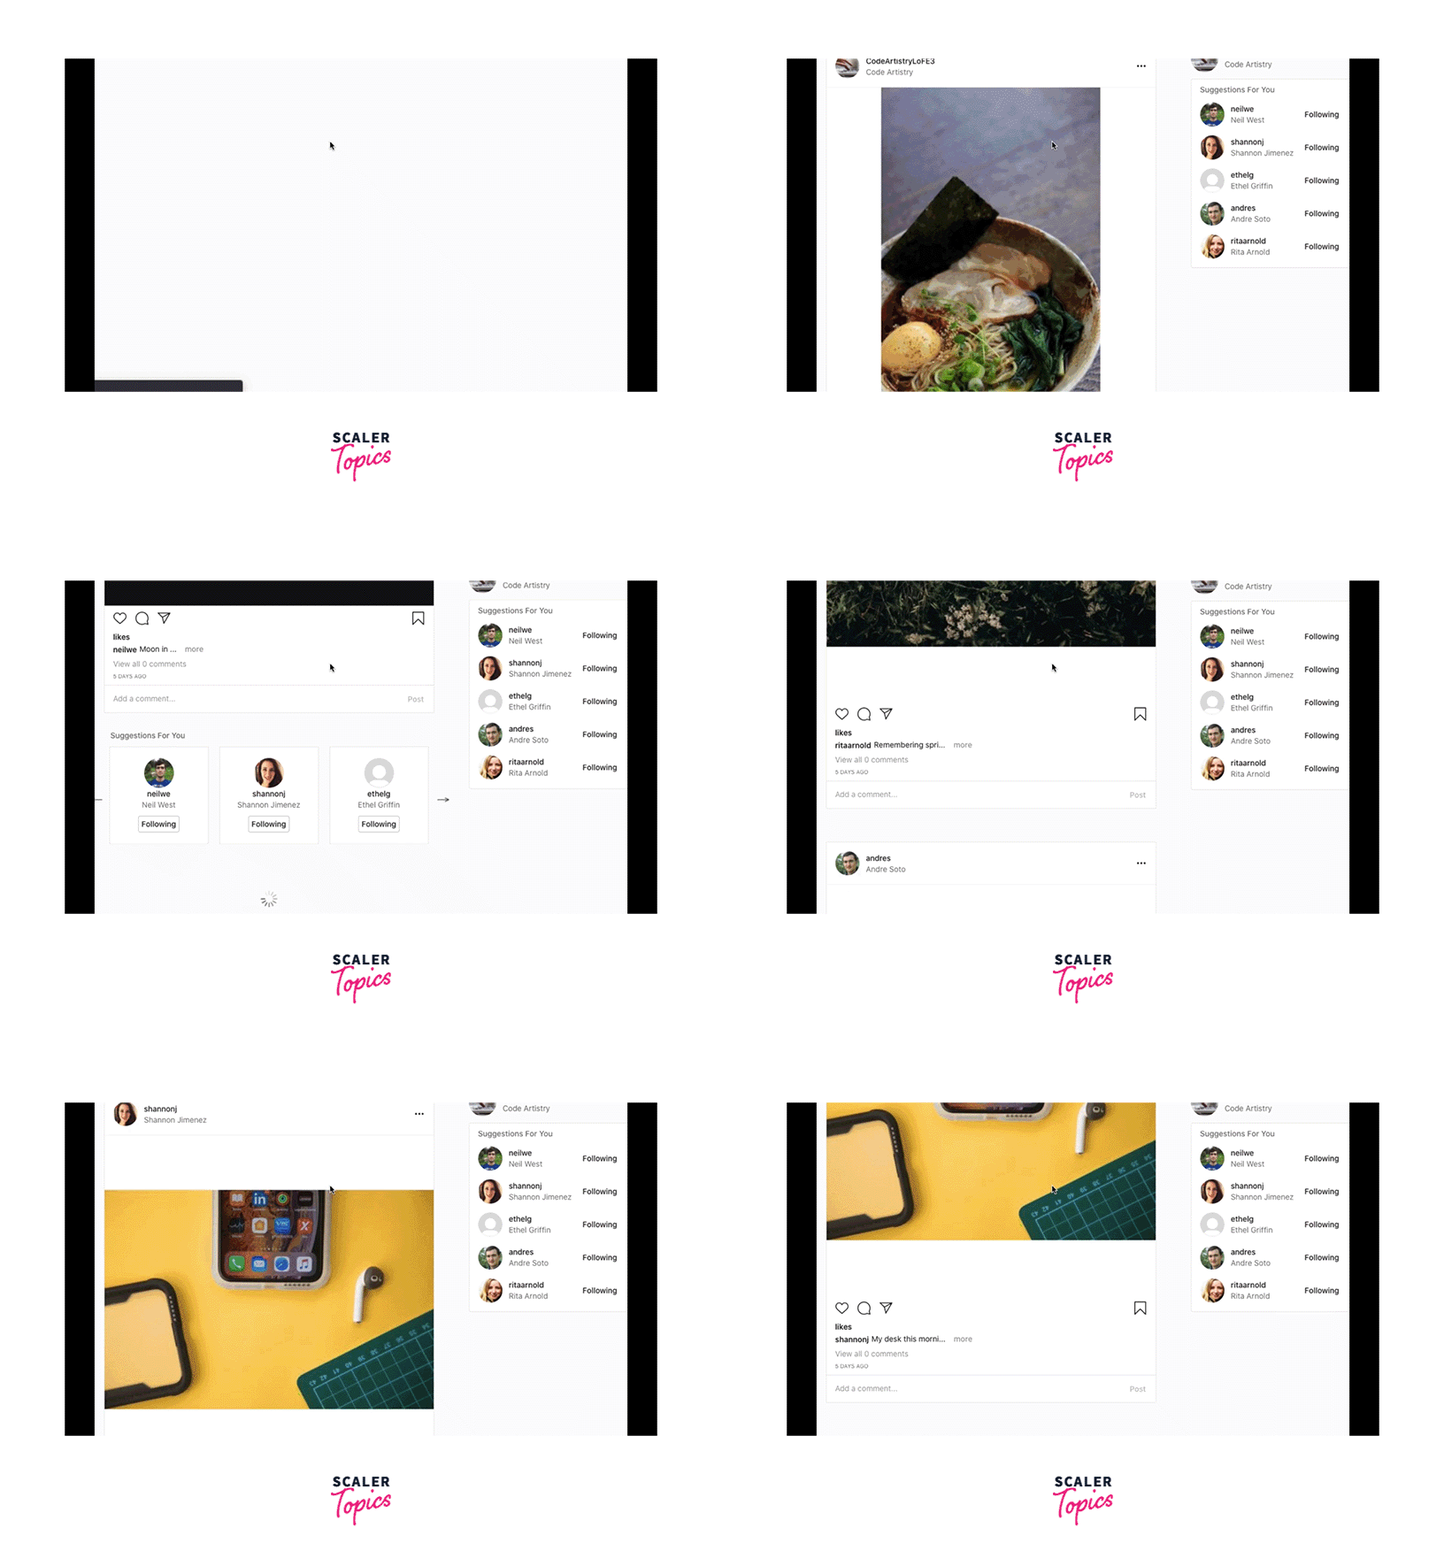
Let's look at building our own usePageBottom hook for purposes similar to building an infinite scroll.
In our utils folder, we'll first create a new file called usePageBottom.js and add a method (hook) with the same name:
Let's look at building our own usePageBottom hook for purposes similar to building an infinite scroll. In our utils folder, we'll first create a new file called usePageBottom.js and add a method (hook) with the same name:
When the offsetHeight and the innerHeight values of the window and the document are equal, the user will have reached the bottom of the page. The result will be true if the two values are equal, and the user has reached the bottom of the page:
In addition to updating the state variable bottom, which we'll finally return from our hook, we'll store the outcome of this expression in a variable named isBottom.
However, our code as is won't function. why not?
The problem is that whenever the user scrolls, we have to figure out isBottom. As a result, we must watch for a scroll event that includes a window. addEventListener. By defining handleScroll as a local function that will be invoked each time the user scrolls, we may reconsider this statement.
Finally, we need to deal with the scenario in which our user navigates away from the page and our component is deleted because we have an event listener that is changing state. In order to avoid attempting to change a state variable that no longer exists, we must remove the scroll event listener that we installed. This is accomplished by returning a function along with window from useEffect.
We supply a reference to the same handleScroll method when calling removeEventListener. We're done now.
Now, all we have to do is call this code from everywhere we need to know if we've reached the bottom of the page or not. I have fewer links to have.
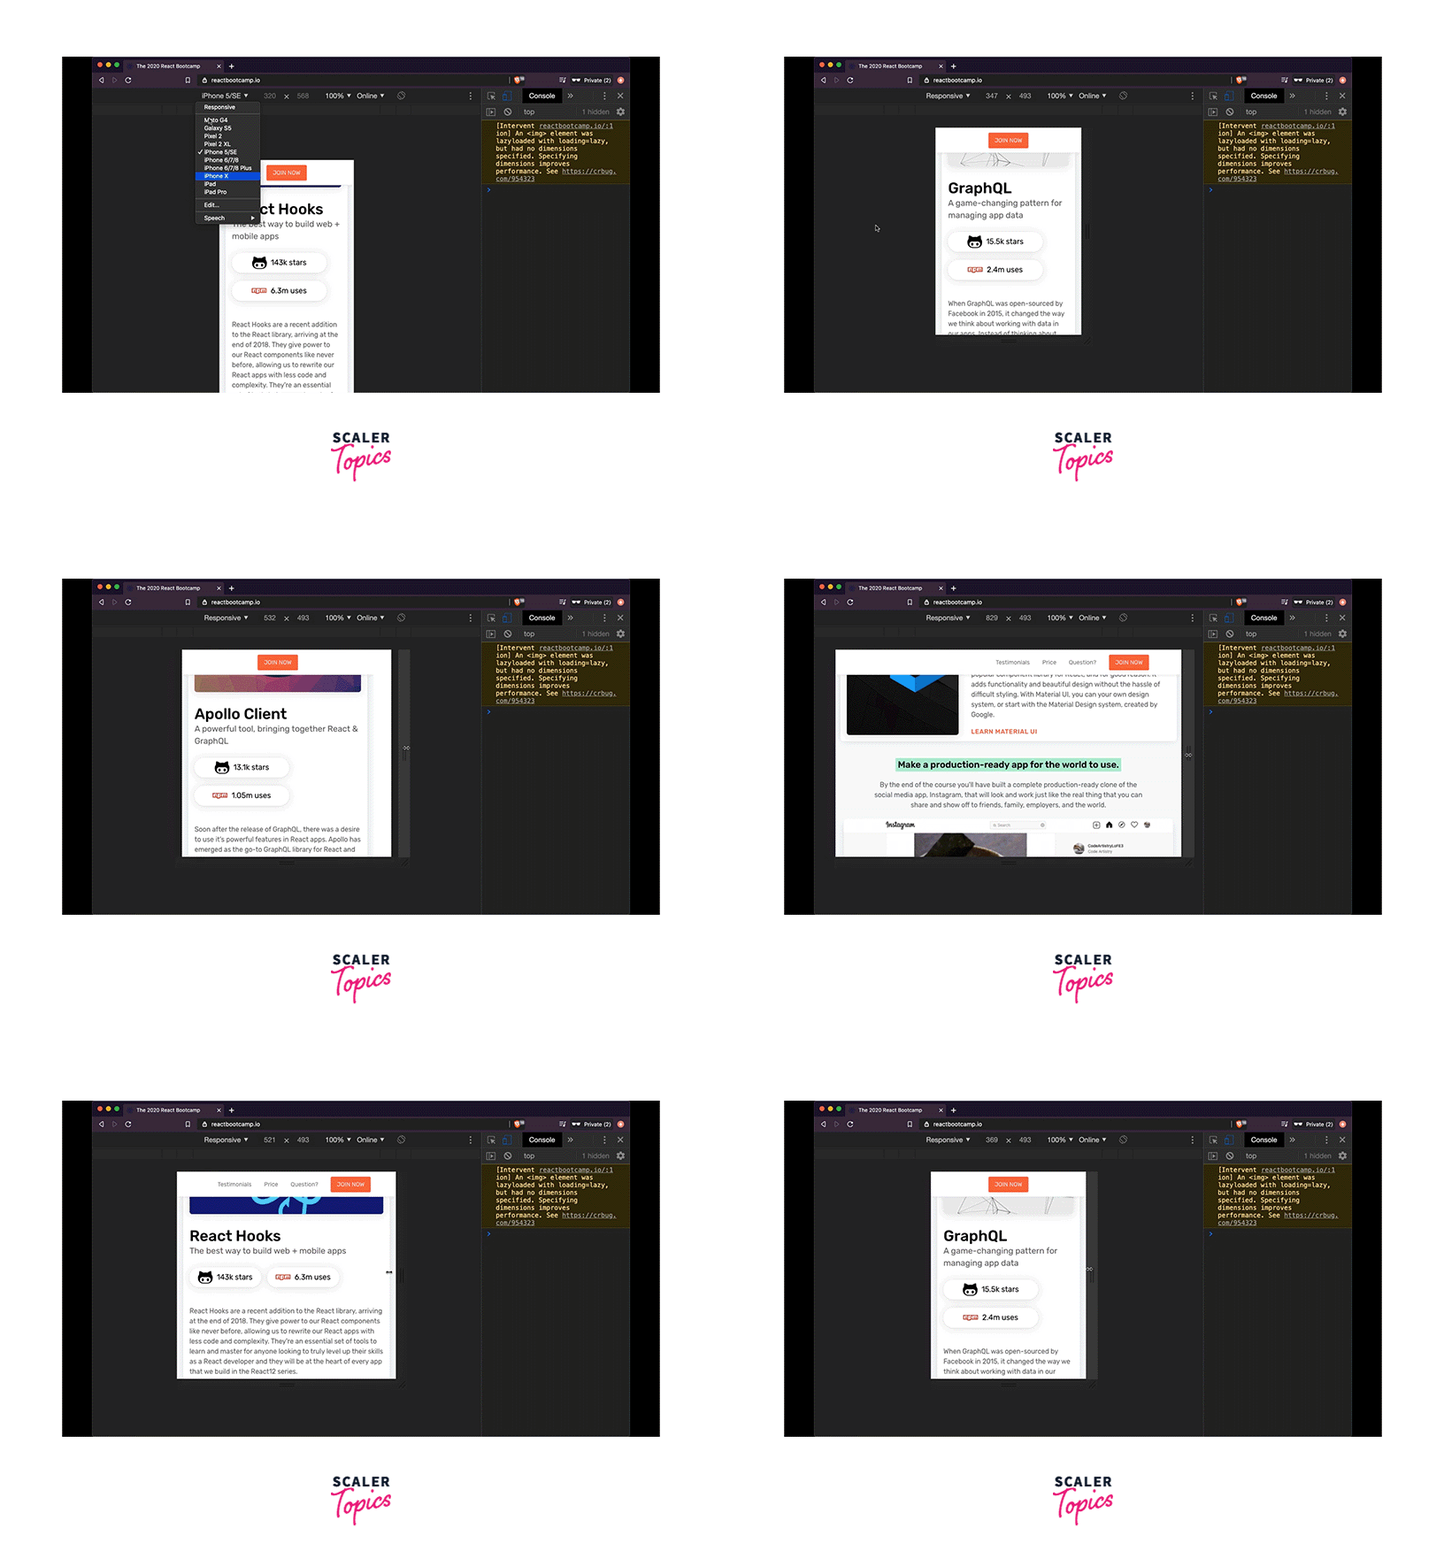
To accomplish this, we could either utilize a custom React hook to provide us with the current page size and hide or reveal the links in our JSX, or we could use a media query (CSS).
I previously used a hook from the react-use library. I made the decision to build my own hook that would offer the window's width and height rather than bringing a full third-party library. This hook was named useWindowSize.
How to Create the Hook
We'll start by making a new file.js file with the same name as the hook useWindowSize in our utilities (utils) subdirectory. While exporting the custom react hook, I'll import React (to use hooks).
Now that I'm utilizing this within a server-rendered Gatsby site, I need to find out how big the window is. However, given that we are on the server, we cannot have access to it.
We can test whether the type of window is not equal to the string undefined to make sure we are not on the server.
In that situation, we can go back to an object's default width and height, let's say 1200 and 800:
How to Get the Width and Height from Window
Assuming we are on the client and have access to the window, we can use the useEffect hook to interact with the window and carry out a side effect. To ensure that the effect function is only run once the component (in which this hook is called in) is mounted, we'll add an empty dependencies array.
We can add an event listener and watch for the resize event to determine the window's width and height. Additionally, we can update a piece of state (made with useState) that we'll call windowSize anytime the browser sizes change, and the setter to do so is setWindowSize.
The callback will be activated when the window is resized, and the windowSize state will then be updated with the new window sizes. We set the width of the window to obtain that. innerWidth and window height innerHeight.
How to Add SSR Support
However, the code as it is currently written will not function. This is so that they can't be called conditionally, which is a fundamental hook rule. As a result, before our useState or useEffect hooks are invoked, we are unable to put a conditional above them.
In order to correct this, we will conditionally set useState's initial value. To conduct the same check to see if the window is not equal to the string undefined, we'll add a variable called isSSR.
And after confirming that we are on the server, we will use a ternary to set the width and height. If not, we'll use window.innerWidth and window.innerHeight. If we are, we'll use the default value.
Finally, we must consider the time when our components unmount. What should we do? We must get rid of the resize listener.
How to Remove the Resize Event Listener
Returning a function from useEffectand will enable you to do that. The listener with the window will be taken out. removeEventListener.
But instead of two separate functions, as we have above, we need a reference to just one. To do this, we'll make changeWindowSize a shared callback function for both listeners.
Finally, we shall return our windowSize state at the conclusion of the hook. The end of that.
Final Result
Simply import the hook where you need it, call it, and utilize the width anywhere you wish to hide or expose specific parts.
This is 500 pixels wide in my situation. As you can see in the example above, I want to conceal all of the other links and simply display the Join Now button there:
This hook will work on any server-rendered React app, such as Gatsby and Next.js.
3. useDeviceDetect Hook
As I was creating a new landing page for one of my courses, I came across a really peculiar mistake on mobile. The designs looked fantastic on desktop computers.
But everything was damaged and out of position when I checked it on my phone.
I found the culprit in a library called react-device-detect that I was utilized to determine whether or not users were in possession of mobile devices. If so, I'd take the header off.
The issue was that this library lacks server-side rendering functionality, which is what Gatsby relies on by default. As a result, I had to develop my own technique to determine whether a user was using a mobile device. To address this, I built a special hook called useDeviceDetect.
How I Created the Hook
For this hook, I made a separate file called useDeviceDetect.js in my utils folder. I made a function named useDeviceDetect and imported React since hooks are just sharable JavaScript functions that use React hooks.
How to Extract the Window's User Agent
Through the userAgent attribute, we may determine whether we can obtain details about the user's device (located on the navigator property of window).
We must gain access to the user agent within the useEffect hook since using the window API as an API or external resource would be considered a side effect.
We may use typeof navigator to ascertain whether we are on the client or server once the component has mounted. We won't have access to the window if we're on the server. Since it is absent, typeof navigator will be equivalent to the string undefined. Otherwise, we'll be able to access our user agent property if we're on the client.
To obtain the userAgent information, we may express all of this using a ternary:
How to Identify a Mobile Device Using User Agent
If a user is accessing a website via a mobile device, their userAgent string value will be one of the following:
IEMobile, Opera Mini, iPhone, iPad, BlackBerry, Android, BlackBerry, iPhone, iPod, iPad, or WPDesktop.
All we need to do is take the string we receive and check to see whether it matches any of these strings using the.match() method and a regex. We’ll store it in a local variable called mobile.
The useState hook, which we'll initialize with the value false, will be used to save the outcome. We'll make an equivalent state variable for it called isMobile, and setMobile will be its setter.
We will therefore set the mobile value in the state once we have it. Finally, we will return an object from the hook so that we can later add more values if we decide to give it greater functionality.
We'll add the property and value "isMobile" to the object:
Final Result
We can run the hook on the landing page and then utilize that property to get it from the destructured object and use it where we need it.
Conclusion
- A hook in React is a function that allows a component to interact with React features such as state and lifecycle methods.
- React custom hooks are user-defined hooks that allow developers to abstract component logic into reusable functions.
- React custom hooks are a new feature introduced in React 16.8. Custom hooks allow developers to abstract component logic into reusable functions that can be shared among multiple components.
- Custom react hooks are subject to the same general guidelines as React Hooks, including
- Only call Hooks at the top level. Don’t call Hooks inside loops, conditions, or nested functions
- Only call Hooks from React function components
- Don’t call Hooks from regular JavaScript functions
- Using react custom hooks has a number of benefits:
- We don't have to write the same hook twice because we can use it repeatedly.
- A cleaner codebase can be achieved by isolating all component logic into a hook.
- The logic of the hook only needs to be altered once, if at all.
- there is a significant probability that the hook you had in mind has already been developed.
- Create your own custom React hooks by breaking down three hooks, along with what problems they were created to solve.
- useCopyToClipboard Hook
- usePageBottom Hook
- useDeviceDetect Hook
