How to deploy a React application to Netlify?
Overview
So far, you would have made your react app and run it locally. The problem is that others cannot view a local application on the web, and moreover, what is the point of a “web application” if it is not available on the web. There are many ways to do so. One of them is using Netlify, which provides a serverless backend for web applications.
Introduction
To access our application on the web, we have to first deploy the web application on the web. We have to transfer our code from local storage or a version control system (like GitHub) to a hosting platform so that it can be stored there and can be made accessible to users as a web application. This process is known as Deployment. Usually, the cloud, as well as the local server, is used for this purpose.
When cloud services like Netlify were not introduced, deploying or hosting was exclusively accomplished through hosting companies that needed all static files(files produced after executing npm run build, known as build files) to be reuploaded each time you made a change. The files were uploaded via the FTP software or a complicated, stressful, and technically demanding web hosting administration system such as cPanel.
Netlify solves the above-mentioned problem. Netlify offers many techniques for deploying your web application while keeping certain use cases in mind.
Pre-Requisites
Let us review the requirements before we begin our how to deploy react app on netlify tutorial:
- GitHub, GitLab, or Bitbucket accounts are required.
- A Netlify account is required.
- Ensure npm is installed, which comes preinstalled with Node (version 12 or higher is required) or yarn.
- Basic familiarity with using the terminal (optional).
Transform Your Career
Choose from our industry-leading programs designed for career success
Modern Software and AI Engineering Program
Master full-stack development with AI integration

Modern Data Science and ML with specialisation in AI
Advanced data science techniques with AI specialization
Advanced AIML with Specialisation in Agentic AI
Deep dive into AIML with focus on Agentic systems
DevOps, Cloud & AI Platform Engineering
Build and manage AI-powered cloud infrastructure
AI Engineering Advanced Certification by IIT-Roorkee
Premier AI engineering certification from IIT-Roorkee
Why Use Netlify?
Netlify is a remote-first cloud computing firm that provides a development platform for web apps that includes build, deploy, and serverless backend services. It is made to maximise productivity by making it possible for engineers and developers to create, test, and deploy websites and applications rapidly (especially those that are frontend centric).
Your GitHub repository is connected to Netlify and the source code is pulled from there. Then a build process will be launched so that static files can be generated from your website or application's pages.
The following are just a handful of the many benefits that Netlify provides.
- Netlify is a little bit cheaper; in the long term, building and running a static website is going to cost less. Also, there is a free plan which will fulfill all the needs of personal projects and hobby sites.
- Through automatic pre-rendering and global distribution, Netlify significantly increases site speed.
- The most straightforward approach to deploying a website is to utilise GitHub, Bitbucket, or GitLab to configure continuous deployment, which Netlify makes really easy. With its integrated DNS management system, Netlify makes the process of launching a website extremely simple.
- Every time you publish your project from a Git repository, Netlify turns on Continuous Deployment for you automatically. As a result, each time you push a new commit to your repository, Netlify automatically builds it for you and updates your project to the most recent version. All of this is accomplished without the need to write a lengthy set of rules or a configuration file.
- Only a particular branch of our project on Git may very easily be deployed at a time. This is useful for immediately determining how a Pull Request(PR) will impact your website and for testing brand-new features that could or might not be pushed to the main/master branch.
- With Netlify, you and your team can can view beforehand the deployment you are about to make so that you can see how the changes will appear finally without pushing the changes onto the live application.
- We can get submissions from users using Netlify's convenient form submission tool. Without writing any backend programming or paying for any third-party services, you can quickly set up a form on your static website and receive submissions. You can even customise your own success page and have the option to activate reCAPTCHA.
- With the help of Netlify, you may automatically optimise assets for your project. With a few simple clicks, you can enhance the efficiency of your website with options like image compression, CSS and JS minification, and nice URLs.
Pushing Your Code to GitHub
Prior to deploying your applications to Netlify, your project must be pushed to a Git provider. In this tutorial, we will use GitHub to push our React application on to via the terminal.
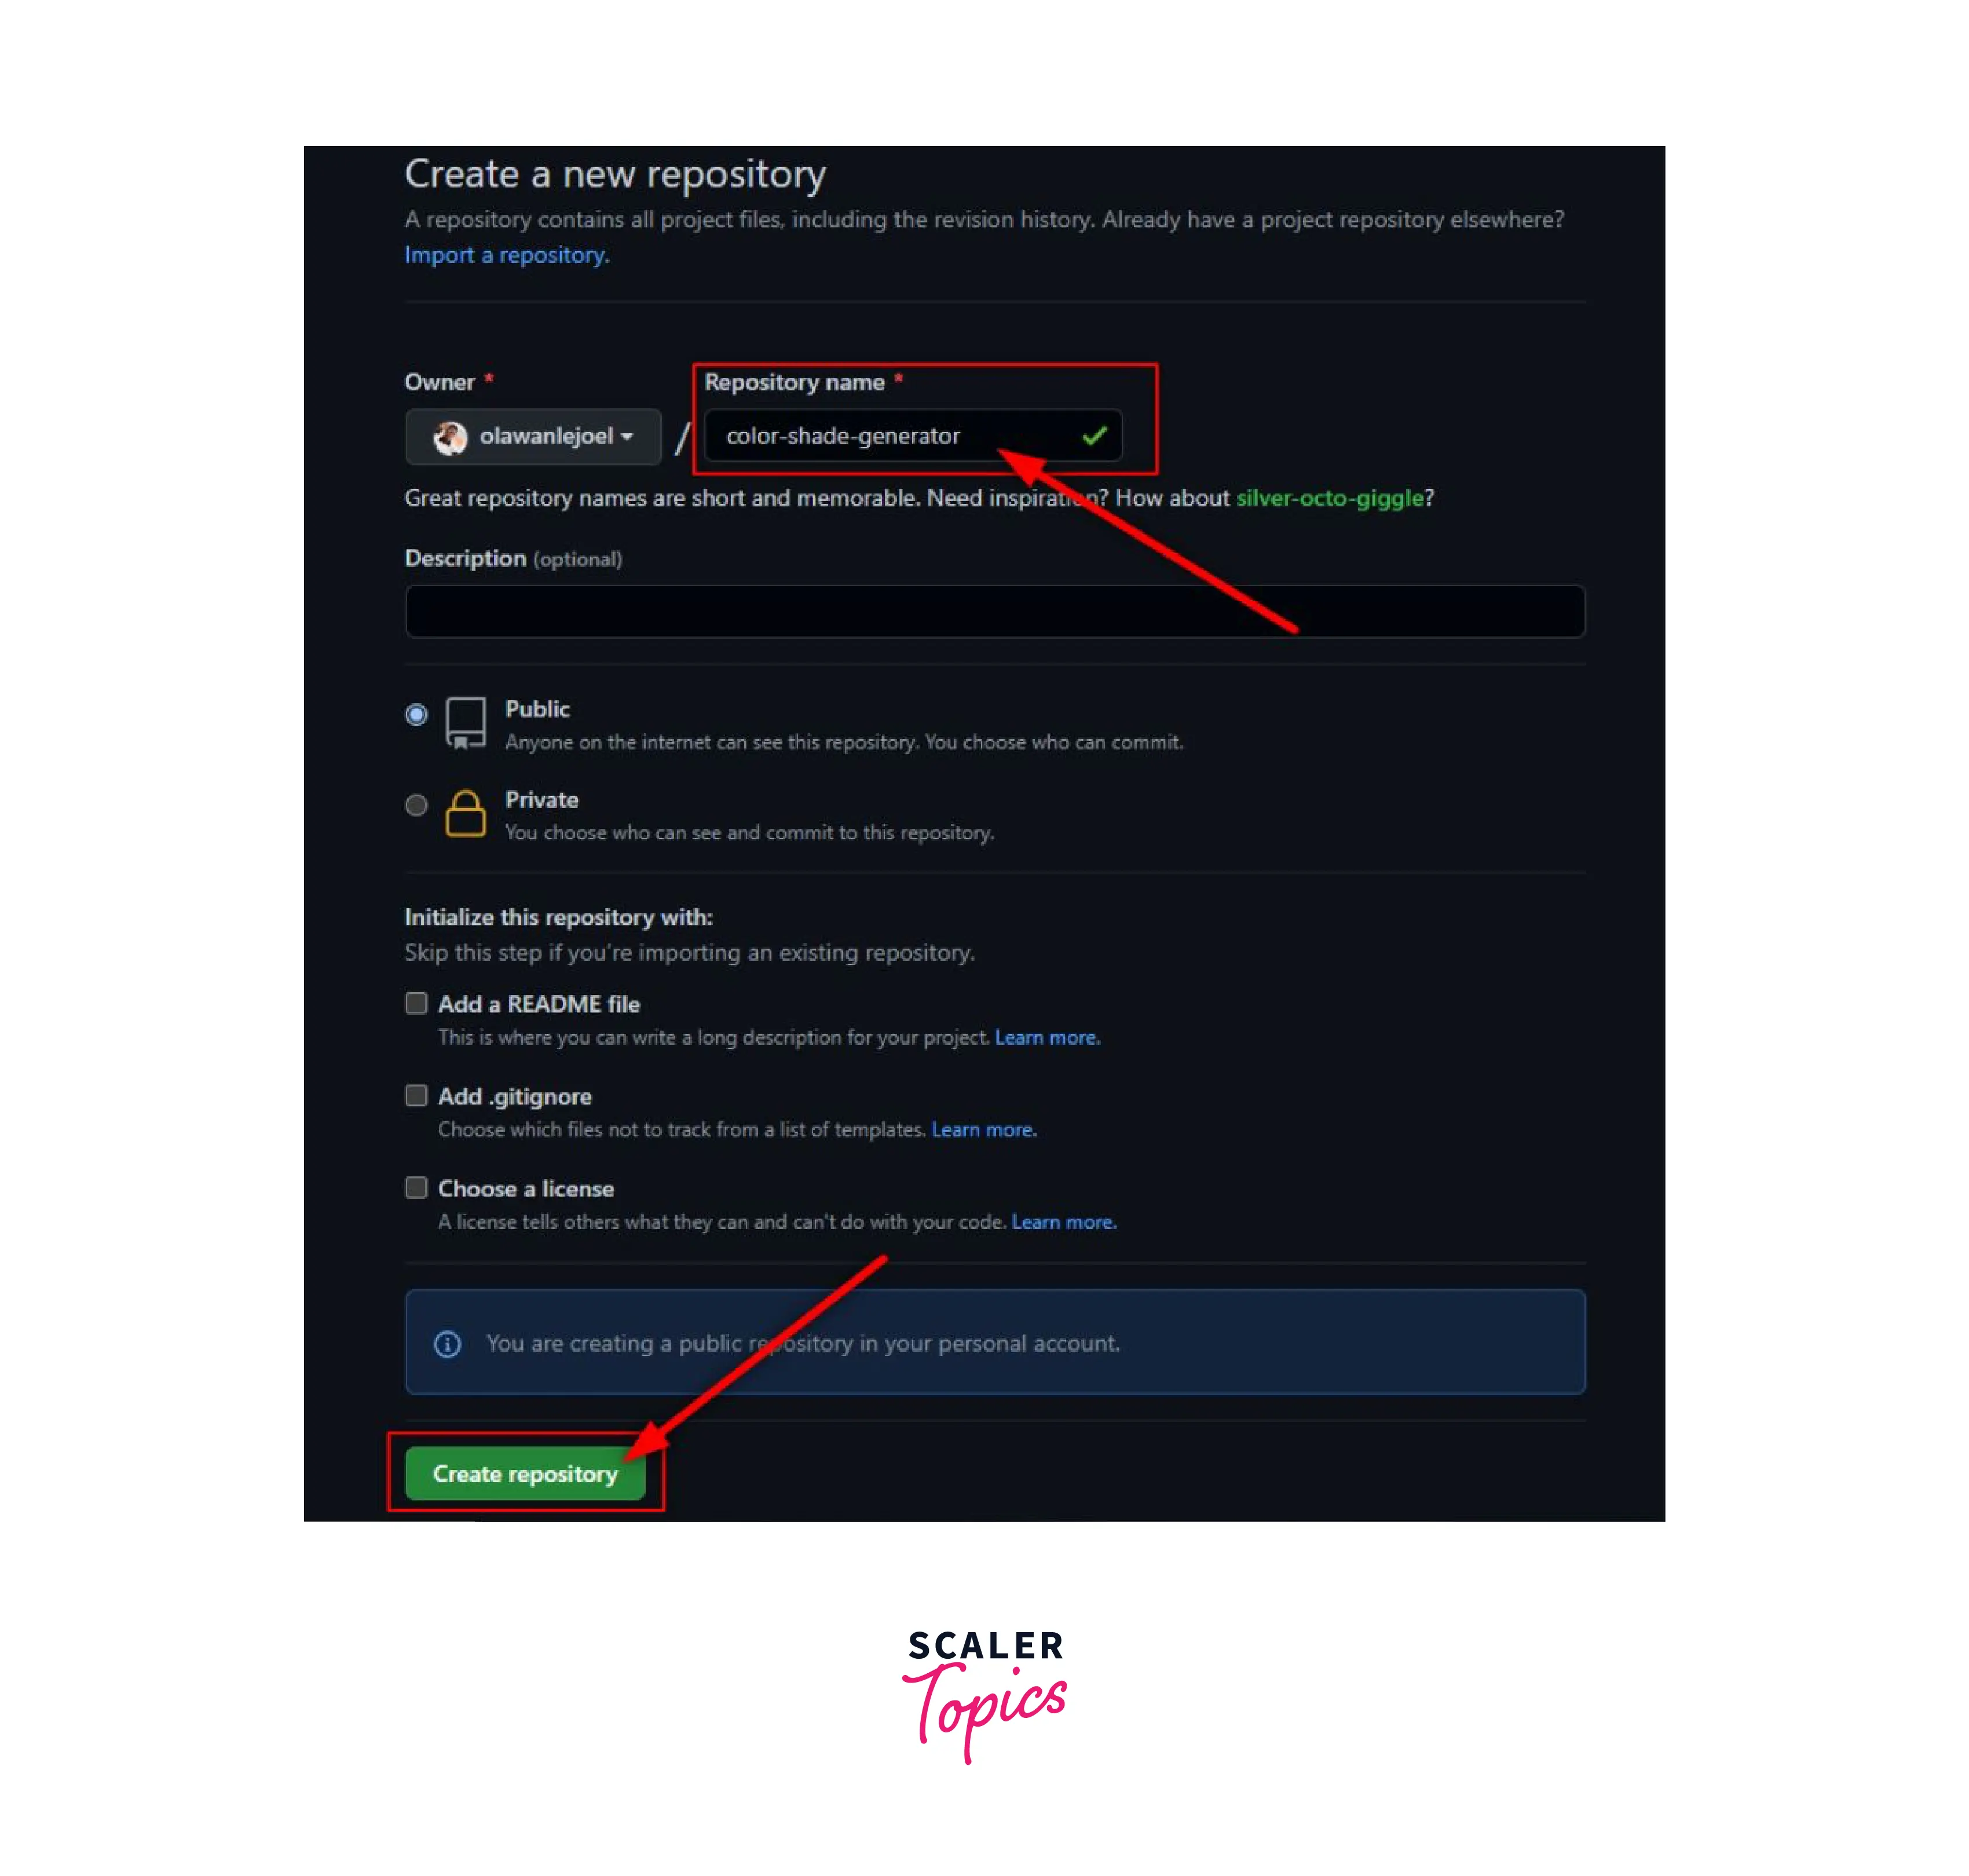
Let us begin by setting up a repository on GitHub. Make sure to complete the required fields, then click on the Create repository button.
Open the folder in which you have your react app.
As soon as we return to the terminal, all the files need to be staged so that we can commit those files to the repository. After that, a new branch called main is to be created using the following methods:
After completing this, we can use the following commands to push our files to the remote repository that we have created earlier:
The repository needs to be reloaded to view your code. The three main ways to deploy apps on Netlify are as follows. Let us examine each approach individually before comparing them all.
Steps to Deploying Your React App
Let us begin and see, in detail, the different methods and the steps describing how to deploy react app on netlify.
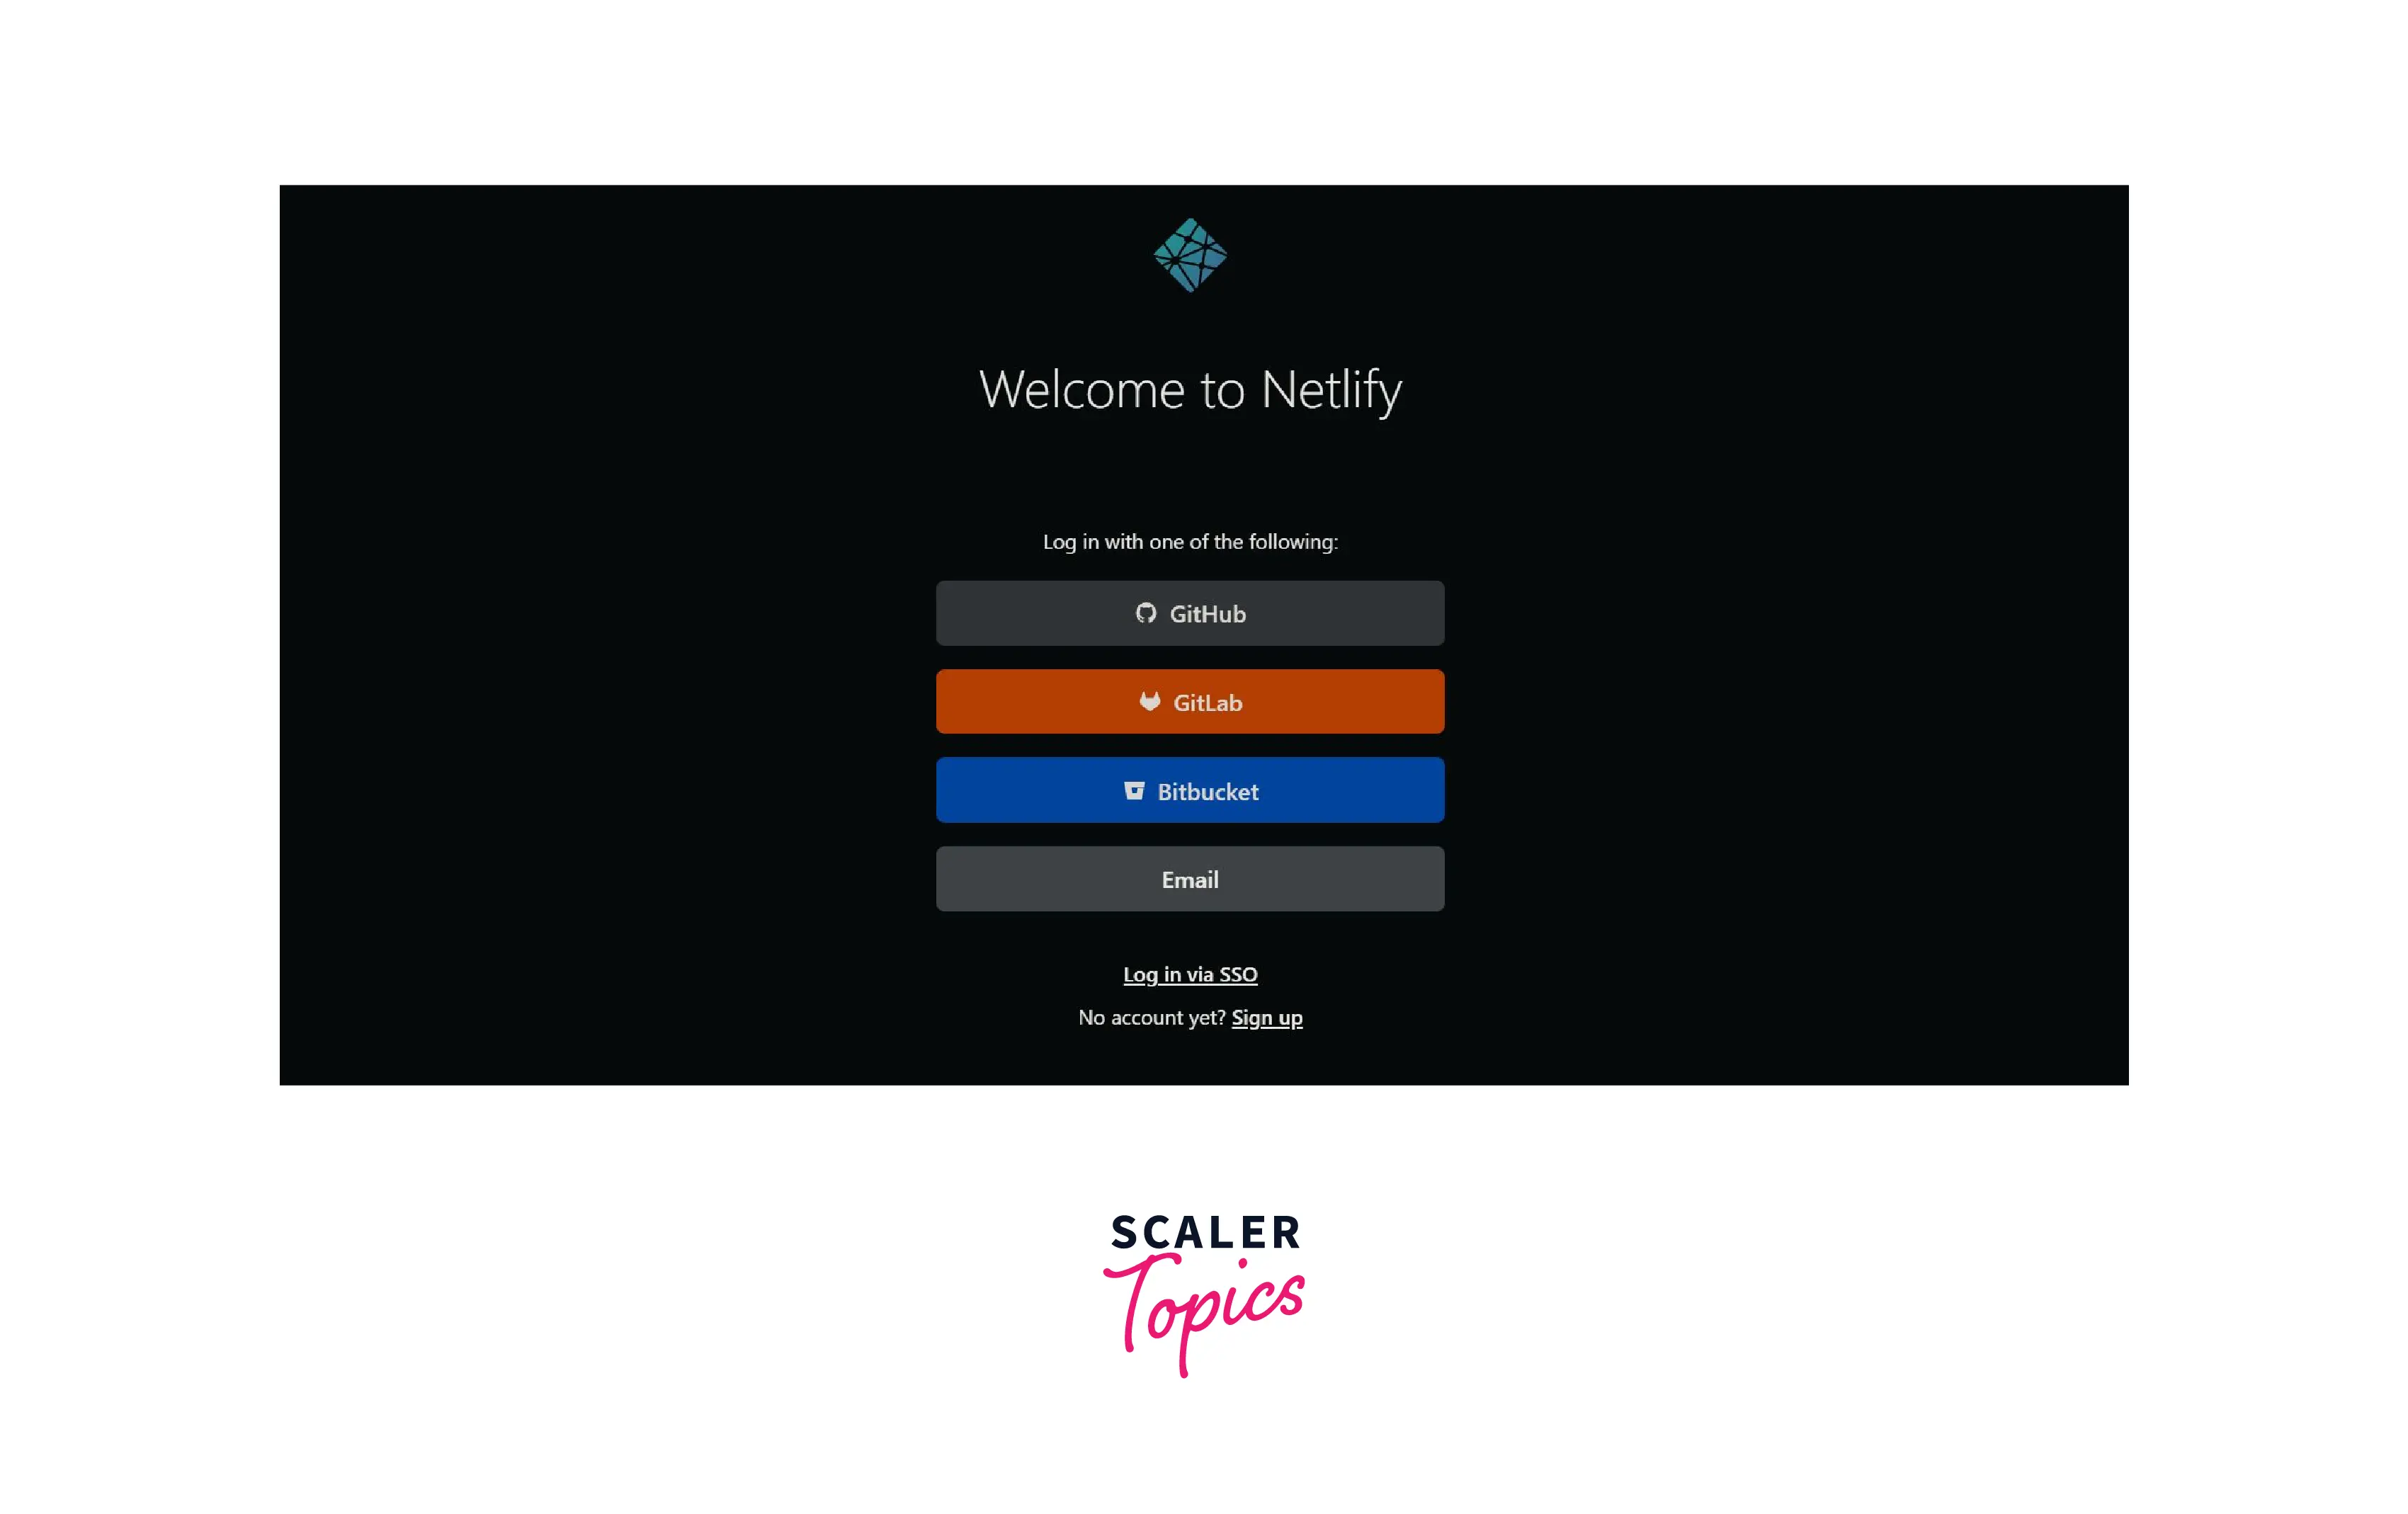
With Netlify's free plan, we can either login or set up an account using any of the methods mentioned on the login page of Netlify(GitHub, GitLab, etc.).
Once logged in, you will be sent to your Netlify dashboard, where you can deploy your app to Netlify using either the drag-and-drop approach or the project import method.
Turn Learning into Career Growth
Deploy Application to Netlify with Drag-and-Drop
Firstly, open the folder which contains your react app. Then use the following command to produce a build of your application.
After this command has been executed successfully, your build folder, containing all the files that are ready for production(the files that will be uploaded to Netlify via drag-and-drop), will be created.
NOTE: Only static files such as HTML, JavaScript, and CSS will work with this. Because of this, we had to first create a build of our project so that static files could be produced.
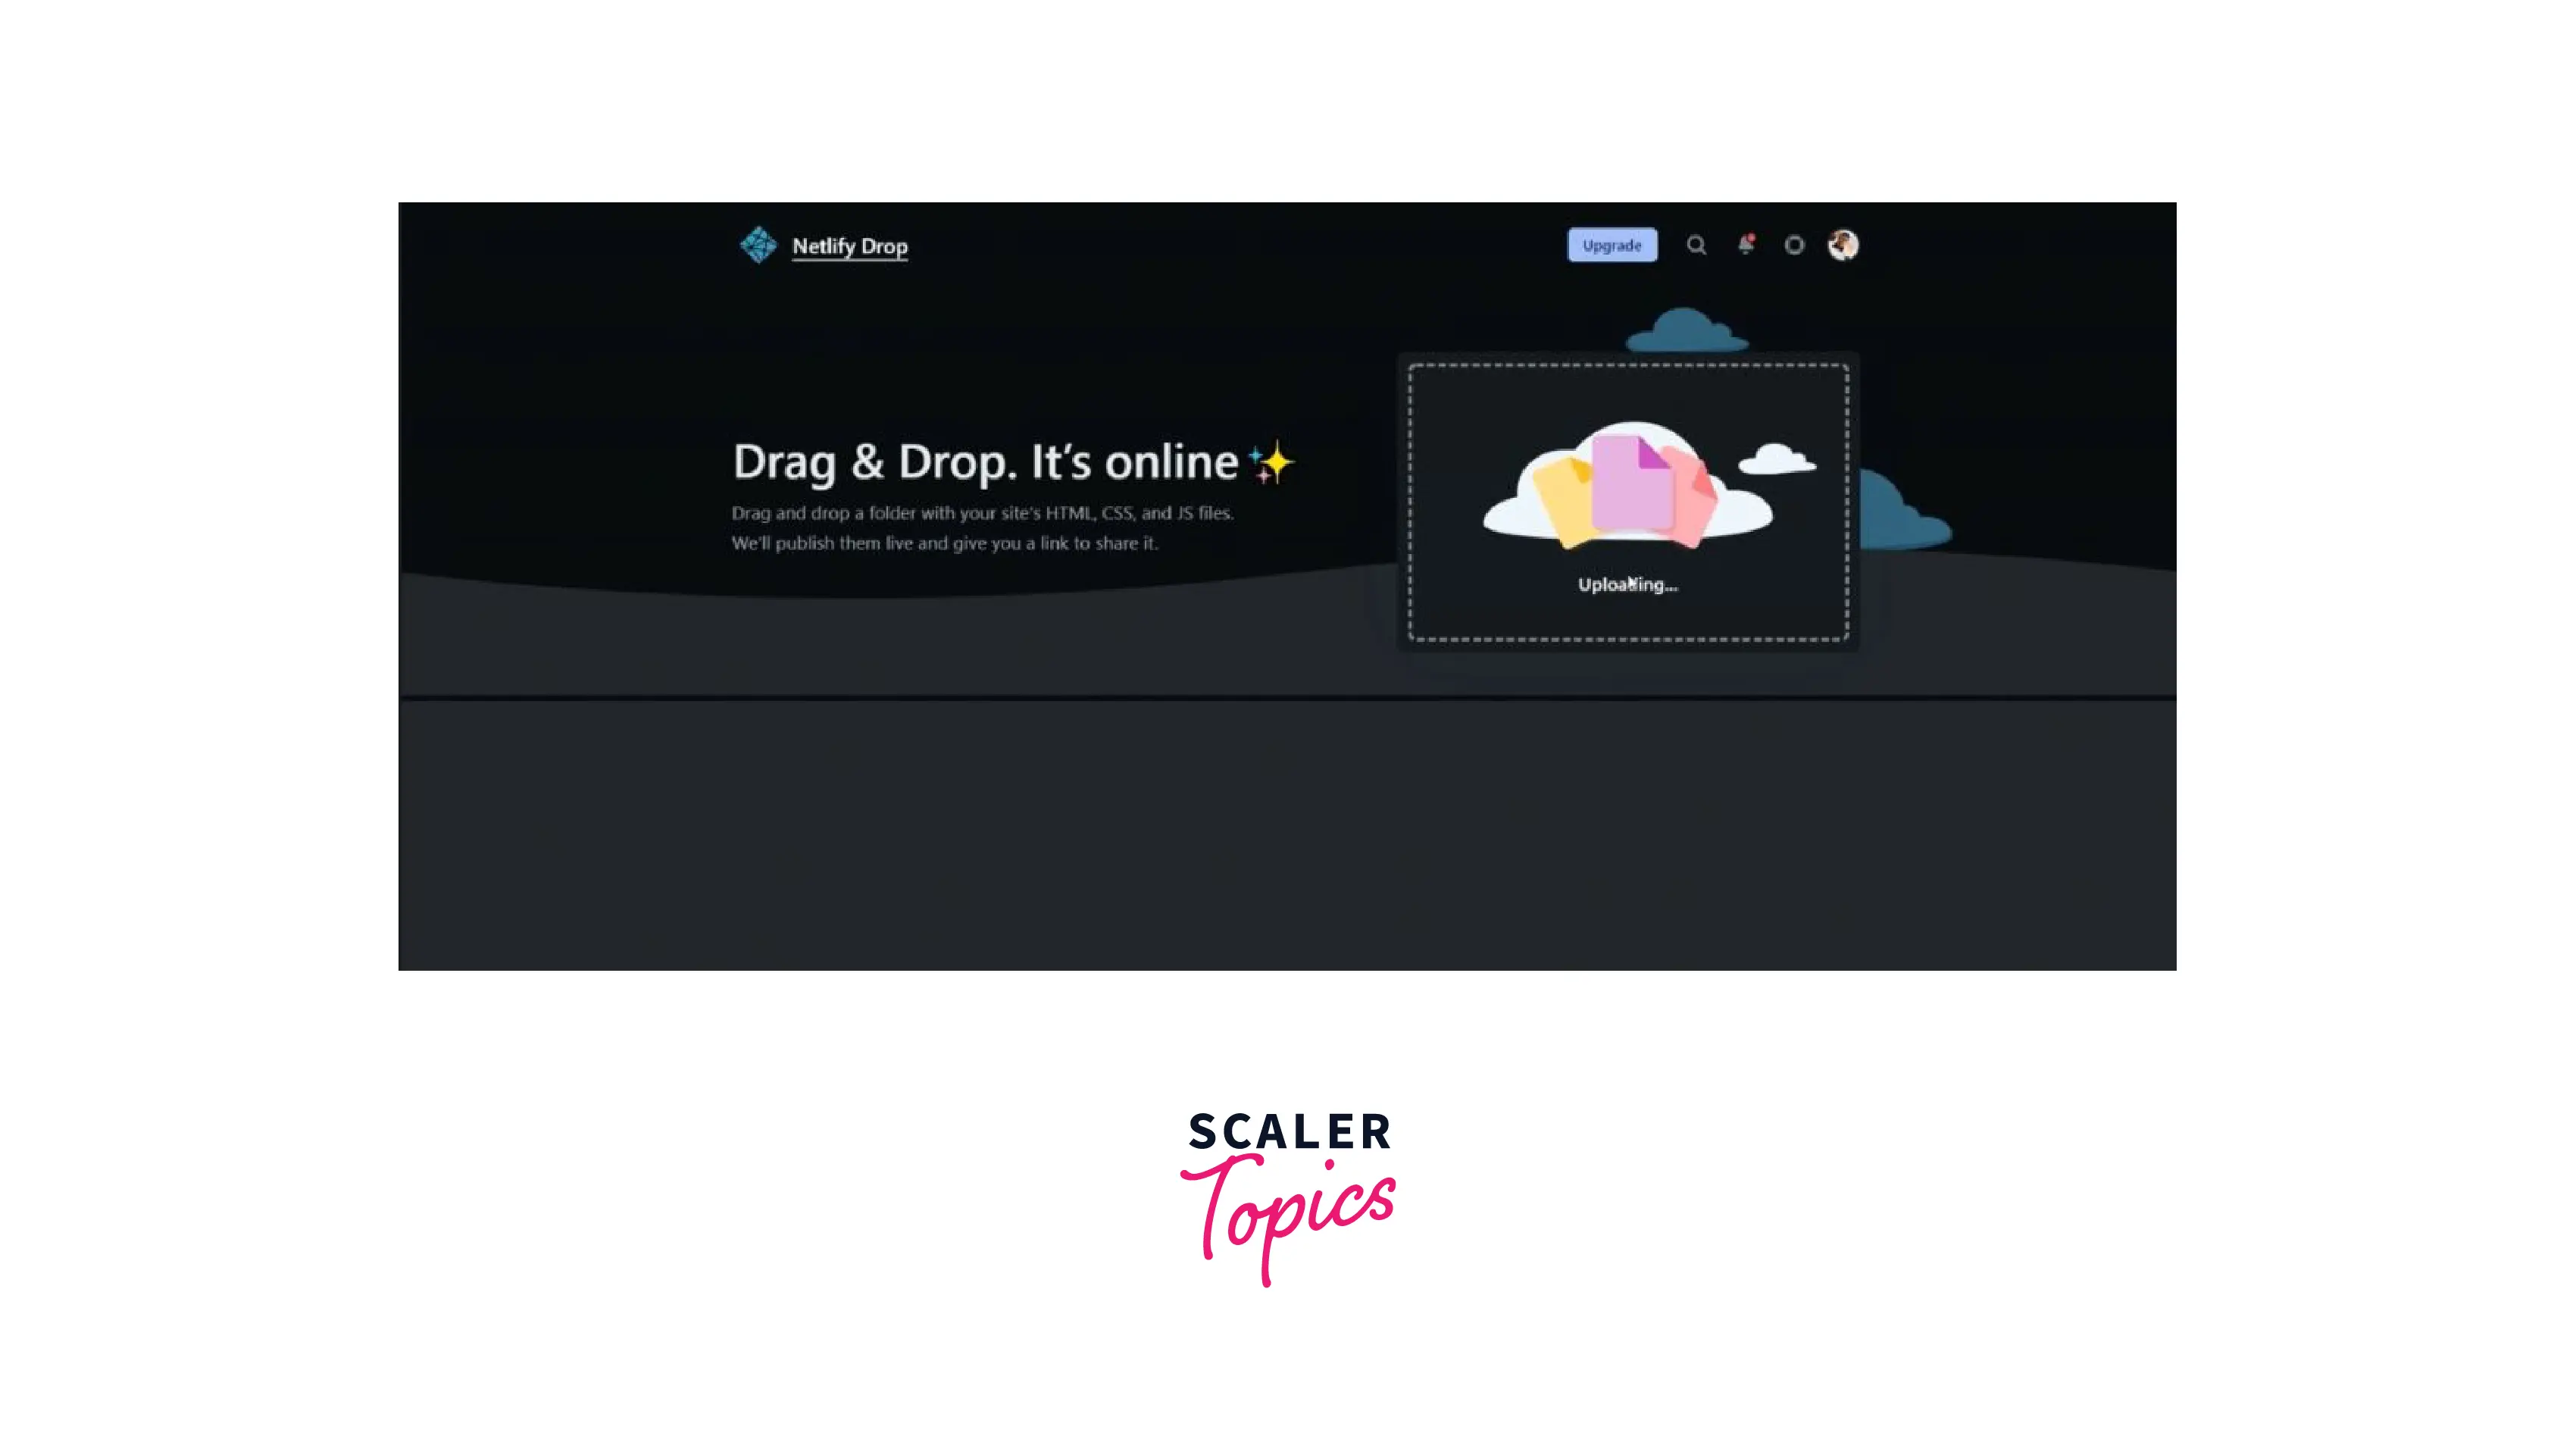
On the Netlify Overview page, select Add New Site > Deploy Manually. By doing this, we will be forwarded to the webpage, where we will drag-and-drop our static files.

The last step would be to drop the created build folder so that it is immediately deployed to a live URL.
Scaler Placement Report and Statistics
Scaler learners achieved 2.5x salary growth with average post-Scaler CTC reaching ₹23L.
Deploy Application to Netlify with Netlify's CLI
Using the command-line interface (CLI) of Netlify, our application can be directly deployed from the command line. Furthermore, we can configure continuous deployment such that Netlify publishes new iterations of our website each time we push updates to the associated Git repository.
The initial step is to use the below-mentioned command in the terminal to install the Netlify's CLI:
With this command, Netlify will be installed globally. If you wish for your Netlify CLI to be installed locally, use the below-mentioned command from the project's root directory:
After Netlfiy CLI has been properly installed, we can use the command netlify to see a list of each command that may be used with Netlify, along with an explanation of how it works.
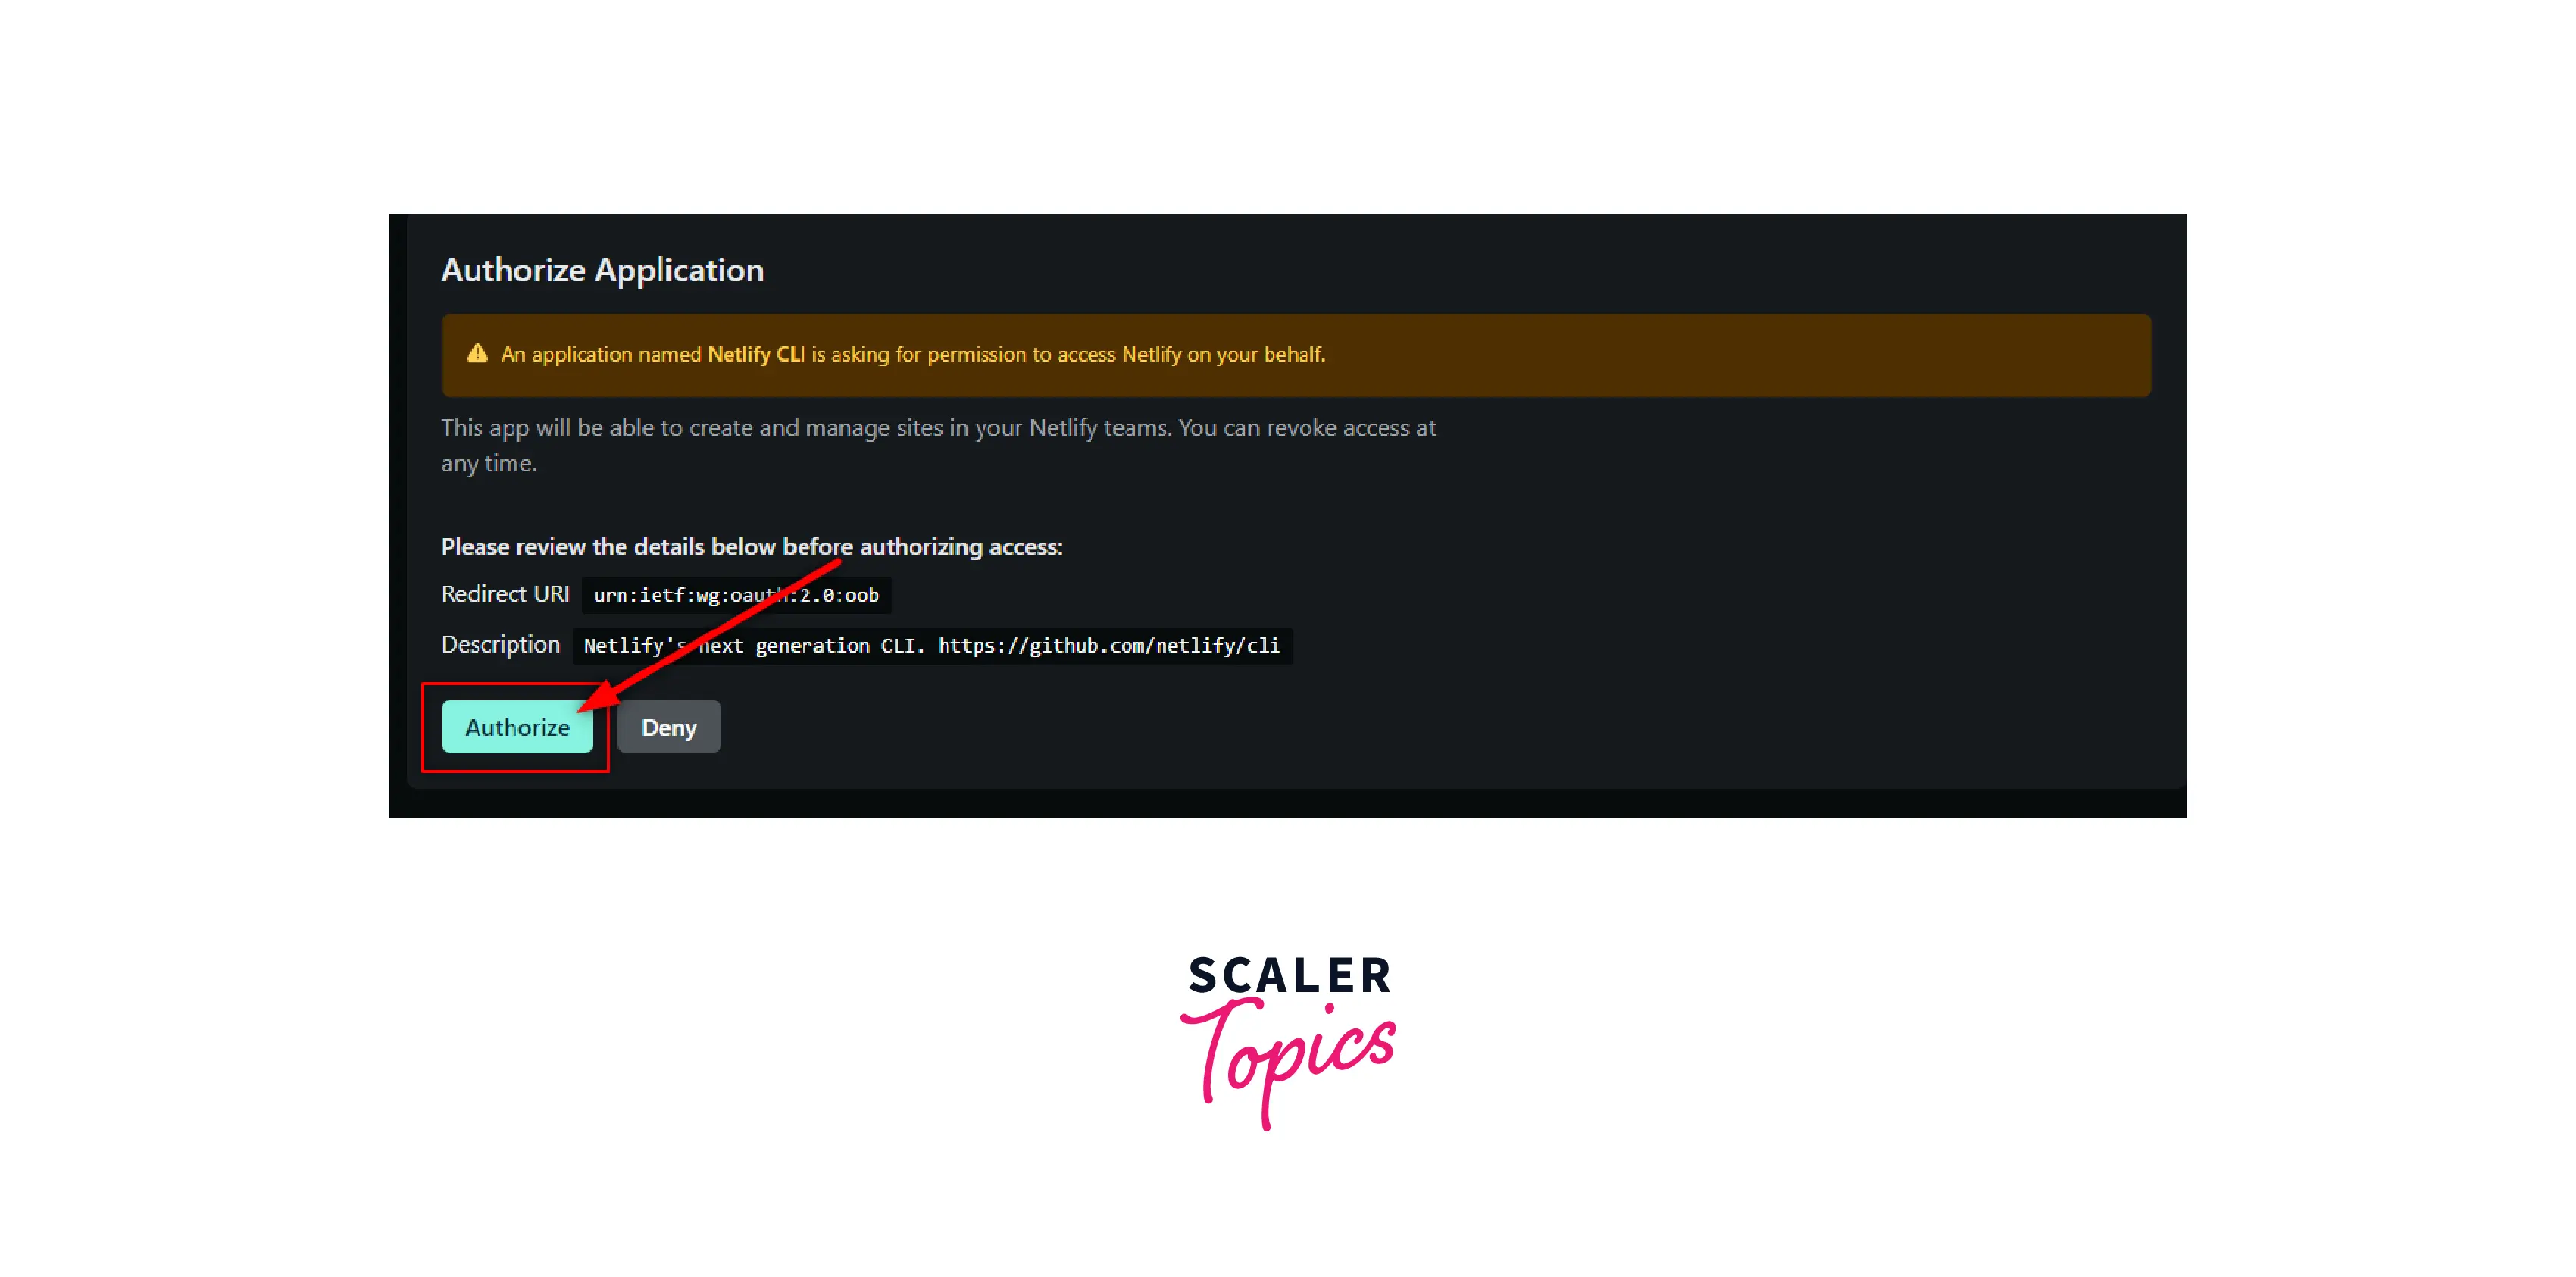
Using the command line, you must first authenticate and obtain an access token before you can use Netlify CLI to deploy your React application. In any folder, run the following command:
In order to authenticate you and give you access to the Netlify CLI, this will open a browser tab:
Using the deploy command, you can now deploy your app when this has been successful:
This will raise the following prompts about the setup:
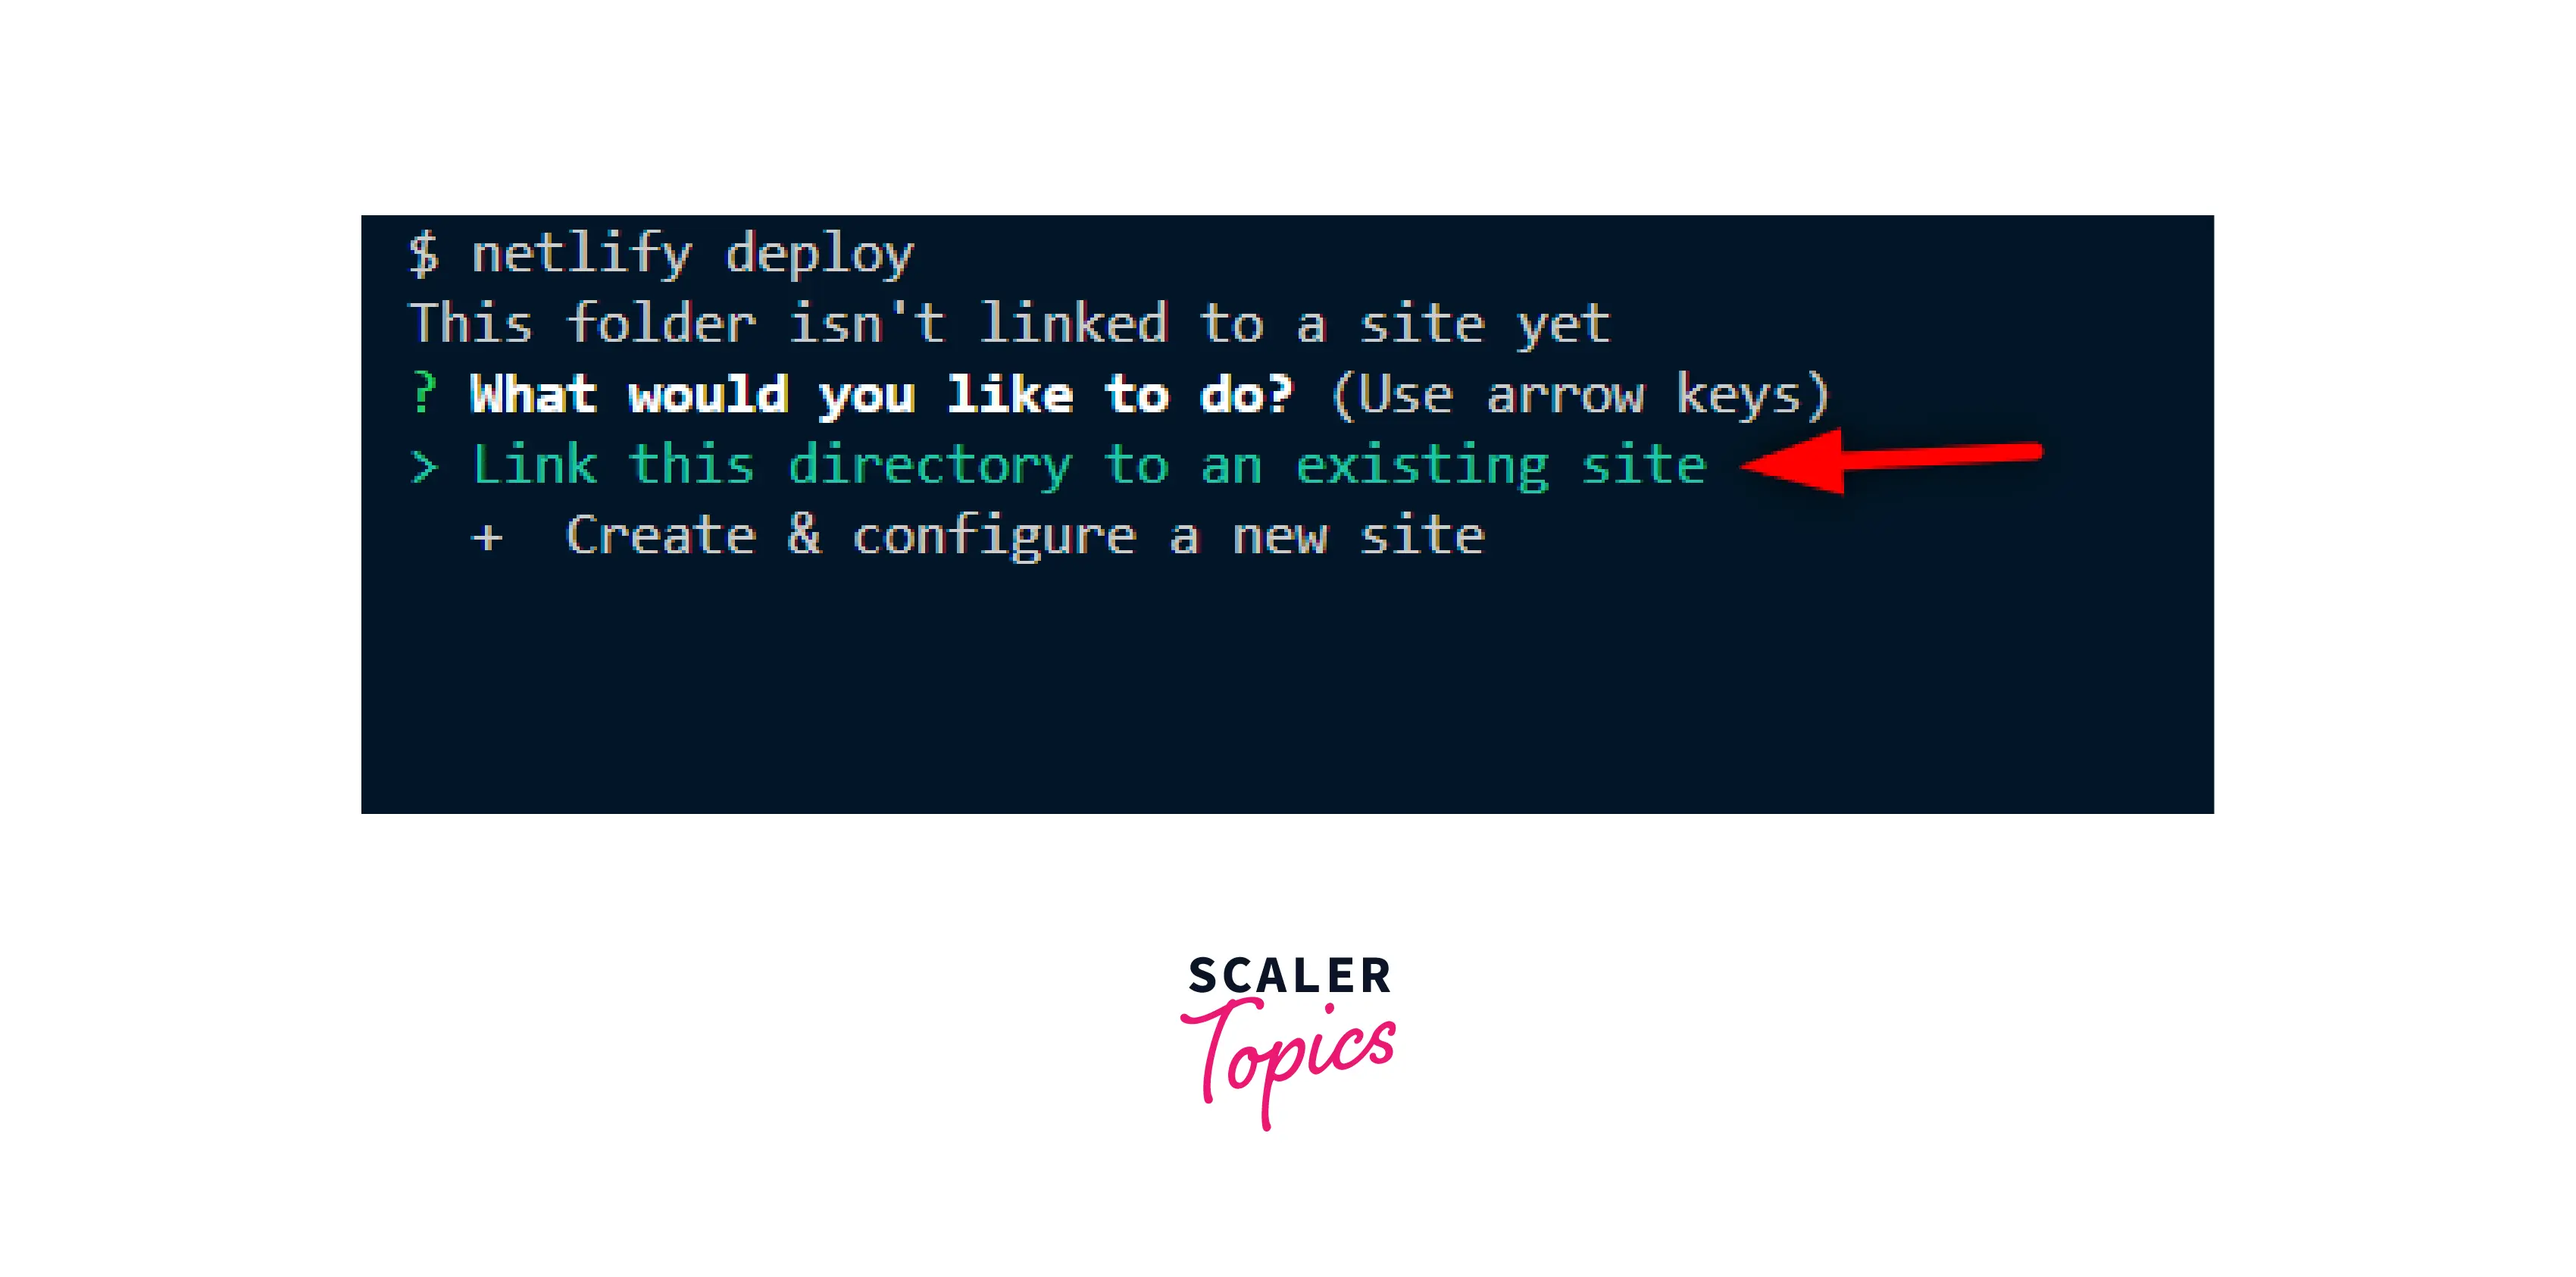
You only need to Link this directory to an existing site because your react app is already hosted on GitHub. The following query will now be raised:
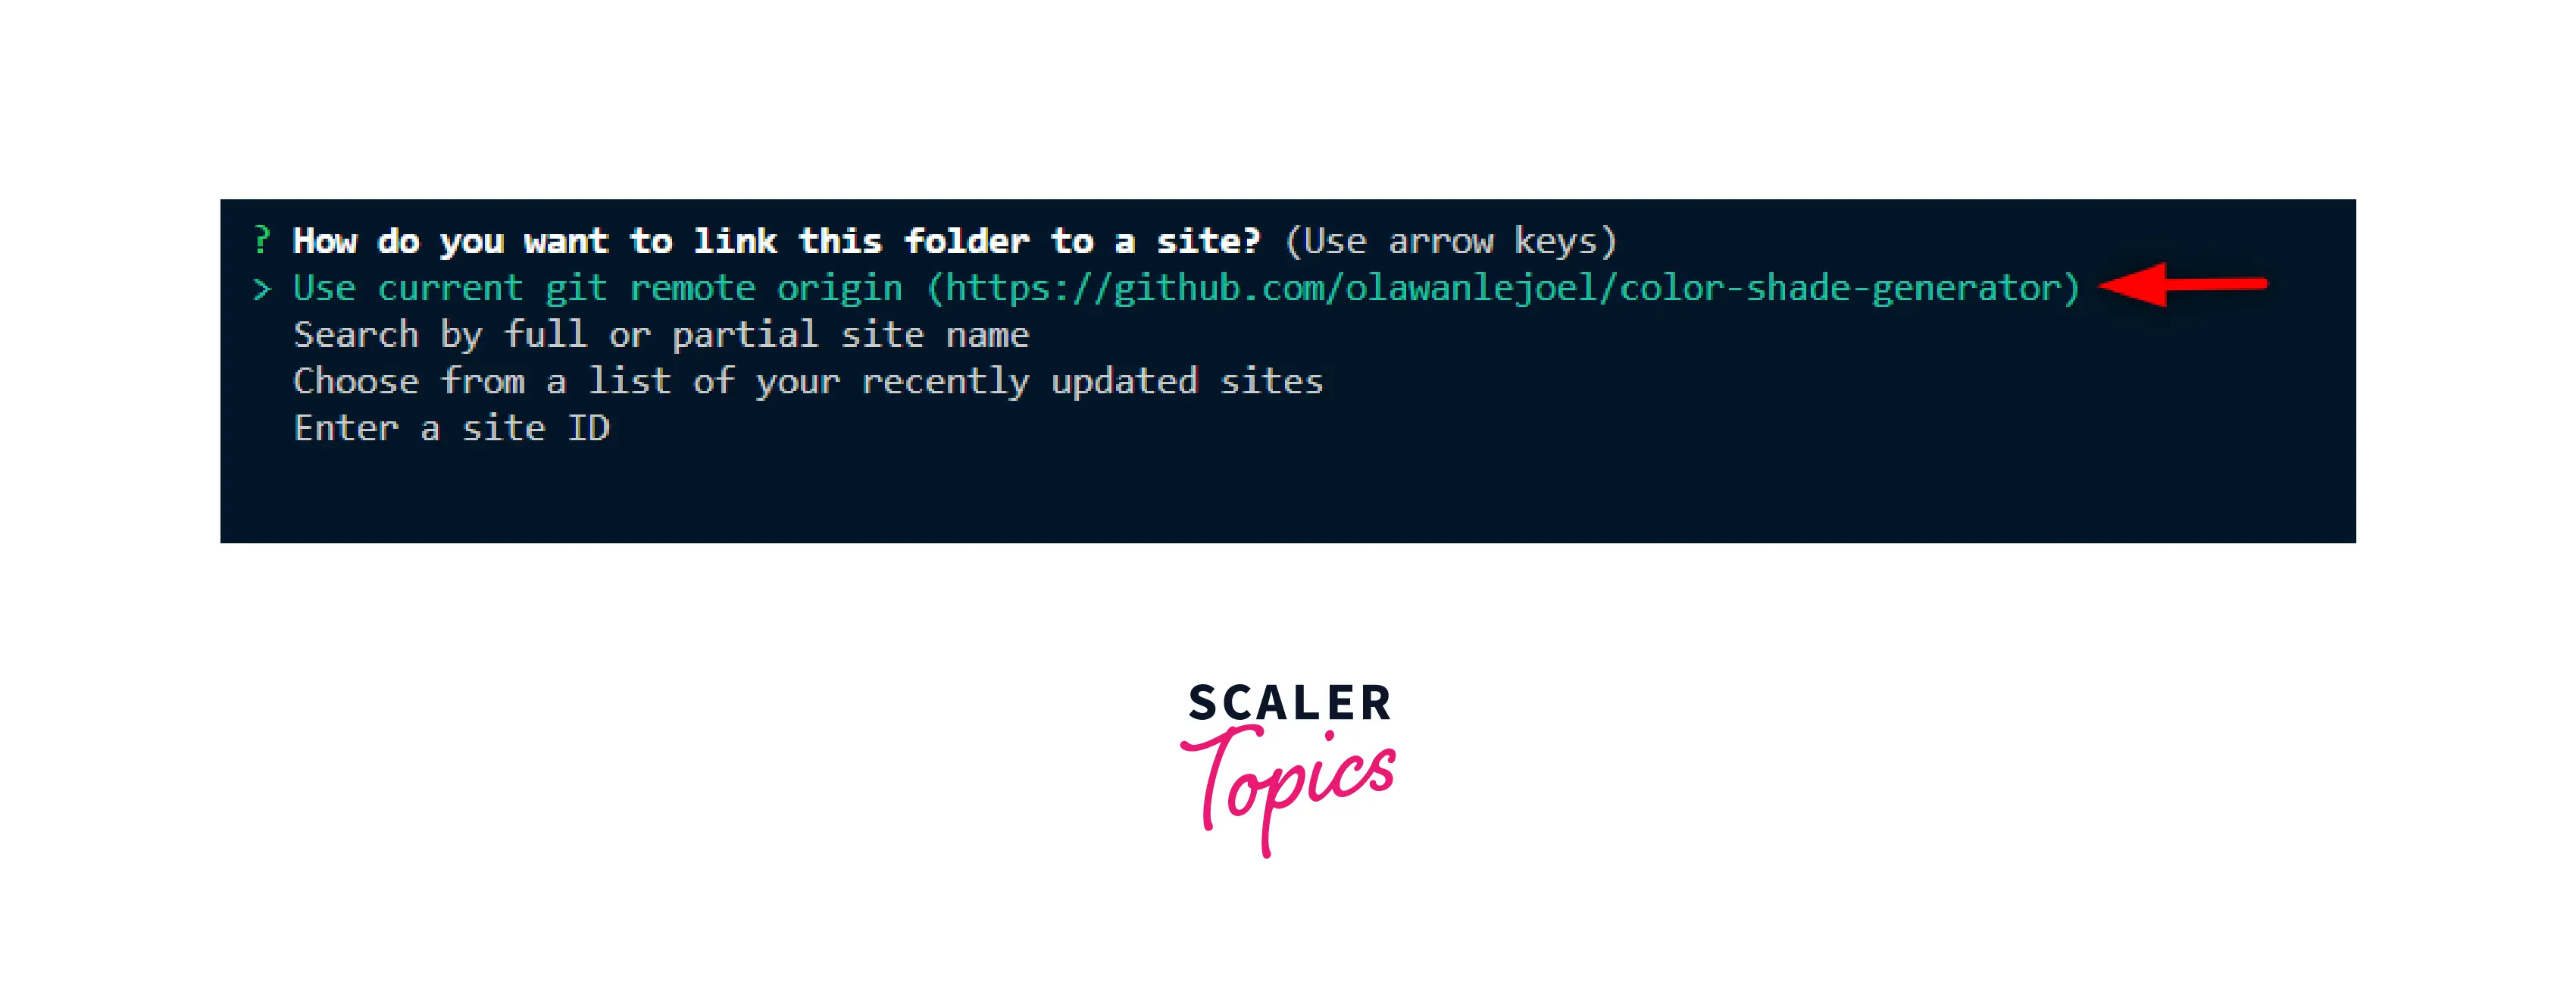
If the GitHub repository is designated as the remote origin, this folder will immediately appear and be connected to the location where we pushed our code. The URL can then be copied and pasted into a browser to access our site after the website has been created and made available:
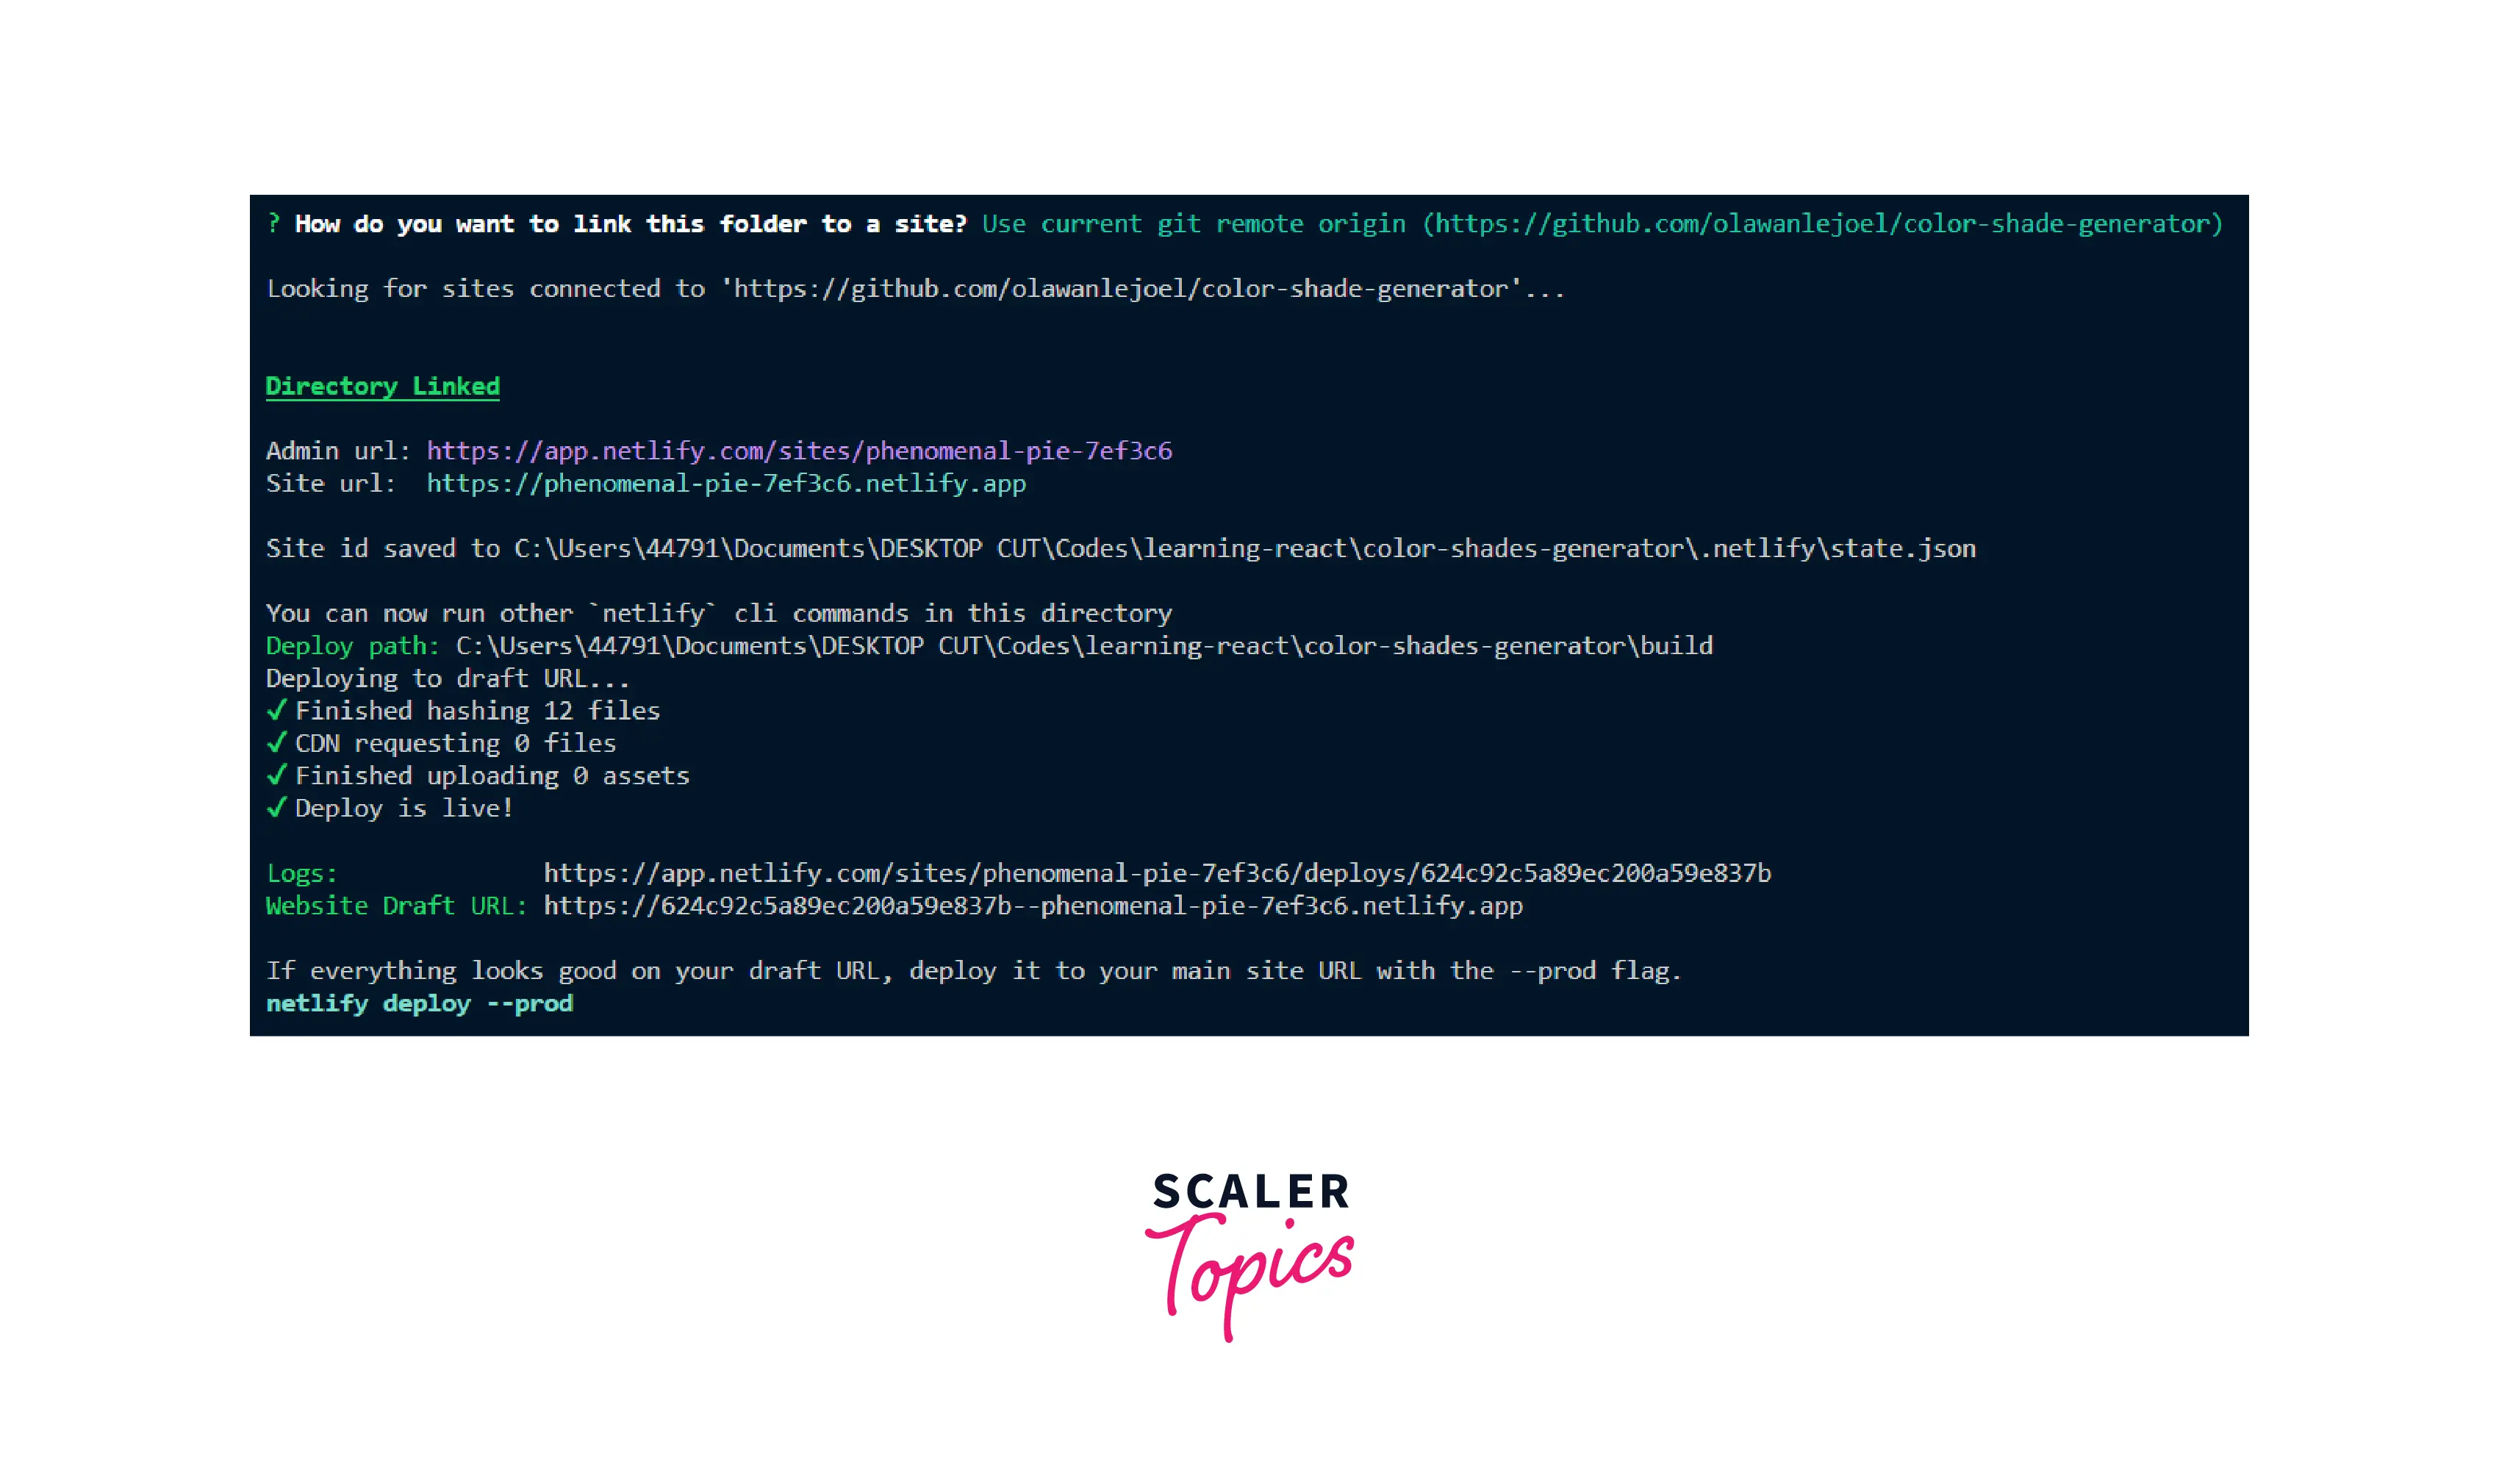
On the console, a message appers: "if everything looks good on your draft URL, deploy it to your main site URL with the --prod flag." Because of this, we are able to preview every deployment we do, giving your team and you the opportunity to see how changes will show up on the live website without deploying them first. So, to publish your application, run the following command:
Once everything has been performed successfully, two main URLs will be given to us: the Unique Deploy URL, which serves as the specific URL for each individual deployment, and the Live URL, which always displays your cuurent deployment that is the live site:
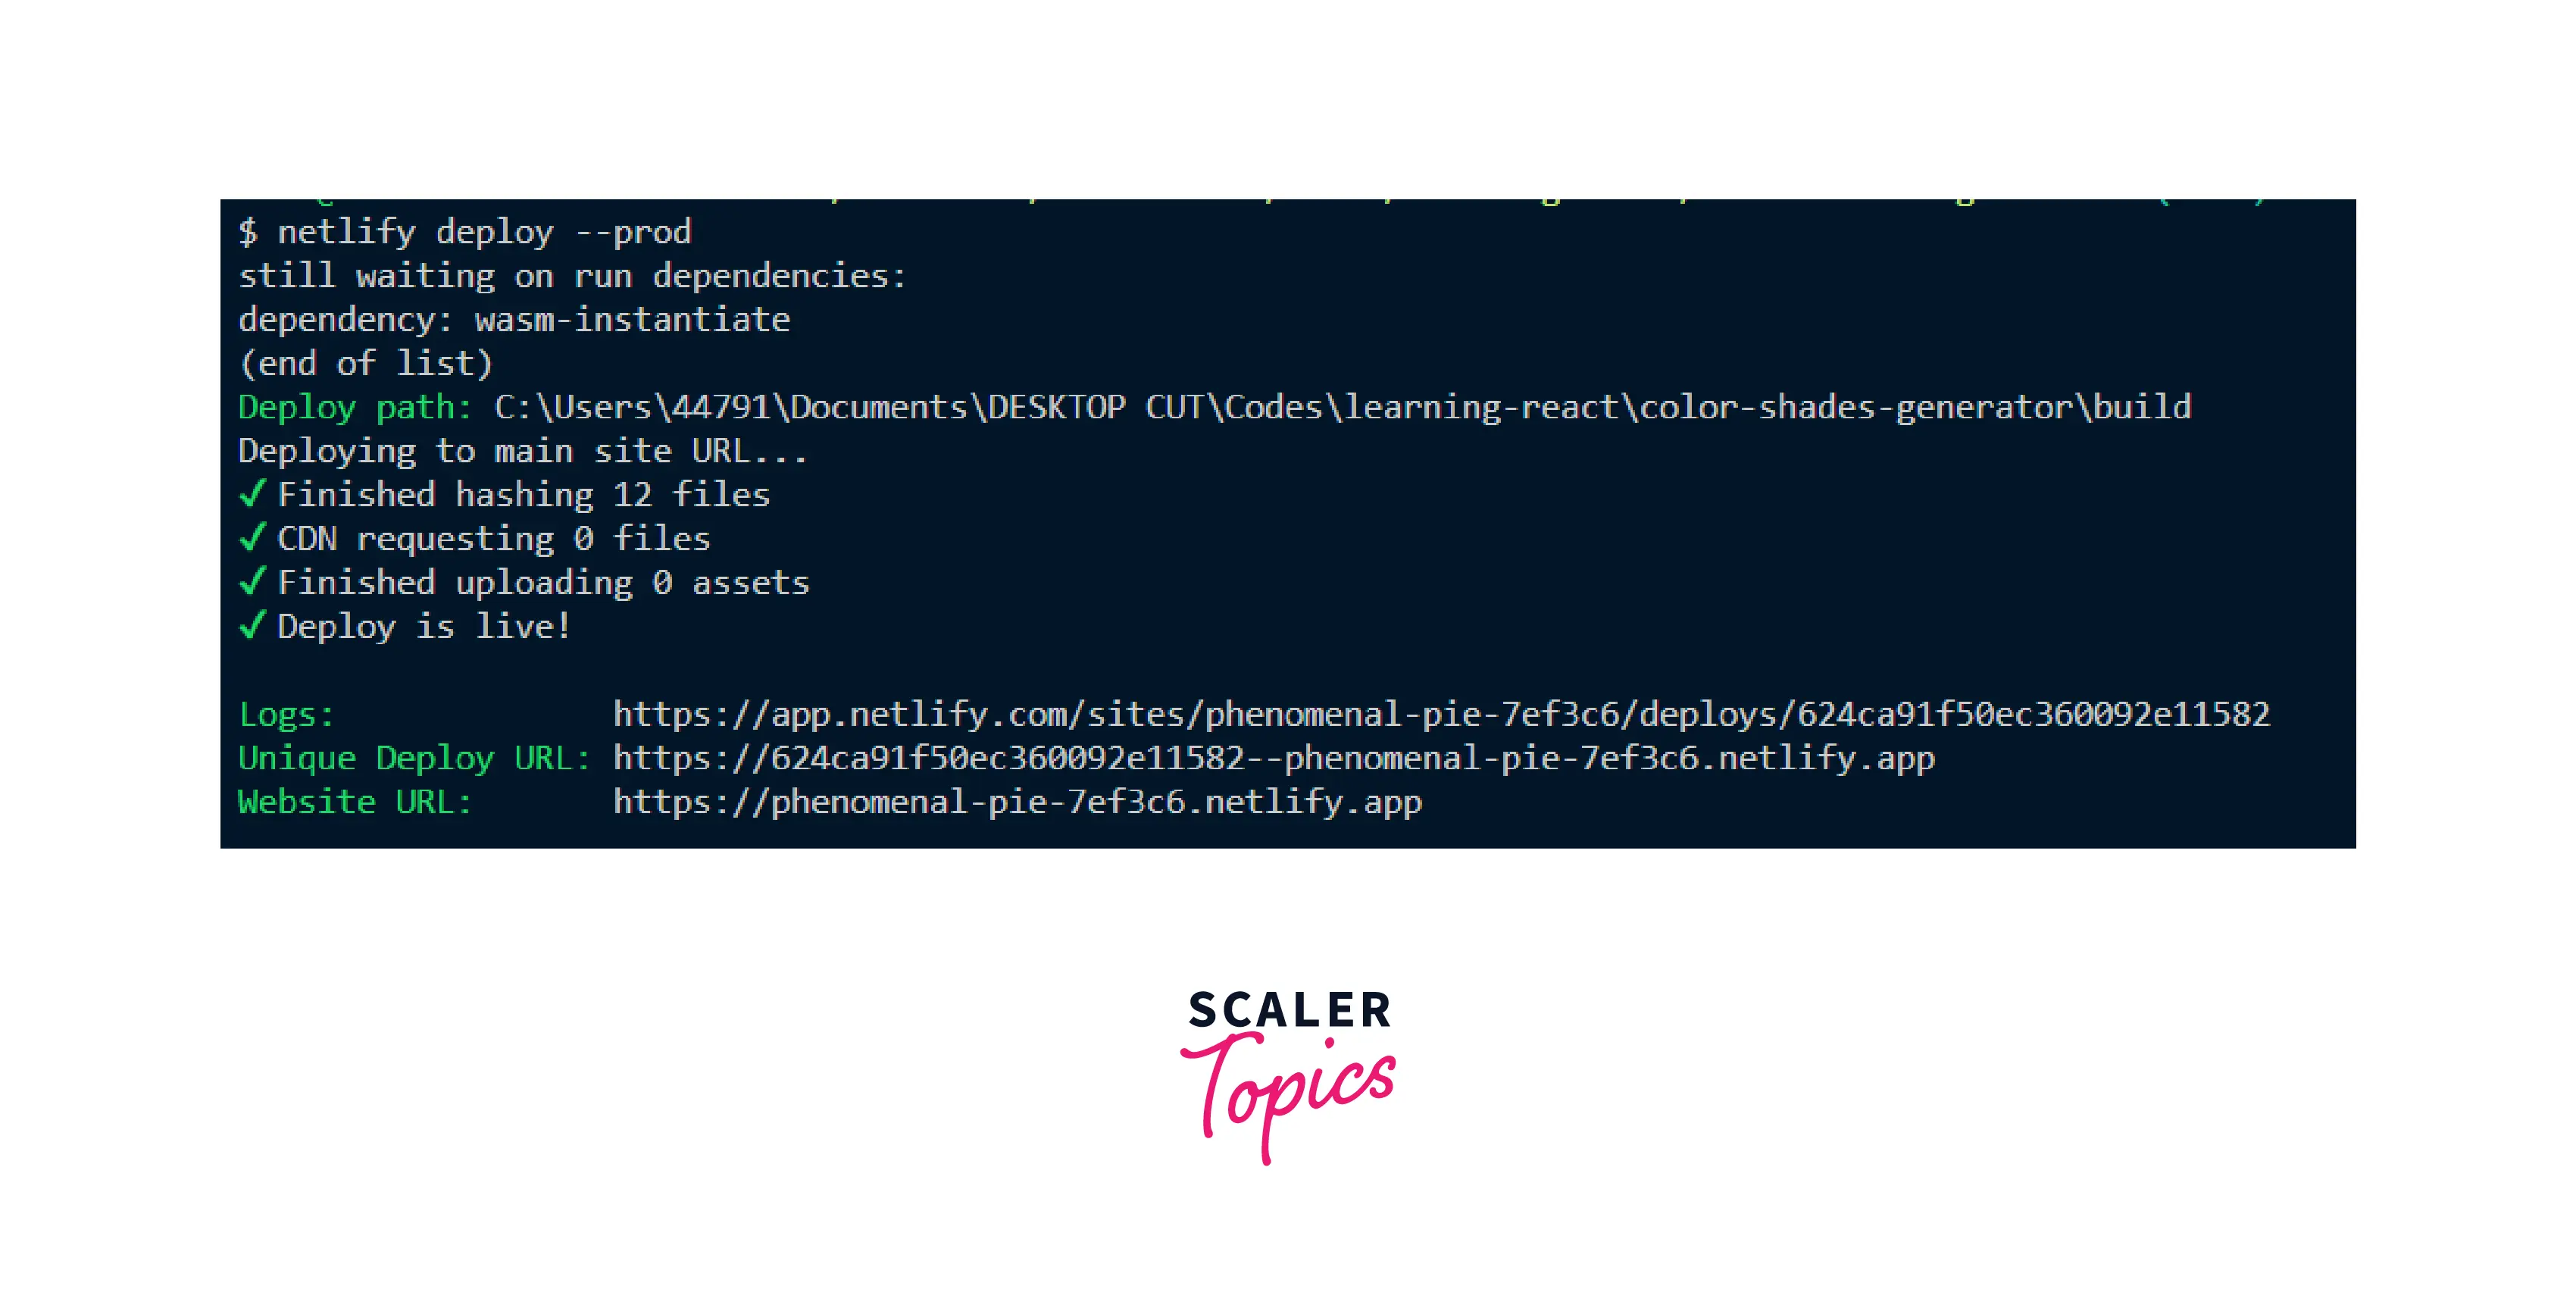
Therefore, each time you update and launch your website, you will receive a special URL. In essence, if you deploy more than once, you will have more than one distinctive URL you may use to point users to a certain version of your application. The most current modifications, however, are always shown at the same URL by the live URL.
Importing project to Netlify Dashboard
We have already shown how to use the Netlify CLI and drag and drop to deploy a React app. We may complete everything manually if we do not want to use the CLI by importing the project from your Git service onto our Netlify website. This has capabilities that are comparable to those of the Netlify CLI.
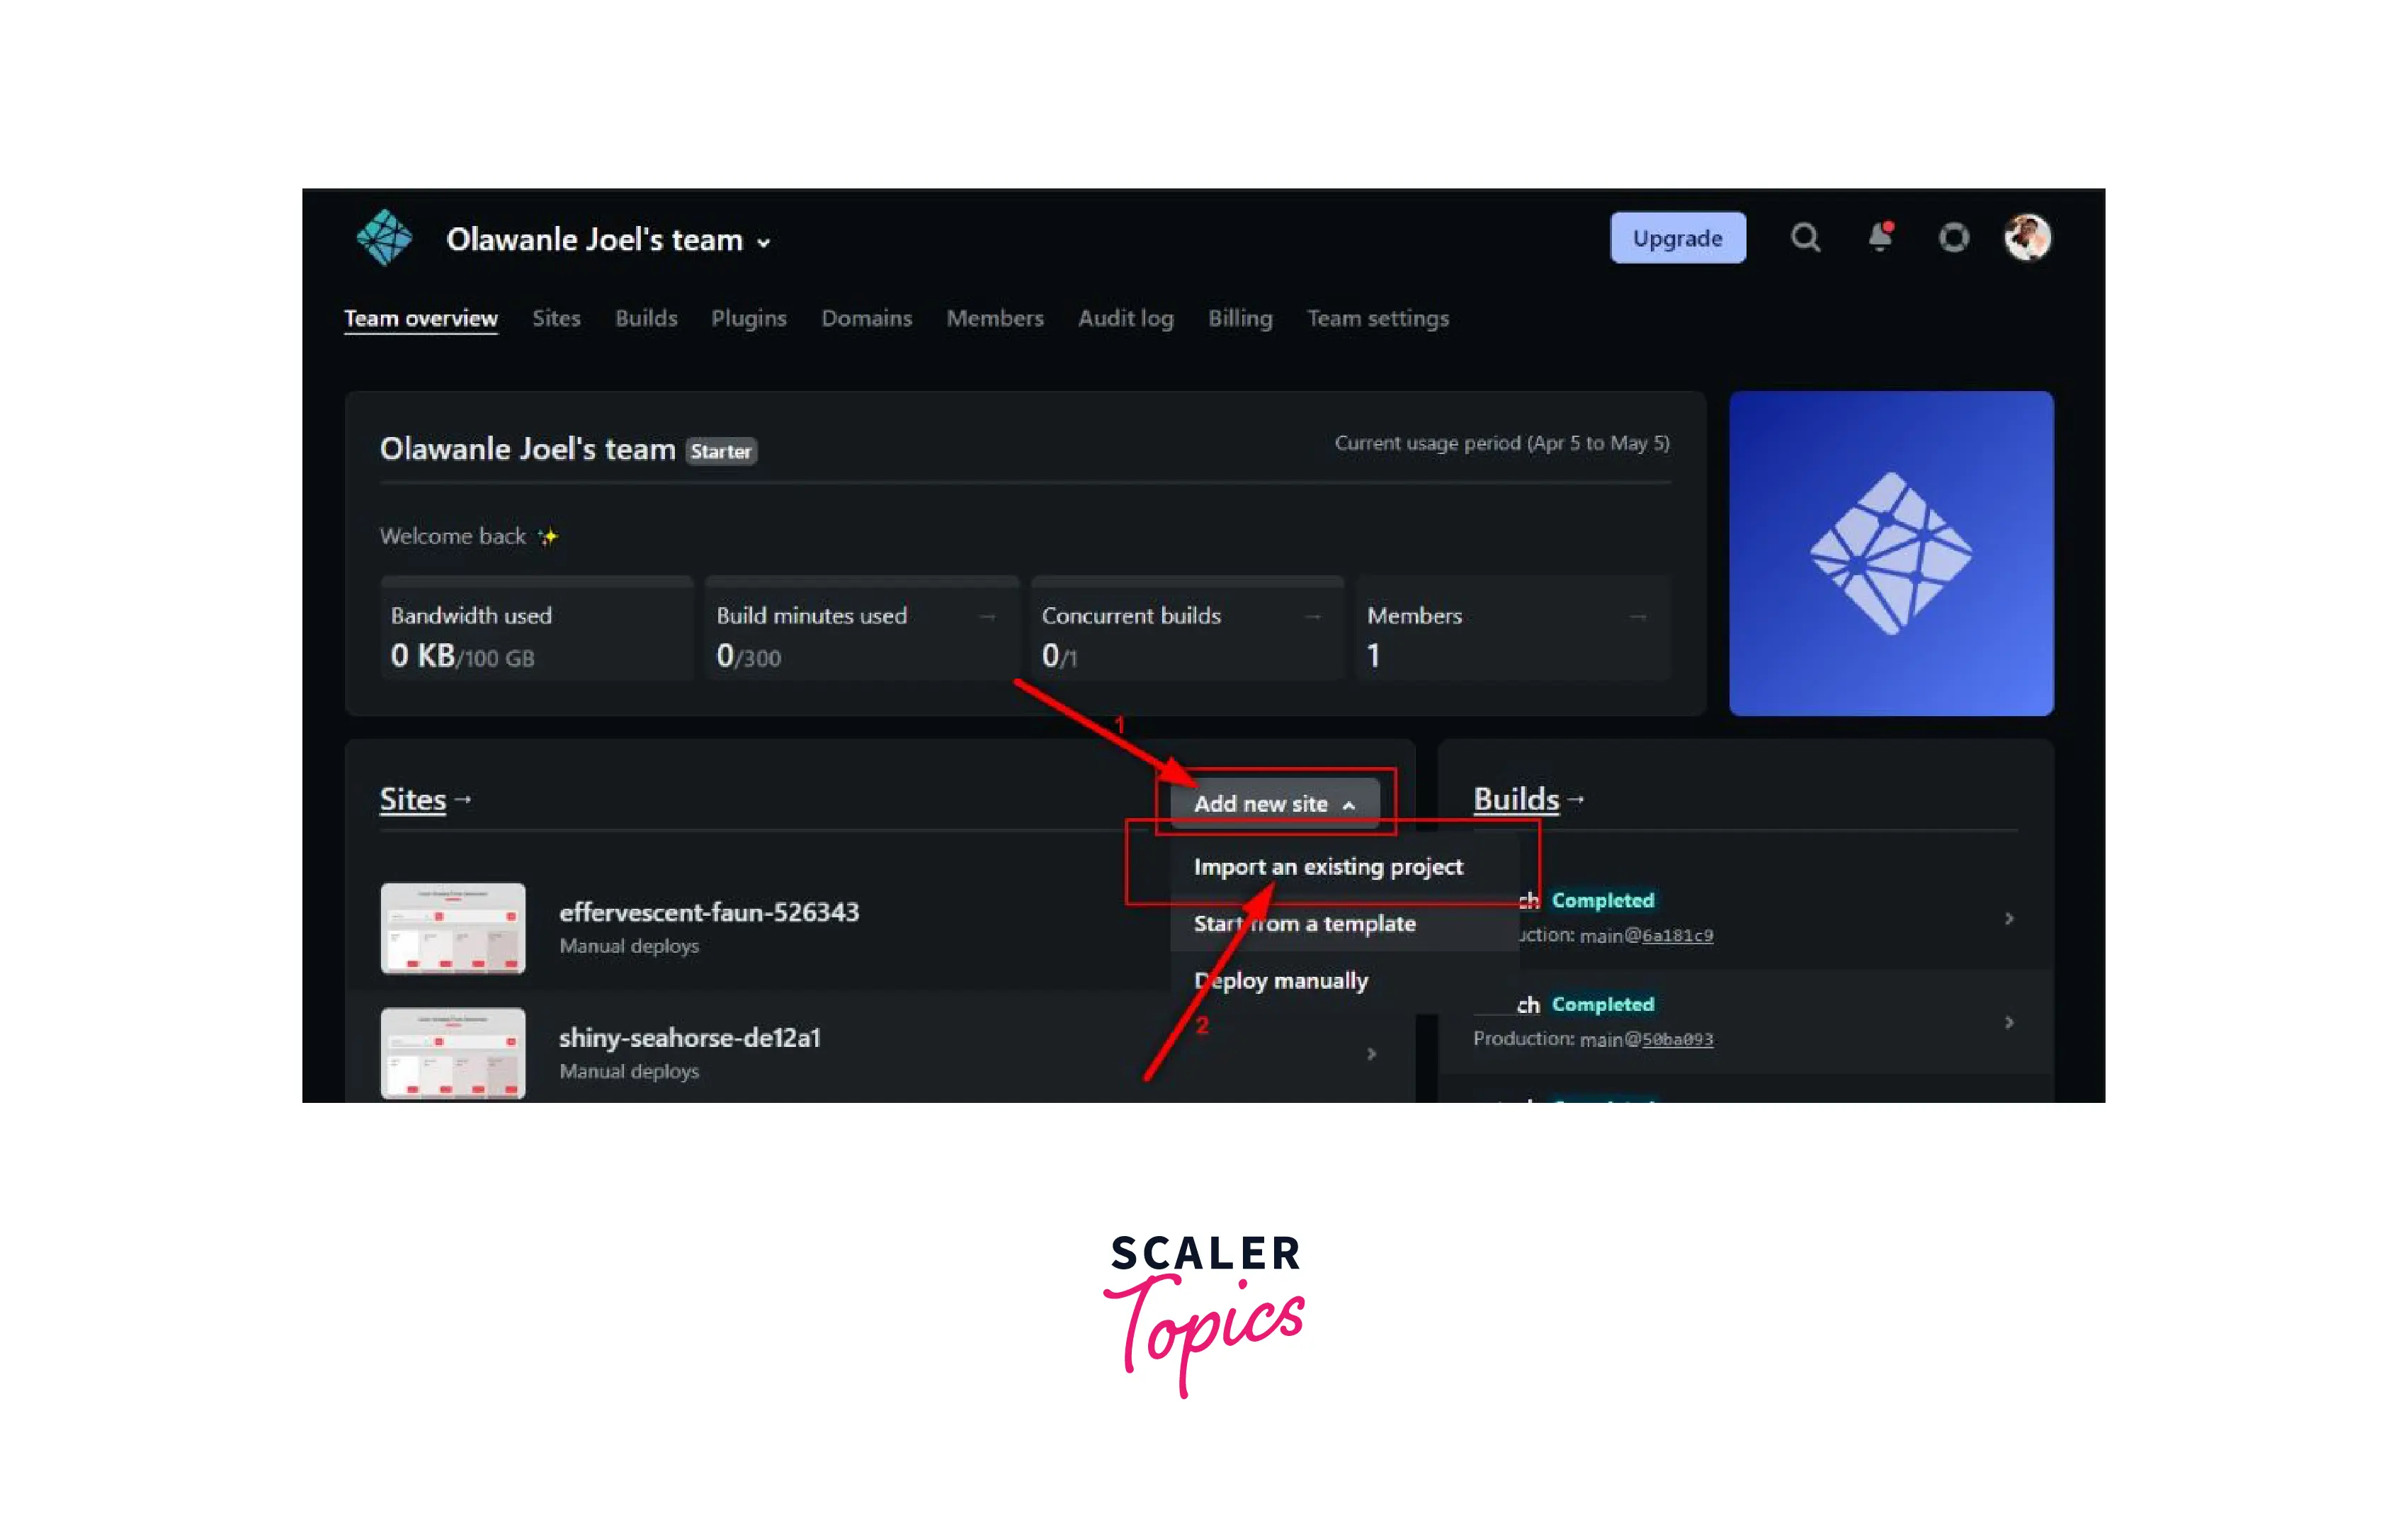
The initial step would be to open the Netlify team webpage and select Add new site > Import an existing project, as seen below:
Afterwards, you will be directed to a screen where you have the option to choose the Git Provider, which is hosting the source code for your application or website. We will choose GitHub. The GitHub repository can be searched for after it has been given authorization.

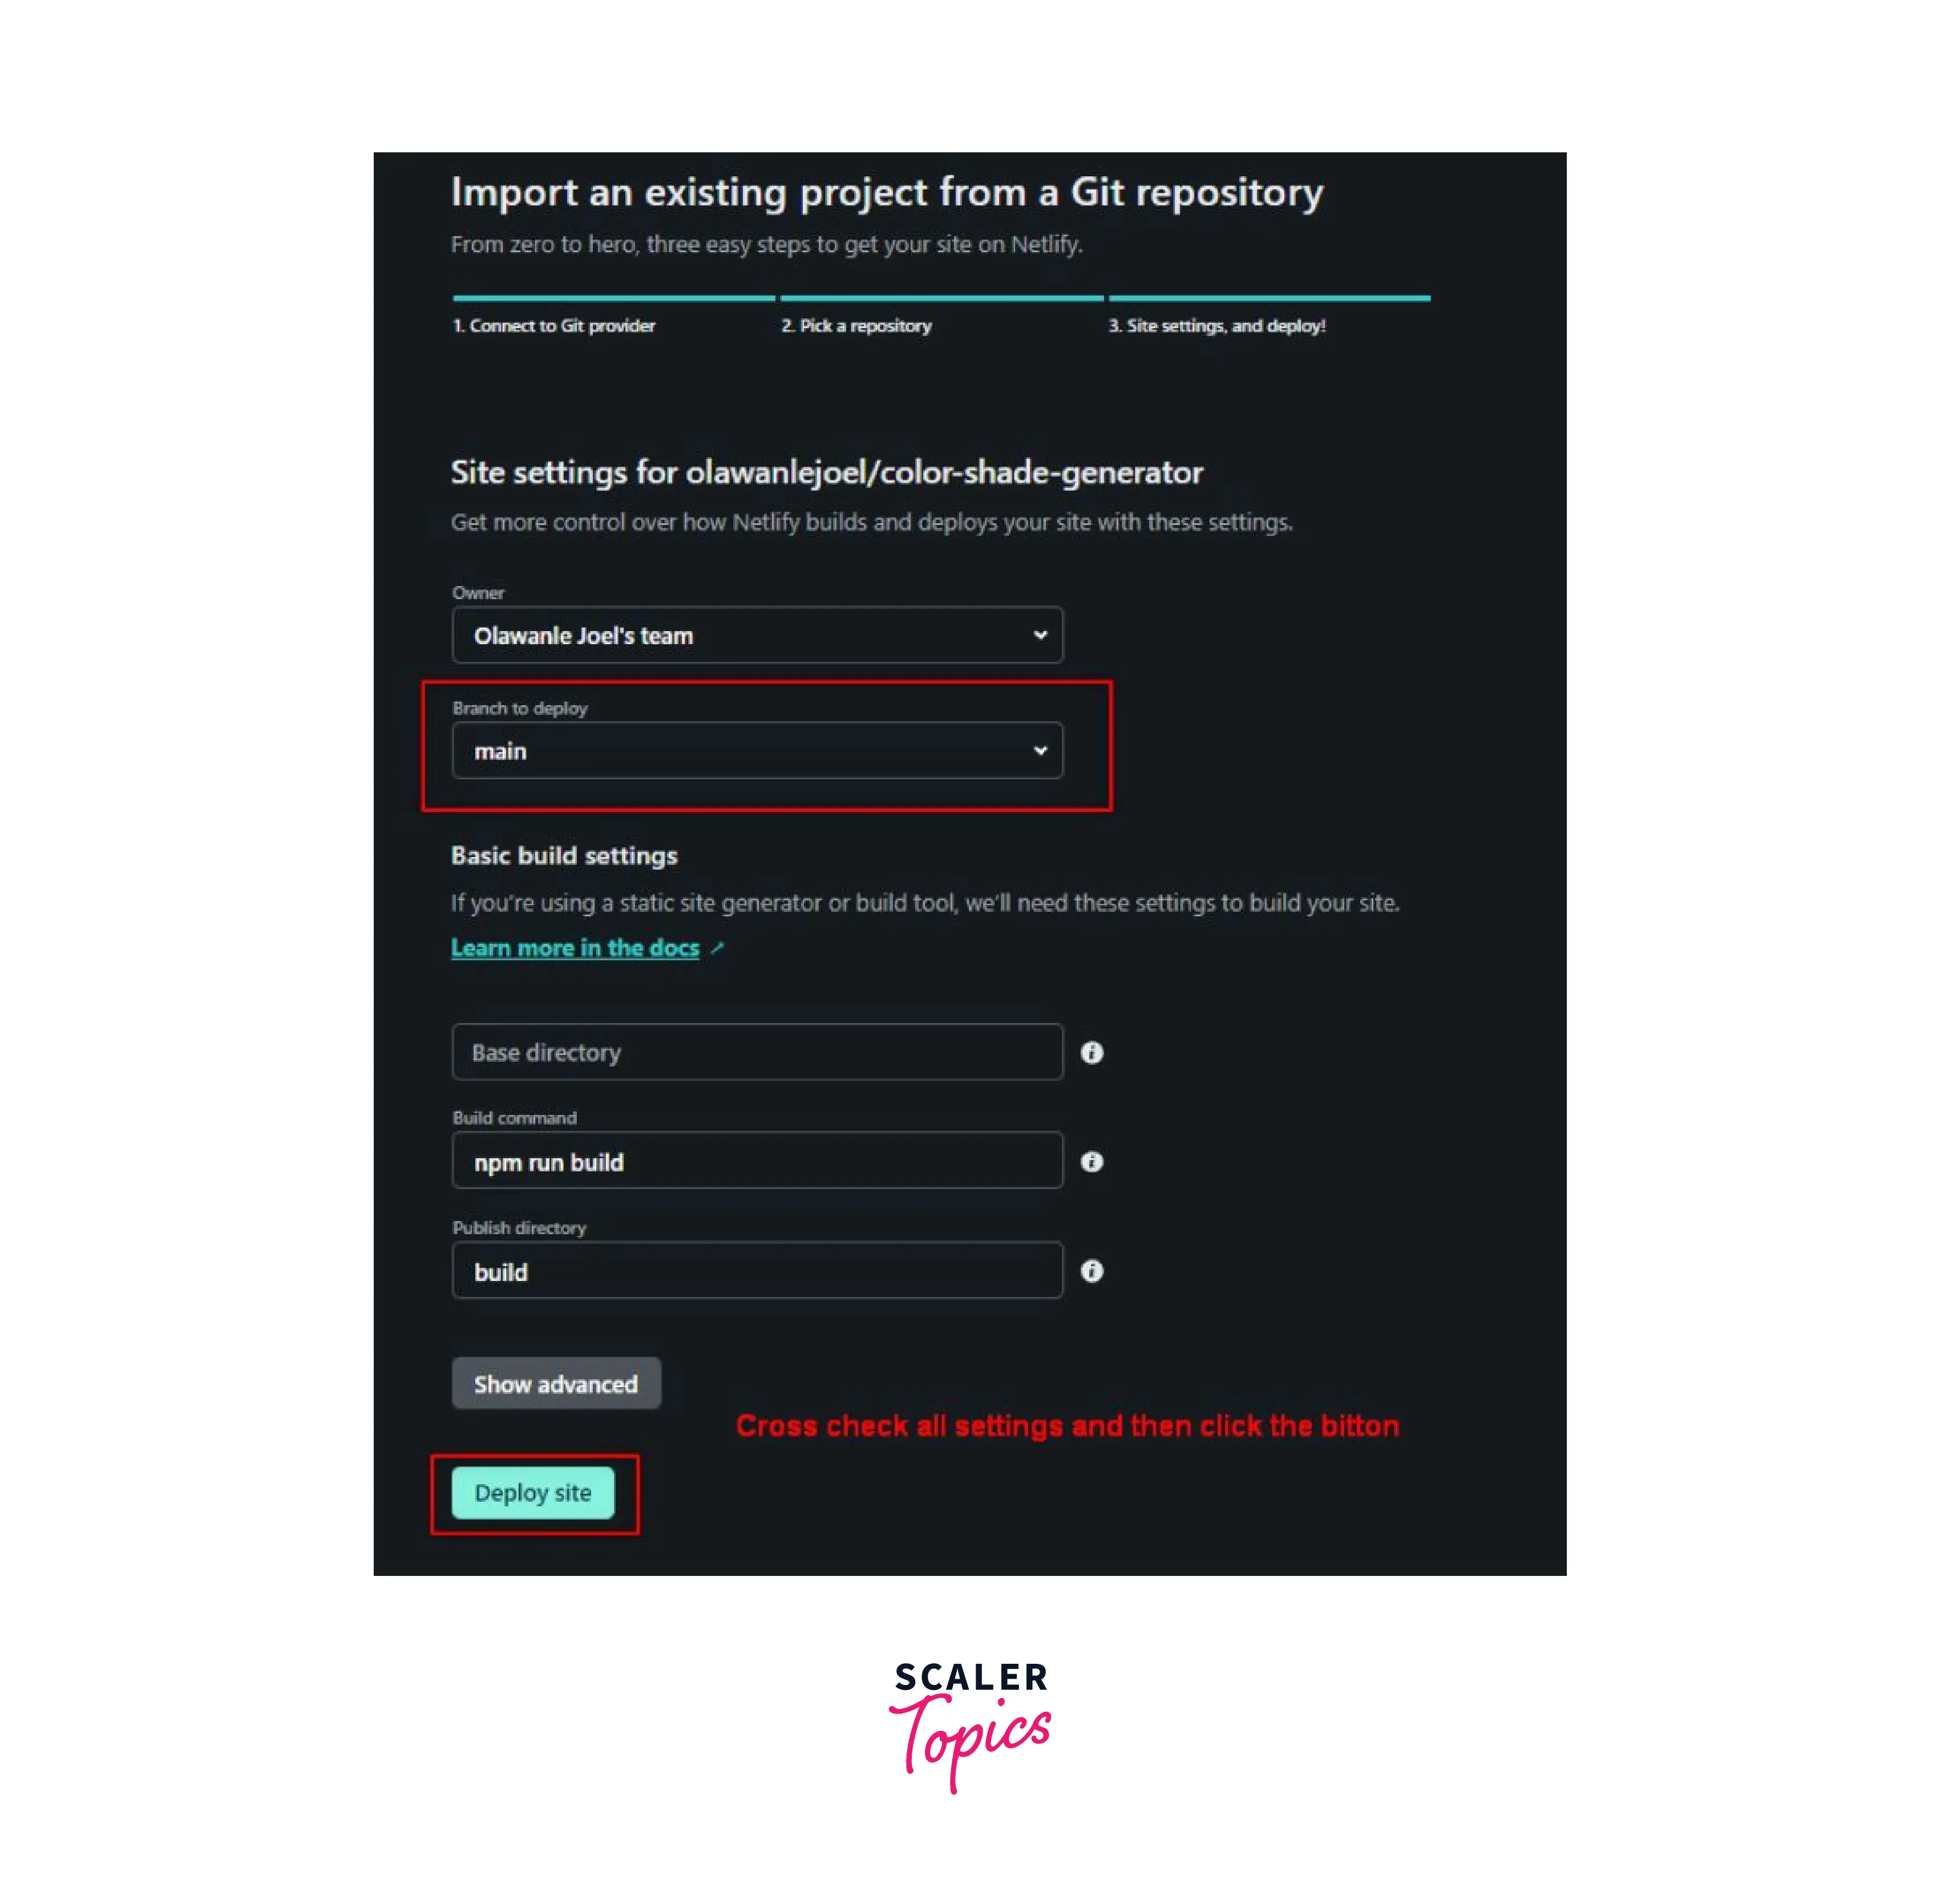
After identifying the project you can begin deployment. You are directed to a screen where you may, for example, choose the branch you want to deploy if you are testing a specific version. Furthermore, this webpage lets you to give the build command and location of the build file(this is automatically handled by Netlify, except if we wish to change it). Following completion, we would select the Deploy Site button.
We should receive a Live URL once our deployment is complete. We may adjust the domain settings, look at deployment logs, and other options on the settings overview page.
Comparing Deployment Options
The first three strategies, mentioned in this how to deploy react app on netlify tutorial, all help with deployment, but the latter two also help with other aspects like deploying specific branches, continuous deployment, managing testing, and so on.
When you want to rapidly publish build files without having to upload your code to any Git provider, the drag-and-drop interface comes in handy. The Netlify CLI and Dashboard provide the same functions under the hood. You would not have to deal with unnecessary navigation because the Netlify CLI receives all commands via a clean terminal and changes less frequently than a webpage.
The ideal option depends on the developer's own preferences. Many prefer the CLI because of the lesser overhead needed, the fact that you can use it from the IDE, and the fact that it does not change as much over time.
Handling Page Not Found Error
You must set up redirects and rewrite rules for your URLs if you plan to deploy an app using a router such as React Router. Because a 404 error page appears when we click on any navigation link to change the page, that is route, and refresh the browser.
Therefore, Netlify makes it easier to set up redirects and rewrite rules for your URLs. We must include a file called _redirects in our app's build folder. The following rewrite rule needs to be placed inside the file.
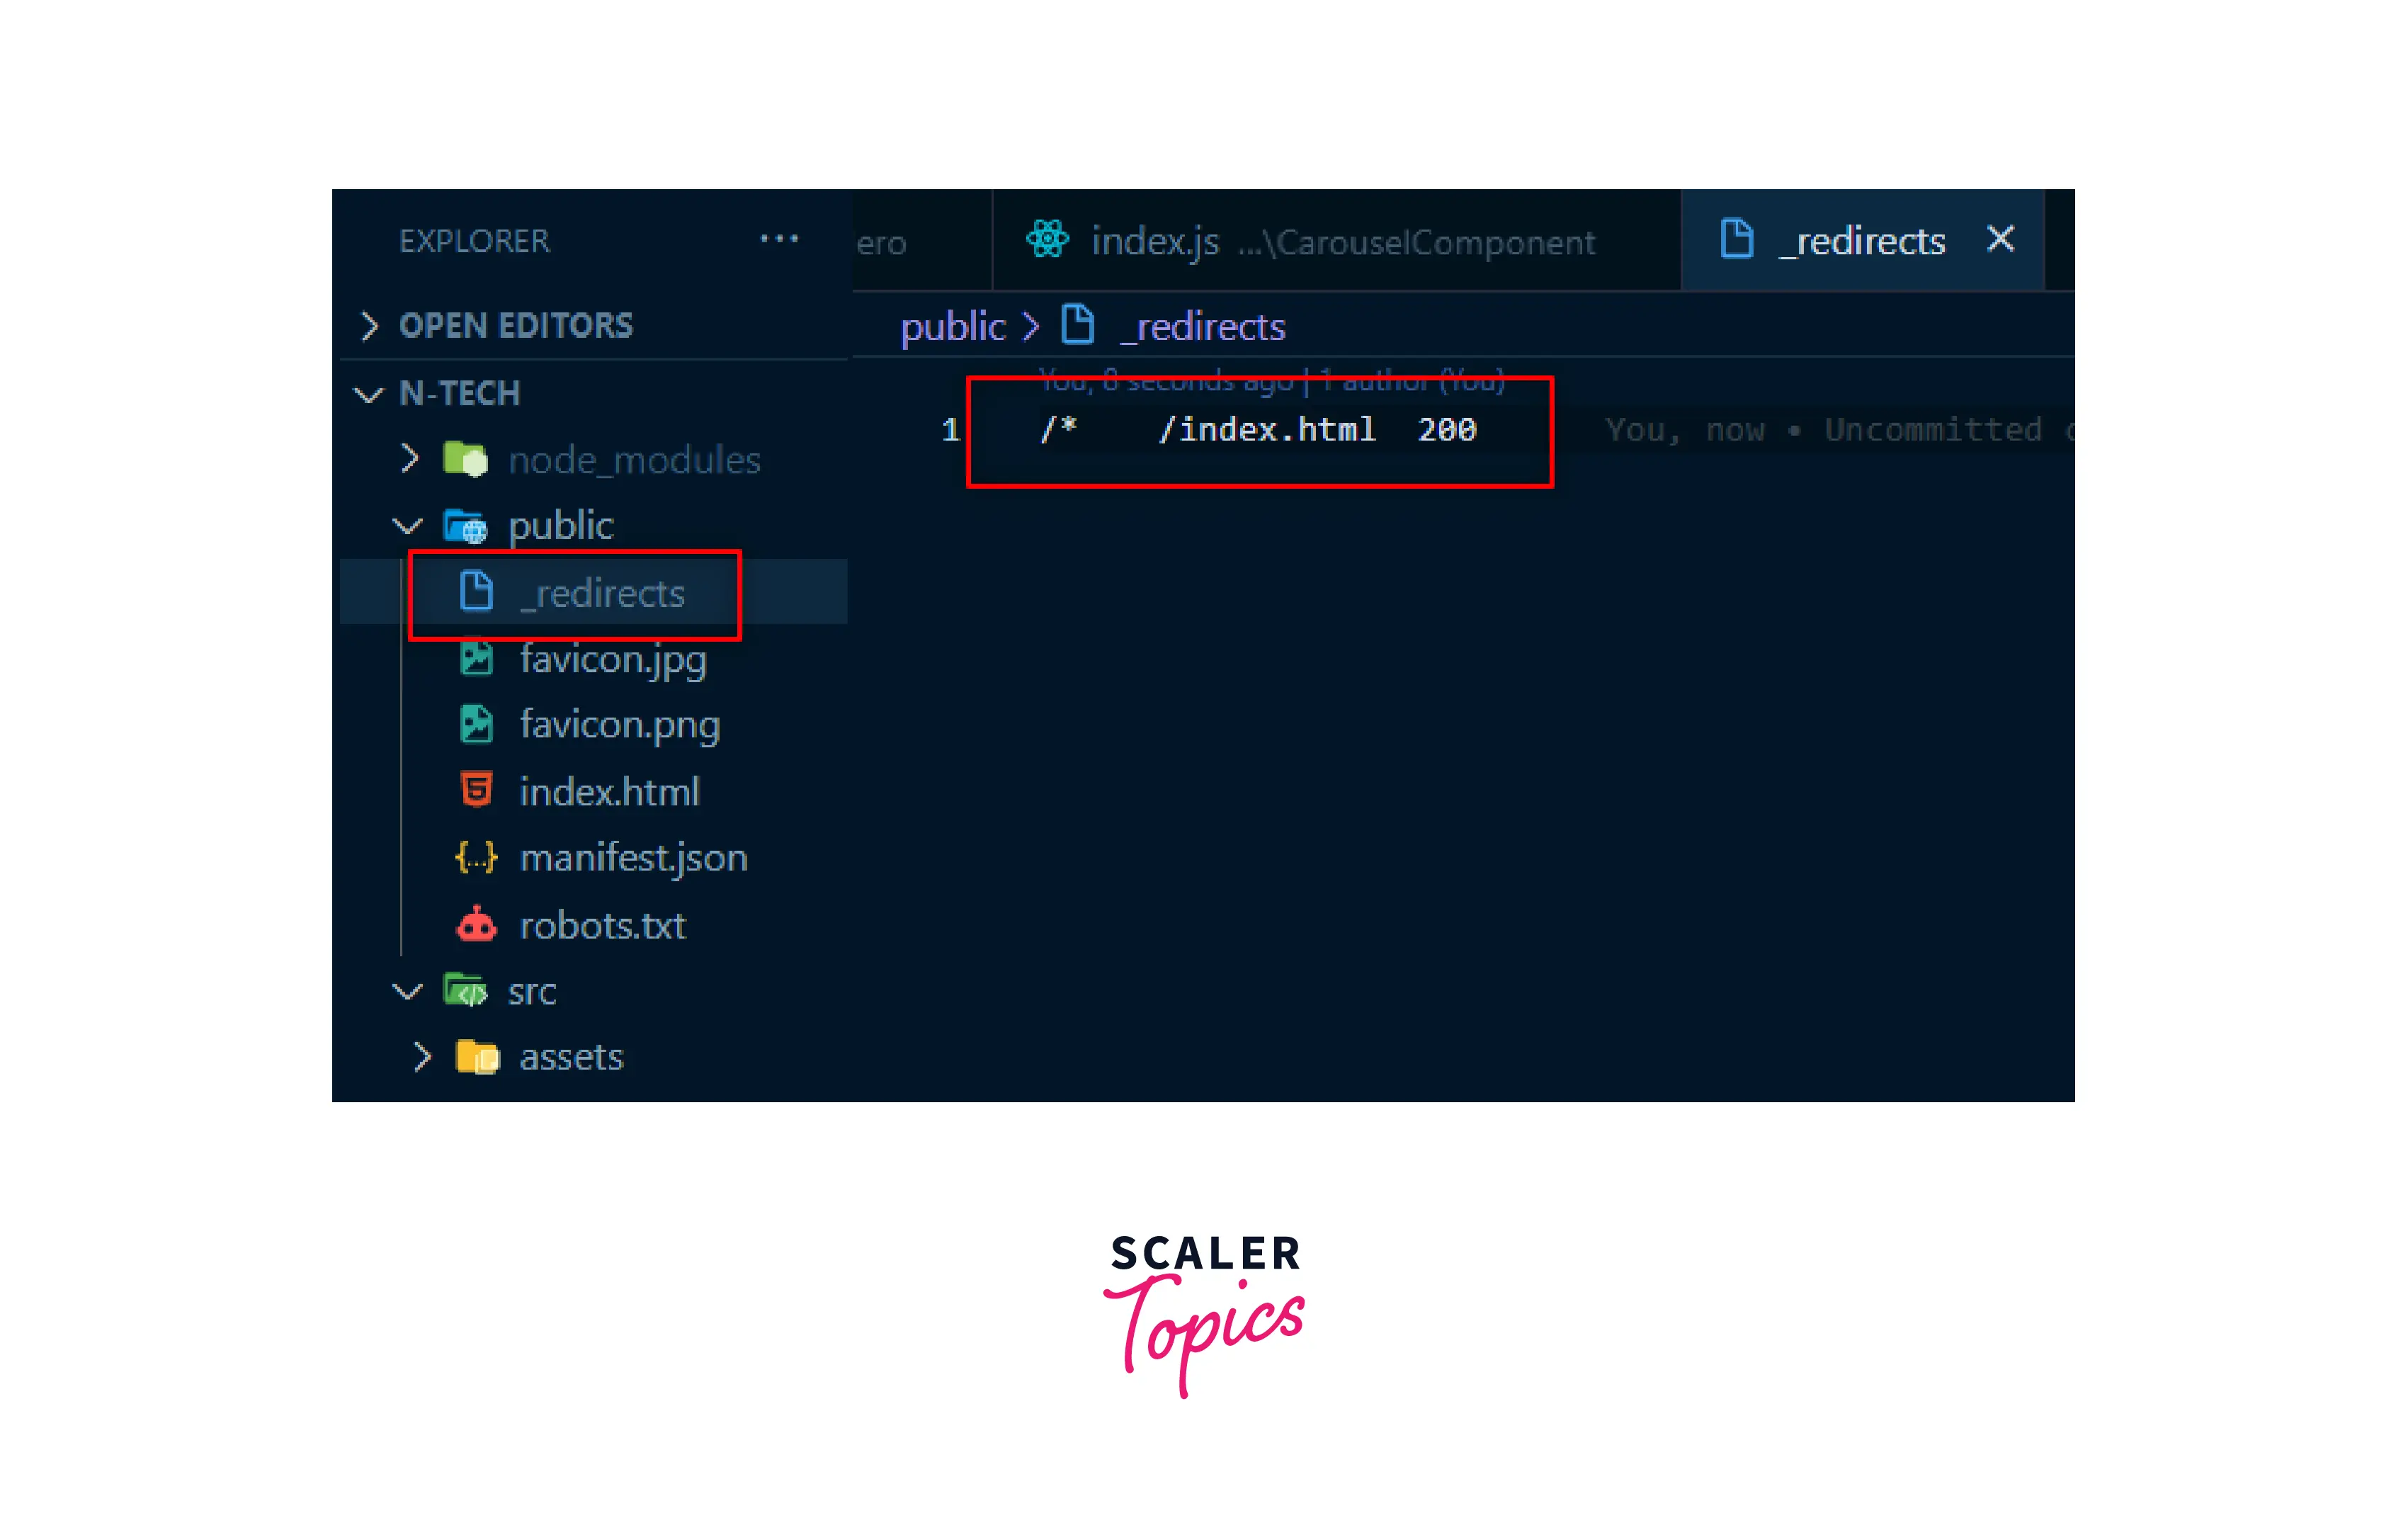
Regardless of the URL that the browser requests, this rewrite rule will provide the index.html file instead of returning a 404 error page. Therefore, we must re-deploy using any of the recommended techniques in order to see the most recent updates in the live URL. After altering our path in the URL and refreshing the app, we would not see the 404 error page anymore.
Conclusion
- We have to transfer our code from local storage or version control system (like GitHub) to a hosting platform so that it can be stored there and can be made accessible to users as a web application. This process is known as Deployment.
- A re-upload of all static assets (build files produced after executing npm run build) was required for every update prior to the development of cloud platforms like Netlify.
- Netlify provides a large number of advantages, and a few examples are as follows:
- Netlify comes with a free plan which serves all the needs for personal projects and small-scale web applications. Also, the paid plans are cheaper in the long run.
- Netlify provides automatic pre-rendering and global distribution, which significantly increases site speed.
- Netlify provides continuous deployment. As a result, each time you push a new commit to your repository, Netlify automatically builds it for you and updates your project to the most recent version.
- It is effortless to deploy your react app using Netlify. Following are the three ways of deploying react app on Netlify:
- Deploy Application to Netlify with Drag and Drop
- Deploy Application to Netlify with Netlify's CLI
- Importing project to Netlify Dashboard
- All three techniques aid in development, but the CLI method and importing the project to Netlfiy’s dashboard help in other features like deploying particular branches, continuous deployment, managing testing, etc.
- We have seen how to handle the page not found error.