How to Use PrimeReact in React Applications?
Overview
One of the advantages of using React framework to create a web application is that many pre-existing libraries and packages can be used to create various UI features and components in the react application. These react libraries save a lot of code writing time for the developer and also help in creating various responsive components and features. In this article, we will be discussing a very famous react library called Prime React.
Transform Your Career
Choose from our industry-leading programs designed for career success
Modern Software and AI Engineering Program
Master full-stack development with AI integration

Modern Data Science and ML with specialisation in AI
Advanced data science techniques with AI specialization
Advanced AIML with Specialisation in Agentic AI
Deep dive into AIML with focus on Agentic systems
DevOps, Cloud & AI Platform Engineering
Build and manage AI-powered cloud infrastructure
AI Engineering Advanced Certification by IIT-Roorkee
Premier AI engineering certification from IIT-Roorkee
Introduction
One of the advantages of using React framework to create a web application is that many pre-existing libraries and packages can be used to create various UI features and components in the react application. These react libraries save a lot of code writing time for the developer and also help in creating various responsive components and features. There are many such libraries like Material UI, Bootstrap, React Suite, Prime React, etc.
Prime React is an open-source UI library that contains many features and components that can be used to create a React application. All these components are already pre-written and they can be used by just importing to the react applications.
Prerequisites
There are a few prerequisites that are required to learn about the Prime React library.
- Understanding of javascript programming language.
- Understanding of React Js library to create a web application.
- Understanding of NPM i.e. Node Package Manager.
Navigation
In any application, navigation is referred to as the process of moving from one component of the application to the other component of the same application. Usually, all the applications contain a navigation bar that contains links to all the components of the application. Users can click on these links to navigate to any component they want.


What is PrimeReact?
Prime React is an open-source UI library that contains many features and components that can be used to create a React application. All these components are already pre-written and they can be used by just importing to the react applications.
Prime React library contains some of the features that are not present in the other open-source React UI libraries. For example, the Material UI library and Bootstrap library do not have features to create charts like bar charts and pie charts which are present in the Prime React library.
Scaler Placement Report and Statistics
Scaler learners achieved 2.5x salary growth with average post-Scaler CTC reaching ₹23L.
Create React Application
Let us create a React application in which we will be using PrimeReact to add different features and components. We will be creating a page that shows a list of products on the page.
First, let us create a React application by opening our code editor and writing the following command in the terminal. npx create-react-app reactapp
This command will create a React application with the name 'product page' and load all the modules that are required to create any application.
To run this application, inside the terminal, navigate to the folder which has been created by the command npx -create-react-app reactapp by using the command cd reactapp. Then run the application by writing the following command in the terminal. npm run start This will start the React application and it will run on the local host 3000.
Adding PrimeReact Dependencies
To add Prime React dependencies, refer to the commands given below. Navigate to the React Application folder in the terminal and write these commands to install the dependencies.
You can refer to the official documentation for more information. Prime React
To check whether we have installed dependencies for primereact and primeicons successfully, go to the package.json file and check whether dependencies are present there or not. It should look something like this. The versions of primereact and primeicons may vary.
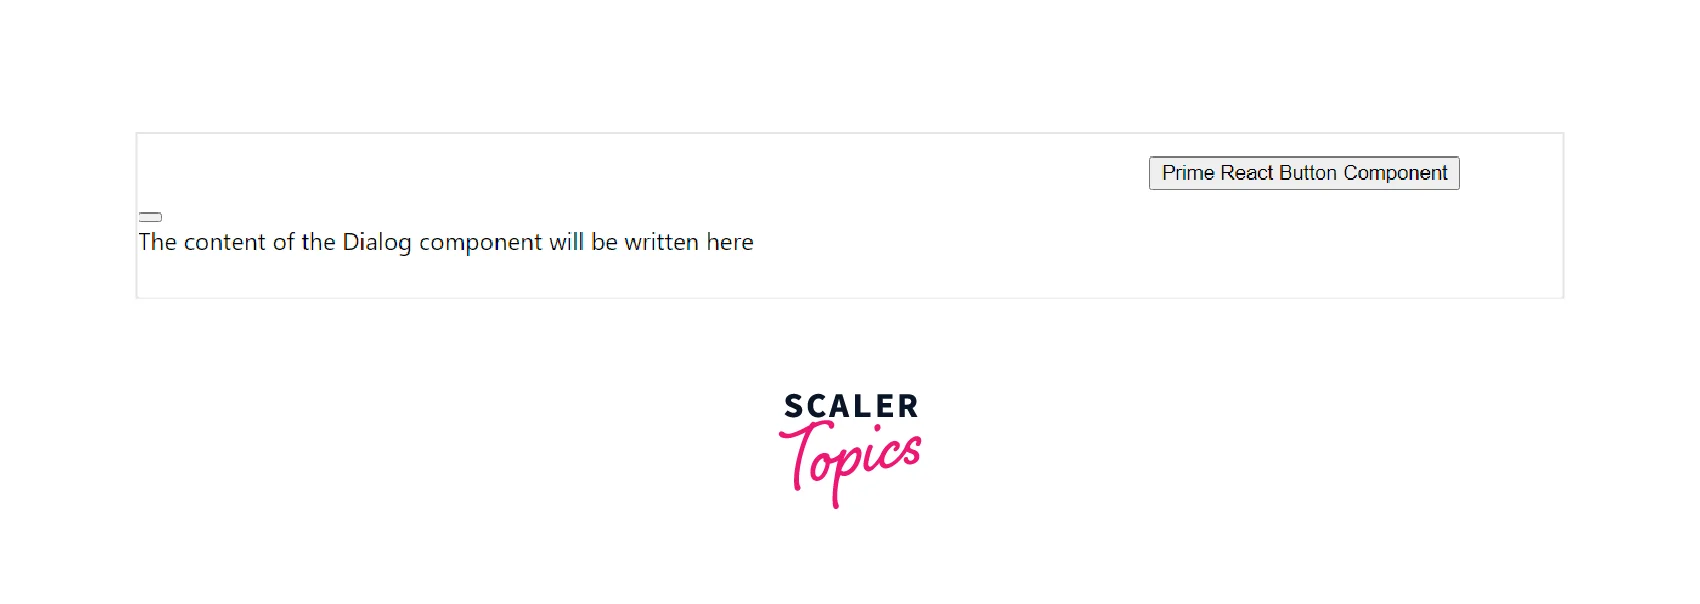
Now to use any Prime React component, we just have to import that component from our Prime React module. For example, if we want to use the Prime React button in our application, we can do it as follows.
App.js
This is what our react page looks like.
Turn Learning into Career Growth
Modifying Our React Application
We can use various features from Prime React like a grid system, flexbox, etc. to implement various components in our React application. To use these, we have to configure PrimeFlex in our React Application.
PrimeFlex is a CSS utility package that offers several tools, including a grid system, flexbox, spacing, elevation, and more. Although it is not necessary, adding PrimeFlex is strongly advised because it is likely to use such tools when designing apps.
Inside the terminal, navigate to the folder of our React application. Write the command given below.
npm i primeflex
This command will install the 'primeflex' package in our React application. For more information, you can refer to the npm page of primeflex. primeflex NPM
Also, to load the CSS properties of the primeflex, we need to write the below code line in the component in which, we are using primeflex. This will import the CSS properties of the primeflex library.
import primeflex/primeflex.css;
The CSS files are to be imported inside the App.js file. Given below is the example code to import CSS files for primereact, primeflex, and primeicons in the App.js file.
App.js
Creating a Nav Component
Let us create the NavBar (Navigation Bar) component of our React application. We will be using the Div element to create our Navbar and it will contain links to various components of our React Application.
We divide our NavBar into two parts i.e. NavBar left and NavBar right. NavBar left will contain our application name and NavBar right will contain the links to the other components of our React application.
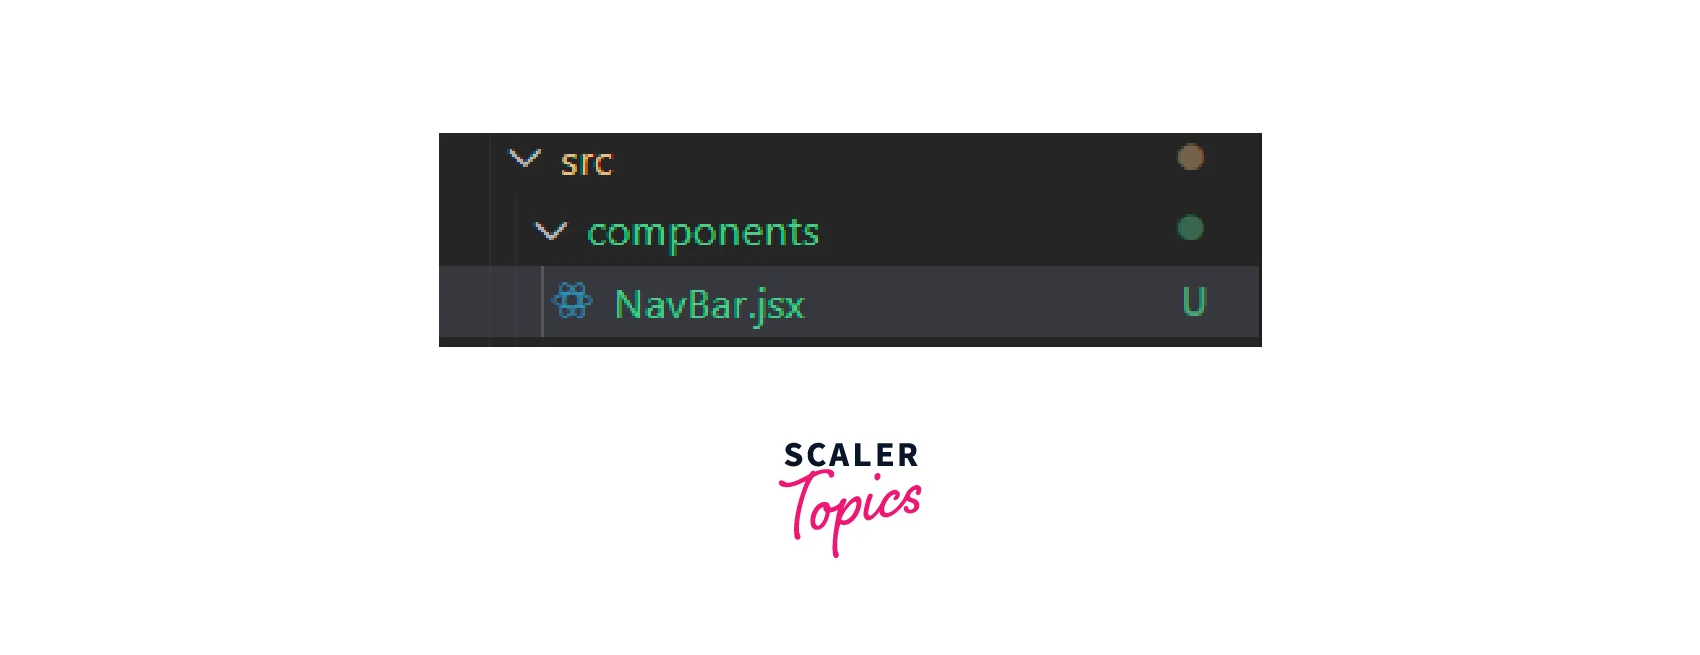
1. Creating NavBar.jsx file Create a new folder called component inside the src of the React application. Inside this folder, create a file with the name NavBar.jsx. We will write our NavBar code inside this file only.
This is what our file system will look like.
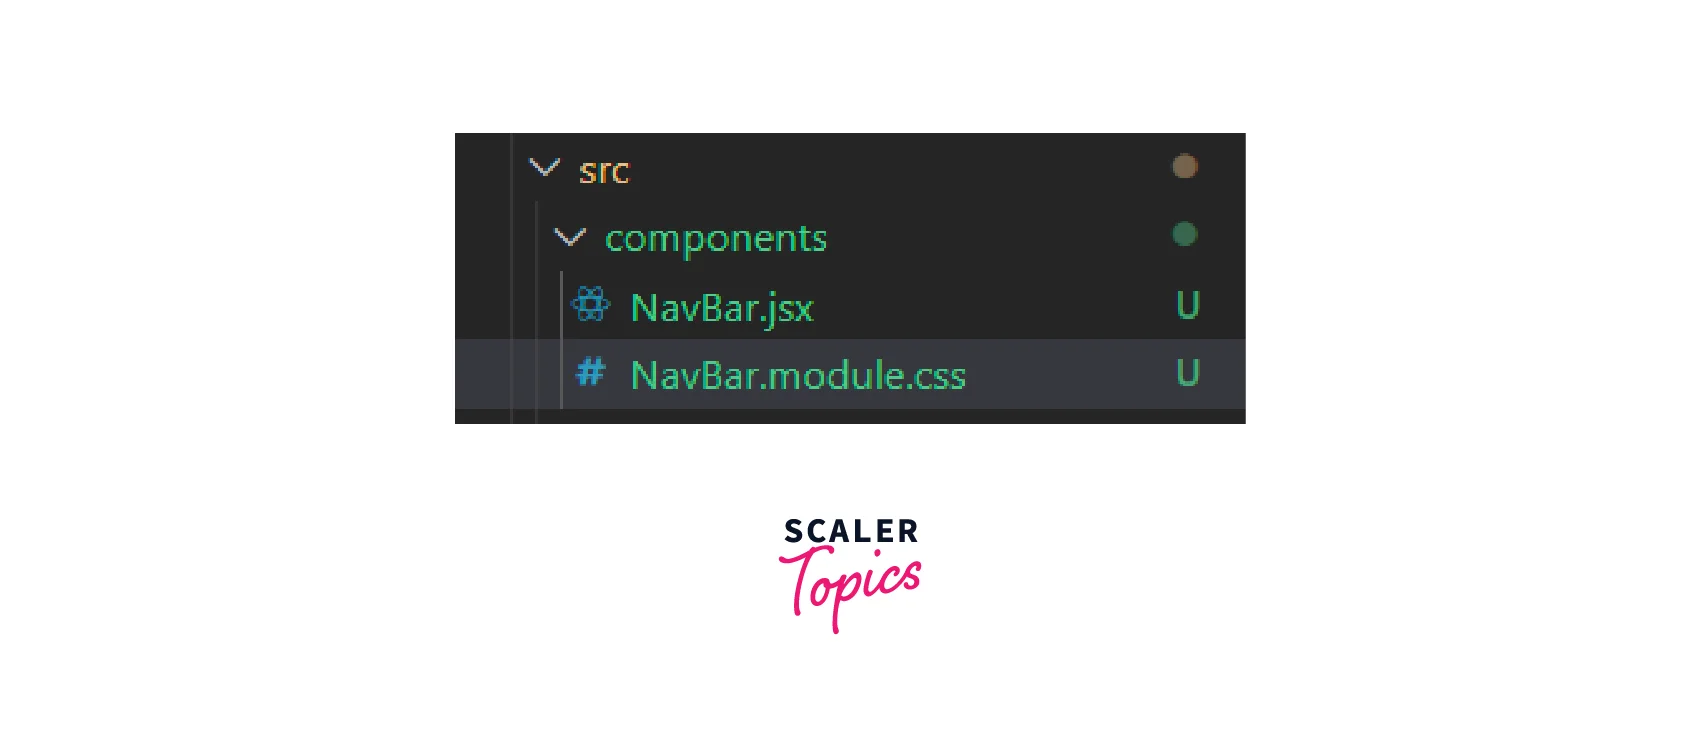
2. Creating CSS file Create another file with the name 'NavBar.module.css' which will be used to write CSS properties of the NavBar component. Also, import styles (CSS) from this file in our NavBar component.
NavBar.jsx
3. Creating NavBar, NavBar right, and NavBar left Given below is the code which creates the NavBar of our React Application. We will use general CSS properties for styling purposes.
NavBar.jsx
NavBar.module.css
We will import this component to the App.js file.
App.js
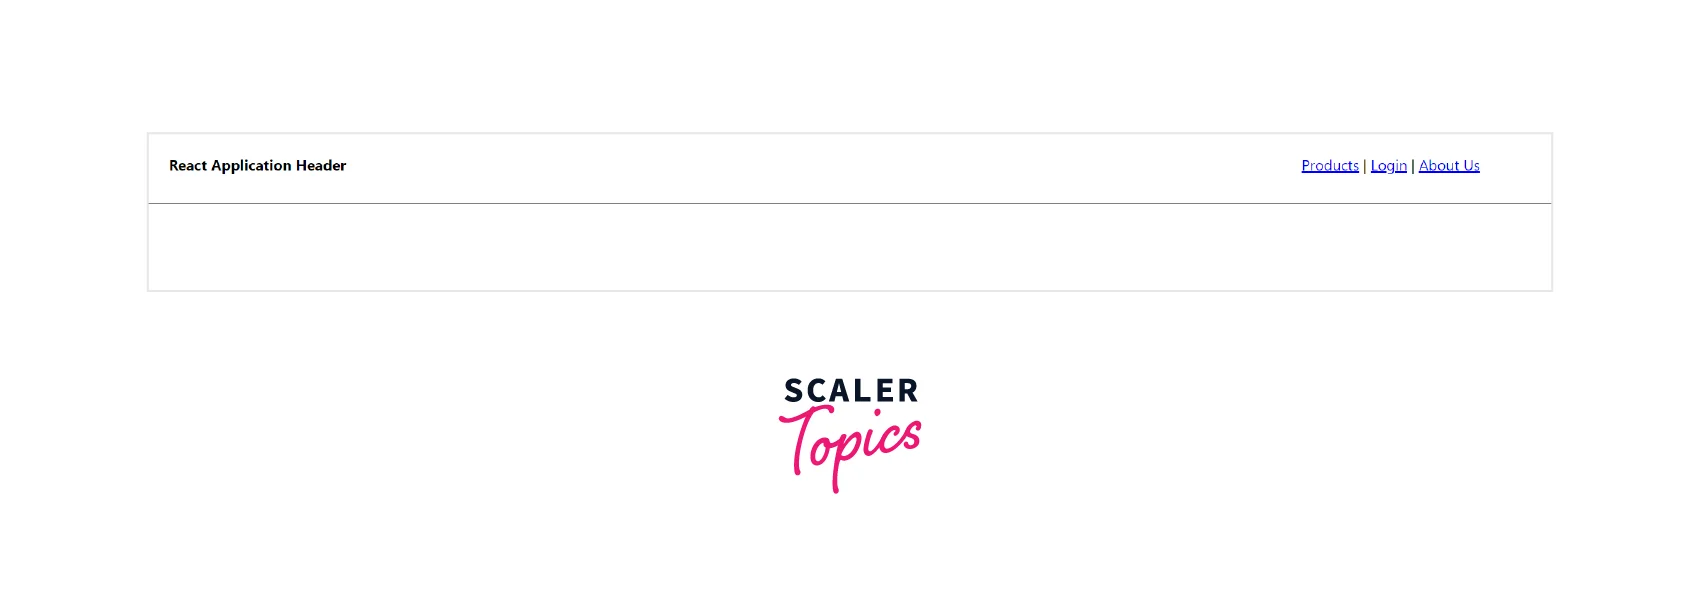
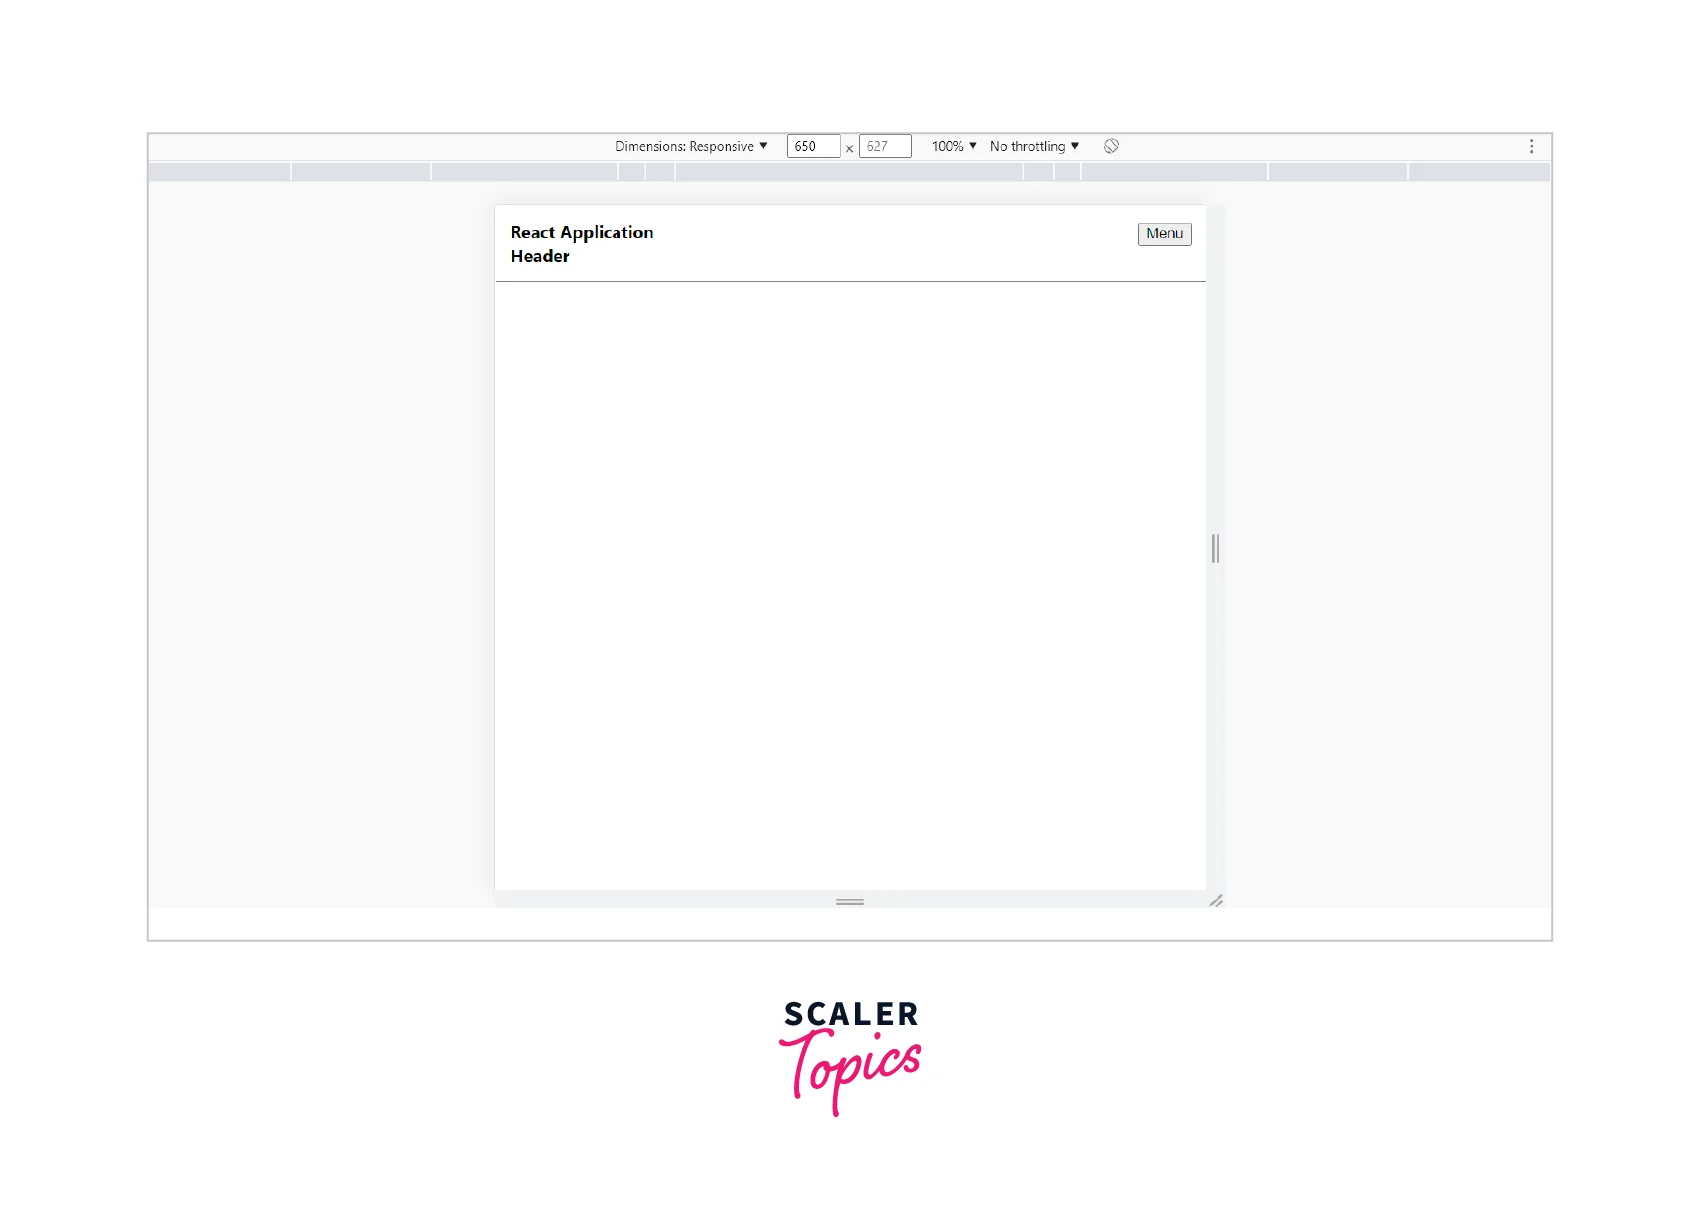
This is what our Navigation Bar component looks like.
Making Our Navigation Bar Responsive
We will be using the @media query to make our Navigation Bar component responsive. Will will set the width of 700 pixels are our breaking point.
This means if our page width is greater than 700 pixels, our Navigation Bar will be seen as normal. But if our page width is less than 700 pixels , we will display the right part of our Navigation Bar as a menu button.
We will use the display CSS property to hide or show the various div elements inside the navigation bar.
NavBar.jsx
NavBar.module.css
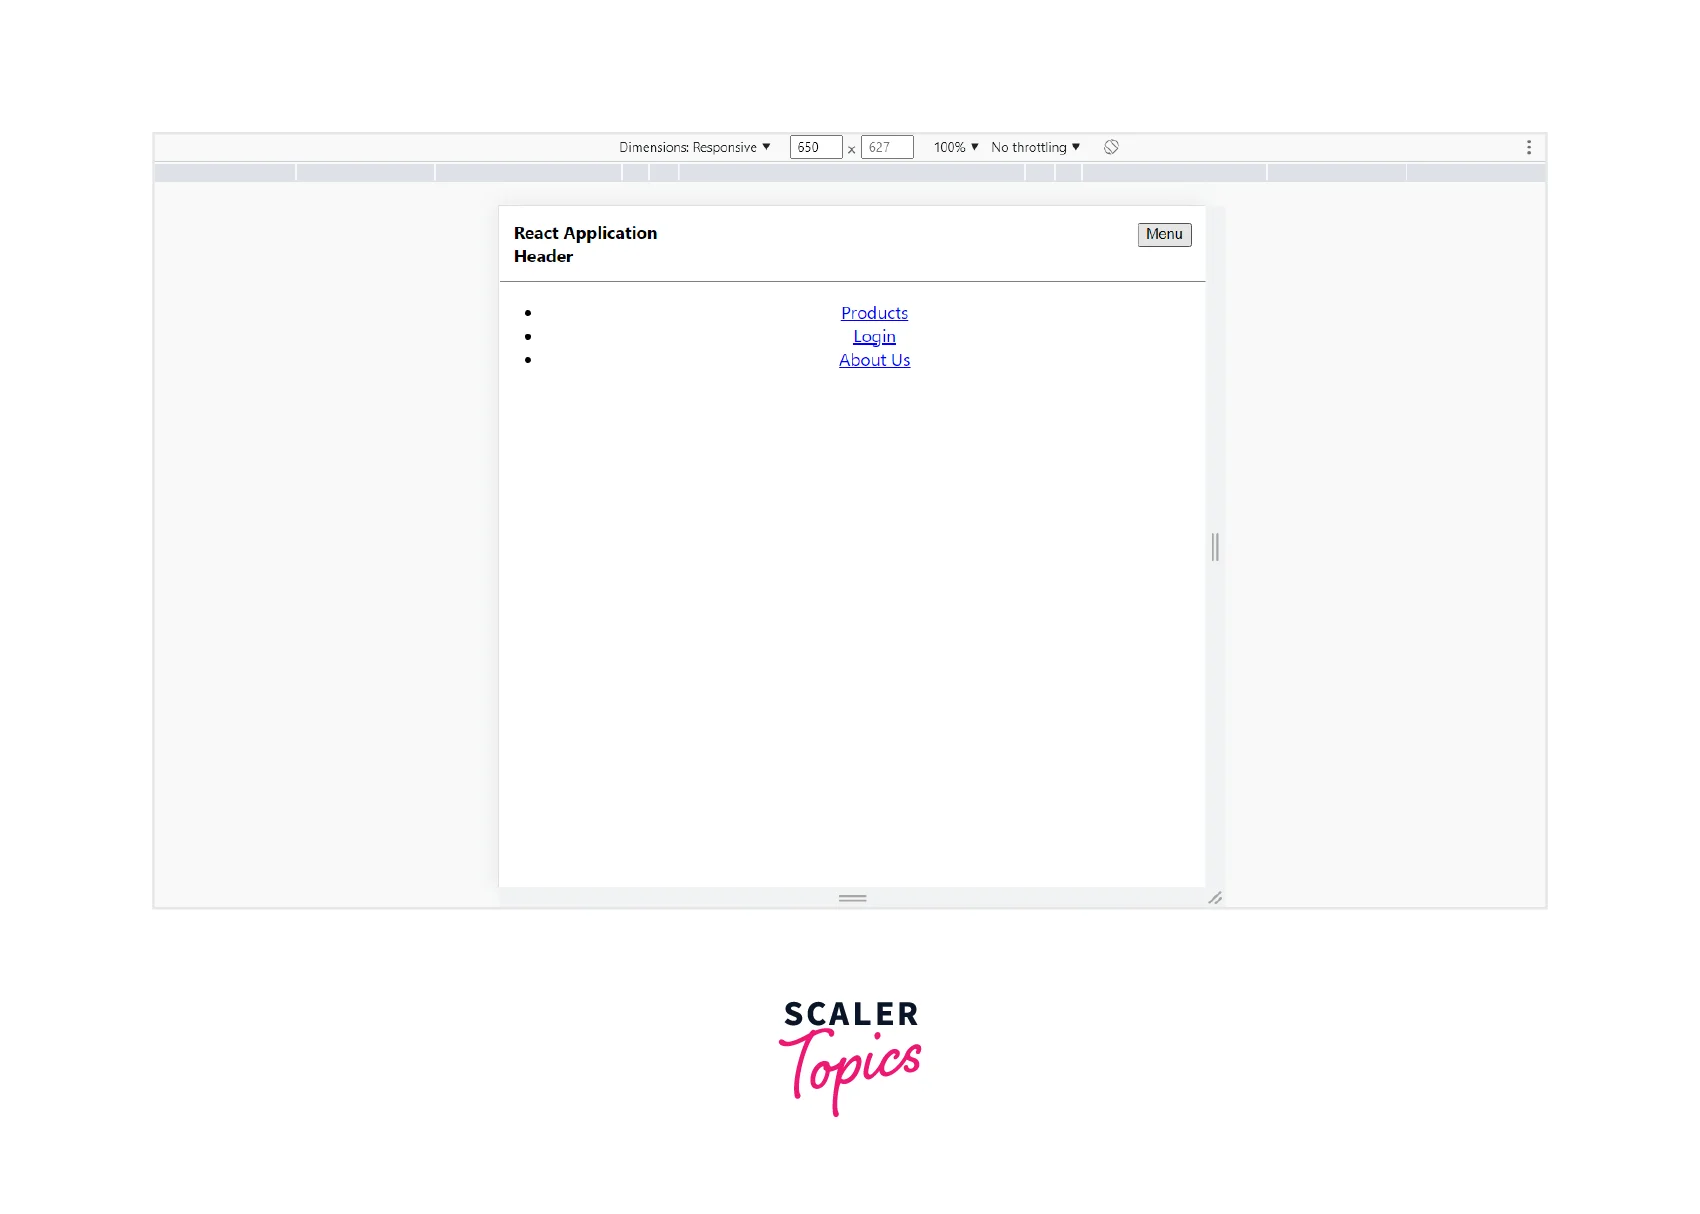
This is how our page looks like when the page width is less than 700 px.
If we click the menu button, we will see the navigation right part list.
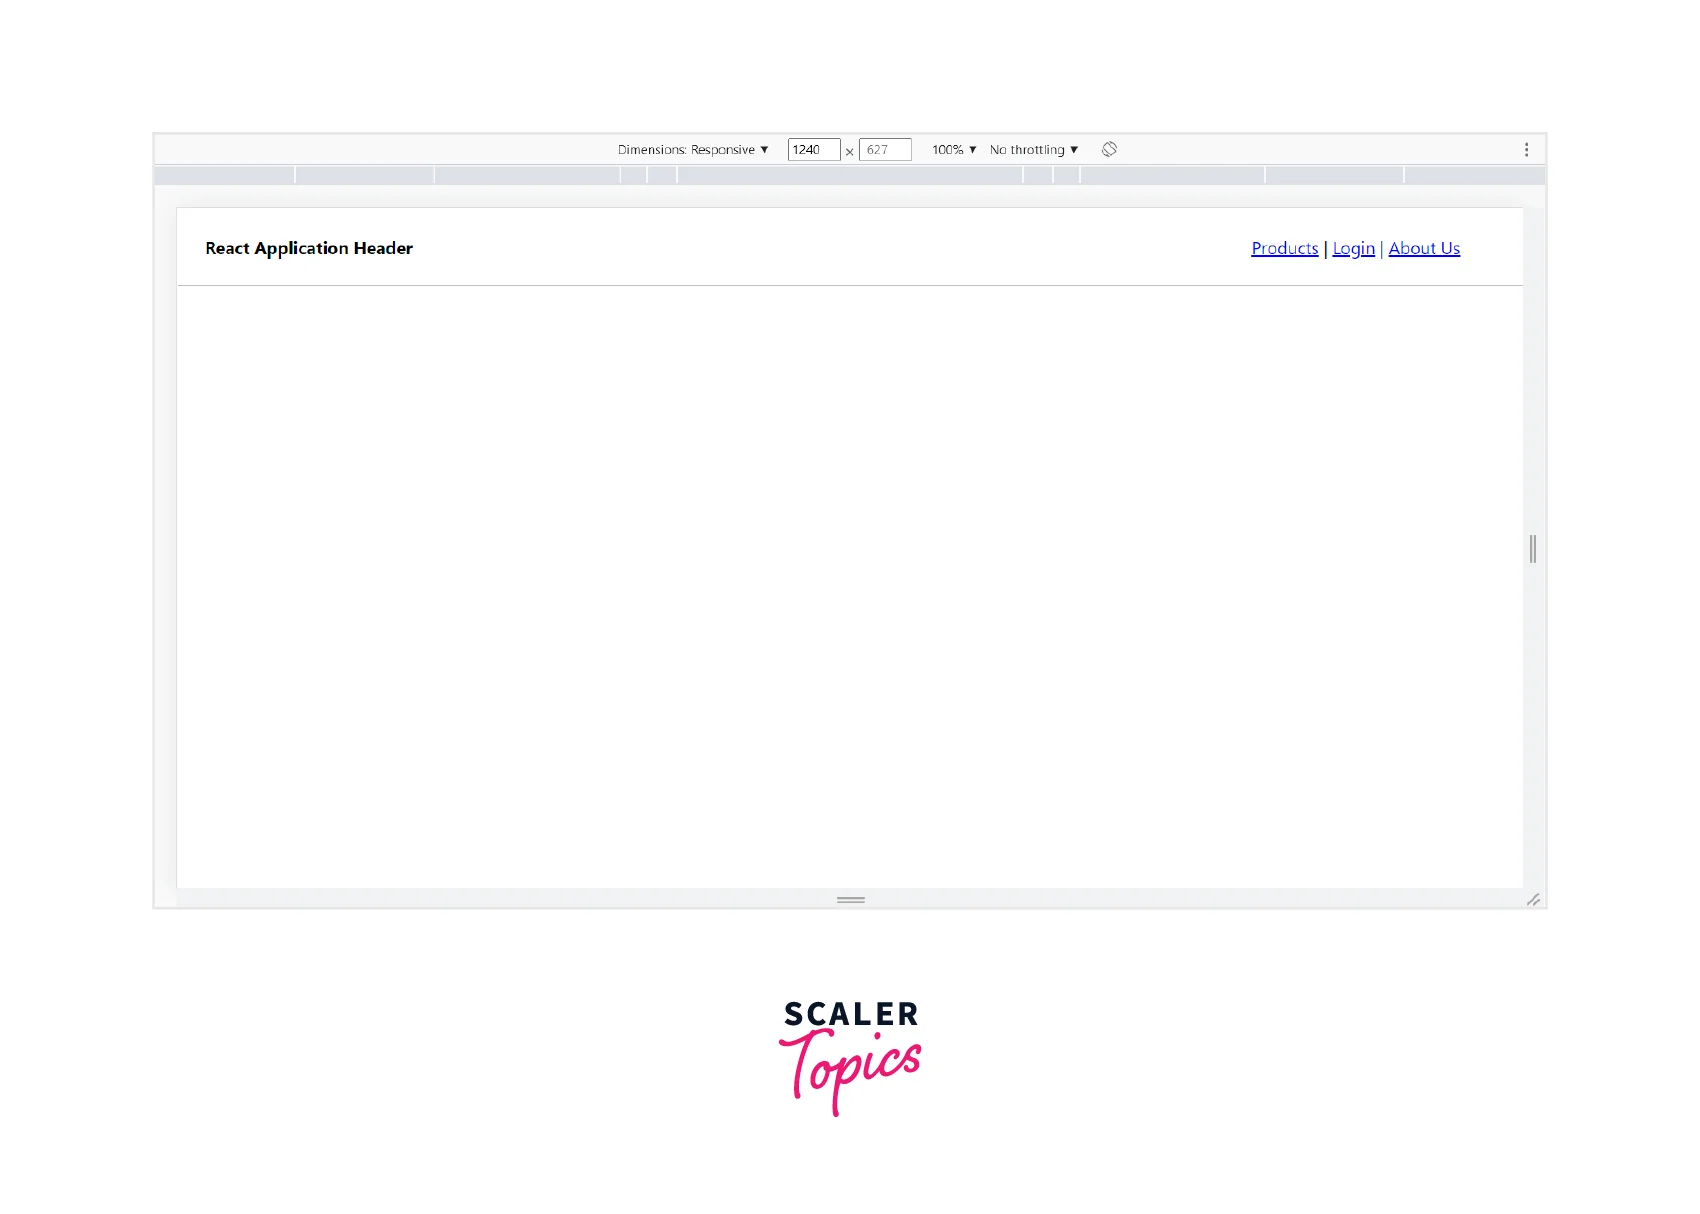
This is how our page looks like when the page width is more than 700 px.
Adding Routes to Our Navigation
To set up Routes in our React application, we can use BrowserRouter, Route, and Routes. To use these, we need the 'react-router-dom' package which can be installed using the command given below.
npm i react-router-dom
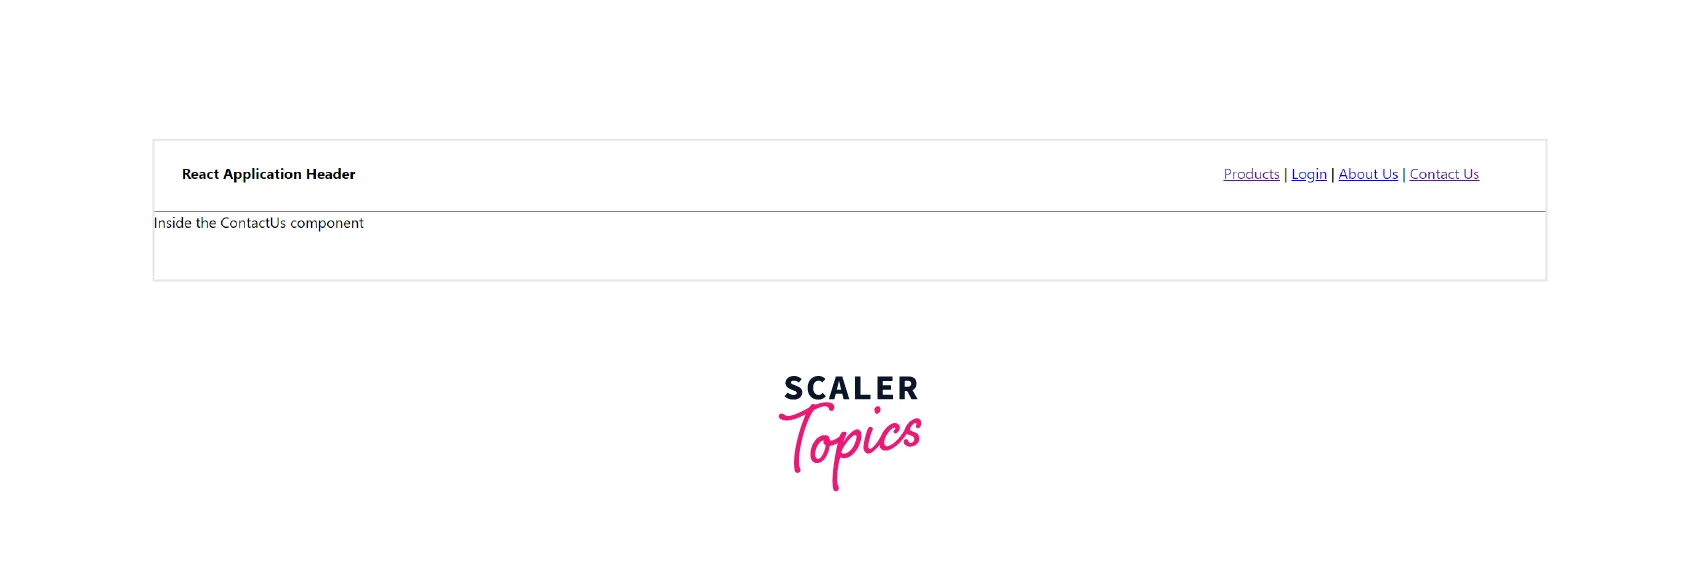
Let us set the Route to the `Contact Us component which will be loaded at the '/contactus' route. We will also create a Contact Us component and will use Prime React Forms features to implement it.
We will create a file ContactUs.jsx inside the component folder in which, we will implement the Contact Us page.
Given below is the App.js code to set up routes in React application.
ContactUs.jsx
Now on clicking the ContactUs link in the Navigation Bar, the ContactUs component will be loaded.
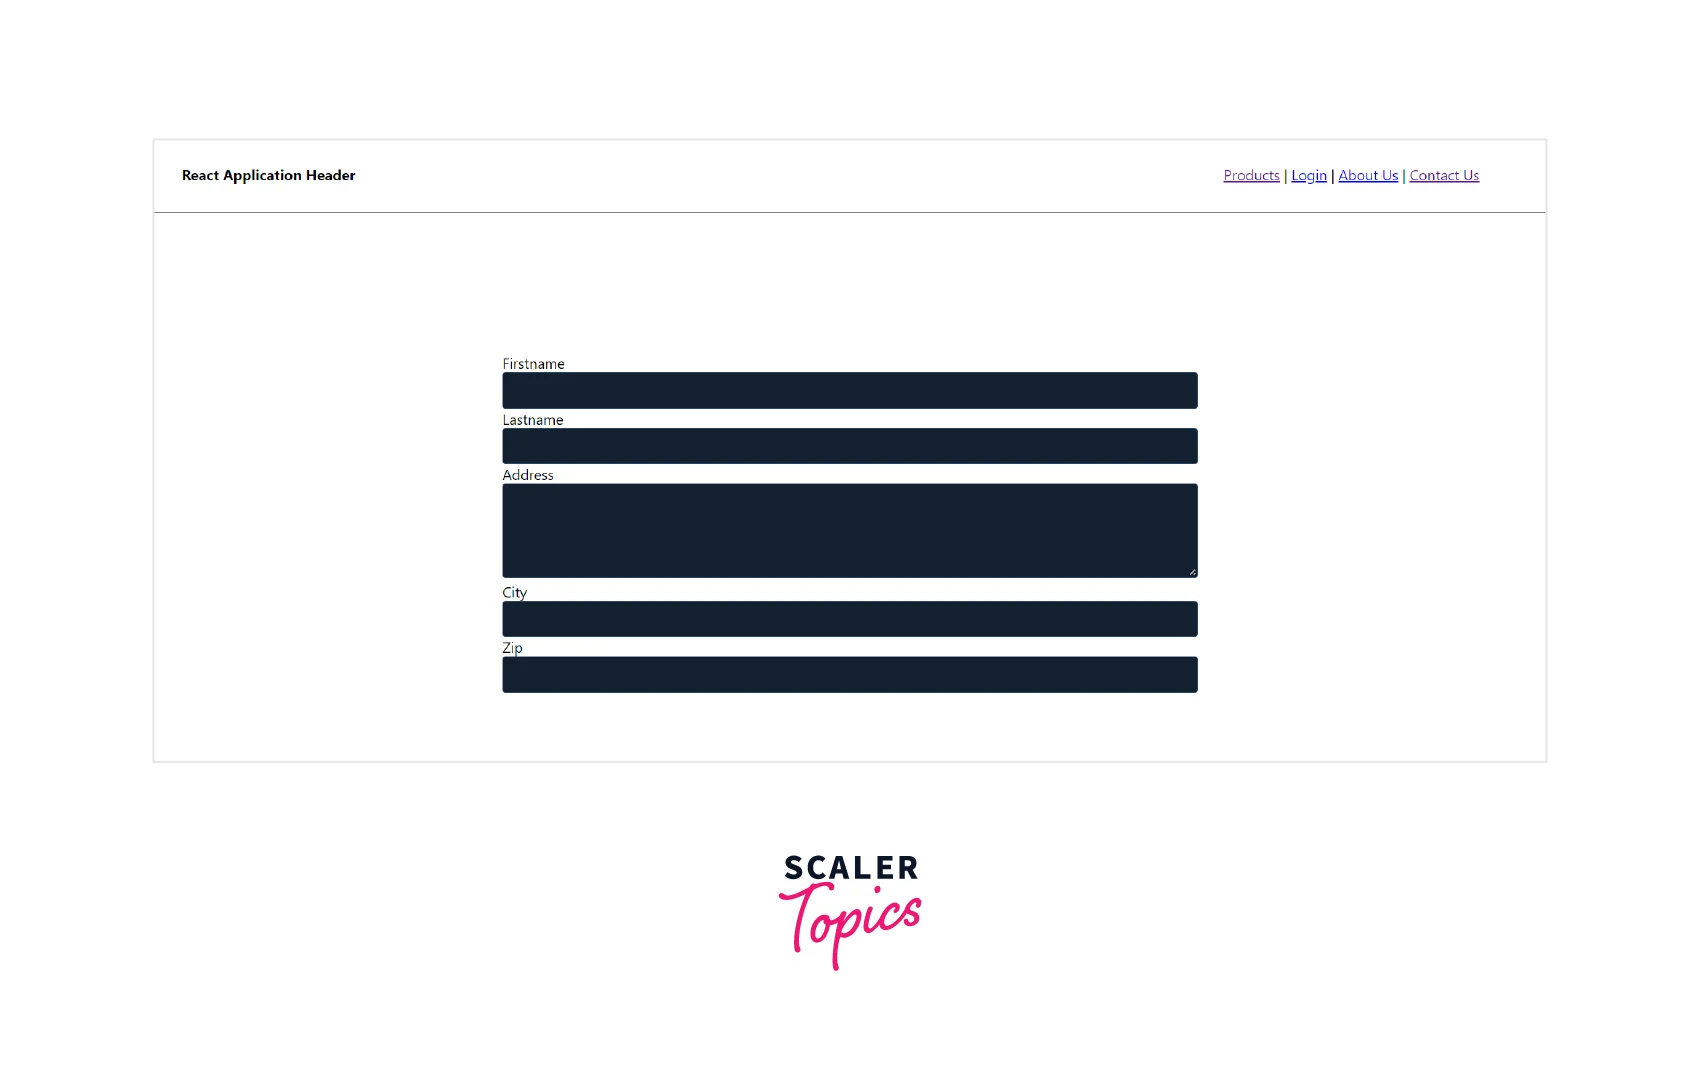
Let us implement a Prime React Form inside the ContactUs.jsx component to insert details of some users using our React application.
We will be using advanced forms in Prime React Library that use primeflex as well. You can refer to the official documentation of Prime React Forms. Prime React Forms
ContactUs.jsx
This is what our form looks like.
Conclusion
-
Prime React is an open-source UI library that contains many features and components that can be used to create a React application.
-
React application can be created by opening a code editor and writing the following command in the terminal. npx create-react-app reactapp
-
To add Prime React dependencies, refer to the commands given below. Navigate to the React Application folder in the terminal and write these commands to install the dependencies.
-
To use Prime React and its different features, CSS files are to be imported inside the App.js file. For example to import Prime Flex CSS, write the below code inside App.js. import 'primeflex/primeflex.css';
-
To make Navigation Bar responsive, we can use media query and set a breakdown width. We will be able to see the responsiveness in the navigation bar at the breakdown width only.