React Helmet
Overview
Every website developer hopes that his or her website will show up first in the browser's search results. The browser's inability to render JavaScript causes situations where the search engine crawler cannot be trusted. As a result, Single-page applications created using React are unable to favor search engine crawlers.
One of the biggest challenges is getting pages to the front of the webpage. Server Side Rendering may therefore be used to address the issue, but it typically has adaptability restrictions. React Helmet can be helpful in this situation, and it can help in the SEO optimization of the website.
Transform Your Career
Choose from our industry-leading programs designed for career success
Modern Software and AI Engineering Program
Master full-stack development with AI integration

Modern Data Science and ML with specialisation in AI
Advanced data science techniques with AI specialization
Advanced AIML with Specialisation in Agentic AI
Deep dive into AIML with focus on Agentic systems
DevOps, Cloud & AI Platform Engineering
Build and manage AI-powered cloud infrastructure
AI Engineering Advanced Certification by IIT-Roorkee
Premier AI engineering certification from IIT-Roorkee
Introduction
Search engine optimization, or SEO, simply refers to the process of making changes to your website to make it more visible when users search for goods or services associated with your company on Google, Bing, and other search engines. The more visible your pages are in search results, the more likely it is that you'll get noticed and draw both new and returning customers to your company.
When React is used without server-side rendering, the crawler becomes stuck on the first page since it cannot see any links to follow. Before adding the page to the queue for the crawler, the indexer must render it and extract the hyperlinks. The crawler will ultimately reach the following collection of pages, but it will also halt there because all of the links are concealed until JavaScript is rendered. So it has to wait until the indexer comes back with new URLs to crawl, etc.
As a result, the crawl process is incredibly laborious and ineffective. And for this reason, React-based websites (as well as those built on similar JavaScript platforms) perform worse in Google than those whose primary content is plain HTML.
The latter type of website will be crawled much more effectively; plain HTML websites can be crawled very efficiently, new content will be added to and changed much faster, and Google is much better able to assess the crawl priority of individual pages on such websites. React Helmet is a useful component that can help to dynamically manage the document's head section. Setting the document's title, description, and meta tags are a few frequent use cases.
What is React Helmet?
The React Helmet can be called a document head manager for React-based applications. It makes it very simple for developers to update meta tags that are present on both the client side and the server side. This library can be considered ideal for applications where SEO is important. Additionally, it is a media-friendly library with a variety of features and dependencies that make using it in any React app simple.
React Helmet is a simple component that makes managing and dynamically setting the contents of the document's head section simple. As a result, server-side rendering and React Helmet form a powerful team for developing apps that are social media and SEO-friendly. All of your changes to the document head will be managed by this reusable React component. Helmet produces plain HTML tags from plain HTML input. It's incredibly easy, and React is user-friendly for newcomers.
React Helmet, for instance, can be used to dynamically set the document's title, description, and meta tags. This comes in very handy when you need to update the meta tags for SEO based on the route that is currently being rendered to the page and has a project with multiple routes. It enables you to add meta tags that search engines and social media crawlers will read when combined with server-side rendering. Building apps that can take advantage of SEO (search engine optimization) and social media data like oEmbed, Facebook Open Graph, or Twitter Cards, makes server-side rendering and React Helmet a potent combination.
Installation and Setup
First, you must have Node.js installed in your system to go through this tutorial. If you don't have Node.js installed, you can easily install it with the help of the installer provided on the official Node.js website.
Next, you need to create a React application using the create-react-app. Run the following command for this:
Now you can install React Helmet into your project using npm or Yarn :
In case of yarn,
Turn Learning into Career Growth
React Helmet Basic Features and Usage
There are several features that React Helmet provides that make it ideal for use in optimizing SEO ranking for a React-based website:
- Supports all valid head tags, including title, style, base, meta, link, script, and noscript.
- Supports title, HTML, and body tag attributes.
- Server-side rendering is also supported.
- Duplicate head changes are overridden by nested components (Components further down the tree can override values provided to the Helmet component on a higher level).
- Whenever they are specified in the same component, duplicate head changes are kept (support for tags like apple-touch-icon).
- It provides a Callback for tracking DOM changes.
To use React Helmet, you first import the Helmet component; then you add the elements you want in your document's <head>. Let us now have a look at how to import and make use of the React helmet.
Write the following code in the src/App.js file in your react application:
We will see the changes in our React application as soon as the above-mentioned code snippet is updated in the file located in the directory src/App.js . Only the <title>, <html>, and <meta> tag elements were used in this code snippet's description to keep things simple to understand. A small amount of theme color was also used for the other elements, such as base, meta, link, script, etc. These elements are typically regarded as Helmet's offspring.
The output of the above code is as follows:
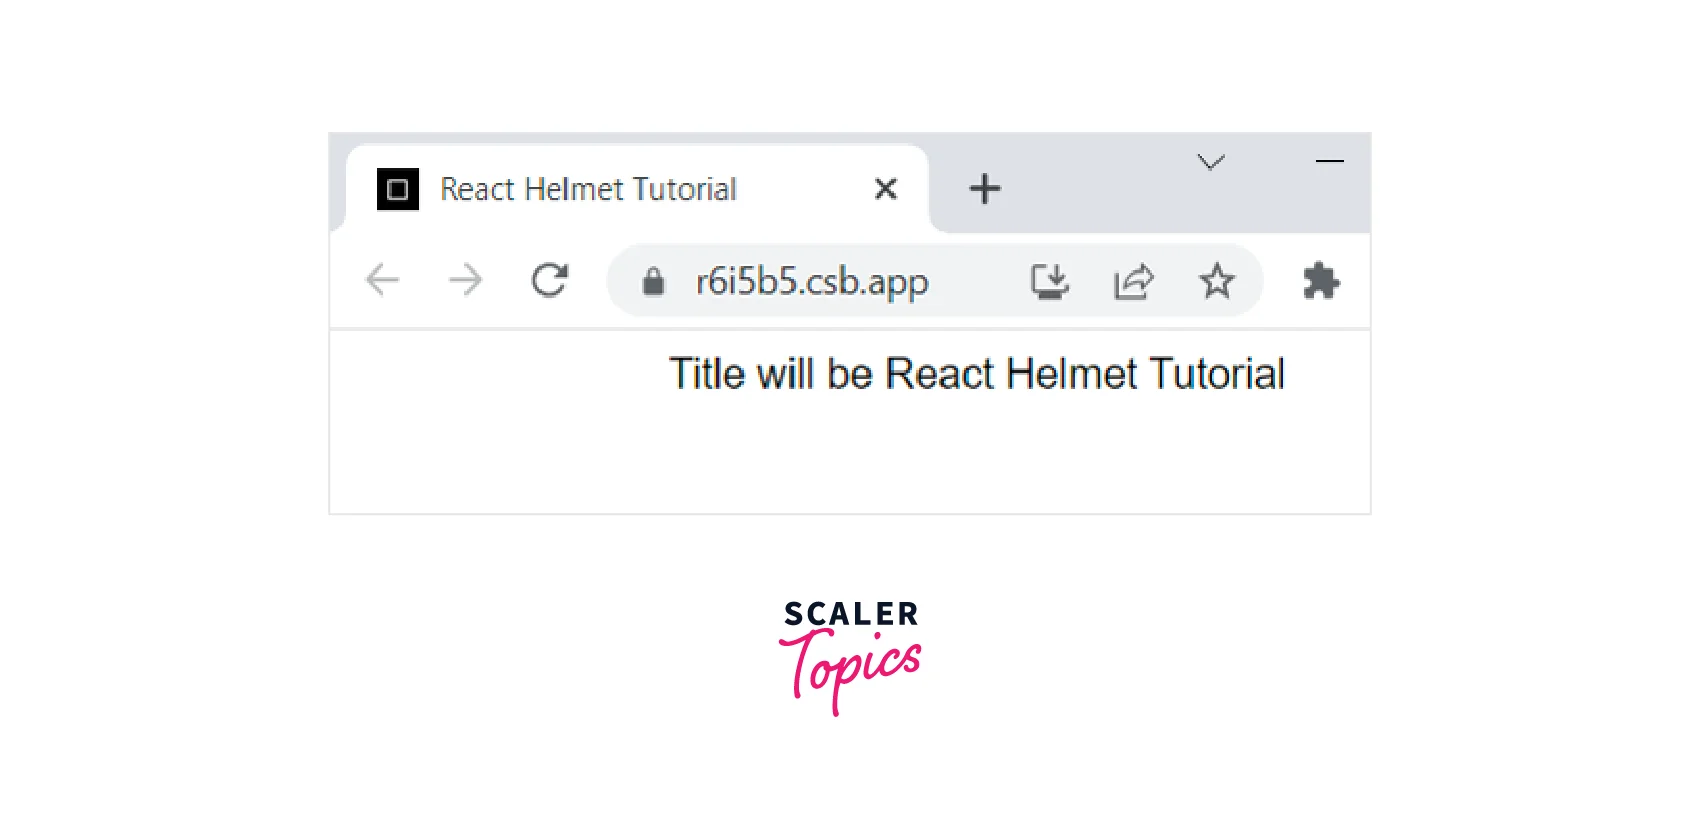
The title has been set according to the Helmet tag.
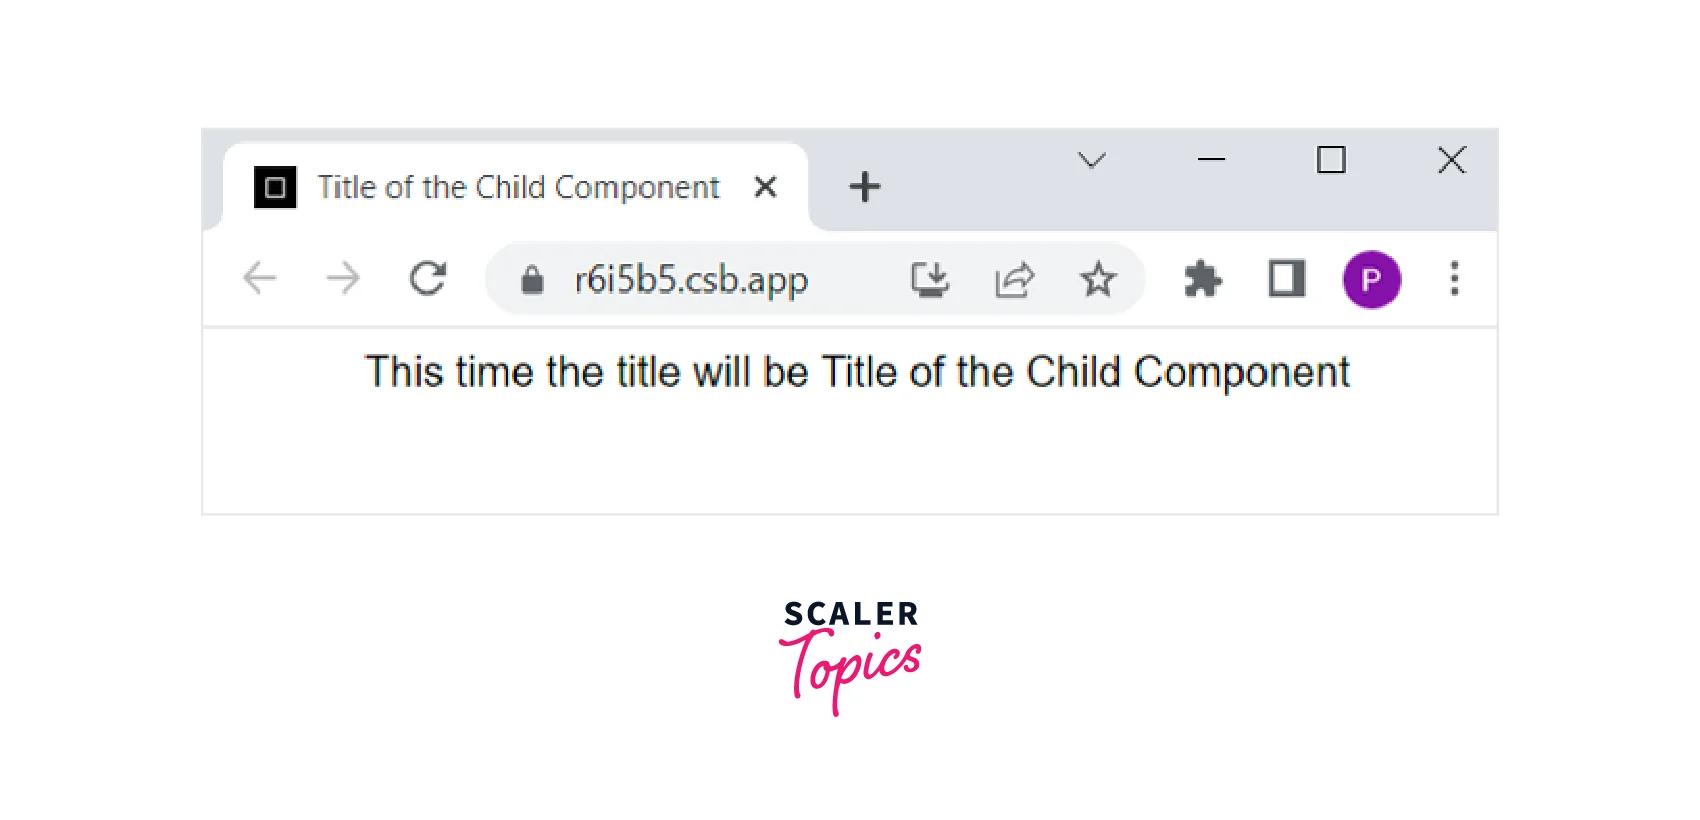
The attributes that have been defined for the body tag and html tag are shown in the example below. Make a file Child.js in the src directory and write the following code in it.
Now create a child component in the src folder and write the following code in it. Also, import the child component in App.js.
As we may not be certain whether the preference would be given to the child or parent, the example above contains ambiguity. In a condition like this, preference is given to the child component over the parent component.
For example, if you have a child component like this:
Outpupt:
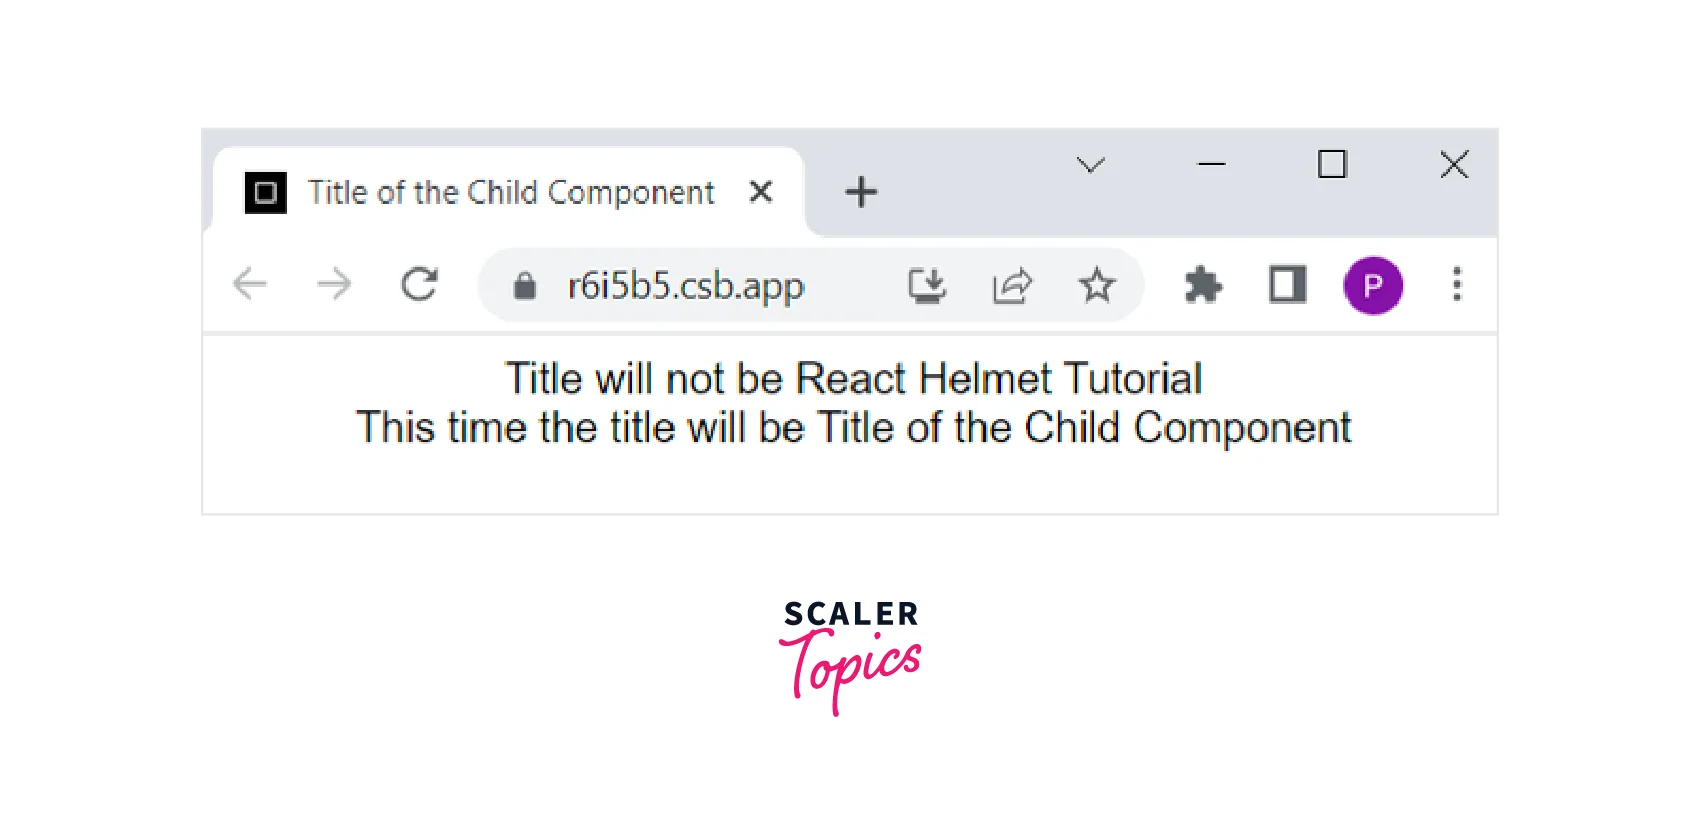
Now that the child component, represented by the Child.js file, has been imported into the parent component, represented by the App.js file, it is important to remember to update the document's title to reflect the child component. But it's also crucial to realize that the theme color and the metadata cannot be changed. The following code snippet provides a demonstration of the same.
Make the changes in the App.js file as follows:
Output:
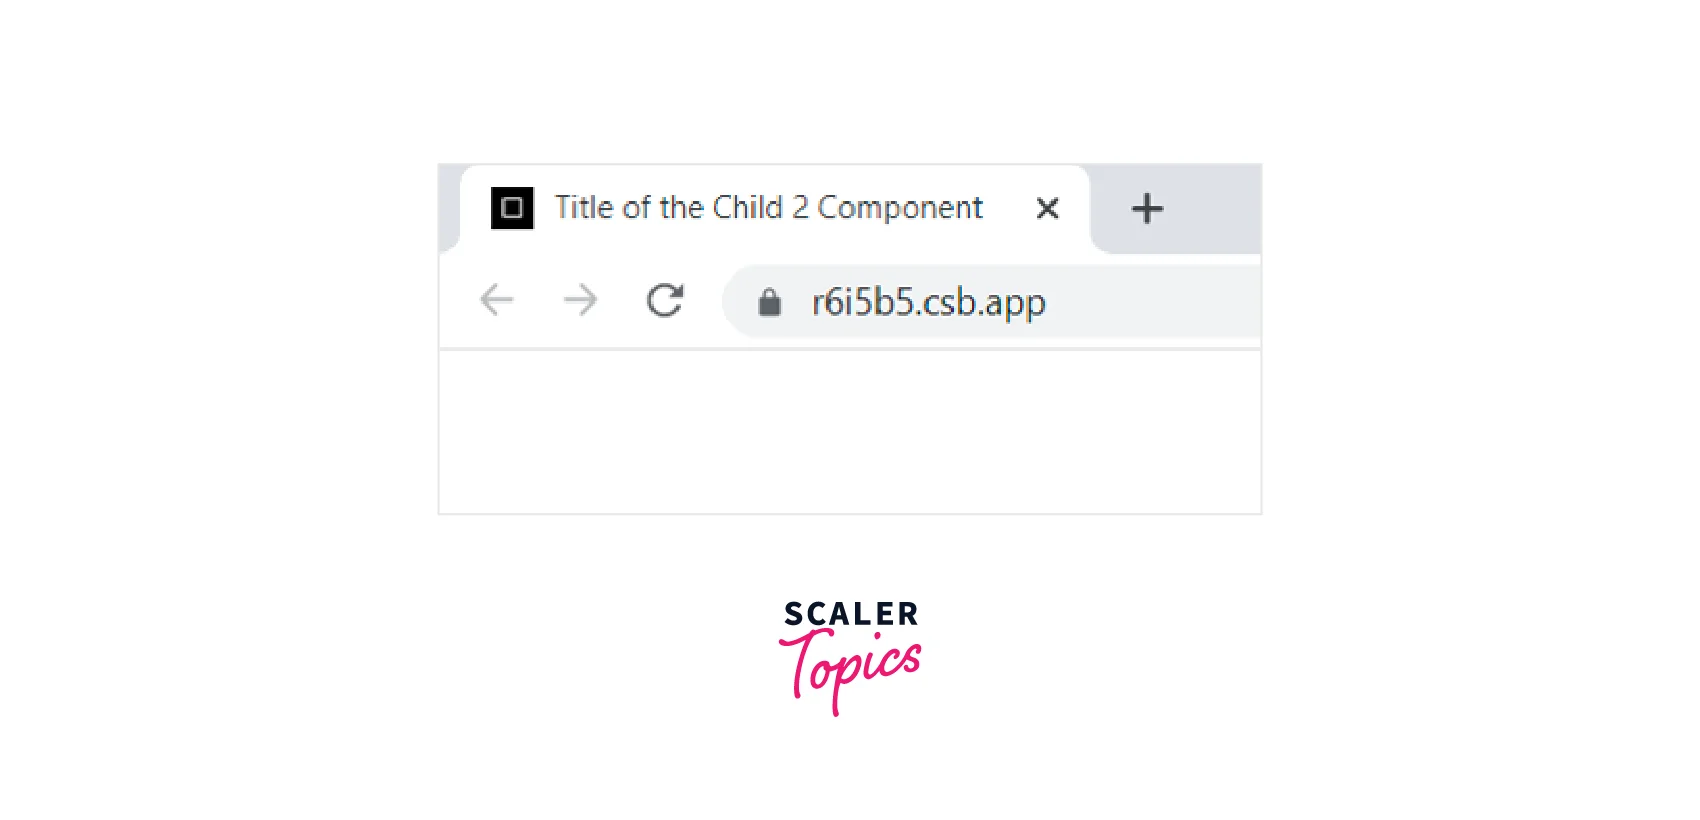
Another situation to take into account in this context is between two child components. The child component occurring later will always be given the highest preference between the two child components. For example, if there were two child components, Child1 and Child2, Child2 would receive preference and vice versa. An example that demonstrates this claim is provided below.
Write the following code in App.js:
Make two components Child1 and Child2 as follows:
The above-mentioned code makes it clear that the title will be set by the <Child2> component. The preference will be set for the <Child1> if the order is reversed.
Output:
React Helmet with SSR Integration
As we've already discussed, React Helmet is widely mentioned as the best partner for server-side app rendering. You can quickly review the terms by setting up a sample React SSR application. As a result, we need to use the render static in the Helmet method in the server-side code of the application, immediately following the ReactDOMServerr's renderToString or renderToStaticMarkup. Take a look at the code snippet below to see how it's done.
It's necessary to remember that the function toString() method exists in every Helmet property. The HTML string is where this method is most frequently used. It is also an instance of the render static function in Helmet, which typically returns all the properties covered, including the script, link, title, etc., and contains the default function toString() method in each of these properties.
Working synchronously might not always be the best choice when implementing SSR in the React Helmet. The React Helmet could pose risks and cause errors if we are free to make asynchronous requests like streaming. Therefore, we use the react-helmet-async method to address this problem. This approach addresses the issue by explicitly forking React Helmet. We must execute the following terminal command in the node environment to install it.
The two components we will be importing from react-helmet-async are called Helmet and HelmetProvider.
- HelmetProvider:
To provide context and stop memory leaks, HelmetProvider will wrap the entire app component. As a result, only the root App component will need to import this component. - Helmet:
Any page component where you want to use meta tags will need to import Helmet. Consider the <Helmet> tag as the page's <head> tag.
After executing this command, everything will remain the same other than the HelmetProvider for the React tree to be encapsulated on both the server side and the client side. Below is a short demonstration of how this works.
React Helmet & React Router
If the application being built uses React Router for routing, React Helmet performs admirably. One hook associated with it is that each Router must use React Helmet for the routes to remain intact. The following code snippet shows how to do this.
In the src/App.js file, write the following code:
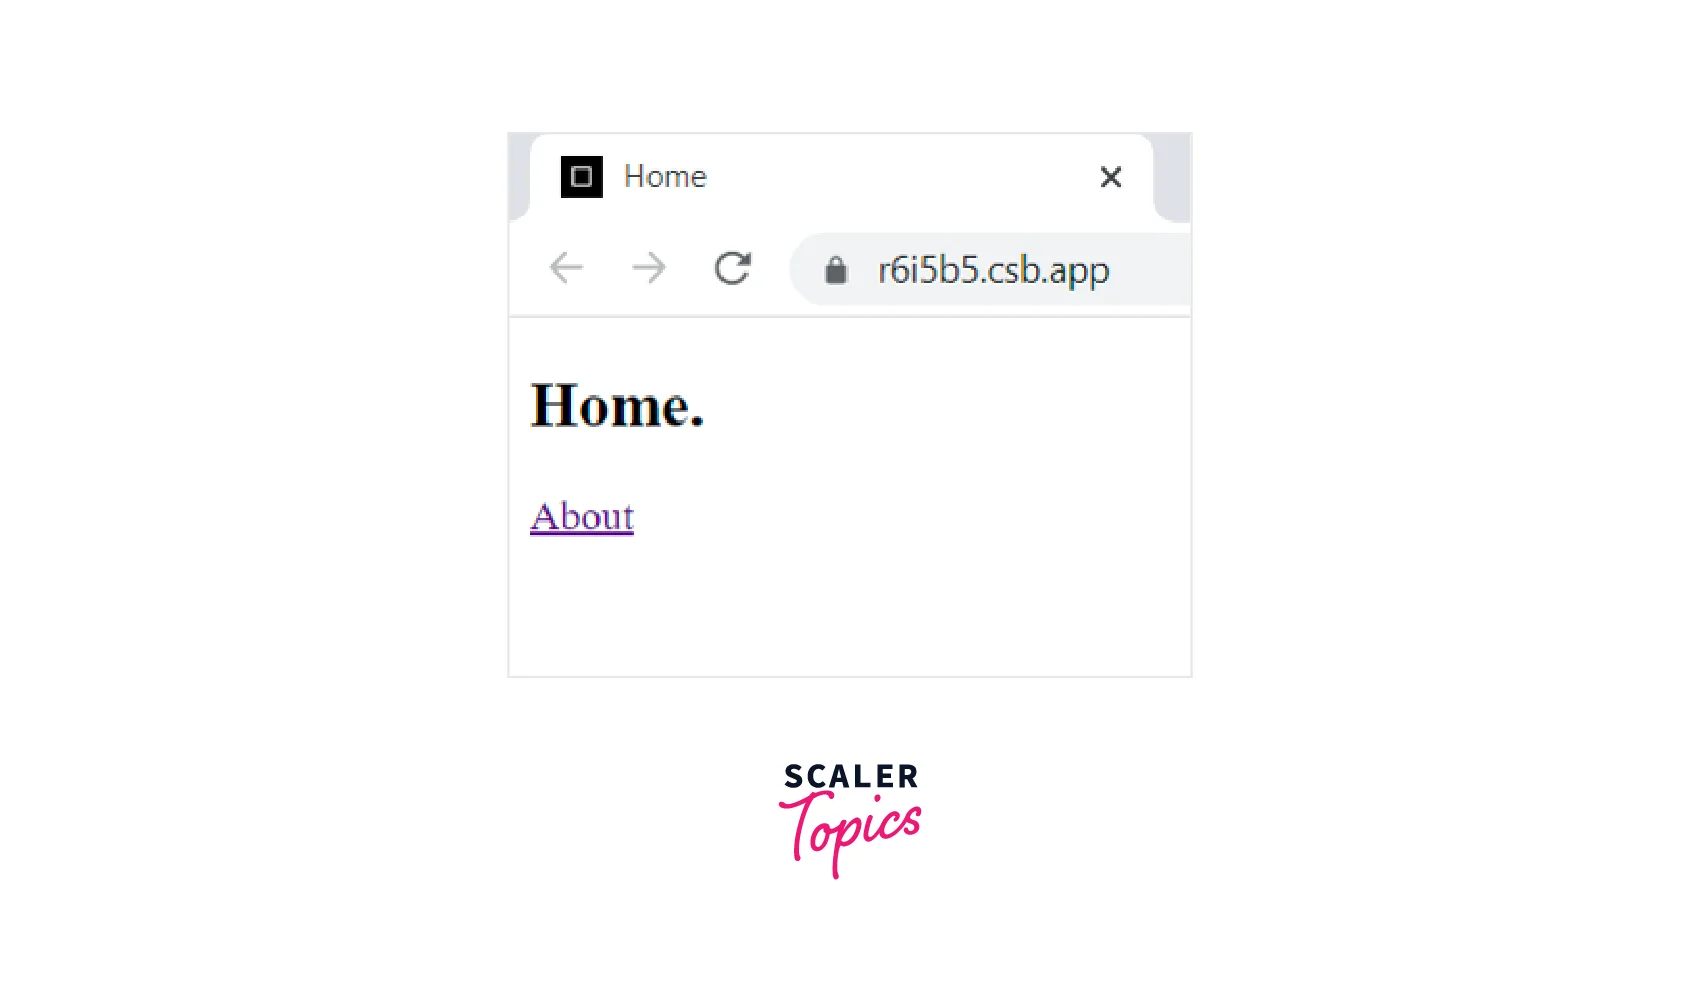
In the above code, BrowserRouter has been used, and two routes have been defined. The / path has been set for the Home component, and the /about path has been set for the About component
Now make a file Home.js in the src folder and write the following code in it:
In the above code, the Home component has been defined and the Helmet tag has been used to provide the title for the Home component.
Now make a file About.js in the src folder and write the following code in it:
In the above code, the About component has been defined and the Helmet tag has been used to provide the title for the About component.
Output:
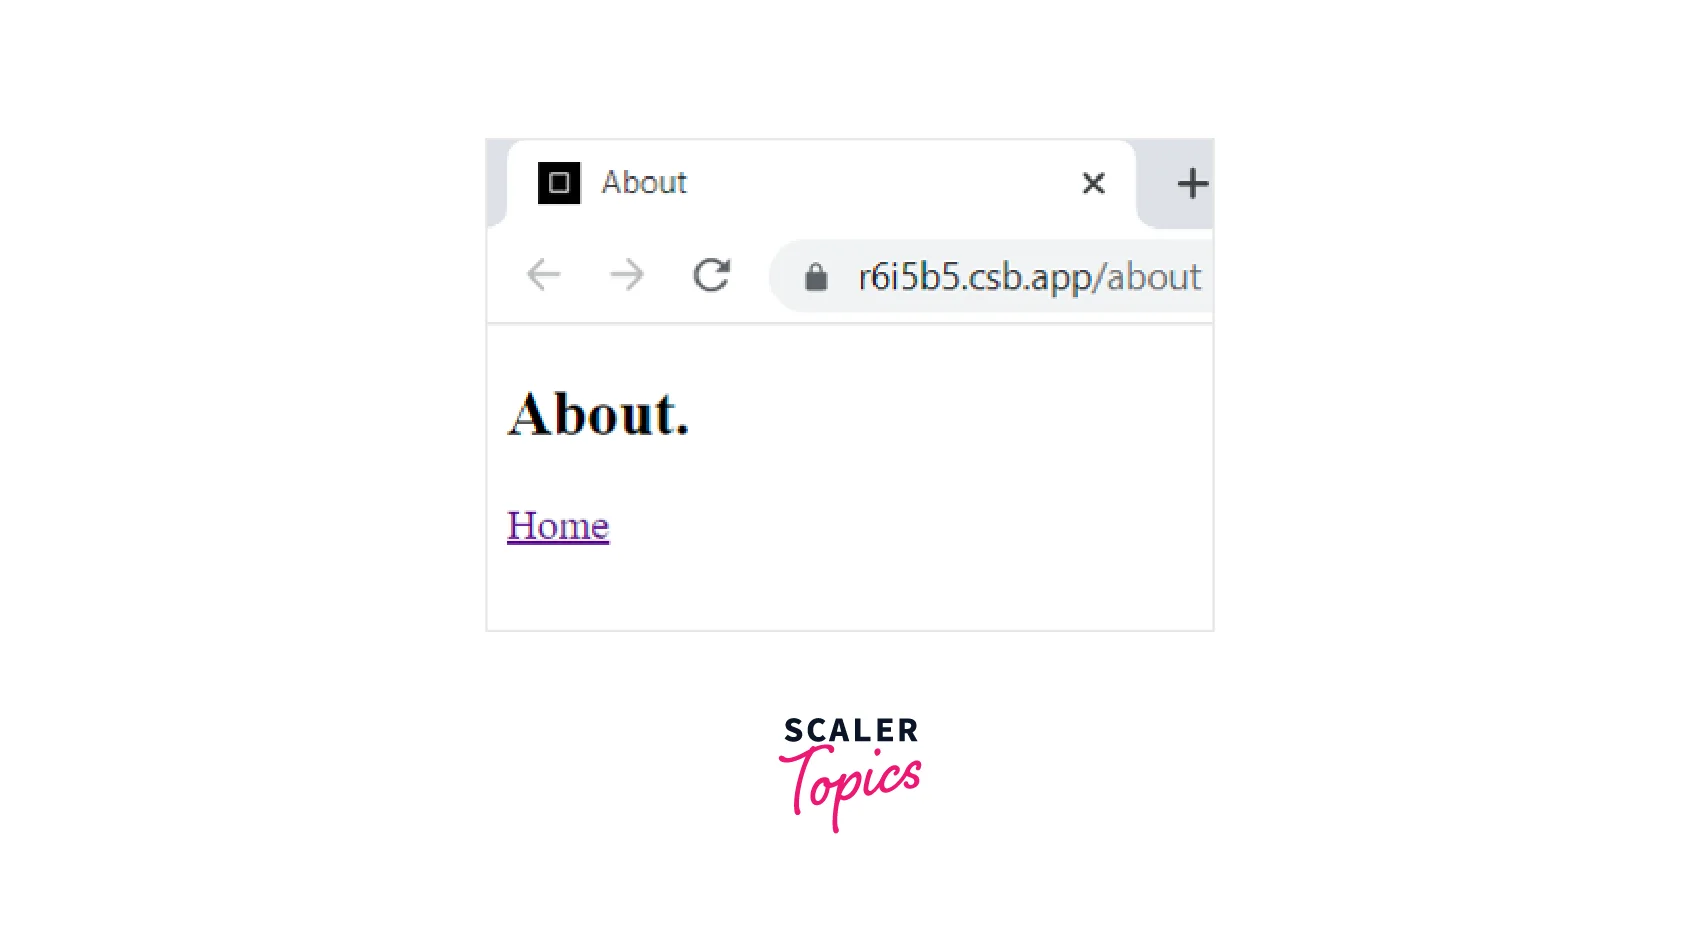
This is how routing is done using React Helmet and React Router, and also, the method can be used for as many routes as possible.
Conclusion
- The crawler stalls on the first page when React is used without server-side rendering because it cannot see any links to follow.
- The React Helmet can be called a document head manager for React-based applications as it is very simple for developers to update meta tags that are present on both the client side and the server side.
- React Helmet, for instance, can be used to dynamically set the document's title, description, and meta tags. This comes in very handy when you need to update the meta tags for SEO.
- React Helmet supports all valid head tags, including title, style, base, meta, link, script, and noscript.
- Duplicate head changes are overridden by nested components (Components further down the tree can override values provided to the Helmet component on a higher level).
- Whenever react helmet are specified in the same component, duplicate head changes are kept.
- The React Helmet could pose risks and cause errors if we are free to make asynchronous requests like streaming. Therefore, we use the react-helmet-async method to address this problem.
- HelmetProvider is used to provide context and stop memory leaks, HelmetProvider will wrap the entire app component.
- Helmet is imported in any page component where you want to use meta tags will need to import Helmet. Consider the <Helmet> tag as the page's <head> tag.