React Slick
Overview
It regularly becomes necessary to incorporate carousels into our online apps. UI elements called carousels show numerous items in one area. They are one of the most aesthetically pleasing parts of a web page, but they can be challenging to build from scratch, especially with frameworks like React. React provides a great library for creating carousels: React Slick. This popular library offers responsiveness and accessibility to support the development of powerful carousels.
Transform Your Career
Choose from our industry-leading programs designed for career success
Modern Software and AI Engineering Program
Master full-stack development with AI integration

Modern Data Science and ML with specialisation in AI
Advanced data science techniques with AI specialization
Advanced AIML with Specialisation in Agentic AI
Deep dive into AIML with focus on Agentic systems
DevOps, Cloud & AI Platform Engineering
Build and manage AI-powered cloud infrastructure
AI Engineering Advanced Certification by IIT-Roorkee
Premier AI engineering certification from IIT-Roorkee
What is React Slick?
A carousel typically consists of a collection of pictures. Carousels are an excellent choice if you want to present multiple pieces of material in one area. We would need to code a lot of complex logic and CSS to display the elements in a basic carousel. As a result, the carousel's design will take a lot of time and effort. Fortunately, we can quickly and easily make an image slide show thanks to React Slick, an open-source carousel component library.
React Slick is a popular library for building carousels (slideshows or image galleries) in a React application. It is based on the Slick carousel library, which is a widely used jQuery plugin for building carousels. React Slick provides a set of React components that make it easy to integrate the Slick carousel library into a React application.
The library provides several different types of carousels, including horizontal and vertical carousels, and allows you to customize the appearance and behavior of the carousel through a set of props. You can use React Slick to create image galleries, product carousels, and other types of carousels for your application.
Features
Here are some key features of React Slick:
- Responsive design: React Slick allows you to create React slick sliders that adapt to the size of the viewport so they look good on any device.
- Customization: You can customize the appearance and behavior of your sliders with a wide range of options and settings.
- Touch and swipe support: React Slick includes built-in support for touch and swipe gestures, making it easy to navigate through your sliders on mobile devices.
- Lazy loading: You can set React Slick to lazy-load images, which can improve the performance of your sliders, especially on mobile devices.
- Navigation controls: React-Slick provides various navigation controls, such as arrows, dots, or thumbnails, that allow users to navigate between slides.
- Auto-play: You can set your sliders to automatically advance to the next slide after a certain amount of time.
- Callbacks: React Slick provides a variety of callback functions that allow you to trigger custom behavior at different points in the slider's lifecycle.
- Accessibility: React-Slick is designed to be accessible to users with disabilities, with features such as keyboard navigation and proper focus management.
Getting Started with React Slick
To install React-Slick, you can use npm or yarn, the two most popular package managers for JavaScript.
- First, make sure you have a project set up with React. If you don't already have a project, you can create a new one by running the following command:
- Navigate to your project's directory and install React-Slick by running the following command:
or
- After installation, you can import React-Slick into your project by adding the following line to the top of your JavaScript file:
- You will also need to include the CSS for React-Slick in your project. There are a few ways to do this, but the most common method is to import the CSS file from the react-slick package. You can do this by adding the following line at the top of your JavaScript file:
This will include the default styles for React Slick in your project. You can also customize the styles by overriding the default CSS in your stylesheets.
- You will also need to install the slick-carousel package, as React-Slick depends on it:
or
- You can customize the behavior and appearance of the carousel by passing various props to the Slider component. For example, you can use the arrows prop to show navigation arrows, or the dots prop to show navigation dots. You can also use the slidesToShow prop to specify the number of slides to display at a time, or the autoplay prop to enable automatic rotation of the slides.
This will create a carousel with navigation dots, infinite scrolling, a slide transition speed of 500 milliseconds, and an autoplay with a speed of 2000 milliseconds.
That's it! You are now ready to use React Slick in your project.
Note: If you are using a version of React before 16.8 (which introduced hooks), you will also need to install the prop-types package as a dependency:
Creating a Carousel with React Slick
Since we have installed React Slick in our app, let's start to create a carousel:
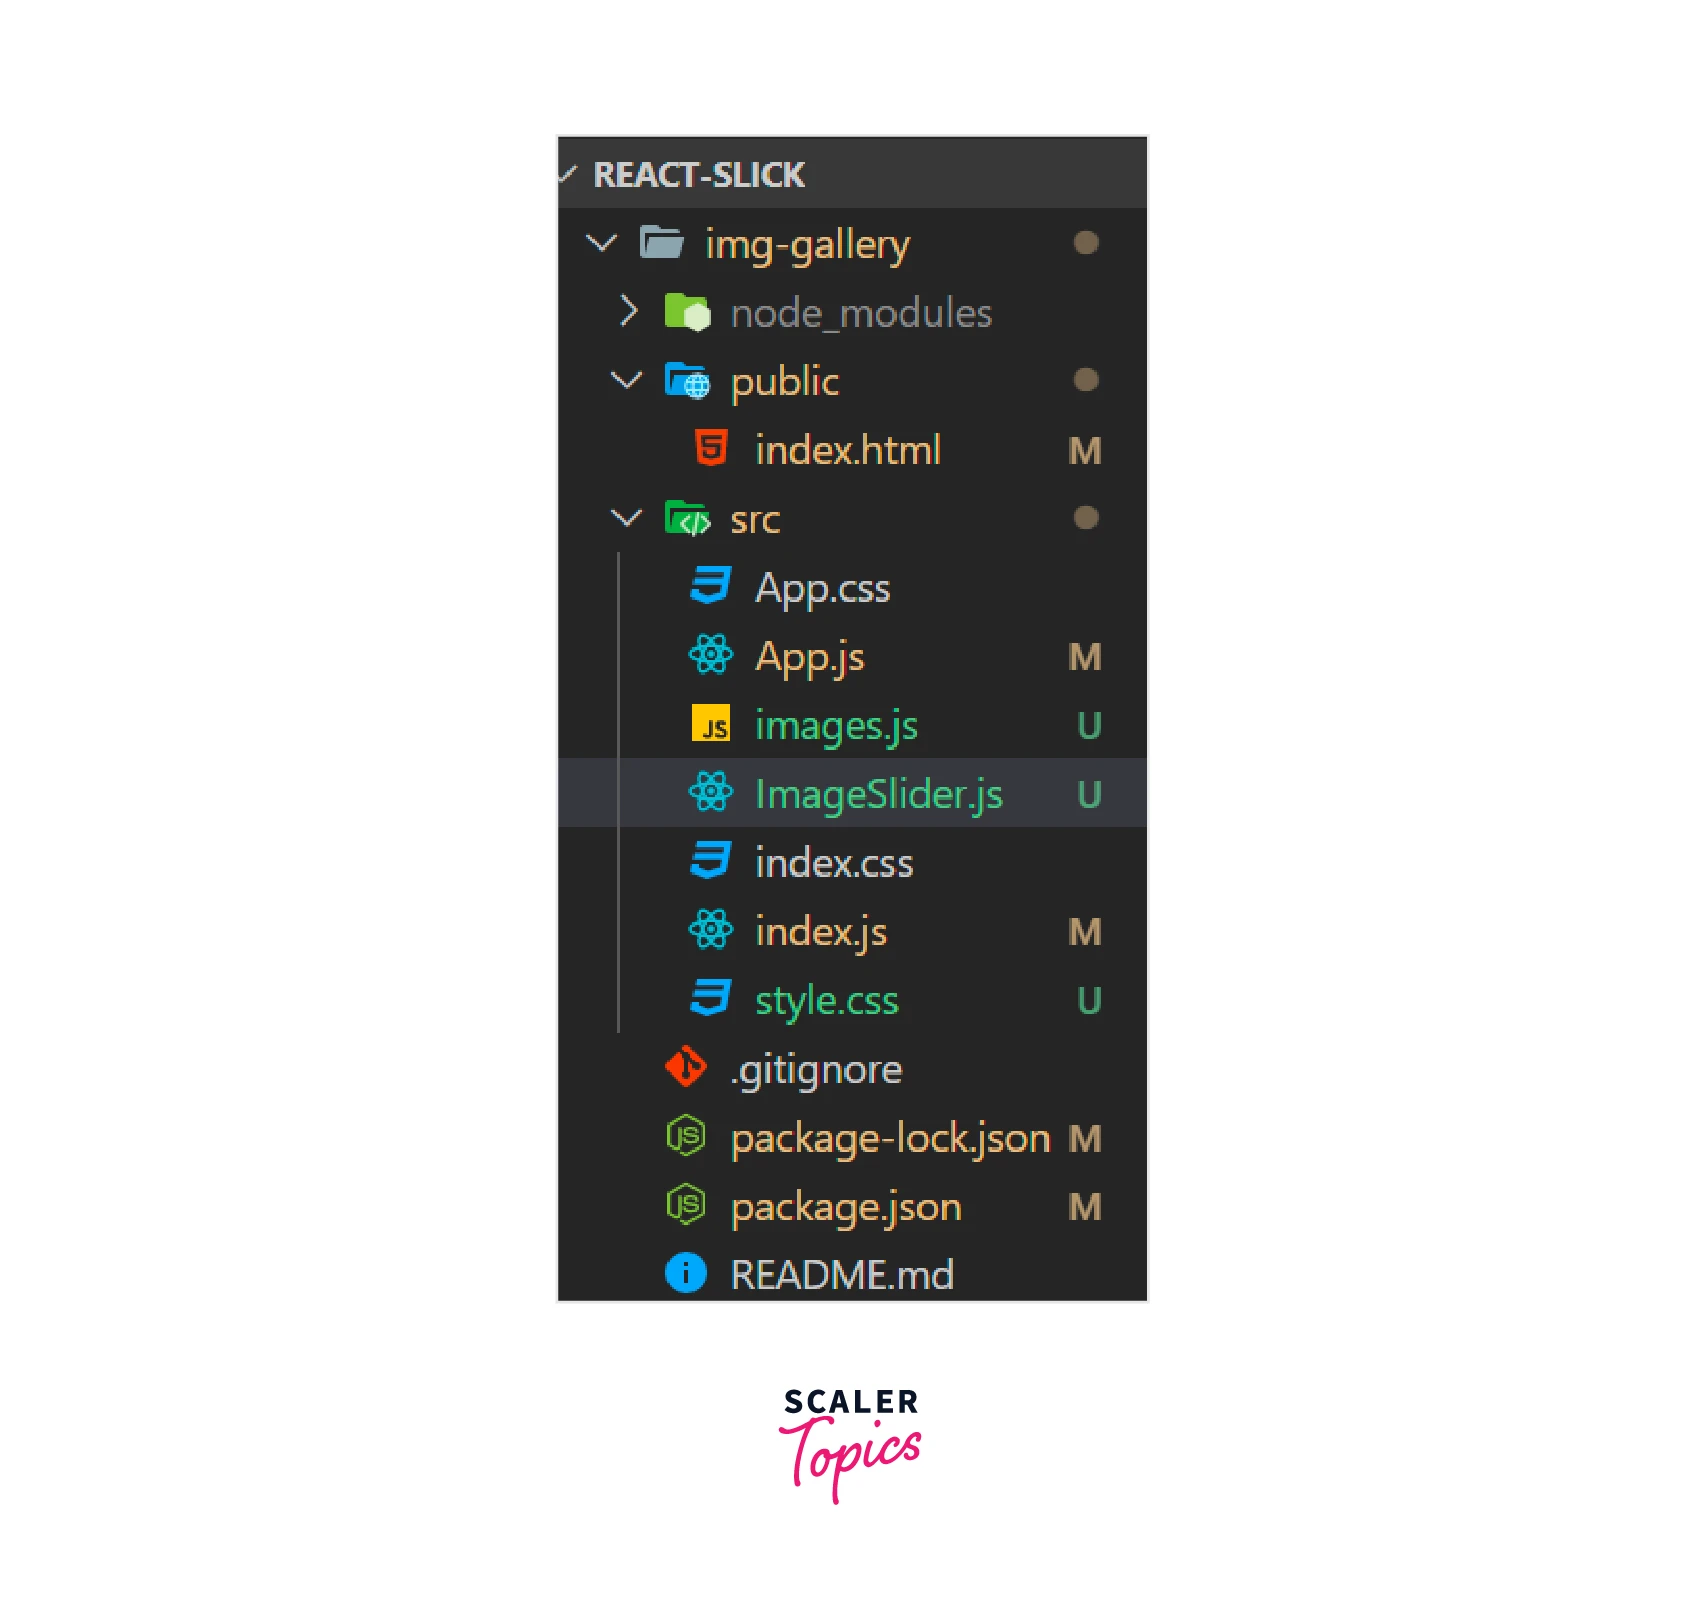
- Change the structure of your project. This is how the Directory structure currently appears.
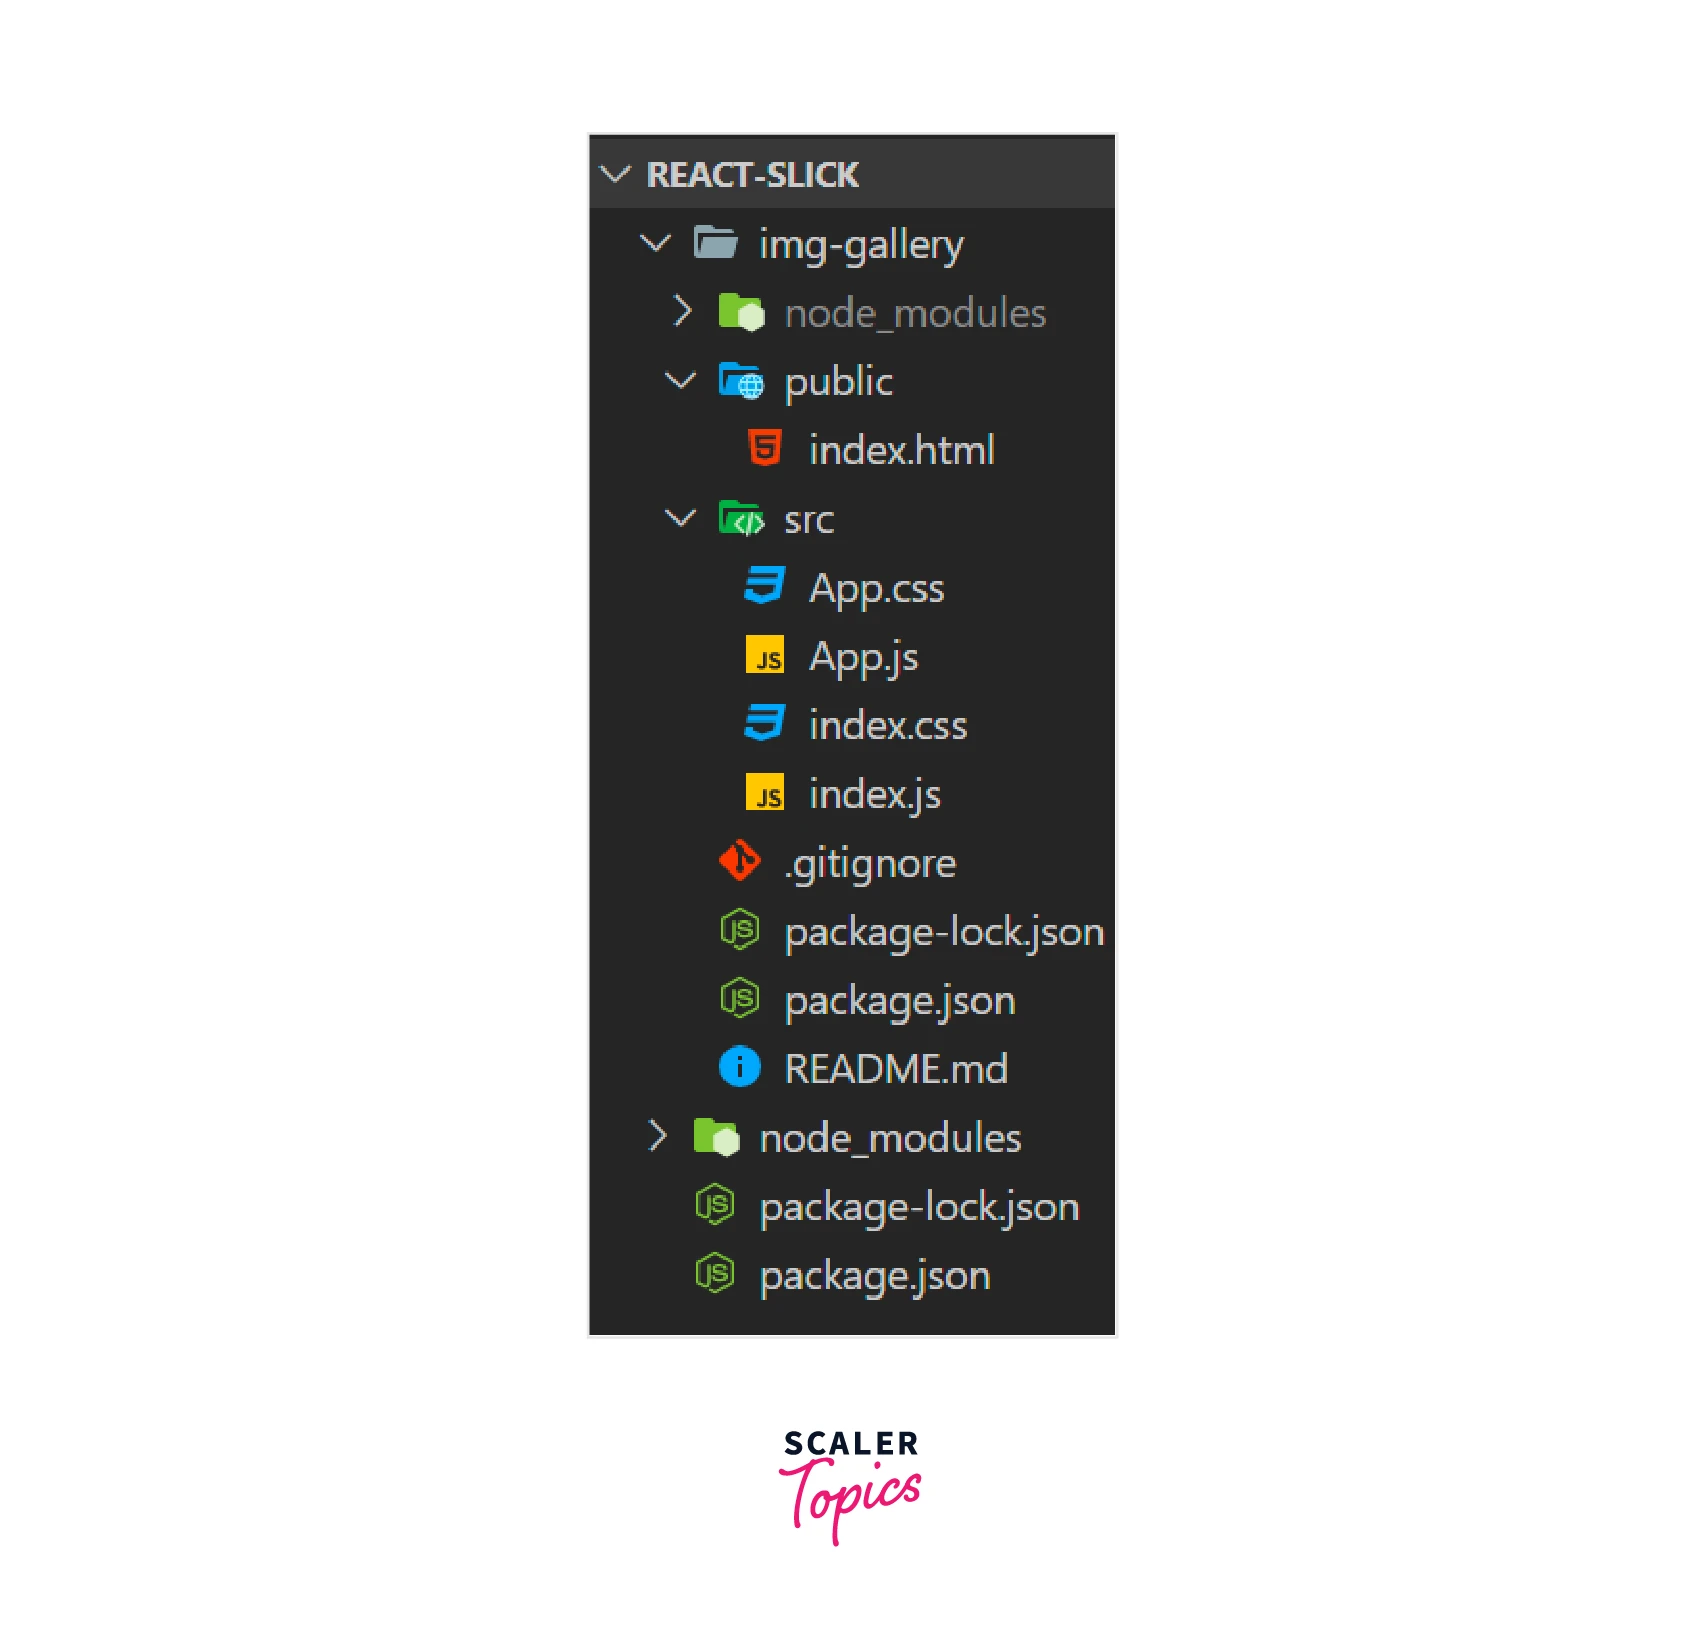
We will modify the folder, and the files required for this project will be retained.
- Create the aforementioned files:
images.js
Now, ensure that your file structure is like this.
- Your index.html file should contain code: The index.html file in your project directory's public subdirectory should include the following code.
- The images.js file should be updated with the images we want to display: The images.js file should contain the following code. By entering the image's URL in the src section, you can use any image of your choosing.
- Creating the "ImageSlider" carousel component inside the imageSlider.js file.
The react slick package will first be imported into the imageSlider.js code. Import the Slick Carousel package's default CSS code. Fill up style.css with unique styling.
We'll set up our carousel with the help of the built-in techniques and attributes listed below:
Infinite: The infinite attribute designates an endless scroll.
LazyLoad: Load components as needed.
Autoplay: Play our slideshow automatically without requiring user input.
Slideshow: a number of slides to display in a frame for a slideshow.
Dots: a navigational aid.
You may alter your slider by utilizing several other tools and techniques. We will build a Slider and provide that component into our setup to generate the desired images in the carousel. Each image in the Image array is mapped by the Map function. To imageSlider.js, add the following code.
- React-slick defines the CSS class slick-slide img class to style the component's image. The code below should be included in the style.css file
- In the root App component pass the ImageSlider component: In the App.js file, add the following code.
- This is how your index.js file should appear. The App.js file is rendered at the root ID of the DOM inside the index.js file, which acts as the main entry point.
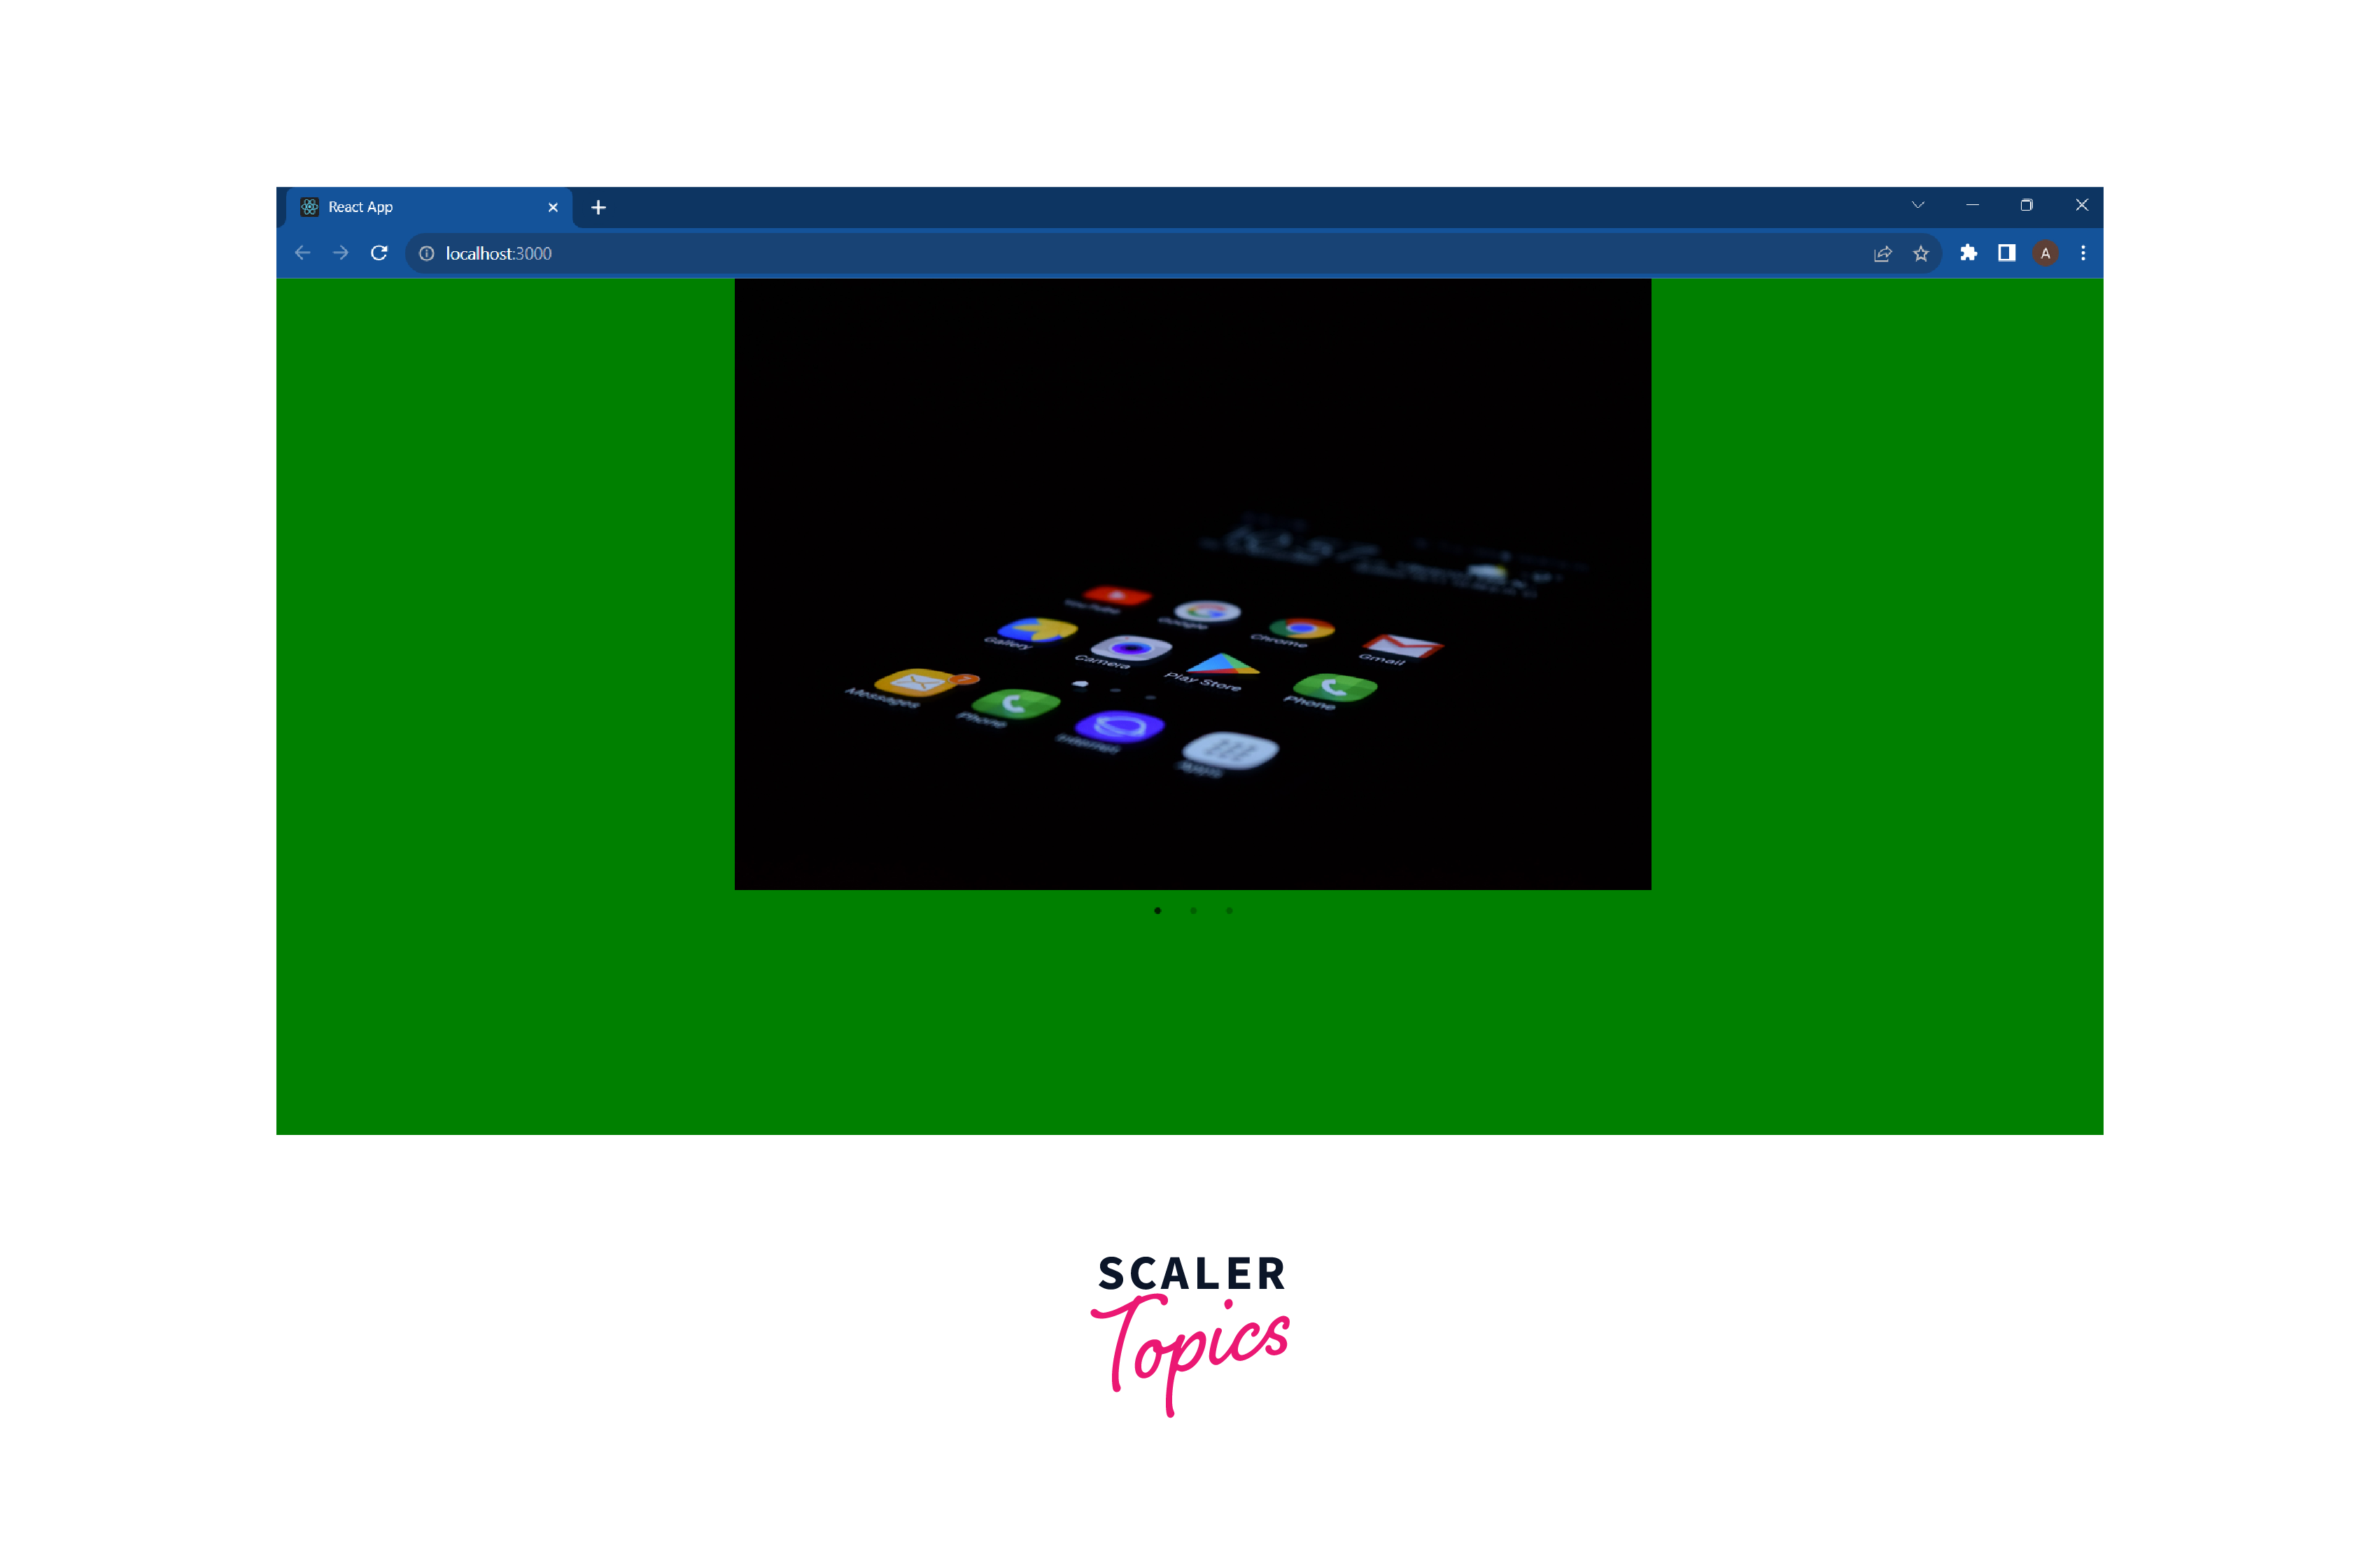
- Now run your application by using the given command:
Output:
Some Tips While Using React Slick
Here are some tips to consider when using React Slick that can help you create high-quality sliders and carousels in your React projects:
- Make sure to carefully read through the documentation and familiarize yourself with the various options and props available in React Slick. This will help you get the most out of the library and customize its features to meet the needs of your project.
- Test your sliders and carousels on a variety of devices and screen sizes to ensure that they are responsive and look good on all devices.
- Consider using the lazy loading and infinite scrolling features to improve the performance of your sliders and carousels, especially if you are displaying a large number of items.
- Use the built-in customization options, such as dots, arrows, and autoplay, to enhance the user experience and make your sliders and carousels more engaging.
- Pay attention to the design and layout of your sliders and carousels to ensure that they are visually appealing and easy to use. This can involve choosing the right colors, fonts, and images, as well as organizing the content clearly and logically.
- Make sure to keep the library up to date by regularly checking for new releases and updating to the latest version. This will ensure that you have access to the latest features and bug fixes.
- Consider using a tool like the React Developer Tools browser extension to debug and troubleshoot any issues you encounter while working with React Slick.
Unlock the Power of Full-Stack Development With Our Full Stack Web Development Course and Seamlessly Integrate JavaScript Across the Stack.
Conclusion
- React Slick is a popular and widely used library for building sliders and carousels in React applications.
- It provides a simple, easy-to-use interface for creating and customizing sliders and carousels with a variety of features, such as autoplay, dots, arrows, and more.
- React Slick is highly customizable and can be easily integrated into any React project.
- One of the key features of React Slick is its responsive design, which allows the slider to adapt to the size of the device or viewport. This is useful for building sliders that will be displayed on a variety of devices, including mobile devices.
- It is well-documented and has a large community of users, making it a good choice for developers looking to add sliders and carousels to their projects.
- One potential downside of React Slick is that it may not be suitable for larger projects or projects with complex slider requirements, as it may not offer as much flexibility as other options.
- Overall, React Slick is a solid choice for adding sliders and carousels to a React project, especially for developers who are looking for a simple and easy-to-use solution.