Webpack in React
Overview
Webpack in react is a JavaScript module bundler that is commonly used with React to bundle and manage dependencies. It takes all of the individual JavaScript files and other assets in a project, such as images and CSS, and combines them into a single bundle that can be loaded by the browser. Webpack also has the ability to transpile modern JavaScript code (such as ES6) into older versions that can be understood by older browsers.
What is Webpack?
What does it imply when it claims that Webpack in react is a static module bundler for modern JavaScript applications? The bundler Webpack compiles all of the javascript files into a single bundle.js file that can be inserted into your HTML file. Internally, Webpack constructs a dependency graph that maps all of your modules. Additionally, it allows for the use of loaders and plugins to perform tasks such as minification, linting, and hot module replacement during development. React projects typically use Webpack in react to manage the building and deployment process.
Starting to use Grunt and Gulp is usually a great idea in order to understand Webpack in react. Using file paths as input in Gulp pipelines and Grunt jobs (globs). There are numerous ways that can be used on the matched documents. The operations transpile, concatenate, minify, and others are frequently employed. This is a really great idea, but neither Grunt nor Gulp is familiar with the structure of your project as a whole. Gulp and Grunt deal with documents, whereas Webpack works with projects, in comparison to Webpack.
You can define a single path with Webpack in react. the path that takes you to your entry point. Usually, main.js or index.js are employed. Webpack is now looking at your application. Using lines like require, import, etc., URL values from your CSS, and href values from image tags, among other things, will determine how everything is connected. It creates a comprehensive dependency graph of every asset needed for the proper operation of your project. The same file is referenced by all of them.
A tool for building JavaScript modules is called Webpack, often known as a module bundler. It creates one file (or a few files) that your software uses to run from a variety of other files.
It can do a lot of things, including the following:
- Supports resource bundling
- It monitors for modifications and repeats the jobs as necessary.
- You are able to use the most recent JavaScript features without having to worry about browser compatibility by using Babel to convert to ES5.
- Conversion from CoffeeScript to JavaScript is doable.
- May generate data URIs from inline images.
- Enables you to use CSS files as needed.
- May operate a development web server.
- Can be used to quickly switch modules.
- You can divide the output files into many files to avoid having a big JS file load on the first page click.
- Skills to shake trees
Scaler Placement Report and Statistics
Scaler learners achieved 2.5x salary growth with average post-Scaler CTC reaching ₹23L.
React Webpack Components
We'll go through some of the most important webpack in react fundamentals in the sections below.
- Loaders
- Dev Server (webpack-dev-server)
- Plugins
- Entry
- Output
Entry
- From this point, Webpack in react creates a graph for every application dependency.
- By using the dependency graph, this entry point tells Webpack where to start and what to bundle.
- In the "webpack.config.js" file, the entry attribute of the module.export method is defined.
Output
- You must instruct Webpack in react where to bundle your application after you've gathered all of your assets into one package.
- Webpack is given instructions on how to handle bundled files by the output attribute.
Example
Scaler Placement Report and Statistics
Scaler learners achieved 2.5x salary growth with average post-Scaler CTC reaching ₹23L.
Loaders
- Webpack in react should be in charge of managing all project assets rather than the browsers.
- Despite only understanding javascript, Webpack regards every file (including html, css, scss, and jpeg) as a module.
- In webpack.config, there are two functions for loaders.
- Decide which files a certain loader should transform. Property experiment
- Modify the file so that the dependency graph may utilize it (and eventually bundle). (The "loader" property) When files are added to the dependency graph, Webpack's loaders turn them into modules.
Example
Dev Server – webpack-dev-server
- It can be used to quickly build applications.
- Both a server and real-time reloading are included.
- The developer must explicitly configure a specific content base or it will automatically save the files in the current directory. A mode called "inline" enables you to operate while (a small webpack-dev-server-client entry is added to the bundle which refreshes the page on change)
Example
Plugins
- Loaders only conduct transforms on a per-file basis, whereas plugins can perform actions and custom functionality on "compilations" or "chunks" of your bundled modules.
- An effective plugin interface is included with Webpack. The majority of webpack's functionality makes use of this plugin interface. As a result, Webpack is more flexible.
Example
How Does React Webpack Work?
In this section, we'll examine Webpack's capabilities. Even the most straightforward project is HTML, CSS, and JavaScript documents. Additionally, it might include things like fonts, images, and other distinguishable components. A current web pack react app approach would involve creating an index.html file that contains the requested property along with all the necessary CSS and JS links. Additionally, a large number of CSS and JS modules that may be interconnected should be correctly optimized and combined into a single unit. Production-appropriate, in other words.
The configuration used to accomplish all of this is the foundation of the Webpack react app. With models four and up, Webpack provides acceptable settings out of the box, so there may be no need to write a configuration file. For each non-trivial task, you'll need to provide a unique webpack.config.js record, which is why you should specify how the documents and properties should be changed and what kind of output should be produced. In addition, this record can easily become monolithic, making it difficult to comprehend how the web pack functions unless you are familiar with the fundamental principles that support it.
By starting with the access points and resolving each module it reveals in accordance with the settings, Webpack creates the dependency graph. The operation is performed for each dependency until the traversal is finished if a module has dependents. Then, using webpack, all of the project's modules are combined into the fewest number of bundles—typically the simplest one—that the browser can load.
When building a React application, Webpack is used to bundle all of the application's dependencies, including React and any other libraries or custom modules, into a single file or a few files that can be loaded by the browser. When you run a Webpack in your application, it starts by identifying the entry point of your application. The entry point is specified in the Webpack configuration file, typically named webpack.config.js. This file tells Webpack where to start looking for the dependencies of your application.
From the entry point, Webpack starts traversing the application's code, following import and require statements to identify all of the dependencies that are required to run the application. These dependencies can be JavaScript files, CSS files, images, and more. Once Webpack has identified all of the dependencies, it then processes them using loaders. Loaders are modules that can transform the code being bundled, such as transpiring from ES6 to ES5 or transforming JSX to JavaScript. Loaders are also specified in the Webpack configuration file.
Once the loaders have finished processing the dependencies, Webpack then bundles them into a single file or a few files. The output location for the bundled files is also specified in the Webpack configuration file. The resulting bundle(s) can then be included in the HTML file, which is served to the browser and loaded by the browser. This allows for faster loading times and a more efficient overall application since the browser only needs to download a single file or a few files instead of many individual files.
It's important to note that webpack also has a development server which is great for development environments, it allows you to see your changes instantly without the need to refresh the page.
In summary, React and Webpack work together to make building and maintaining large JavaScript applications easier by allowing developers to modularize their code, and bundle all of the application's dependencies into a single file that can be loaded by the browser for faster loading times and better performance.
Install Webpack in React
When using webpack for the first time, it can be difficult to understand how it functions and how to use it. Although it has substantial documentation, the steep learning curve and intimidation factor for new users can make it challenging. On the other side, learning Webpack is worthwhile because it will ultimately help you save a lot of time and work. To aid you in getting started, I'll go through all the key concepts here.
We should examine the React with Webpack installation procedure now that we are aware of webpack's function in React. The flexibility and freedom we would have if we started from scratch and added webpack settings to create-react-app would again be constrained. You may expand the possibilities for customization and take full control of the setup by installing React webpack.
Transform Your Career
Choose from our industry-leading programs designed for career success
Modern Software and AI Engineering Program
Master full-stack development with AI integration

Modern Data Science and ML with specialisation in AI
Advanced data science techniques with AI specialization
Advanced AIML with Specialisation in Agentic AI
Deep dive into AIML with focus on Agentic systems
DevOps, Cloud & AI Platform Engineering
Build and manage AI-powered cloud infrastructure
AI Engineering Advanced Certification by IIT-Roorkee
Premier AI engineering certification from IIT-Roorkee
1. Install nmp init Installing Dependencies
The first item you must install is npm init, assuming your machine already has the most recent versions of Node.js and npm installed. Although VS Code is a well-liked option, you can use any code editor. Run this procedure first:
$ npm init -y
By doing this, a startup package and package.json file are both created. Here you can find a list of all the dependencies required to construct your app. The next step is to build a fundamental React application, for which we'll require the React and React DOM frameworks. Using npm, we can add them as dependencies:
$ npmIi react react-dom --save
We may now include a webpack to package our app. For its hot reloading replacement feature, Webpack is also required. The following details how to add webpack-react to your project:
$ npm i webpack webpack-dev-server webpack-cli --save--dev
The React app is informed that these dependencies are only dev with the save dev command.
| React Webpack dependencies | Function |
|---|---|
| webpack module | includes all of the essential Webpack features. |
| webpack-dev-server | When files are modified, this server automatically restarts Webpack. |
| webpack-cli | Allows using the command line to execute Webpack. |
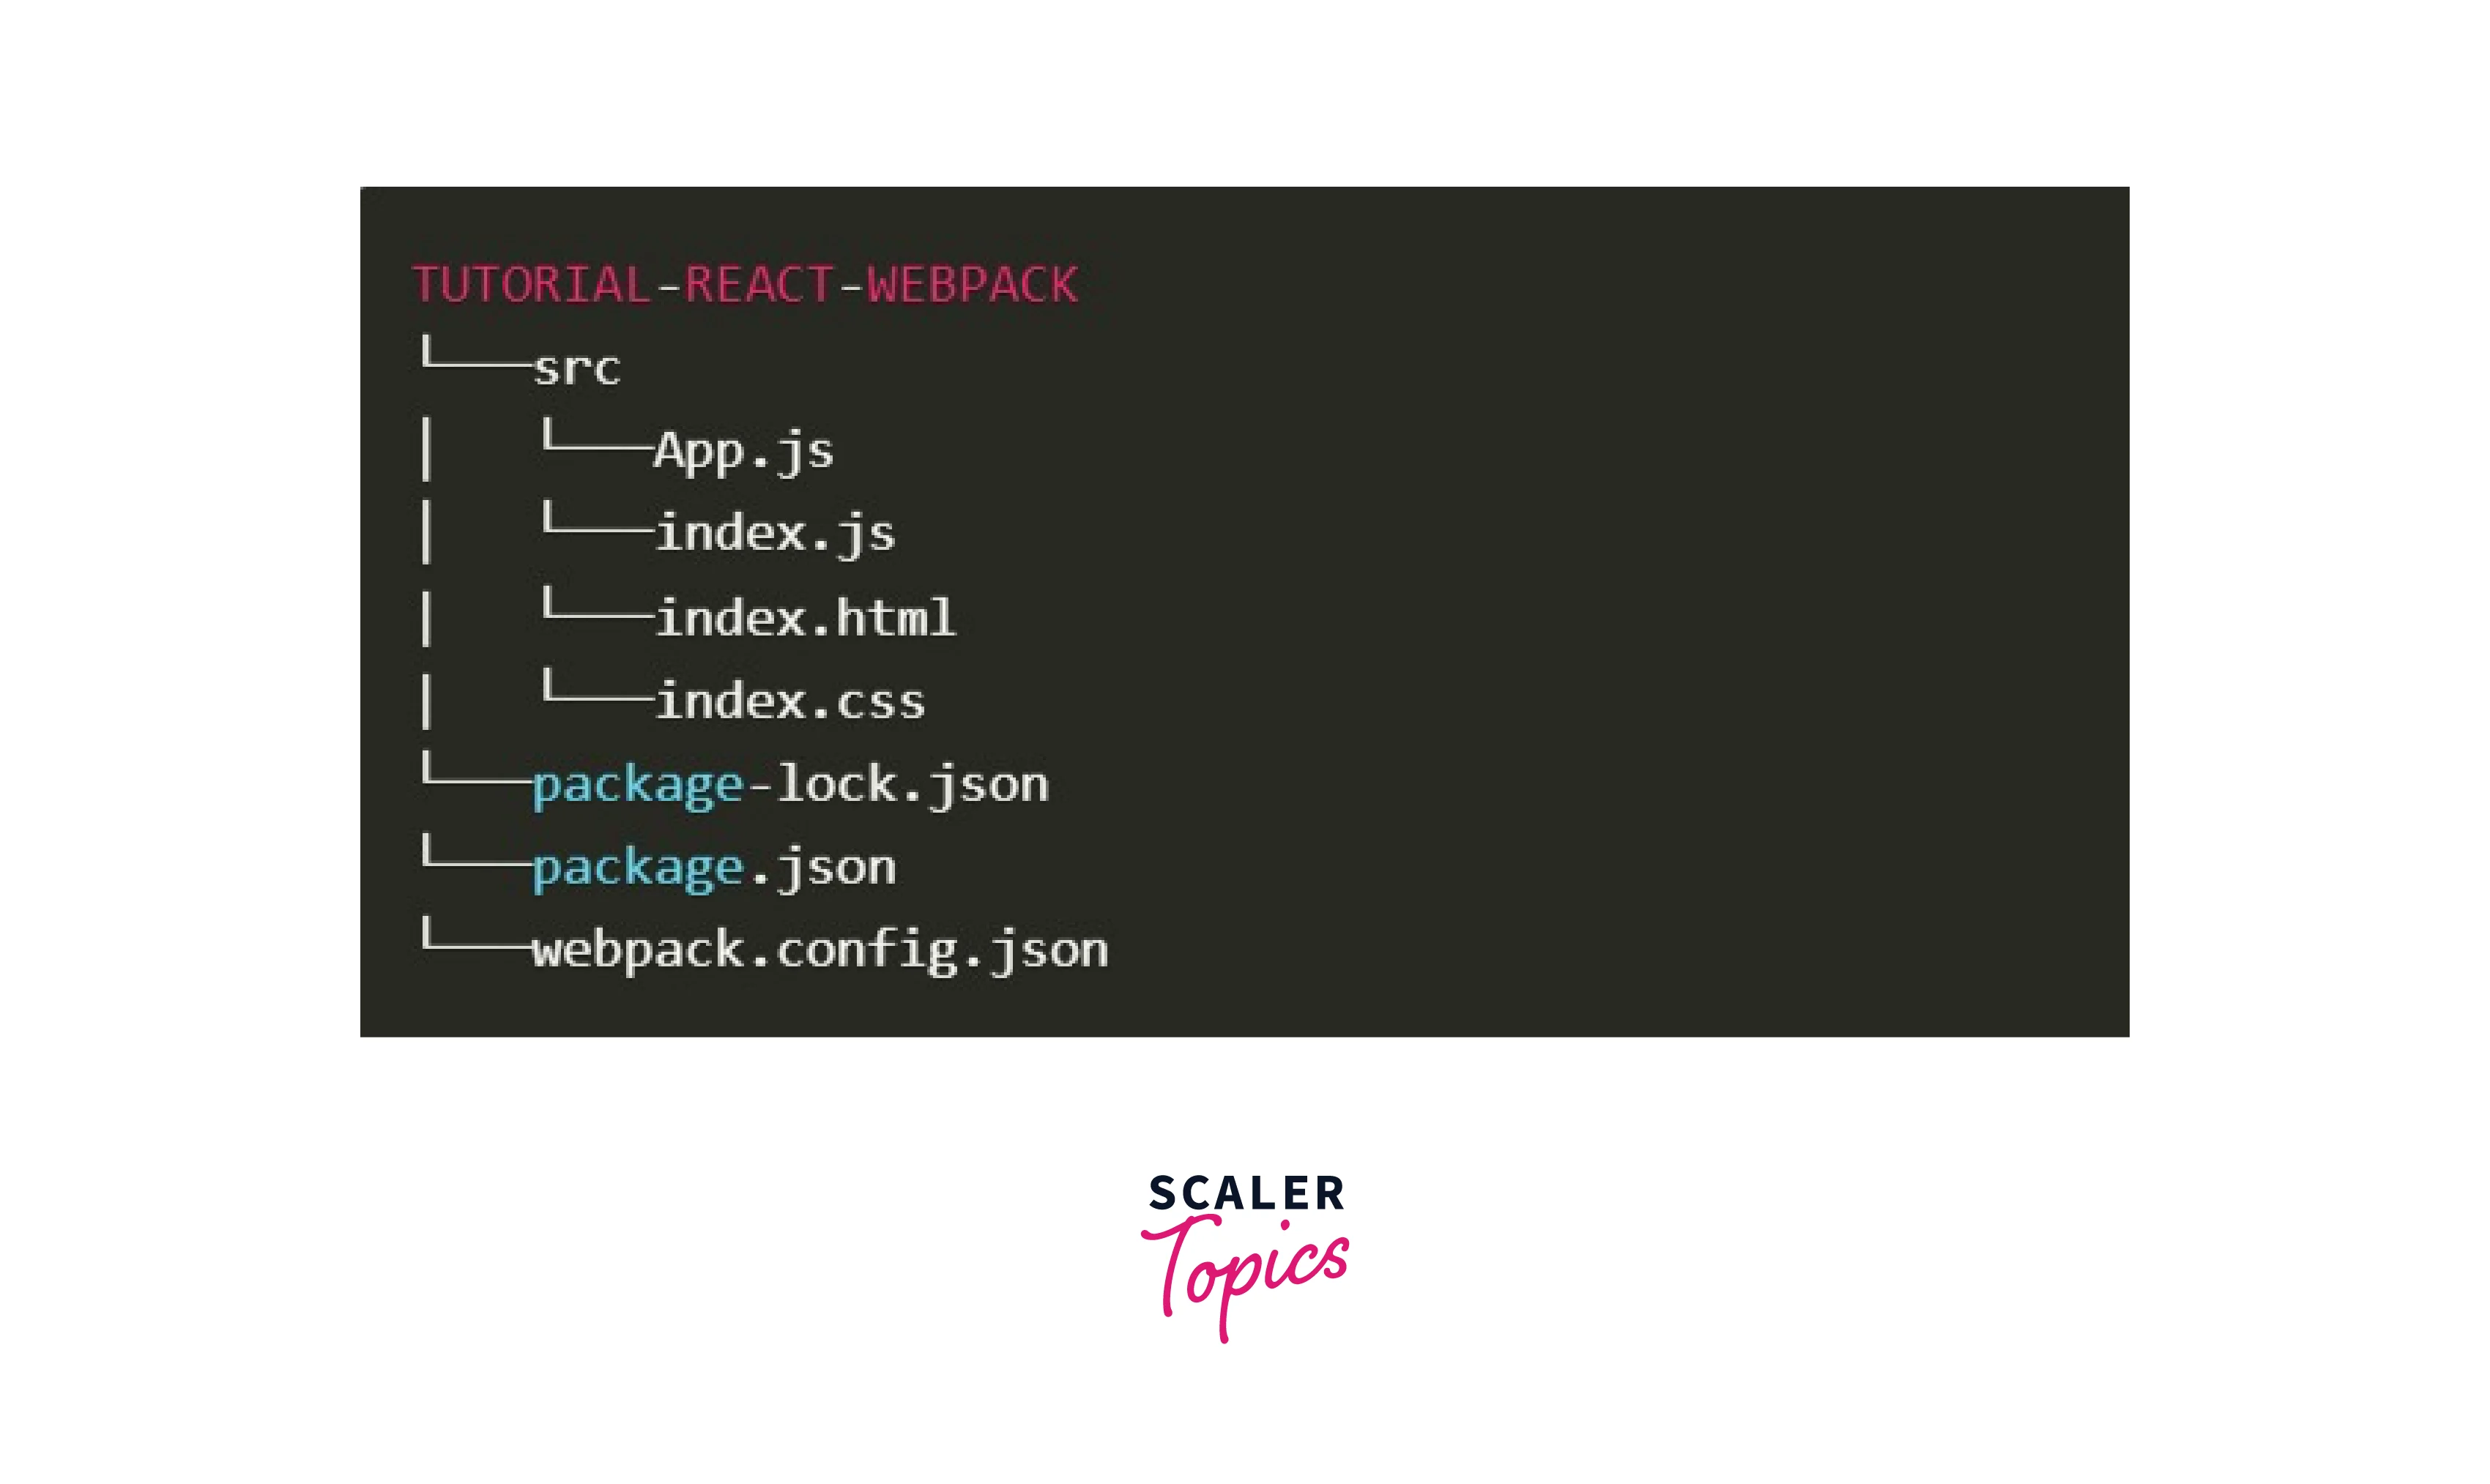
2. Set up Project Structure
You would have two files in your root directory: package.json and package-lock.json. We'll make some blank files next, which we'll later fill with data. You should now arrange your project so that it has the structure described below:
3. Create a Simple React App
Let's fill those folders we earlier generated with the necessary codes to test how they work on the browser now that we have all the materials in place.
The goal of this simple Hello World app is to display a Your react app tag in the page's <h> tag. However, if you attempt to include an index.js file in your HTML file as follows:
The code is ineffective. There will be a blank page on your browser. The ./App directory cannot be imported into your browser. Only static JS files can be loaded by the browser.Too turn your React project into readable code that browsers can understand, webpack settings is required.
4. Utilizing Loaders
As was said above, loaders are a crucial component of React Webpack since they may be used to translate complicated JSX files into JavaScript files that can be read by browsers. For this work, the babel-loader will be used. Using the following code, install the babel-loader:
npm i -D @babel/core @babel/preset-env @babel/preset-react babel-loader
Babel, two presets, and the babel-loader required to load our JSX files have all been installed.
5. Configure React-Webpack
Now that the JSX files have been understood, we need to configure webpack React to tell it to use Babel during bundling:
We told Webpack to utilize the babel-loader anytime it encounters a file with the js or JSX extension in this directive.
6. Bundle Your React App
We must now include a script in our bundle. json file that enables us to seamlessly construct our app whenever necessary
Now run the build using this command npm run build
This will produce the main.js file in the project root's dist subdirectory. We can now integrate this packaged JS into our HTML:
6.1 Manually Running Bundled App
When you open index.html in the browser after adding the script tags stated above, the browser will display the text "Hello World!"
6.2 Using HtmlWebpackPlugin
The solution mentioned above works well for including bundled JS in your HTML. However, in actual life, it is not useful. Any genuine app will chunk your JS files using numerous Webpack plugins. Therefore, manually importing every bundling script into HTML would be time-consuming and pointless. Instead, we can automate the procedure by downloading and installing the HTML-webpack-plugin, a potent React plugin:
npm i -D HTML-webpack-plugin
Modify our project configuration file for adding this plugin by running the following code:
The plugin was added and given a template HTML with the webpack attached to the packaged JS by running this code. The <script> tag can now be deleted from the src/index.html directory. Run the build now by using:
npm build
When you do this, you will see that main.js and index.html are both generated in the dist folder.
How to Use Webpack With Create React App?
We are now required to use a wide range of add-on technologies to help, speed up, and improve our web development workflow. On the other side, these tools frequently increase the complexity of the stack. We will therefore need to invest more time and effort into understanding these technologies and using them effectively. It's the same with webpack.
Install Webpack in React
Webpack in react can be installed locally or globally for each project.
Global Install Here's how to use Yarn to install it globally:
with yarn: yarn global add webpack webpack-cli
with npm: npm i -g webpack webpack-cli
After this, you ought to be able to go on to running. webpack-cli
Local Install
Additionally, Webpack in react can be set up locally on a computer. You won't be as reluctant to use the newest features on a small project rather than updating all your webpack-using projects because webpack may be updated per project.
With Yarn: yarn add webpack webpack-cli -D
With npm: npm I webpack webpack-cli --save-dev
Add this to your package after its finished.json document:
Then, by going to the project root and running the command, you may run webpack.
yarn build
Turn Learning into Career Growth
Set Up Project Structure
Get the Project started
Let's start by making an empty project and installing a few dependencies. Make a directory and then execute it.
npm init –y
to launch your new project A default package ought to be produced as a result of this. It is a json file, manifest.json.
You are free to start the project however you like by leaving out the -y argument. Installing some of the necessary software packages will help us get started.
React: The most important react library is react. webpack: the JavaScript bundler we're going to be searching at extra under webpack-cli: a device that permits us to run webpack instructions from the command line . react-dom: React may be used inside a browser thanks to the package react-dom. To instal all of them, issue the ensuing commands:
npm I react react-dom npm i -D webpack webpack-cli
You should currently have the files package.json and package-lock.json in your root directory. Create a few blank files that we will later fill in, and then arrange your project as discussed in the install section above.
Create a Hello World React App
That is all we need to get started with Webpack React App. To test the previously created files in the browser, let's go ahead and add some code to them.
The primary intent of this program is to produce a heading tag that shows Hello Friend on the page. If you attempt to use index.js in your HTML usage, though.
It won't be successful. You will only see a blank page if you open it in a browser.
The browser's inability to import an App from ./App is the cause of this. To make our application compatible with the browser, let's utilise webpack in react as the browser can only load static JS files.
Utilizing Loaders
Installing babel-loader initially enables us to convert JSX into JavaScript that is compatible with browsers. To achieve this, issue the following commands:
npm i -D @babel/core @babel/preset-env @babel/preset-react babel-loader
We installed babel, two presets, and the loader before we could load our JSX files. Consult the babel manual to learn more about what these parameters achieve.
Configure React-webpack
In order to parse any JSX files during bundling, we may now instruct Webpack to use Babel.
Bundle Your React App
In order to complete our package, let's add a script. JSON is what we're using to make it simple to build our app whenever we want.
Run The Bundled Application
Benefits and Limitations of Using Webpack in React
React is a JavaScript library for building user interfaces, whereas webpack is a module bundler for JavaScript applications. If you're building a web application and want to create reusable UI components, then React would be a good choice. It allows you to build complex UI's with reusable components and manage the state of your application.
Webpack, on the other hand, is used to bundle and optimize the assets of your application. It can be used with React, or any other JavaScript framework or library, to bundle the code and assets of your application for production. So if you want to create a react based web application, you would use both React and webpack in your project. React for building UI and webpack for bundling and optimizing your application.
We have other options besides using webpack to work with React, such as Browserify, Parsel, Brunch, and others.
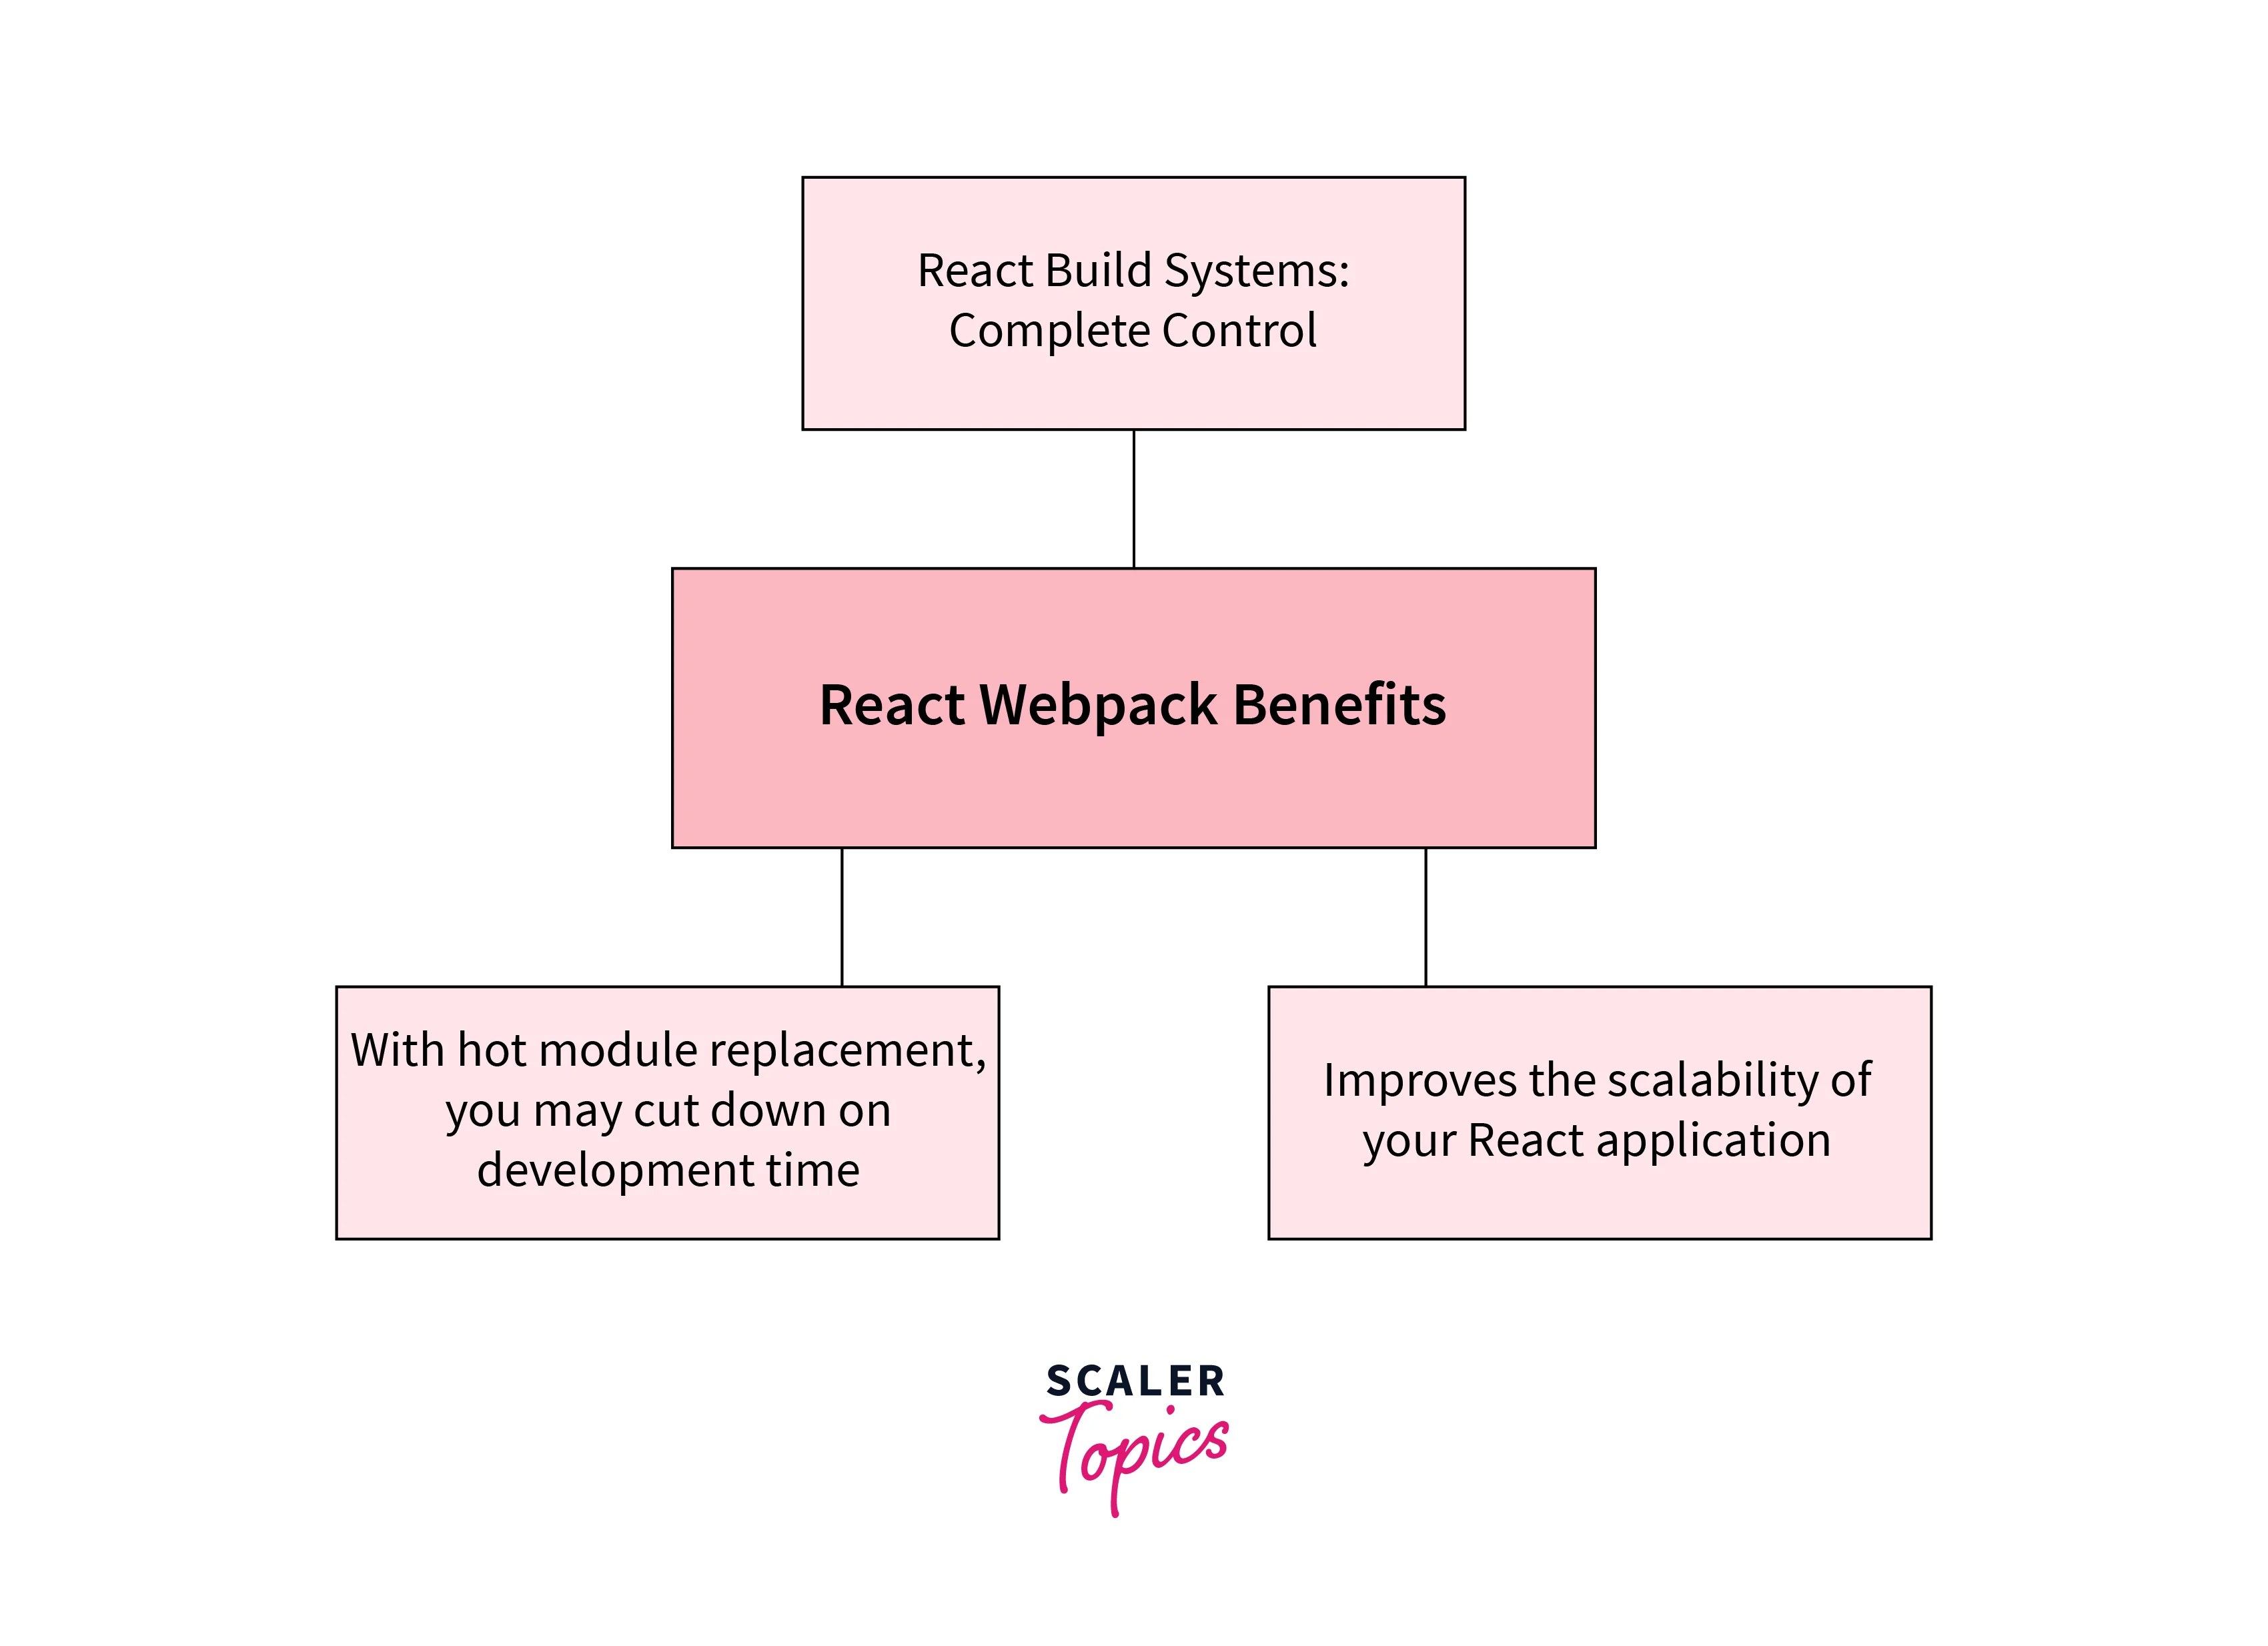
Complete Control for React Build Systems
The main problem with the existing code is that older browsers have a hard time understanding it. Basic browsers employ HTML, CSS, and JavaScript, while React uses JSX and ES6+ code. When utilising React webpack, you have complete flexibility and the choice to transpile your current code to older browser versions using create react app Babel or Traceur. You might immediately surpass your rivals as a result of this.
Makes Your React Application More Scalable
React Webpack can help with scalability because it uses a modular architecture. A module system based on ES6 standards is called Webpack. When a file is created using this module system, it automatically turns into a module with its own scope. This is helpful if your project depends on a range of vendors. By using the Webpack React app, React developers may discover how front-end boilerplates work in practice.
You can Reduce the Time Spent Developing with Hot Module Replacement
A promising aspect of React with Webpack is the Hot Module Replacement capability. When improvements to the internet programme don't work as anticipated, it can be one of the most uncomfortable and annoying situations in online improvement. The developer is compelled to restart the web page as a result, allowing you to view the most recent updates to their web project. To manipulate the DOM so that it re-renders each time the developer saves changes without necessitating a complete reload, many developers have developed plugins and tools.
This is referred to as Hot Reloading in React and involves replacing a chosen app module with an updated one at some undetermined point in runtime so that it can be used immediately as needed. Hot Module Replacement goes one step further by eliminating the need to reload a web page to reflect minor changes to your JS or CSS code. You wish to include CSS loaders in the webpack configuration file for creating React apps. Debugging additionally speeds up the loading of web pages. This alternative option expedites the posting of your web page by cutting down on the typical development time.
Pros and Cons
Pros:
- With this application, working with single-page apps is a breeze.
- Both the import module syntax and the require() syntax are supported.
- Code can be split up in a variety of ways.
- For quicker development, Hot Reload can be useful for React, Vue.js, and other frameworks.
- The most popular build tool, as per a 2016 JavaScript poll.
Cons:
- If you are new to web programming, this is not a good place to start.
- It can be confusing at first to work with CSS files, images, and other non-JS resources.
- often changes; in fact, the majority of 2016 tutorials are now out-of-date.
JavaScript Maestro Seeking Full-Stack Mastery? Enroll in Our Full-Stack Developer Course and Uncover the Symphony of Front and Back-End Development.
FAQs
Q. Should I make a React app or use webpack?
A. React is a JavaScript library for building user interfaces, while webpack is a module bundler for JavaScript applications. They serve different purposes, but are often used together in modern web development. If you're starting a new project, consider using React if you want to build a user interface, and webpack to bundle and manage assets and dependencies.
Q. How can a webpack be added to a react app?
A. You can add a webpack to a React App in following ways-
- Install webpack and its dependencies as dev dependencies.
- Create a webpack.config.js file in the root of your project to configure webpack.
- Add the entry point for your React app in the webpack.config.js file.
- Configure the output of the bundled file in the webpack.config.js file.
- Add a script to your package.json file to run webpack.
- Finally, run the build script using npm run build to generate the bundled bundle.js file.
Q. Is webpack-dev-server used to create React apps?
A. Yes, webpack-dev-server is commonly used by Create React App (CRA), which is a popular tool for quickly setting up and creating React projects. webpack-dev-server serves the application in development mode and provides live reloading and other features to improve the development experience.
Q. How can I update the version of Webpack?
A. npm: npm install webpack@latest Yarn: yarn add webpack@latest
Q. What distinguishes Webpack from Babel?
A. Babel belongs to the JavaScript Compilers region, whereas Webpack is a member of the JS Build Tools / JS Task Runners group.
Conclusion
- Webpack is a JavaScript module bundler that is commonly used with React to bundle and manage dependencies.
- It can do a lot of things, including the following:
- Supports resource bundling
- It monitors for modifications and repeats the jobs as necessary.
- Conversion from CoffeeScript to JavaScript is doable.
- May generate data URIs from inline images.
- Enables you to use CSS files as needed.
- May operate a development web server.
- To use webpack in react do the following steps:
- Initialize a new Node.js project by running npm init in the root of your project directory.
- Install webpack and webpack-cli by running npm install --save-dev webpack webpack-cli.
- Create a webpack.config.js file in the root of your project directory.
- In the webpack.config.js file, specify the entry point for your application and the output location for the bundled code.
- In your package.json file, add a new script to run webpack.
- Run the command npm run build to bundle your application.
- Now you can include the generated bundle.js file in your HTML file and run your application.
- To use webpack with React, you will also need to install some additional loaders and plugins, such as babel-loader, css-loader, and html-webpack-plugin.
- In the webpack.config.js file, configure the loaders to handle the different file types, such as JSX, CSS, etc.
- You can add additional features such as hot module replacement, code splitting, and minification in your webpack.config.js file to improve the performance of your application.