Registration Form in HTML

Overview
Offering users simple registration and login forms is essential for any software application as it mostly serves as the application's entry point. Hence, building a login or registration form that delivers a good user experience can potentially impart a first good impression to users regarding the entire application.
When it comes to building a form, there are many key aspects to be concerned about, such as form validation, how the authentication is designed, and its user interface. This article will discuss how to create a basic UI of a registration form in HTML and CSS.
Transform Your Career
Choose from our industry-leading programs designed for career success
Modern Software and AI Engineering Program
Master full-stack development with AI integration

Modern Data Science and ML with specialisation in AI
Advanced data science techniques with AI specialization
Advanced AIML with Specialisation in Agentic AI
Deep dive into AIML with focus on Agentic systems
DevOps, Cloud & AI Platform Engineering
Build and manage AI-powered cloud infrastructure
AI Engineering Advanced Certification by IIT-Roorkee
Premier AI engineering certification from IIT-Roorkee
Pre-requisites
Before we start, we assume you have a basic understanding of flexbox in CSS.
What Are We Creating?
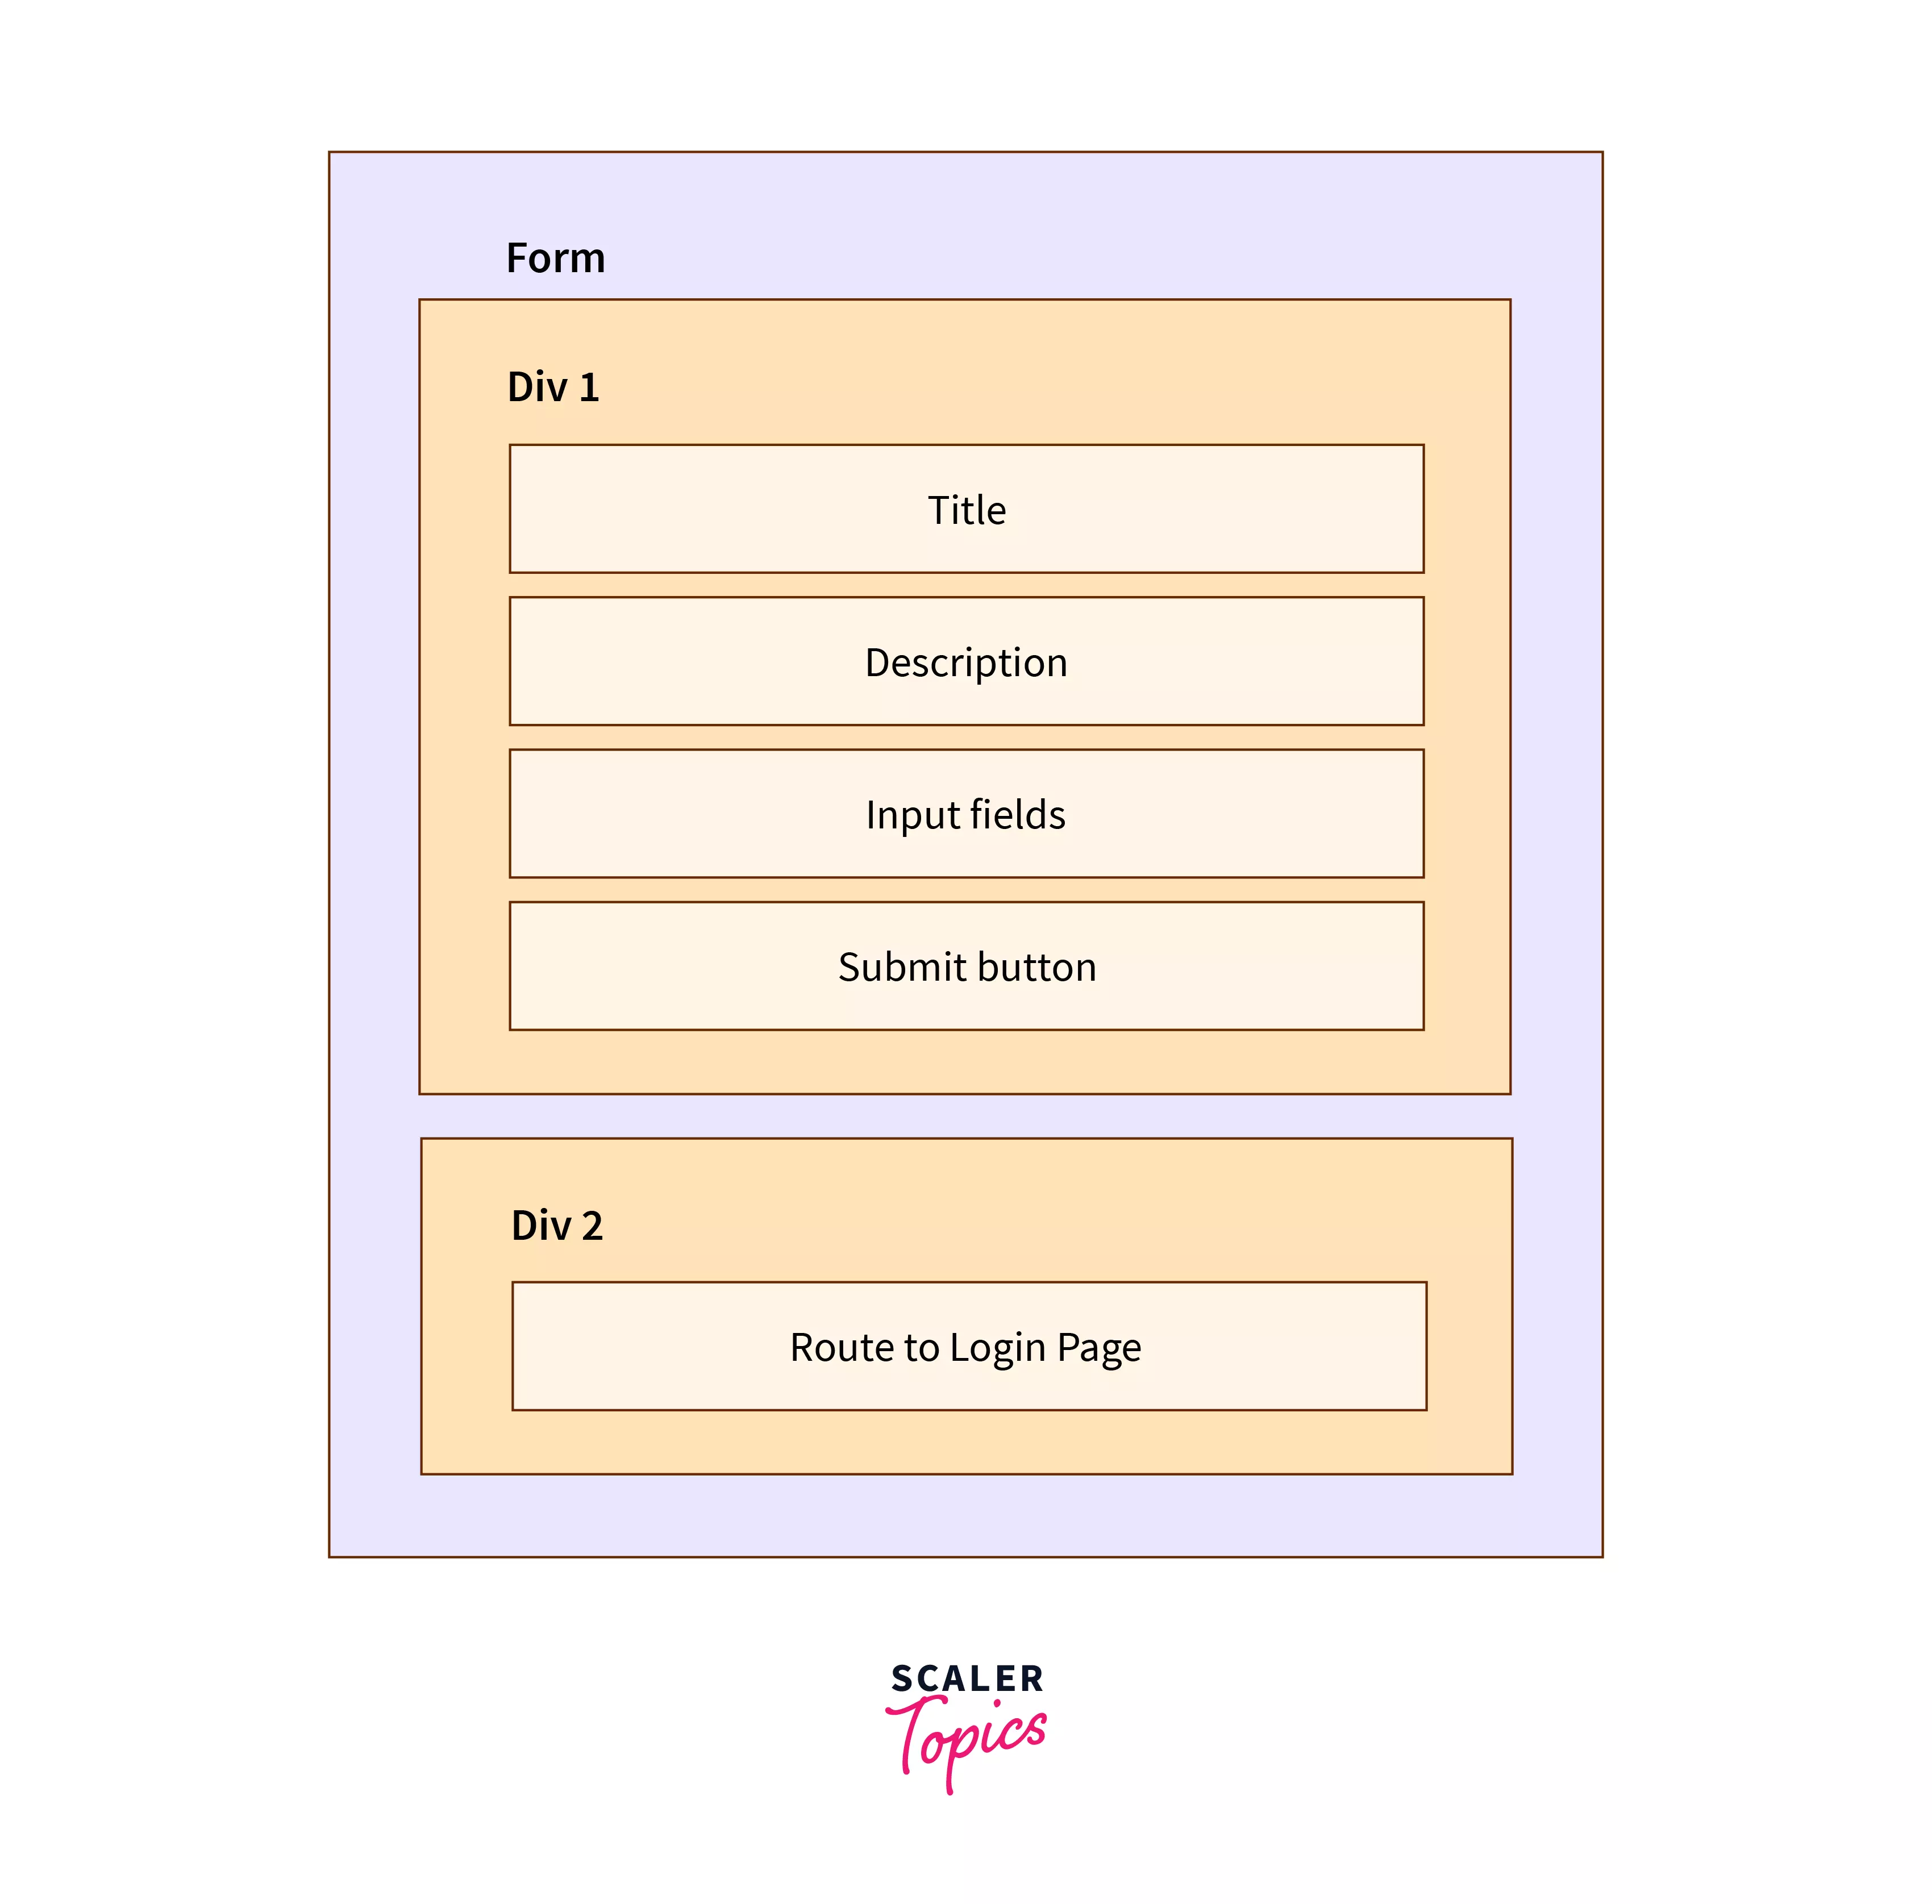
The basic structure of a registration form using HTML can be divided into three parts as follows :
- Title and description
- Login/Registration form body
- Route to the login page
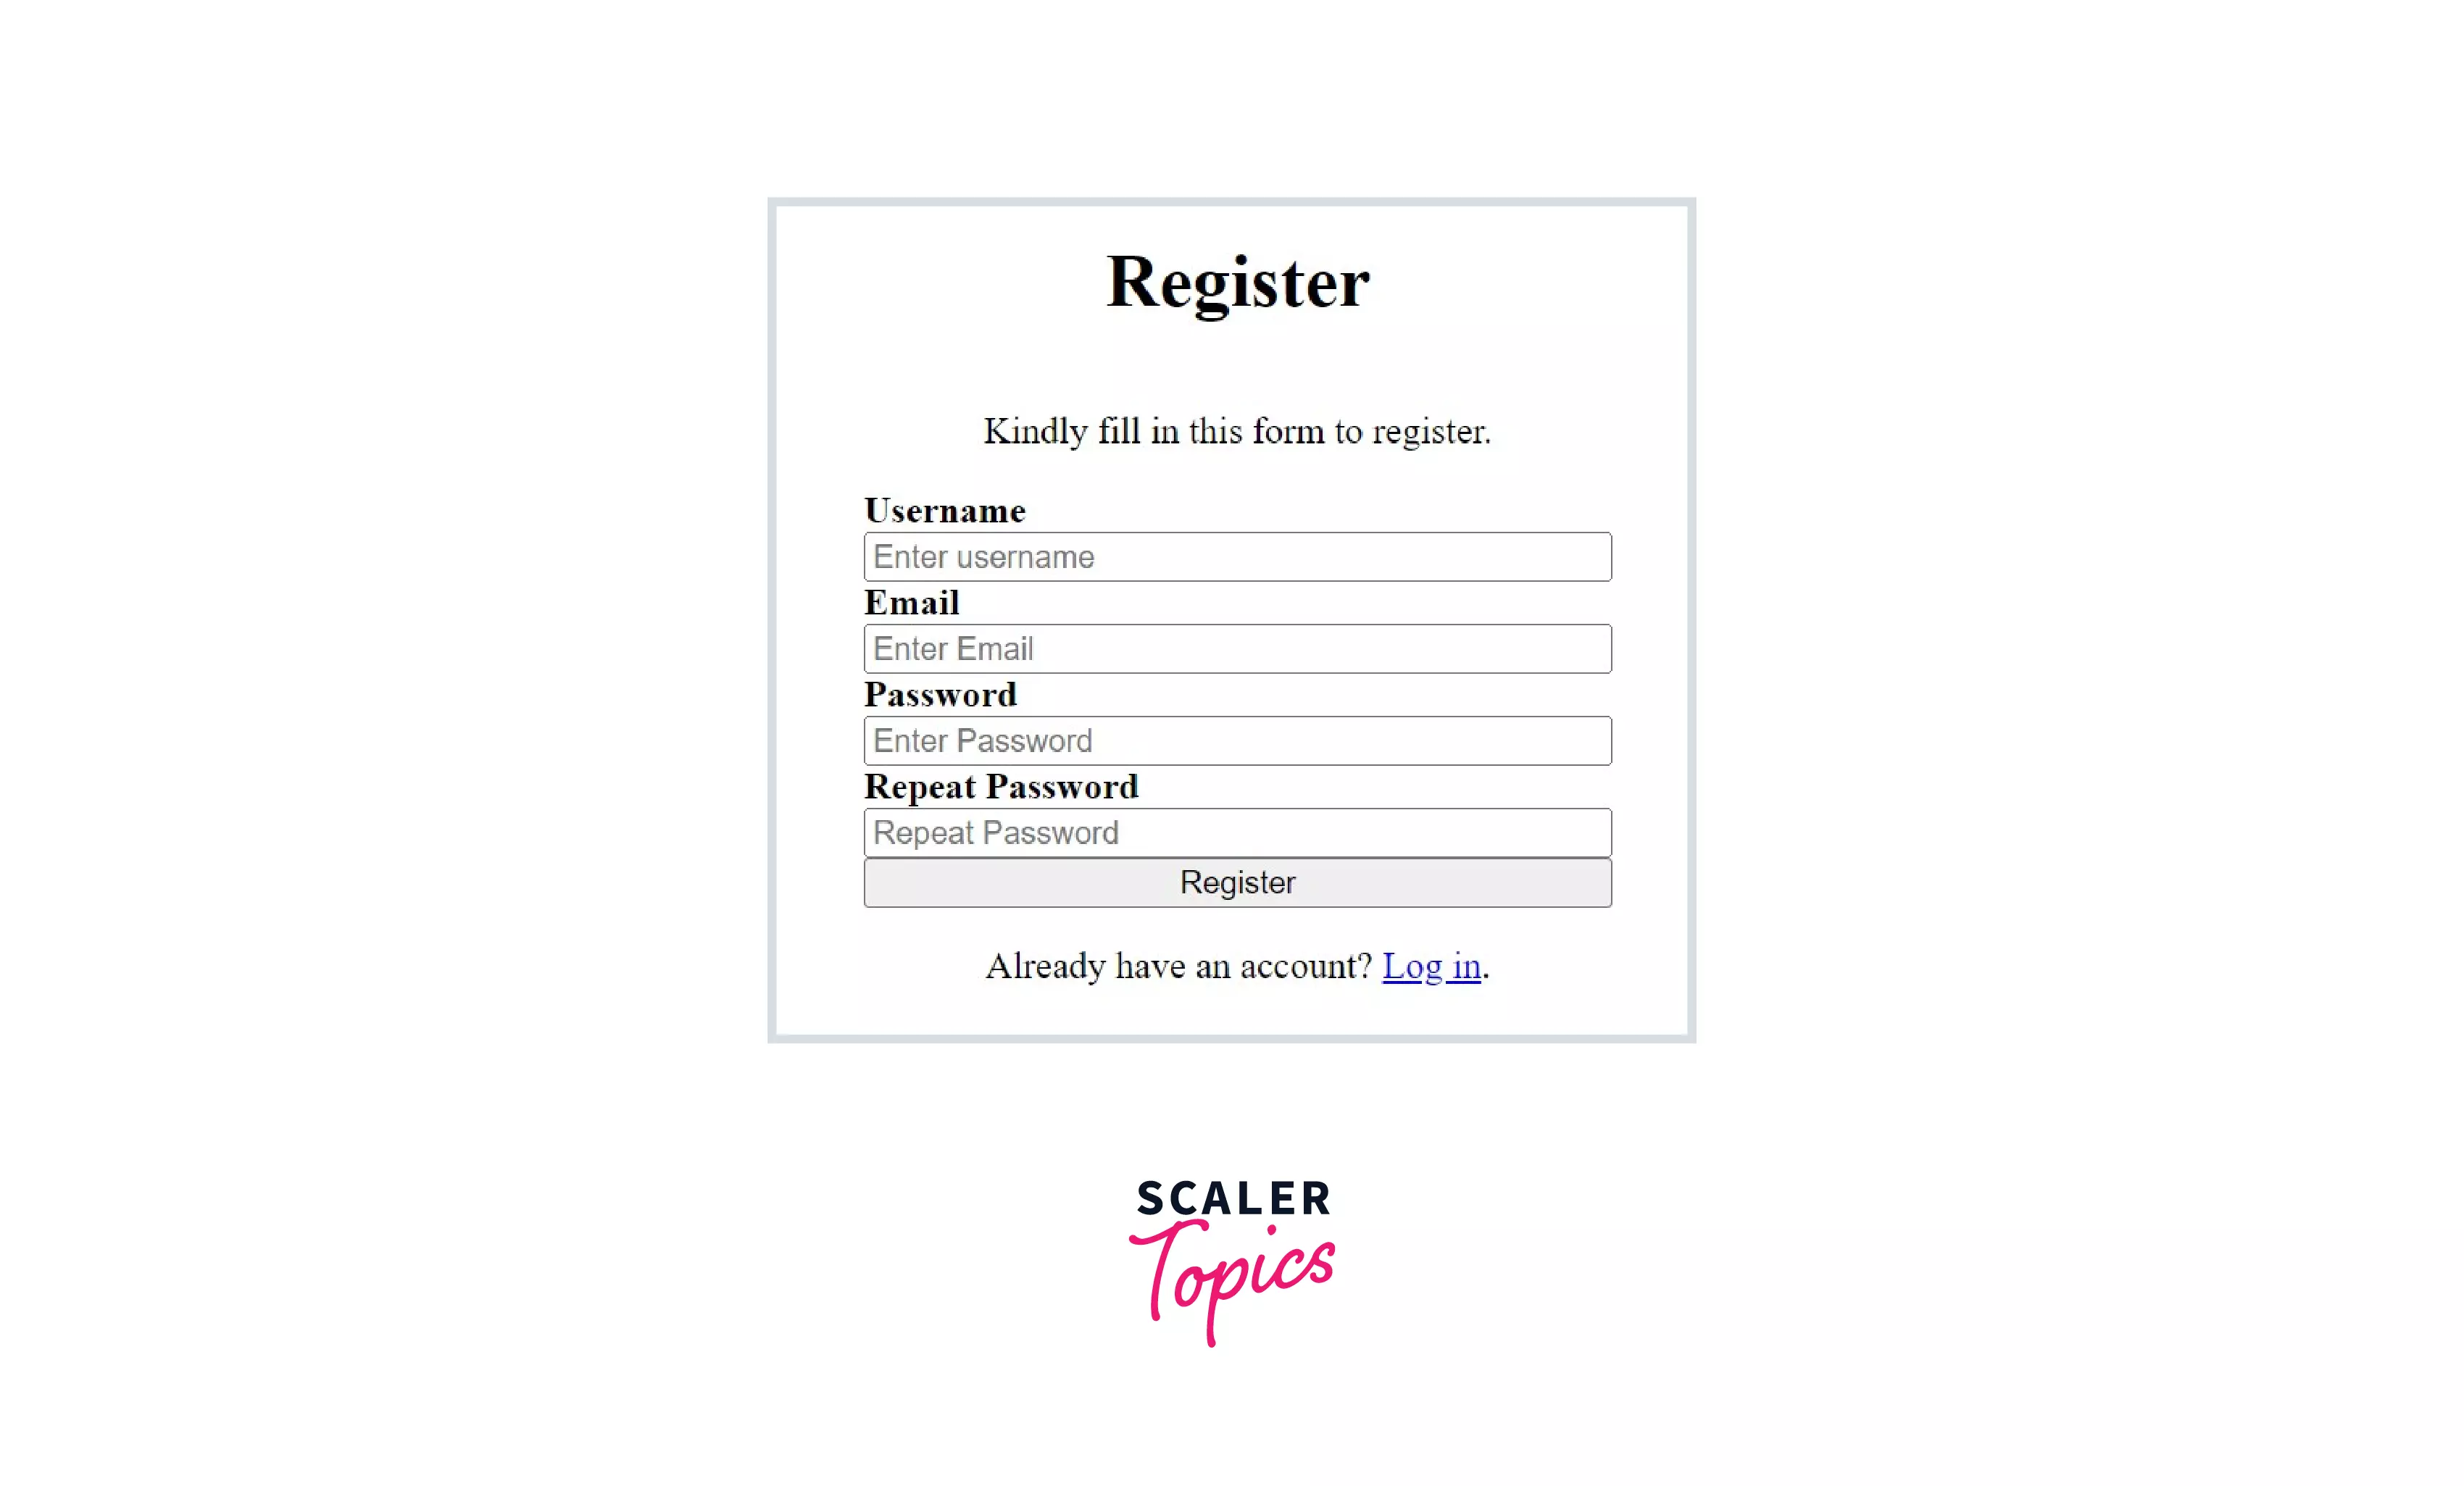
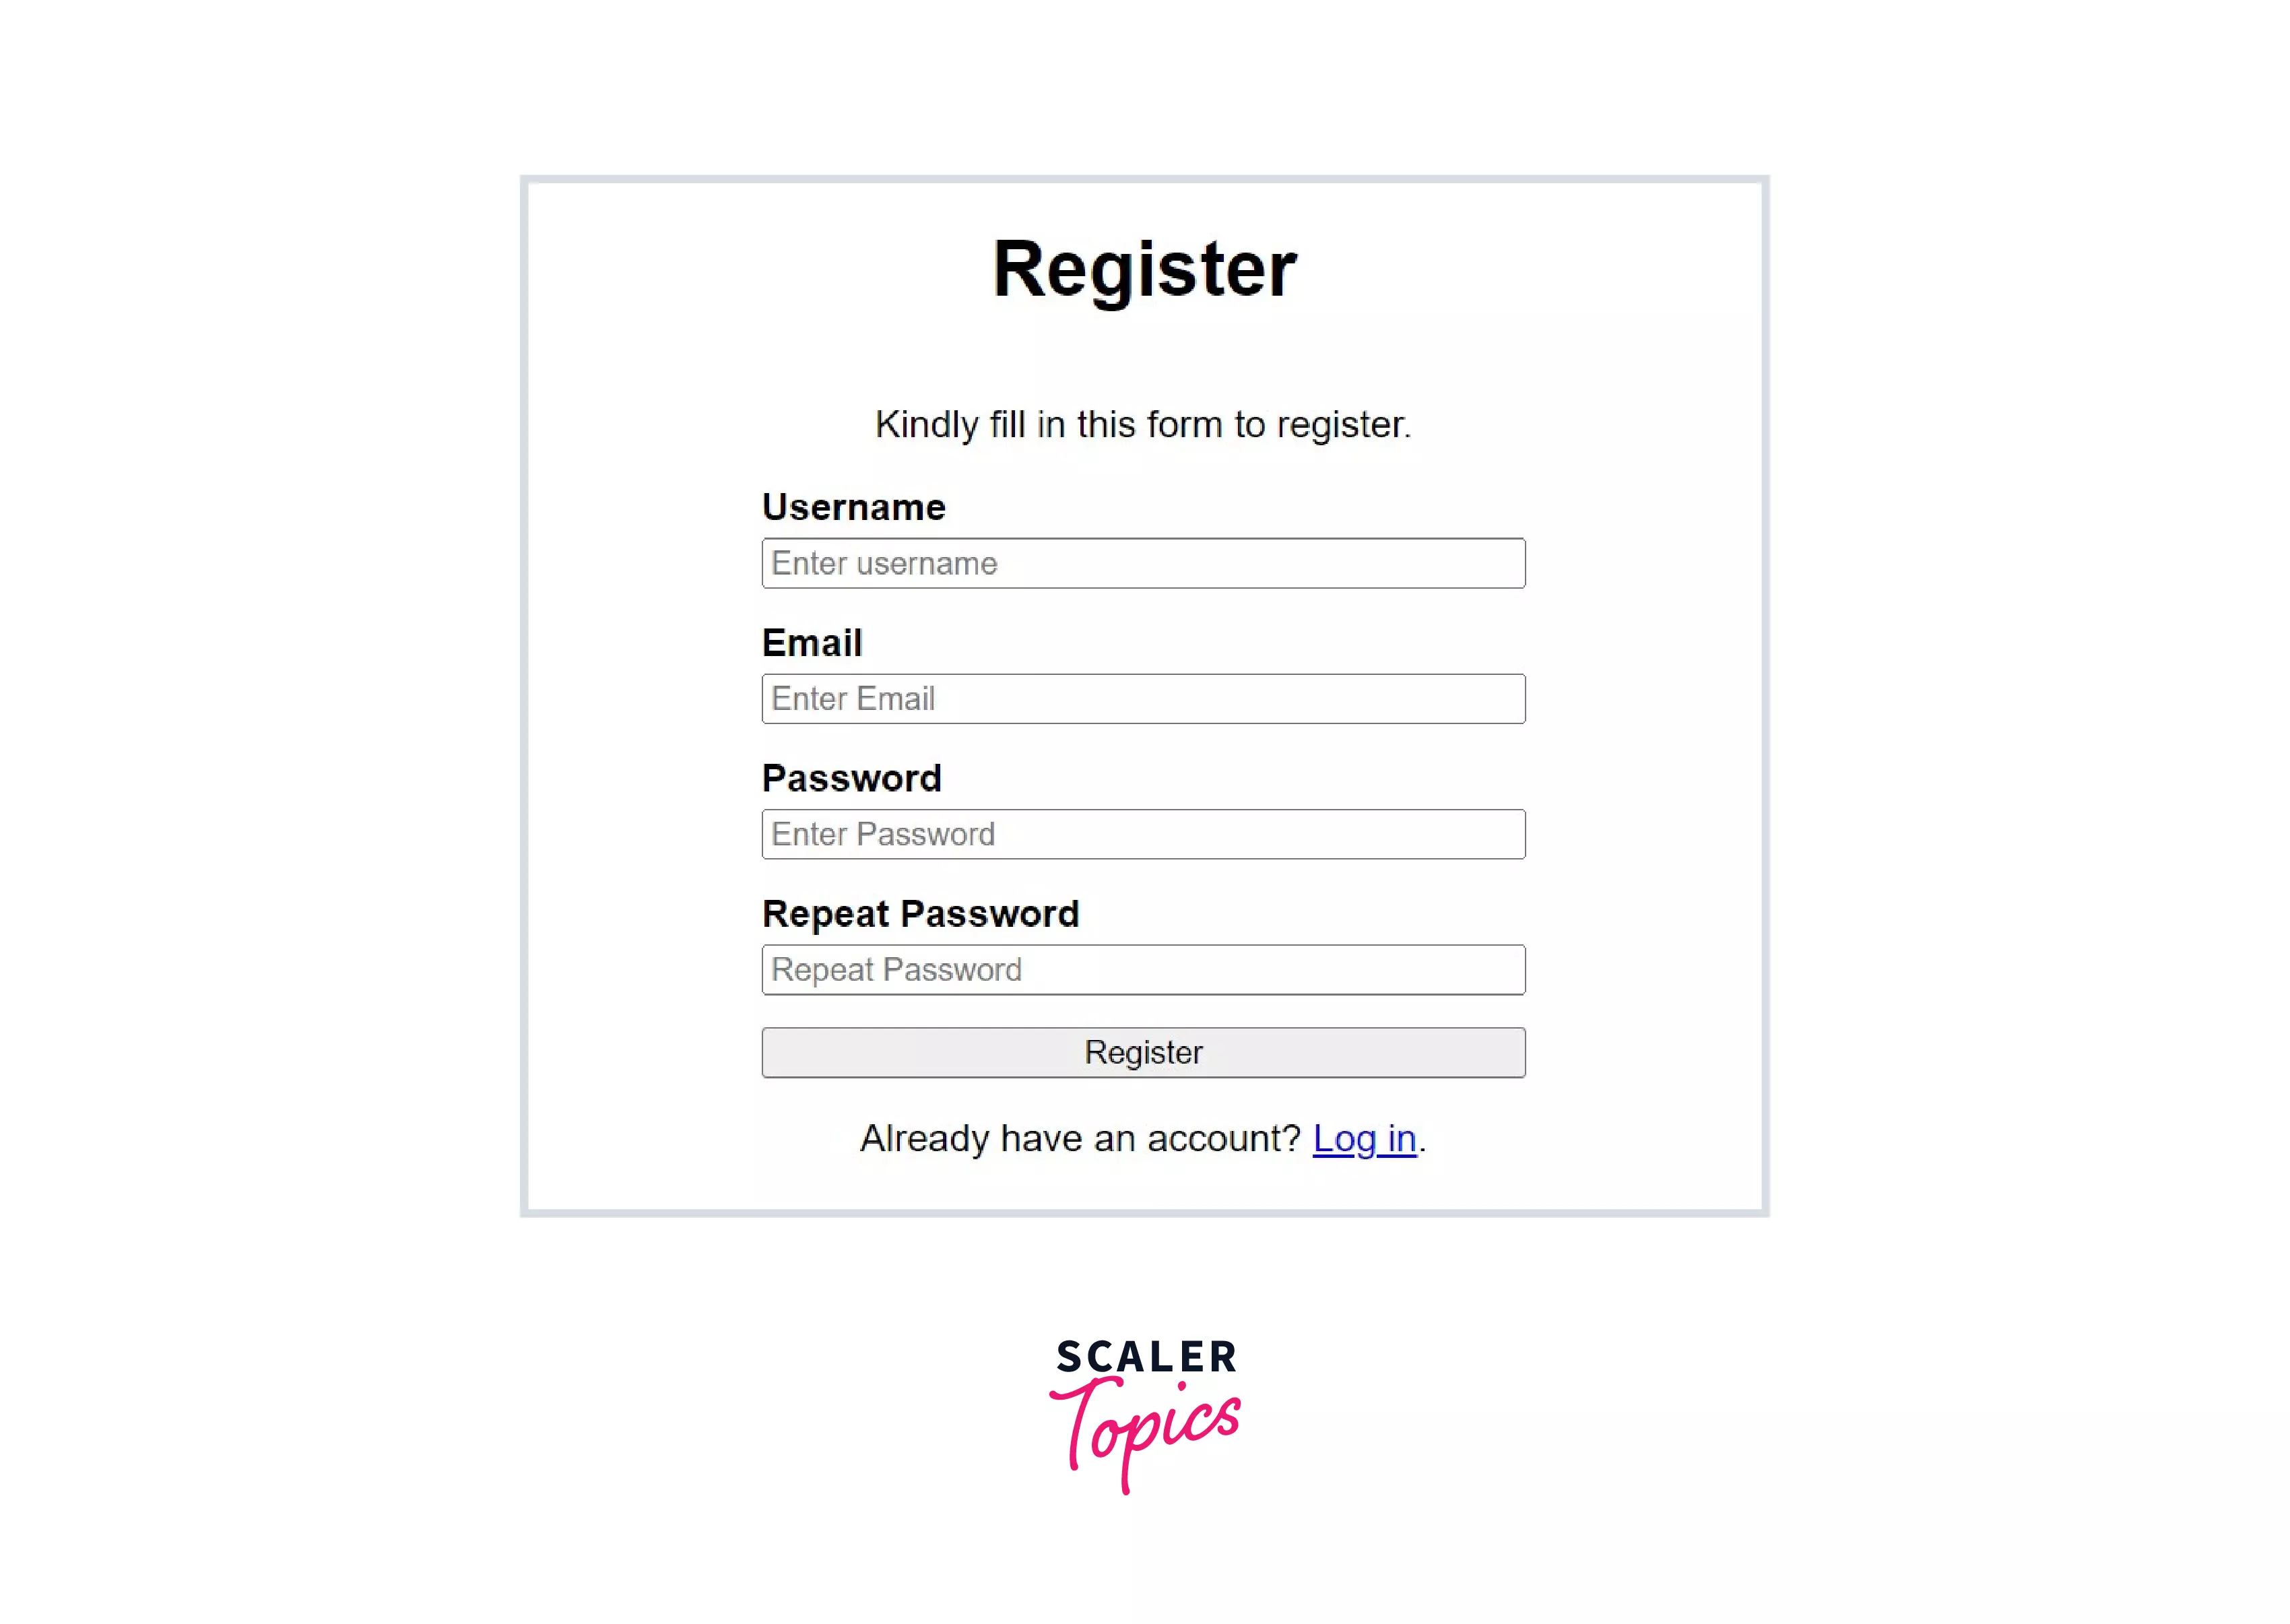
The following image shows the final result of what we will build. We will use HTML5 to create the basic layout and CSS for styling the created layout.

Turn Learning into Career Growth
HTML Structure for Registration Page
We have broken down the entire procedure into different steps for better understanding as follows.
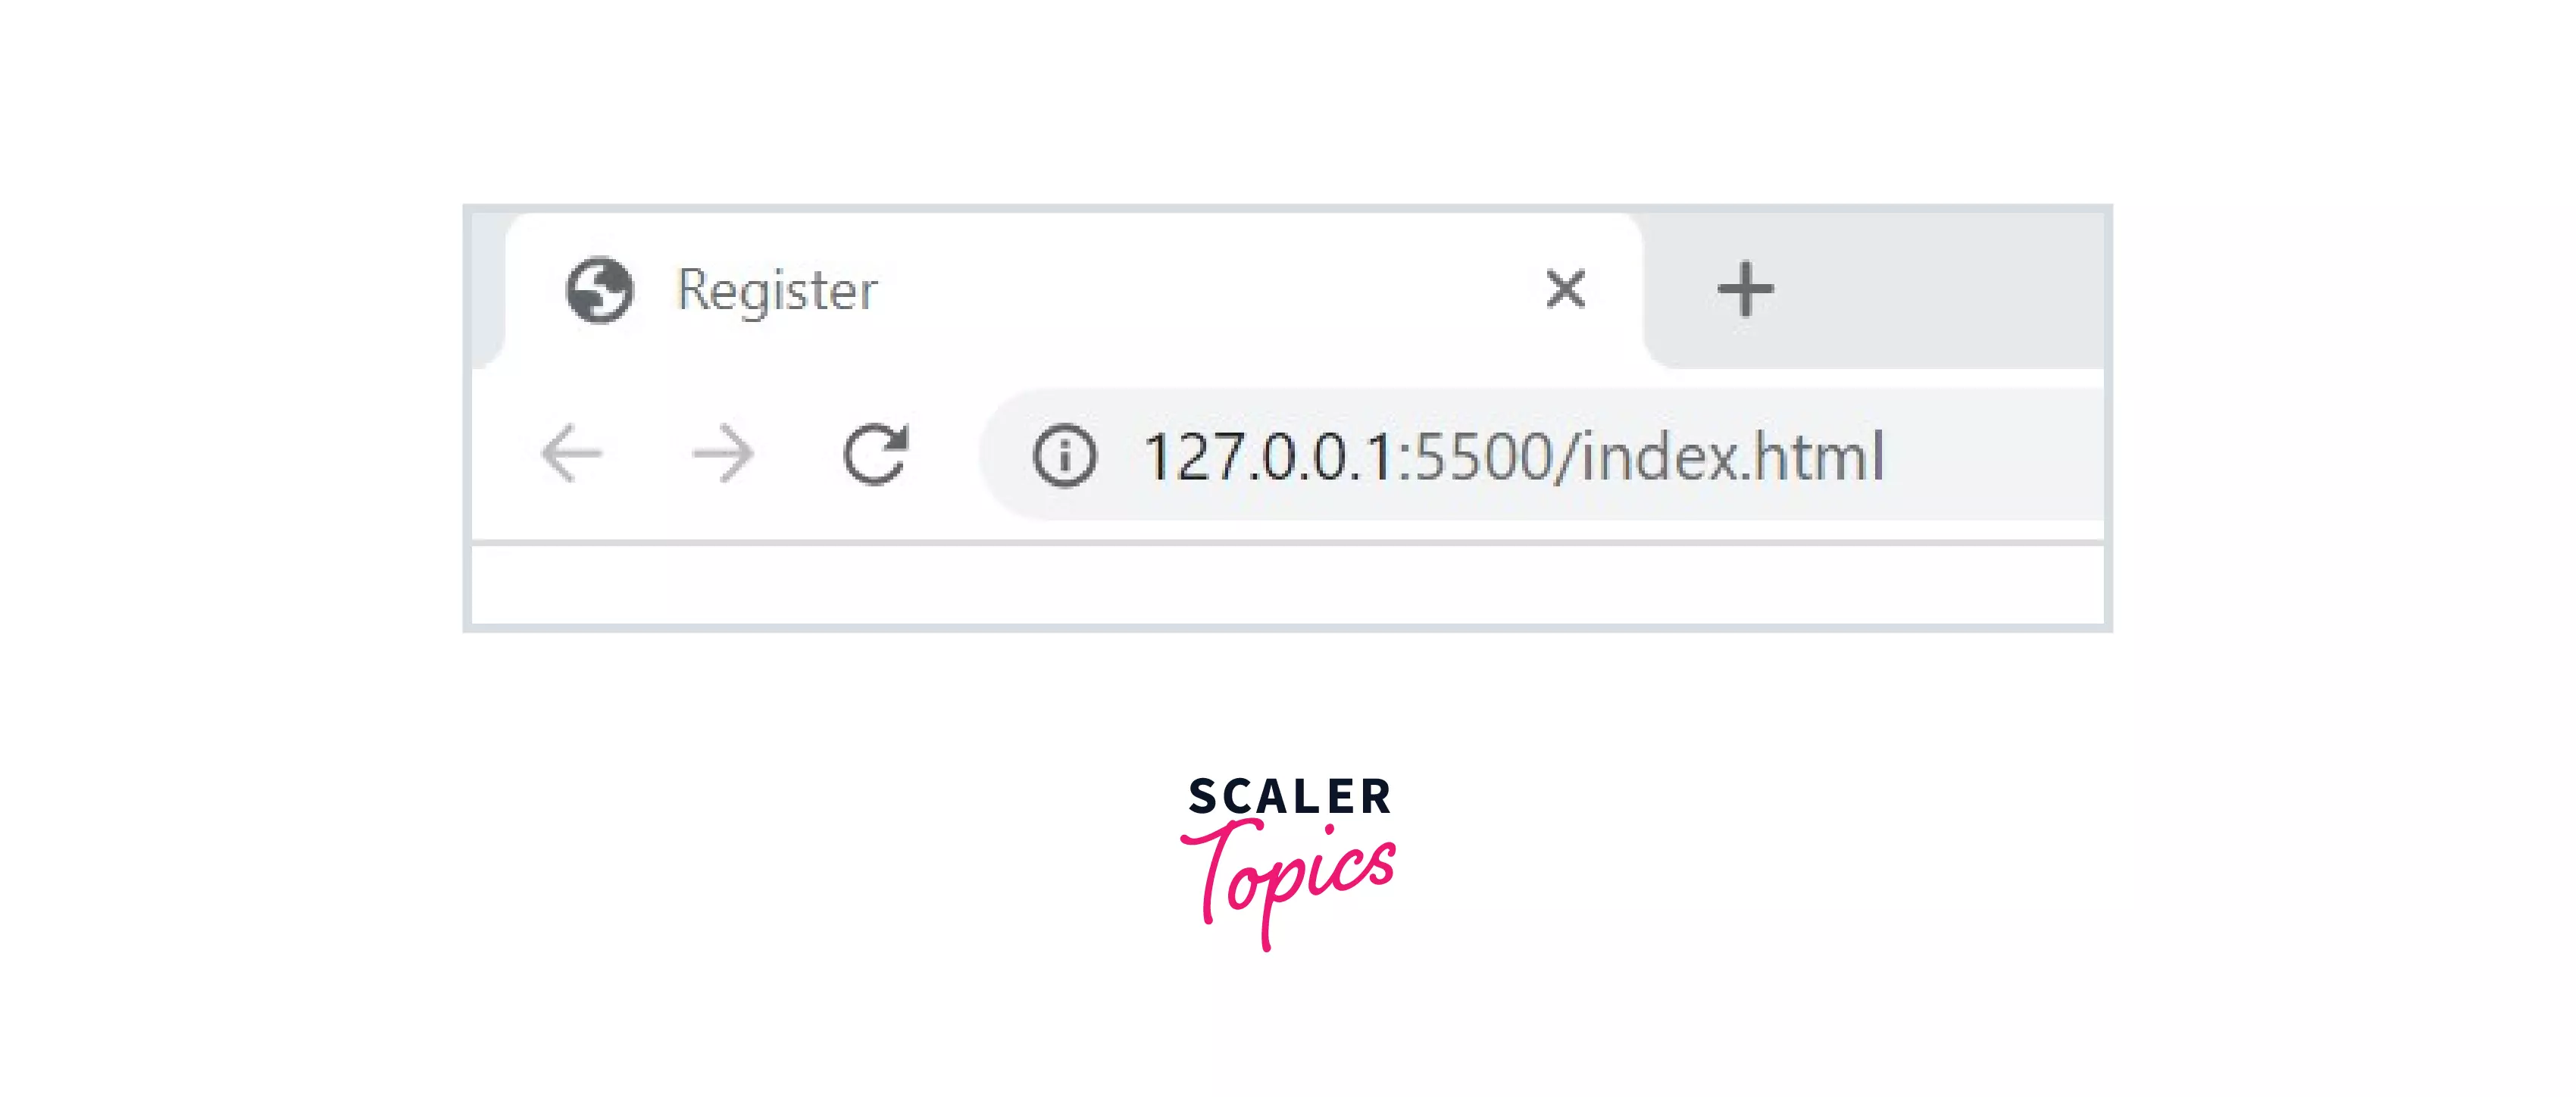
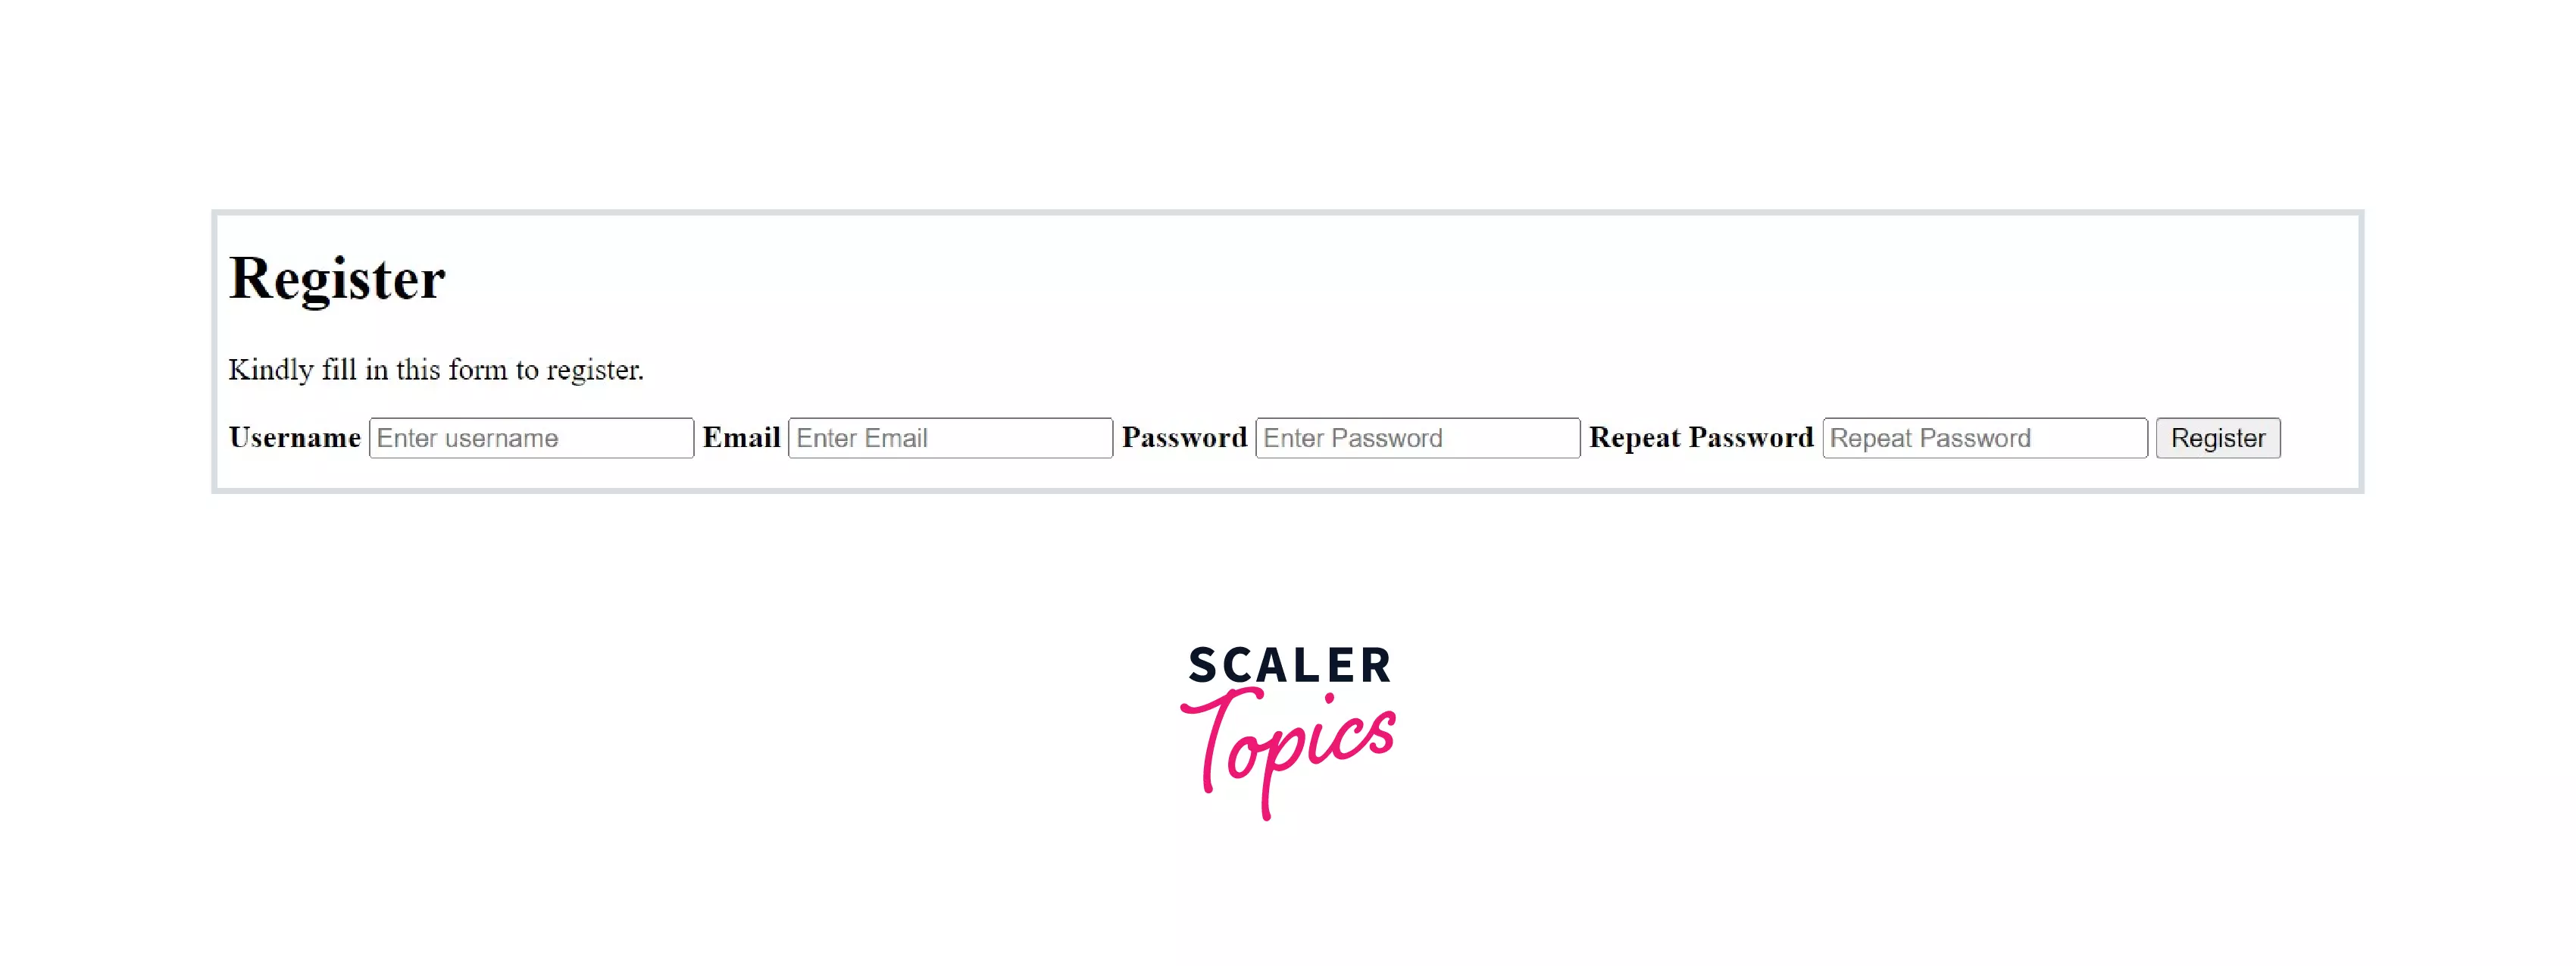
- Let's first create an index.html file with a basic HTML template, as shown below. Next, inside the <head> tag, we can find the <title> tag. The content mentioned inside the <title> tag appears on the tab's name as it refers to the title of the current web page. So, change the text to Register, as shown below.
Now, if we run the HTML page in the browser, we can see the following:
- Next, inside the <body> tag lets add a <form> tag. Our entire registration form will be created inside this <form> tag.
Form tags are used to create any form in HTML. Among many attributes, the two most important attributes in a form tag are action and method. The action attribute specifies where to send the form data once the user submits it, and it will be in the form of a URL, while the method attribute specifies the HTTP method which is used to send the form data, such as GET and POST.
Inside the form, we create two divs. The first div will include the title, description, input fields, and the submit button. The second div will consist of the link and description to route to the login page for already registered users.
 The code inside the <body> tag so far looks like this:
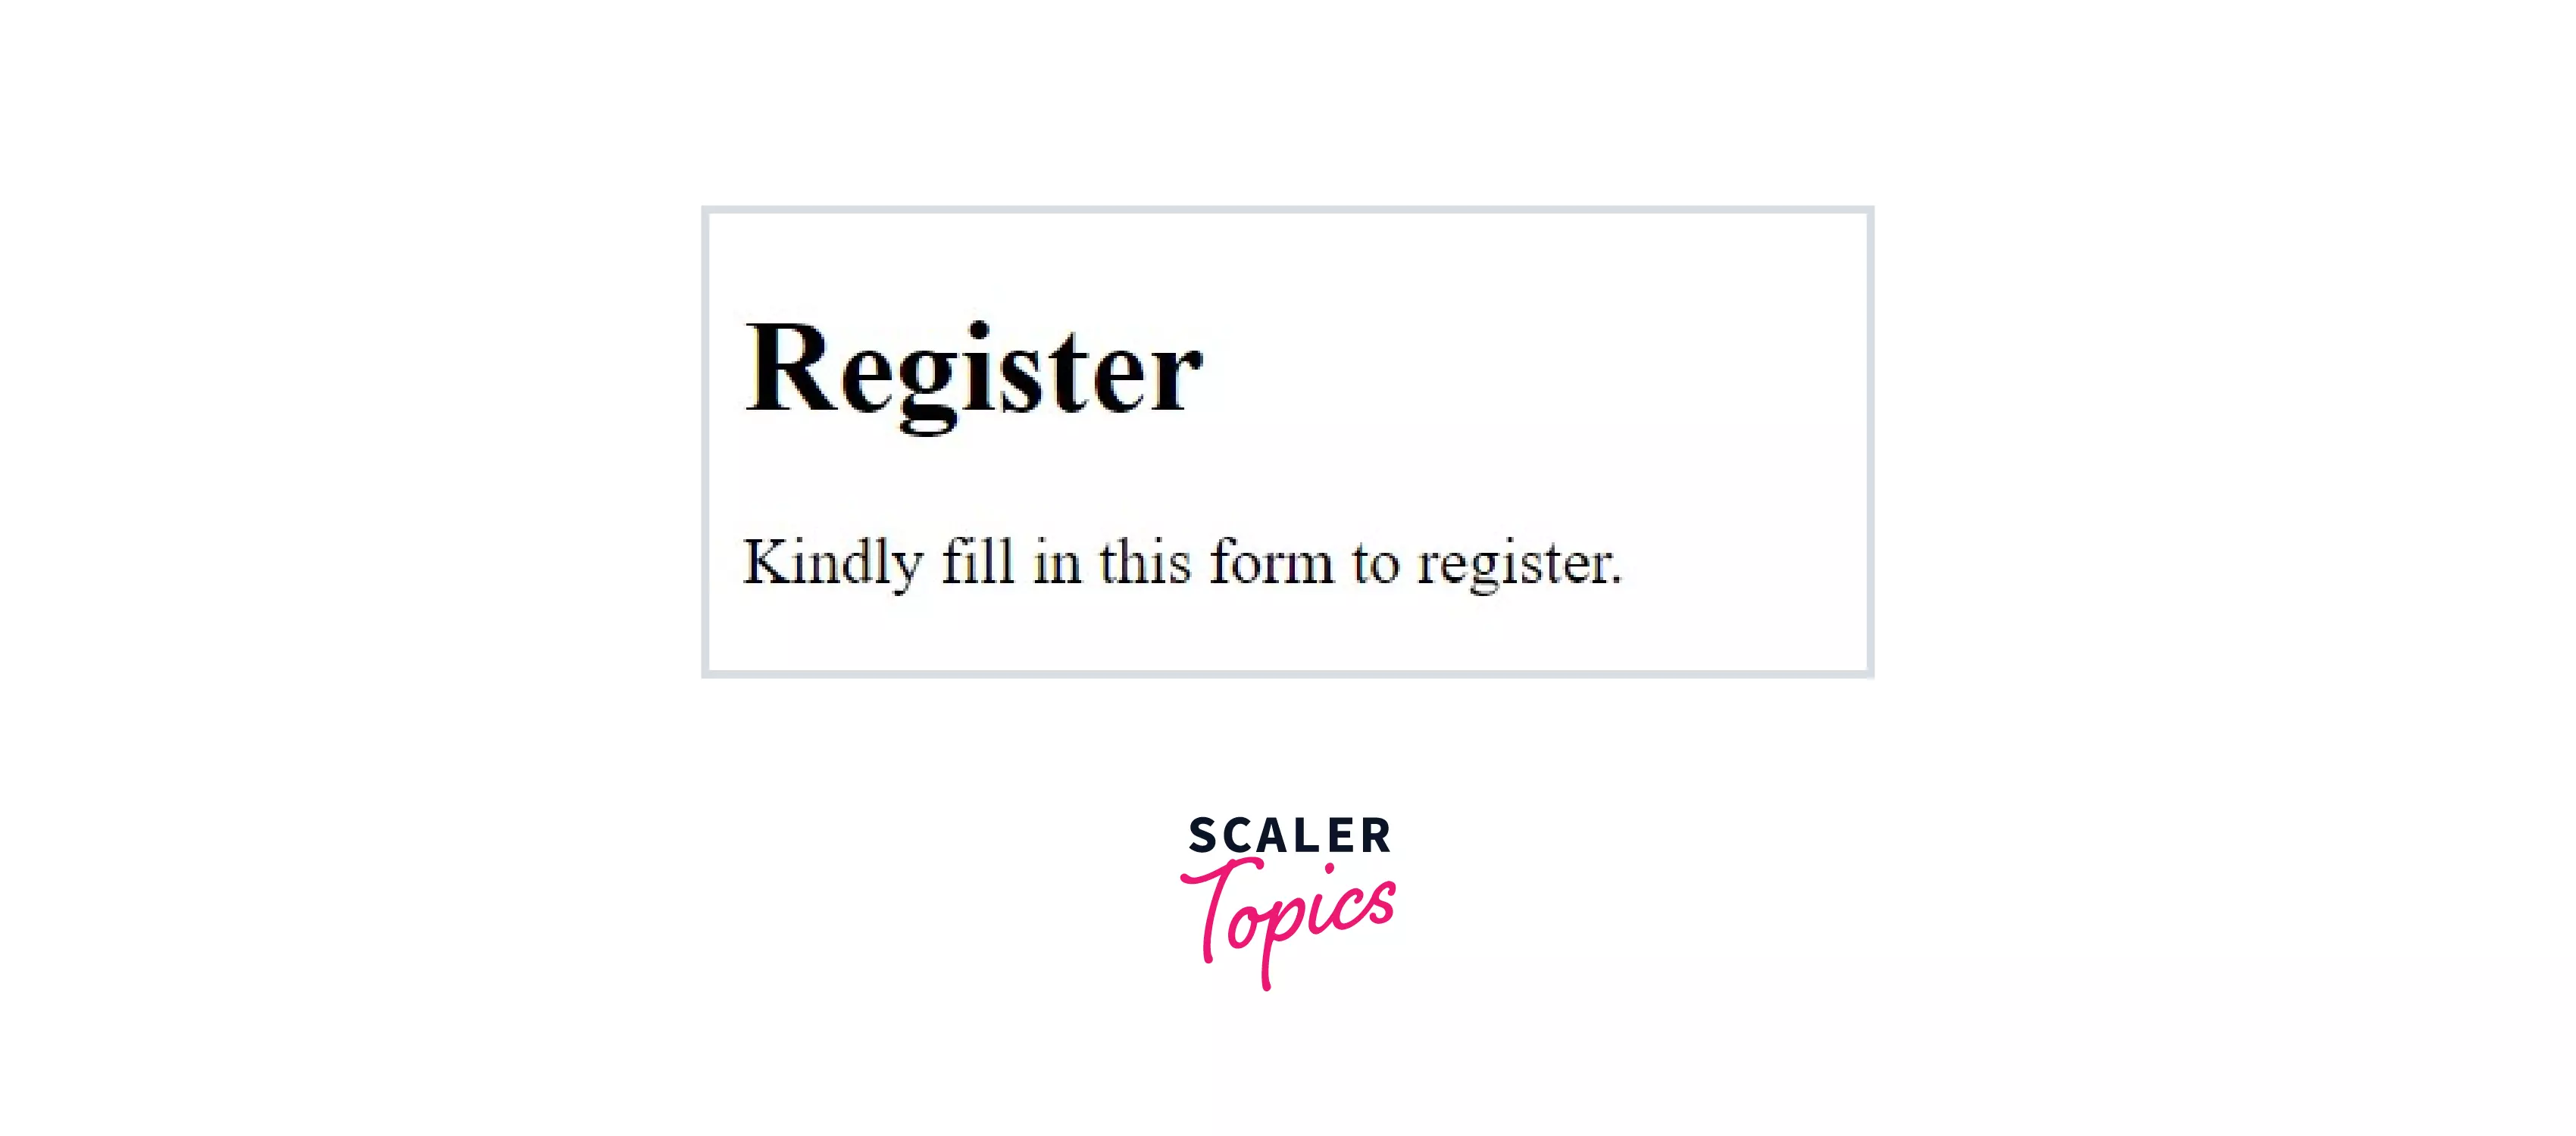
- We will work inside the first div tag in the following steps. First, let's create a title and description for our form. Create an <h1> tag and write the heading for our registration form, namely “Register,” and then create a <p> tag to include the description for our form, which is “Kindly fill in this form to register”. <h1> tag is a part of tags consisting of <h1>,<h2>,<h3>,<h4>, which is used to write headings or titles in HTML, while <p> tags are used to write a body of text such as paragraphs or descriptions. Now the following shows our current progress:
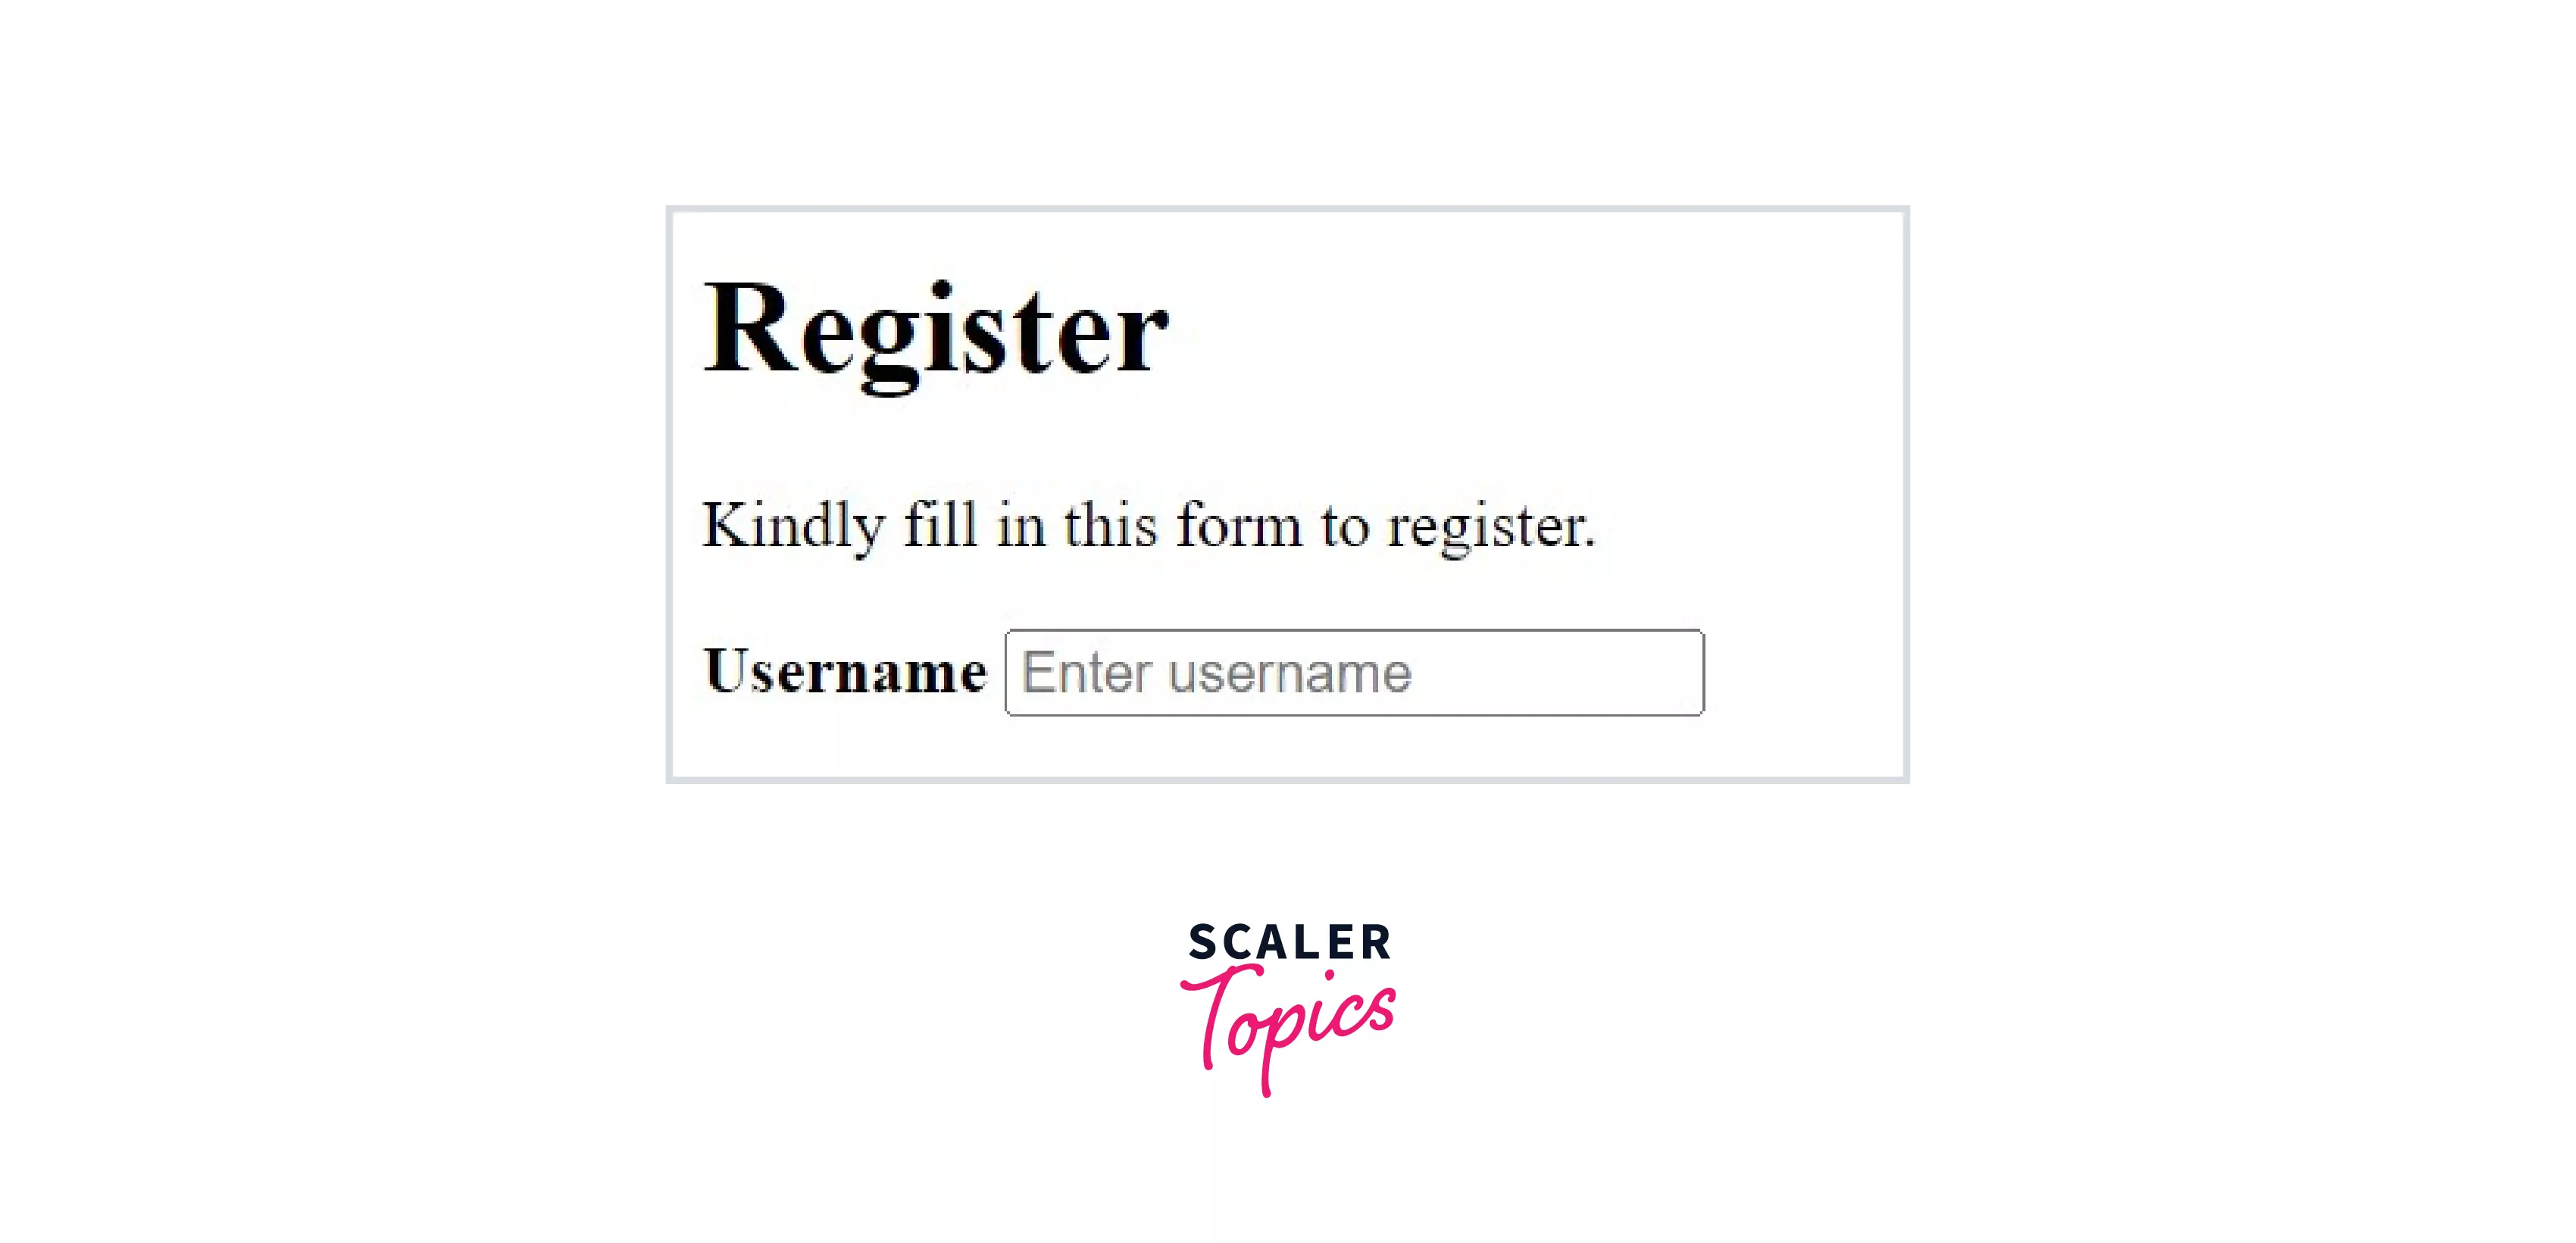
 4. Now, we will add our input fields for entering the username, email, and password and another field for repeating the password. We add this as a pair of labels and input tags. <Label> tag labels the input field, while <input> tags are used to enter user information.
a. The label tag has an attribute that specifies the entity to which the label is associated with.
b. We have added a <b> tag inside the label tag to provide bold text.
c. The input tag has mainly five attributes.
4. Now, we will add our input fields for entering the username, email, and password and another field for repeating the password. We add this as a pair of labels and input tags. <Label> tag labels the input field, while <input> tags are used to enter user information.
a. The label tag has an attribute that specifies the entity to which the label is associated with.
b. We have added a <b> tag inside the label tag to provide bold text.
c. The input tag has mainly five attributes.
- type represents the type of information that the input field takes in. It can be numbers, text, passwords, email, etc. For example, if the type is specified as a number, the user won't be able to add text to the input field.
- placeholder gives a brief hint to the user regarding what the input field expects as input data. It disappears when the user starts entering data.
- name refers to the entity entered in the input field after the form is submitted.
- id, as the name suggests, serves as a unique identifier of the element.
- required is a boolean attribute that specifies whether it is mandatory for the user to enter data. If a required attribute is mentioned inside the input tag, then the user must enter data in that field else the webpage will show a default error message. We have created a label and input field pair for entering the username, as shown below.
The output in the browser will be the following:
 5. Similarly, we can add a corresponding label and input fields for entering email, password, and repeat-password as shown below.
And the output will be as follows:
 6. Lastly, inside the first div, we can add a submit button to submit the registration form data, as shown below.
The browser will output the following:
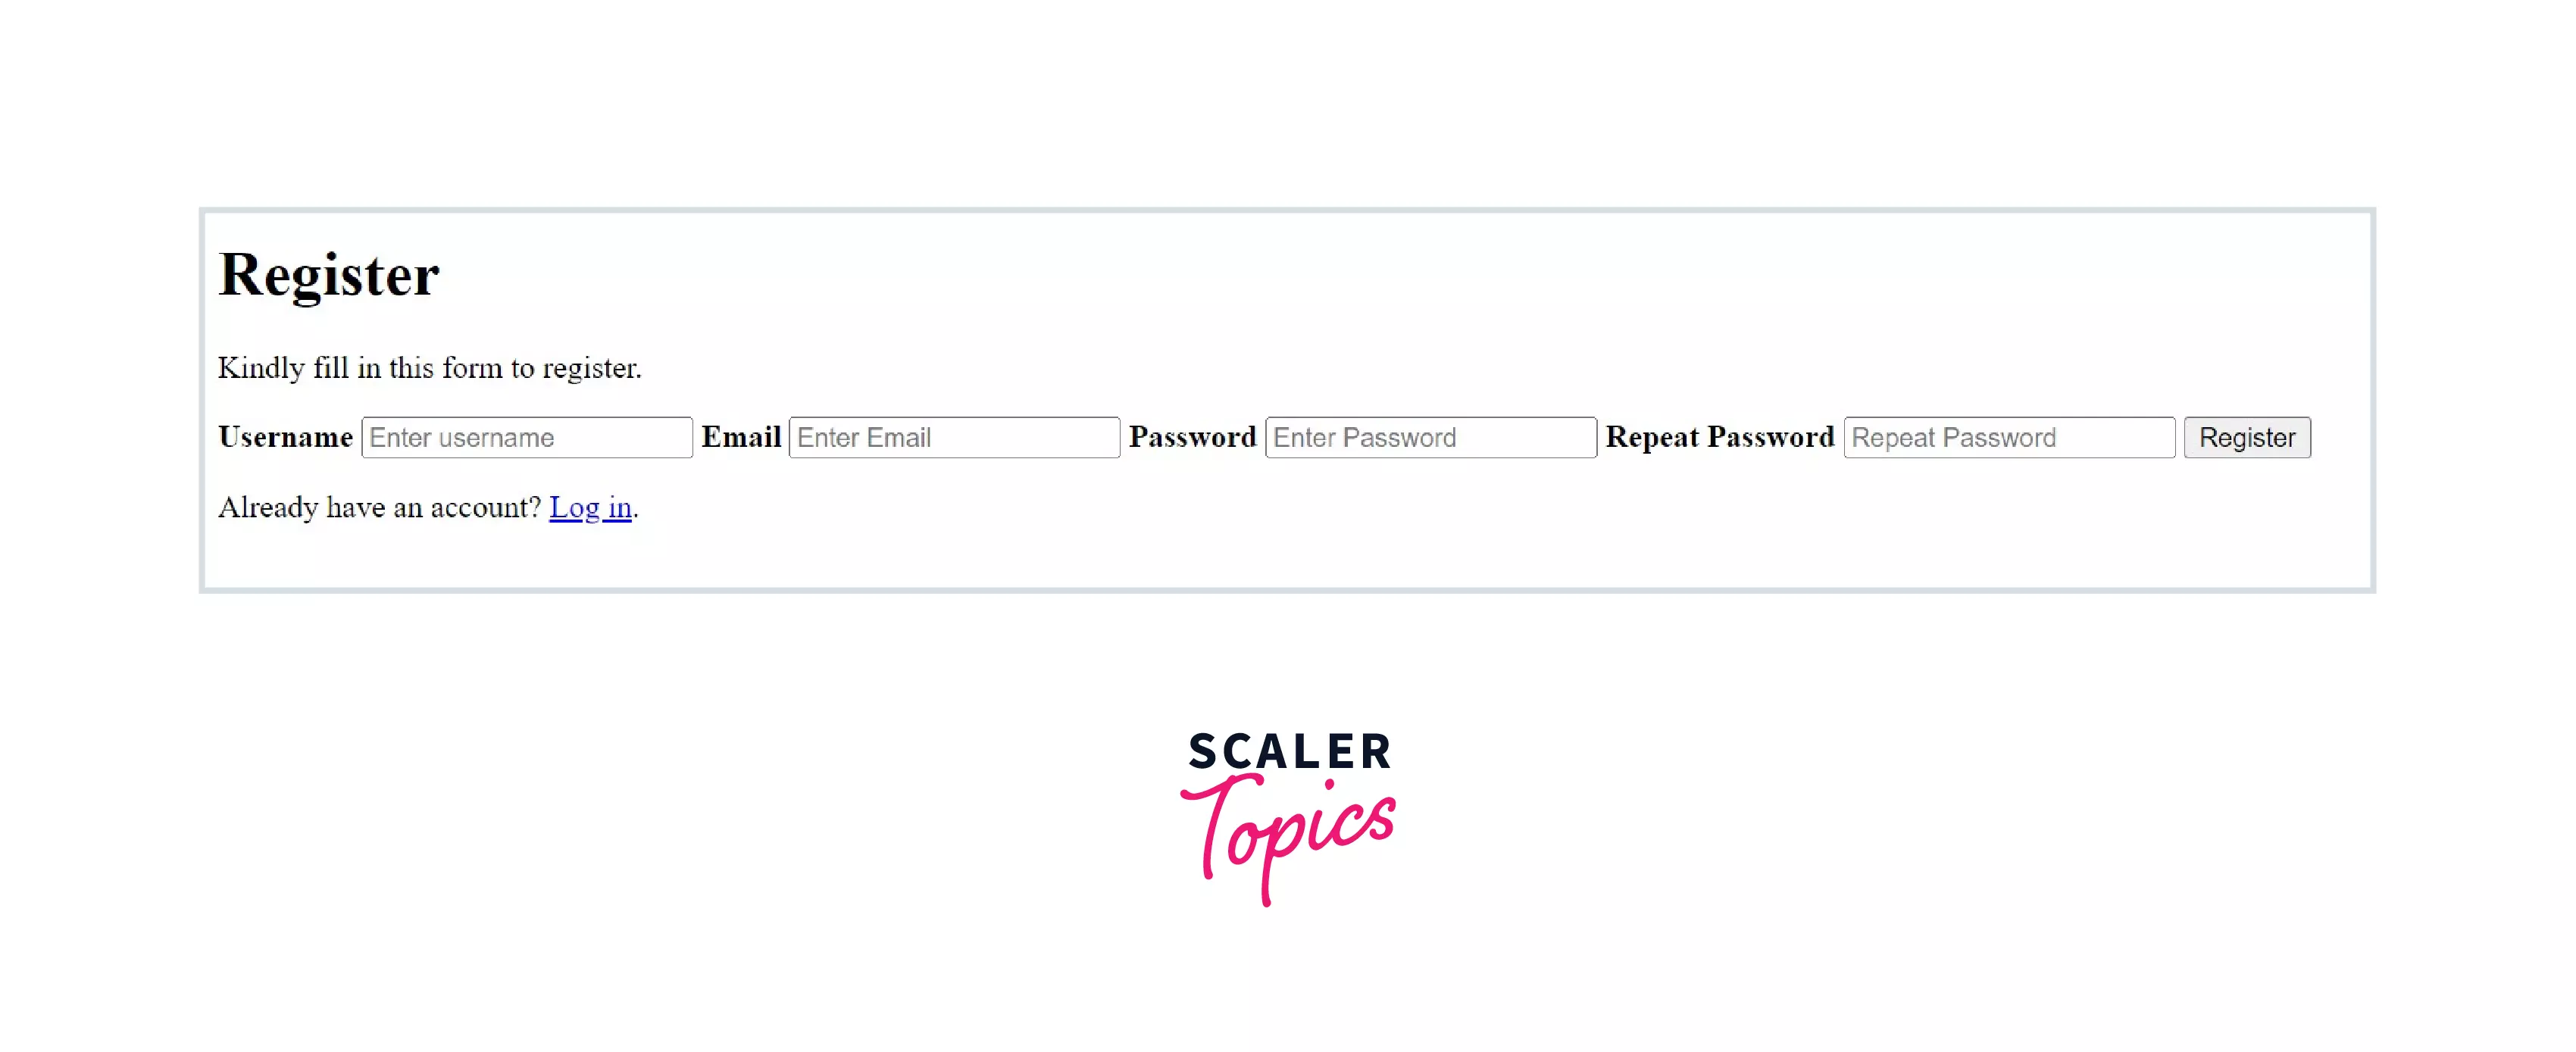
 7. Finally, inside the second div inside the form tag, we can add the routing to the login page by wrapping the text inside the p tag with the a tag, as shown below.
The text "Log in" is written inside an <a> tag and is used to enclose web links in HTML. It contains an href attribute, ideally containing the link to route toward the login page.
The browser output is shown below:
CSS Styling for Registration Page
We have successfully created the basic structure of the registration form. Next, we will discuss how to add styling to this form to make it look better using CSS.
- After creating a styles.css file, we should link it to our index.html file, as shown below.
- First, let’s add some basic styles to the form, as shown below. The form tag is selected inside the CSS to add the necessary styles.
The above styles will center the form on the screen and provide the following result.
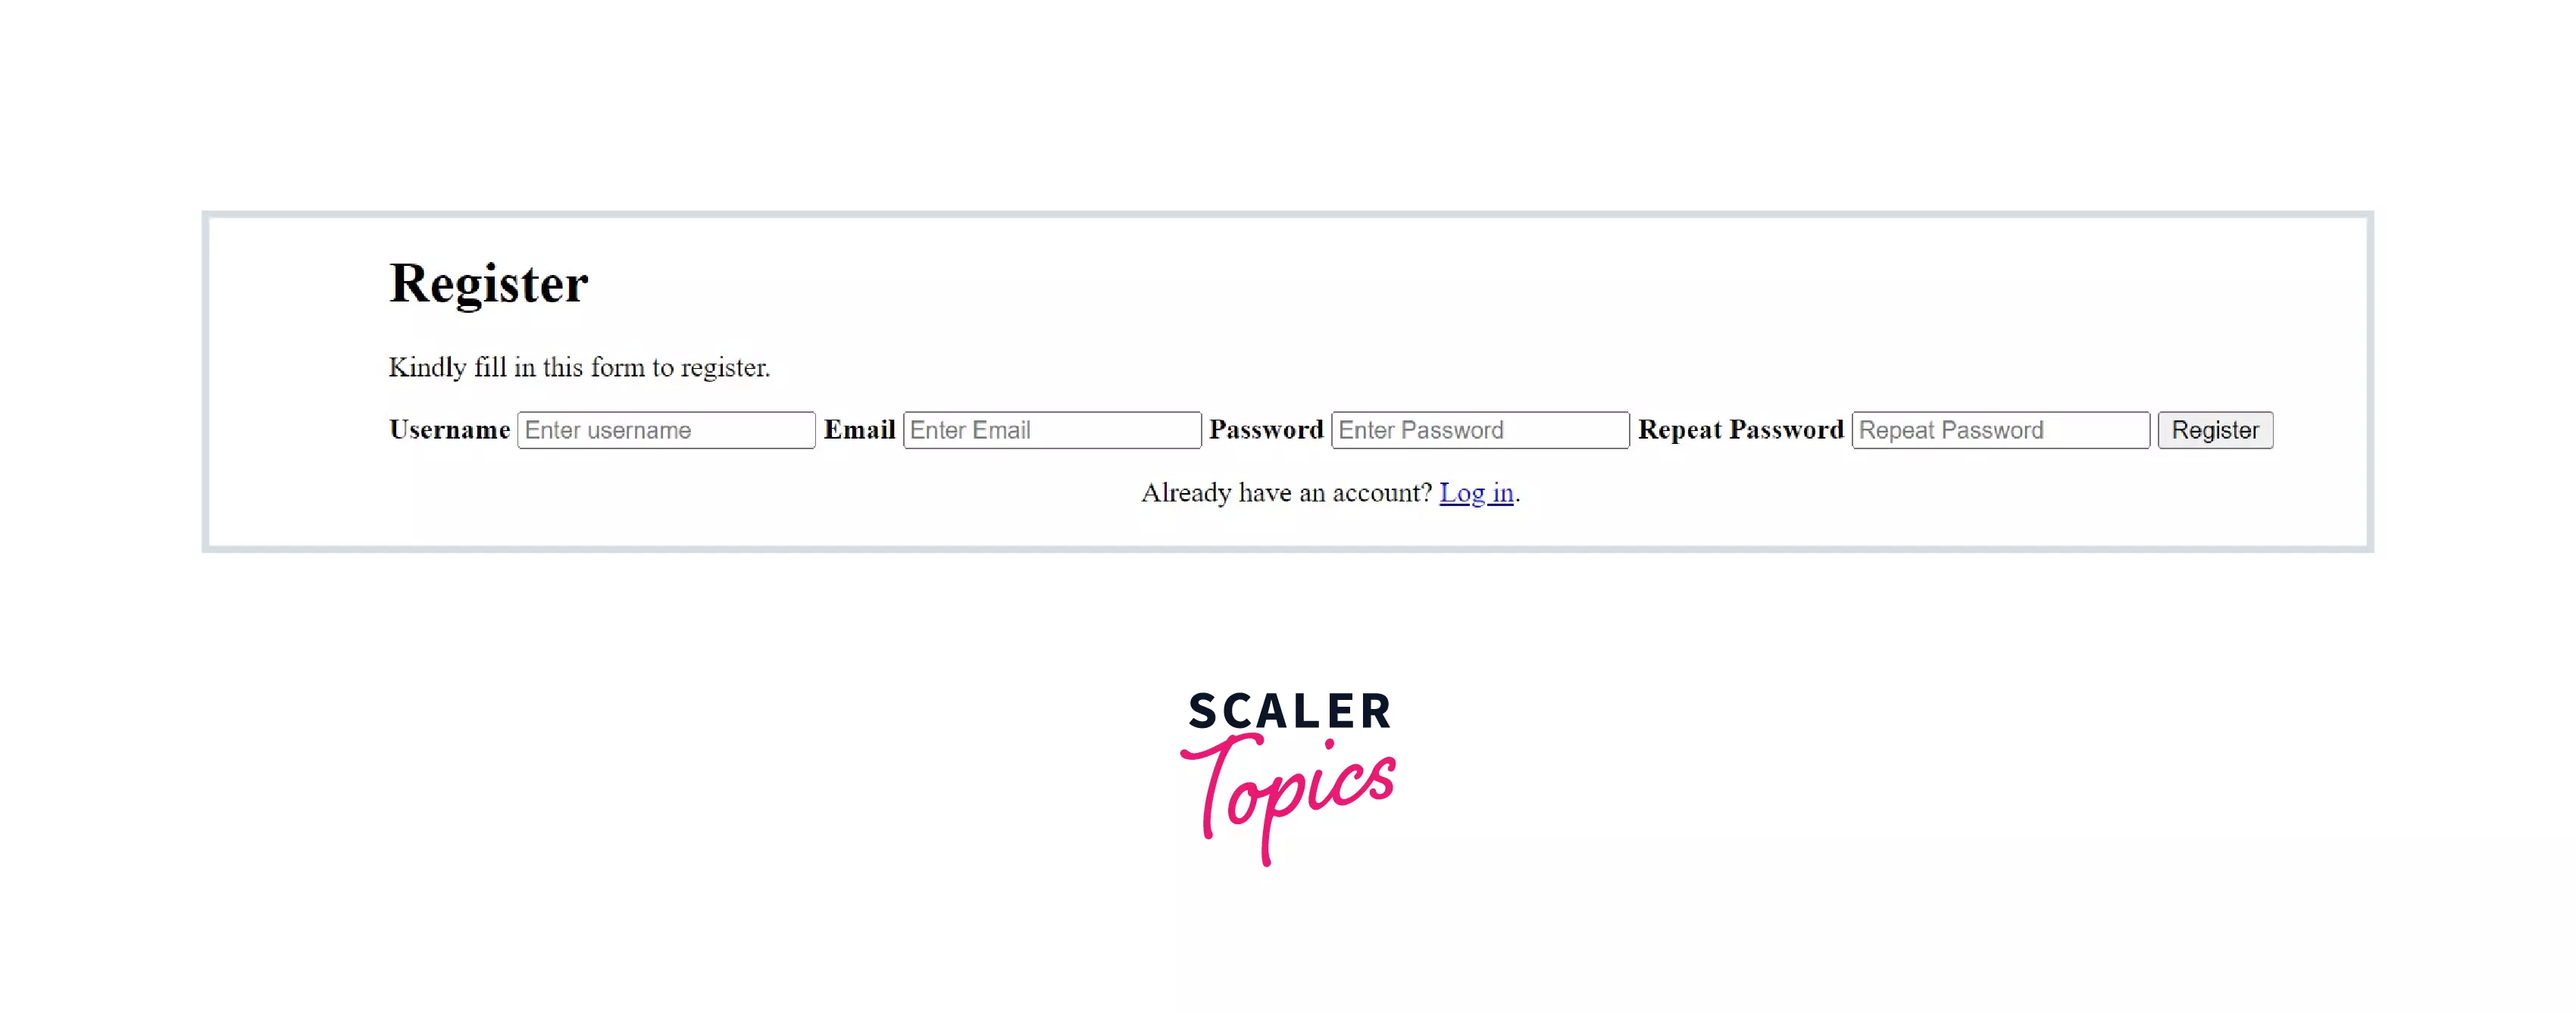
- Next, let's add a class to the first div tag inside the form and name it "container". The following is the HTML code:
The following are the corresponding styles given to the class "container". In short, it aligns all the fields vertically as rows and takes up a width of 25vw.
The browser shows the following result.
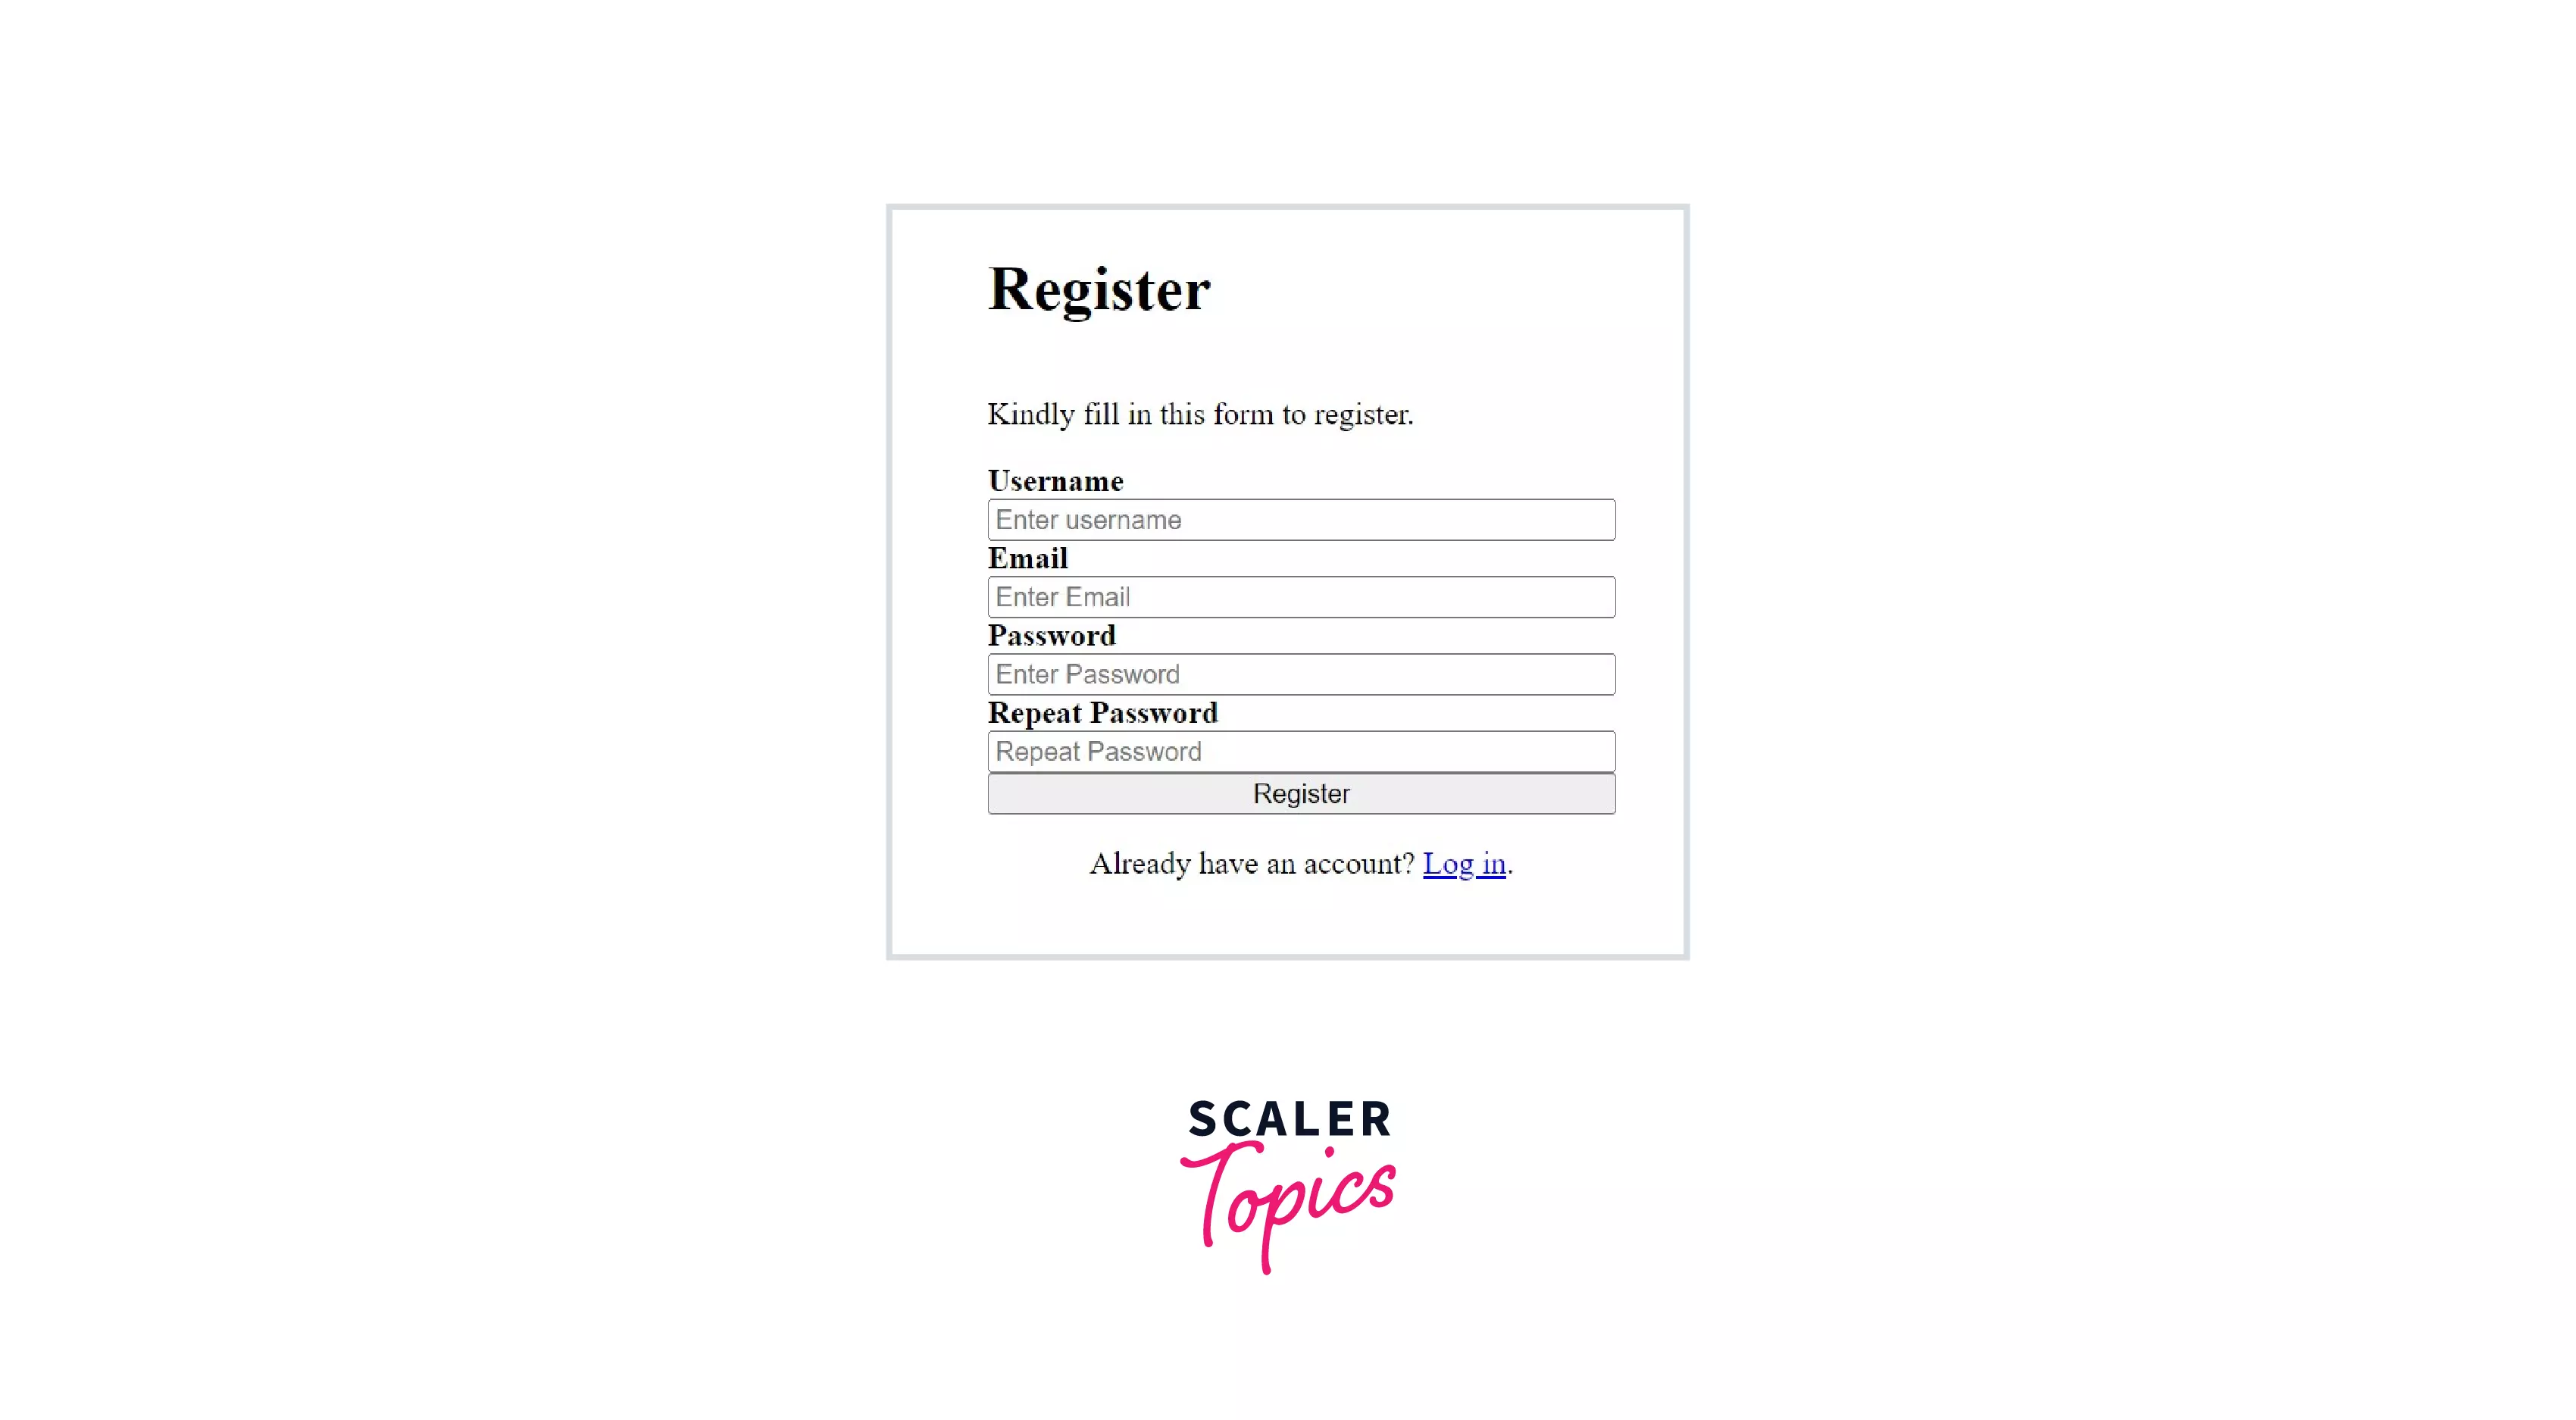
- Next, we align the title and description to the center of the form, as shown below.
The browser shows the corresponding changes as follows.
- The basic styling of the form is almost complete. Now, we can add fonts and necessary spacing to the input fields, as shown below.
Browser output:
- Now, let's beautify our input fields.
- Lastly, let's add some basic styling to our submit button, including hover functionality, as shown below.
Finally, we successfully built a registration page, and the final output in the browser is shown below.

Conclusion
- It is important to have a good knowledge of flexbox in CSS before we start developing the registration page in HTML.
- The entire registration page is composed inside a form tag which contains two divs.
- Inside the first div, we have the title tag for the title and p tag for the description, and for each user input, we can add a pair of label and an input tag. Once all the user inputs are added, we finally add the submit button for submitting the form data.
- The second div contains the description for routing back to the login page, which is done using an a tag.
- Once the HTML is created, a basic flexbox can be used to style the form using CSS.
- By building a registration form, one gets to learn about the usage of form, input,label, and a tags and flexbox in CSS as well.