Memcached
Overview
Memcached has in-memory key-value stores that store short bits of random data (strings, objects) returned by databases queries, API requests, or page rendering. Memcached is indeed a simple but powerful memory cache. Its straightforward architecture supports speedy deployment, and simplicity of development, and overcomes numerous issues associated with a huge data cache. Its APIs are accessible in the majority of common languages. A free and open-sourced, high-performance, shared memory object caching solution that is general but is designed to be used in accelerating dynamic web apps by relieving DB burden.
Transform Your Career
Choose from our industry-leading programs designed for career success
Modern Software and AI Engineering Program
Master full-stack development with AI integration

Modern Data Science and ML with specialisation in AI
Advanced data science techniques with AI specialization
Advanced AIML with Specialisation in Agentic AI
Deep dive into AIML with focus on Agentic systems
DevOps, Cloud & AI Platform Engineering
Build and manage AI-powered cloud infrastructure
AI Engineering Advanced Certification by IIT-Roorkee
Premier AI engineering certification from IIT-Roorkee
What Is Memcached?
Memcached is a technology for general-purpose distributed memory cache. It is frequently also used to improve the performance of dynamic databases driven webpages by caching data and objects in RAM to decrease the number of times an arbitrary data source (like a database or Apis) should be accessed.
It provides a robust, scaled, open-source system for providing sub-millisecond response speeds, which makes it suitable for usage as a cached or sessions store. Memcached is a popular option for real-world applications enabling Websites, Mobile Applications, Games, Ad-Tech, and E-Commerce.
Advantages:
- The data is saved on the server.
- It is efficient and Cheap.
- This may be used on a variety of systems, including Mac OS, Linux, Unix, and Windows.
- It can compensate for poor ACID characteristics and never blocks.
Disadvantages:
- It's rather sluggish, mostly owing to serialization or deserialization and network latency, compared with the In-Memory cache.
- Because there is only one copy and it is kept in one location, several users have restricted access to the same data package.
- The datastore is not permanent.
How Does Memcached Work?
Memcached, apart from the database, stores data in memory rather than on disks or Ssds. In-memory key-value stores, such as Memcached, minimize search delay time and therefore can retrieve data within microseconds by removing the requirement to visit drives.
Because Memcached is decentralized, it is simple to expand out by introducing more nodes. Furthermore, because Memcached is multithreaded, users may quickly increase computation capacities.

So as a consequence of its scalability and speed in addition to its simple architecture, effective memory administration, and API compatibility for the most common language Memcached is a major option for high-performance, large-scale cache use cases.
A cache is a high-speed data storage layer in computing that saves a portion of data that is often temporary in nature so that subsequent requests for that data may be delivered up faster than accessing the data's primary storage location. Caching helps you to utilize previously received or calculated data more effectively.
Cache data is typically kept in rapid access hardware such as RAM (Random-access memory) and may also be utilized in conjunction with a software component. The fundamental goal of a cache is to improve data retrieval performance by eliminating the need to contact the slower storage layer beneath.
Benefits Of Memcached
Response Times Of A Millisecond Or Less
All of Memcached's data is stored inside the server's primary memory. In-memory data stores eliminate the need for frequent roundtrips to the drive, in contrast to a database like PostgreSQL, Cassandra, and MongoDB that keep the majority of the data on disks or SSD. They are capable of supporting orders of magnitude additional processes and quicker reaction time as a result. As a consequence, performance is extremely quick, with typical write and read speeds of less than one millisecond and capability for billions of operations every second.
Simplicity And Usability
Memcached is effective and simple to utilize in app development since it is basic and general in architecture. Memcached programmers have access to a wide variety of open-source consumers. Java, Python, PHP, C, C++, C#, JavaScript, Node.js, Ruby, Go, and numerous other languages are available.
Scalability
Scalability is made simple by Memcached's distributed and multithread design. One may scale up capacities by including an extra node in the cluster by distributing the data over a variety of nodes. Furthermore, Memcached may utilize several cores on a given node because it is multithreaded. It enables increasing computational capacity straightforwardly. One may create massively scalable distributed caching systems that are intended to deliver quick and reliable performances using Memcached.
Patterns Of Data And Access
Knowing the data and its access patterns are also required when deciding what and how to cache. It makes little sense, for example, to cache data that varies often or is rarely retrieved. For caching to be effective, the data must be relatively static and regularly requested. A personal profile on a social networking site is an example. On the other side, you do not want to cache data if doing so delivers no benefit in terms of performance or cost. Caching websites that produce search results, for instance, makes little sense so because requests and outcomes are frequently distinct.
Community
An active community provides the matured open-source program Memcached. Memcached is supported by programs like WordPress and Django to boost performance. Because Memcached is built on standard protocols, support open data format, and has a wide range of client, there's no supplier or technological lock-in.
Turn Learning into Career Growth
Popular Memcached Use Cases
- Caching
AWS Memcached is a wonderful option for setting up a powerful performance in-memory caching to reduce the stress on the back-end system, boost capacity, and reduce data access delay. AWS Memcached makes it easy to and affordably grow under increased demands and can offer cached objects within less than a millisecond. AWS Memcached is widely used for caching database query results, sessions, web pages, APIs, and things like pictures, documents, and metadata. - Sessions Stores
When durability is not essential, app developers frequently choose AWS Memcached for its in-memory data store to keep and handle session log information for internet-scale apps. The scalability and sub-millisecond delay needed to maintain session data, including user's profile pages, passwords, and session status, are provided by AWS Memcached. - Data Storage In Memory
The basic goal of an in-memory key-value store is to enable fast (submillisecond latency) and low-cost access to data copy. Most data repositories contain sections of data that are regularly retrieved but rarely modified. Furthermore, searching a database is always more expensive and slower than finding a key in a key-value pair caching. Many queries are very costly to execute. - Joins for the Queries
Queries that entail joins across numerous tables or queries with complex computations are two examples. By caching such search queries, users just pay the cost of the query once. The data may then be instantly retrieved at any time without having to run the queries. - Staleness
Cached data is, by definition, stale data. Even if it isn't stale in some instances, food should always be viewed and handled as stale. Assess the user's sensitivity for stale data to evaluate if the data is suitable for caching.
Scaler Placement Report and Statistics
Scaler learners achieved 2.5x salary growth with average post-Scaler CTC reaching ₹23L.
Setting Up To Use Memcached
Create Your AWS Account
You must have an active AWS account and rights to access ElastiCache and other AWS services to utilize Amazon ElastiCache.
Create an AWS account if you don't already have one. AWS accounts are completely free. You are only paid for utilizing AWS services, not for signing up for them.
To Set Up An AWS Account:
- Navigate to AWS Home Page.
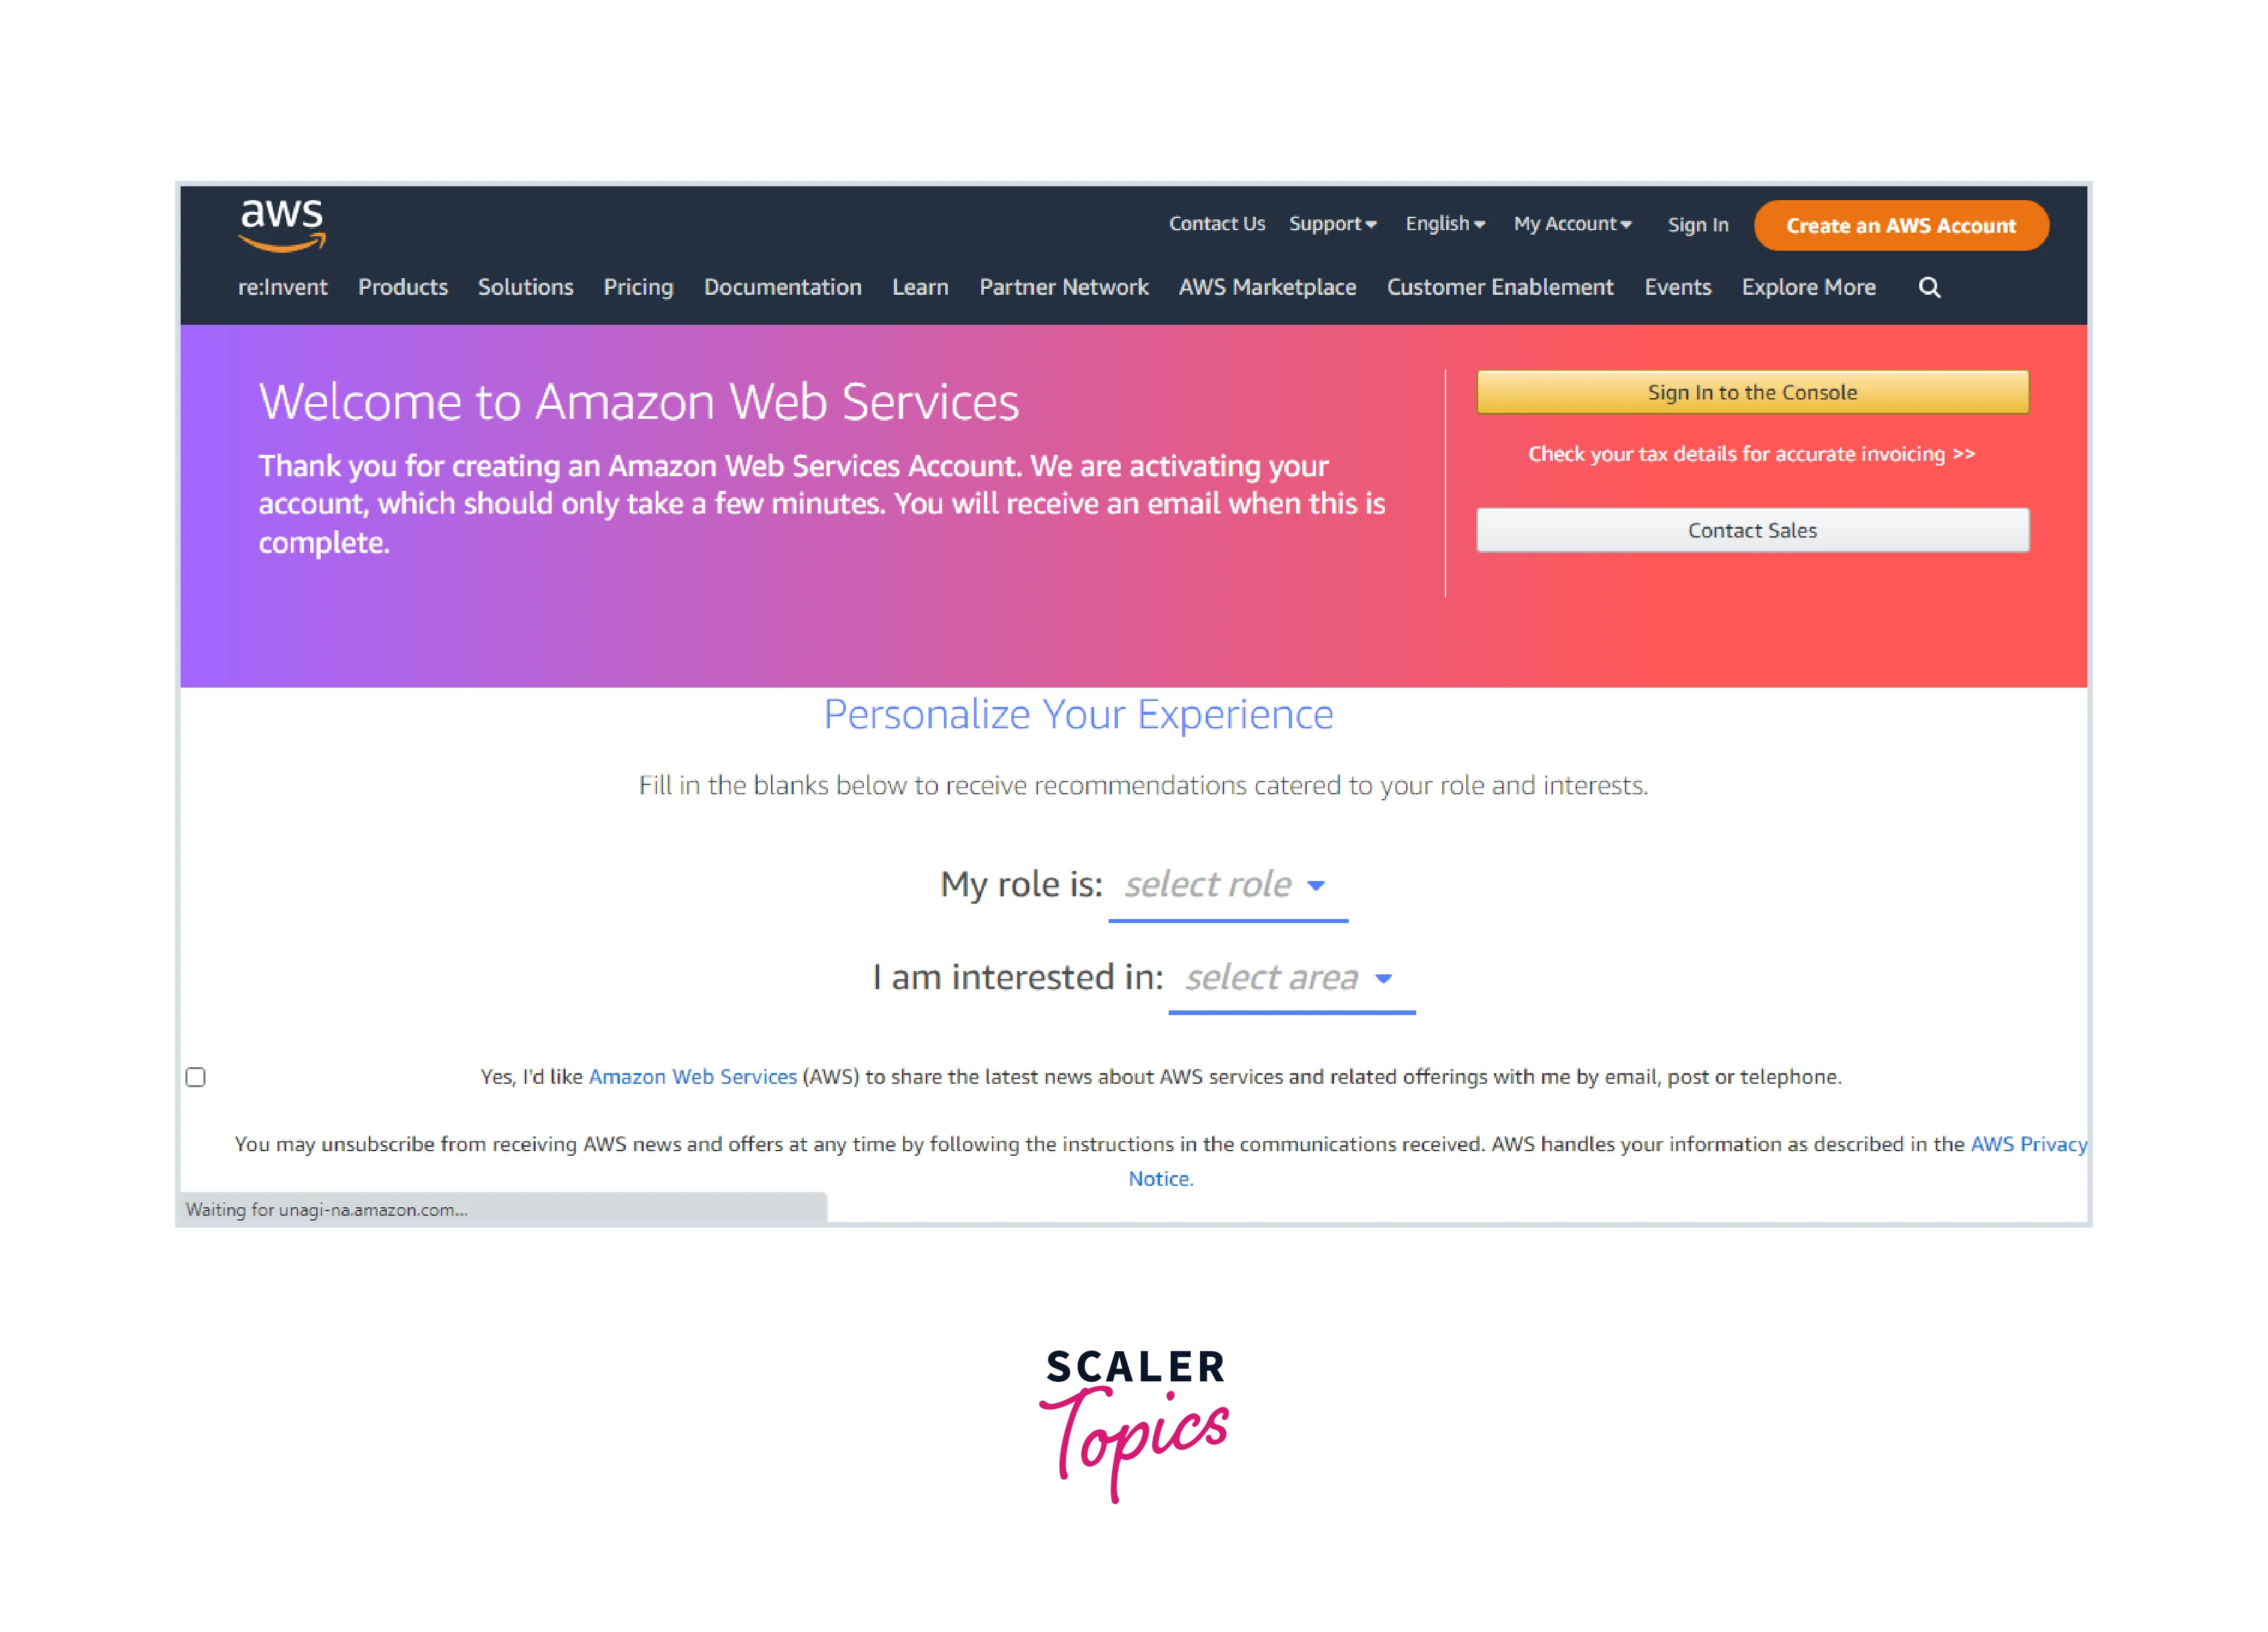
- Comply with the online instruction.
Receiving a phone call and entering a verification code on the phone keypad are both required steps in the sign-up process.
When you sign up for an AWS account, you establish an AWS account root user. The root user has full access to the account's AWS services and resources. As a best practice for security, provide administrative access to an administrative user and utilize the root user solely for tasks that need root user access.
Getting An AWS Access Key
You must have an AWS access key before you can use ElastiCache programmatically or using the AWS Command Line Interface (AWS CLI). If you solely want to utilize the ElastiCache console, you do not require an access key.
Access keys are made up of an access key ID and a secret access key, and they are used to sign programmatic requests to AWS. If you don't already have access keys, you may generate them using the AWS Management Console.
As a best practice, avoid using the AWS account root user access credentials for any operation that isn't strictly necessary. Create a new administrator IAM user with access credentials for yourself instead. You can only read or download the secret access key while you are logged in.
You will not be able to recover them afterward. You can, however, generate fresh access keys at any moment. To conduct the relevant IAM activities, you must also have the necessary permissions.
To Create Access Keys For An IAM User
- Log in to the AWS Management Console and go to IAM Dashboard.
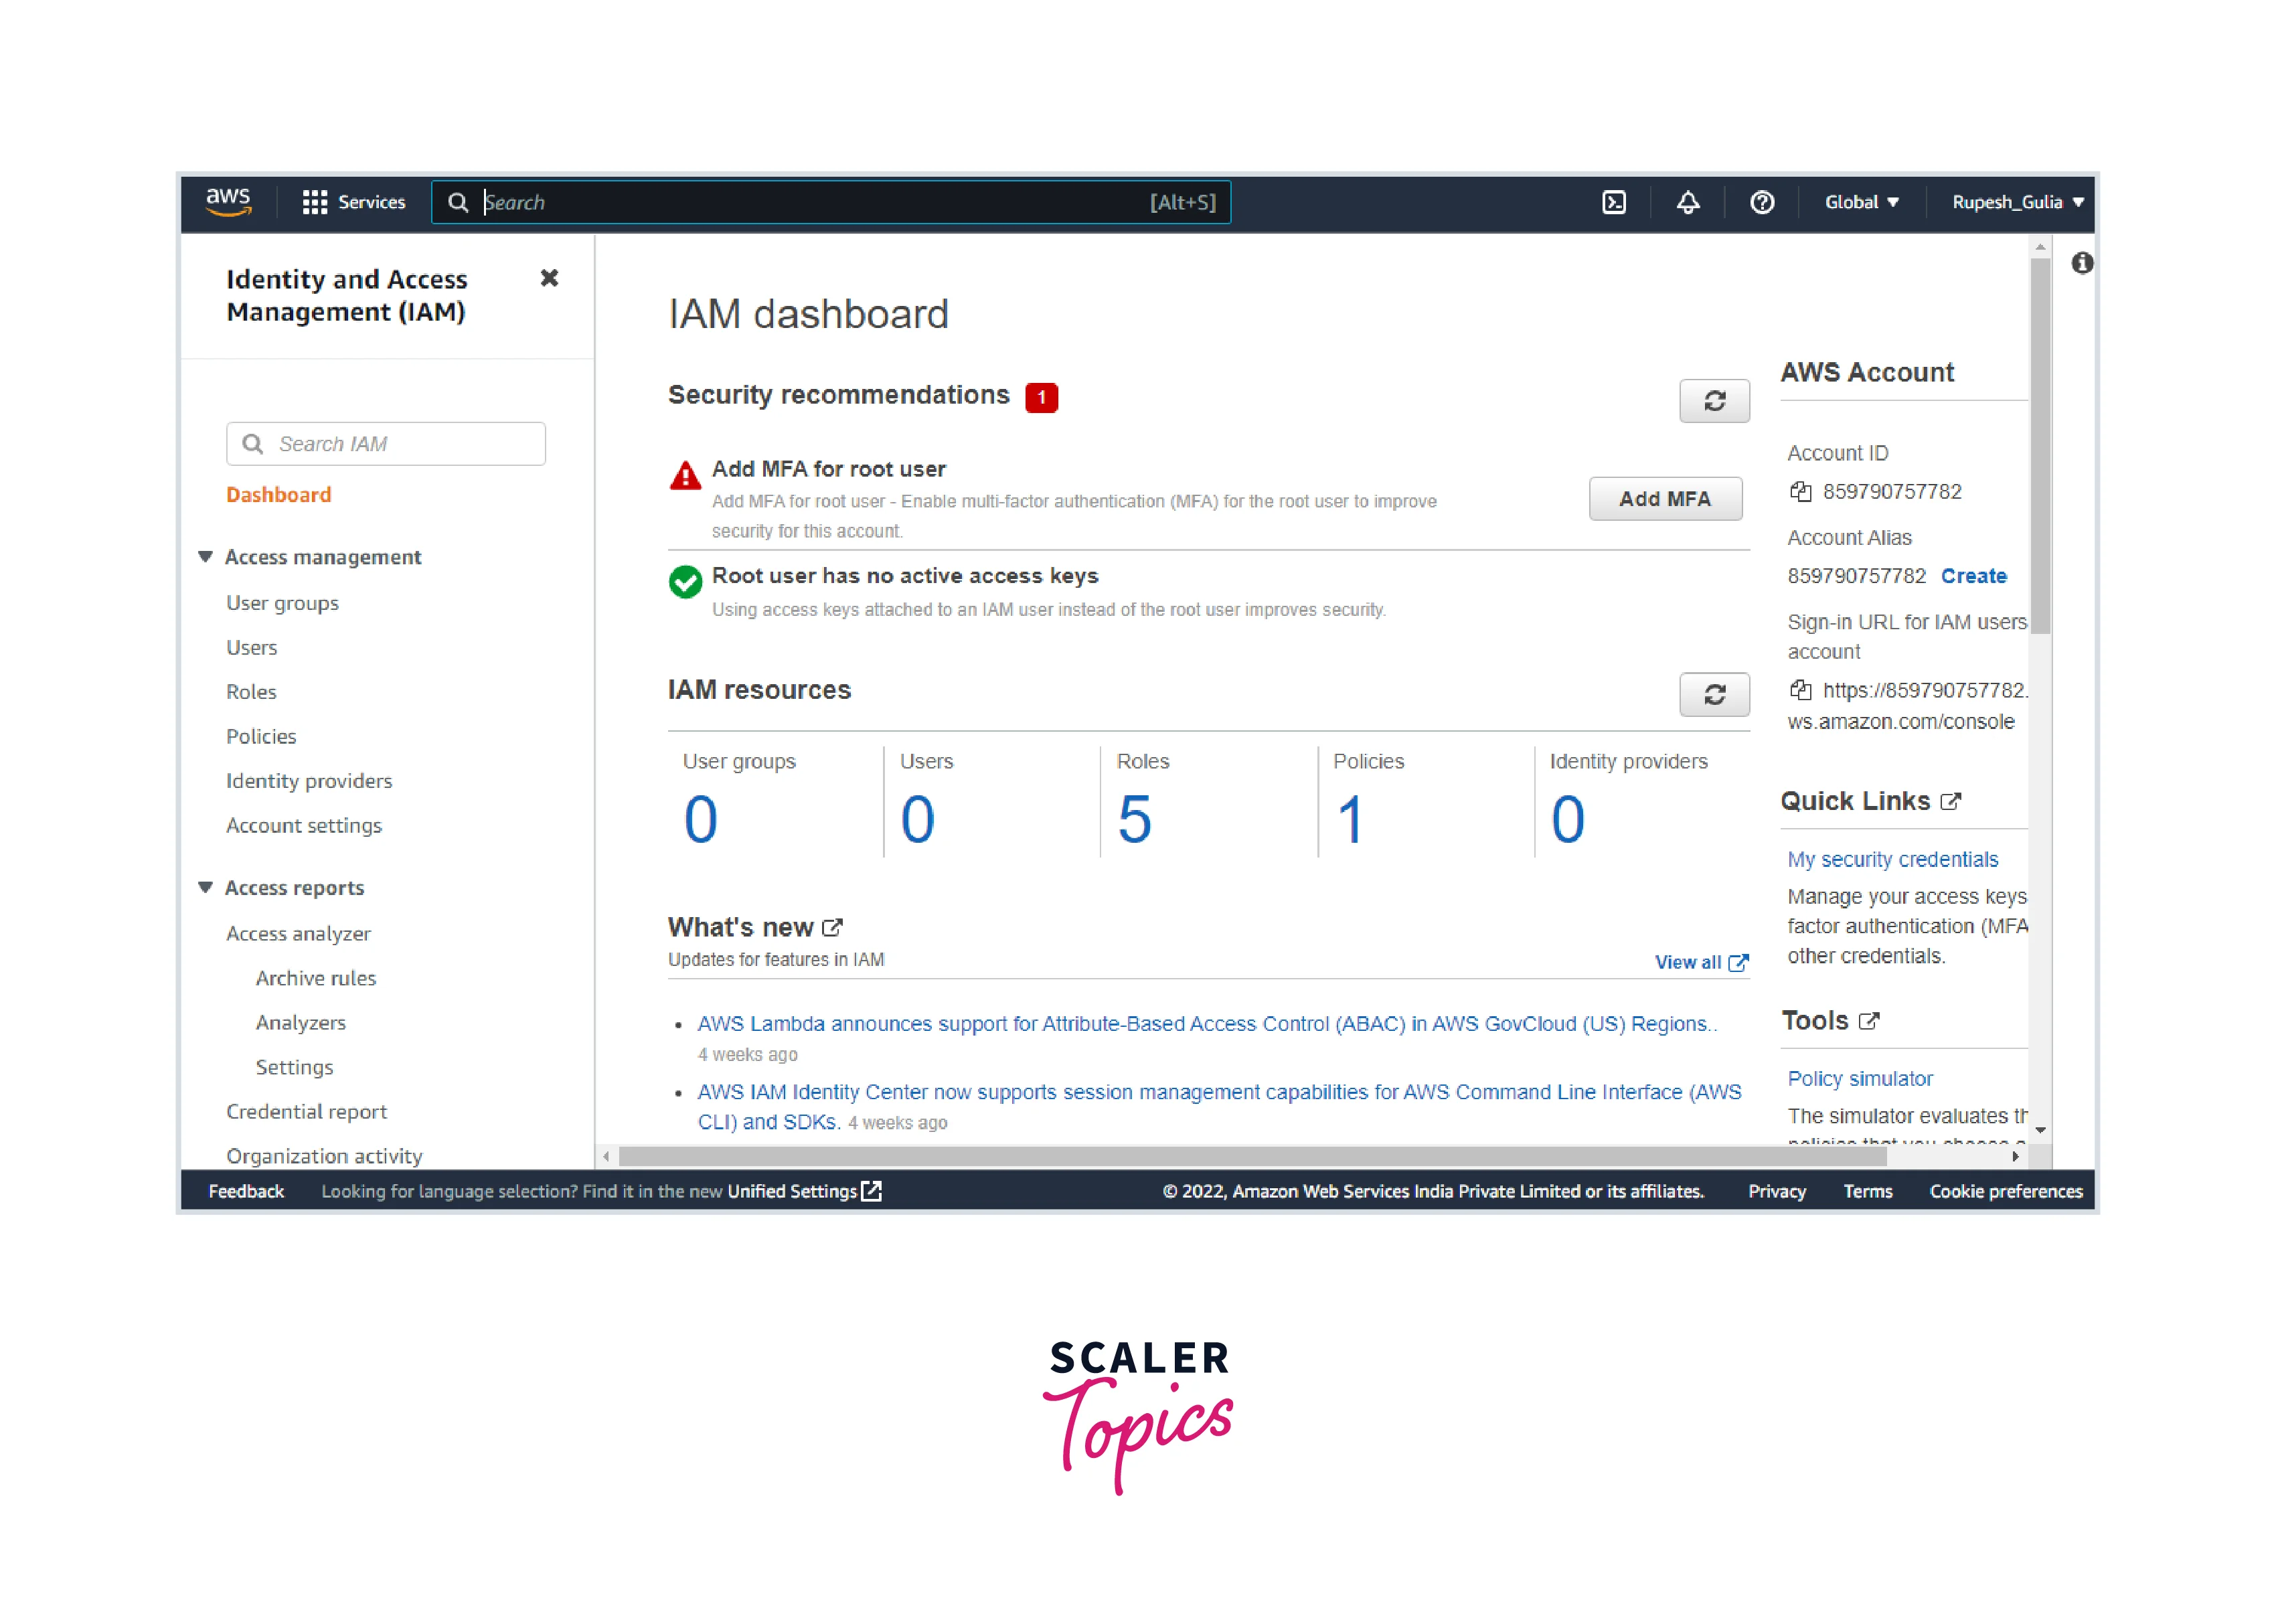
- Select Users from the navigation pane.
- Select the Security credentials tab after selecting the name of the user whose access keys you wish to create.
- Select Create access key from the Access keys area.
- Select Show to see the new access key pair. After this dialog box closes, you will no longer have access to the secret access key. Your credentials should look like this:
- Access key ID: AKIAIOSFODNN7EXAMPLE
- Secret access key: wJalrXUtnFEMI/K7MDENG/bPxRfiCYEXAMPLEKEY
- Select the Download.csv file to obtain the key pair. Keep the keys in a safe place. After this dialog box closes, you will no longer have access to the secret access key.
- To safeguard your AWS account, keep the keys private and never email them. Even if an inquiry looks to come from Amazon or Amazon.com, do not distribute them outside your business. Nobody who works for Amazon will ever ask you for your private key.
- After downloading the.csv file, choose Close. When you create an access key, the key pair is automatically activated, and you may use it immediately away.
Configuring Your Credentials
You must configure your credentials to allow permission for your apps before you can use ElastiCache programmatically or use the AWS CLI.
There are various approaches to this. You can manually build the credentials file, for example, to hold your access key ID and secret access key.
You may alternatively use the AWS CLI's AWS configure command to create the file automatically. You might also utilize environment variables.
Downloading and Configuring the AWS CLI
The AWS CLI may be found at this Link. It is compatible with Windows, Mac OS, and Linux. After downloading the AWS CLI, proceed with the following steps to install and configure it:
- Navigate to the Amazon Web Services Command Line Interface User Guide.
- Follow the installation and configuration instructions for the AWS CLI.
Set Up Your Permissions (New ElastiCache Users Only)
Amazon ElastiCache builds and utilizes service-linked roles on your behalf to provide resources and access other AWS resources and services.
Use the AWS-managed policy AmazonElastiCacheFullAccess to have ElastiCache generate a service-linked role for you. This role is pre-configured with the permissions required by the service to create a service-linked role on your behalf.
You may choose to utilize a custom-managed policy instead of the default policy. In this scenario, ensure that you have either the rights to execute iam:createServiceLinkedRole or that the ElastiCache service-linked role has been established.
Create and Connect To A Memcached Cluster
You may try ElastiCache for Memcached by building a cluster now that you have your AWS account and permissions set up. The parts that follow will show you how to achieve this.
Step 1: Determine The Needs Of Your Cluster
Before creating a Memcached cluster, you should always define the cluster's requirements so that when you construct the cluster, it meets your business needs and does not need to be rebuilt. We will skip identifying criteria because we will mostly accept default values for the cluster in this experiment.
Step 2: Form A Cluster
The cluster you're going to start will be operational, not in a sandbox. Until you remove the instance, you will be charged the usual ElastiCache use rates. If you perform the exercise detailed here in one session and remove your cluster after you're done, the overall expenses are small (usually less than $1).
To Create An ElastiCache For Memcached Cluster
- Log in to the AWS Management Console and navigate to this link.

- Select the AWS Region in which you wish to launch this cluster from the list in the upper-right corner.
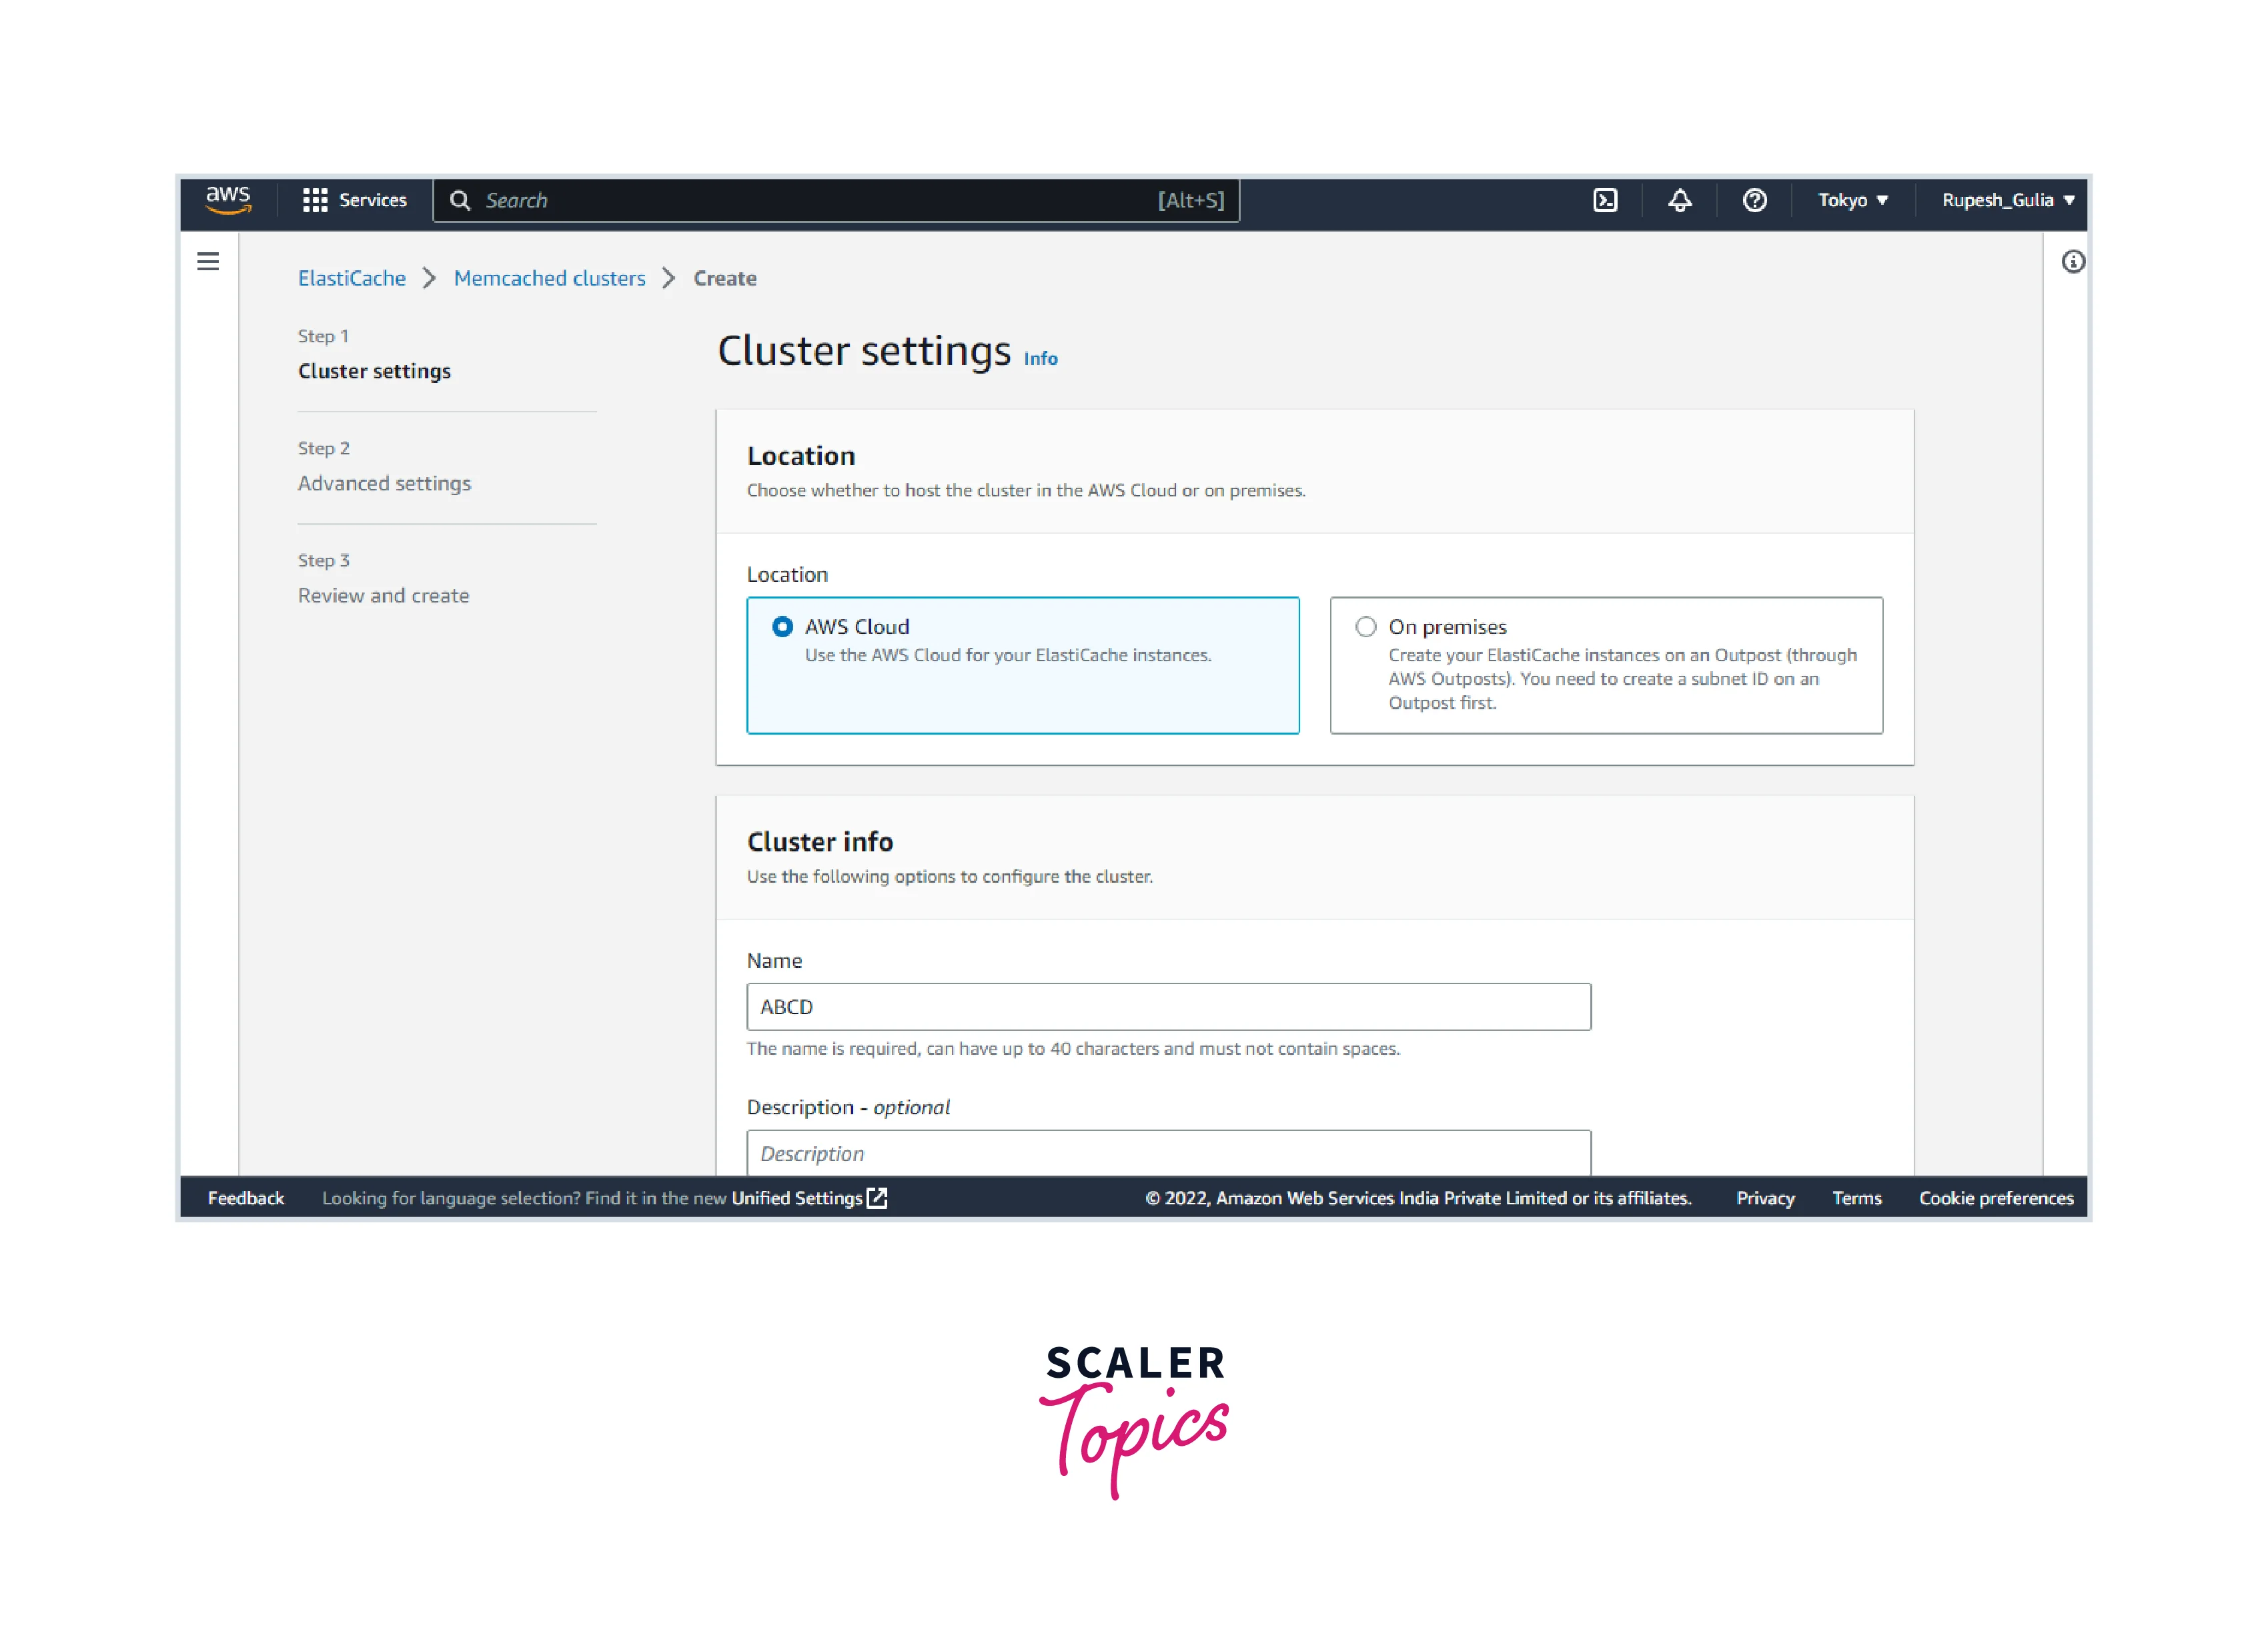
- Select Create now.
- Select Create VPC and proceed with the procedures specified in Creating a Virtual Private Cloud (VPC).
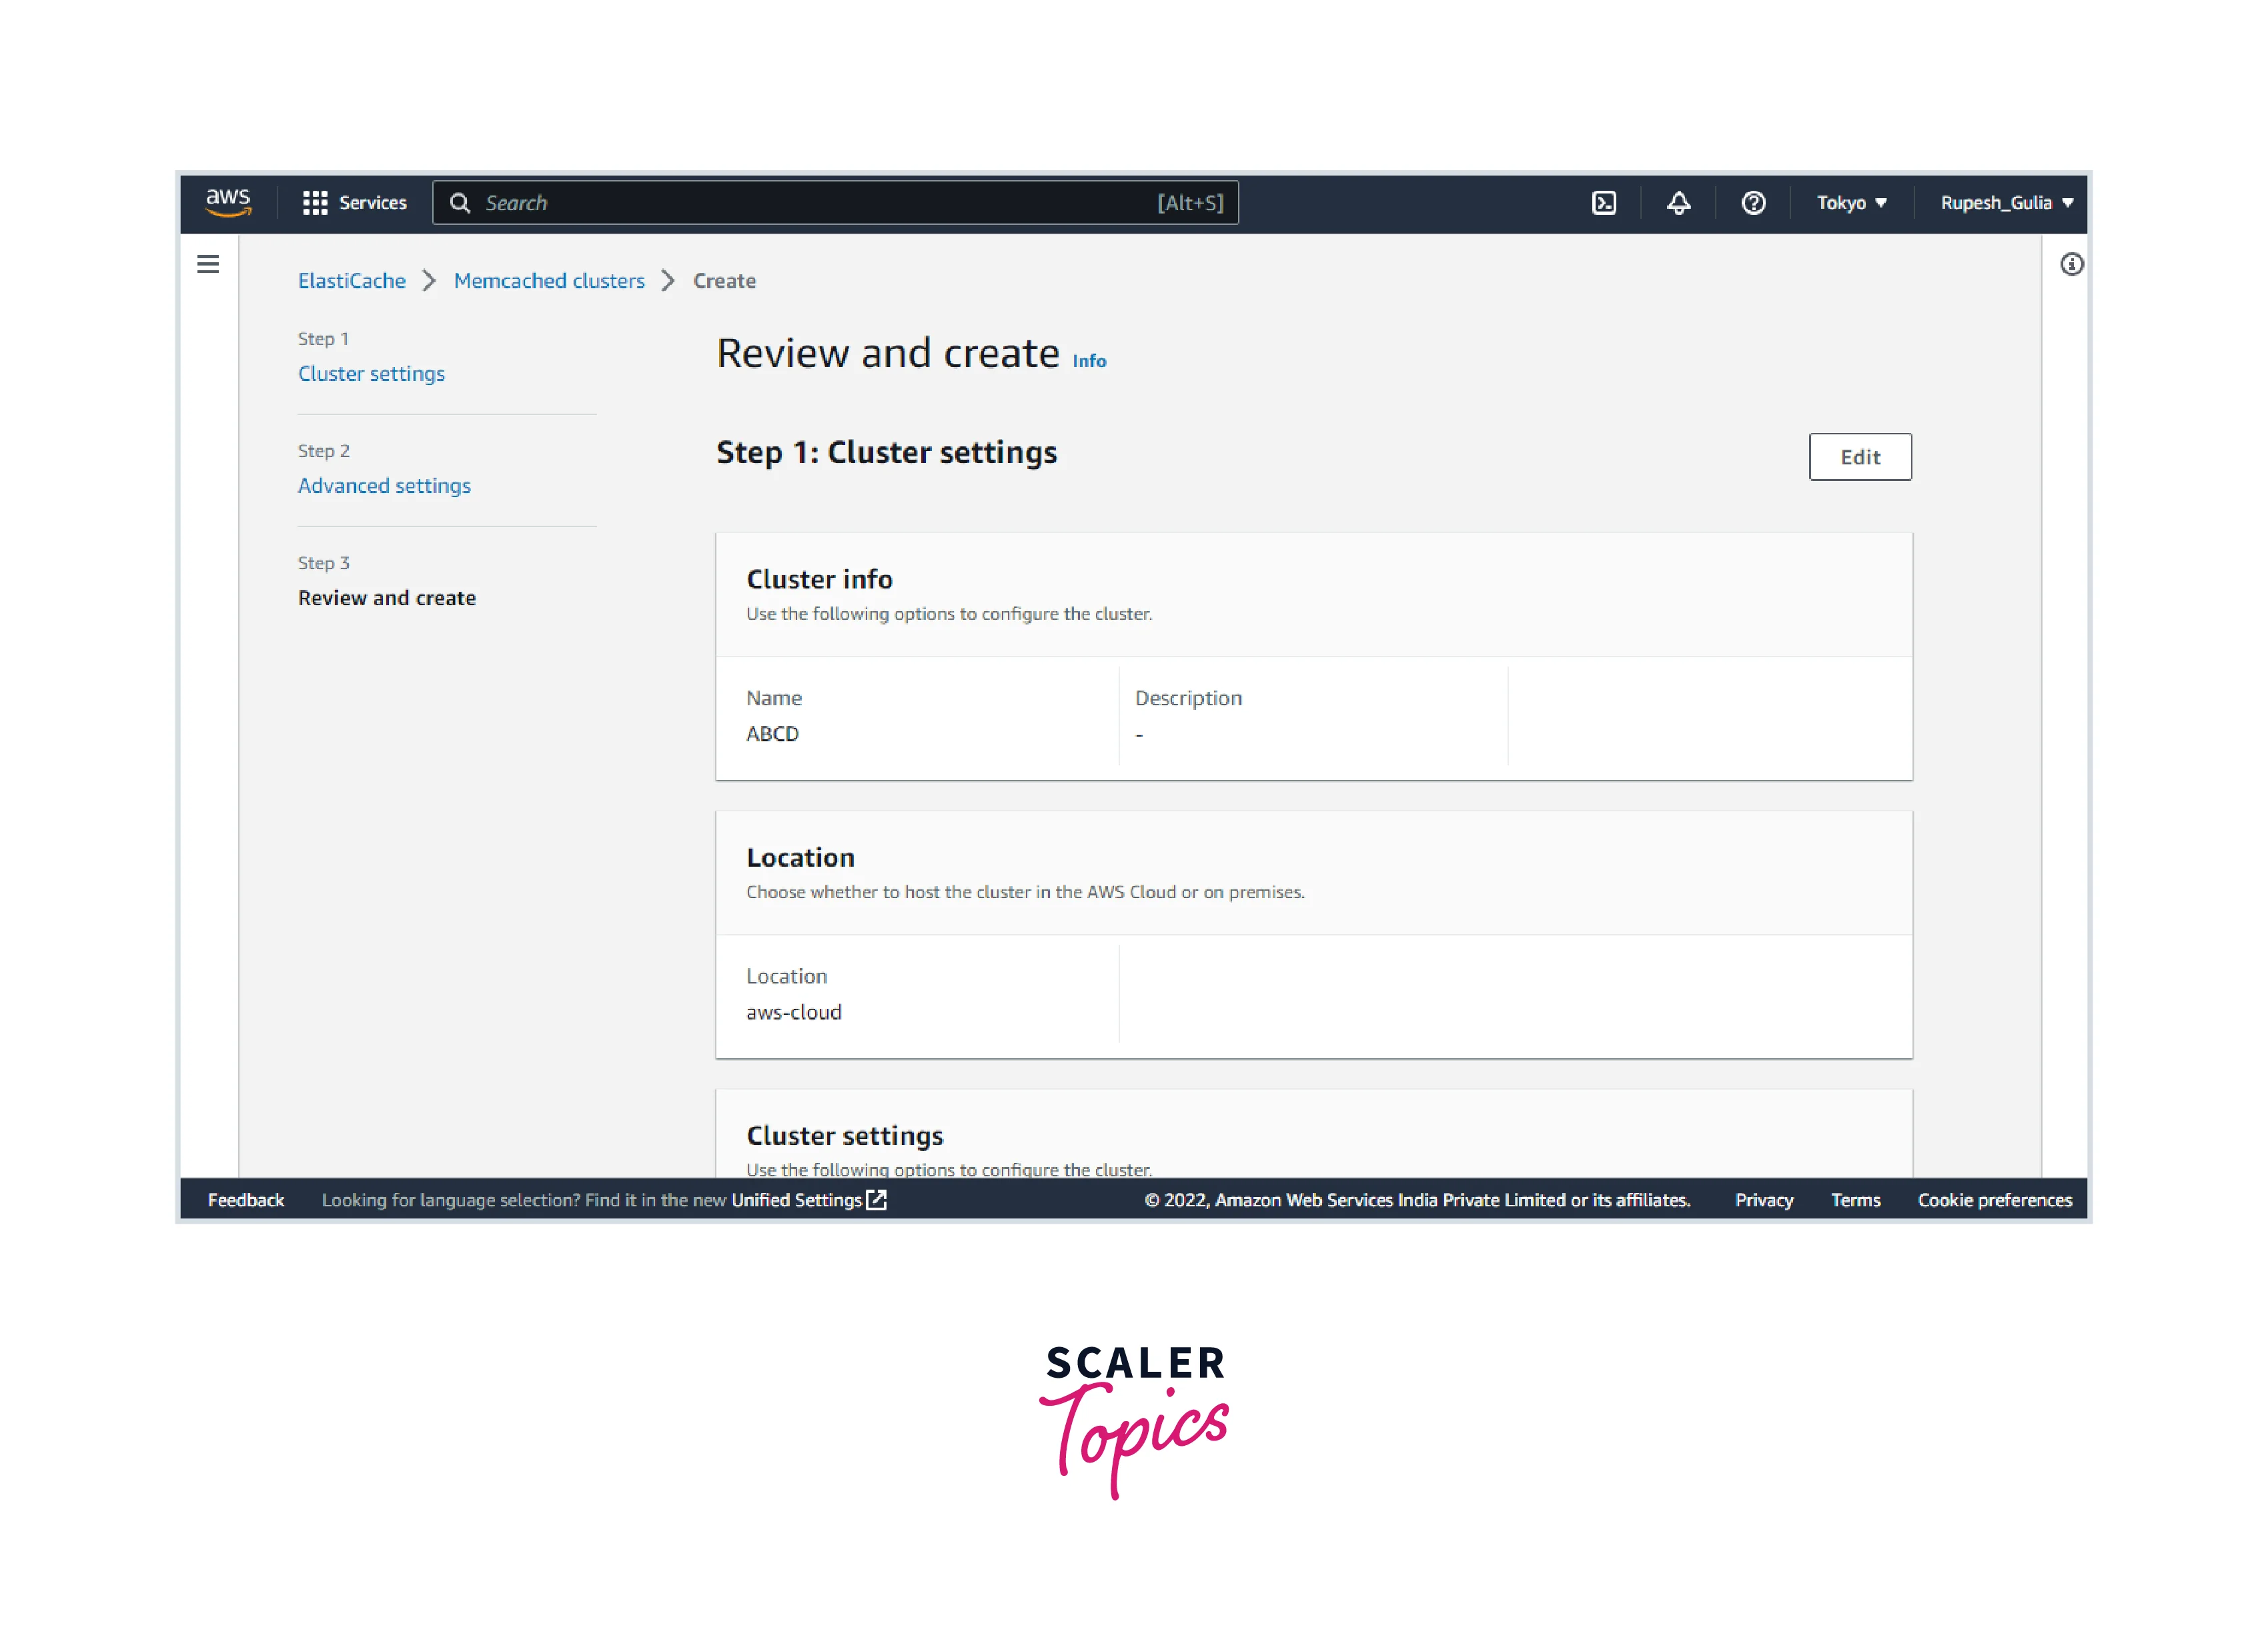
- On the ElastiCache dashboard, choose Create cluster, then Create Memcached cluster.
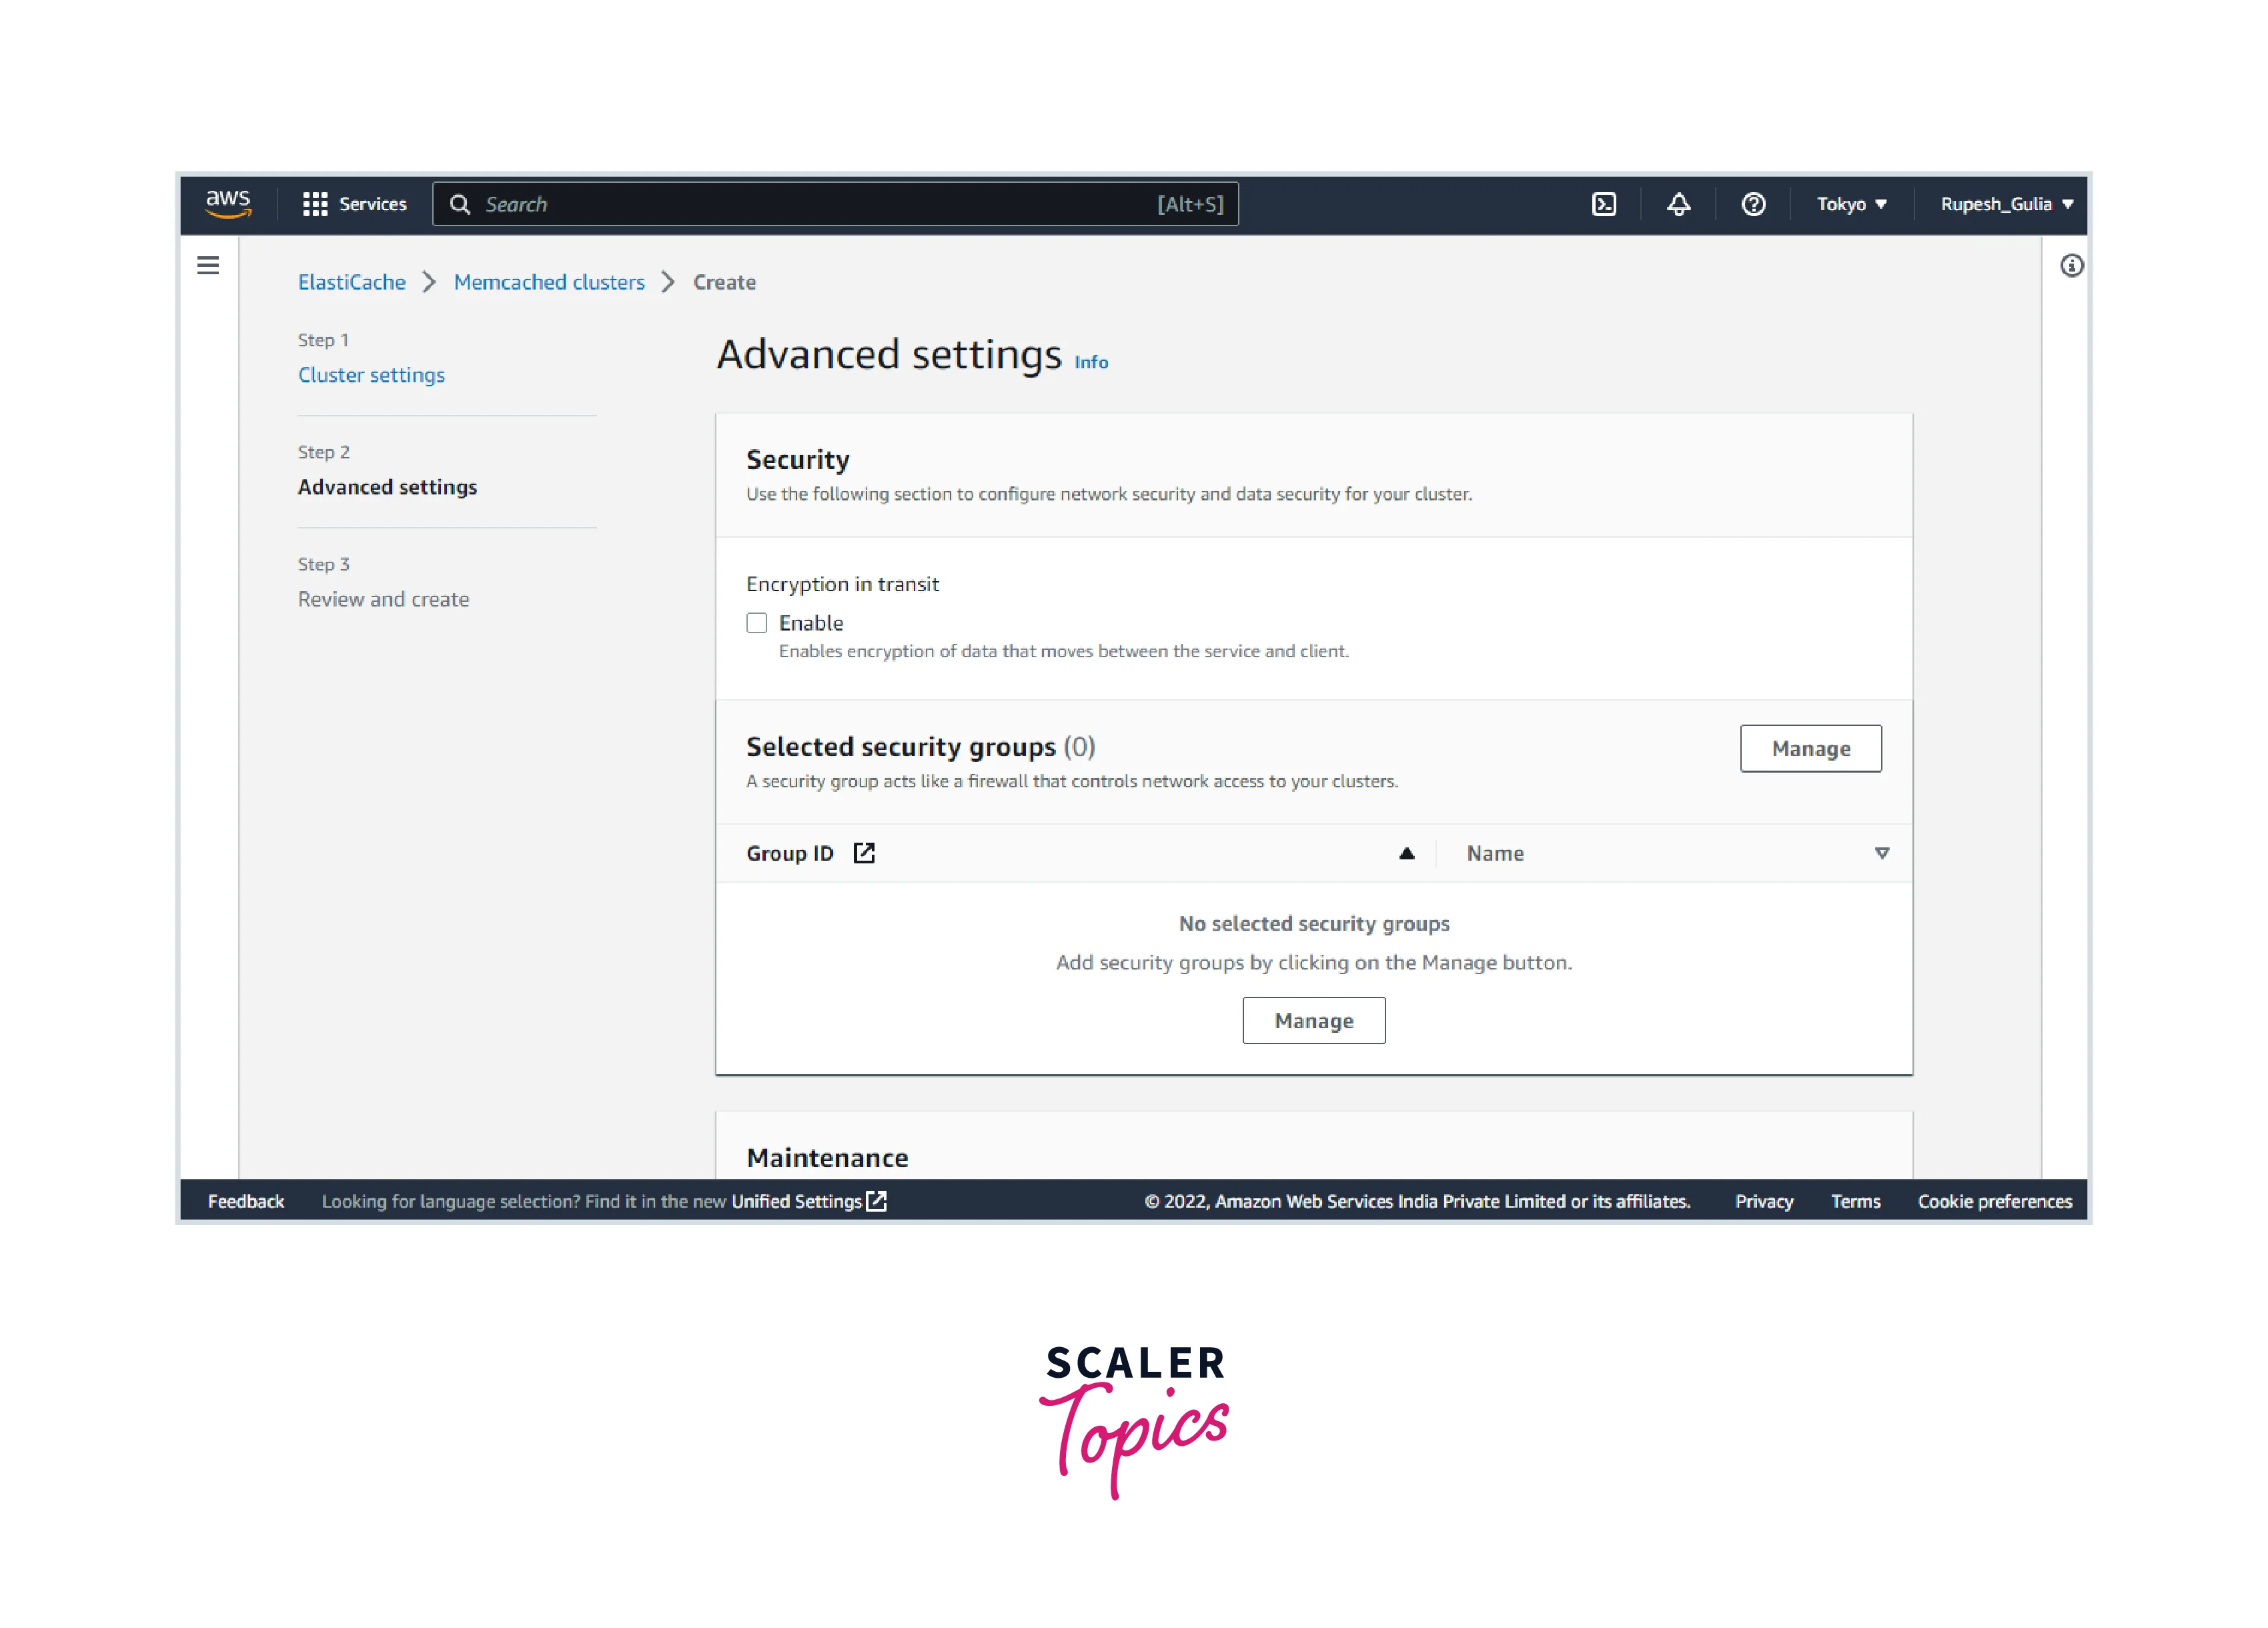
Step 3: Authorize Access To The Cluster
This part assumes you're comfortable deploying and connecting to Amazon EC2 instances.
ElastiCache clusters are all intended to be accessible using an Amazon EC2 instance. The most usual case is that an ElastiCache cluster is accessed from an Amazon EC2 instance within the same Amazon Virtual Private Cloud (Amazon VPC). This is the scenario discussed in this article. See the following for details on accessing your ElastiCache cluster from a different Amazon VPC, a different region, or even your corporate network:
- Access Patterns for ElastiCache Clusters in Amazon VPCs
- Using ElastiCache resources outside of AWS
Network access to your cluster is restricted by default to the user account that was used to launch it. Before connecting to a cluster from an EC2 instance, the EC2 instance must be authorized to access the cluster. The procedures necessary differ depending on whether your cluster was launched in EC2-VPC or EC2-Classic.
Step 4: Connect To The Cluster's Node
Before proceeding, ensure that you have completed Step 3: Authorize Cluster Access.
This section assumes you've already built an Amazon EC2 instance and can connect to it. The Amazon EC2 Getting Started Guide has advice on how to achieve this.
Identify Your Node Endpoints
When your cluster is in the accessible state and you've approved access to it (Step 3: Authorize access to the cluster), you may connect to it using an Amazon EC2 instance. First, you must determine the endpoint.
See the correct subject from the list below to identify your endpoints. When you've located the required endpoint, copy it to your clipboard for use in the following step.
- Identifying connection endpoints
- Locating a Cluster's Endpoints (Console)—You'll need the Configuration endpoint.
- Identifying Endpoints (AWS CLI) * Identifying Endpoints (ElastiCache API)
Open-source in-memory data storage Redis and Memcached are popular. Although they are both simple to use and function well, there are some crucial distinctions to consider when selecting an engine.
Memcached is meant for simplicity, but Redis has a robust feature set that makes it suitable for a wide range of applications. Understand your criteria and what each engine offers to select which option better matches your demands.
Join A Memcached Cluster
Once your cluster is in the accessible state and you've approved access to it (Step 3: Authorize access to the cluster), you may connect to it using an Amazon EC2 instance.
Step 5: Delete Your Cluster (Avoid Unnecessary Charges)
Before proceeding, ensure that you have completed at least Step 2: Create A Cluster.
How To Remove A Memcached Cluster:
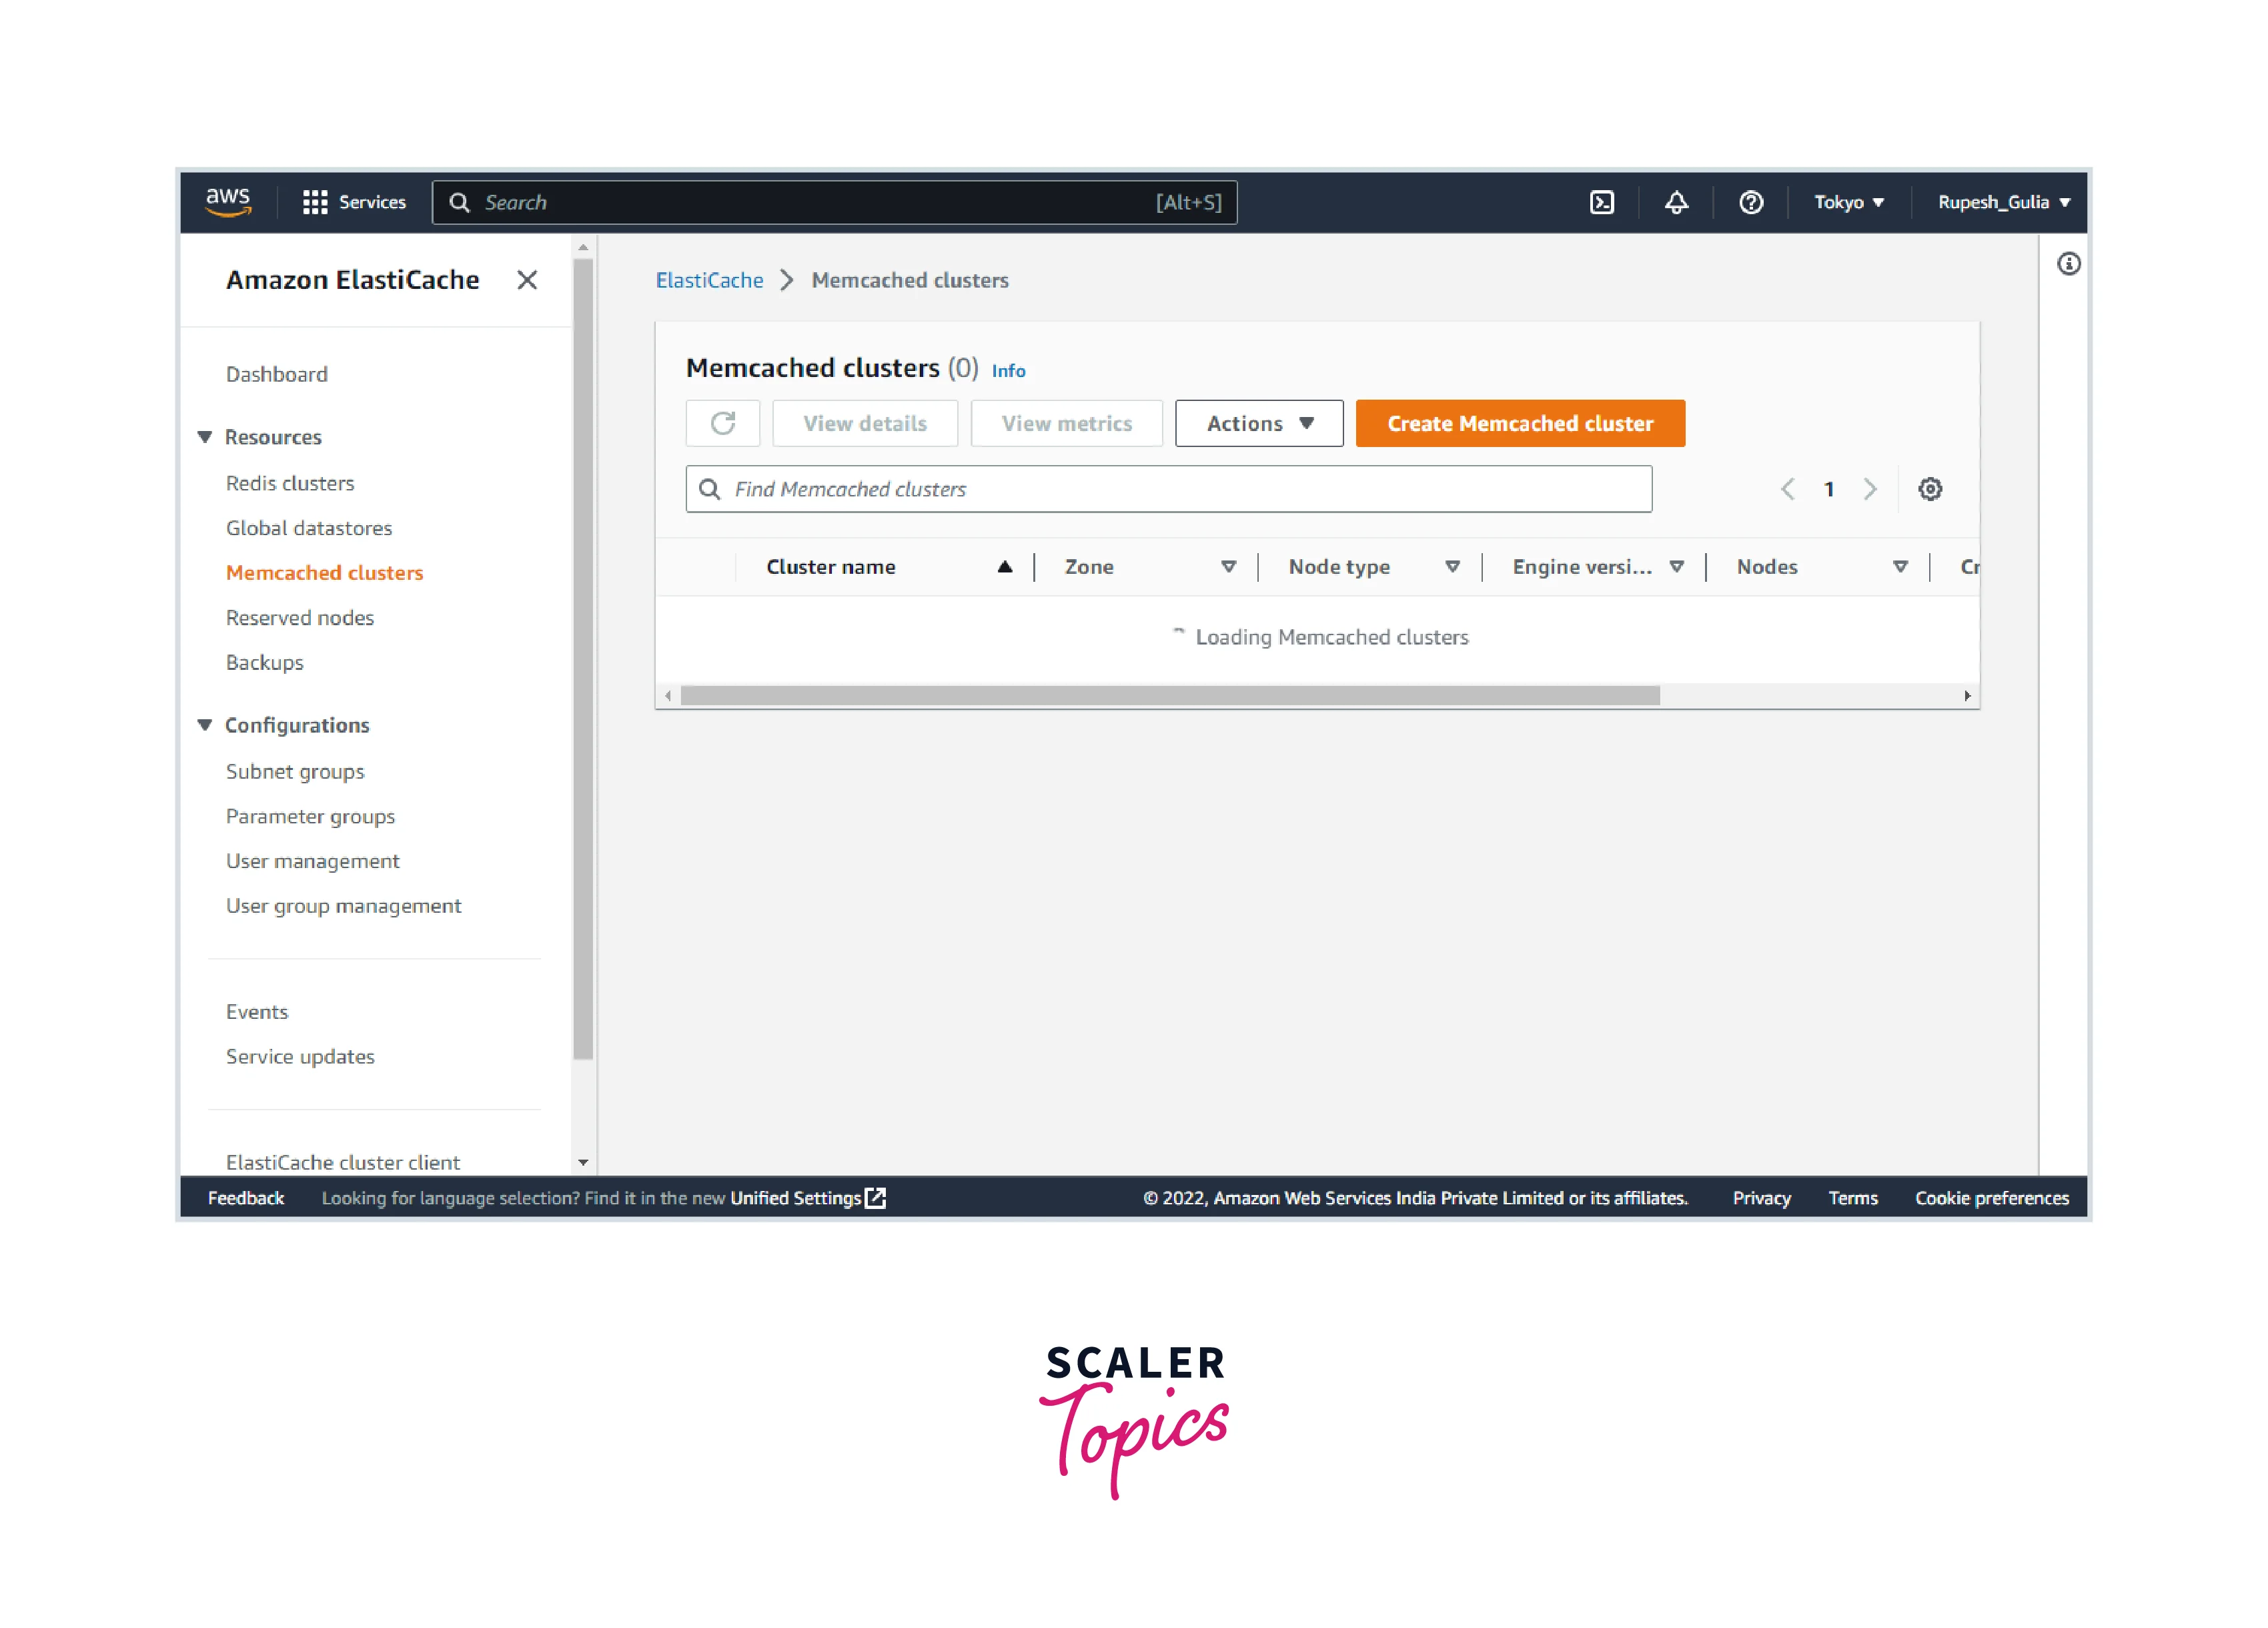
- Log in to the AWS Management Console and navigate to the Amazon ElastiCache console, which can be found here.
- In the navigation pane, select Memcached to get a list of all your clusters that are running Memcached.
- To remove a cluster, pick the name of the cluster from the list of clusters.
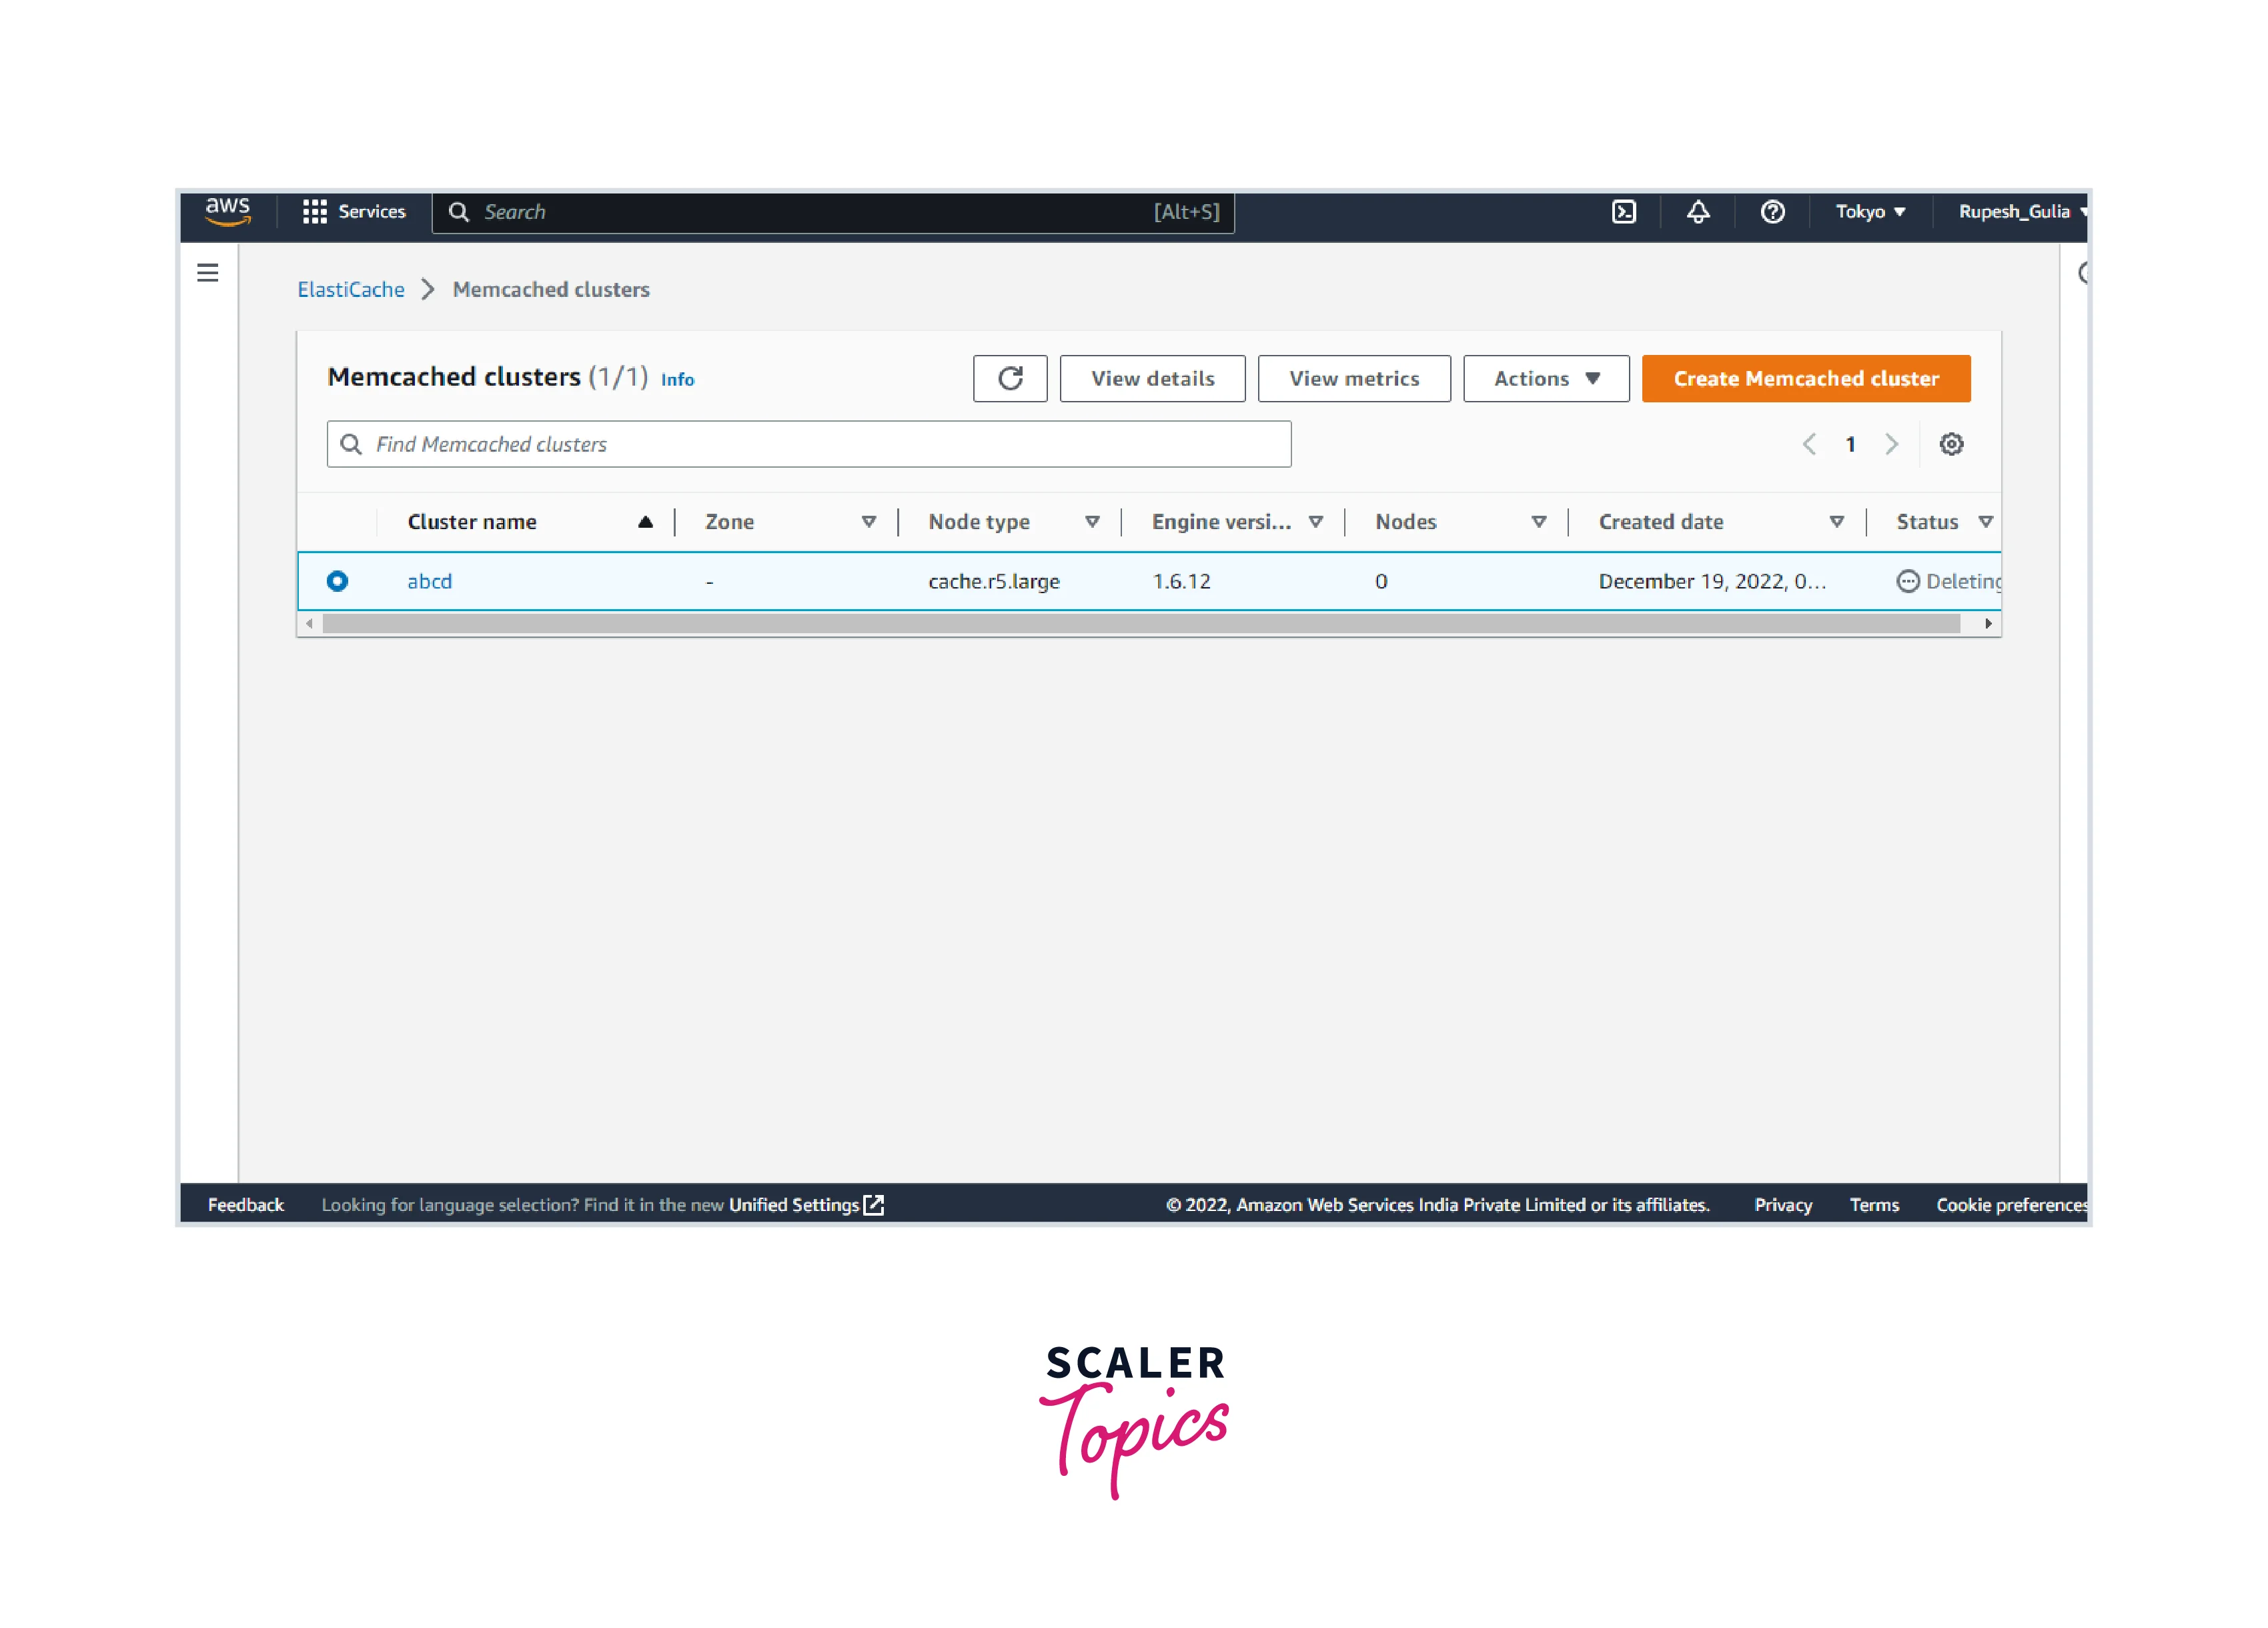
- Select Delete from the Actions menu.
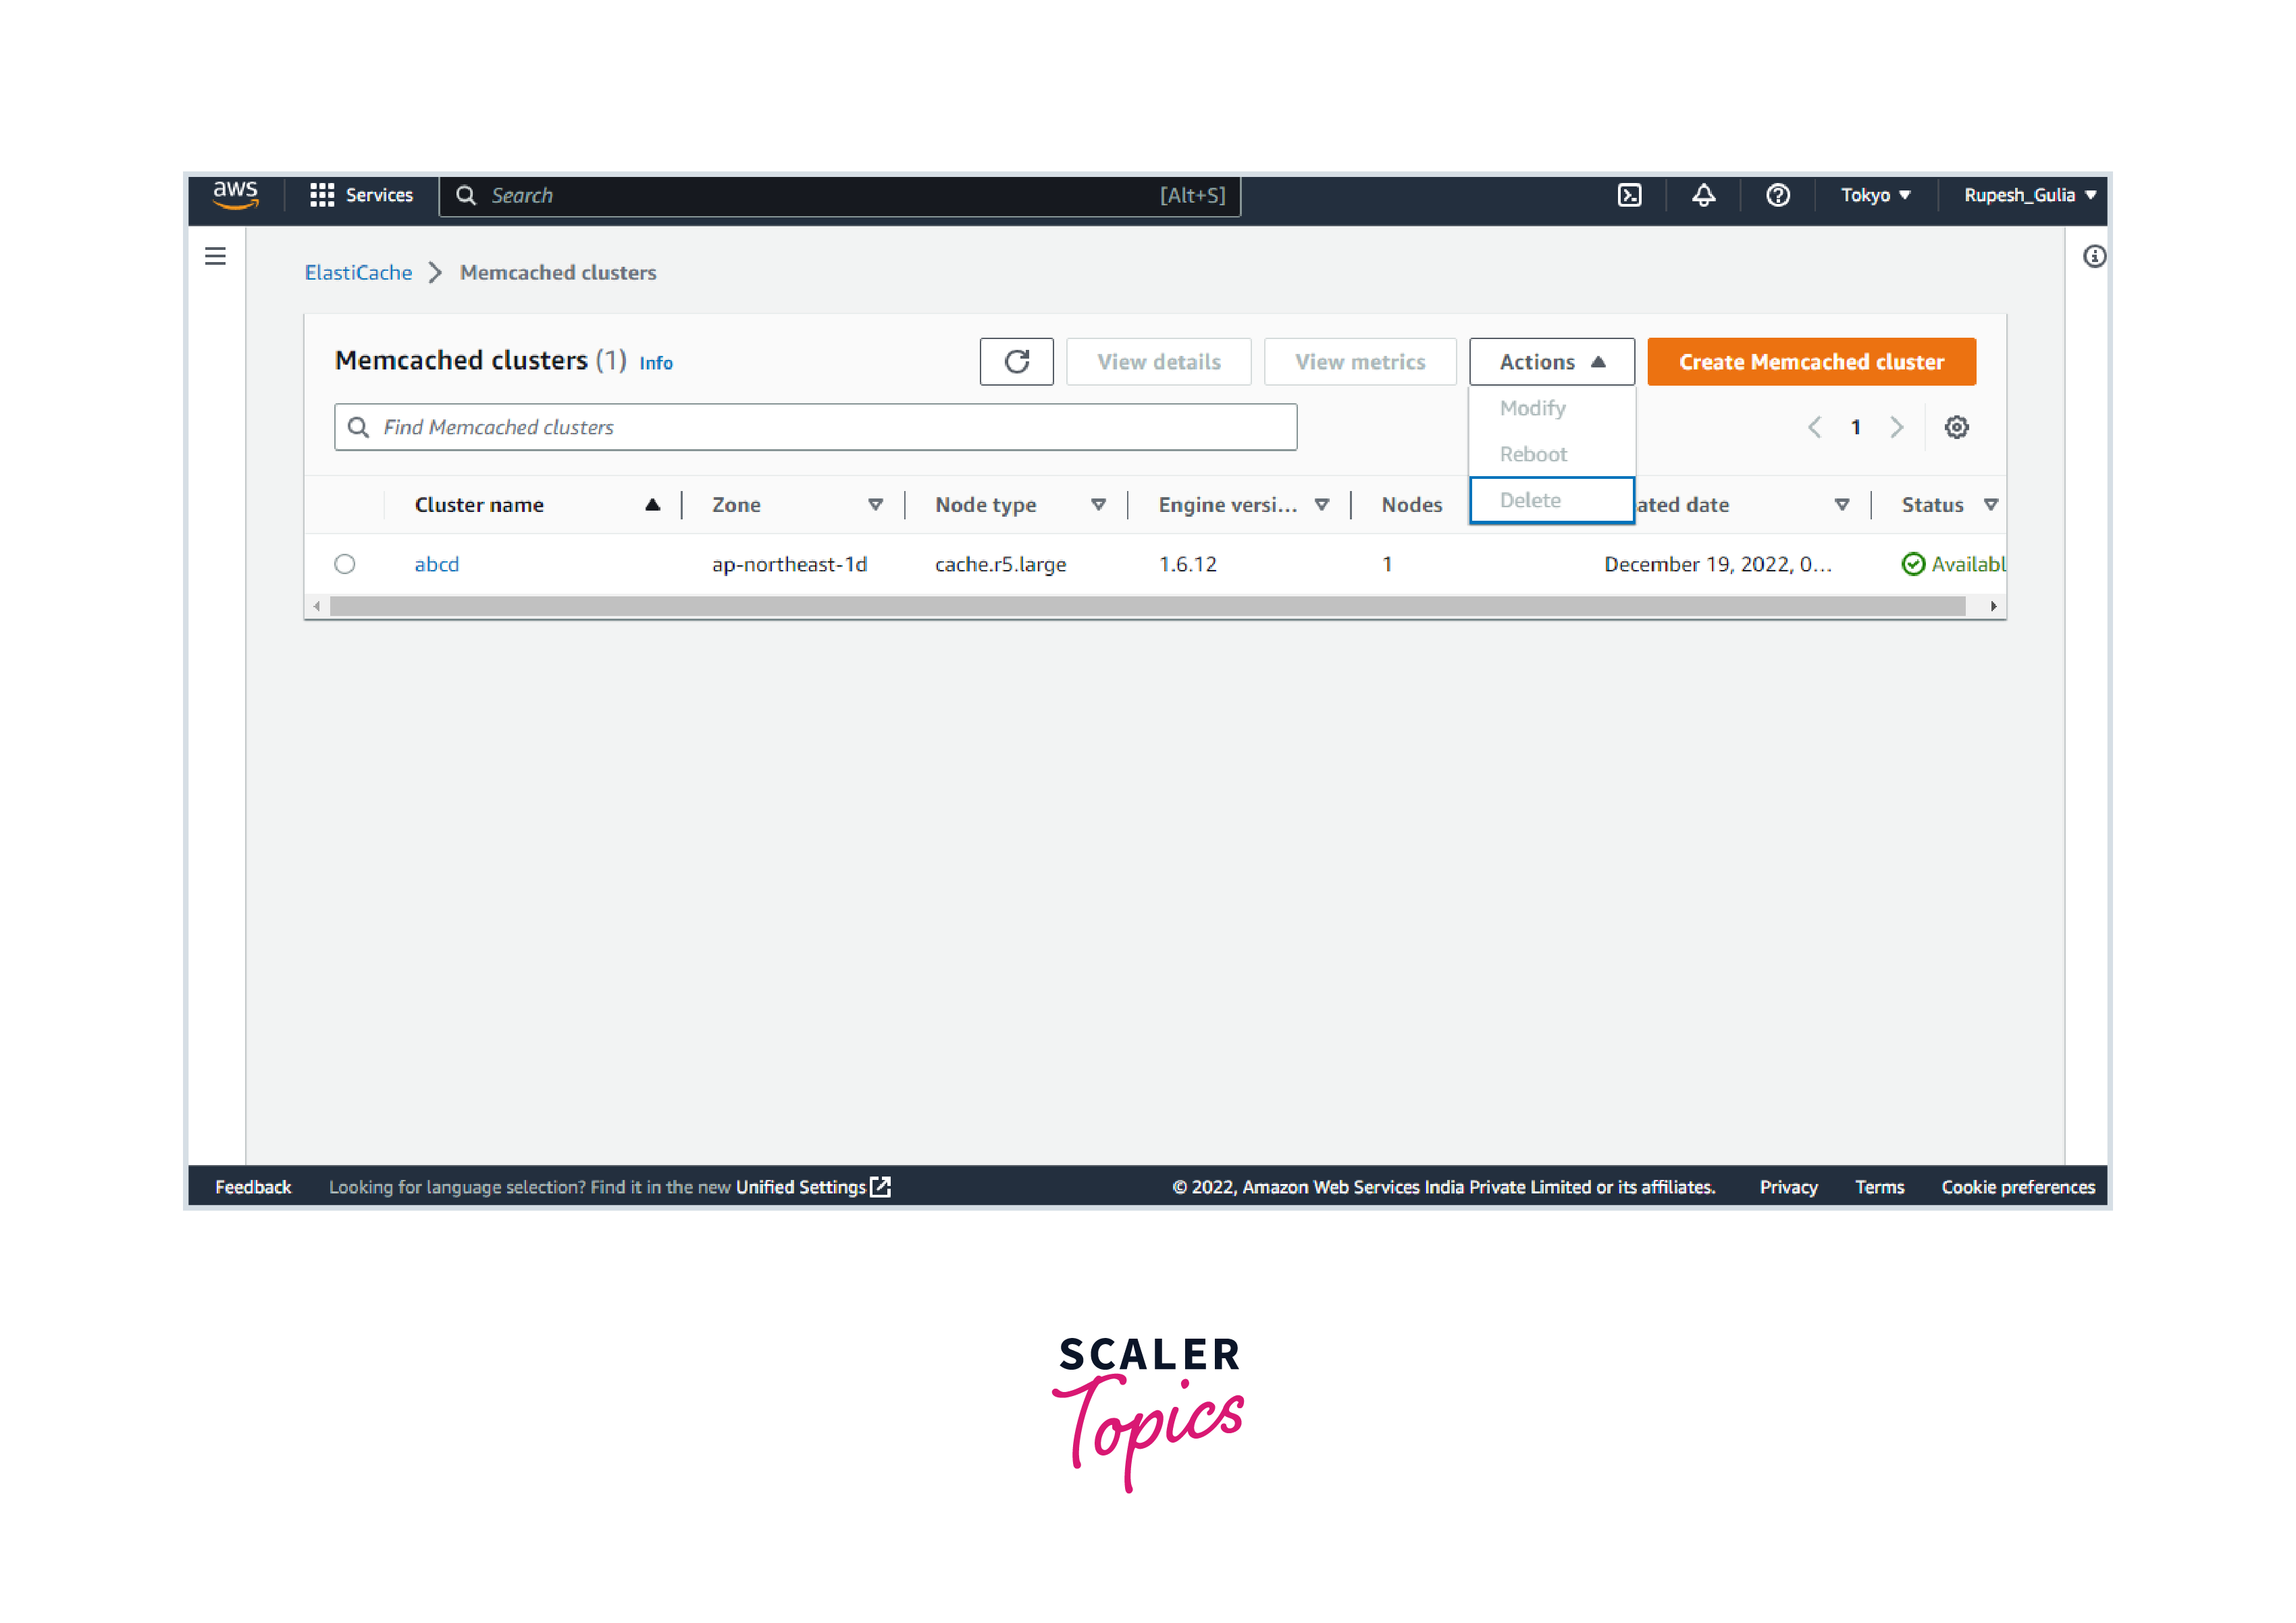
- On the confirmation box for the Delete Cluster, select Delete to delete the cluster or Cancel to keep it. When you select Delete, the cluster's status switches to deleting.
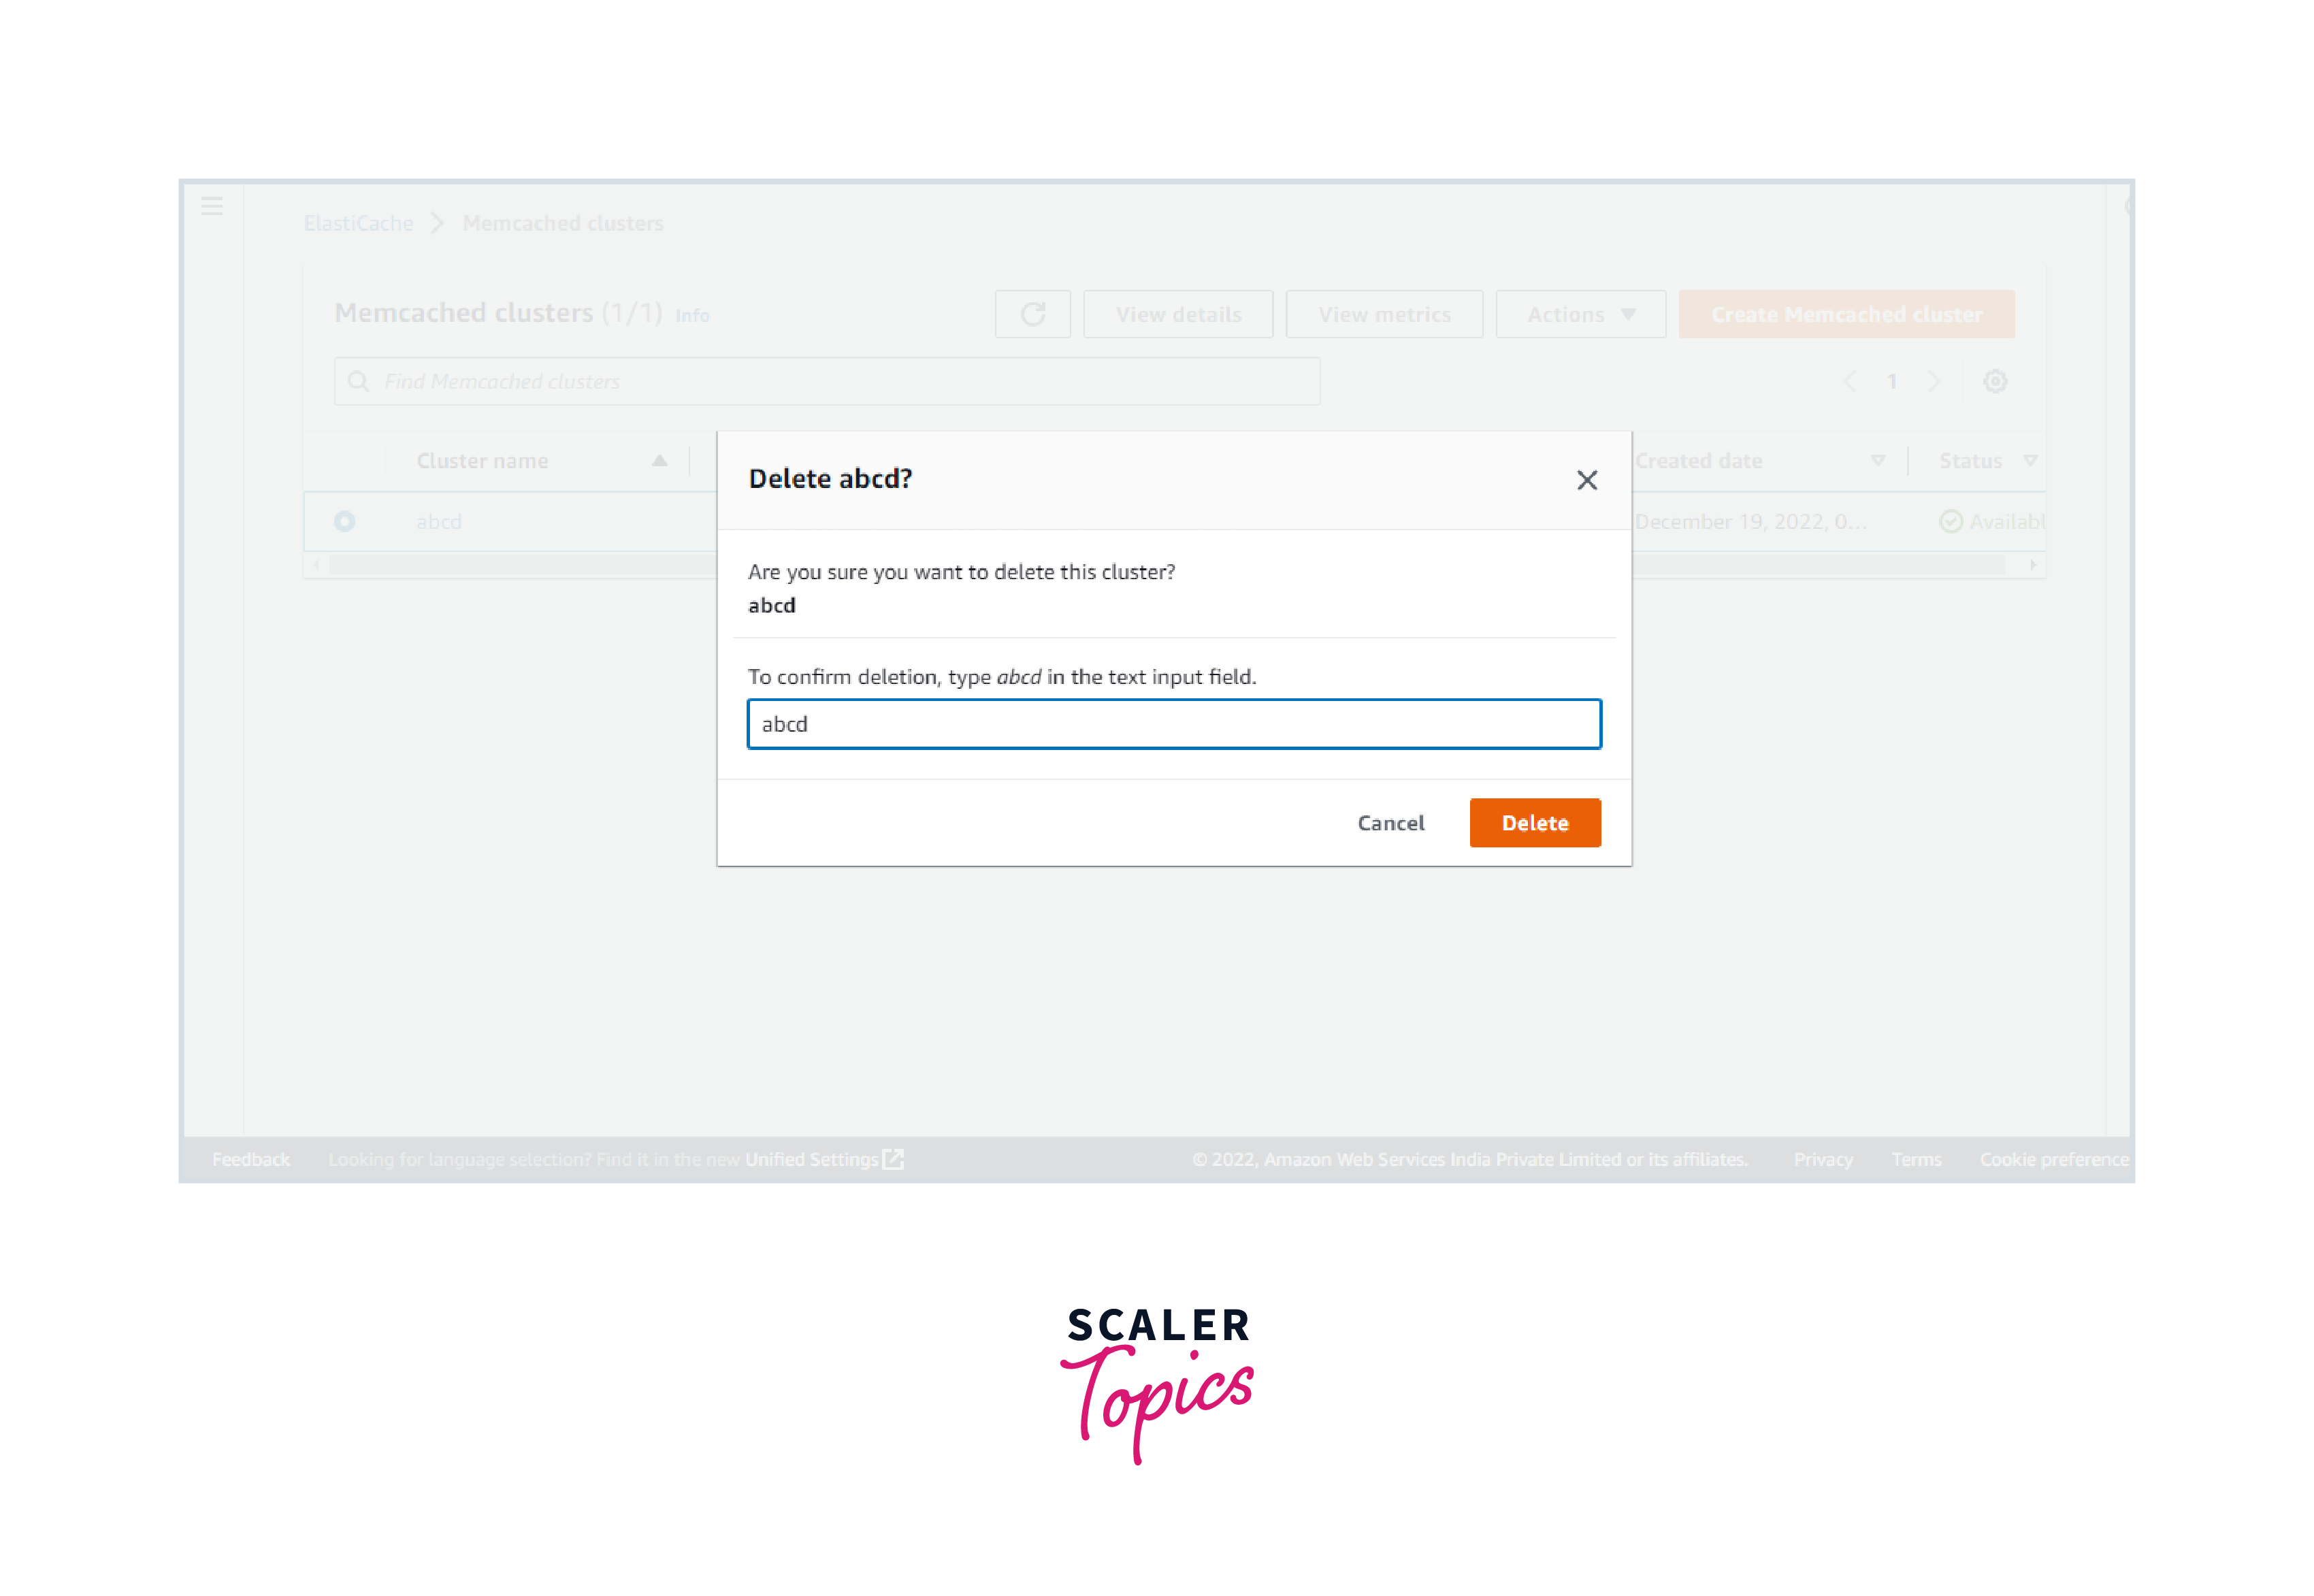
You will no longer be charged for your cluster once it is no longer displayed in the list of clusters.
You have now established, granted access to, connected to, examined, and deleted your first ElastiCache for the Memcached cluster.
Conclusion
- Existing Memcached applications may virtually immediately utilize ElastiCache for AWS Memcached. Your apps just require the host names and port numbers of the ElastiCache nodes you've installed.
- ElastiCache for AWS Memcached has several capabilities that improve the service's reliability for essential production installations, such as automated detection and recovery from cache node failures.
- Automatic discovery of nodes within a cluster is enabled so that no modifications to your application are required when adding or removing nodes.
- Redis and Memcached are the two most popular in-memory key-value data stores. Memcached is designed for simplicity while Redis offers a rich set of features that make it effective for a wide range of use cases. Understand the differences between the two engines to decide which solution better meets your needs.
- Integration with other Amazon Web Services (AWS) services such as Amazon EC2, Amazon CloudWatch, AWS CloudTrail, and Amazon SNS to deliver a secure, high-performance, managed in-memory caching solution.