Amazon Elastic Transcoder
Overview
Amazon Elastic Transcoder is a cloud-based video transcoding service. It is used to convert audio files, video files, and images into different formats and resolutions. It can also be used to extract audio tracks from video files, add watermarks to video files, and create thumbnail images from video files. In addition, one of its many applications is that it converts real-time video media files to various images in thumbnail formats.
What is an Elastic Transcoder?
Elastic Transcoder is an Amazon service used to transcode media files from an S3 bucket into formats that can be played on various devices. It is used to change media files from their source format into various formats that may be played on computers, tablets, smartphones, and other devices.
Elastic Transcoder provides transcoding presets for popular output formats. So we do not have to choose the settings for a particular device. Some of the output formats Amazon Elastic Transcoder supports are MP4, WebM, FLV, MPG, MP3, etc. We need not manage all administration, scalability, performance optimization, and management of transcoding infrastructure while using Elastic Transcoder. Amazon will fully manage it.
Let's understand the use case of Amazon Elastic Transcoder with an example. Imagine if we want a thumbnail format image from the videos taken by CCTV cameras. We need this process to happen in real-time, i.e., the input captured needs to be processed as soon as it gets captured, and the desired output should be generated instantly. So, to manage this situation, Amazon comes with its own managed services for such scenarios, i.e., Amazon Elastic Transcoder. It converts real-time video media files to various images in thumbnail formats.
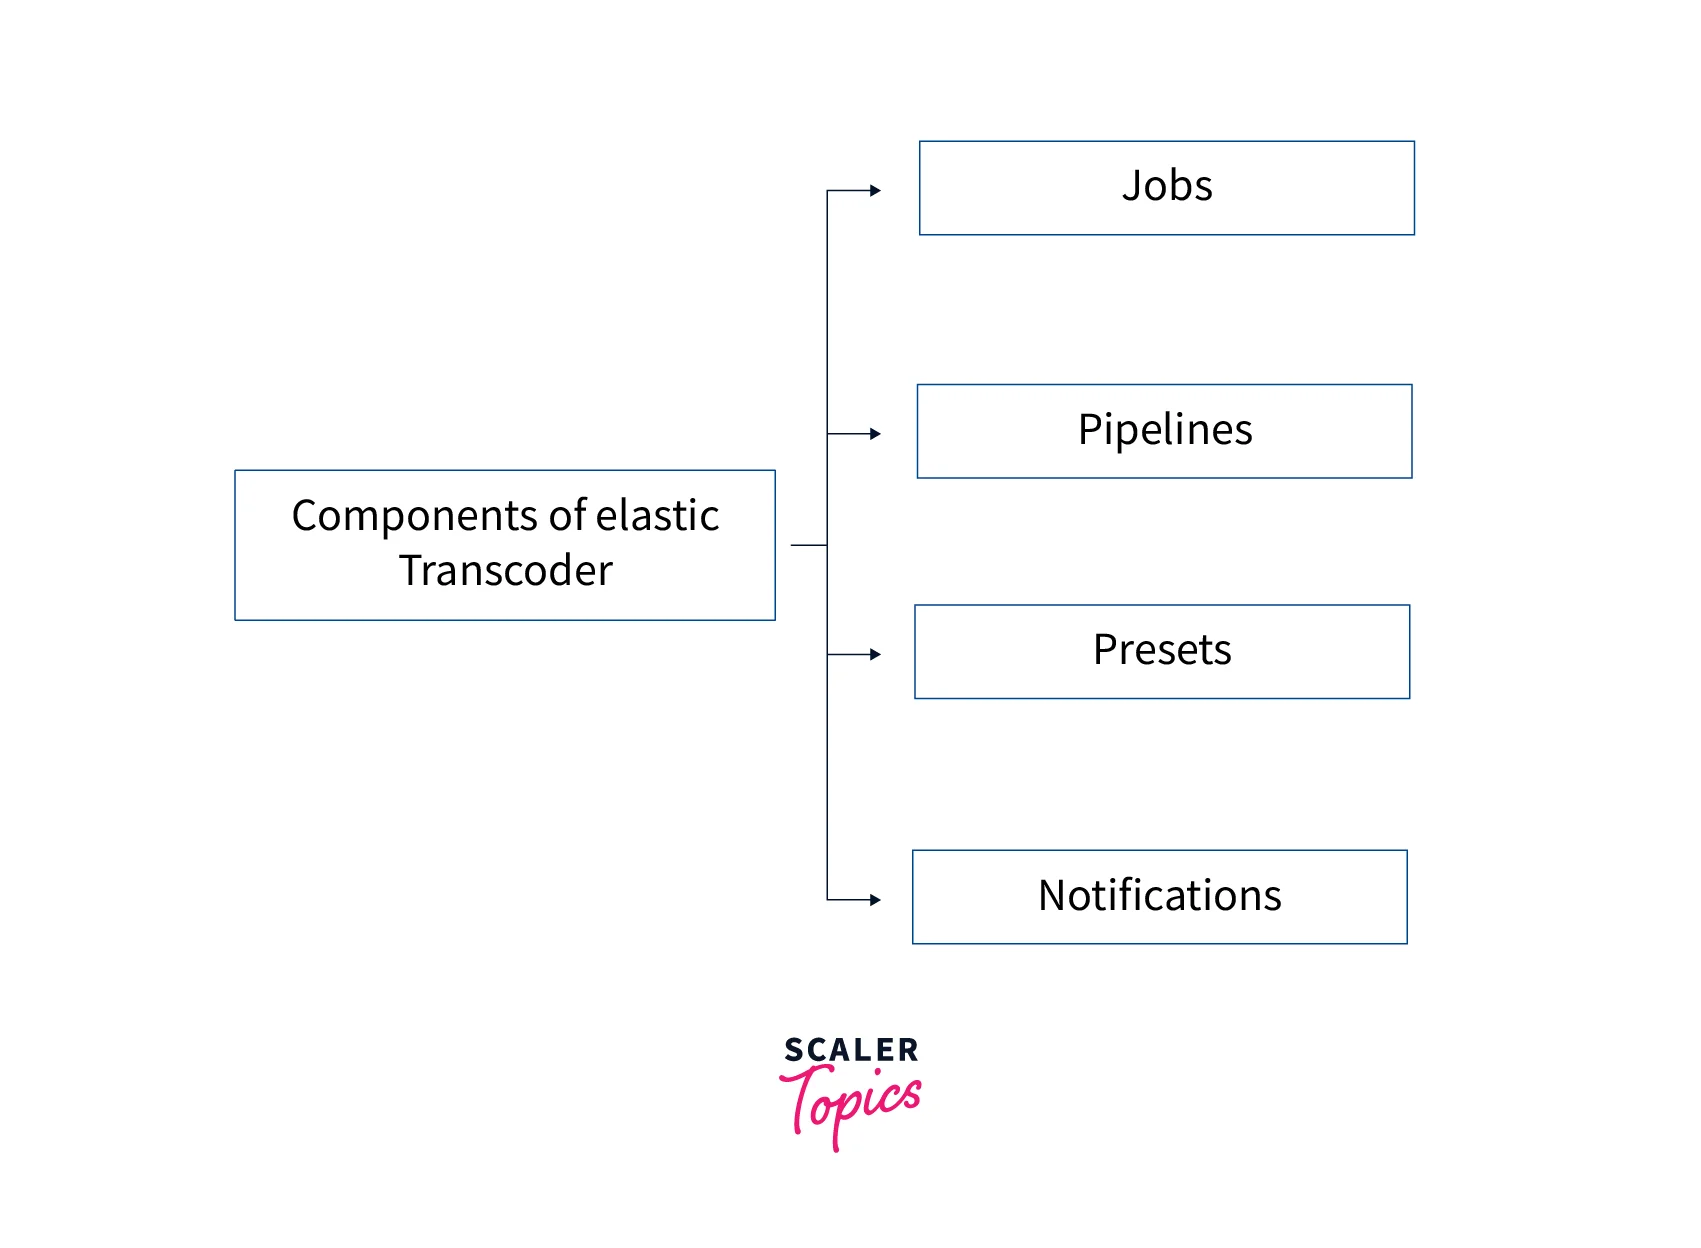
Components of Elastic Transcoder
Amazon Elastic Transcoder consists of four main components. Let's discuss each one of them.
Jobs
- Jobs does the work of transcoding.
- A single job can convert a file into 30 different formats. Let's try to understand this with an example. We want to convert a file stored in Amazon S3 into ten other formats. We can achieve our file in all ten formats using a single job.
- While creating a new job, you need to specify details like the file to be transcoded, the file name to which it should be transcoded, the format of transcoding, etc.
Transform Your Career
Choose from our industry-leading programs designed for career success
Modern Software and AI Engineering Program
Master full-stack development with AI integration

Modern Data Science and ML with specialisation in AI
Advanced data science techniques with AI specialization
Advanced AIML with Specialisation in Agentic AI
Deep dive into AIML with focus on Agentic systems
DevOps, Cloud & AI Platform Engineering
Build and manage AI-powered cloud infrastructure
AI Engineering Advanced Certification by IIT-Roorkee
Premier AI engineering certification from IIT-Roorkee
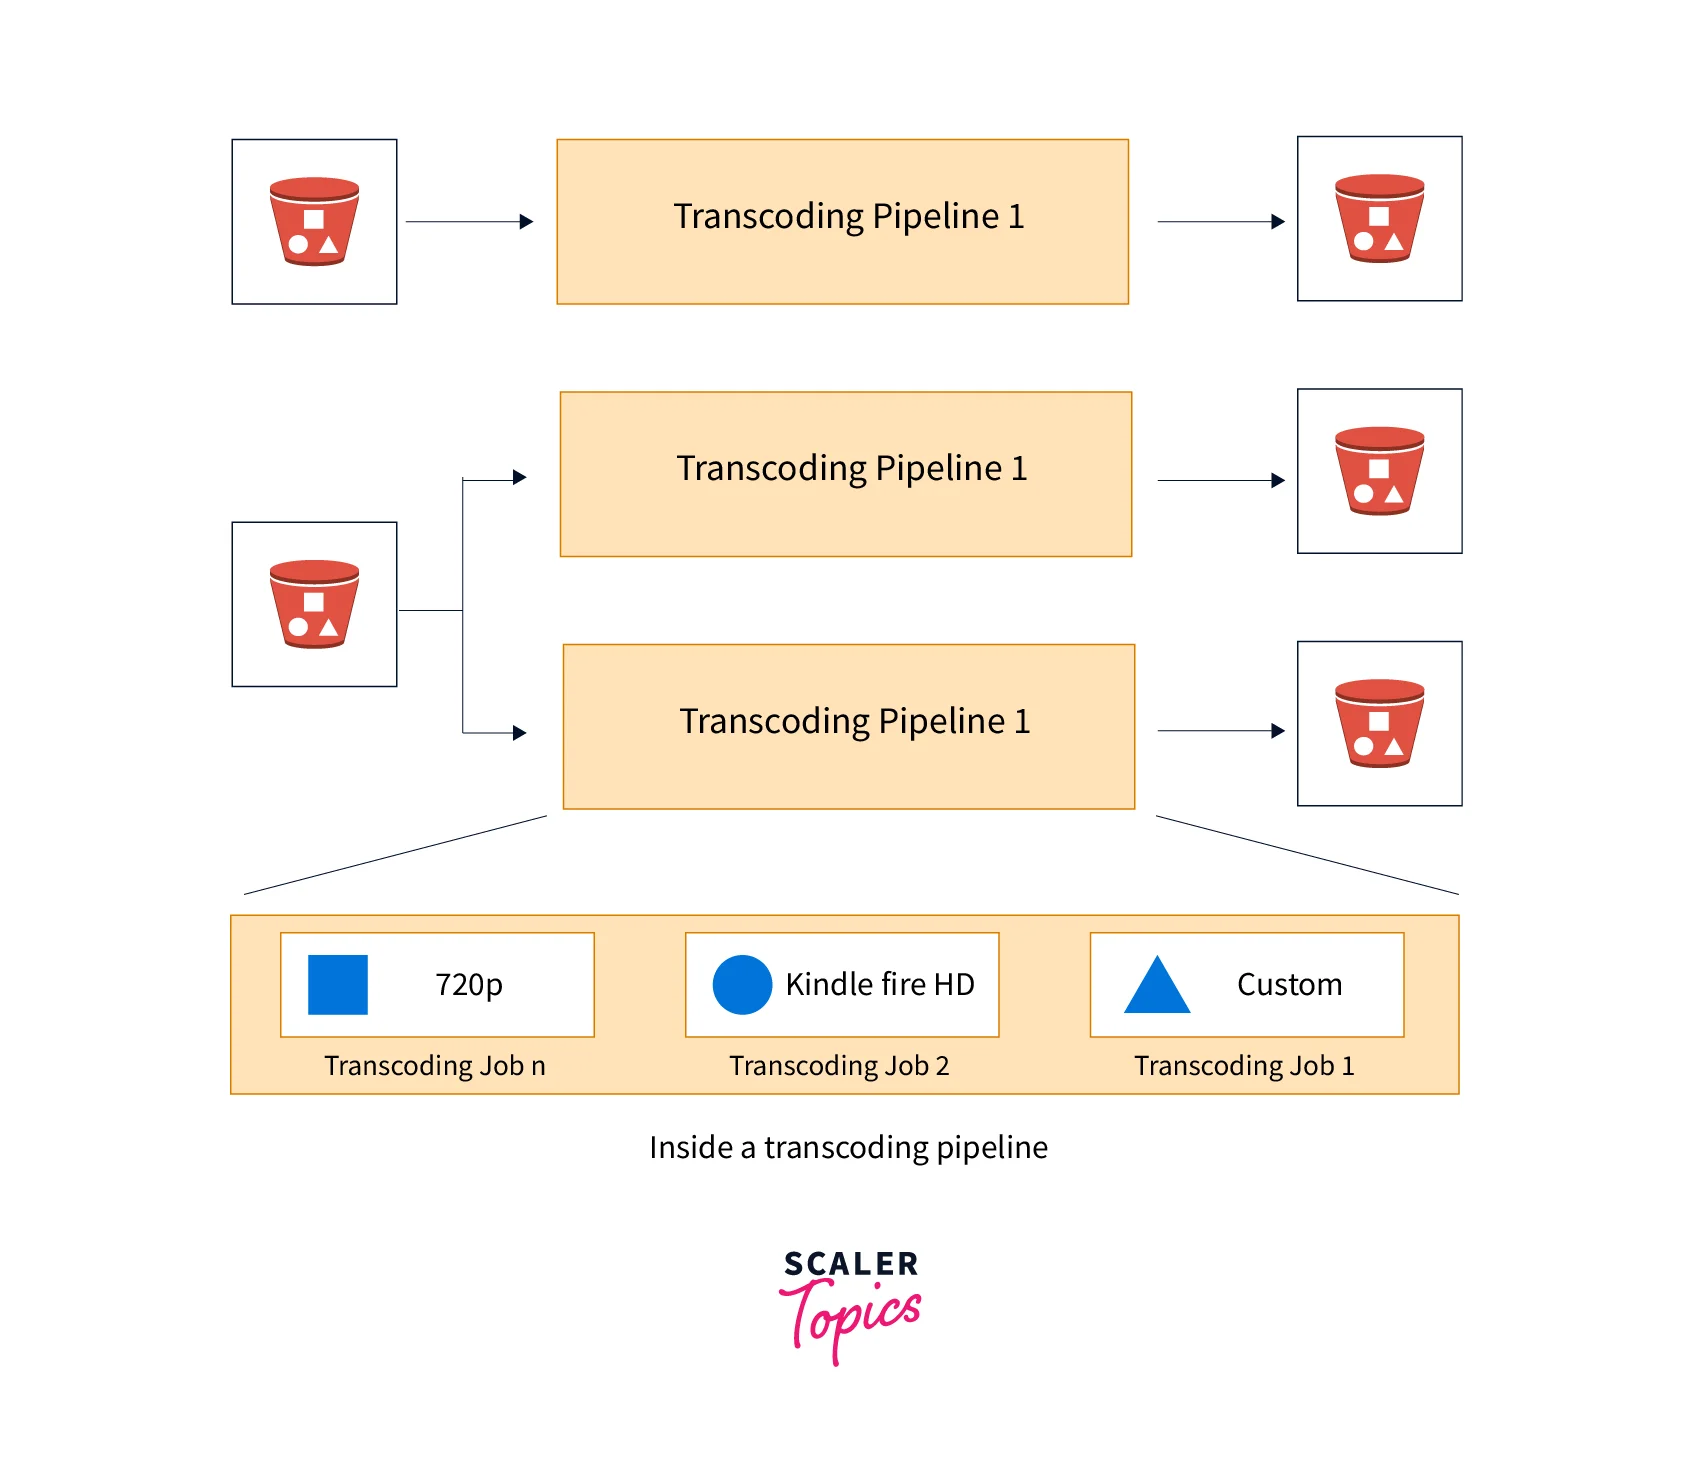
Pipelines
- Pipelines are queues or sequences of transcoding jobs.
- When you create the job, you can specify the pipeline to which you want to add your job. The jobs of a pipeline are transcoded one by one based on the order in which they are added to the pipeline.
- Pipelines can also be used for processing multiple jobs simultaneously. Moreover, you can also stop the transcoding process by pausing the pipeline.
- The time taken to process the jobs in a pipeline varies depending on the size of the file to be transcoded and the format. Hence, it is okay that the job that started to transcode first will also continue.
Presets
- Presets are templates that contain the required configurations for converting/transcoding the file into individual formats.
- There are some in-built and default presets. You can also create custom presets.
- While creating a job, you need to specify the preset you want to use. You can choose an in-built or a custom preset.
Notifications
- Amazon Elastic Transcoder can be integrated with Amazon SNS (Simple Notification Service) to receive notifications related to updates on the transcoding process of jobs.
- This is helpful when the transcoding process starts, finishes, or stops due to some warnings, etc.
- Notifications can also be configured to receive updates related to a pipeline.
How can an Elastic Transcoder be Used?
Let's understand how we can use Amazon Elastic Transcoder.
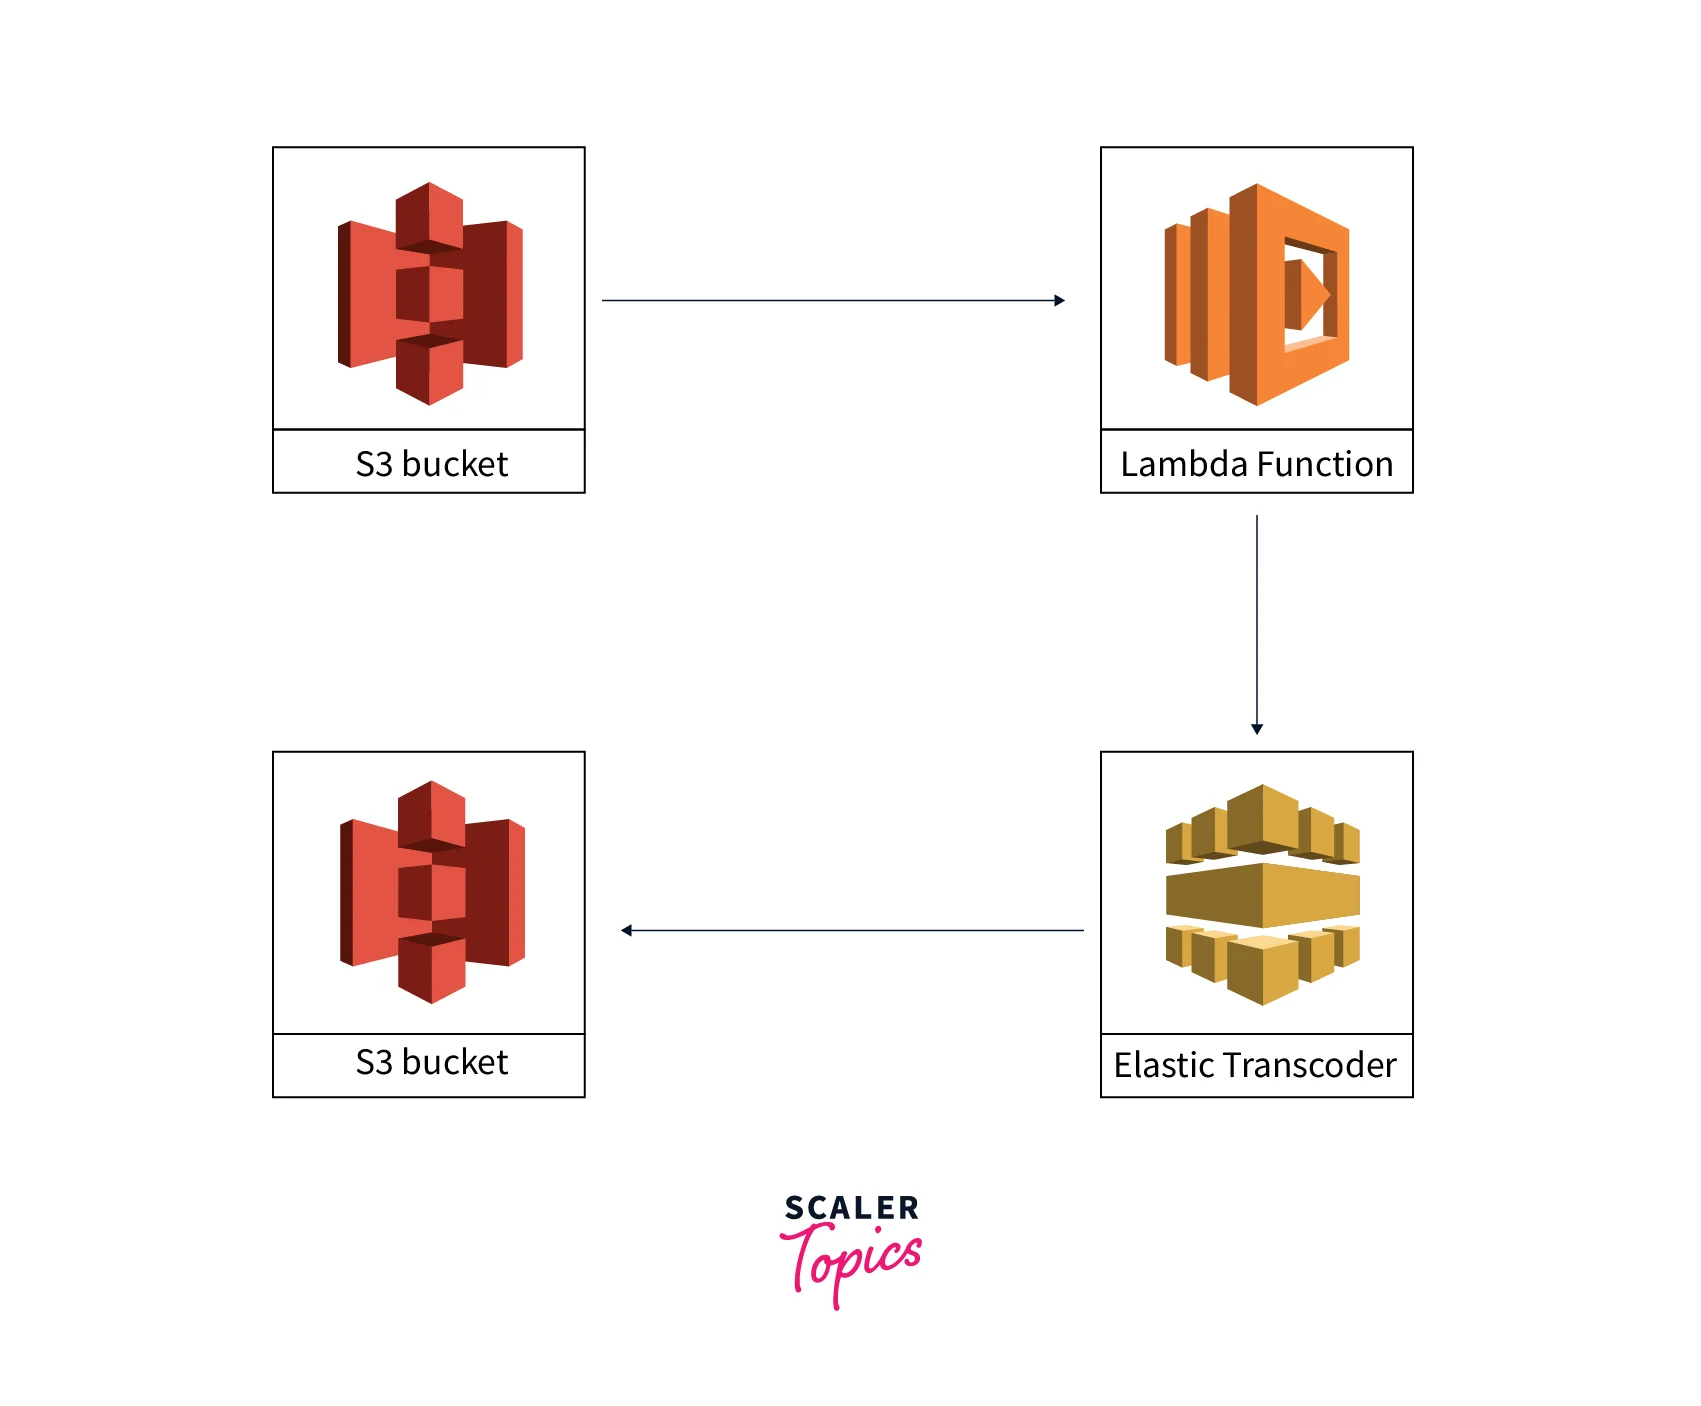
Suppose we have to transcode an mp4 file. First, it is uploaded to the Amazon S3 storage. Then a pre-set lambda function is invoked to call the Elastic Transcoder pipeline. In this pipeline, we created jobs to transcode the media file to different formats using the predefined and custom presets. When the transcoding is finished, it stores the converted output files in an S3 bucket.
Turn Learning into Career Growth
Accessing Elastic Transcoder
Now, we know how the Elastic Transcoder work and its components. Let's learn to access Elastic Transcoder.
Elastic Transcoder is a RESTful web service that uses JSON as the message format and HTTPS as the communication protocol. It provides a management console to create and manage pipelines, jobs, and presets.
 We learned a detailed concept of Elastic Transcoder. Now, let's try some hands-on demos to implement this AWS service.
First, we will create two Amazon S3 buckets, one for input and output files. Then, we will work with Elastic Transcoder by creating pipelines, jobs, and presets.
Follow these steps:
-
Sign in to the AWS console.
-
Type S3 and click S3 in the search bar.
-
On the next page, click on Create bucket.
-
Fill in the bucket name as the input bucket, which stores the input media files.
-
Leave all other fields as default and click Create bucket.
-
Our input bucket is successfully created. Click again on Create bucket to create an S3 bucket to store the output files.
-
Fill in the bucket name as the output bucket, which stores the transcoded output media files.
-
Leave all other fields as default and click Create bucket.
-
Our S3 bucket is successfully created for input and output media files. Click on the input bucket name to open it.
-
On the next page, you must upload a file in his input bucket. Click on Upload.
-
Click Add files and choose a file from the local storage. For this demo, I will choose an mp4 file. Scroll down and click on Upload.
-
The mp4 is successfully uploaded in the input bucket. We successfully created two buckets and uploaded an input file in the input bucket. It's time to use the Elastic Transcoder using pipelines, jobs, and presets.
Working with Pipelines
Pipelines are transcoding work management queues. Follow these steps to start working with pipelines.
-
Search Elastic Transcoder in the search bar and click on it.
-
On the Elastic Transcoder console, it asks to create a pipeline for the new users. Click on Create a new Pipeline.
-
On the next page, enter the pipeline's name, choose the input bucket to fetch the input files, configure a bucket for Transcoded or output files, and choose the standard for storage class.
-
Configure a bucket for Thumbnails and choose the standard for storage class. Click on Create Pipeline.
-
The Pipeline is created, and the status is active.
- We can select the created pipelines and pause the pipeline. We can also reactivate the pipeline.
- Update of pipeline notification is done in Elastic Transcoder.
- We can list and view all the pipelines in Elastic Transcoder.
- For deleting a pipeline, select the pipeline and click on Delete.
Working with Jobs
As we created a pipeline in our demo. Now learn how to work with jobs. Follow these steps:
-
Click on Create New Job.
-
Select the pipeline for the job and choose the input key, i.e. the input file which should be transcoded.
-
Scroll down. In the output details, we have to choose the preset. In this demo, we choose a pre-created preset and set an output key, which will be the name of the output file after transcoding.
-
Leave all other fields as default and click Create New Job.
-
The job is created successfully in the pipeline with the preset.
- We can list and view all the jobs in a pipeline in Elastic Transcoder.
- We can cancel an Elastic Transcoder Job.
Working with Presets
Presets are the templates that hold the settings we want Elastic Transcoder to use when transcoding a file. Which preset to use is specified when a job is created? Several popular output formats have default presets available in Elastic Transcoder.
We use the default presets for this demo, but we can also create a custom preset.
- We can create a custom preset on the Presets page, click Create New Preset and use the applicable values to configure the presets.
- Modification of presets is done in Elastic Transcoder.
- We can list and view all the presets in Elastic Transcoder.
- For deleting a presets, select the preset and click on Remove.
Let's come to the demo part where we left off. We have done the job creation part. It will take a few seconds to transcode the result output file in the bucket. Follow these steps:
-
Click the Jobs page and choose Pipeline in the Search by option.
-
Choose the Pipeline ID and click on Search.
-
It will show the created job and the status as Complete.
So, our output file is ready in the output bucket. Let's check. Go to the S3 bucket and click on the output bucket.
We will see an output mp4 file, our desired output, generated in the output bucket.
We successfully learned and did the hand on demo of the Elastic Transcoder.
Choosing a Region for Your Elastic Transcoder Resources
Jobs and pipelines are tightly related to particular AWS regions. Jobs and pipelines should be in the same region. When creating a new job, a pipeline must be specified in the current region. Suppose we create a pipeline in the Mumbai region, then the jobs are also in the Mumbai region.
We can have an S3 bucket in a different region to access the Elastic Transcoder. But it is a bad practice because it will be more expensive to transfer files between AWS regions. So, We should choose a specific region to use this service. Otherwise, it may cause extra charges.
Limits on the Number of Elastic Transcoder Pipelines, Jobs, and Presets
There are some limits on Elastic Transcoder pipelines, jobs, and presets. They are:
- 4 pipelines per AWS account is the limitation on pipelines.
- The maximum number of queued jobs is 1000000 per pipeline.
- A total of 30 outputs is the maximum output per job.
- The maximum number of jobs processed simultaneously is 100 per pipeline.
- We can create 50 user-defined presets per AWS account.
- Maximum rate at which you can submit job requests:
- For each AWS account, we can consistently submit 2 Create Job requests every second, and 100 requests per second are allowed in brief bursts.
- For each AWS account, we can consistently submit 4 Read Job requests every second, and 50 requests per second are allowed in brief bursts.
Conclusion
- AWS's Elastic Transcoder service is used to transcode media files from an S3 bucket into formats that can be played on various devices.
- Components of Elastic Transcoder are:
- Jobs
- Pipelines
- Presets
- Notifications
- Amazon S3, Lambda function, and Amazon SNS are the different AWS services used with the Elastic Transcoder.
- We must use a single region for the Elastic Transcoder Resources.
- 4 pipelines in an AWS account, 1000000 jobs per pipeline, and 50 user-defined presets we can use in Elastic Transcoder.