EC2 Instance Connect
Overview
Amazon EC2 Instances are servers hosted on the cloud. To work with an Amazon EC2 instance using our local devices, we need to connect to it. AWS EC2 Instance Connect allows you to connect with the EC2 instance easily using the SSH (Secure Shell) protocol. AWS Identity and Access Management can be used to manage access via EC2 Instance Connect.
What is EC2 Instance Connect?
Before learning about EC2 Instance Connect let's first discuss about EC2 Instance.
What is EC2 in AWS?
- EC2 instances are virtual operating systems launched on top of AWS Cloud.
- EC2 stands for Elastic Compute Cloud. Using Amazon EC2 we can launch our virtual operating system with the hardware configuration of our choice.
- It eliminates the need of investing in buying expensive hard equipment.
- It is a cost-effective approach to using virtual operating systems hosted on the cloud.
EC2 Instance Connect
We need to connect to the EC2 instances in some way to carry out any operations on the instance. Generally, the SSH protocol and key pair are used to connect to the EC2 instance.
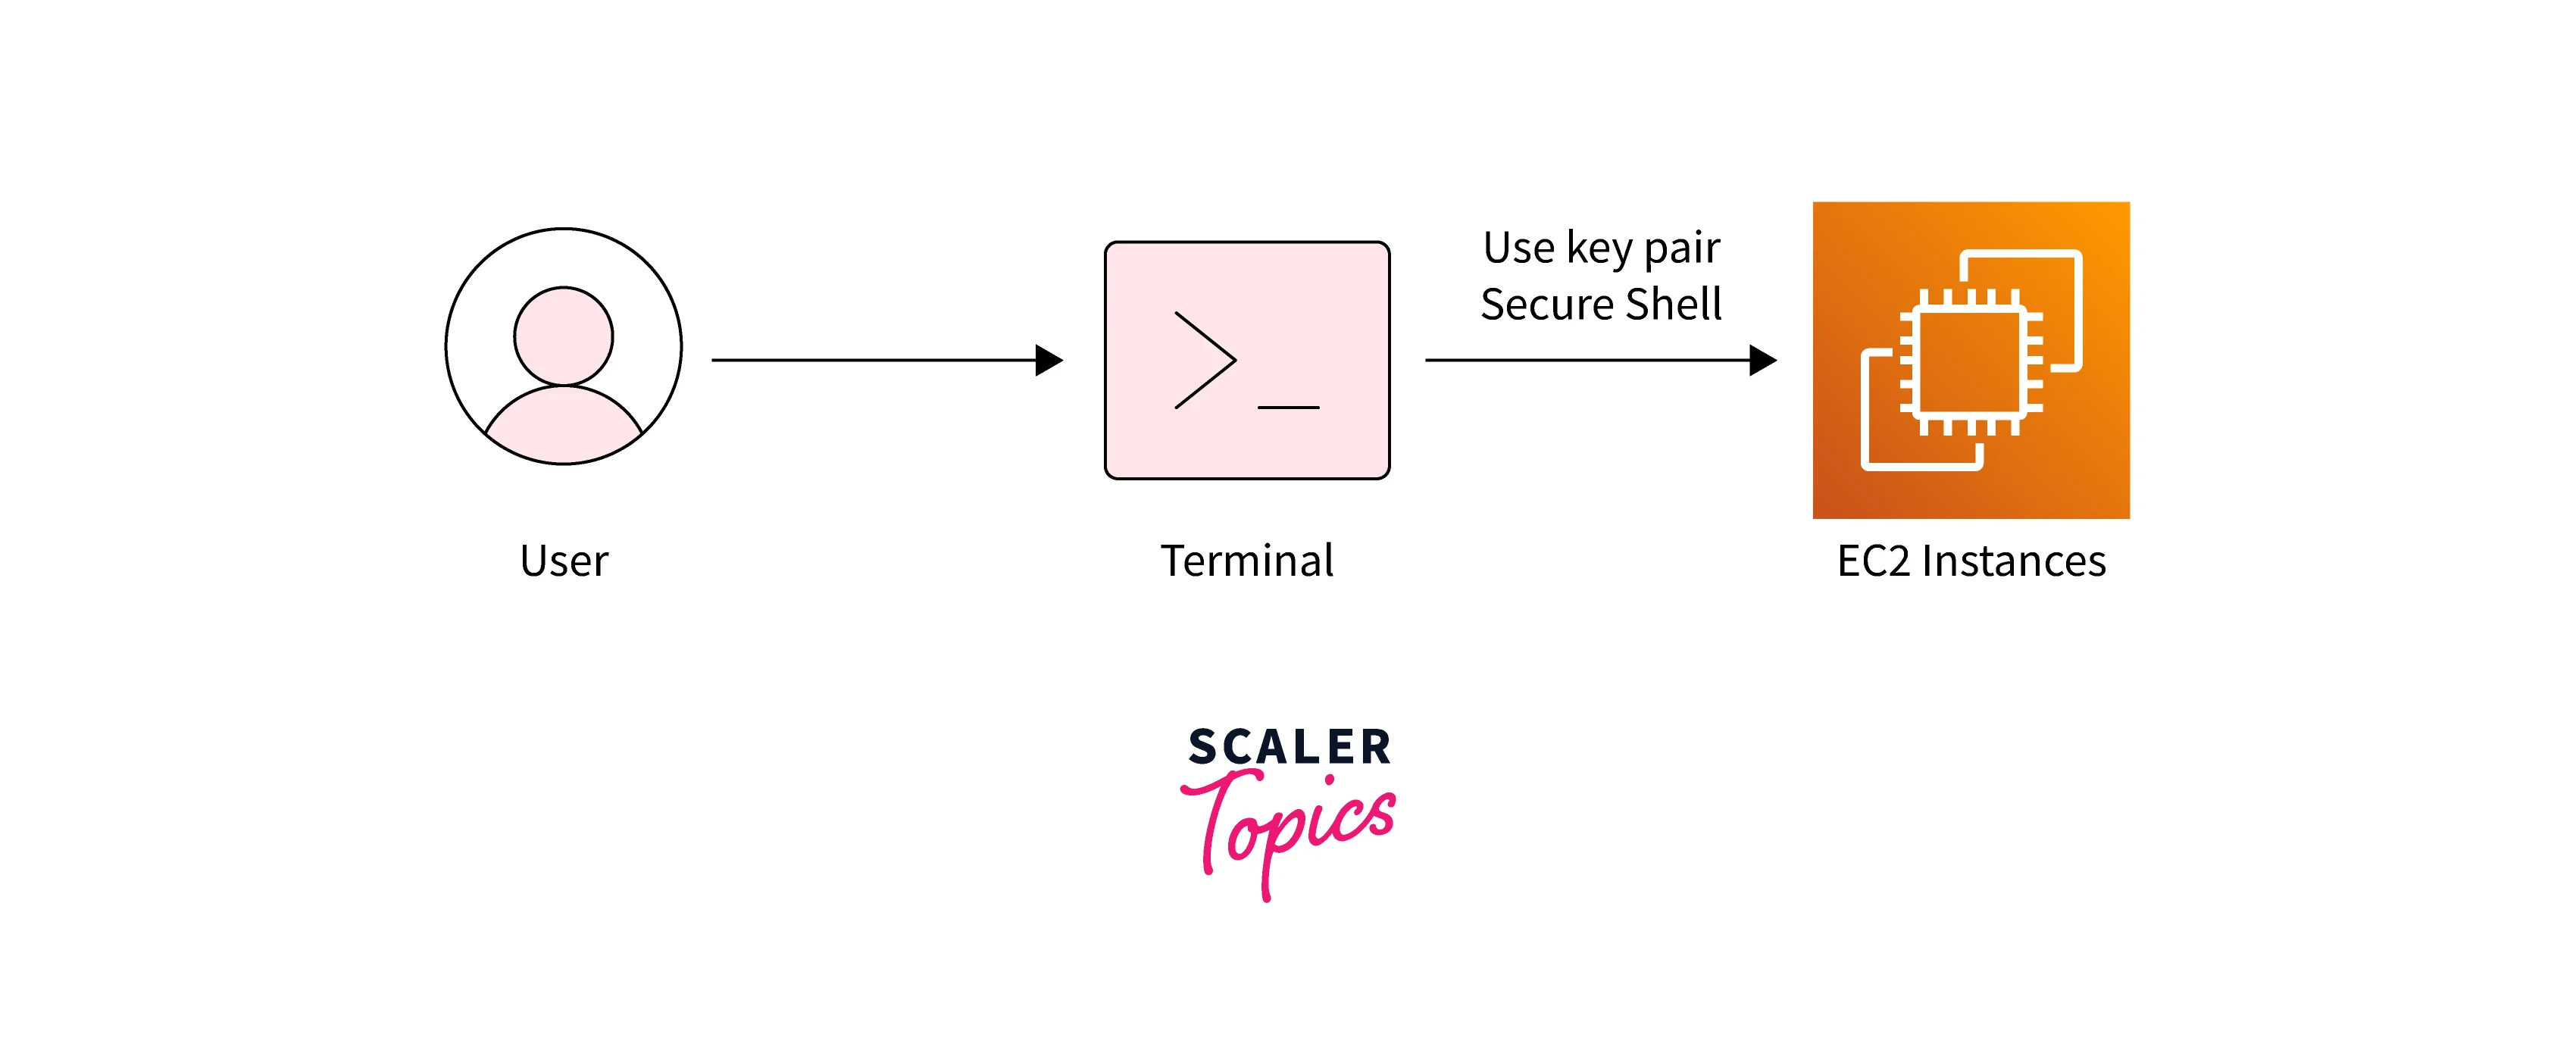 AWS EC2 Instance Connect is an AWS service that helps to connect to the EC2 instance using SSH protocol. It provides greater security and simplicity.
- If you are using Amazon Linux 2 2.0.20190618 AMI or later and Ubuntu 20.04 or later AMI, then you can connect to your instance directly with the help of a single click on the Amazon EC2 Console.
- The access to the EC2 instance via SSH protocol can be controlled using IAM roles.
- Connection requests for the instances can be managed using AWS CloudTrail events.
- It is available for use without any additional charges for certain AWS regions.
Transform Your Career
Choose from our industry-leading programs designed for career success
Modern Software and AI Engineering Program
Master full-stack development with AI integration

Modern Data Science and ML with specialisation in AI
Advanced data science techniques with AI specialization
Advanced AIML with Specialisation in Agentic AI
Deep dive into AIML with focus on Agentic systems
DevOps, Cloud & AI Platform Engineering
Build and manage AI-powered cloud infrastructure
AI Engineering Advanced Certification by IIT-Roorkee
Premier AI engineering certification from IIT-Roorkee
AWS Instance Pricing for EC2
Check out AWS Instance Pricing for EC2 here.
Set Up EC2 Instance Connect
Prerequisites for installing EC2 Instance Connect:
- You should have AWS CLI installed in our system. Follow this link to install your system's AWS command line interface.
- You also need to have an SSH client to connect to the instance. You can visit this link to install OpenSSH in your system, which serves as SSH Client. If you have a Windows OS, you can visit this link.
Before connecting to an instance, we need to create it.
Create an AWS EC2 Instance
Let's look at the steps to create an EC2 Instance.
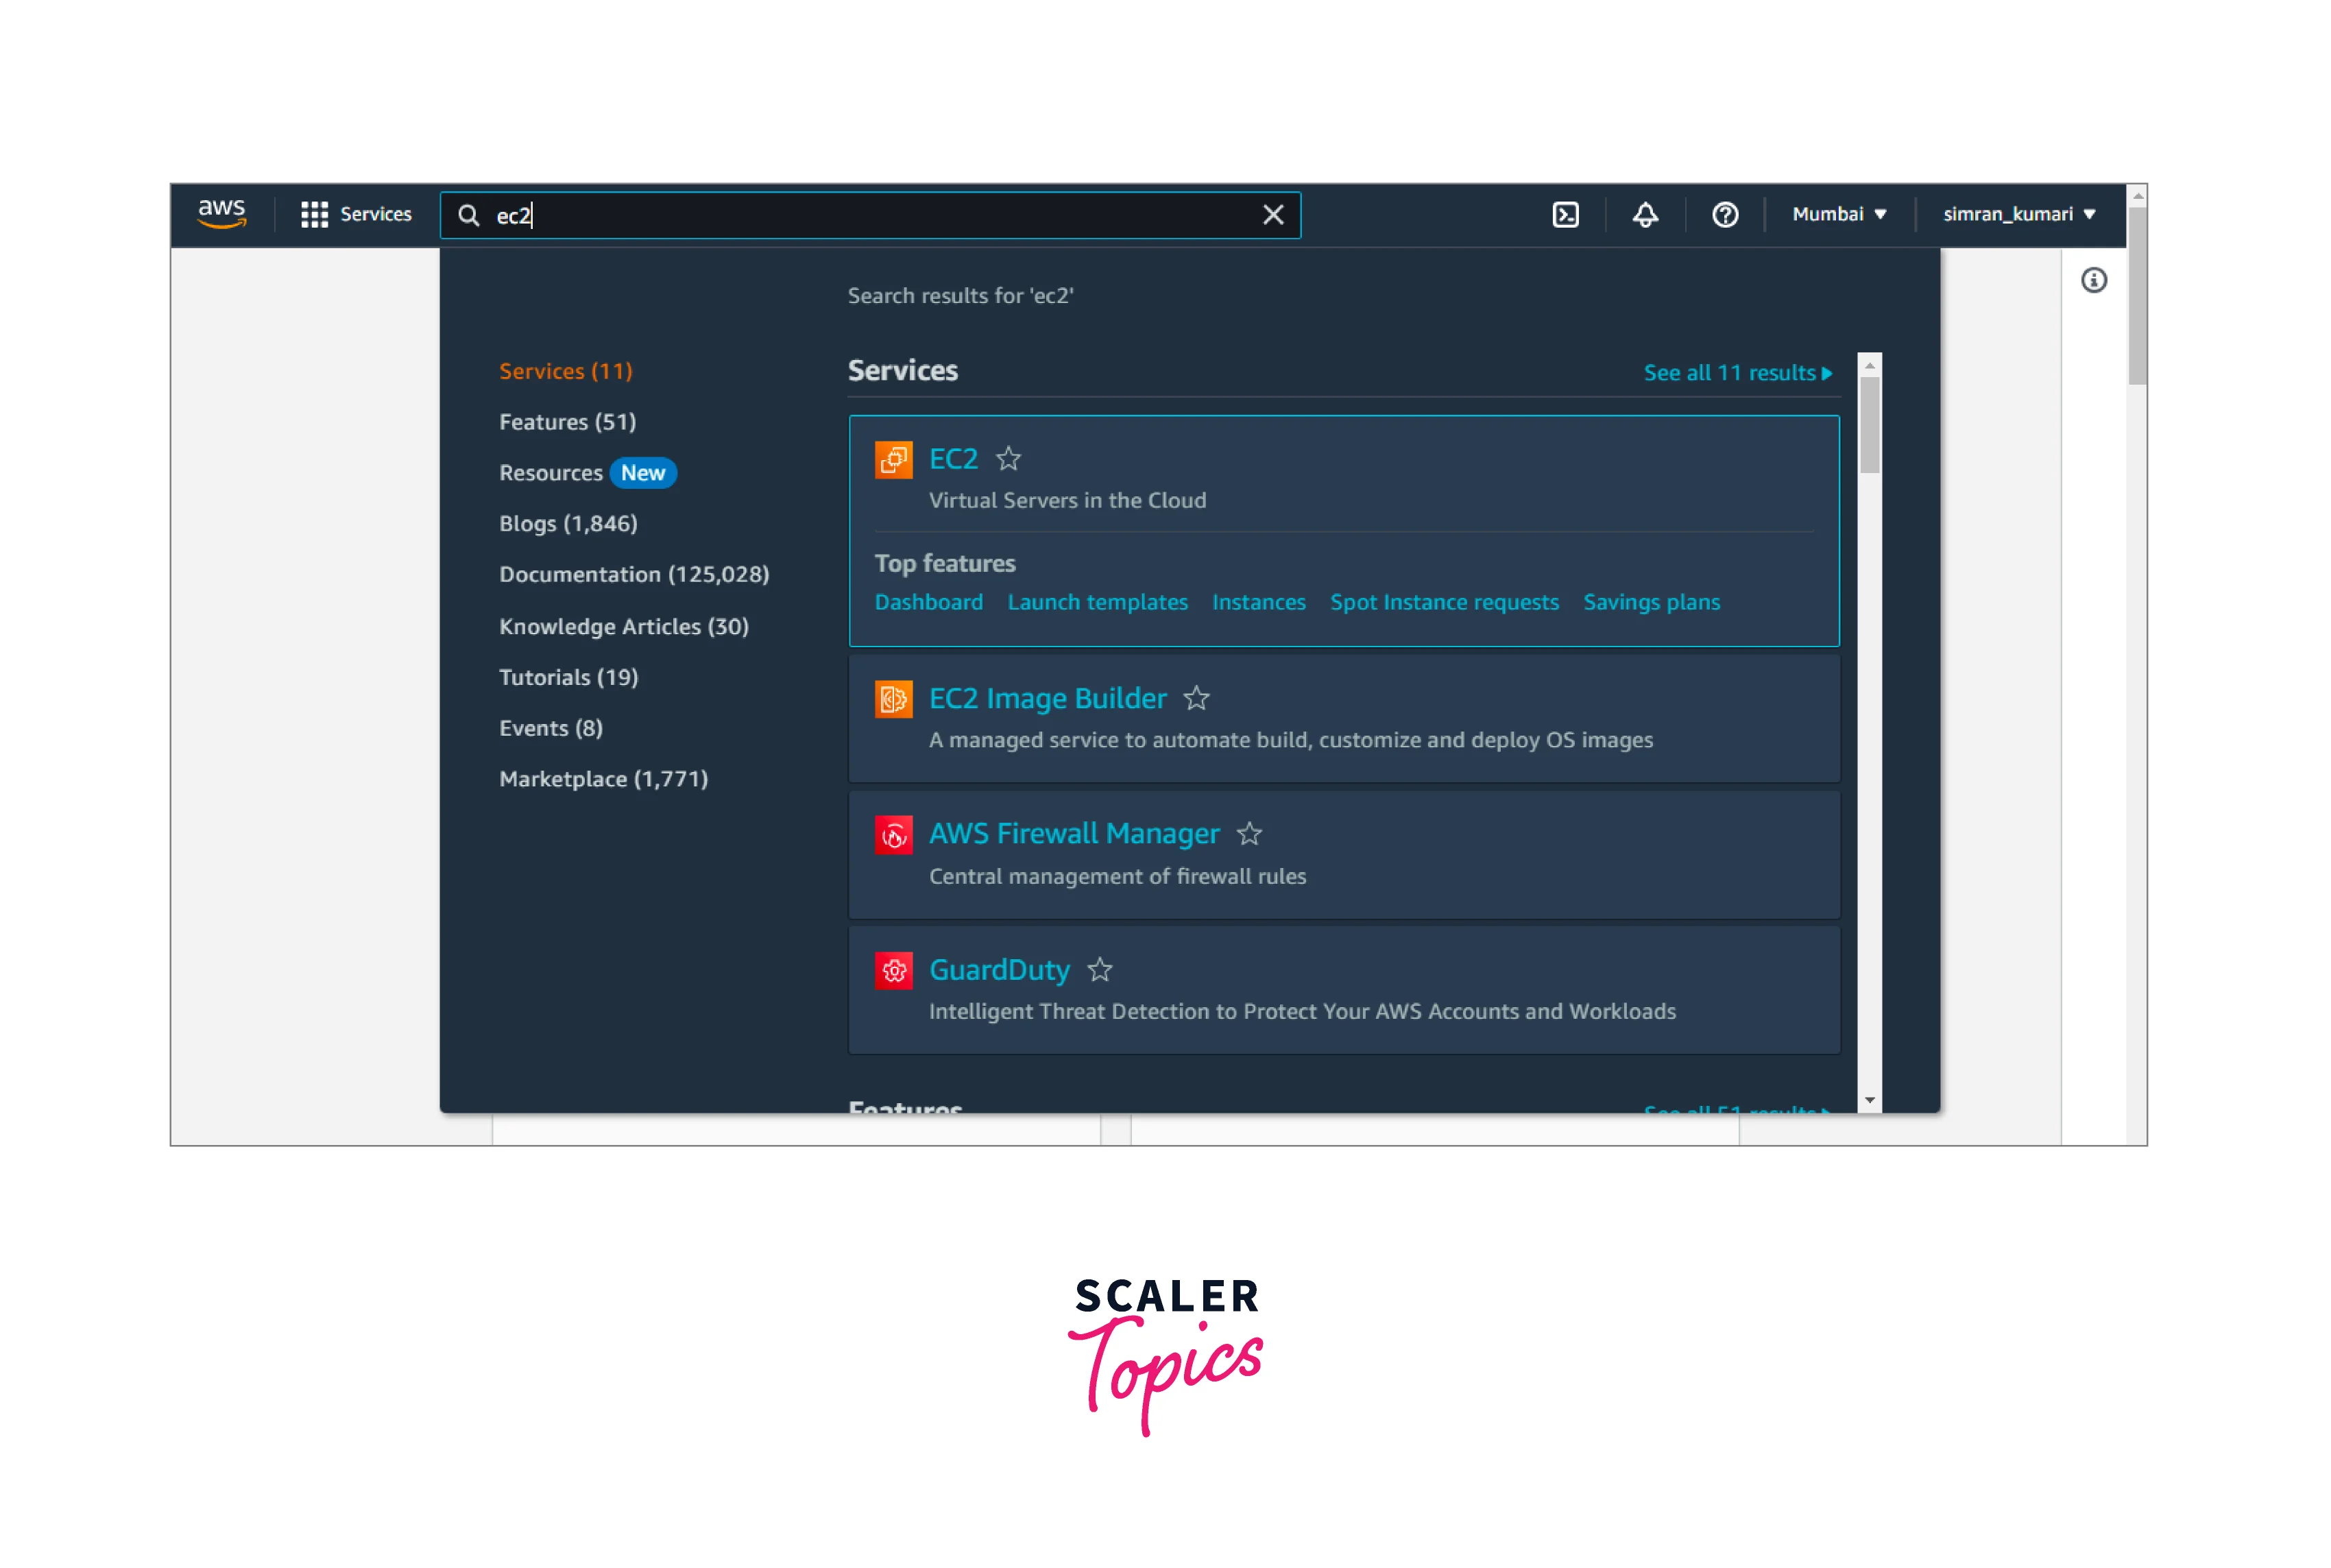
- Login to the AWS Management Console. In the search bar, search for EC2. Select the first option which appears.
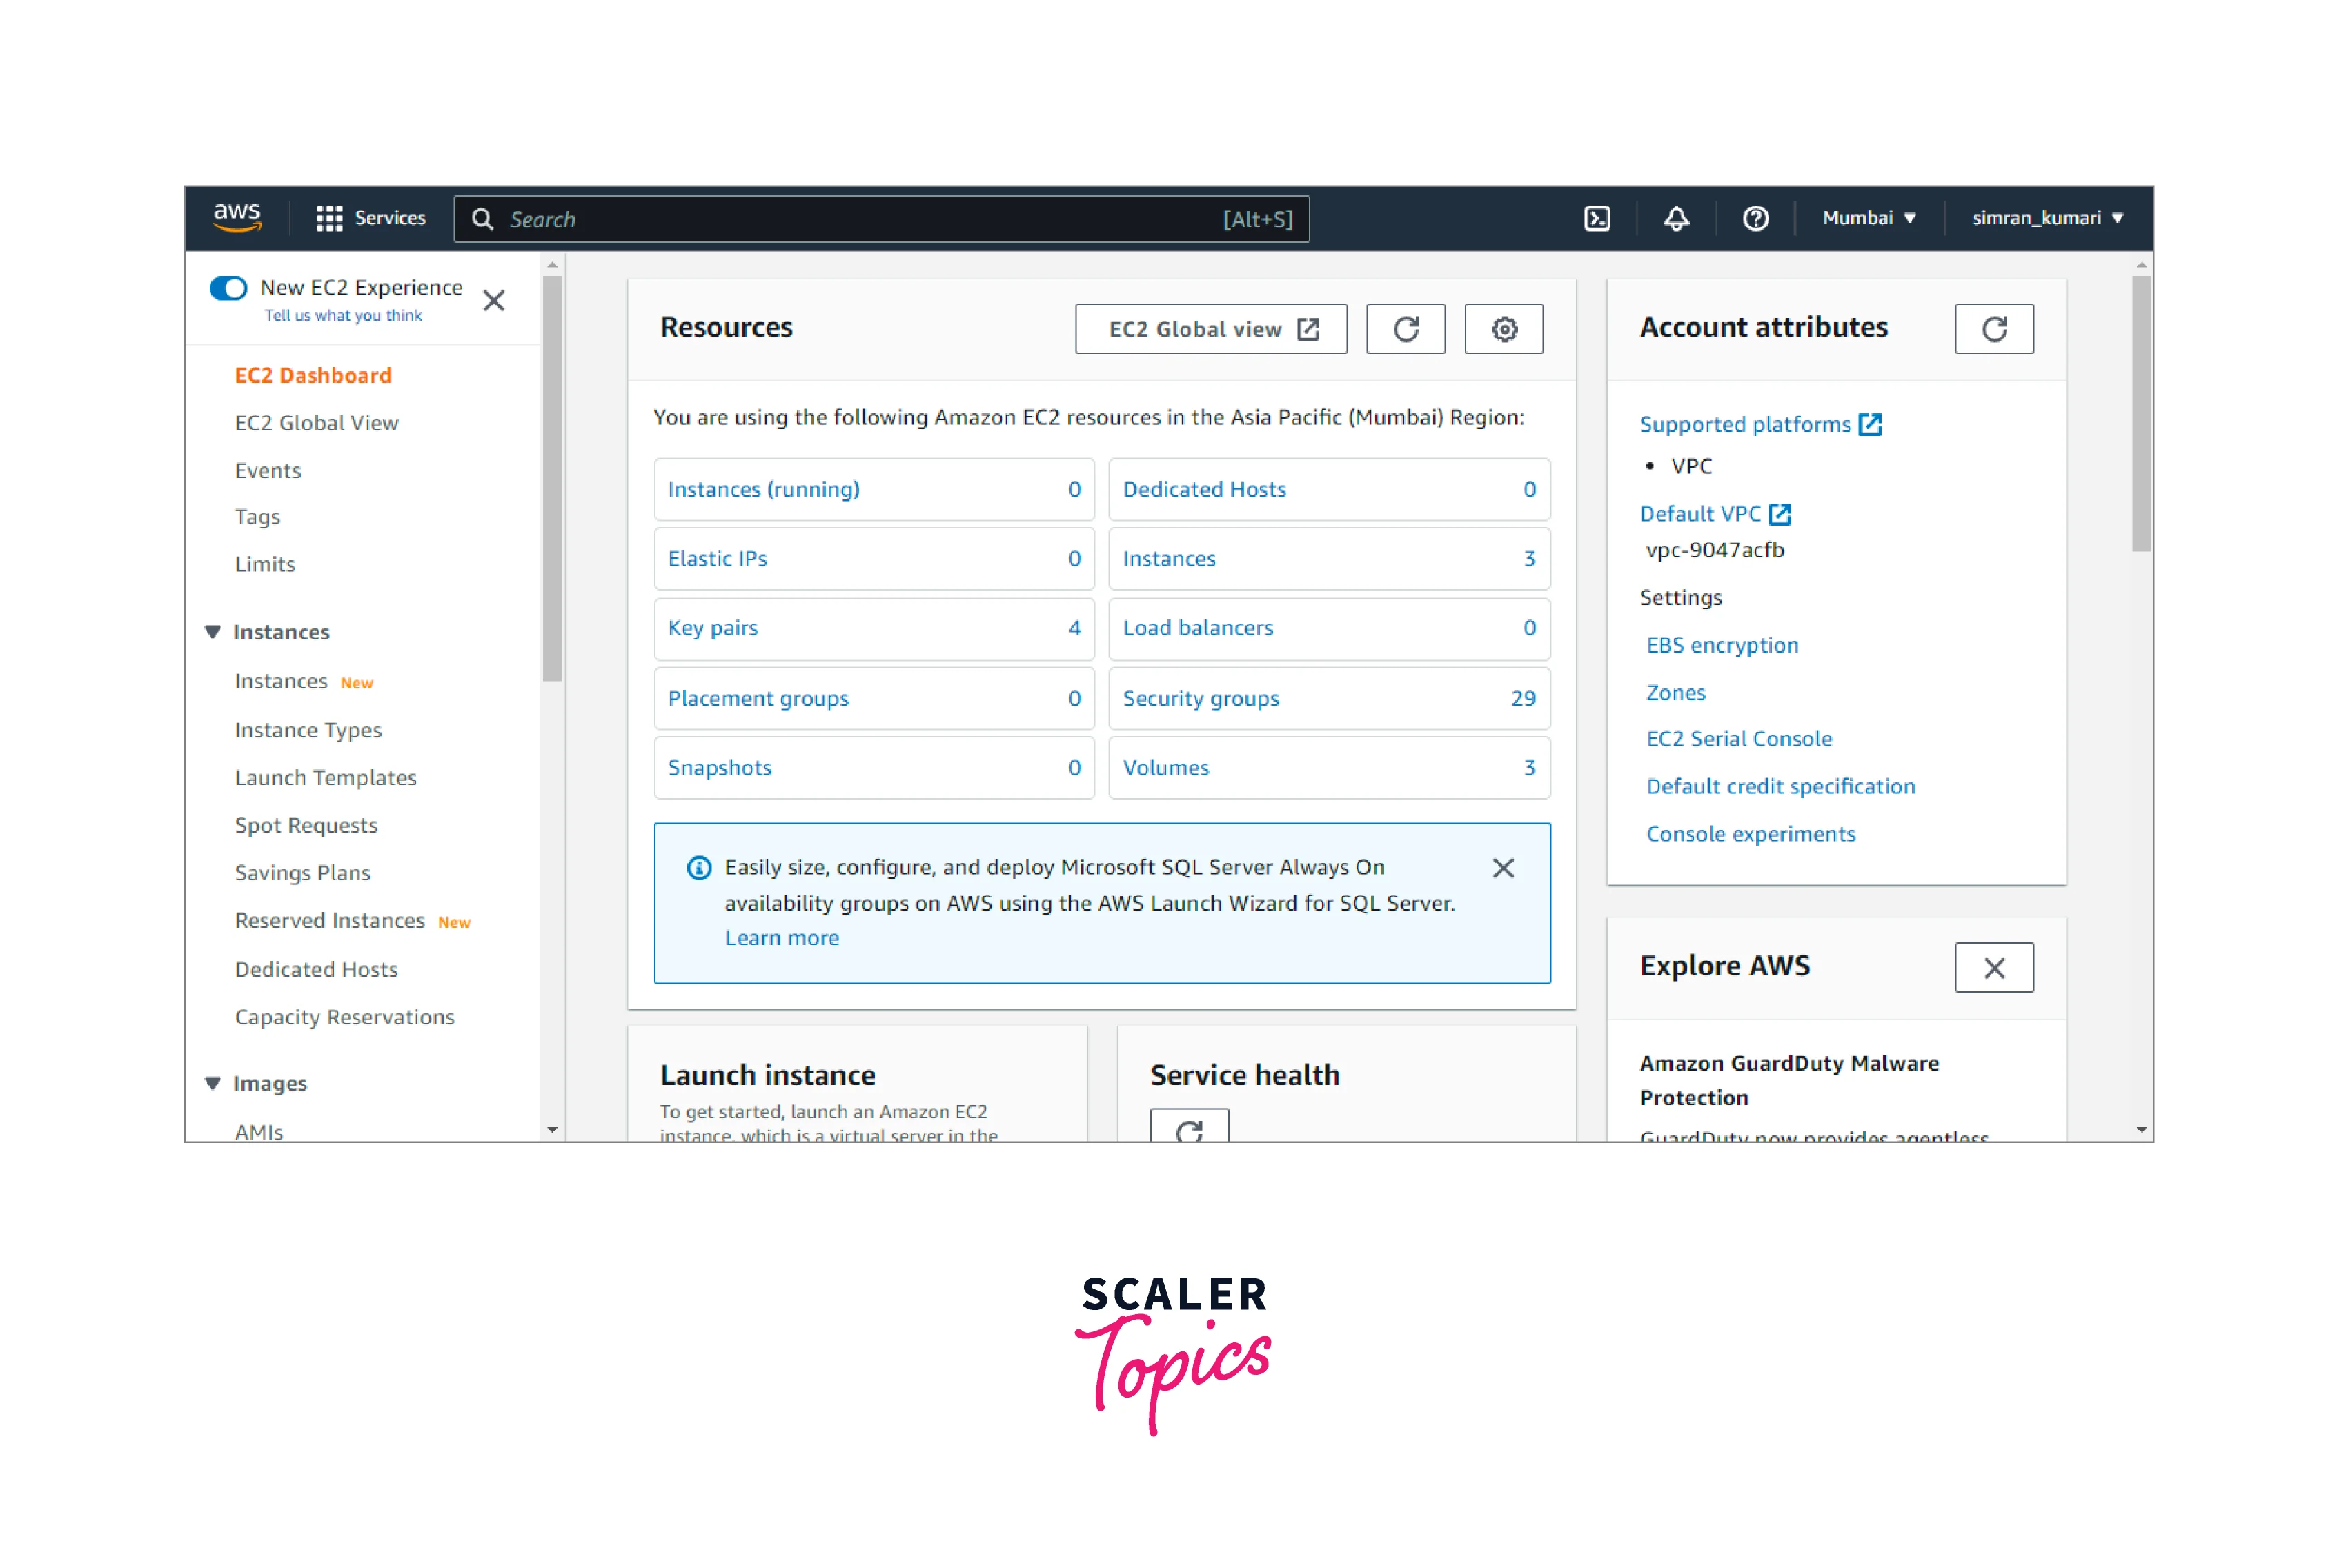
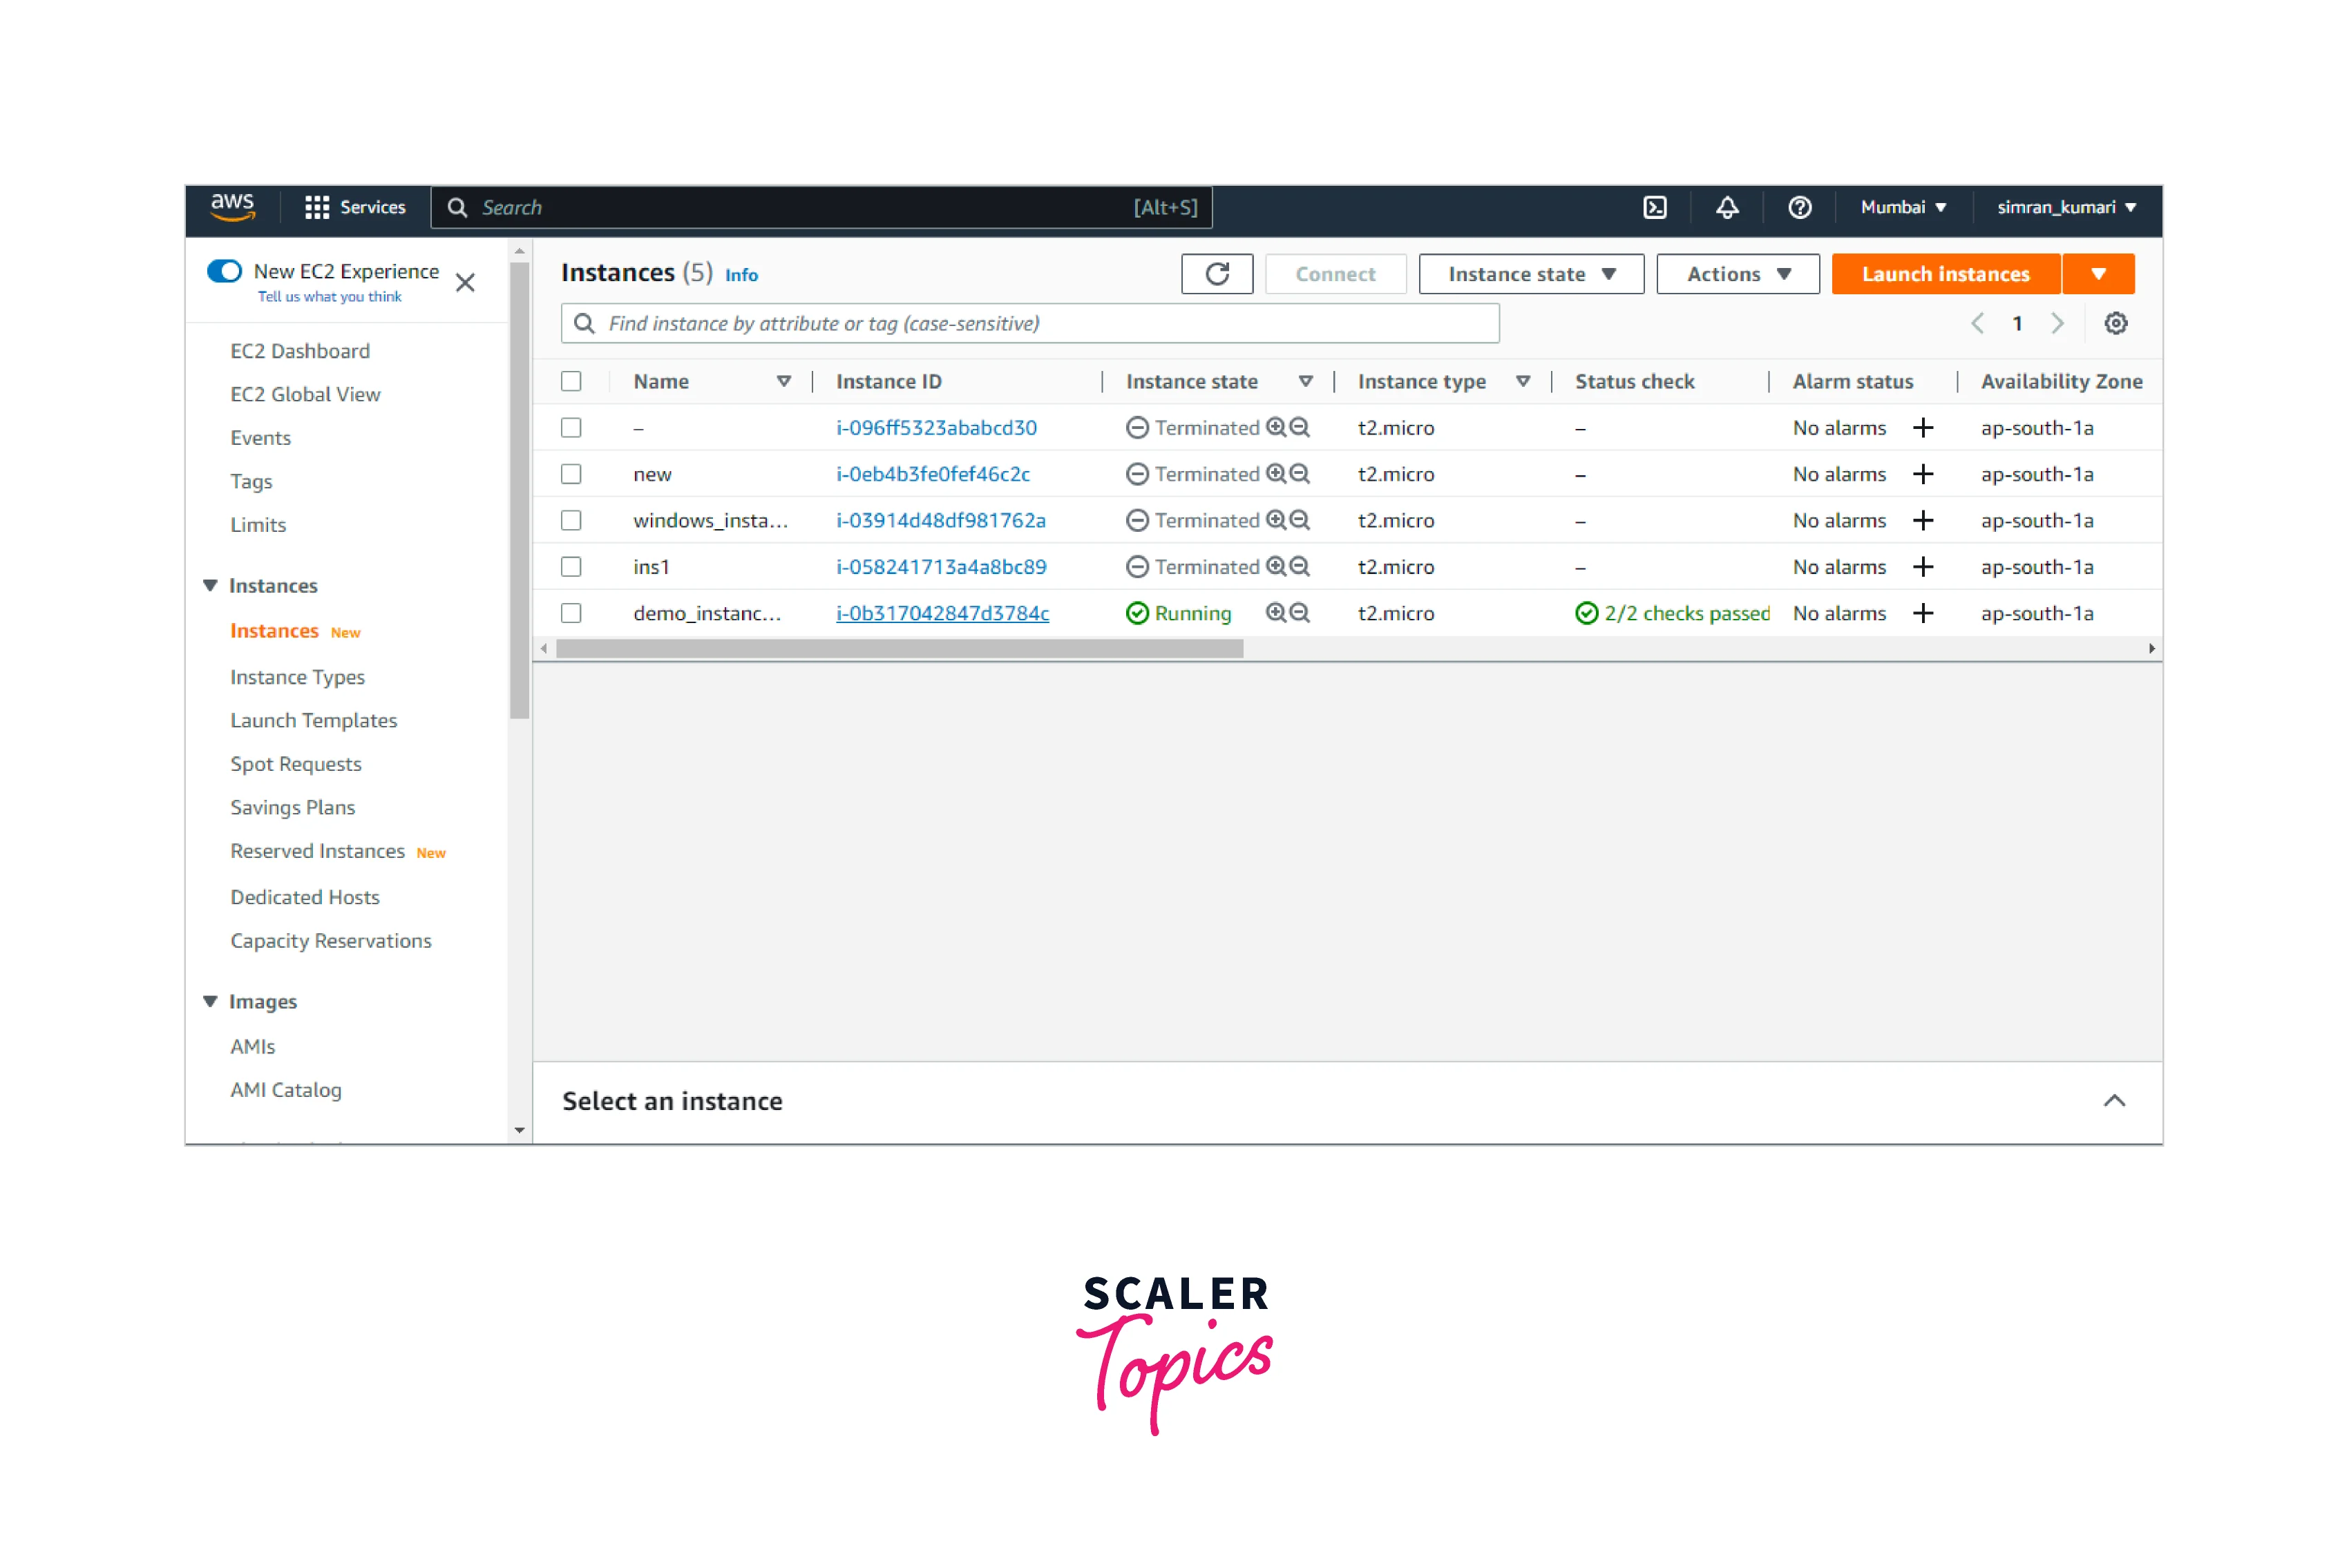
- You will be redirected to another page containing some information on the EC2 instances launched and running for your AWS account. Here I have no running instances. From the left navigation pane, select the Instances option.
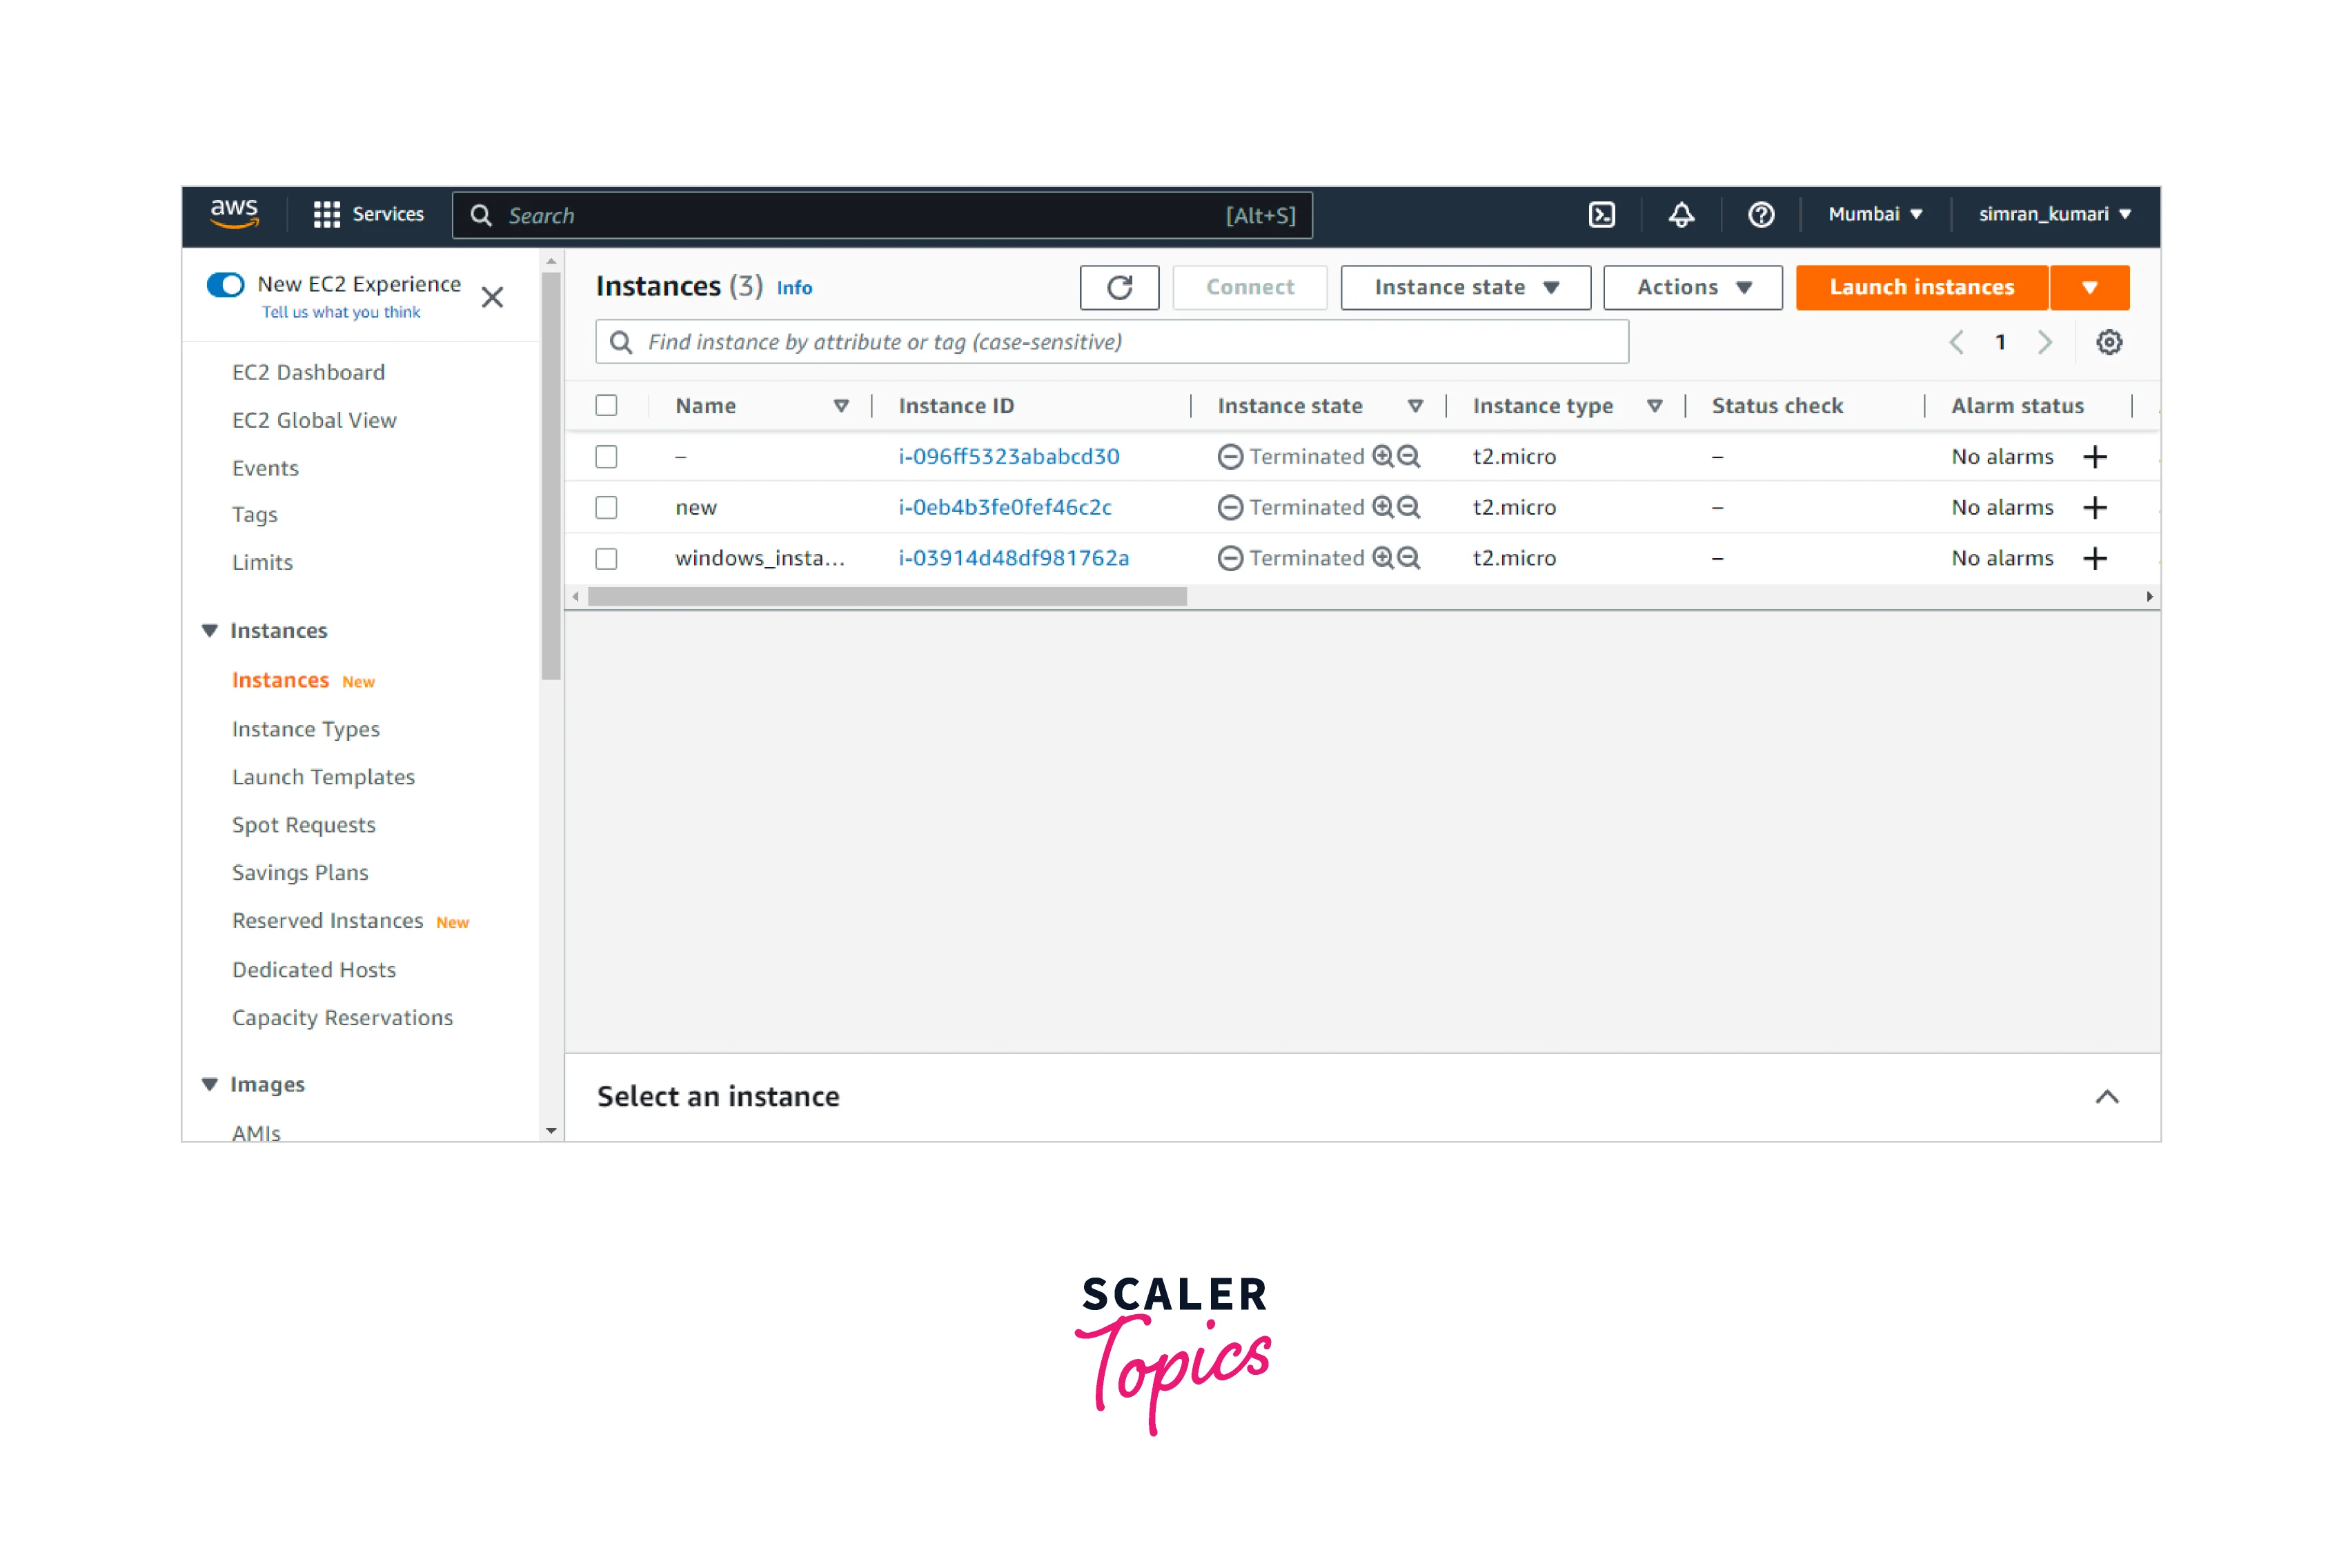
- The console shows the list of running instances if any. Click on the Launch Instances button to create a new instance.
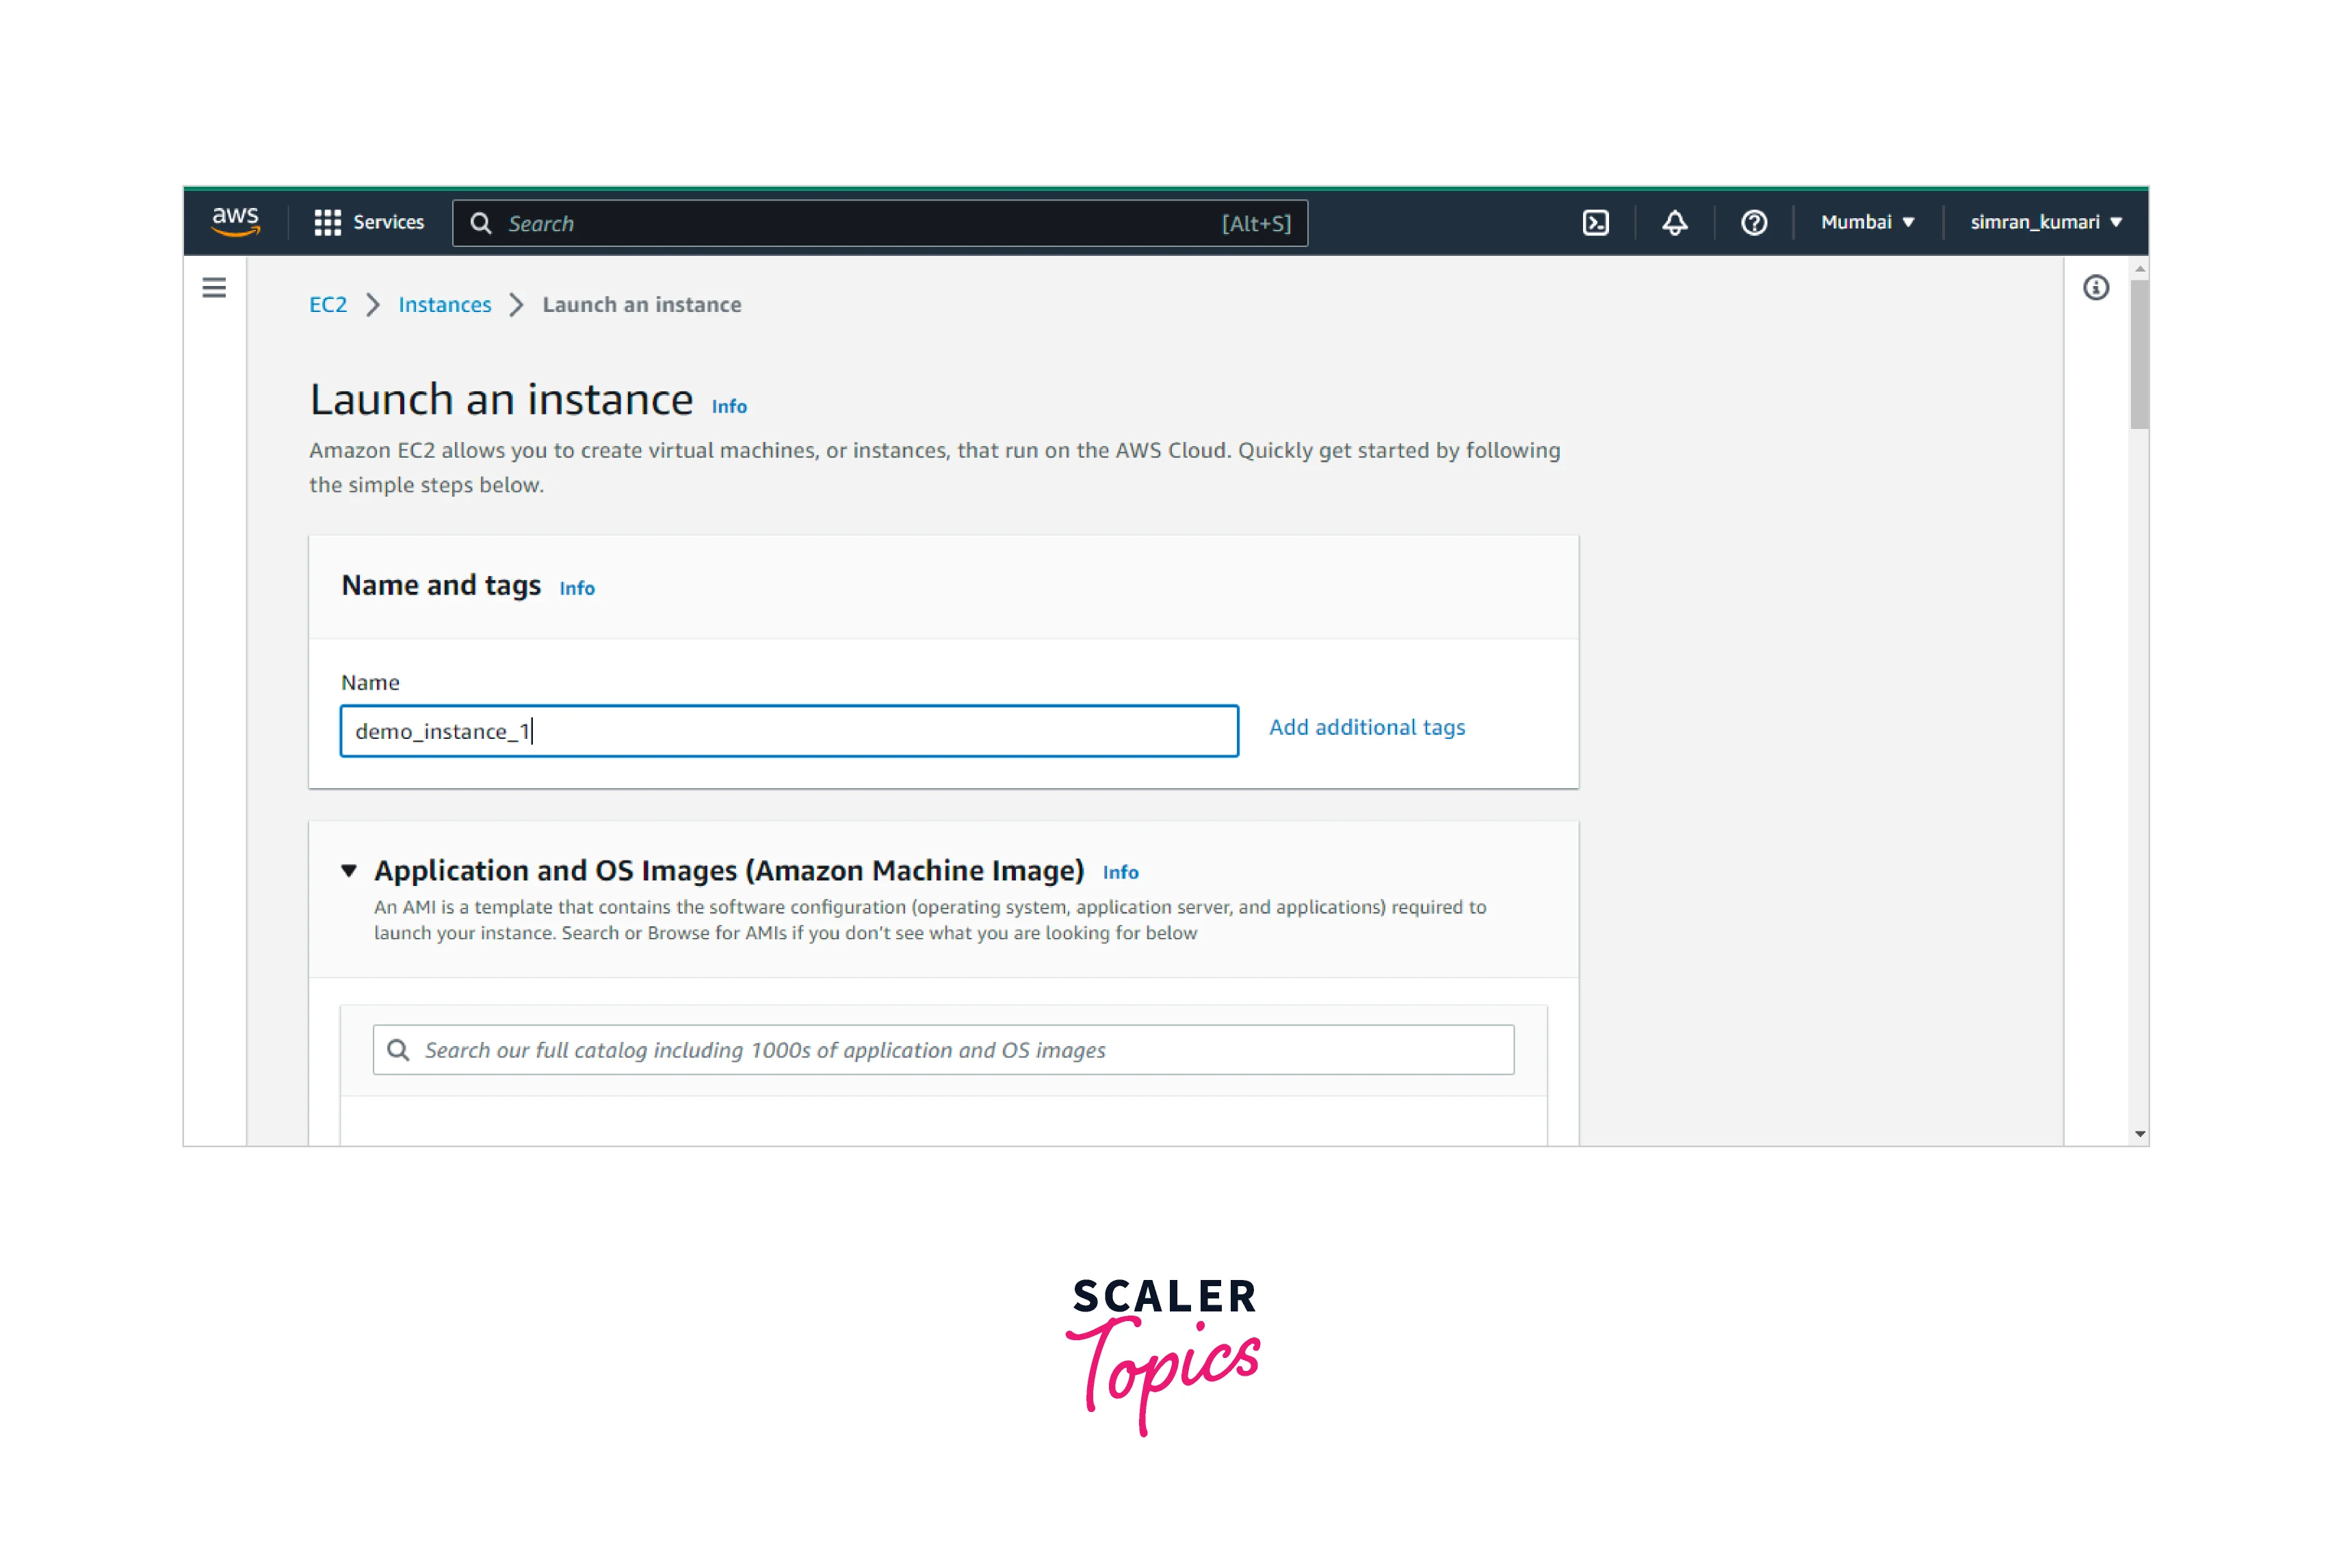
- On the next page, which appears, fill in the details needed for creating the new instance.
- Name: You can give any name to your instance per choice. Here we are using the name demo_instance_1 for the instance to be launched.
- Image: You can choose any image of your choice (Amazon Linux, Redhat, Ubuntu, Kali Linux, etc.). Here we are using Amazon Linux.
- In the key pair section, we can create a new pair by clicking on the Create new key pair button.
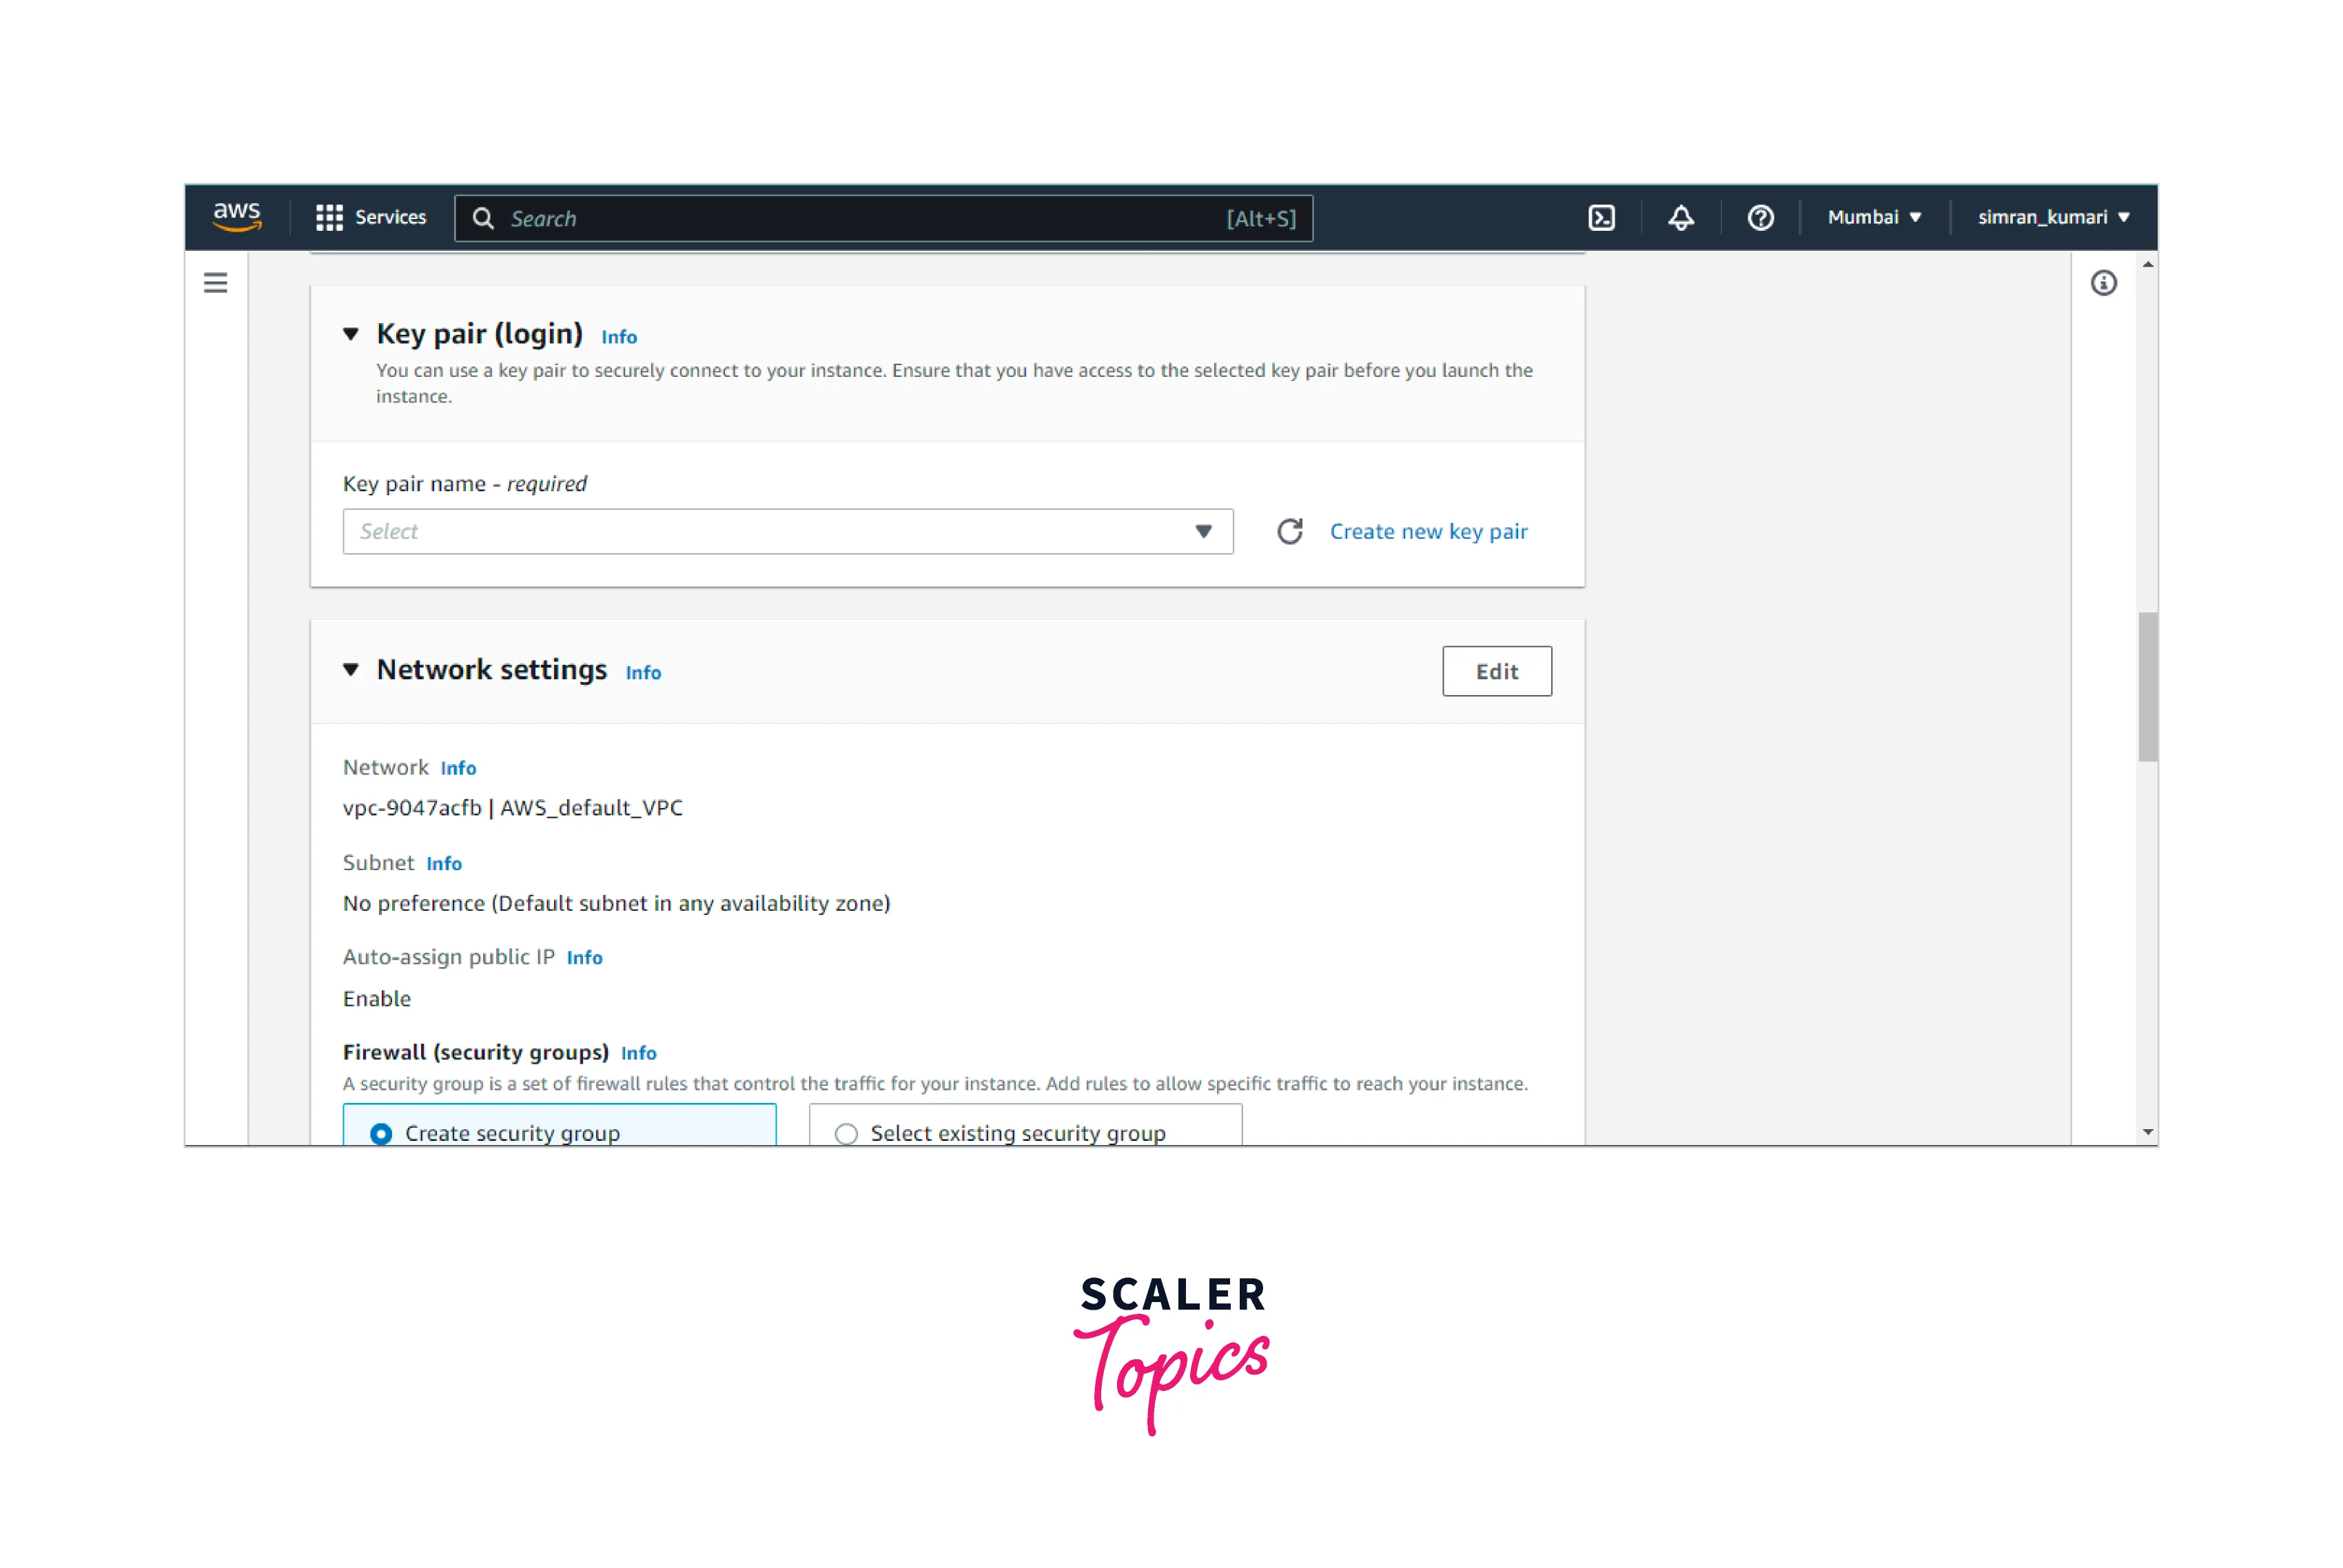
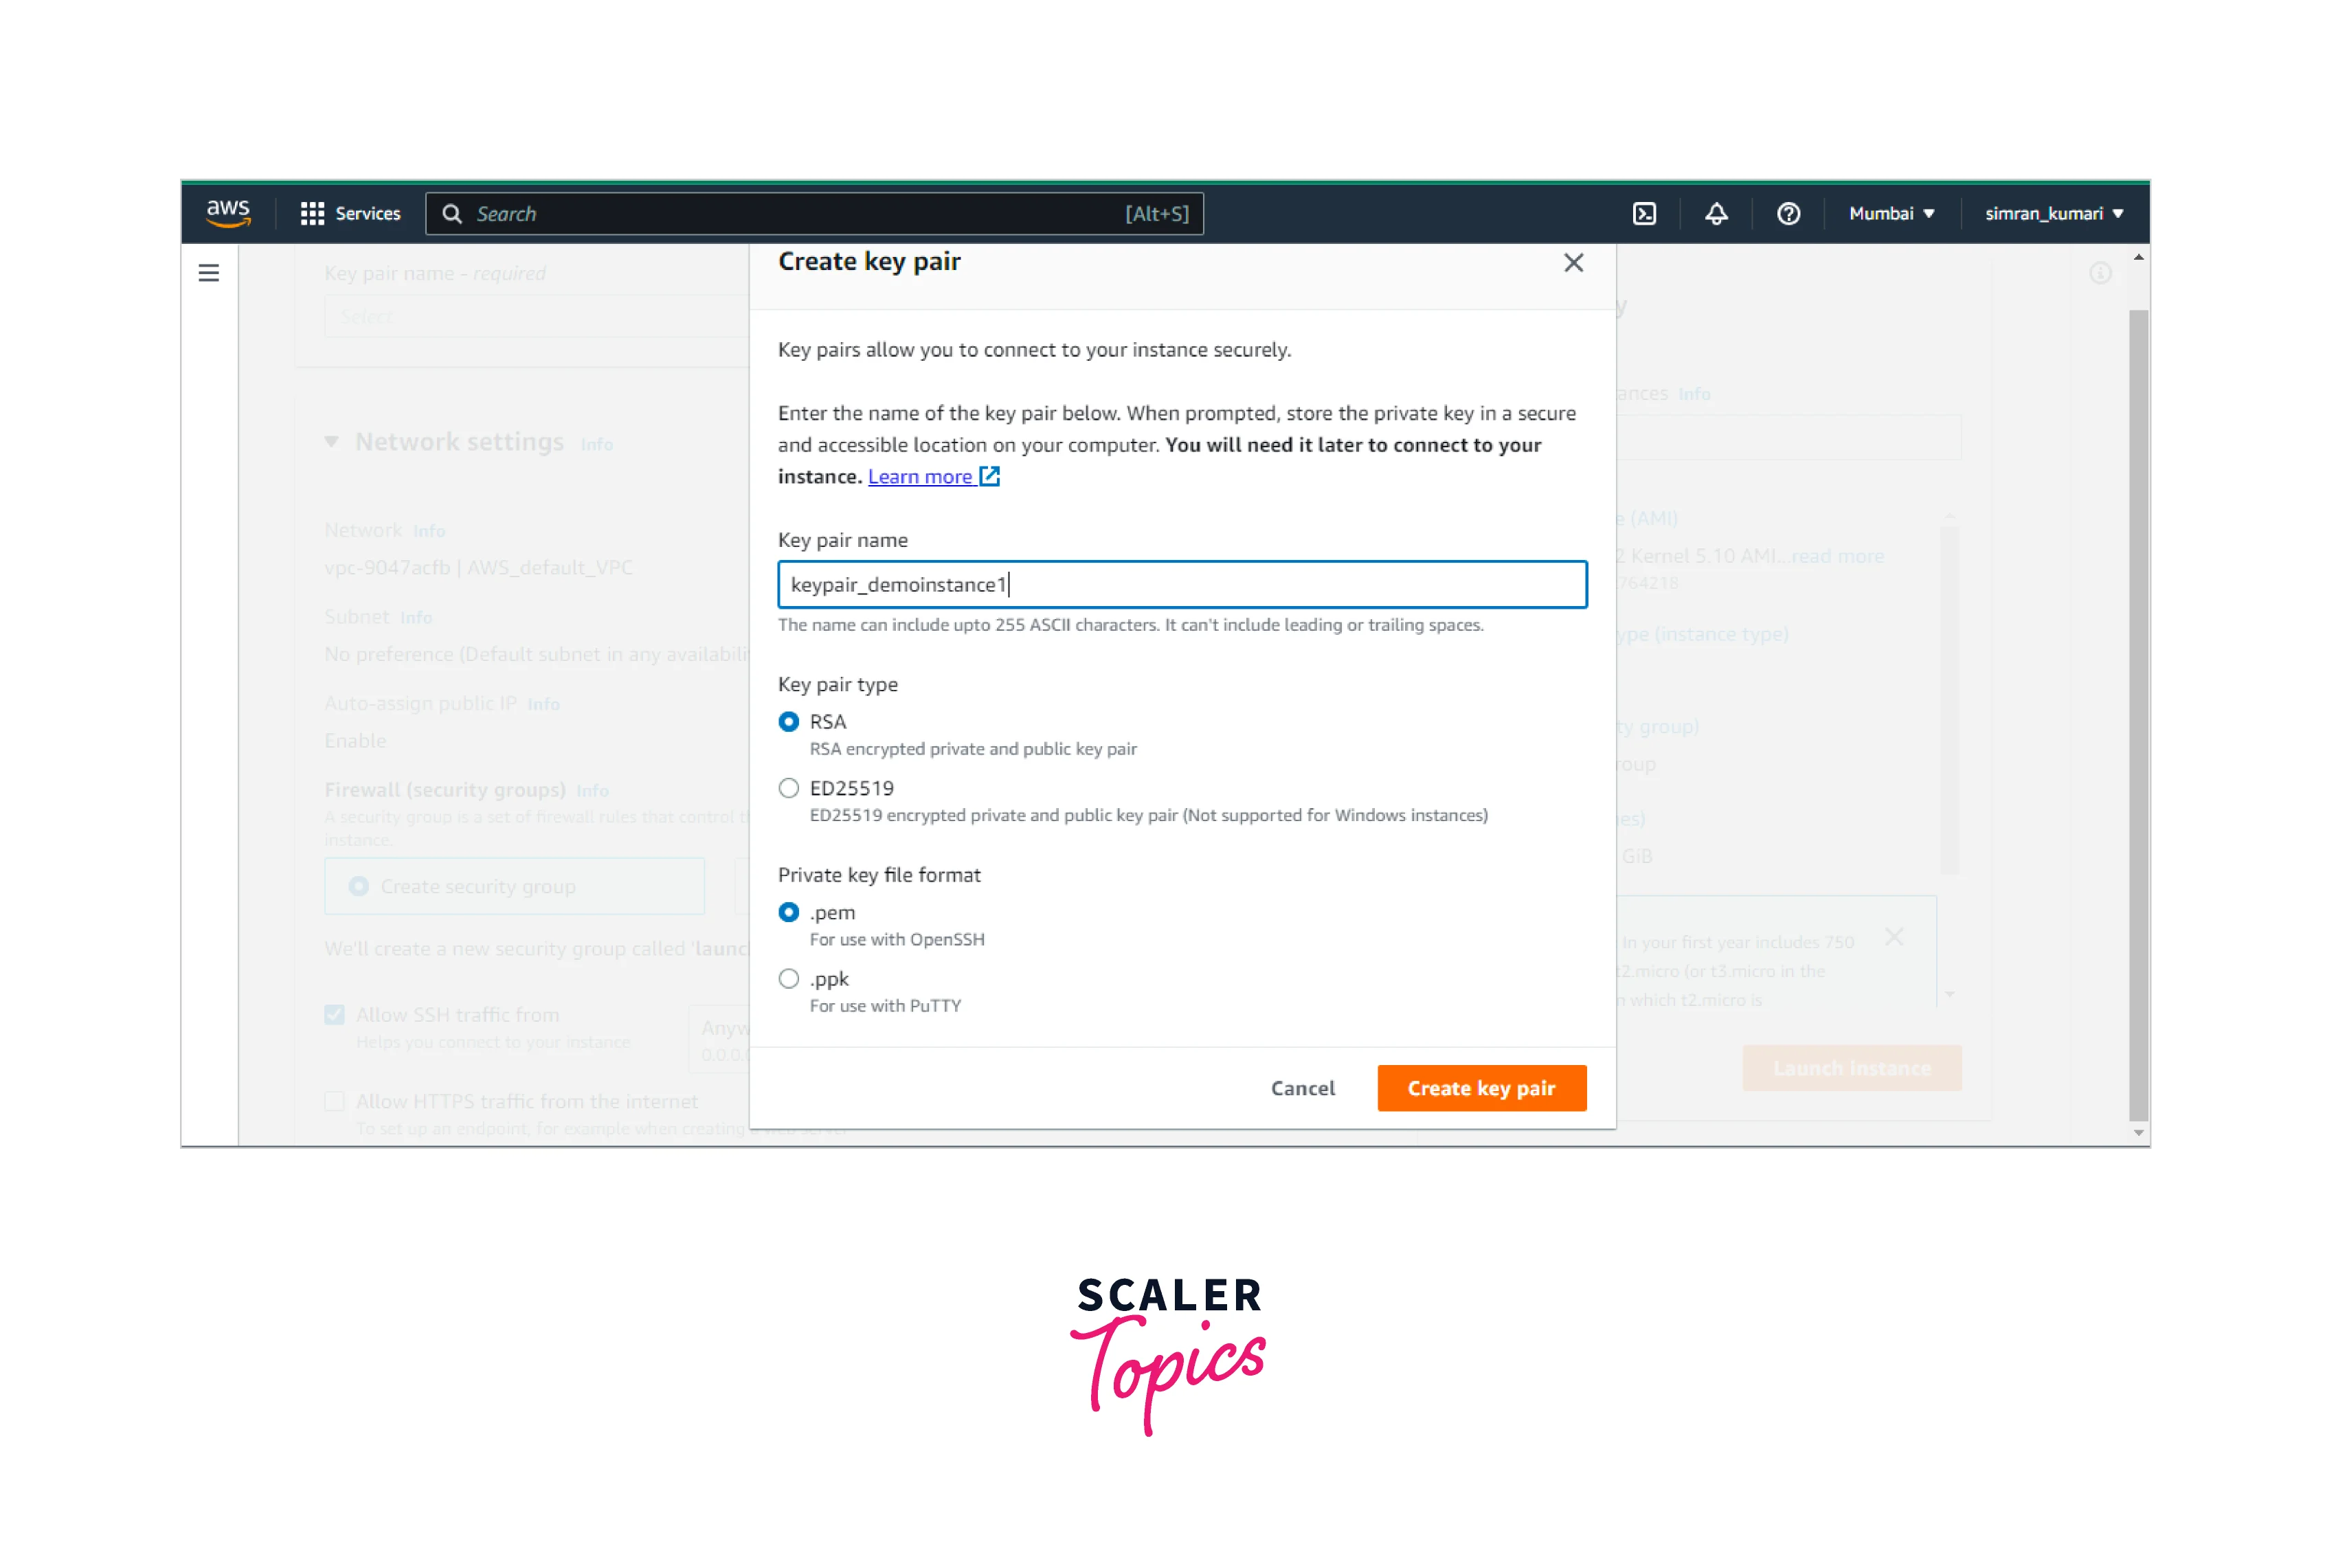
- Add a name to the keypair and keep other options as default. Key pair is used to connect to the EC2 instance using SSG protocol. After filling in the details, click on the create key pair button. The key pair will get downloaded on your device with the specified name and .pem extension.
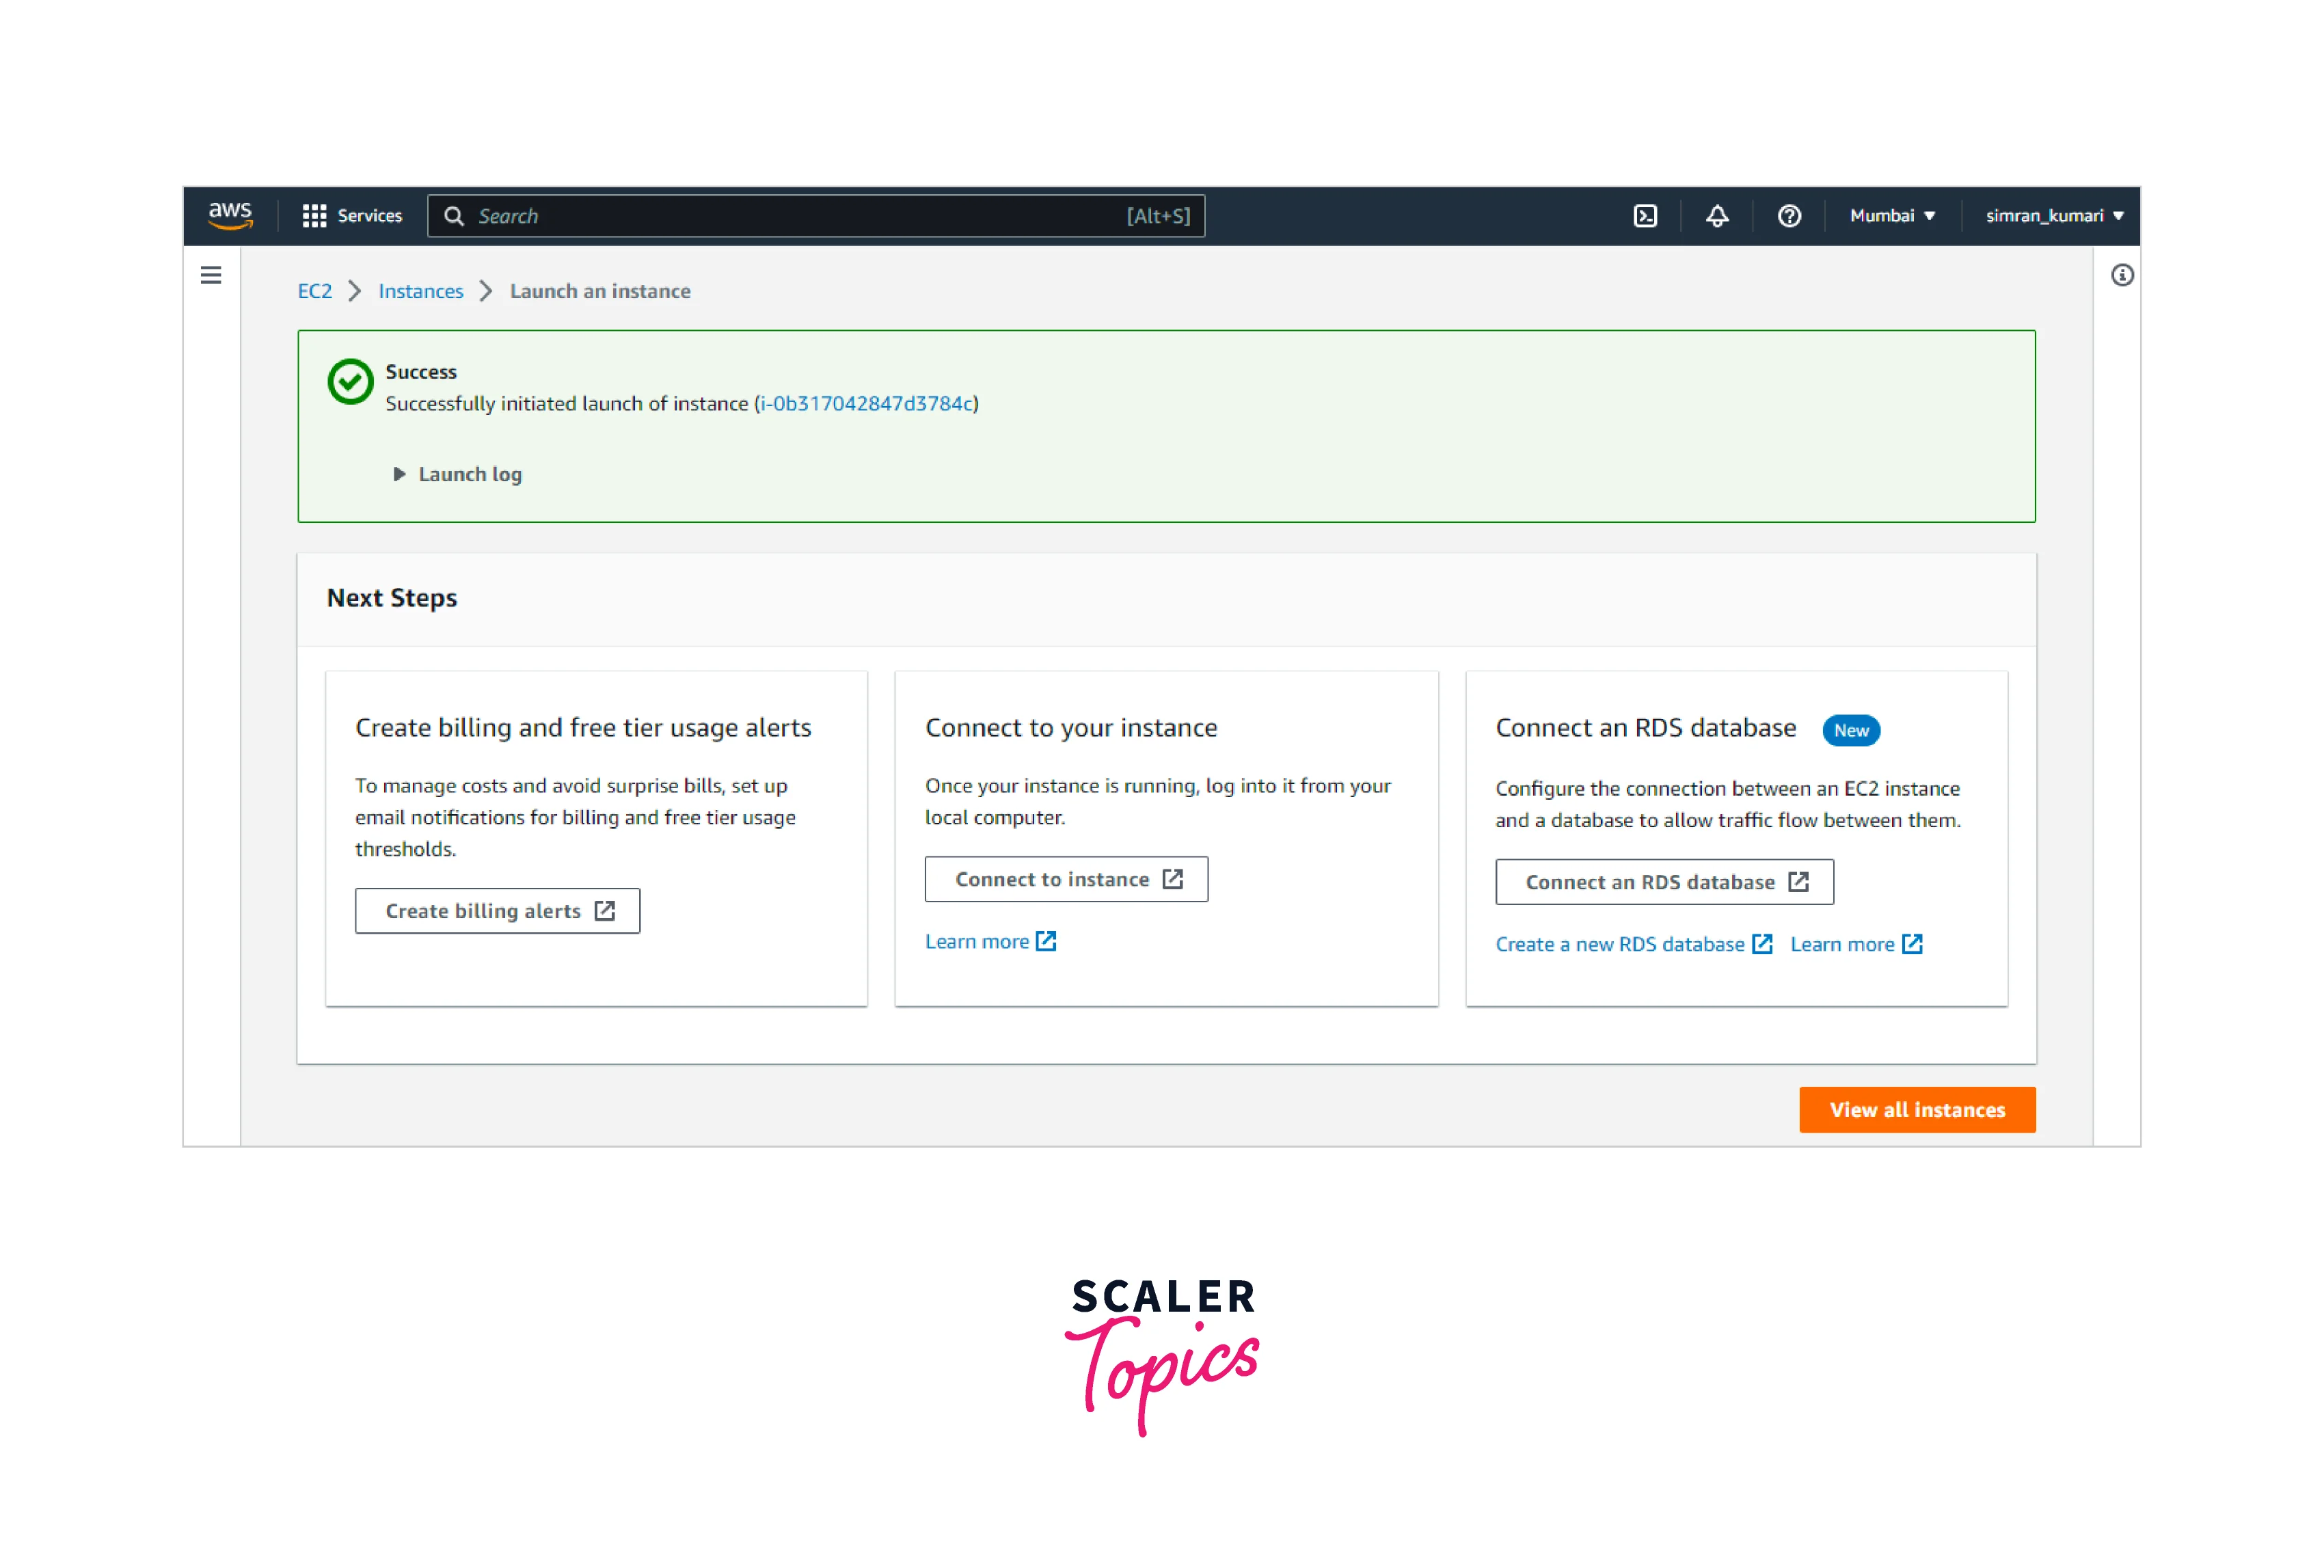
- After filling in the details for creating the instance, click on the Launch Instance button.
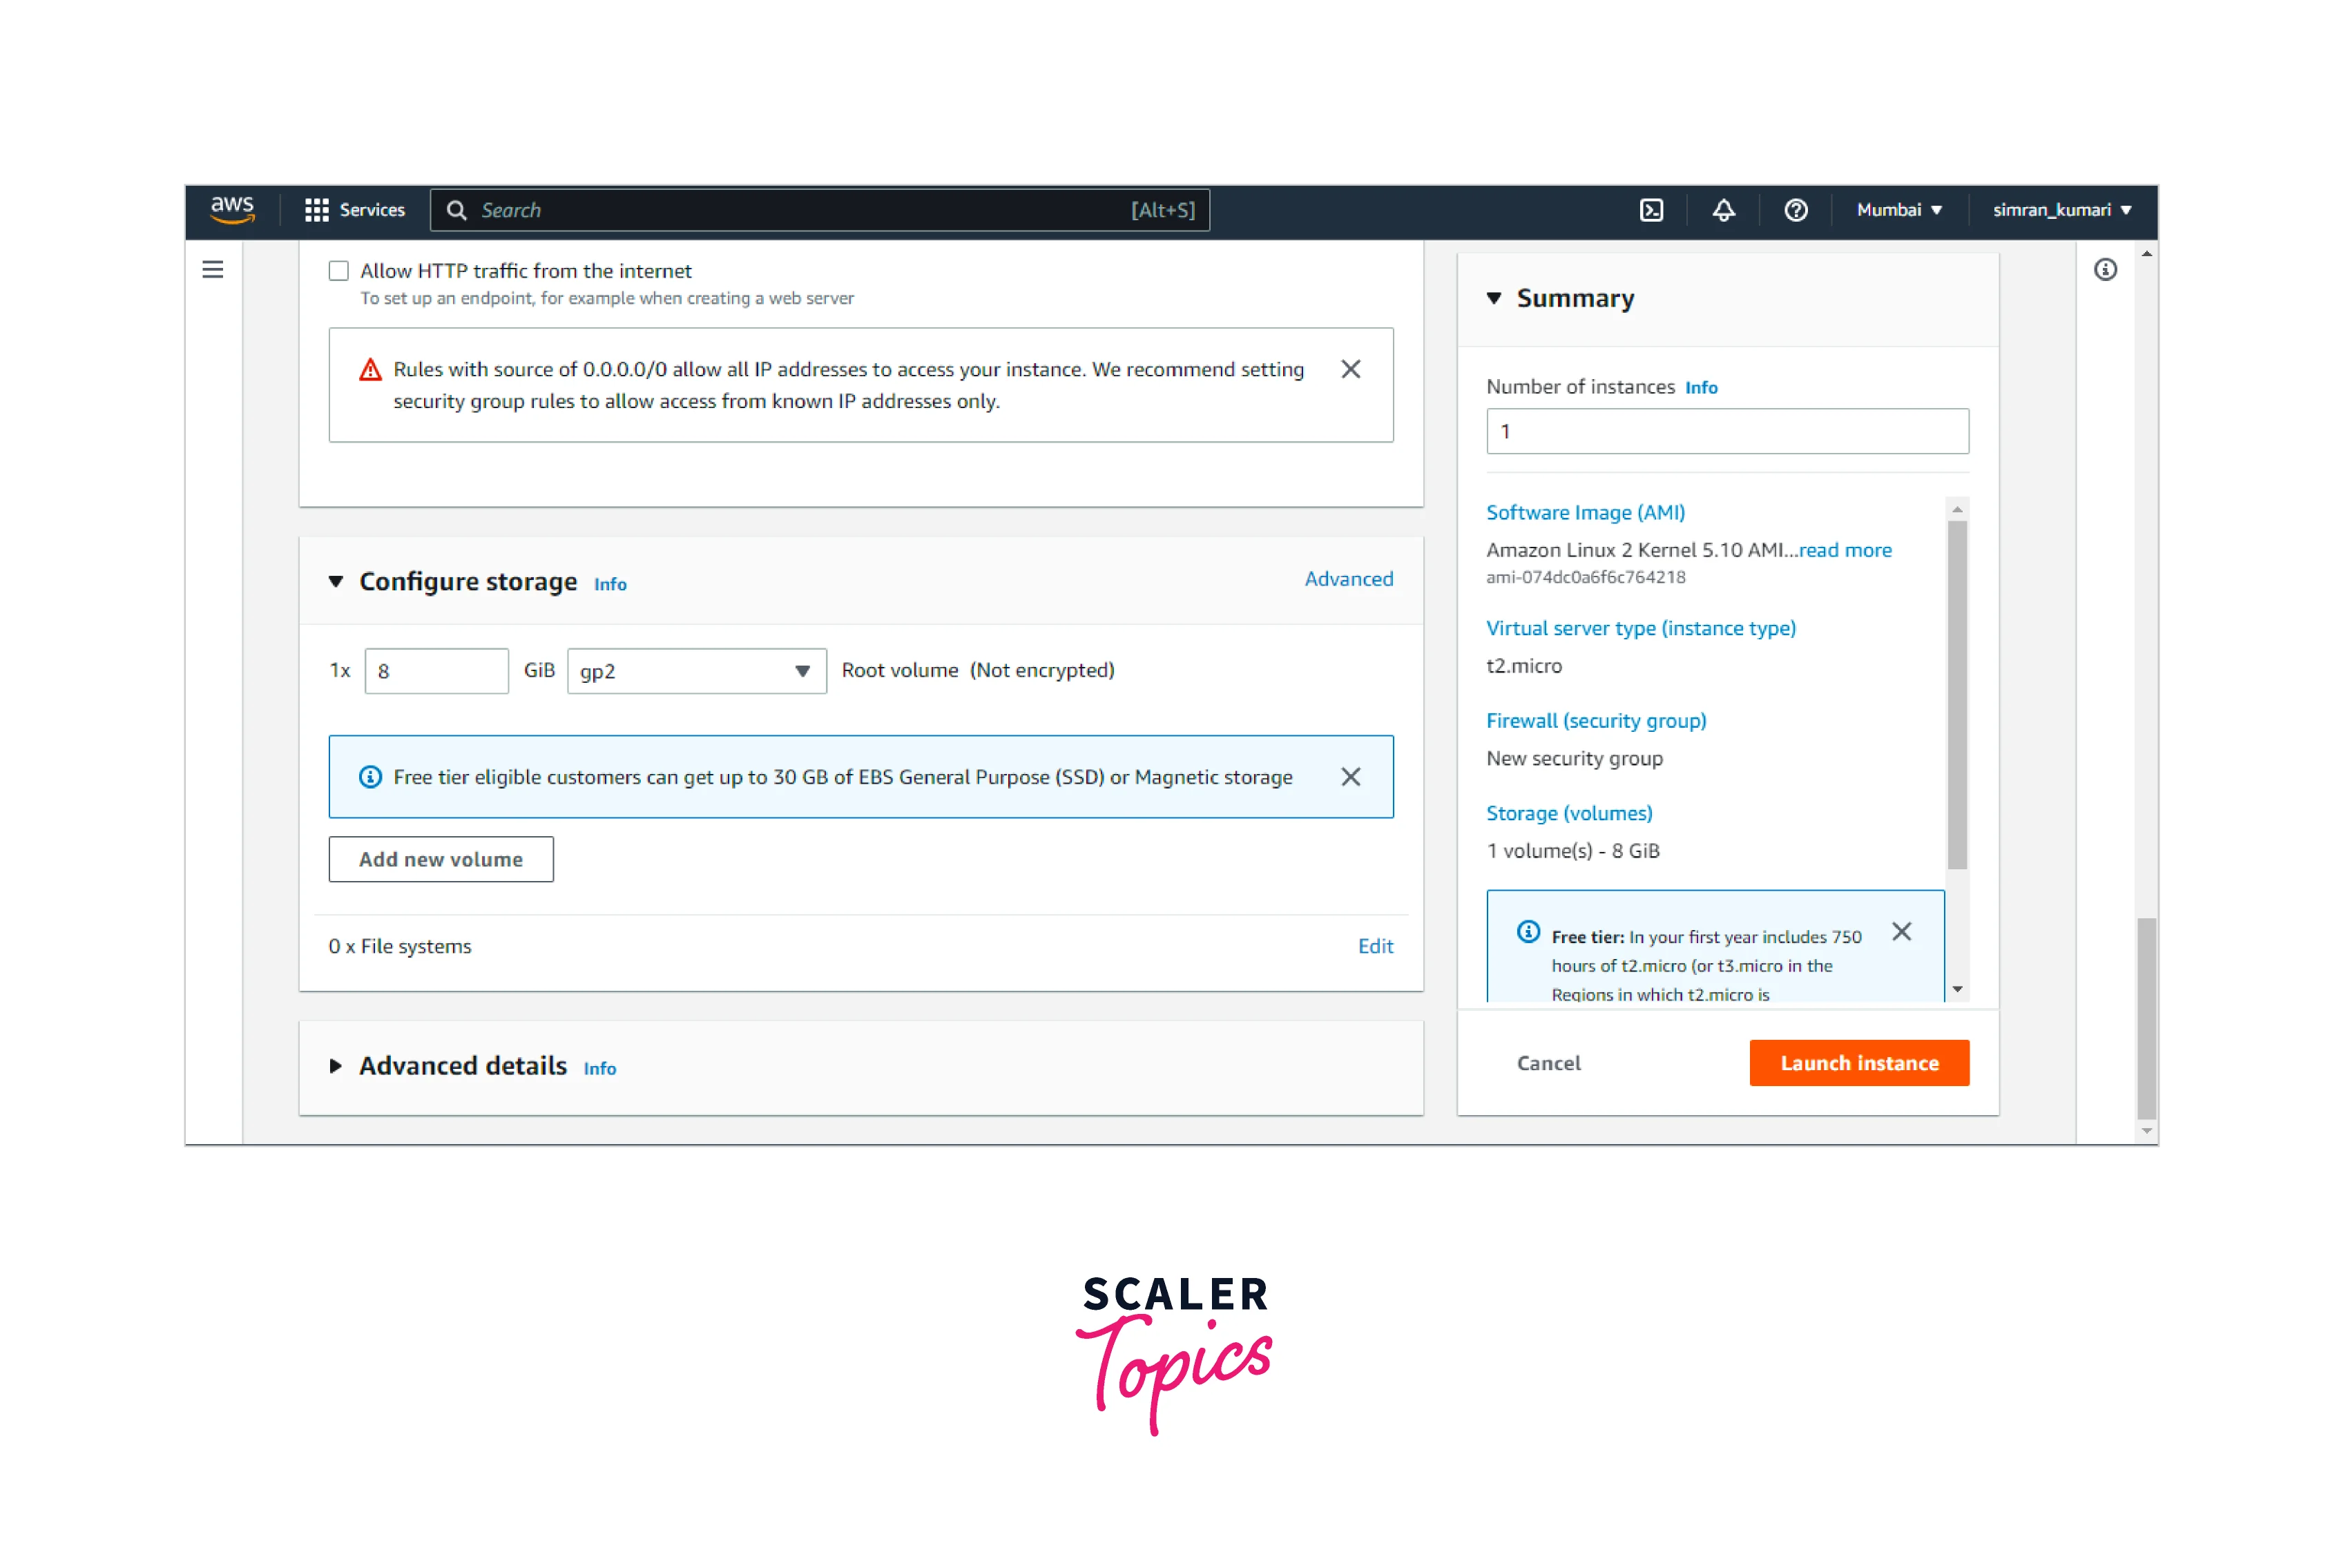
- The instance gets successfully created with the specified configurations.
Configure Network Access Using The Security Group
We need to ensure the SSH protocol traffic is specified in the security group, as EC2 Instance Connect works on the SSH protocol.
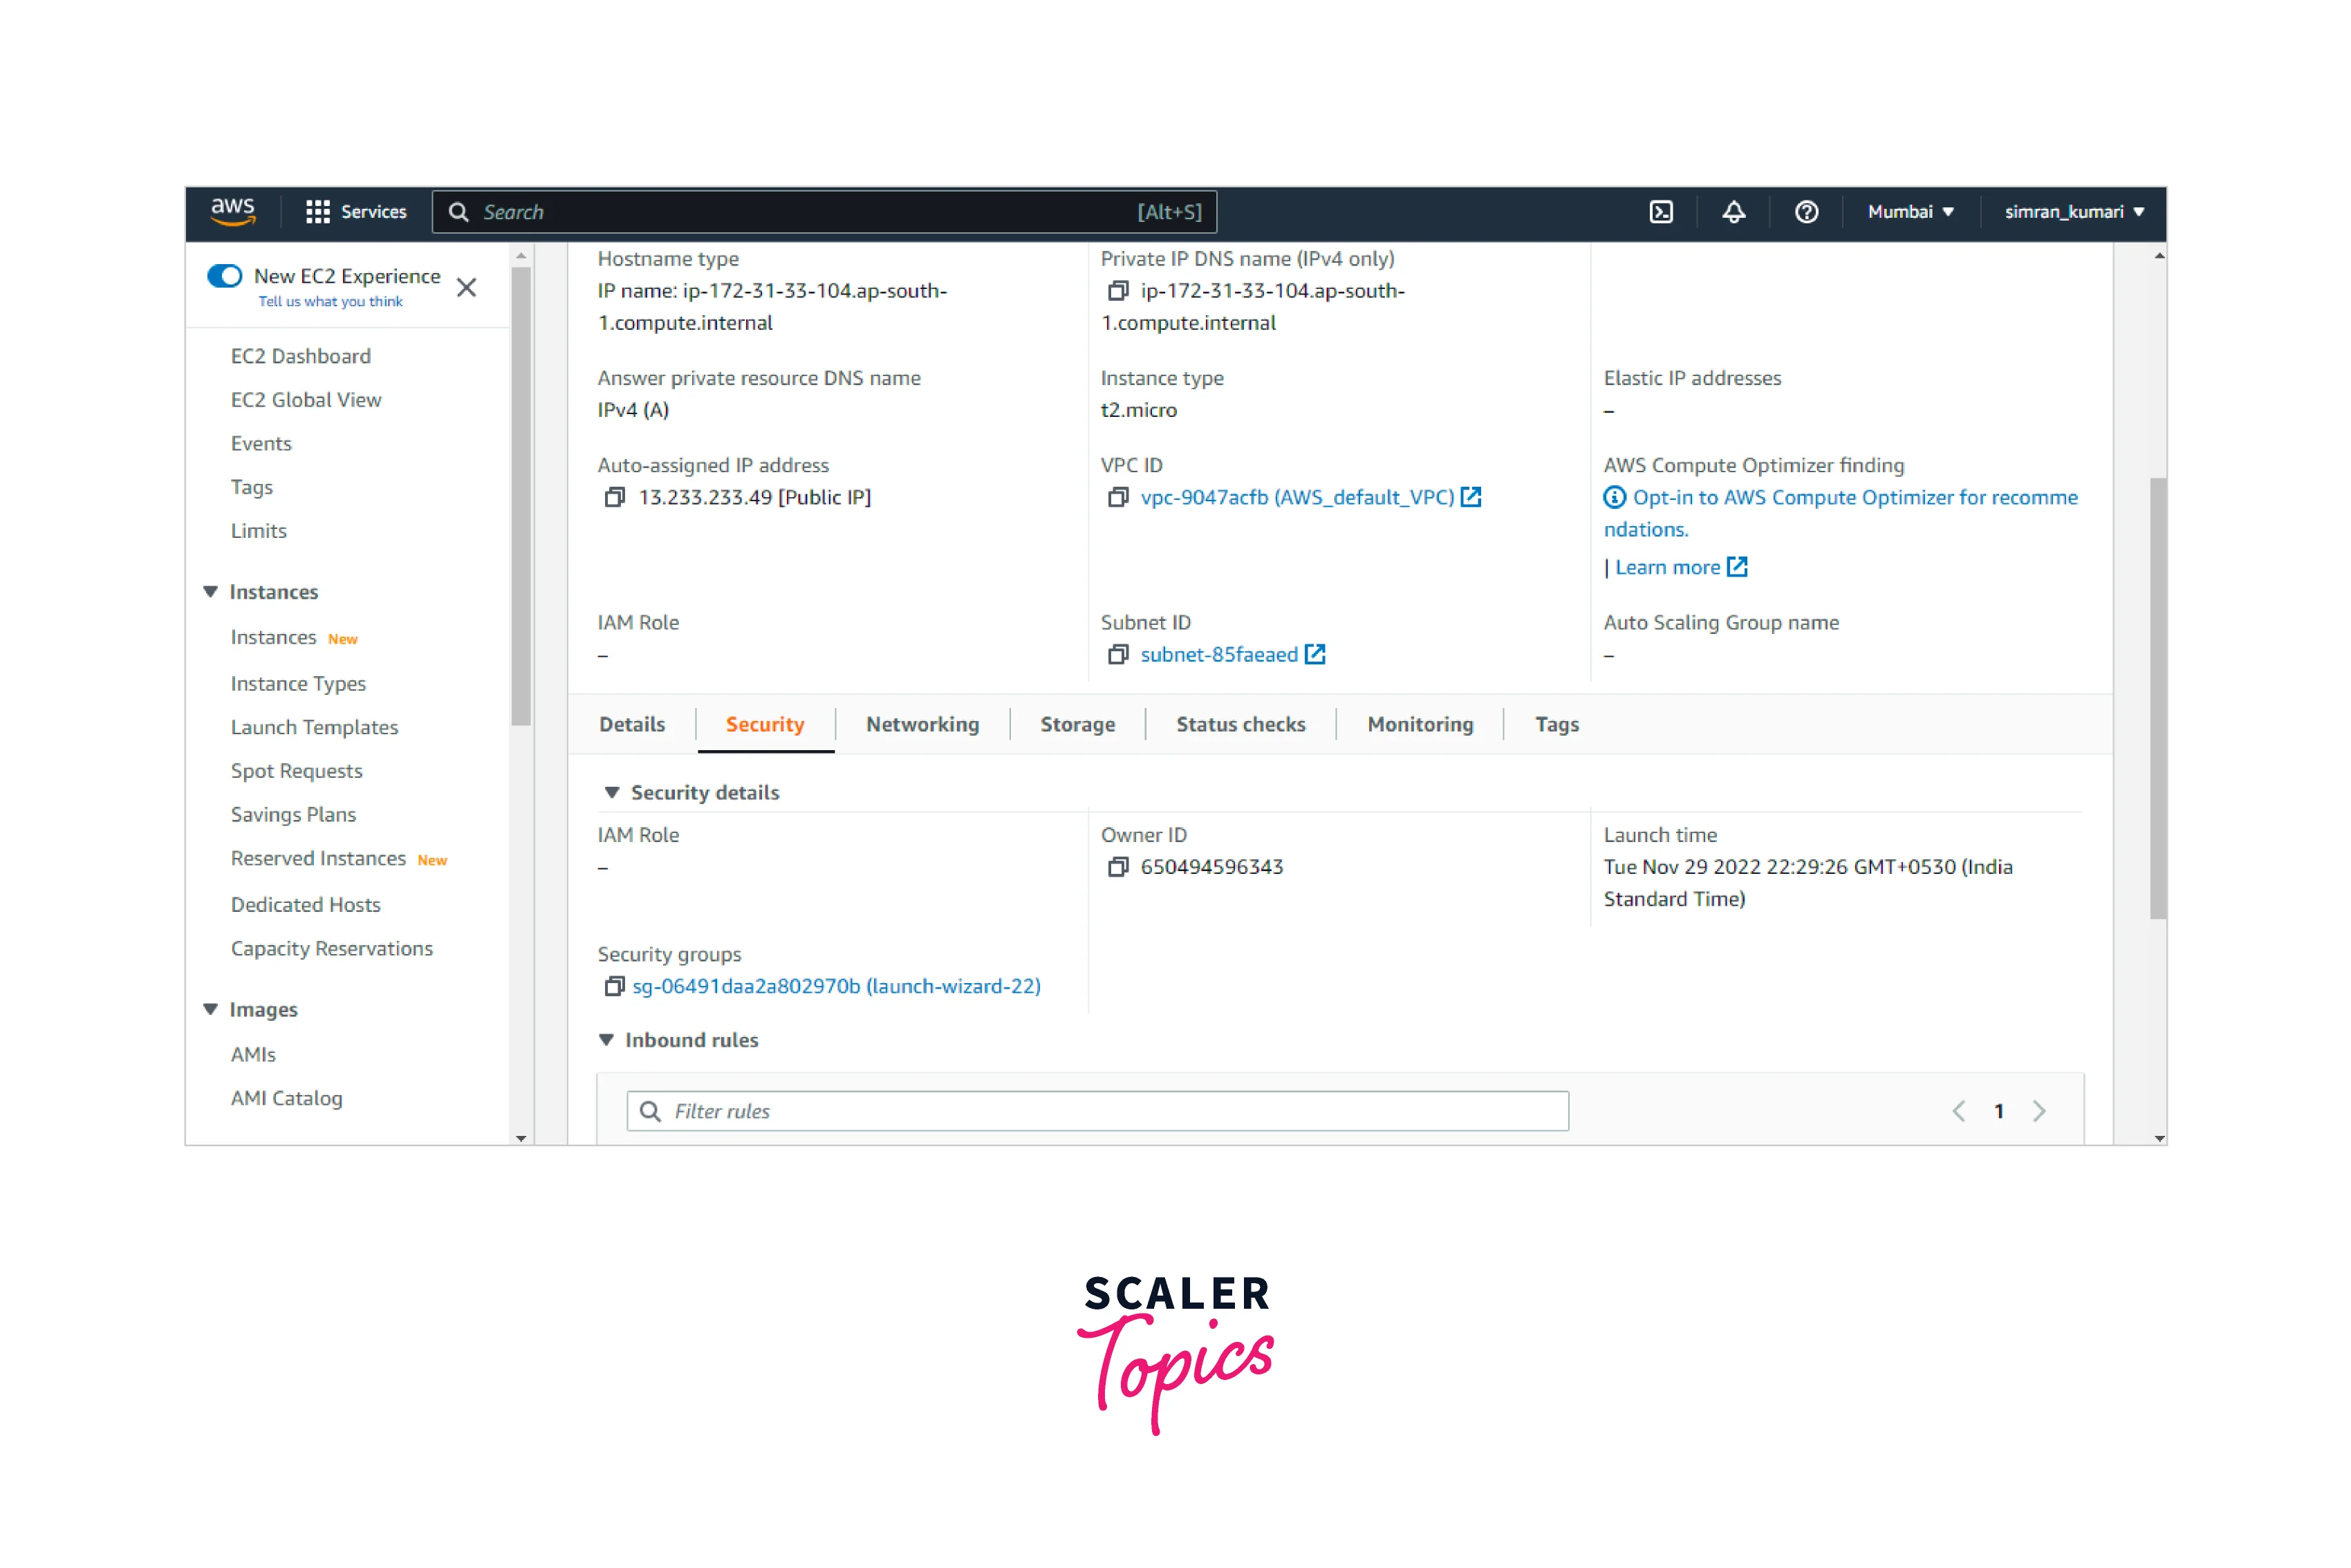
- Login to the AWS Management Console and navigate the Instances option under the EC2 page. Click on the instance ID of the EC2 instance for which you want to check the inbound rules for traffic.
- You are taken to another page. Here move to the Security tab. Click on the security group ID.
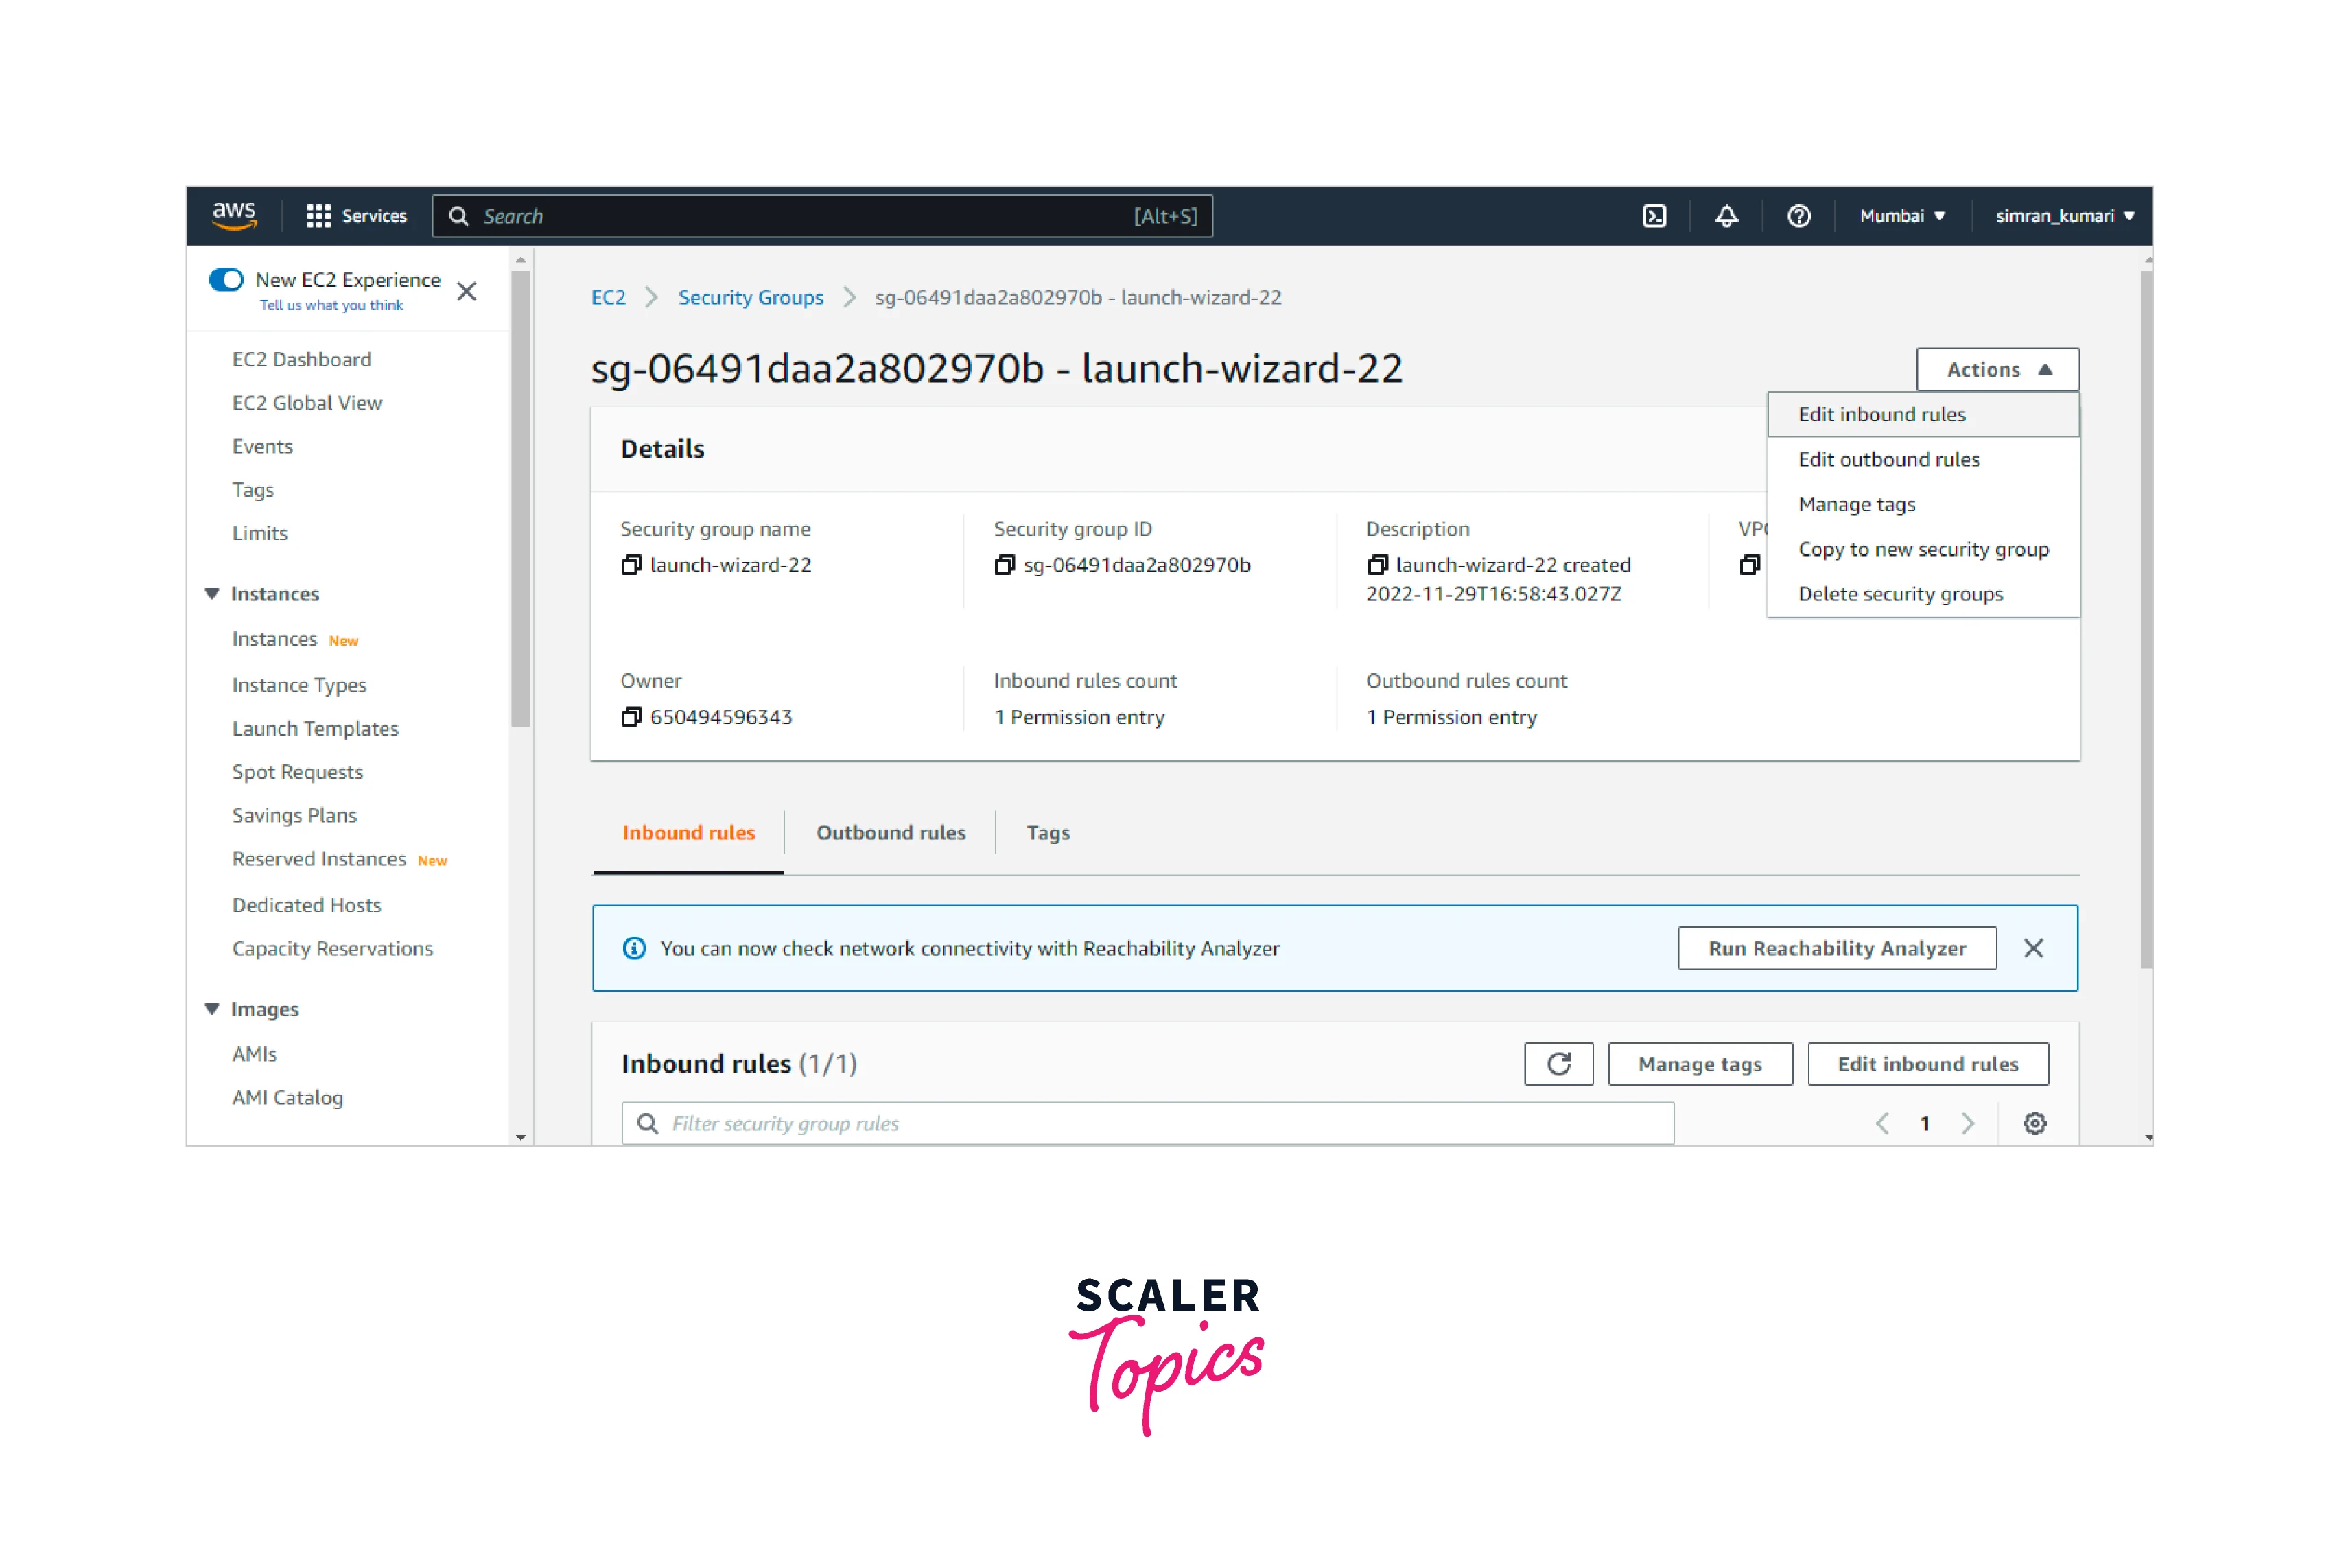
- We are again redirected to another page containing an overview of the security group.

- To make changes to the inbound rules, select the Edit inbound rules option from the Actions dropdown.
- Check if we have an inbound rule for SSH allowing traffic from all sources. Add a rule for this if we do not have any, and then click on Save rules.
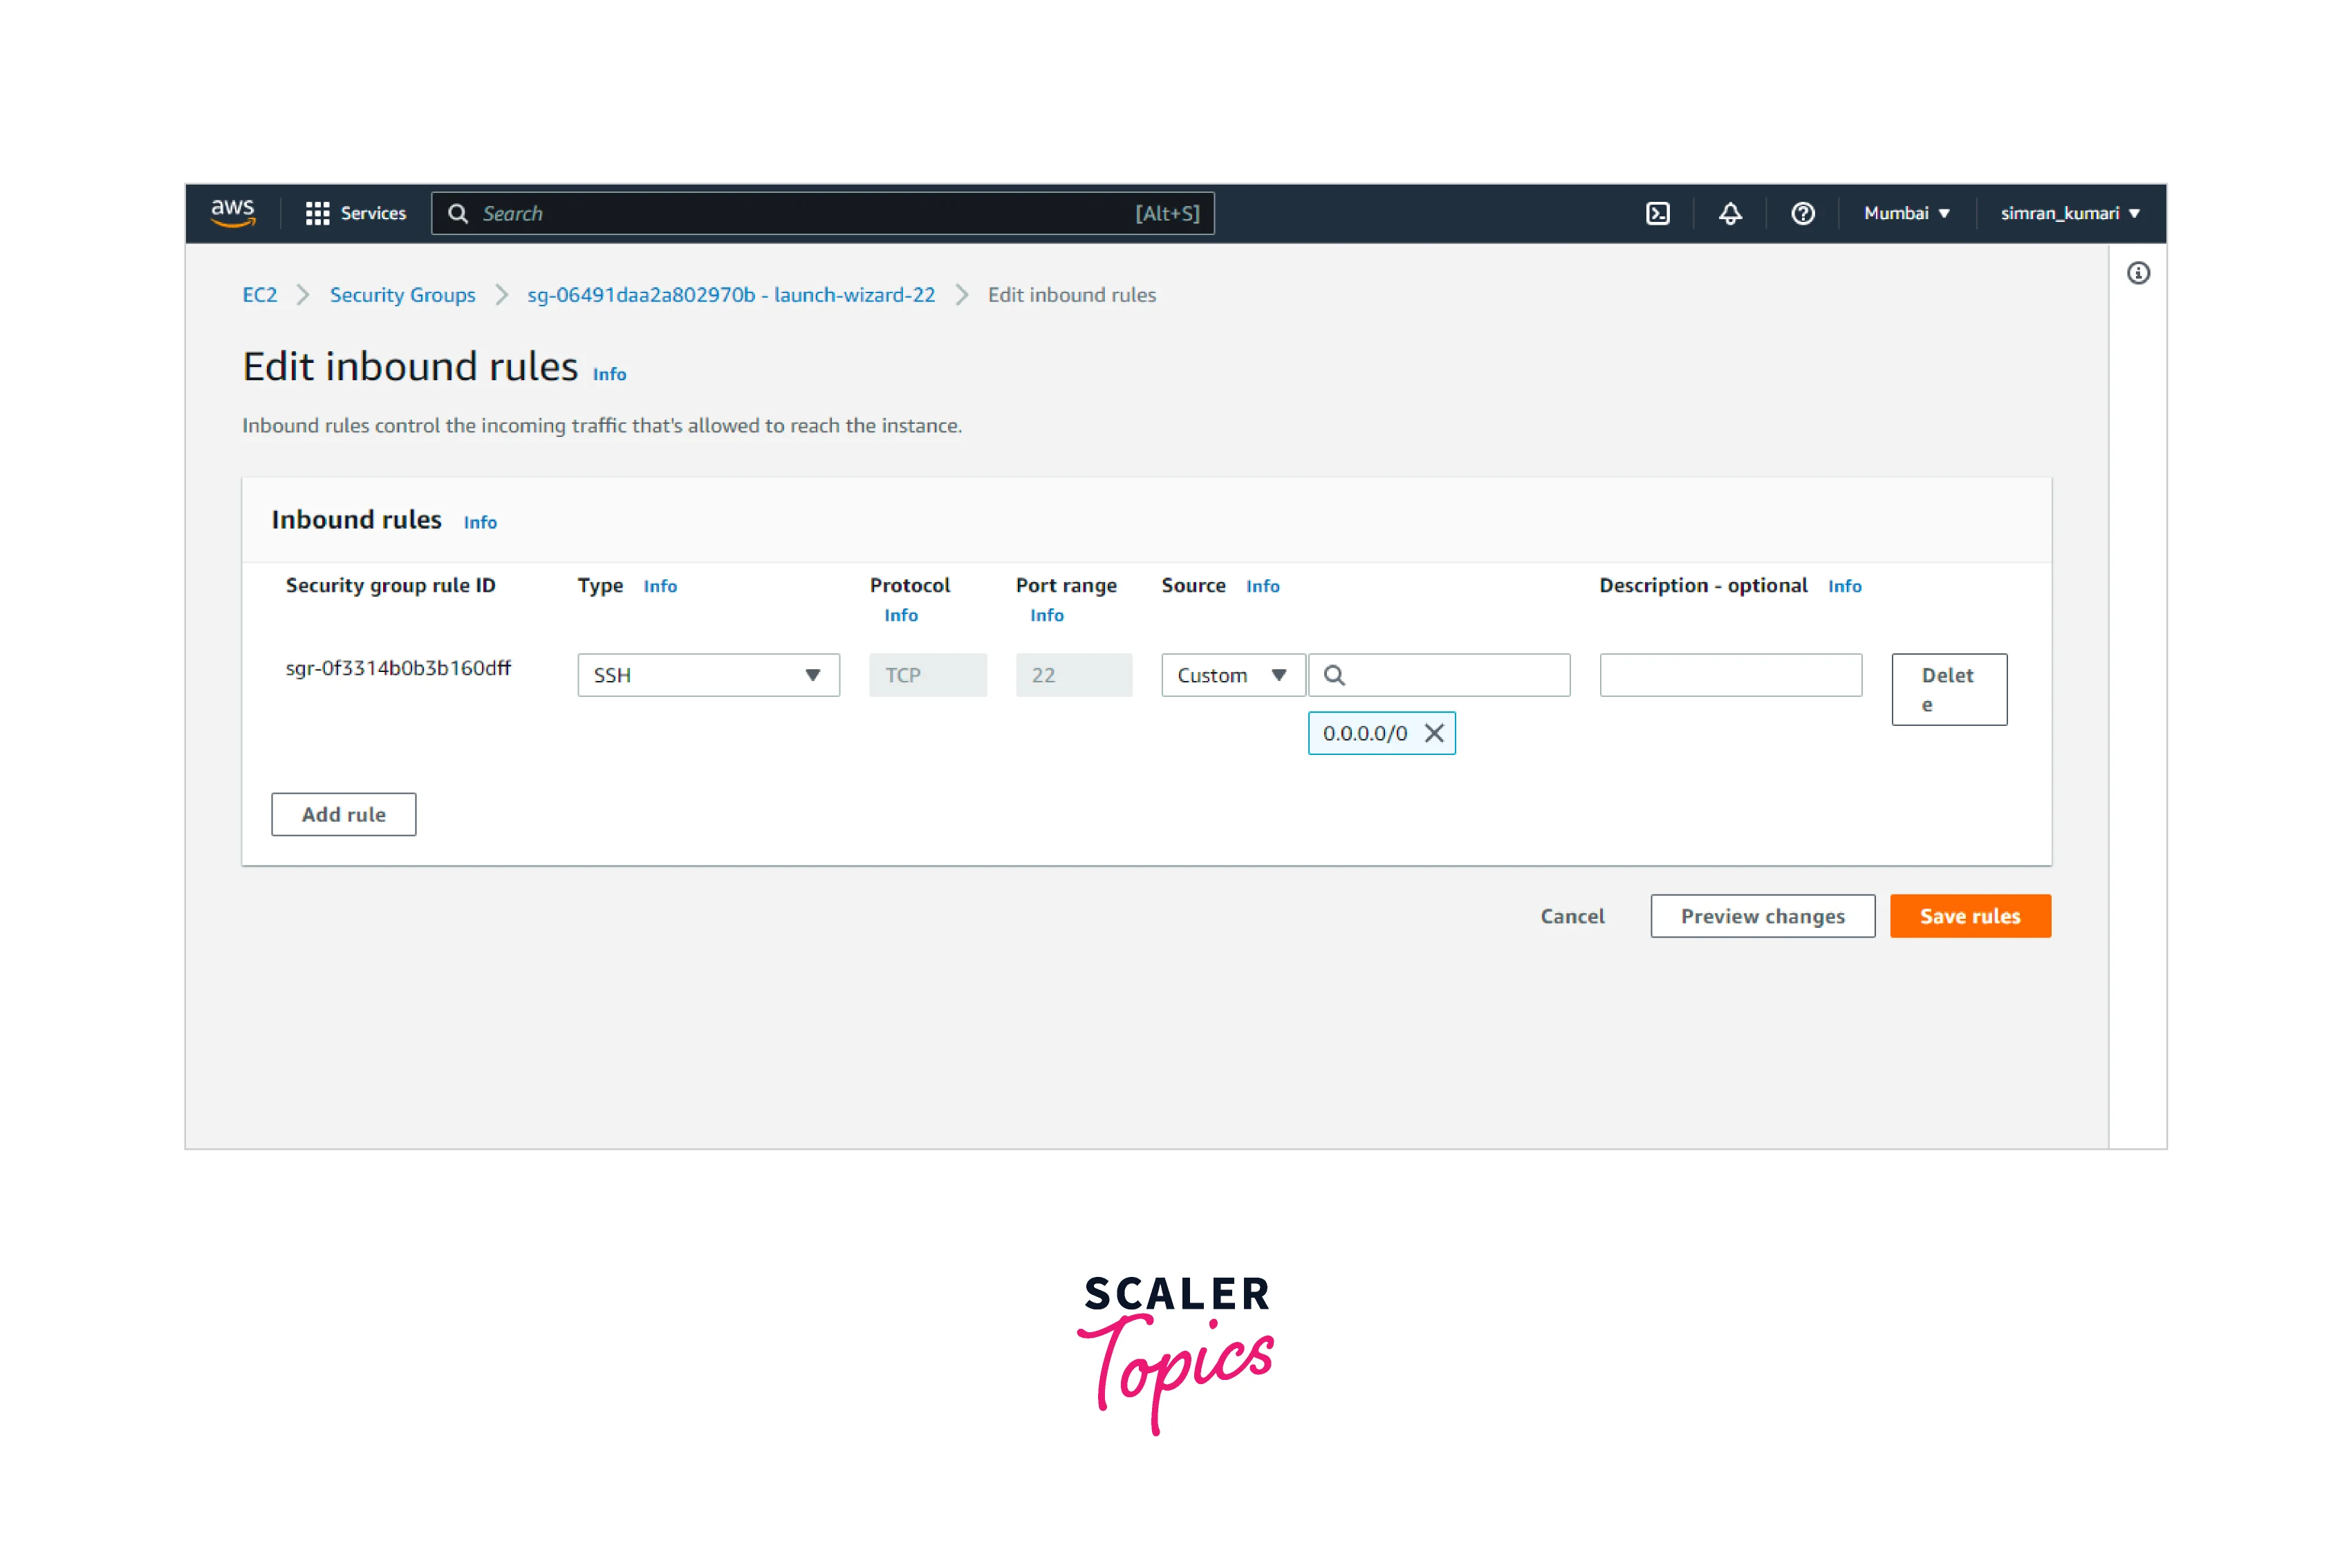 Your security group is updated as per the need of EC2 Instance Connect.
Install EC2 Instance Connect
If you are using Amazon Linux 2 2.0.20190618 or later and Ubuntu 20.04 or later as AMIs for your instance, you can skip this step because they come preinstalled with EC2 Instance Connect.
We can run the following command to install it. sudo yum install ec2-instance-connect EC2 Instance Connect set up the SSH daemon on the instance.
Turn Learning into Career Growth
Install EC2 Instance Connect CLI
We can install the EC2 Instance Connect CLI using a single command on your local machine. pip install ec2instanceconnectcli
It provides a simple way to connect to the instance using the command mssh instance_id.
This is an optional step, and we don't need to execute this step if we use EC2 Instance Connect through Amazon EC2 console or SSH Client. You can visit this GitHub link to get more information on the Instance to connect CLI.
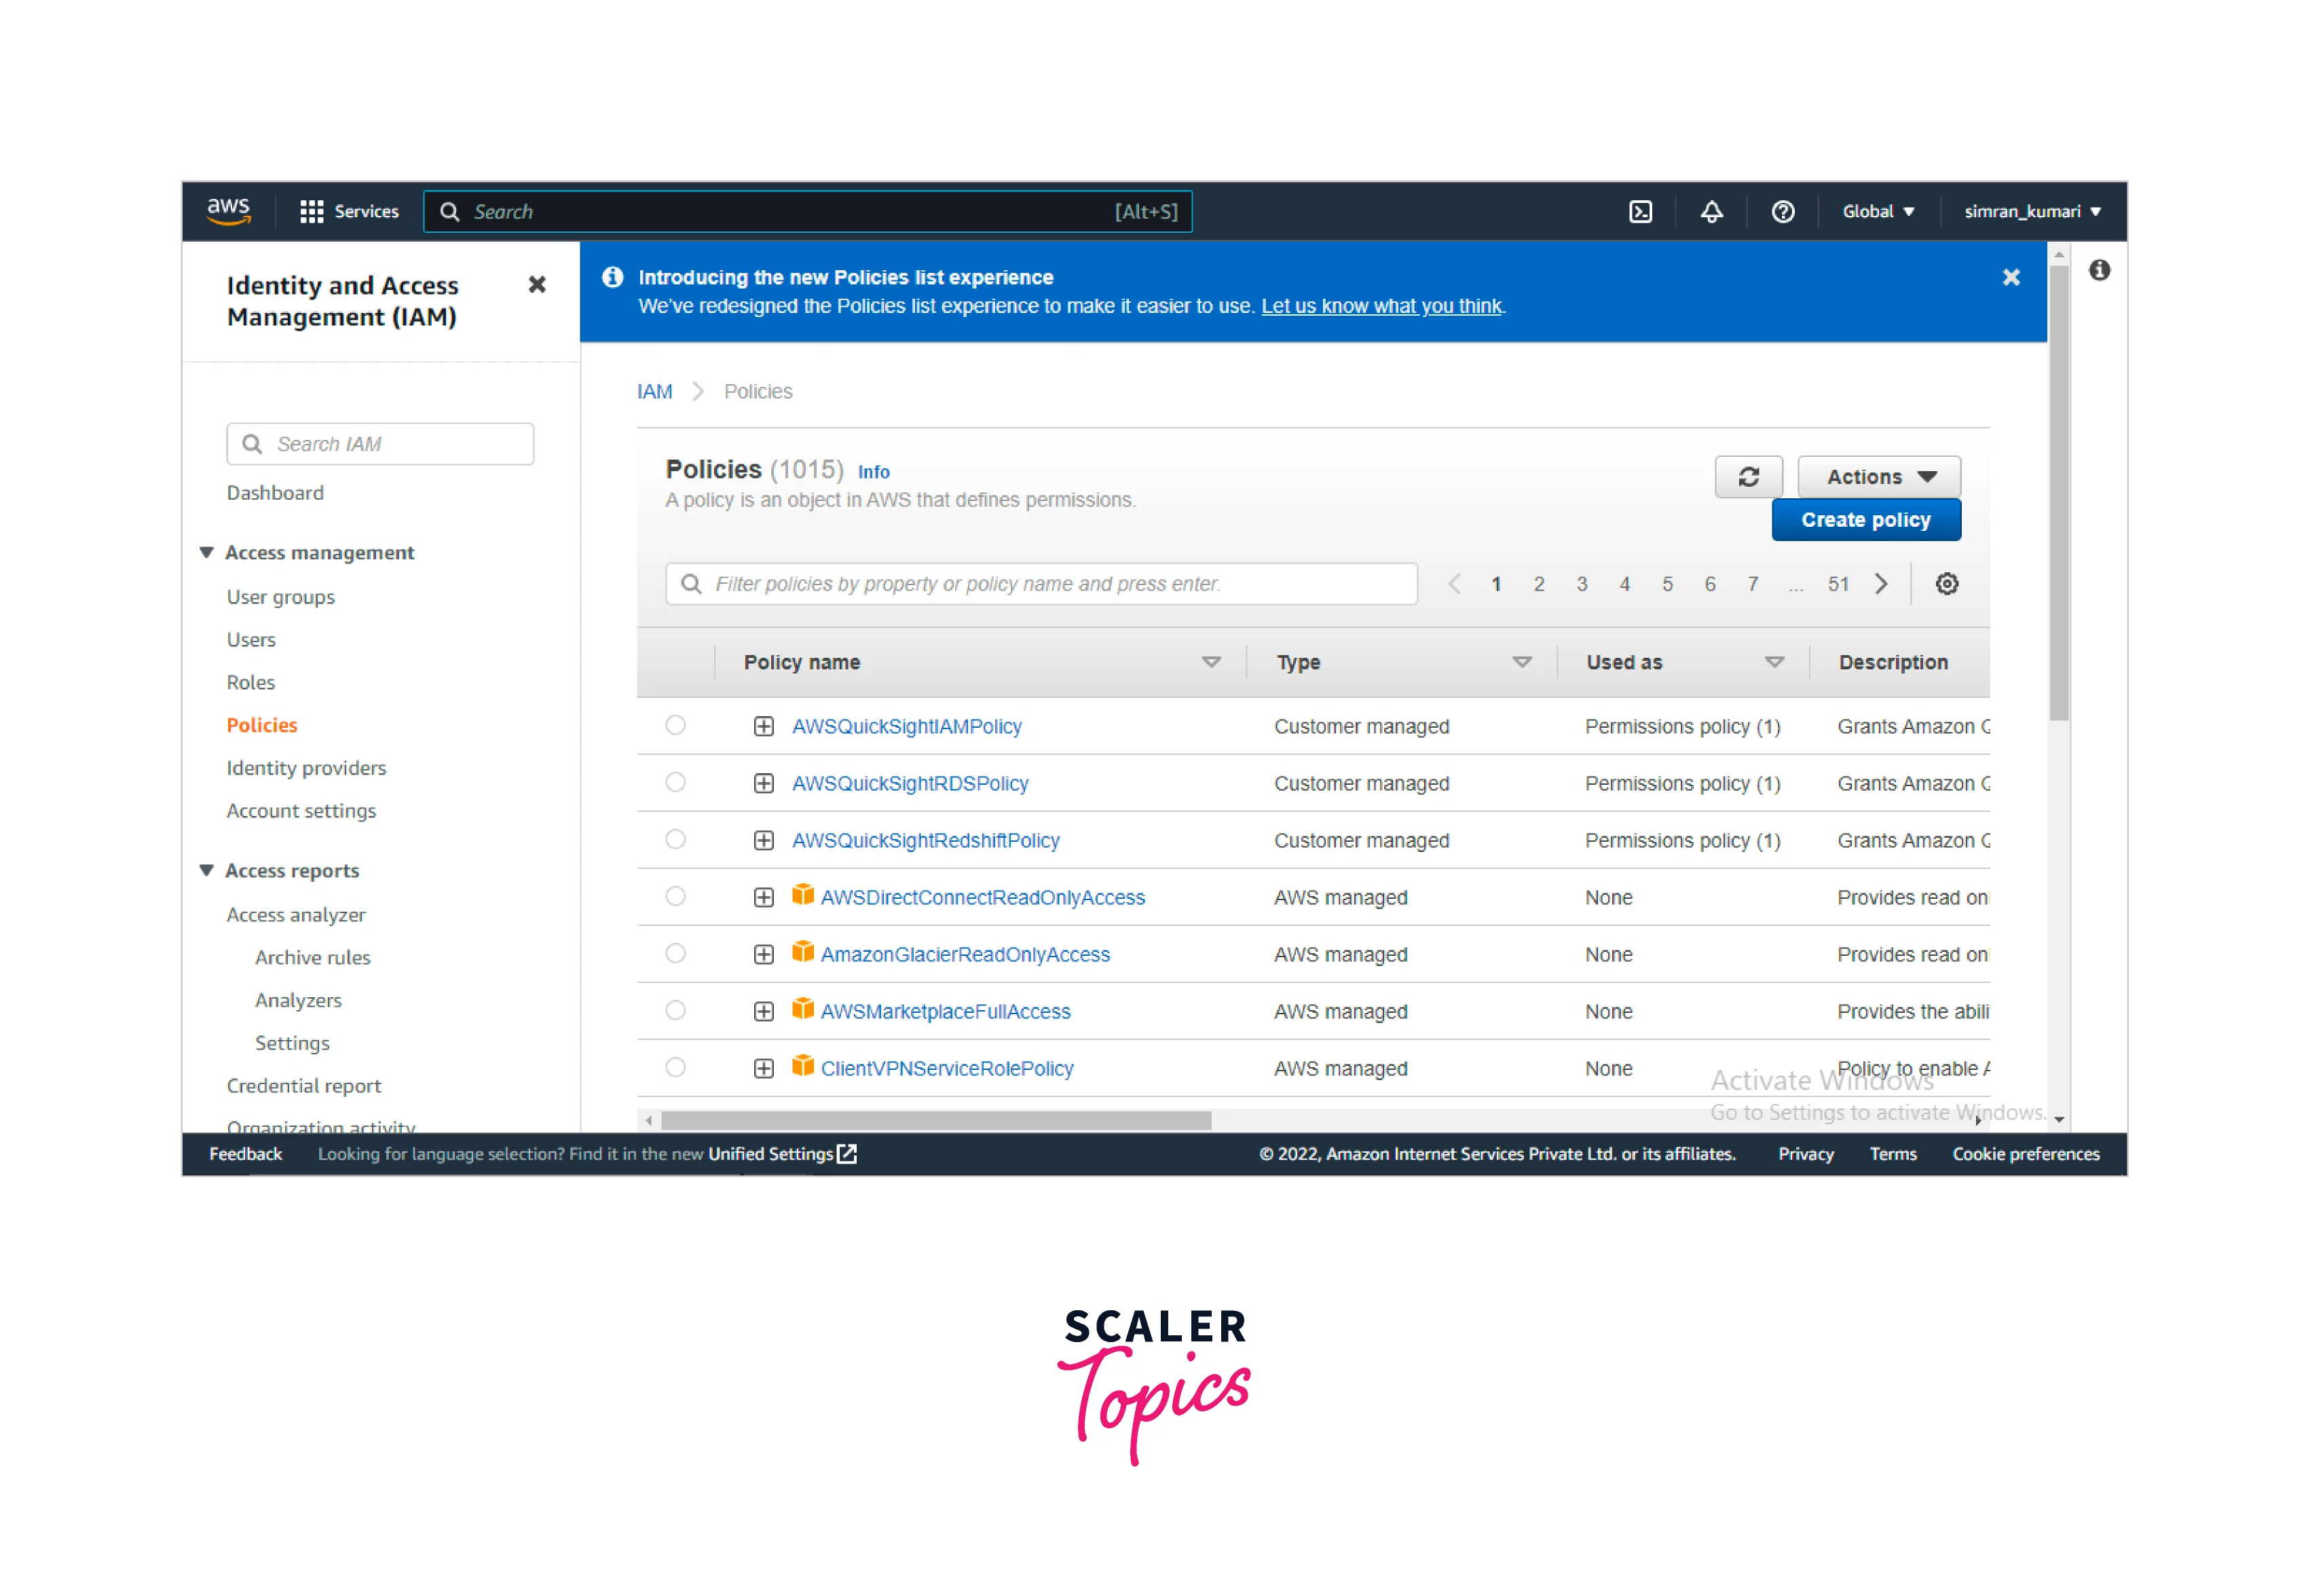
Configure IAM Permissions
Following are the steps for configuring IAM permissions for EC2 Instance Connect:
- In the AWS Management Console, search for IAM and click on the IAM option, which pops up.

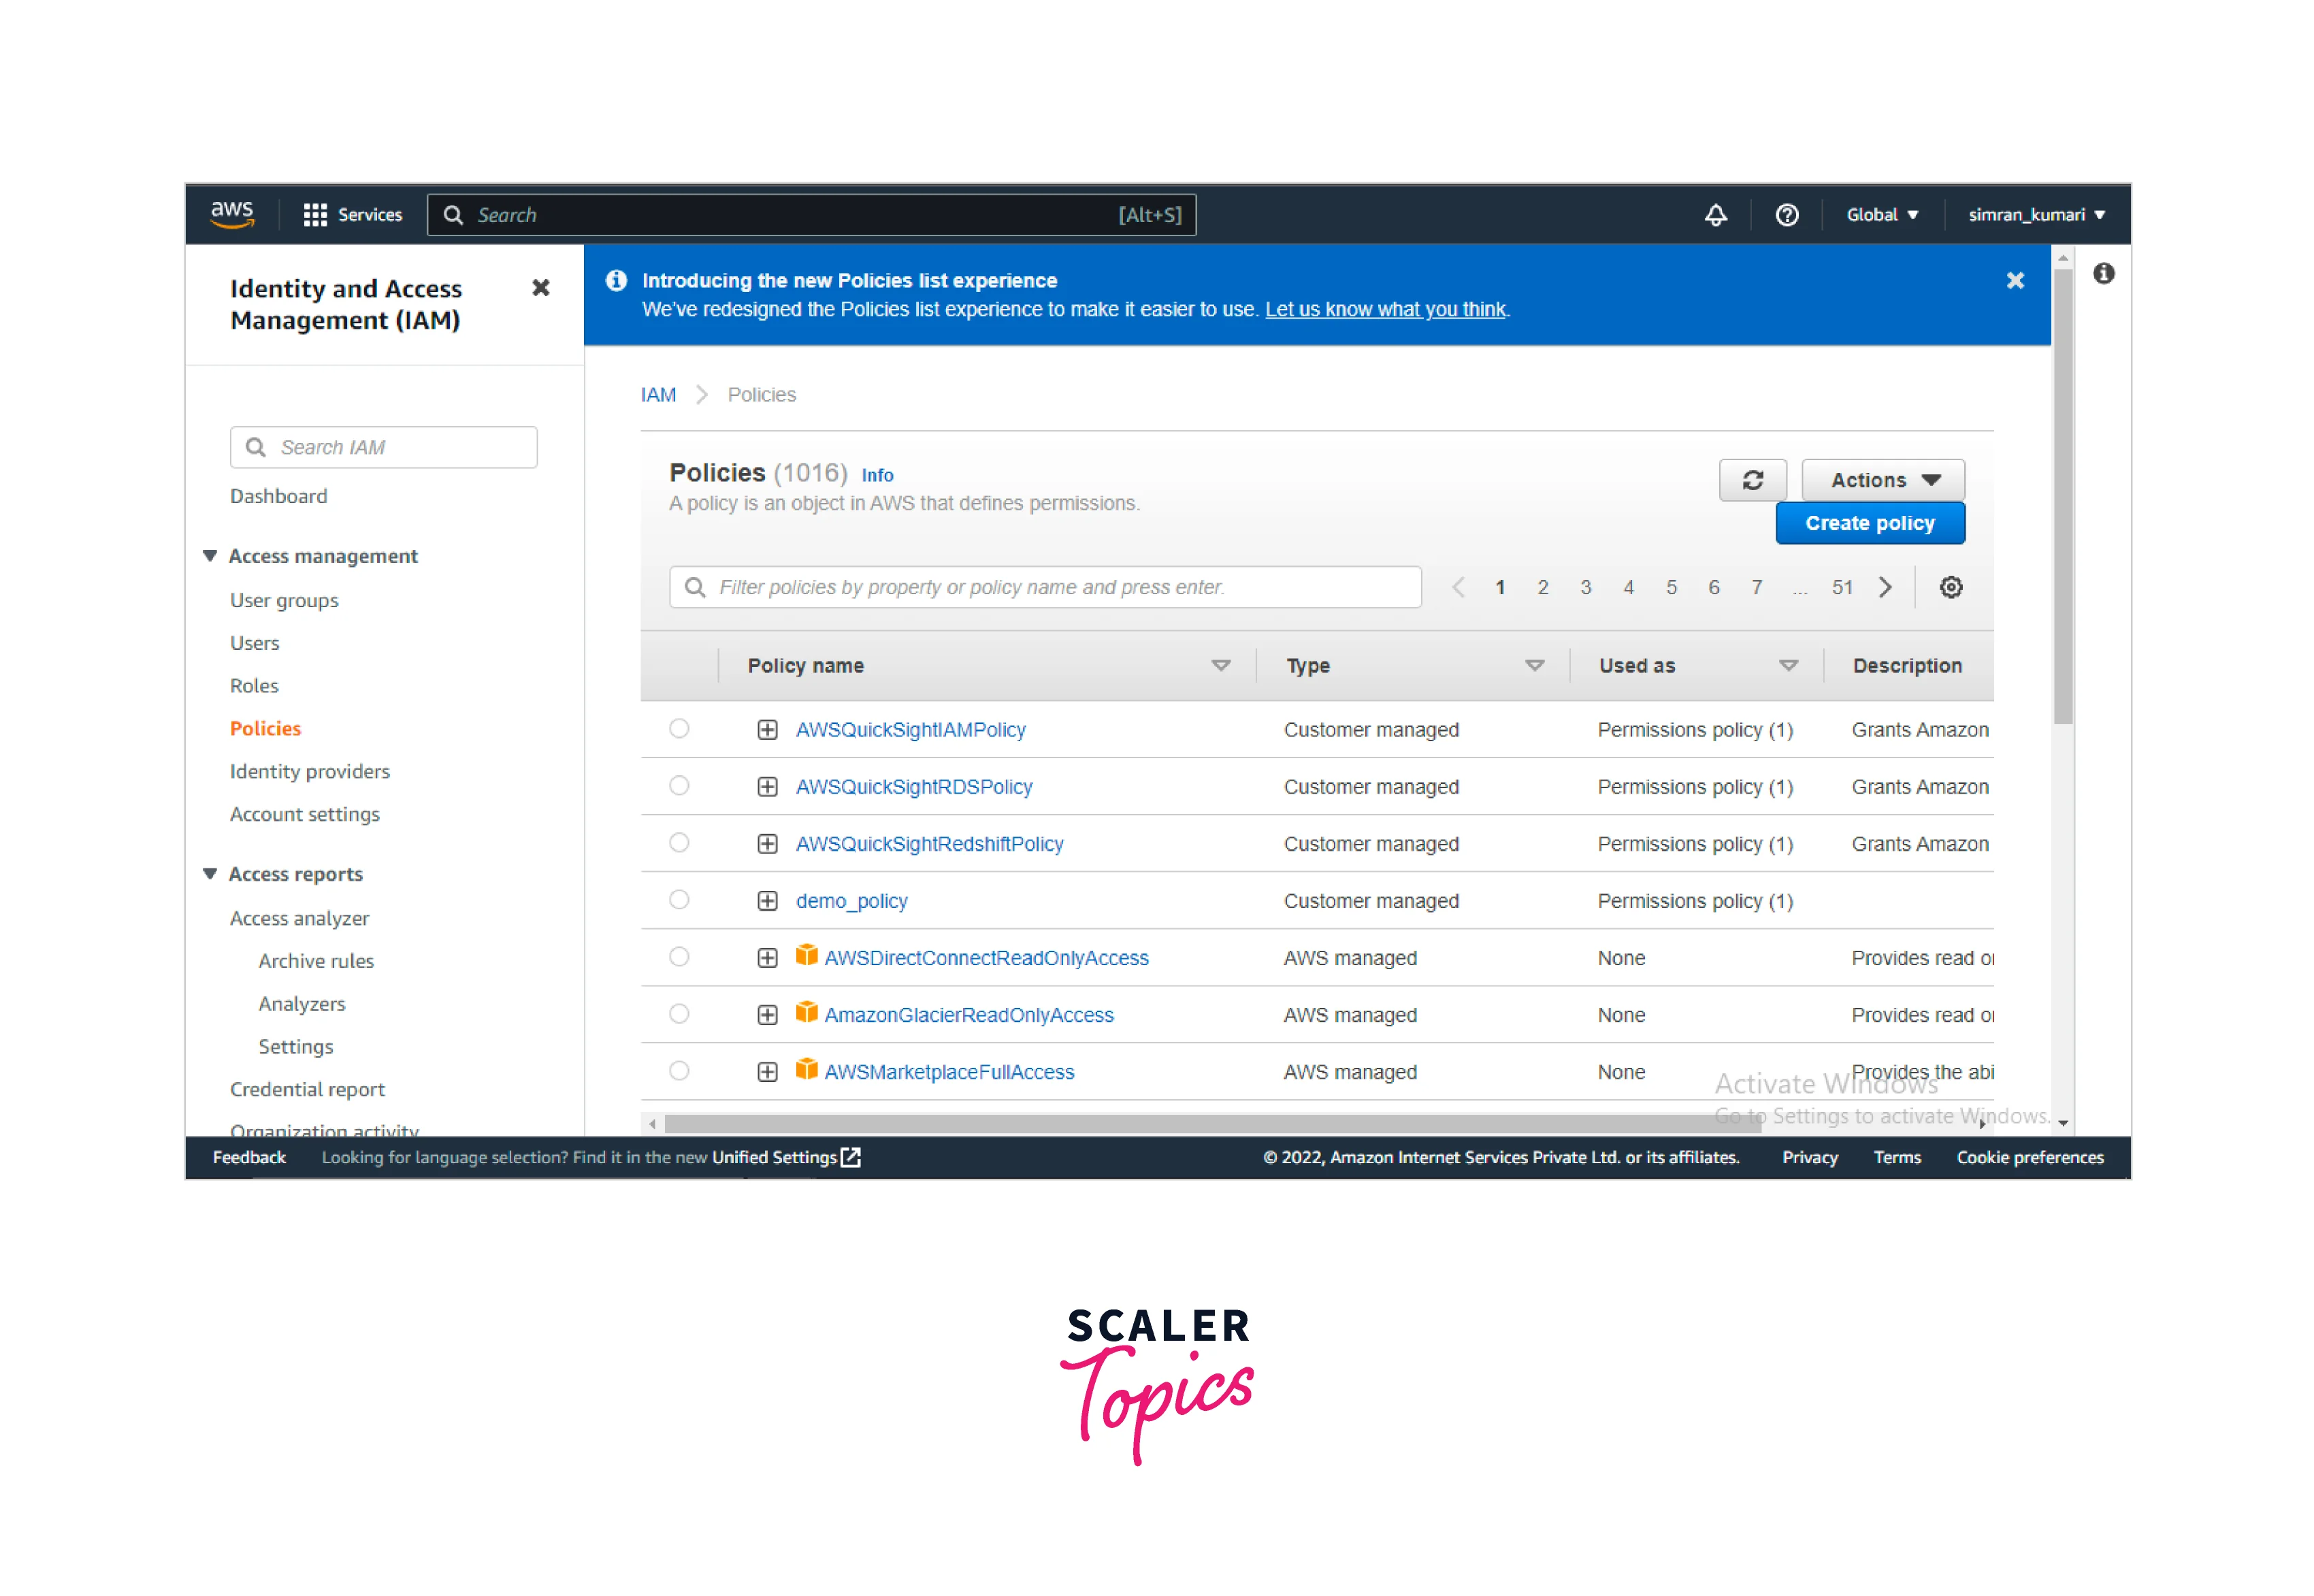
- You are redirected to a new page. Click on Create Policy to create a new IAM policy.
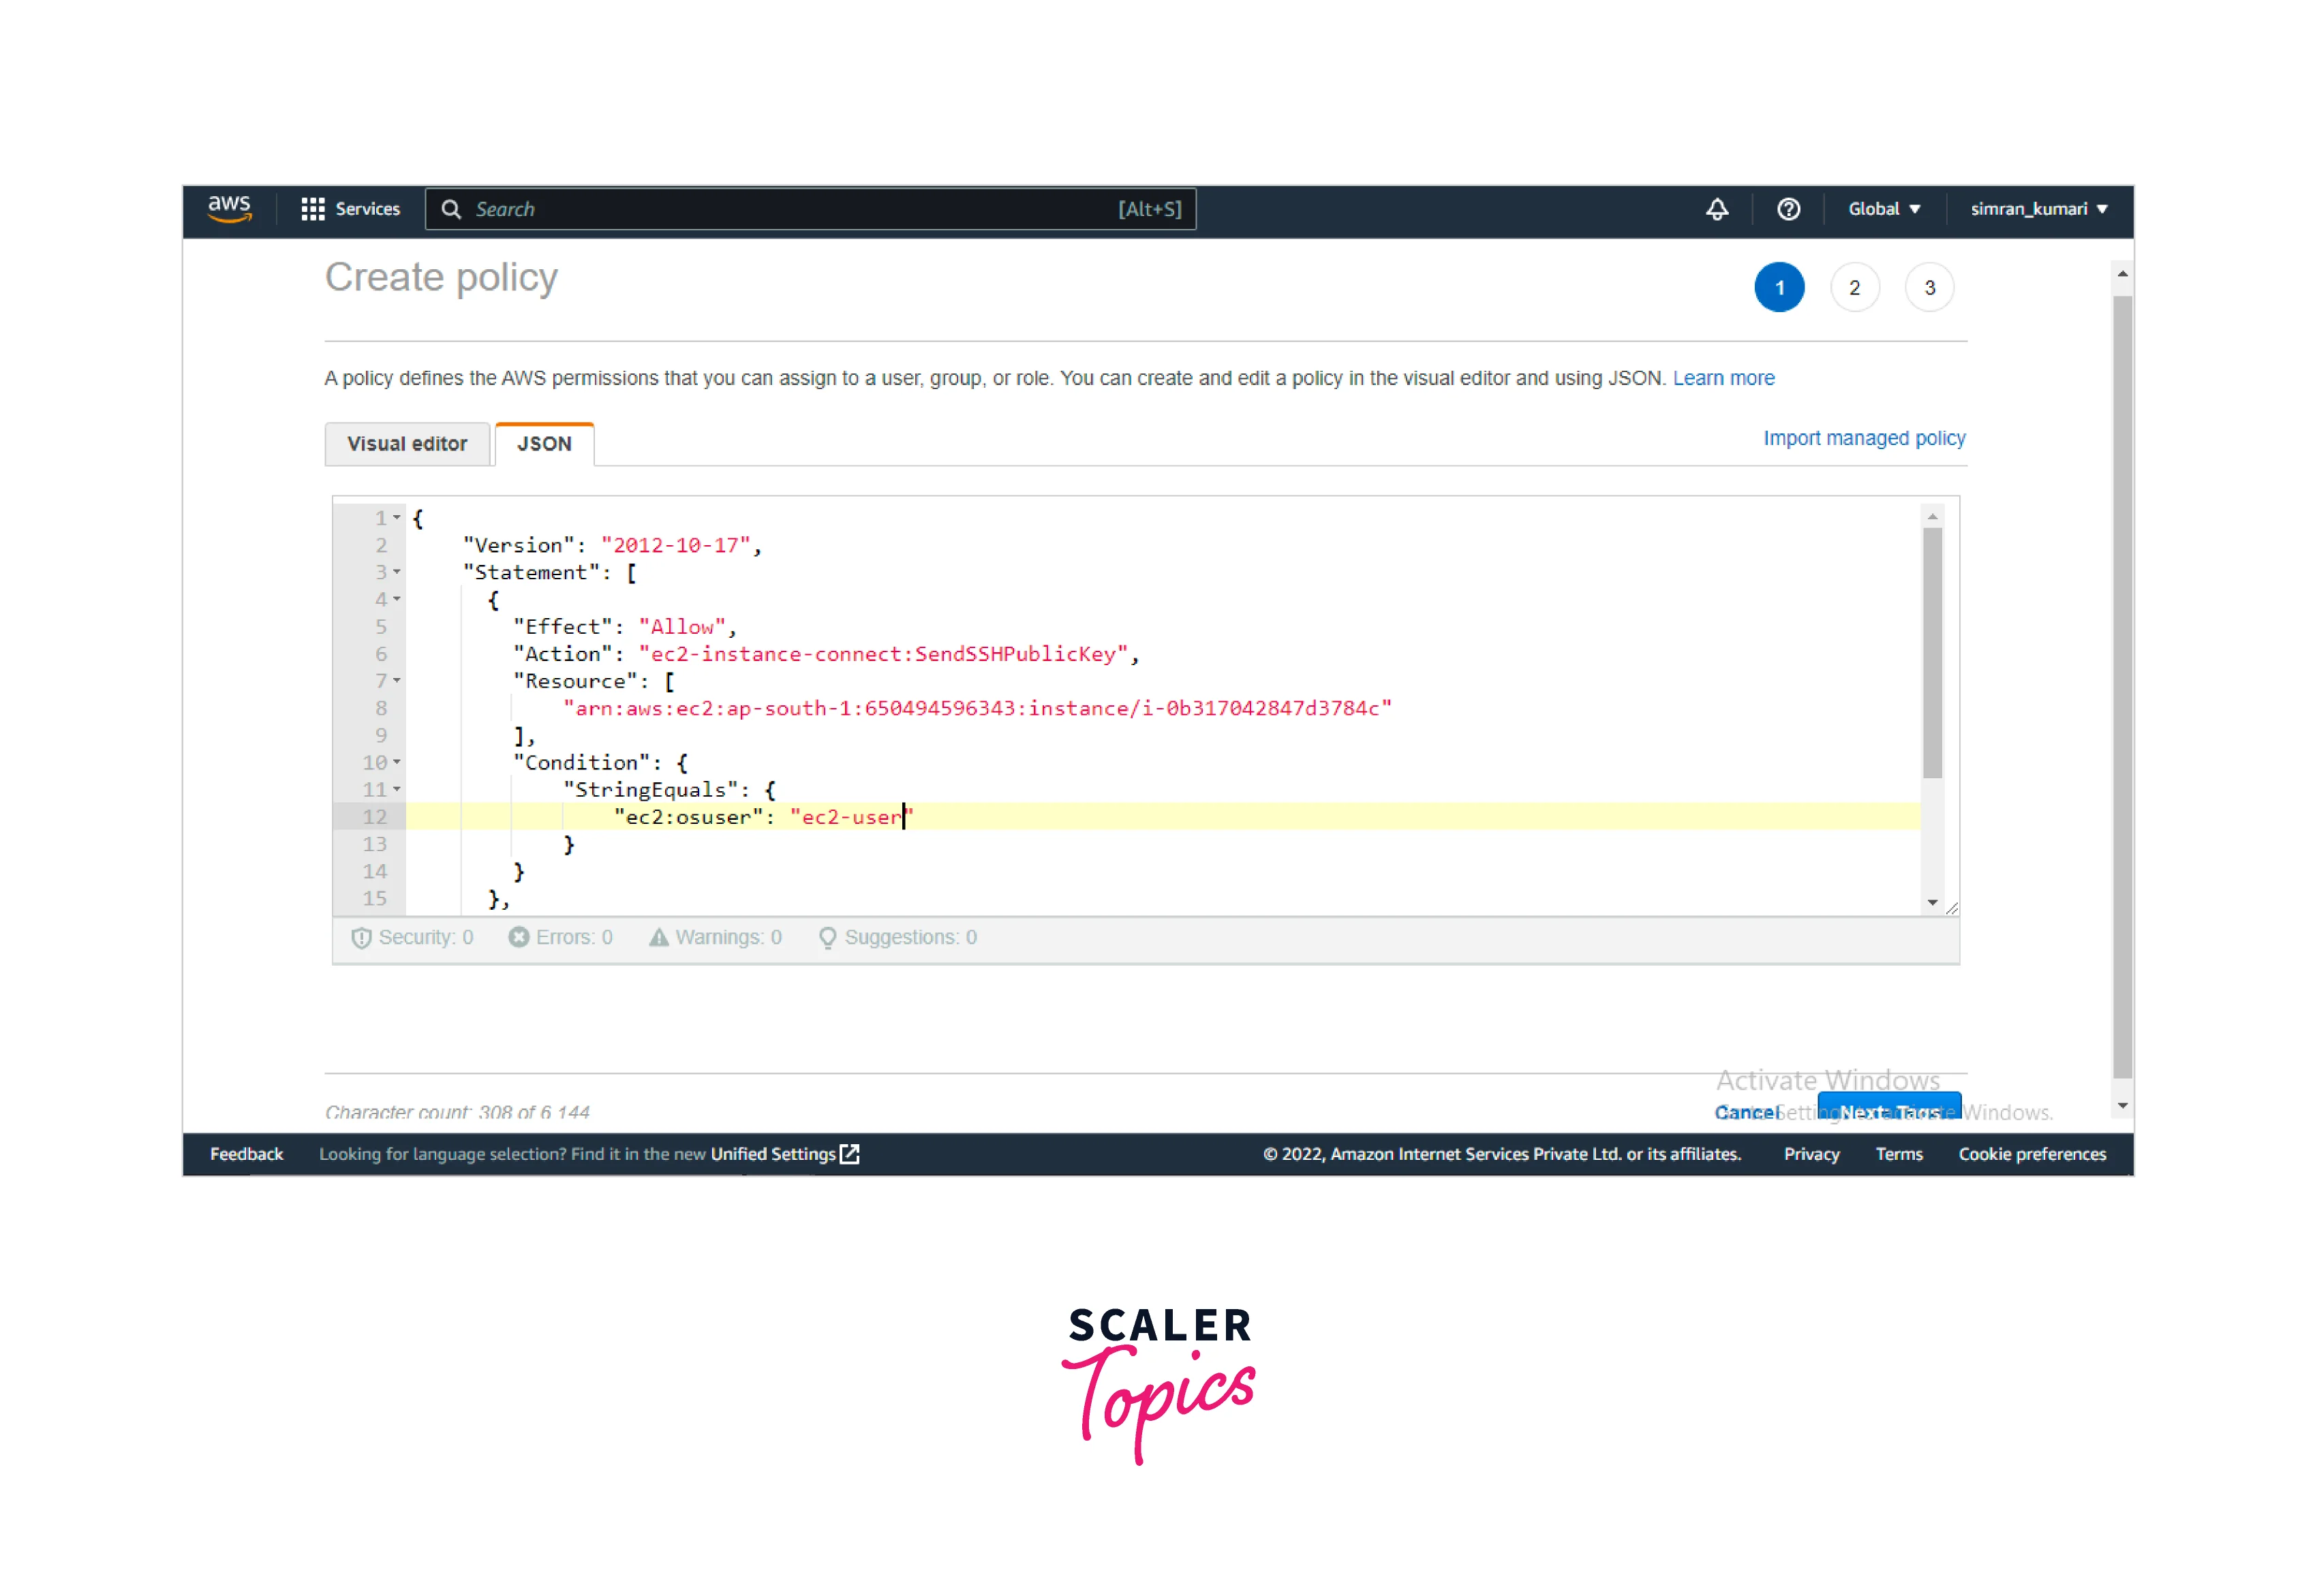
- Click on the JSON tab and write a JSON policy document.
Edit the region name, aws account-id, instance-id, and ami-username in the JSON file. Click on Next: Tags.
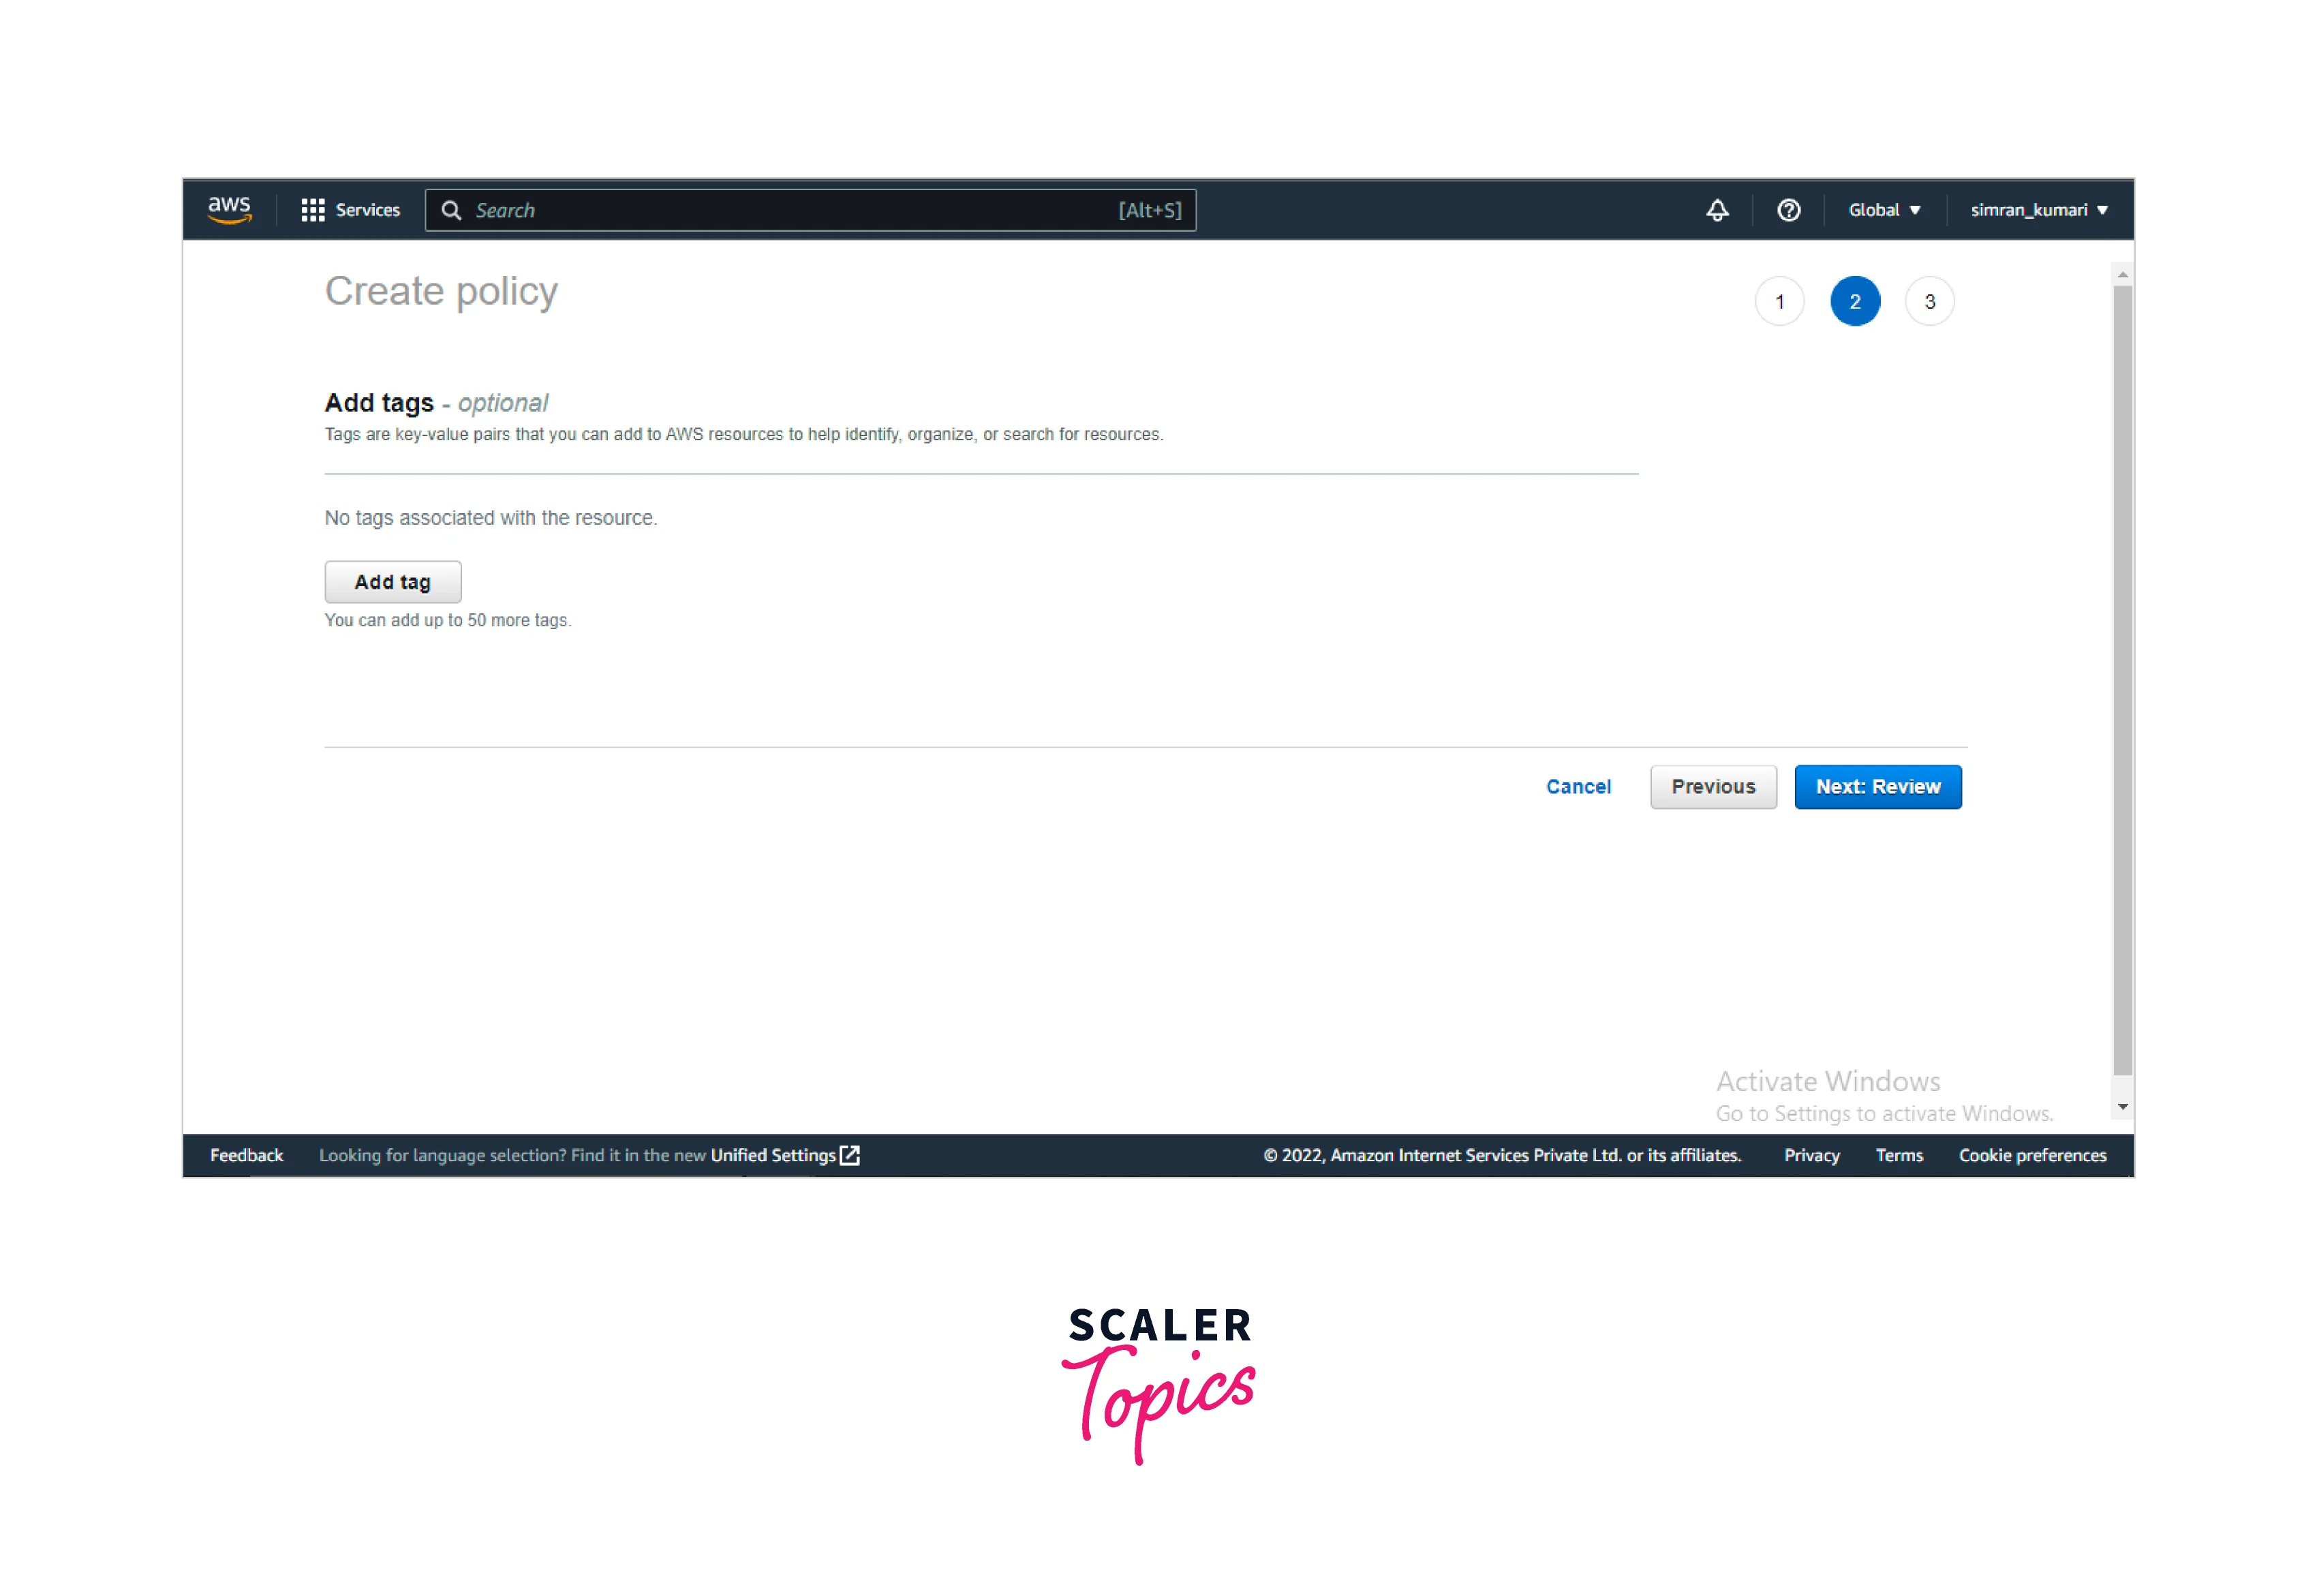
 4. Leave this page as default and click on Next: Review.
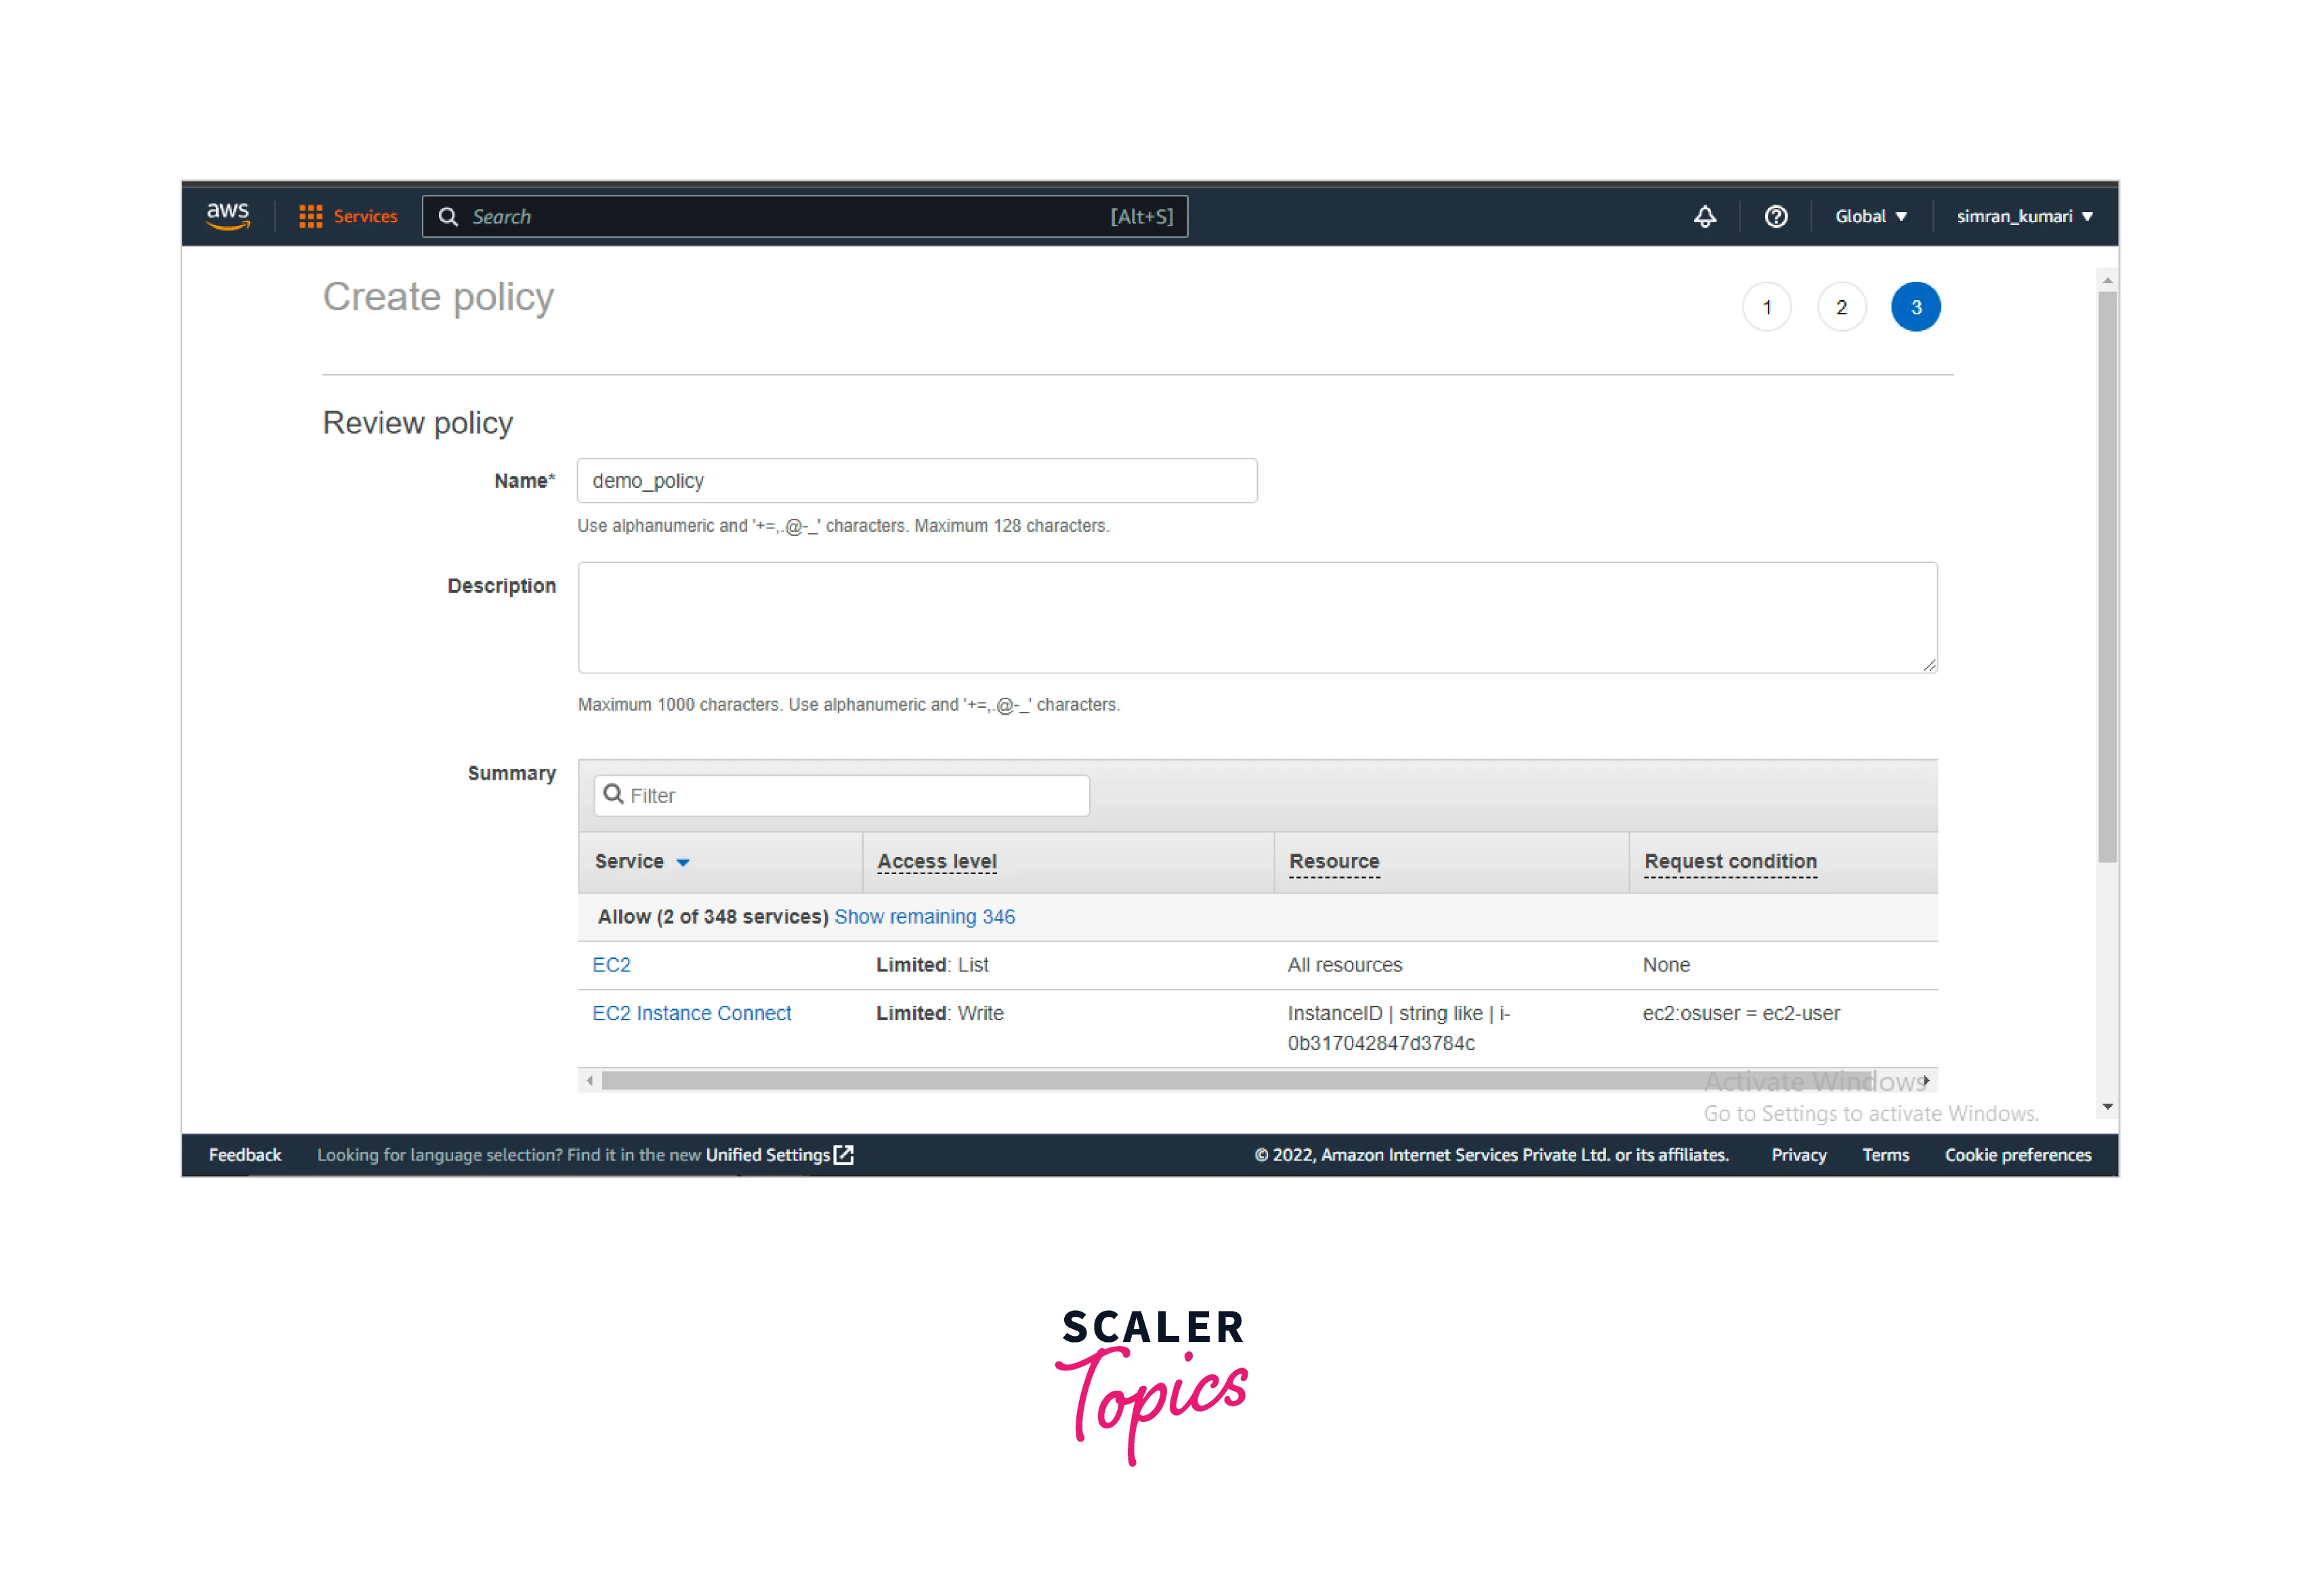
 5. Next, review the policy and provide a name for it. Scroll down and click on Create Policy.
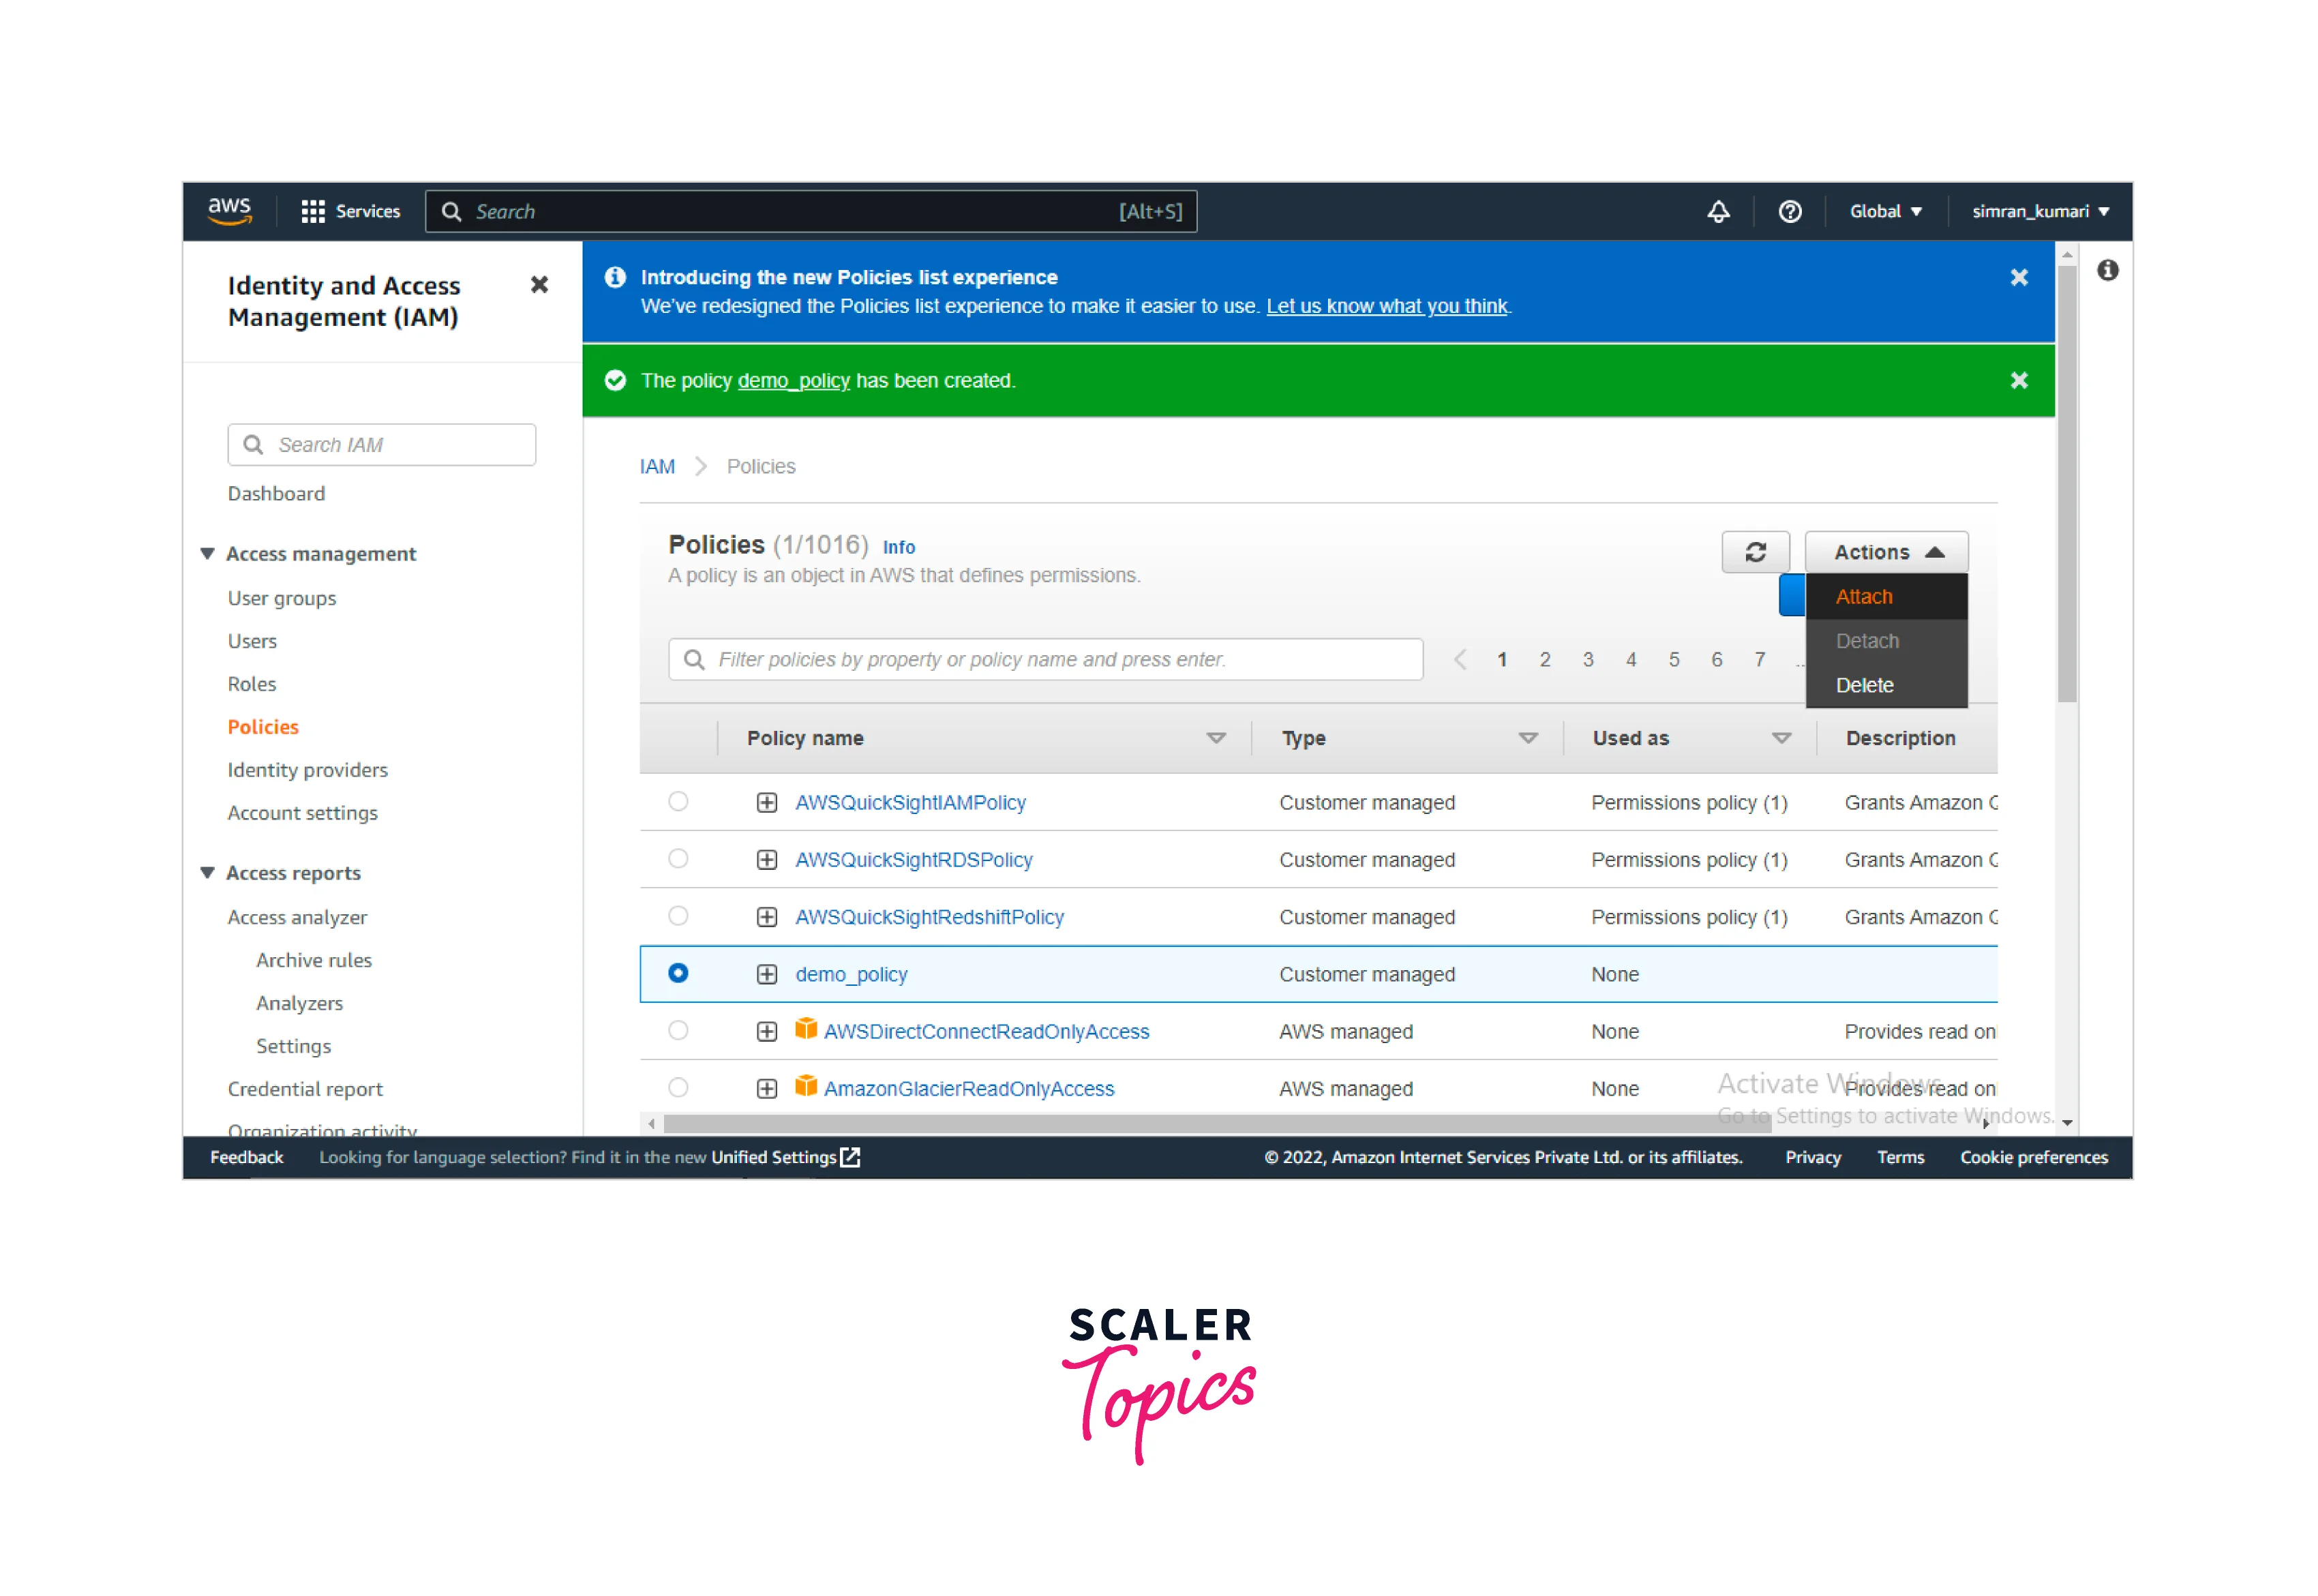
 6. The policy has been created successfully. Select the policy. Click on Actions and click on Attach.
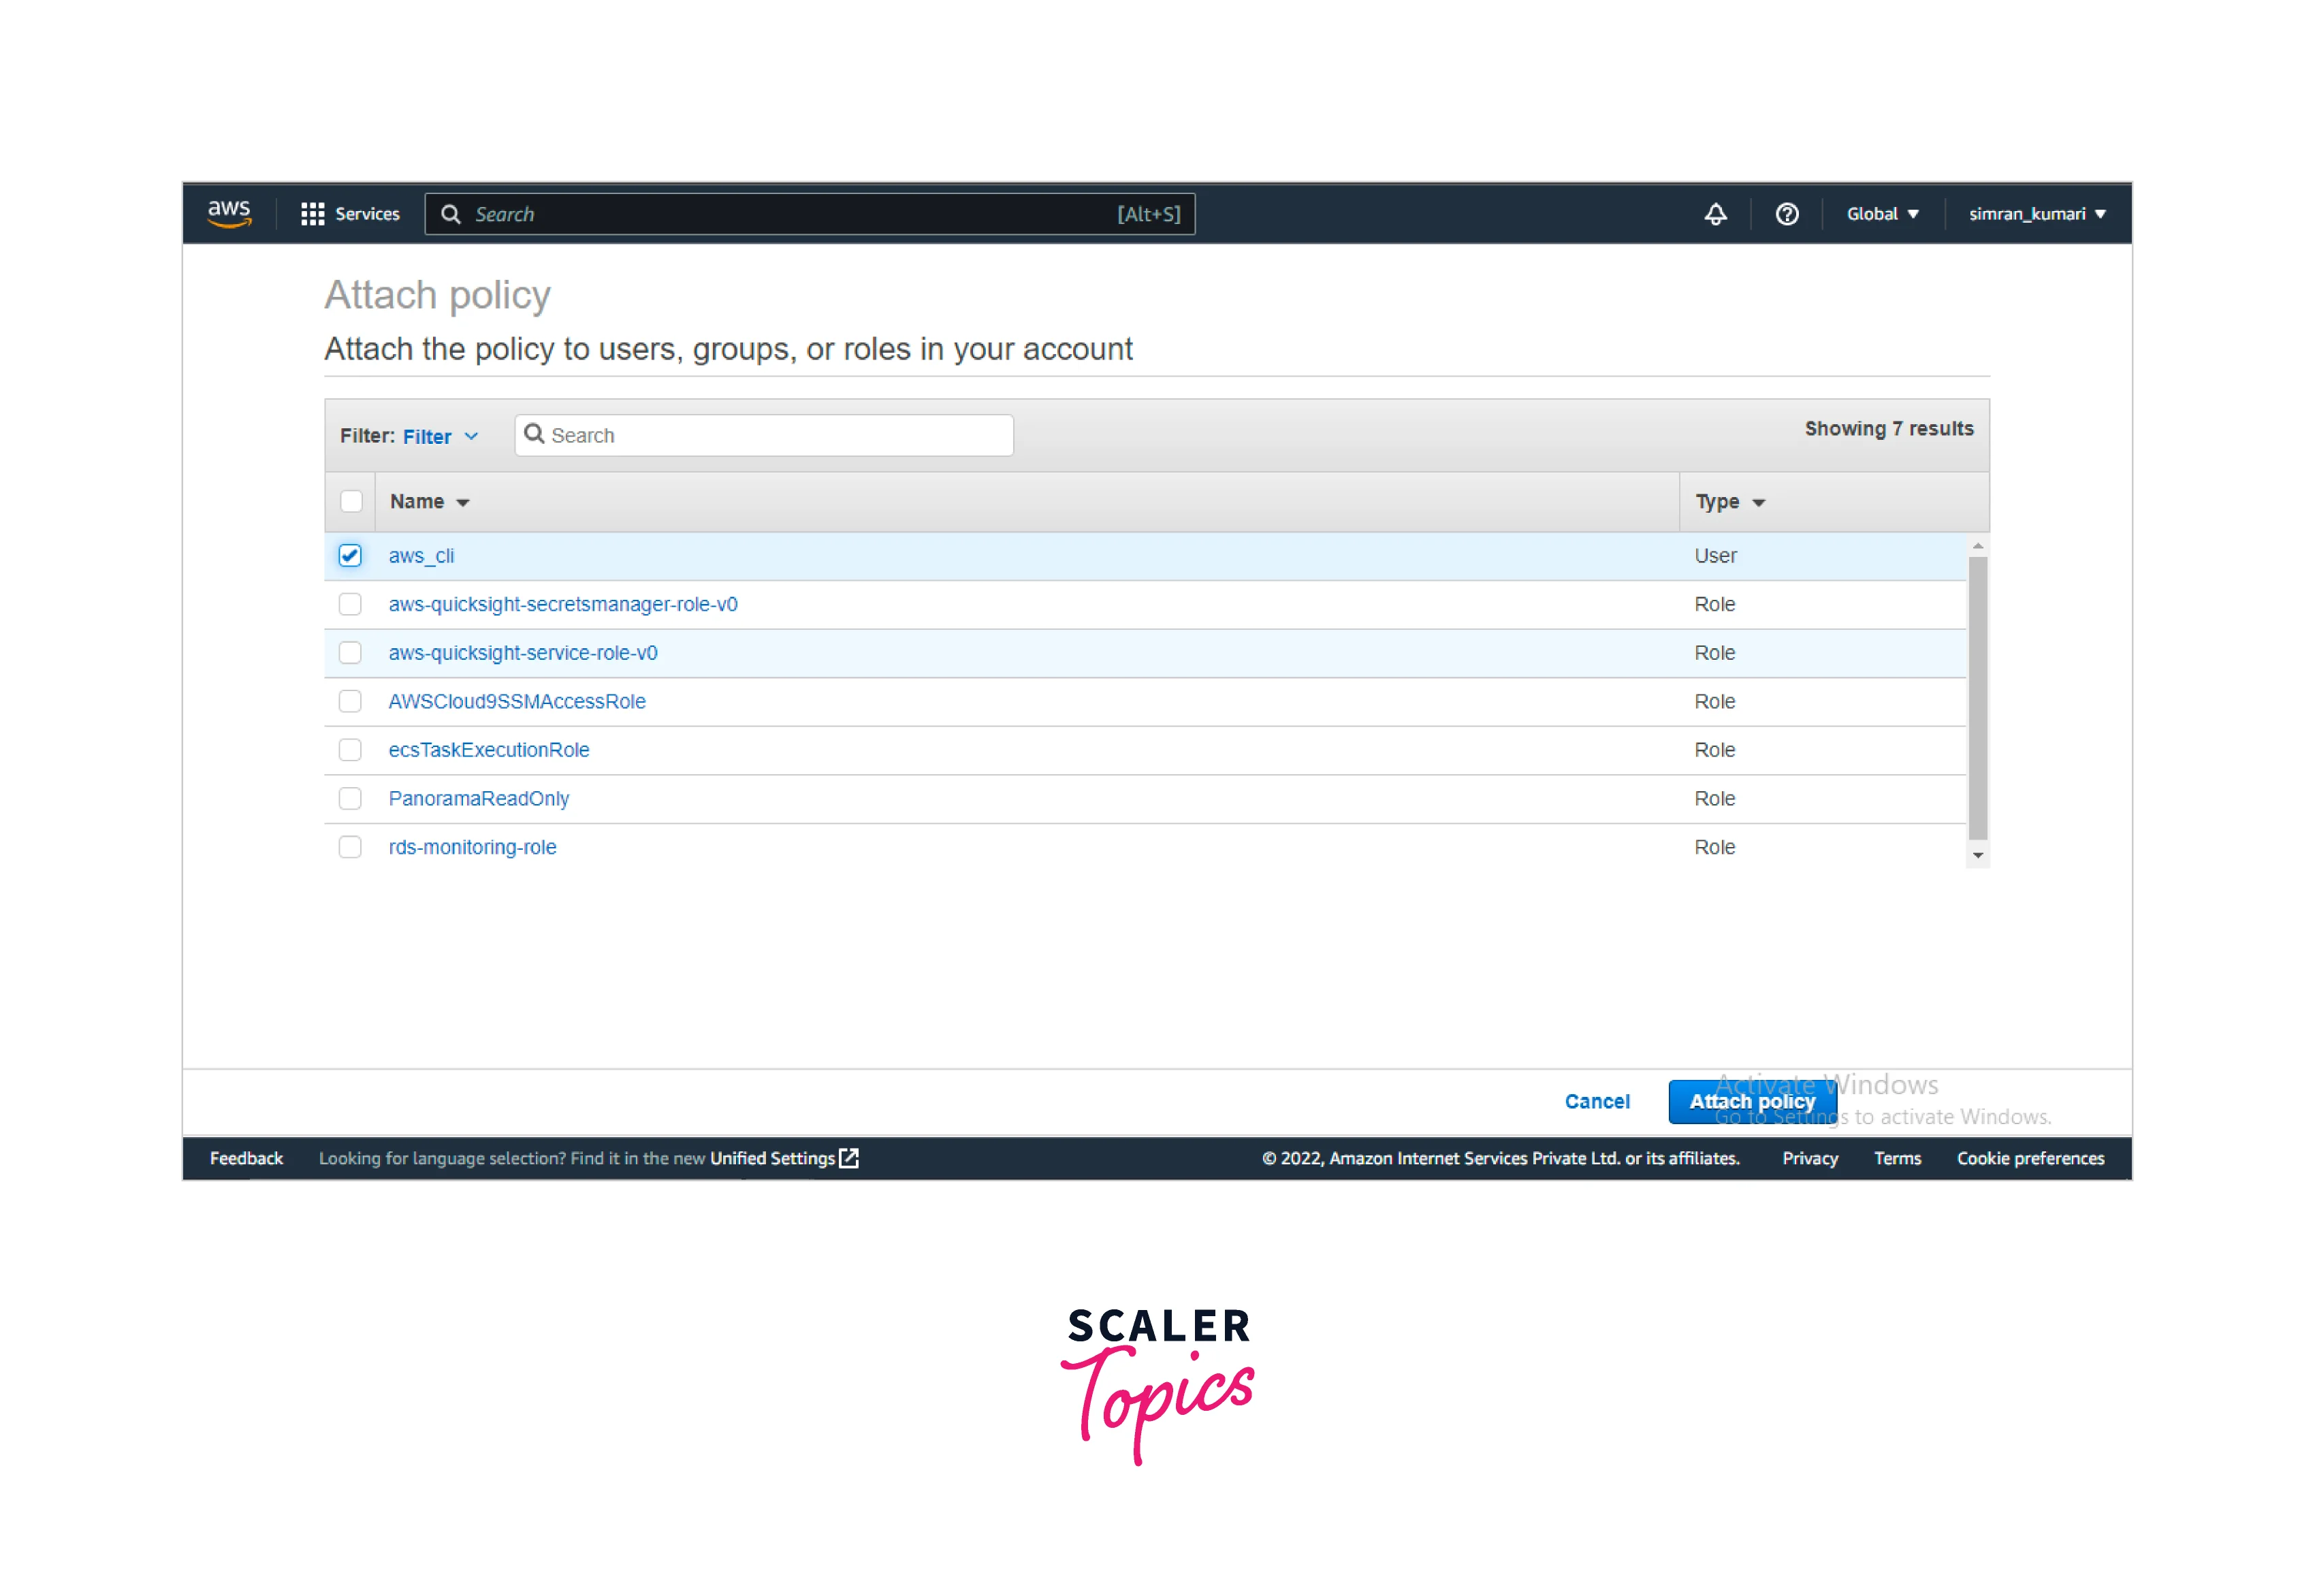
 7. Select an AWS user and click on Attach policy.
 8. We successfully attached the policy and configured the IAM permissions.
Connect Using EC2 Instance Connect
We can connect to the AWS EC2 Instance using the AWS EC2 Instance connect in multiple ways. Let's look at the steps for each of them.
Connect Using The Amazon EC2 Console
Following are the steps to connect to the EC2 instance using the Amazon EC2 console:
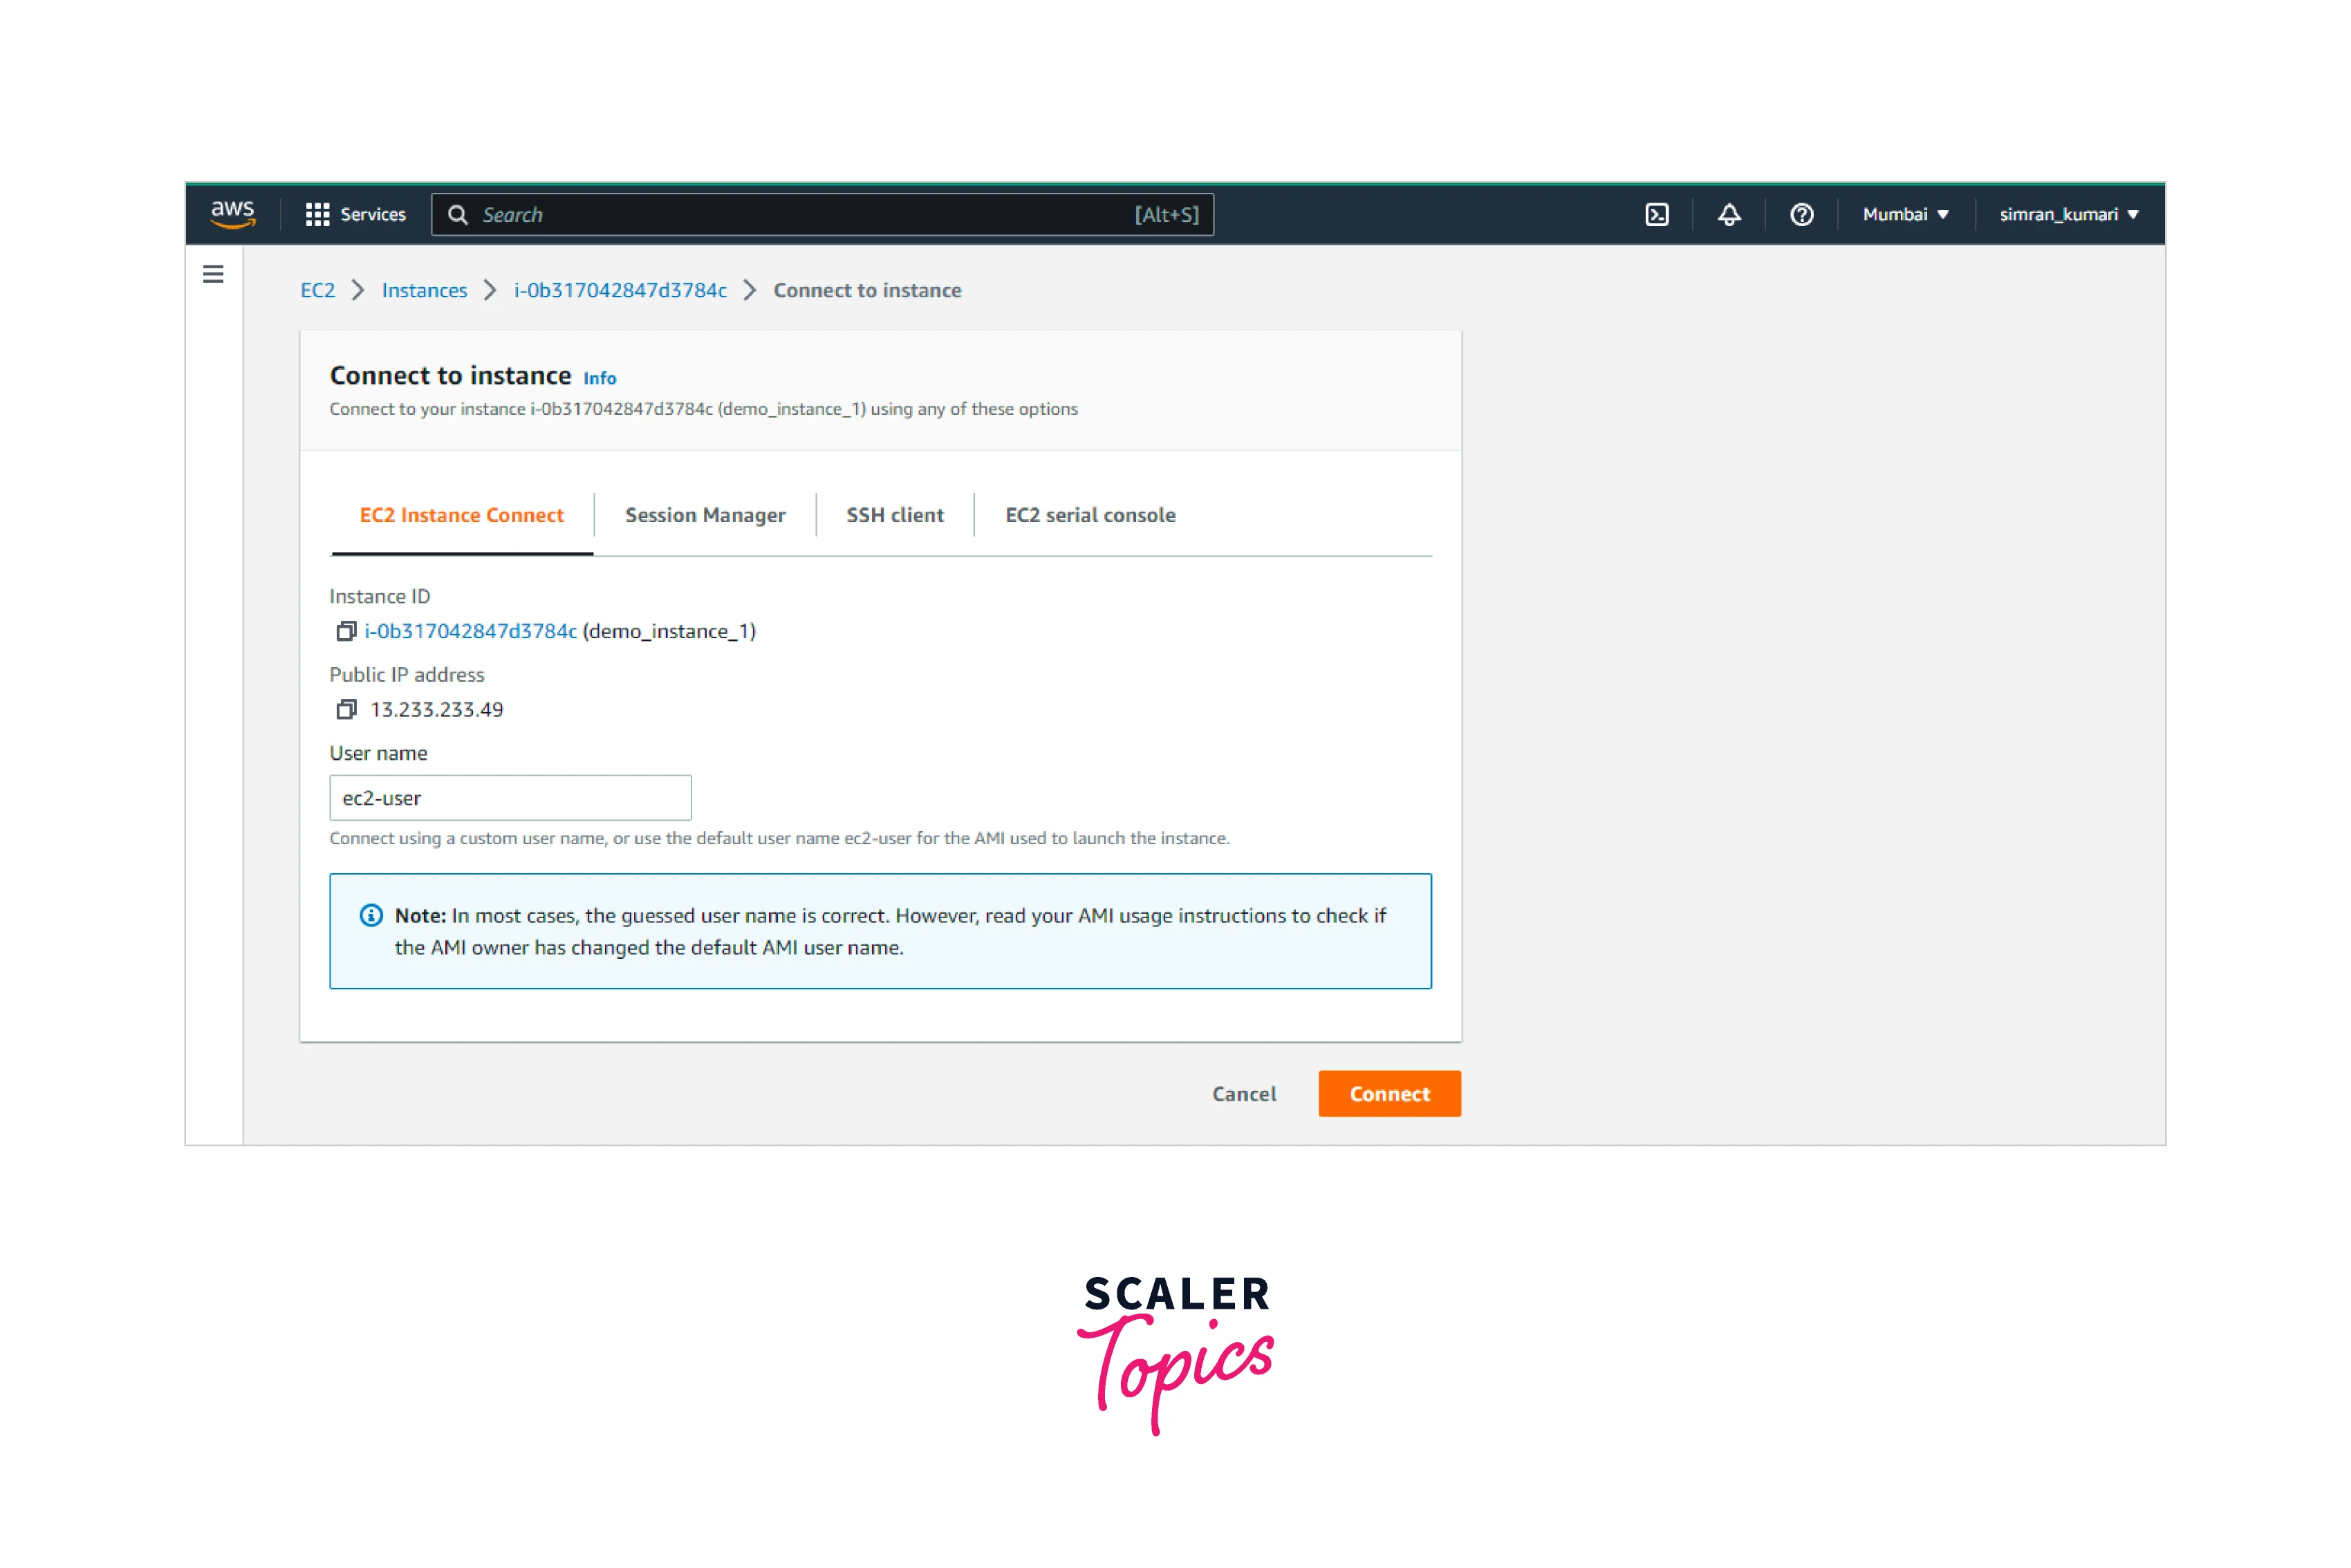
- Login to the AWS Management Console and move to the EC2 page. On this page, we will see the list of instances we launched. The instance launched by us is in a running state. If we want to connect to an EC2 instance, the instance should be in a running state.

- Select the instance you want to connect to and then click on the Connect button. On the next page, you will see multiple options to connect to the EC2 instance, and we will be using EC2 Instance Connect. Click on the Connect button to connect with the AWS EC2 instance via EC2 Instance Connect.
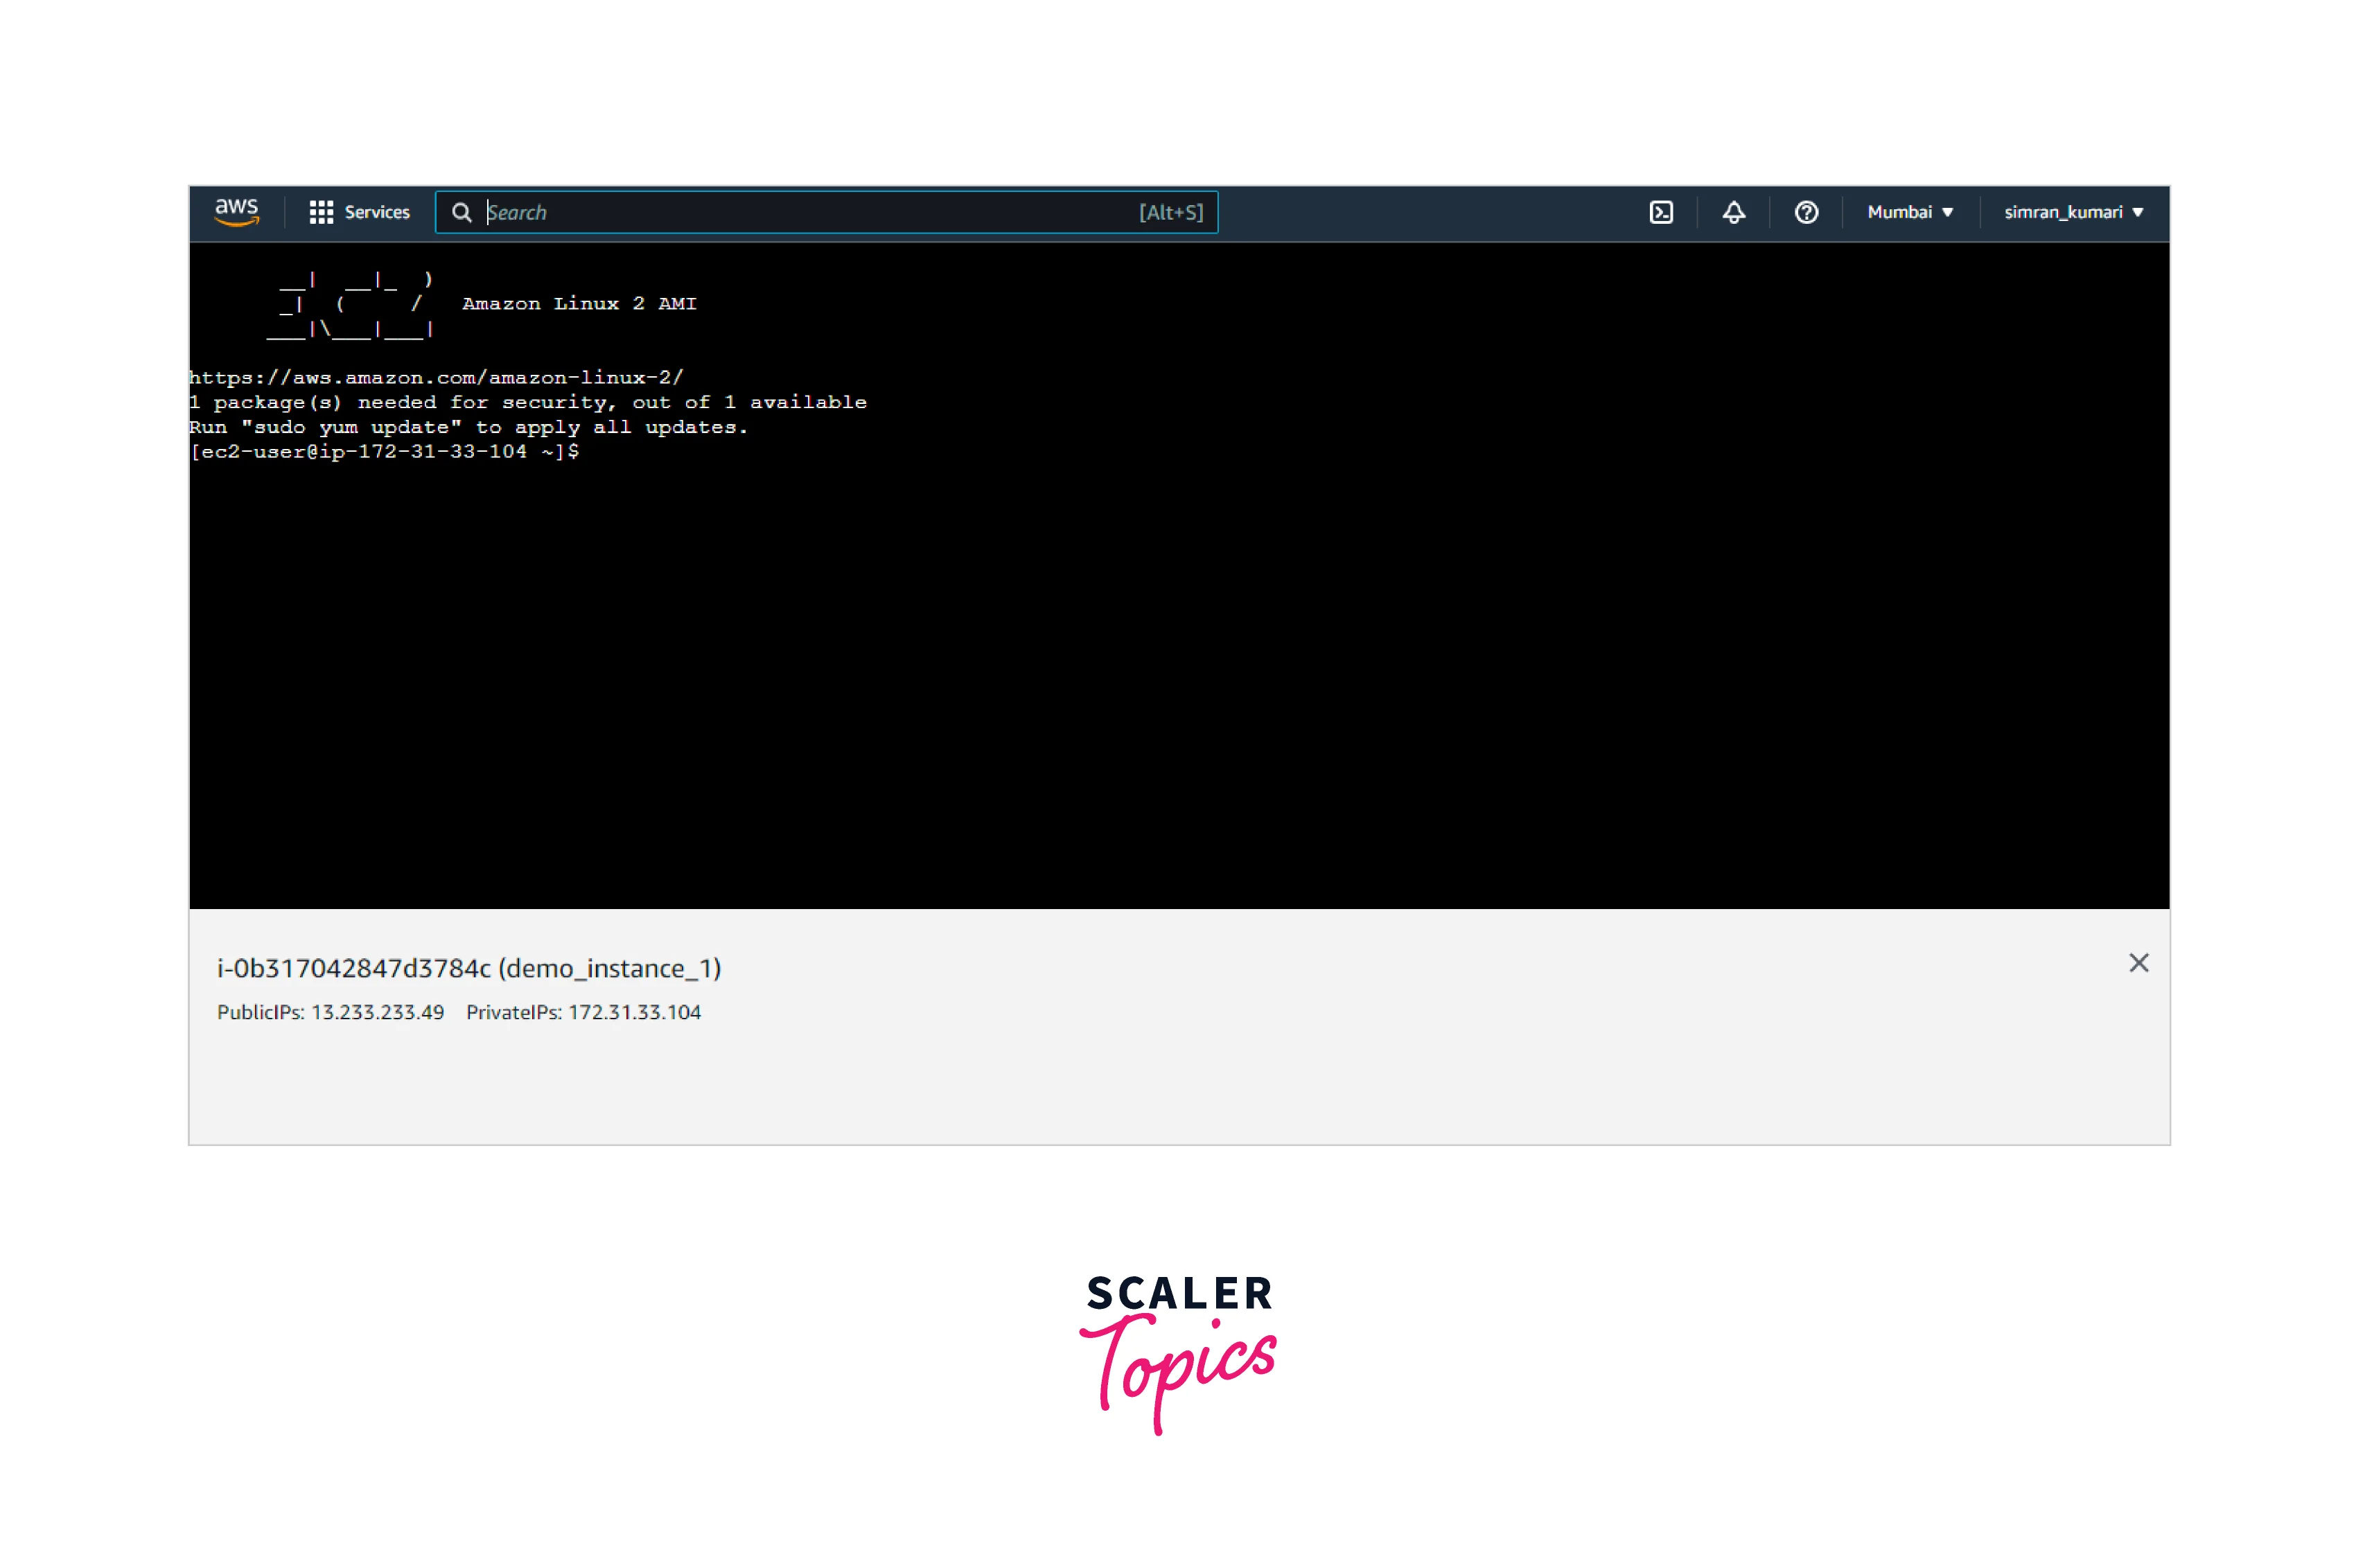
- A new tab in the browser window connects us easily to the EC2 instance. We can run any command here and work with our instance launched in the cloud provider's data center.
Connect Using The EC2 Instance Connect CLI
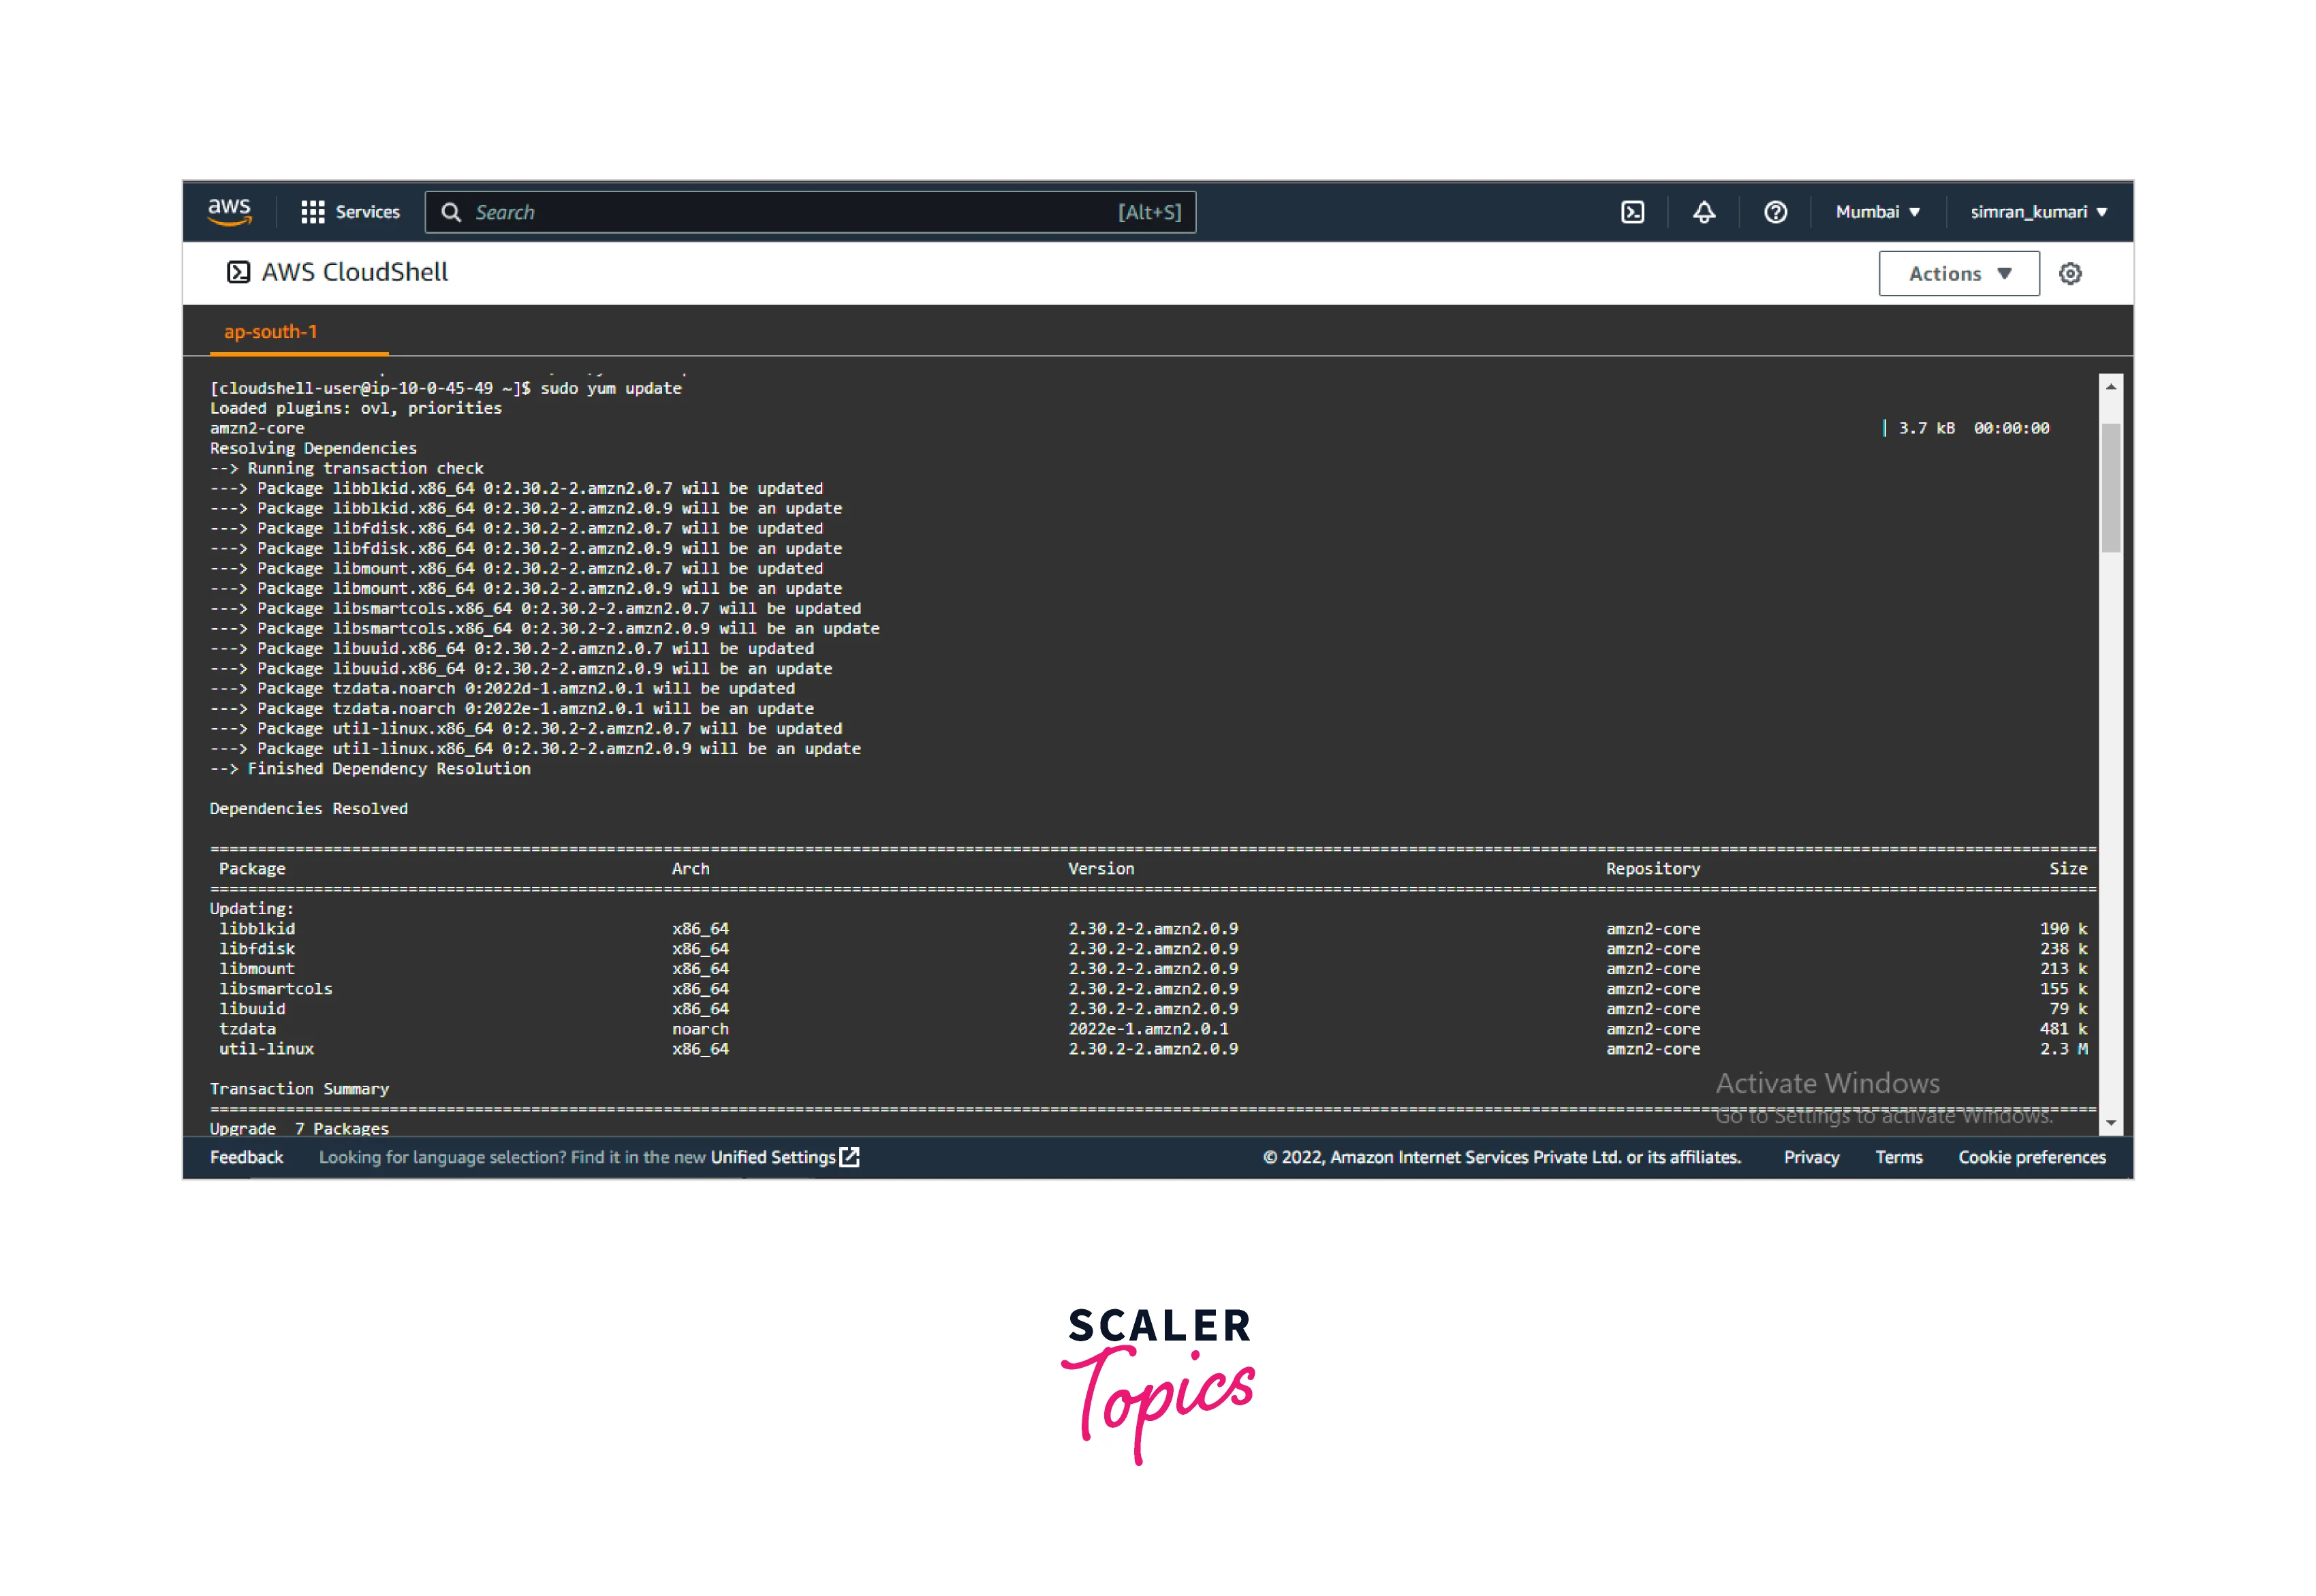
We are using the AWS cloud shell for this demo. Follow these steps to connect to the EC2 instance using the EC2 Instance Connect CLI:
- Open the AWS cloud shell and run the command sudo yum update.
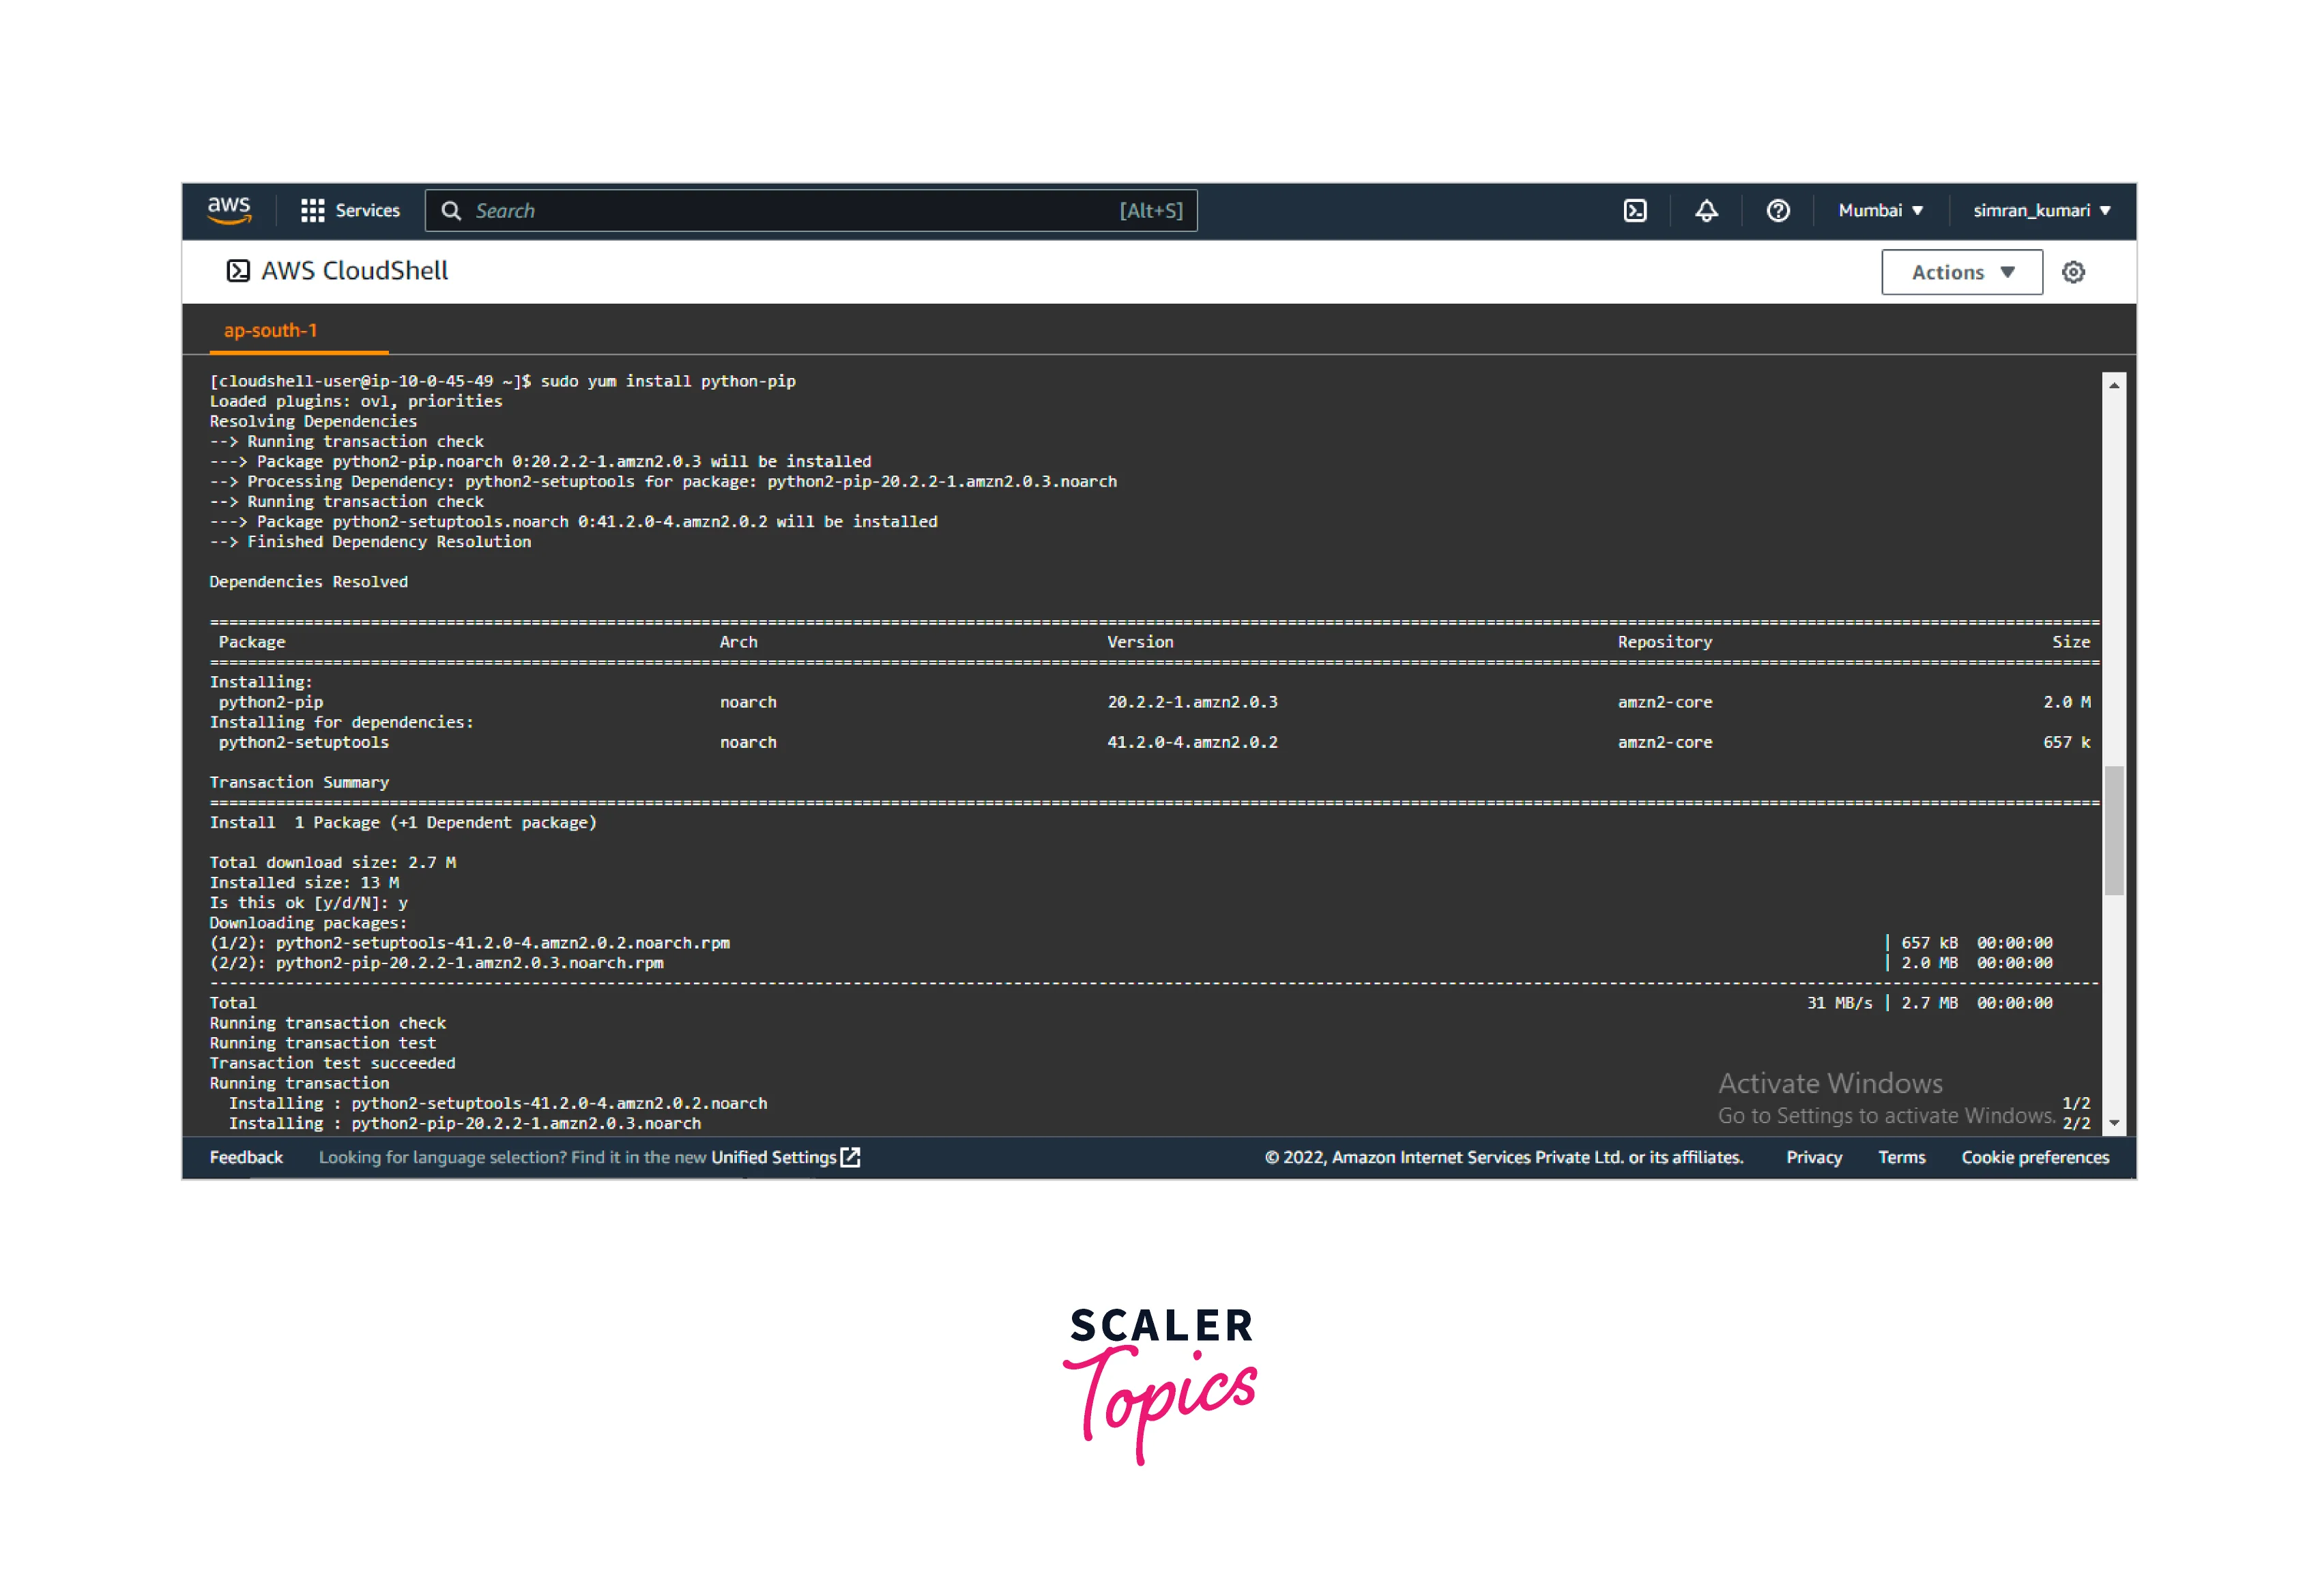
- If pip is not installed, install the python-pip using the command `sudo yum install python-pip.
- Install the EC2 Instance Connect CLI using the command pip install ec2instanceconnectcli.

- Run the command `ssh instance-id to connect to the running EC2 instance.

Connect Using Your Key and SSH Client
Following are the steps to connect to the EC2 instance using your Key and SSH Client:
- Run the command ssh-keygen -t rsa -f my_key to generate new SSH private and public keys, my_key and my_key.pub. If a key is already present, it will overwrite it. Type y to overwrite the key and create a new key.
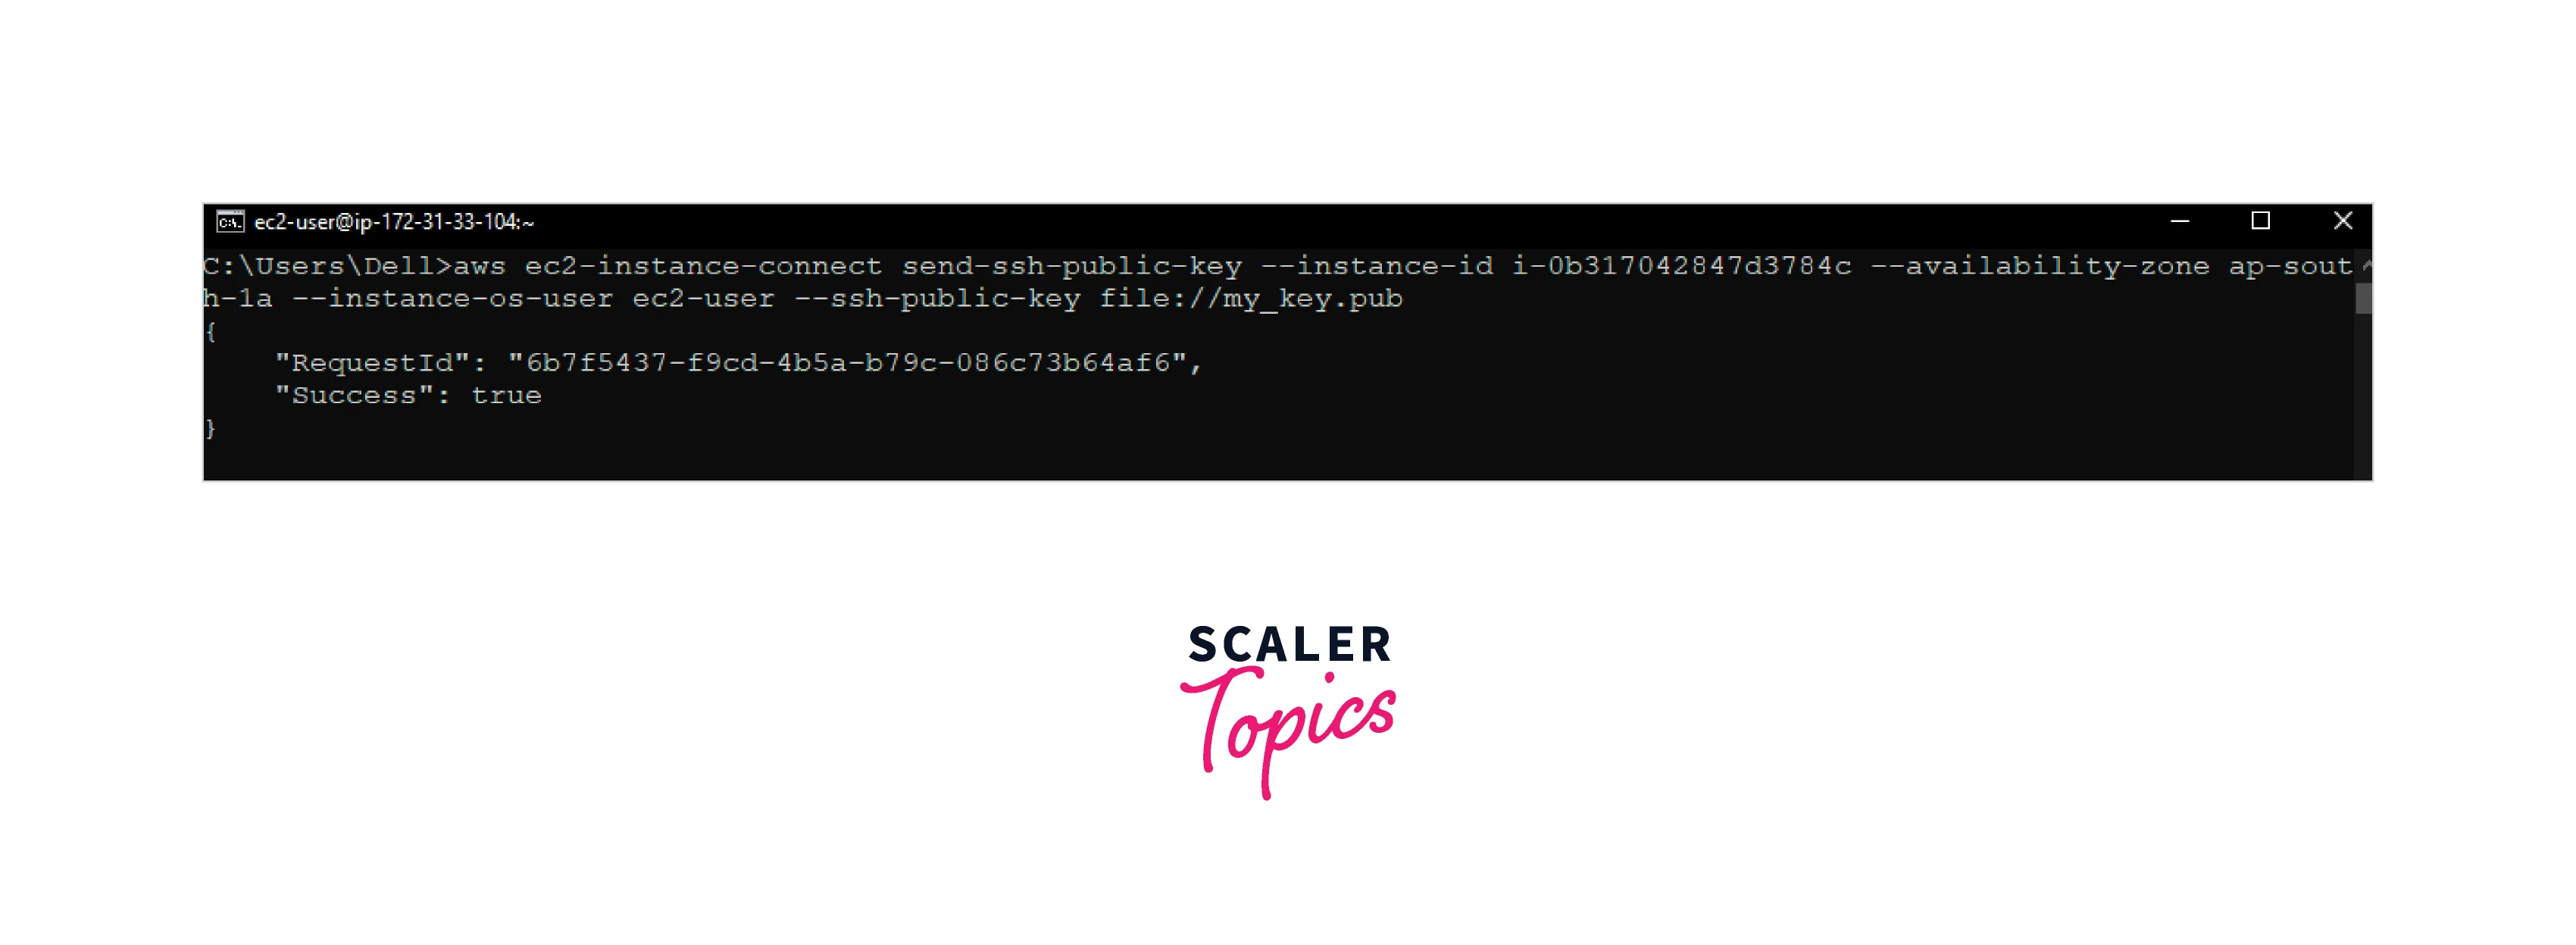
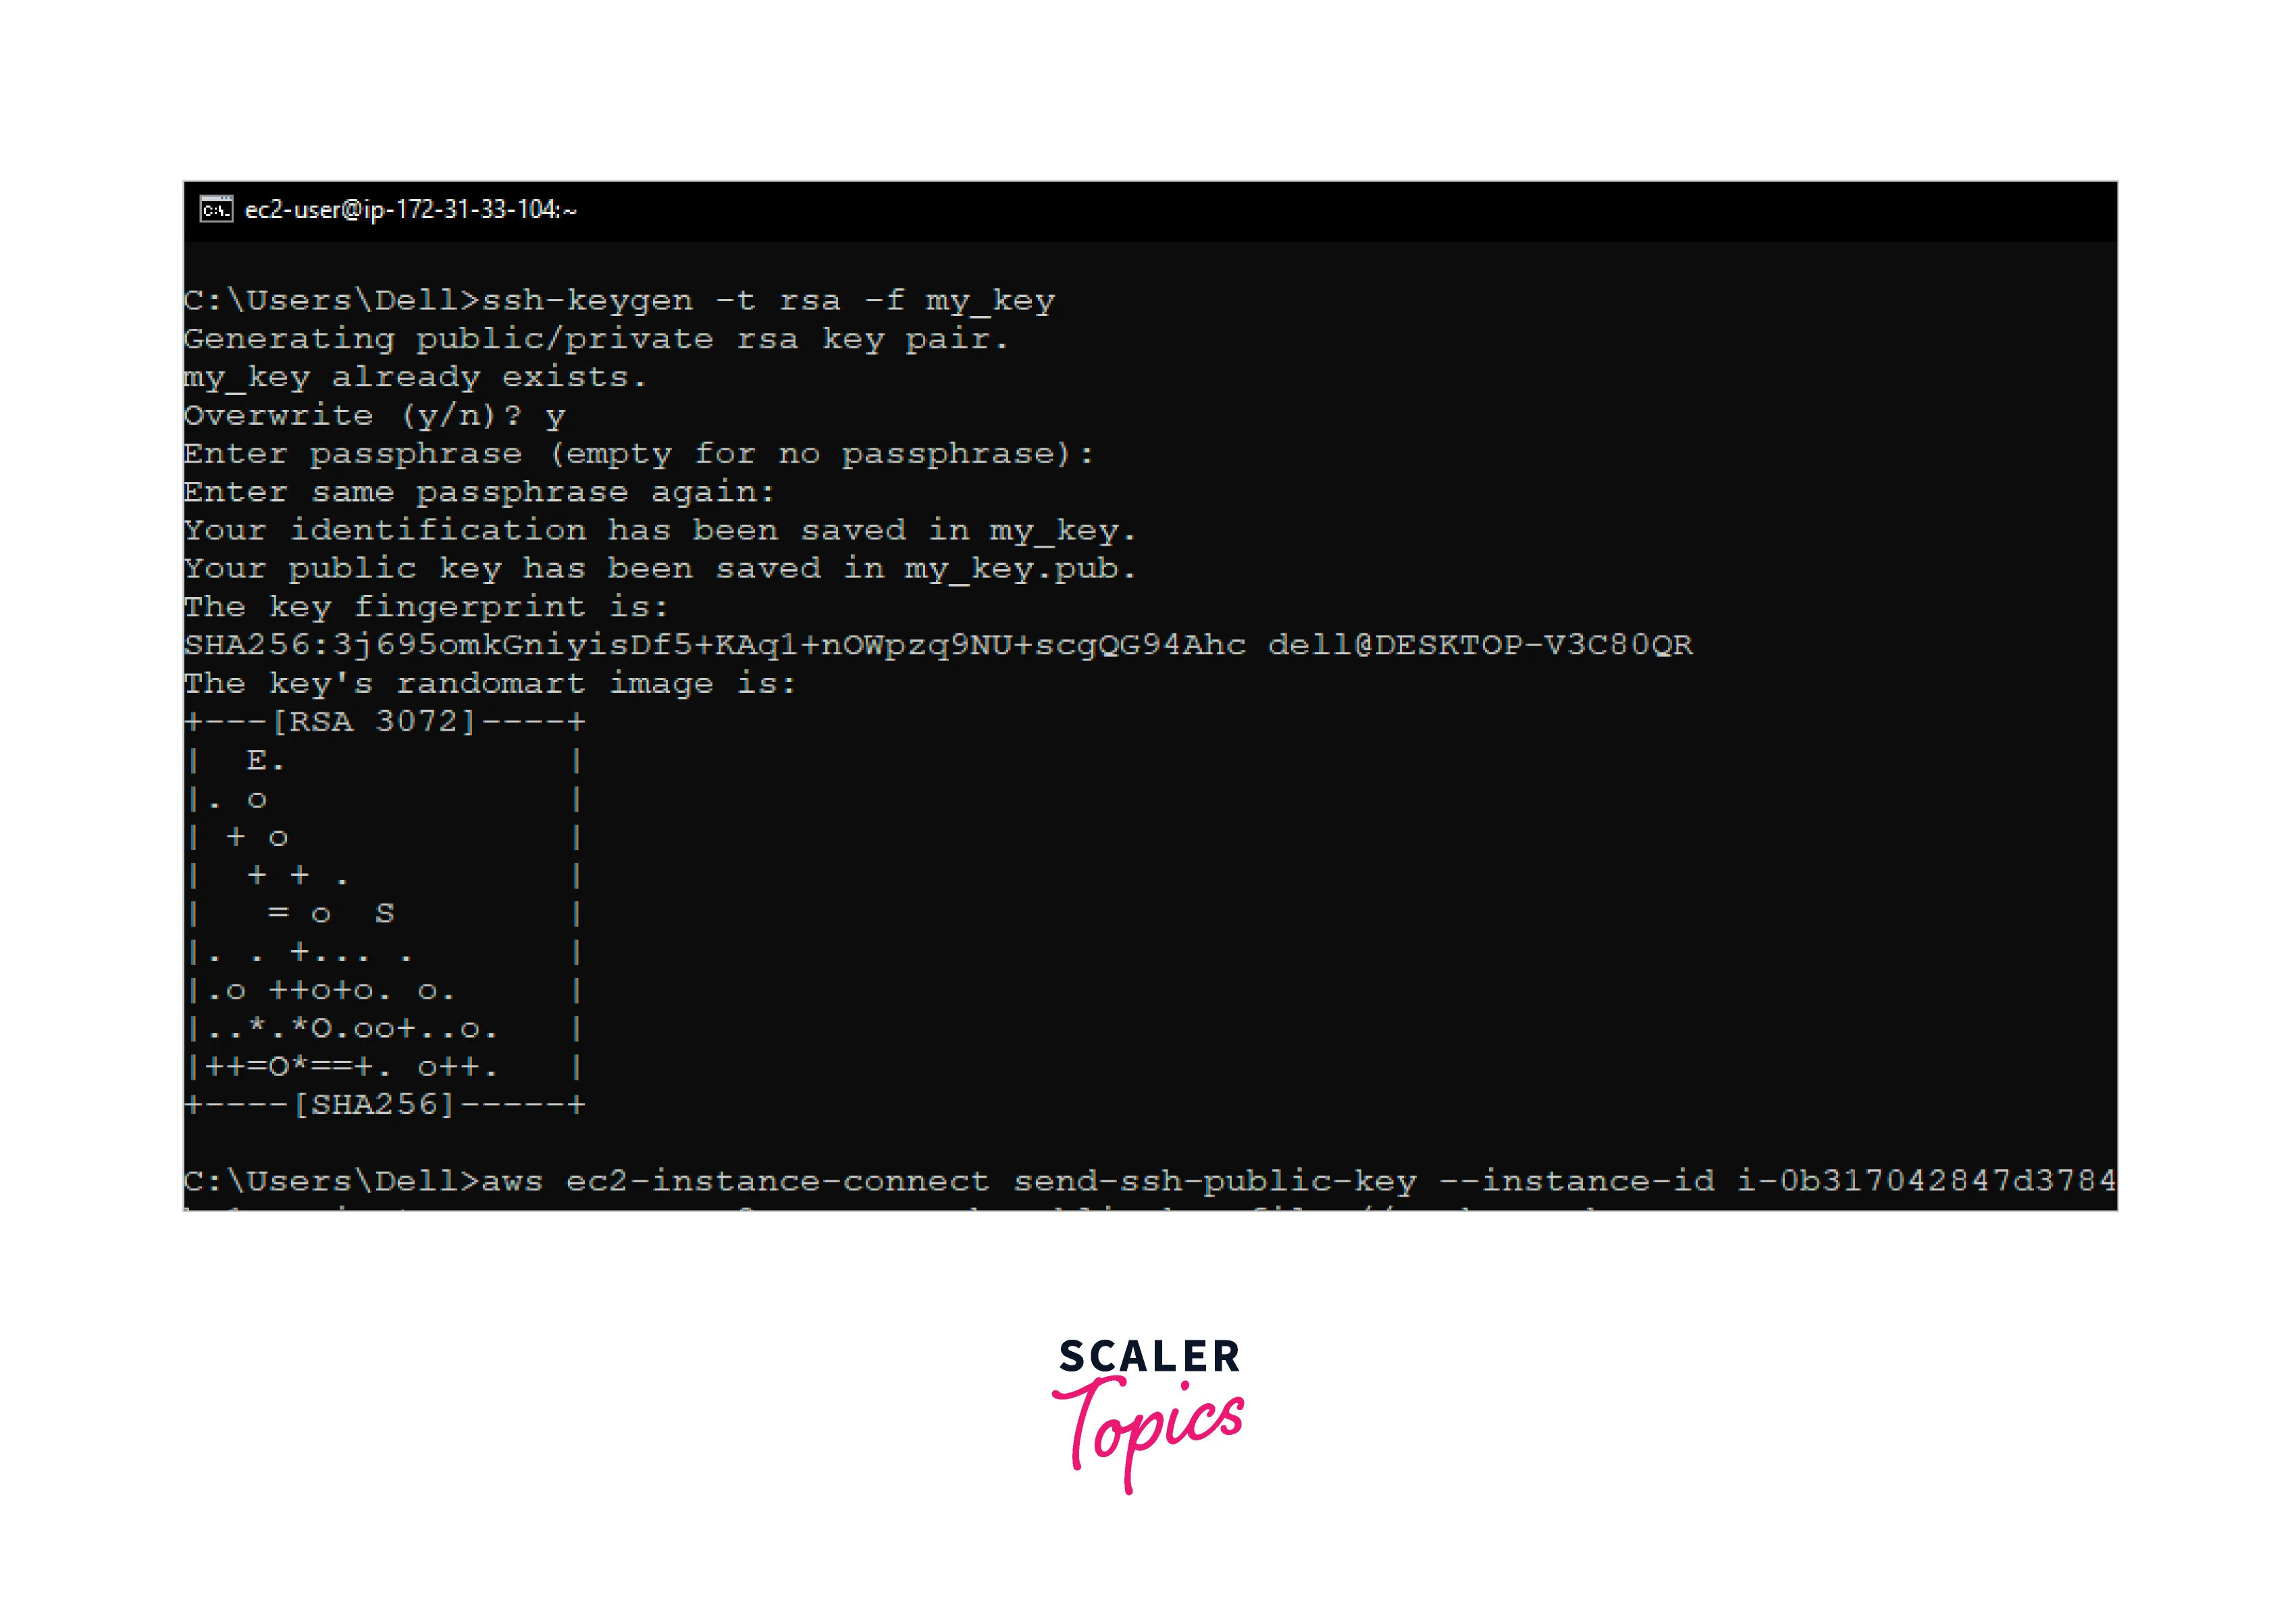 2. Next, use the following command:
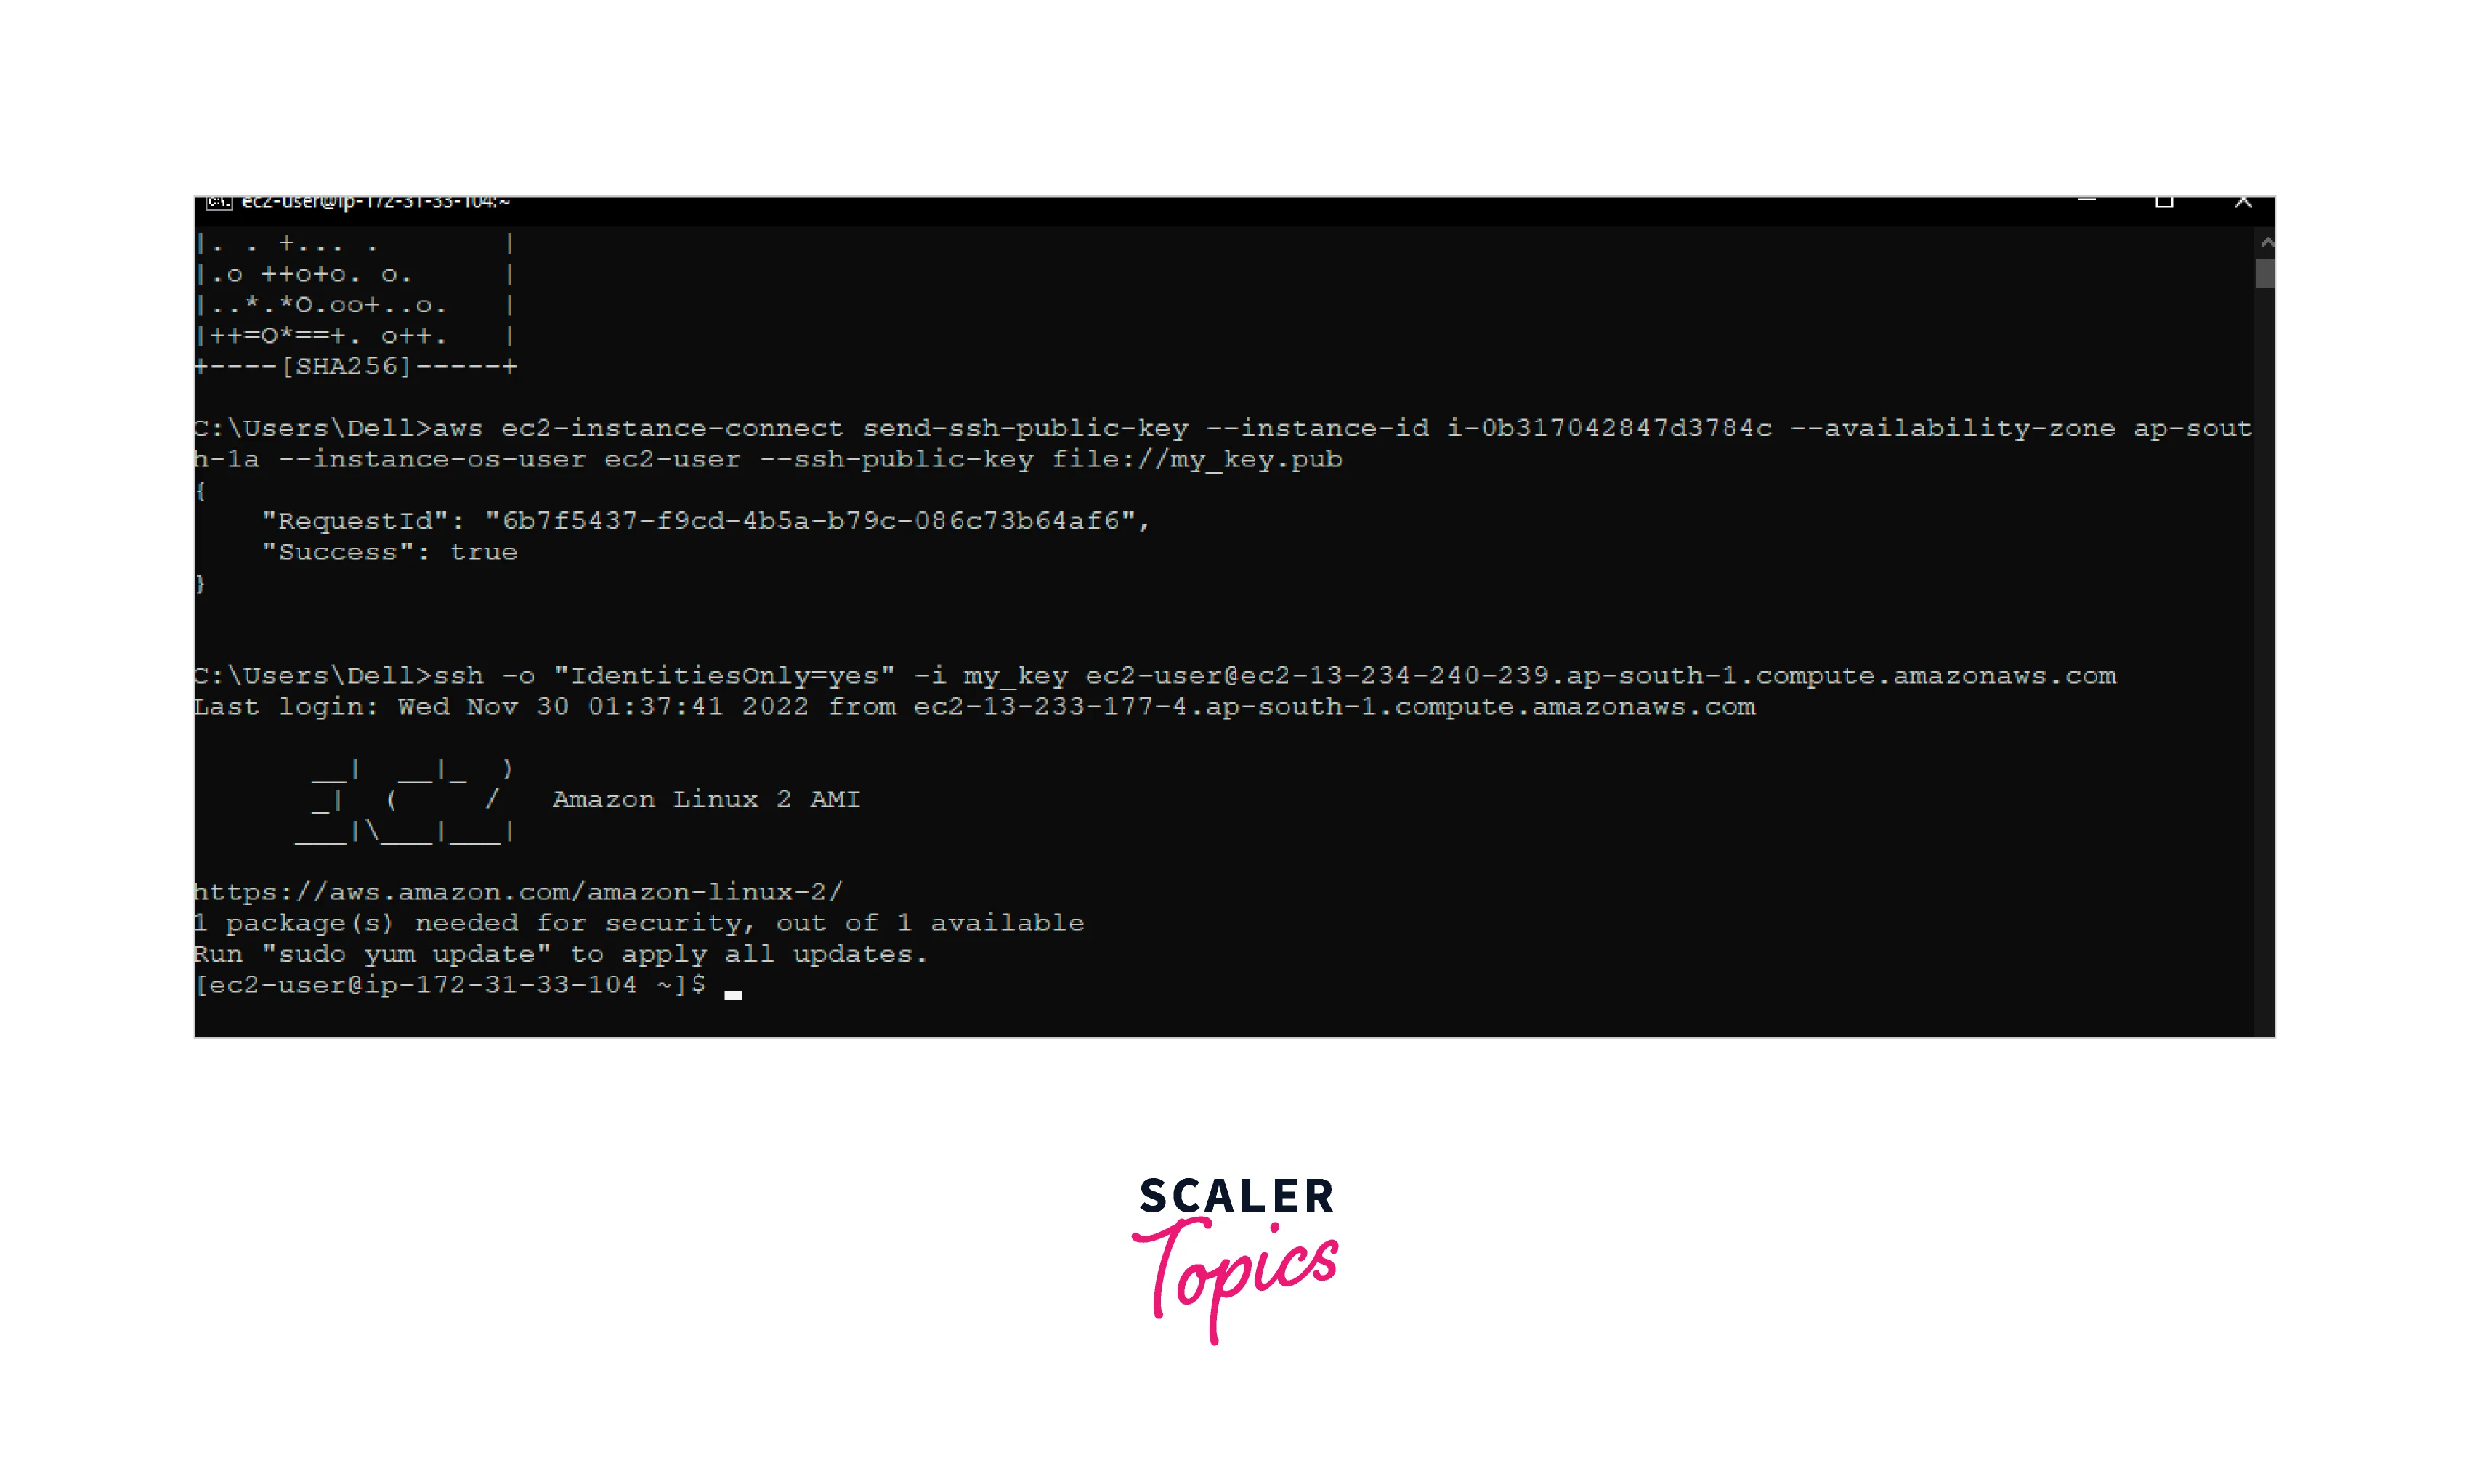
It pushes the created key to the instance in the Availability Zone and authenticates the ec2-user.
 3. Now, using the command ssh -o "IdentitiesOnly=yes" -i my_key ec2-user@ec2-198-51-100-1.compute-1.amazonaws.com, we can connect to the EC2 instance.
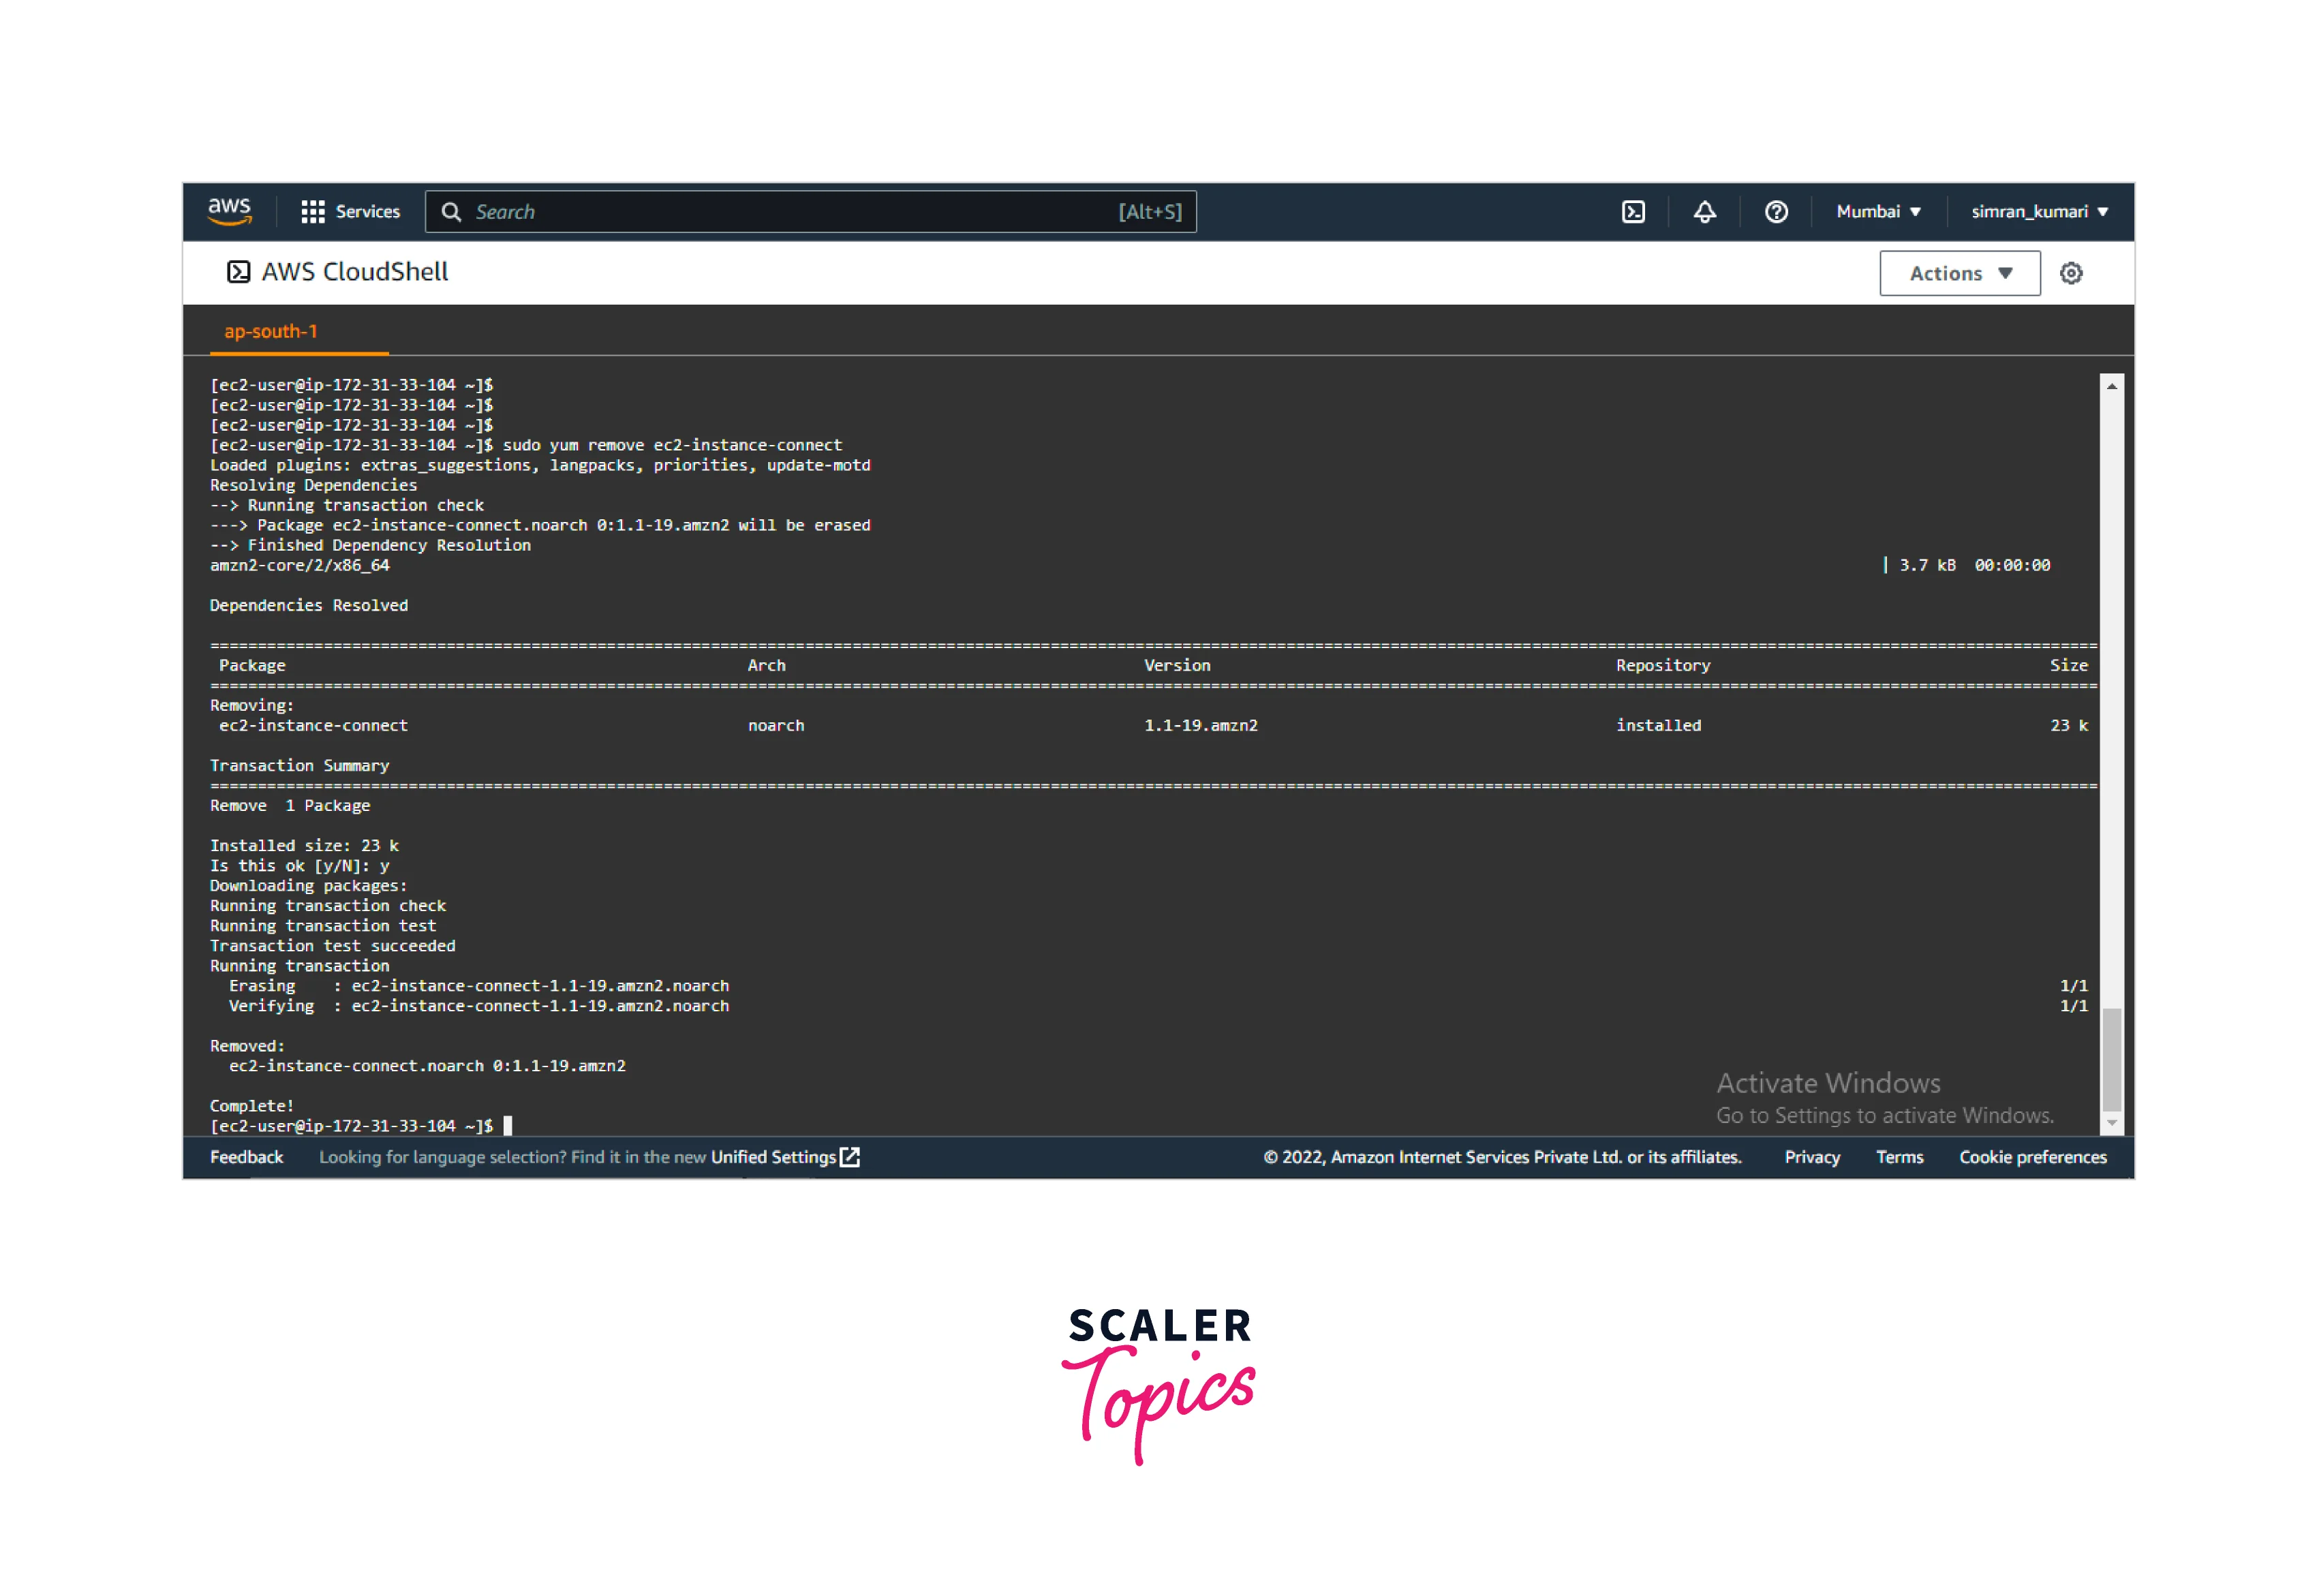
Uninstall EC2 Instance Connect
To disable the EC2 Instance Connect, we have to uninstall the ec2-instance-connect package from the Operating System.
Uninstall the ec2-instance-connect package using the yum command. sudo yum remove ec2-instance-connect
Scaler Placement Report and Statistics
Scaler learners achieved 2.5x salary growth with average post-Scaler CTC reaching ₹23L.
Conclusion
- EC2 instances are virtual OS hosted on AWS Cloud. EC2 Instance Connect helps us to connect to the EC2 instance using SSH protocol.
- It can be integrated with other AWS services like AWS IAM to enhance security.
- It can also be combined with AWS Cloudtrail Events to keep a check on the requests received for connecting to the EC2 instance.
- The EC2 instance connect can be used without any additional charges.
- For certain AMI (Amazon Machine Images), we can connect to the instance directly using the EC2 instance connected via the EC2 console.
- For other AMIs, we have multiple options, like installing EC2 instance connect, using EC2 instance connect, etc.