NAT Gateway ( Network Address Translation )
Overview
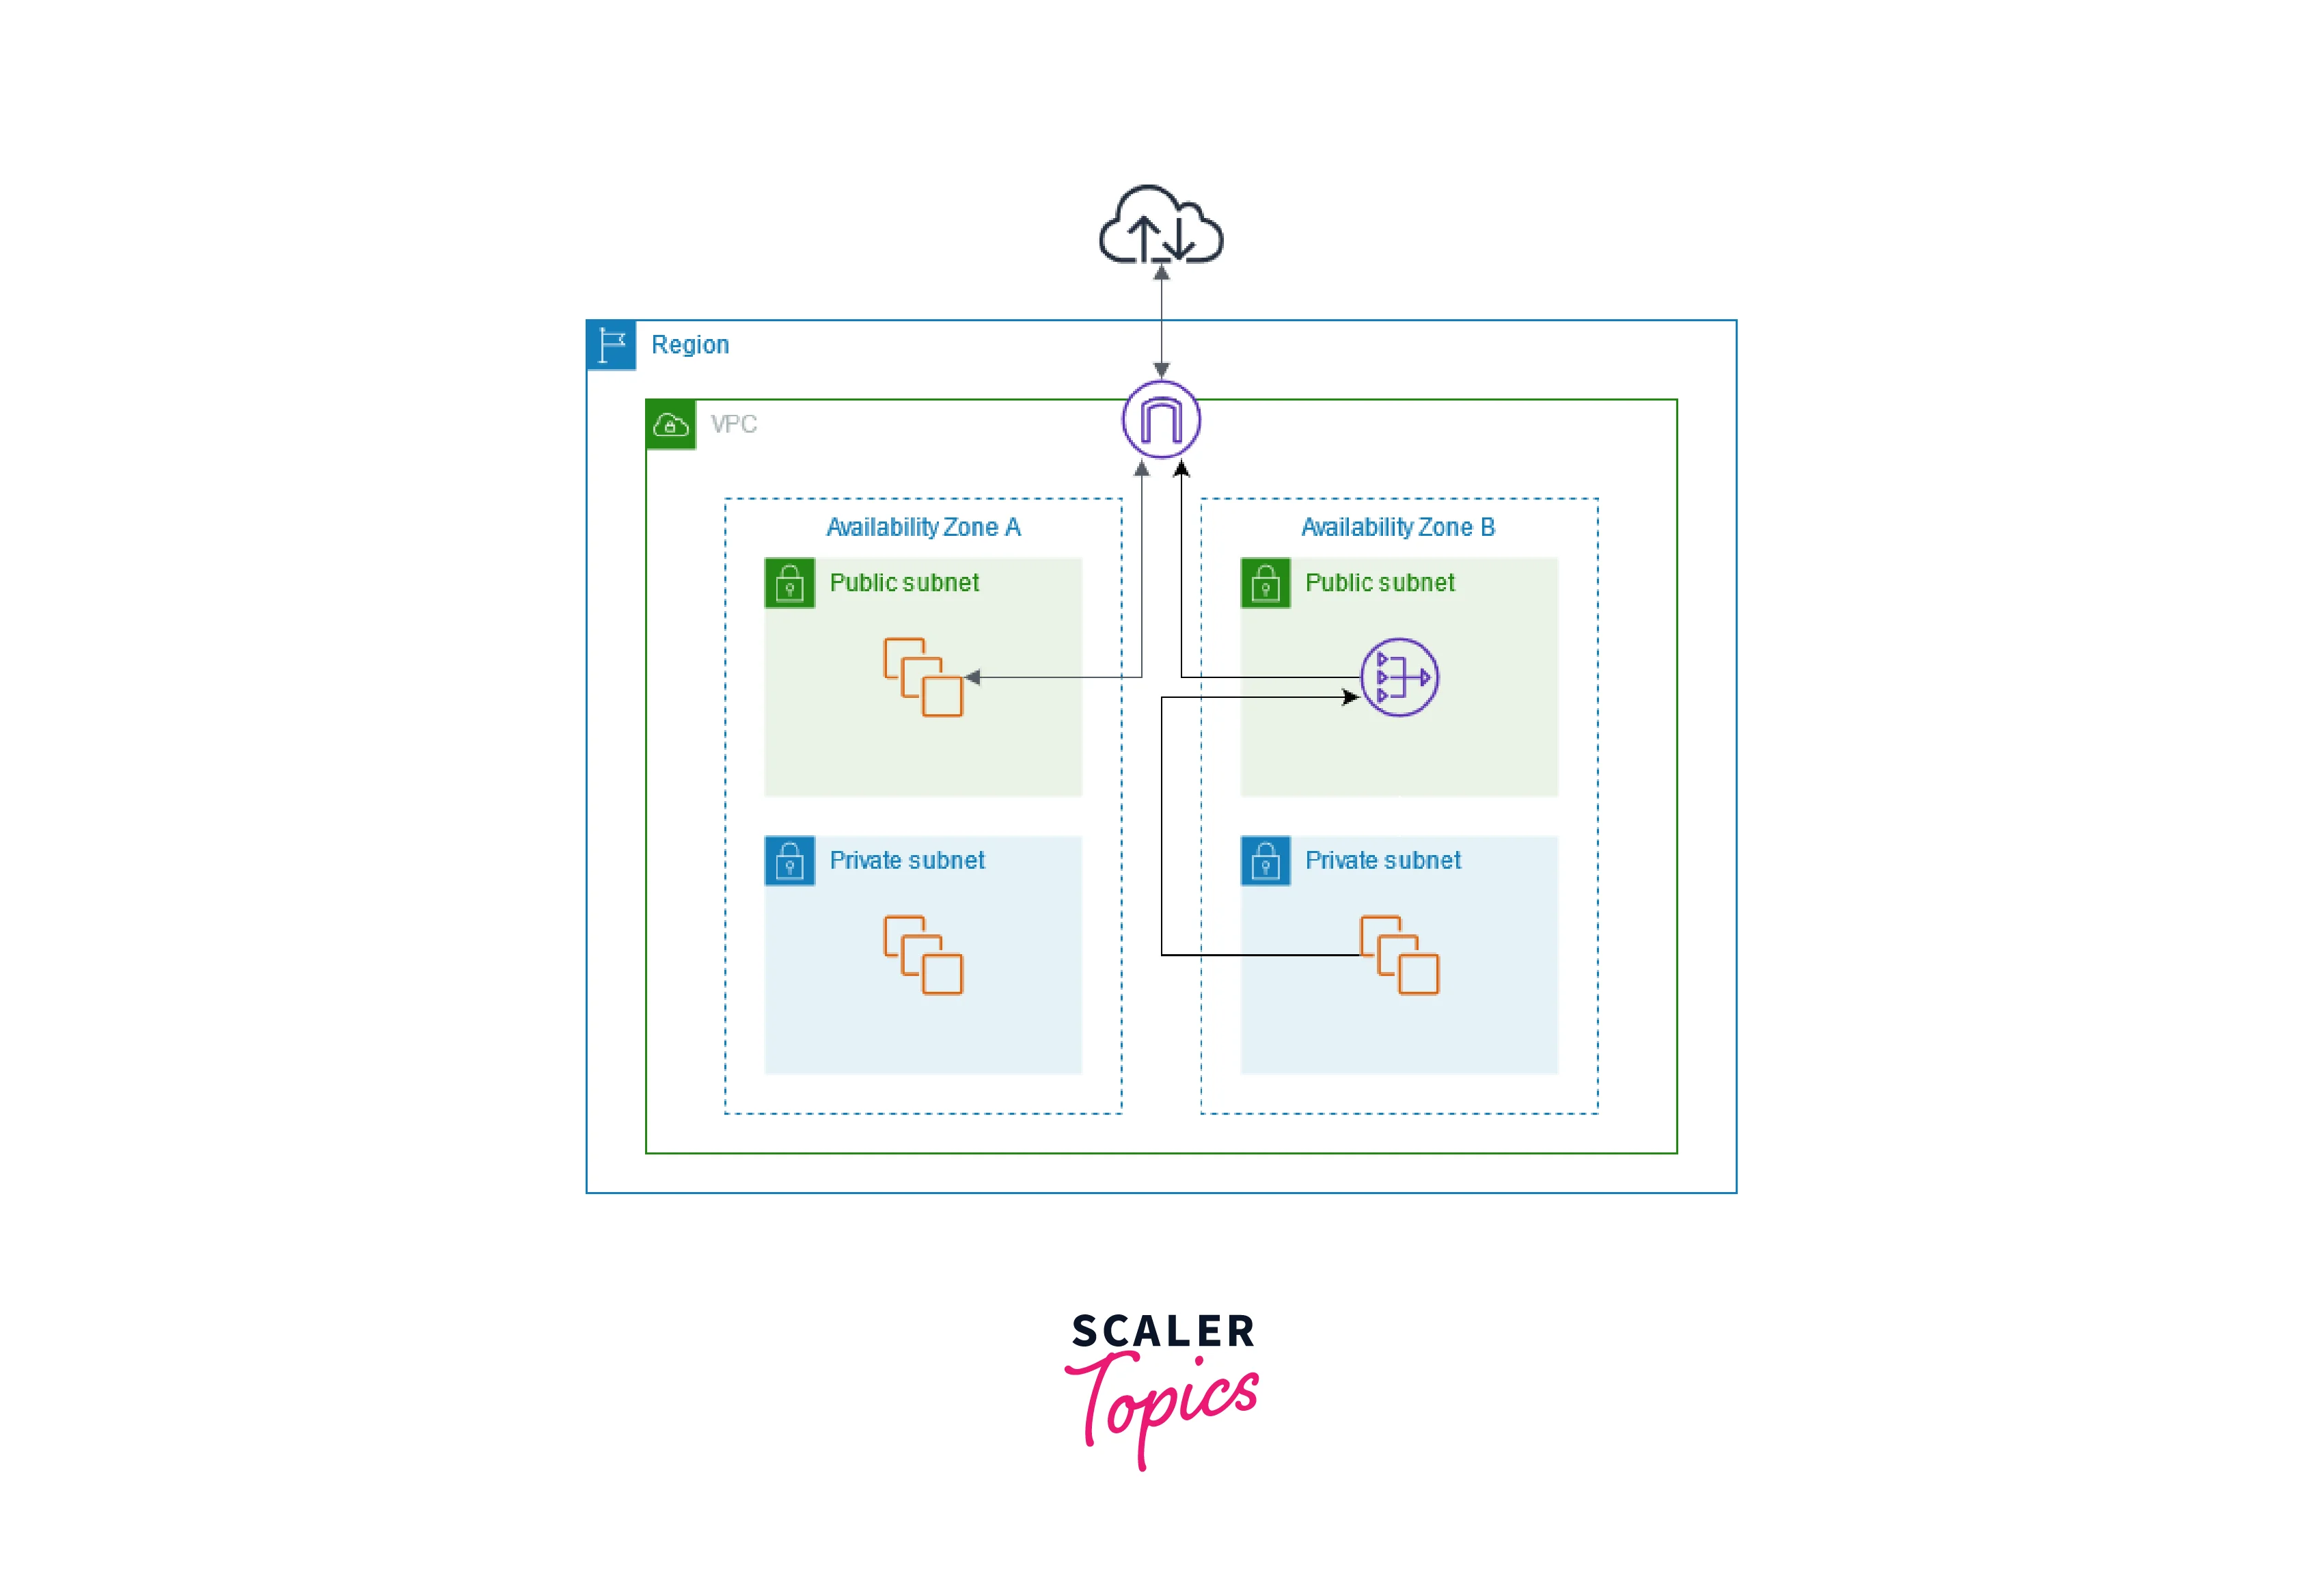
Network Address Translation Gateway, also known as NAT Gateway, works to connect the instances present in the private subnet of AWS to the internet or other AWS services. The private instance isn't supposed to be accessible from the outside world but should have an outbound route to the internet, and NAT Gateway helps to achieve this.
What is NAT Gateway in AWS?
NAT stands for Network Address Translation. As the name suggests, it works to translate network addresses. A NAT Gateway provides cloud resources without public IP addresses access to the internet. While doing this the resources are not exposed to incoming internet connections. It enables instance in Private Subnet to connect to the Internet or other AWS services but prevent the Internet from initiating a connection with those instances.

Features of NAT Gateway
- Both IPV4 and IPV6 traffic supports NAT Gateway
- It supports multiple protocols like TCP, UDP, and ICMP.
- It replaces the source IP address of the instances with the IP address of the NAT gateway.
- It is highly available.
- It can be used with an Elastic IP address. We can attach exactly one Elastic IP to a NAT gateway.
- A specific Availability Zone contains its own NAT Gateway.
- It is capable of supporting approximately 20,000 concurrent connections to a single destination address and port.
- It is an AWS-managed service, which scales automatically.
- It supports a bandwidth of 5 Gbps and can scale automatically up to 100 Gbps.
Transform Your Career
Choose from our industry-leading programs designed for career success
Modern Software and AI Engineering Program
Master full-stack development with AI integration

Modern Data Science and ML with specialisation in AI
Advanced data science techniques with AI specialization
Advanced AIML with Specialisation in Agentic AI
Deep dive into AIML with focus on Agentic systems
DevOps, Cloud & AI Platform Engineering
Build and manage AI-powered cloud infrastructure
AI Engineering Advanced Certification by IIT-Roorkee
Premier AI engineering certification from IIT-Roorkee
Difference between NAT Gateway and Internet Gateway
Internet Gateway also works to provide internet access to cloud resources. The difference between the two beings is that the Internet gateway provides Internet access to cloud resources with public IPs, whereas the NAT gateway provides access to cloud resources without public IPs.
Types of Connectivity
When creating a NAT Gateway in AWS, we have to choose a connectivity type. So let's first know what these stand for.
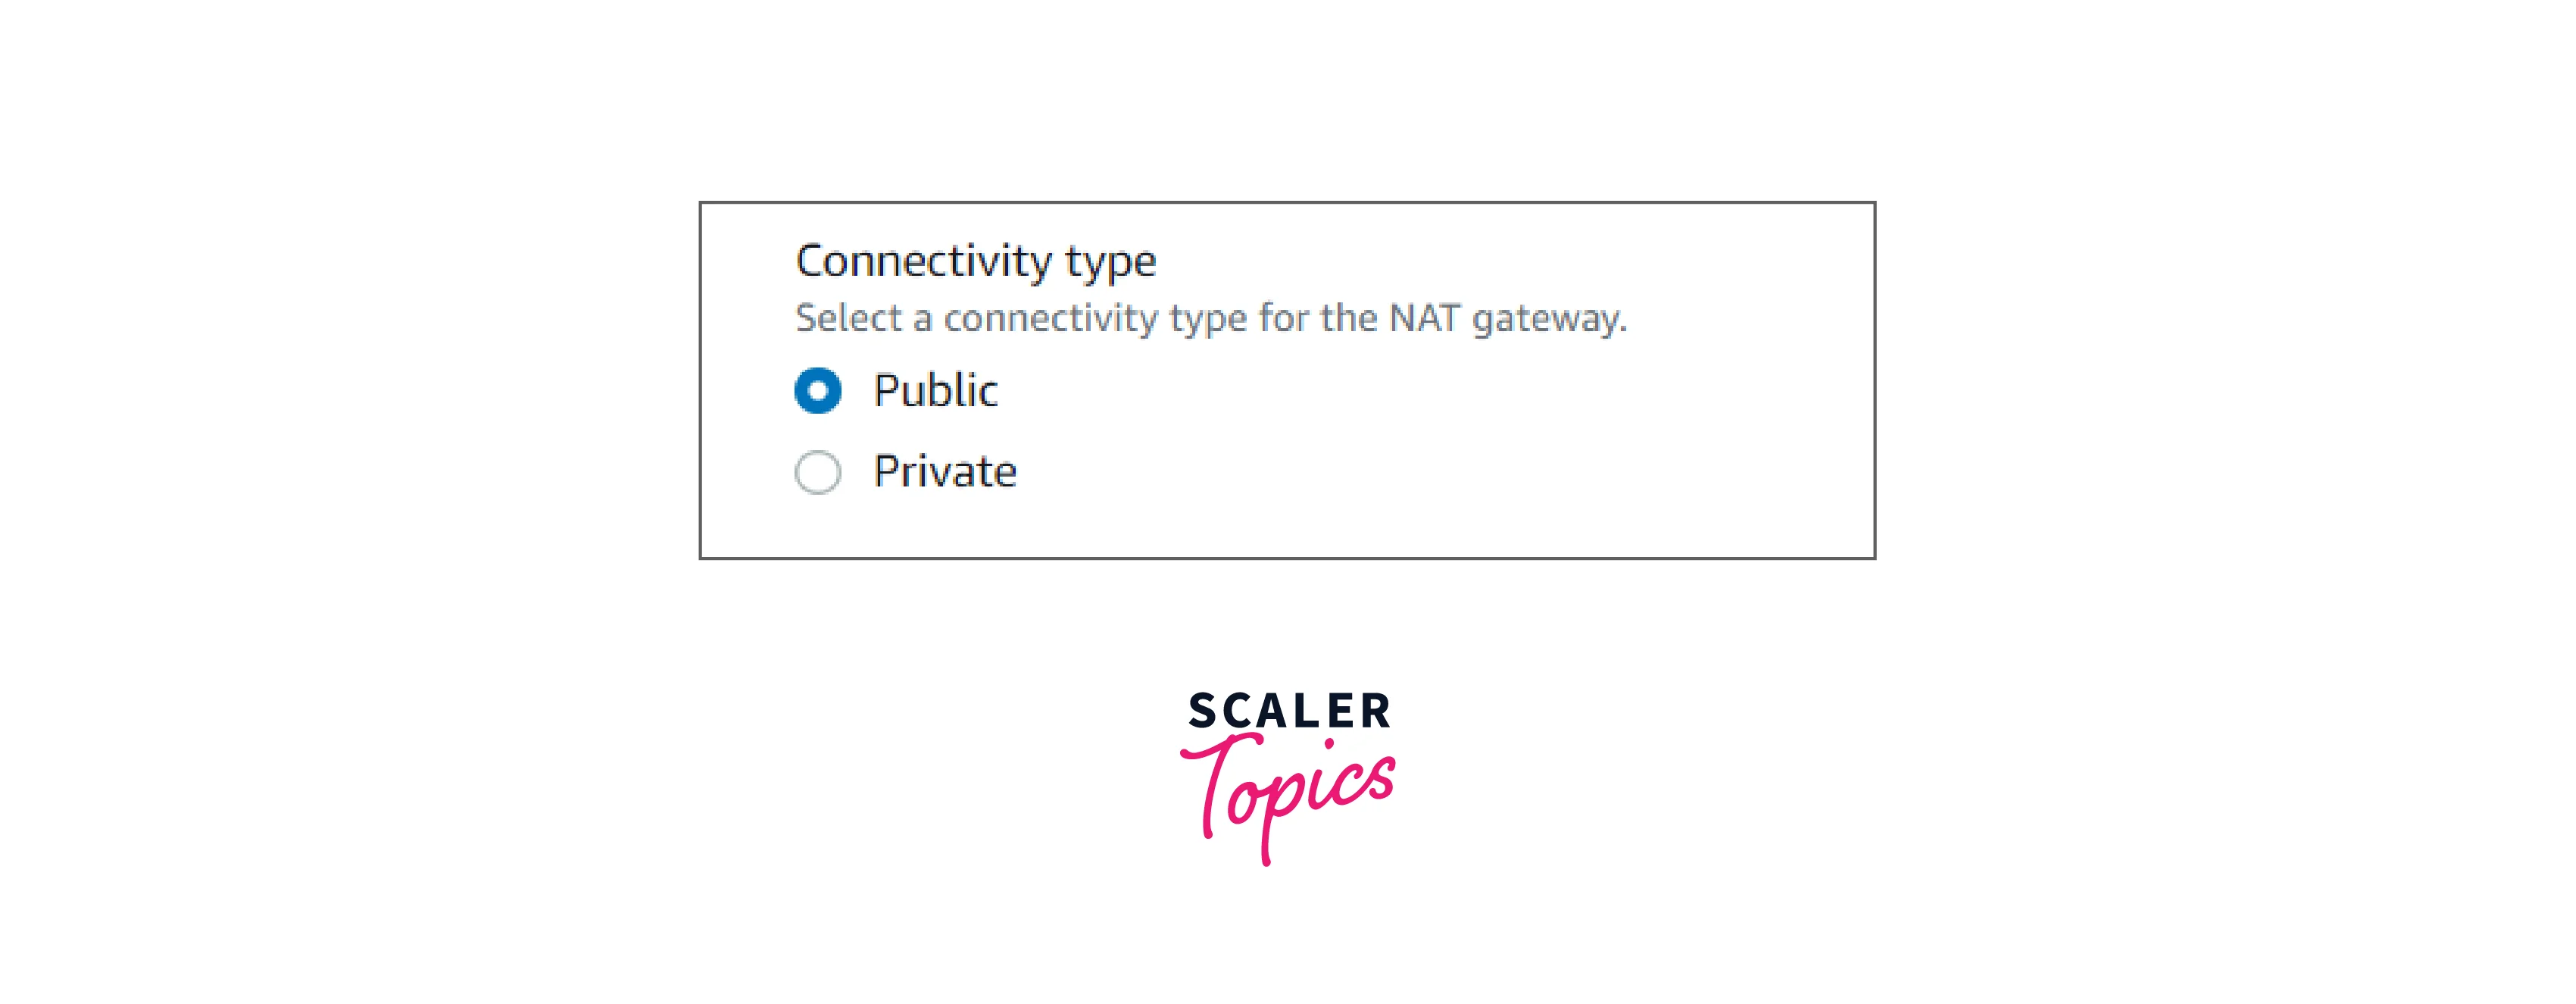
In AWS, we are provided with two types of connectivity for NAT Gateway.
-
Public: Public NAT Gateway is the default NAT Gateway. Under this, private subnet instances can connect to the internet but cannot receive connections from the internet.
We can use this type of connectivity in the following scenarios:
- We can create a public NAT gateway in a public subnet and associate an elastic IP address to it. In this case, we are routing traffic from the NAT Gateway to the Internet Gateway for the VPC.
- We can use a public NAT gateway to connect to other VPCs or our on-premises network. In this case, we are routing traffic from the NAT gateway through a transit gateway or a virtual private gateway.
-
Private: In this type, private subnets can connect to other VPCs. The private subnets can also connect to our on-premises network through a private NAT gateway. For the integration of different VPCs for a project, teams want to enable communication between networks with overlapping CIDRs (Classless Inter-domain Routing), which is impossible through VPC peering and Transit Gateway. So, Such use cases are handled by a private NAT gateway.
We cannot attach an Elastic IP address with a private NAT gateway.
In the features of NAT Gateway, we mentioned a point 'It replaces the source IP address of the instances with the IP address of the NAT gateway'.
For the public NAT gateway, the source IP address gets replaced with the Elastic IP address, however, for the private NAT Gateway, the source IP address gets replaced by the private IP address of the NAT Gateway.
Setting Up a NAT Gateway
Before setting up a NAT Gateway, we need to have the following things done:
-
Create a VPC Subnet. Let's start with creating a public vpc subnet with the following steps:
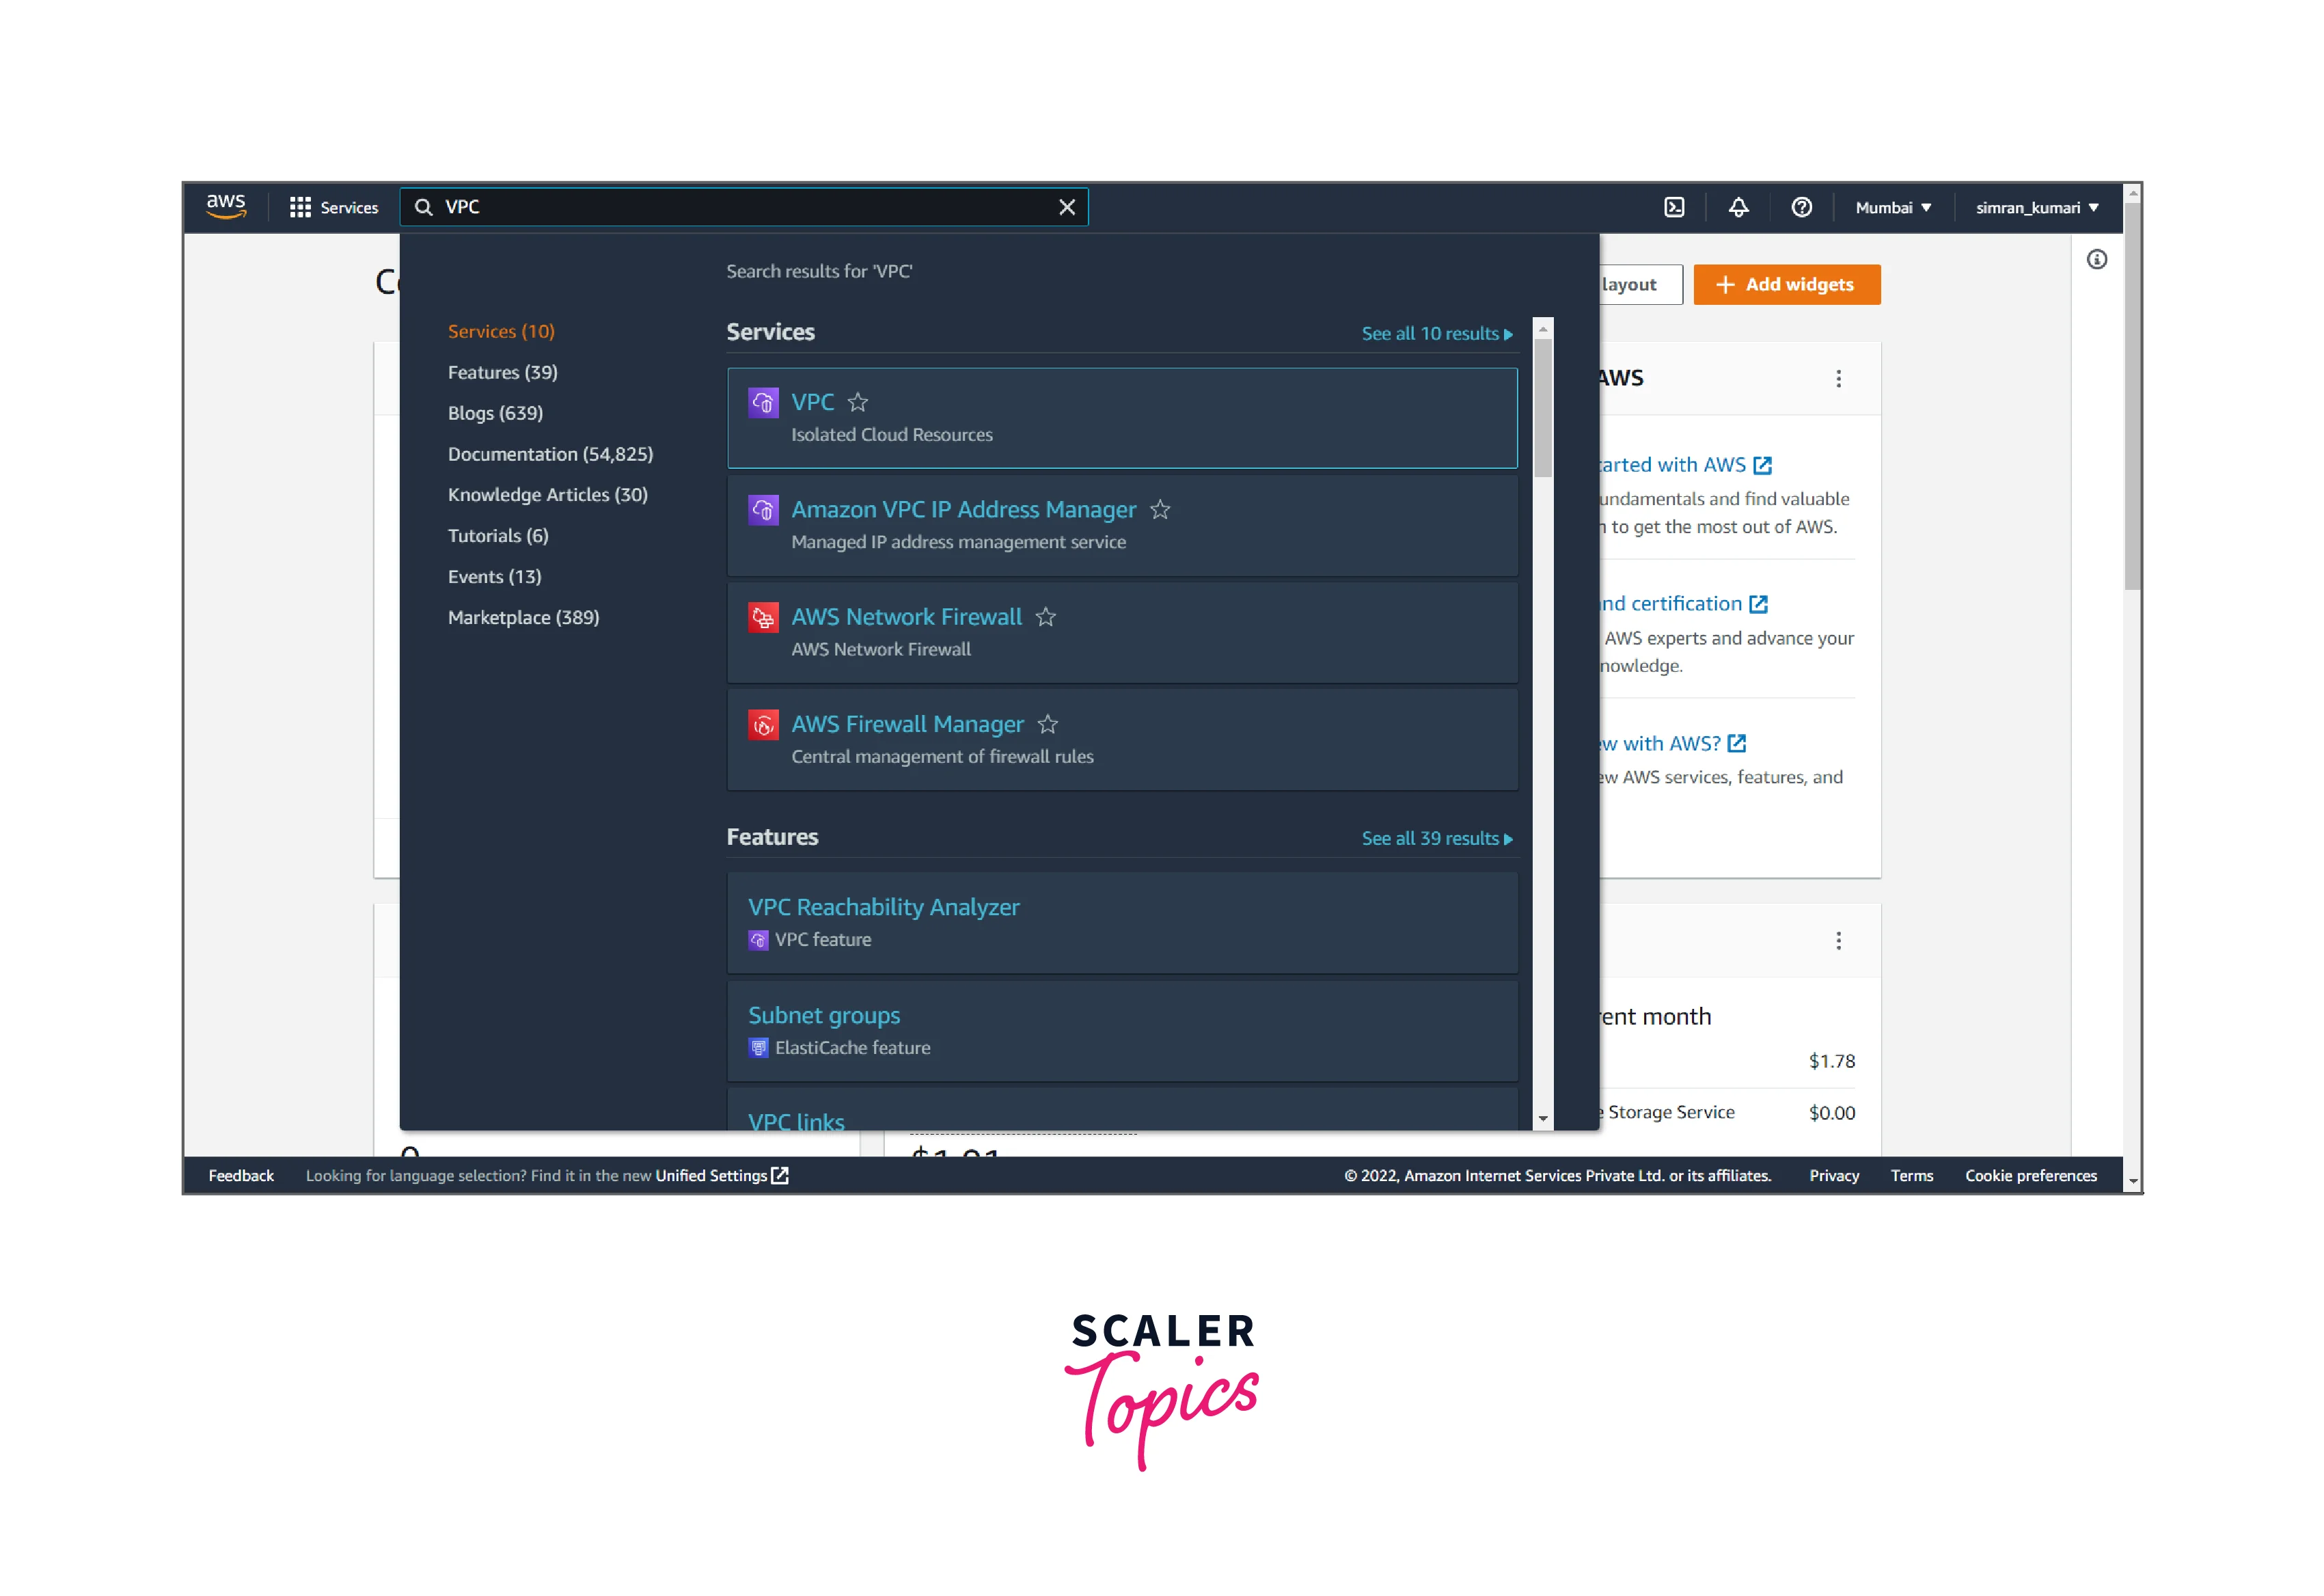
- Log in to the AWS account, search for VPC in the search bar, and click the VPC service.
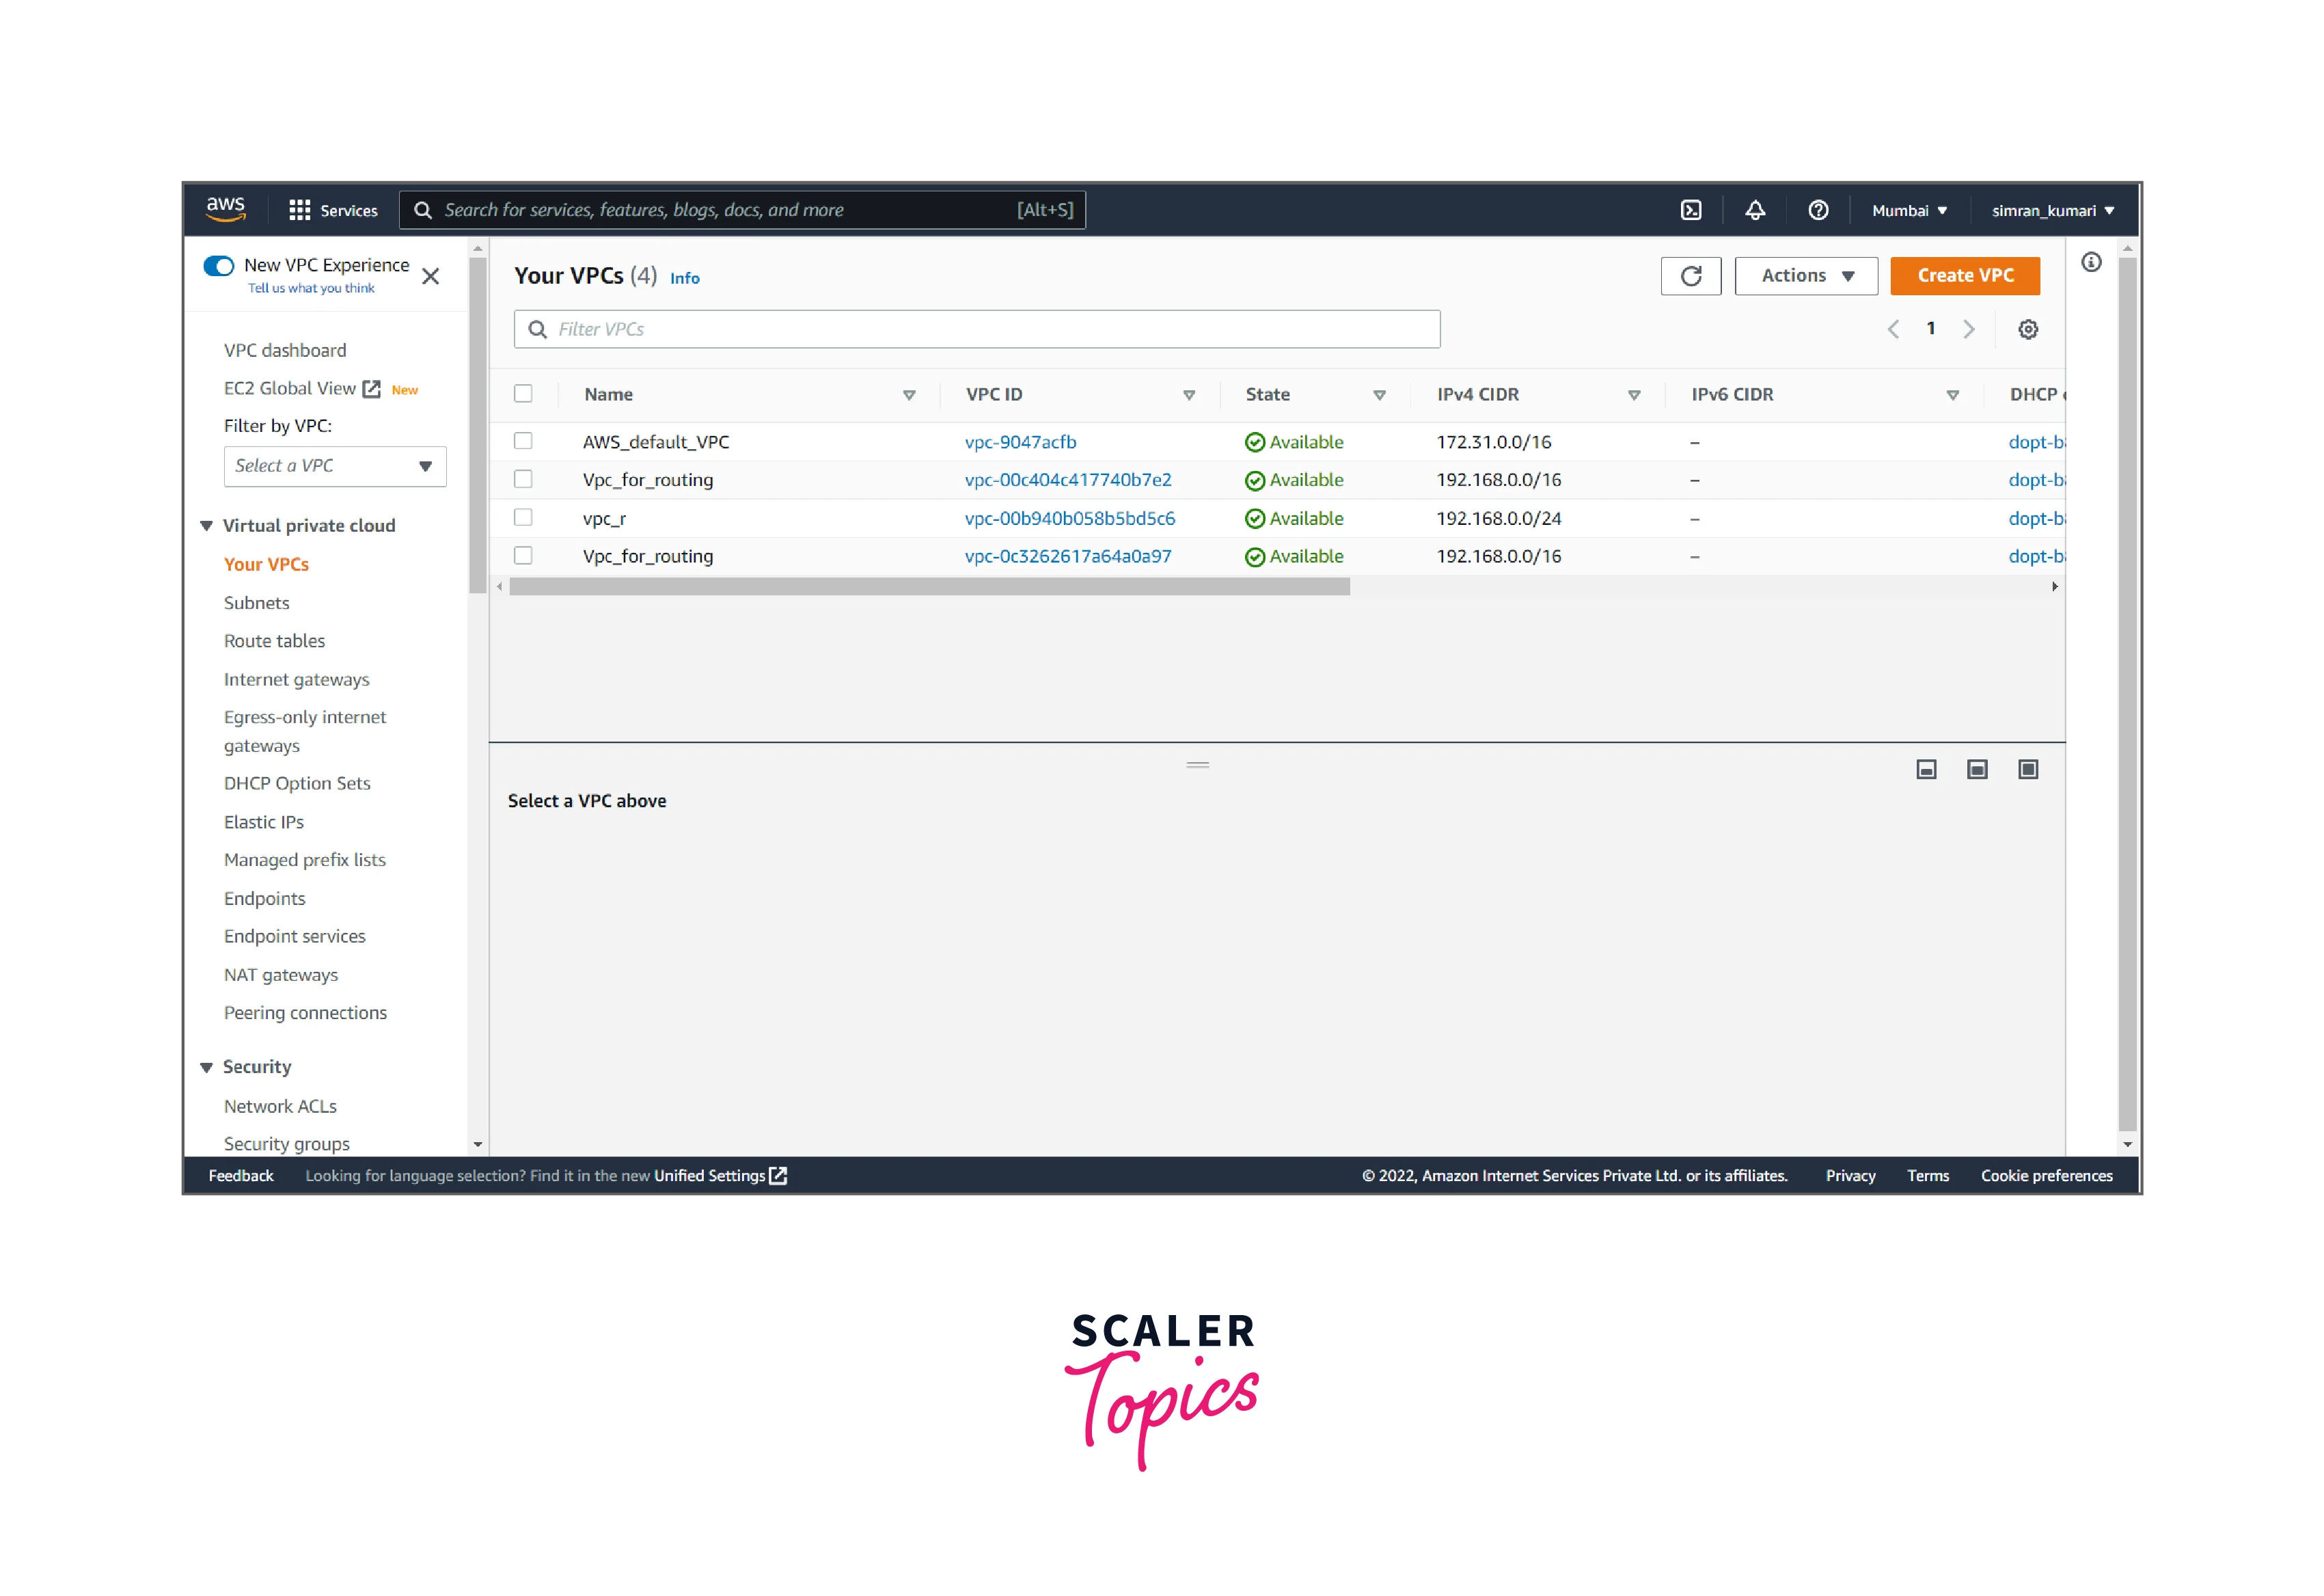
- Click on Your VPCs from the left navigation bar. We have to create a new VPC by clicking on Create VPC.
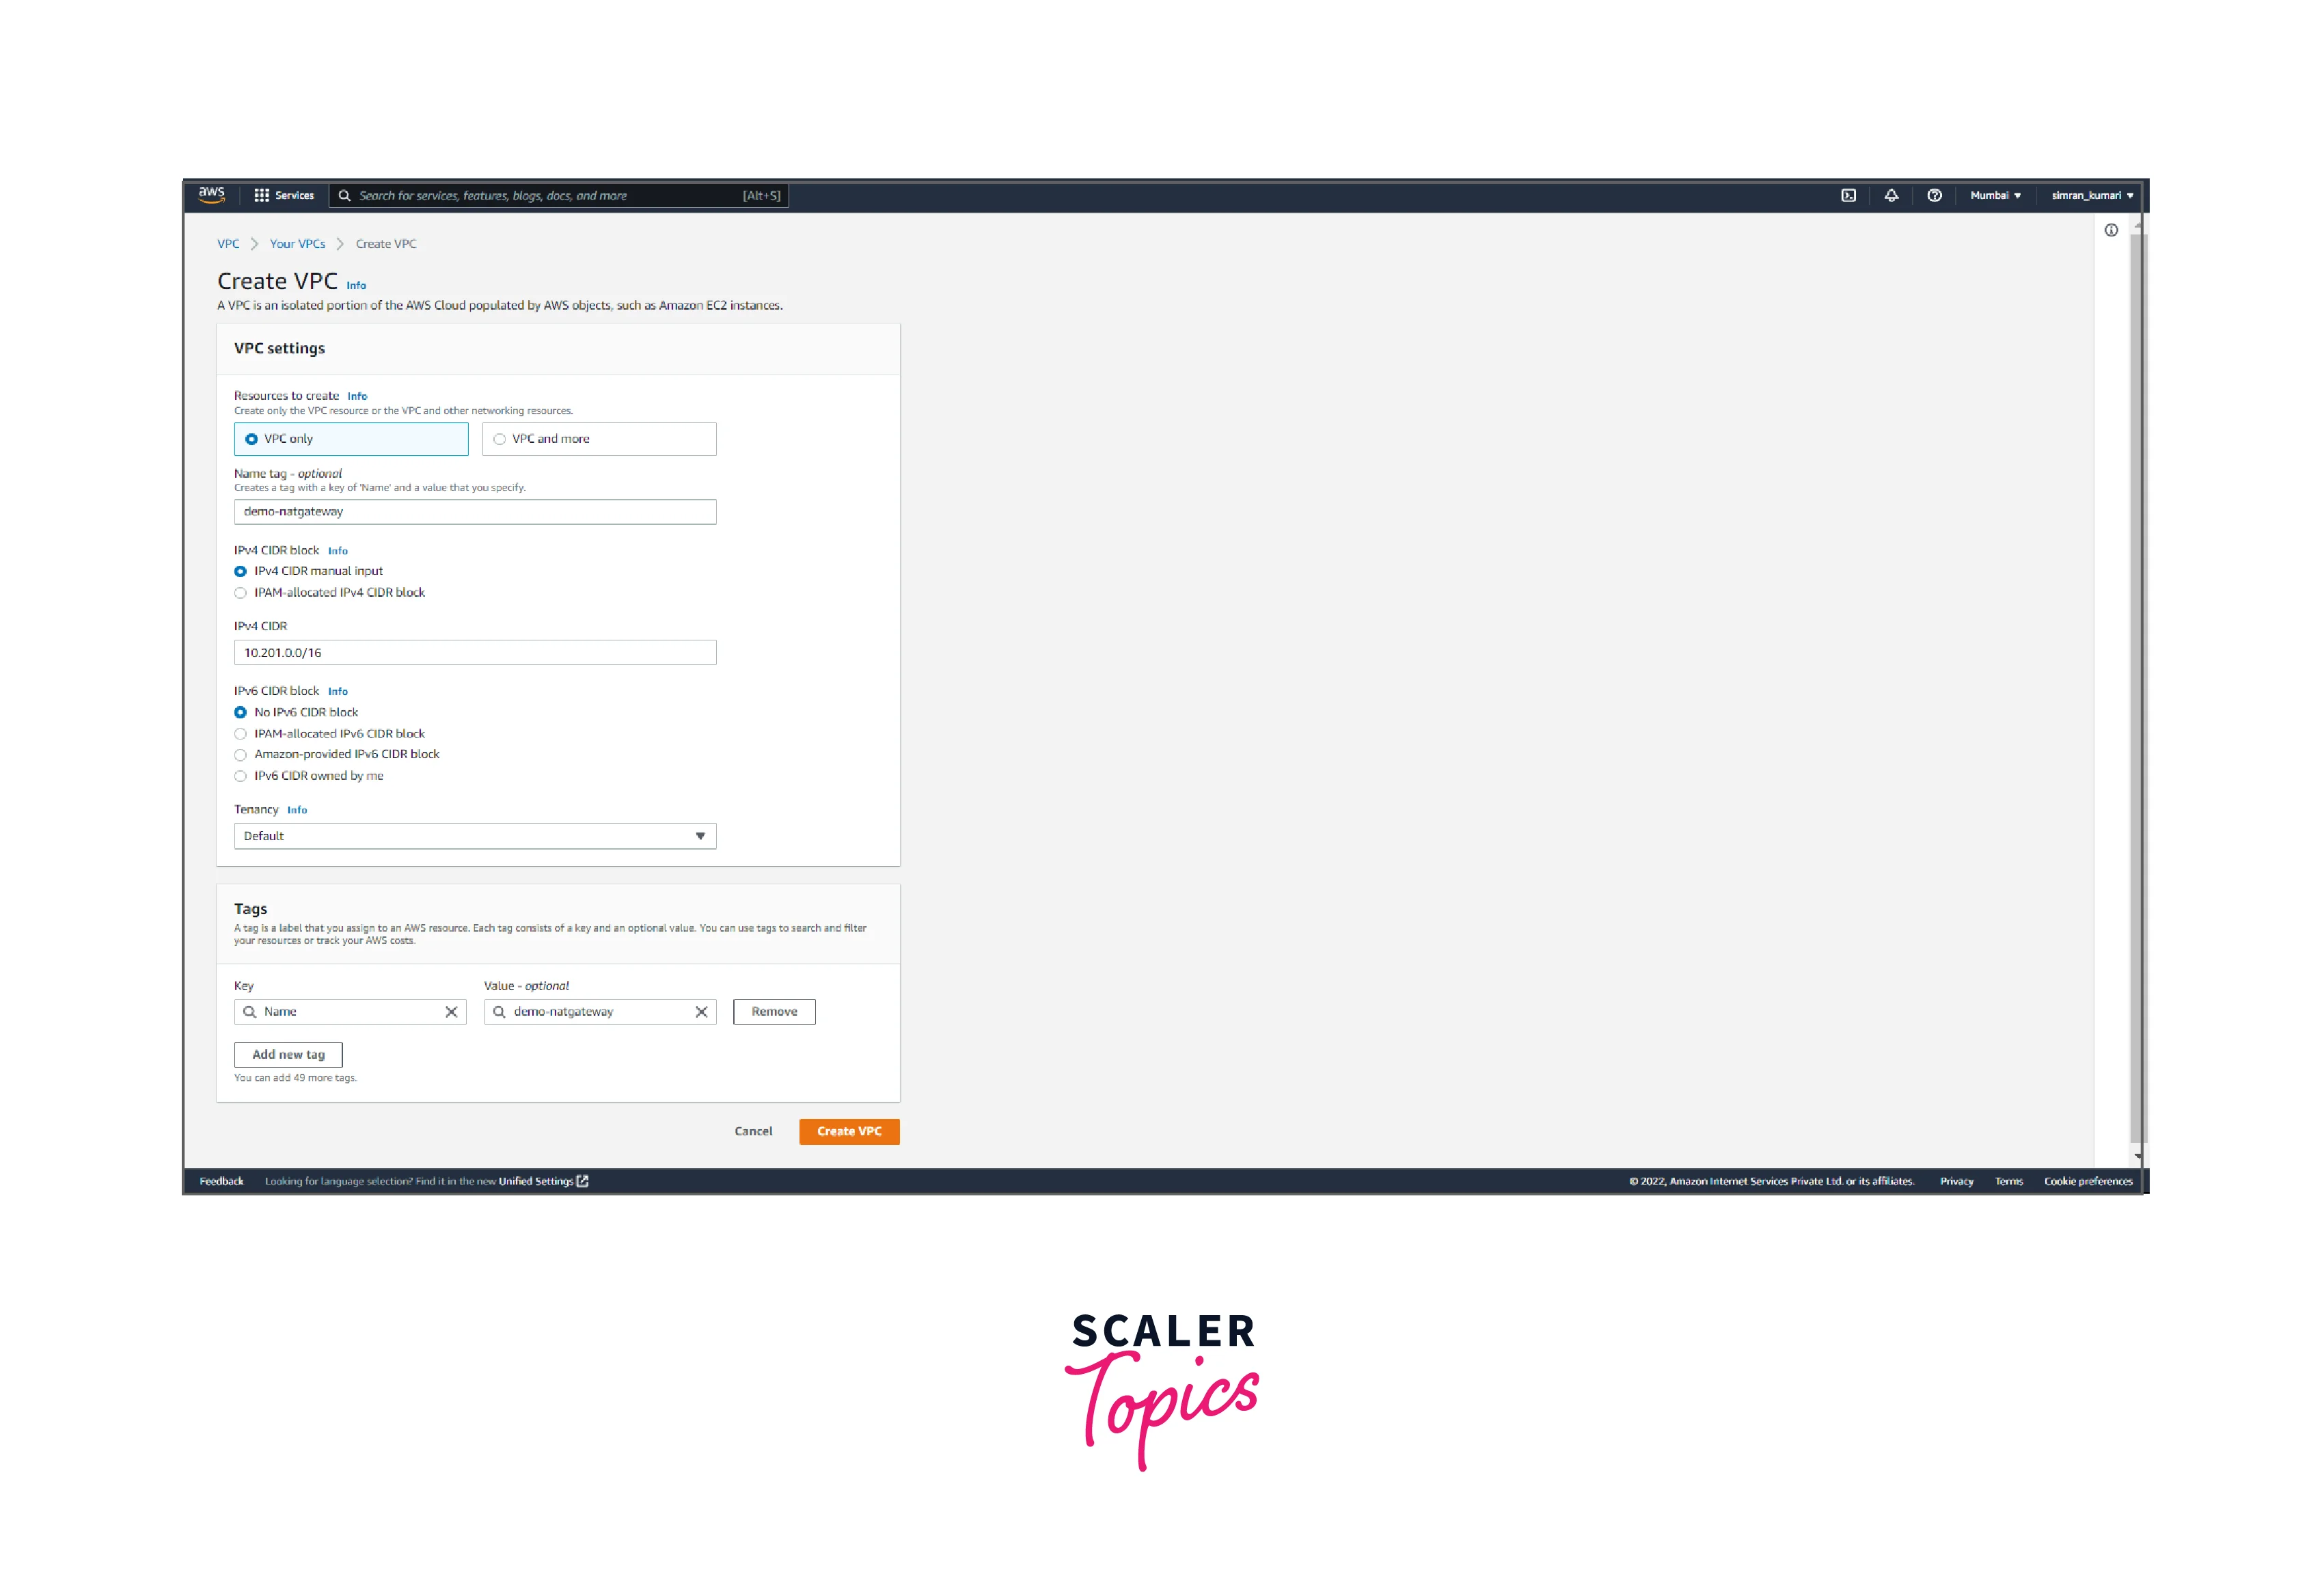
- Fill in the name of VPC and IP range, and click on Create VPC.
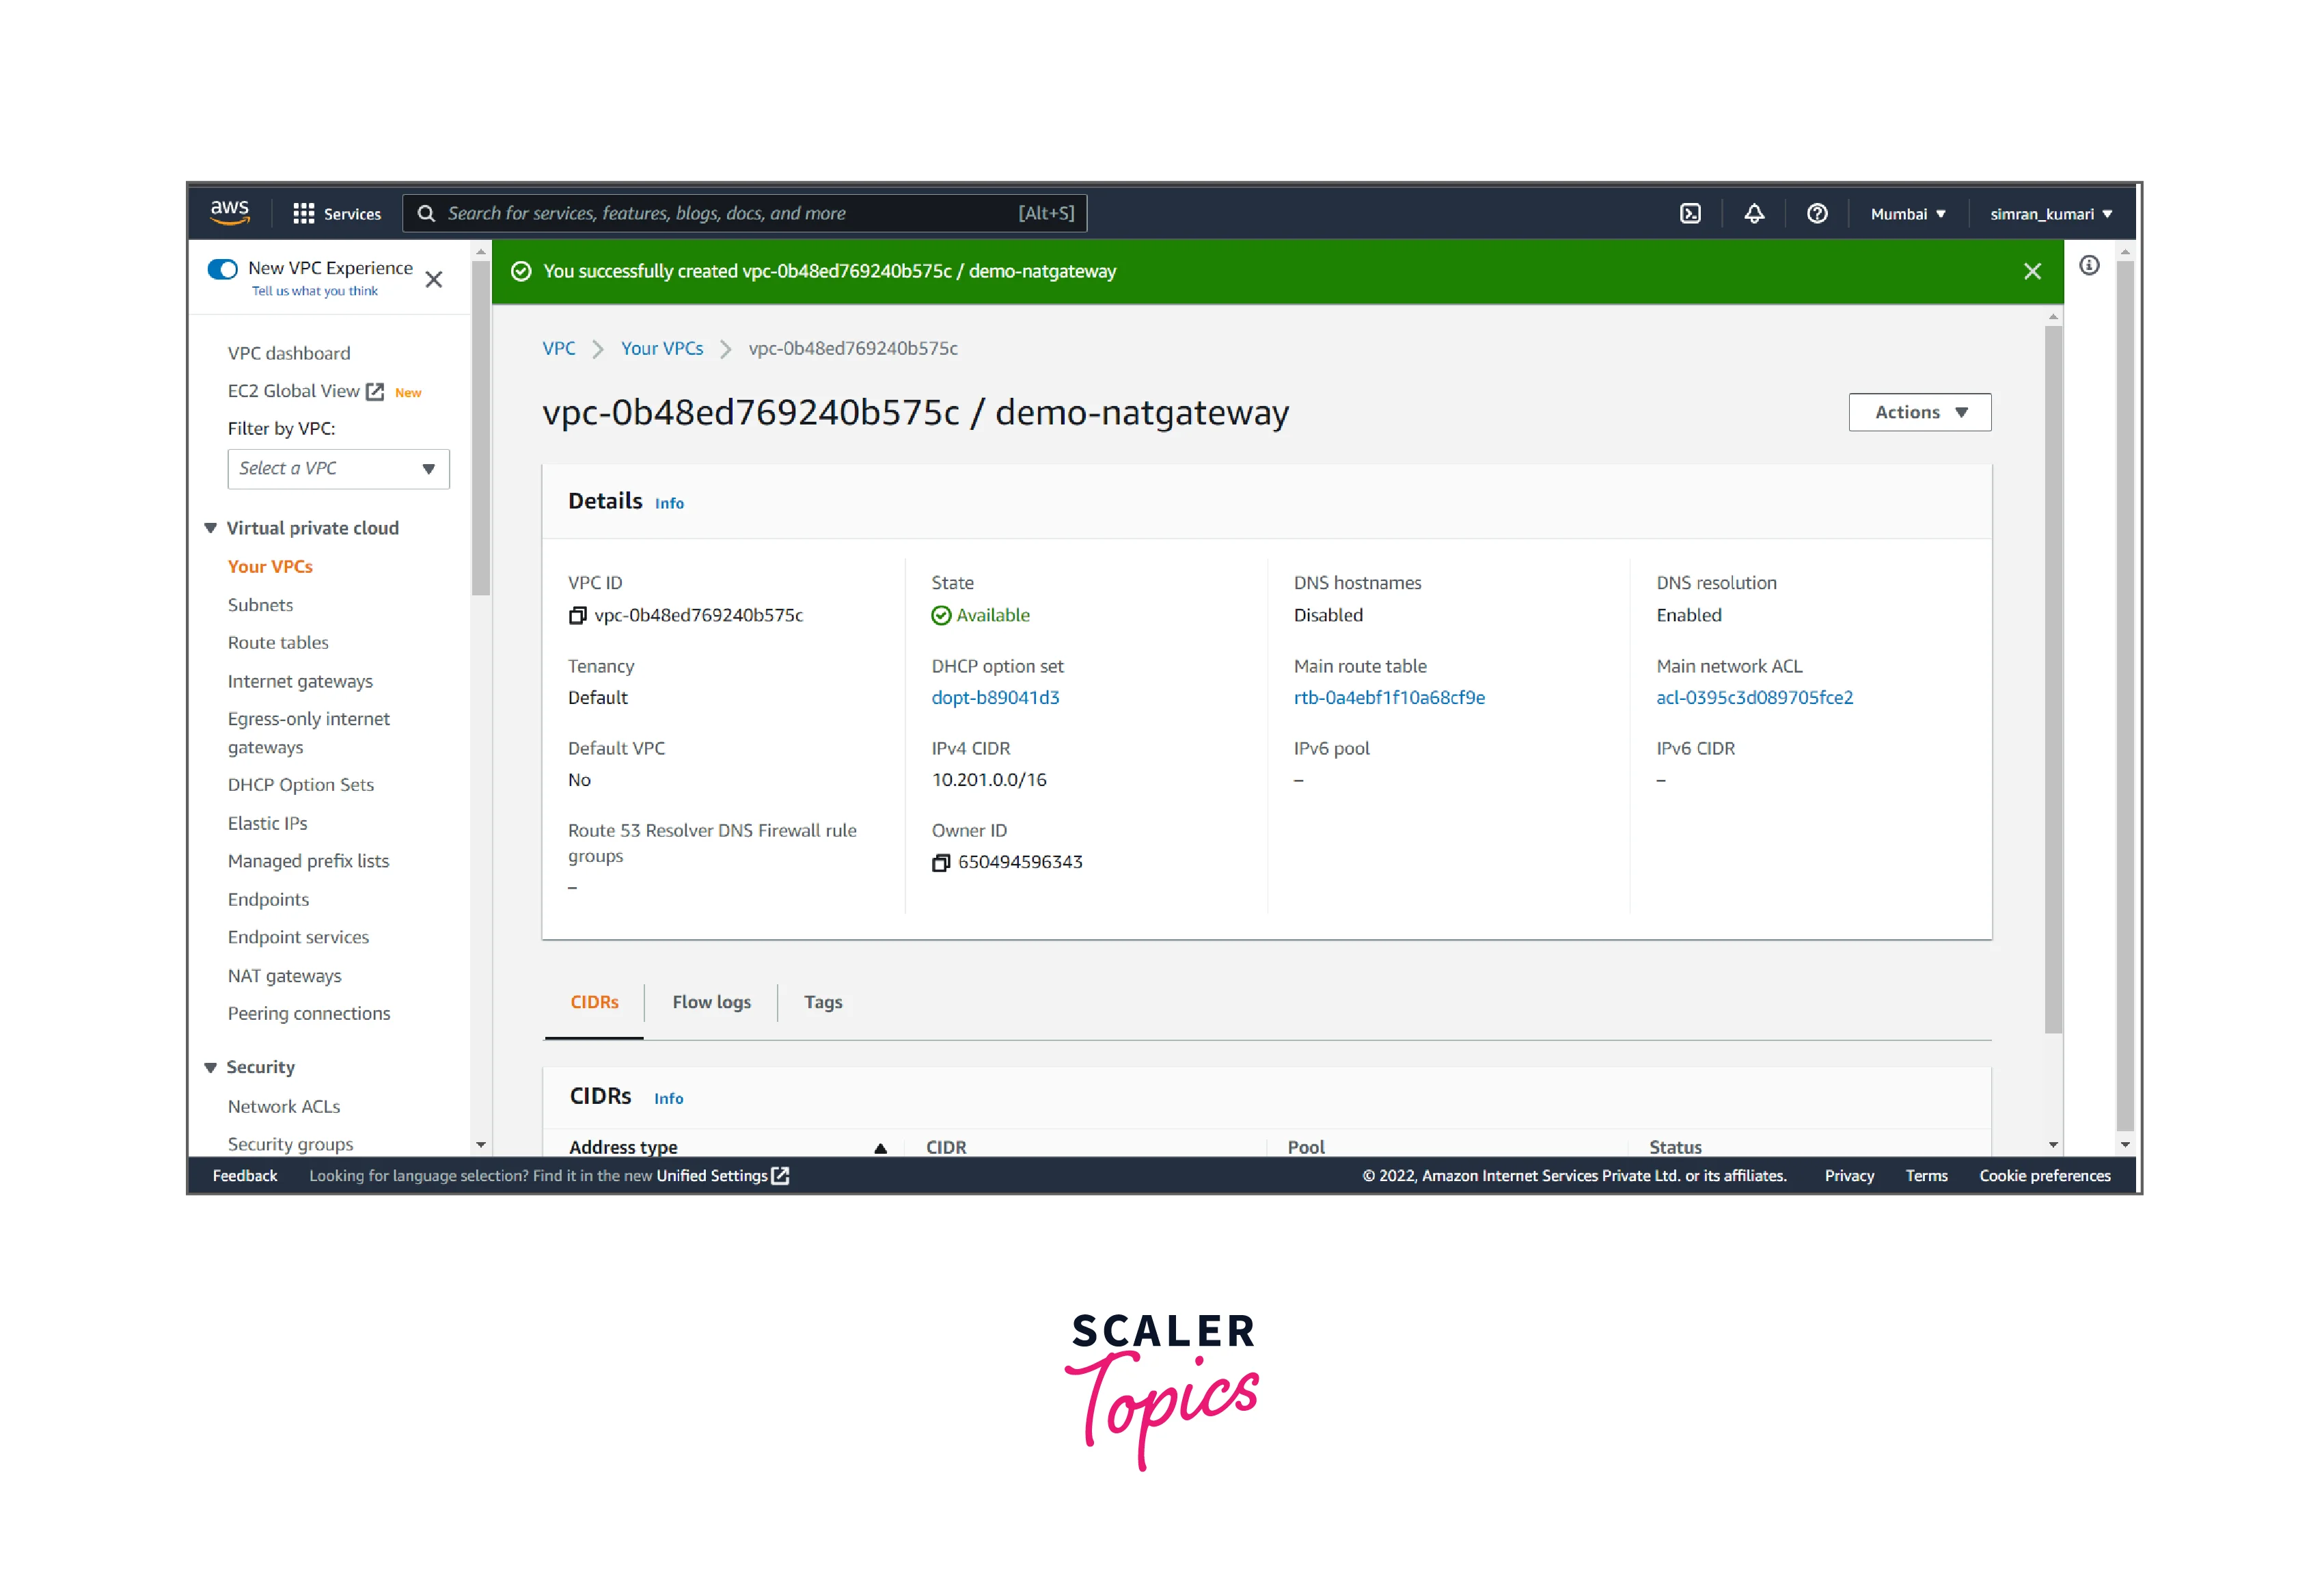
- VPC is successfully created.
- Click on Subnets from the left navigation bar. Here we have to create public and private subnets by clicking on Create subnet.
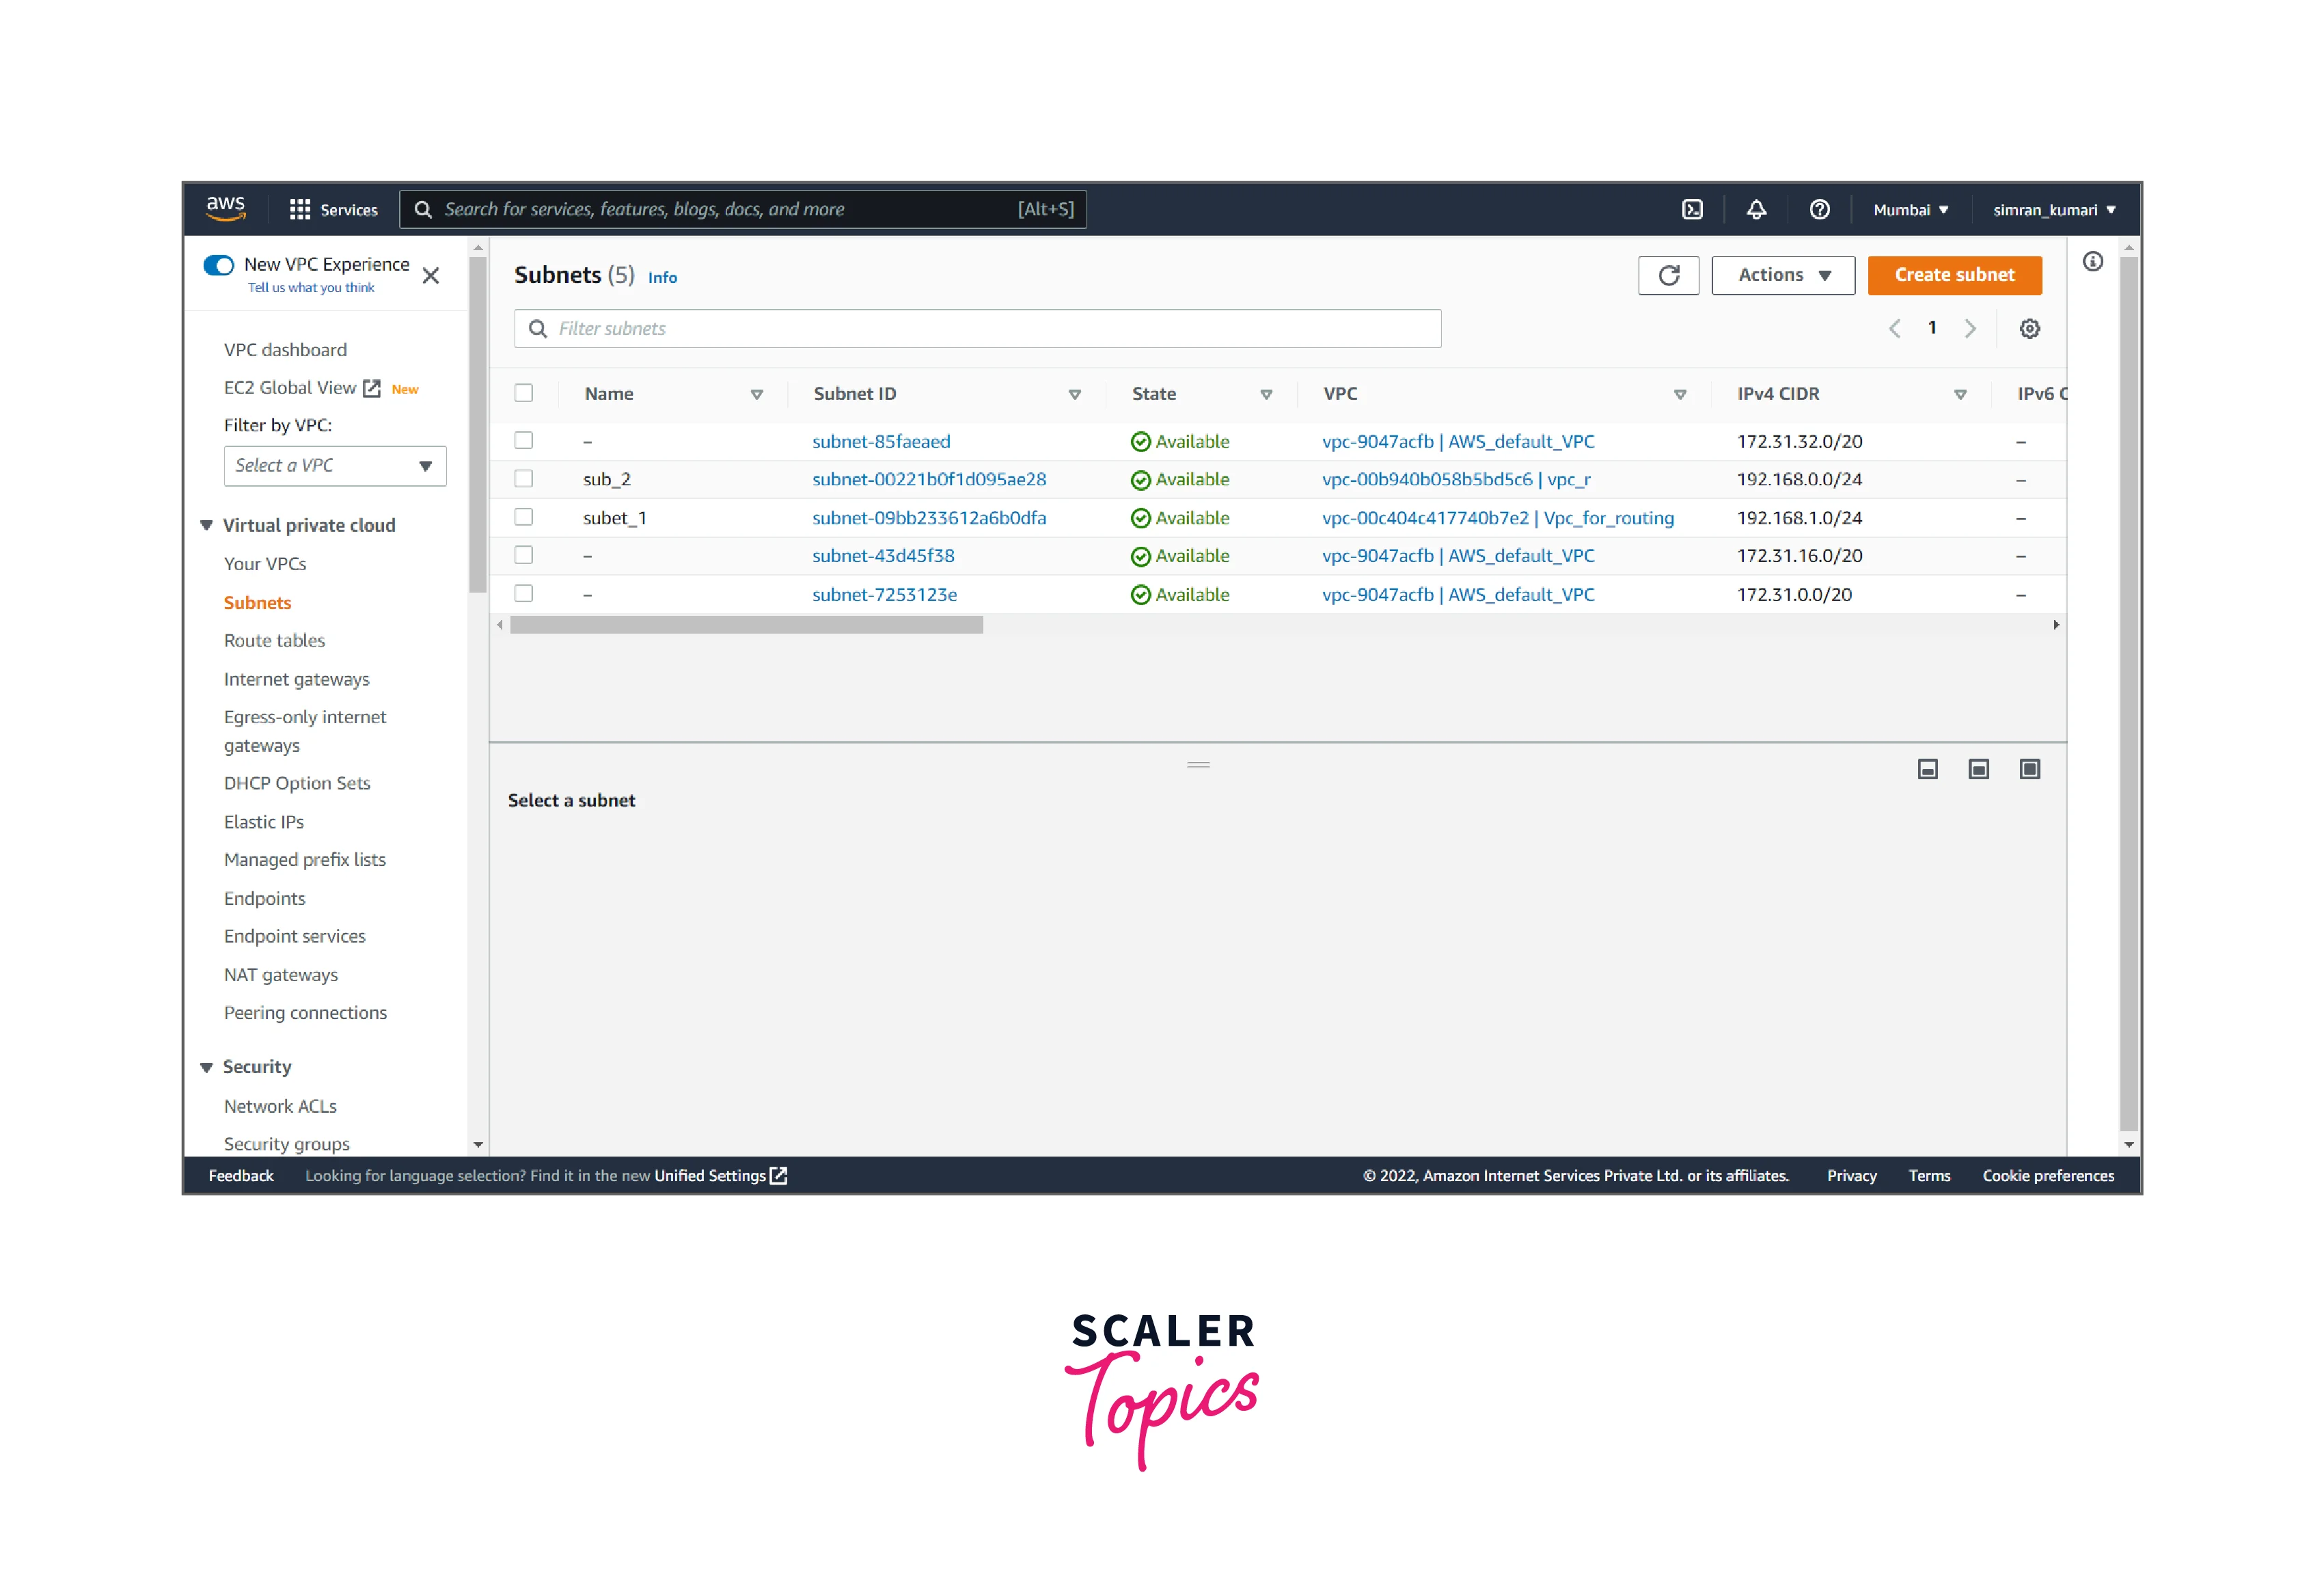
- Choose the VPC.
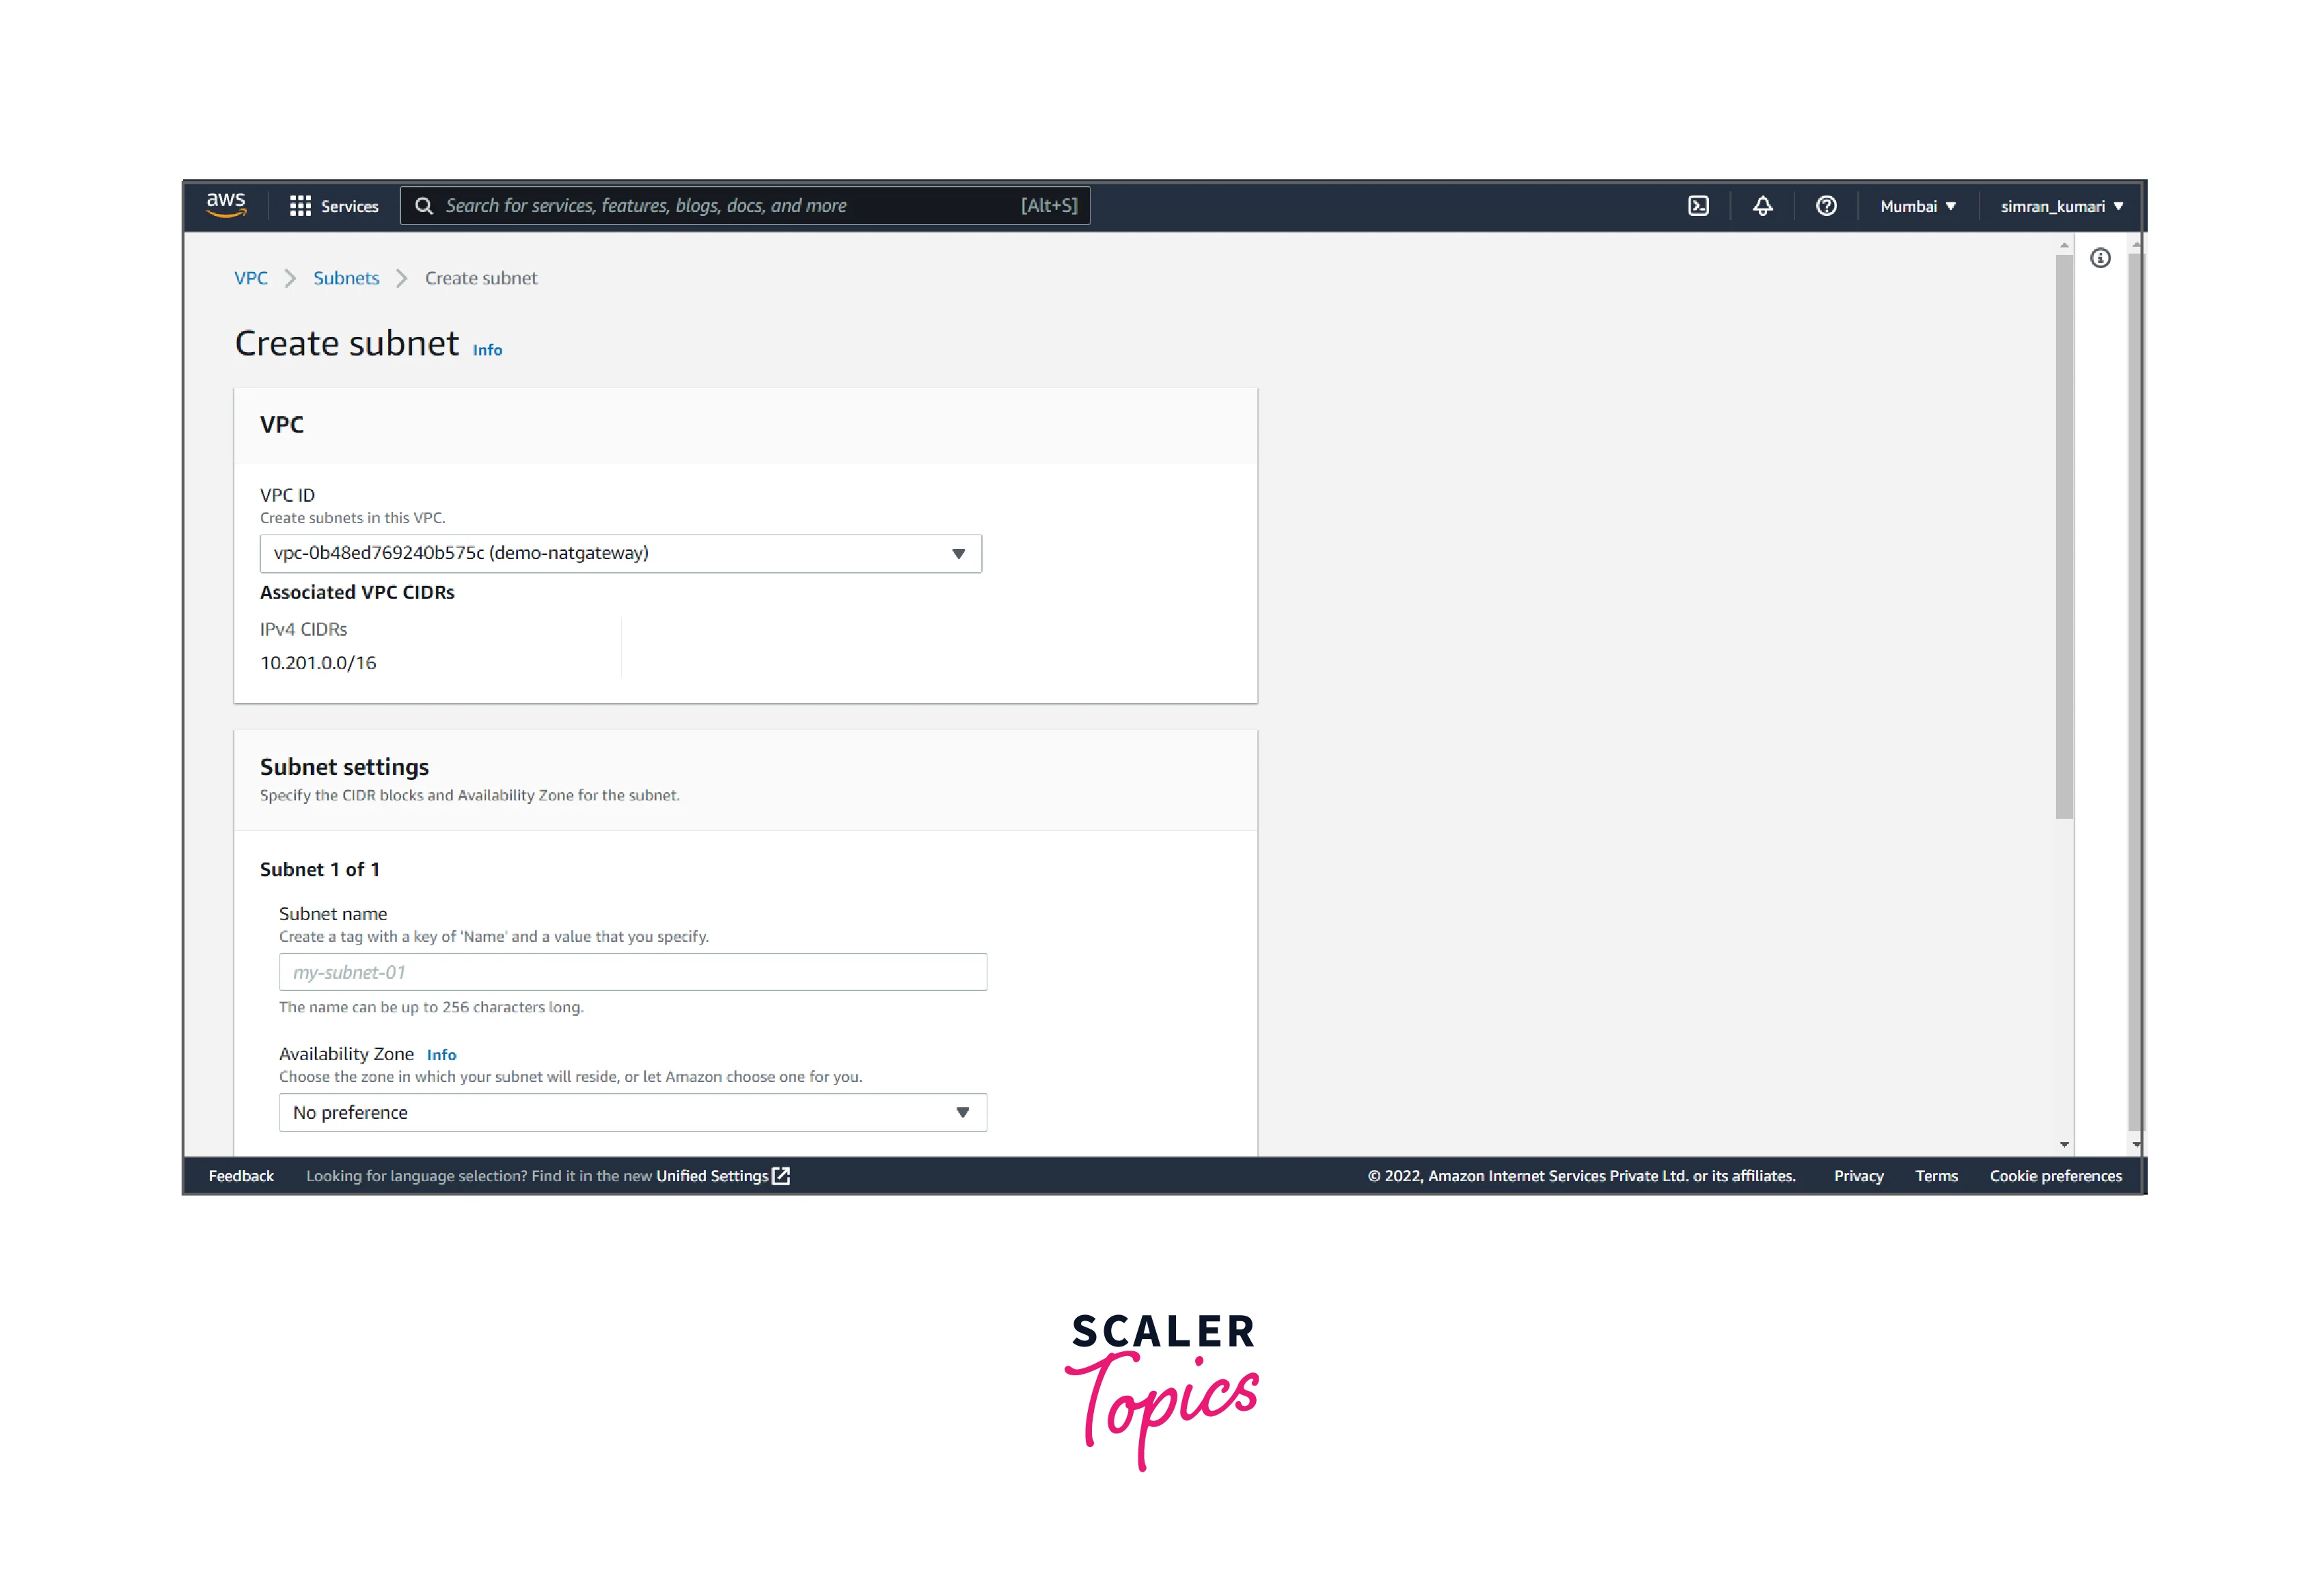
- Fill in the subnet name (public), Availability Zones, and IP range, and click on add new subnet.
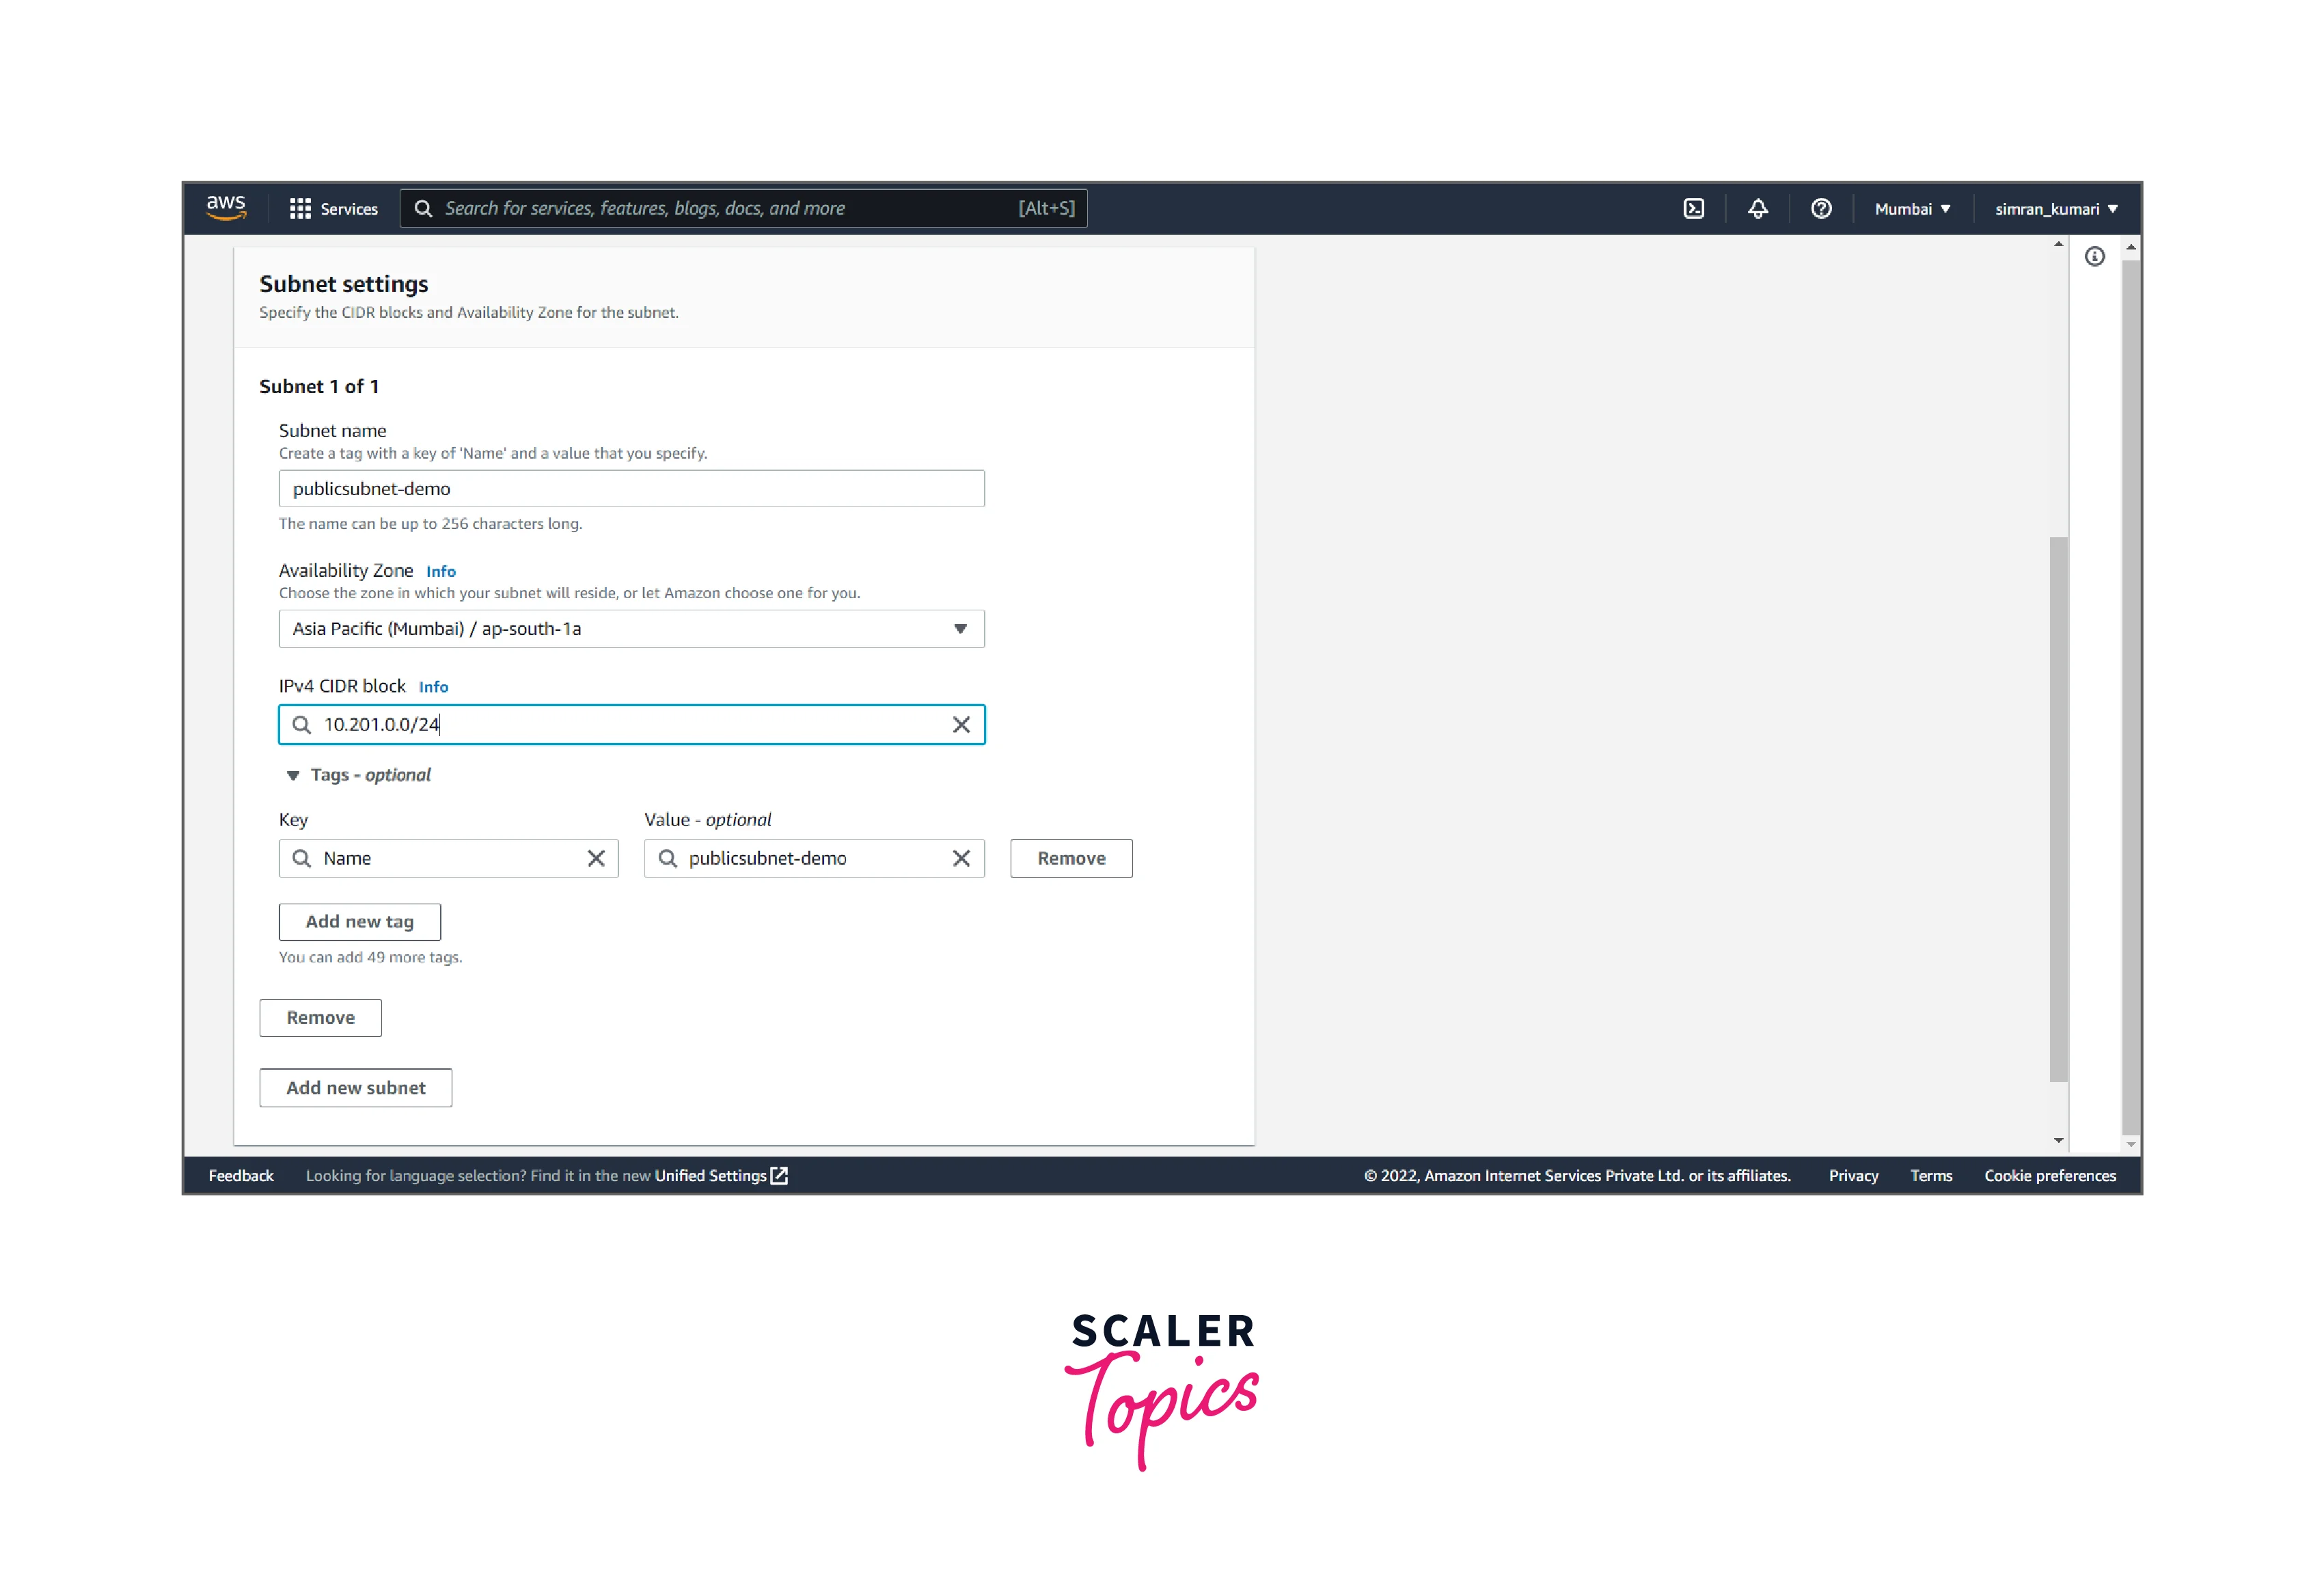
- Fill in the subnet name (private), Availability Zones, and IP range, and click Create subnet.

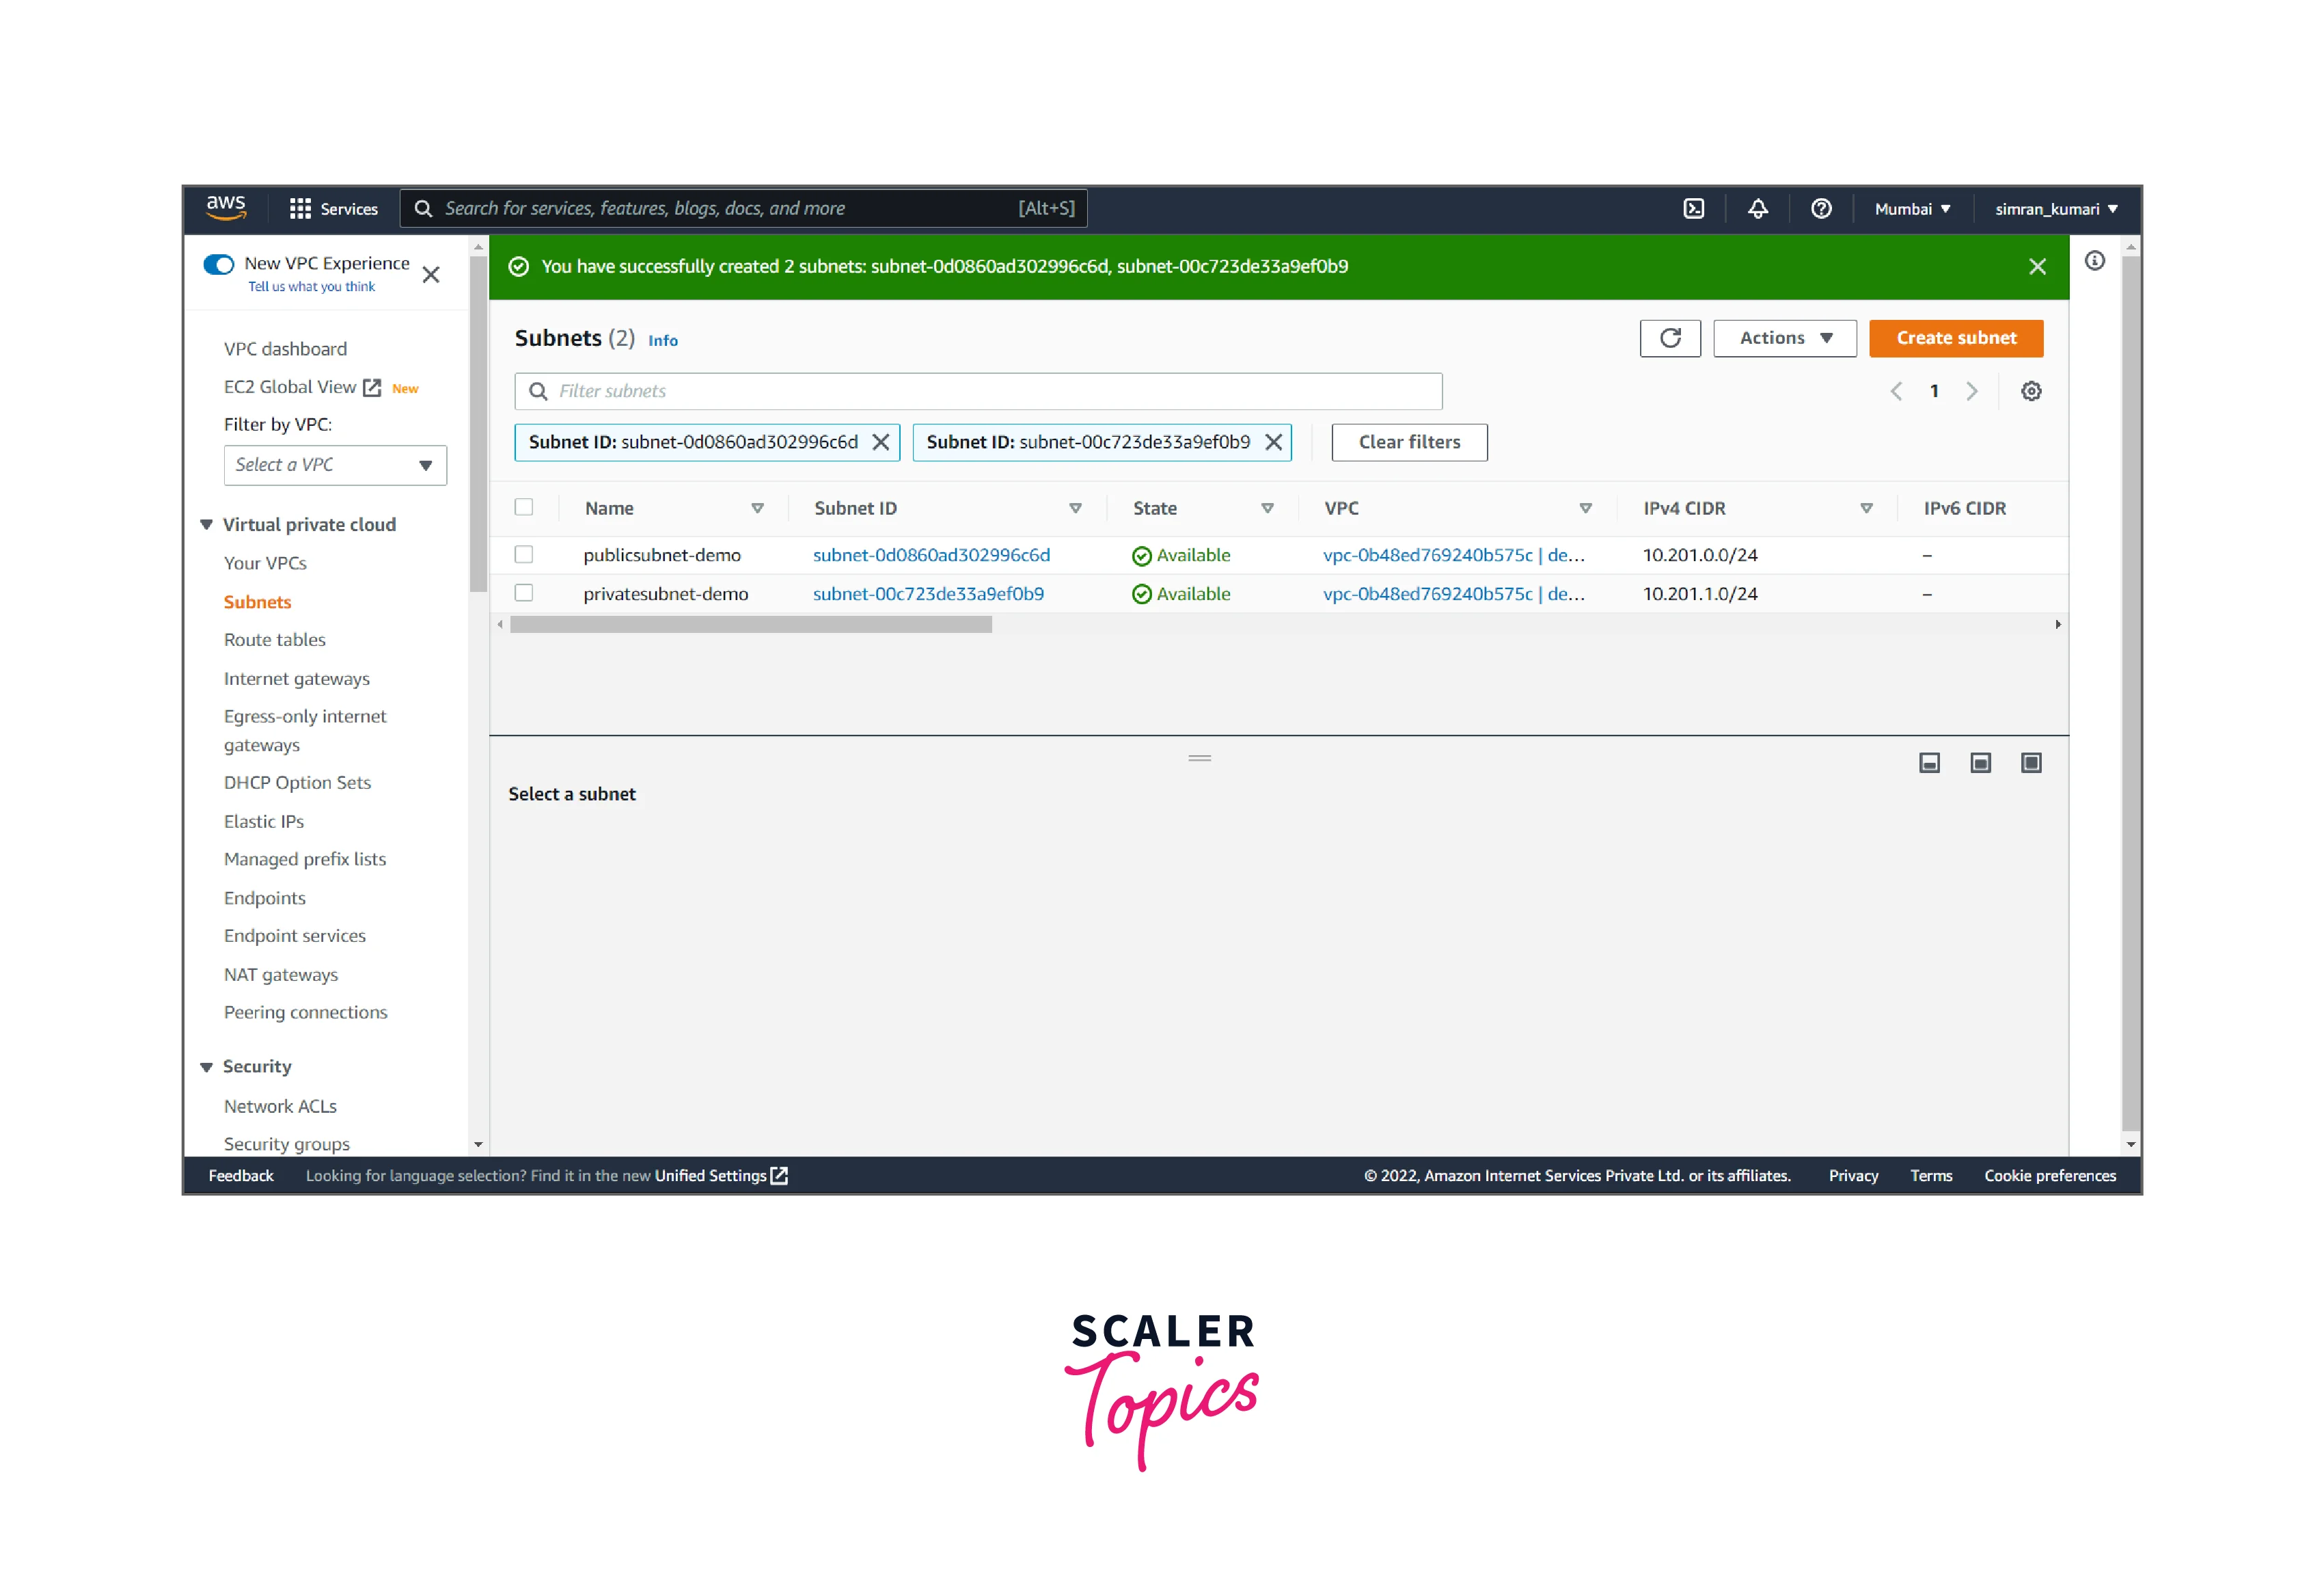
- VPC subnet is successfully created.
-
Create an internet gateway. For this, follow the following steps:
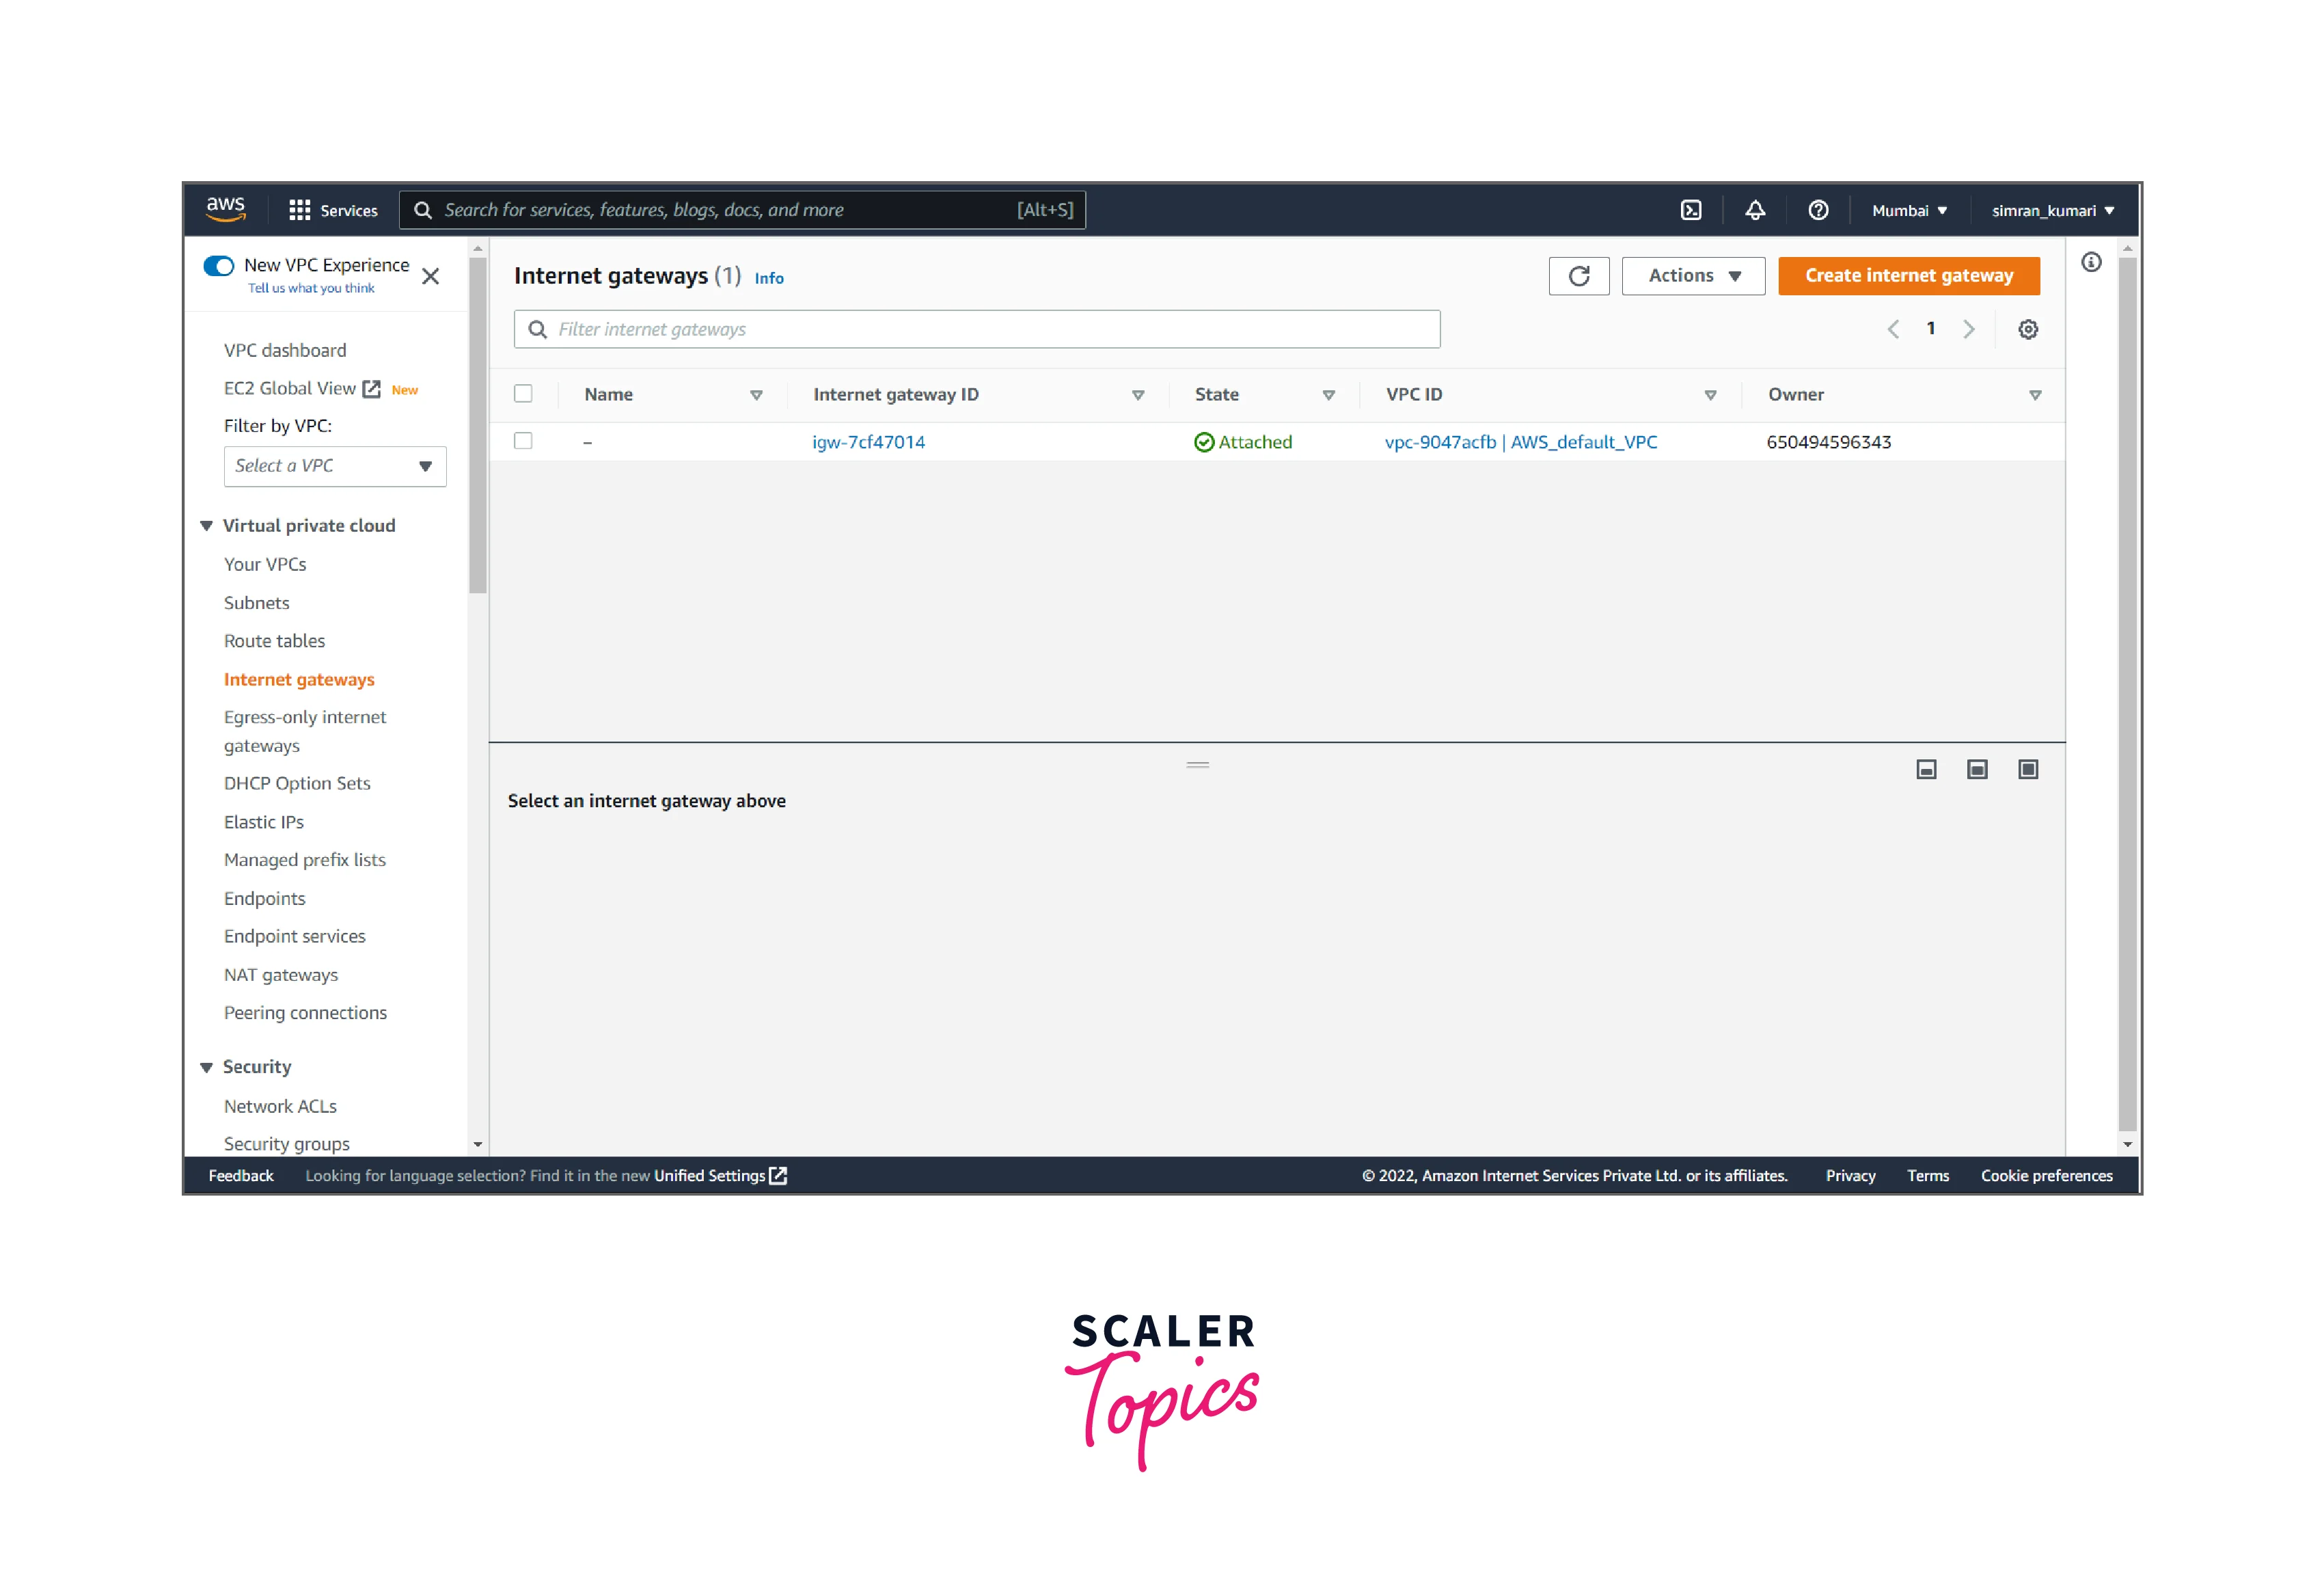
- Click on Internet gateways from the left navigation bar. Here we have to create a new Internet gateway by clicking on Create Internet gateway.
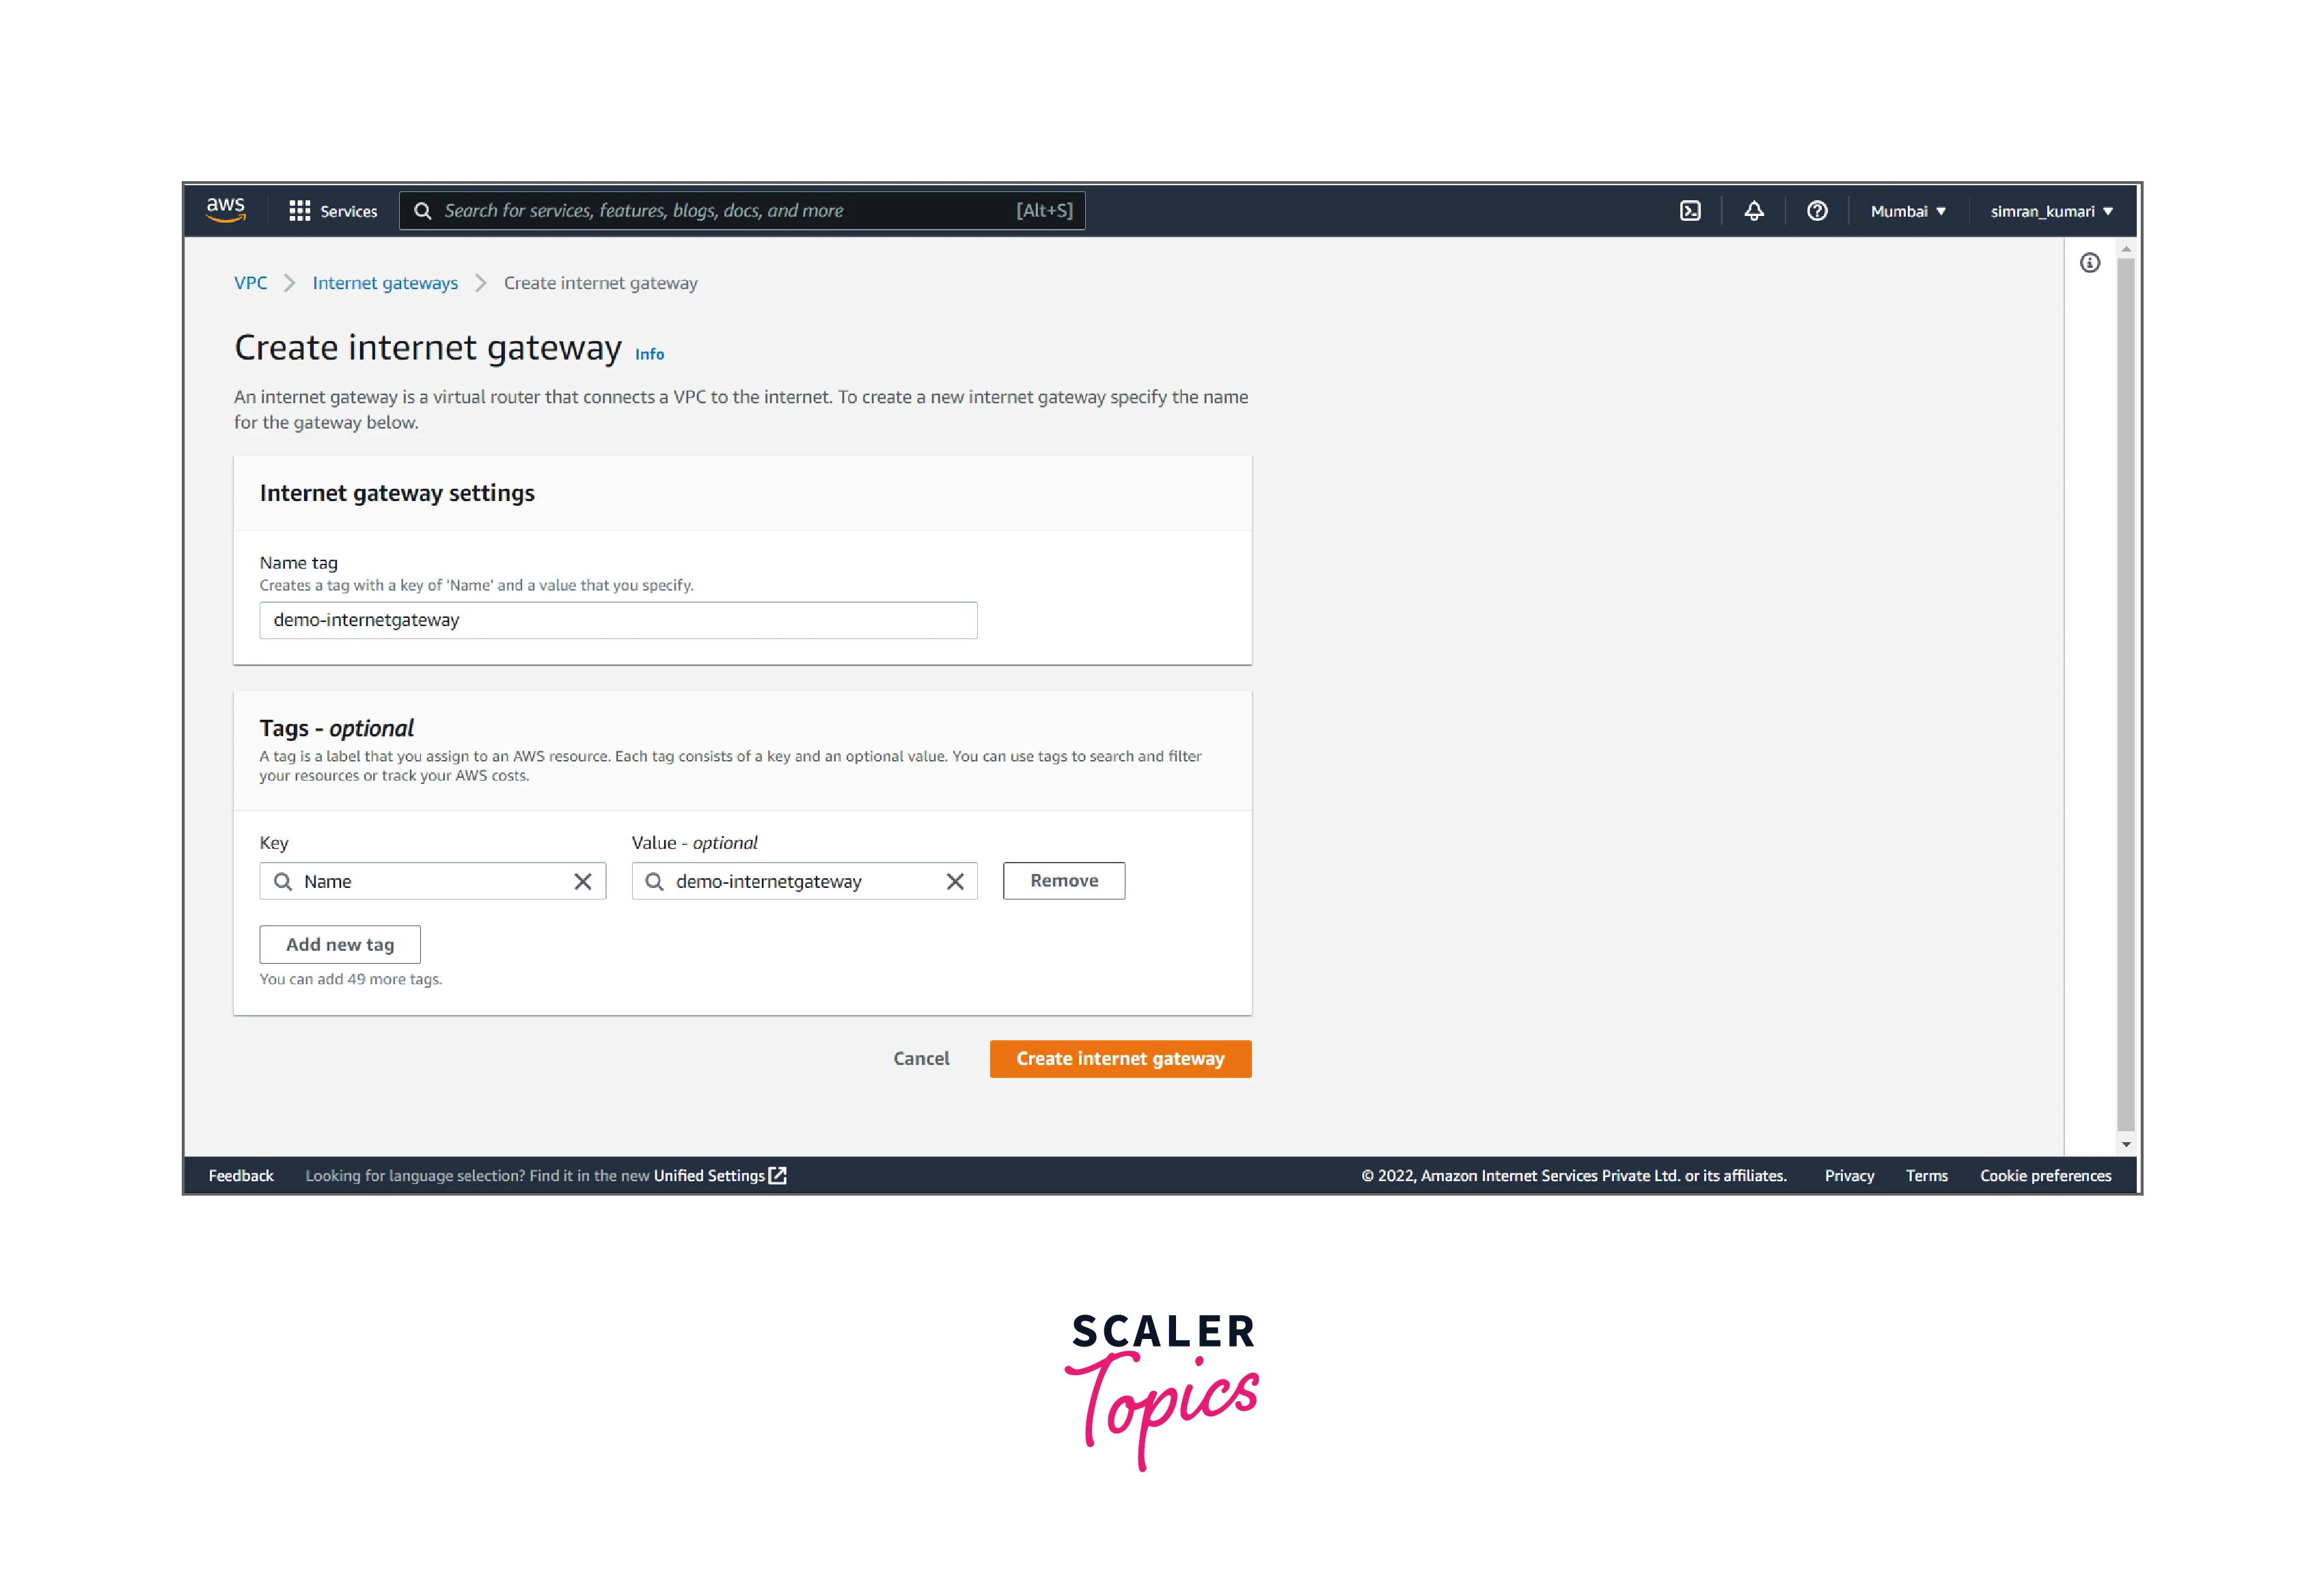
- Fill in the name of the internet gateway, and click on Create internet gateway.
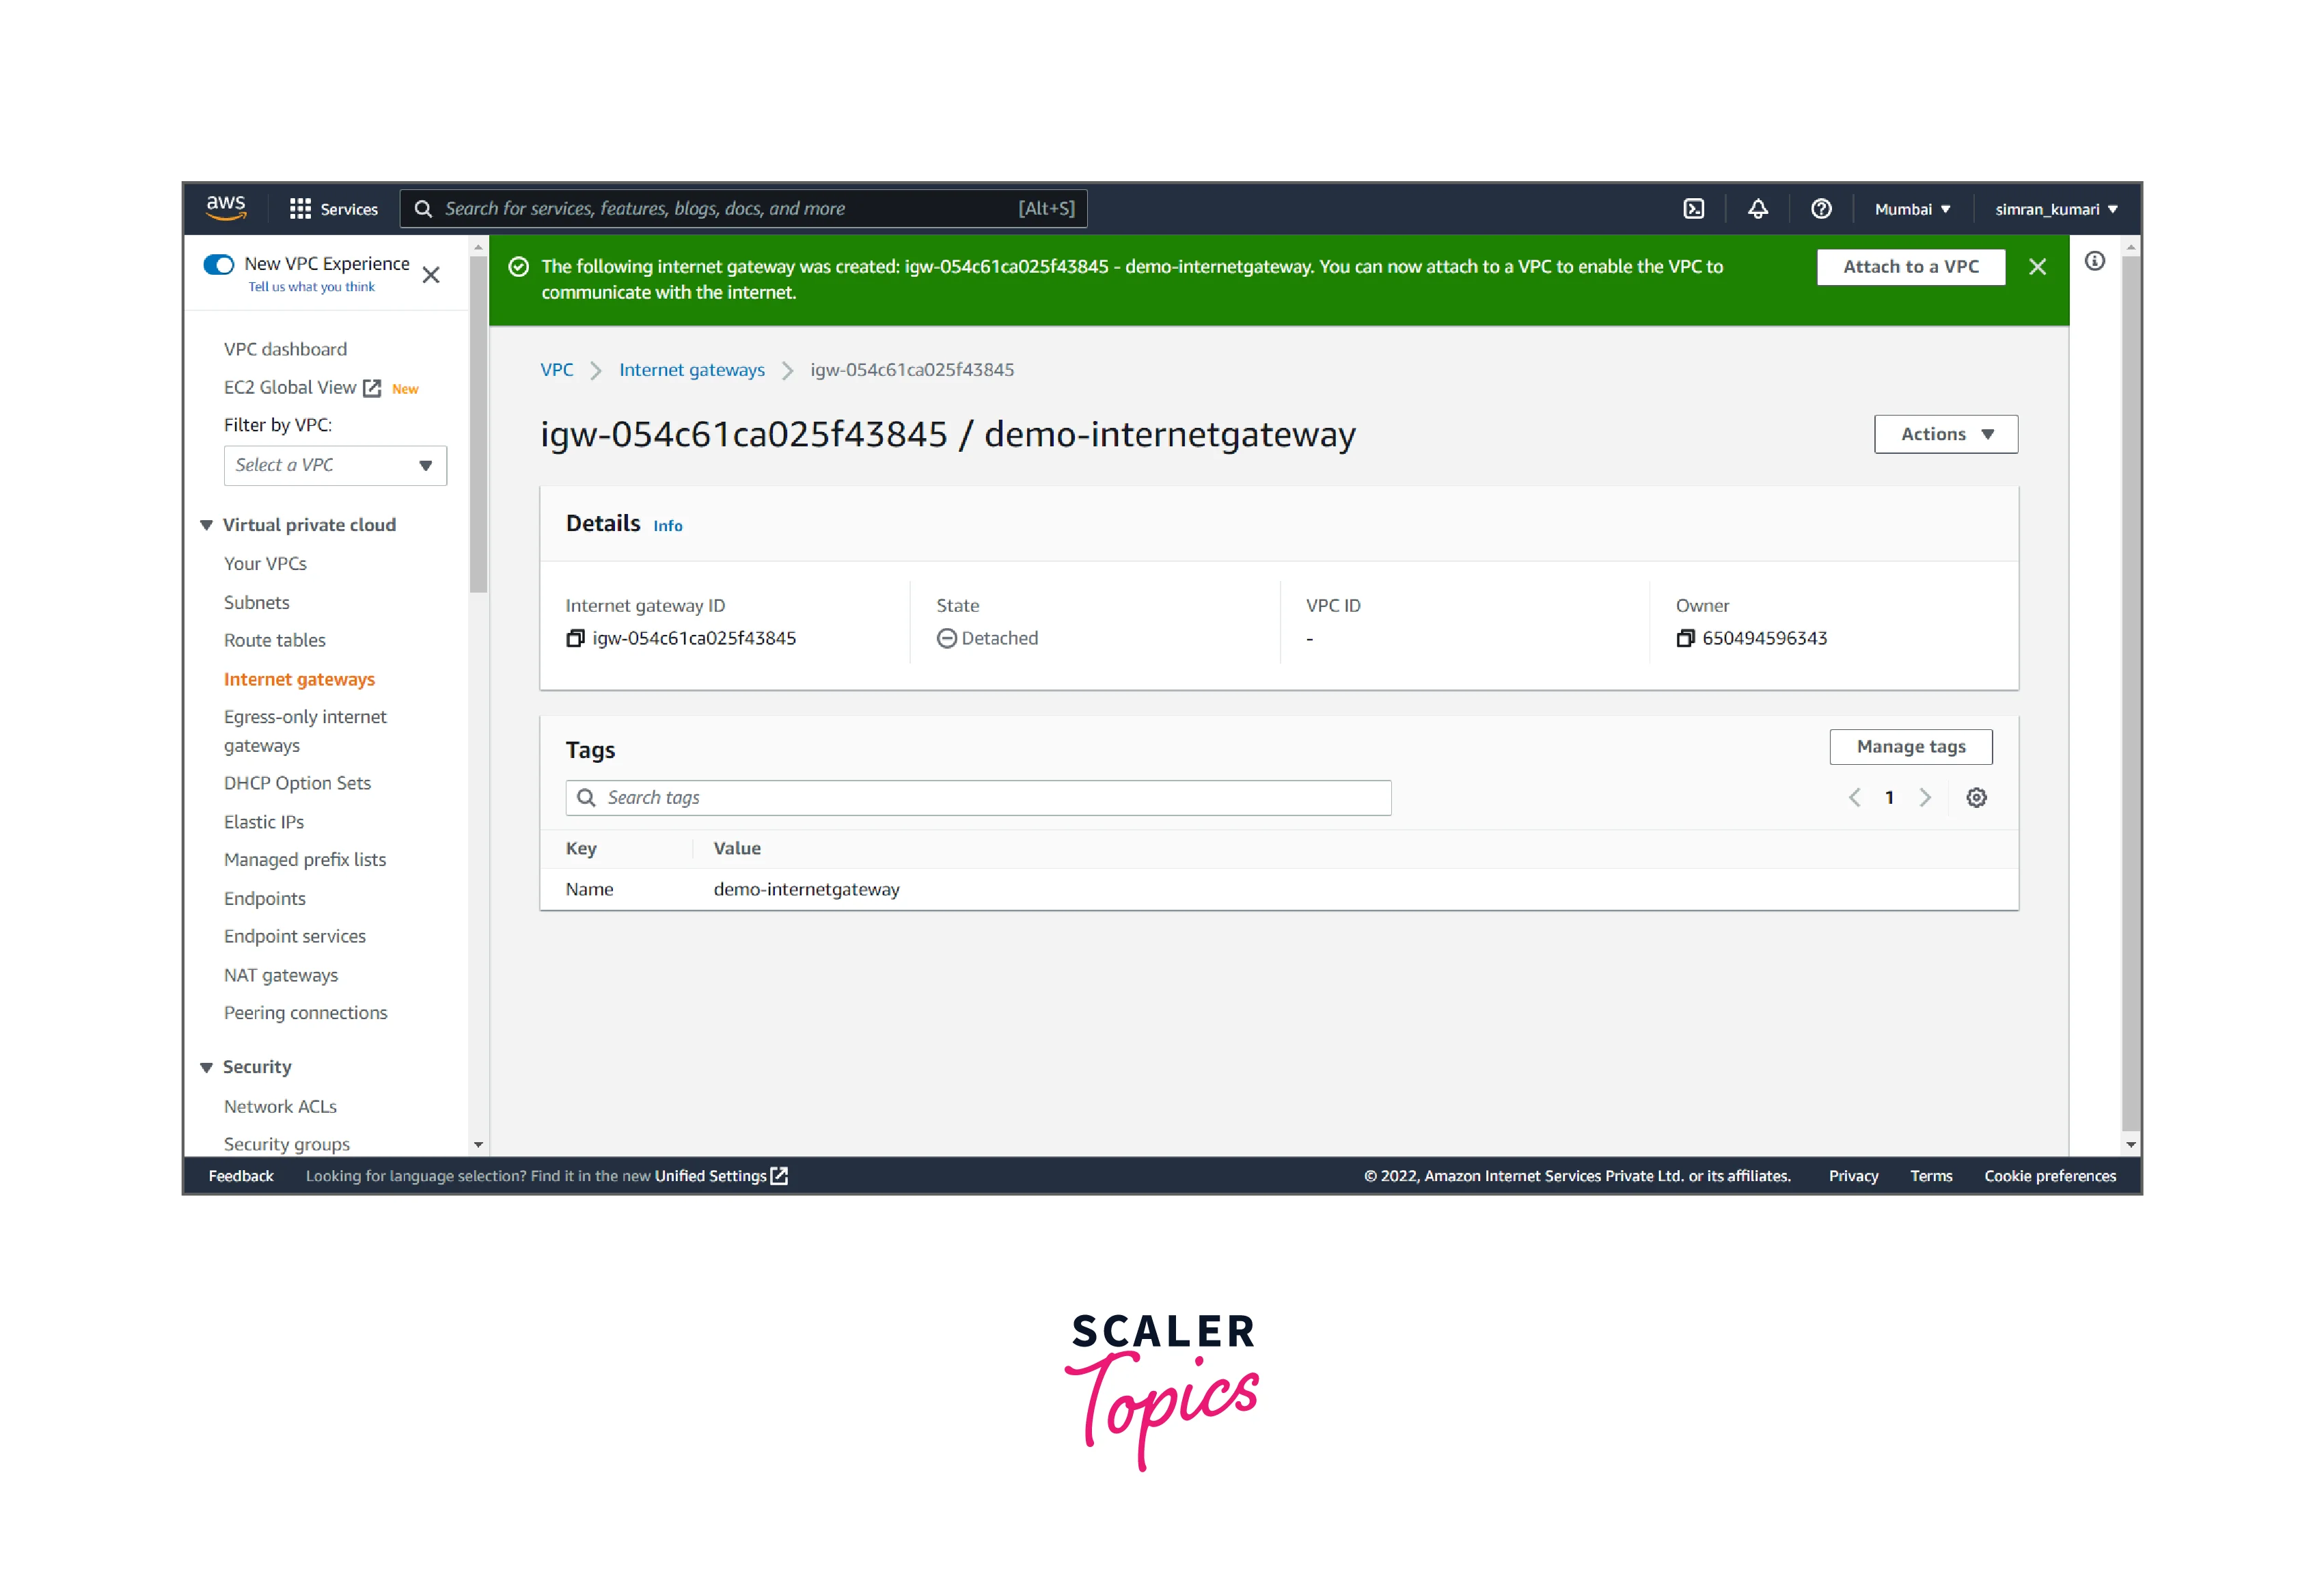
- The Internet gateway is successfully created.
-
Attach the internet gateway to the VPC. It includes the following steps:
- Click on the Actions button, and click on Attach to VPC.

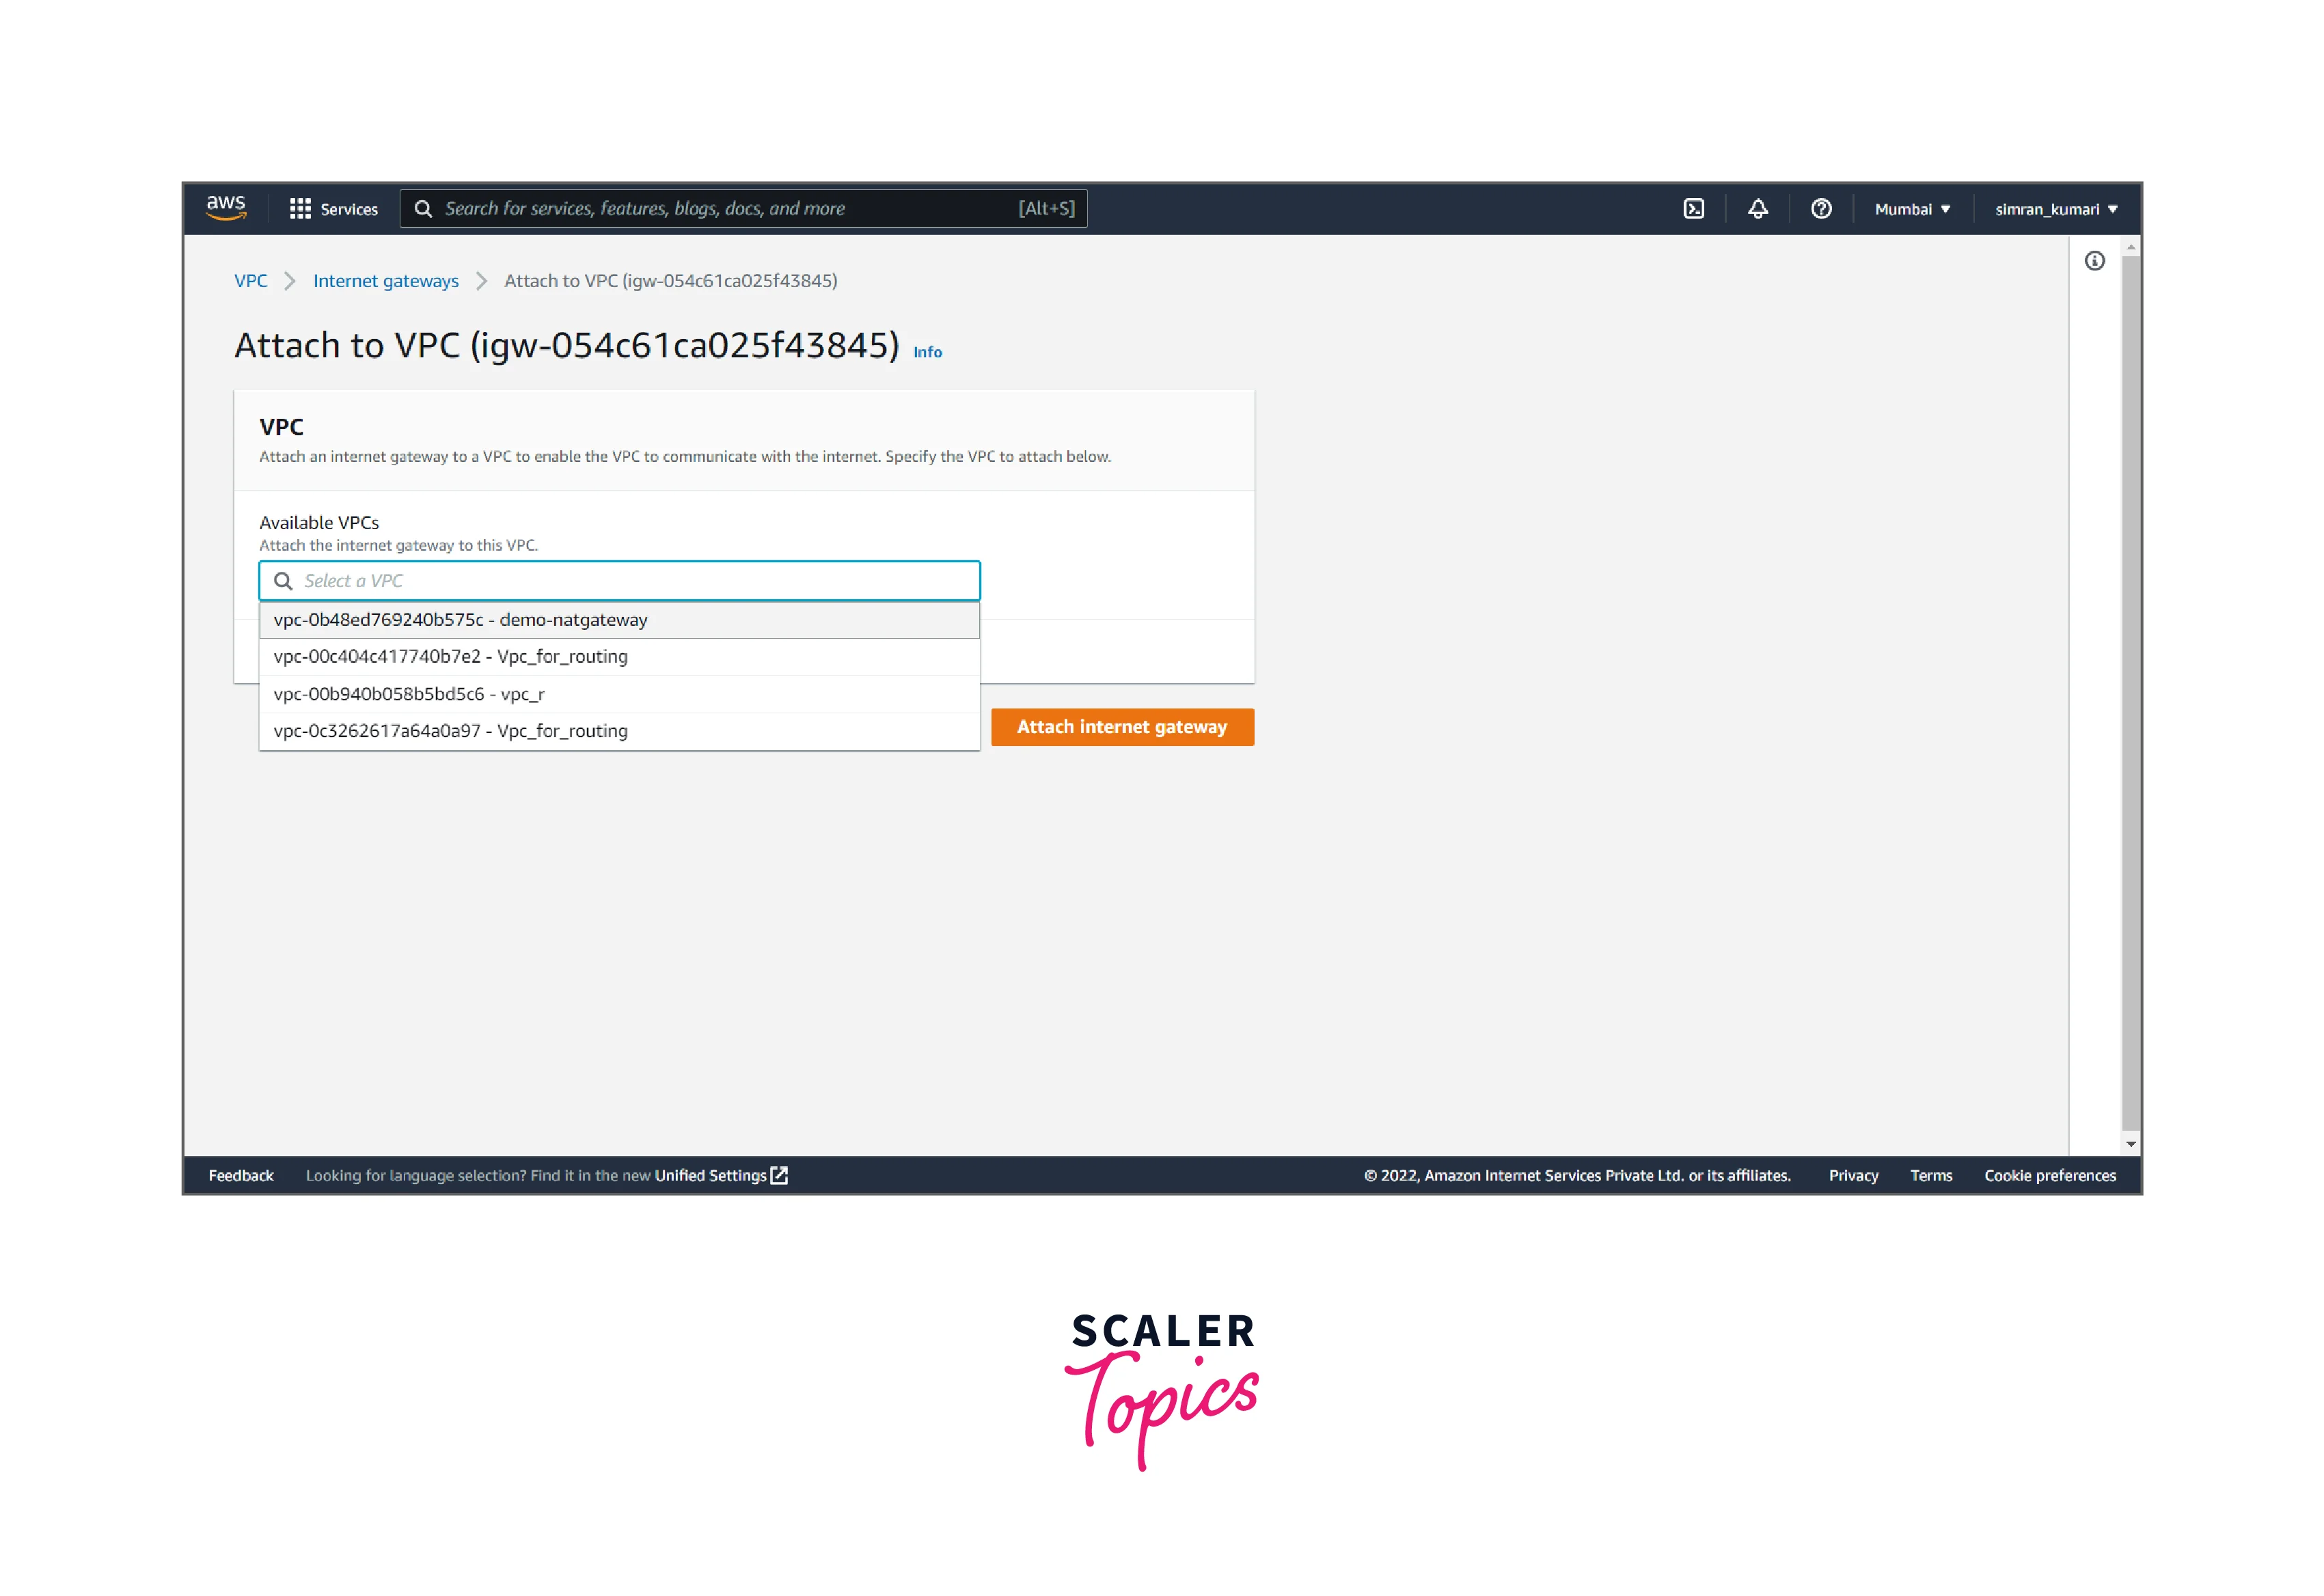
- Choose the created VPC and attach it to the Internet gateway by clicking on Attach Internet gateway.
- The Internet gateway is successfully attached to the VPC.

-
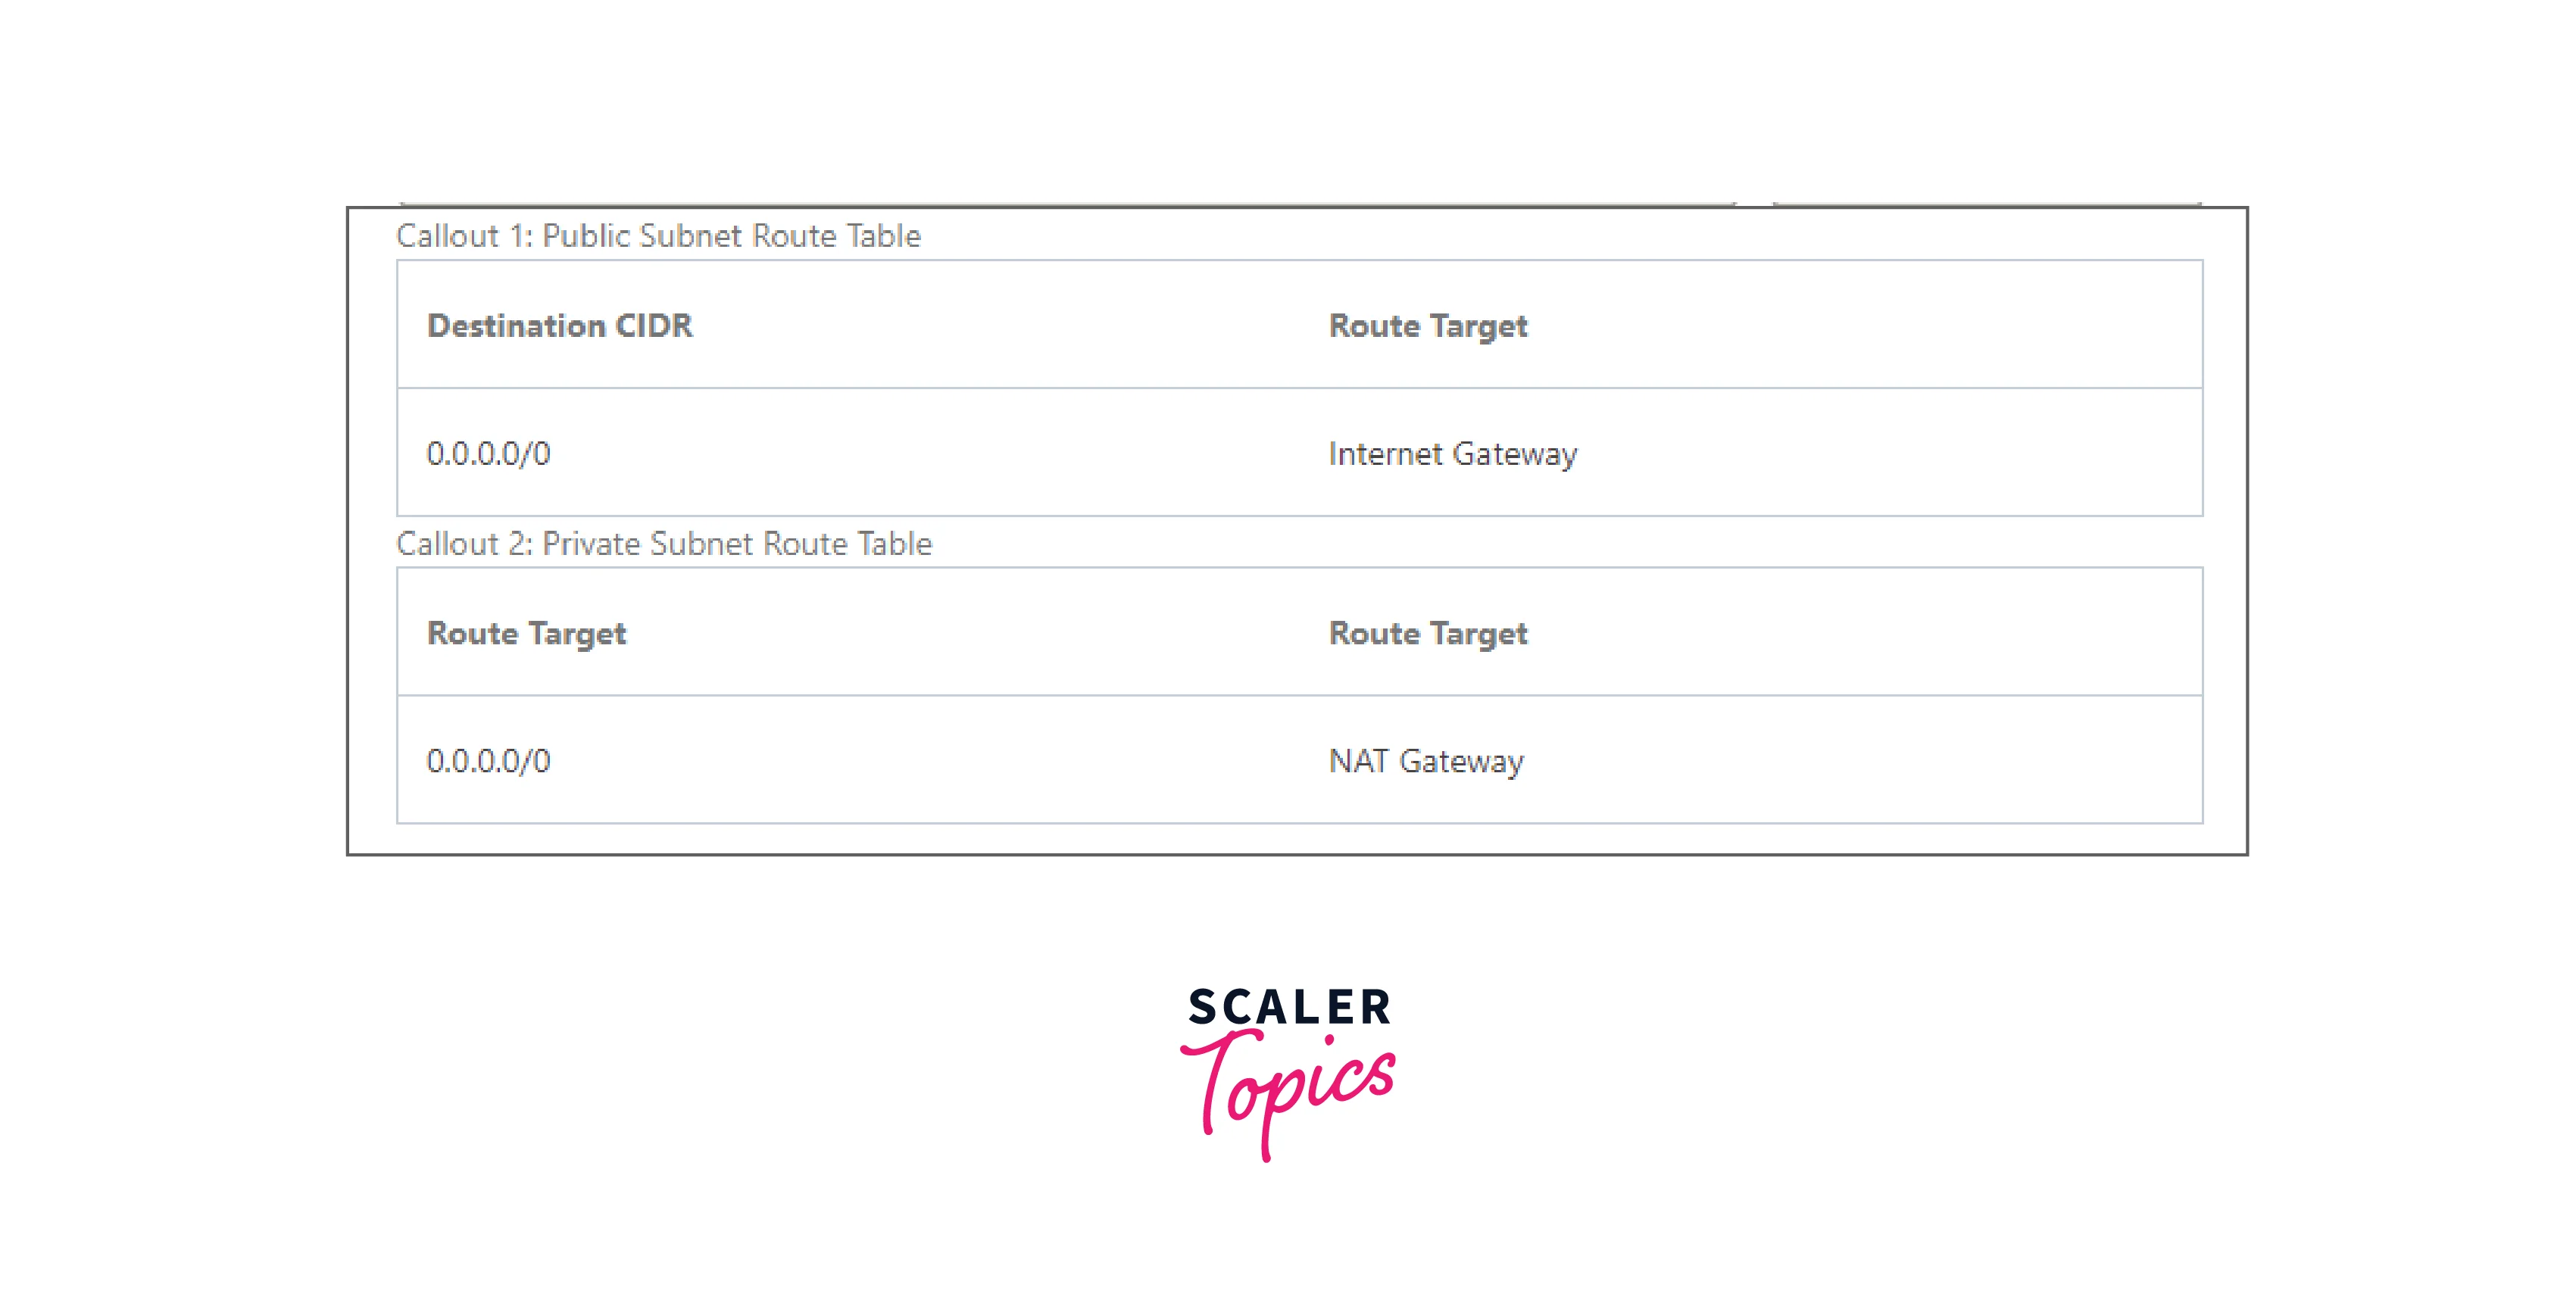
Create a custom route table for the public subnet with a route to the internet gateway. It follows the following steps:
- Click on Route Tables from the left navigation bar. Here we have to create a custom route table for the public subnet by clicking on Create route table.
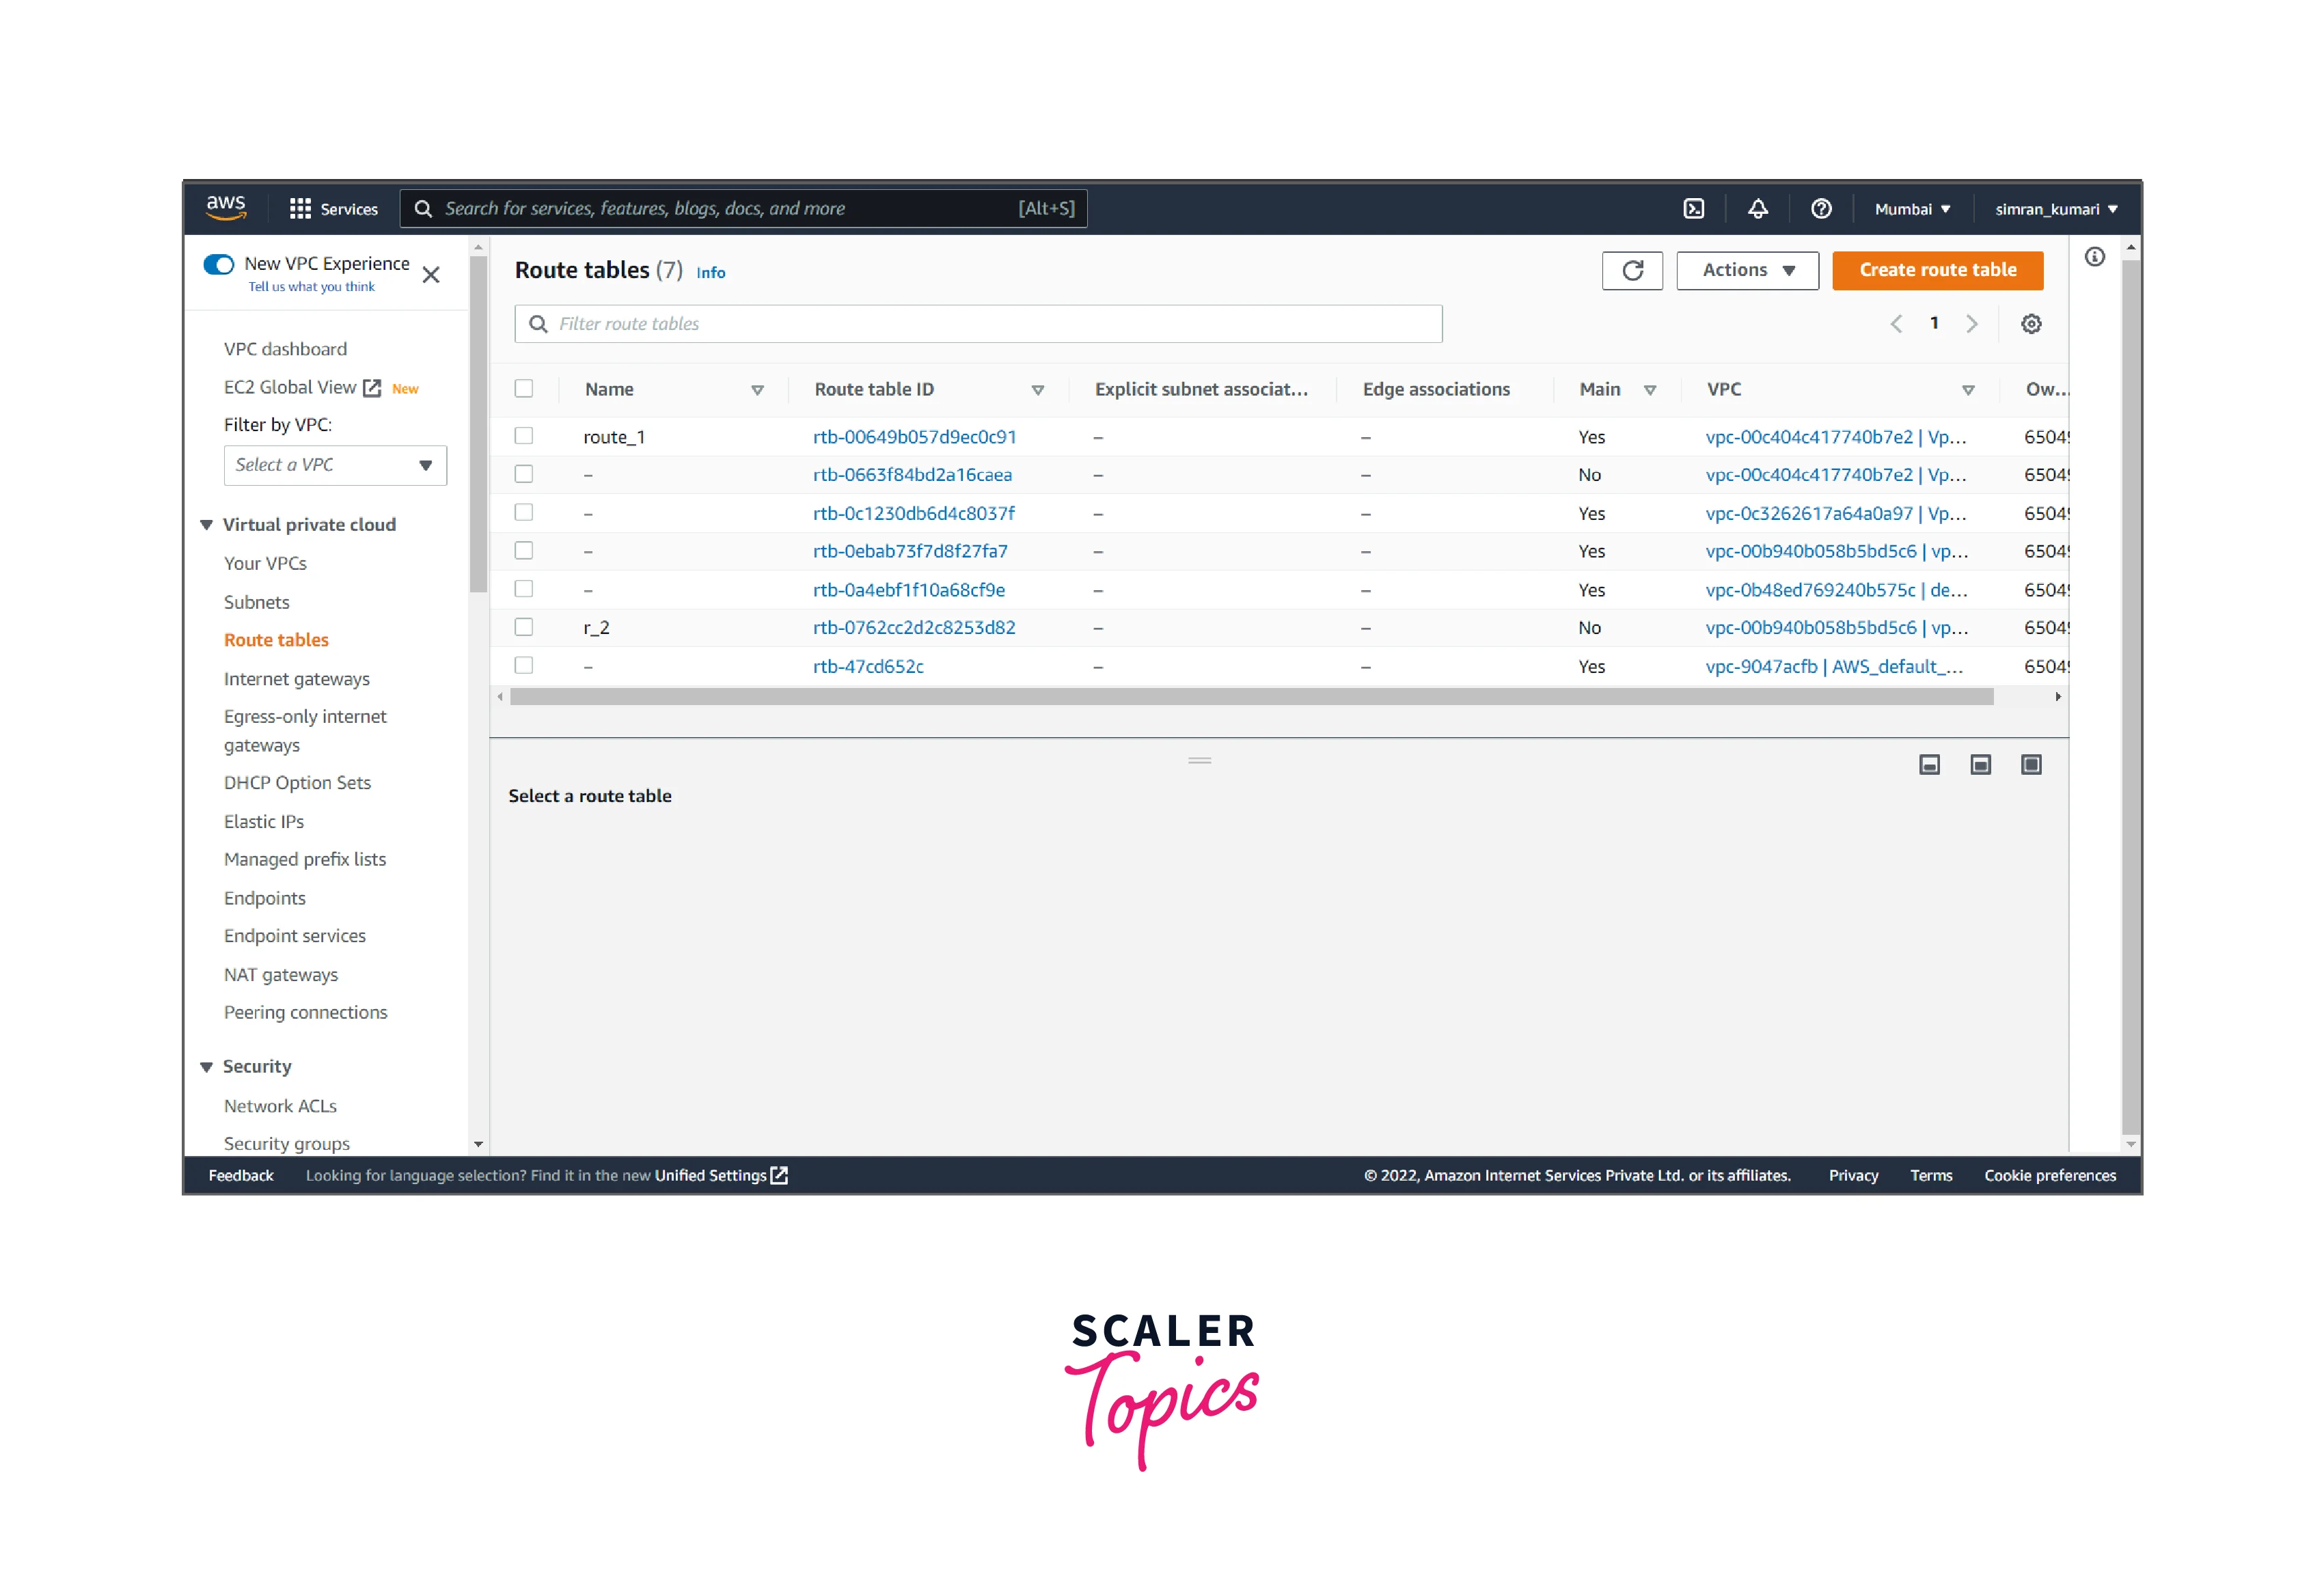
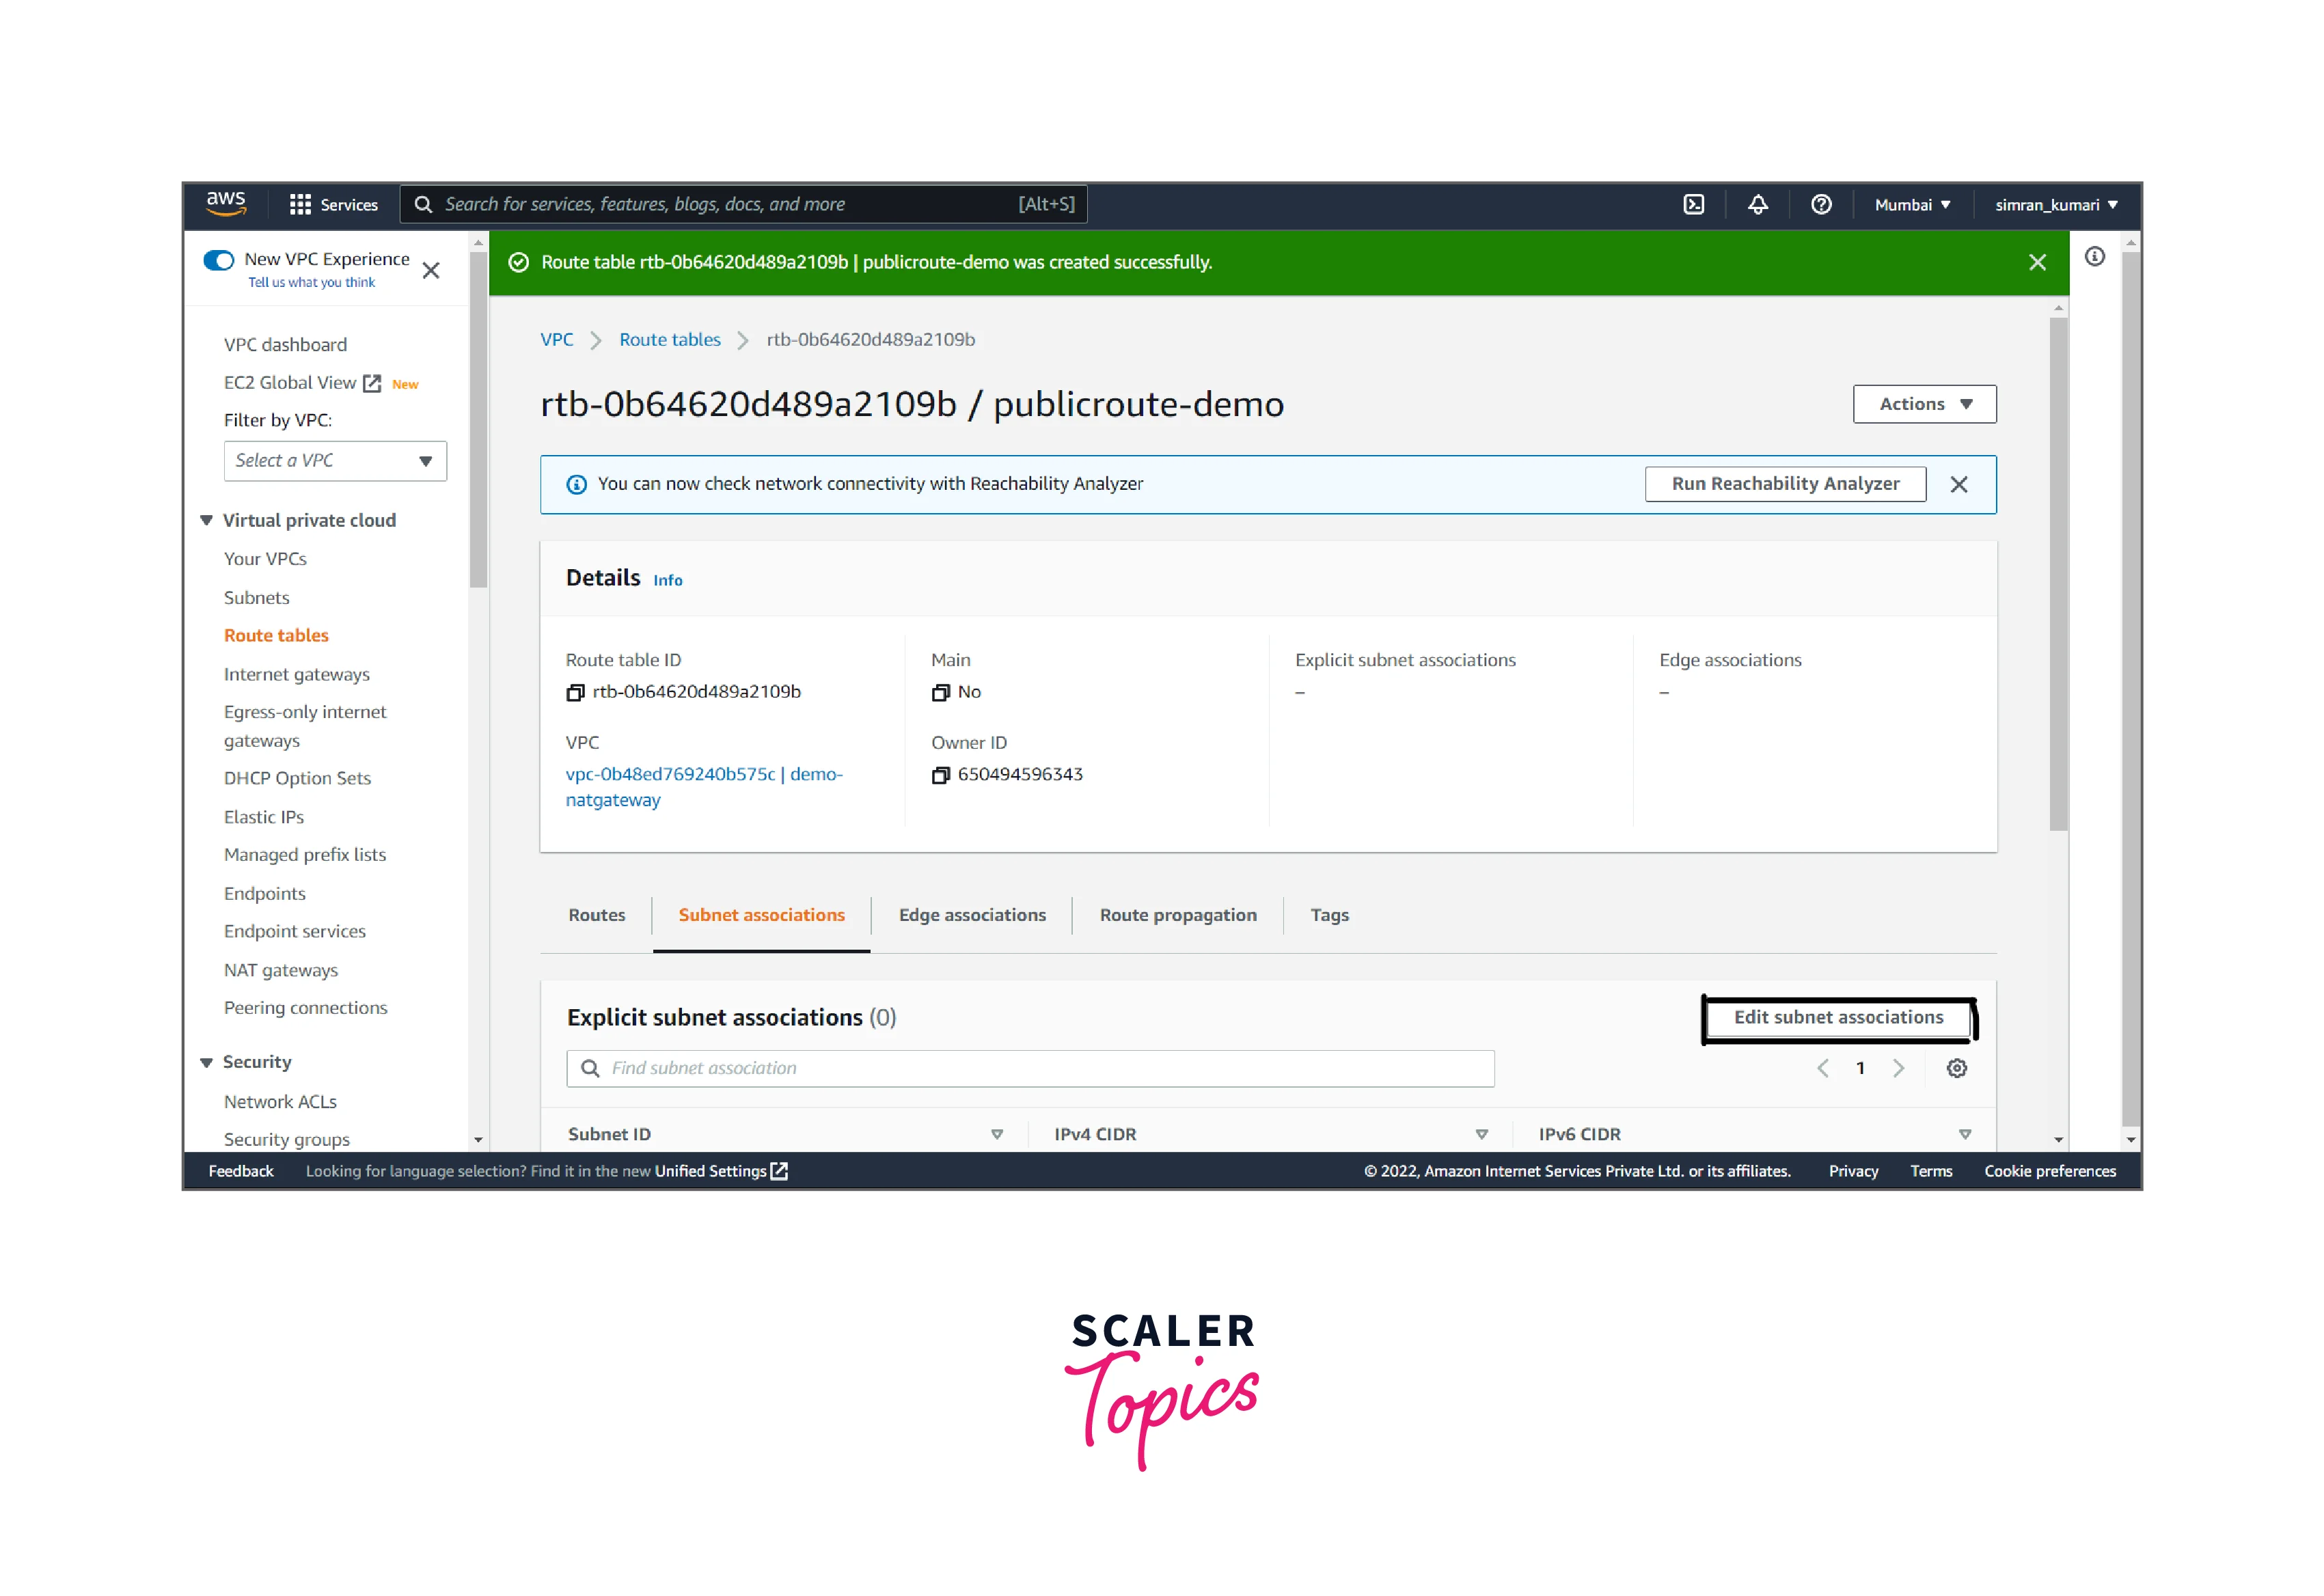
- Fill in the name of the routing table, choose the VPC, and then click on Create route table.

- It is created successfully. Now we have to associate with the public subnet. Click on subnet associations and edit subnet associations.
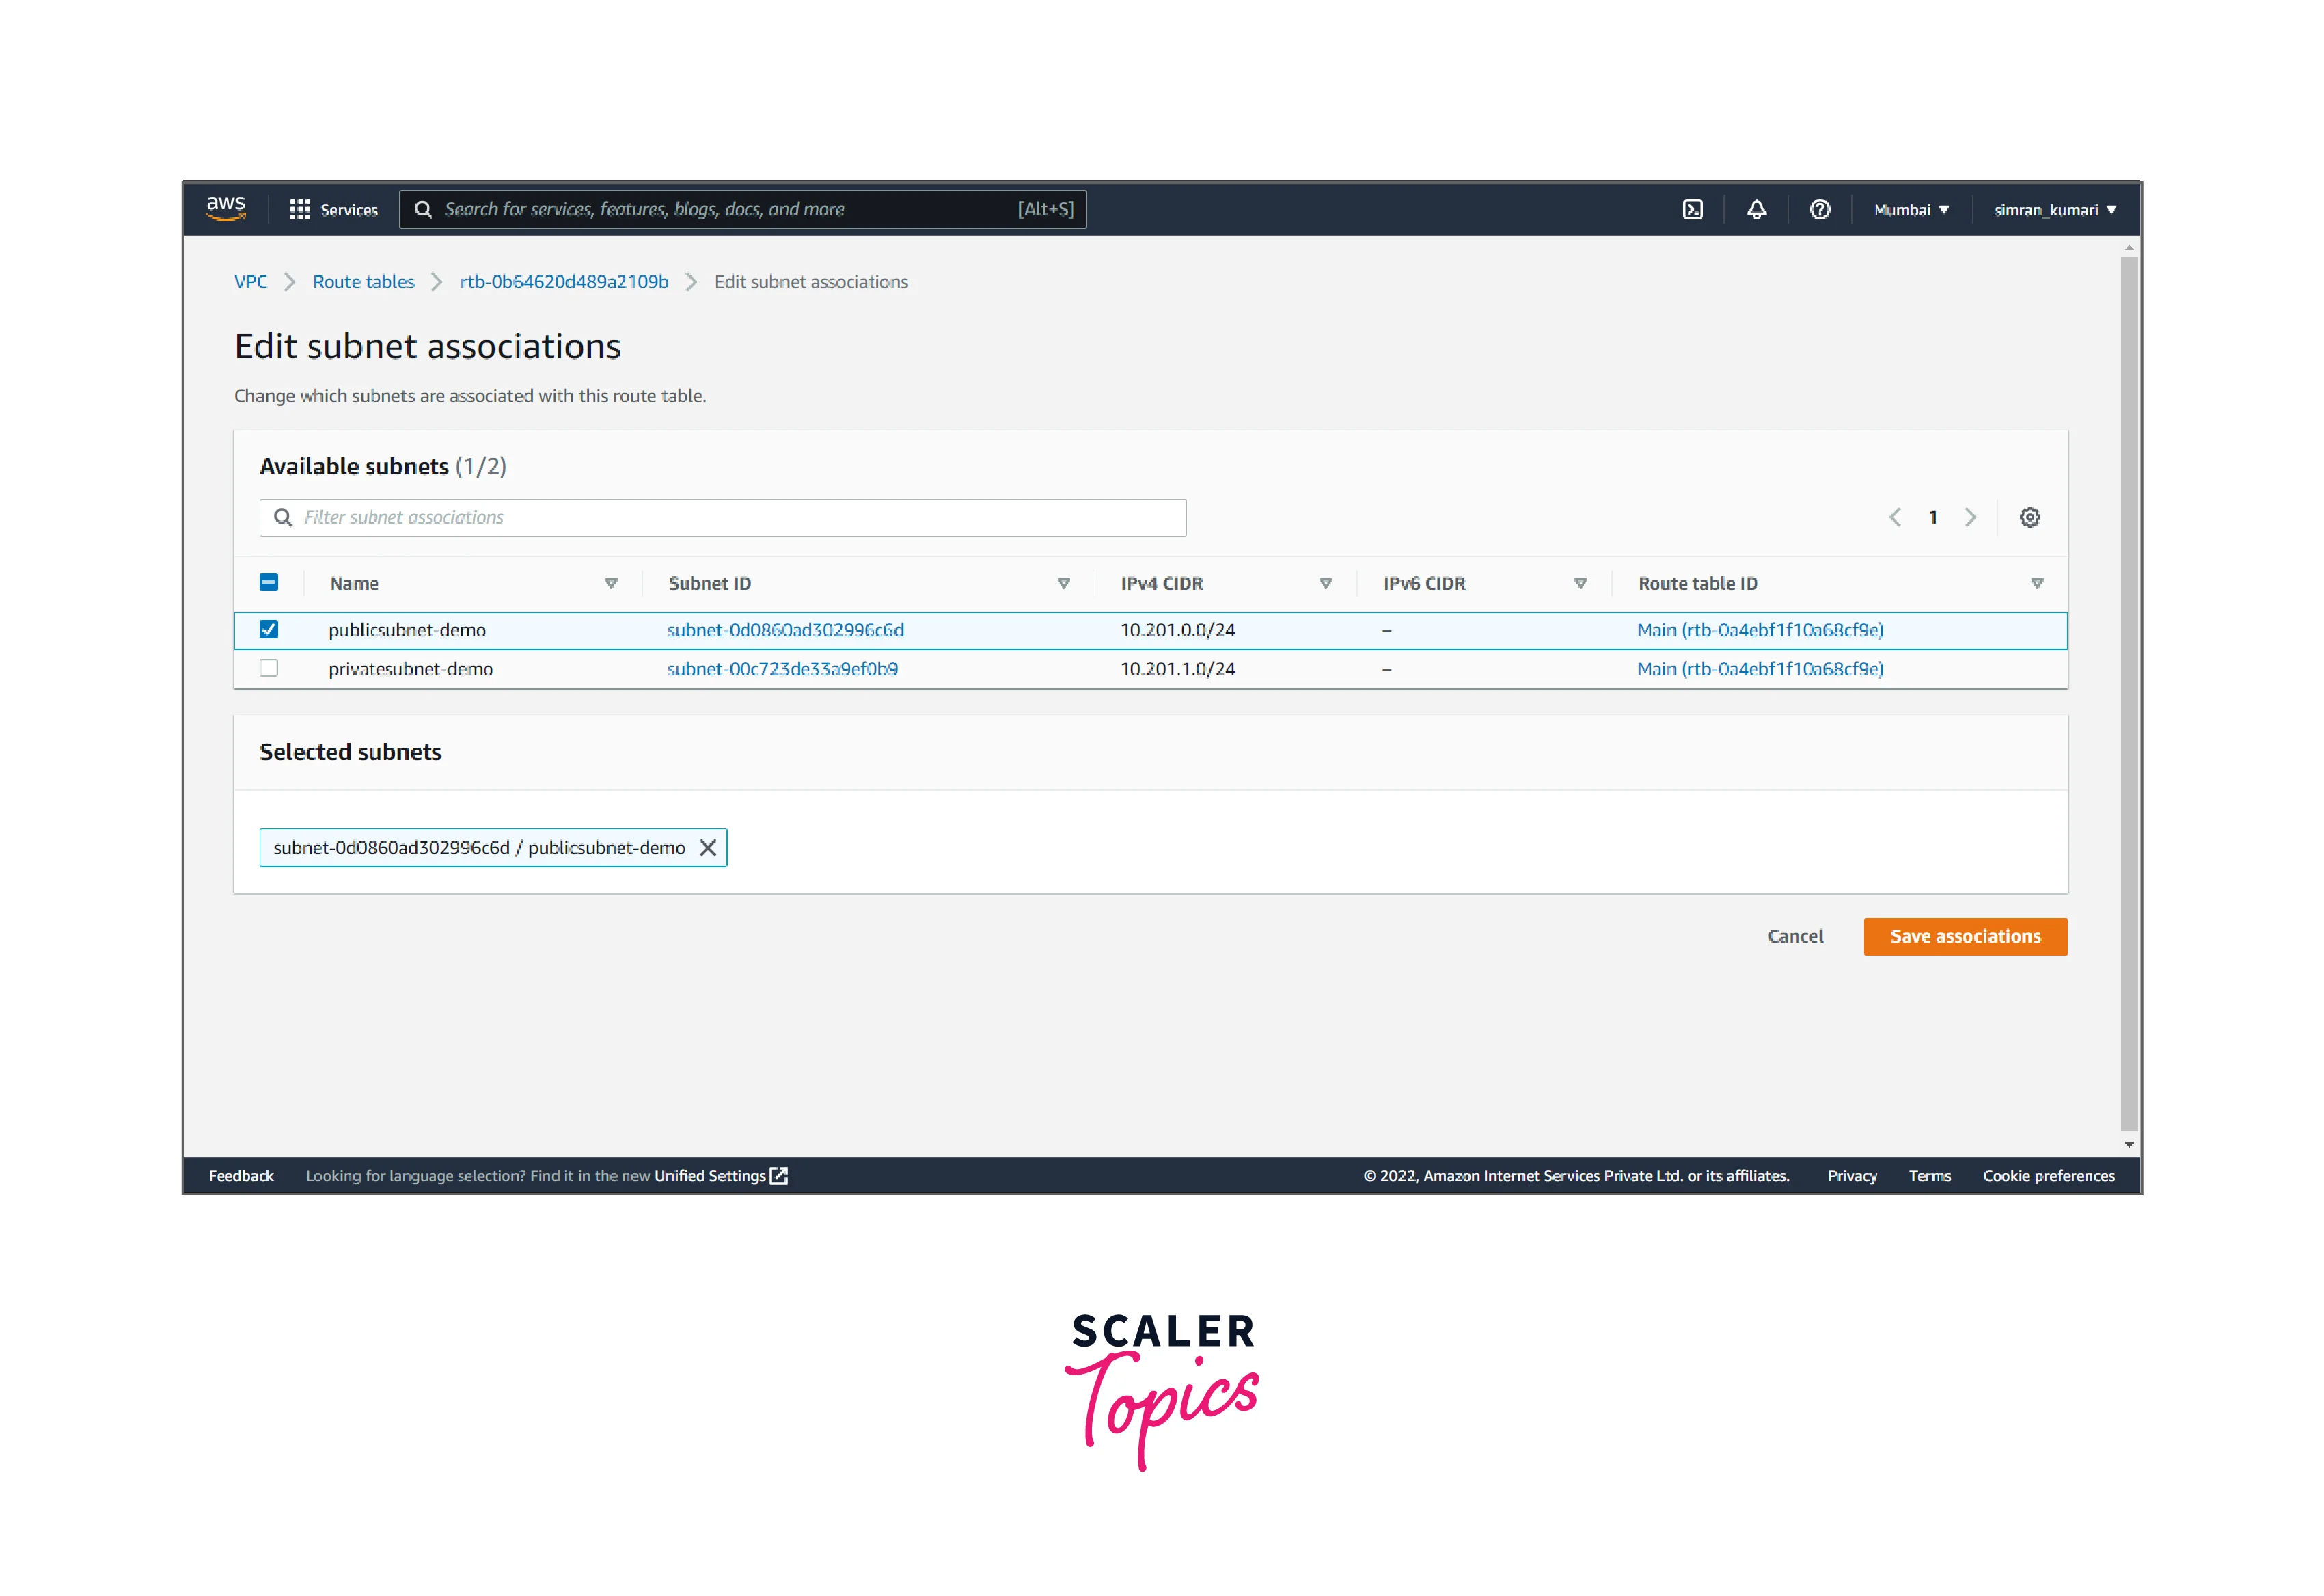
- Choose the public subnet and click on Save associations.
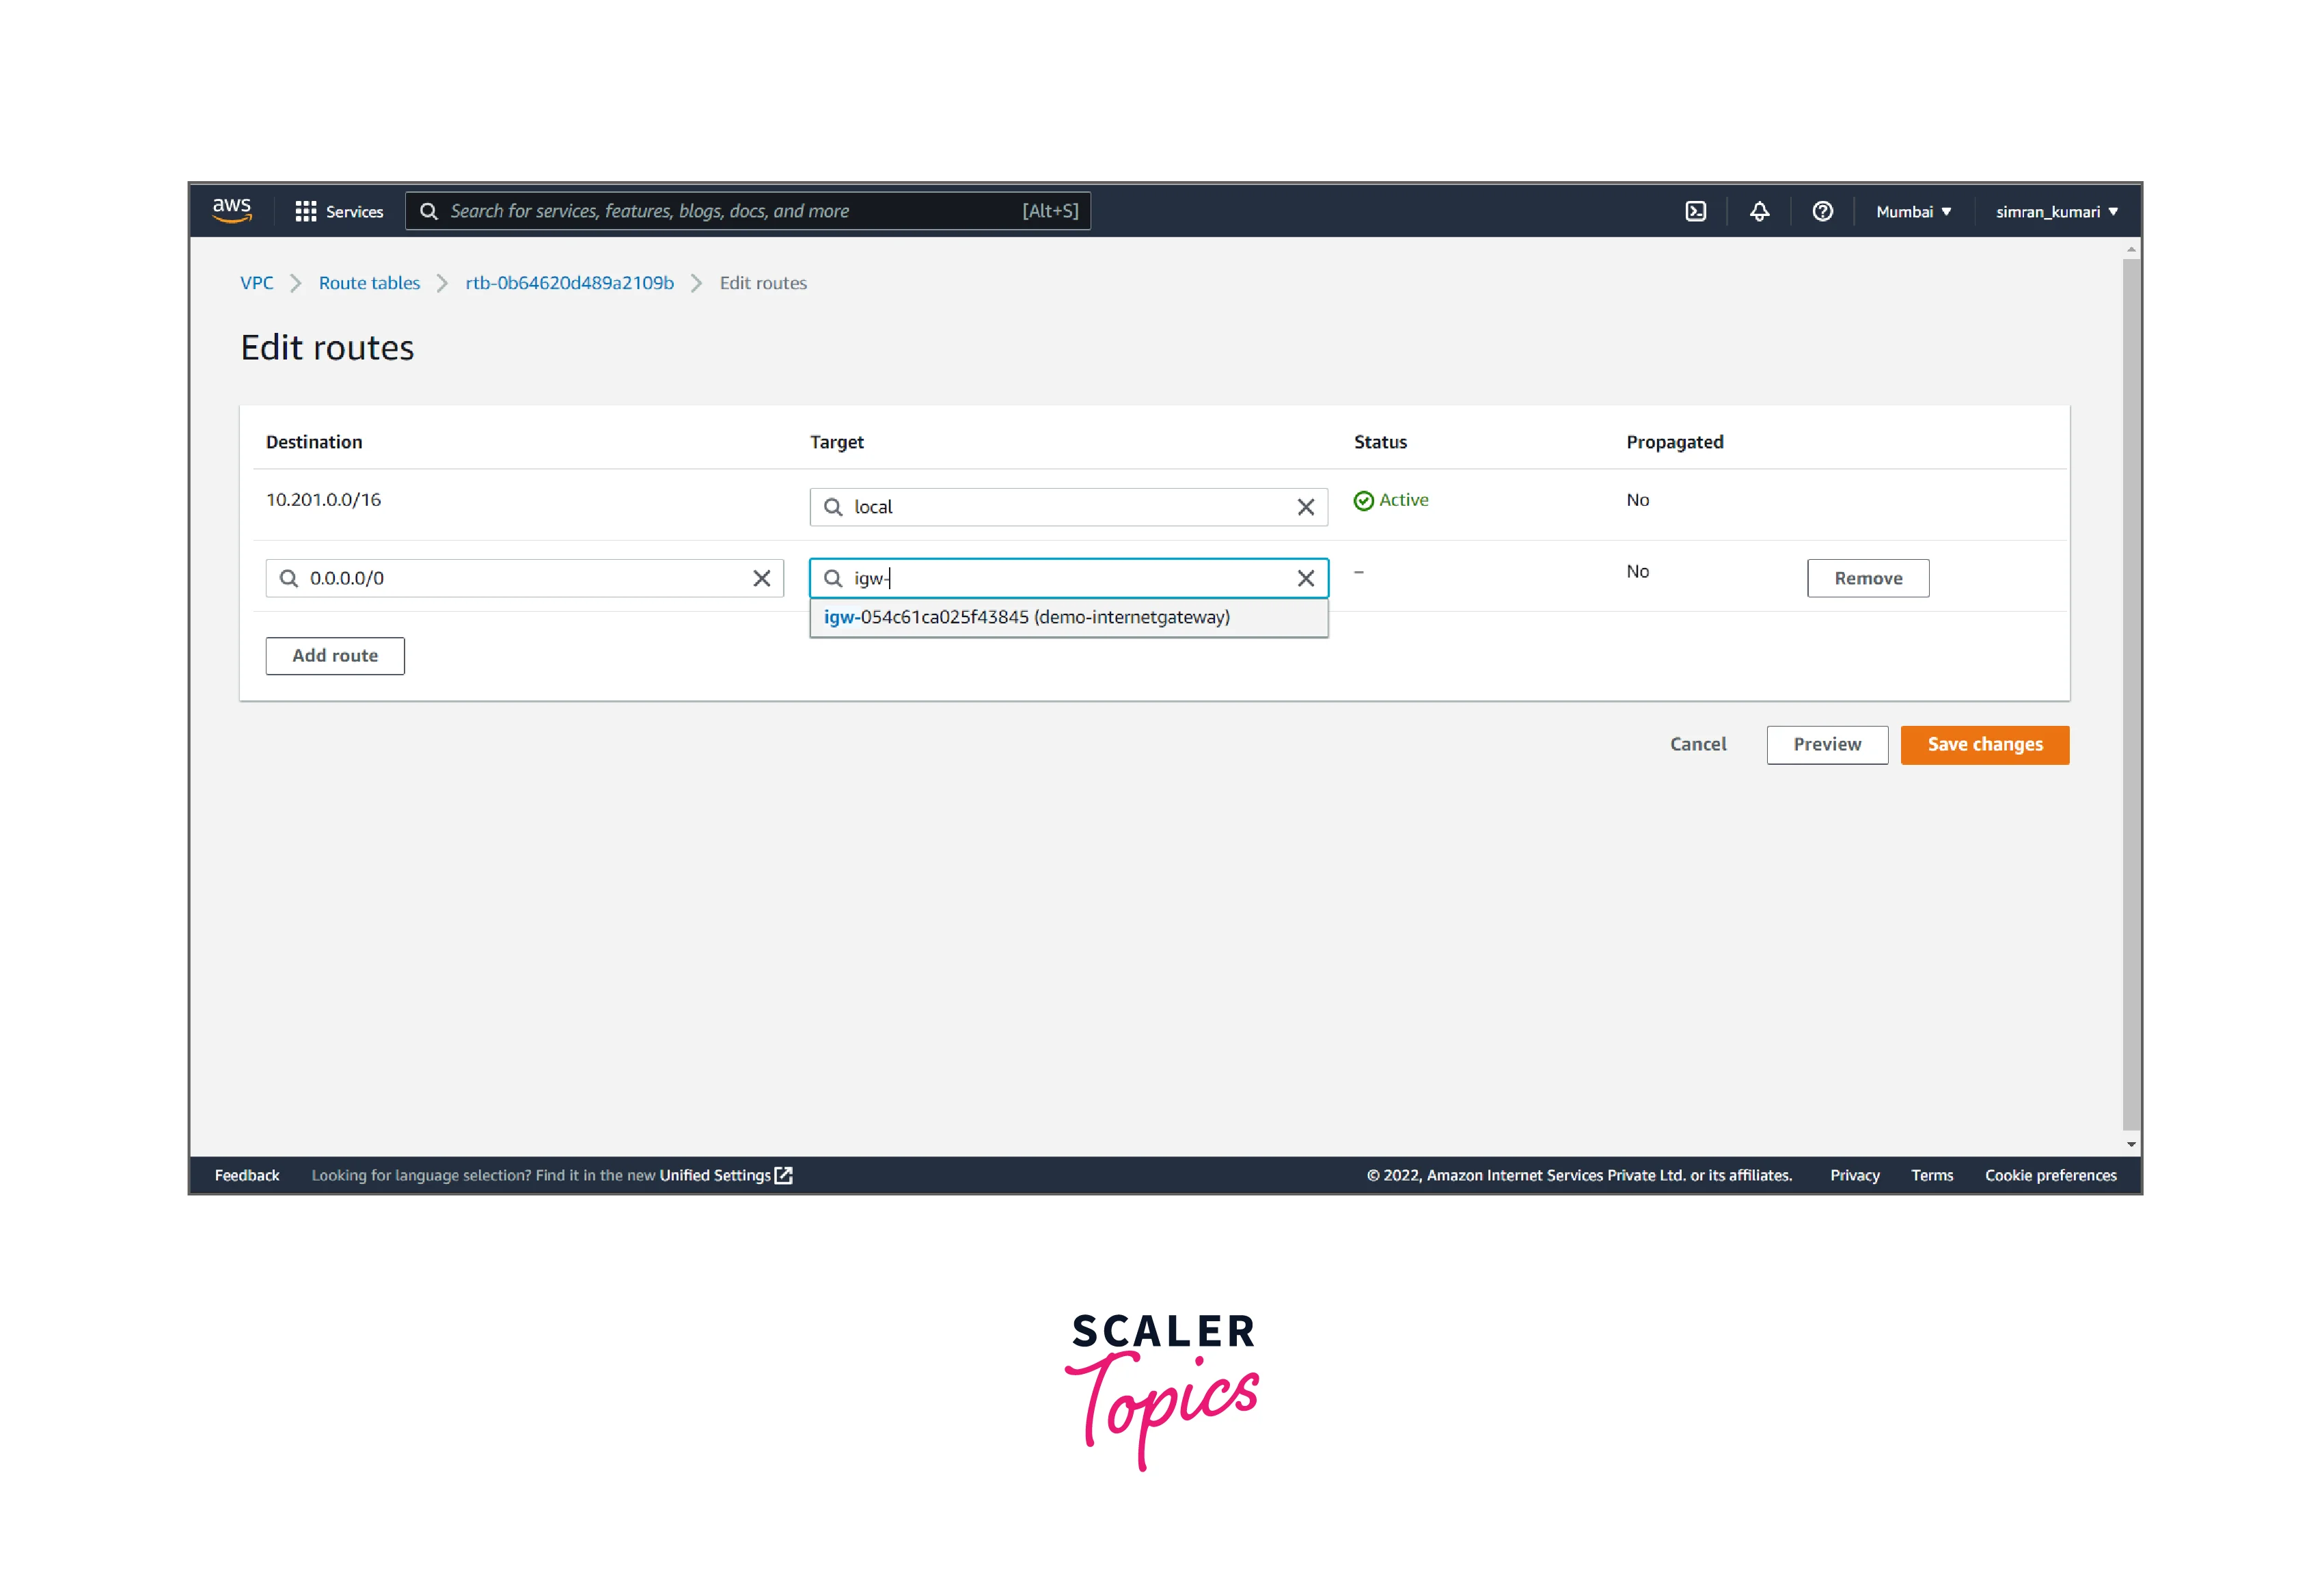
- Click on Edit routes.
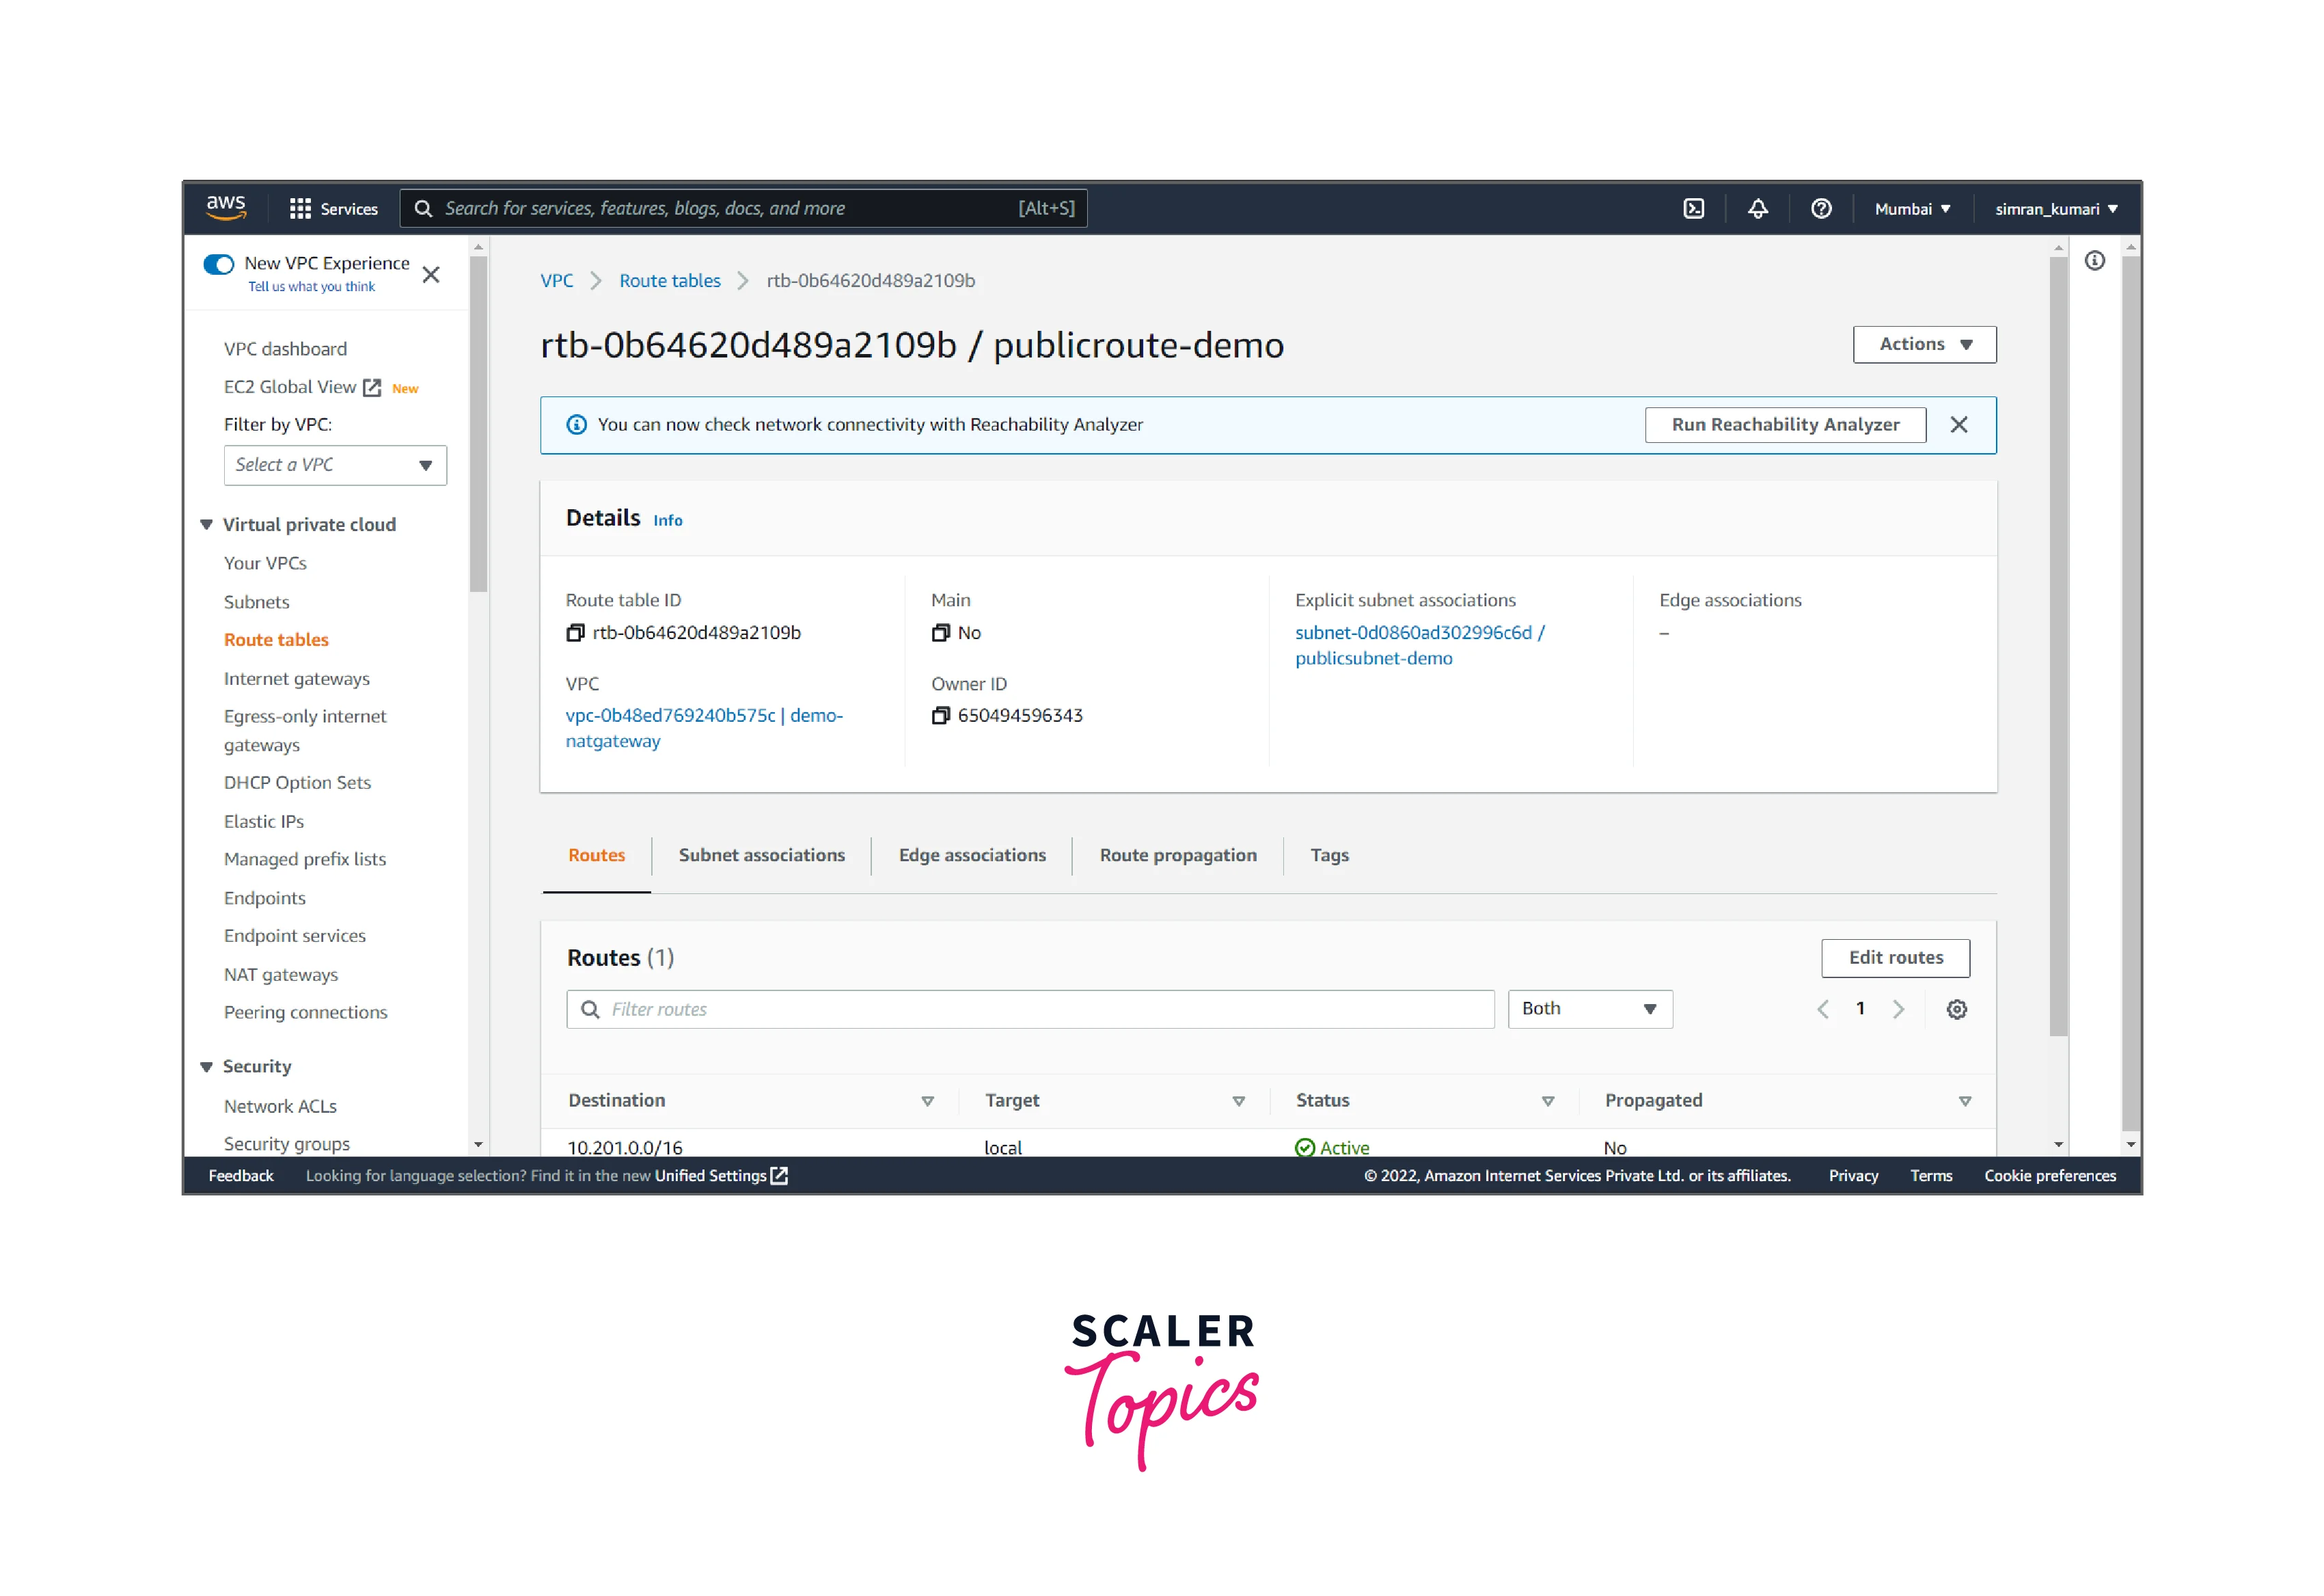
- Click on add a route, and add the internet gateway target to it. Then, click on save changes.
To set up a NAT Gateway in a VPC, create it and then update the routing for the subnet.
It involves the following two tasks:
Creating the NAT gateway
It includes the following steps:
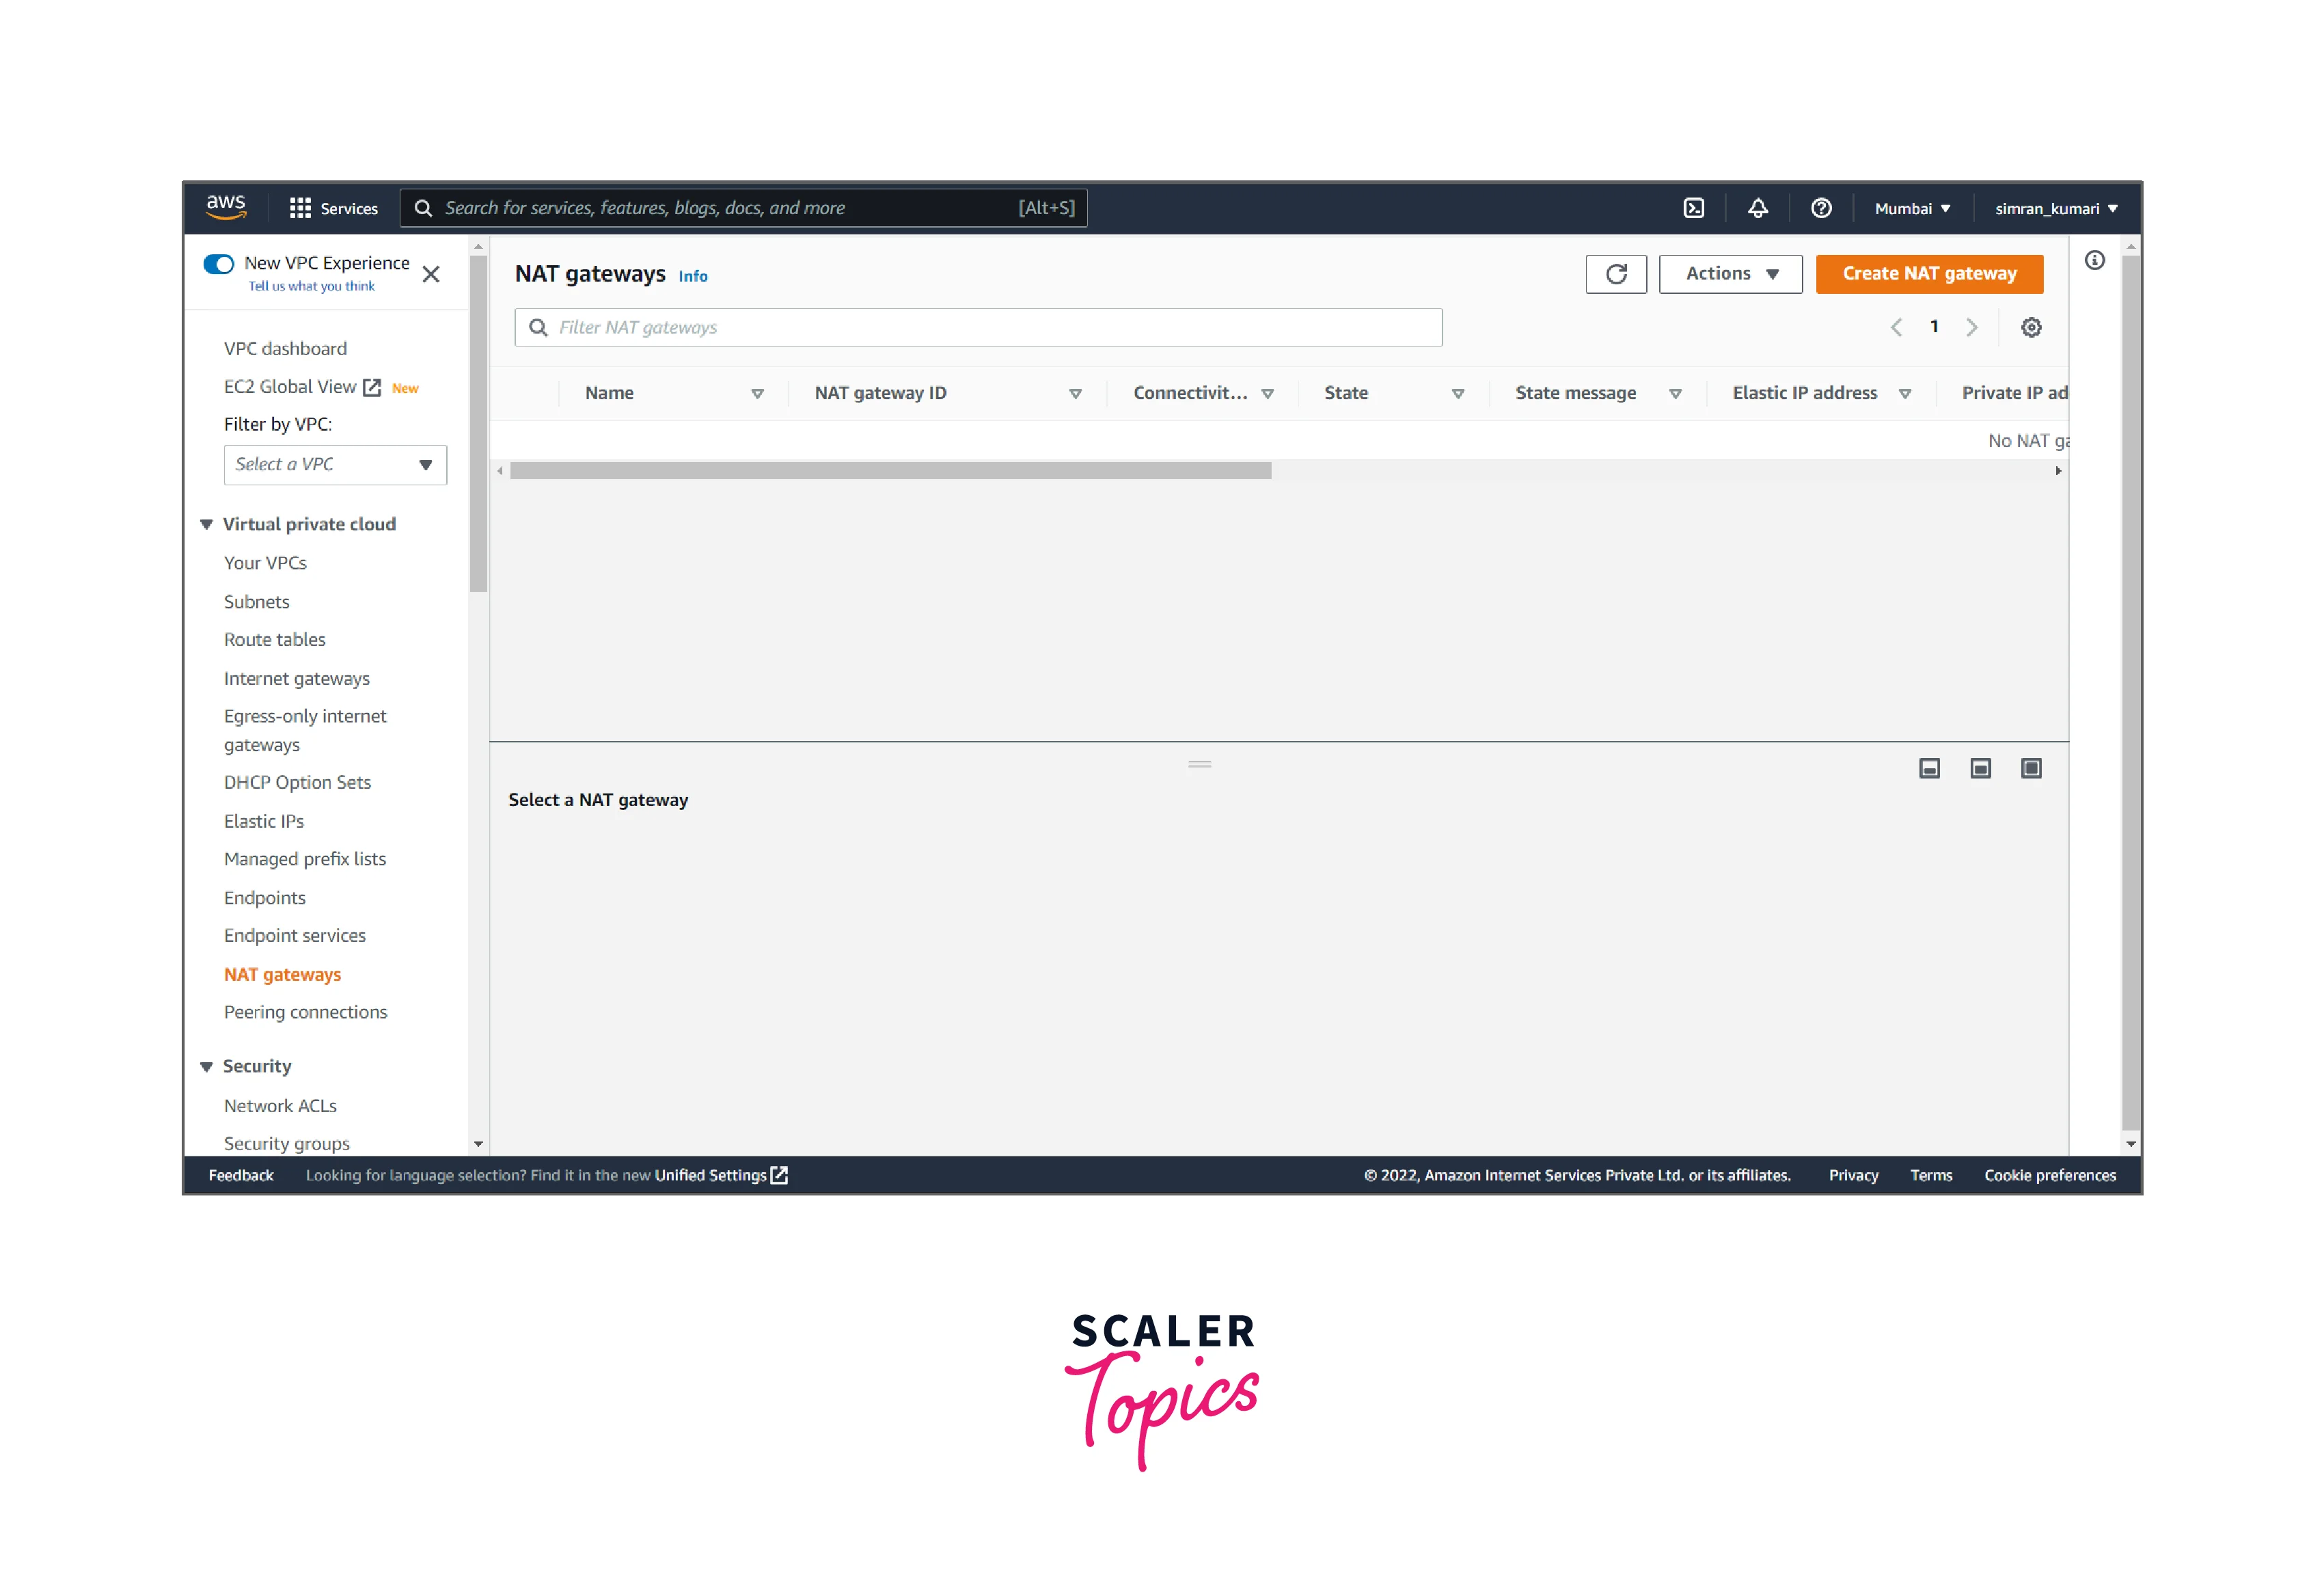
- Click on NAT gateways from the left navigation bar. Here we have to create a nat gateway by clicking on Create NAT gateway.
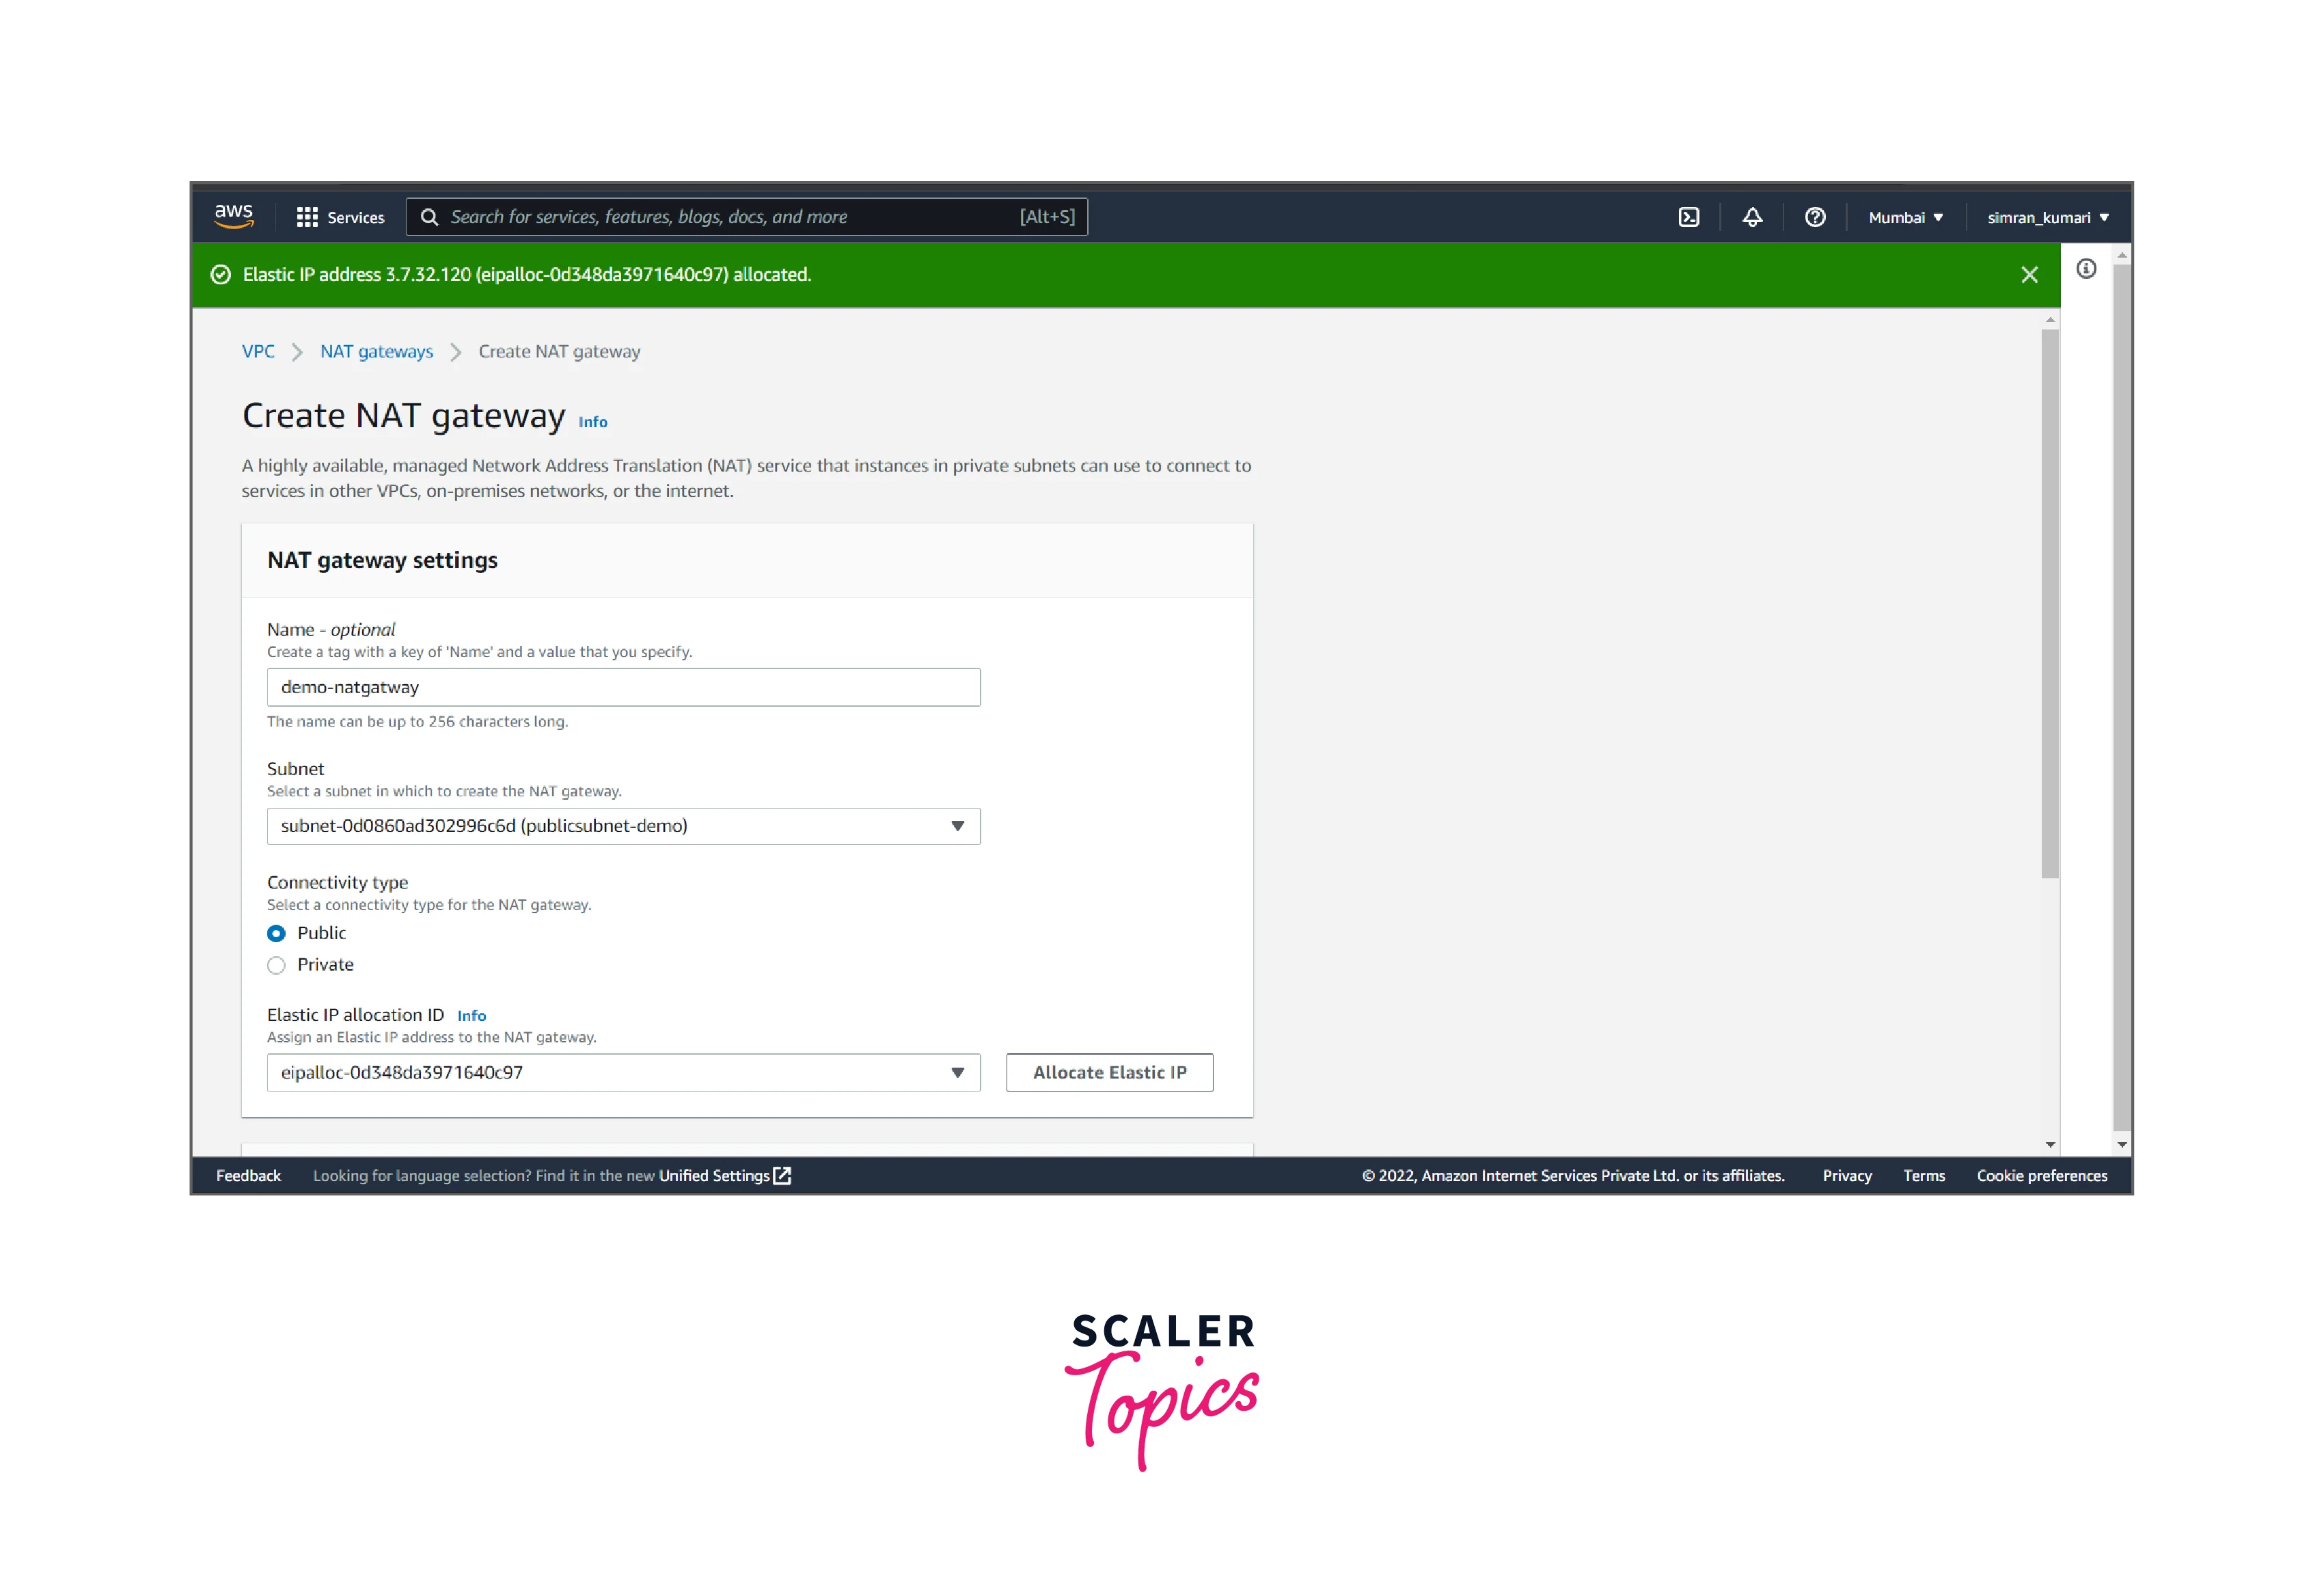
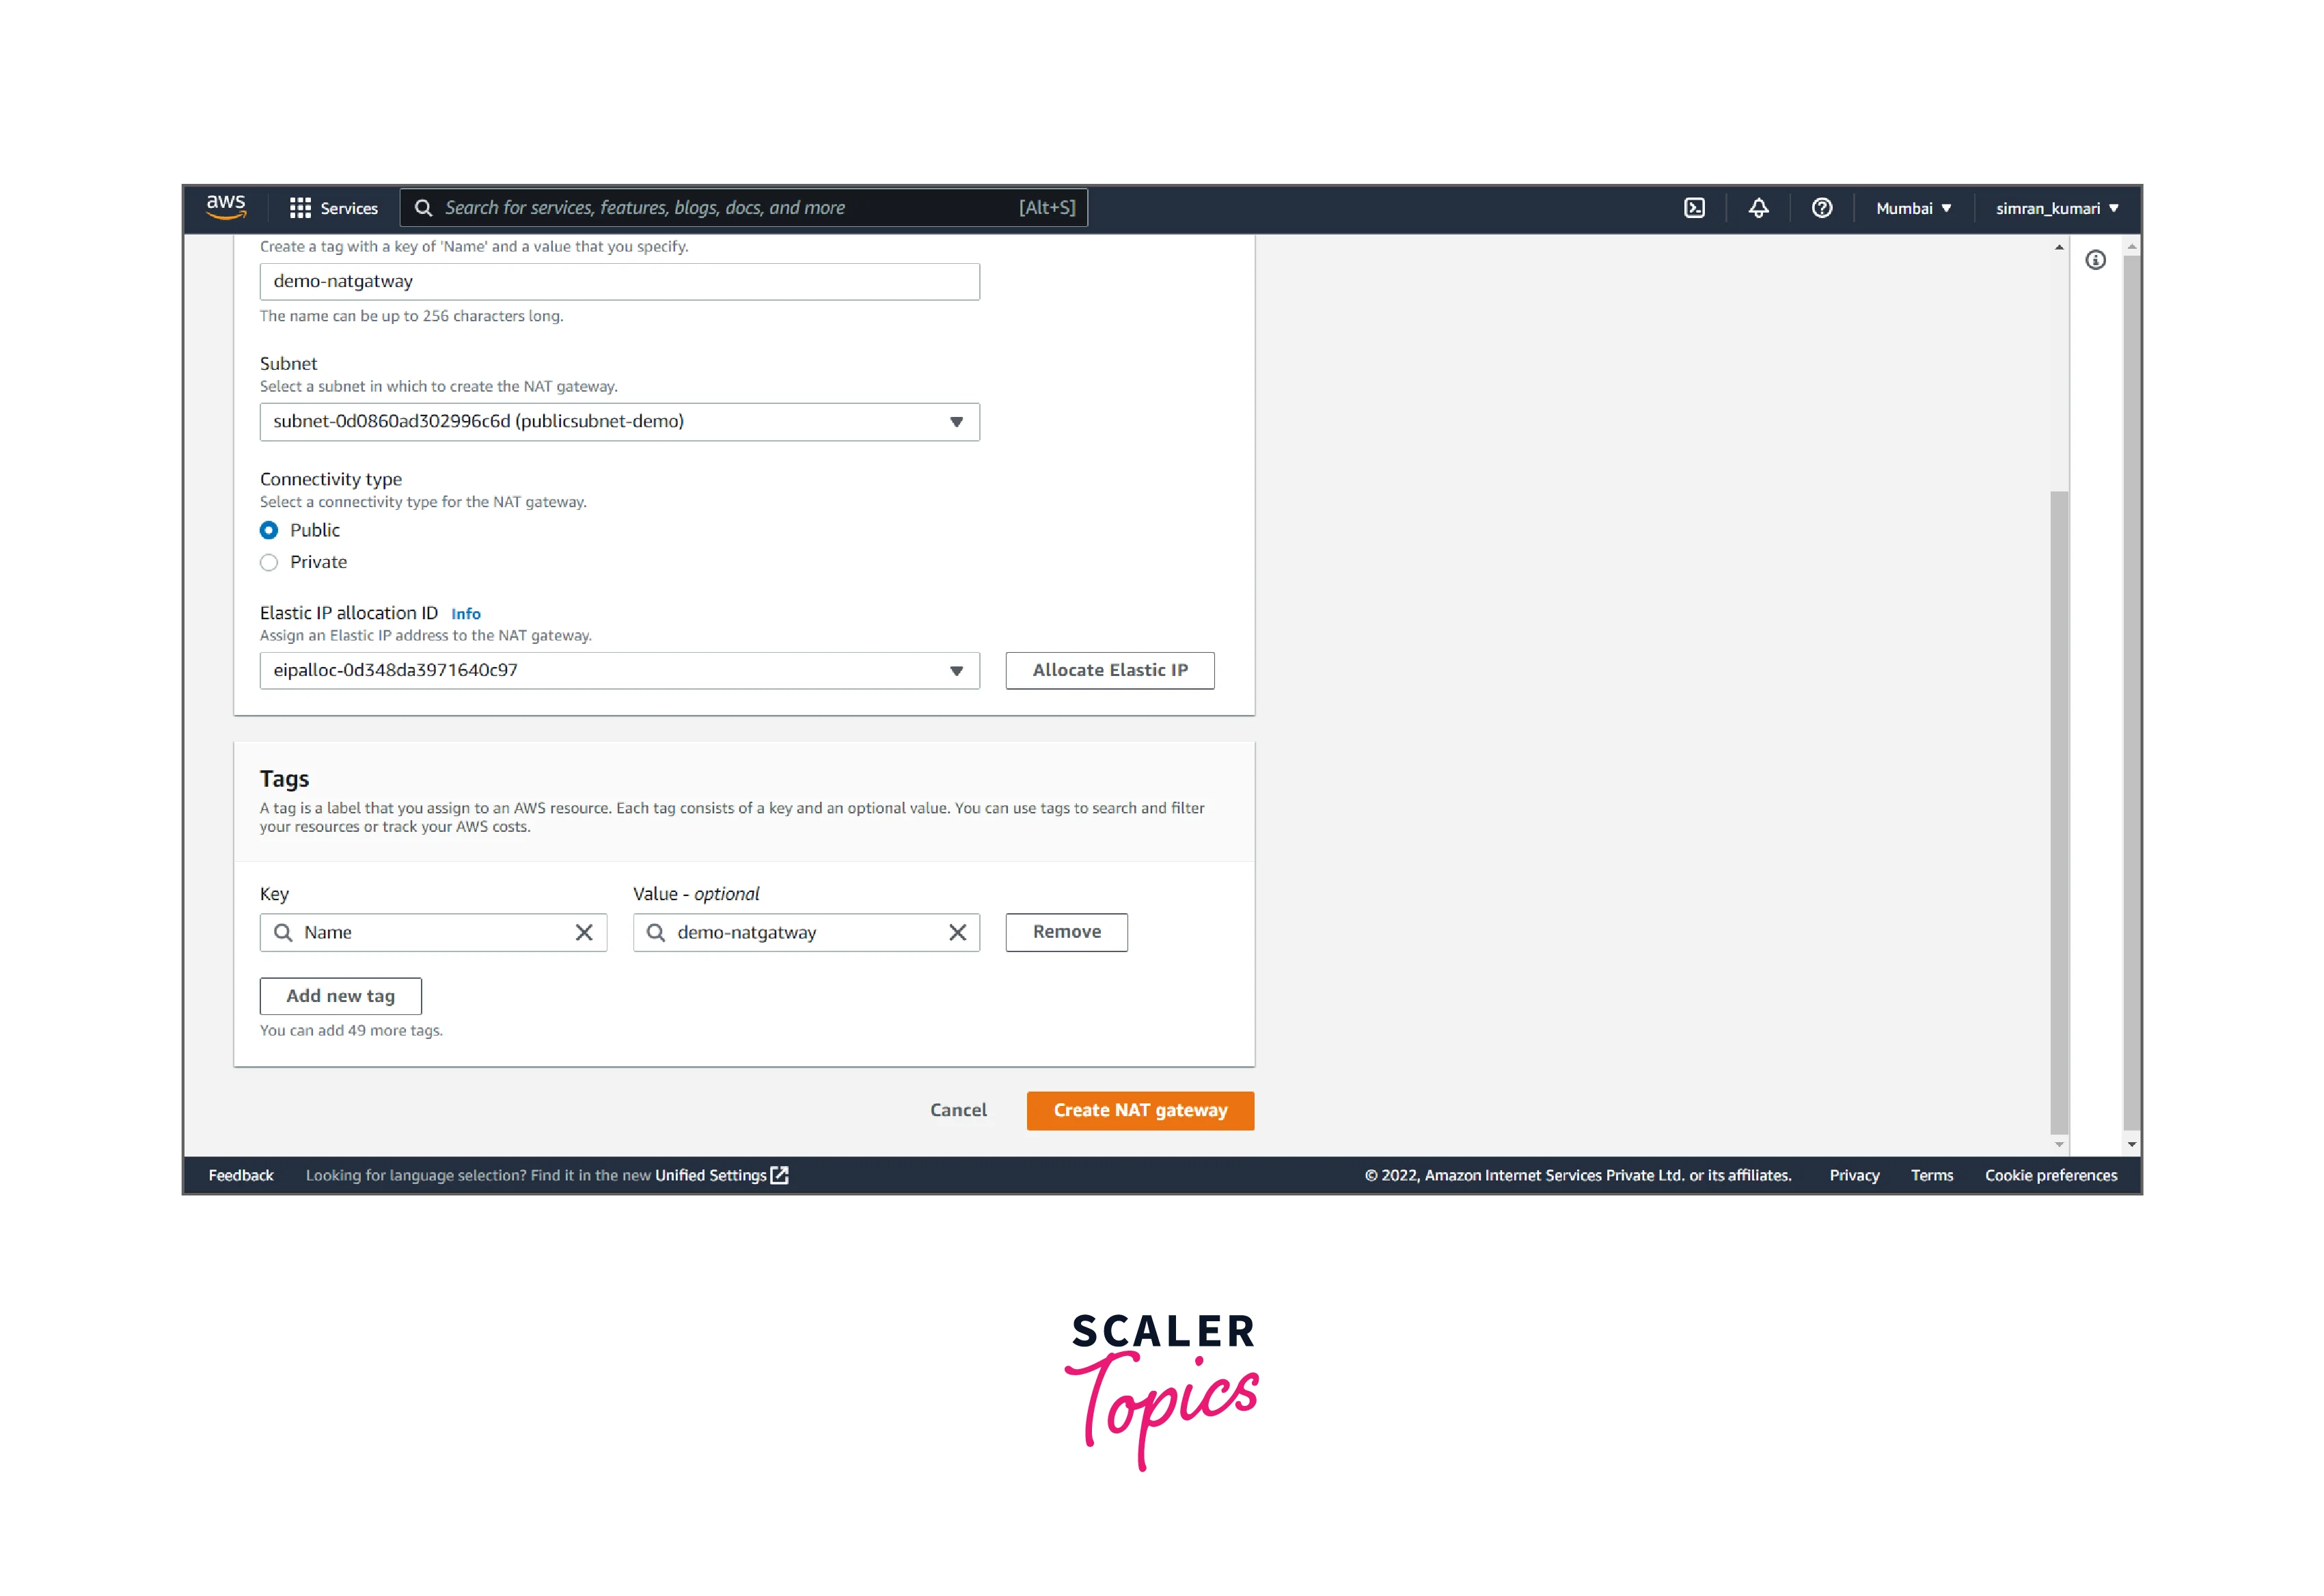
- Fill in the name, choose the public subnet, and allocate the elastic IP by clicking Allocating Elastic IP.
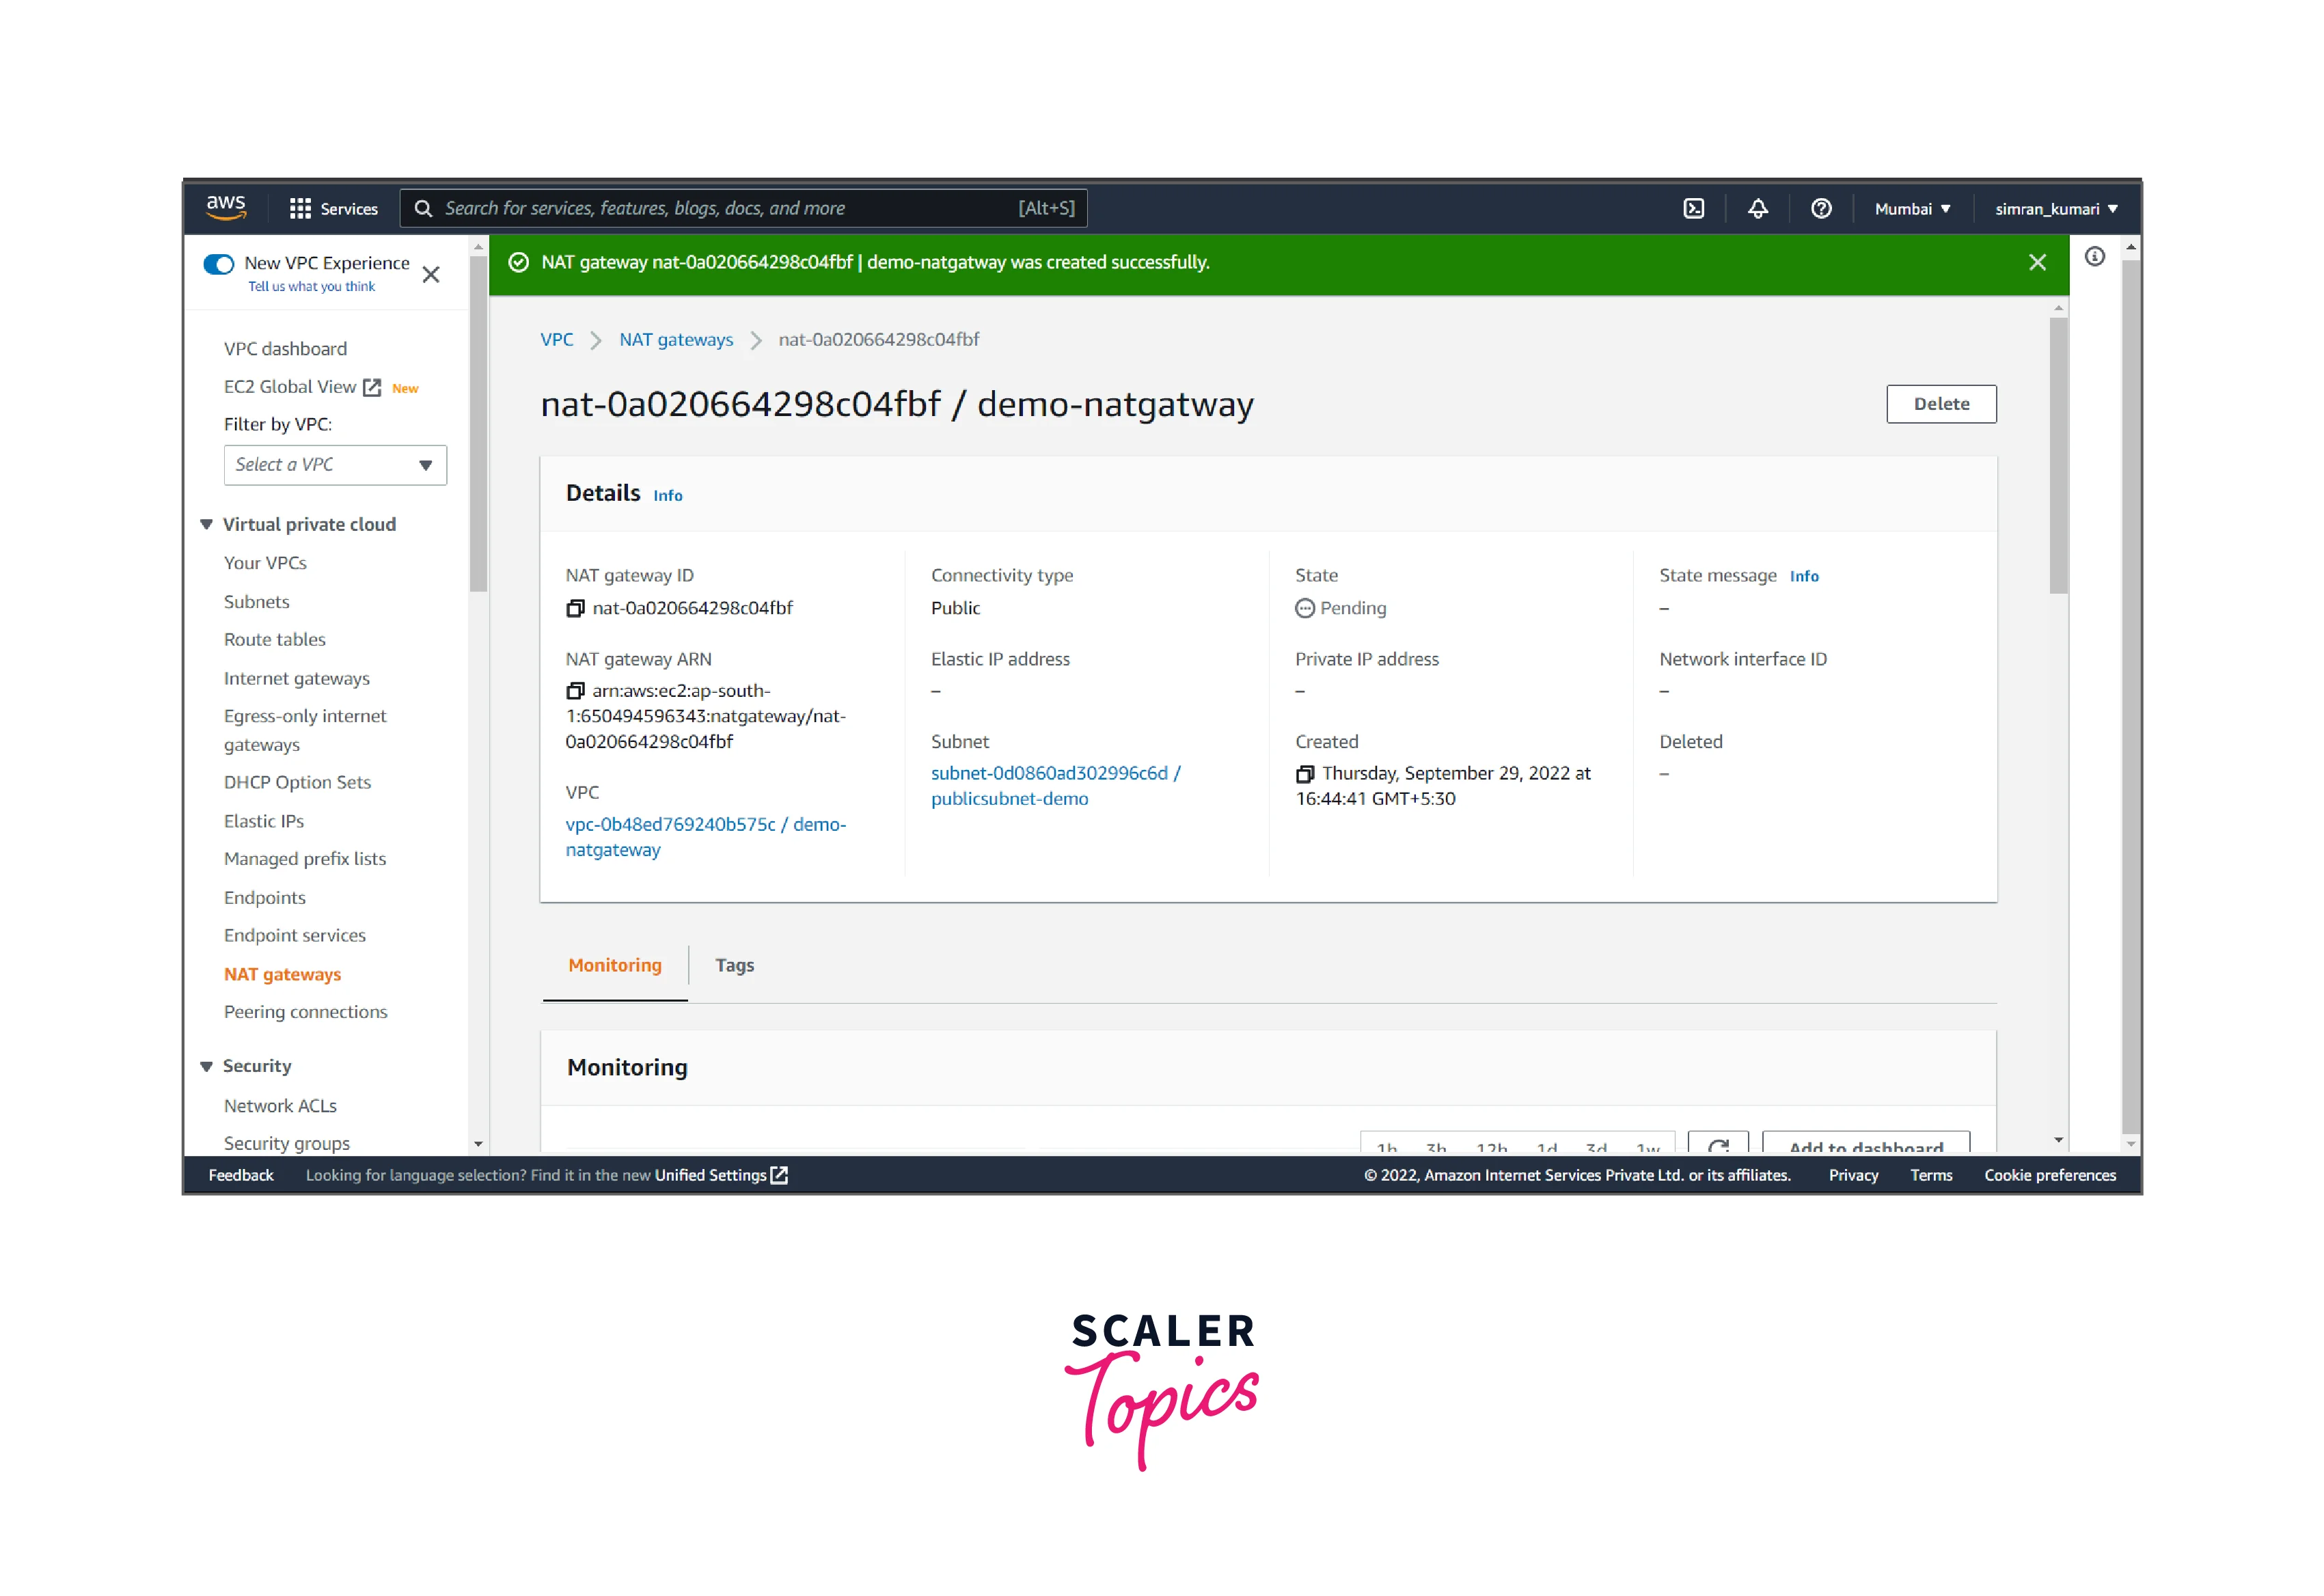
- Click on Create NAT gateway.
- NAT gateway is successfully created.
Update routing for the subnet
It includes the following steps:
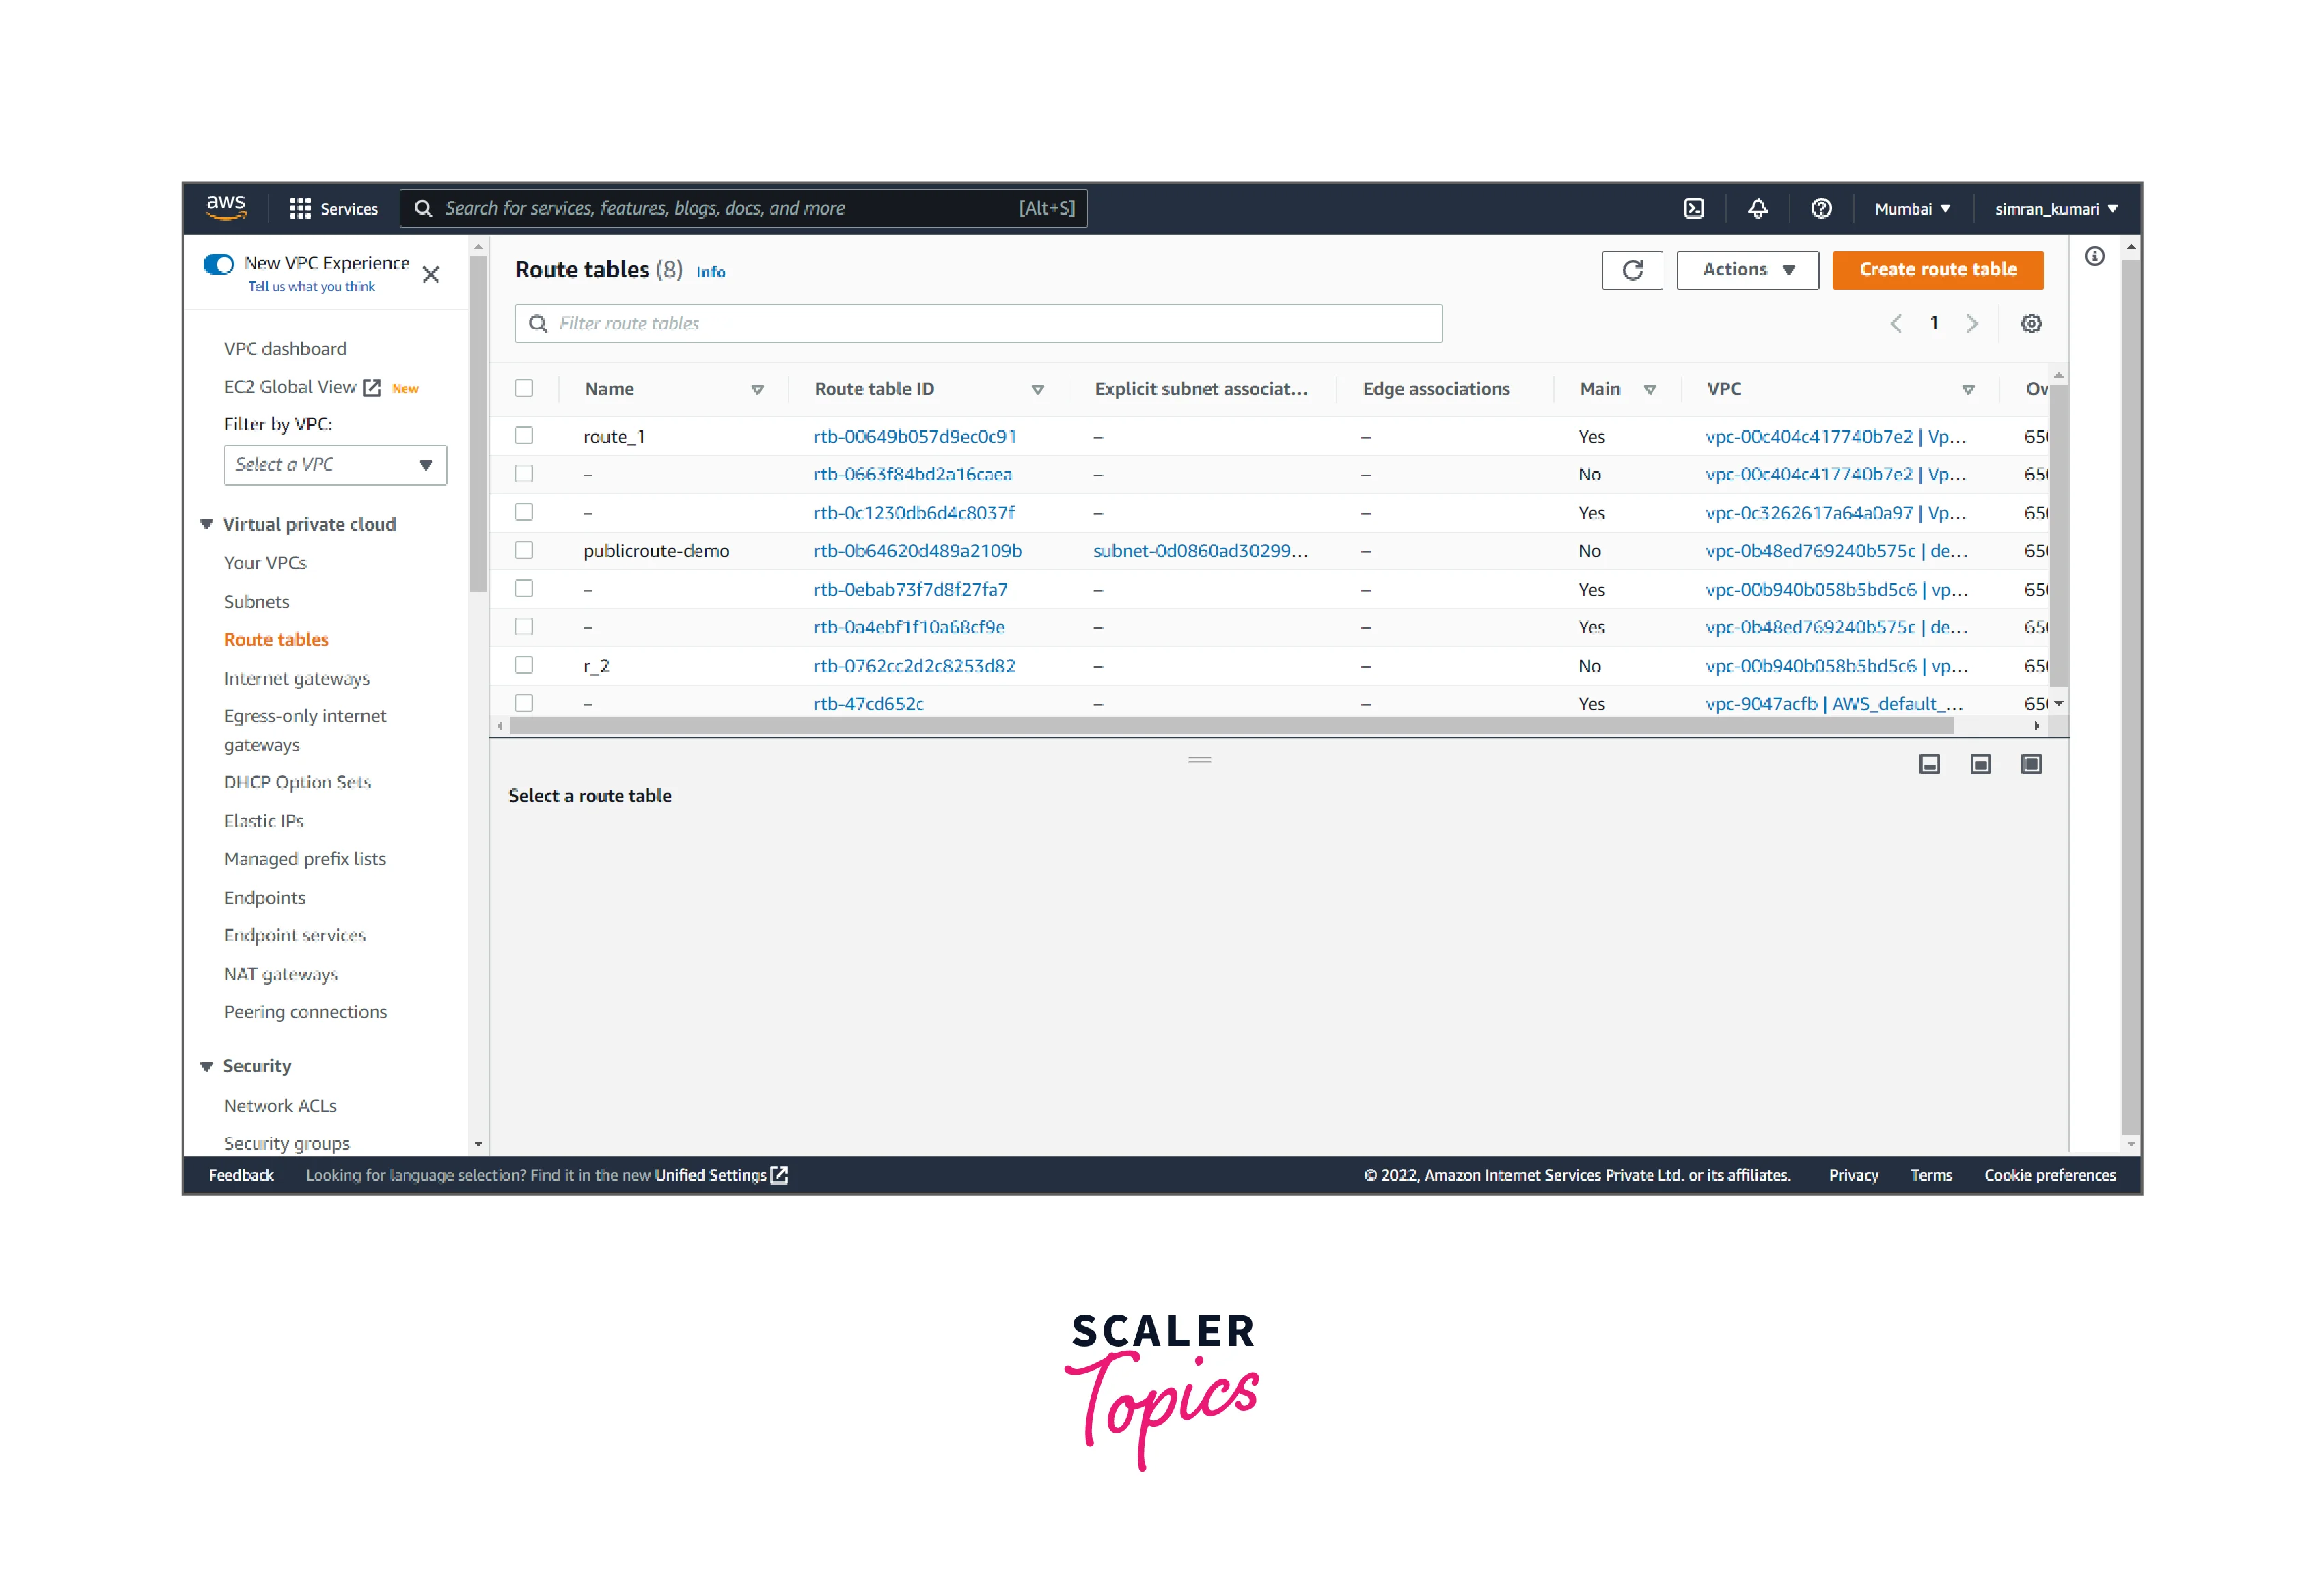
- Click on Route Tables from the left navigation bar. Here we have to create a routing table for accessing the private subnet by clicking on Create route table.
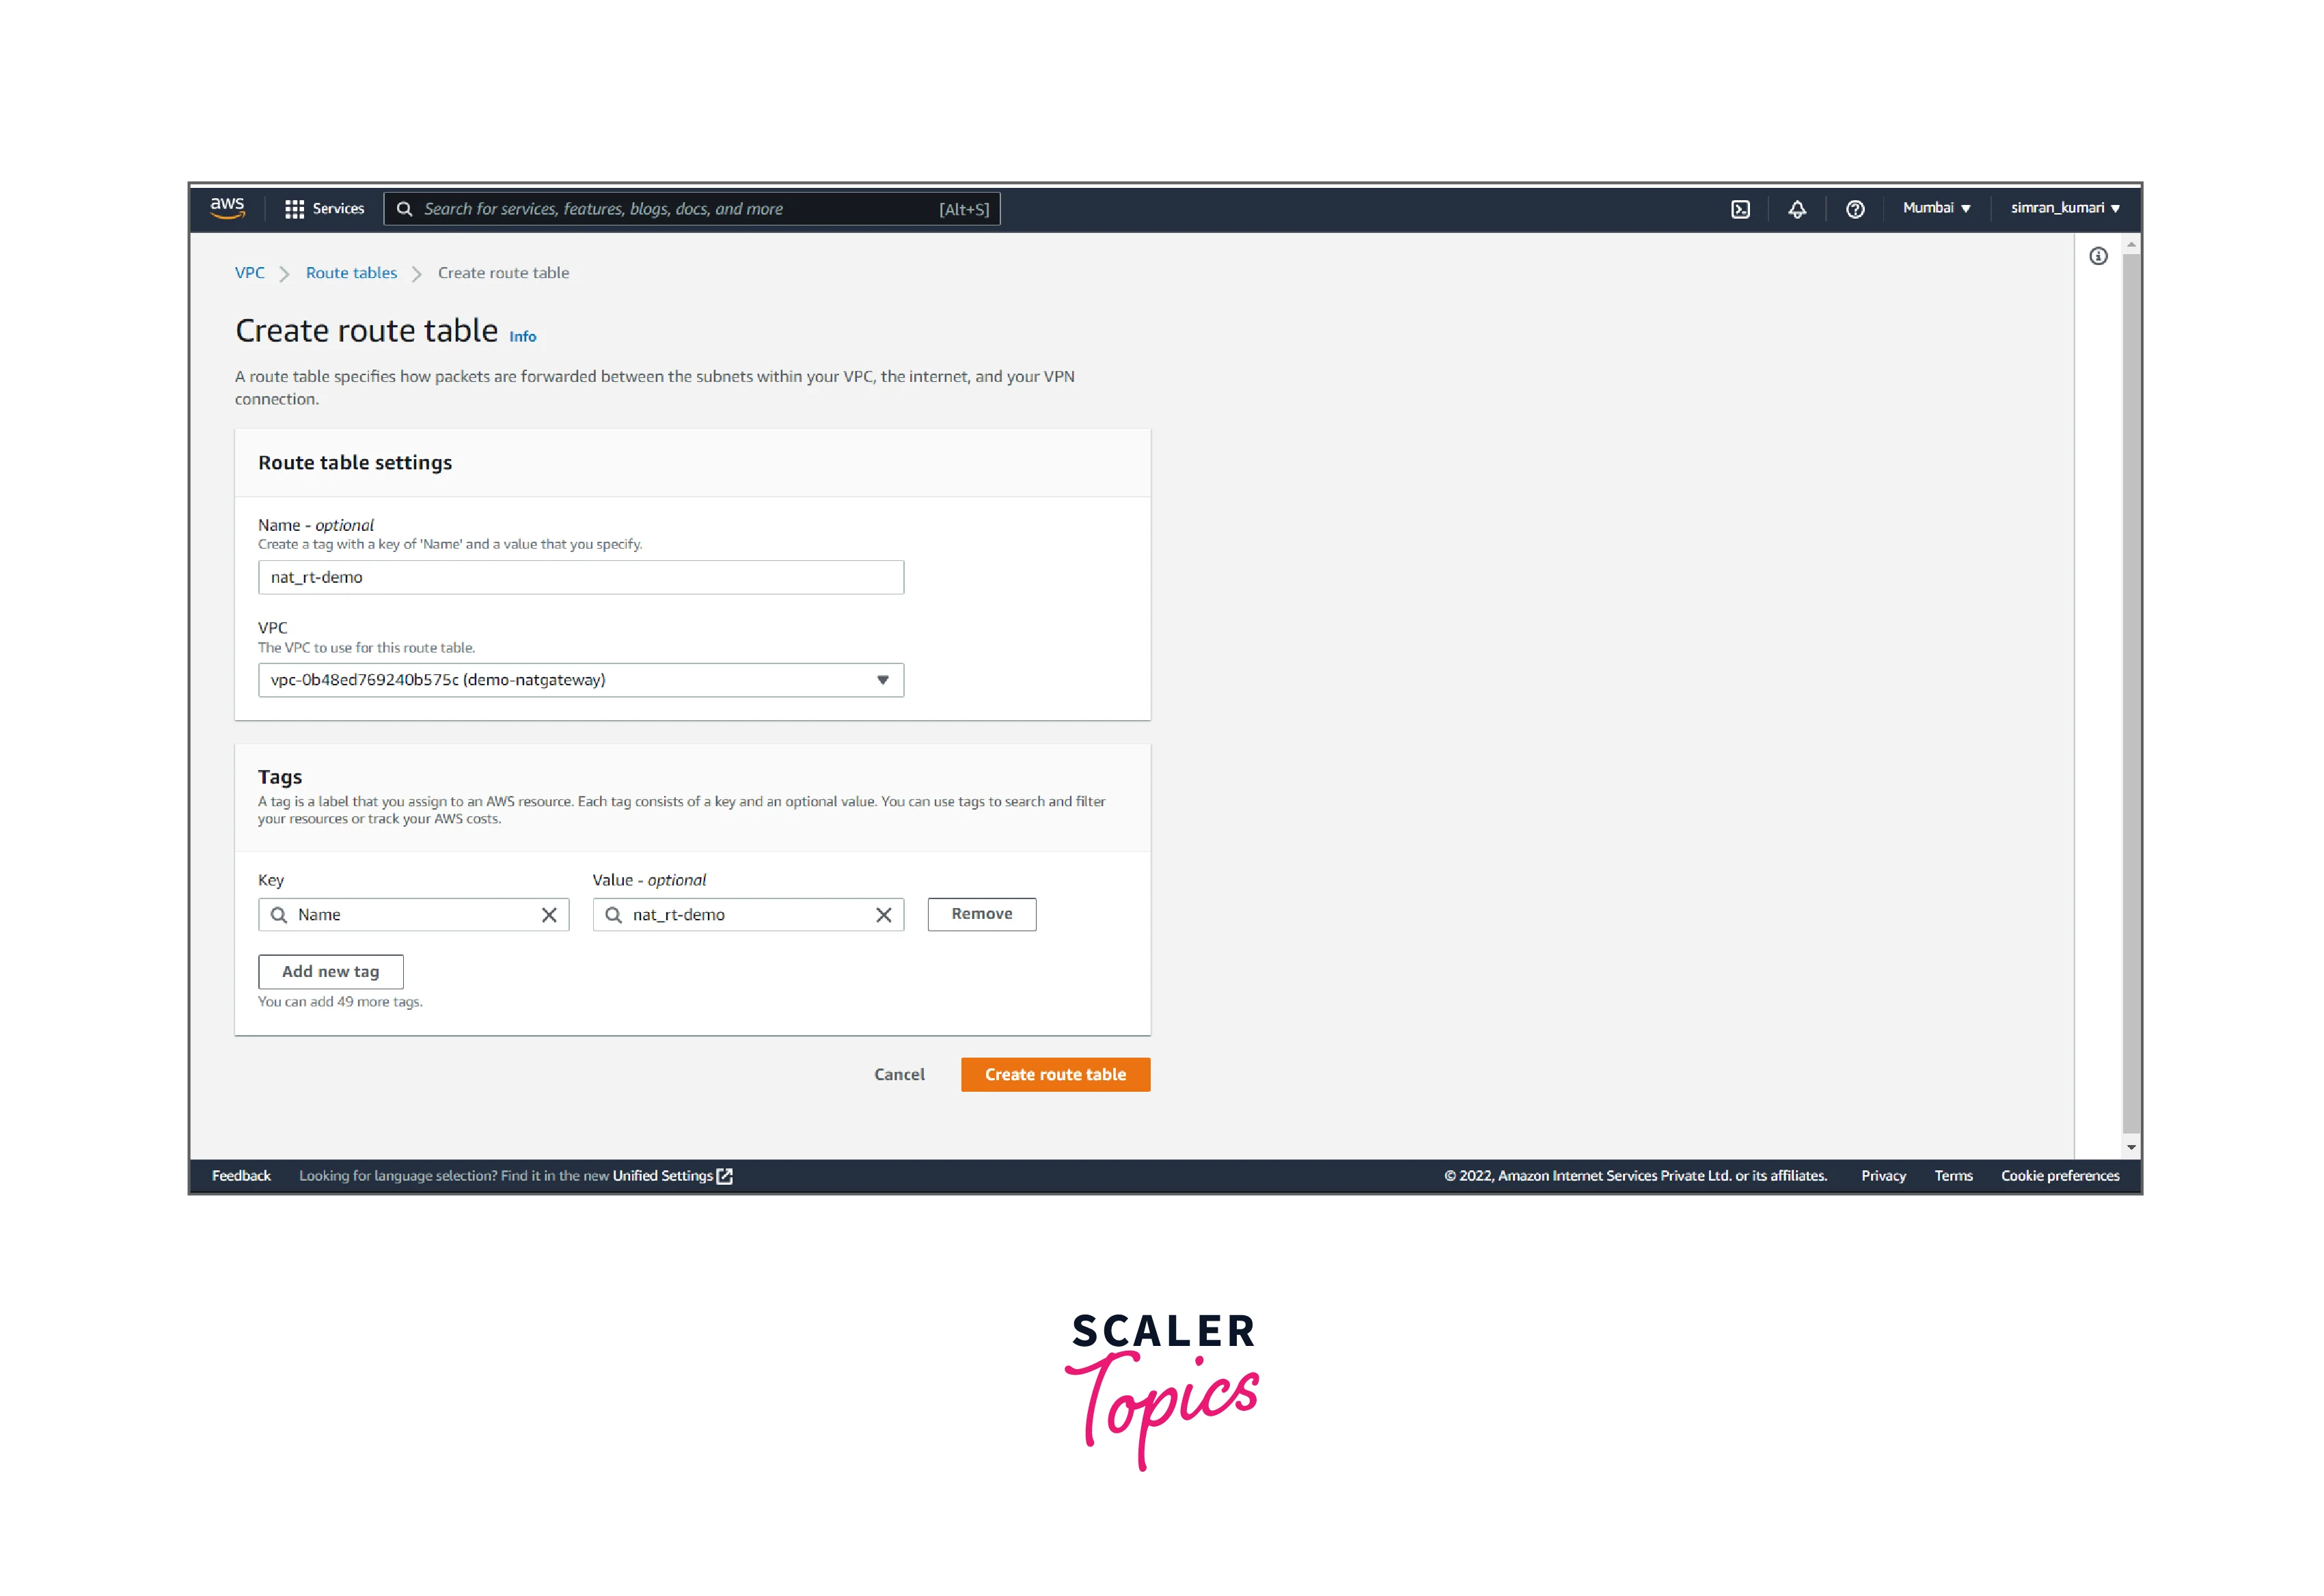
- Fill in the name(private), and choose the VPC. Click on Create route table.
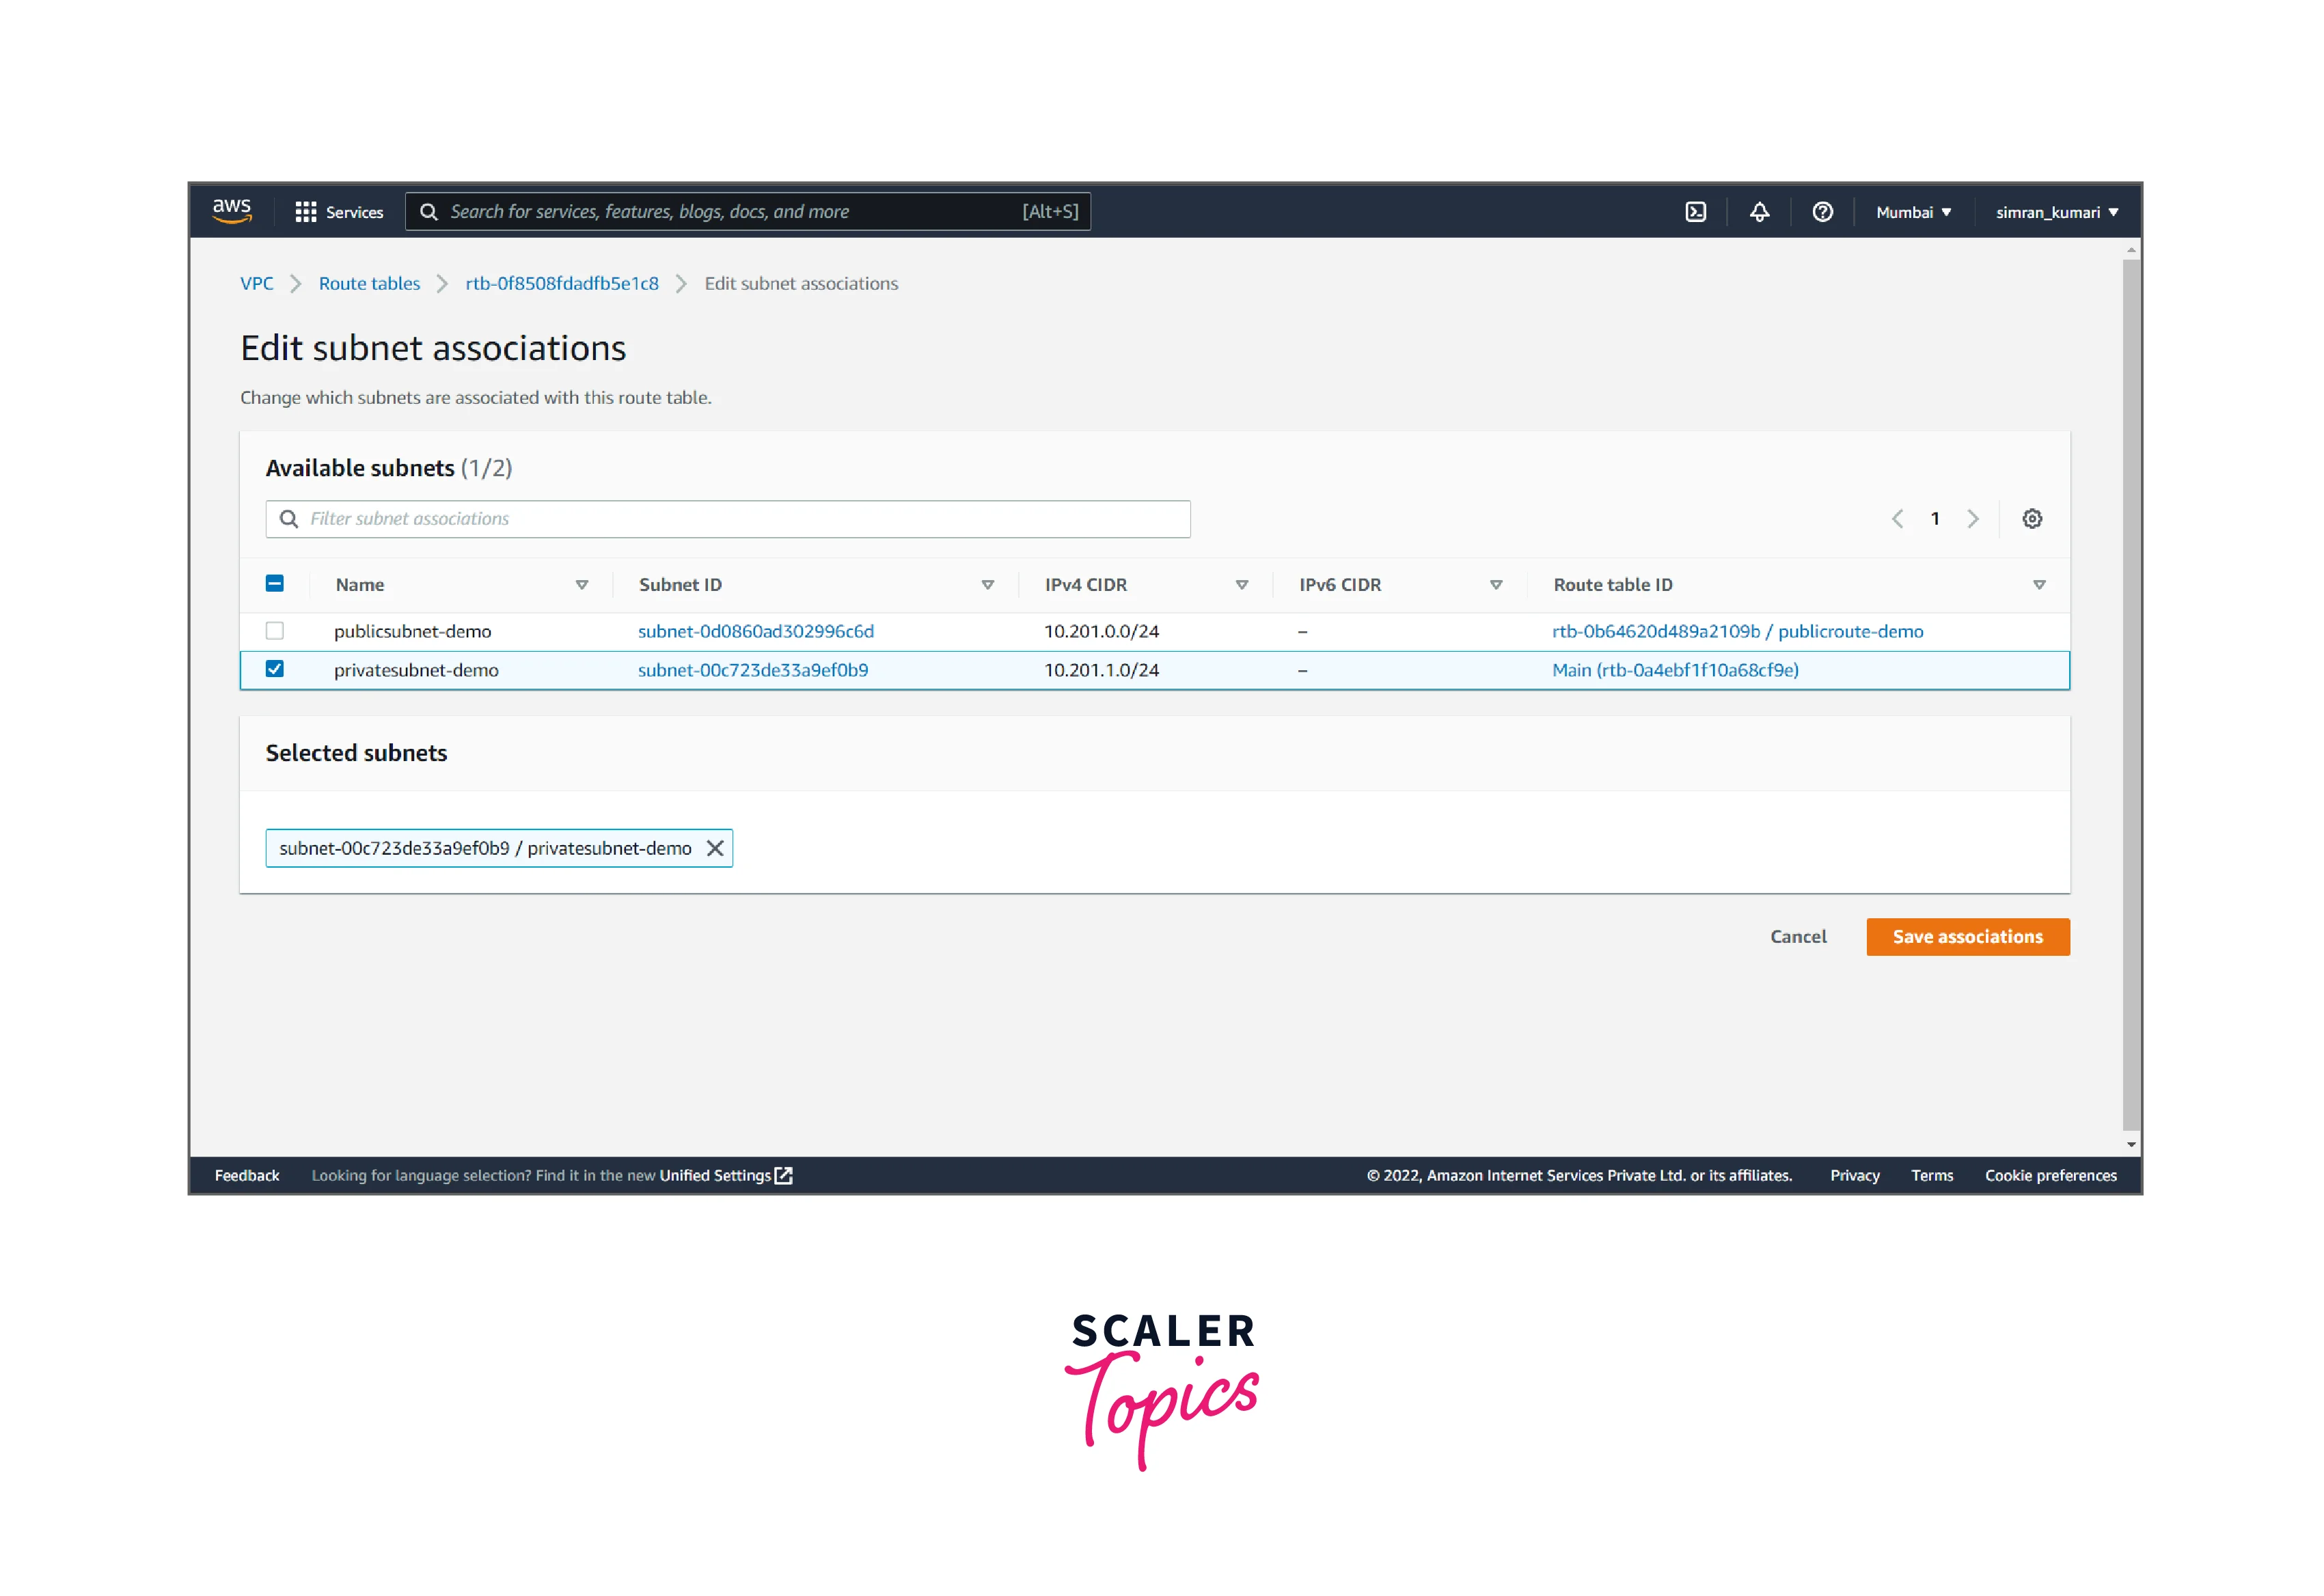
- Click on Subnet associations and edit it.
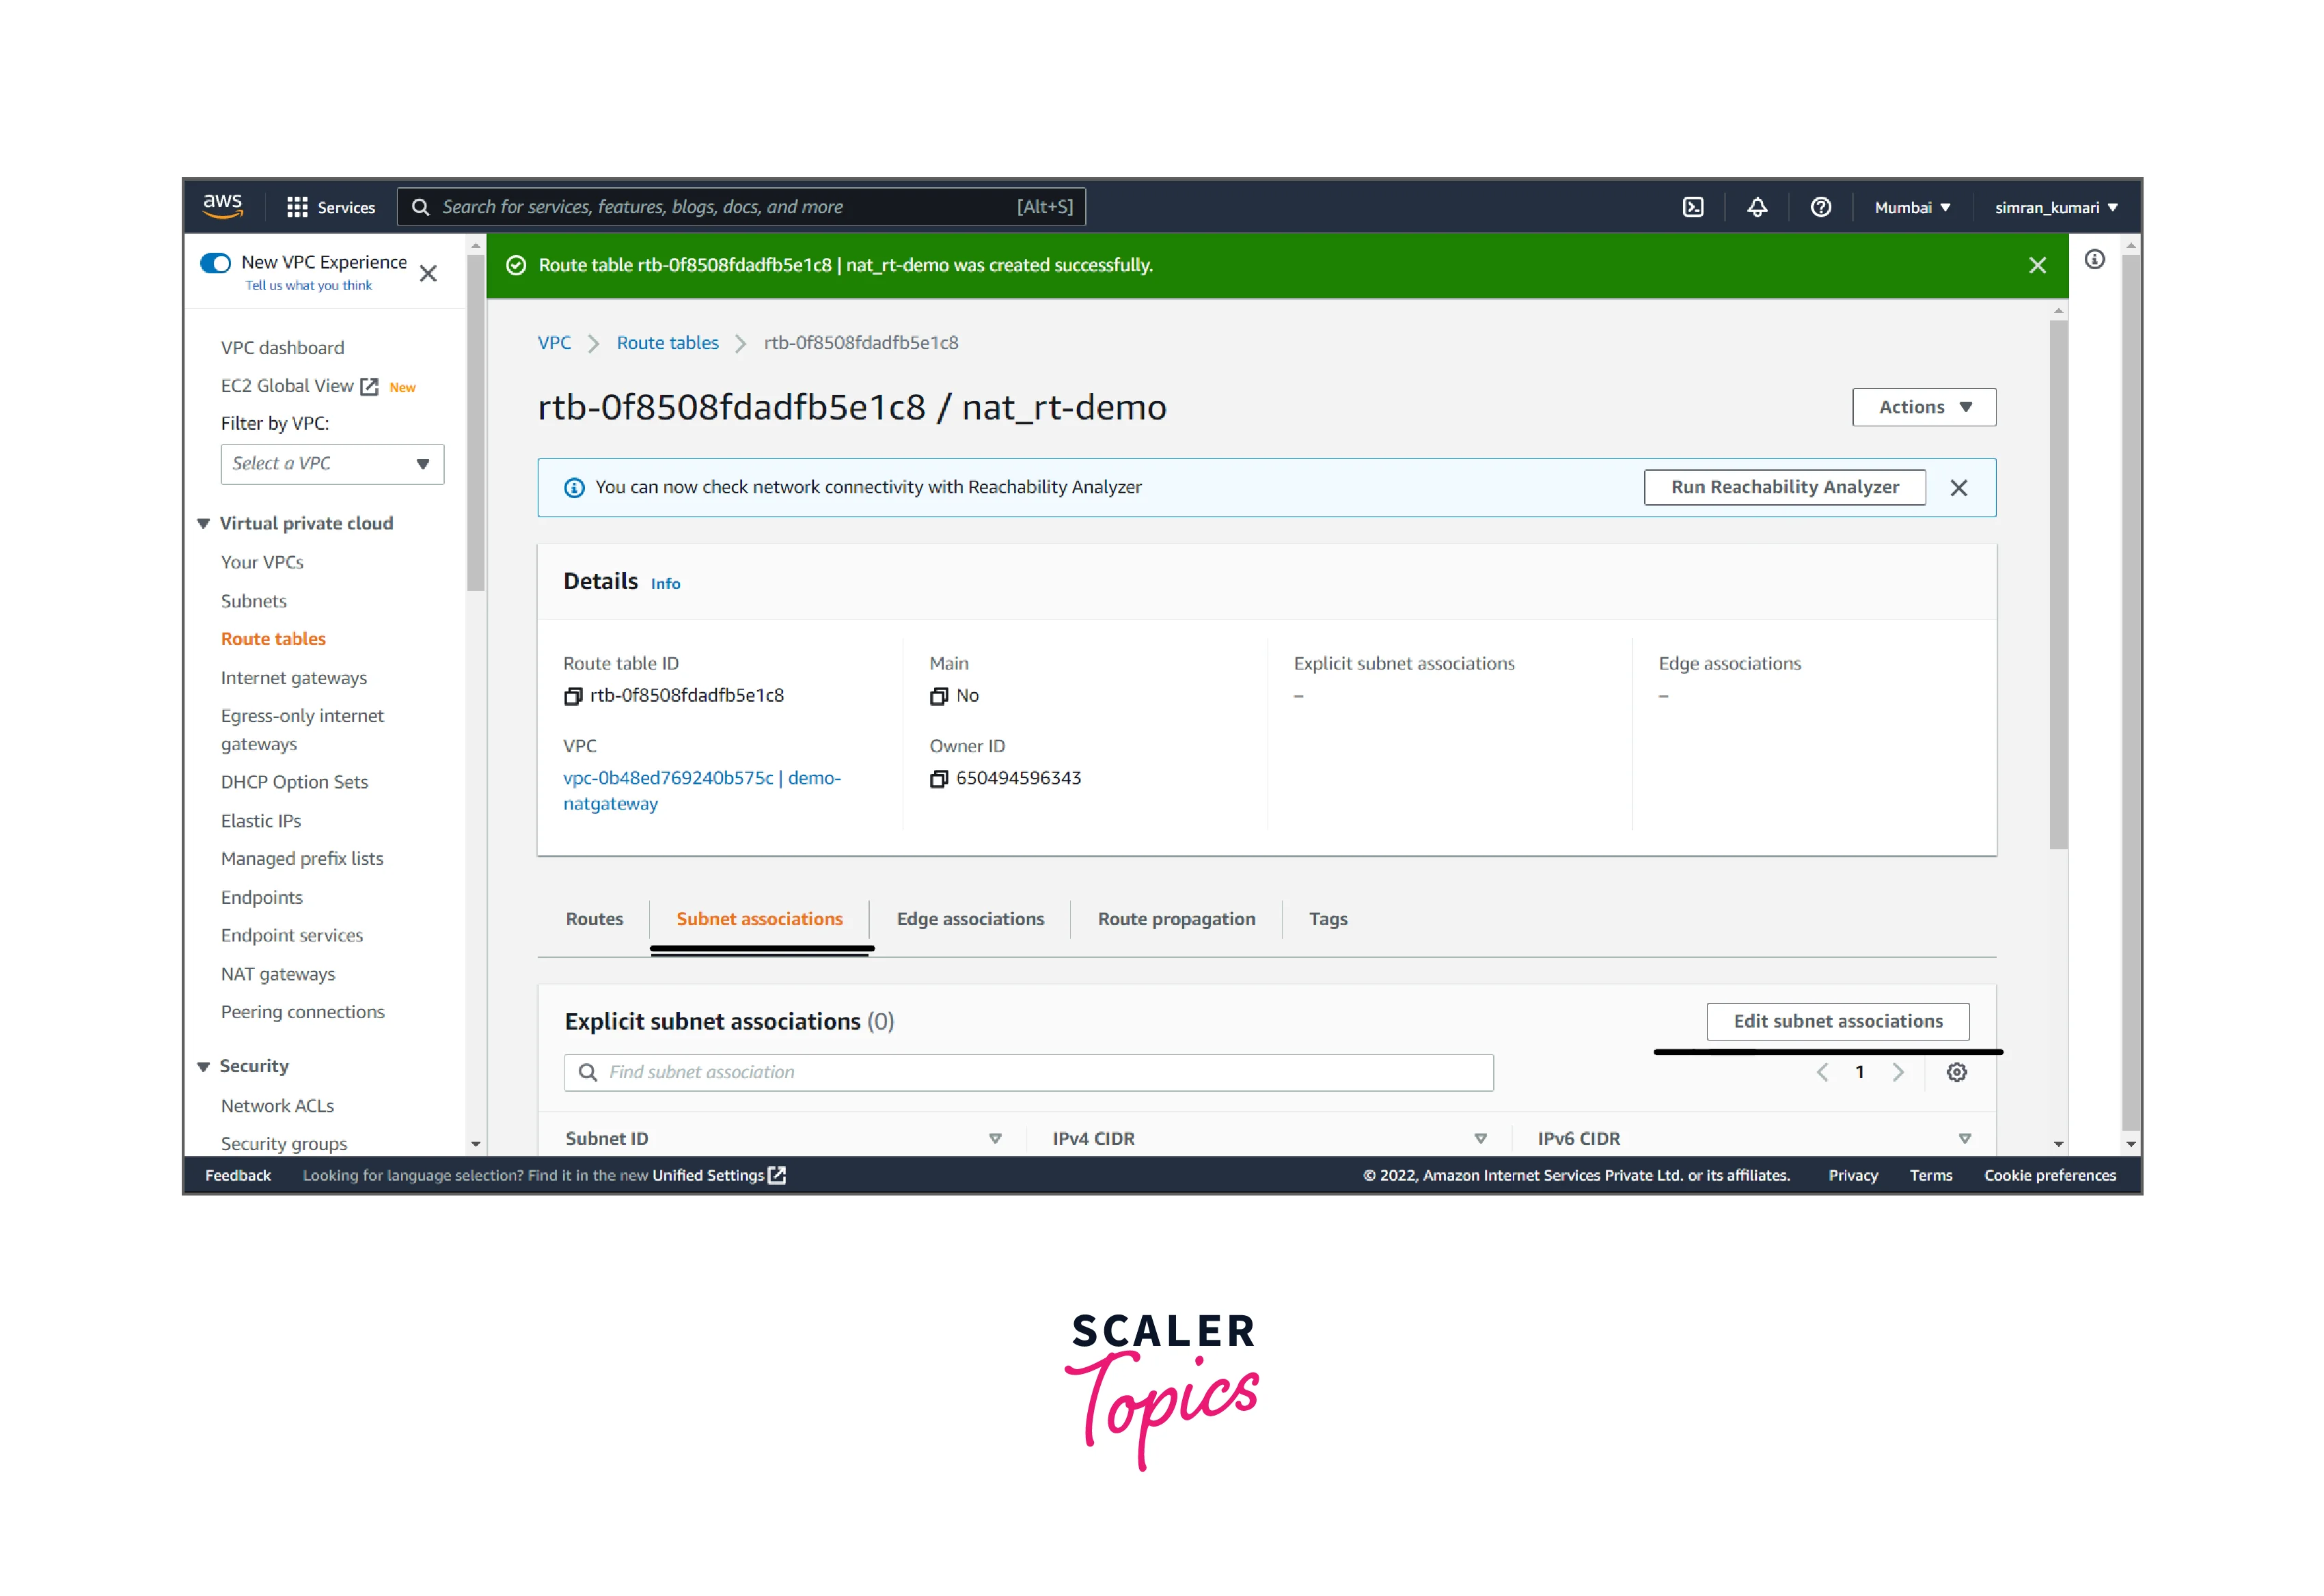
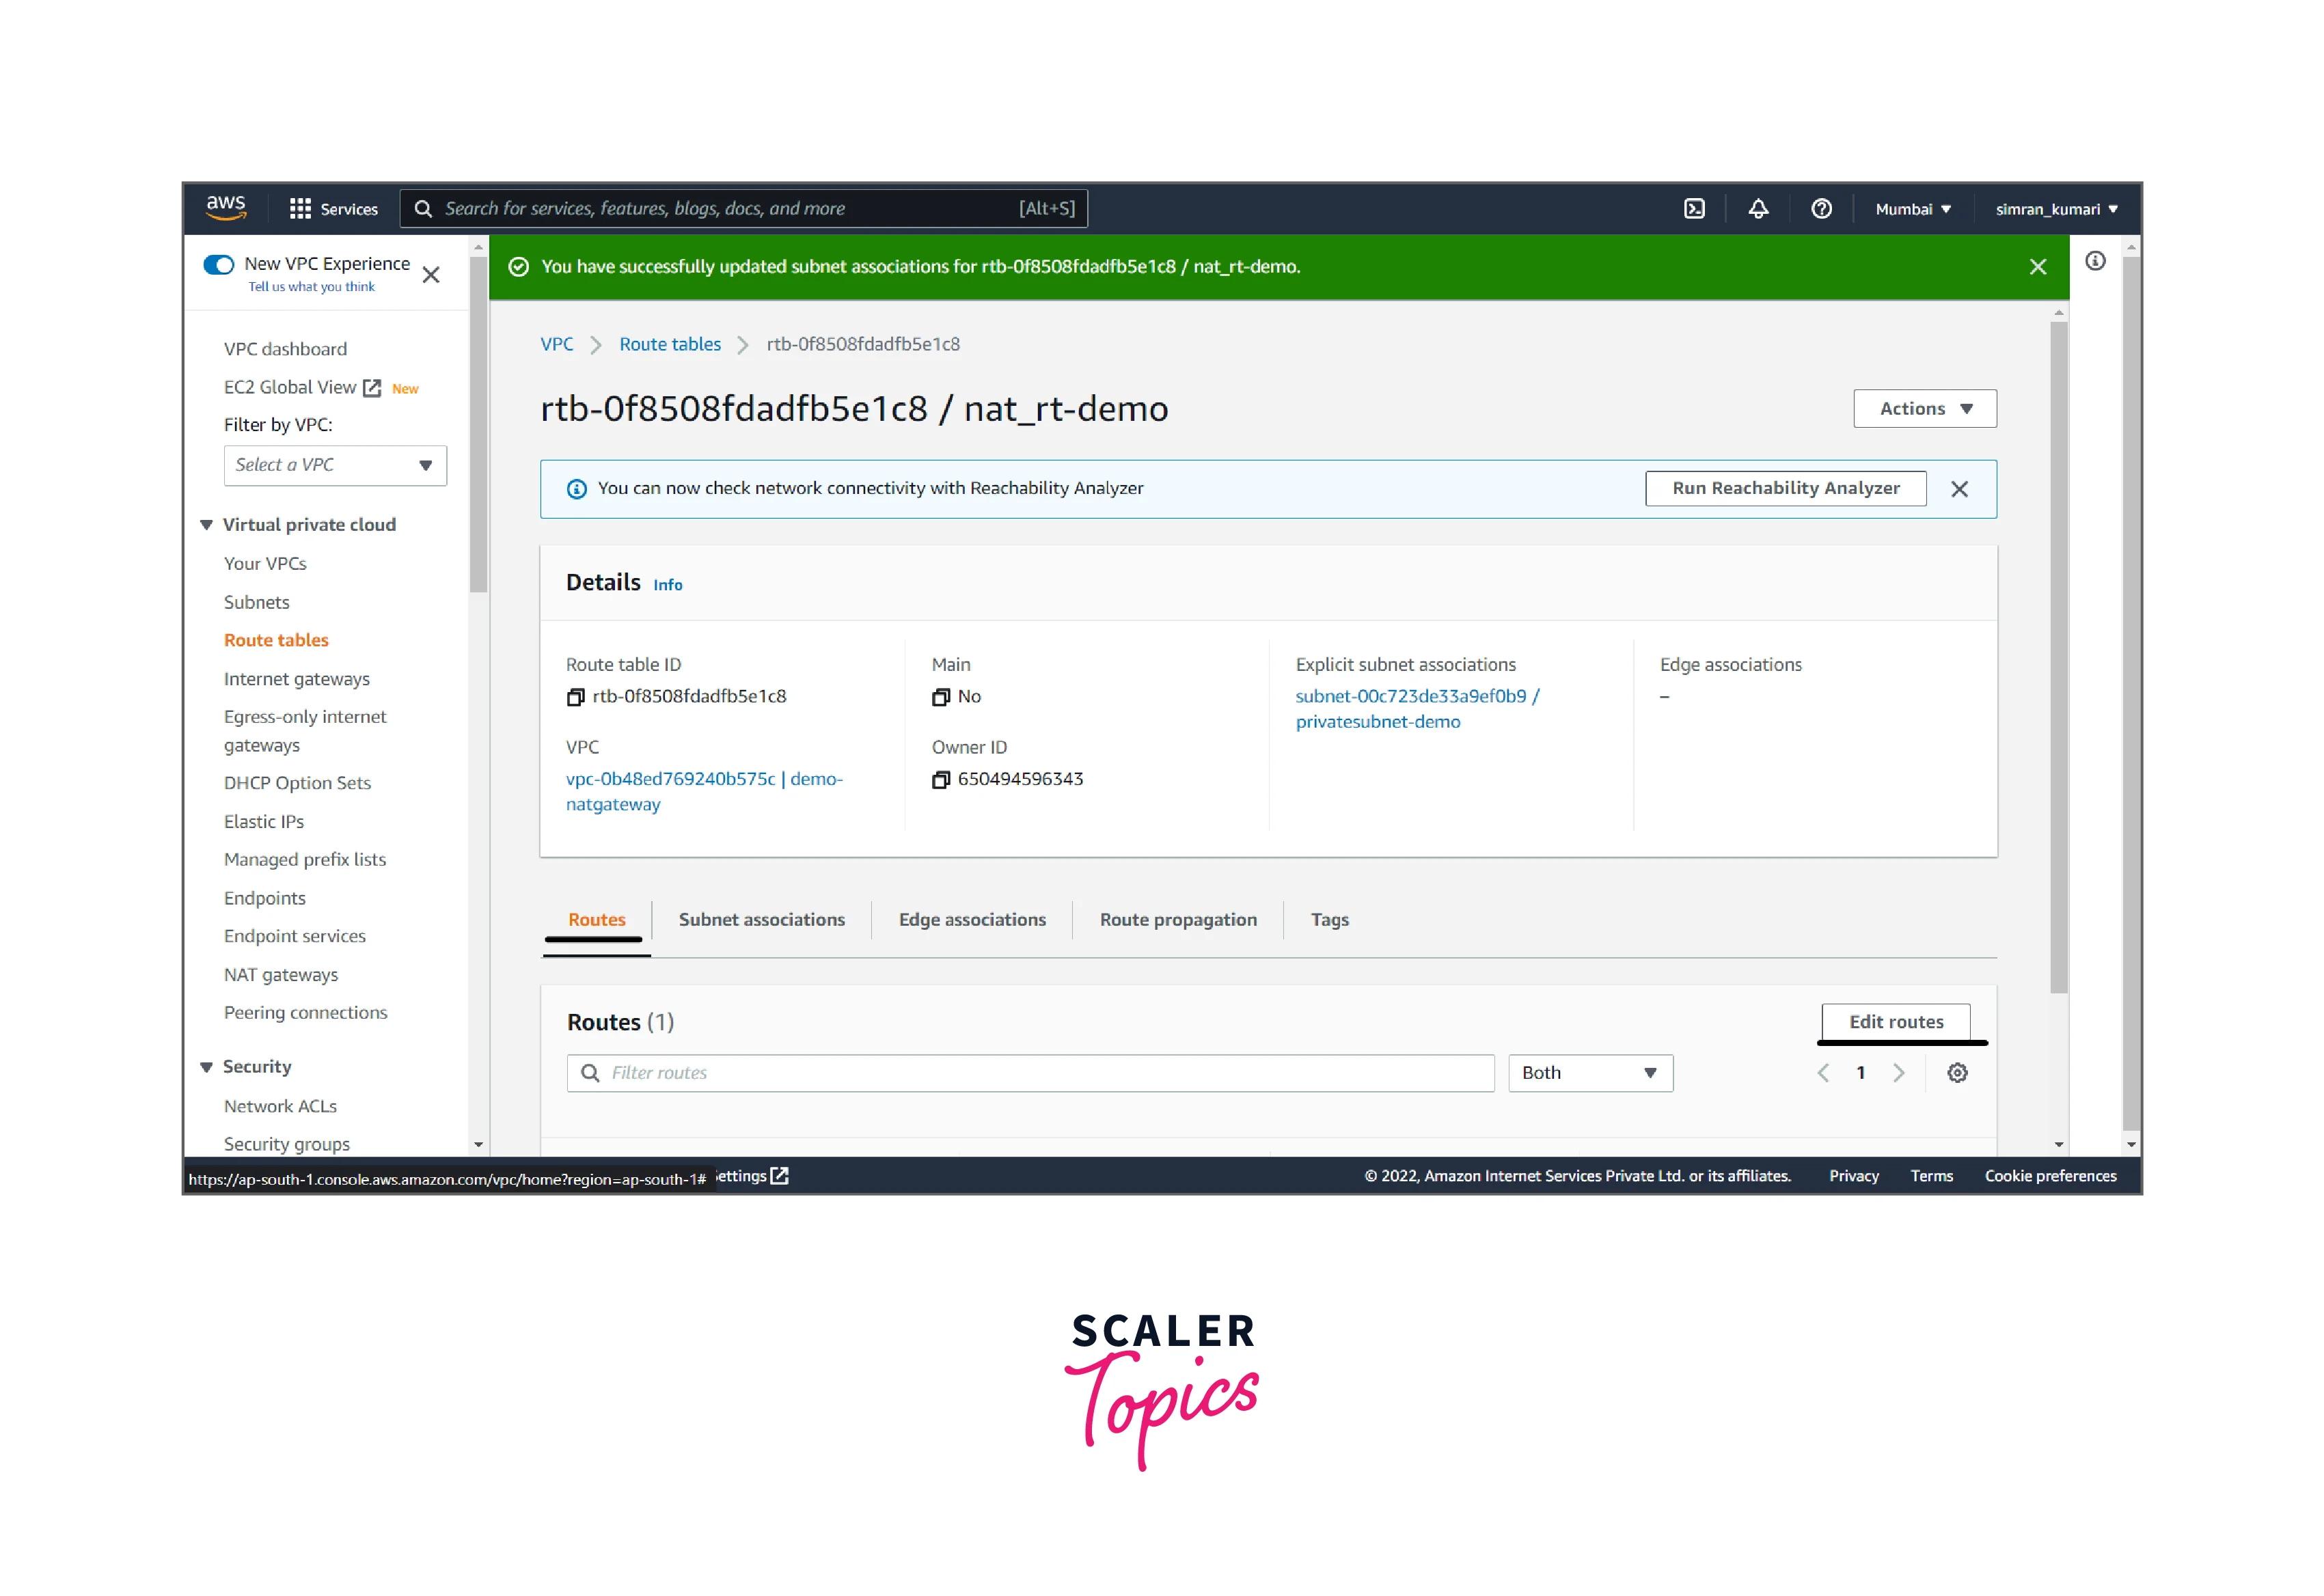
- Choose a private subnet and save it.
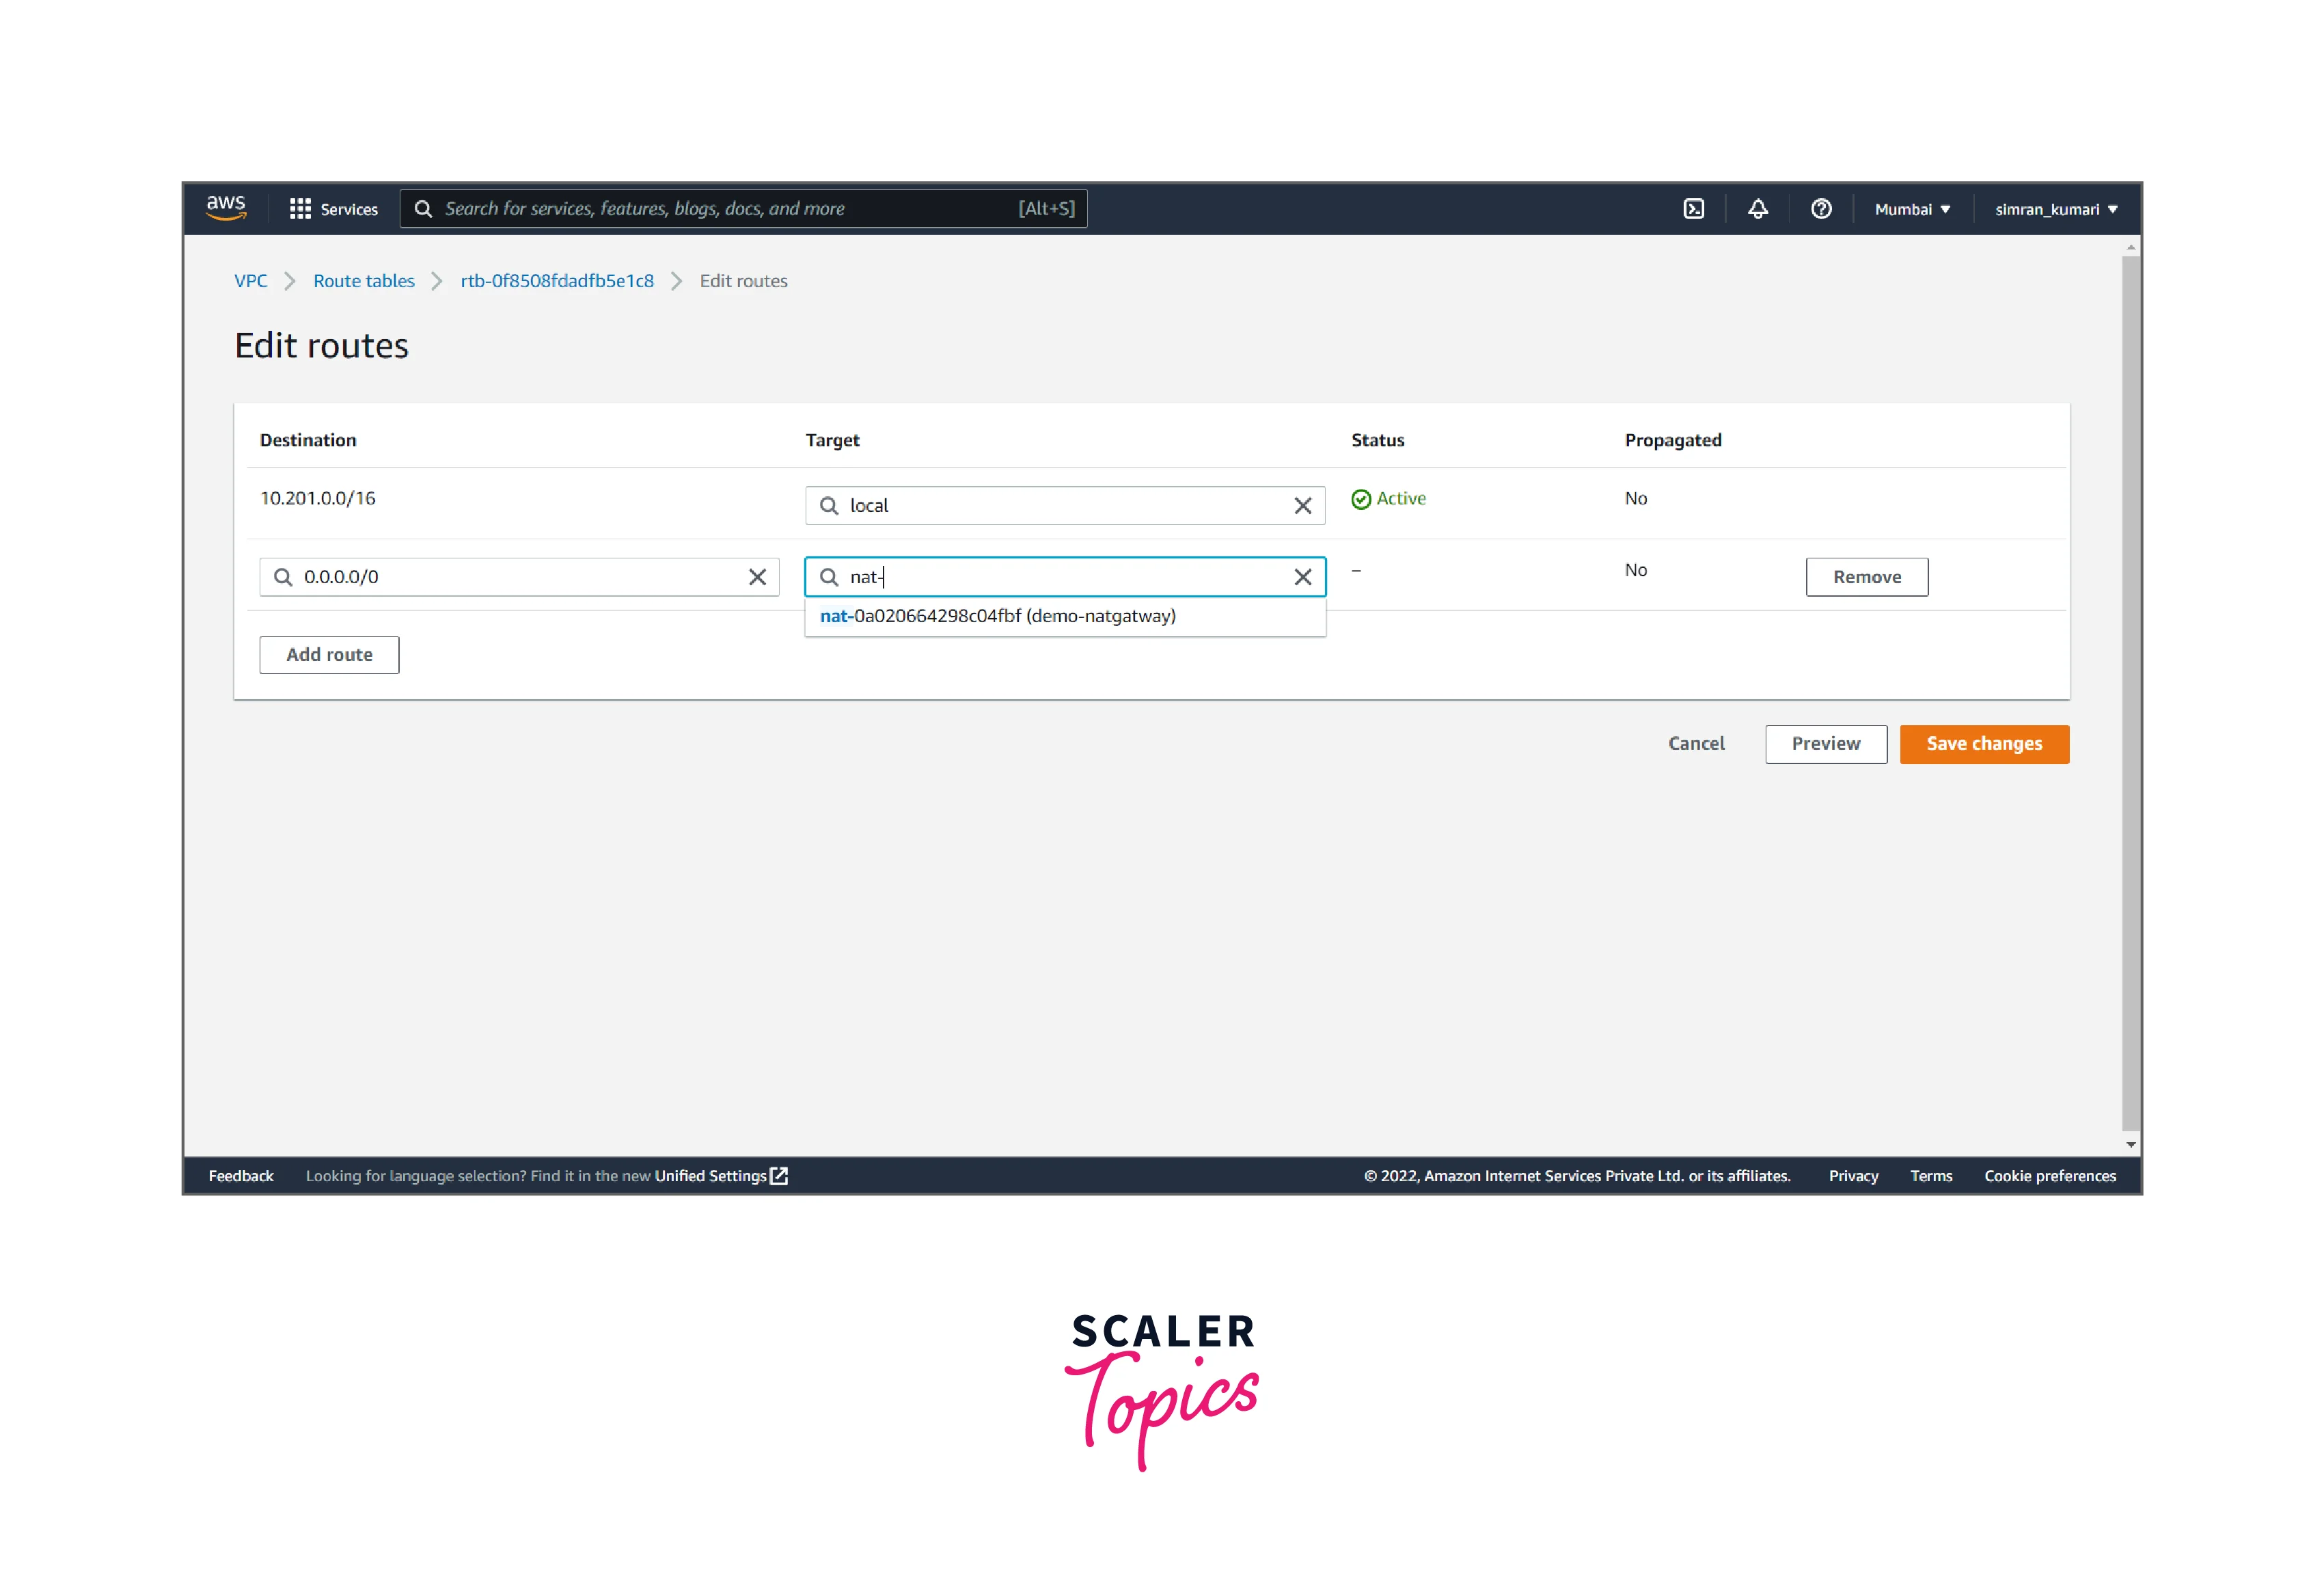
- Click on Edit routes to update the routing.
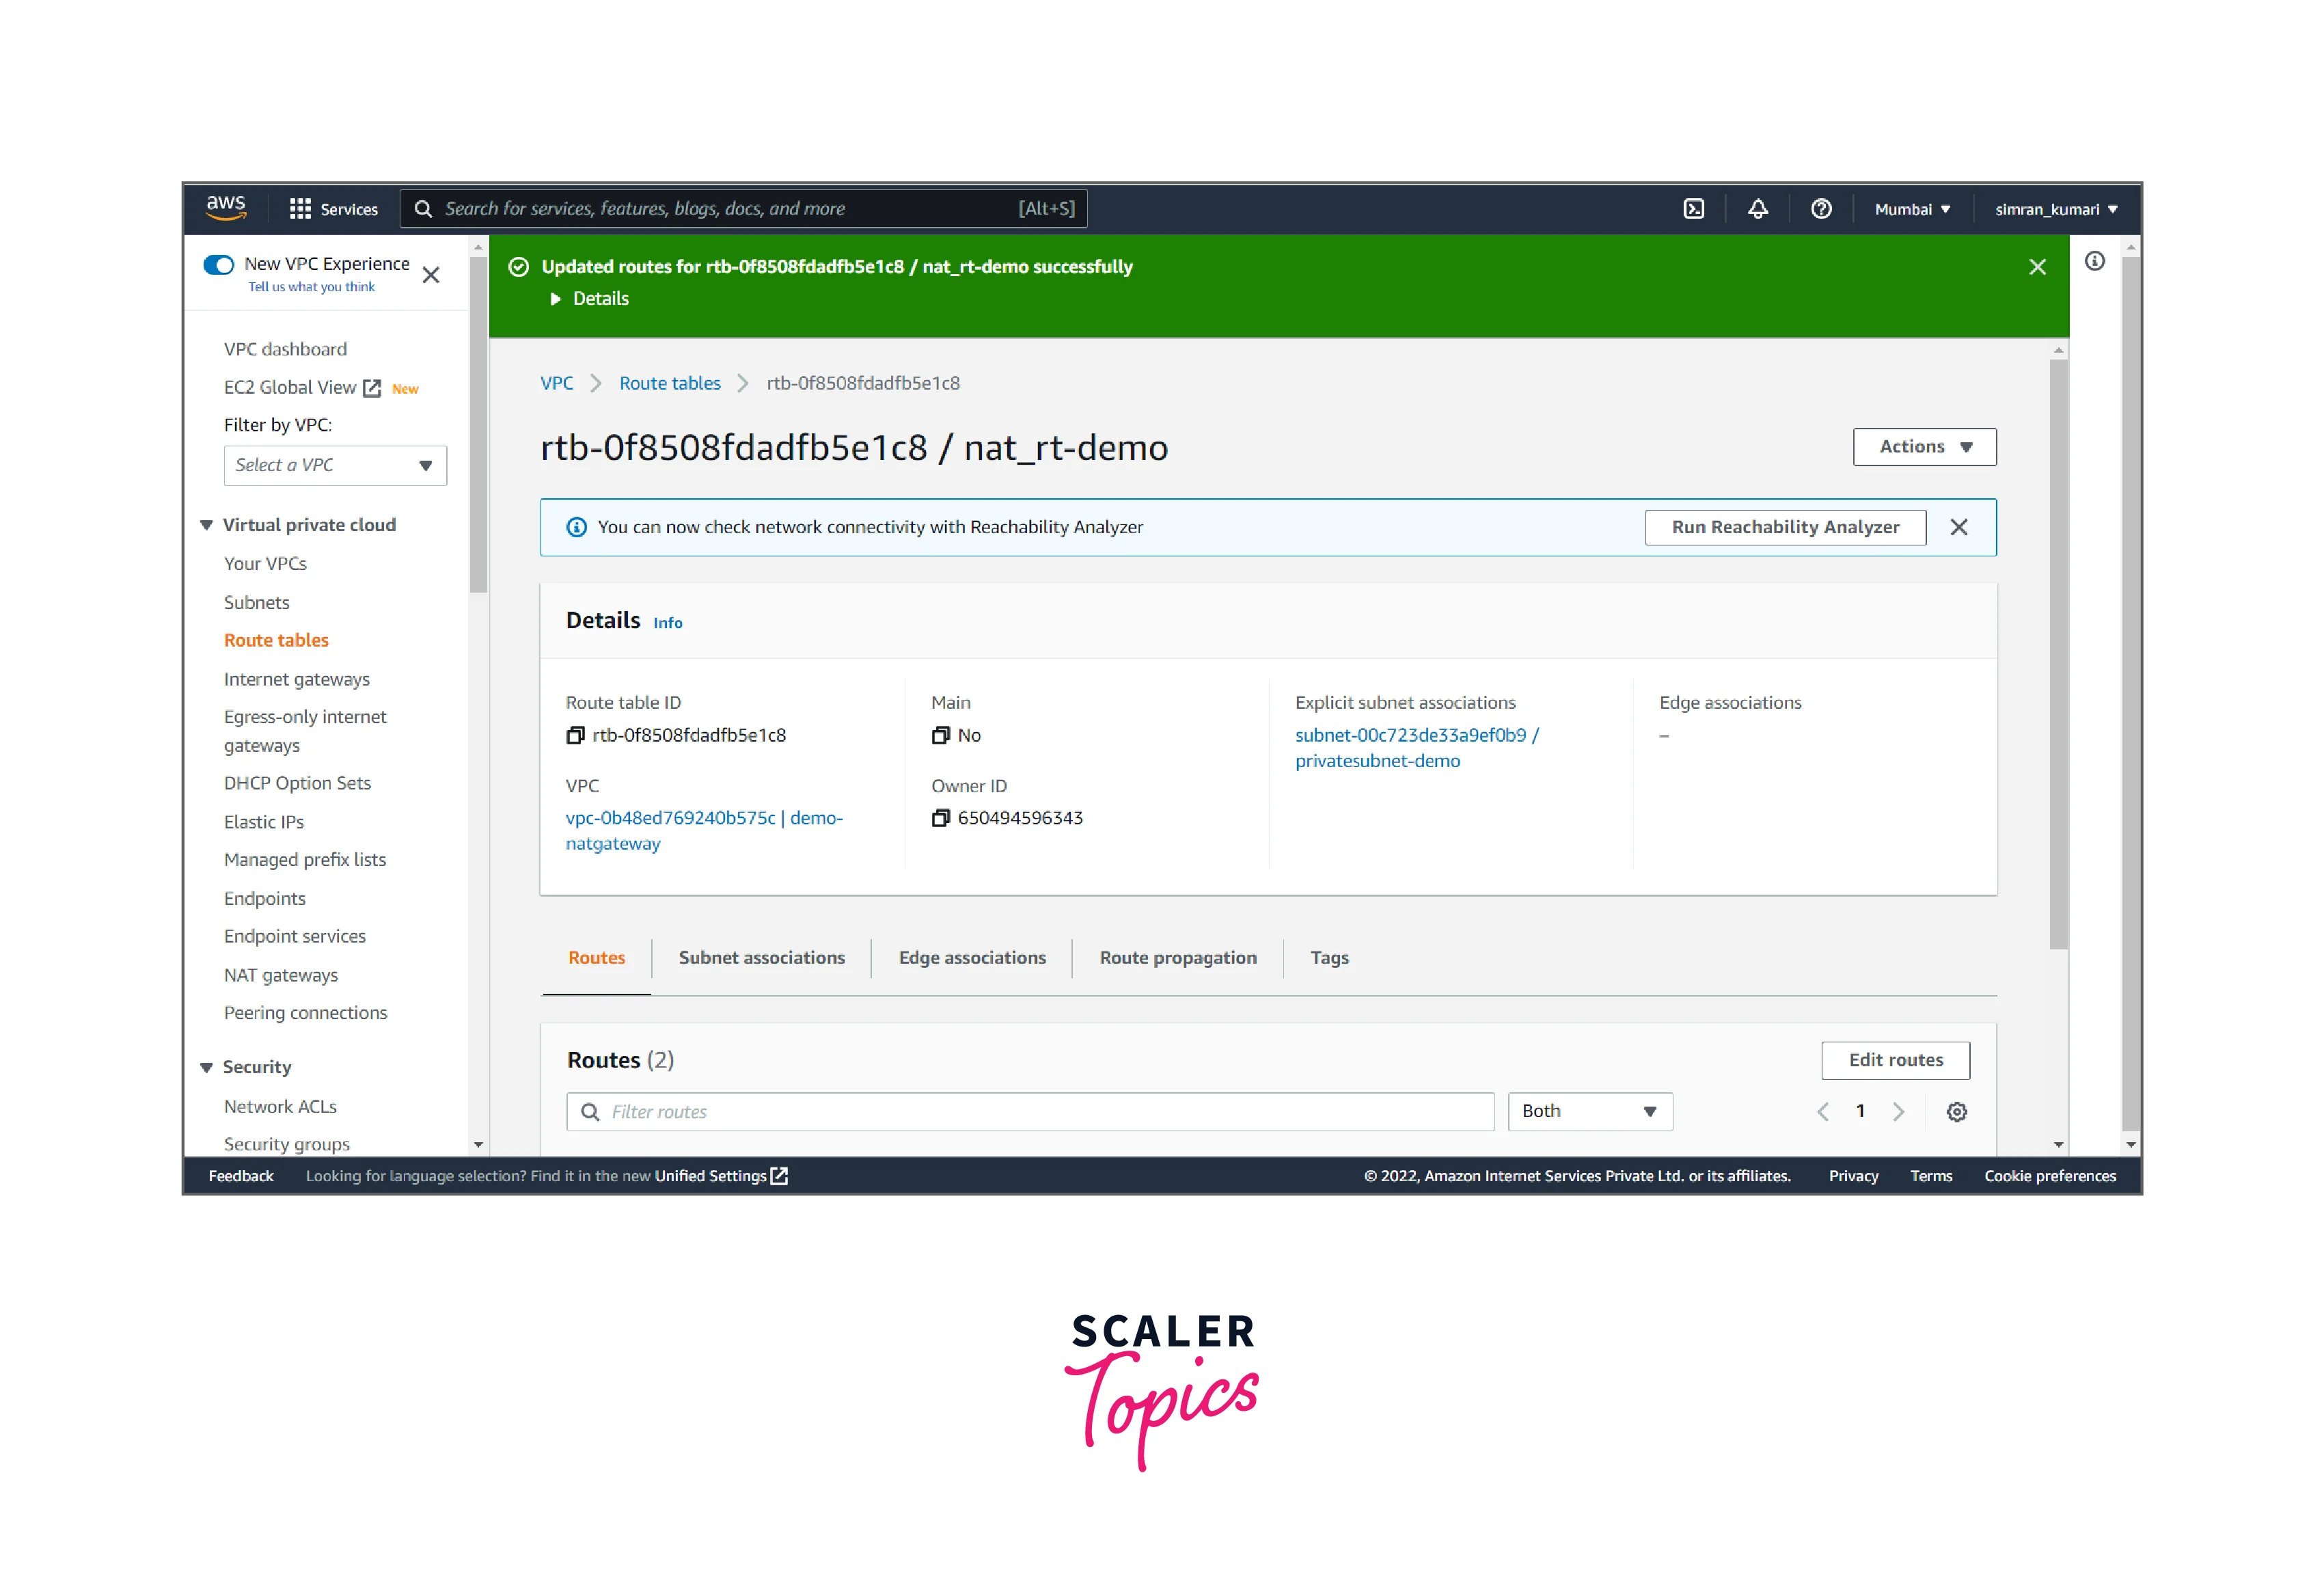
- Click on Add a route and set the target to the NAT gateway. Click on Save Changes.
- The Route table is successfully updated.
Turn Learning into Career Growth
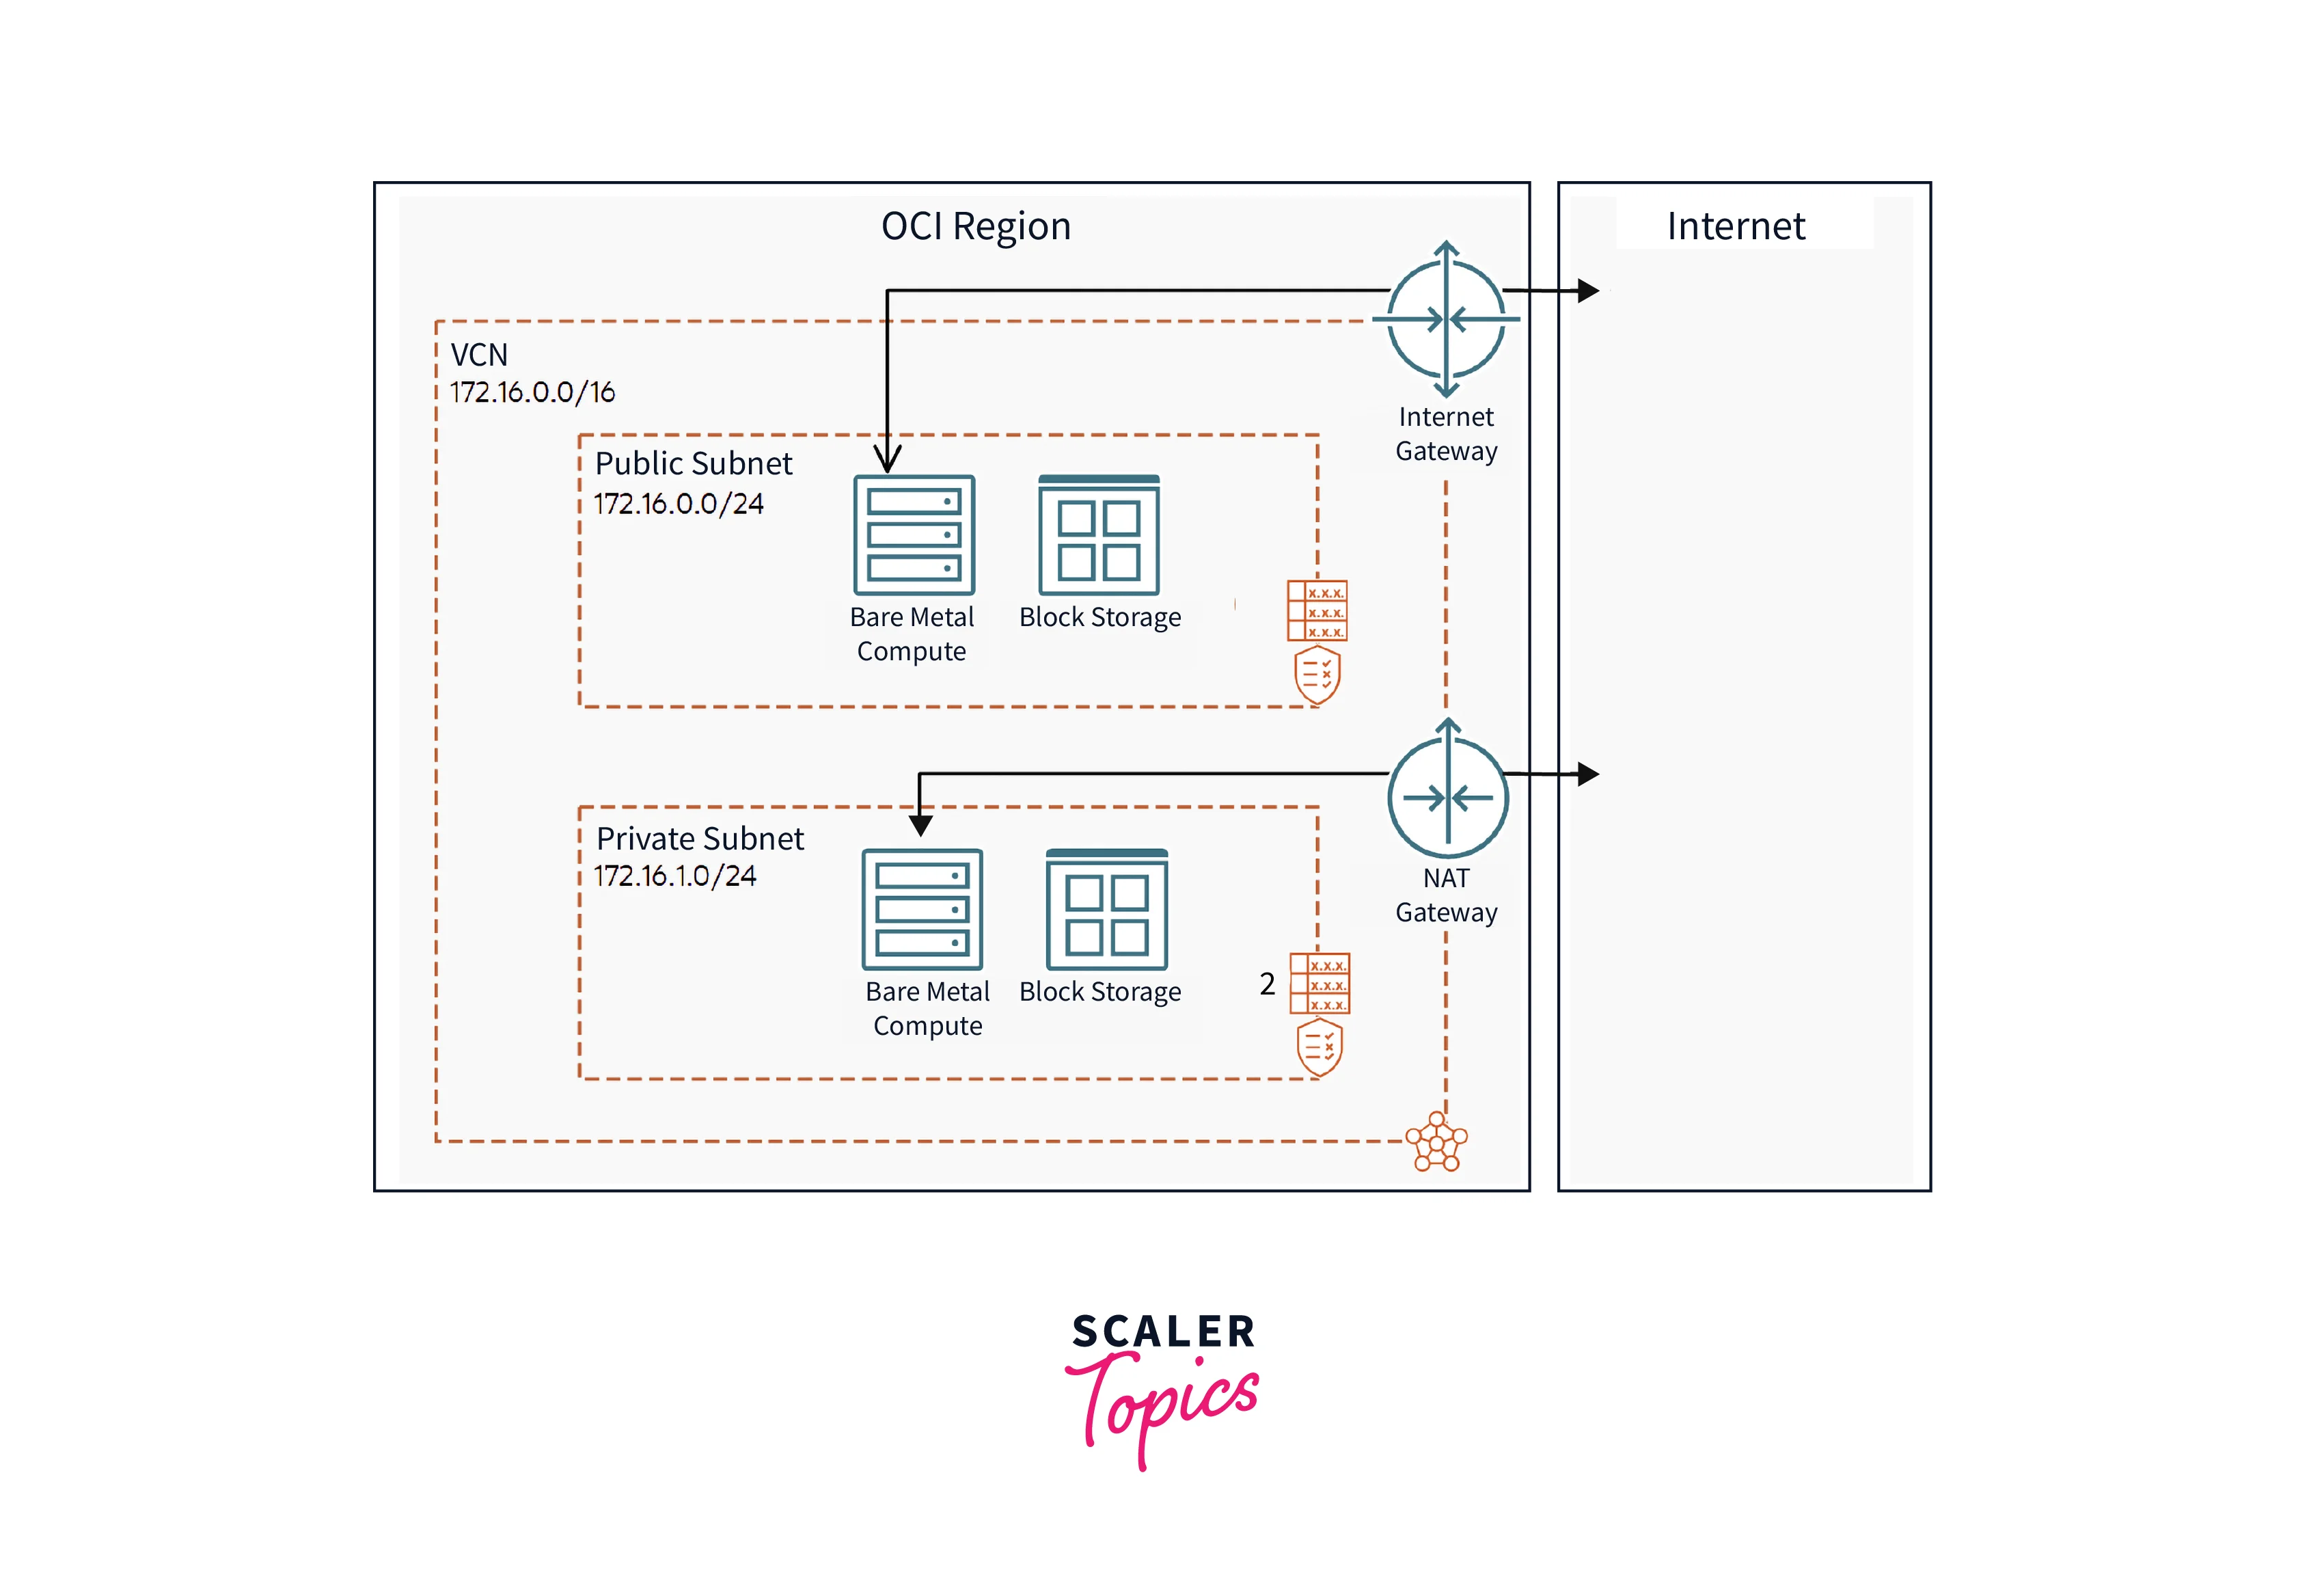
Routing for NAT Gateway
We can control the Virtual Cloud Network routing at the subnet level to specify which VPC subnet uses a NAT gateway. We can have more than one NAT gateway on a VPC. For an external application to distinguish traffic from the VPC's different subnets, we can set up another NAT gateway for each subnet. A single NAT gateway handles the route traffic to a given subnet. We can update routing for NAT Gateway by using the steps discussed above.
Blocking Traffic Through a NAT Gateway
A NAT Gateway has always been attached to only one VPC, which we select automatically. We can block or allow traffic at any time through the NAT gateway. By default, it will enable traffic upon creation.
After the traffic blocks through NAT Gateway, it prevents all traffic from flowing, regardless of any existing route rules or security rules in VPC.
Transitioning to a NAT Gateway
It can be done in two ways:
- The NAT device's public IP address will change when switching from a NAT instance to a NAT gateway in the VCN.
- On switching from an internet gateway to a NAT gateway, instances with access to the NAT gateway no longer need public IP addresses to connect to the internet.
Deleting a NAT Gateway
If our AWS NAT gateway is not in use, we can delete it. On deleting, its entry remains visible in the Amazon VPC console for about an hour, after which it's automatically removed. We cannot remove this entry on our own.
To delete a NAT gateway, we need to follow the following steps:
- Click on NAT Gateways in the left navigation bar, select the radio button for the respective nat gateway, then click Actions.
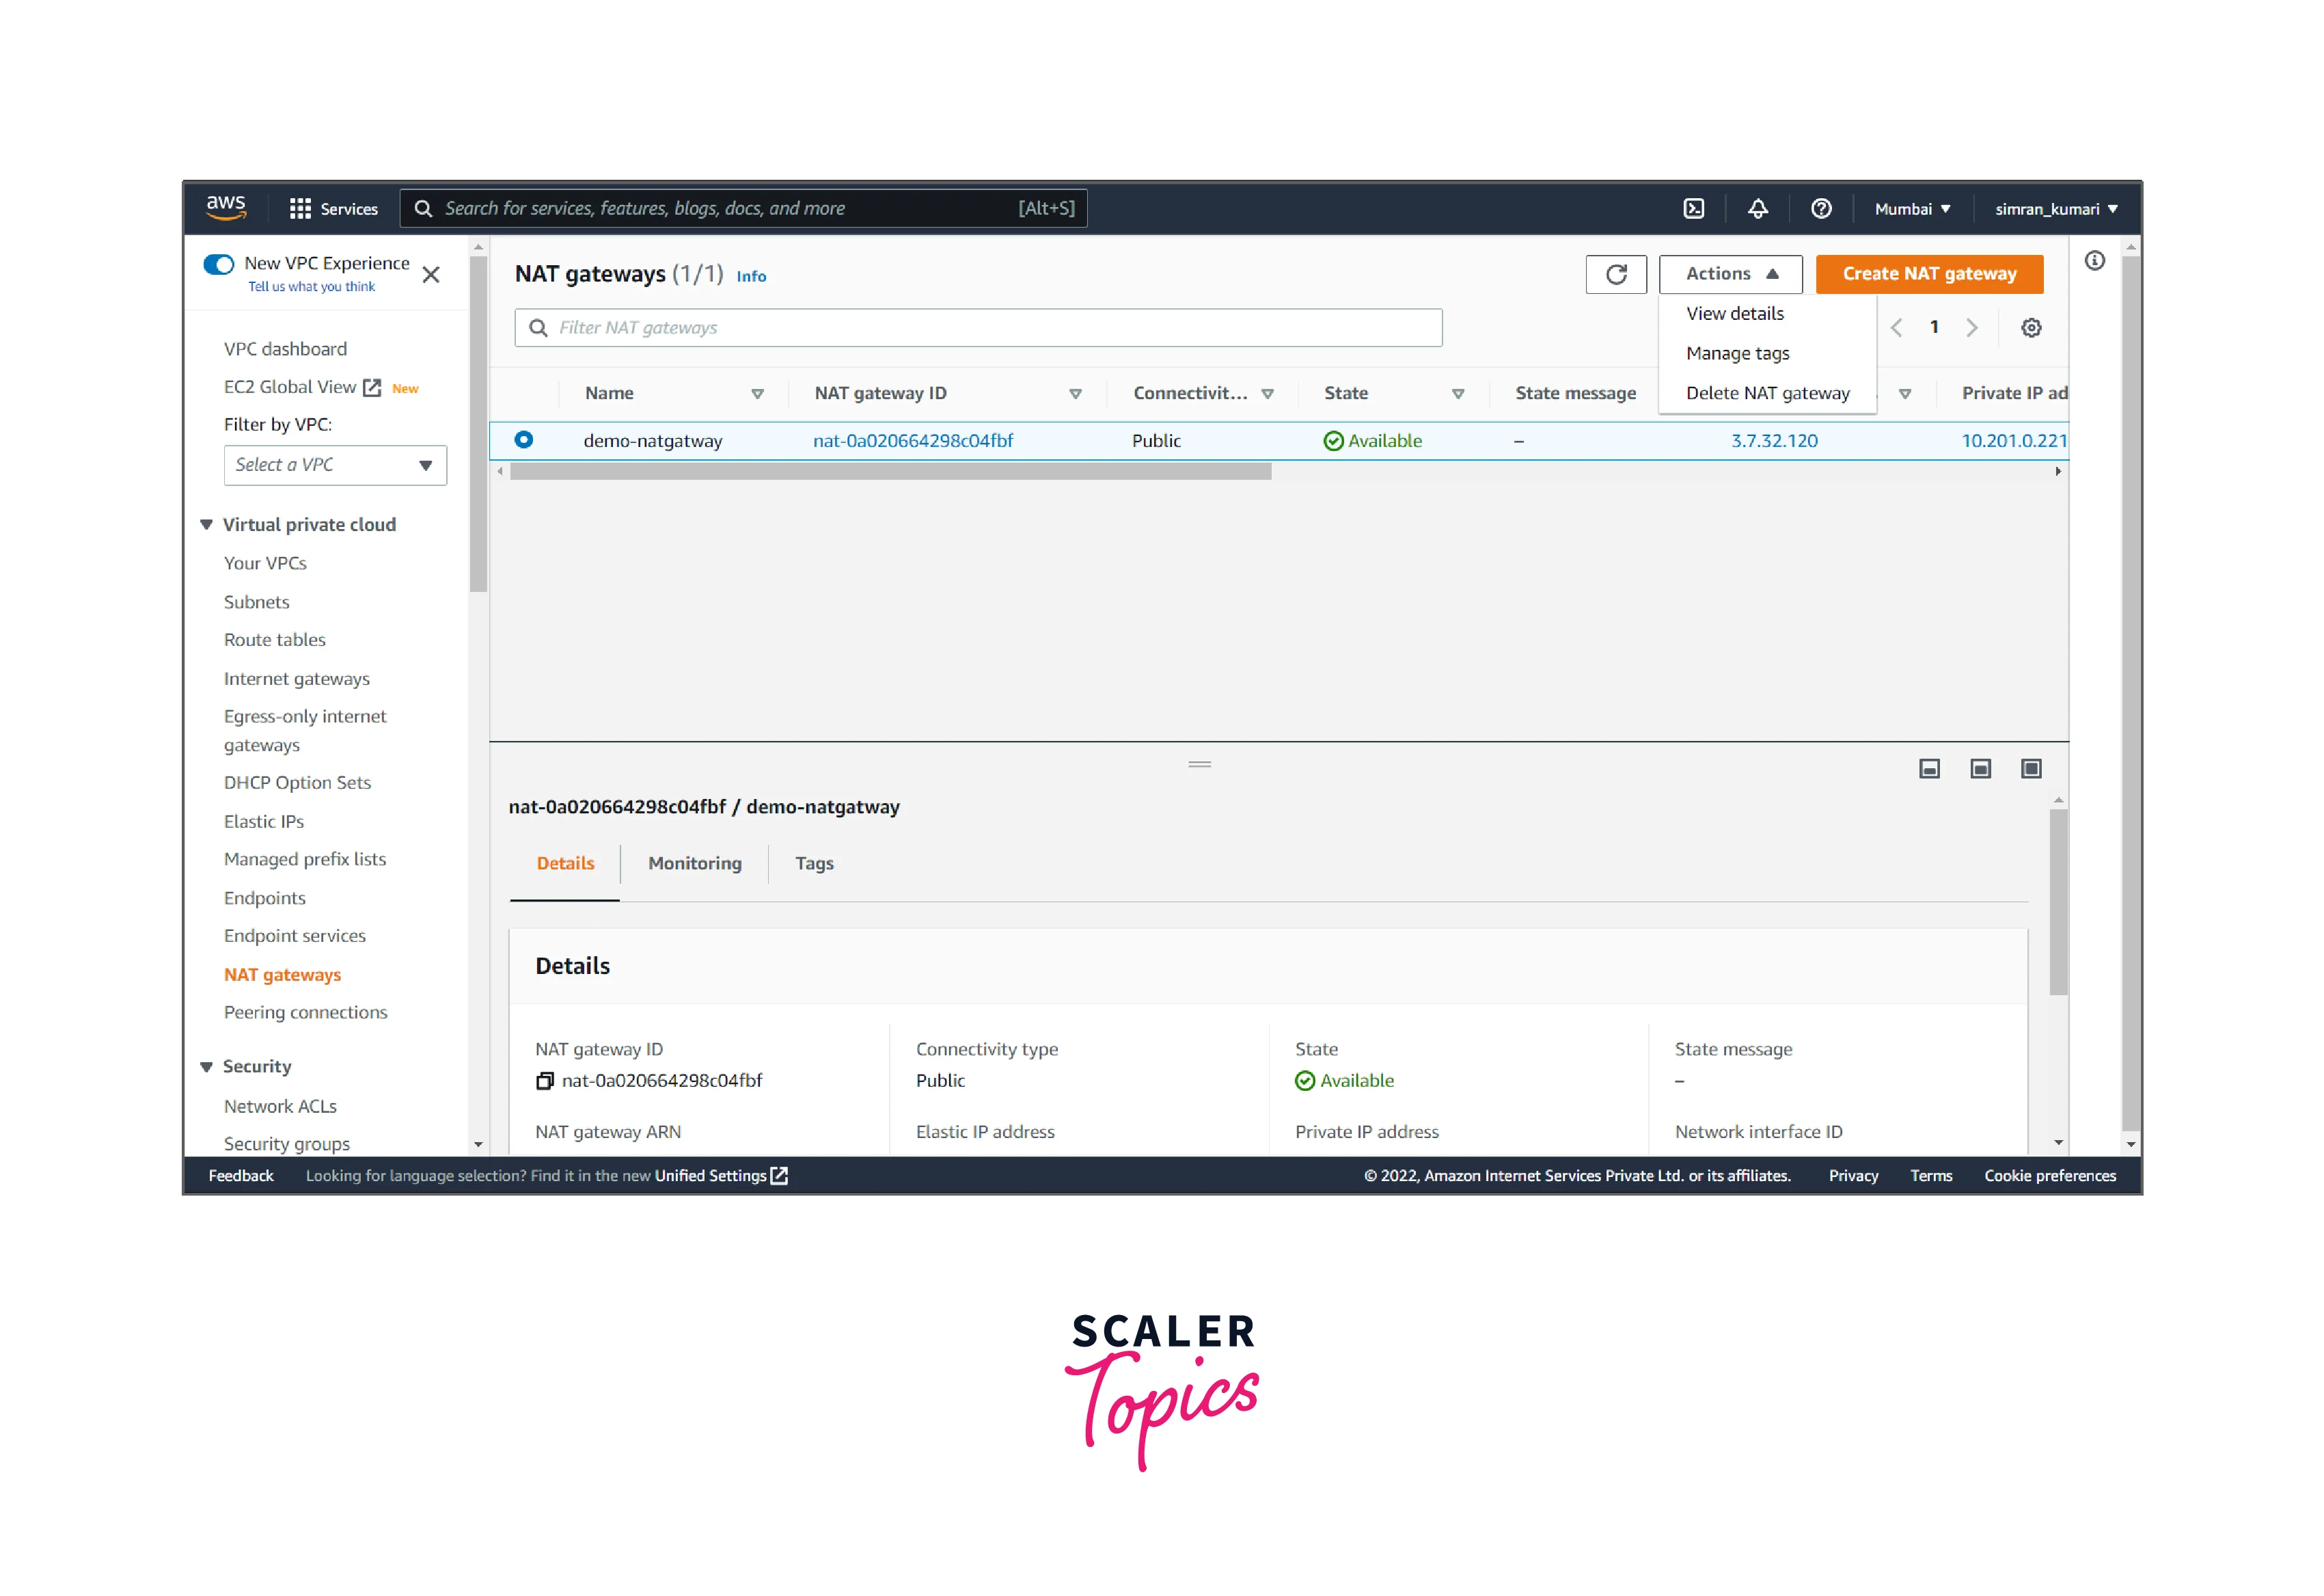
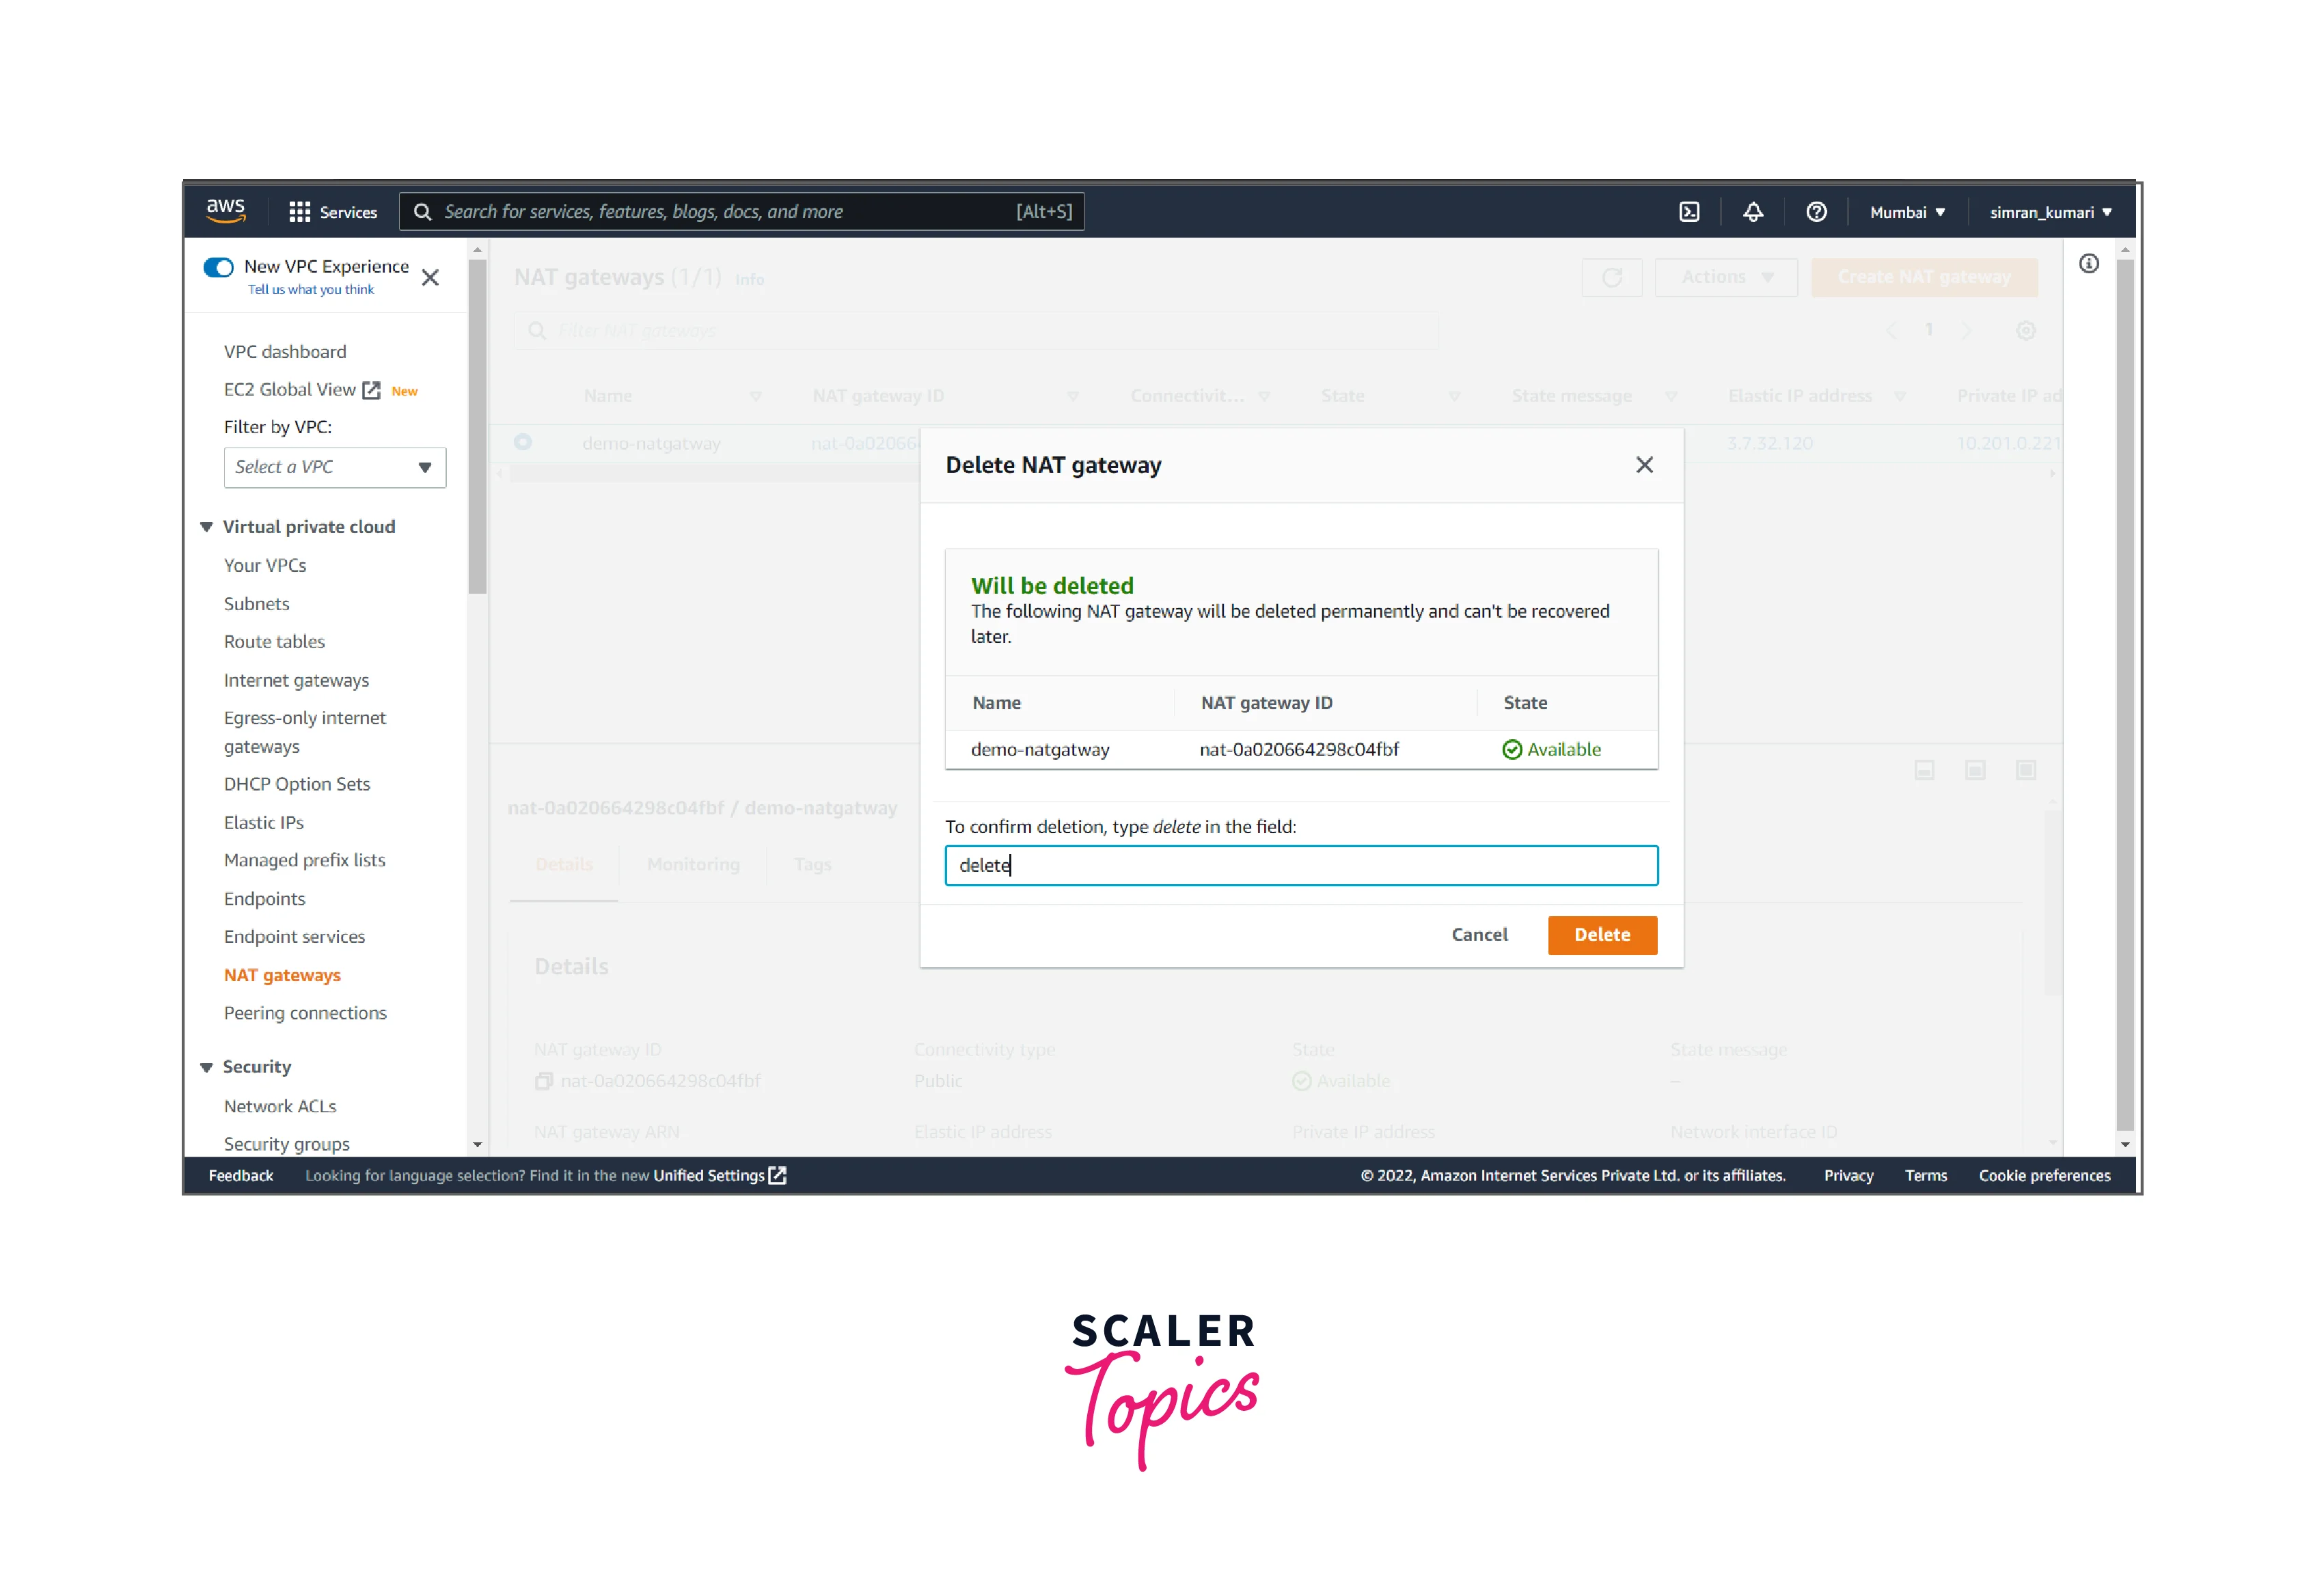
- Click on Delete NAT gateway, confirm the delete, and click Delete.
- It shows something like this.
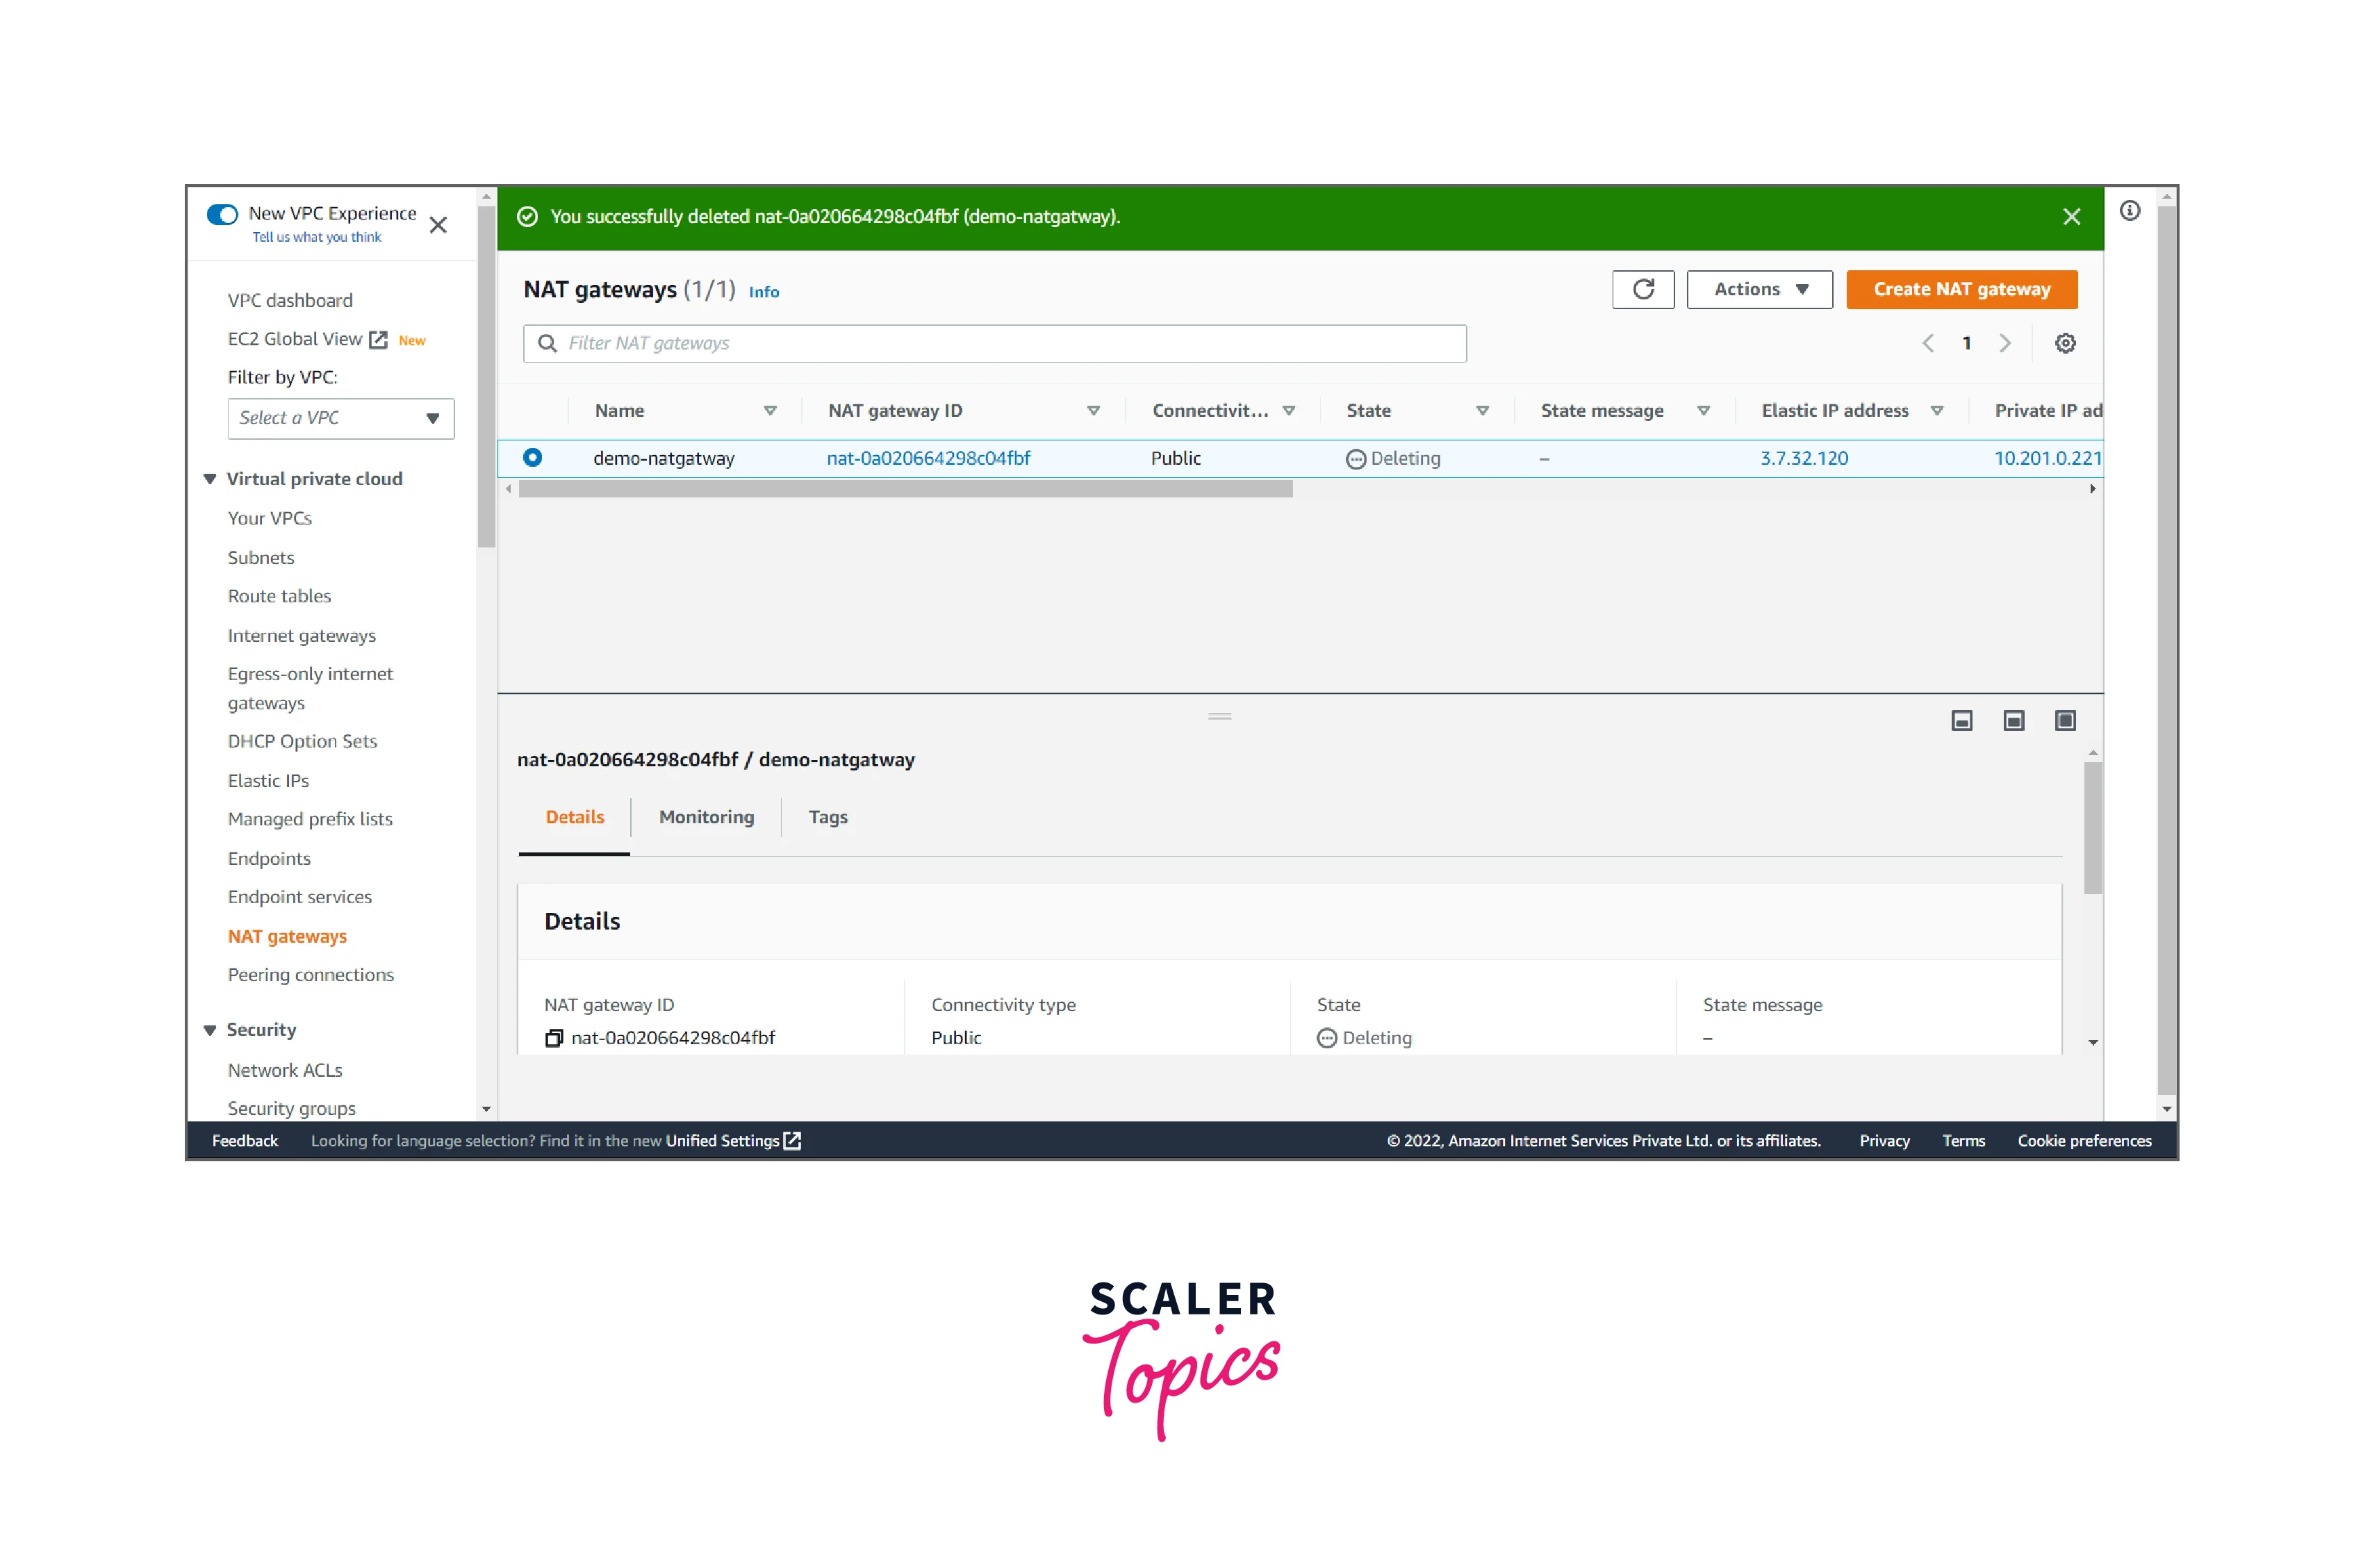
We successfully deleted the NAT gateway.
Pricing
AWS NAT gateway charges are based on the creation and the usage. It can be on hourly use or the pre-processing charges. A fixed limit is defined for the number of NAT gateways created in a specific Availability Zone(AZ), depending on the tier of the user.
If the NAT Gateway in our AWS account is not in use we can delete it to avoid extra charges.
Conclusion
- In this article, we have seen the use case of NAT Gateway in AWS that provides out traffic for the private subnet machines/instances to connect to the internet.
- It offers a security layer to grant your internal services access to the internet without being exposed to the world.
- It allows EC2 instances to establish outbound connections to resources on the internet without allowing inbound connections. Just a few clicks using the VPC console, and the NAT Gateway is ready for use.