Install Bootstrap

Overview
In this article, you will learn how to setup Bootstrap in your project and create your first Bootstrap-powered application.
Bootstrap is a free, open-source, front-end framework for designing web applications. It is a collection of HTML, CSS, and JavaScript ready-to-use components which help you to quickly have your web application ready.
What Is Bootstrap?
Bootstrap gives you pre-written HTML, CSS styles, and JavaScript components that you can simply integrate within your project. Using these CSS classes and JavaScript modules, you can easily add functionalities to your web project that would otherwise take a lot of time and effort to design from the ground up.
Bootstrap is a free, open-source , front-end framework for designing web applications.
Advantages of using bootstrap :
- Open Source: Bootstrap is an open-source project with a wide community of developers. It is free to use.
- Customization: Bootstrap offers many ways to customize its components according to the user's needs.
- Responsive features: Bootstrap's components adjust automatically according to the screen size like phones, tablets, and desktops.
- Browser compatible: Bootstrap is compatible with the latest, stable releases of all major browsers and platforms such as Chrome, Firefox, Internet Explorer, Edge, Safari, and Opera.
Transform Your Career
Choose from our industry-leading programs designed for career success
Modern Software and AI Engineering Program
Master full-stack development with AI integration

Modern Data Science and ML with specialisation in AI
Advanced data science techniques with AI specialization
Advanced AIML with Specialisation in Agentic AI
Deep dive into AIML with focus on Agentic systems
DevOps, Cloud & AI Platform Engineering
Build and manage AI-powered cloud infrastructure
AI Engineering Advanced Certification by IIT-Roorkee
Premier AI engineering certification from IIT-Roorkee
How To Setup Bootstrap?
There are two ways to install Bootstrap
- Link Bootstrap from a CDN
- Download Bootstrap.
Let's go through each one of them in detail.
Bootstrap CDN
Use Bootstrap CDN to quickly add Bootstrap to your project. It is as easy as just adding a few links to your web application and you would have successfully set up Bootstrap in your project.
Let's go through an example to create a simple Bootstrap-powered web page using Bootstrap CDN.
Step 1: creating a basic HTML file
Open up your code editor and create a new HTML file. Save the following code as "example.html" on your computer.
The meta tags are added to make sure the content scales properly on any screens.
Step 2: add Bootstrap CDN
Please visit Bootstrap Documentation to go through the official documentation of Bootstrap CDN.
Note : To make this HTML file a Bootstrap template, you need to include the Bootstrap CSS and Bootstrap JS Bundle with Popper using their CDN links.
Bootstrap CSS: Copy-paste the stylesheet <link> into your <head> before all other stylesheets to load Bootstrap CSS.
Bootstrap JS Bundle :
Many Bootstrap components require the use of JavaScript plugins and Popper to function. The bootstrap.bundle.min.js already includes popper. Popper is used for tooltips and popovers.
Place the following <script> near the end of your web application, right before the closing </body> tag, to enable them.
The attributes integrity and crossorigin have been added to CDN links to implement a security feature. Since you are loading some code hosted on another server, these attributes make sure you are downloading exactly what you expect.
After adding the CDN links, the code looks like this. Save this new file as bootstrap_example.html.
We have successfully added bootstrap to our web application, but let's use one of the pre-existing CSS class to understand the advantage of using Bootstrap.
Turn Learning into Career Growth
Step 3: add Bootstrap classes
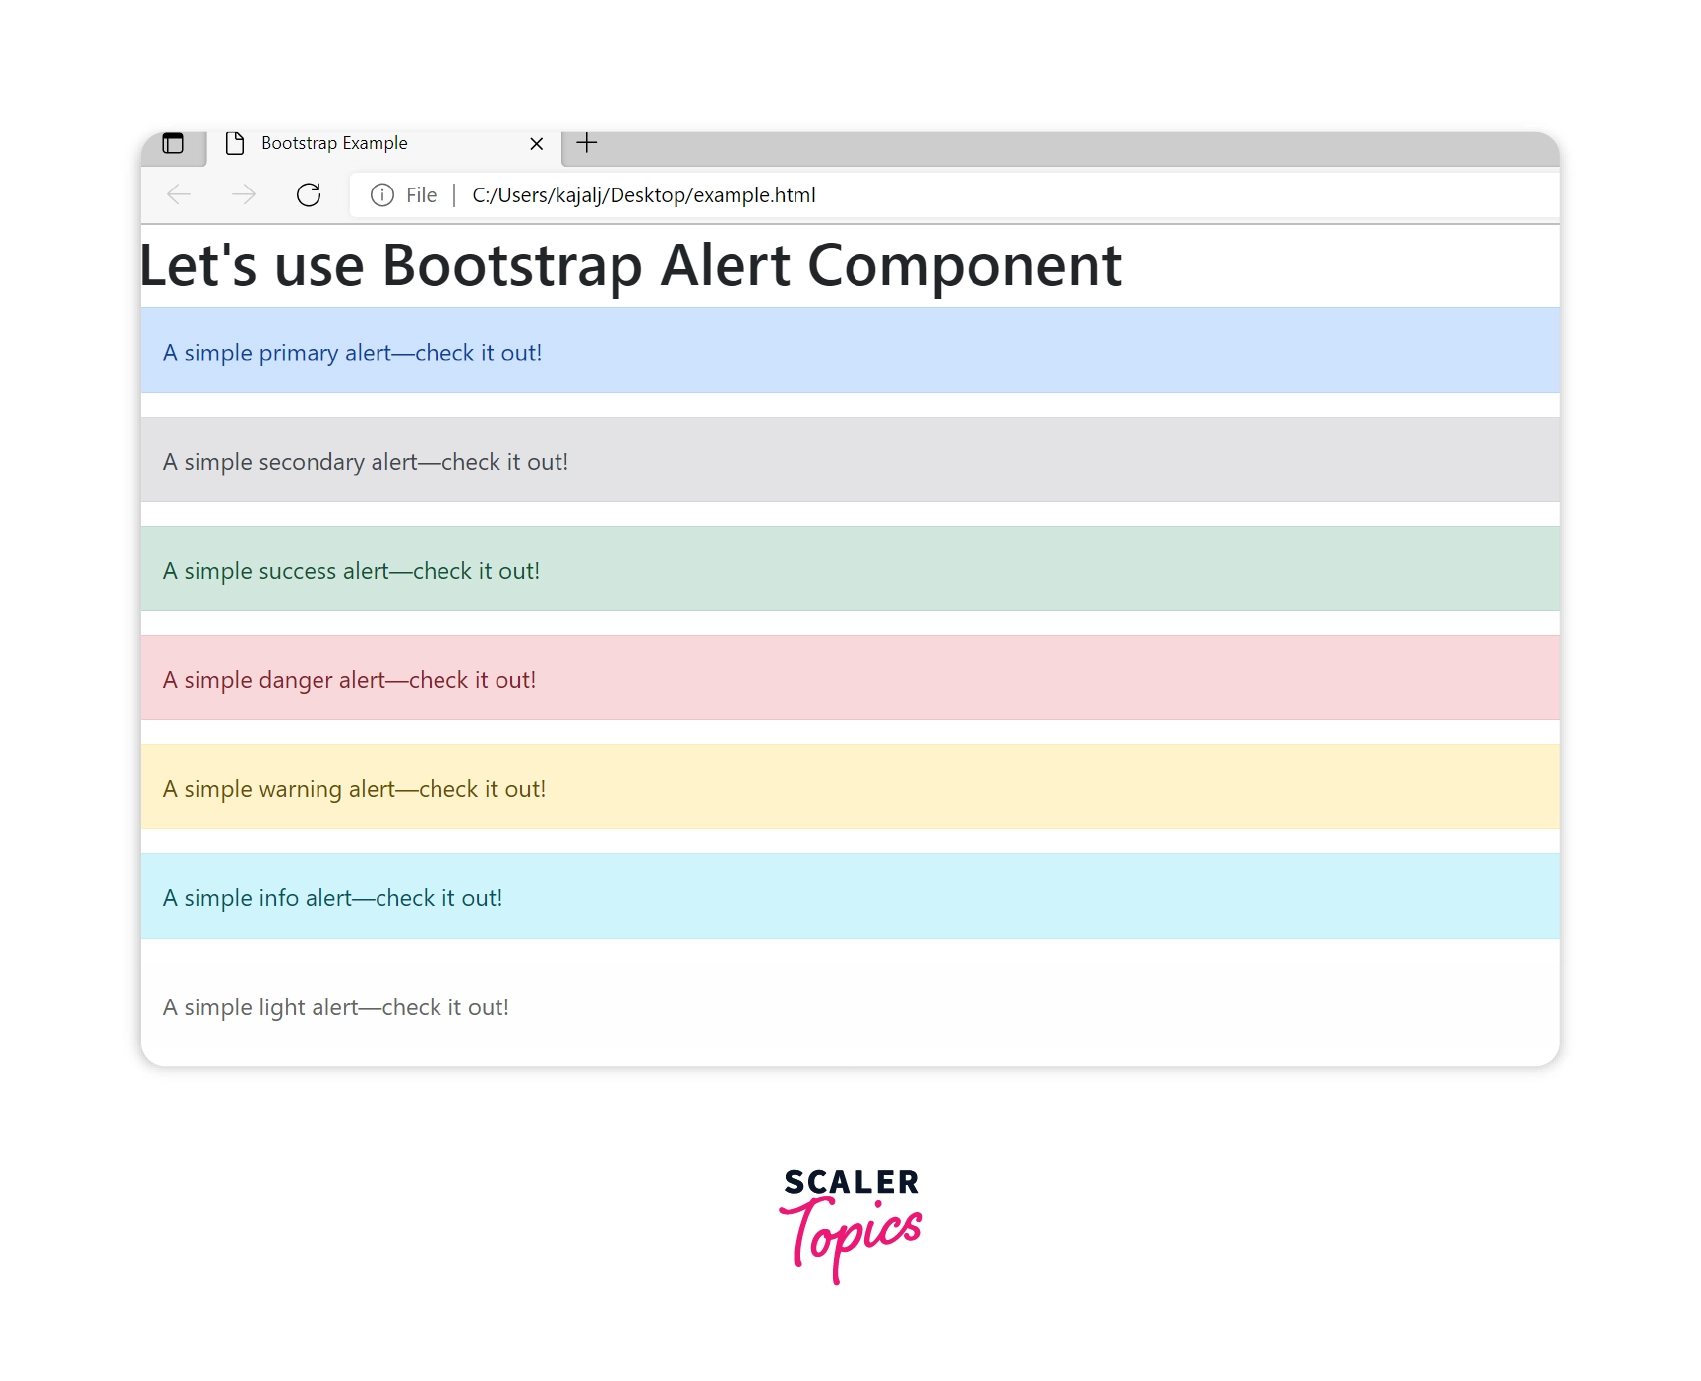
Let's use the Bootstrap Alert CSS class to use colors to add meaning to a text such as successor danger messageoralert`.
In the below code, the class " alert alert-success" is a pre-existing CSS class in Bootstrap that can be readily used by any user to create a success message or alert.
Let's look at some other Bootstrap Alert CSS classes to use colors to add meaning to a text.
Congratulations! You have successfully set up Bootstrap in your web application using CDN.
Now, let's look at how to set up Bootstrap by downloading it.
Download Bootstrap
You can download Bootstrap's CSS and JavaScript files from their official website on your system and include them in your web application.
Let's go through the steps required to install Bootstrap.
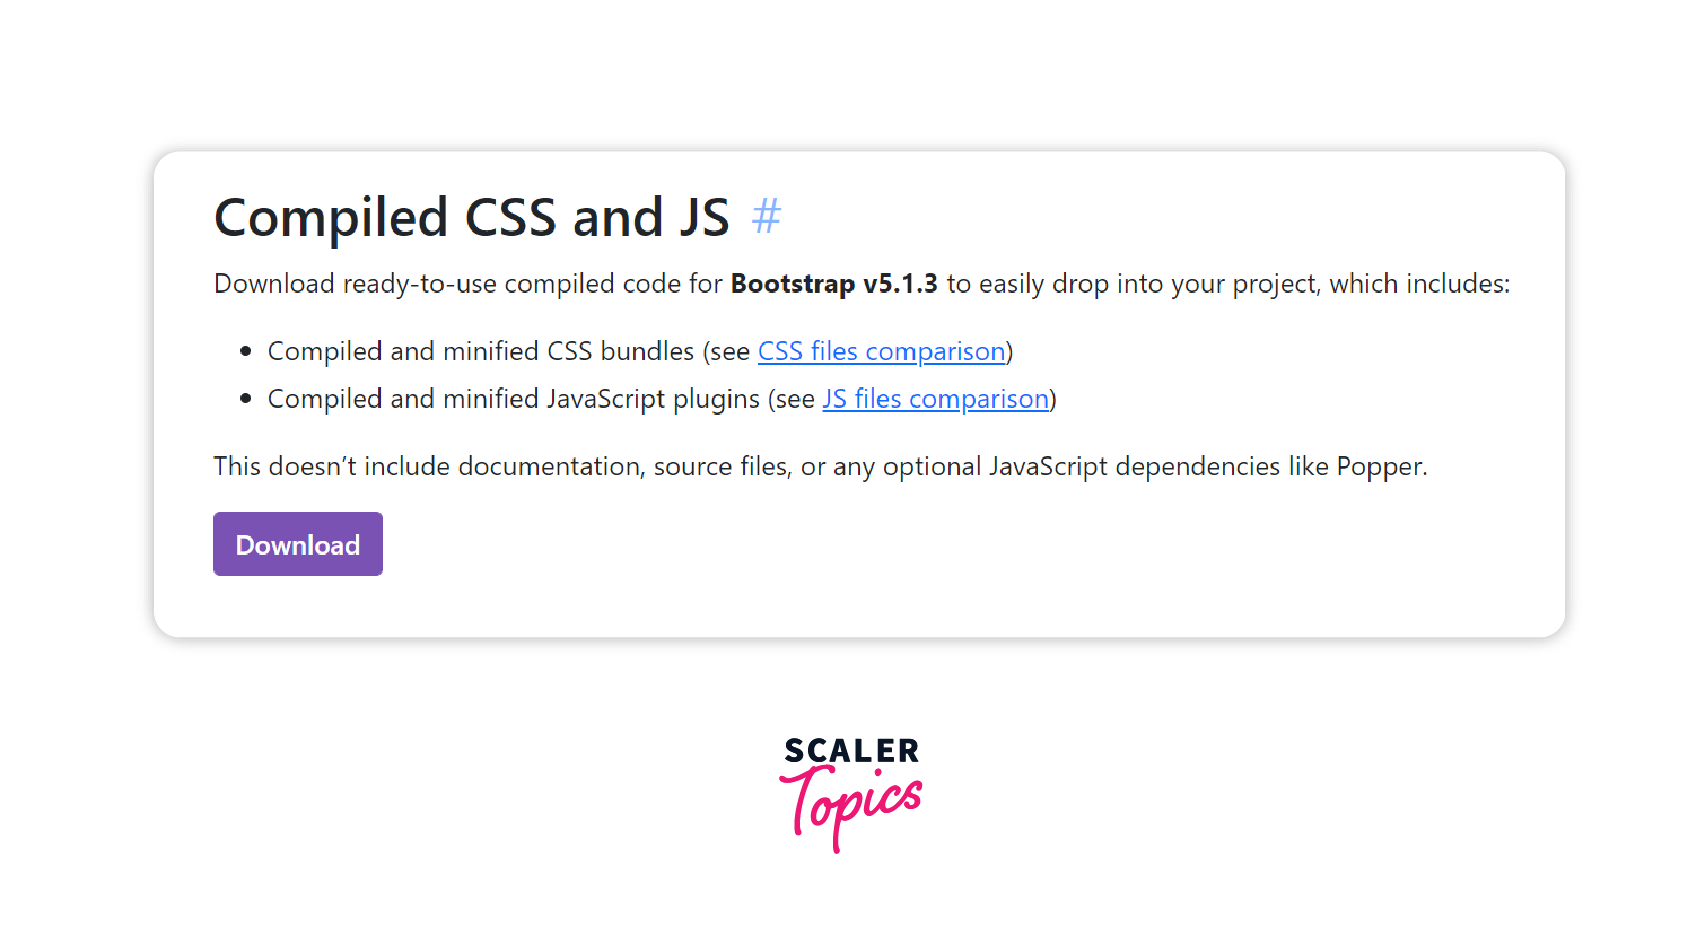
Step 1: Download Bootstrap
To download the latest version of Bootstrap follow link given here Bootstrap Download Link. In the Download section, go to the Compiled CSS and JS section and click Download.
Once the file has been downloaded, go to the file location on your device and unzip the files.
The contents include:
- Compiled CSS and JS (bootstrap.*) files
- Compiled and minified CSS and JS (bootstrap.min.*)
- Source maps (bootstrap.*.map) are available for use with certain browser developer tools.
- Bundled JS files (bootstrap.bundle.js and minified bootstrap.bundle.min.js) which include Popper.
Based on the requirements and resources of the web application, the file to be used can be chosen.
Let's use the compiled and minified CSS and JS files for the example.
Step 2: copy contents in the same directory as HTML document
Create "example.html" file on your computer. Copy the contents of the unzipped files i.e CSS and js folders in the same directory as "example.html".
Step 3: load Bootstrap CSS and JS file in the HTML document
To load the Bootstrap CSS, go to the CSS folder that you copied and find the file "bootstrap.min.css". Now, copy the path of the file and paste it into the href section below.
Similarly to load Bootstrap JS, go to the js folder and copy the path of the bootstrap.min.js file and paste it into the src section of the below code.
Place the following <script> near the end of your example.html file, right before the closing </body> tag.
Once you put it all together, the code looks like this:
Congratulations, you have successfully set up Bootstrap by downloading it locally.
Bootstrap CDN vs Bootstrap Download
CDN or Content Delivery Network is a content distribution network of servers.
| Bootstrap CDN | Bootstrap Download |
|---|---|
| Bootstrap CDN usage leads to faster loading time due to caching and geographically close servers of the CDN network. | The loading time will remain the same when we use Bootstrap Download. |
| CDN might be down sometimes or due to proxy settings, or security policies, the CDN link may not work. | Local copy has no dependency on CDN links and will always be up. |
| It reduces the amount of bandwidth used by your server. | Server bandwidth remains the same. |
It is recommended to use Bootstrap CDN because if a user of your web application has already downloaded Bootstrap files while visiting other sites that use Bootstrap, then it will be loaded in their cache and it will lead to a faster loading time. Even if they have not been downloaded, then the user request for the file will go to the geographically closest server of the CDN network and will also lead to a faster loading time.
Based on the web application use case, the best possible option can be used.
Conclusion
- Bootstrap is a free, open-source, front-end framework for designing web applications.
- There are two ways to install Bootstrap :
- Link Bootstrap from a CDN
- Download Bootstrap.
- Using Bootstrap from a CDN is beneficial because it leads to faster loading time and reduces server bandwidth.
- Bootstrap download is beneficial if due to proxy settings or security policies, the CDN link does not work or it's down.