Install SASS

Overview
SASS (Syntactically Awesome Style Sheets) is an extension to CSS that provides superpowers that won’t make it fly but definitely helps in making CSS code more organized. Basically, it is a CSS preprocessor (processes the source code prior to compilation) that enhances the structure of the document, leading to less time consumption. This way, you can save yourself some time from writing the same code repeatedly with the introduction of concepts like variables. The article lets you peregrinate through all the methods to install SASS on multiple operating systems.
What is SASS?
Let’s first get a brief idea about SASS. SASS is a preprocessor that provides certain comforts like the use of variables, mixins, nesting, etc. We’ll demonstrate the use of these features ahead in this article. These features aren’t available in CSS yet, as they are in several programming languages. However, the use of SASS helps process a SASS file and compile it like the usual CSS file.
CSS is itself so interesting, but your entire hard work would eventually become a mess when there’s a lot of code to maintain. In simple words, we all would wish to have superpowers, and for once, you might have imagined the same. CSS wants to have it too, but not with the existing features. This is where extensions play their part. Extensions, in general, are meant to enhance the performance of a program by providing it with certain features that it doesn’t possess normally.
Suppose you wish to change the background color of certain elements, and they all should be green. So, with CSS, you would go on putting the same background-color property as green (hex code: #00FF00) in all the desired elements.
Instead, SASS introduces you to the concept of variables. Now, you can use variables with a $ symbol followed by a variable name (say, bg-color) and assign it the green color (#00FF00). Now, you can use the same variable as the value of the background-color property everywhere in your style sheet without needing to remember the hex code of colors.
SASS vs. SCSS Although both SASS, as well as SCSS( Sassy CSS) can import each other, SASS ensures indentation without the need for semicolons. SCSS code is identical to CSS code. We'll create a .SCSS file later.
SASS installation requires a bit of work, but it’s super easy if you can find the one relevant for your own OS in particular.
Transform Your Career
Choose from our industry-leading programs designed for career success
Modern Software and AI Engineering Program
Master full-stack development with AI integration

Modern Data Science and ML with specialisation in AI
Advanced data science techniques with AI specialization
Advanced AIML with Specialisation in Agentic AI
Deep dive into AIML with focus on Agentic systems
DevOps, Cloud & AI Platform Engineering
Build and manage AI-powered cloud infrastructure
AI Engineering Advanced Certification by IIT-Roorkee
Premier AI engineering certification from IIT-Roorkee
Methods to Install SASS
Install Anywhere (standalone)
Let us start with understanding what standalone software really means.
The word standalone itself is an indication that it works independently and contains logic so that it doesn’t require any additional service or even the need for an Internet connection.
A standalone application can have several meanings. Some standalone applications are the ones that don’t come combined with other apps in a bundle (different software in a package). These are also locally installed on your computer system, such as notepad, audio, video players, etc.
One such example is the SASS installation that we’ll now talk about. It’s standalone as it needs no additional dependencies (program or software depending on other software to run properly). Here, we’ll be discussing Dart SASS, but what’s Dart? For a moment, let’s travel back a bit to perceive the purpose of Dart Sass.
Dart is a programming language commonly used to create cross-platform applications (the ones that can run on multiple operating systems).
Actually, Dart wasn’t here from the beginning, and it was Ruby.
Ruby is an object-oriented programming language commonly used for building web applications. From the beginning, Ruby was the language on which SASS was built.
However, Ruby SASS was slower. Also, the installation process could be tougher if someone is new to Ruby. The support for Ruby has come to an occlusion a long ago. So, you won’t get to see any new features or possible support coming along with it.
The idea of Dart SASS came up because it is way faster, more portable than Ruby SASS, and requires less effort for installation. Plus, it doesn’t require any additional dependencies. So, Dart Sass became the official implementation for SASS and received the latest updates.
Steps to get started with Dart SASS installation:
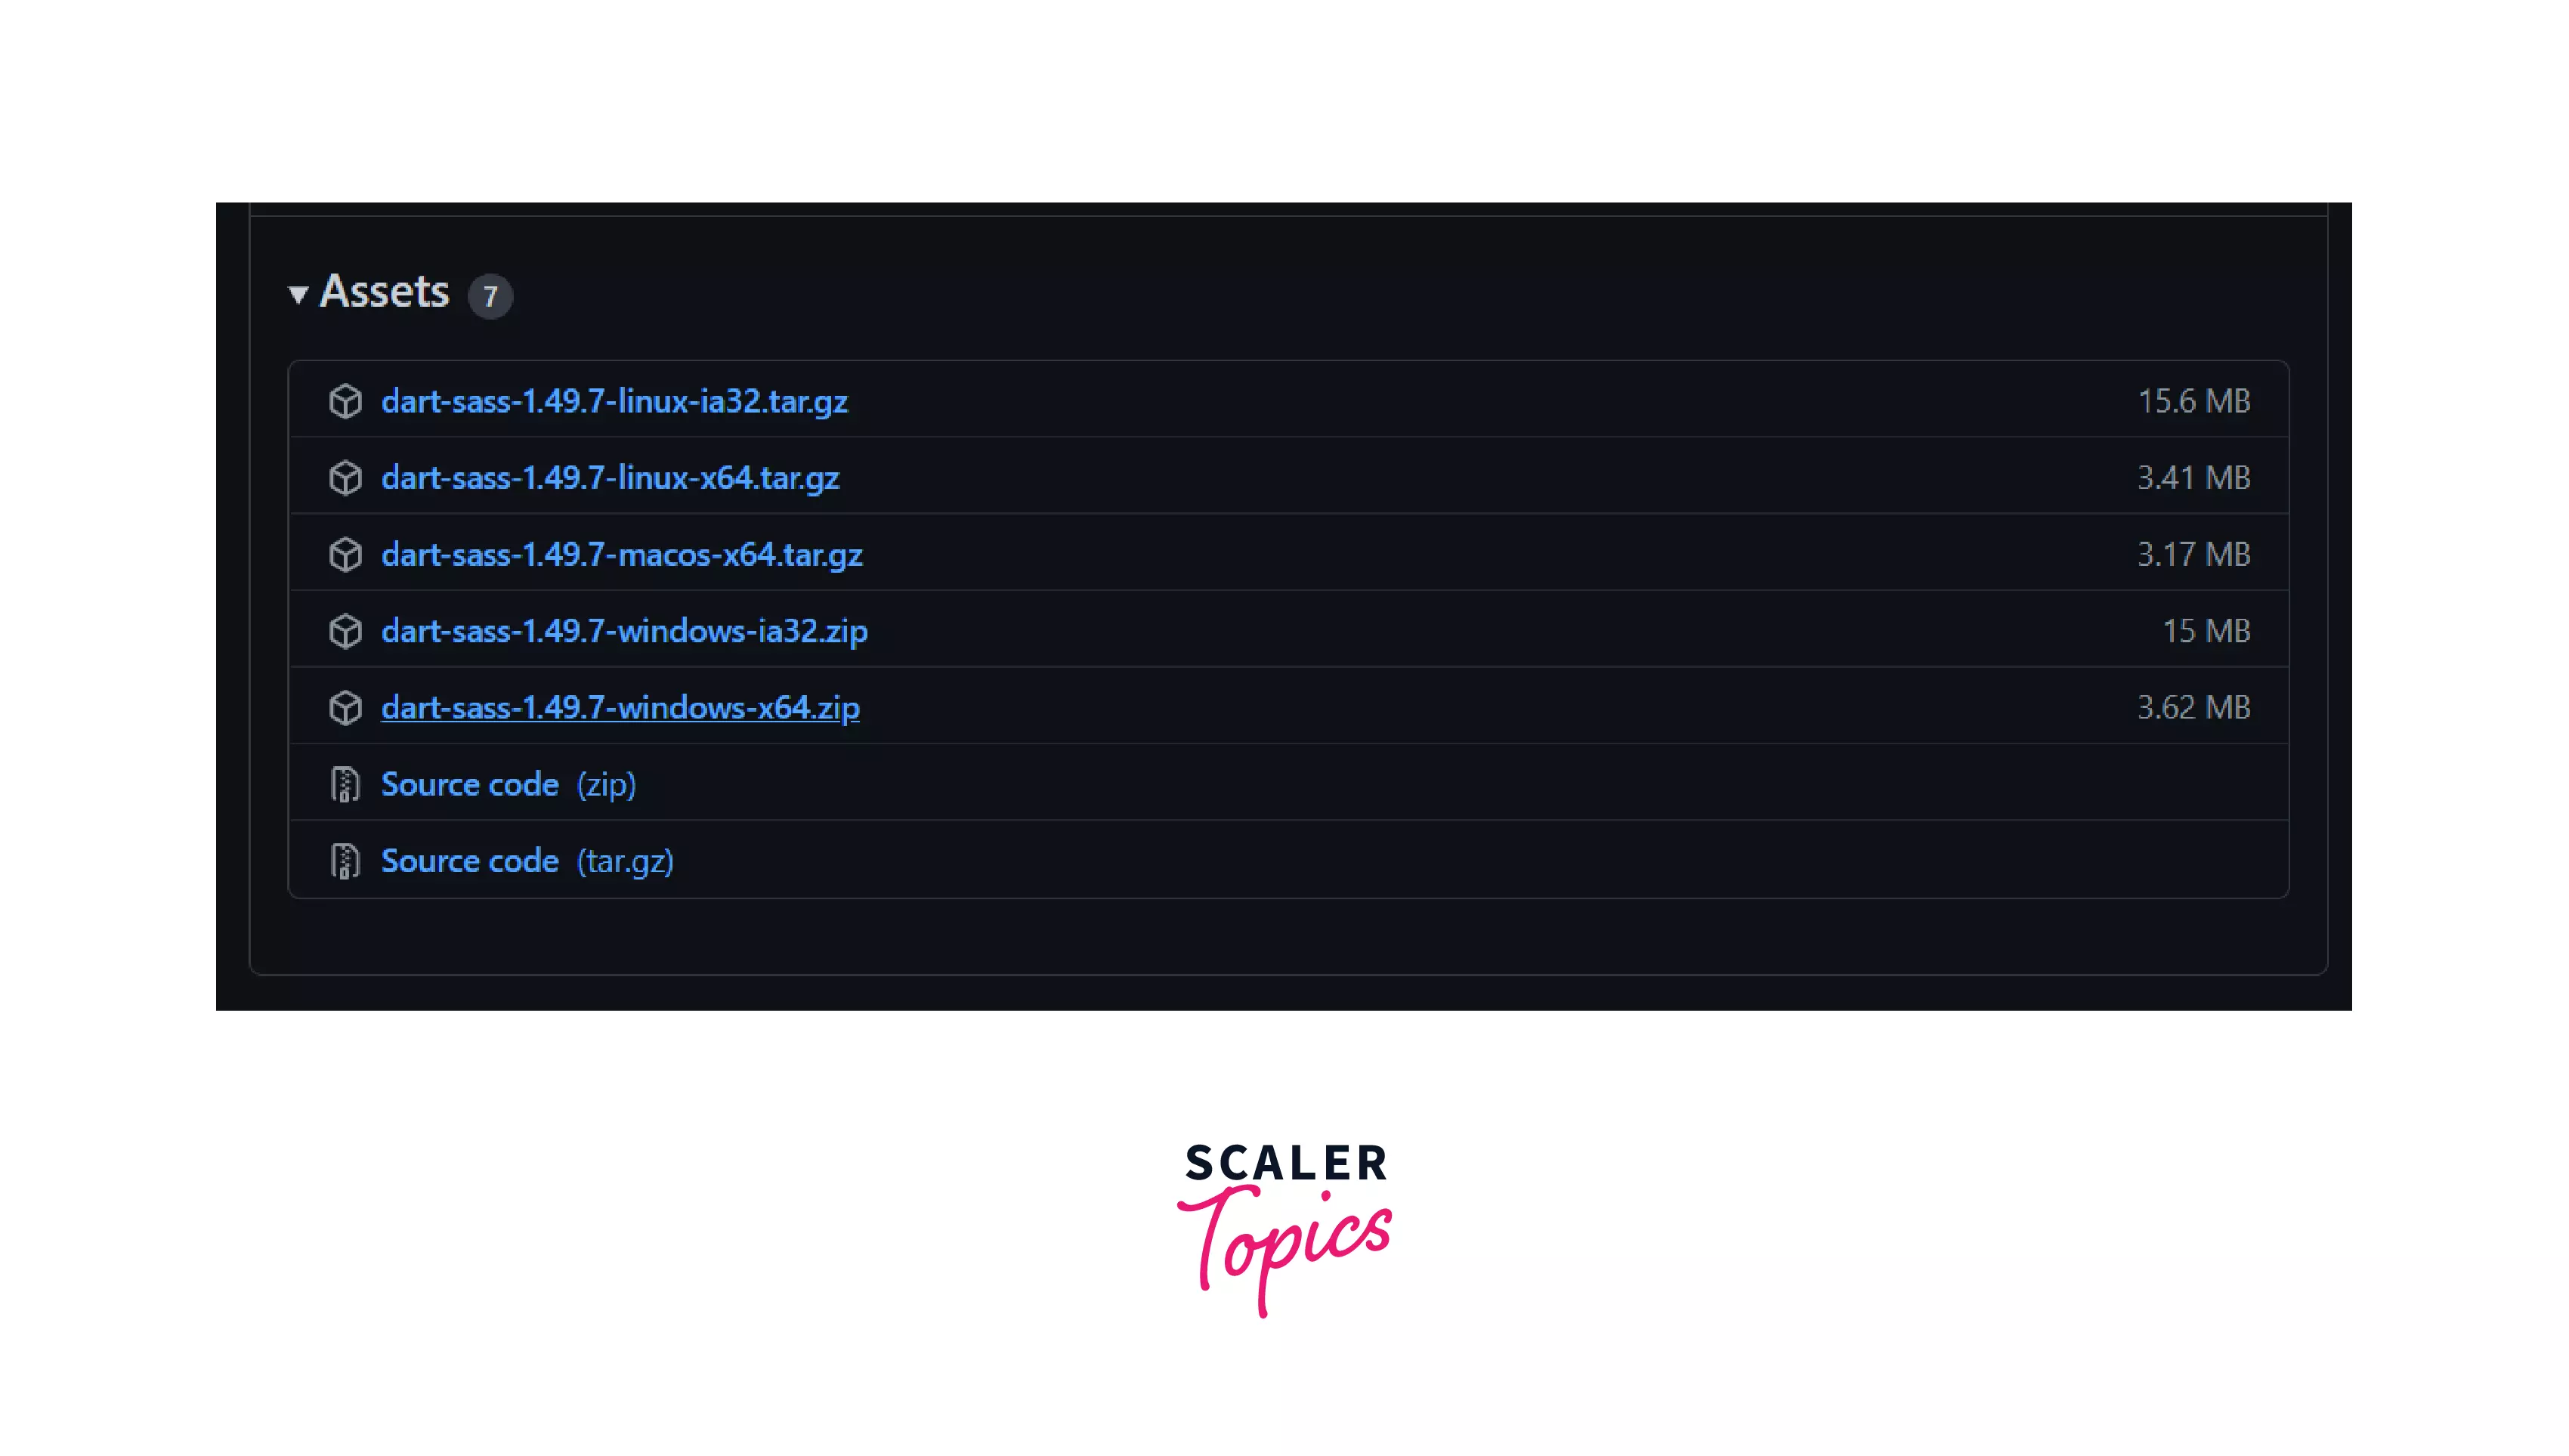
- Visit GitHub and install the suitable package from the list for your operating system.
-
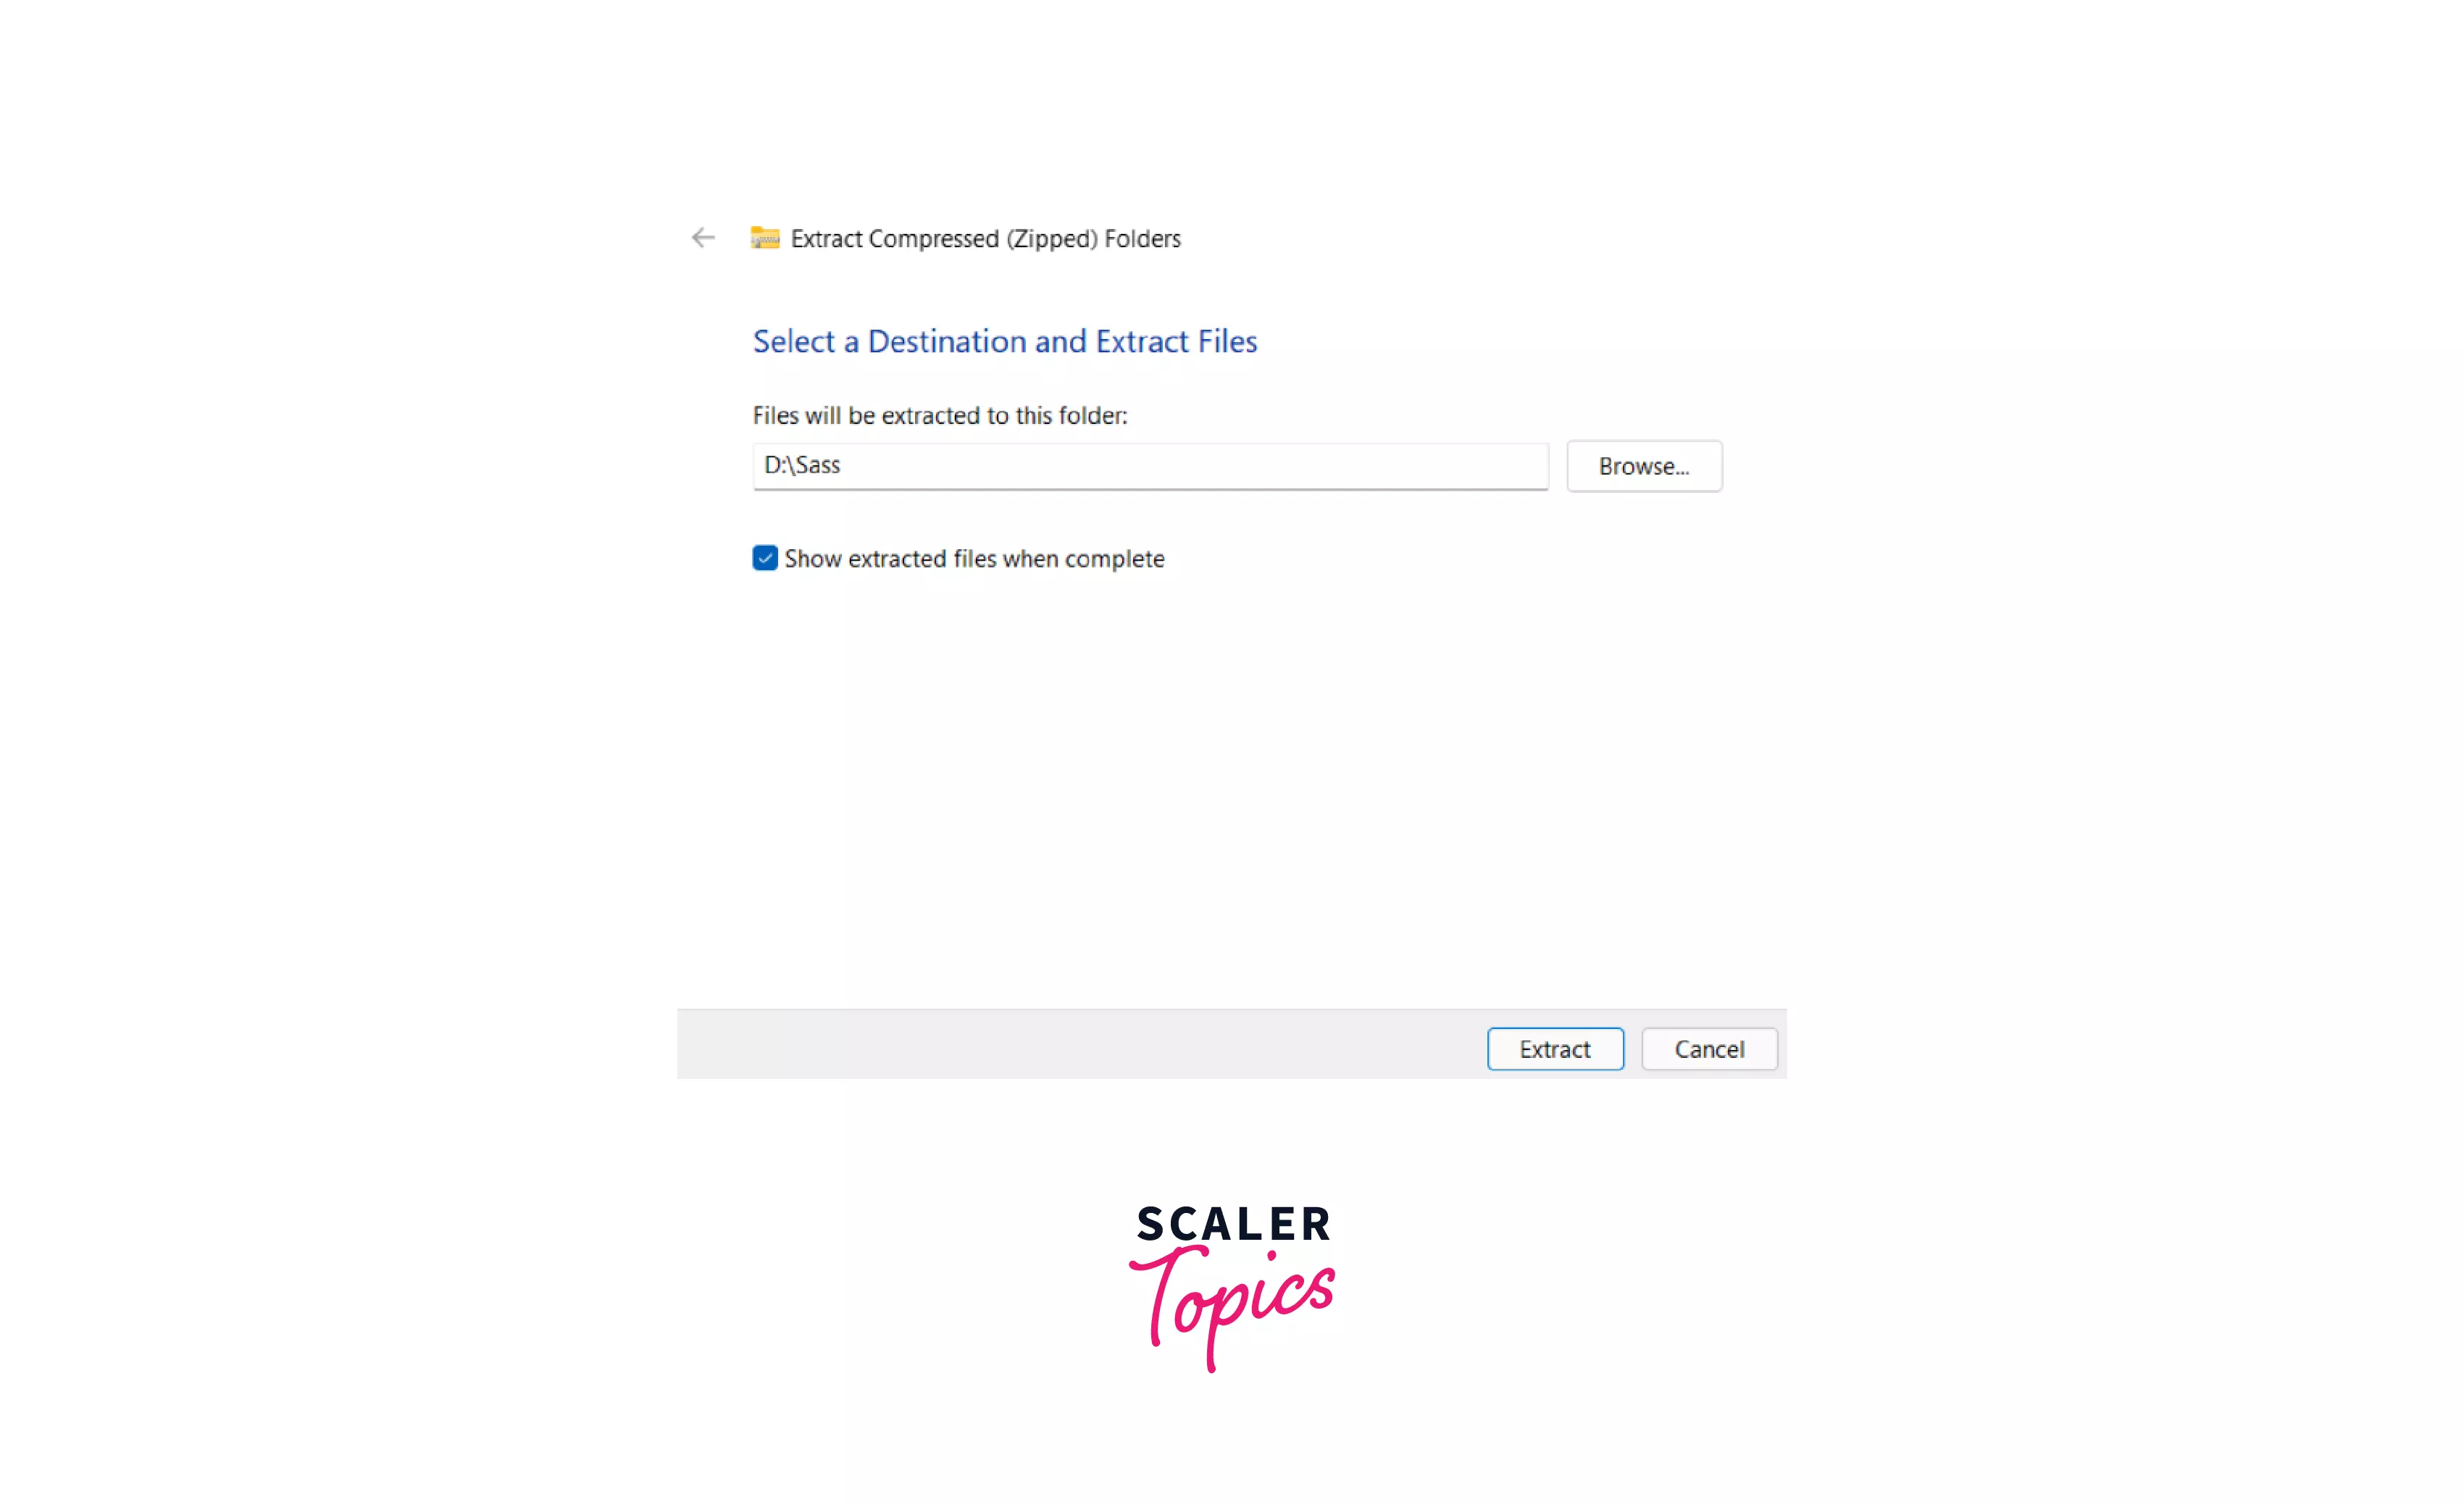
Extract the zip file in any folder you choose. You can also create a new folder.
-
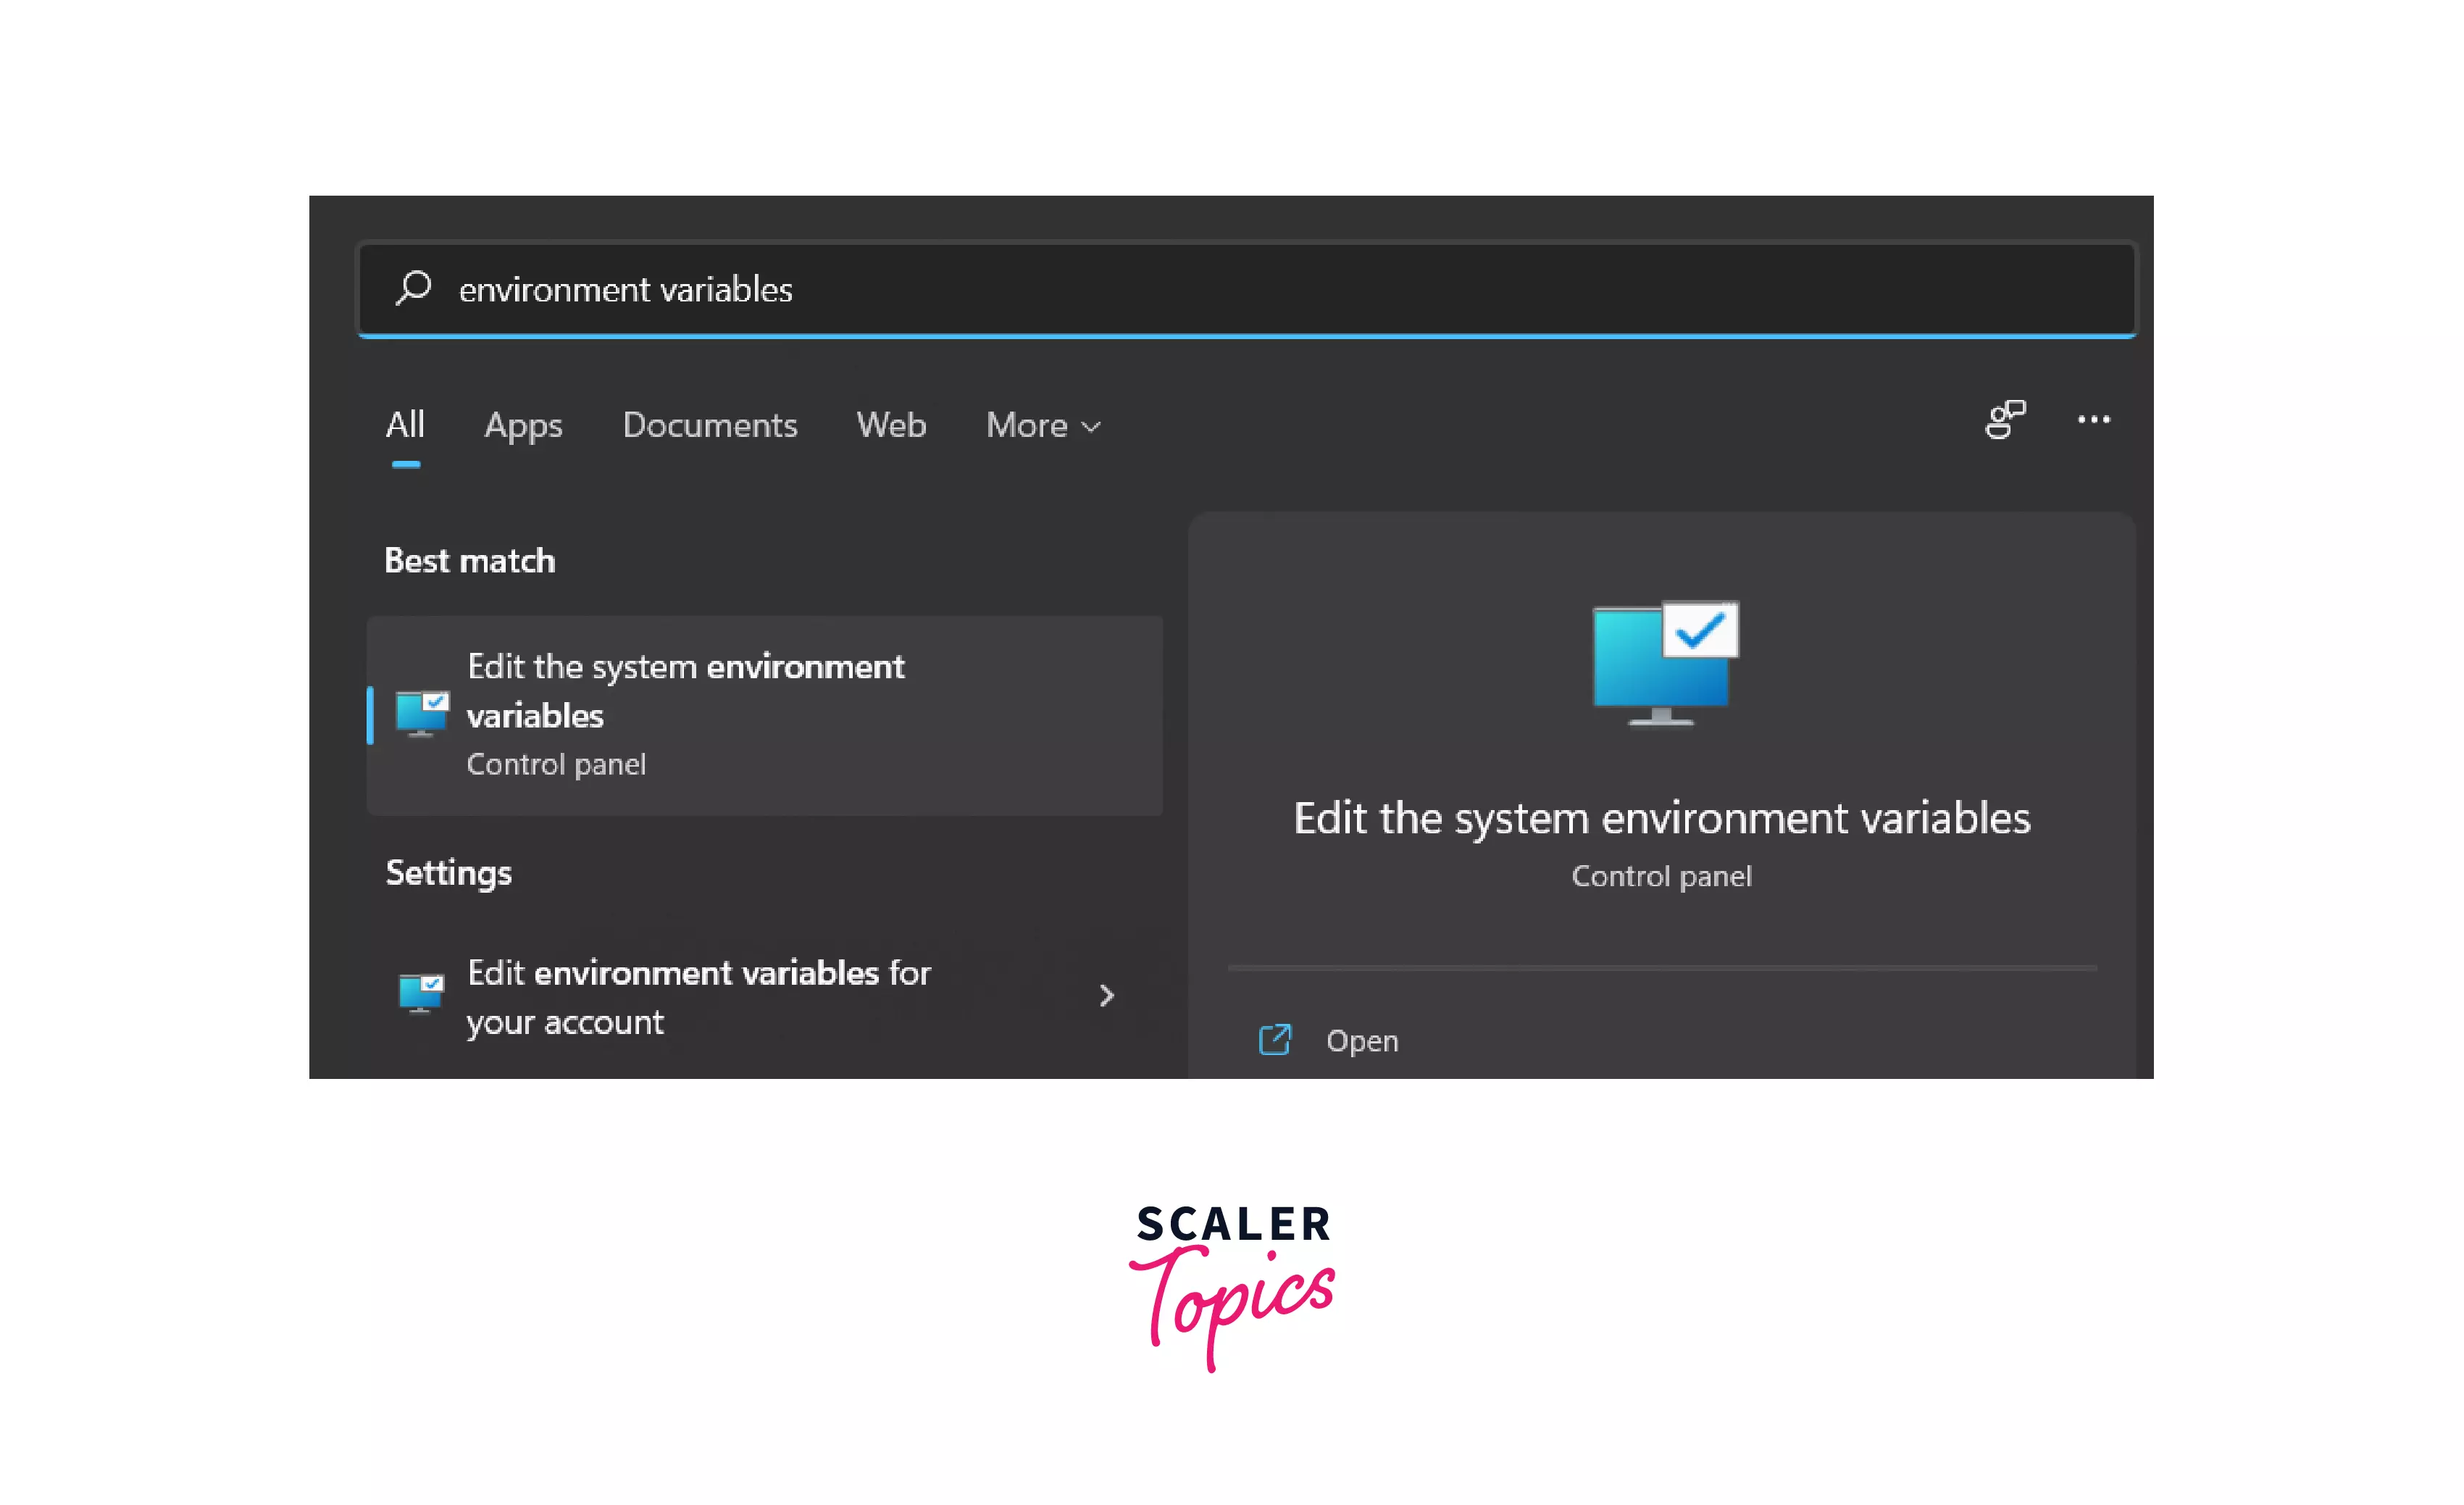
Now, all you need to do is add the extracted folder location to your path environment variable. For Windows 8 and above, search for Environment variables in the search box and open it.
-
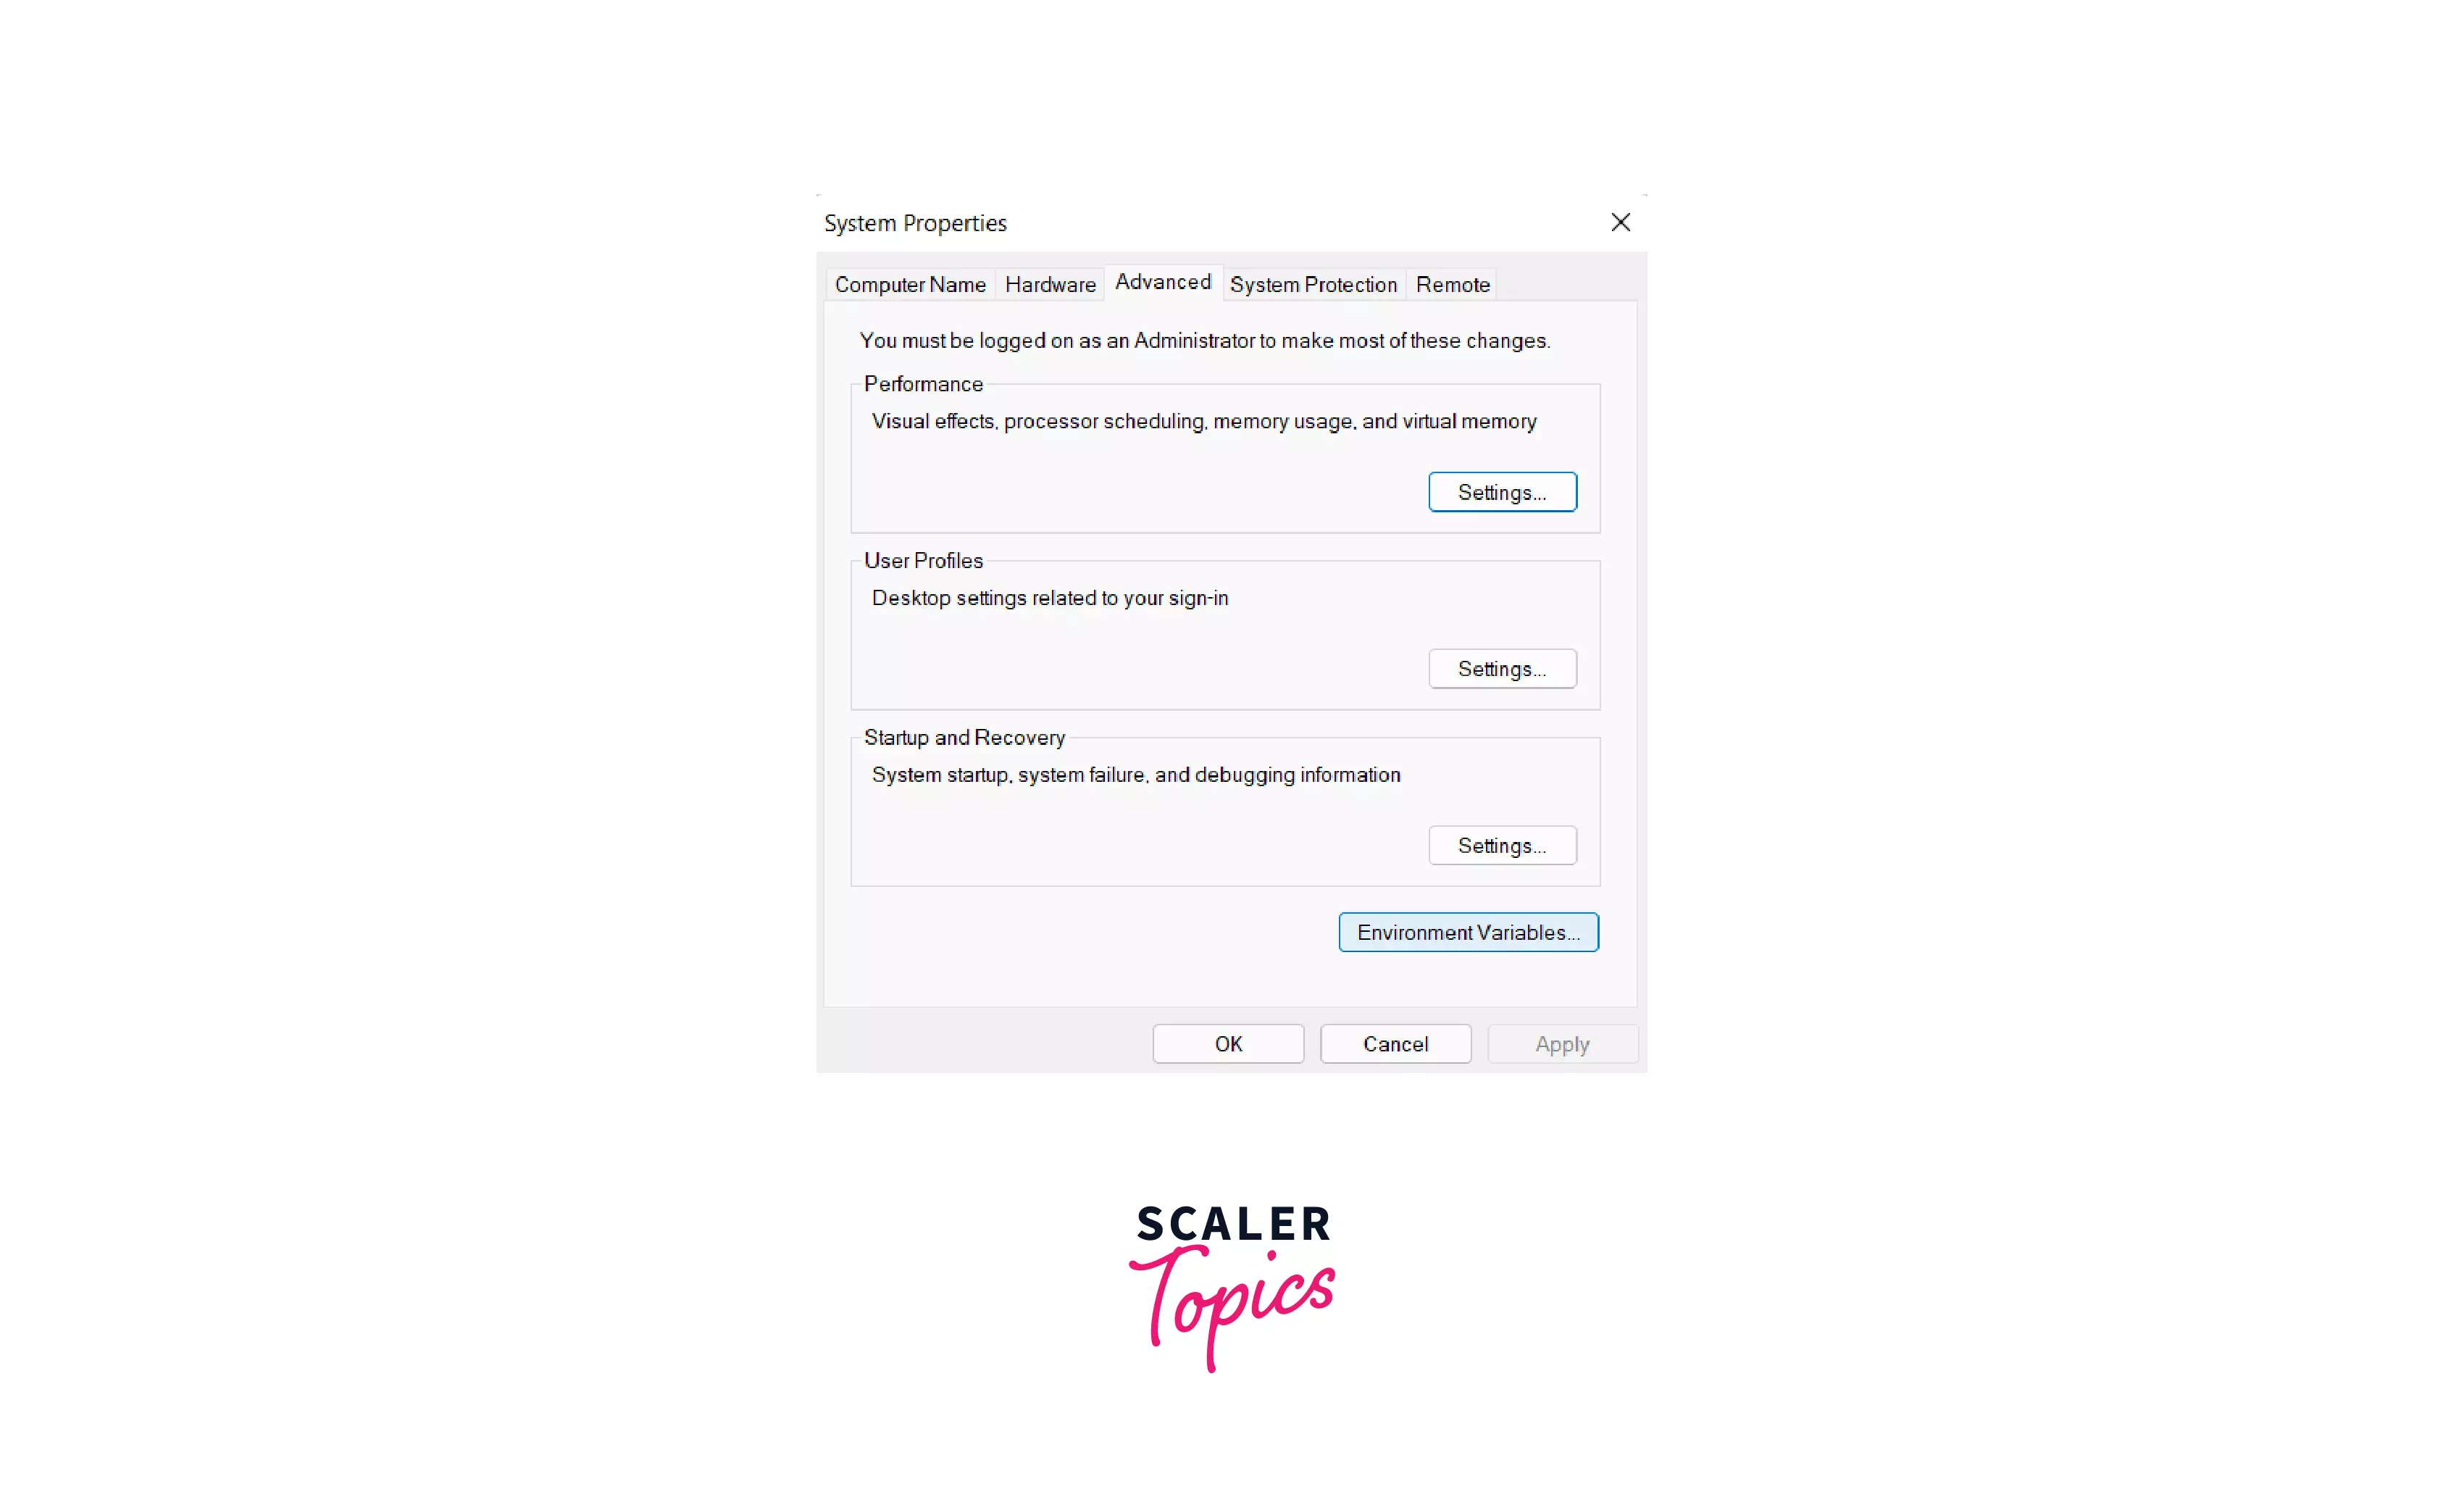
From the list of system variables, open the PATH variable, if it’s present, click on Edit.
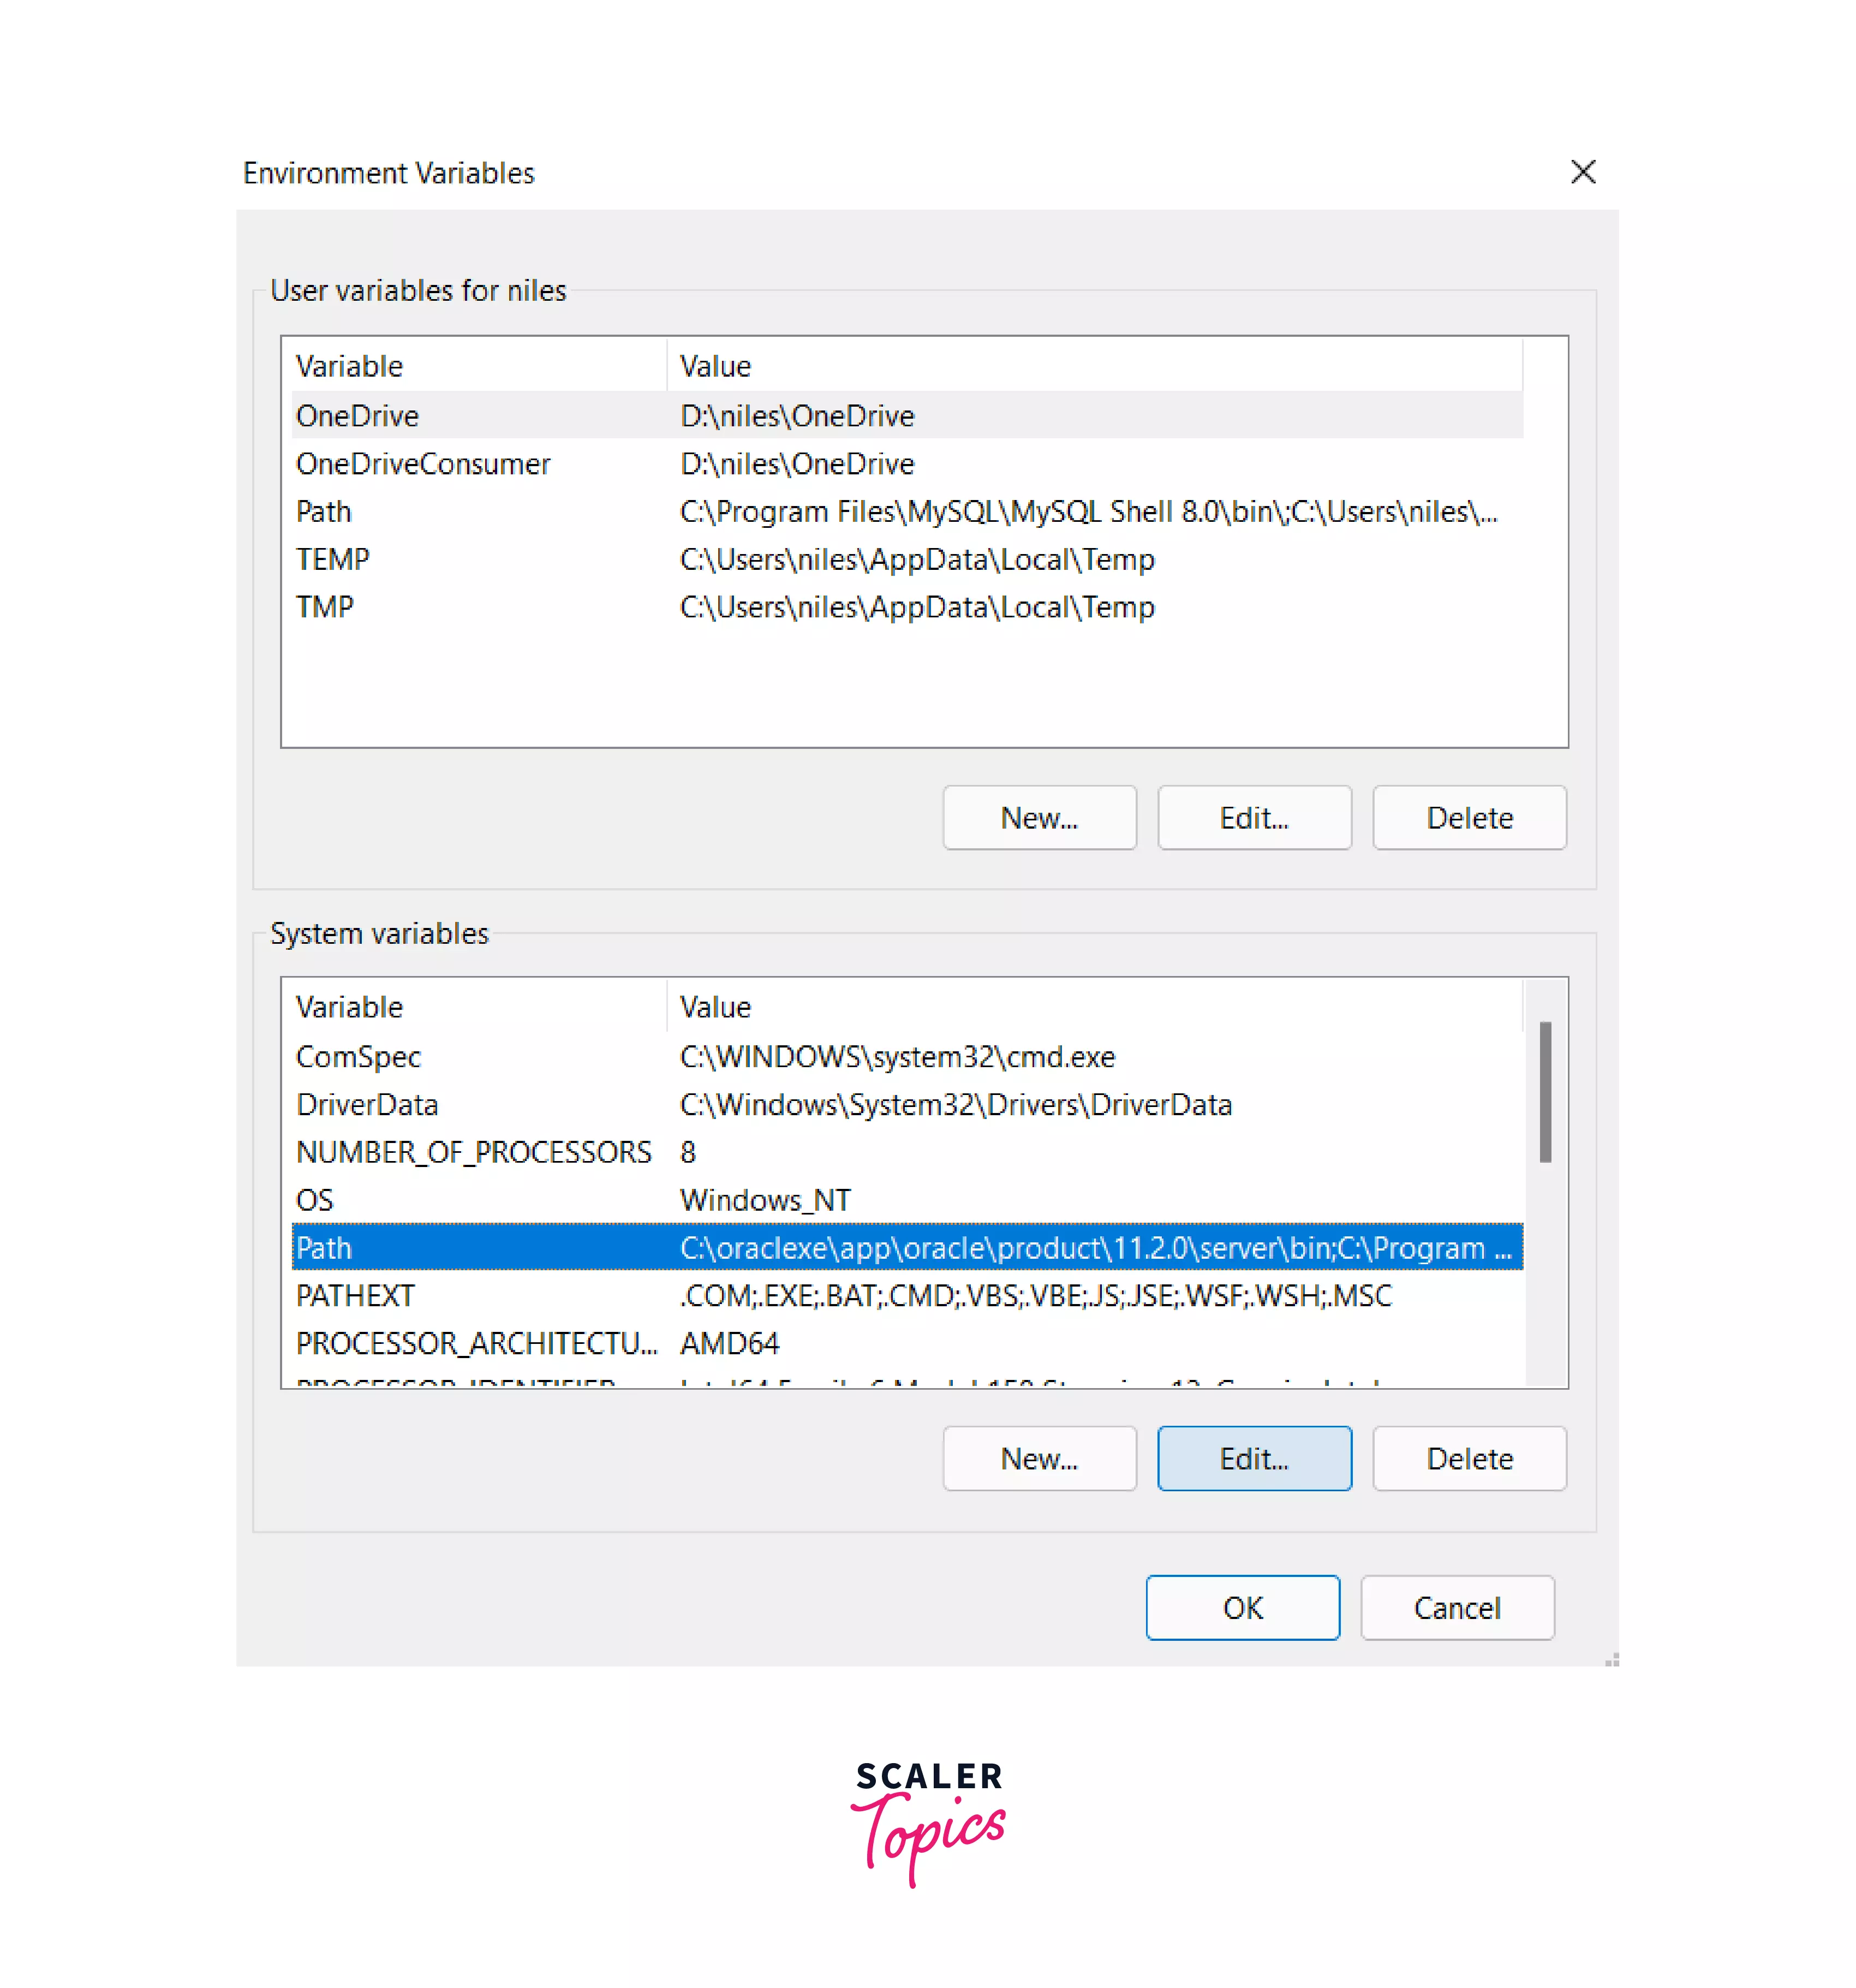
-
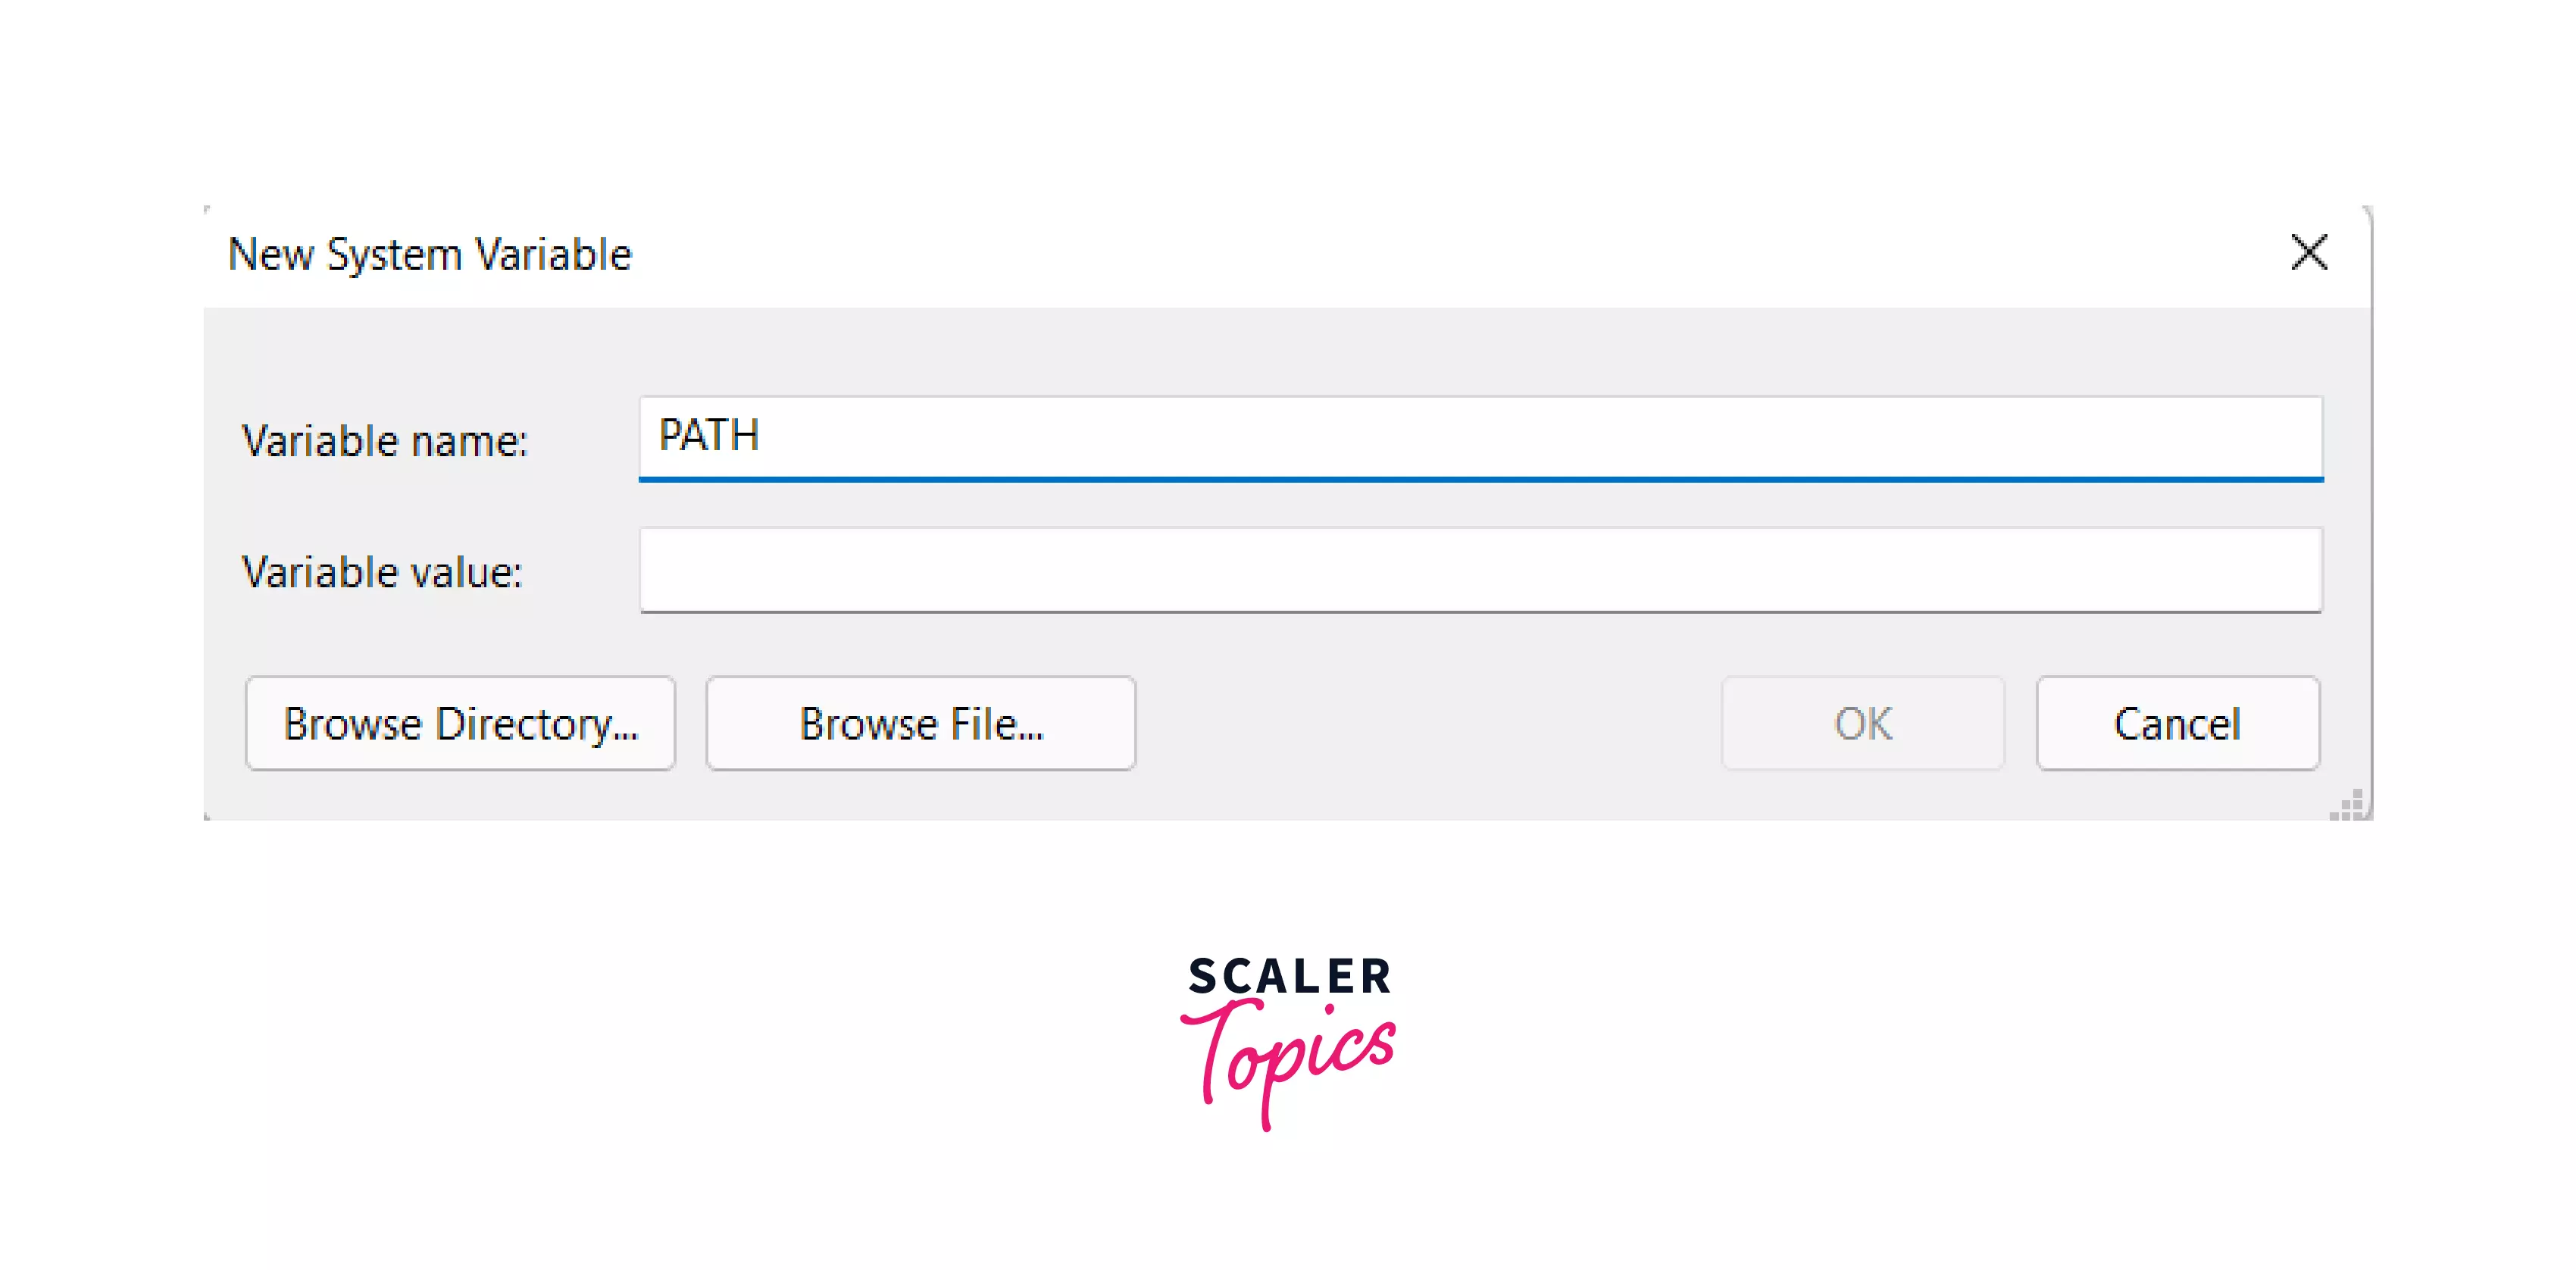
If you can’t find the PATH variable, click on New to create a new path. Write the variable name as PATH and return it to the folder where the Dart Sass zip file was extracted. The location of the folder should be filled in with the variable value with a semicolon (;) at the end.
-
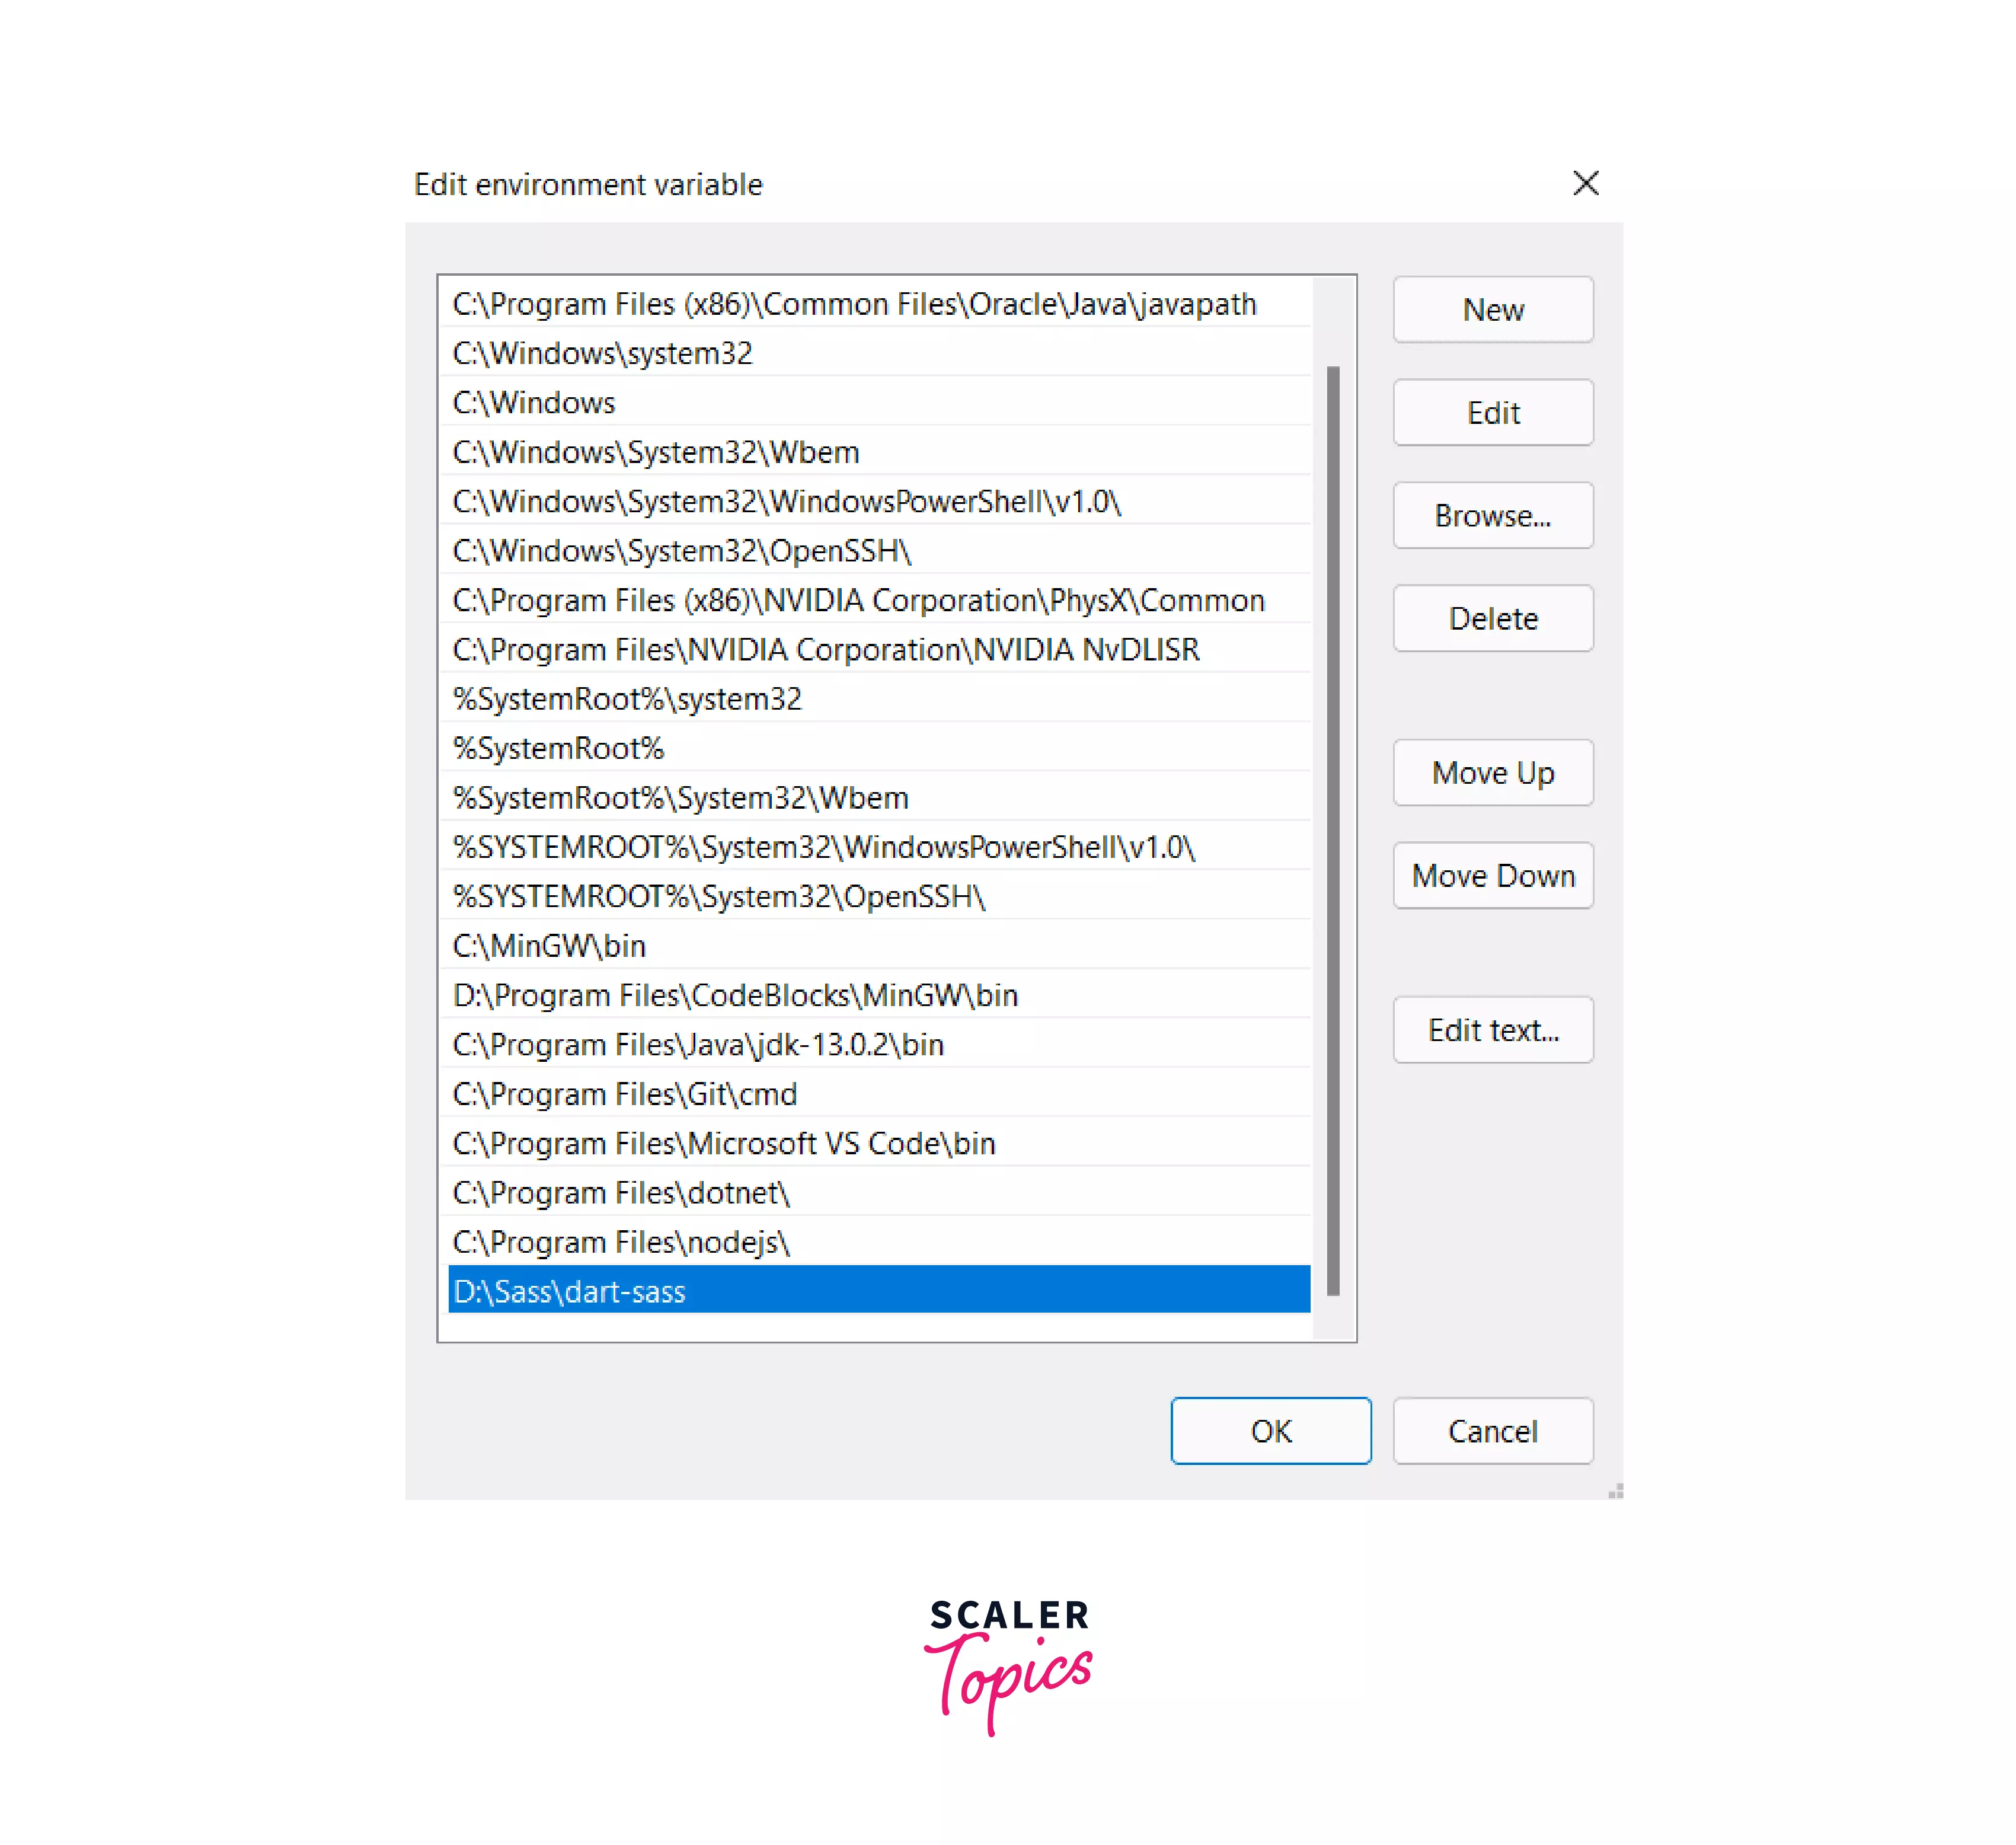
If you already have PATH in your list of variables, click on Edit and then click on New to paste the location of the folder where the Dart SASS zip file was extracted. Then click on OK.
-
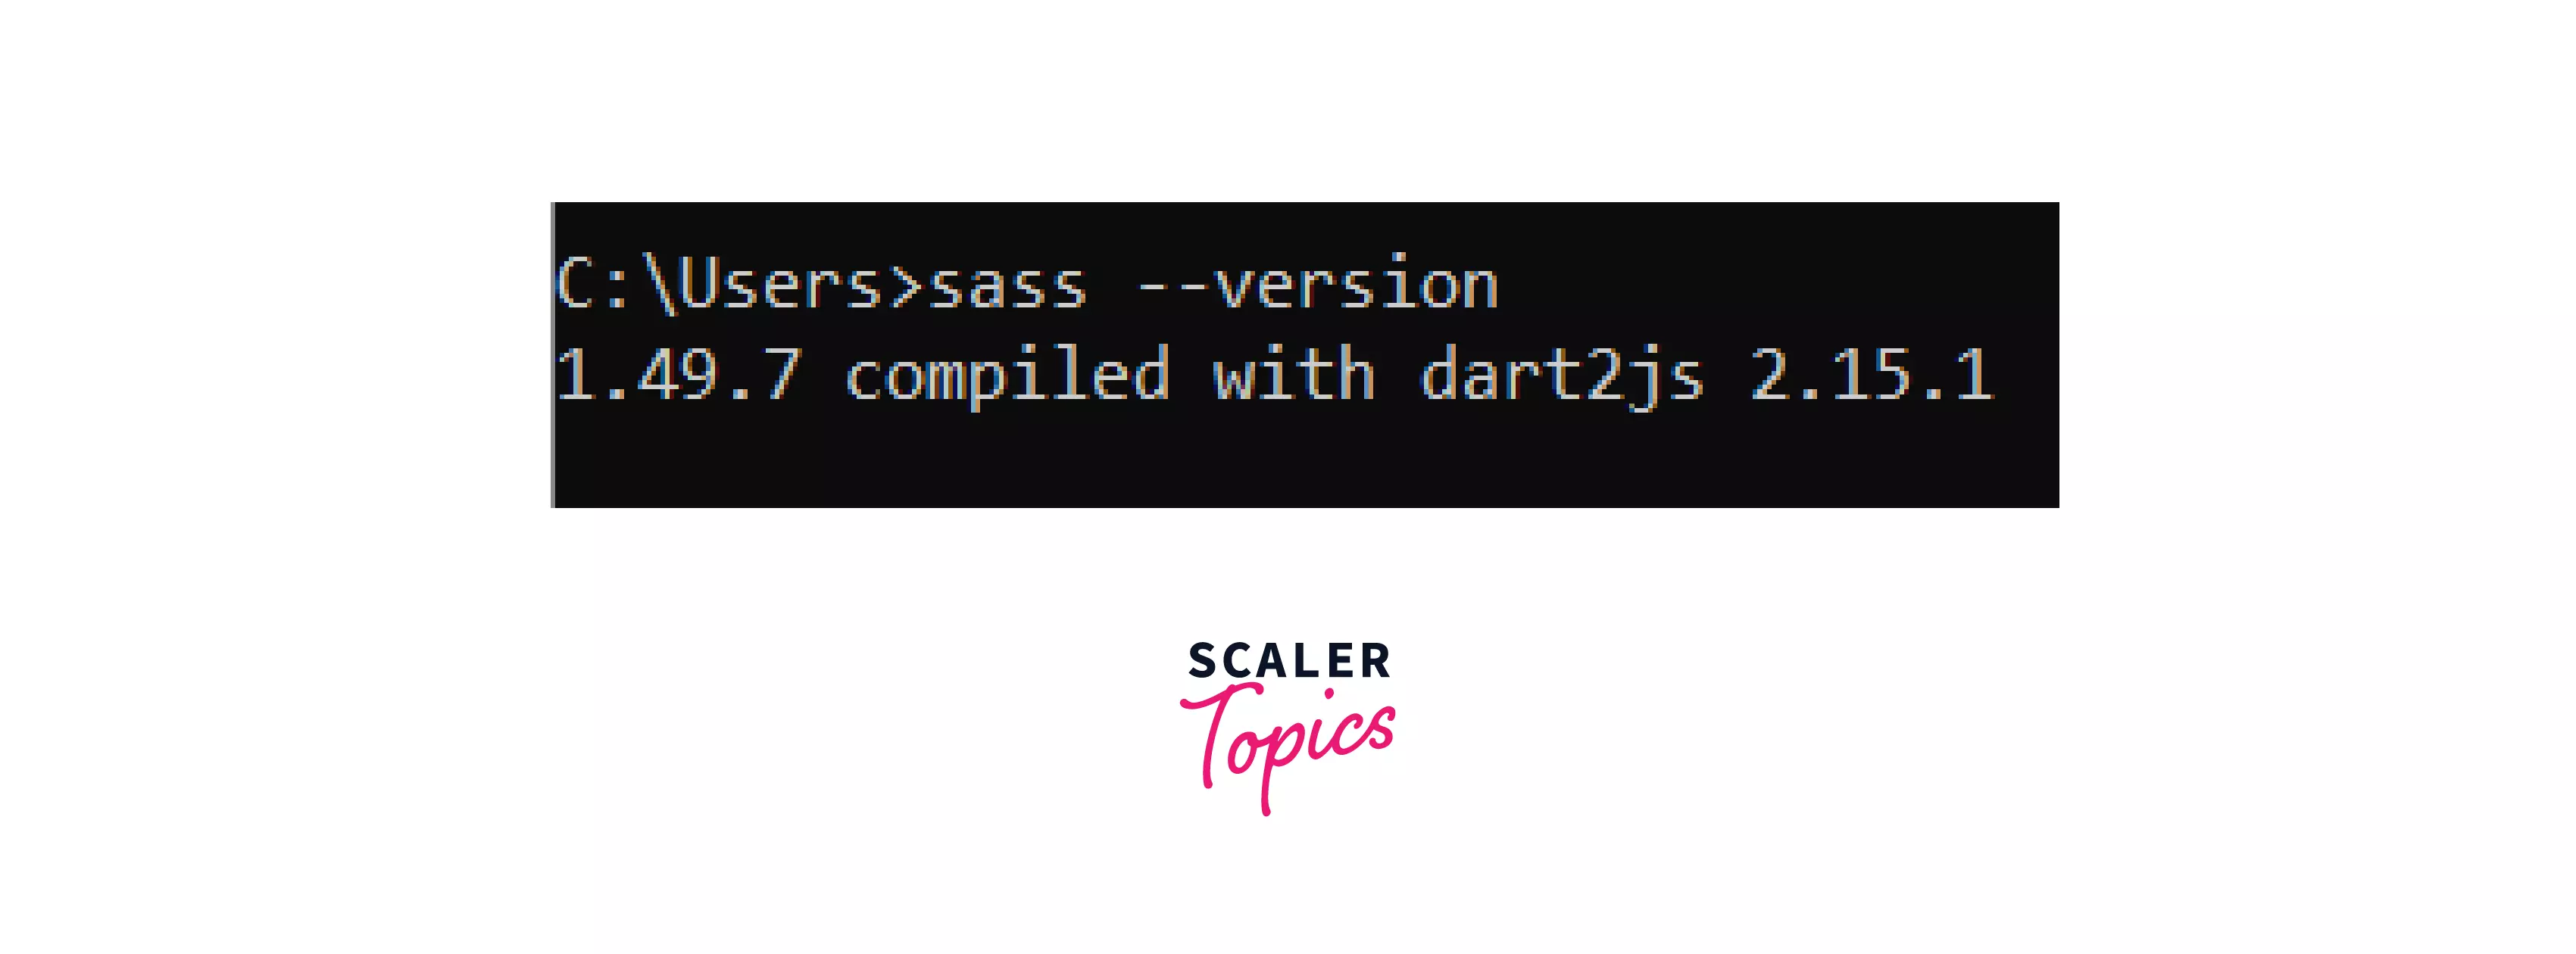
Now, to check if it is installed properly, open Command Prompt and type the given command:
Upon proper installation, it’ll tell you the version of SASS in your system. The latest version is 1.49.7 (at the time of writing this article).
Install SASS Using NPM (Node Package Manager)
Let’s first know what's Node.js?
Node.js is yet another open-source runtime environment to run JavaScript. And npm (Node Package Manager) comes along with the installation of Node.js on our system.
What’s special about npm?
Everything! Firstly, every package installation and dependency can be done through npm as it is a command-line tool.
What’s a package?
You may need additional libraries to include in your JavaScript project, which is known as modules. And package comprises files needed for a module.
Secondly, npm is also a repository for open-source JavaScript frameworks like React, Angular, etc., and also Node.js projects.
We shall begin with installing Node.js in the first place. However, if you have done it previously, you can skip the first step and just check the version by running this command:
- Download Node.js from the official website and install it.
The npm sass installation comprises a few steps, which are covered ahead.
Create a package.json File
- First of all, let’s create a separate folder to look at an example along with the setup.
I’ve created a folder named SassExample in my D:/ drive. Inside it, there will be a folder for SASS and another for CSS files.
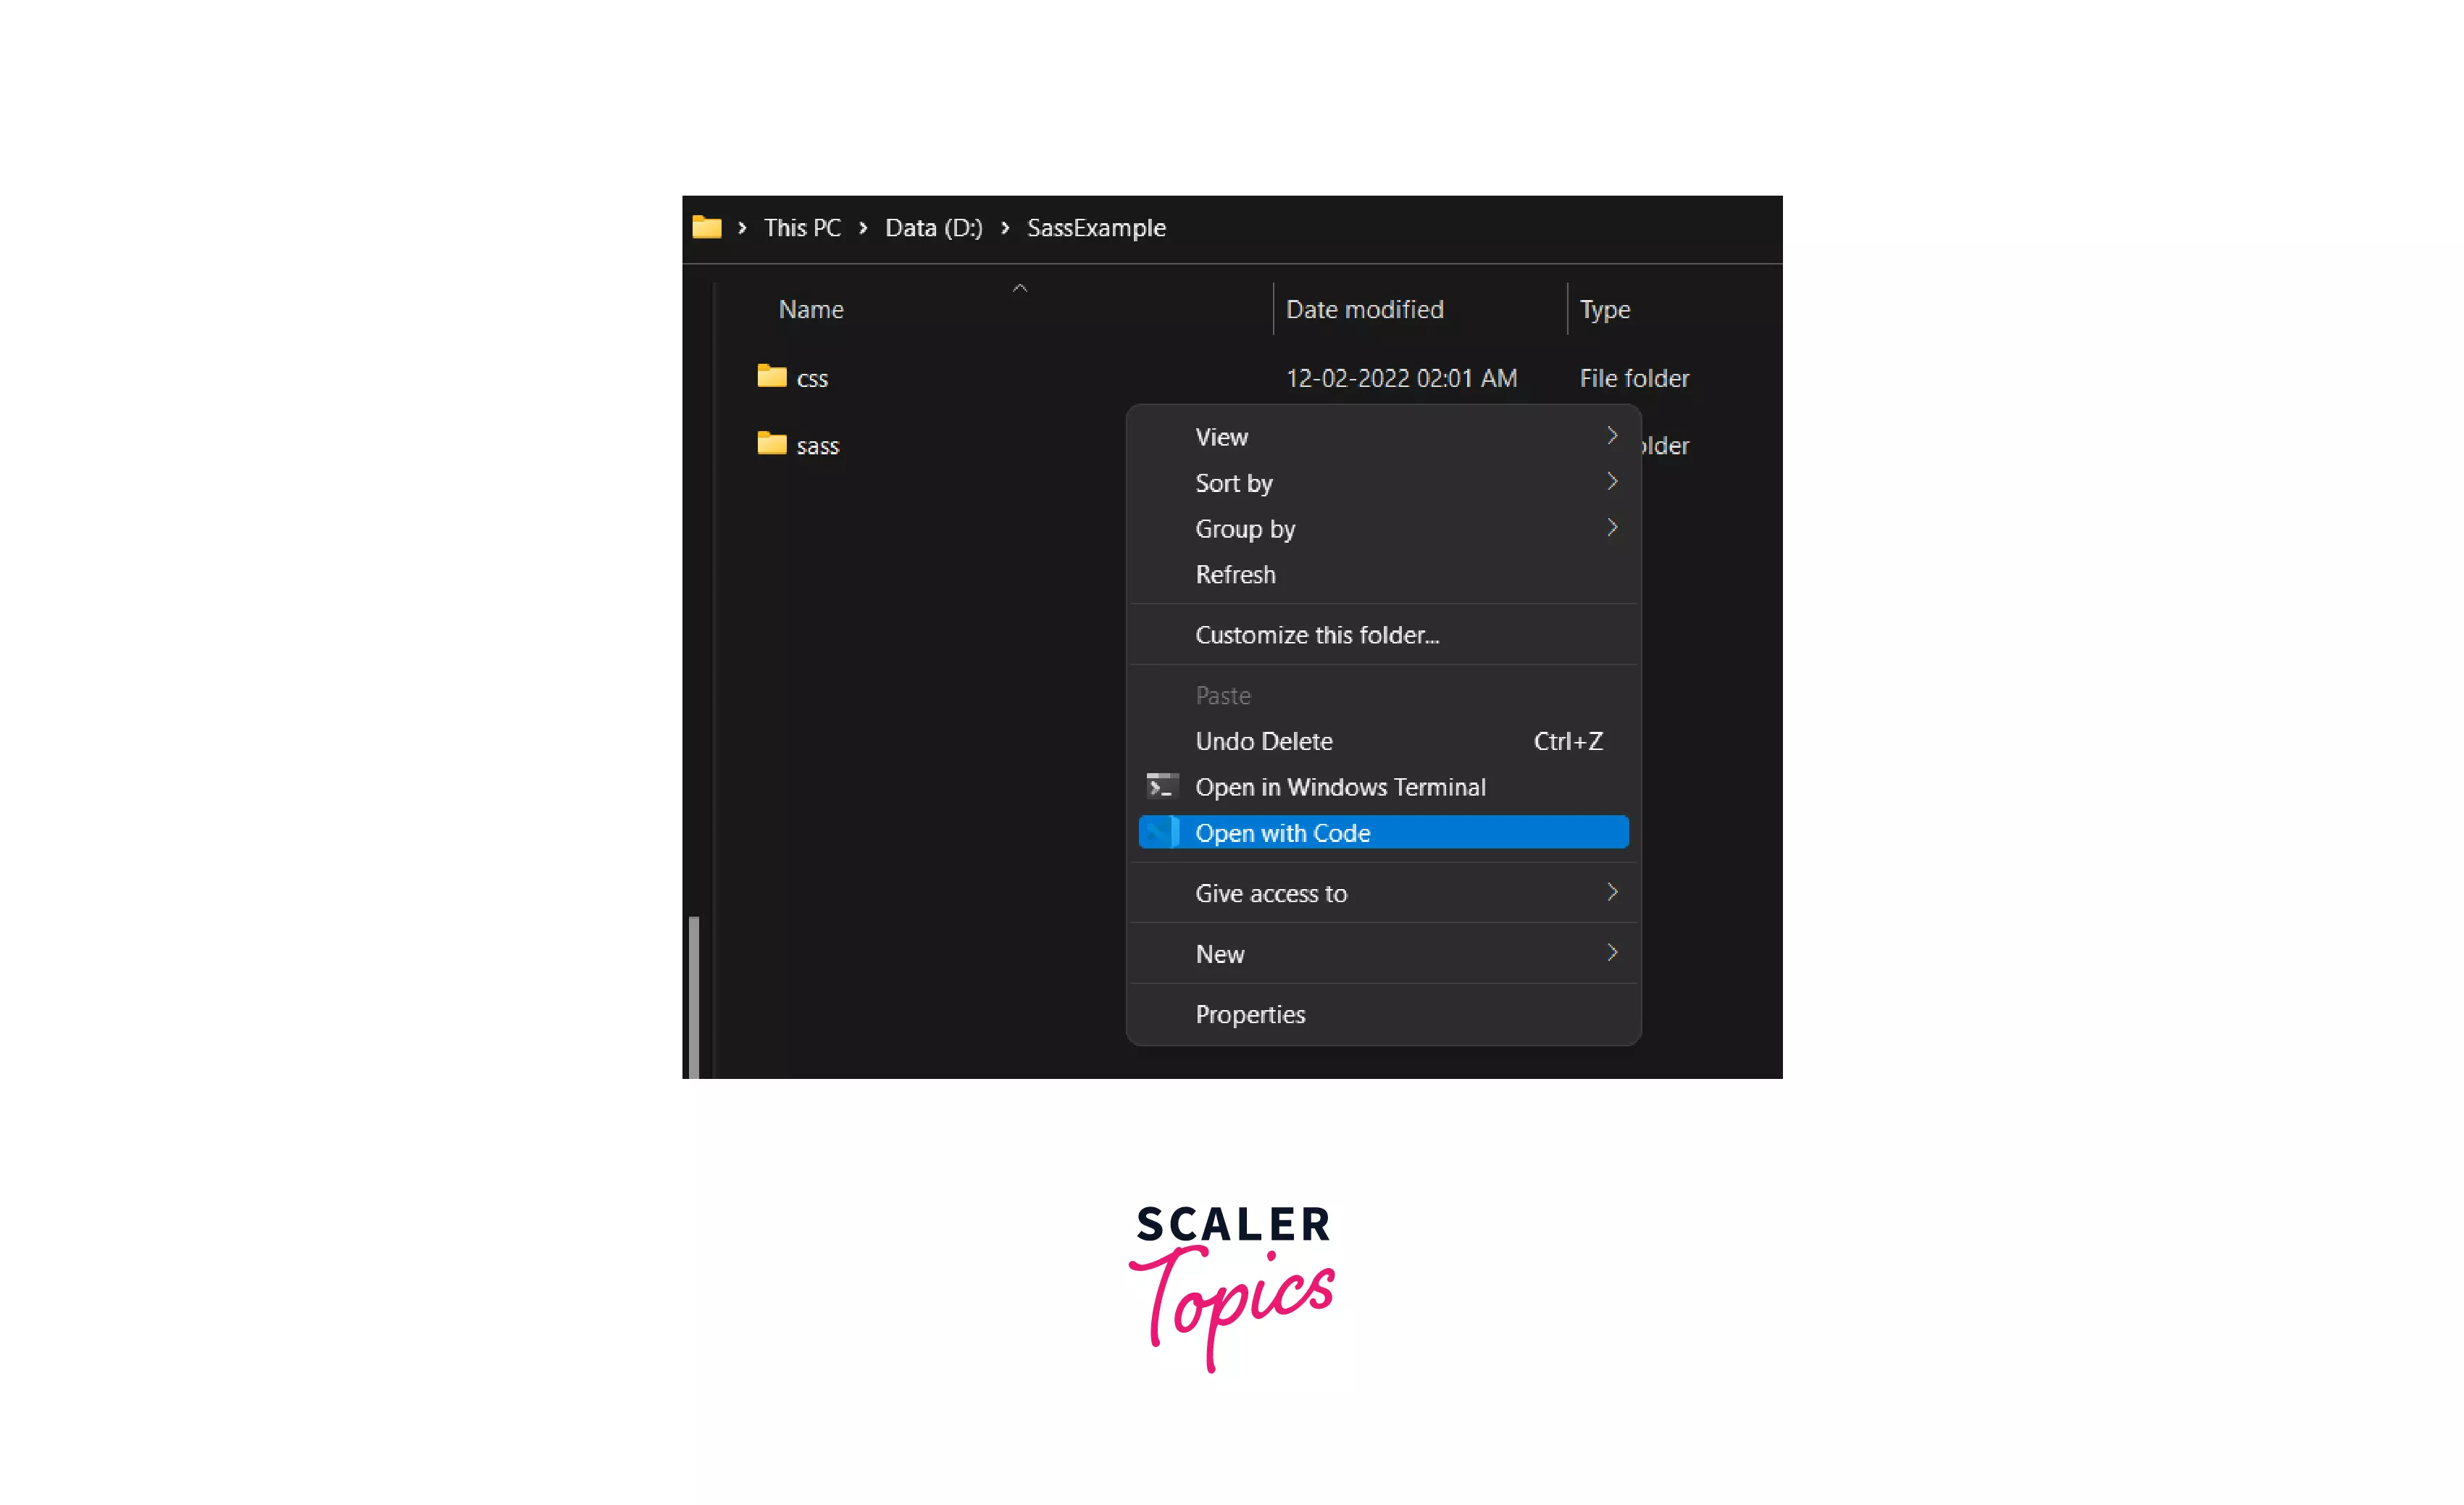
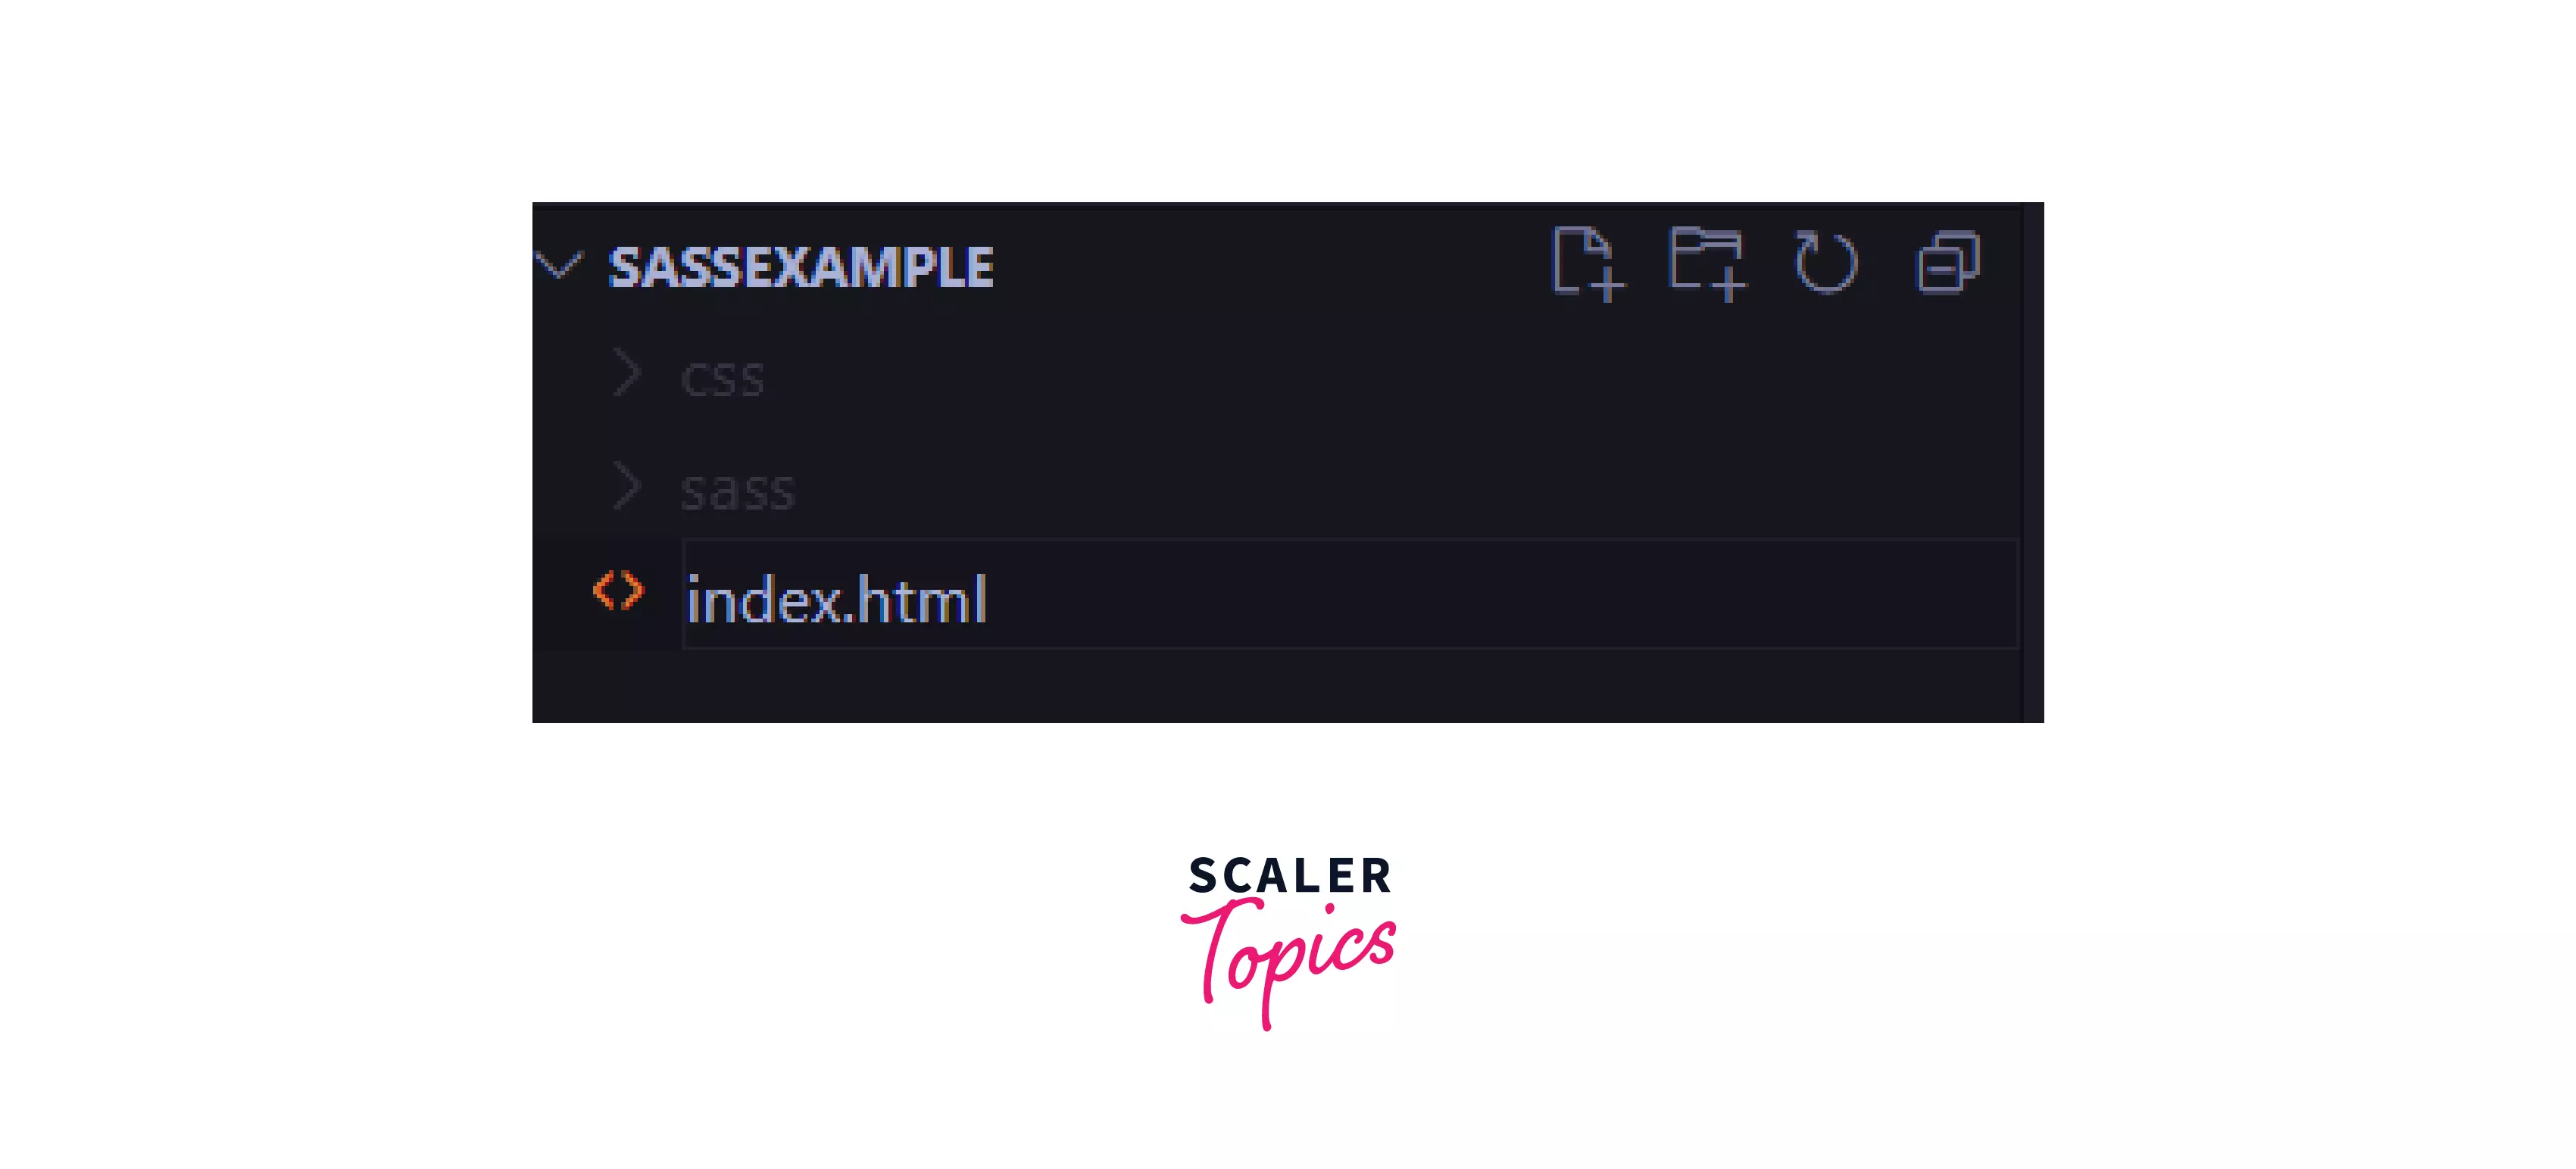
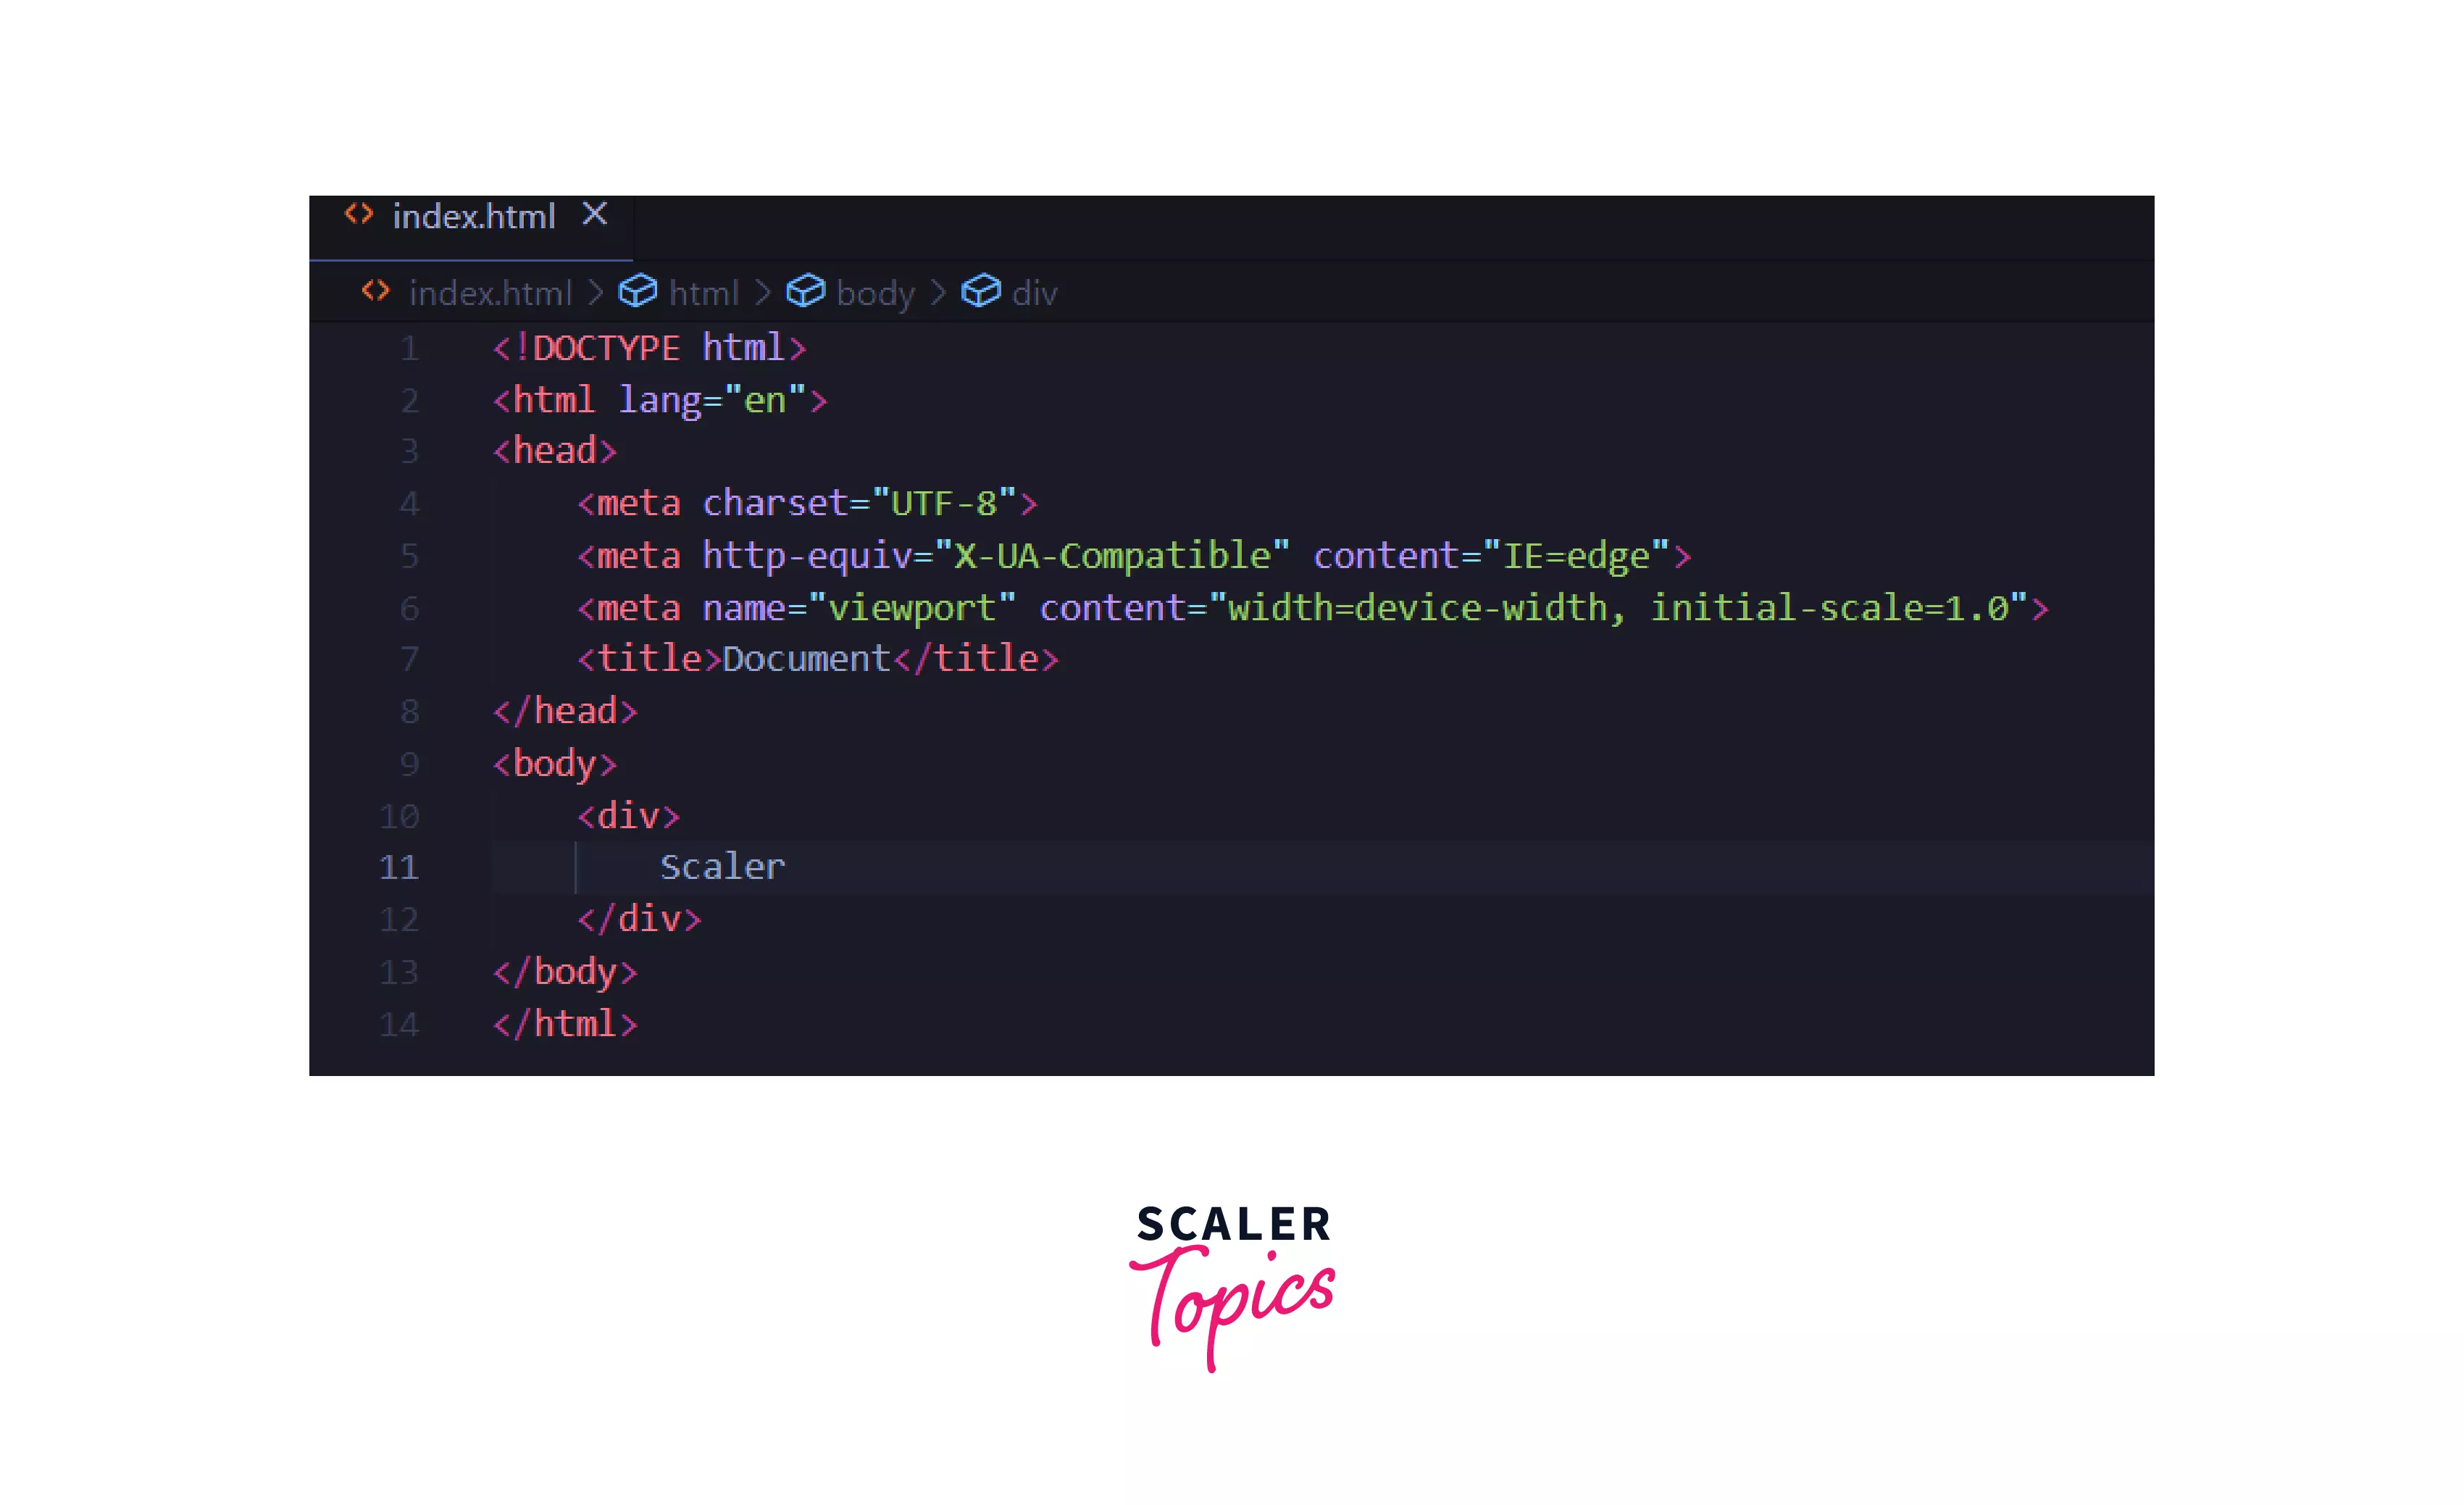
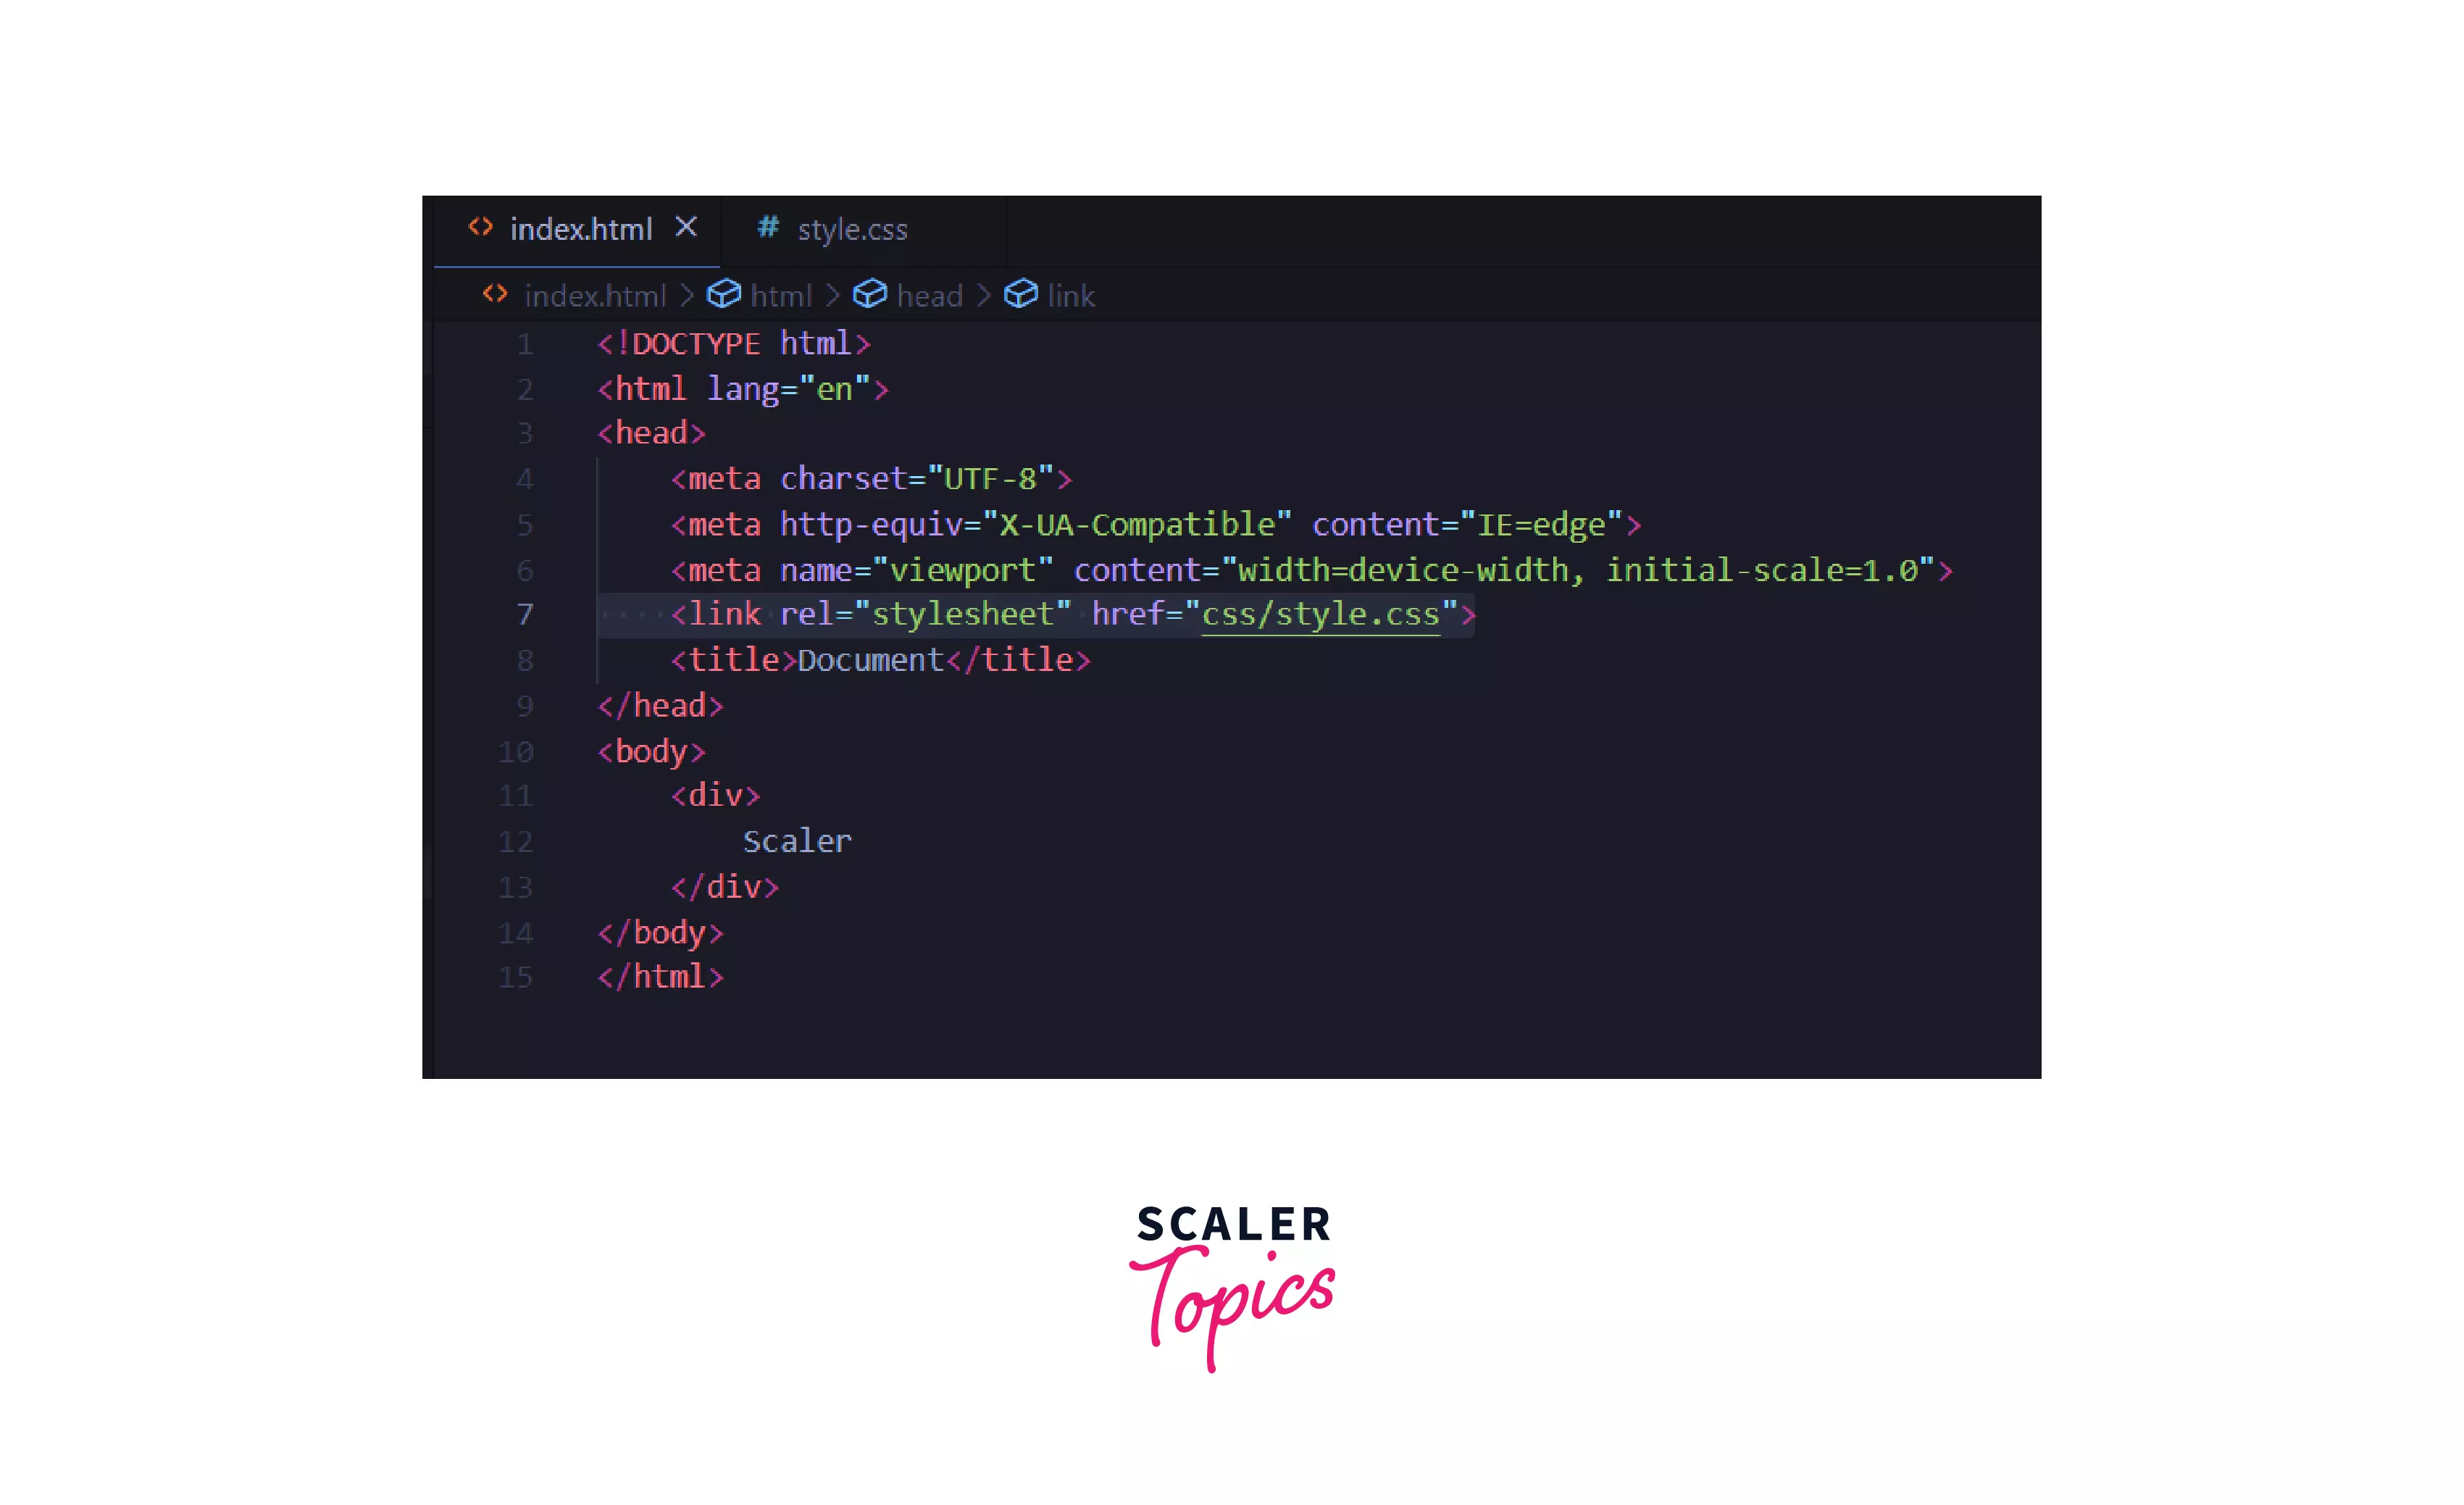
- Open it with VS Code and create a new HTML file inside the SassExample folder.
-
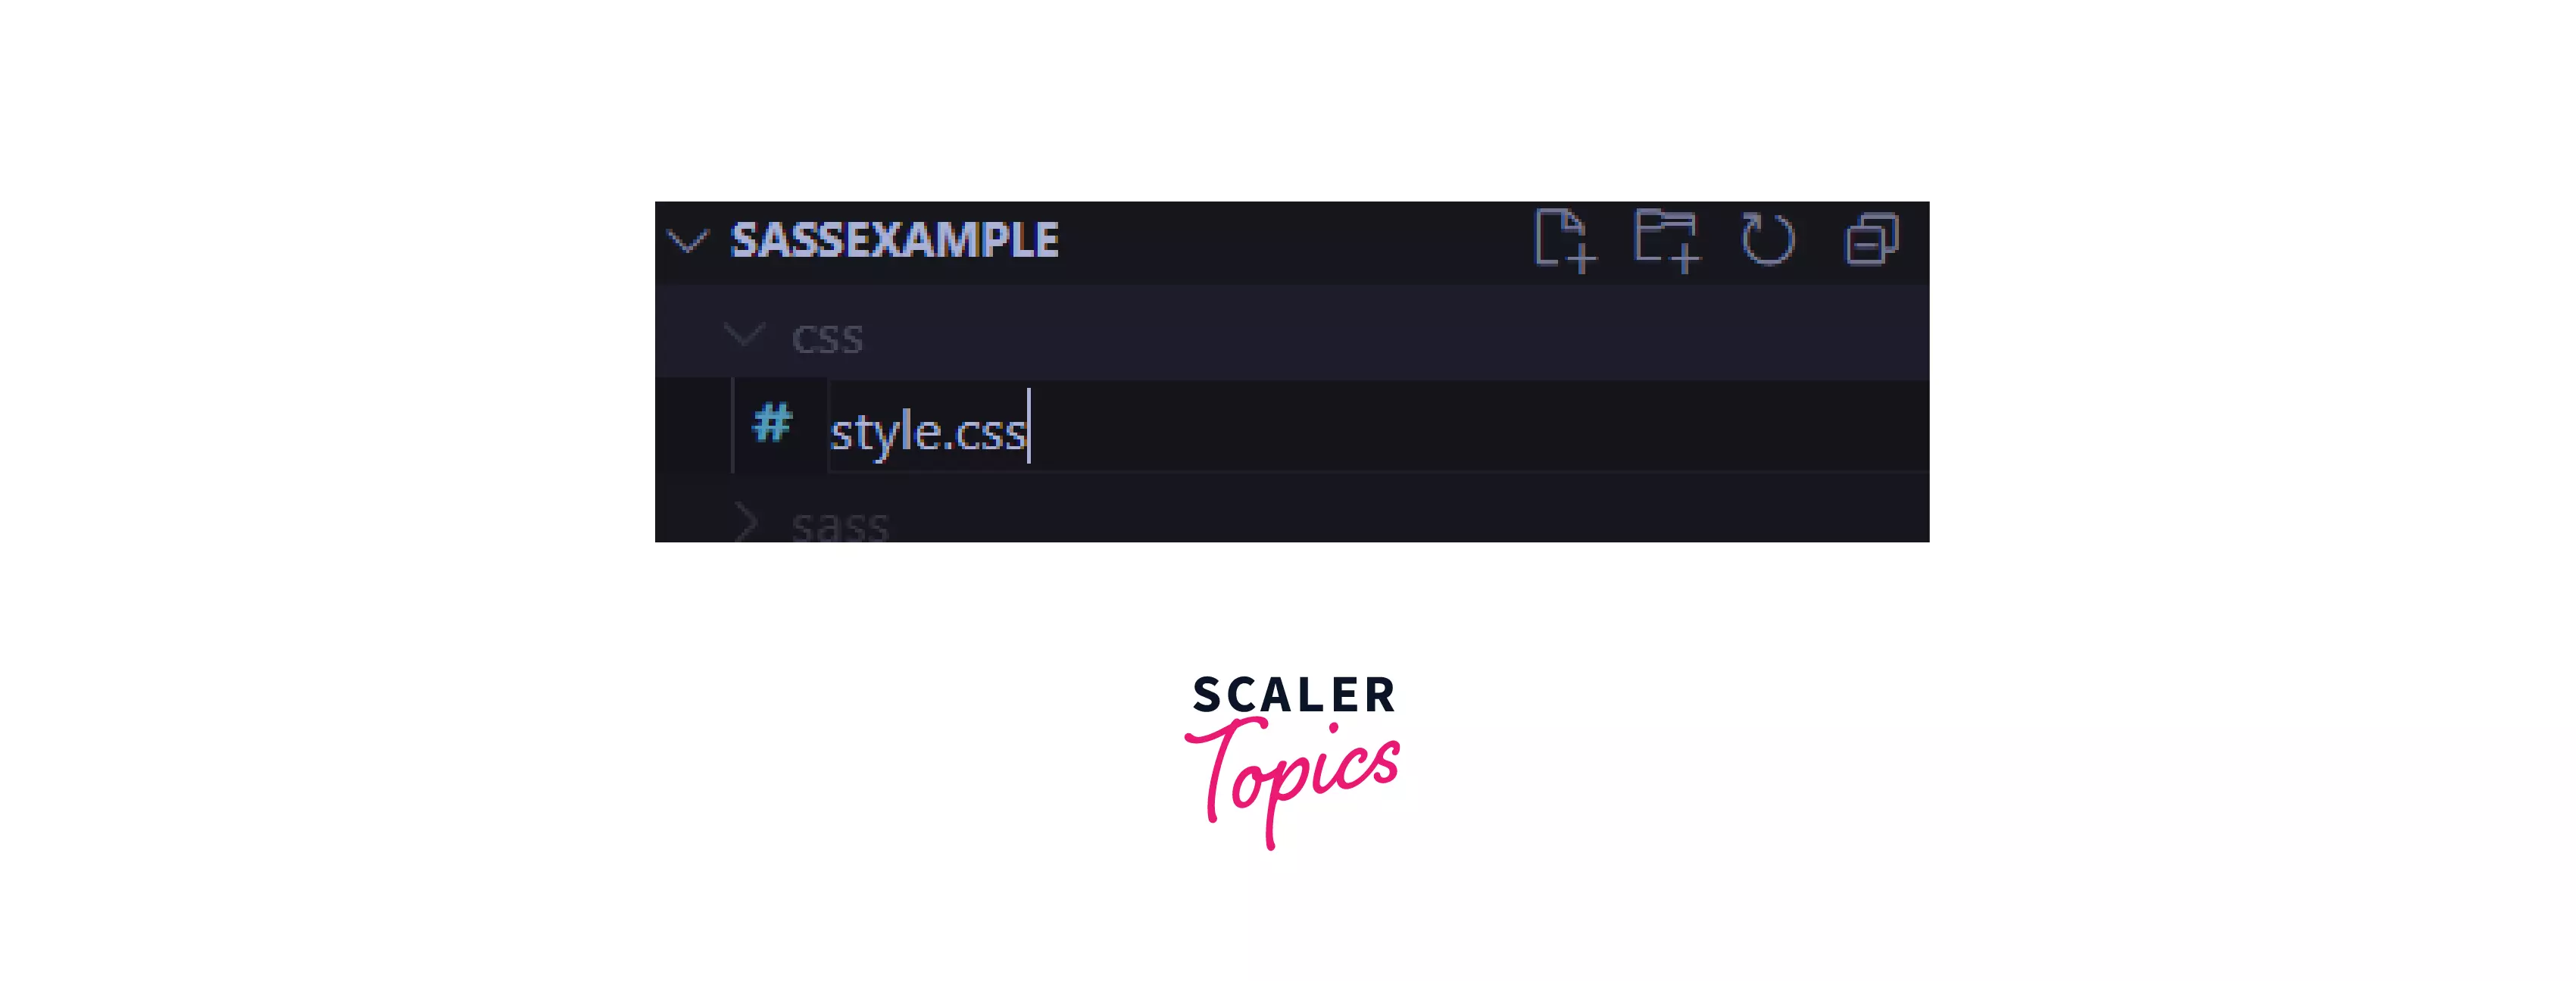
Now, inside the CSS folder, create a style.css file and put the code given below.

- Now, we shall link style.css with index.html.
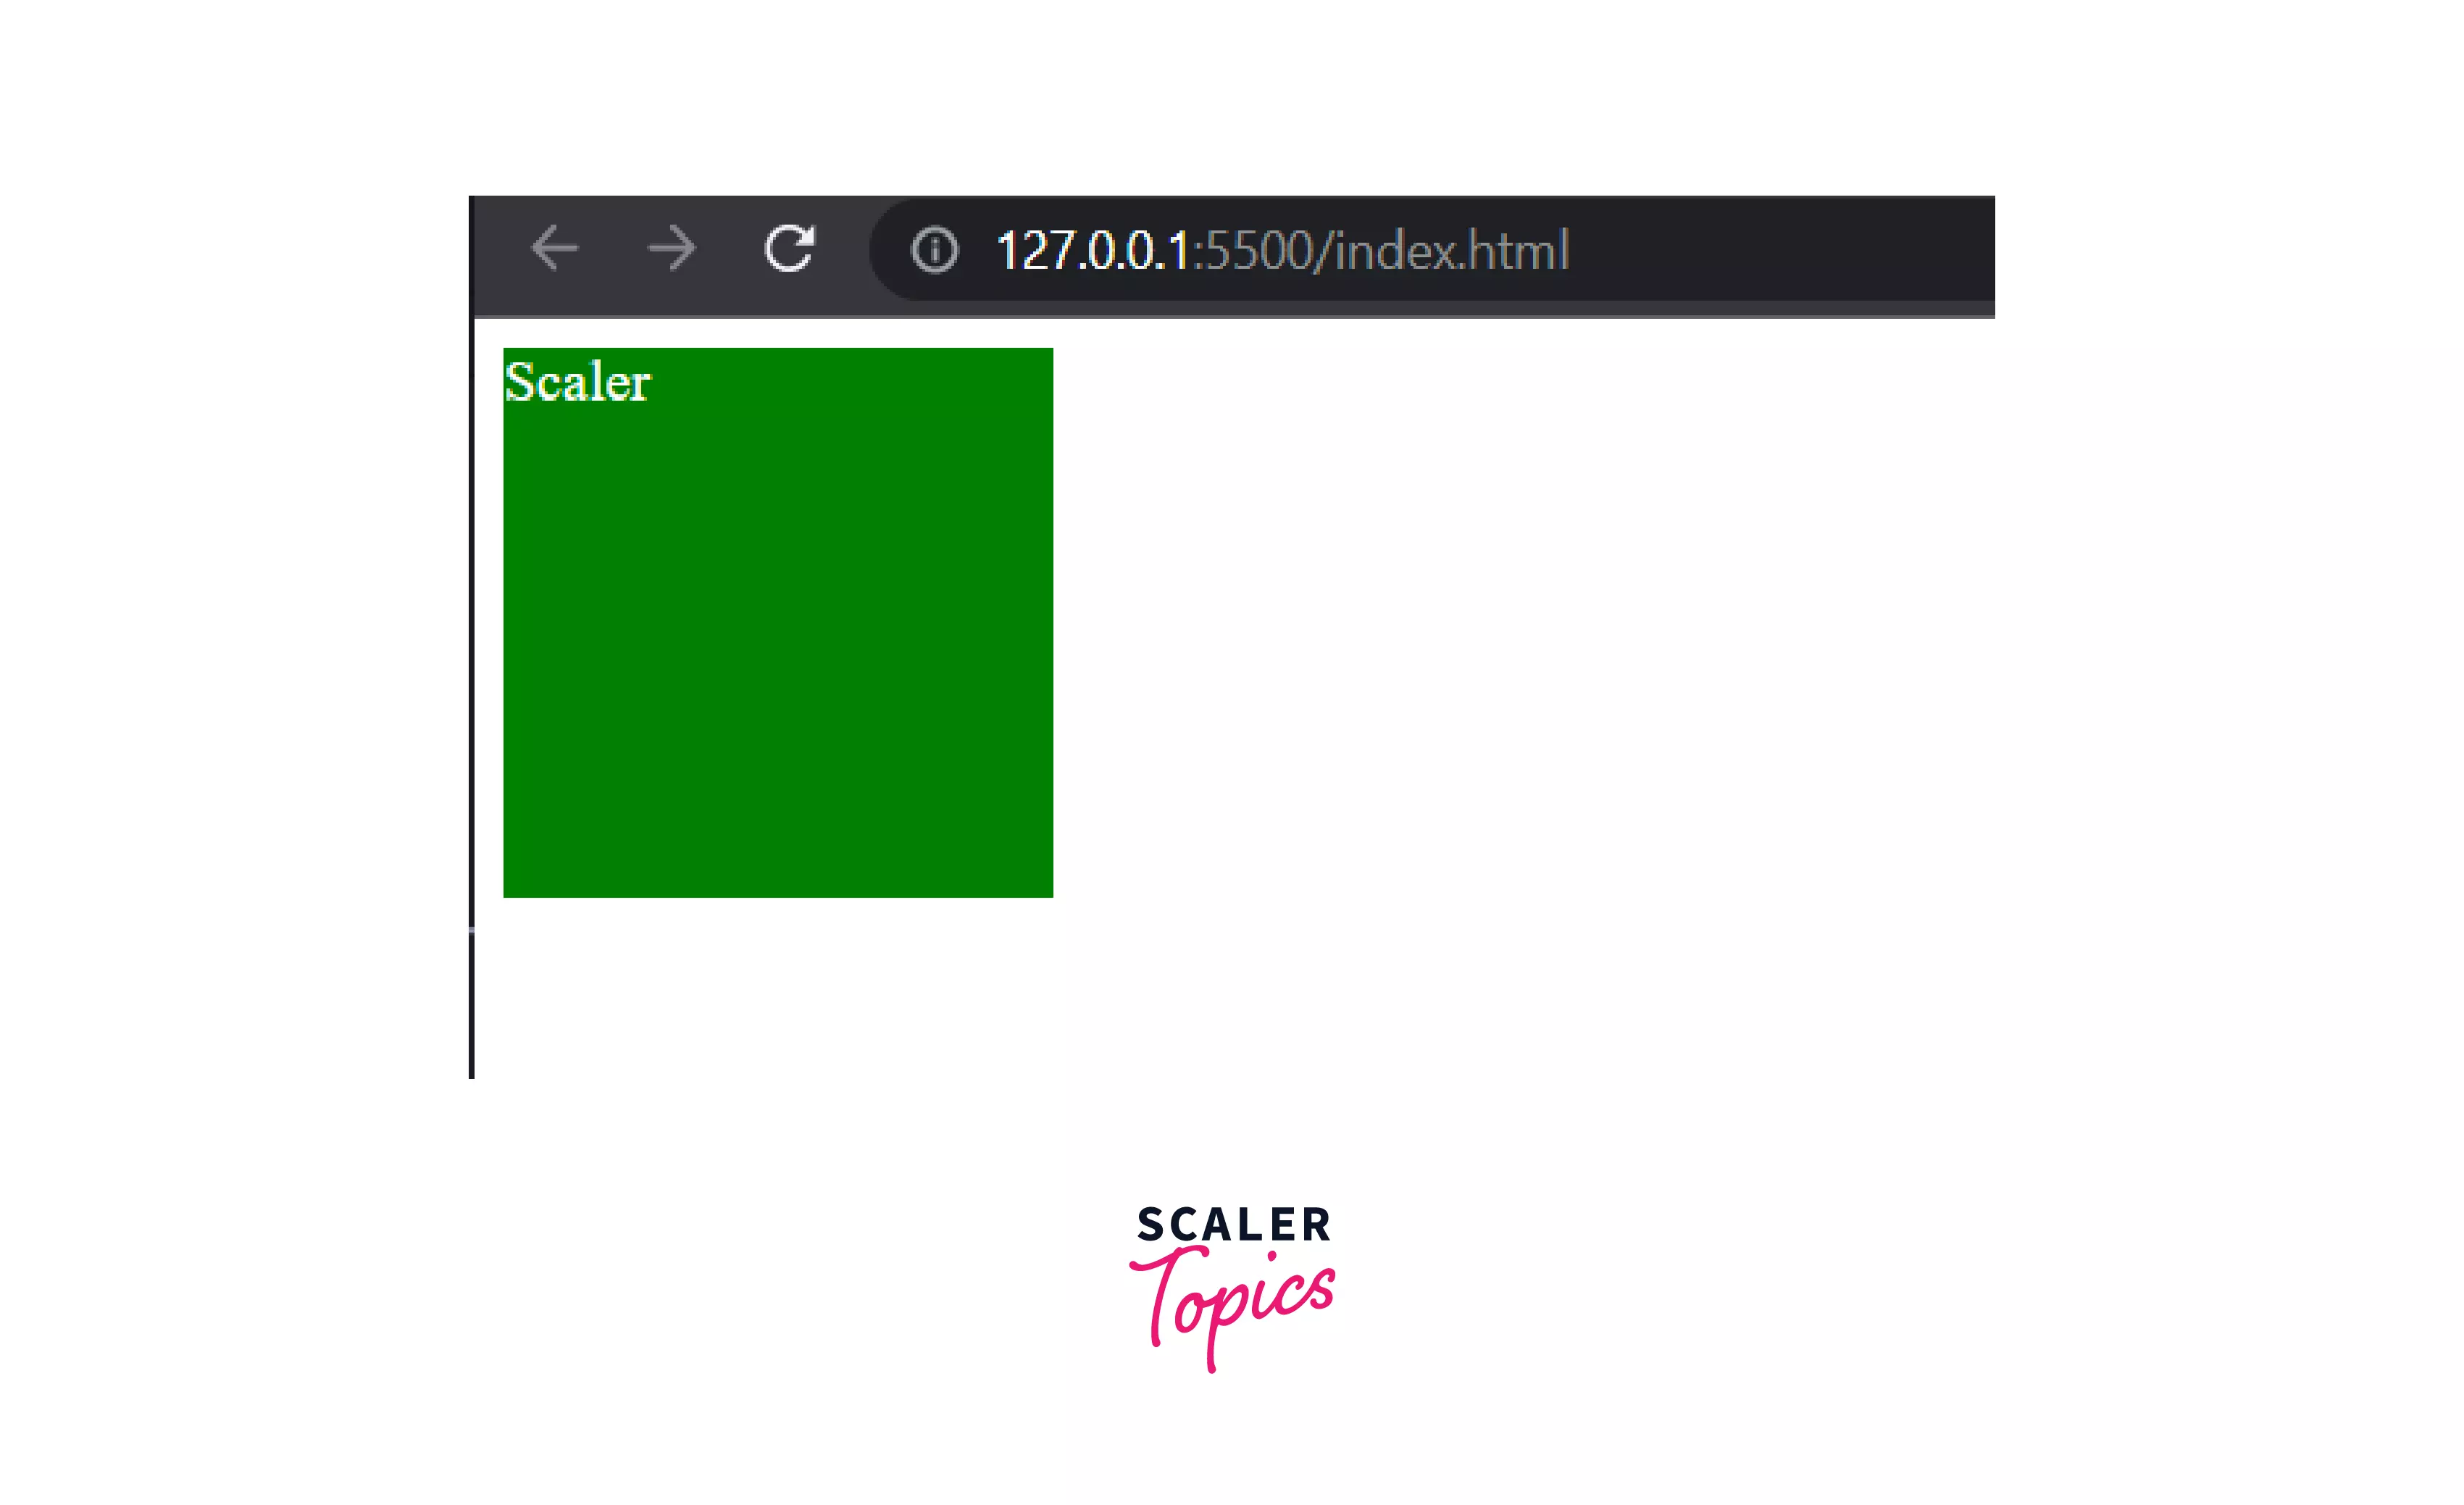
The result would look like this:
-
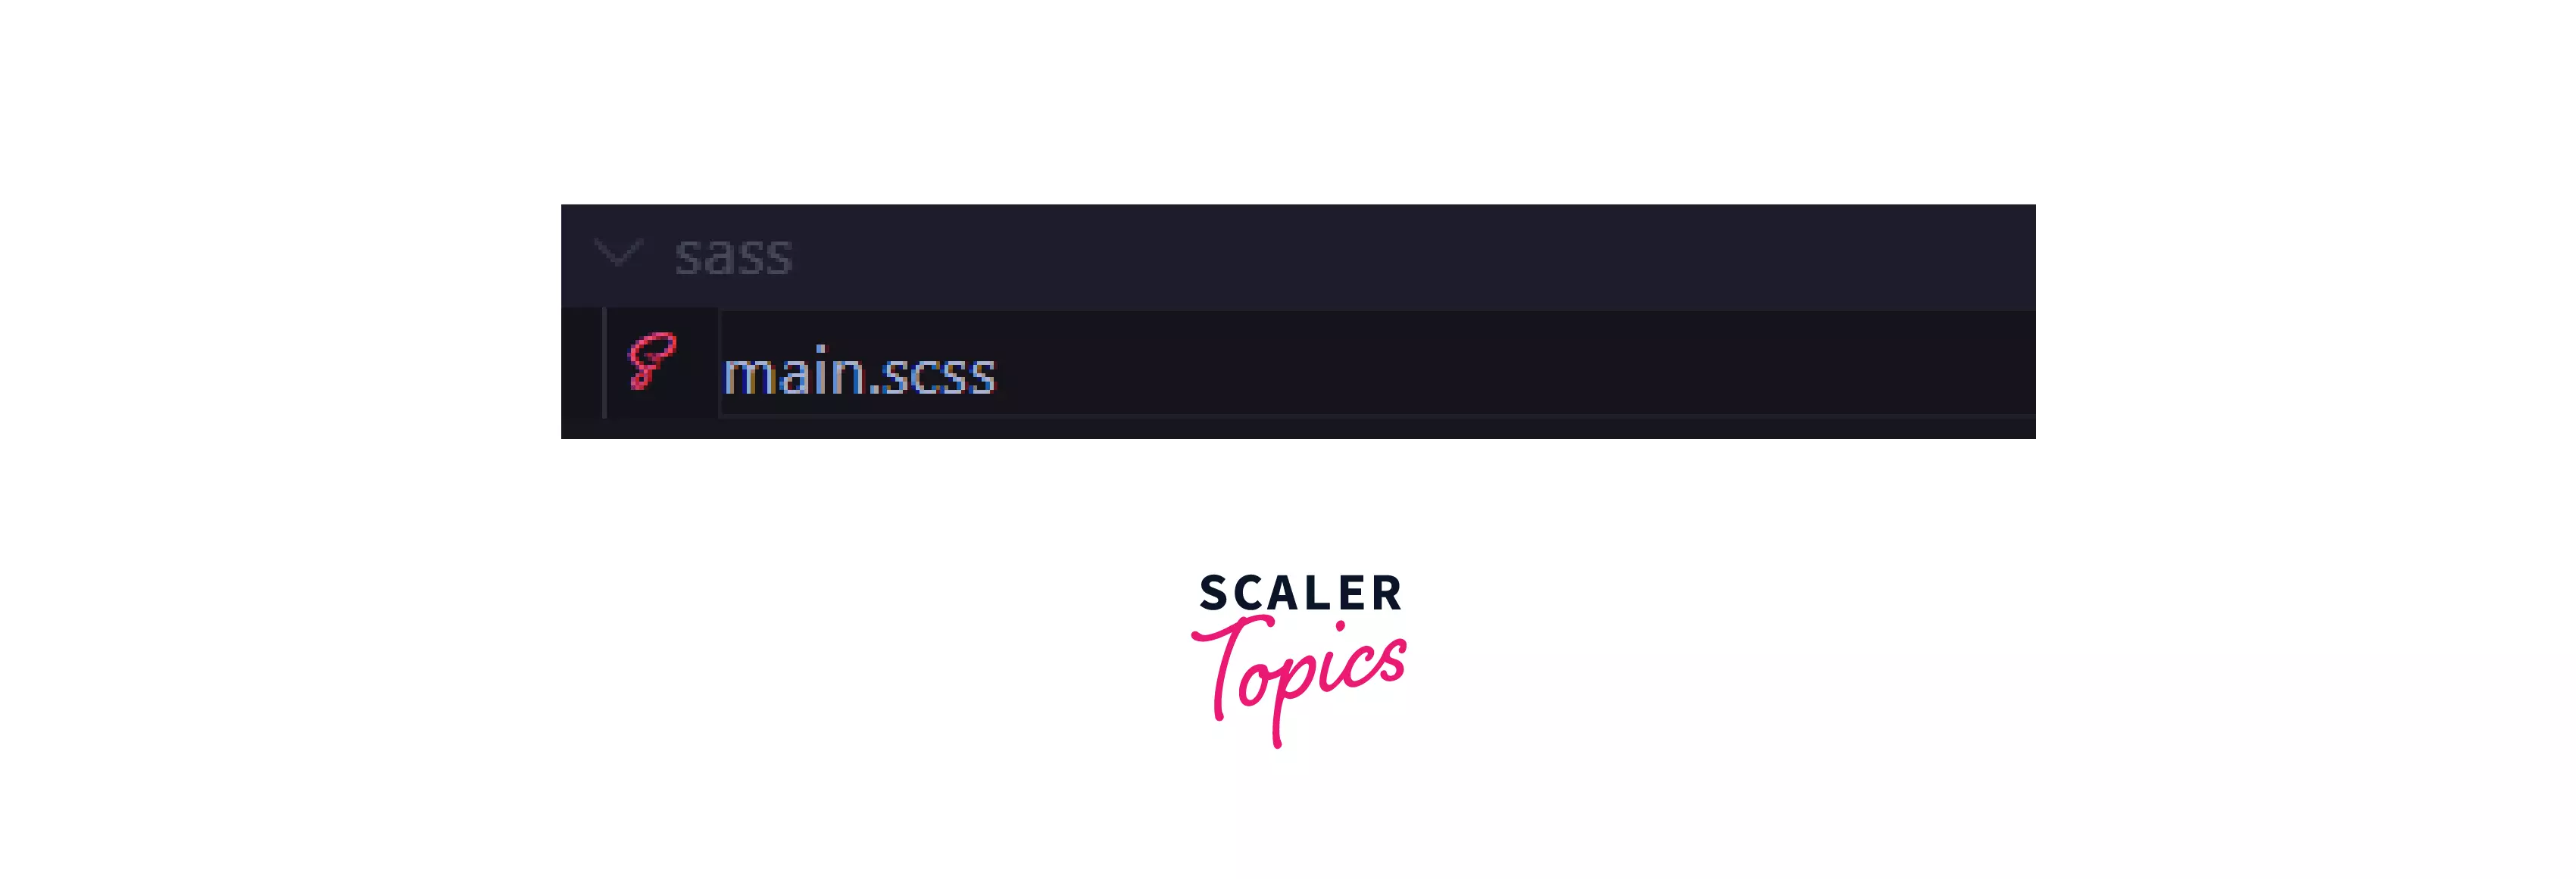
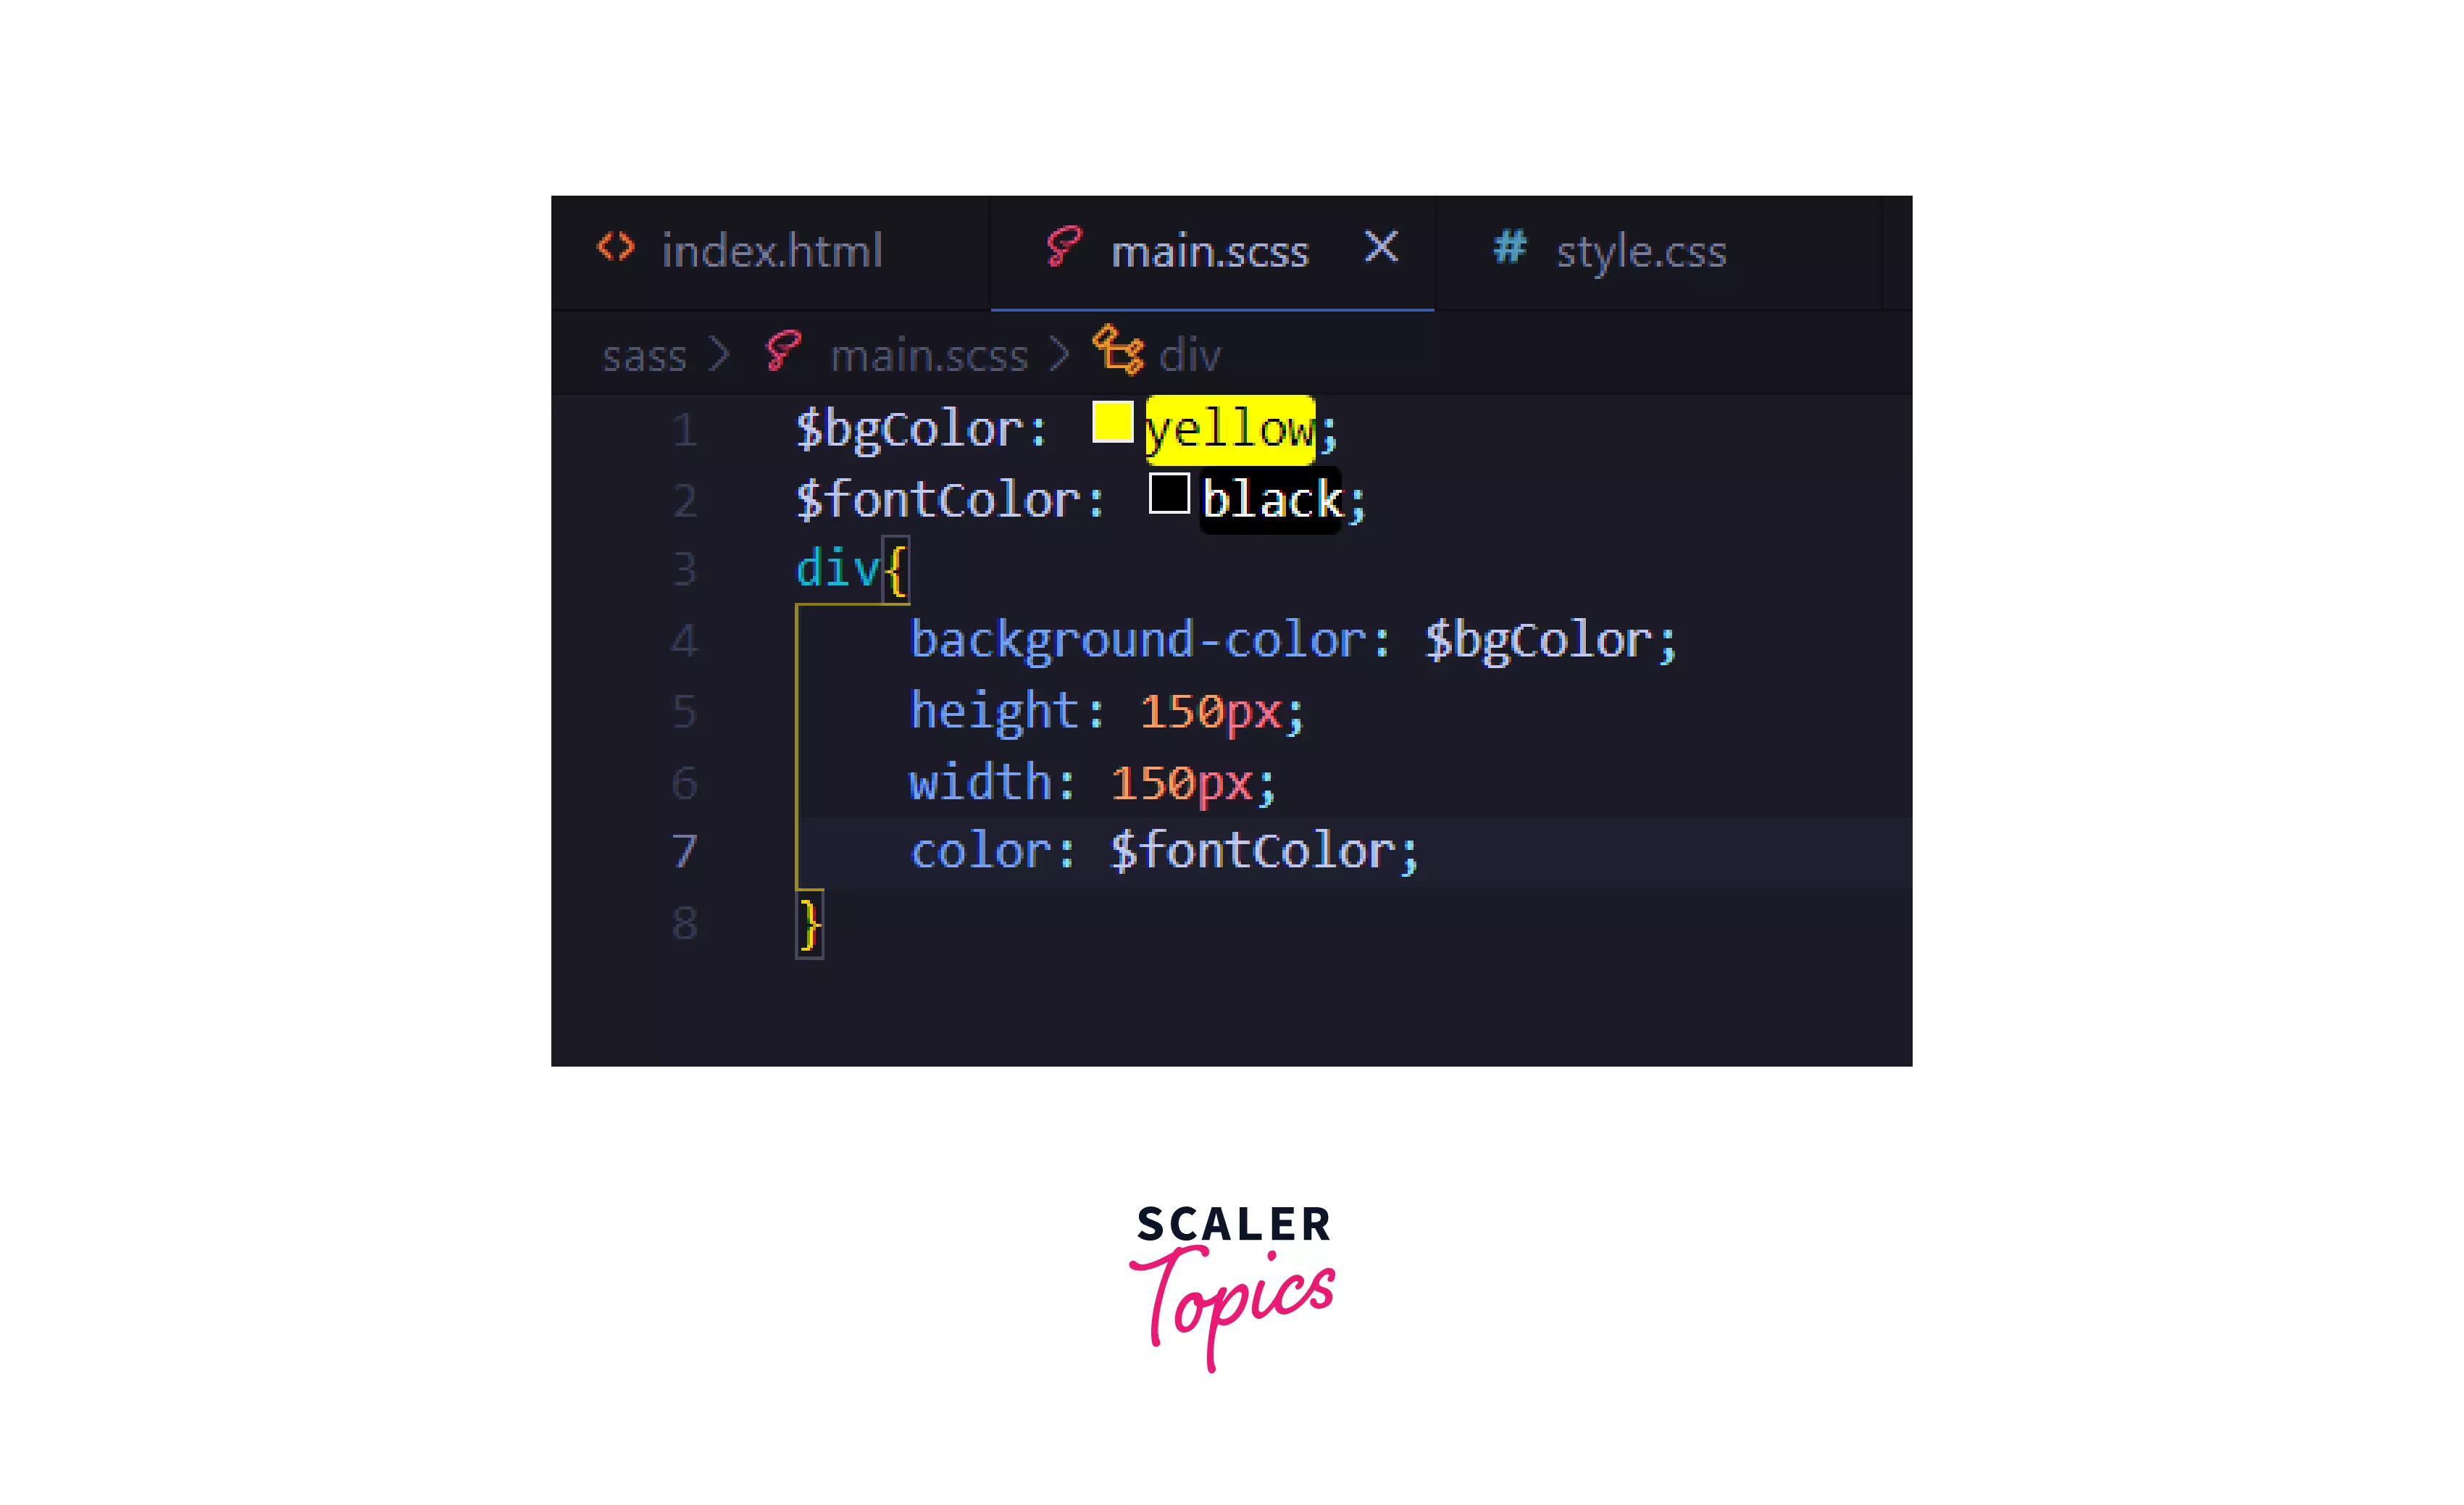
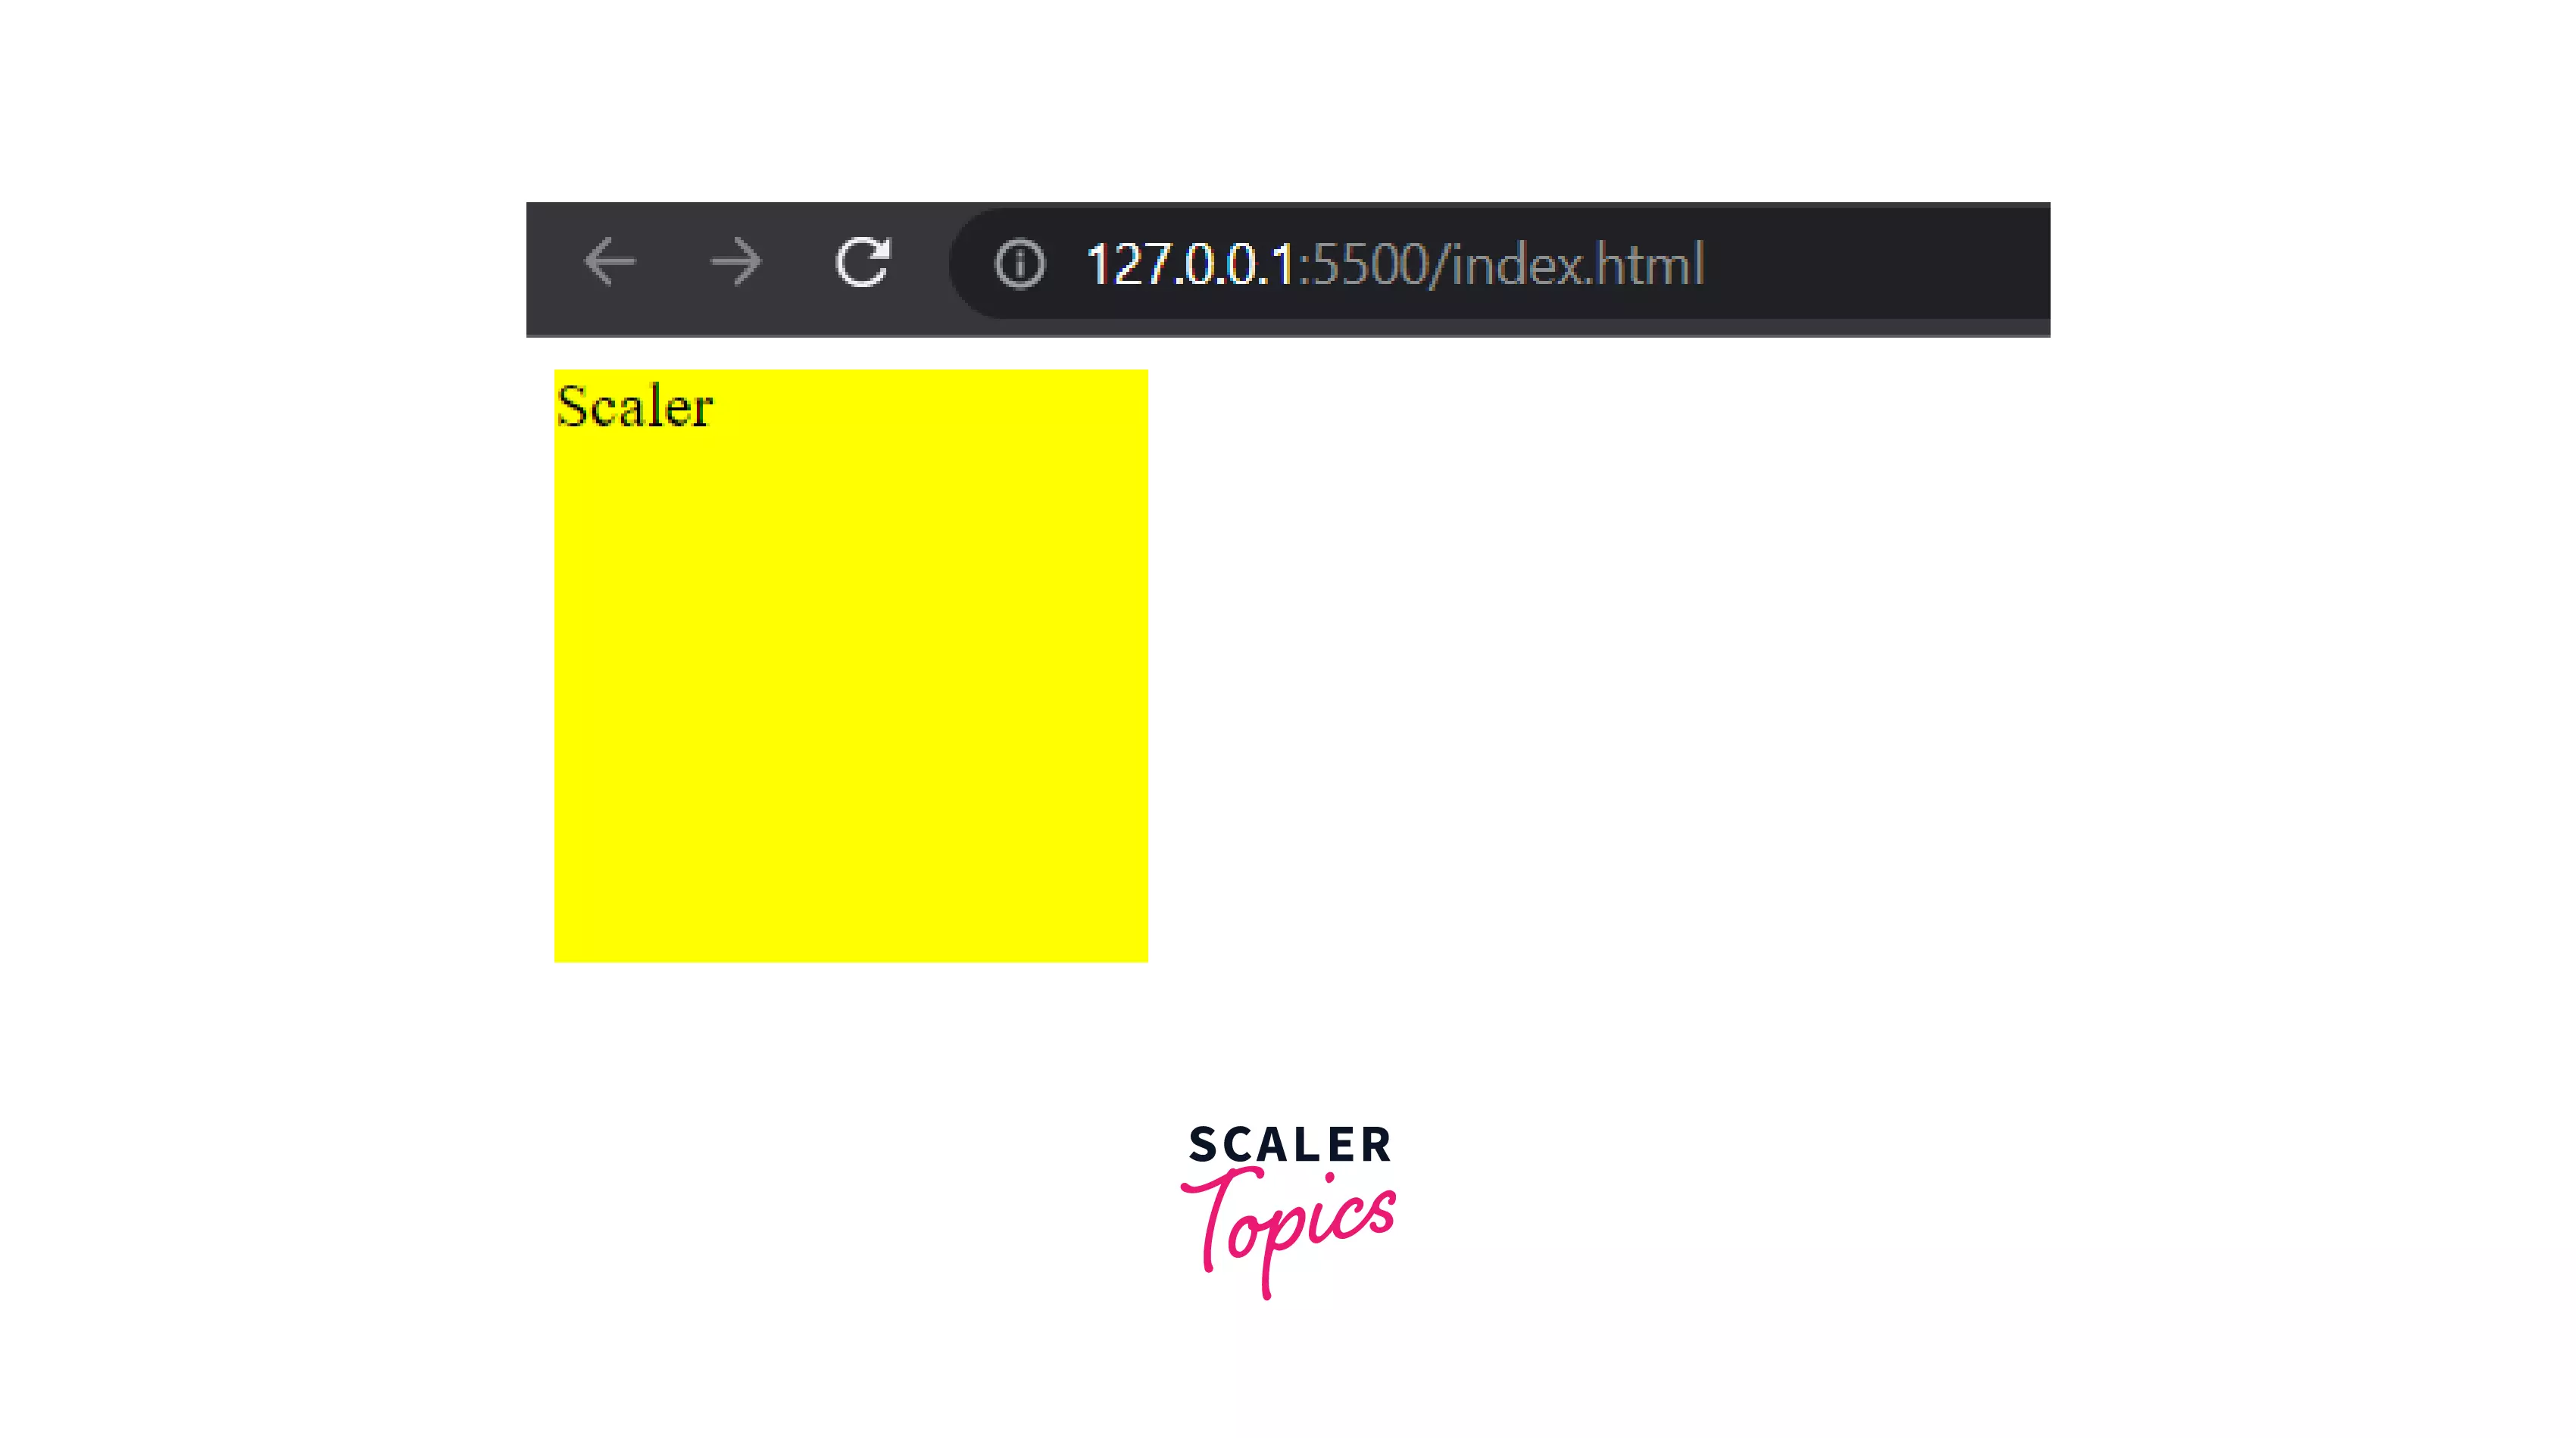
Now, let’s create a main.scss file inside sass subfolder. Consider changing the text color to black while the background color can be yellow.
 Write the code as follows:
-
Okay, now open Command Prompt and navigate to the SassExample folder.

We need to create a package.json file.
A package.json file stores the details about the project, including its package name, version, description, author, and dependencies.
Type this command in the Command Prompt:
This initiates the npm so that you can download dependencies further into your project.
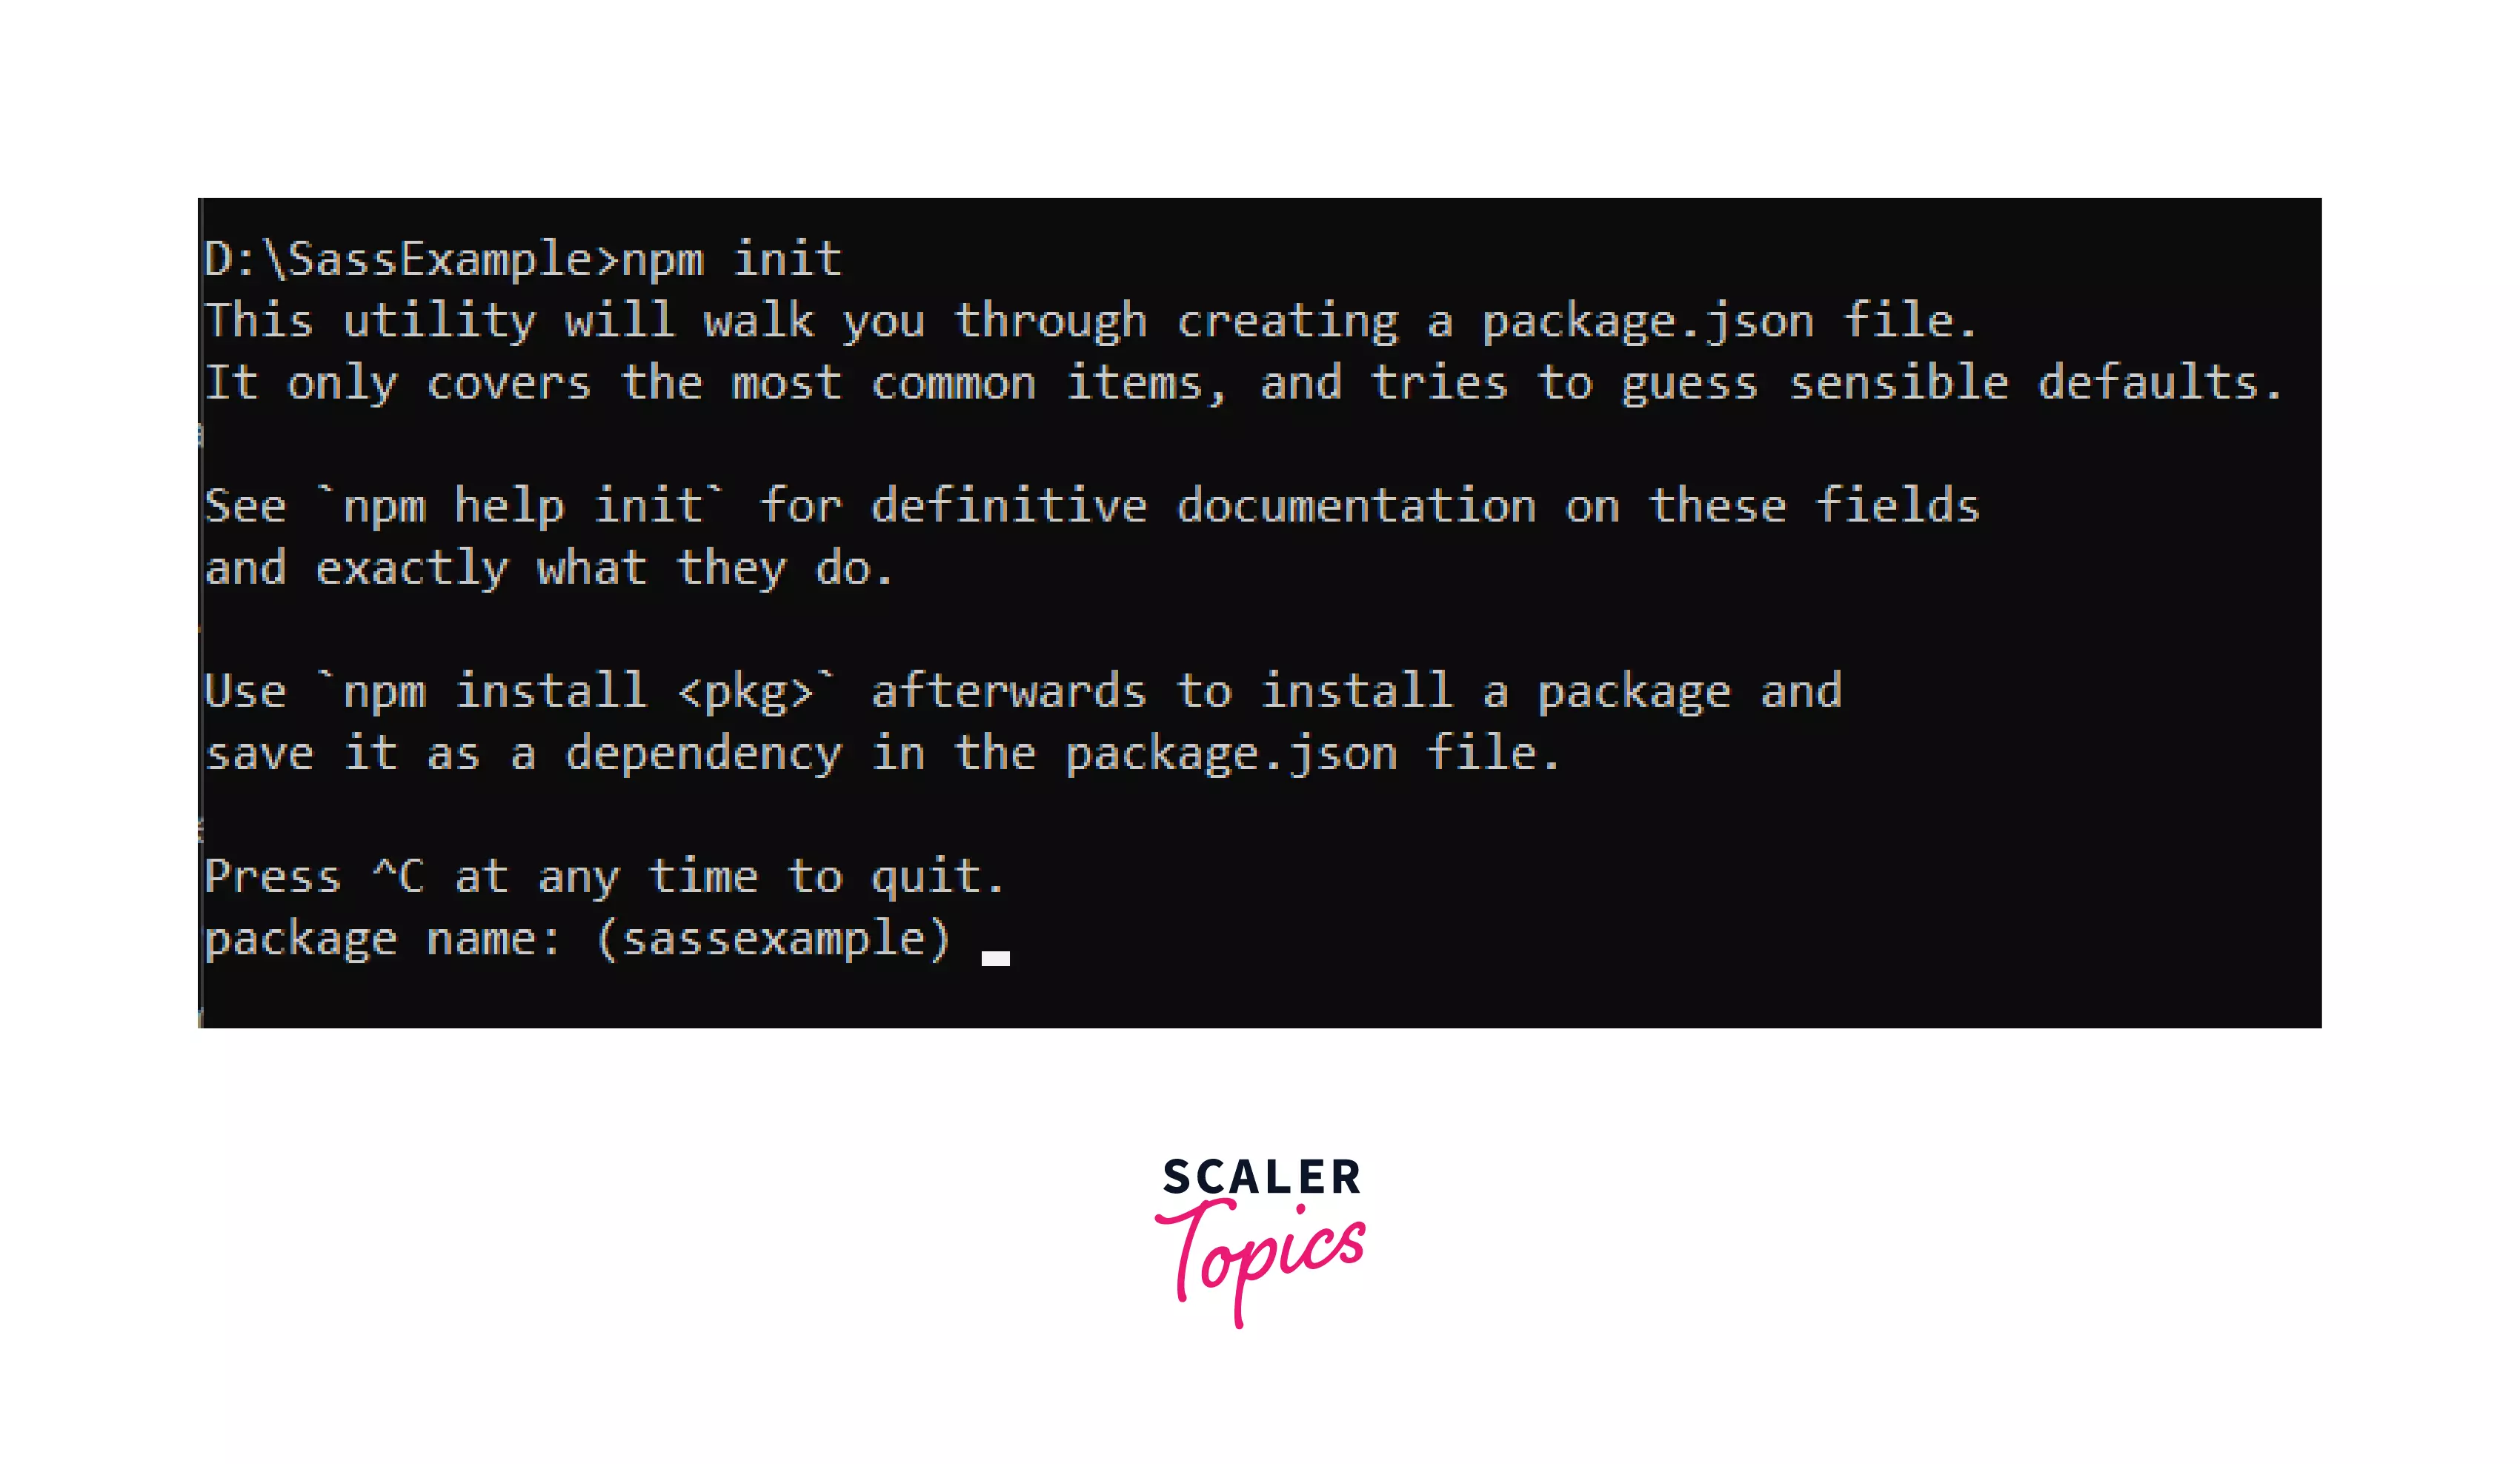
After this, you’ll be presented with a series of information to be filled, which are actually the information about the project you’re working on. You’ll be asked to enter the package name, version, description, author, etc.
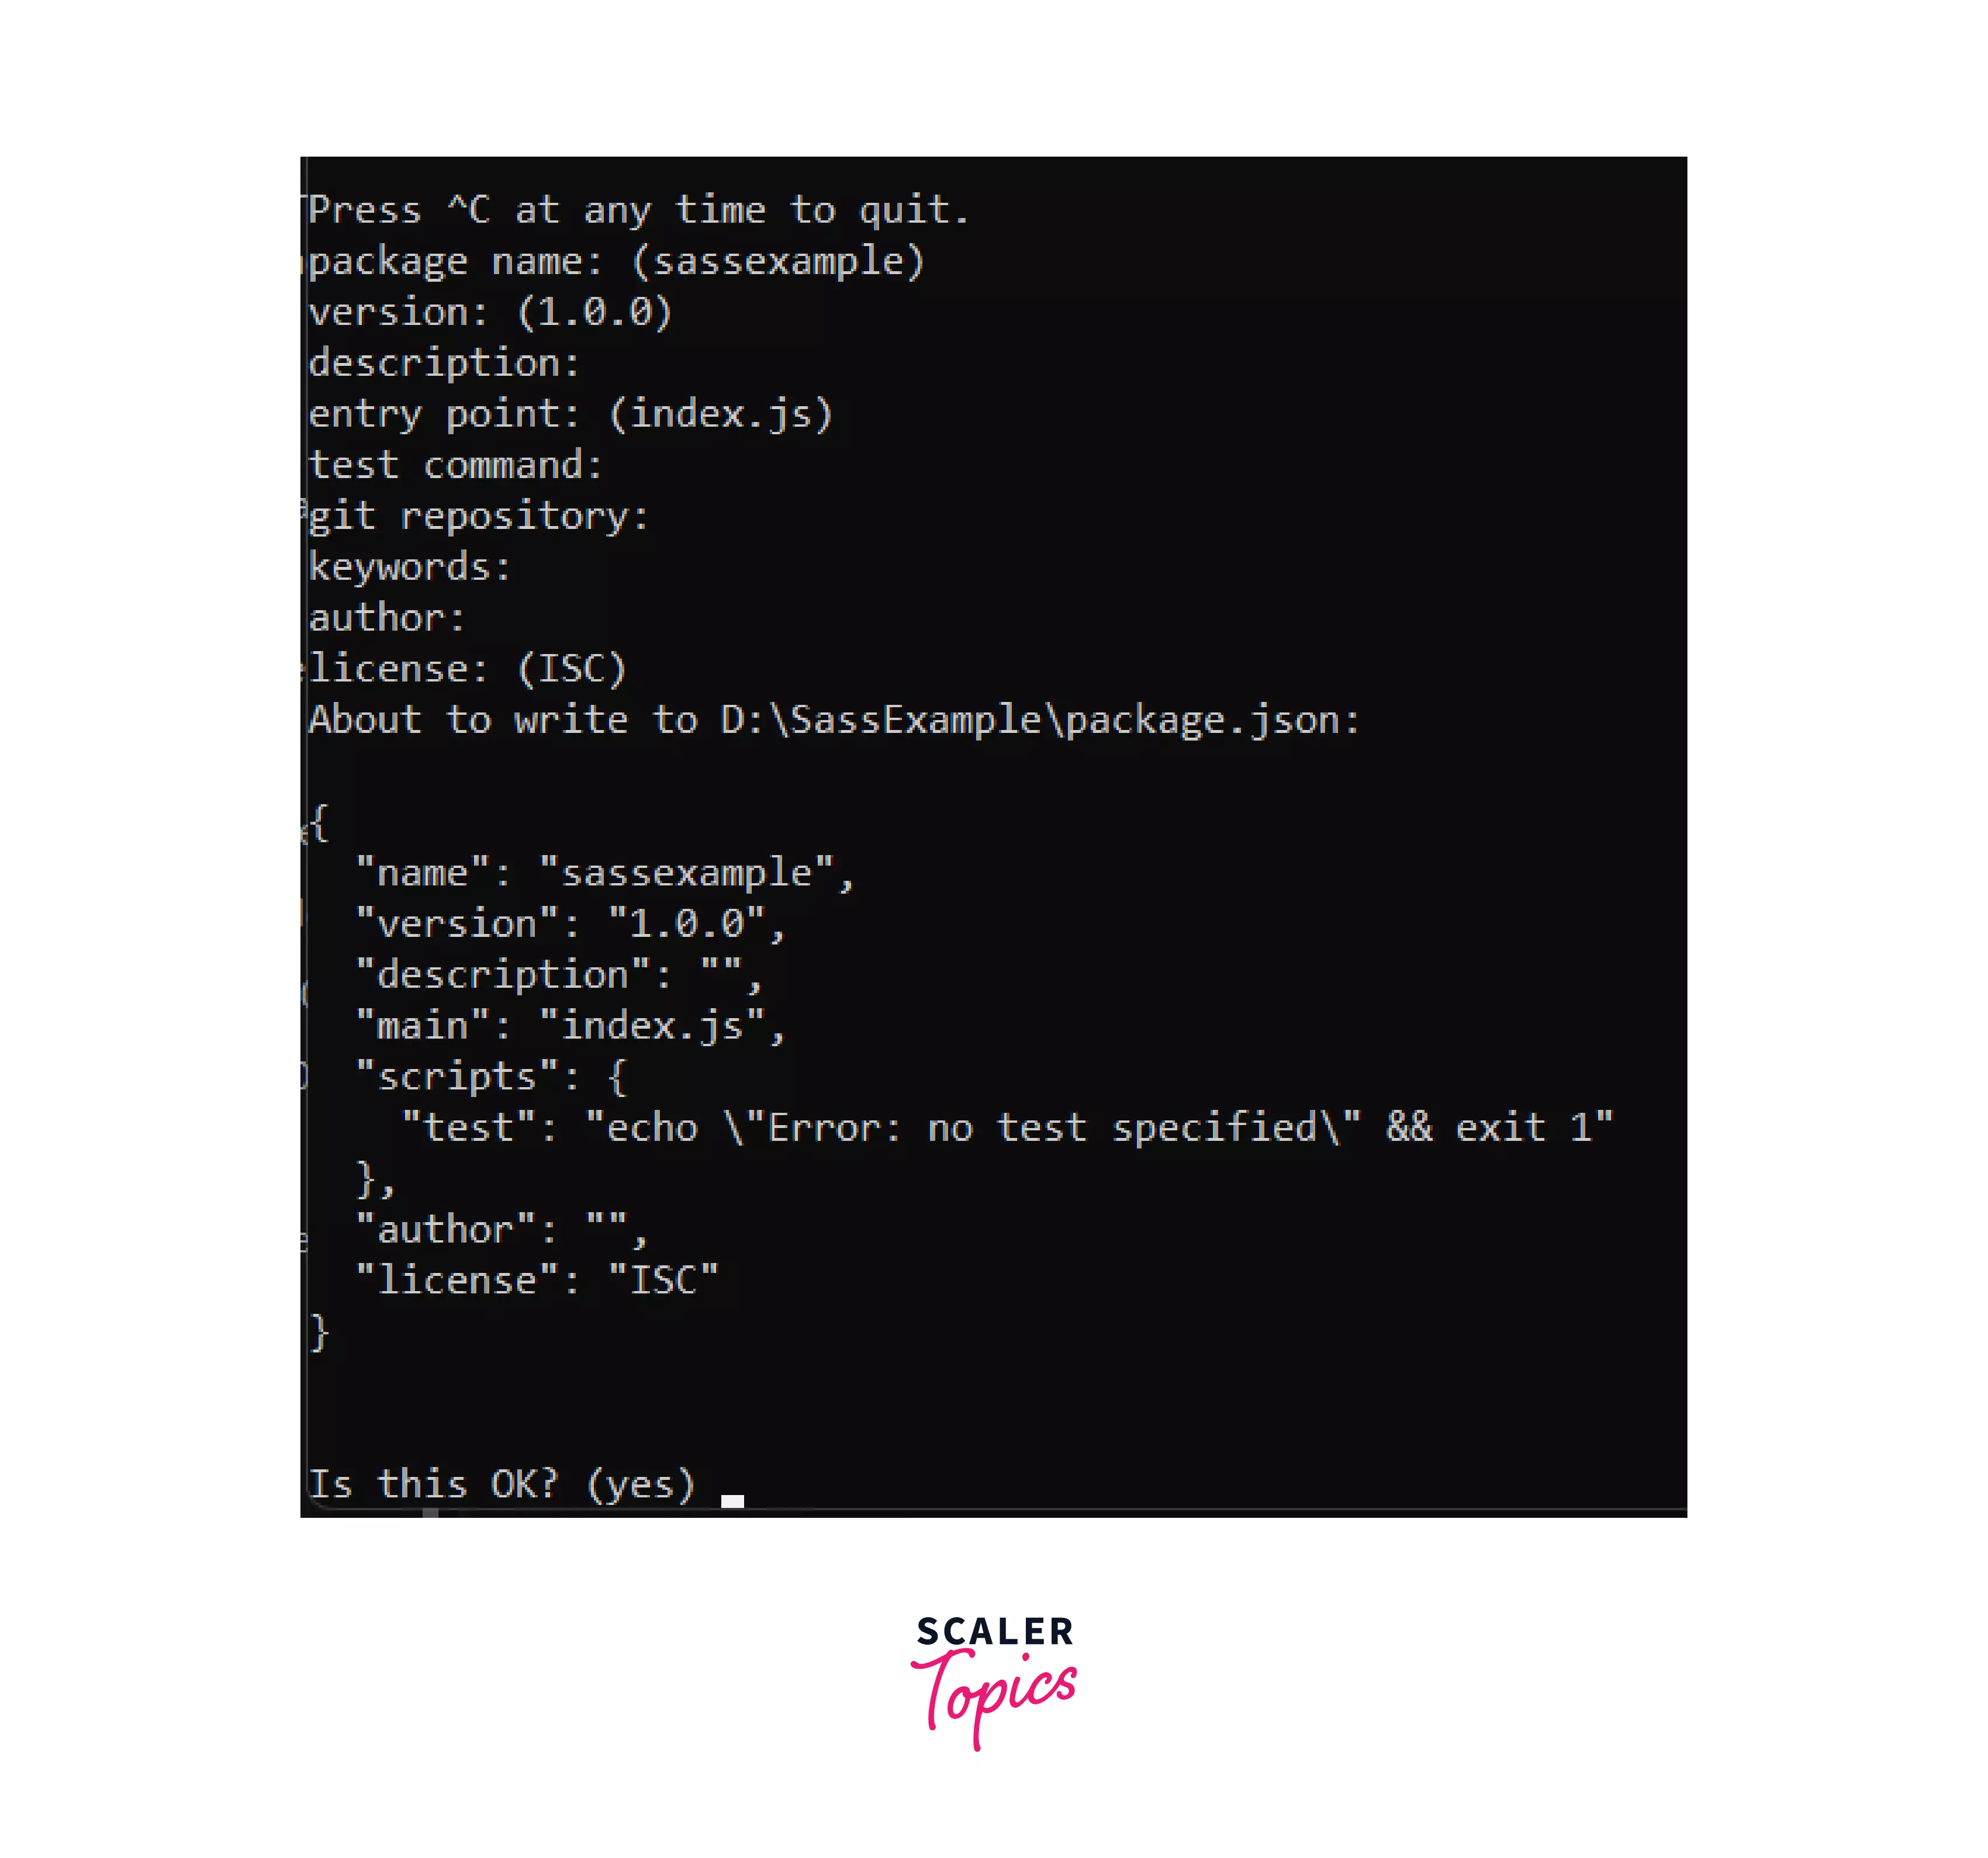
Note: These are meant for the user to change the information for the project. You can simply skip them all by pressing ENTER, and the information given in brackets will be set as default. Press ENTER when asked if it’s OK.
Turn Learning into Career Growth
Install SASS
Now, we’re going to use the install command to install the mentioned packages as in the command given below:
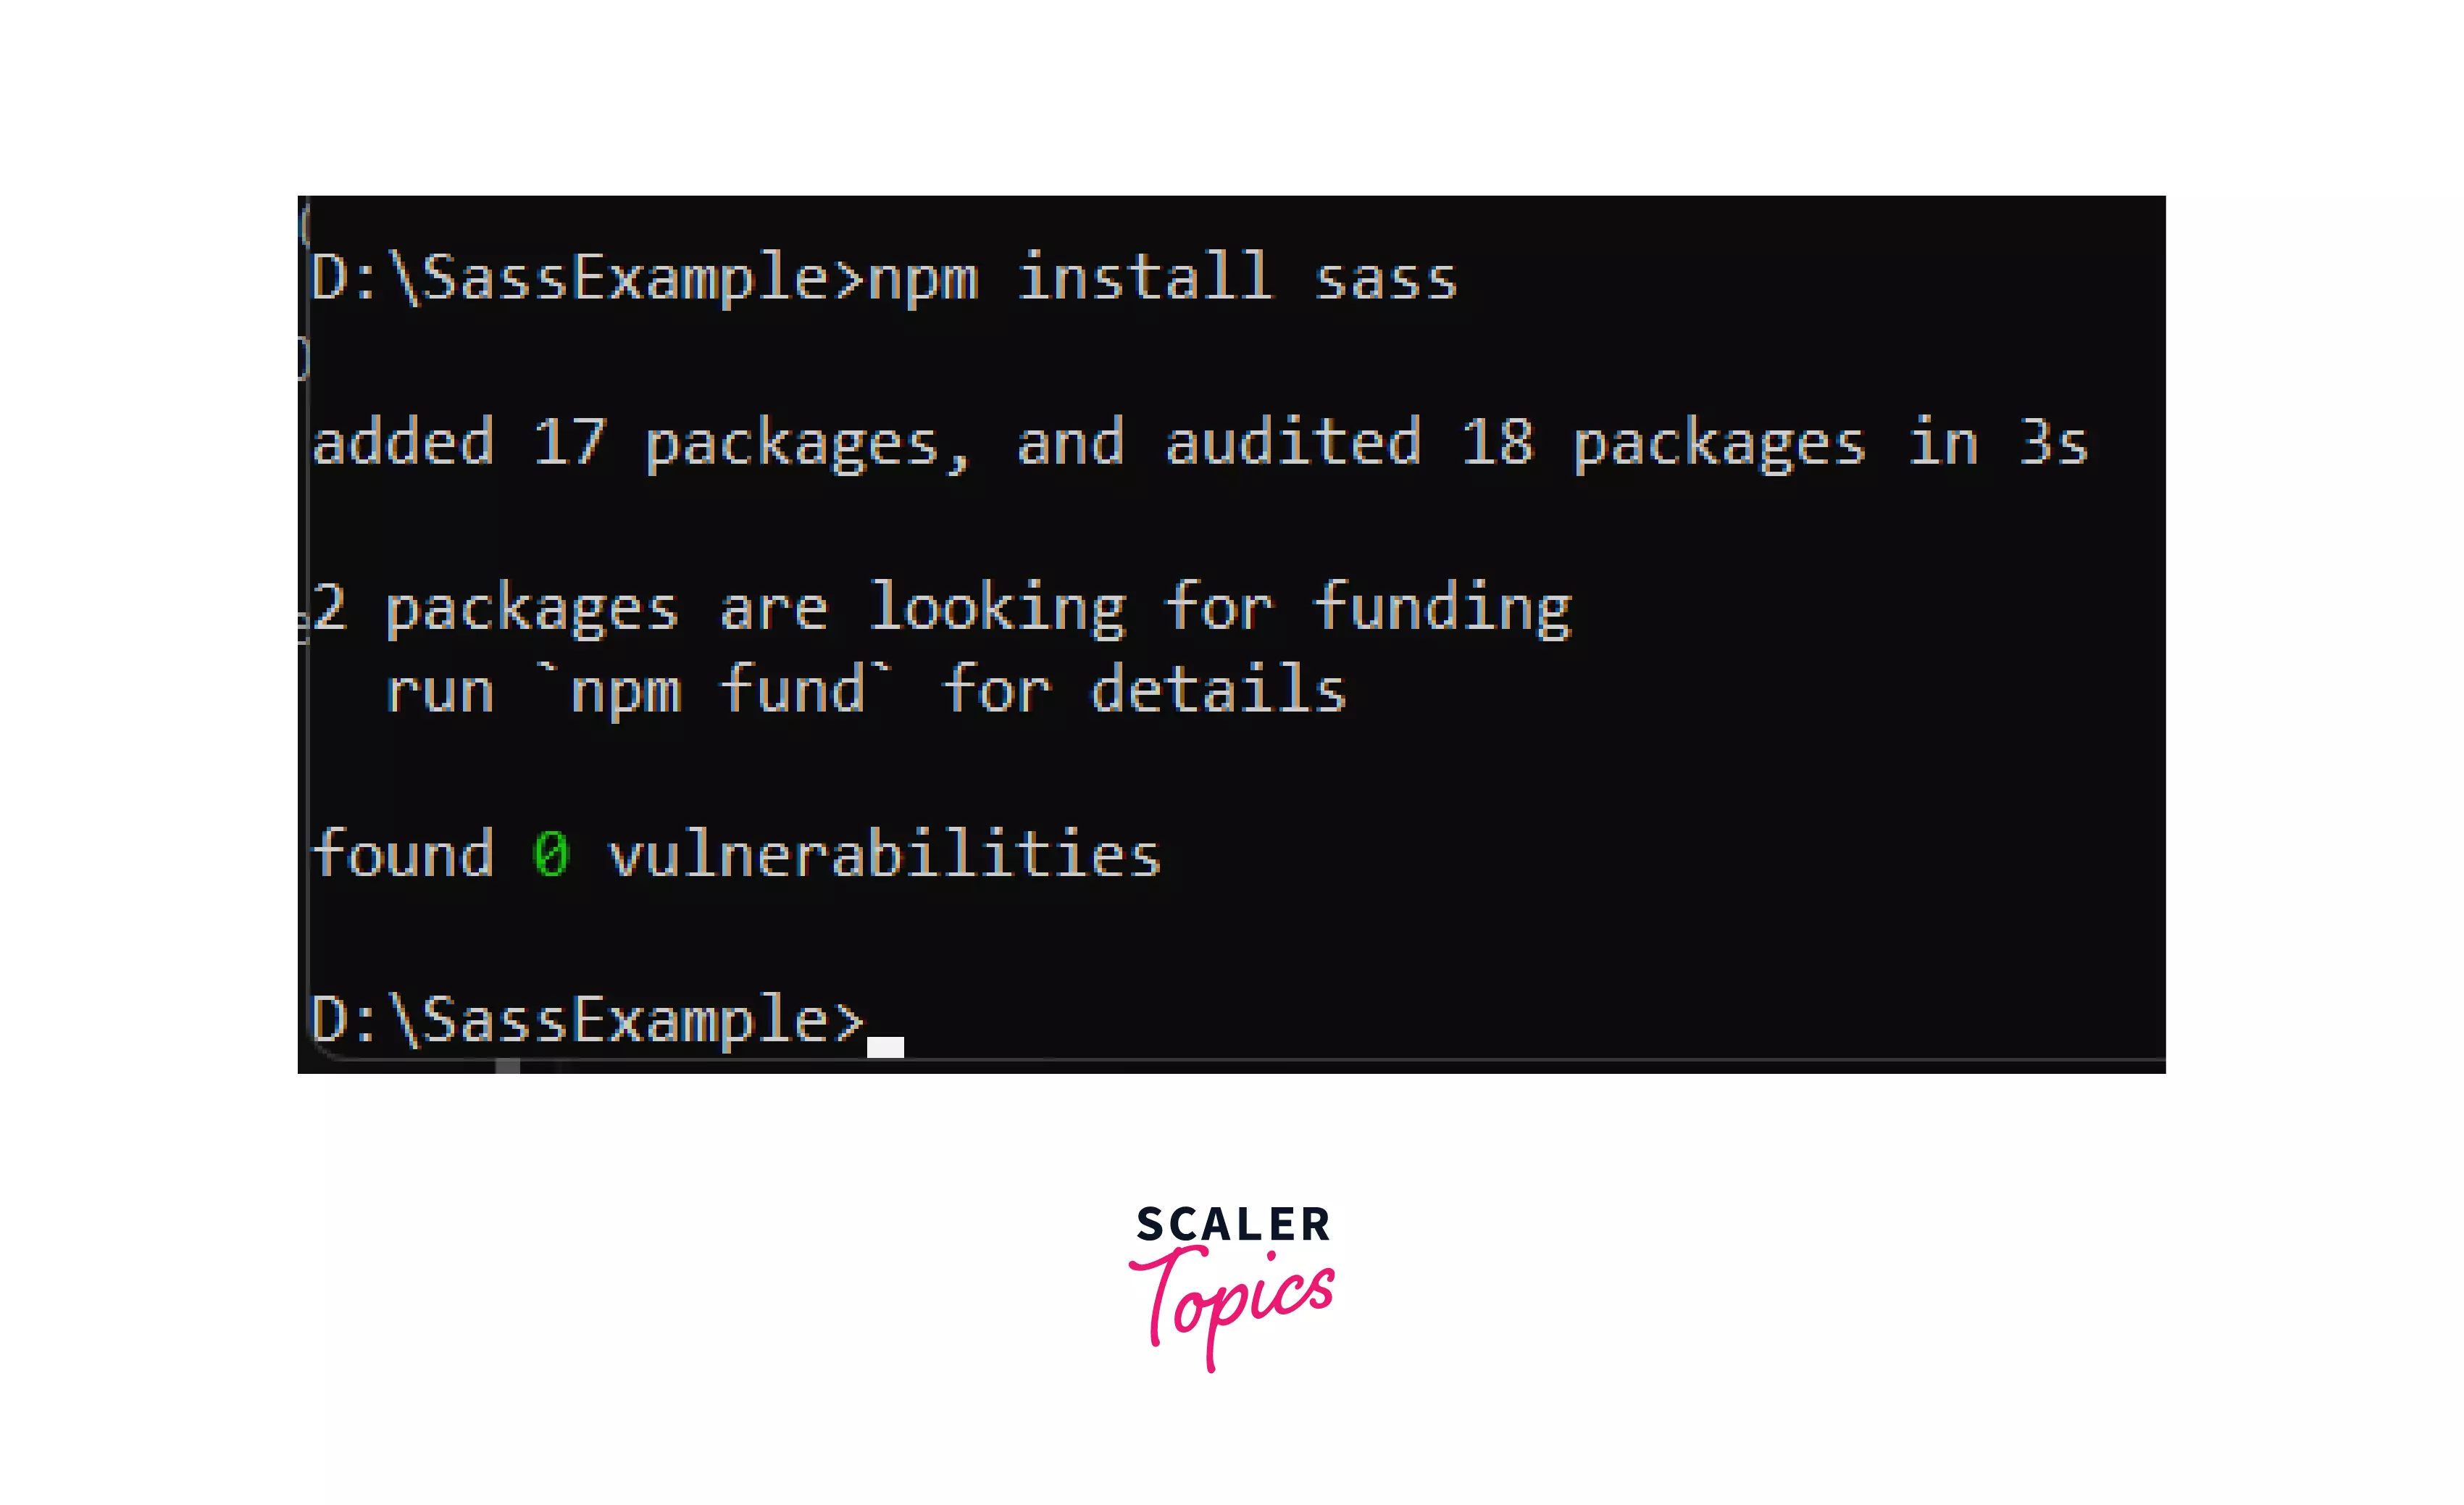
This command will get you the SASS package bundled with all its dependencies.
The SASS package will be installed. You can check its version with the command:
If it has been installed properly, it will show the sass version.
Get Sass Working
A little more work! Open the package.json file. You’ll find something called a scripts object, which contains the necessary script to run SASS. However, it contains a test script, which isn’t for our users yet. So, remove the test script and create a SASS script, put a colon, followed by quotes.
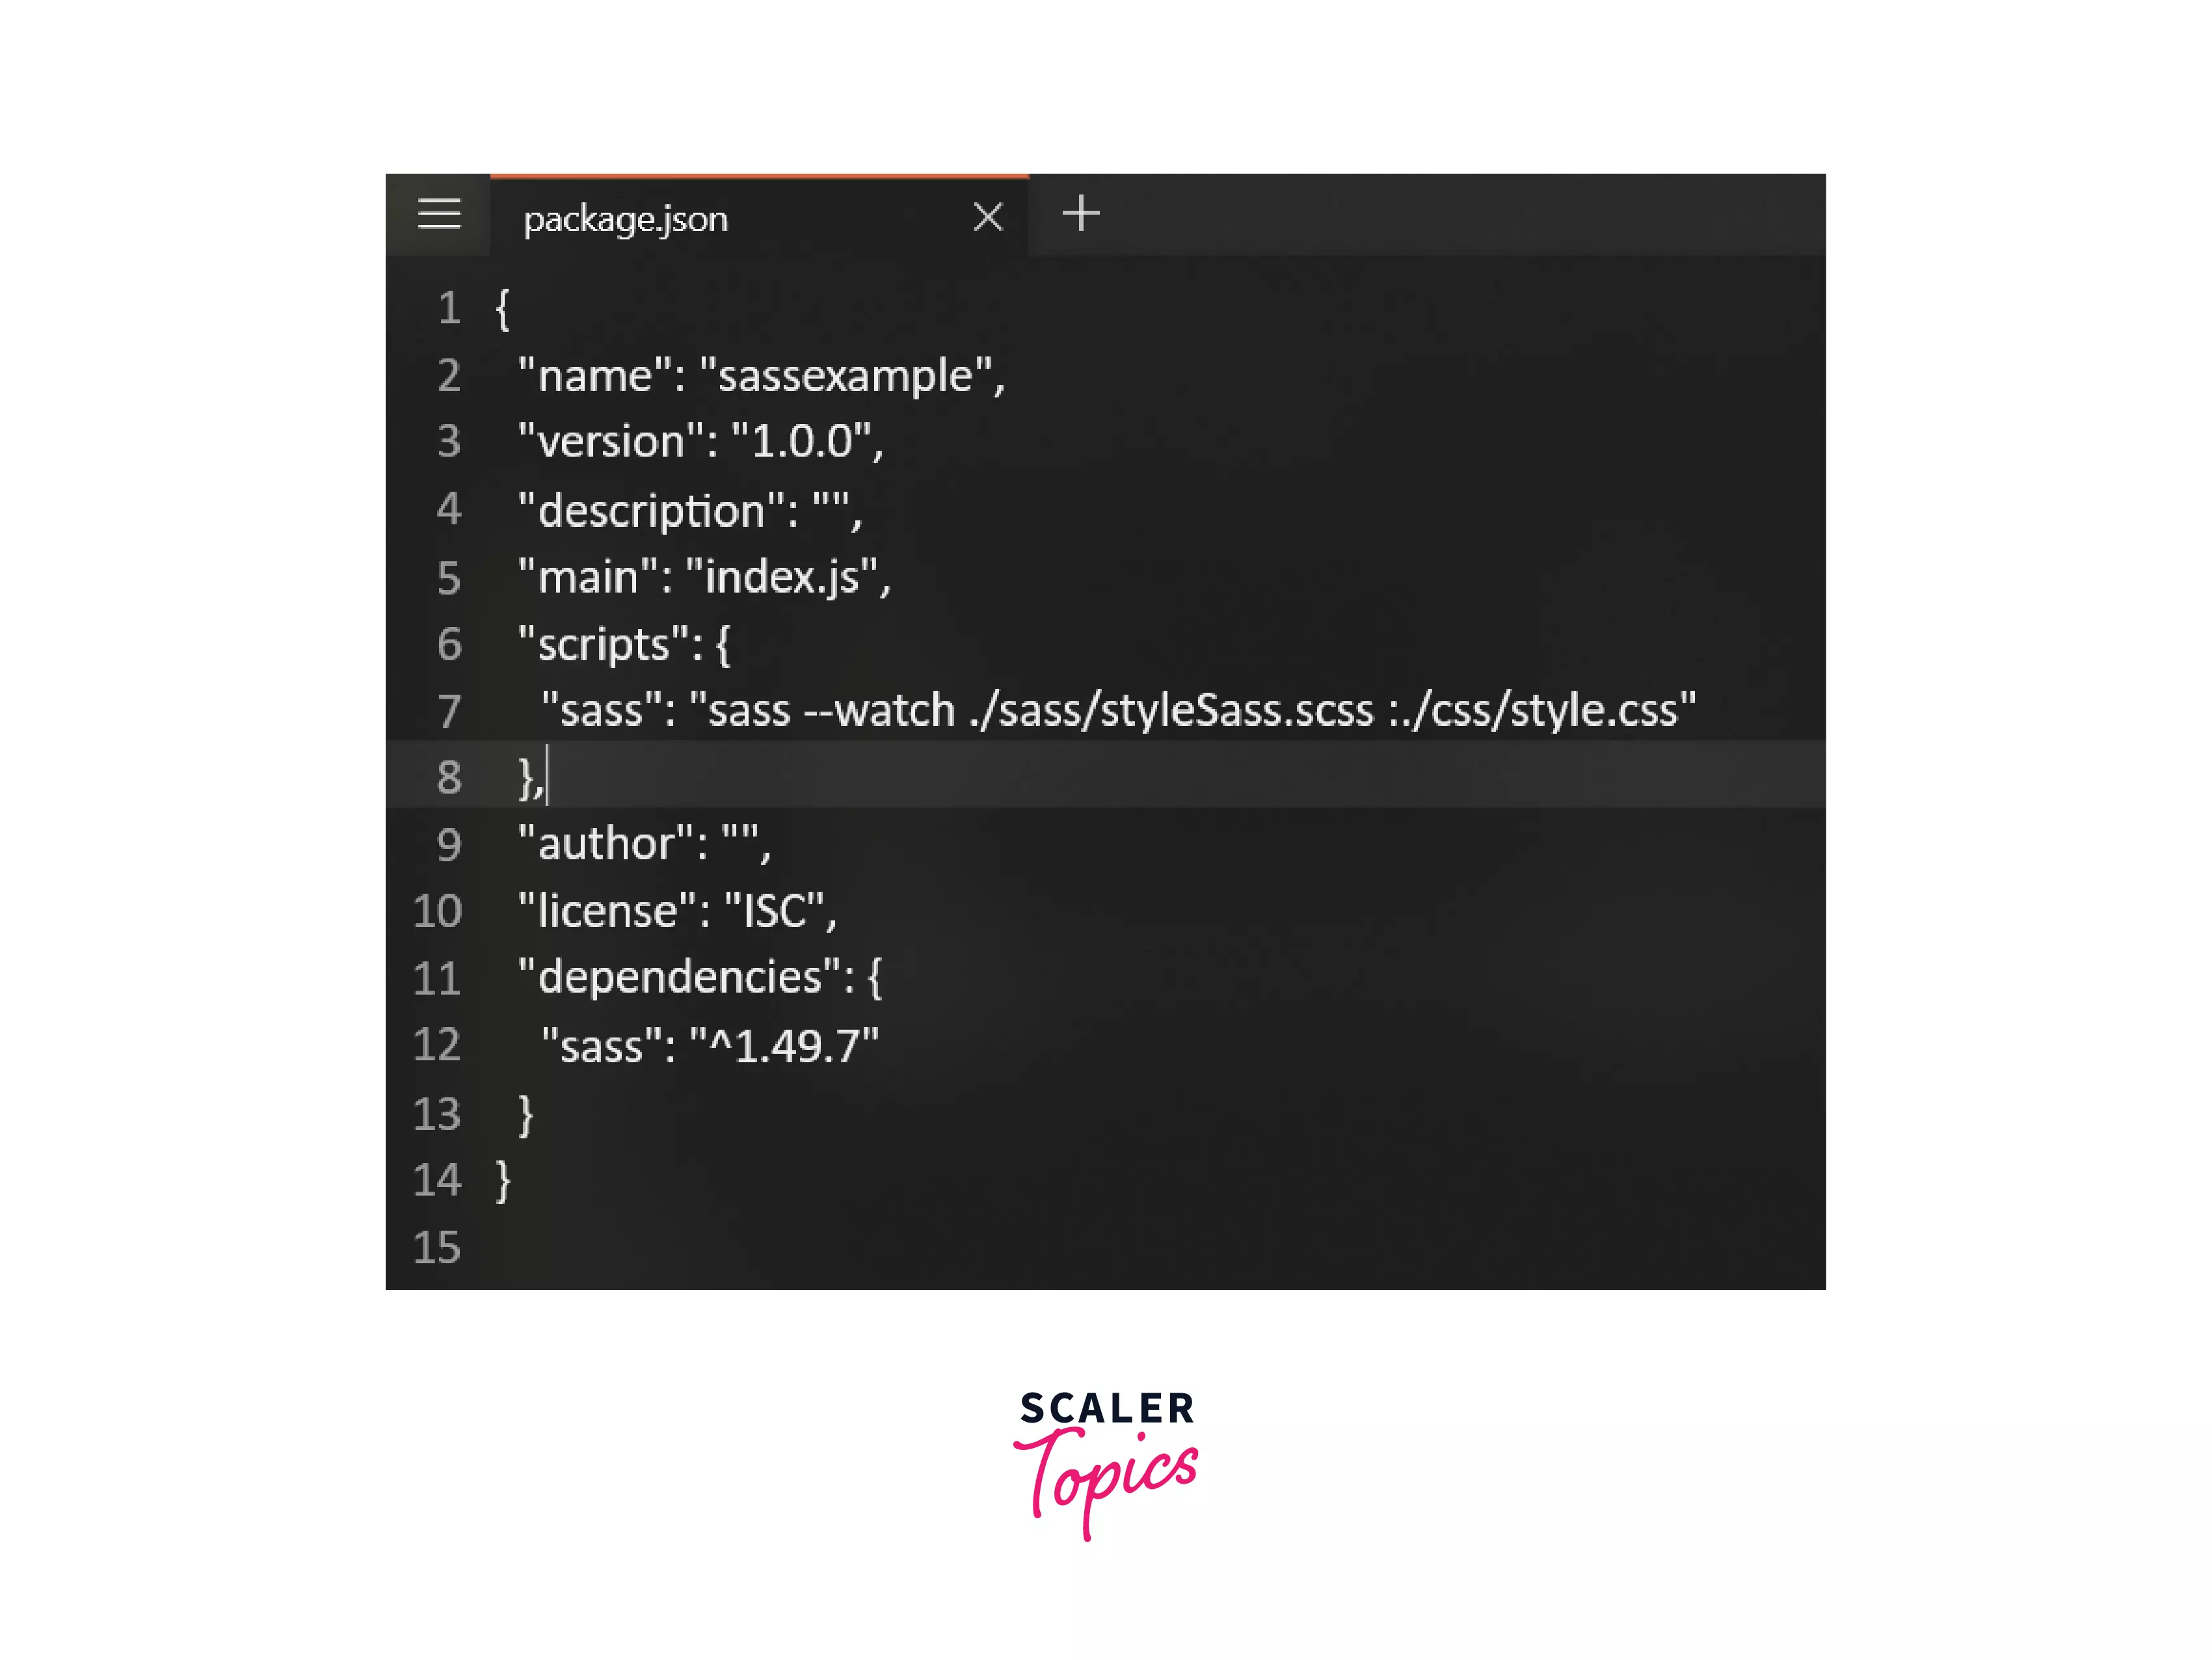 Now, the quotes should contain this:
To give you a glimpse, look at this image:
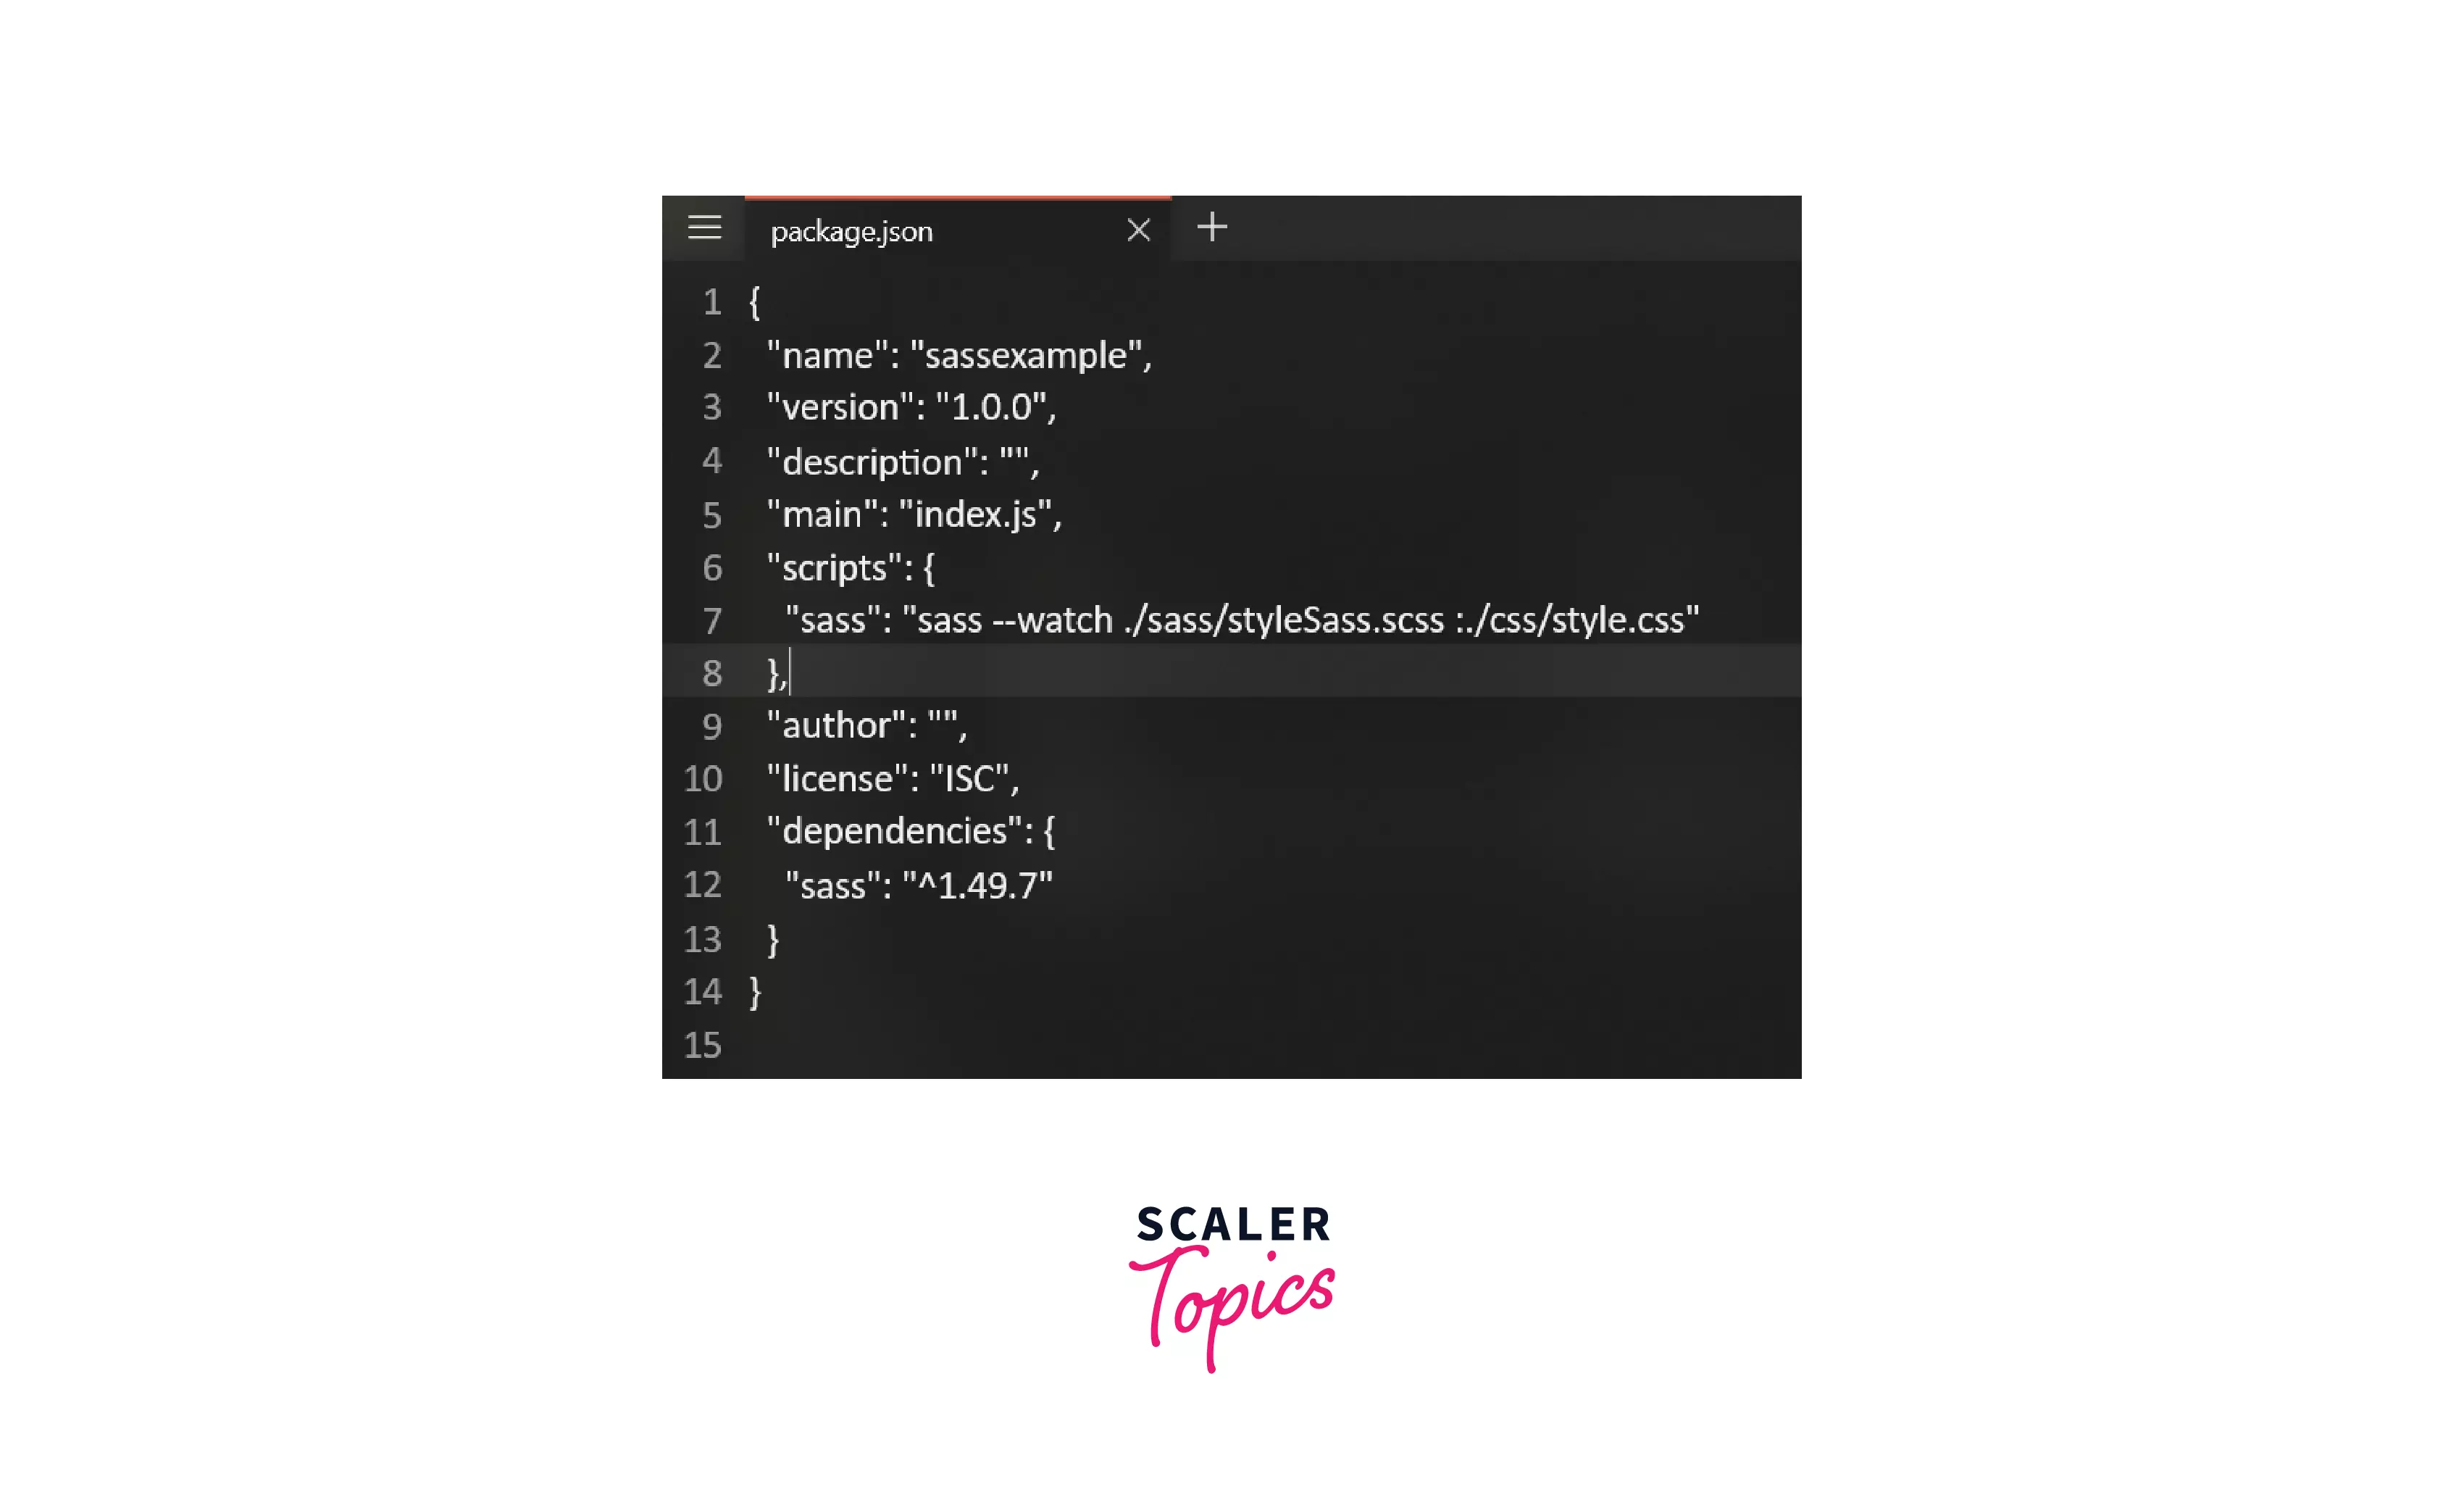
Save the package.json file.
But what’s the purpose of creating a SASS script? Notice that there are two paths given here. The first path is the source path, while the second one is the destination path. With this entire script, the SASS has informed npm of the location for the script to transpile (convert SCSS to CSS file) the source file into the destination file.
Here, --watch is another flag. The above command would work the same without --watch flag, but you’ll have to run it repeatedly whenever any changes are made in the SASS file. --watch indicates that it’s now in watch mode, meaning all the changes will be reflected automatically without needing to compile it several times.
Run the Sass Script
To run the SASS script, use the given command:
run is also a command which would run the indicated script, and if you remember, SASS is the name of the script that we had created.
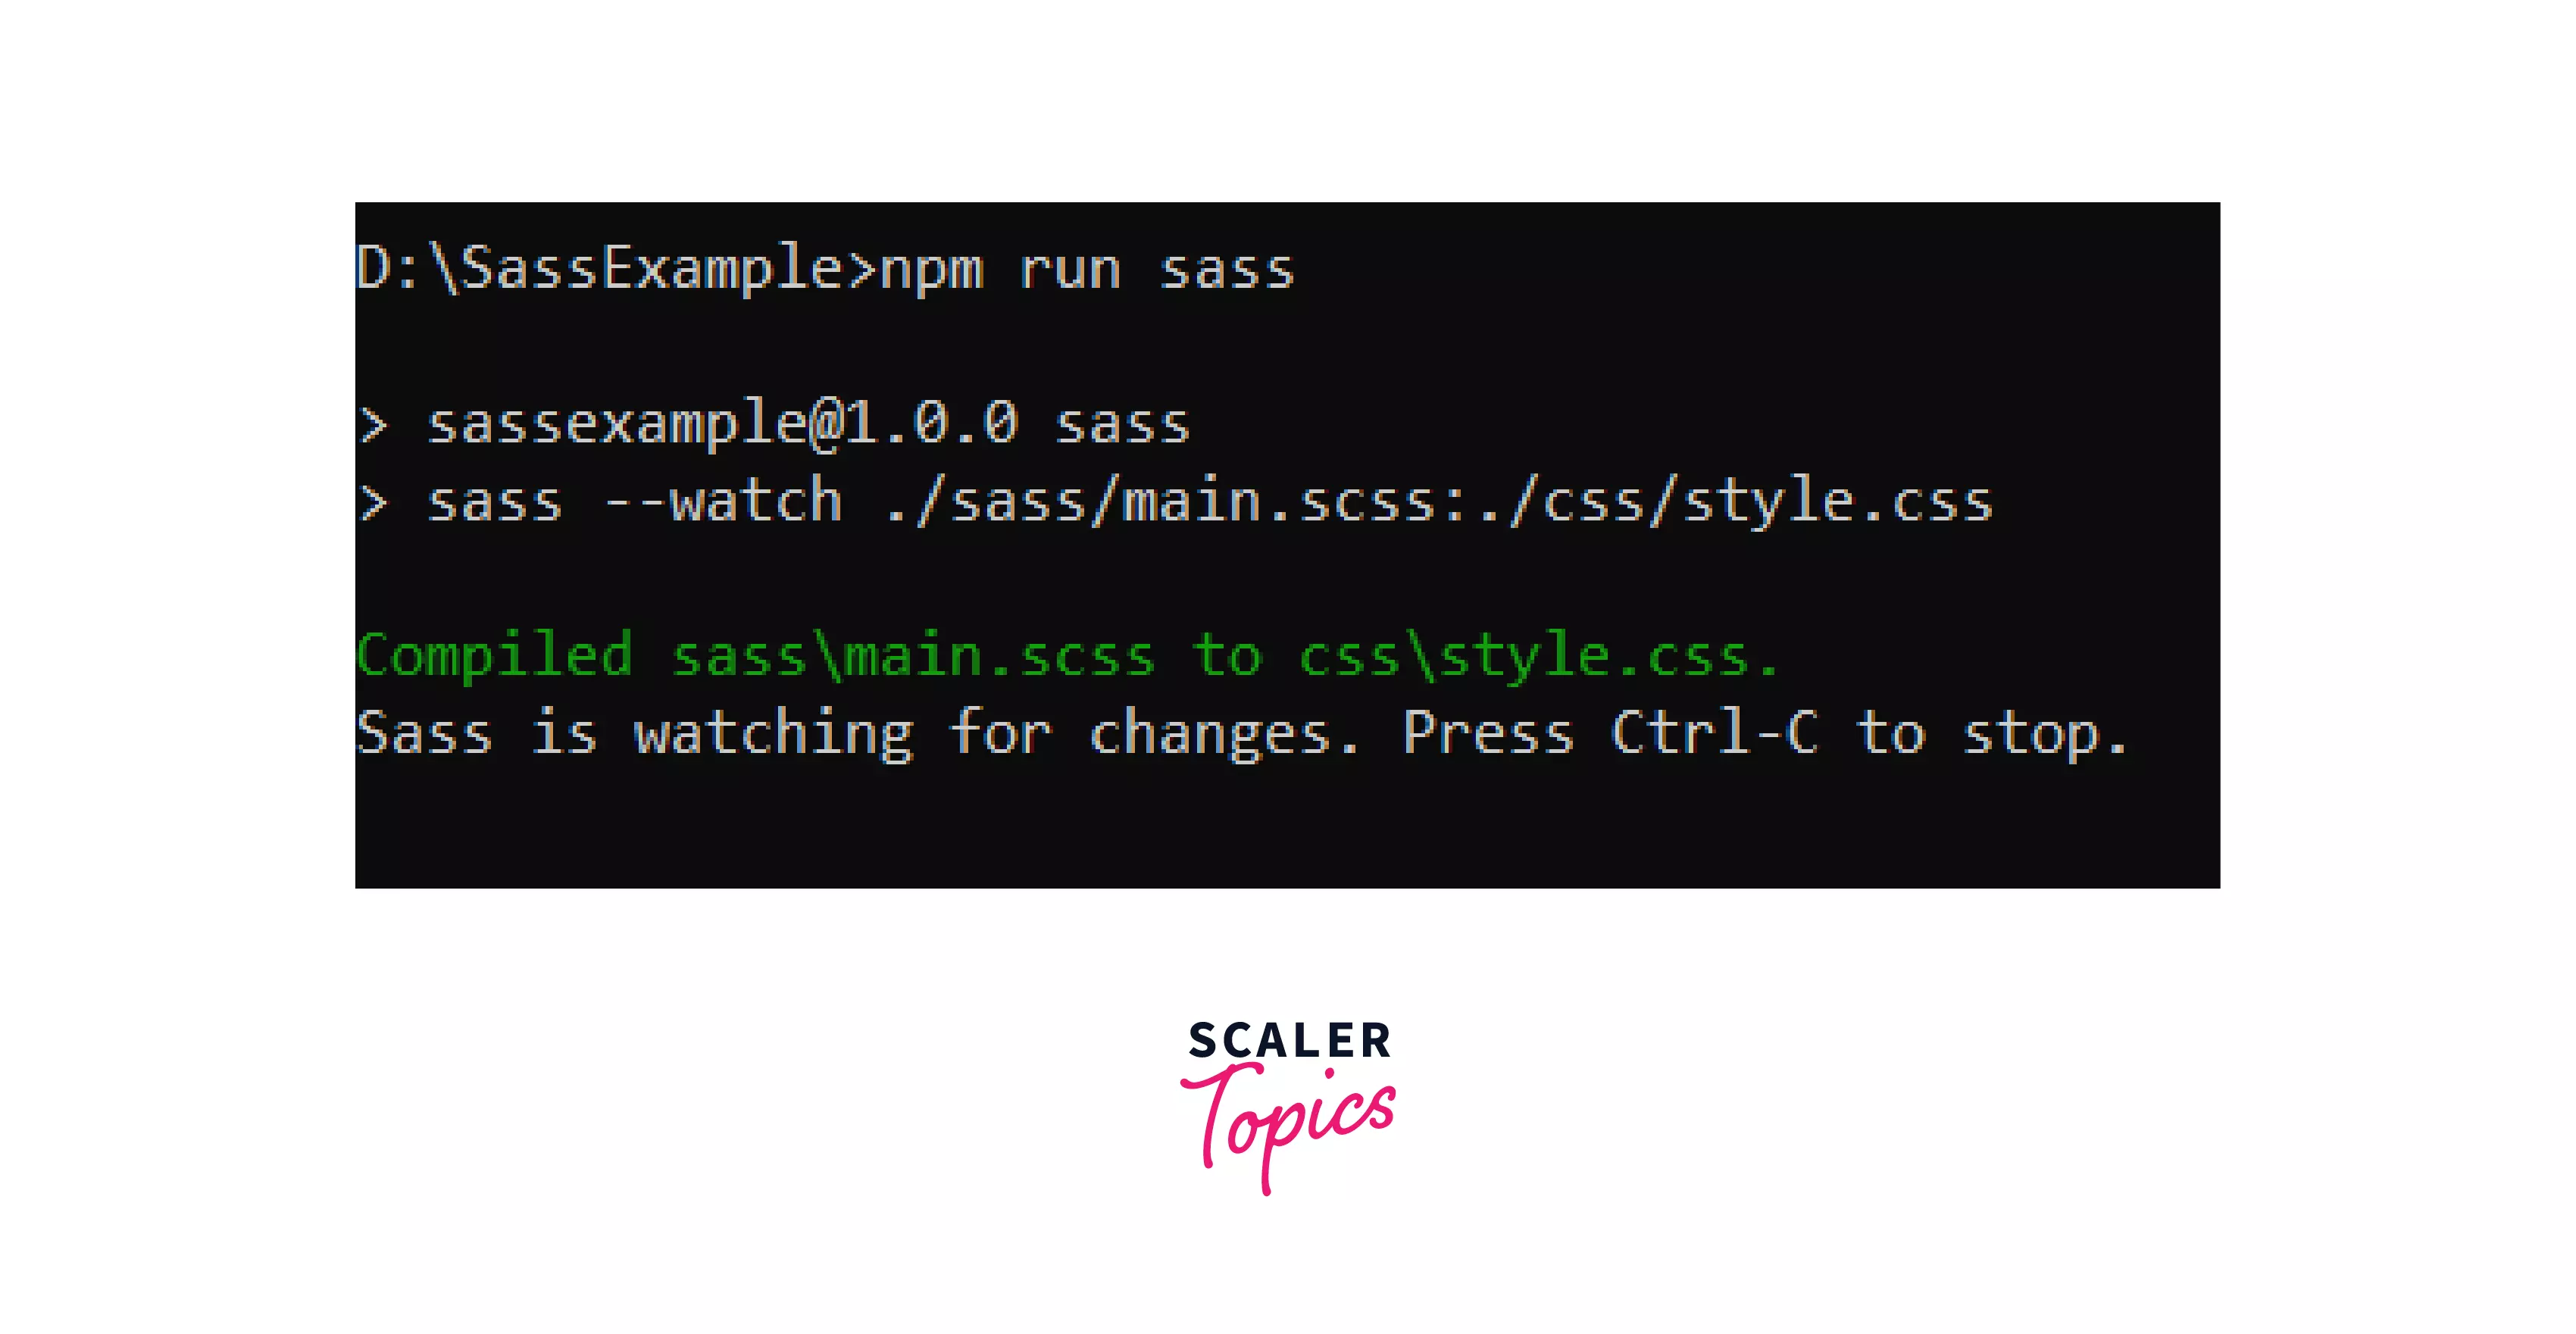
Now, your SASS file will be compiled into a CSS file, and here's the result:
The process continues until you terminate it (either by clicking on the bin icon or by pressing Ctrl+C in the terminal).
Install SASS with Homebrew (Mac OSX and Linux)
Finally, the Apple fanatics! For macOS as well as Linux, Homebrew can be used to install SASS. Although we cannot cover the entire Homebrew installation part. If you’ve done it already, you’re just a step away. Use the command given below:
To make sure the installation is a success, check it using:
Summary
- SASS is a preprocessor that works as an extension of CSS and reduces the unnecessary process of writing the same code repeatedly.
- SASS installation using npm can be done in any folder where you just need to make changes in the package.json file.
- If you want to install SASS on your system, type: npm install sass
- For any OS, you can download it from GitHub, install and add it to your path environment variable.
- SASS installation for macOS and Linux can be done with Homebrew installation, after which you need: brew install sass/sass/sass
- To check the version, run the command: sass –version. The latest version is 1.49.7 (at the time of writing this article).