How to Install Kali Linux in VirtualBox
Kali Linux, a Debian-based distribution, stands out as a premier choice for penetration testing, housing over 600 preinstalled security tools. Its rolling release model guarantees cutting-edge tool updates, bolstered by a vibrant community offering continuous support. While Kali can operate as a Live DVD or be installed directly, it's not ideal for general desktop use due to specific configurations that don't persist post-reboot. Consequently, leveraging Kali within a VirtualBox environment emerges as the preferred method for many. This method offers flexibility, especially when integrating with host systems like Windows, Linux, or macOS. This tutorial elucidates a step-by-step guide, emphasizing Kali's optimal deployment in VirtualBox, ensuring seamless security testing experiences for professionals and enthusiasts alike.
What is the Need for Installing Kali Linux and That Too in a VirtualBox?
So, suppose you are a fresher or installing Kali or any Linux. In that case, you are strongly suggested to try that in a VirtualBox instead of trying it out directly on your system as that might lead to errors and even possible loss of your personal and important information. Whereas VirtualBox provides a virtual environment that protects the machine from such issues. Kali Linux is not the best distribution `for you if you are looking for one to learn the fundamentals of Linux and need an excellent place to start. Instead, you should try out Ubuntu, Mint, or Debian, as Kali Linux is made Specifically for pen-testers and pen-testing.
Prerequisites
To install Kali Linux in a system, there are specific requirements that are directly dependent on how you intend to use the system.
- Suppose you only want to use Kali Linux as a bare Secure Shell (SSH) server with no desktop. It will require 128 MB RAM and 2 GB of disk space.
- And the requirement increases to up to 8 GB of RAM if you plan to use various tools together or a high-requirement software like Burp Suite.
- But considering we have 4 GB of RAM here, we will take at least 1 GB of RAM, a maximum of 2 GB of RAM, and at least 10 GB of disk space for the system's proper functioning.
Never allocate more than 50 % of the RAM to the VirtualBox because that might lead to the host system crashing.
- VirtualBox is only supported in Windows, Mac OS, Solaris, Open Solaris, and some Linux distributions. Before proceeding with this article, please ensure that your operating system supports VirtualBox.
What is VirtualBox?
VirtualBox is open-source software that provides a cross-platform virtualization application. VirtualBox provides a way to interact with multiple Operating systems independent of each other, also called guests, under the main operating system called the host. It provides a virtual version of the memory and processing power to the guest systems. Each virtual machine works as if it is a separate machine and can utilize the host system's resources as provided and controlled by the host system.
Transform Your Career
Choose from our industry-leading programs designed for career success
Modern Software and AI Engineering Program
Master full-stack development with AI integration

Modern Data Science and ML with specialisation in AI
Advanced data science techniques with AI specialization
Advanced AIML with Specialisation in Agentic AI
Deep dive into AIML with focus on Agentic systems
DevOps, Cloud & AI Platform Engineering
Build and manage AI-powered cloud infrastructure
AI Engineering Advanced Certification by IIT-Roorkee
Premier AI engineering certification from IIT-Roorkee
This Provides a Variety of Benefits Such as
-
It saves time; that is if you have used Dual Boot for Kali Linux and Windows and you are using Windows and need some functionality of Kali Linux, you will be required to shut down Windows and then re-login into Kali Linux, but if you use VirtualBox then you can directly use Kali Linux as well as Windows and thus preventing you from switching the windows again and again.
-
It might save significantly high costs of hardware. Much of the time, different machines are used to provide different functionalities. Like few computers are reserved as Servers to provide server functionality, and if that system is not of any other use or is running at a potential that is lower than it can accommodate, then multiple systems can be combined using VirtualBox.
-
Virtual Machines are highly portable; you can easily configure the systems and then export them, and the user can directly import the file to continue using the configuration. The format of the exported file uses Open Virtualization Format or Open Virtualization Application/Appliance.
-
Another Feature of VirtualBox is that VirtualBox can run on 32-bit and 64-bit hosts, and the guests can be 16-, 32- and 64-bit ones. So, if you have a 32-bit host and you want to use the 64-bit application, you can use VirtualBox. You should enable hardware virtualization first in the BIOS settings before you install the 64-bit guest OS.
Installing VirtualBox on Windows
In this part, we will cover how to install Kali Linux in VirtualBox.
-
To install the VirtualBox on Windows, Visit the website: https://www.virtualbox.org/wiki/Downloads Choose your appropriate Platform Packages based on your machine.
-
Once downloaded, install the package. In this tutorial, the screenshots attached are from Windows 10 (host), and the version of VirtualBox Installed is VirtualBox 6.1.38
Follow along the steps:-
-
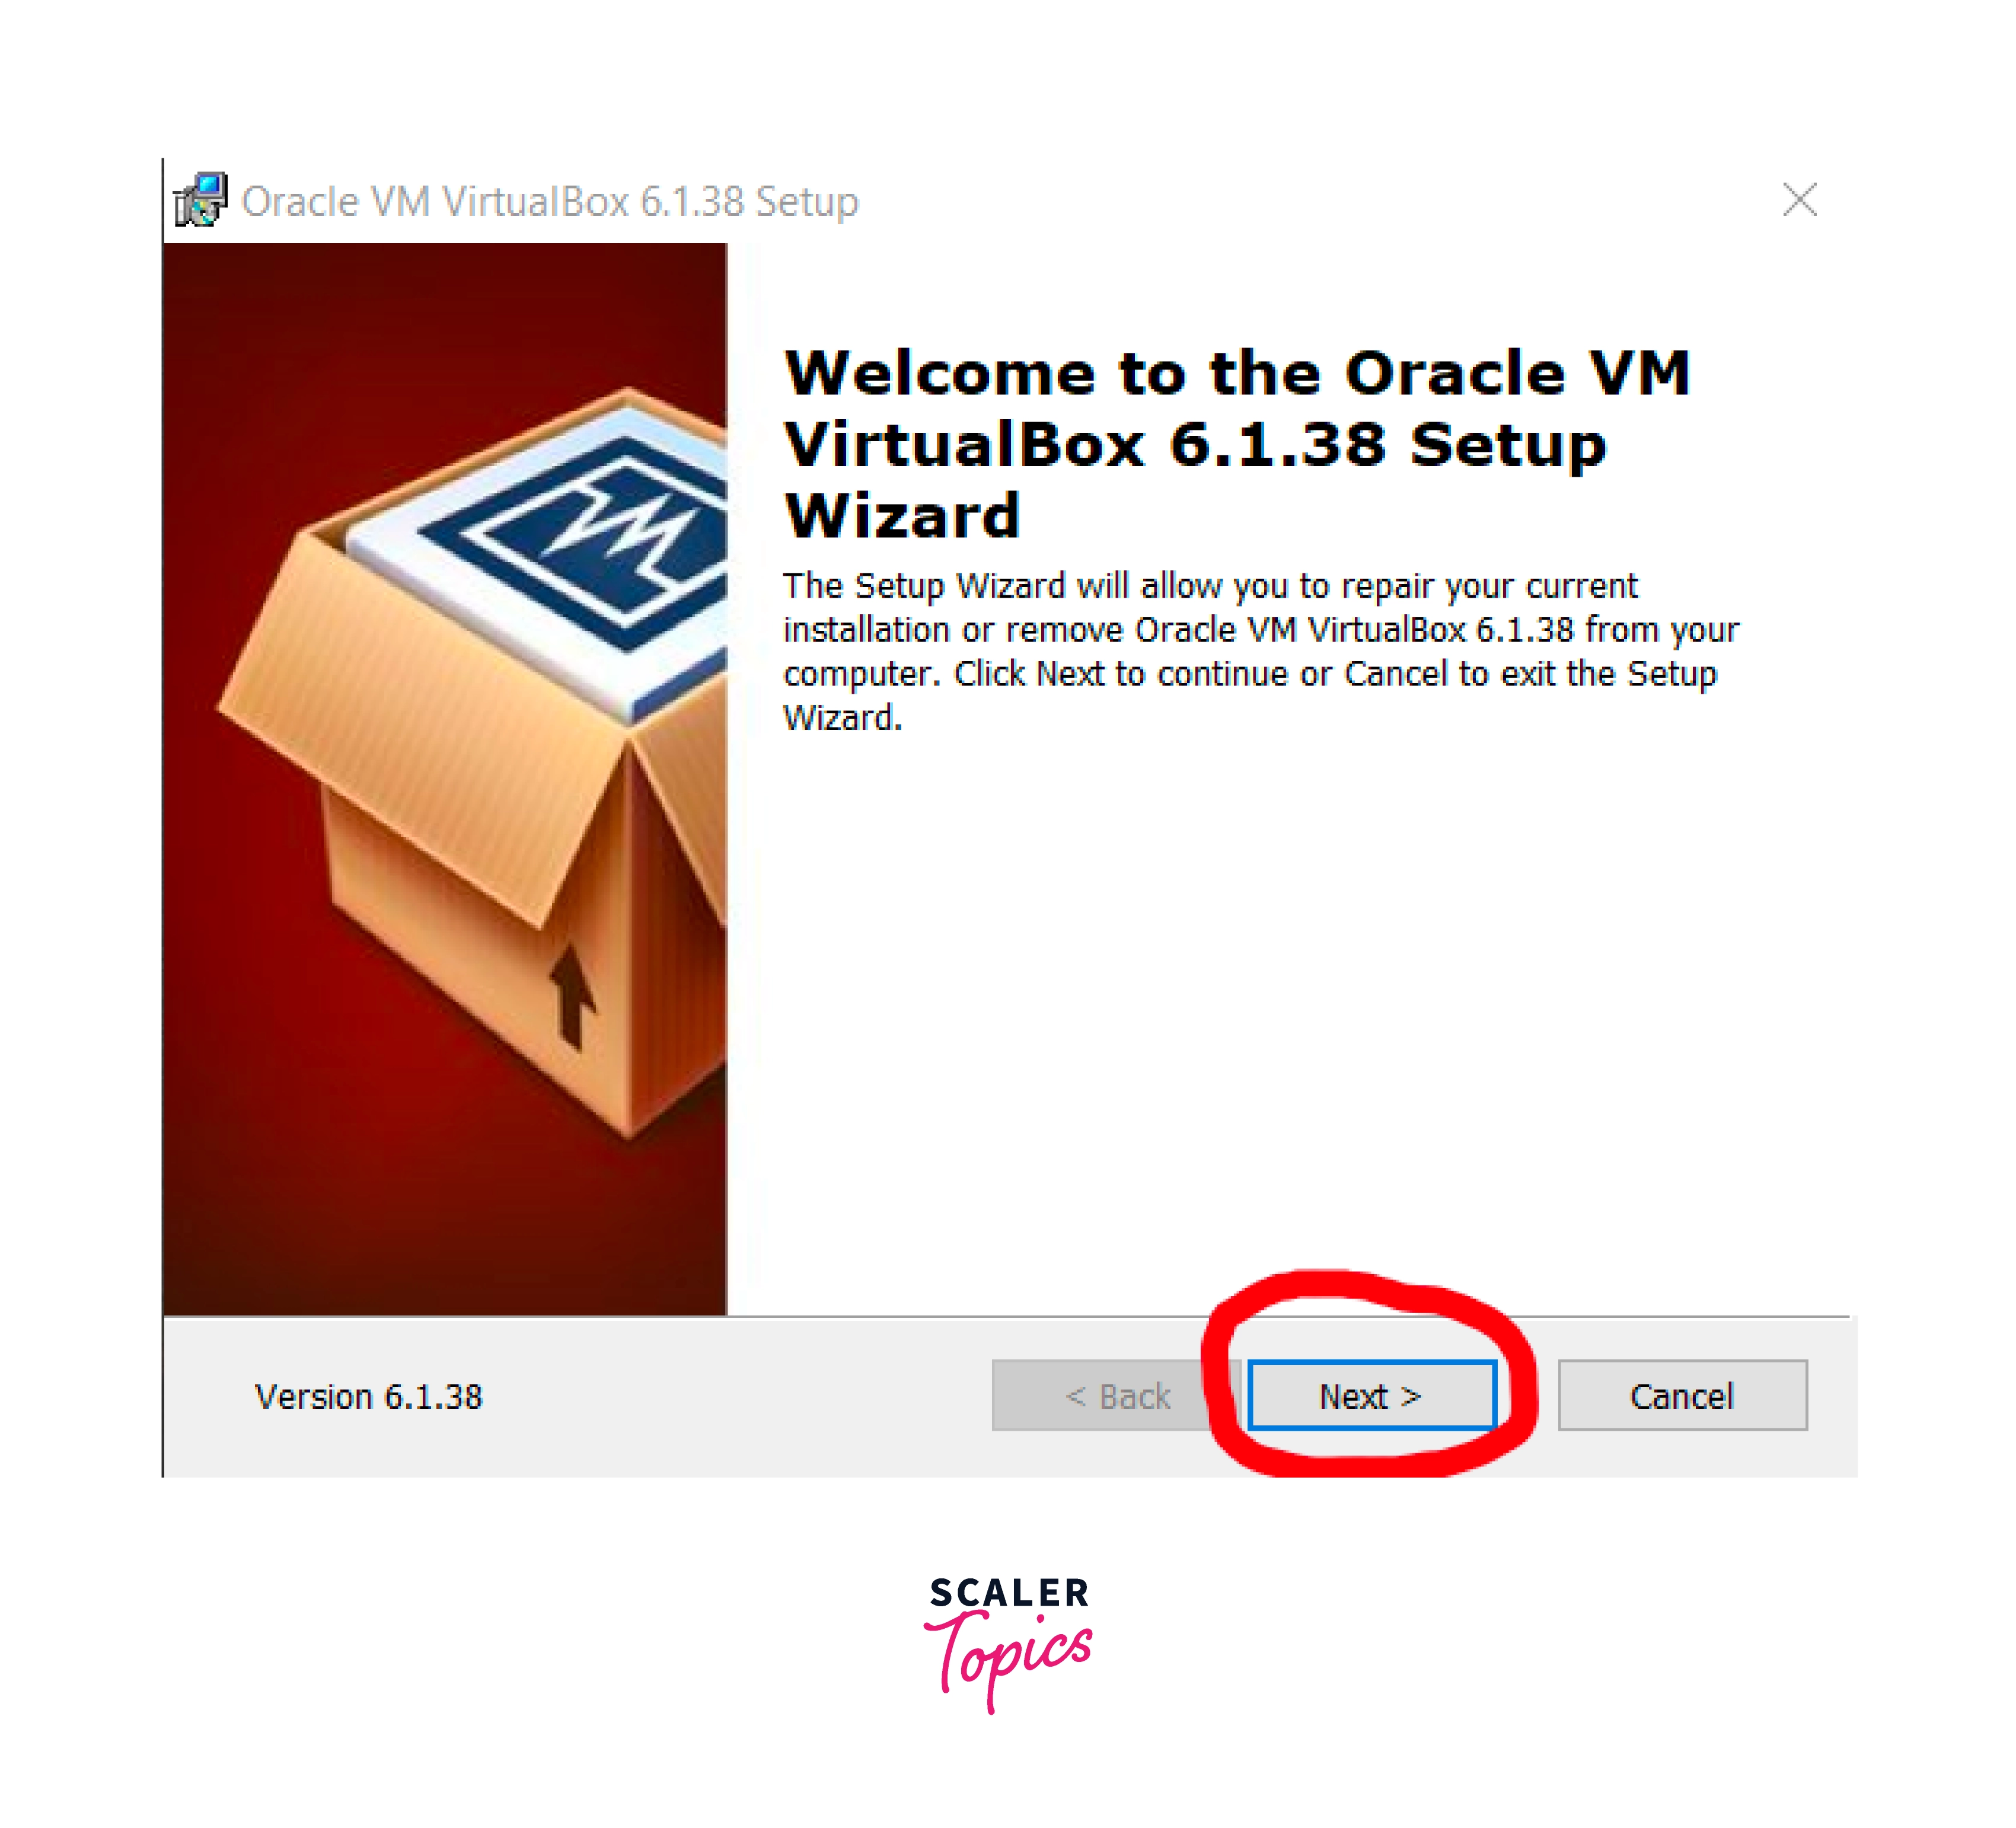
Step One: Open the VirtualBox-6.1.38-153438-Win.exe and give administrative permission (Use password if prompted and then Click Yes).
-
Step Two: Click Next
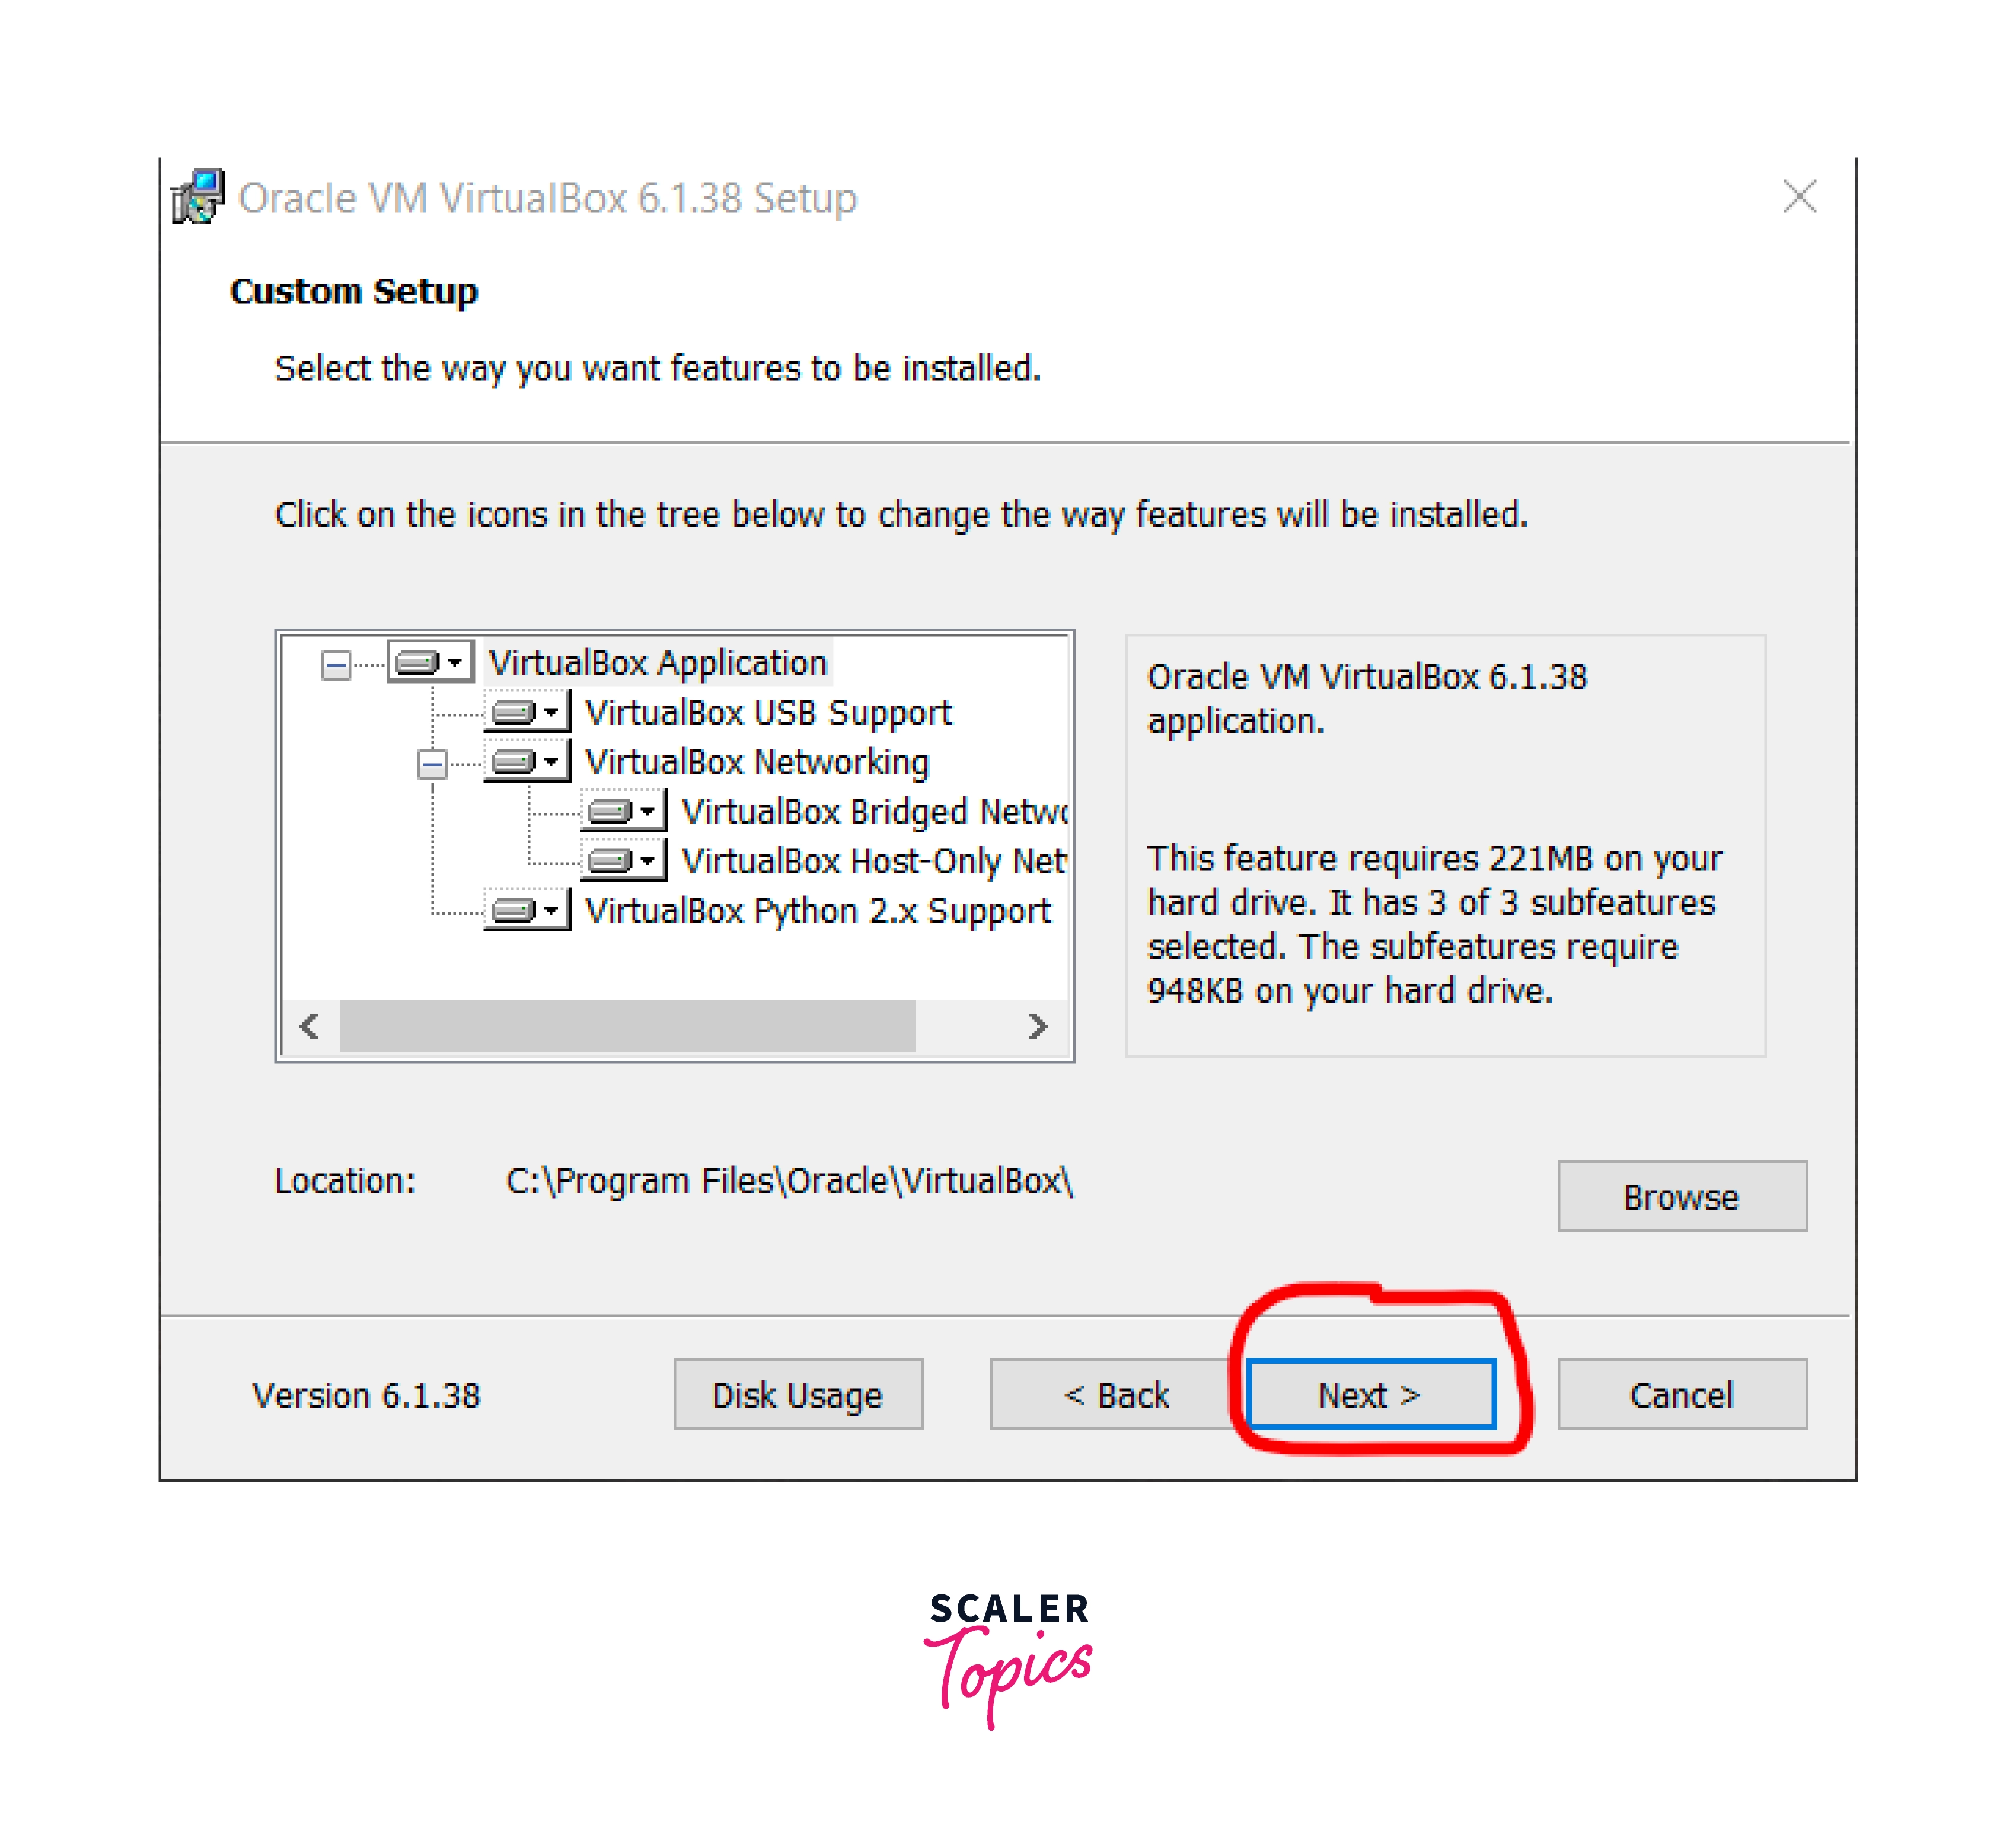
- Step Three: Use the Browse button to select the Location for installing VirtualBox. If you do not want to change it, then leave it at default and click Next for the next step.
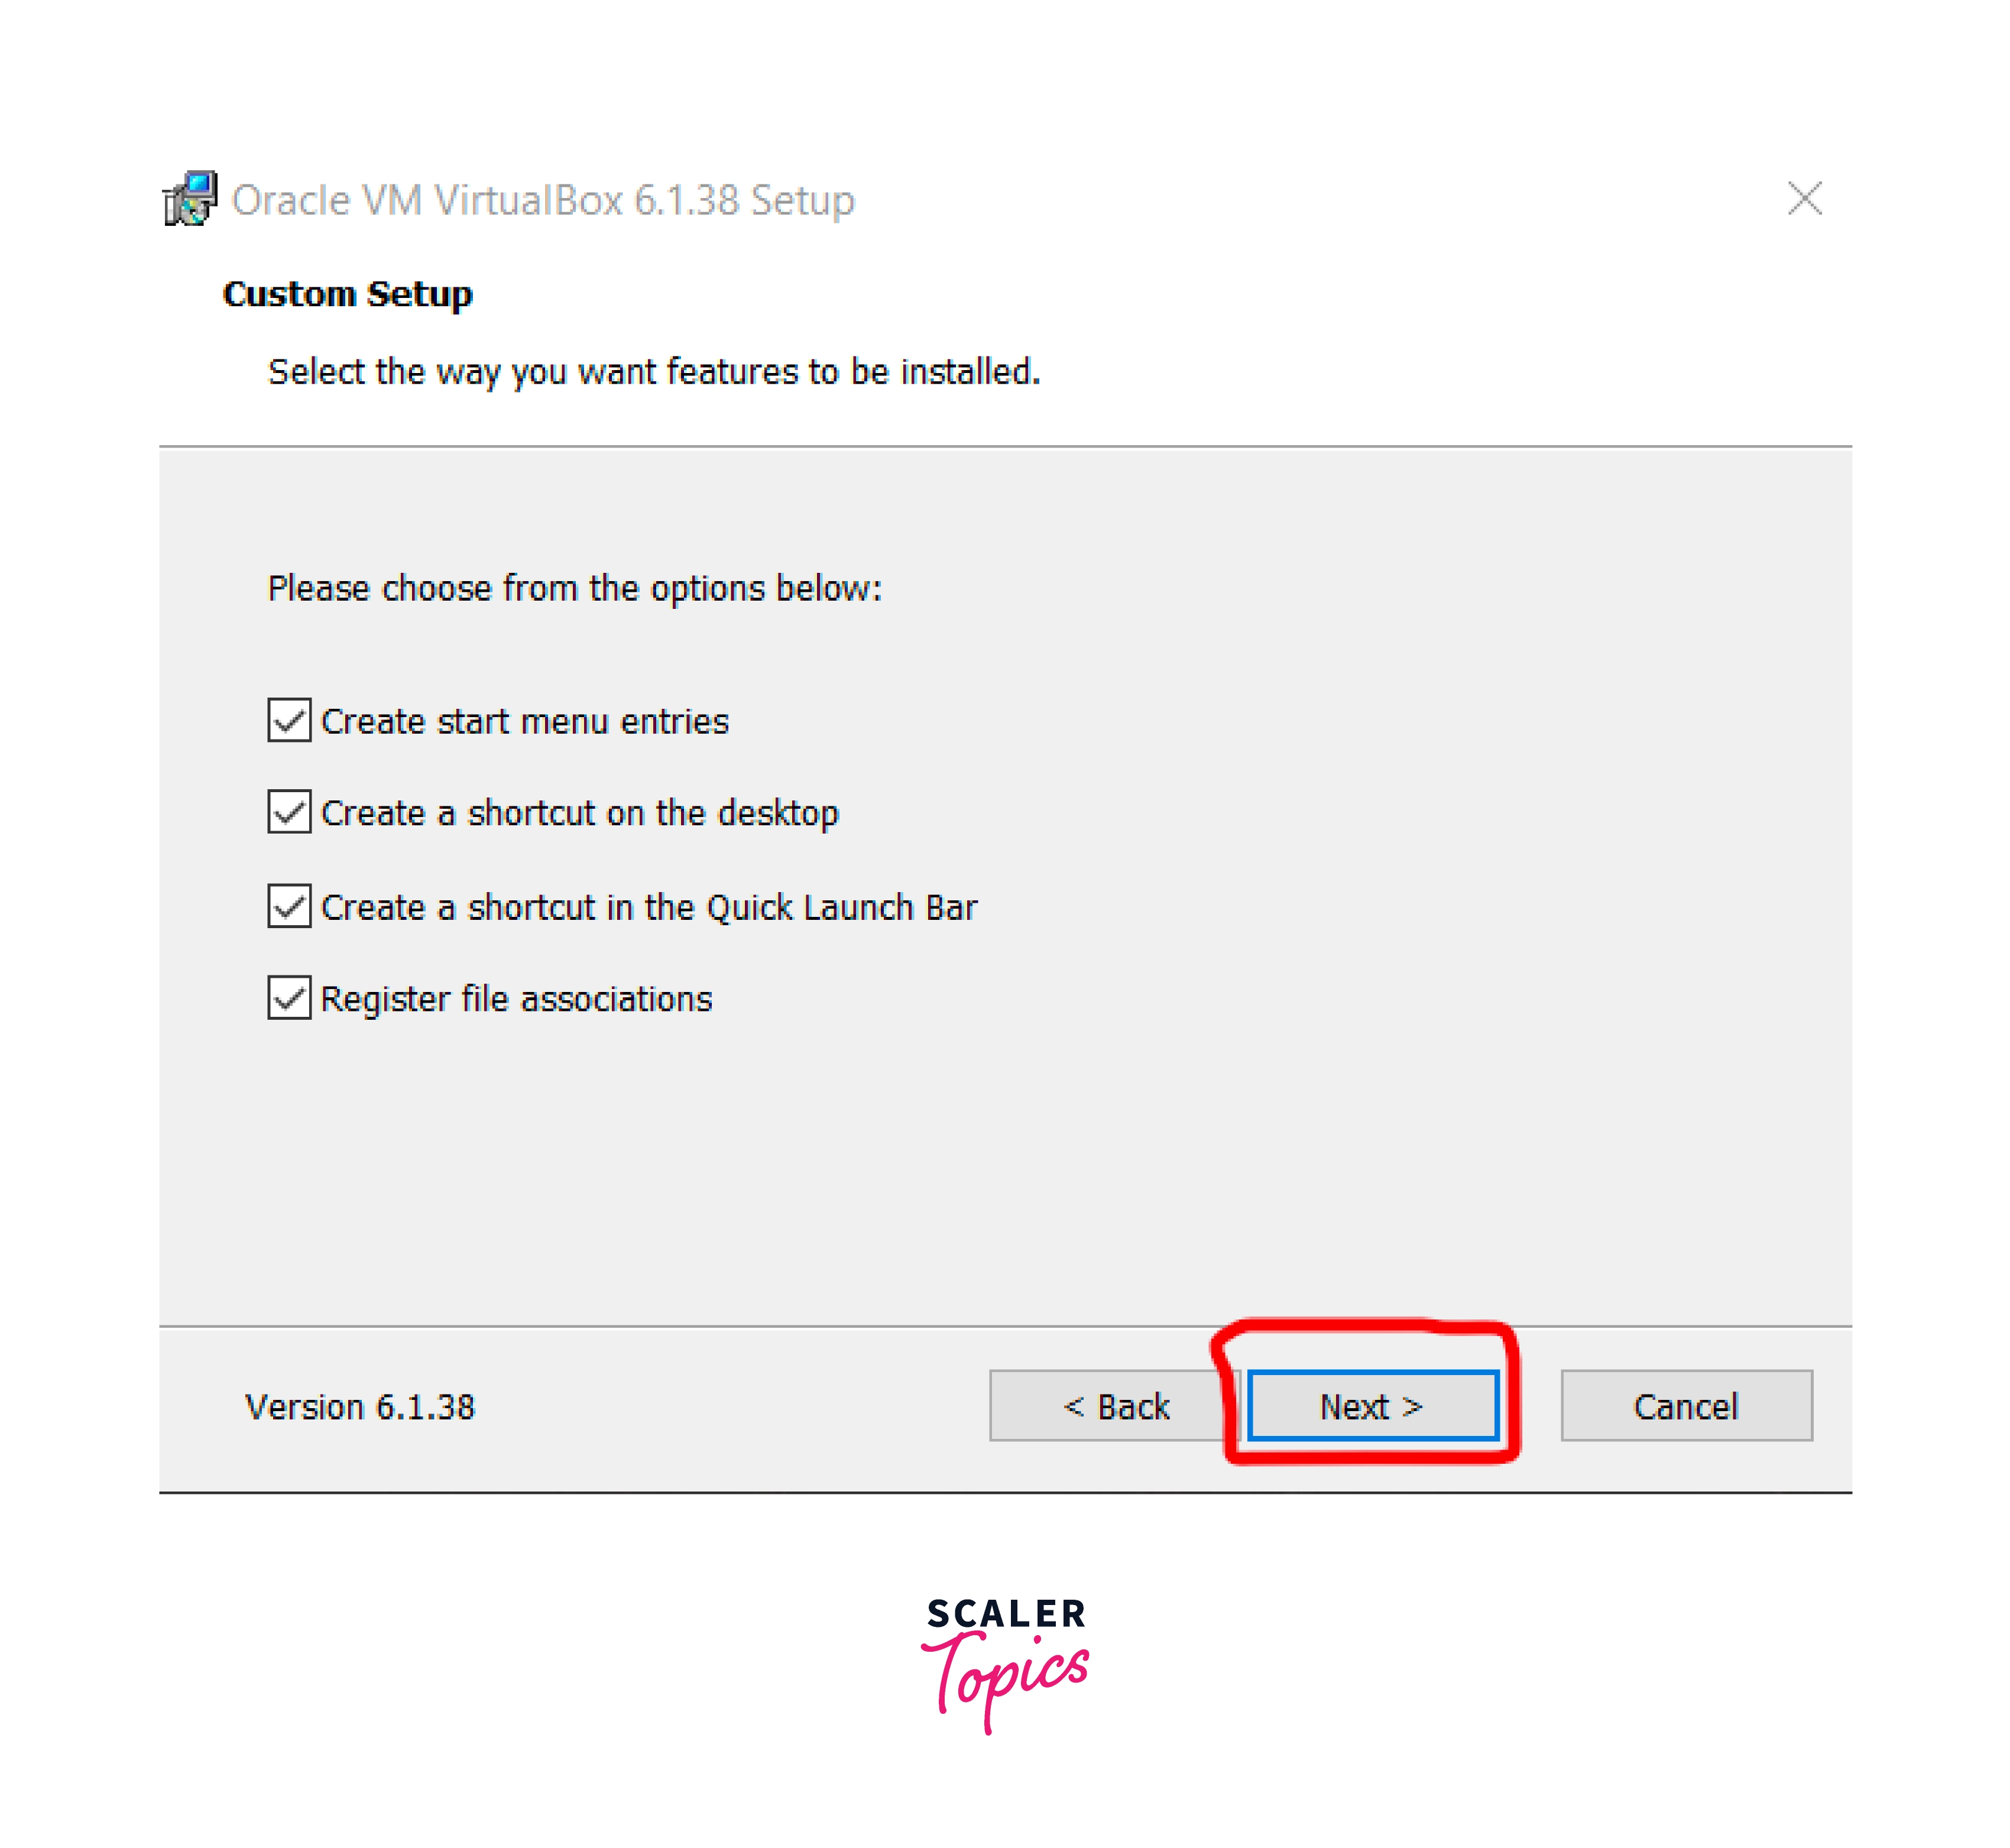
- Step Four: Change any Required settings per Personal Requirement and click Next. Uncheck the first option if you do not want the start menu entry. Uncheck the second option if you do not want a shortcut on the Desktop. Uncheck the third option to prevent the creation of a Quick launch bar icon. And Lastly, Uncheck the last option to prevent VirtualBox from automatically recognizing file formats associated with VirtualBox.
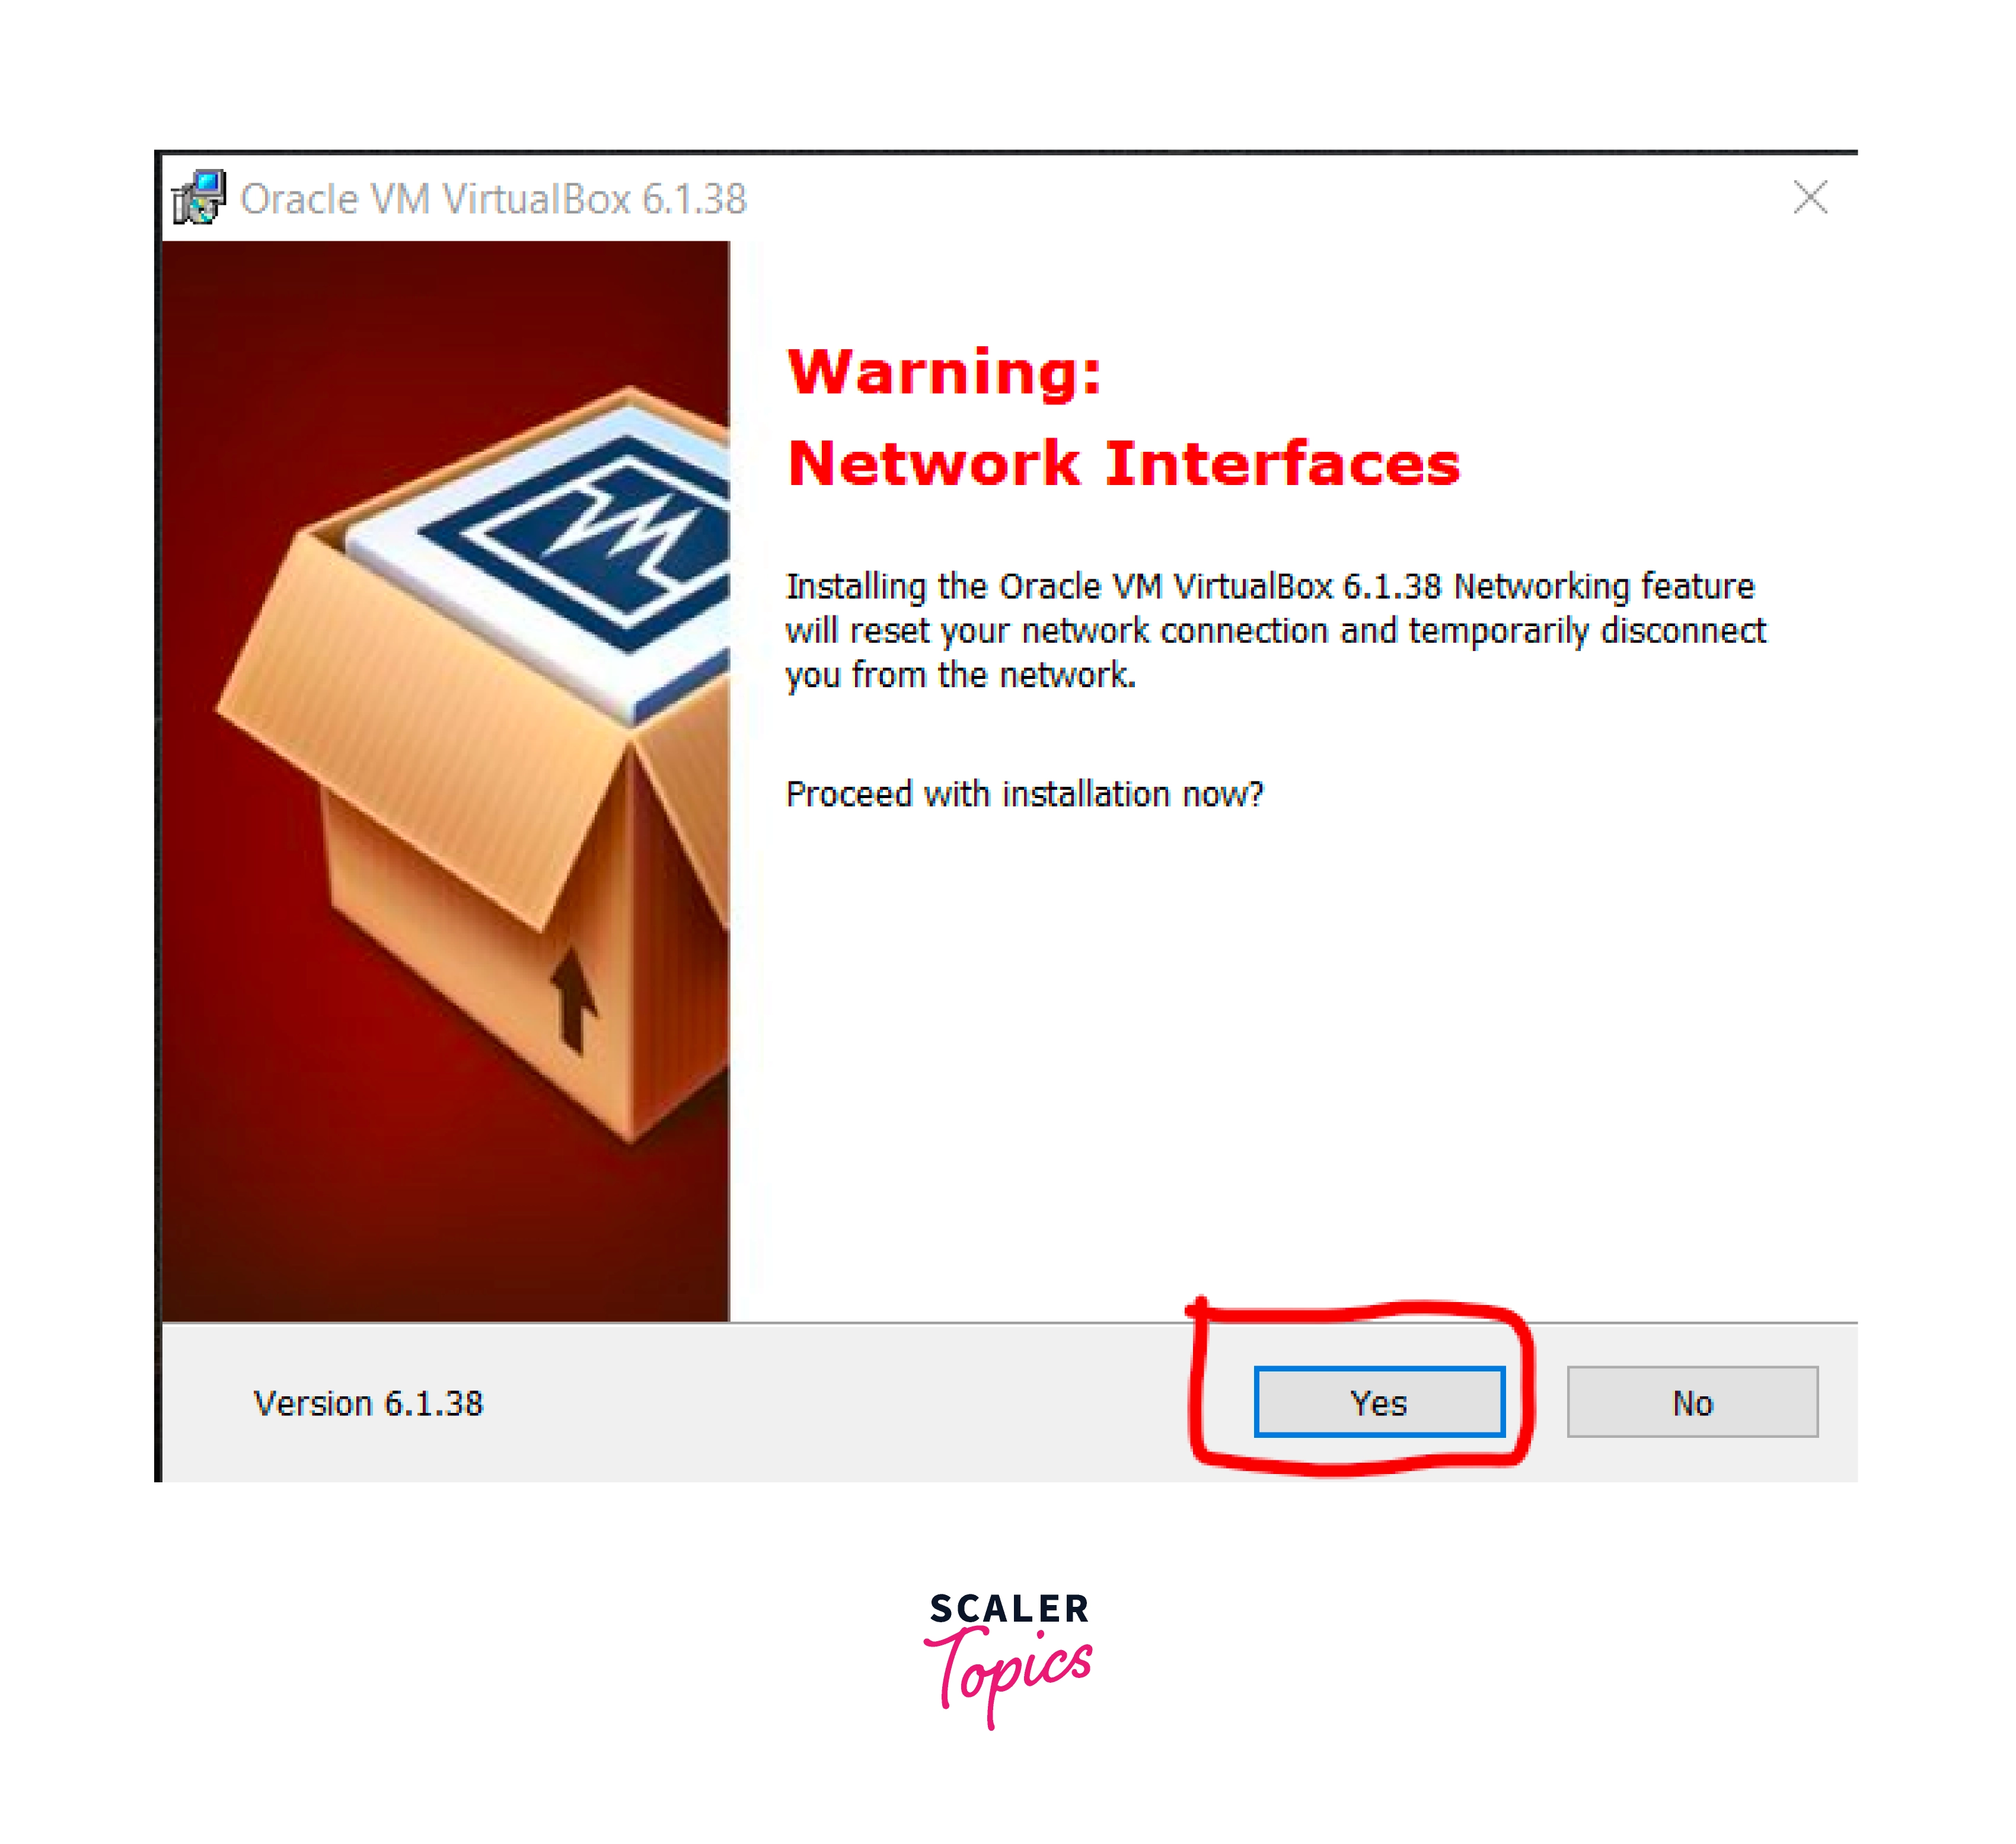
- Step Five: Click Yes only after saving all your work and ensure there are no ongoing downloads as they might fail due to the installation of new drivers, and while installing, there might be disconnection for a small amount of time.
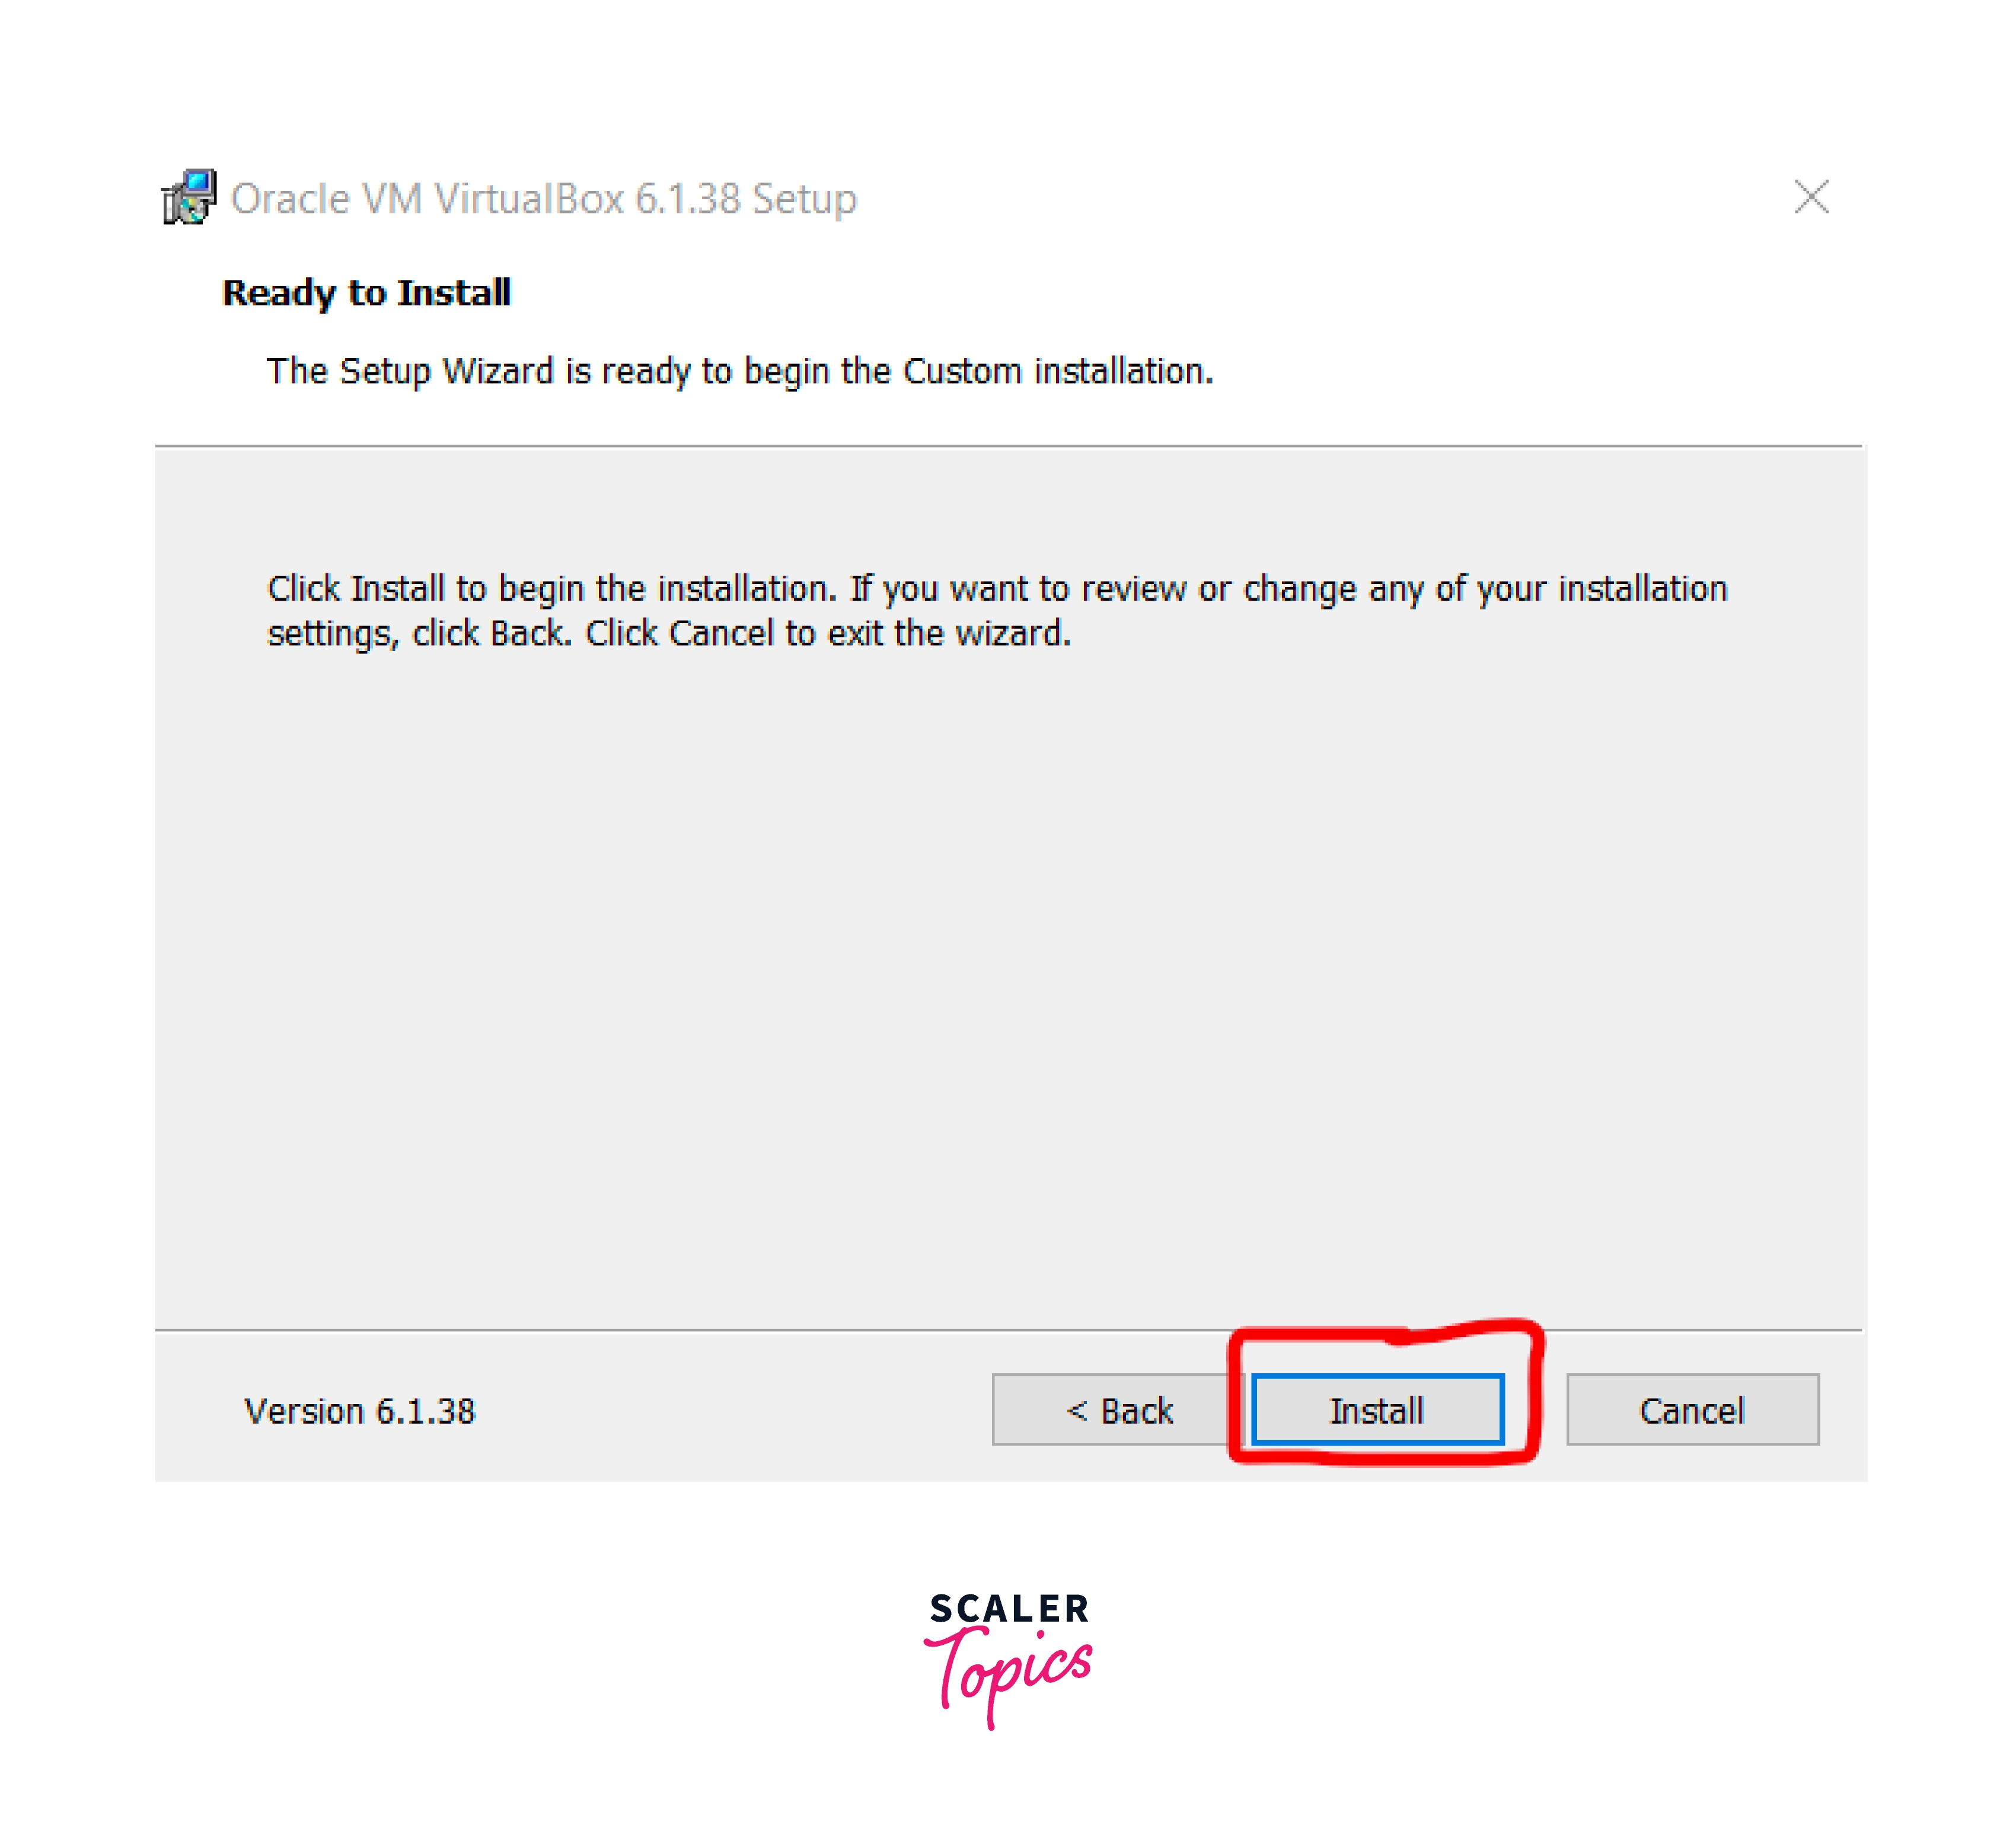
- Step Six: Click Install if you do not want to go back and change any settings.
- Step Seven: Wait until the installation is complete, and do not interrupt the process.
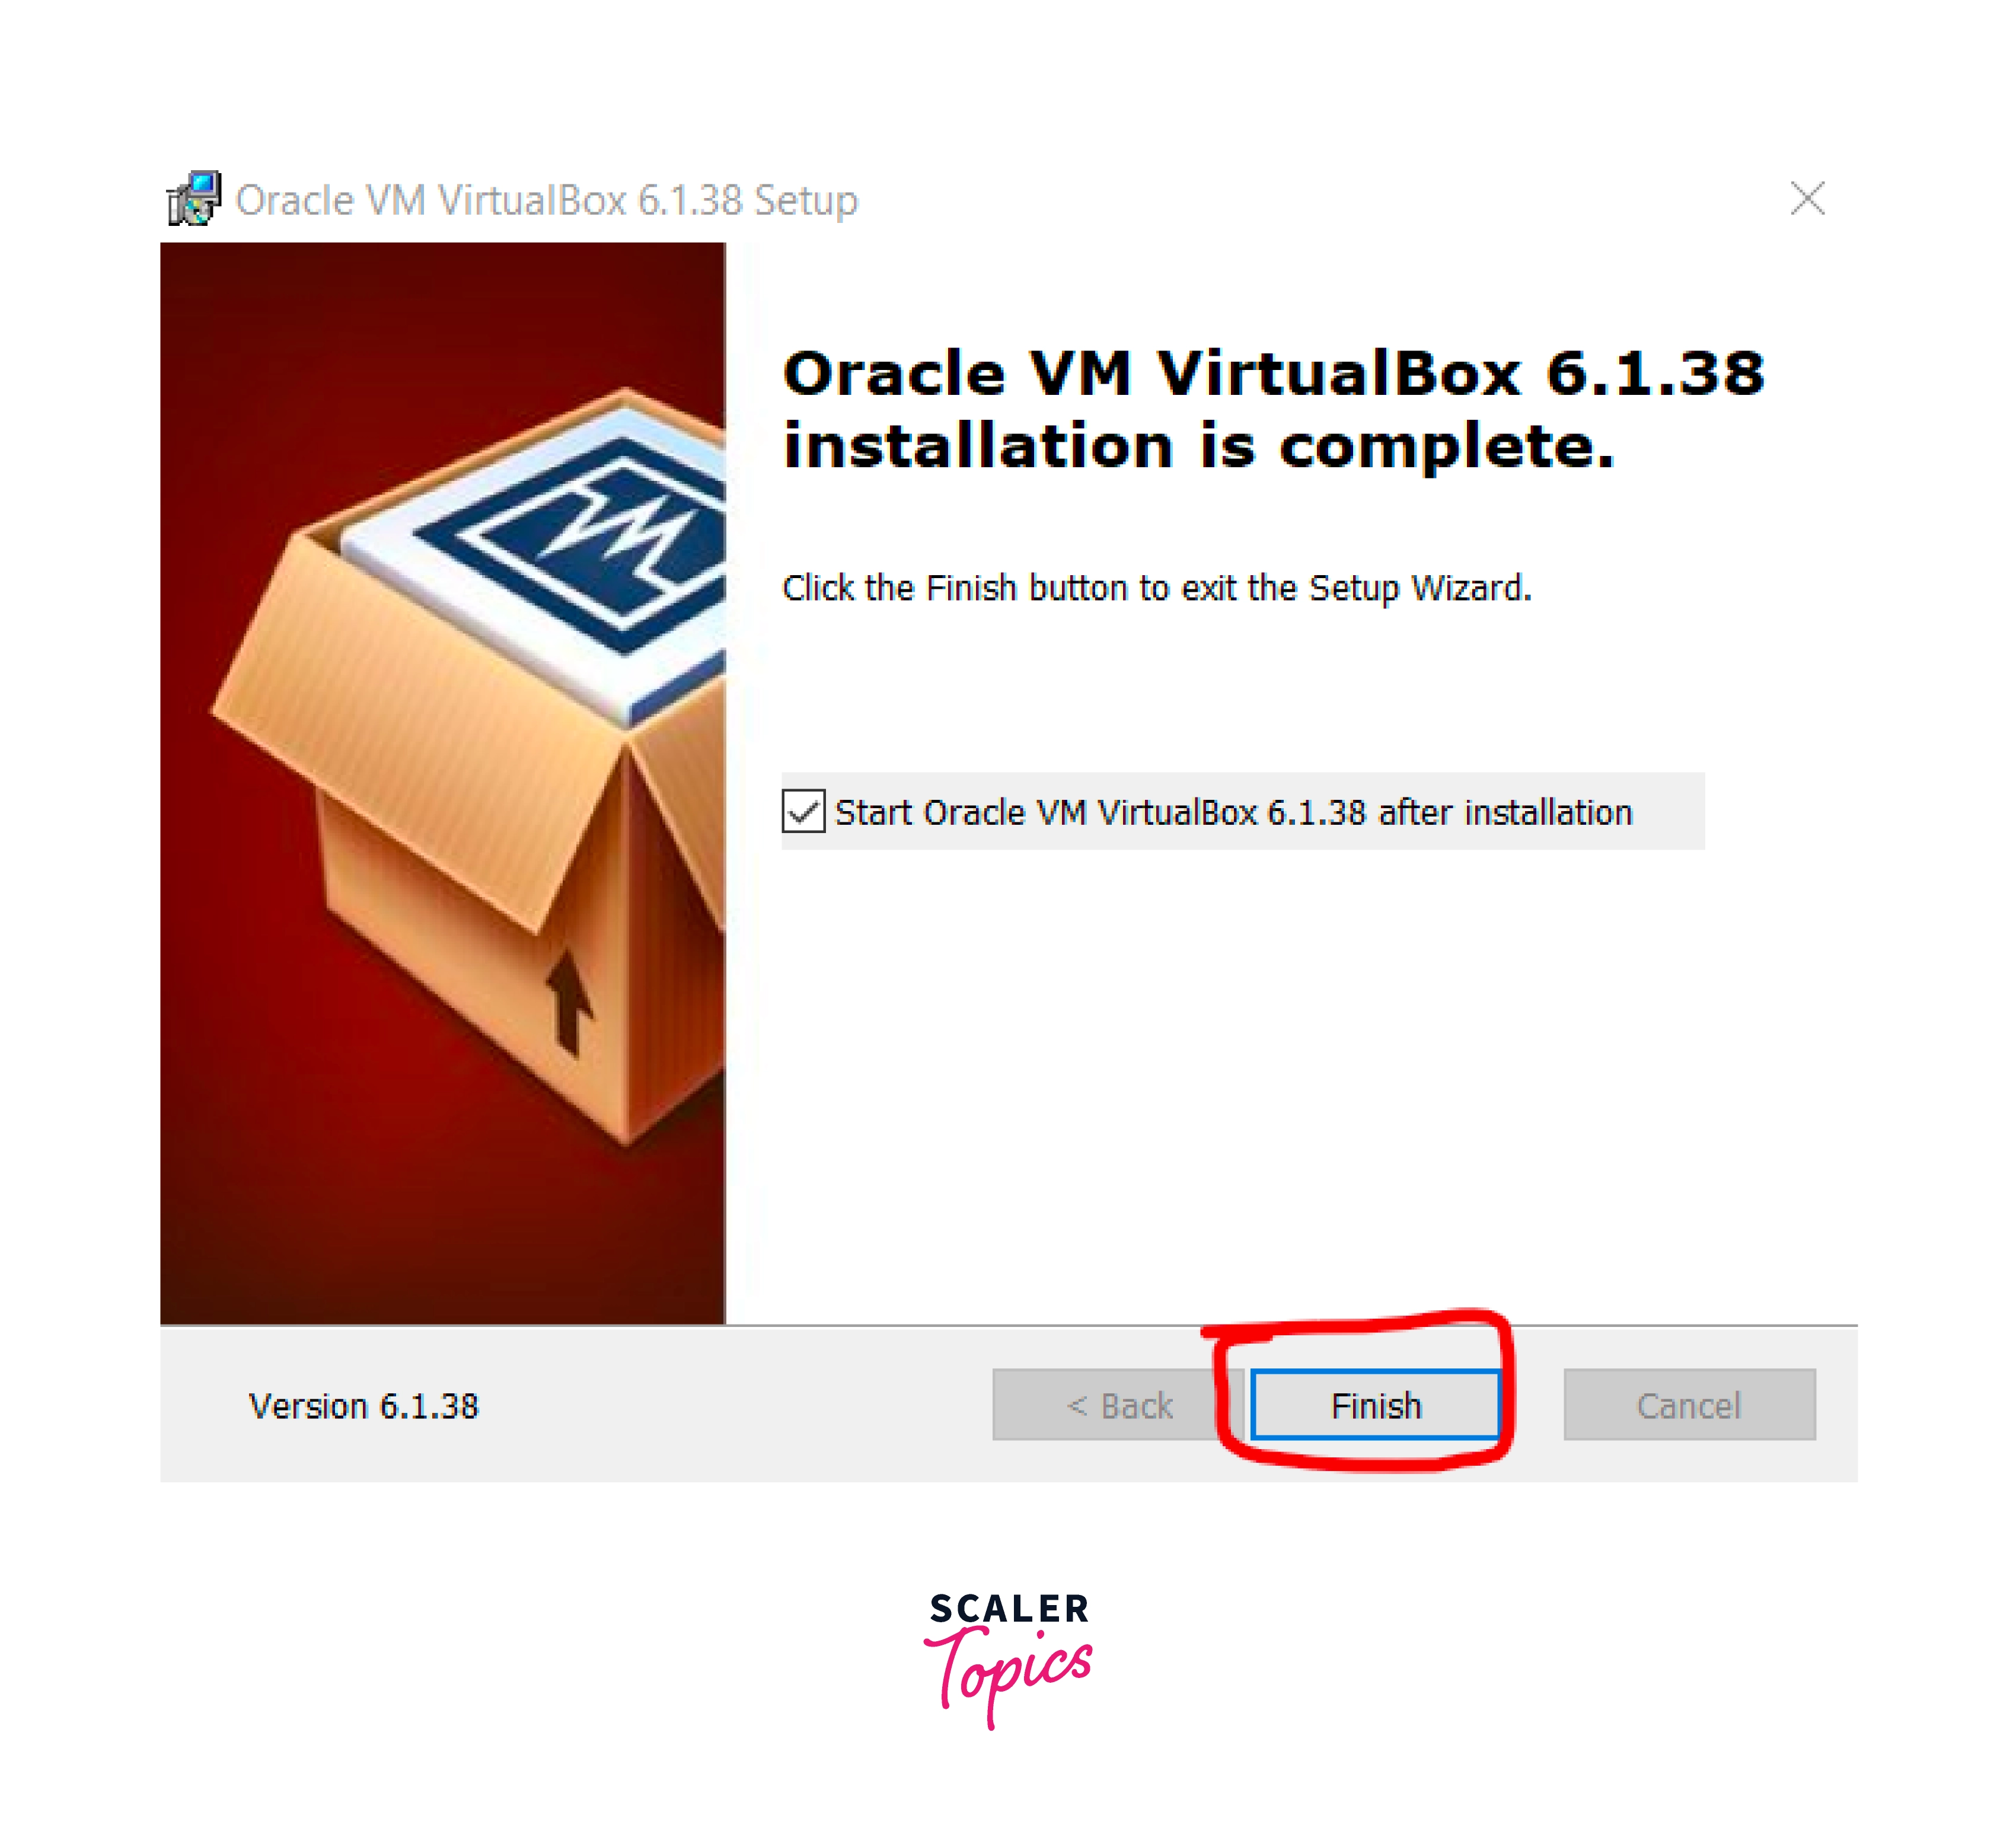
- Step Eight: Click Finish to complete the installation of VirtualBox.
Download Kali Linux
There are Multiple options available to download when you visit the Kali Linux website.
https://www.kali.org/get-kali/
Turn Learning into Career Growth
Installing and Setting Up Kali Linux
There are two options available to download and install kali on a machine.
First Method (VirtualBox images)
-
First, one is to Click on the Virtual Machines tab.
-
This takes you to the Prebuilt Virtual MaMachine'sption`.
-
Choose the VirtualBox 64-bit image (You can choose between directly downloading the file or using a torrent client to Download)
-
You can see another option here, which is VMware. VMware is a similar software to VirtualBox. But here, in this example, we will use VirtualBox.
-
Go to the directory where the downloaded file is located. The file's name would be something like " kali-linux-2022.3-virtualbox-amd64.7z ".
-
Now, Use 7Zip or WinRAR to unzip the file if you are using windows or the terminal if you are using Linux to unzip the file. Upon Extracting, you will get two files " kali-linux-2022.3-VirtualBox-amd64.vbox " and " kali-linux-2022.3-VirtualBox-amd64.vdi "

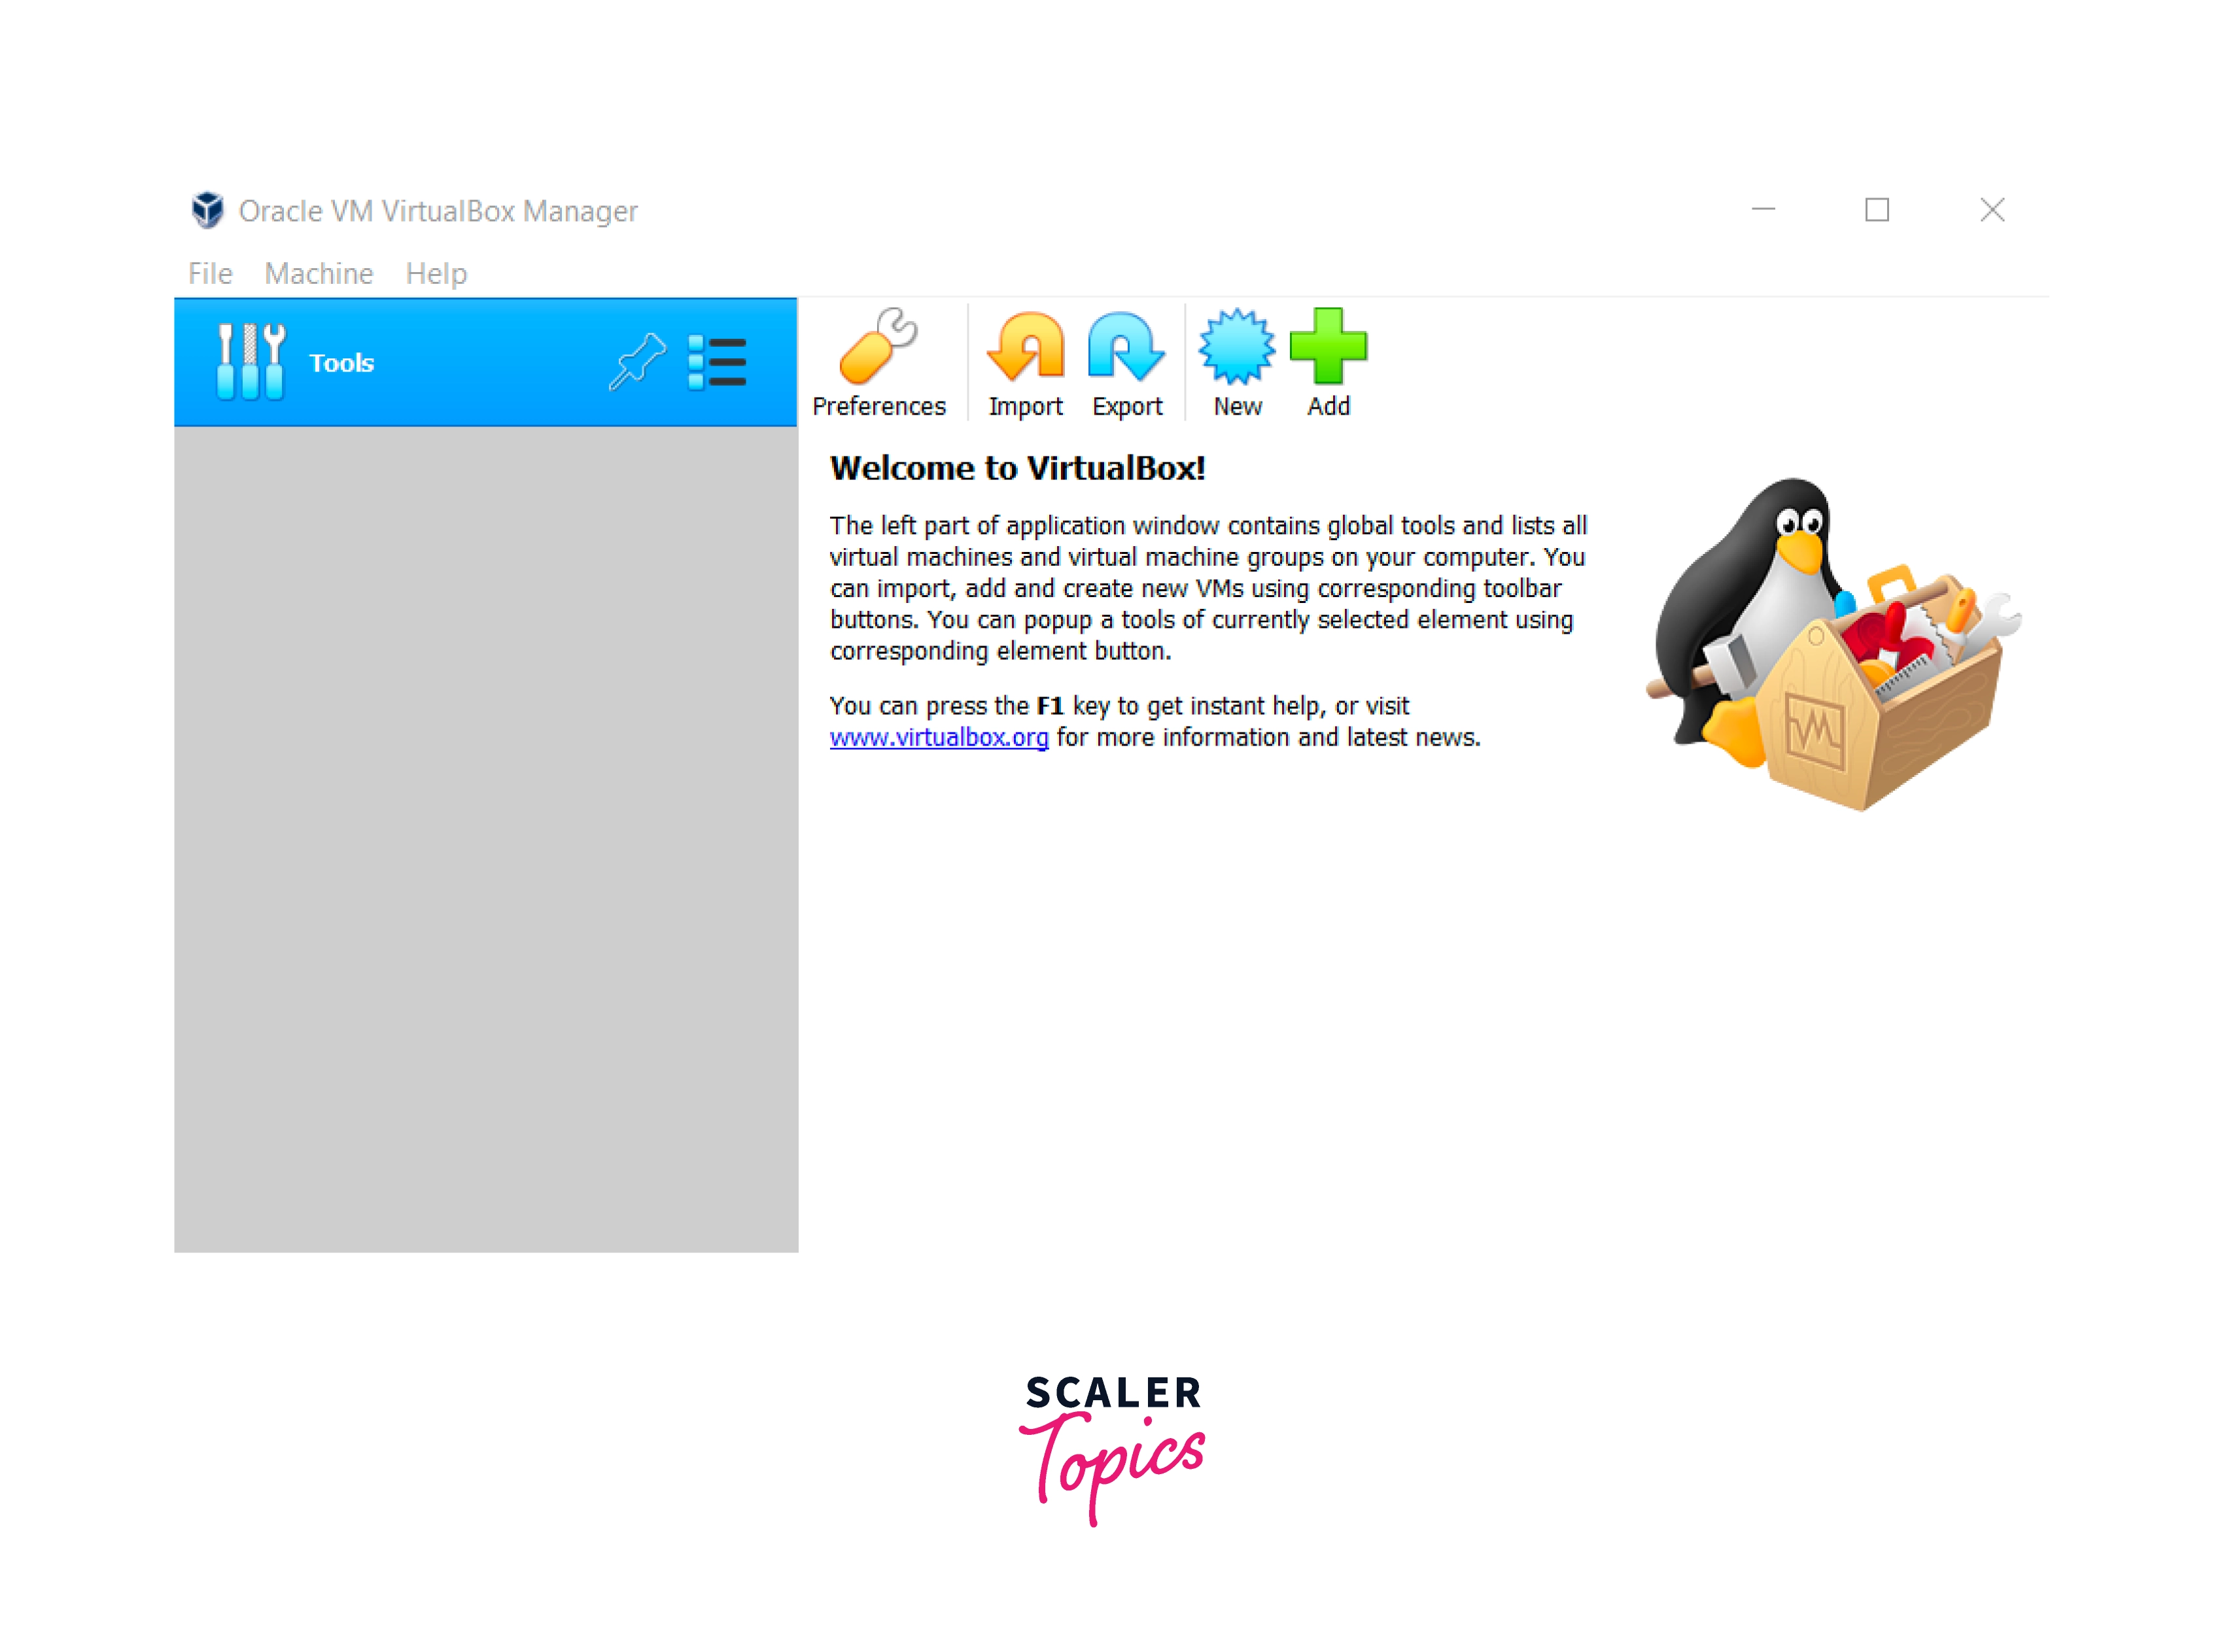
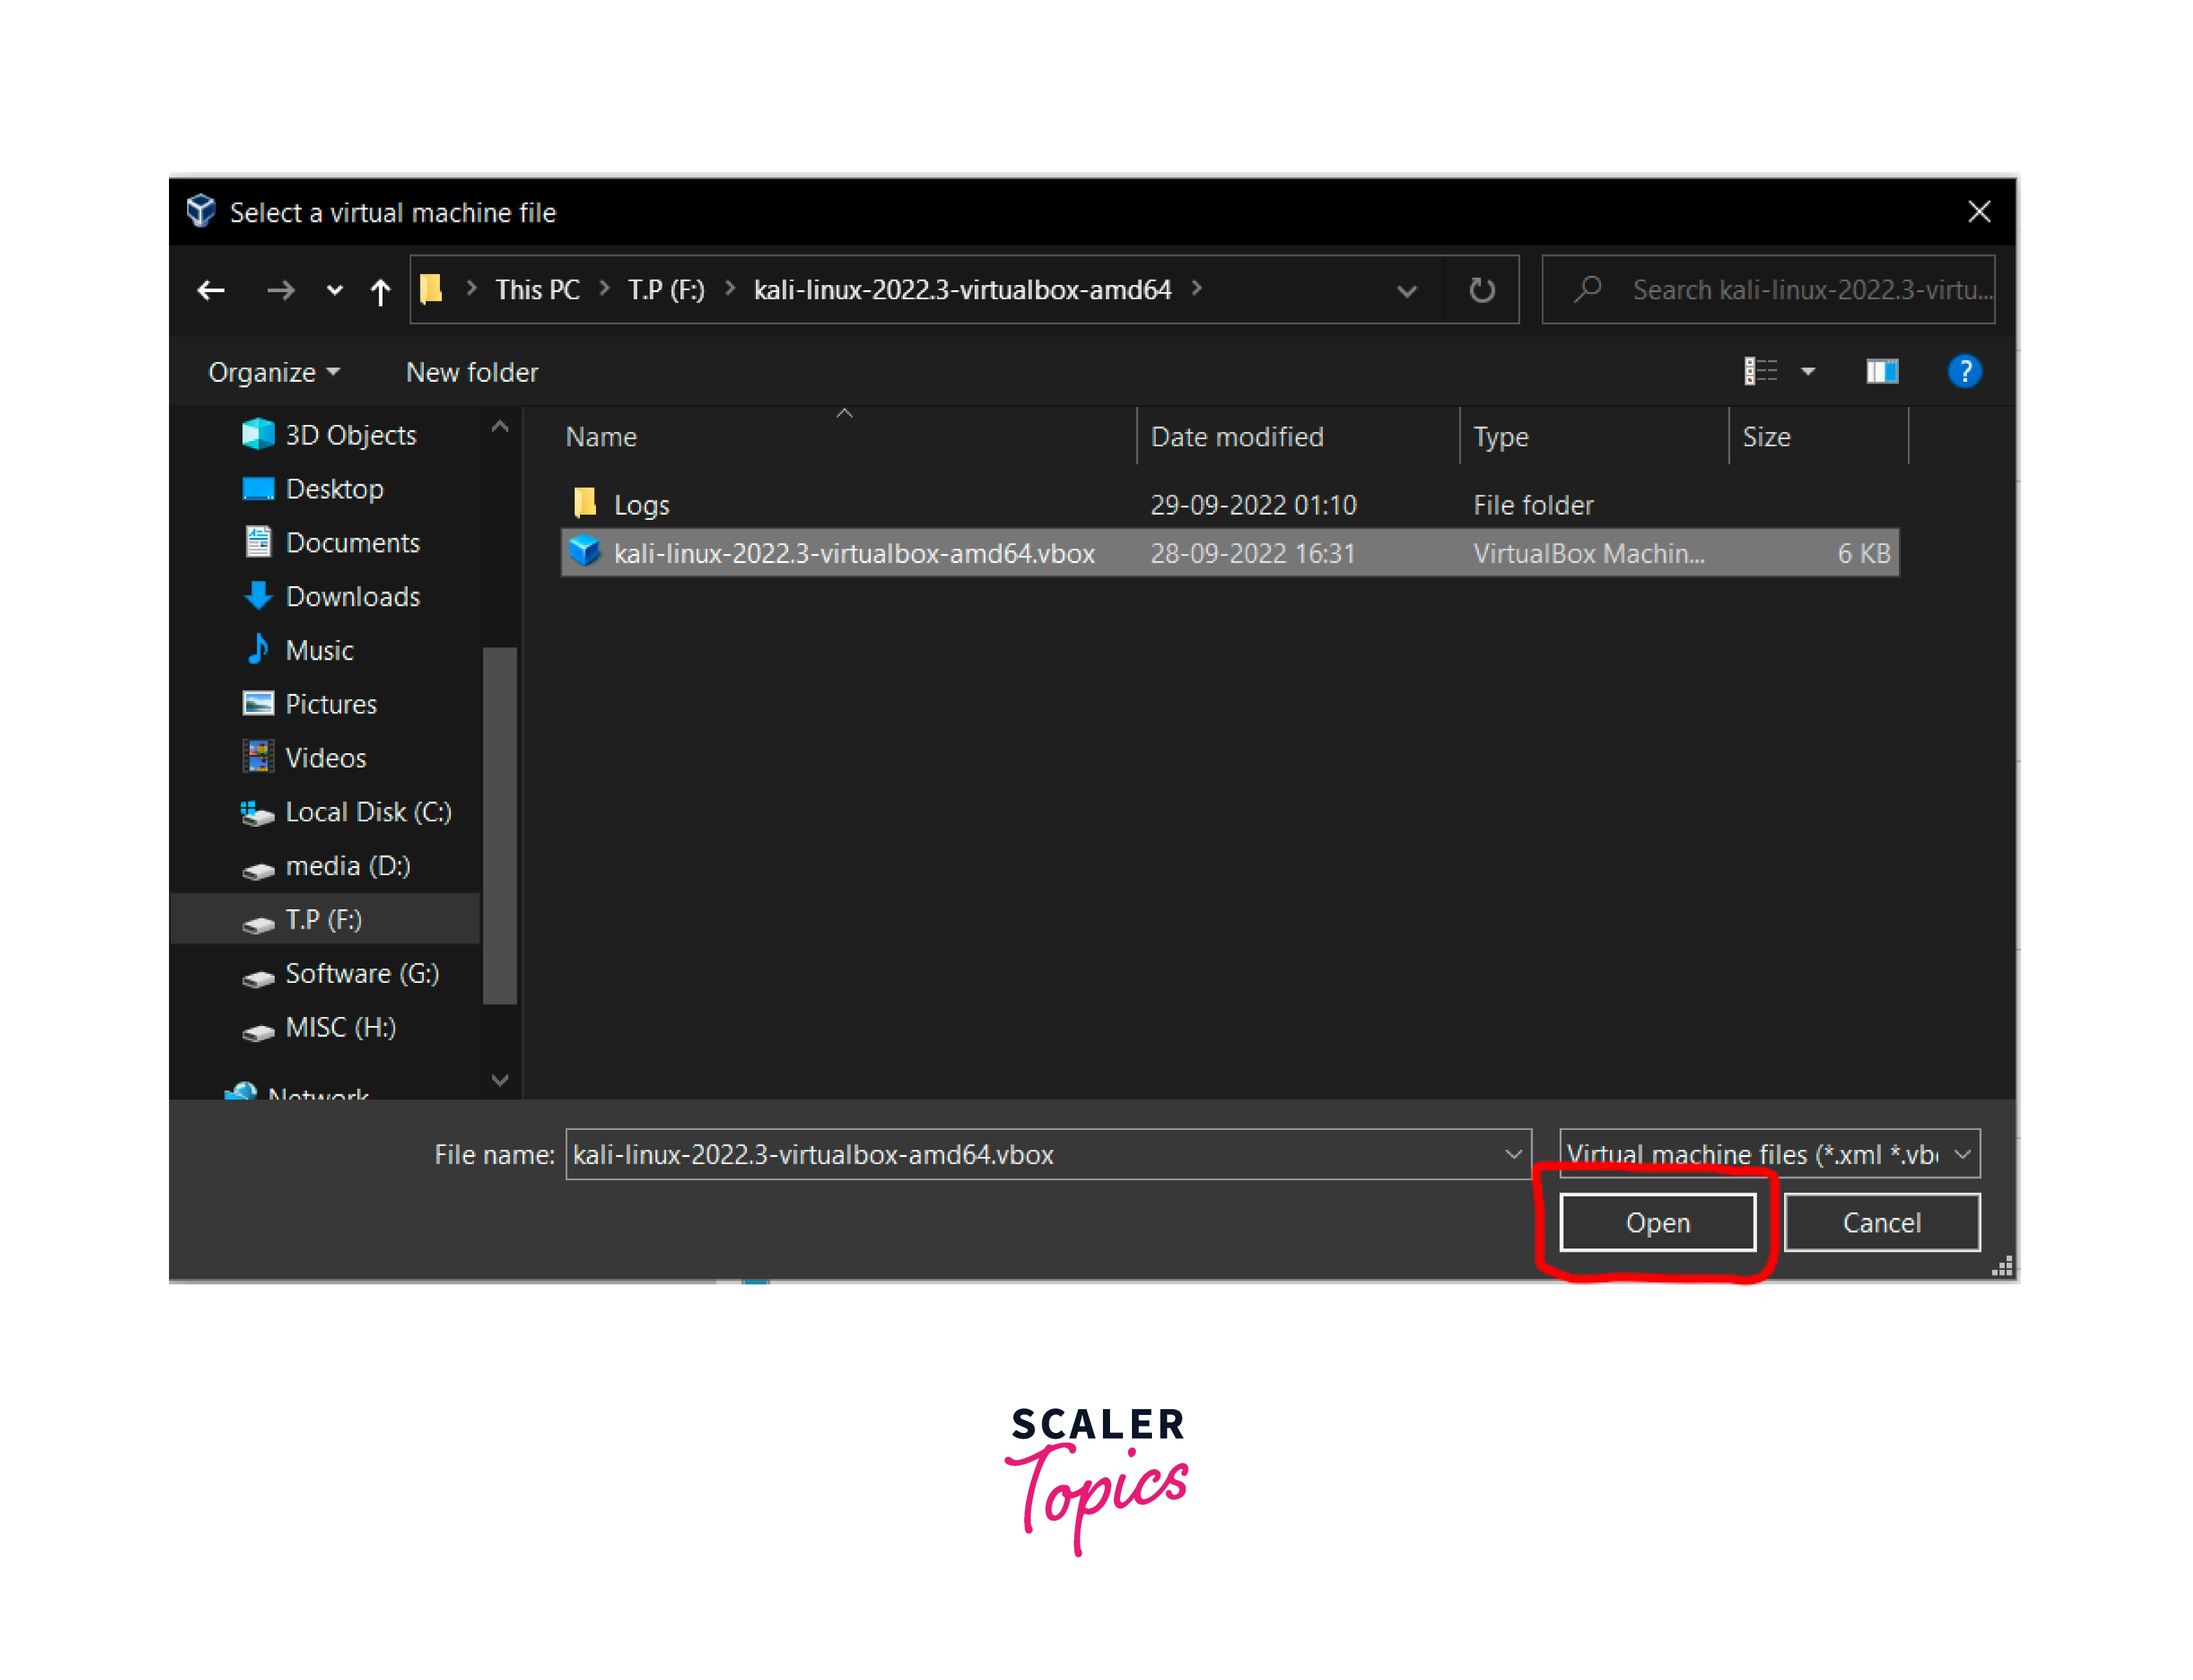
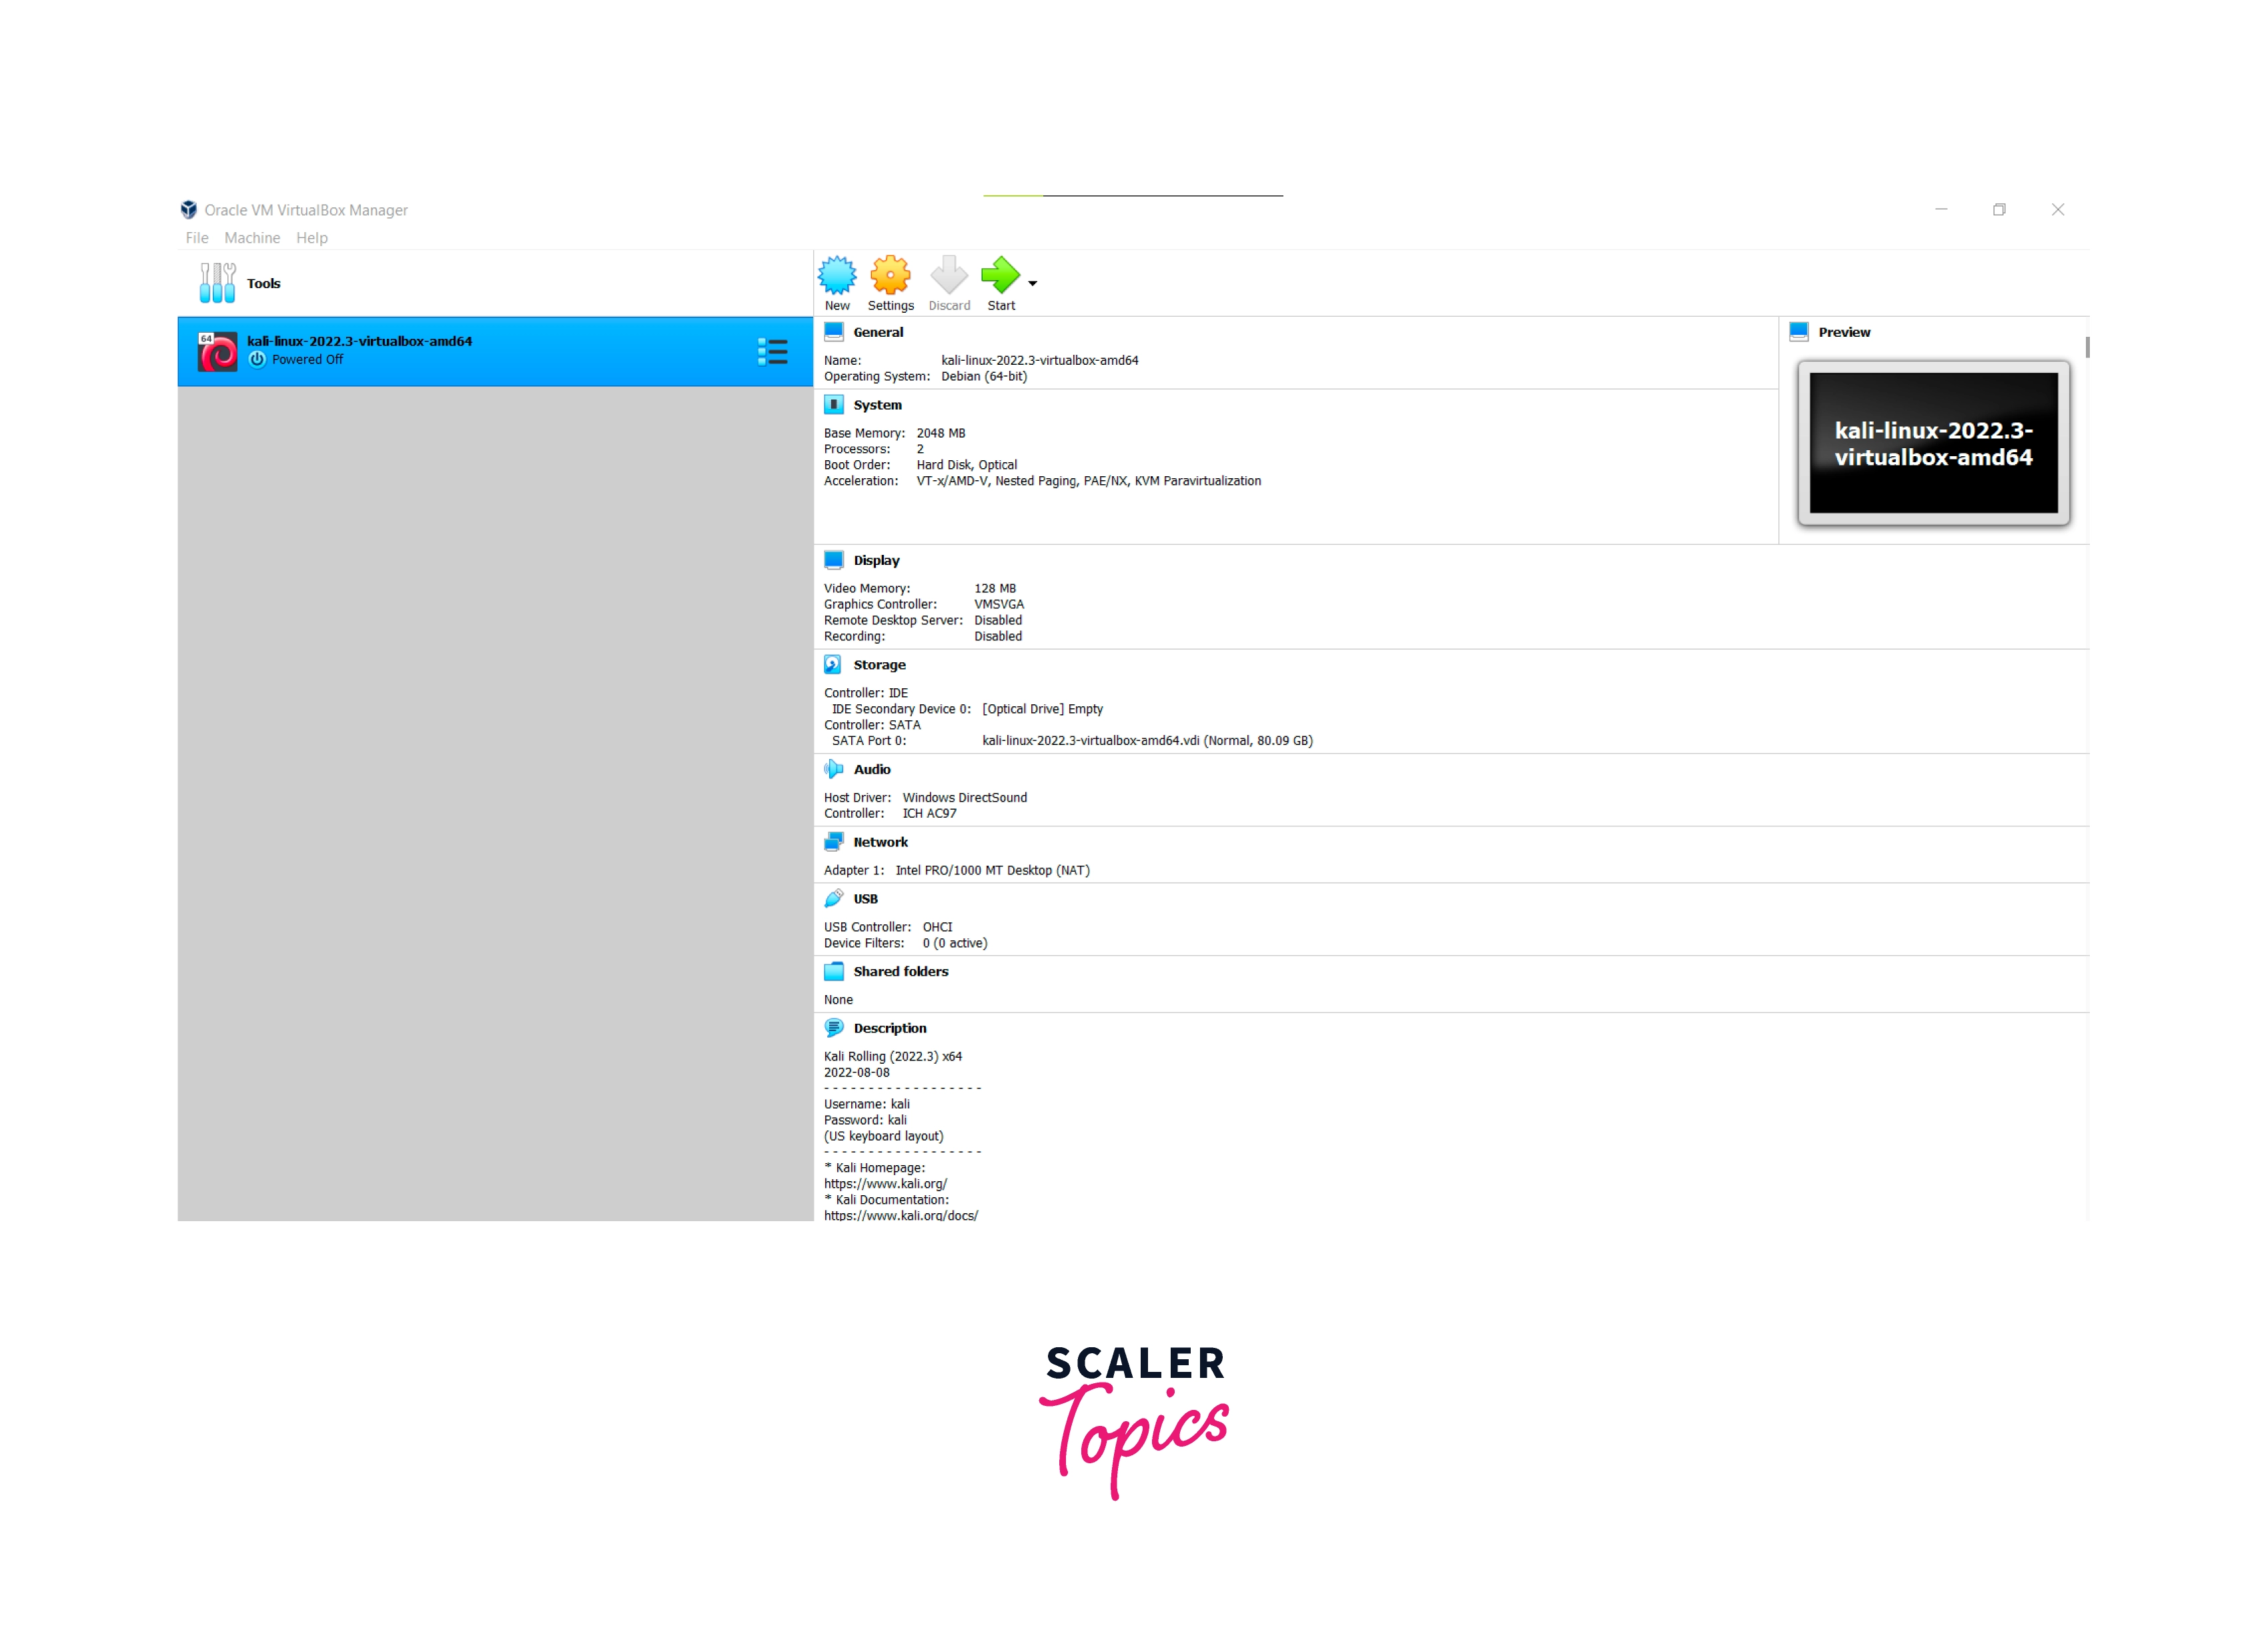
- Open VirtualBox and click Add button, browse to the location where the extracted file is located and select the vbox file and click Open. This will be importing the kali Linux with the prebuilt configurations.
- The default settings include 2048 MB or 2 GB of RAM with 2 Cores of CPU Processor and a video or Virtual Disk Image of size 12 GB which can change according to requirements.
-
The default Username of the system is: " kali " and the default password set is also: " kali "
- Change any required settings you need and then click the Start button
- Select the first option when asked for normal or Advanced configuration
-
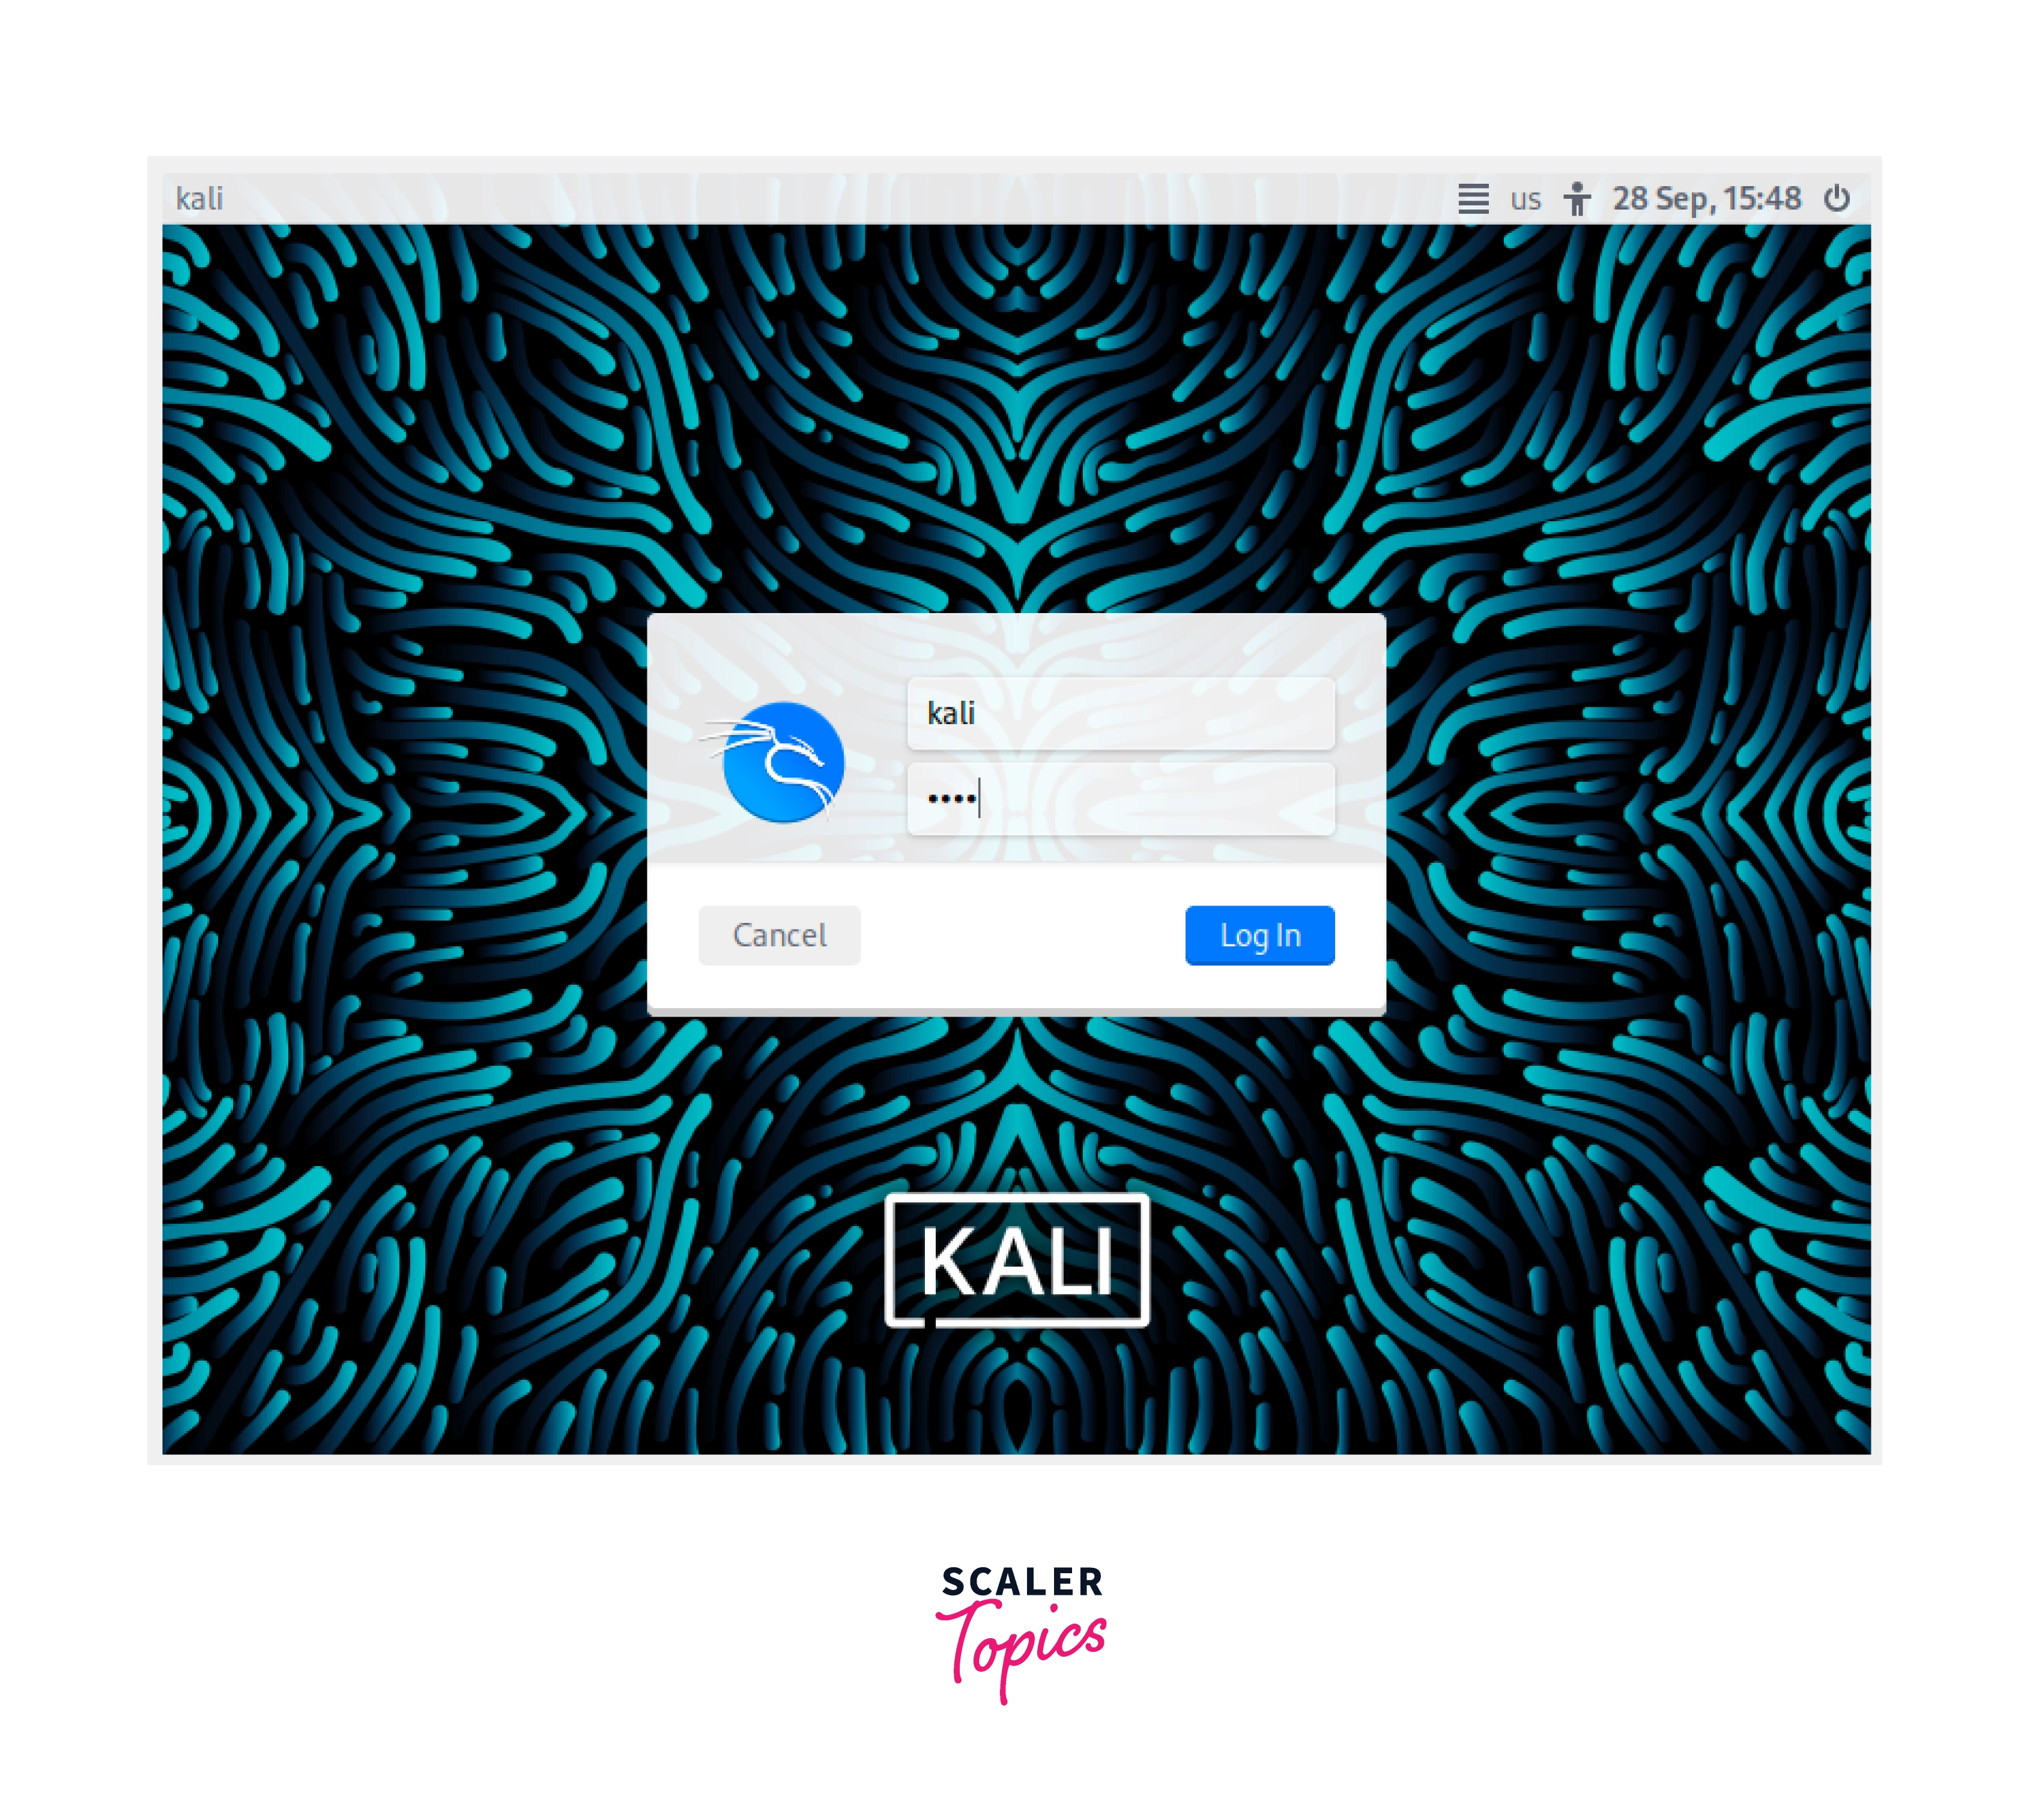
Soon, the Kali Linux will start and prompt you for entering the Username and password -- Enter the username as " kali " -- Enter the password as " kali "
-
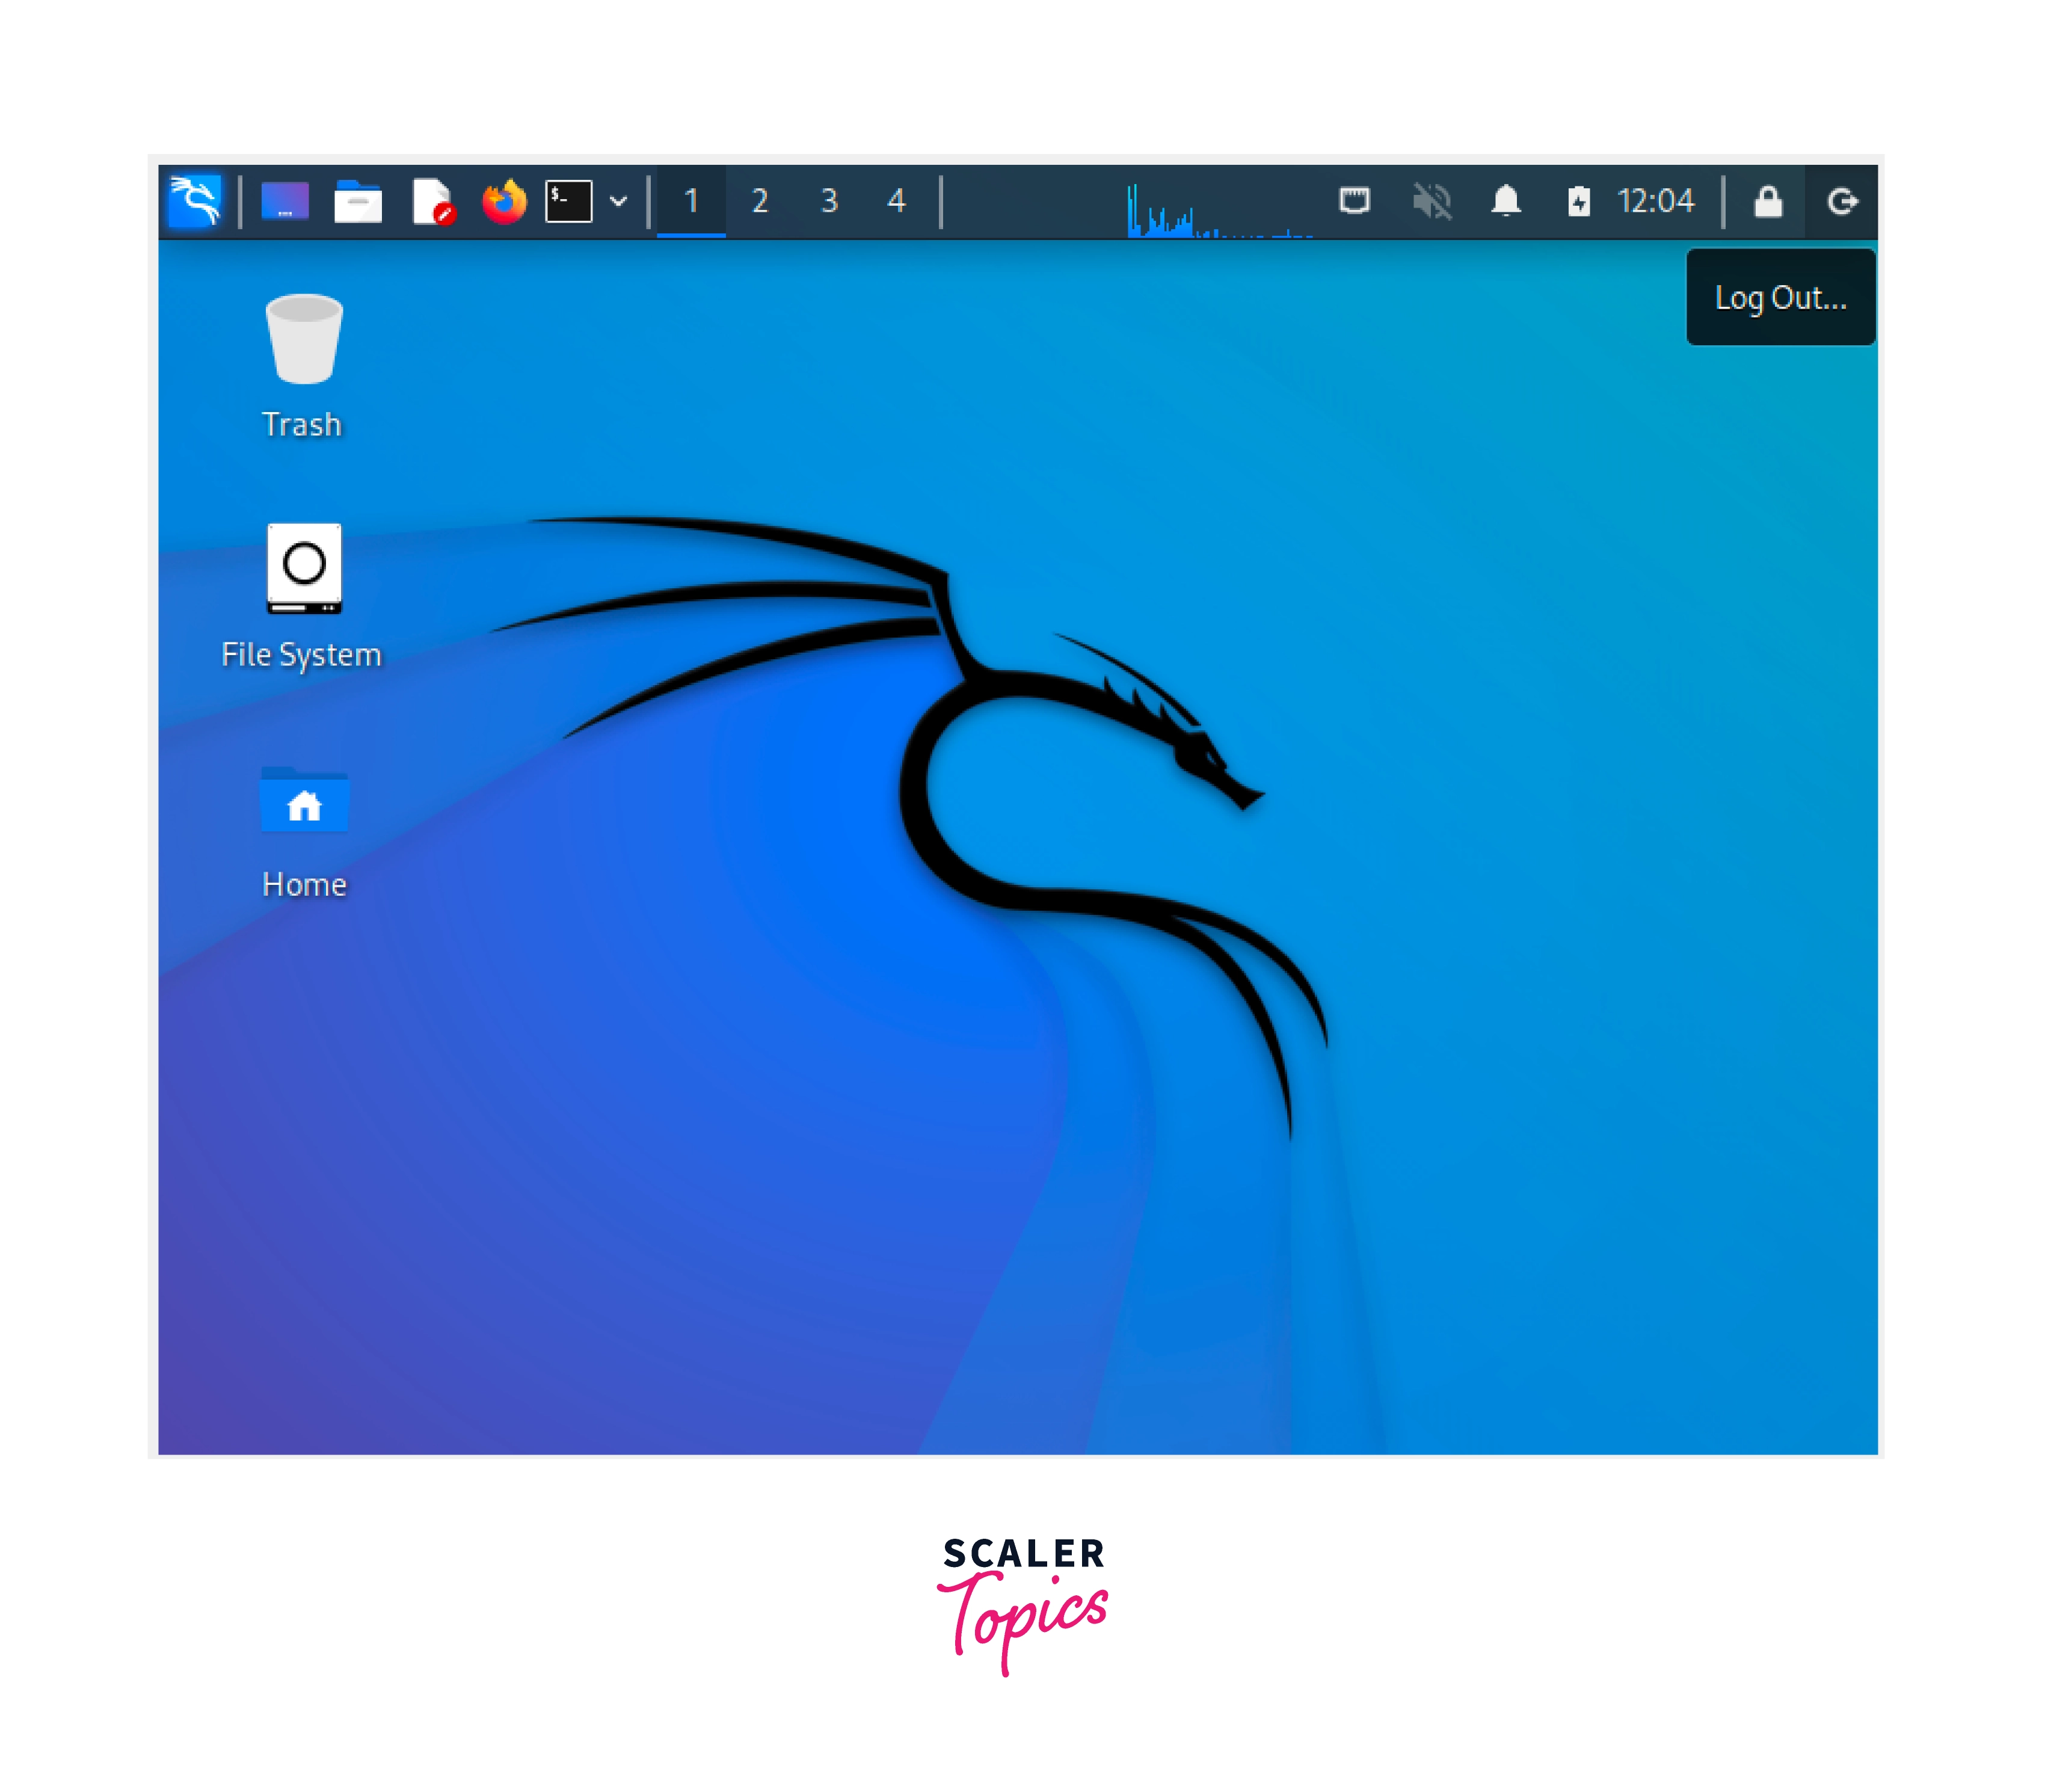
Press login, and you are ready to go and use Kali Linux.
-
- Congratulations You have successfully downloaded and installed the virtual box. You have successfully downloaded and installed Kali Linux and now you are ready to use Kali Linux to your will.
Scaler Placement Report and Statistics
Scaler learners achieved 2.5x salary growth with average post-Scaler CTC reaching ₹23L.
Second Method (ISO install)
When you visit the website to download Kali Linux, you can also choose the option of Live Boot.
-
On clicking the Live boot option, it takes you to three options which include
- Everything
- Point release live image
- Weekly Image
-
As soon as the Download is complete. Open the VirtualBox.
-
Click the Add button, which opens a new window with the following settings.
-
In the name, type the name of your operating system. In Machine Folder, select the place where you want to install Kali Linux. In type Select the type of operating system as “Linux” from the drop-down menu. Select the version of the Operating system as “Debian (64–bit)” from the drop-down menu. And then click “Next.”
-
Select the amount of memory ( RAM ) in megabytes or MB to be allocated to the virtual machine. Allocate at least 1 GB or 1024 MB, but preferred would be 2 GB or 2048 MB, and then Click Next to move to the next step.
-
This step involves creating a virtual hard disk for your virtual machine. You have three options available.
- Do not add a virtual hard disk now; this involves creating a virtual hard disk at a later stage and then adding it.
- Another option is using an existing virtual hard disk file; if you have any preconfigured virtual hard disk file click on this option and then browse to the location and add the virtual hard disk file.
- Click create a virtual hard disk now option and then click create to Virtual Hard disk
-
Create a video file or a Virtual Disk Image file. (VHD and VMDK are also available disk formats, but VHD or VHDX is more commonly used for Microsoft’s virtualization products and VMDK is used for the VMware disk format system). Choose this option and select Next.
-
Select how the storage will be used on your hard disk. That is, a dynamically allocated hard disk file will only use space on your physical hard disk as it fills up (up to a maximum fixed size).
-
This Step involves setting up the location and size of the Virtual hard disk. Browse and select the location for storage of your virtual machine and after that, select the size of the virtual hard disk as per requirement. Select at least 10 GB of space and then click Create to proceed to the next step.
-
This creates your machine configuration, but you still need to load the actual system.
-
Navigate to the Storage settings. In the storage, navigate to “Controller: IDE” and under that, select “EMPTY”. Move to the Attributes tab under that, select Optical Drive, and click on the CD icon. Click Choose a disk file, and browse to the folder where you have downloaded the iso file. Select the ISO file and click open. Click Ok.
-
Now, you are ready to go. Click the start option in VirtualBox to start the Virtual machine.
-
Select the Graphical Install option from the menu and press Enter.
-
For the next step, Choose a language from the menu to be used for the installation process. Click English and press continue.
-
For this step, Choose your current location to set the time zone. Select India and then press Continue.
-
Choose Your Keyboard layout.
-
Select a hostname for the system. This hostname is used for the identification of this machine on your network. Create a hostname and then click Continue.
- If your network uses a domain name, you can enter this field or leave it blank and click continue.
-
For the next step, Create a username and password to create a user account. The root password will be required quite as and when you try to gain administrative access or use the Sudo command.
-
Clock Configuration: Select the desired time zone. And click continue.
-
This step is an important one to ensure you correctly set up the Kali Linux. If you are installing Linux for the first time and probably don’t know the partitioning system of Linux, then use the guided option so that no errors occur. (Be Careful if you are not using VirtualBox, using this option might erase all your data.)
- Select the guided - use the entire disk option and click continue.
- Choose the drive that you wish to install Linux on.
- For partition disks: Select all files in one partition option as it is recommended for new users. Using separate partitions for /home and /var is like storing different files in different partitions. That is keeping system files in one directory and keeping users’ files and programs in another.
-
Choose Finish portioning and write changes to the disk and then click continue. Review the changes and select yes and again click continue.
-
For the next part, select the different desktop environments and collection of tools available to install (you might need to connect to the internet to download and install these tools.
-
Lastly, confirm you want to install the GRUB boot loader to your primary drive.
-
As soon as the installation is complete, a prompt will appear stating the same. Click Continue, after that the device will restart and you are ready to go.
- After restarting, Kali Linux will launch and ask you to enter your username and password.
- Enter the username as the username set above.
- Enter the password as the password set above.
- Press login and you are ready to go and use Kali Linux.
- After restarting, Kali Linux will launch and ask you to enter your username and password.
-
Congratulations You have successfully downloaded and installed the virtual box. You have successfully downloaded and installed Kali Linux, and now you are ready to use Kali Linux to your will.
Some Useful Commands You Can Try:
-
$ date – This returns your current date
-
$ ls -al – This command will list all the files and directories present. The -a attribute will show even the hidden files, and the -l attribute will show the results in more detailedly.
-
$ ip a – This returns your IP address.
-
$ who - This command will return the users logged in, The terminal which you are using, and also the time when the system boot was done.
-
$ cmp first_file second_file - This command is handy as it is used to compare two files. In Forensics and Penetration testing, comparing two files is required to check any updates or changes that occurred in the file.
-
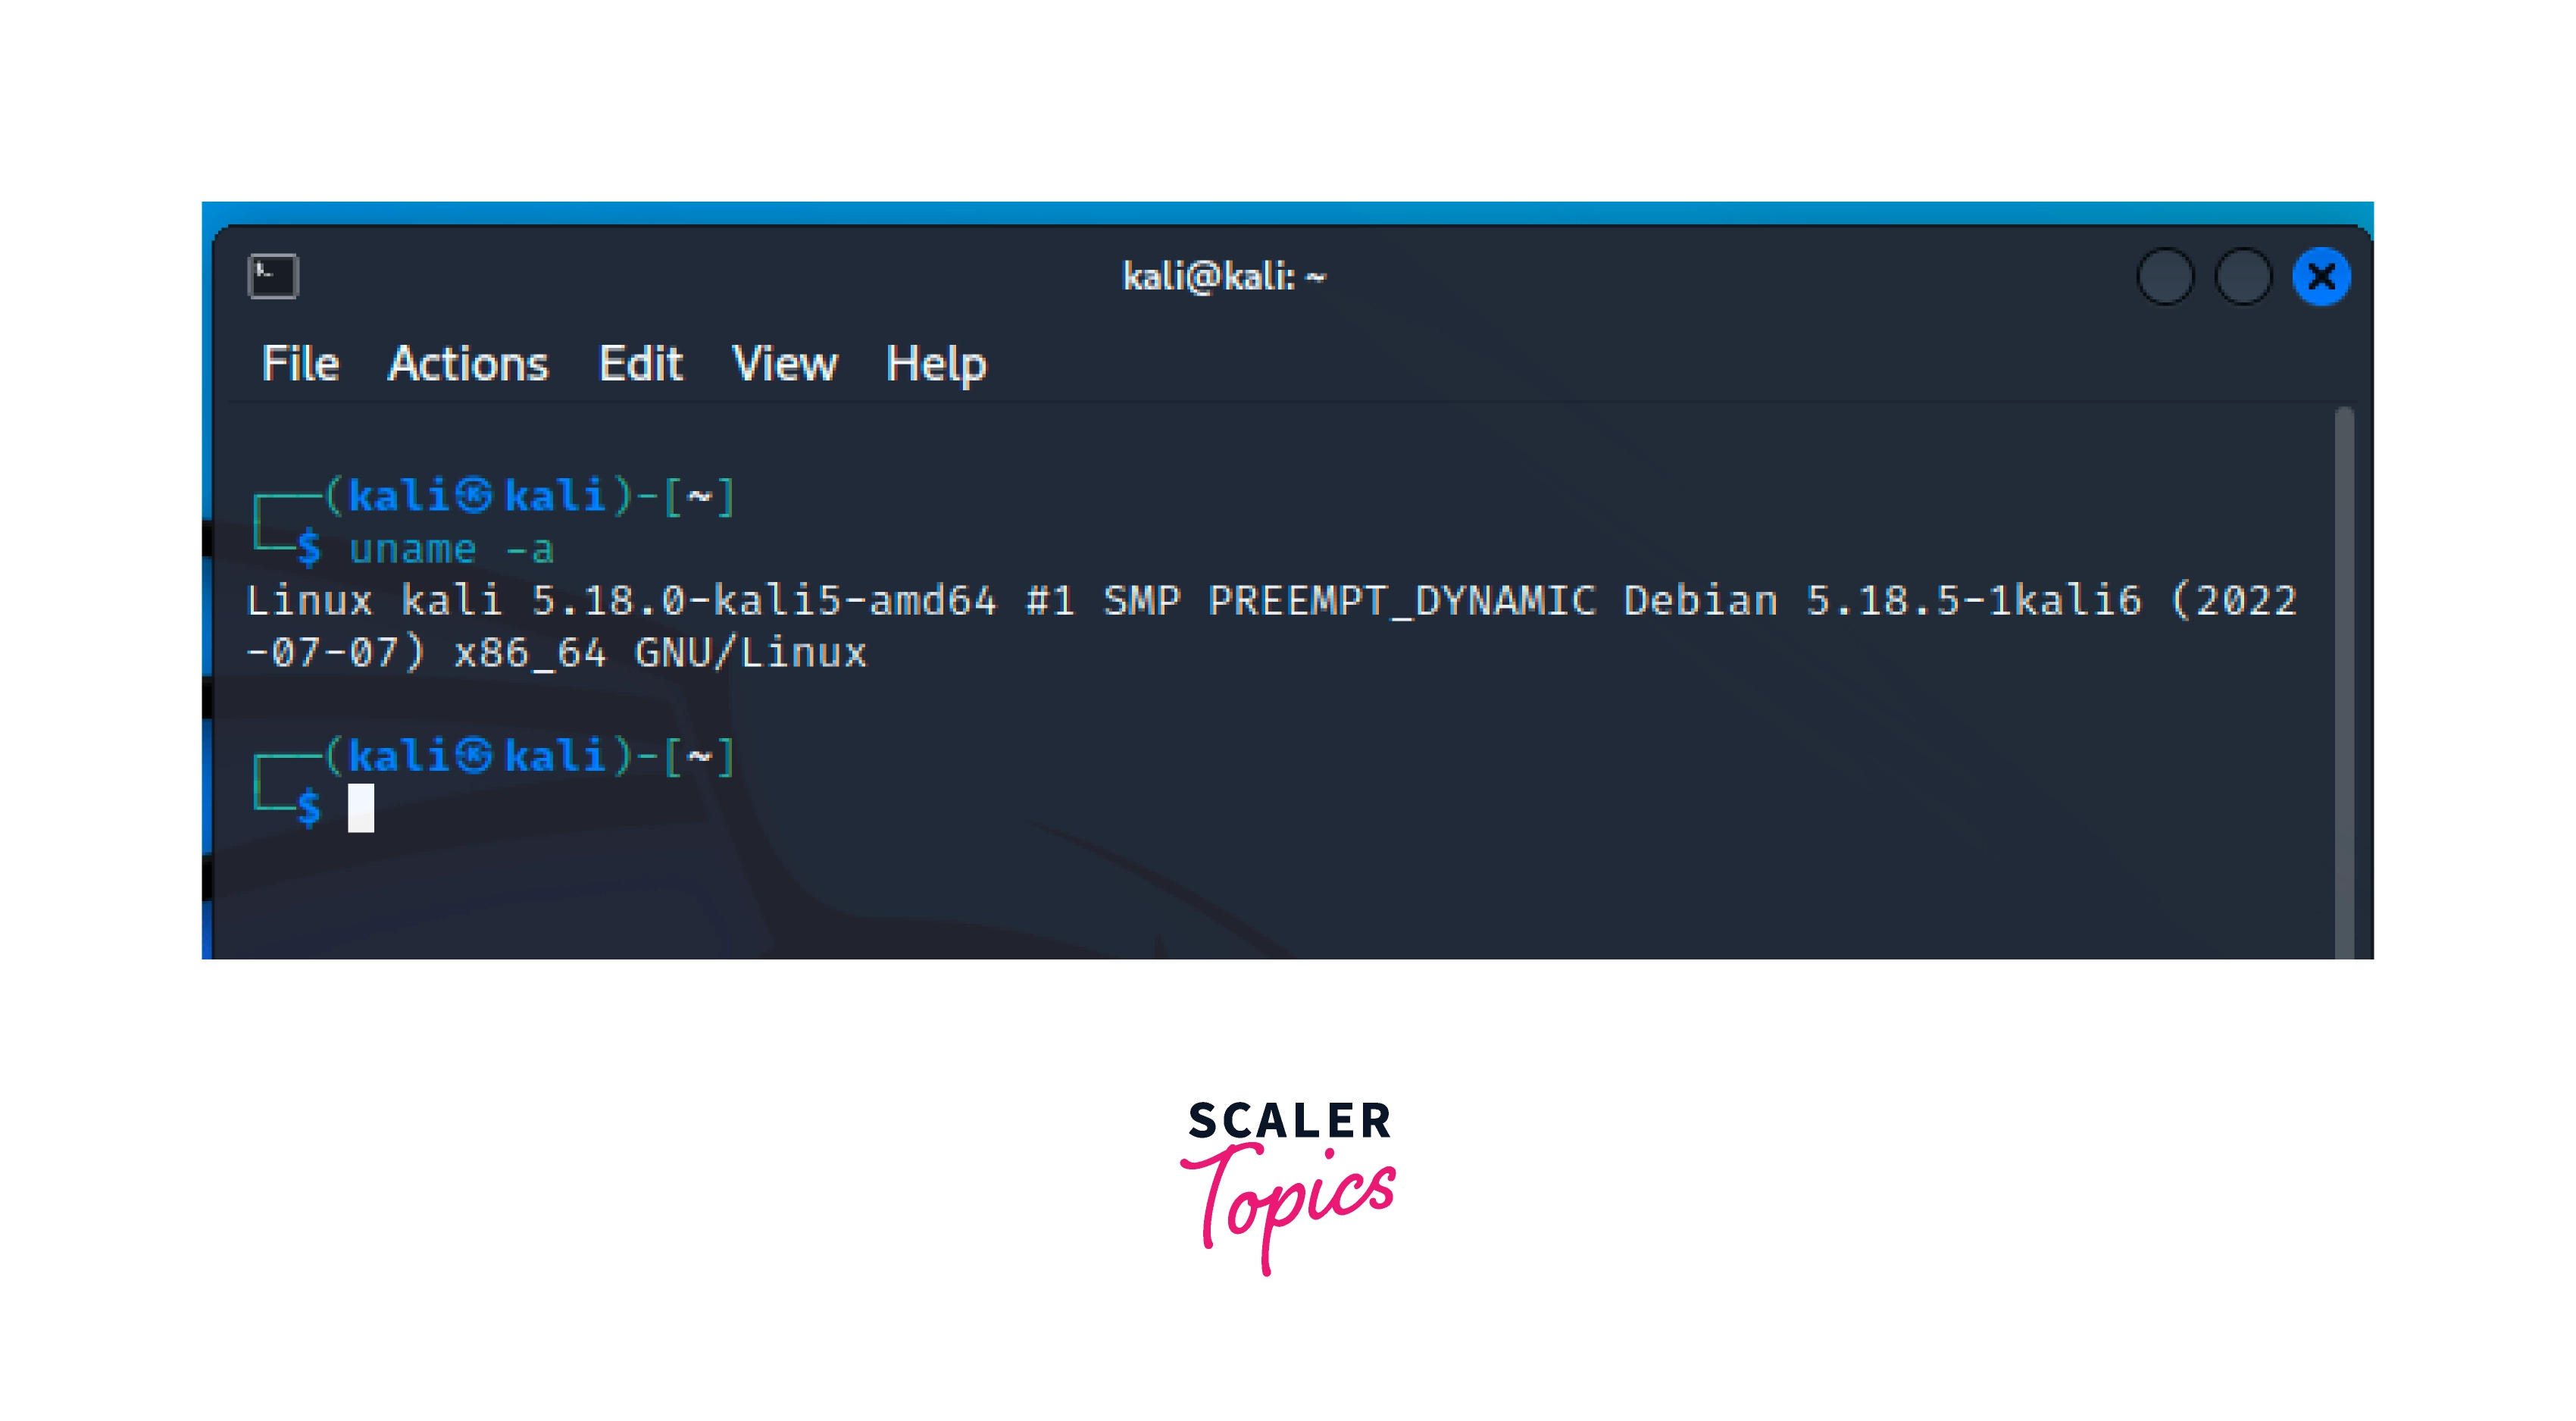
$ name - This command is used to display the details of the computer. If used without any other parameter, it will return the name of the operating system. Another optional parameter, “uname -a” return the following details. Kernel name, hostname, Kernel release, Kernel version, Machine hardware Name, Architecture Processor, Hardware platform, Operating System.
-
$ man (some other command) – This command is used to display the user manual for the specified command. Suppose I want the user manual of the “name” command, then the command will be “man uname” and press Enter. To quit the user manual press q.
-
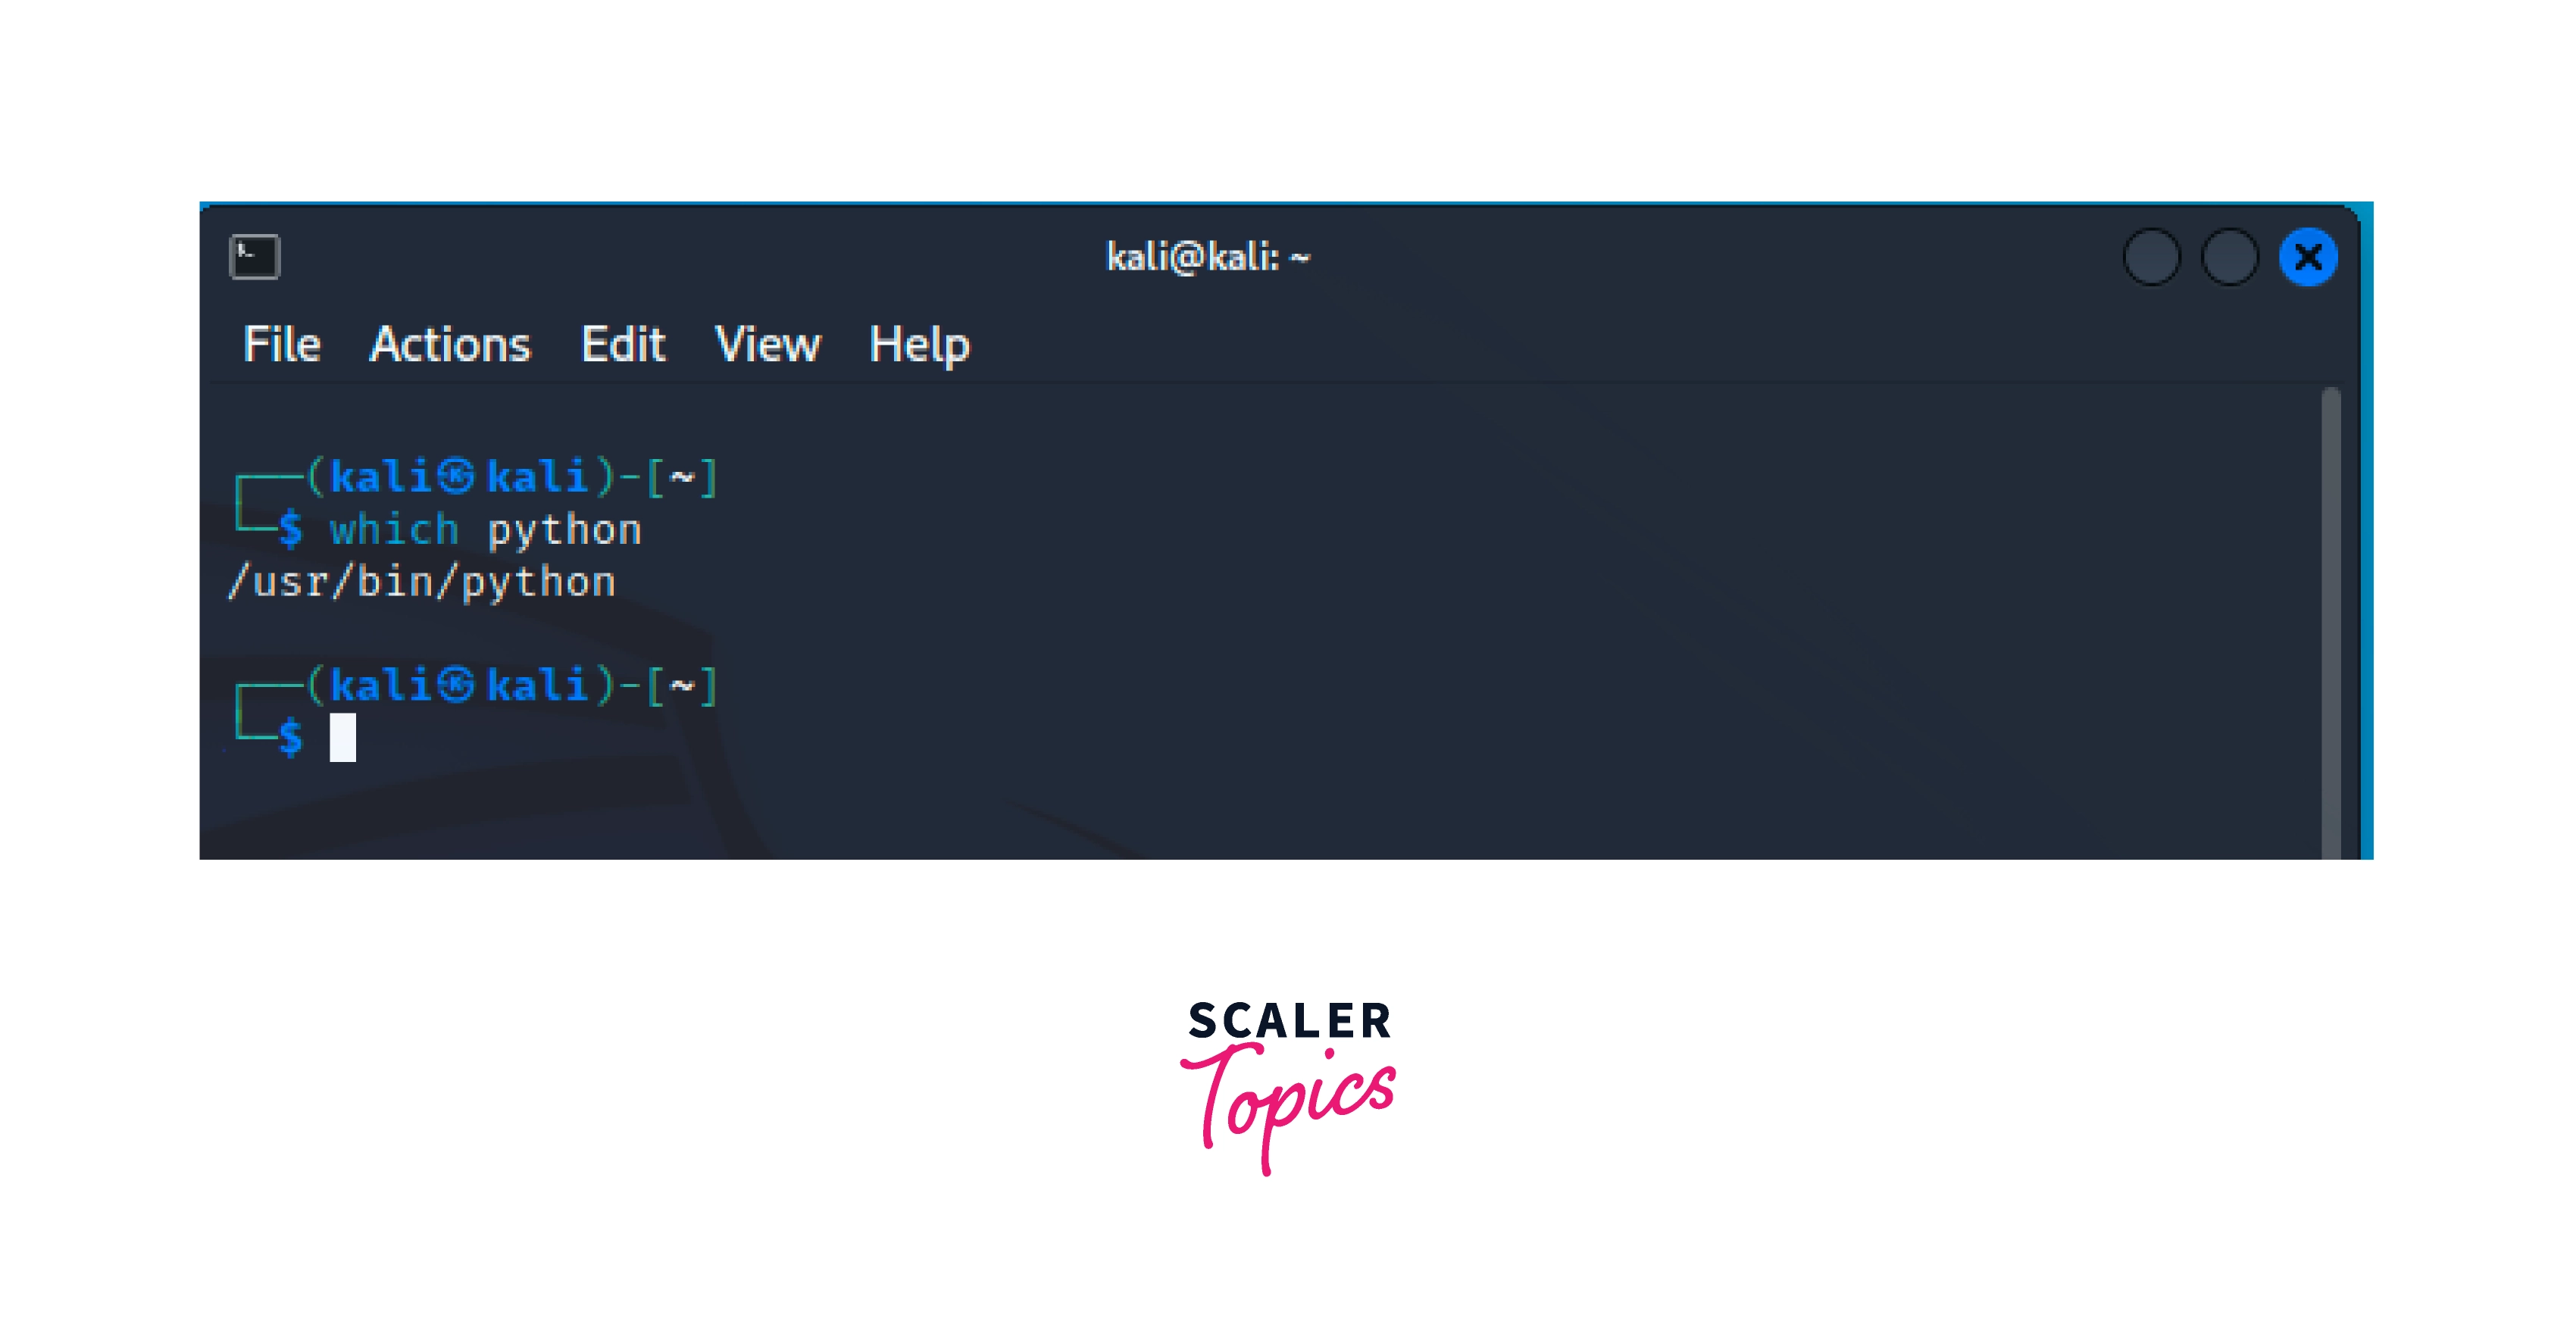
$ which - This Command is used to display the path of the executable from the list of Environment Variables which will be executed when the given executable is called. For Example, The given command searches for the python executable file.
Some Famous Tools to Learn :
-
Aircrack-ng - This is a command line-based collection of tools to assess WiFi Network Security.
-
Burp suite - This is a graphical tool used for performing security testing of web applications
-
Hashcat - This is an advanced Password Recovery and cracking Tool.
-
Hydra - This is a parallelized network login cracker used to brute force different usernames and passwords.
-
John the Ripper - This is also a password cracker that works offline.
-
Metasploit framework - This is a modular penetration testing platform that provides an extensive collection of tools to test vulnerabilities.
-
NMap - This utility is used for network discovery and auditing, also known as Network Mapper.
-
Sqlmap - This is a tool used for exploiting the SQLI flaw.
-
Wireshark - This is a very commonly used network protocol analyzer.
-
WPScan - This is a command line-based tool for WordPress security scanners.
Conclusion
Let us summarize our tutorial by mentioning some important points covered.
- Kali Linux is one of the famous Debian-based Linux used for advanced Penetration Testing and Security Auditing.
- Prerequisites for installing Kali Linux.
- VirtualBox provides a cross-platform virtualization application.
- Installation of VirtualBox on Windows environment
- Kali Linux Installation from scratch using the ISO file of Kali Linux
- Gained knowledge on how to install Kali Linux in VirtualBox
- Also using the pre-built images to import the Kali Linux into VirtualBox directly.
- Some Useful Commands and some famous tools available in Kali Linux.